HobbyBoss CCKW fuel truck build

Hi all, I wanted a quick OOB build to “clear the pipes” and chose HobbyBoss’ fuel tanker out of naiveté! The parts are crisp and it goes together well, but as usual there is a scarcity of positive alignment tabs, and some of the parts are tiny. And I know there’s an issue with the dimensions of the cab, fenders, and hood, but I chose to ignore these for now.

The engine is quite nice! I decided not to glue it in yet, as it will be easier to paint if separate.

The instructions are confusing about the exhaust - use the longer one! Ignore the PE bracket, as it fouls the mudguards and does not appear in any of the pics I’ve looked at.

The U-bolts for the load-bed supports are fun!

At the back HB gives PE parts for the bumperettes - these are a pain to fold and aren’t actually all that nice - I prefer the plastic parts in the ancient Italeri kits. HB forgot the inboard flange and bolt heads…


(And I forgot these fuel trucks didn’t have tow pintles, so had to cut it off later - oops!)

The front springs are really meant to be used with the winch - the winch-less frame ends have a big gap where the springs are meant to attach. If I do another one I’d add a strip of plastic on the inner face of the frame to have something to press against. And I used some clamps as props under the springs to ensure all the axles were level so the wheels will touch the ground!

More to come…

5 Likes

Tom,
No offense meant - but HB goofed not only with the cab, but also when when they designed the tanker’s load bed: They didn’t consider the different spare wheel stowage, so with the carrier upon the frame, the tanks would protrude beyond the chassis rails and HB had to lengthen these by the 7mm of part M7. You can easily check this by comparing HB’s chassis to that of any other CCKW kit, be it Tamiya, Italeri, or Heller.
Correcting that, unfortunately, is laborious, as not only the chassis would have to be shortened, but also the tank load bed and the tanks themselves. You can get an idea of the work involved here:
http://panzer-modell.de/berichte/studebaker_us6/studer.php
Sorry to be the bearer of bad news - but hey, it’s your model and you can ignore them!
Peter

2 Likes

Look forward to seeing how it turns out Tom. Nice build Peter.

Thanks Peter, but it’s far too late to consider changing the frame or the tanks! I could only read the article translated to English by Google (which is never very good!) but it doesn’t seem to say anything about measuring a real truck to get accurate measurements for the load bed - it only compares with other kits. I’m always wary of measurements derived from kits because we have no evidence that Italeri etc got it right, or that ICM got the Studer length correct for that matter. But given the cab issues I could well believe HB may have got things wrong. Still, my only other option was the CMK resin conversion! I reworked the filler manholes to the correct oval shape and created an accurate tap to replace the twin taps HB copied from a modified restoration truck, and replaced the 5gal cans with Italeri ones, but that’s as much surgery I was willing to do on what I hoped would be an uncomplicated out-of-box build! I’ve already got far too many unfinished hyper-detail projects gathering dust on a shelf…

4 Likes

Not that it would matter, but my article is there in a human translation, too: just click on the British flag to the left of the pictured kits’ boxes.
Peter

Hi Peter, yes I noticed the English button after I wrote my previous post! (D’oh…) I wish there was a tanker nearby to visit, but the only one I know is at Debach and is a post-war full size kitbash with made-up tanks. (I was there measuring their bolster truck, and happened to ask about the tanker.) Until the world re-opens I doubt I’ll get any new research info!

That frame extension piece is strange, as you say. I wonder why they needed it, since surely they could have made the bed fit the existing truck frame? The one they measured might have had a frame welded together from scraps - there are some scary “projects” out there on the full-size vehicle restoration websites!

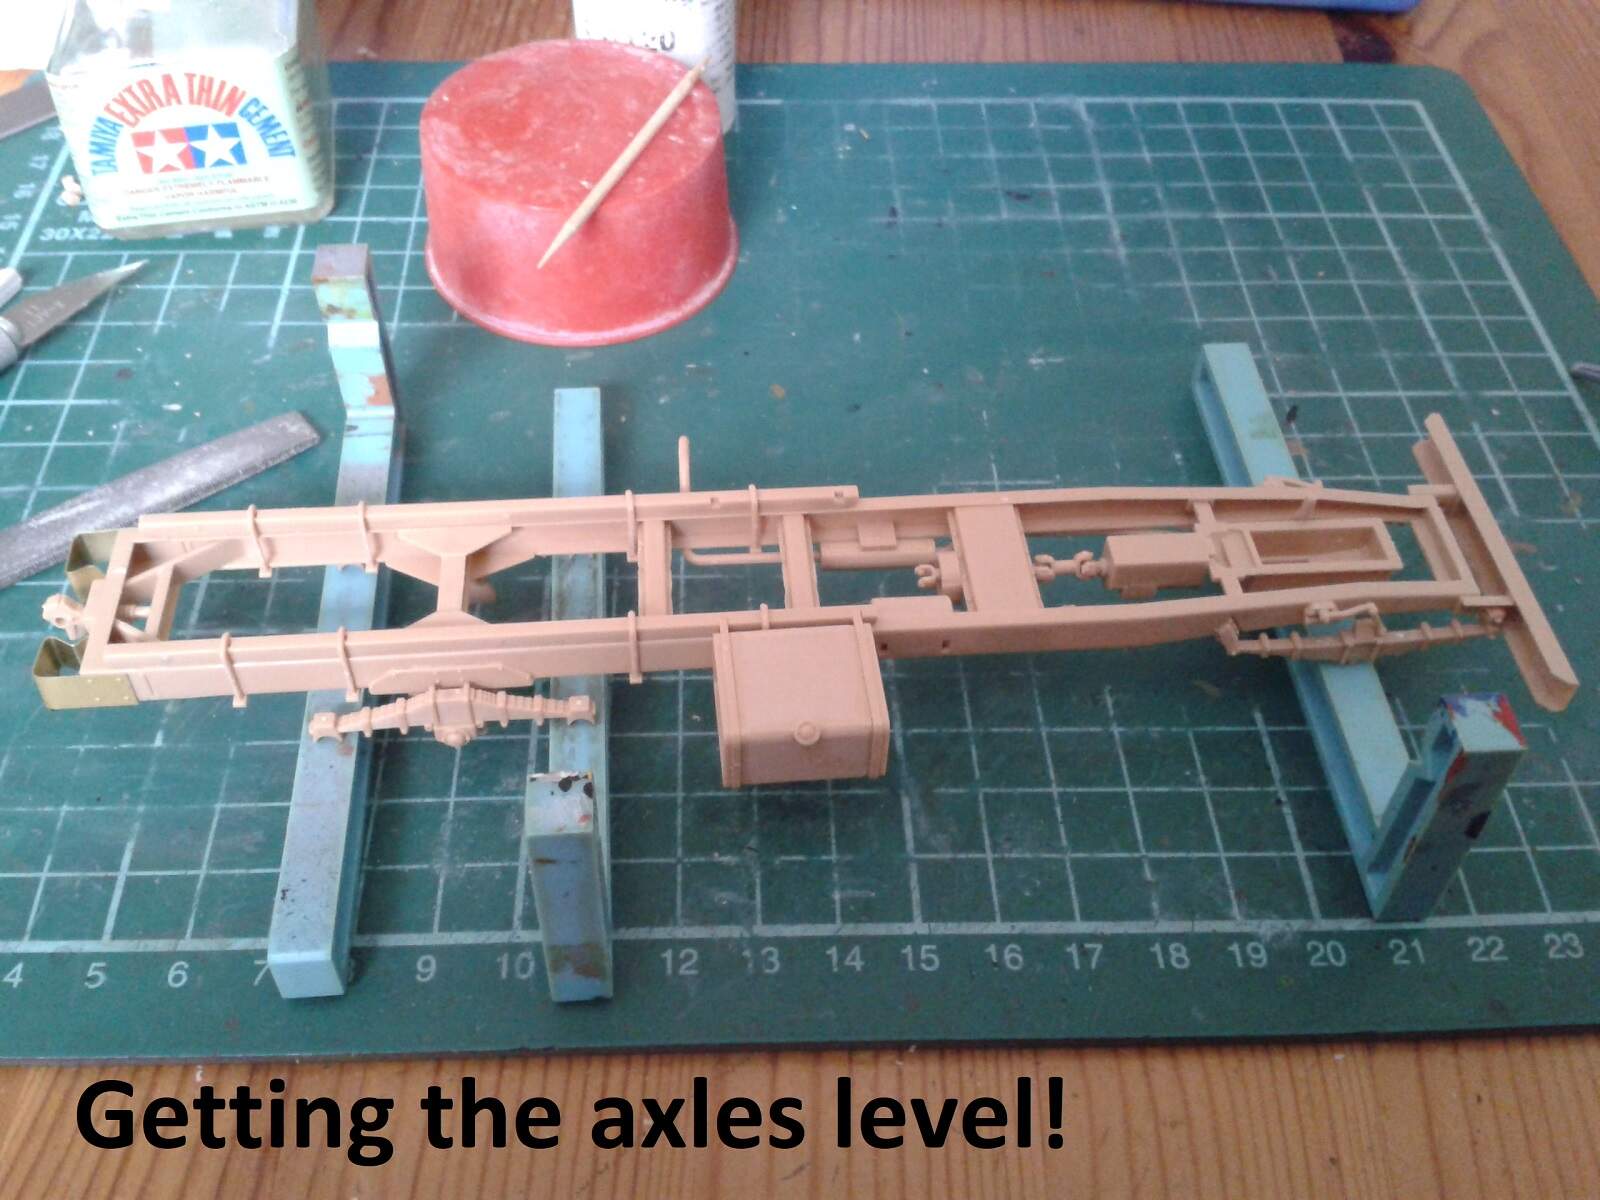
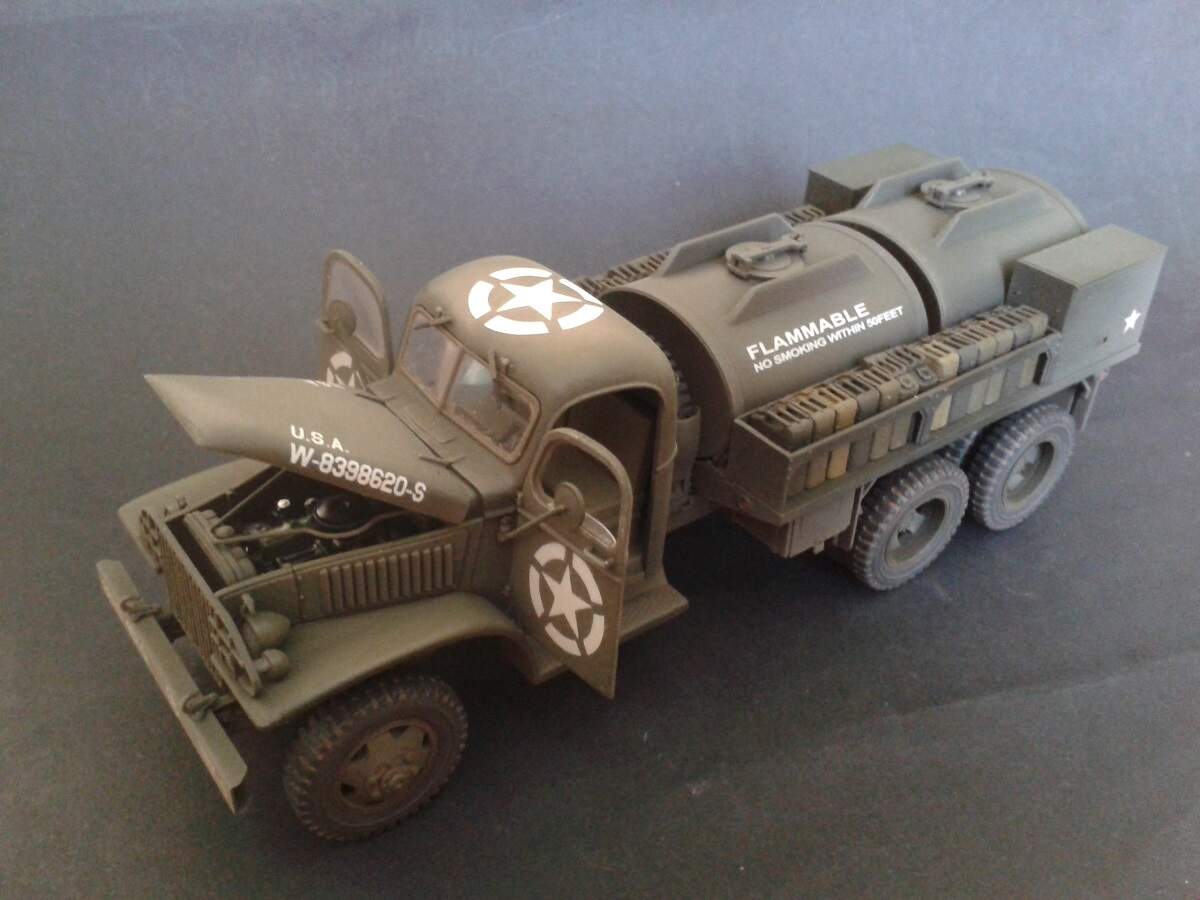
Update on my build: the cab and load.

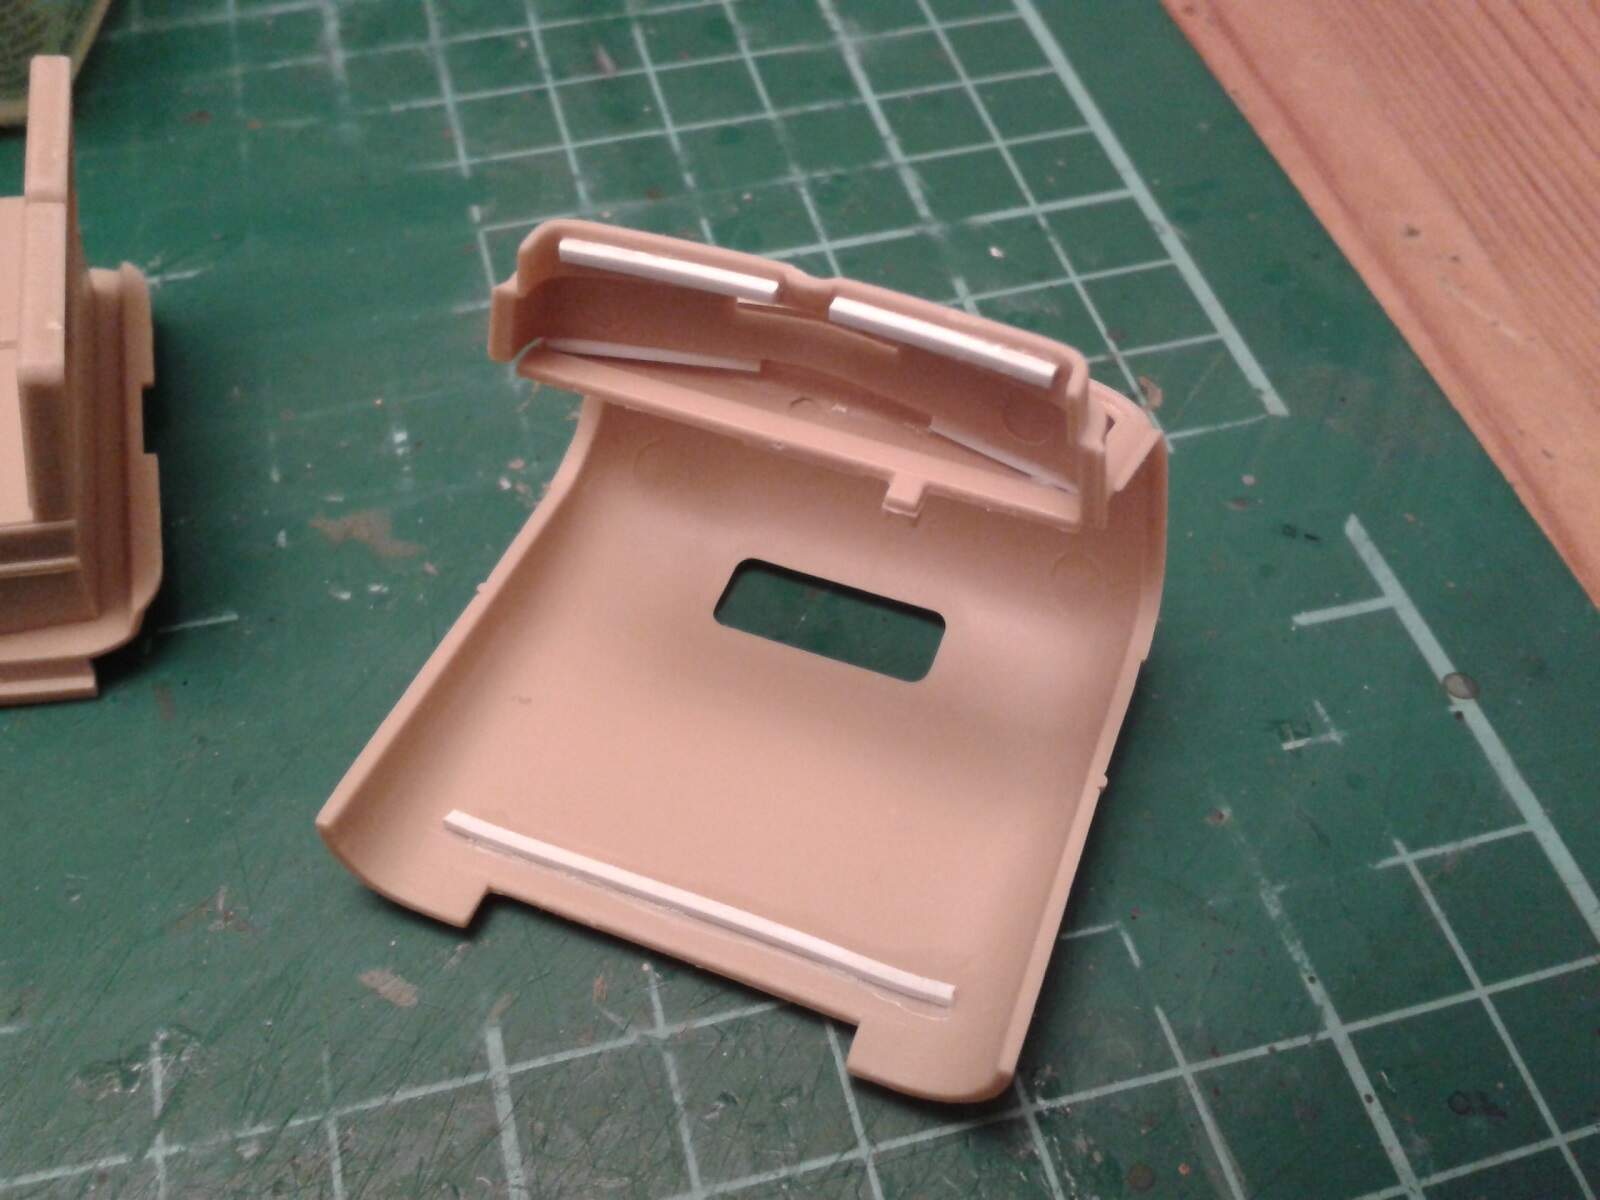
To build the cab as assemblies for painting, I decided to leave the cab roof part separate for now. But there isn’t much positive locating with the floor, so I had to add some plastic strips at the front and rear to make mountings for later assembly.

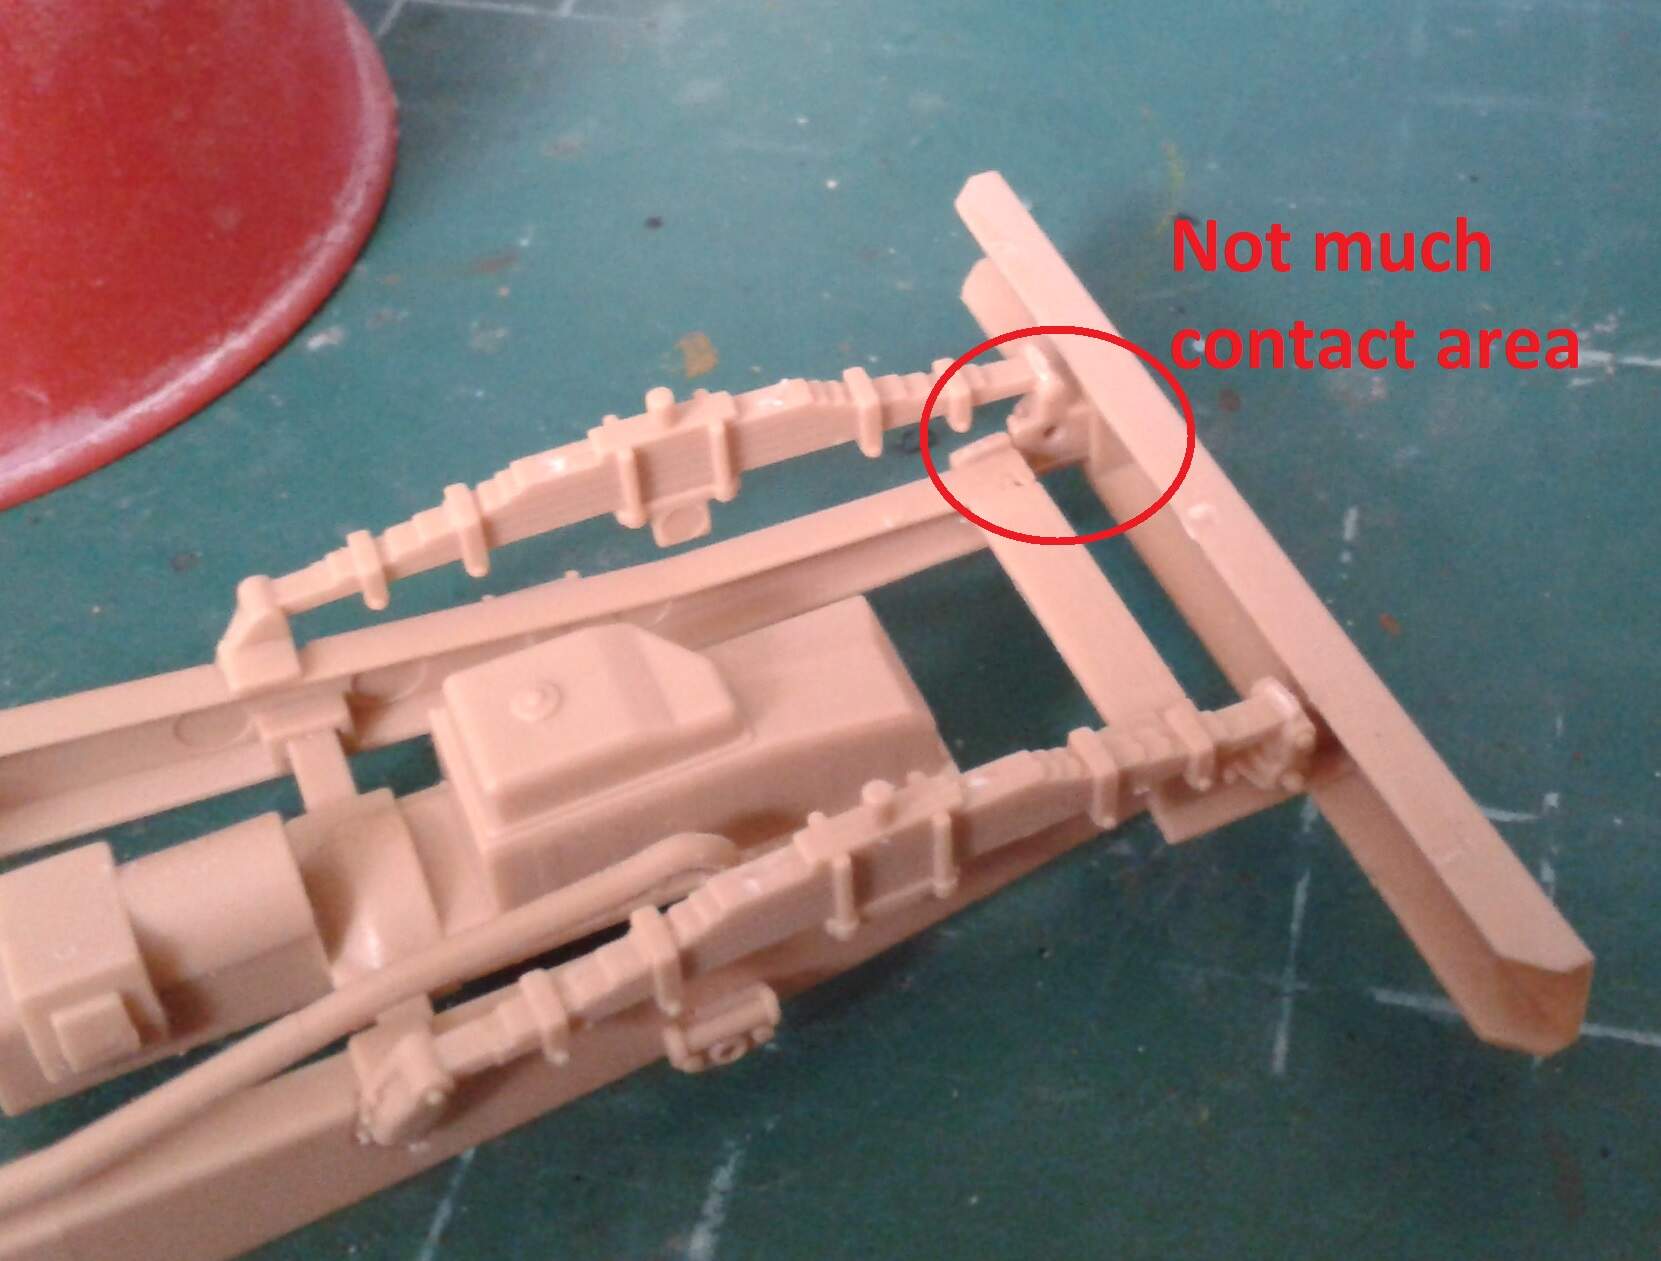
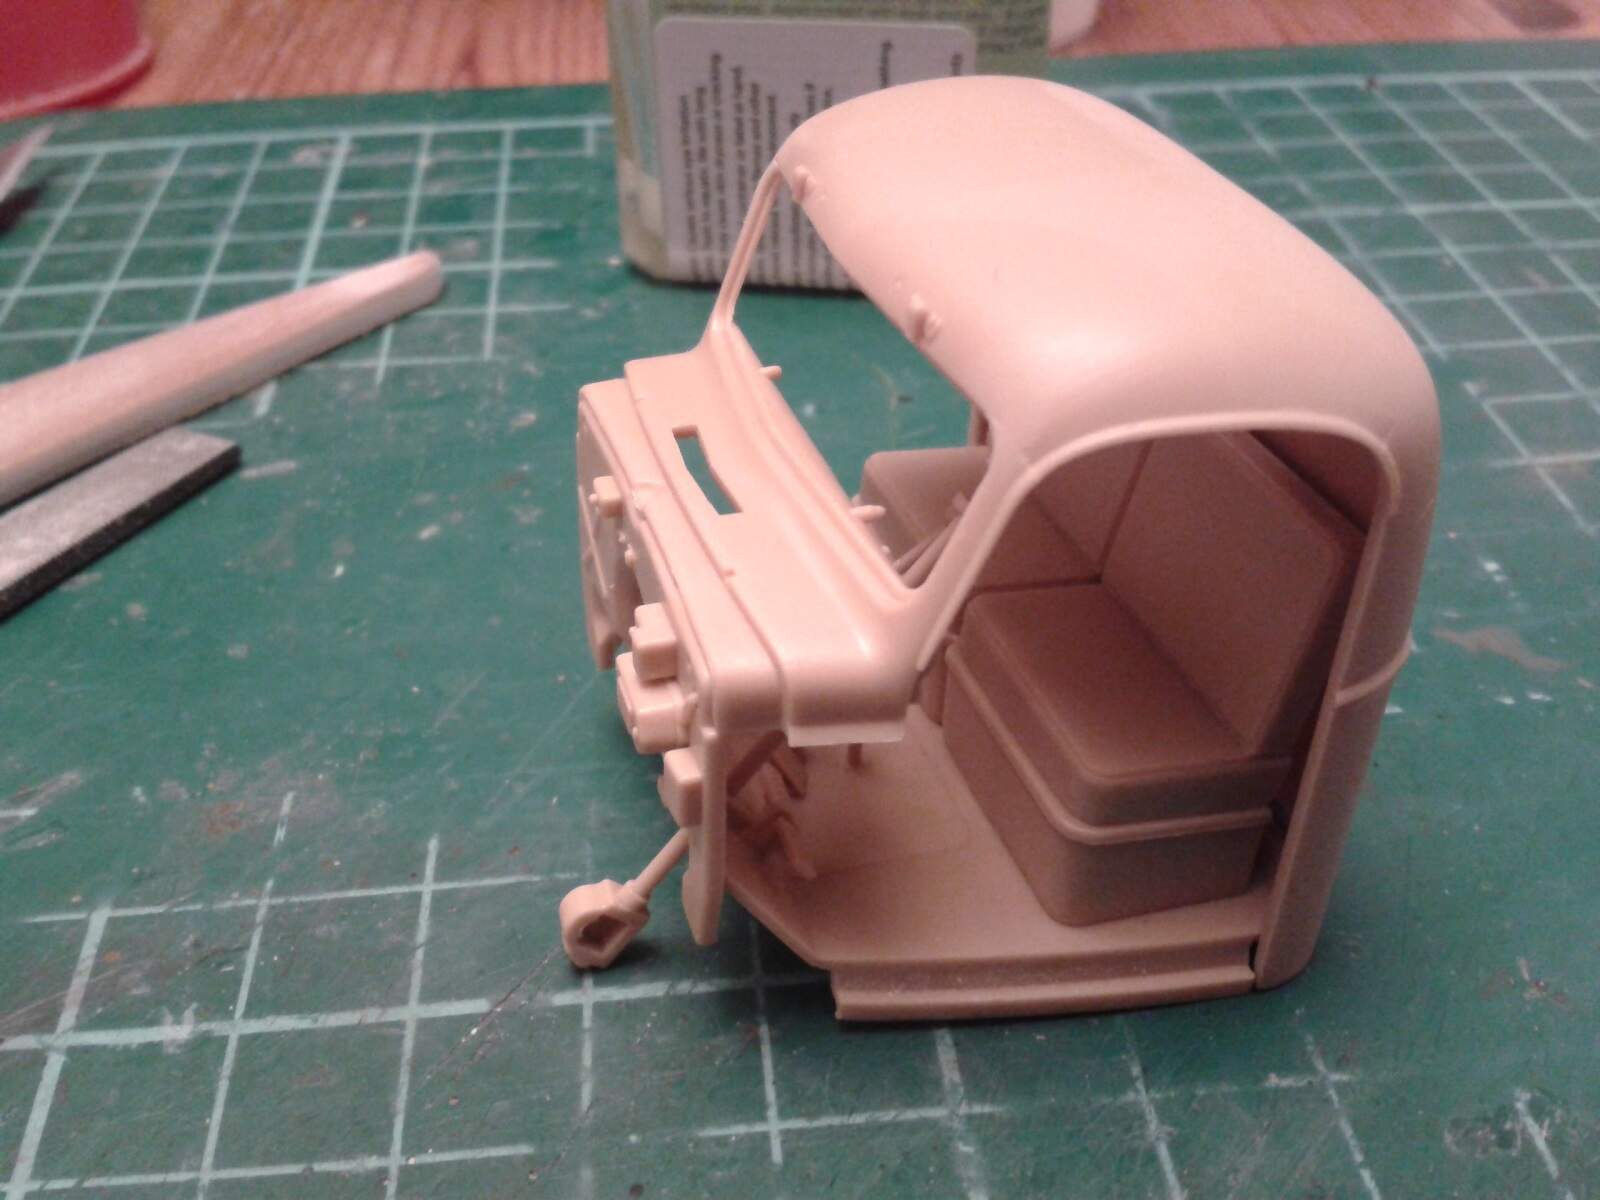
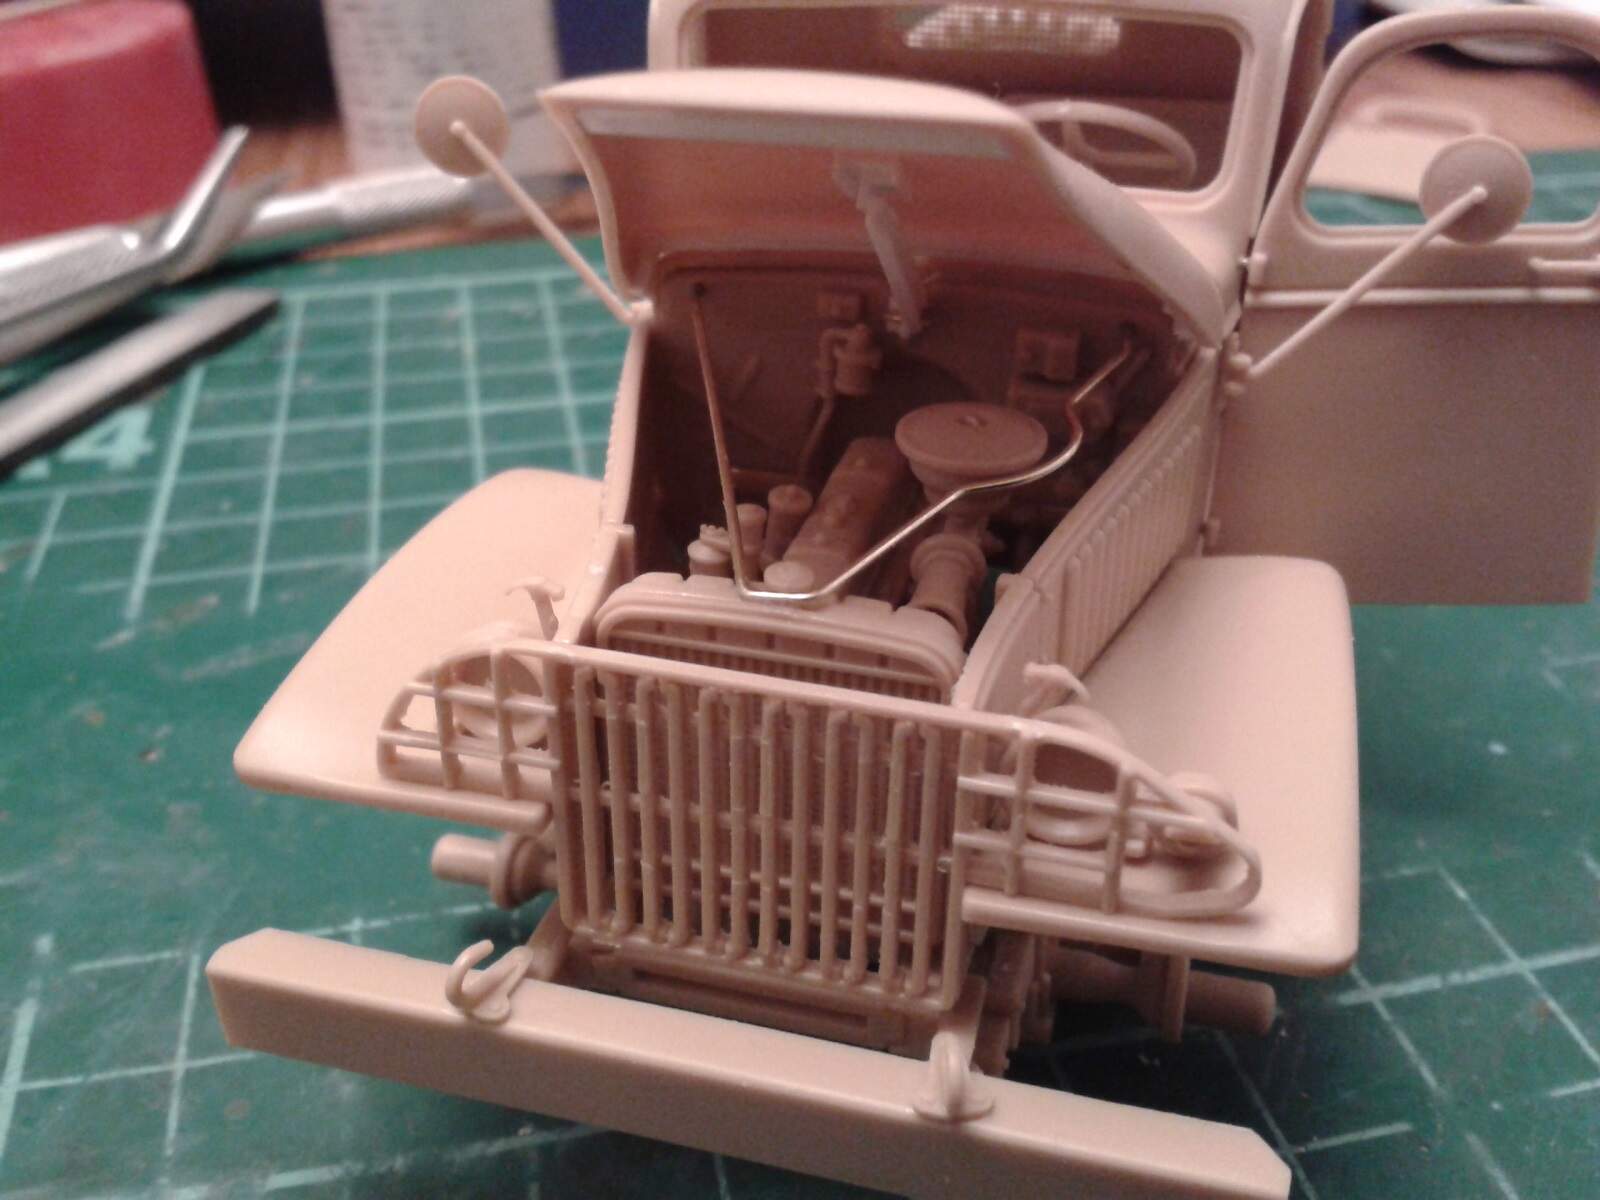
I wanted to show off the details in the cab as well as the engine, so opted to open the doors and hood. I used thin brass rod in the doors and hood, with holes in the cab to receive them, to allow me to add the doors/hood after everything is painted. I also added a strut from the firewall to the hood, based on what I could see in tech manuals and photos.

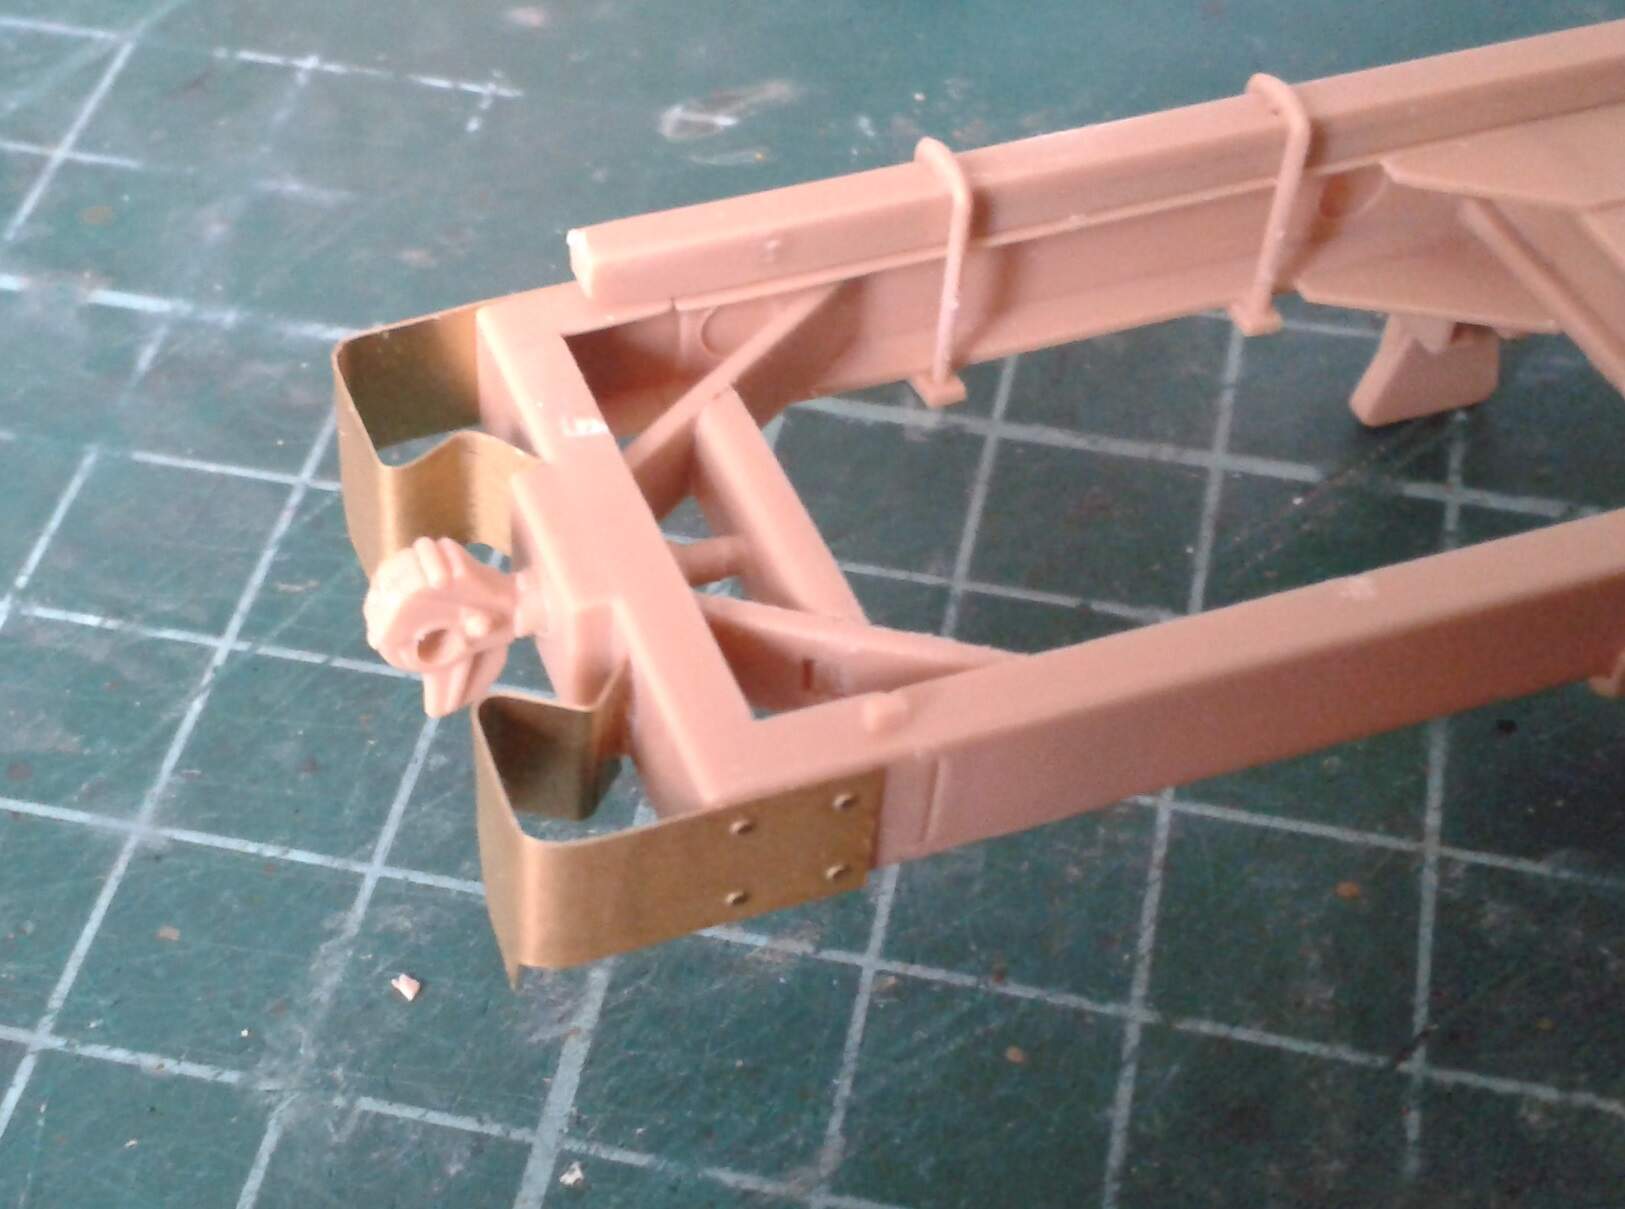
I carefully scraped the back of the brushguards to try to thin the bars since the real thing used narrow metal rods. In hindsight I should have just cut the bars and replaced them with plastic rod…

And there is no firm “tab & slot” alignment for the whole cab, so I added a peg in the frame on each side under the seat, with holes in the floor. It’s best to hold the floor in place and drill down to make sure the holes all line up, but of course I’d already glued in the seats by then! D’oh! - as Homer would say. Once I had the pegs installed I also masked the tops of the frame and underside of the cab to keep paint off where the glue will go later.

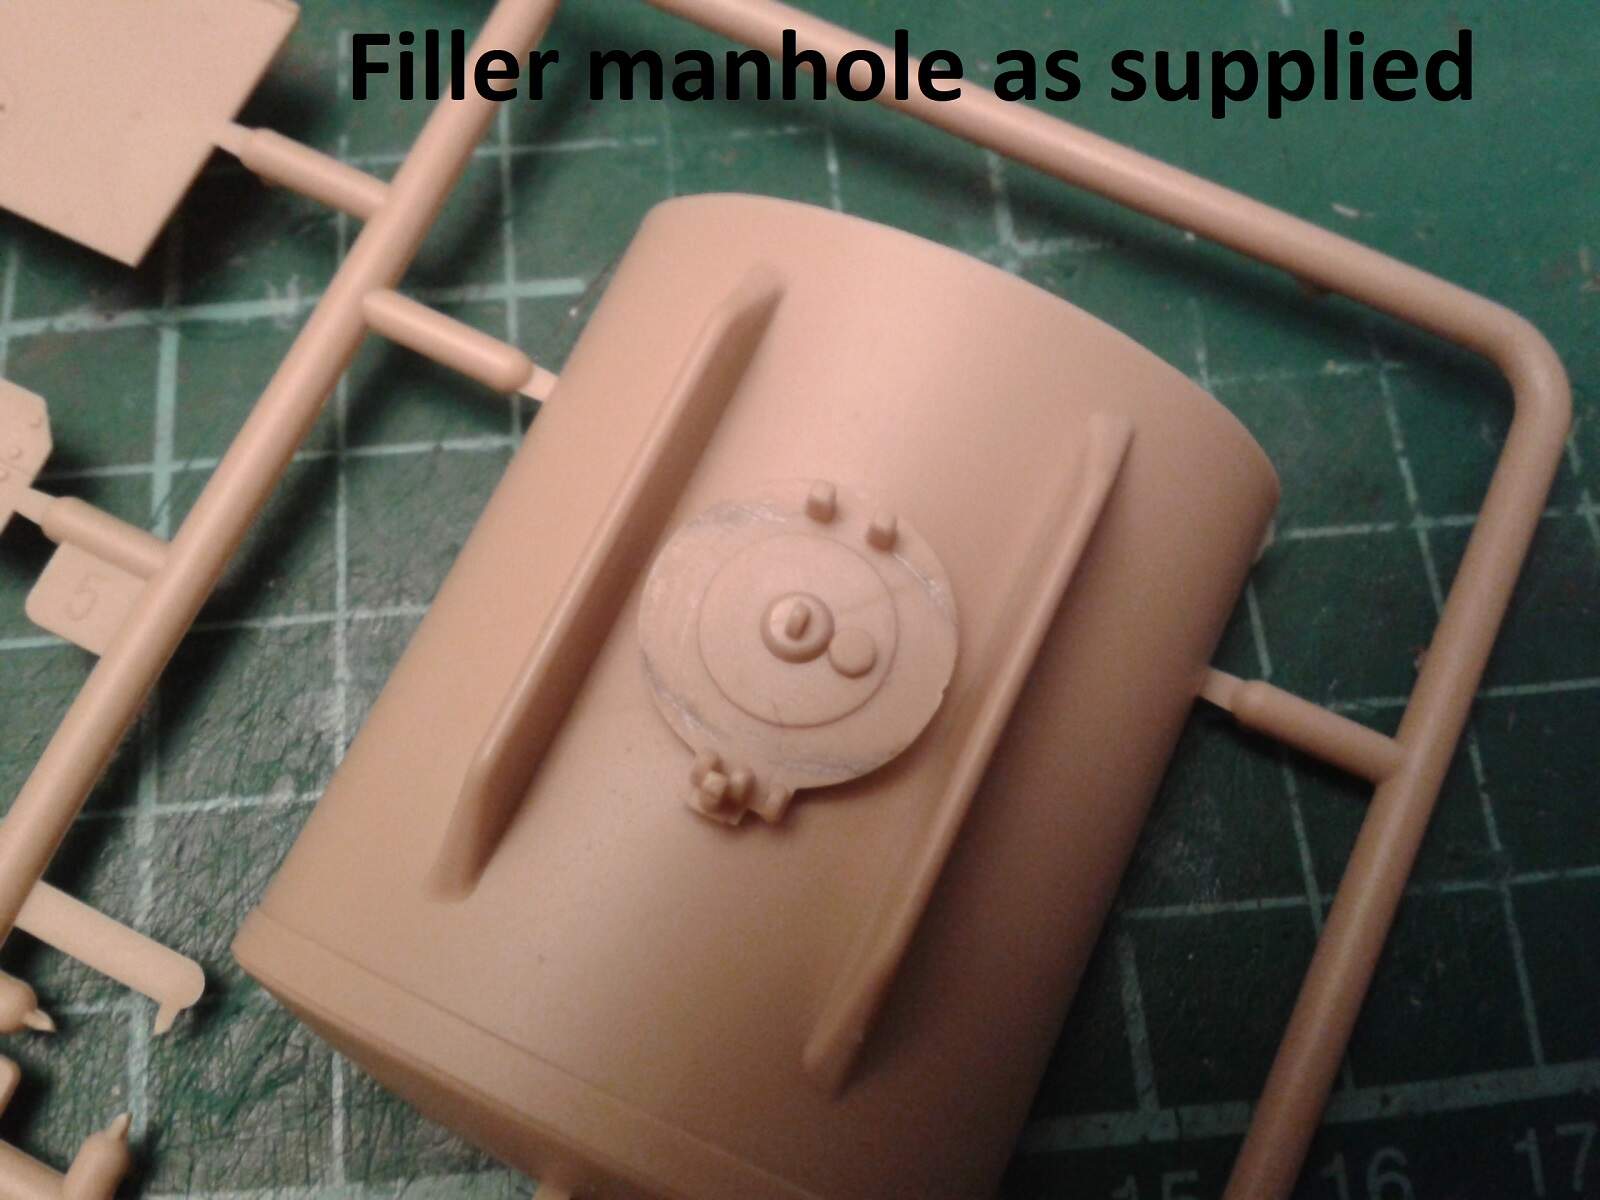
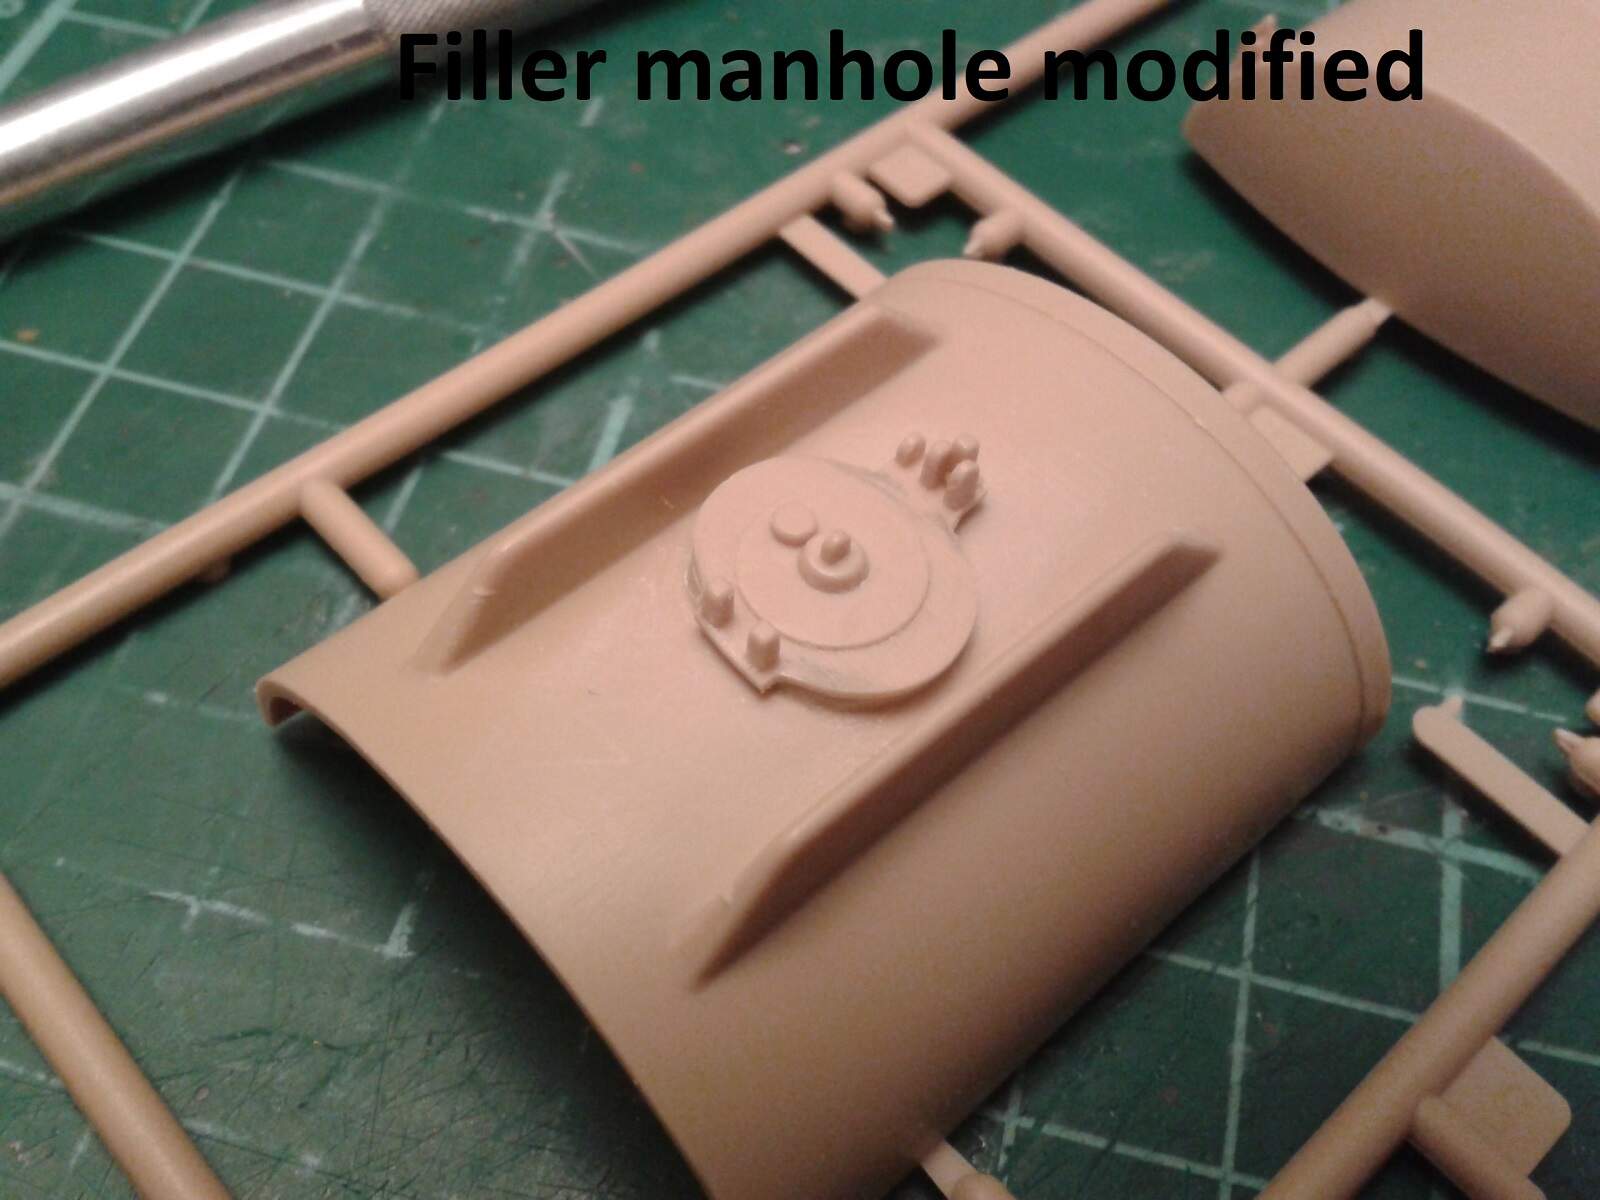
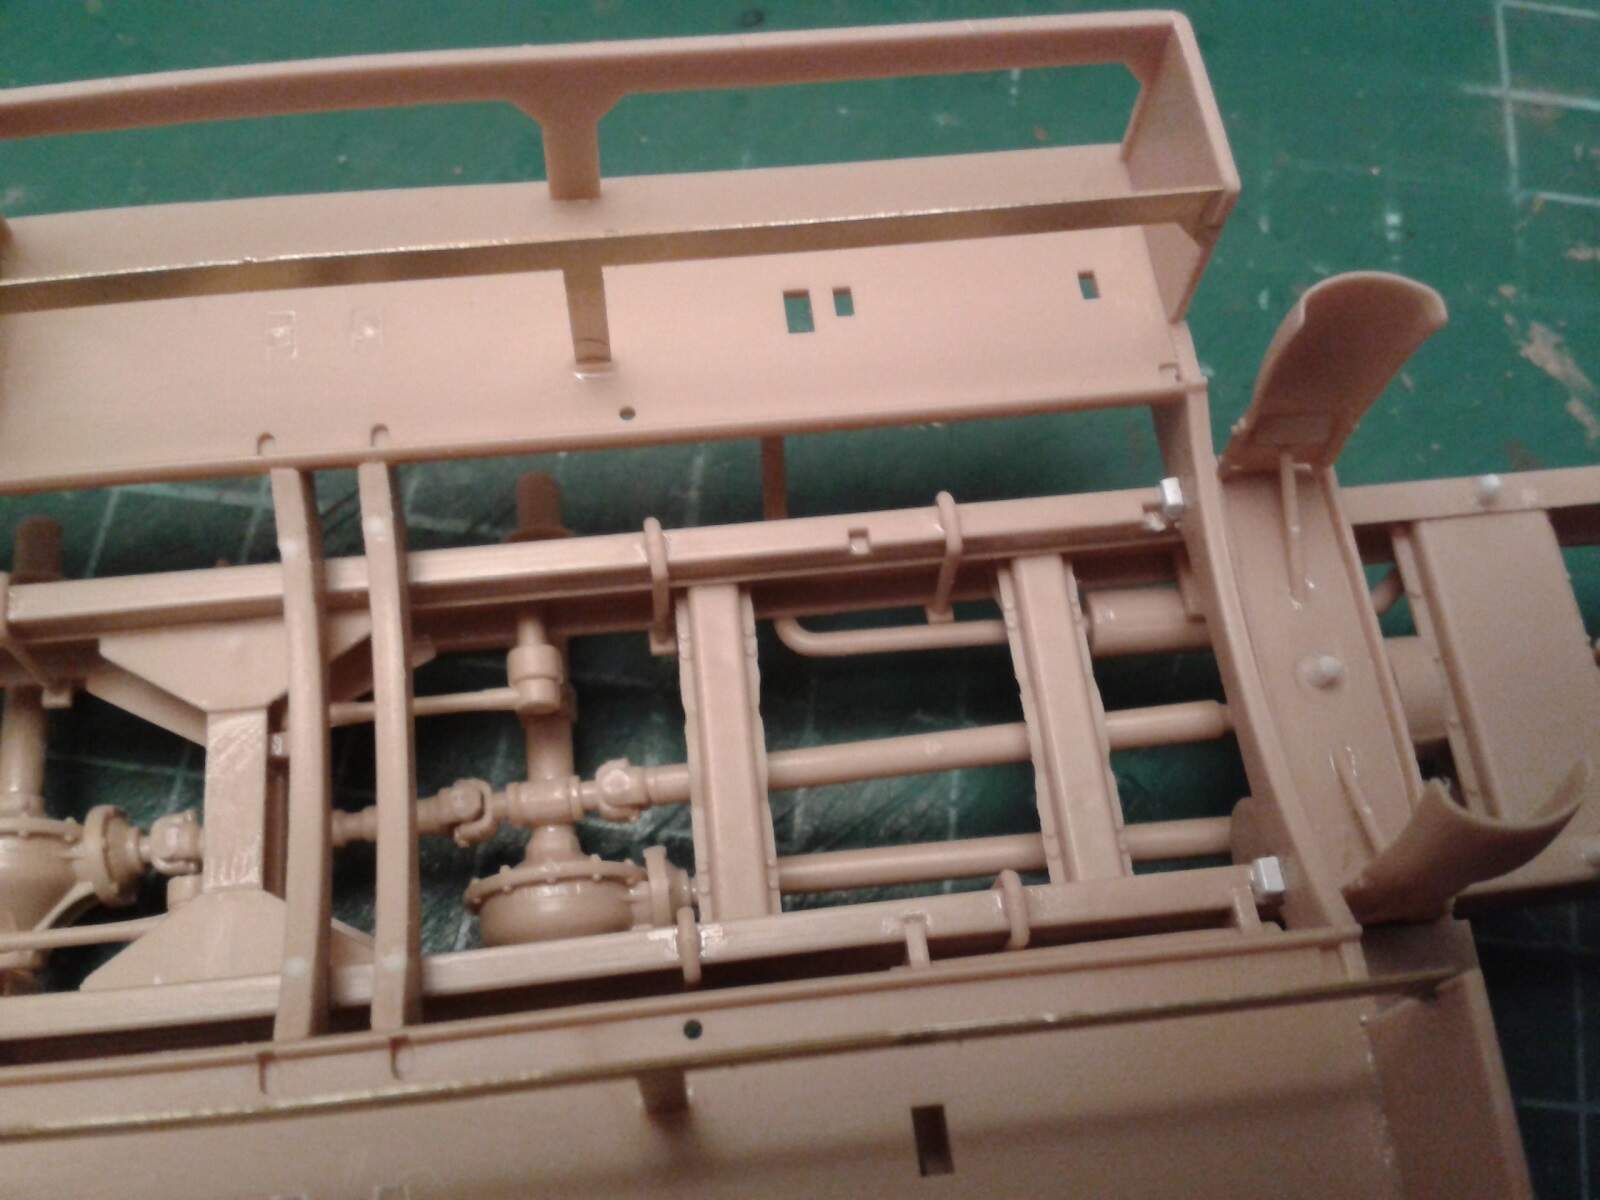
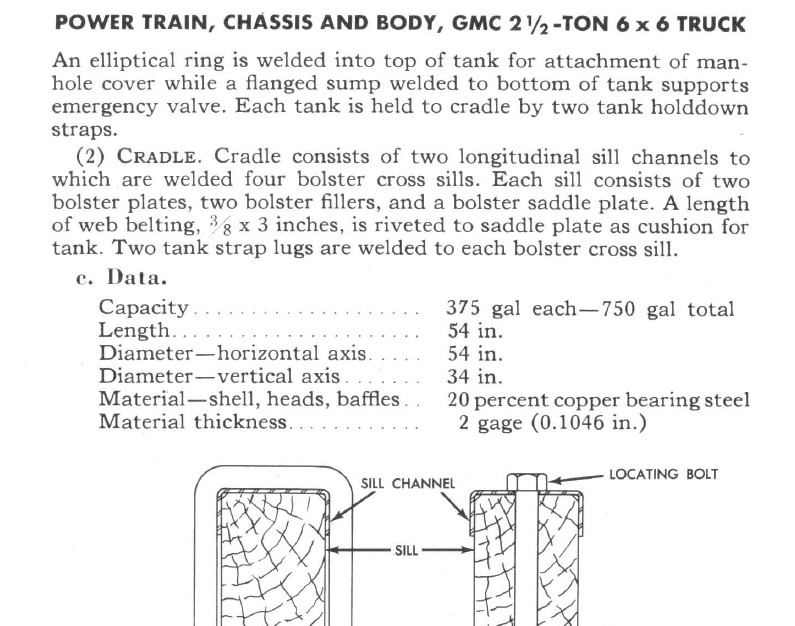
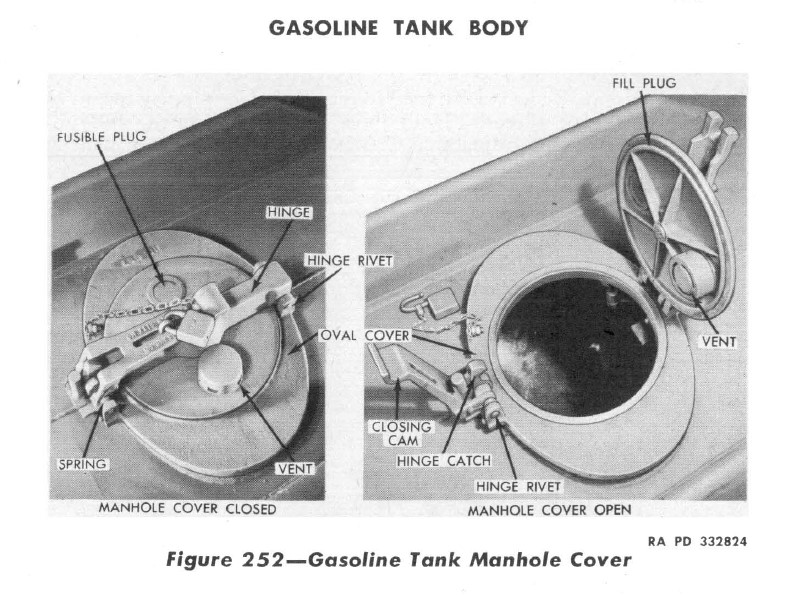
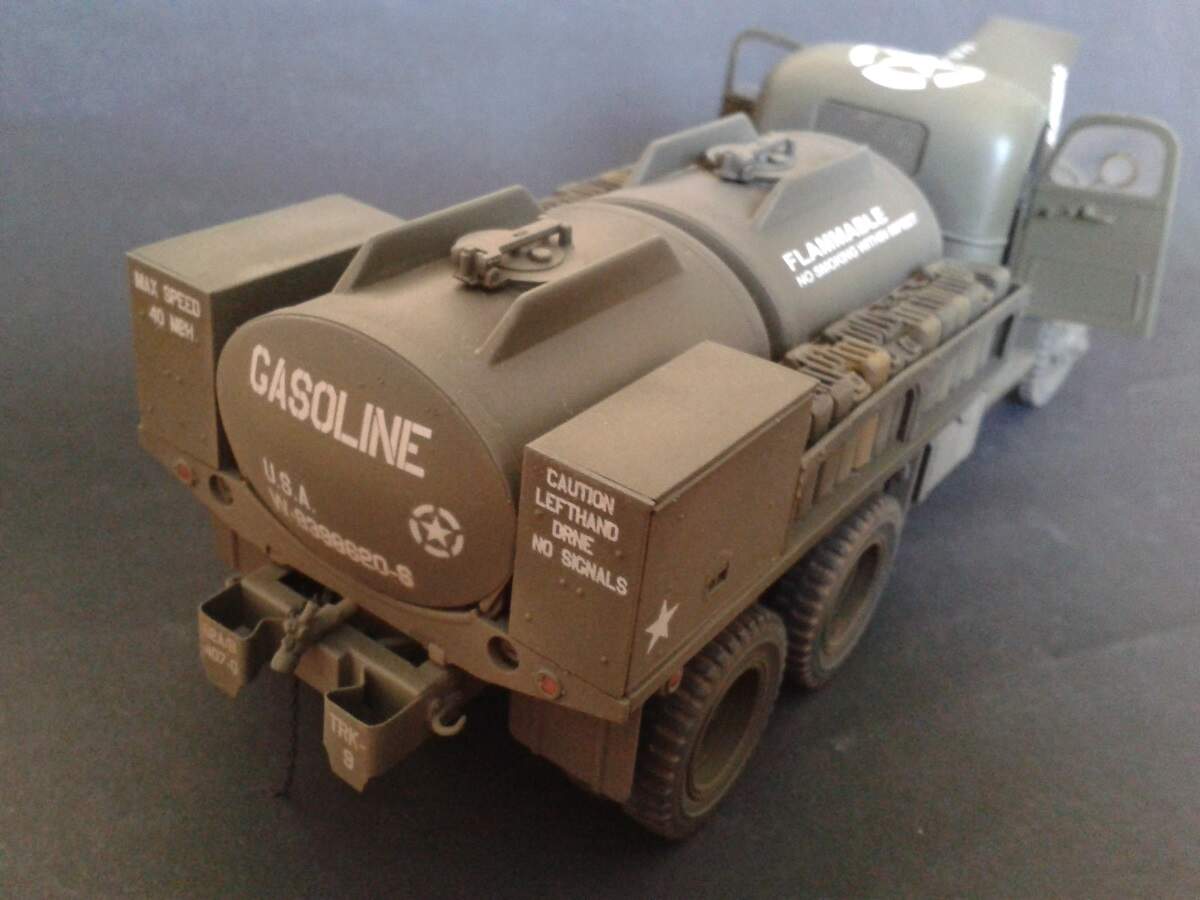
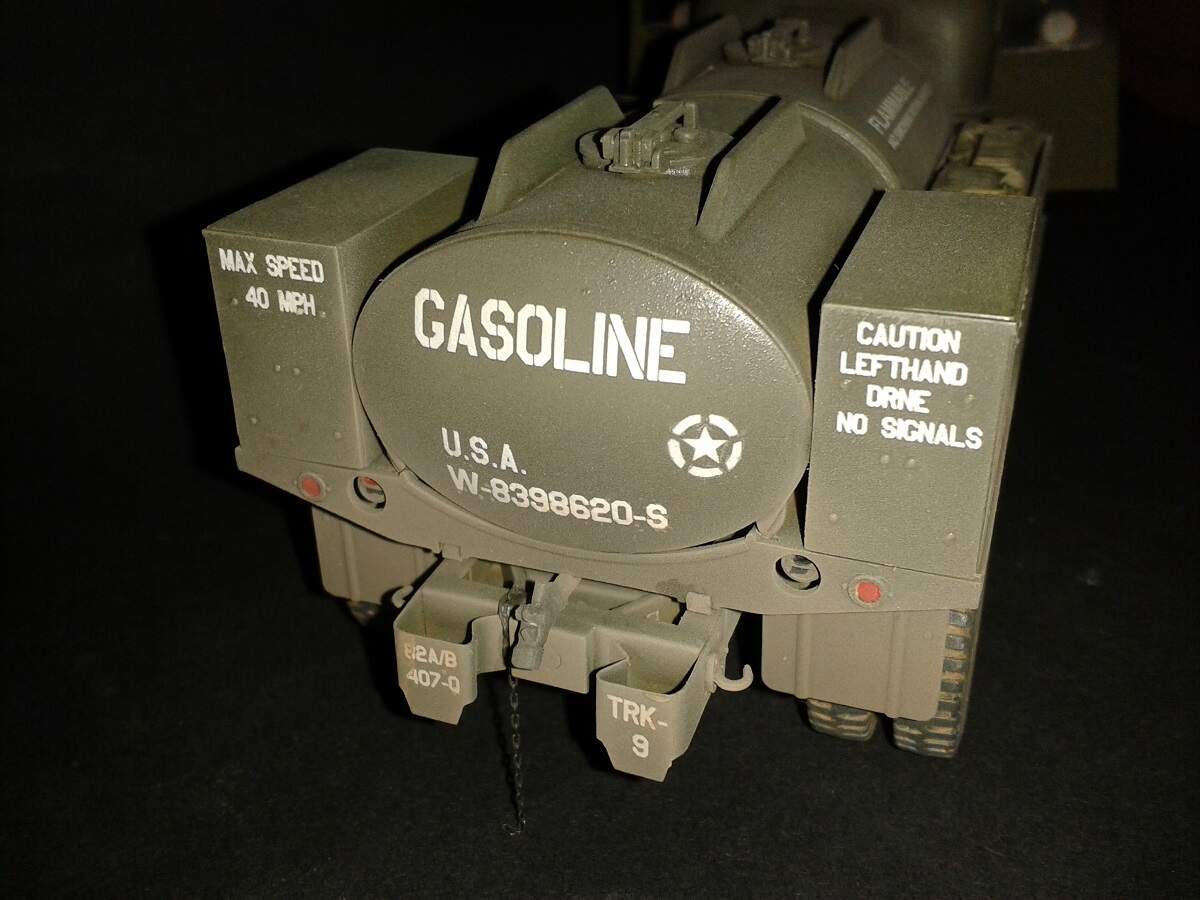
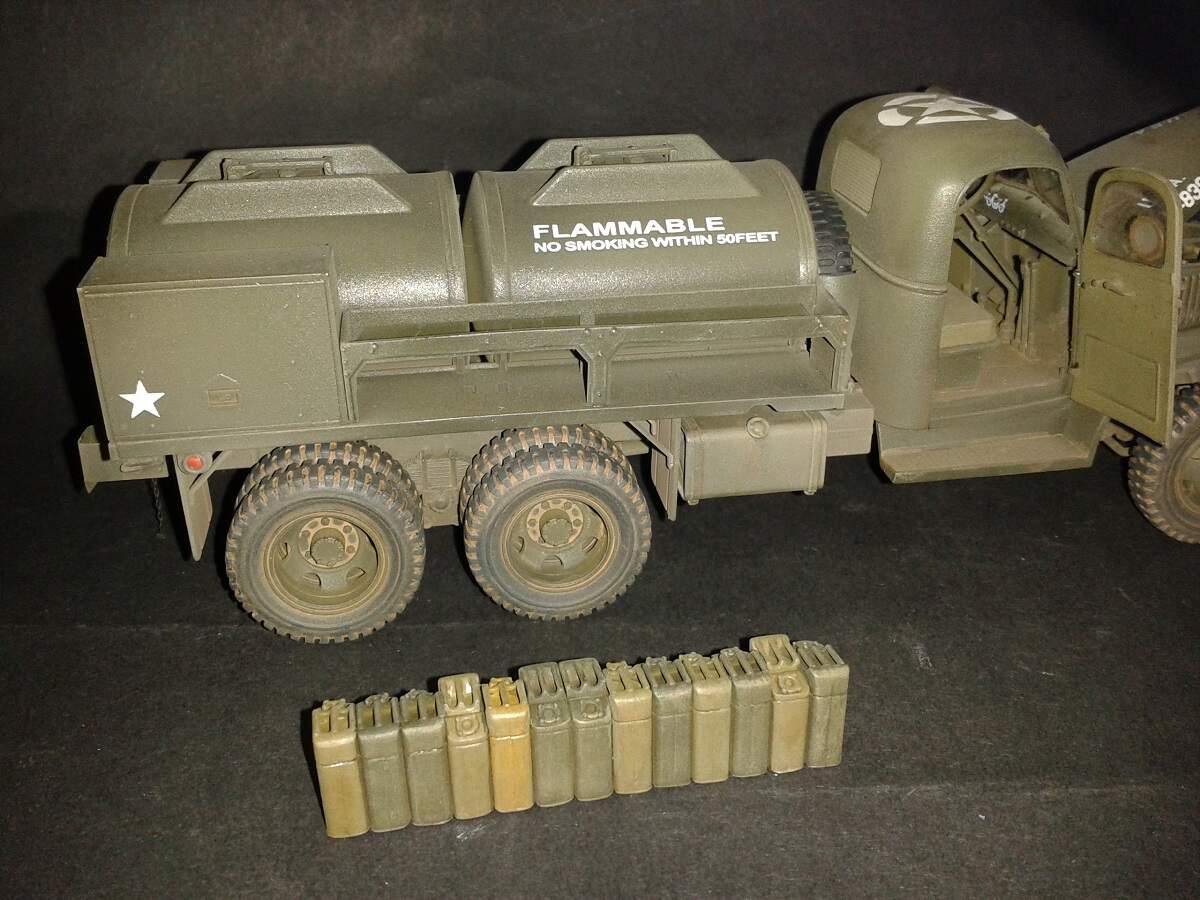
The fuel tanks have a problem with the manhole on top - HobbyBoss made them round when the tech manual shows them as oval. Round ones could be a second legitimate type, but I chose to reshape mine to make them oval. It meant thinning the front and rear edges of the raised lip, which is a challenging bit of careful scraping.


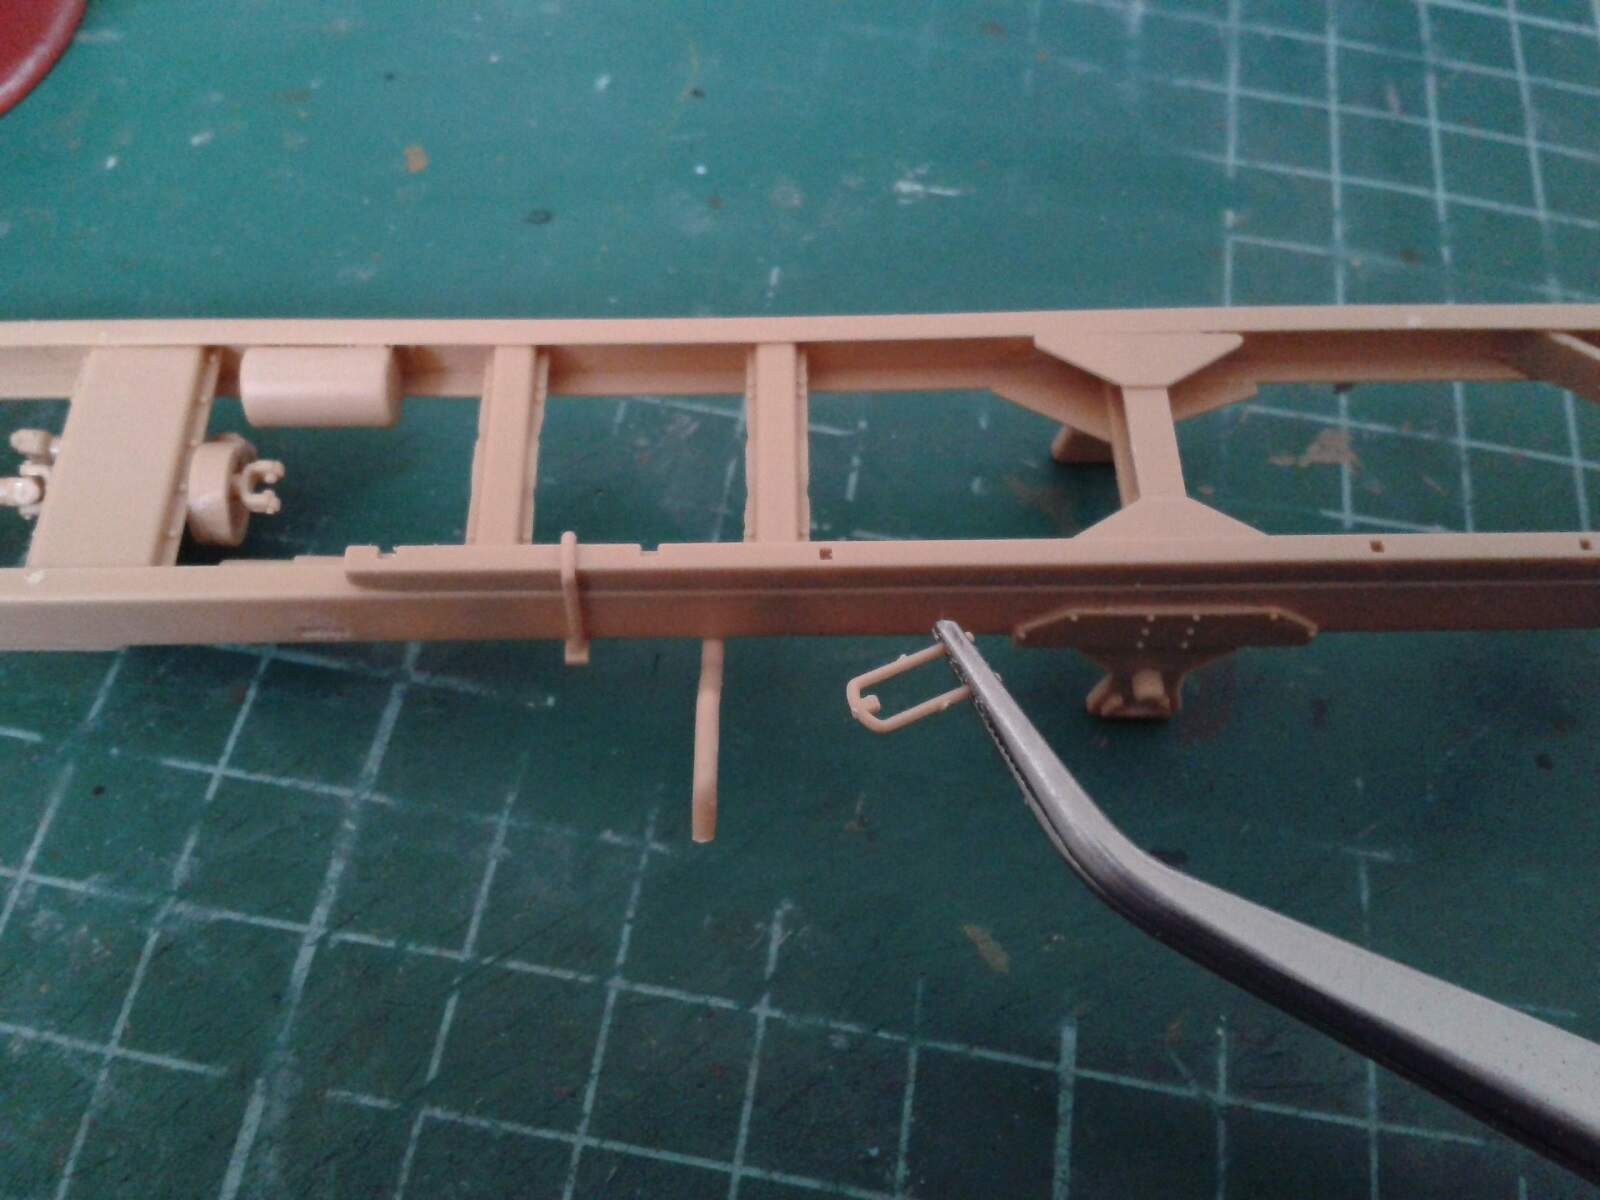
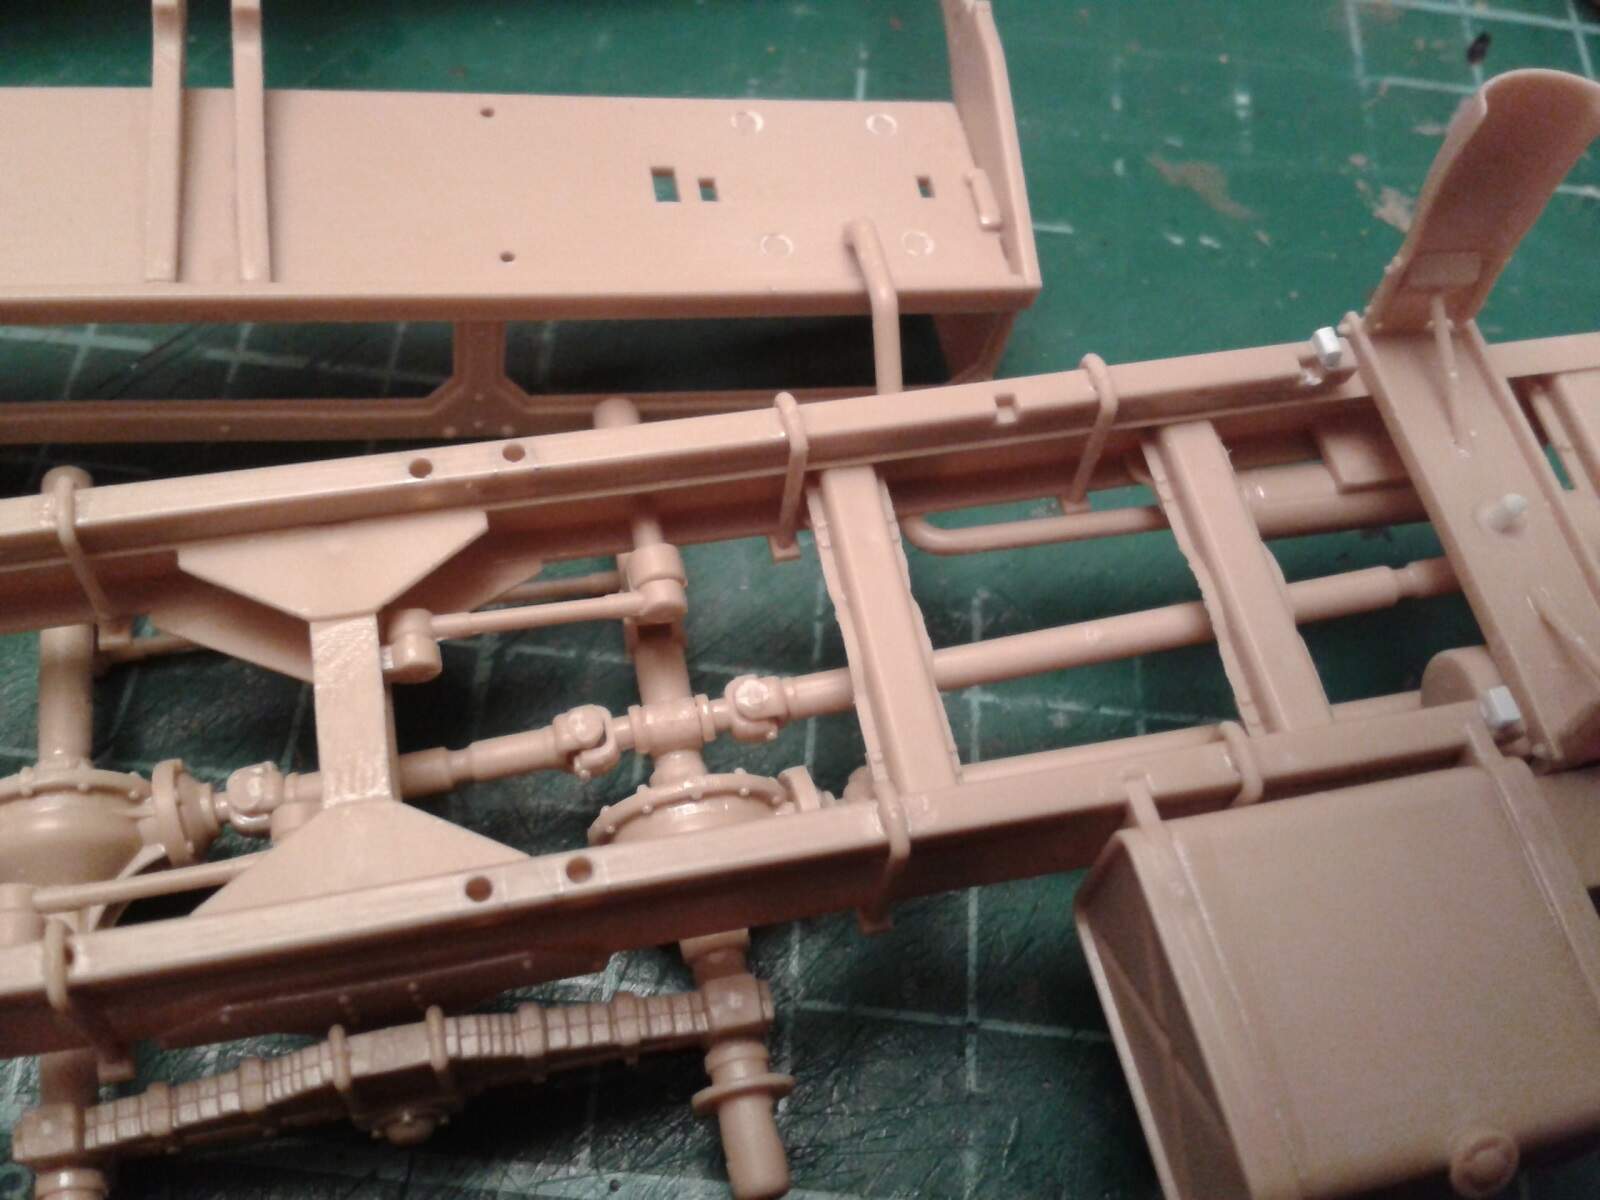
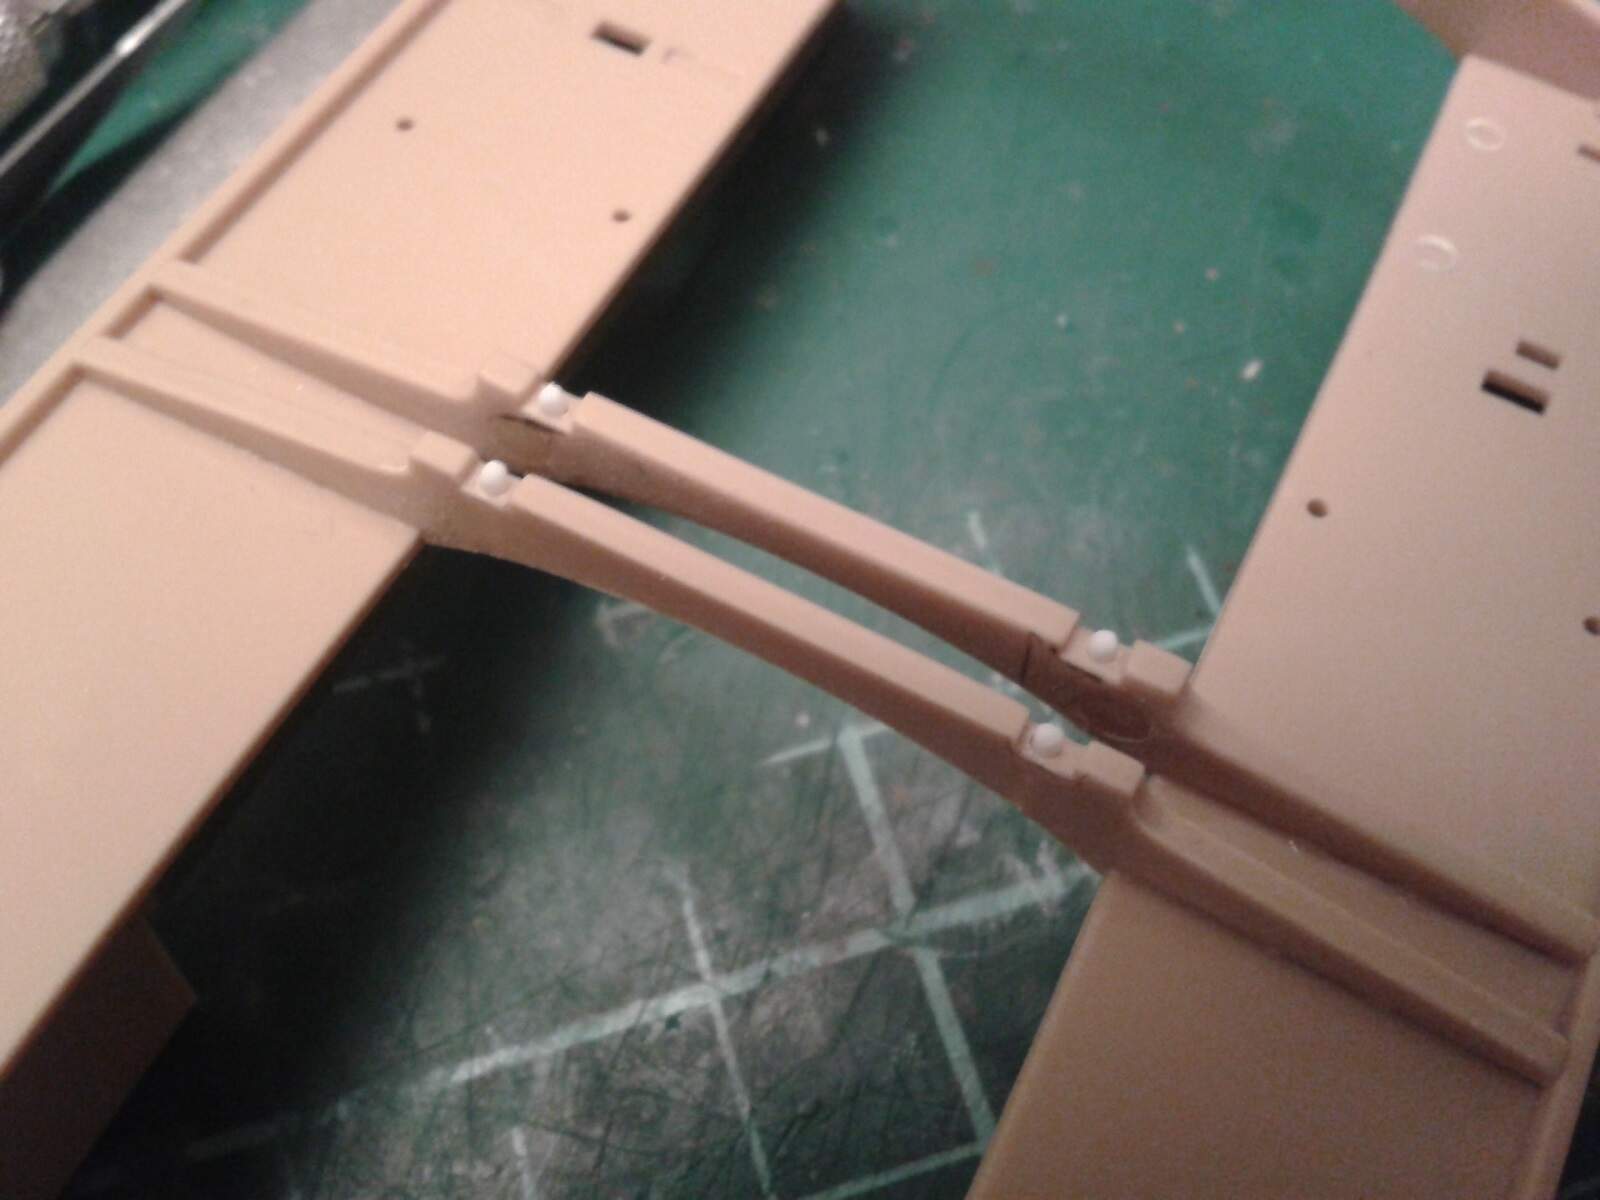
Again, HB offer no locating tabs, so to make it easier to mount after painting I drilled through the central bed frames into the tops of the truck frame and added plastic-rod pegs. Then I added some plastic scraps at each end to butt against the end frames.


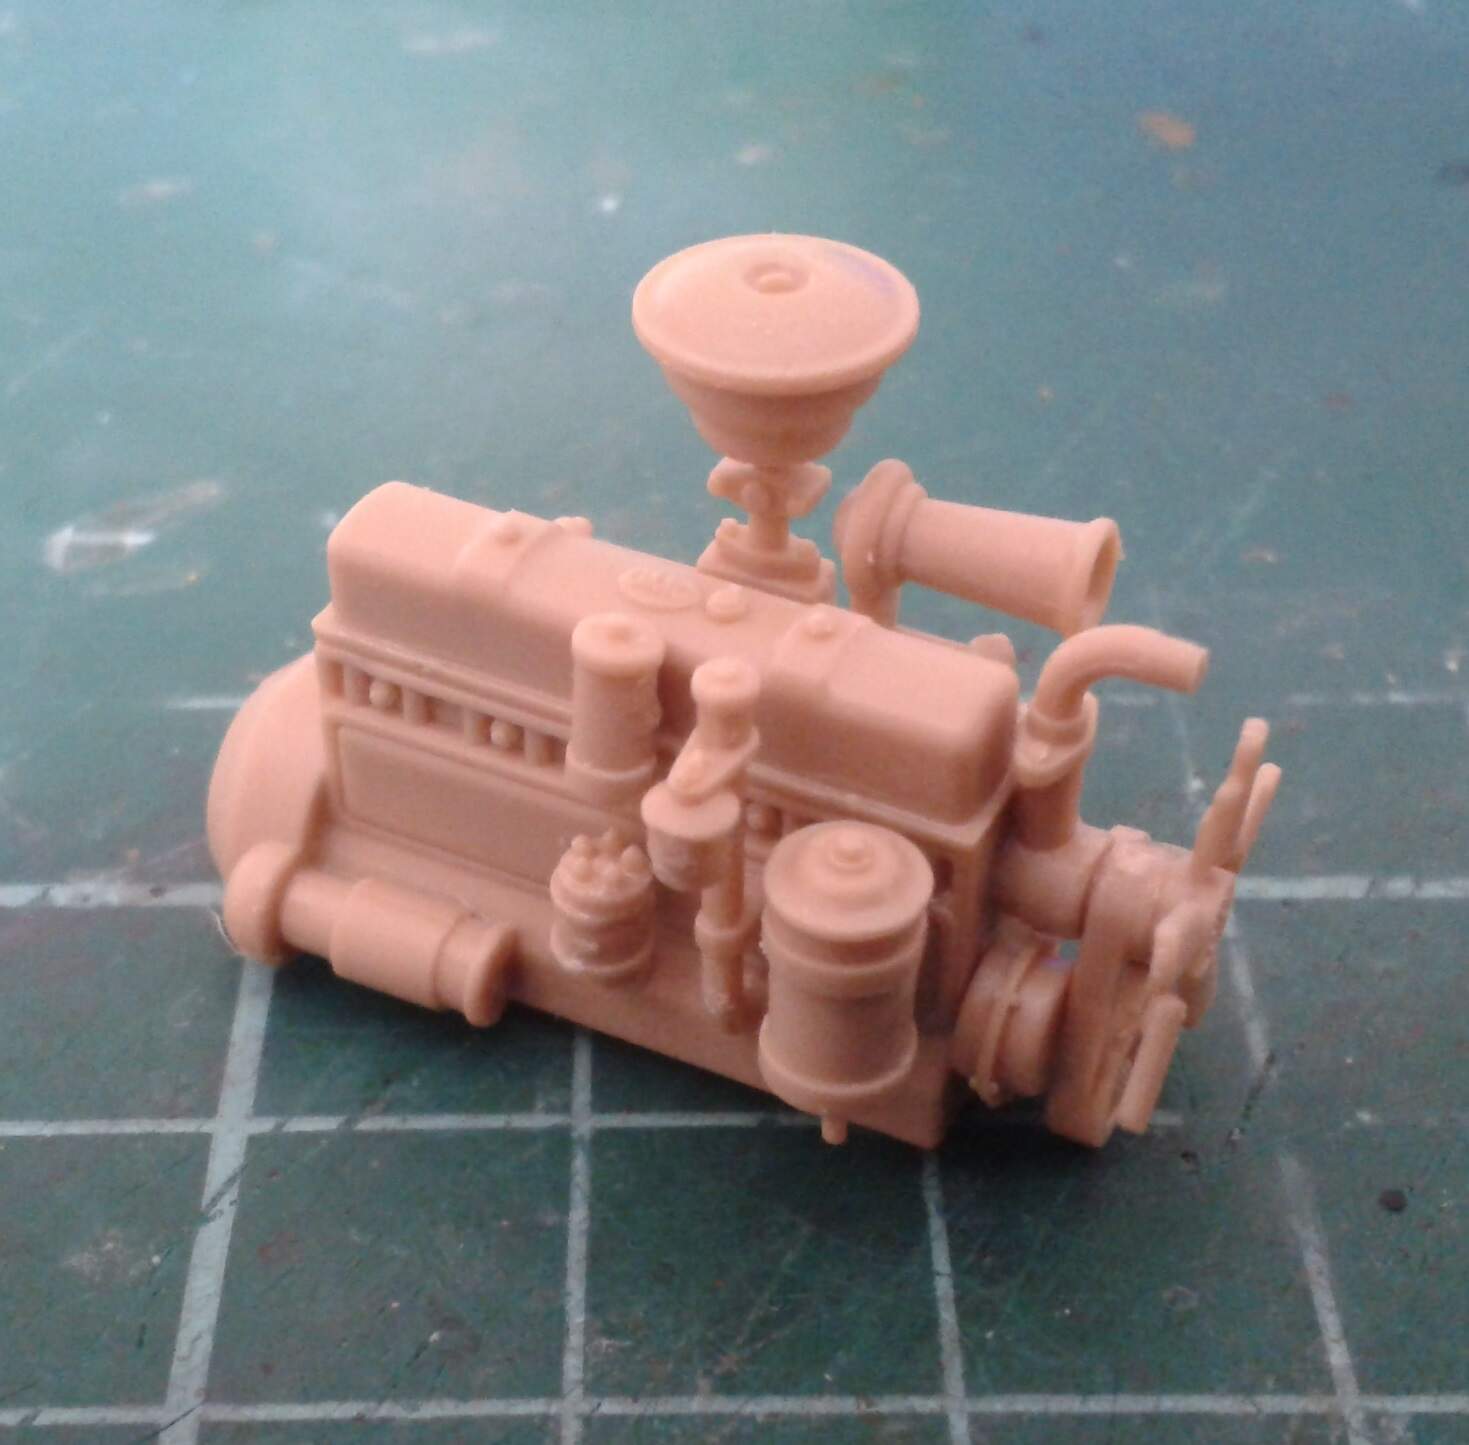
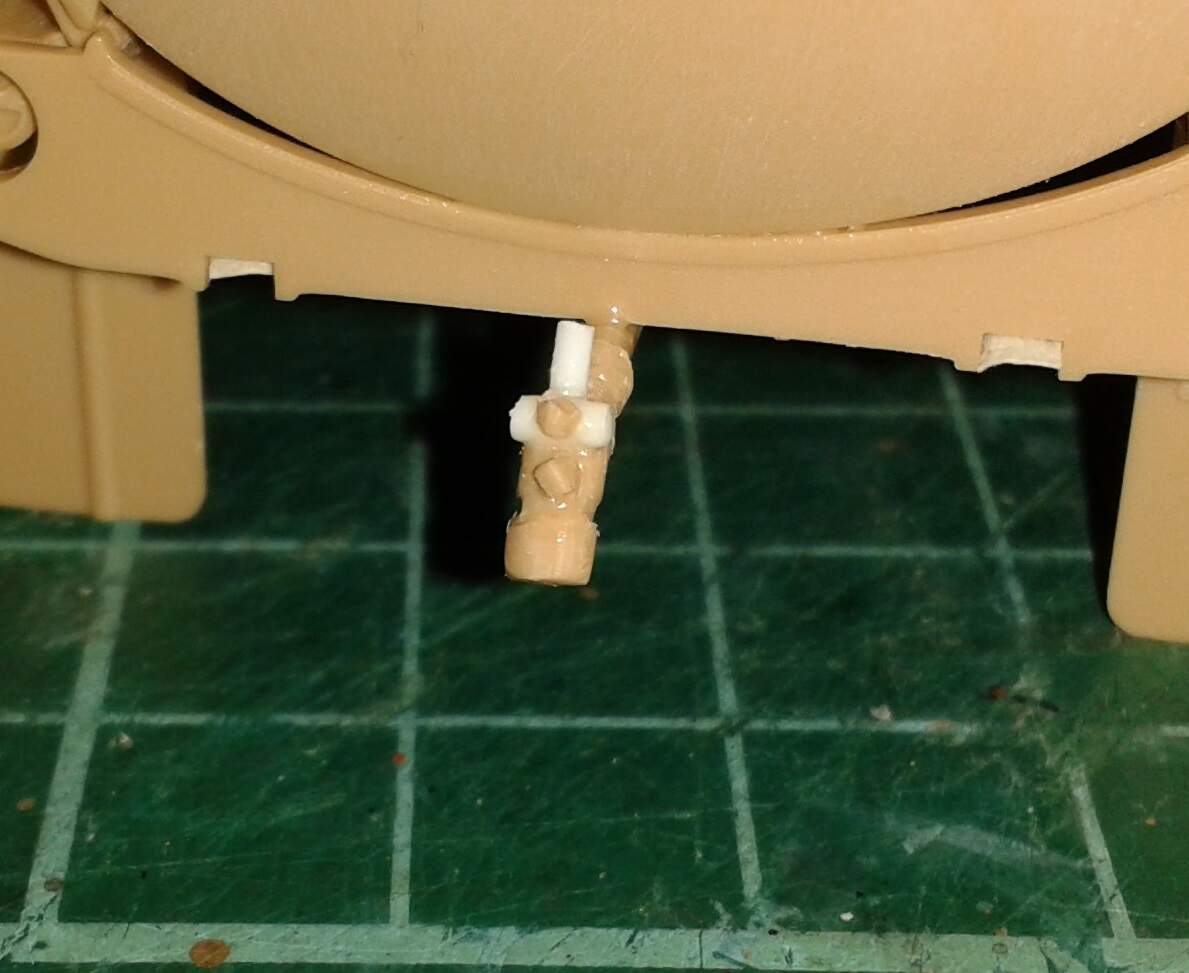
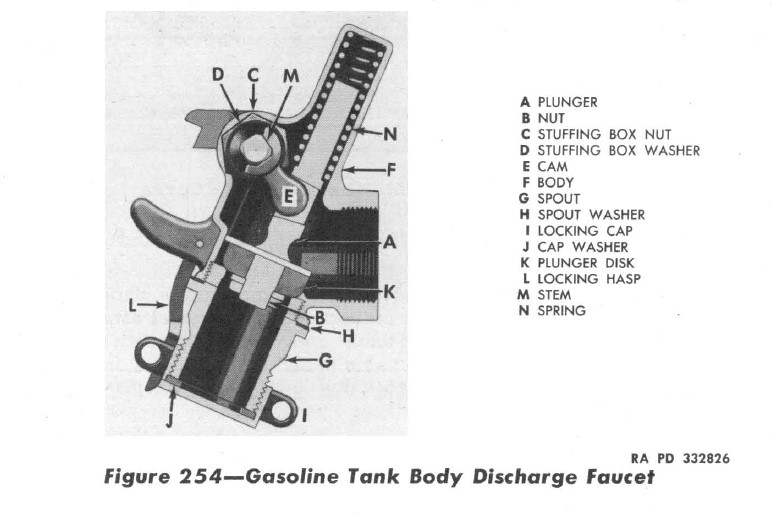
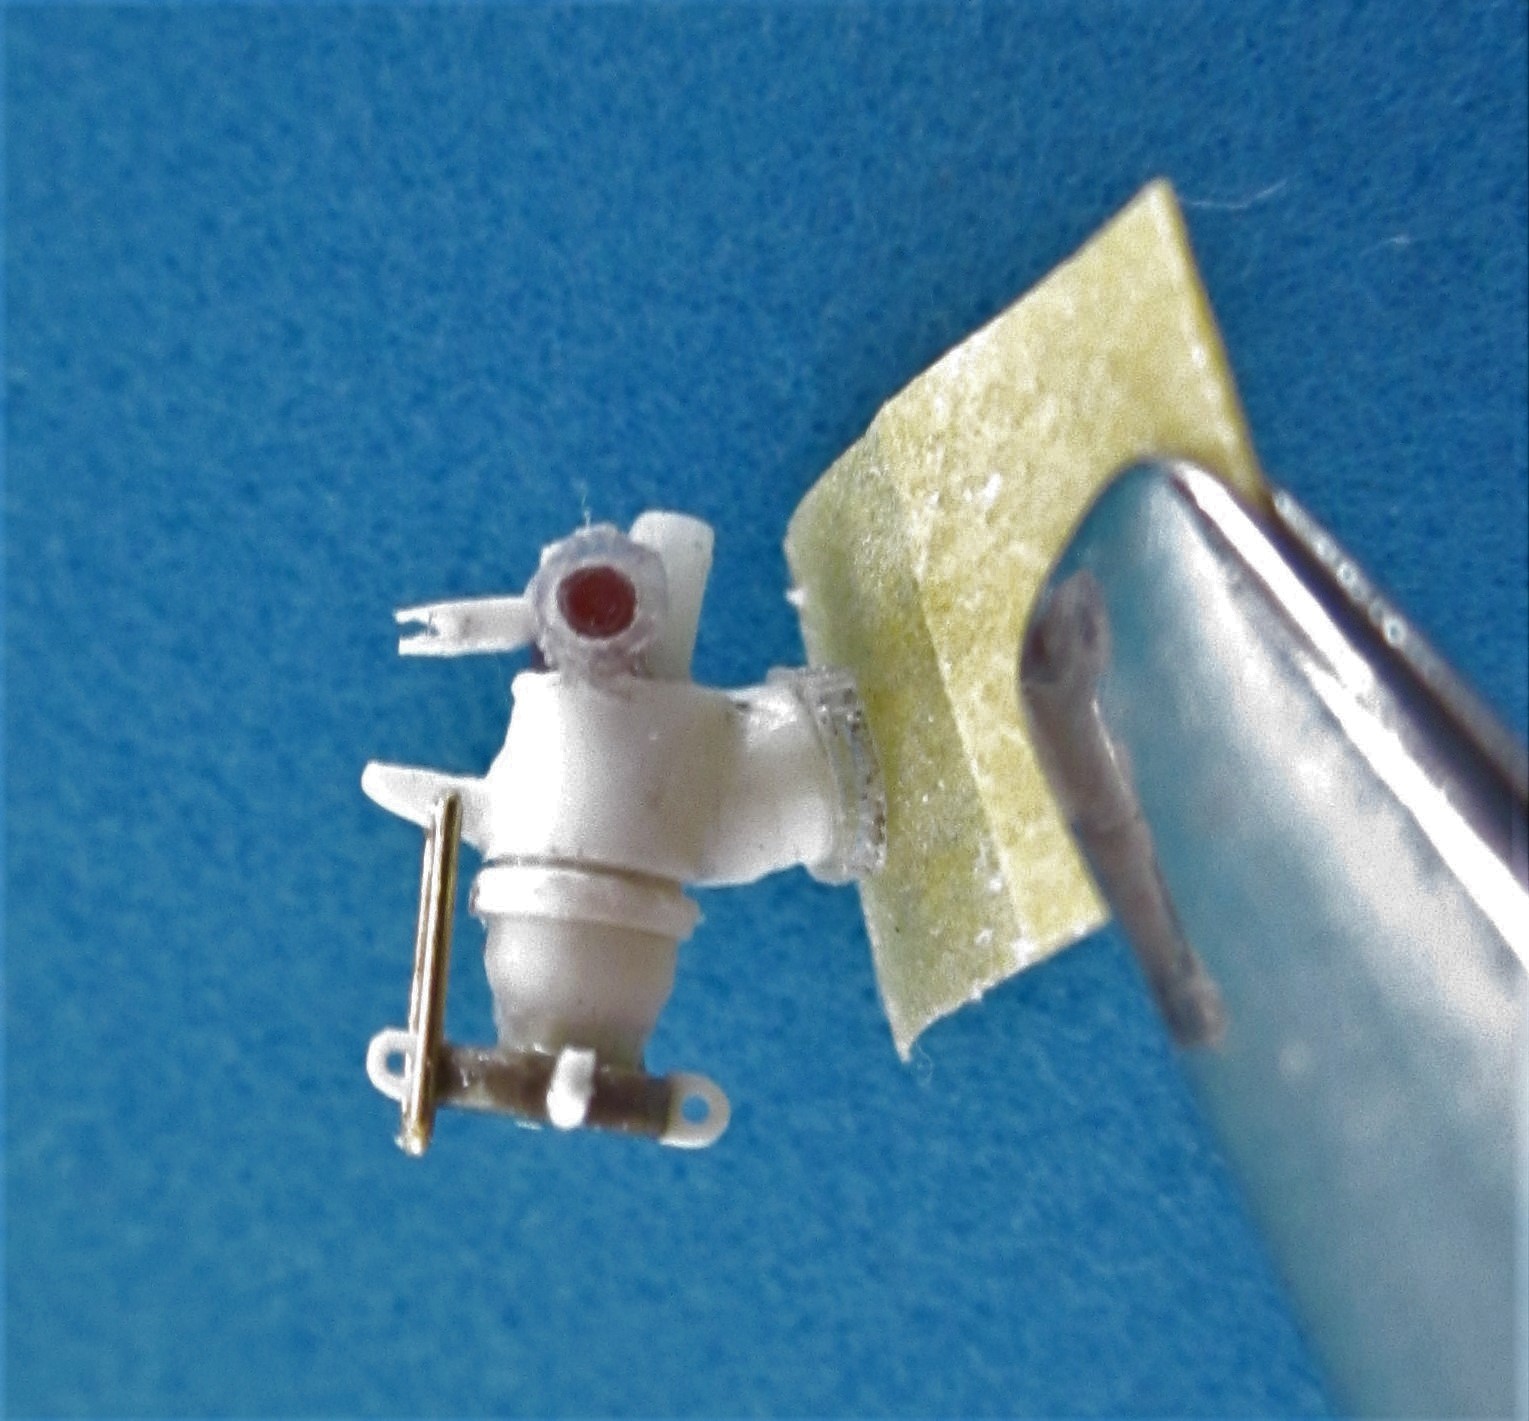
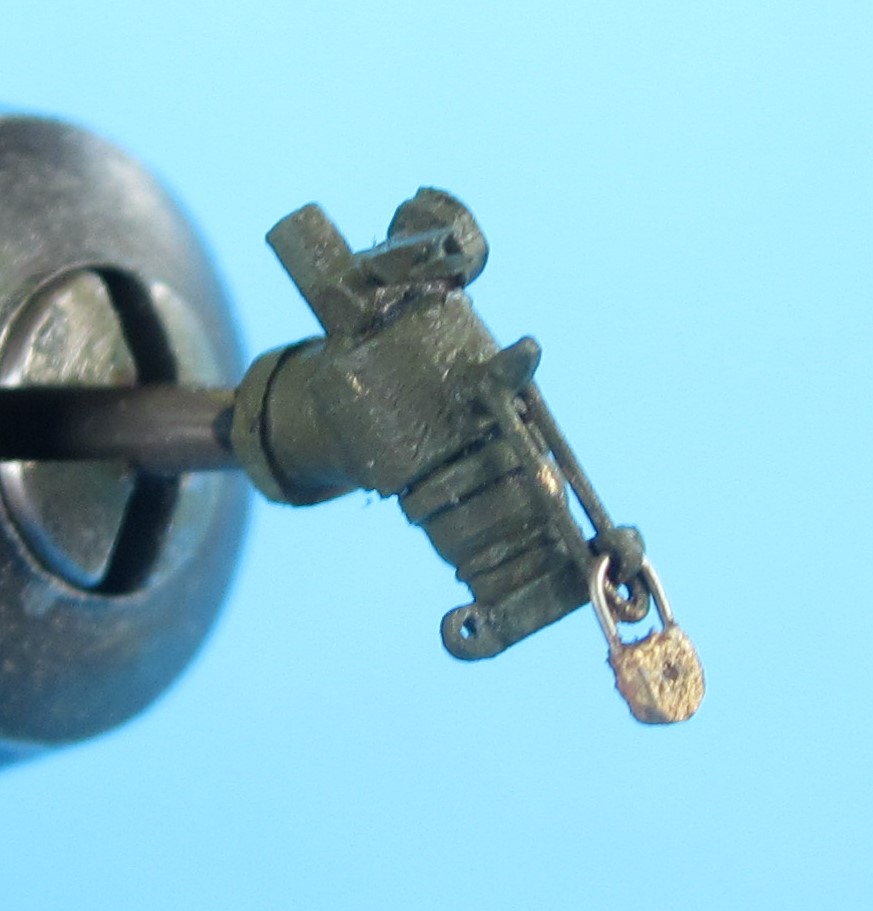
The final task was to make a fuel-dispensing nozzle that matches the tech manual pictures. I used a bit of scrap sprue and some Evergreen rod to do it. (HB offers a strange post-war twin-tap affair that is not correct for a wartime truck.)


I replaced the oversized HB 5-gallon cans with some Italeri cans from the spares box.

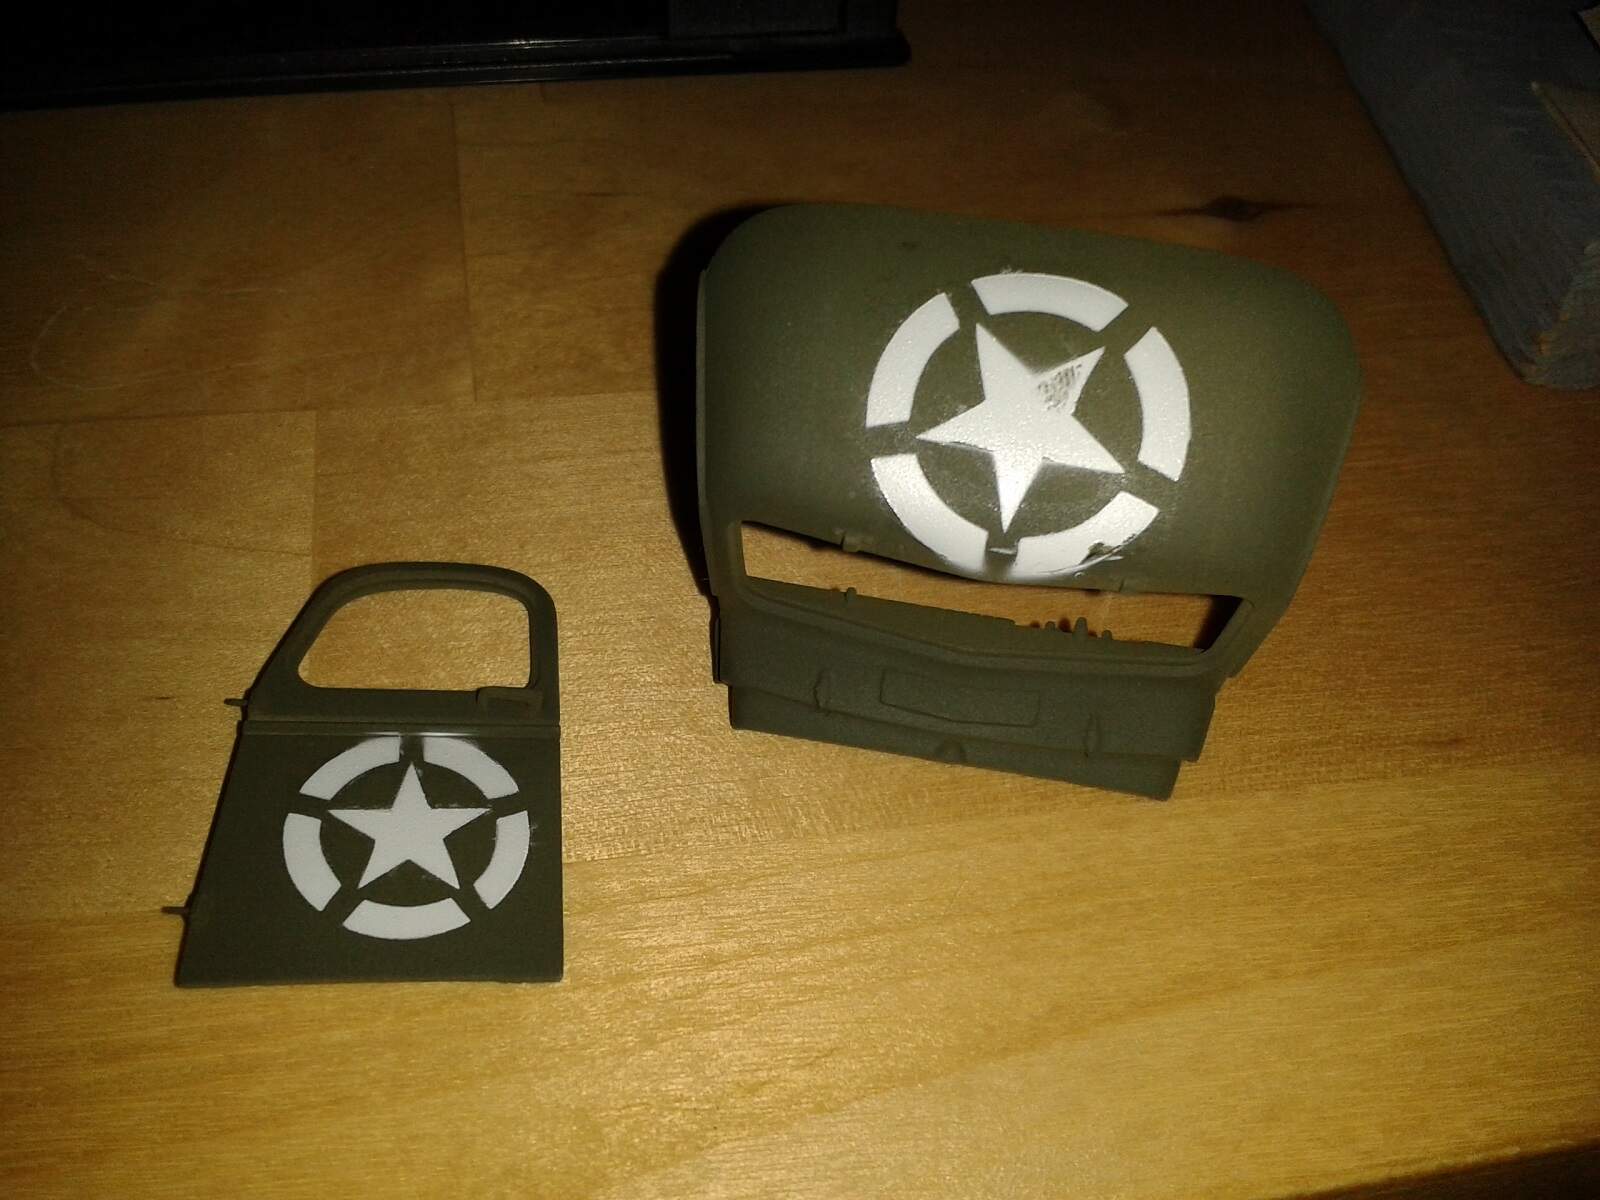
I started painting the assemblies and cleverly wanted to add the stars from a set of Eduard masks, but following the instructions to add a sheet of paper meant I couldn’t see exactly where my mask was going! The doors came out OK, but the roof star was too far forward and needed to be redone. Worse still, the mask edges were trying to lift off, allowing too much overspray. Worse still, as I wrestled with removing the stencil my thumb left its mark. I’ve since sanded off the first star and repainted the OD - a new attempt at a star will wait until the paint has had a few days to harden again! The failed first attempt looked like this:

More to come…

4 Likes

This is great!
The manhole modification looks well worth the effort. I always enjoy a good scratch-build session! :hammer_and_wrench:

—mike

You’re right-compare a kit to 1/35 plans only.

Good job ,i think the is hobby boss better than the old italeri.

Pascal76

Pascal,
The old Italeri kit’s chassis includes the steering arm that HB forgot, and its hood/cab dimensions are correct - which is why the old Italeri Water Tanker is in such high demand ever since HB introduced their CCKW kits…
Peter

1 Like

Tom,
I had noted the different shape of the tanks’ manholes, too, but couldn’t find photographic evidence except one in the David Doyle book, where the covers are not only oval but also have differing locking mechanisms. Could you please show the TM illustration you refer to? (And how about adding the weld bead in front and behind the manholes on your model?)
Another request to allow me the correction of my model: a TM (or comparable) illustration of the dispensing nozzle, please.
Peter

Hi Peter, funny you should ask! I was looking at it last night, and digging through the TMs I have as PDF files (found them free on the web). The real tanks are meant to be 54 inches long & the same wide - that scales to 39.18mm in 1:35. The HB tanks are 39mm wide, but a whopping 45mm long! (The CMK ones are 40mm long, but only 37mm wide, and have the convex ends at both ends.) So it looks as though HB has indeed used the wrong length for the bed as you surmised! The frame length of the truck should be 253.5 inches, or 184mm in scale, but the HB one is 190mm, 6mm too long thanks to that odd end piece o the frame.

The bits I found are here:


(from TM 9-2800)


(from TM 9-1801)


(all three from TM 9-1801)

So it looks like I’d have been better off with the Italeri water tanker and CMK conversion, with some limited scratchbuilding! Oh well - I might rethink my plan to sell off the resin conversion set.

As for the missing weld beads, I won’t bother to add them now since the tanks are already painted and the whole thing is inaccurate anyway. But for what it’s worth the HB kit at least goes together well!

[EDIT: drop me a PM with your email and I’ll send you the TMs if you like!]

4 Likes

Thank For your message.
Pascal

In case anyone is interested, I did manage to finish my truck, warts and all. While it pains me to know there are so many dimensional errors, I have to say it does look the part when finished!

The sharp-eyed will note the olive green engine block - I used Tamiya Nato green because it was handy and shined up well with Pledge. All the GMC engines seem to have left the factory in this colour, but with all the rebuilds over the years I’ve seen everything from OD to grey to red on them at shows. The fuel cans are Italeri, assembled into blocks for convenience and then painted with various mixes of OD, Khaki, and Buff Vallejo paints before washes and dry-brushing. Not sure what to do with the overscale kit parts…

Apologies for the rubbish shots that were taken with my phone in daylight with & without flash - If I can dig out the “big” camera to take good shots I might add this as a build feature on Armorama!

5 Likes

Tom,
I agree, you have make a great looking fuel truck. Love the fuel can OD color variations.

1 Like

Fantastic looking build . This was a joy to see and read

Hi all,
The cutaway drawing shown above helped me to understand the photos in the Doyle book on the CCKW and come up with this rendition of the fuel faucet:


Still not perfect, but a lot more correct than what the kit offers.
Happy modeling!
Peter

4 Likes

Hi Peter, that’s some VERY impressive micro-surgery!

I agree with Tom, very impressive.