Artillery units usually operate several miles from the front, so are not often subject to direct fire. They do have to observe noise and light discipline at night, so, no flashlights. The white ammo box reflects moonlight and allows men to prep rounds by ambient light. Similarly, a white circle is often painted around the breach so the loader can push the round home in the dark without slamming the fuse into the breach block.
3 Likes
Another plausible explanation for the white paint …
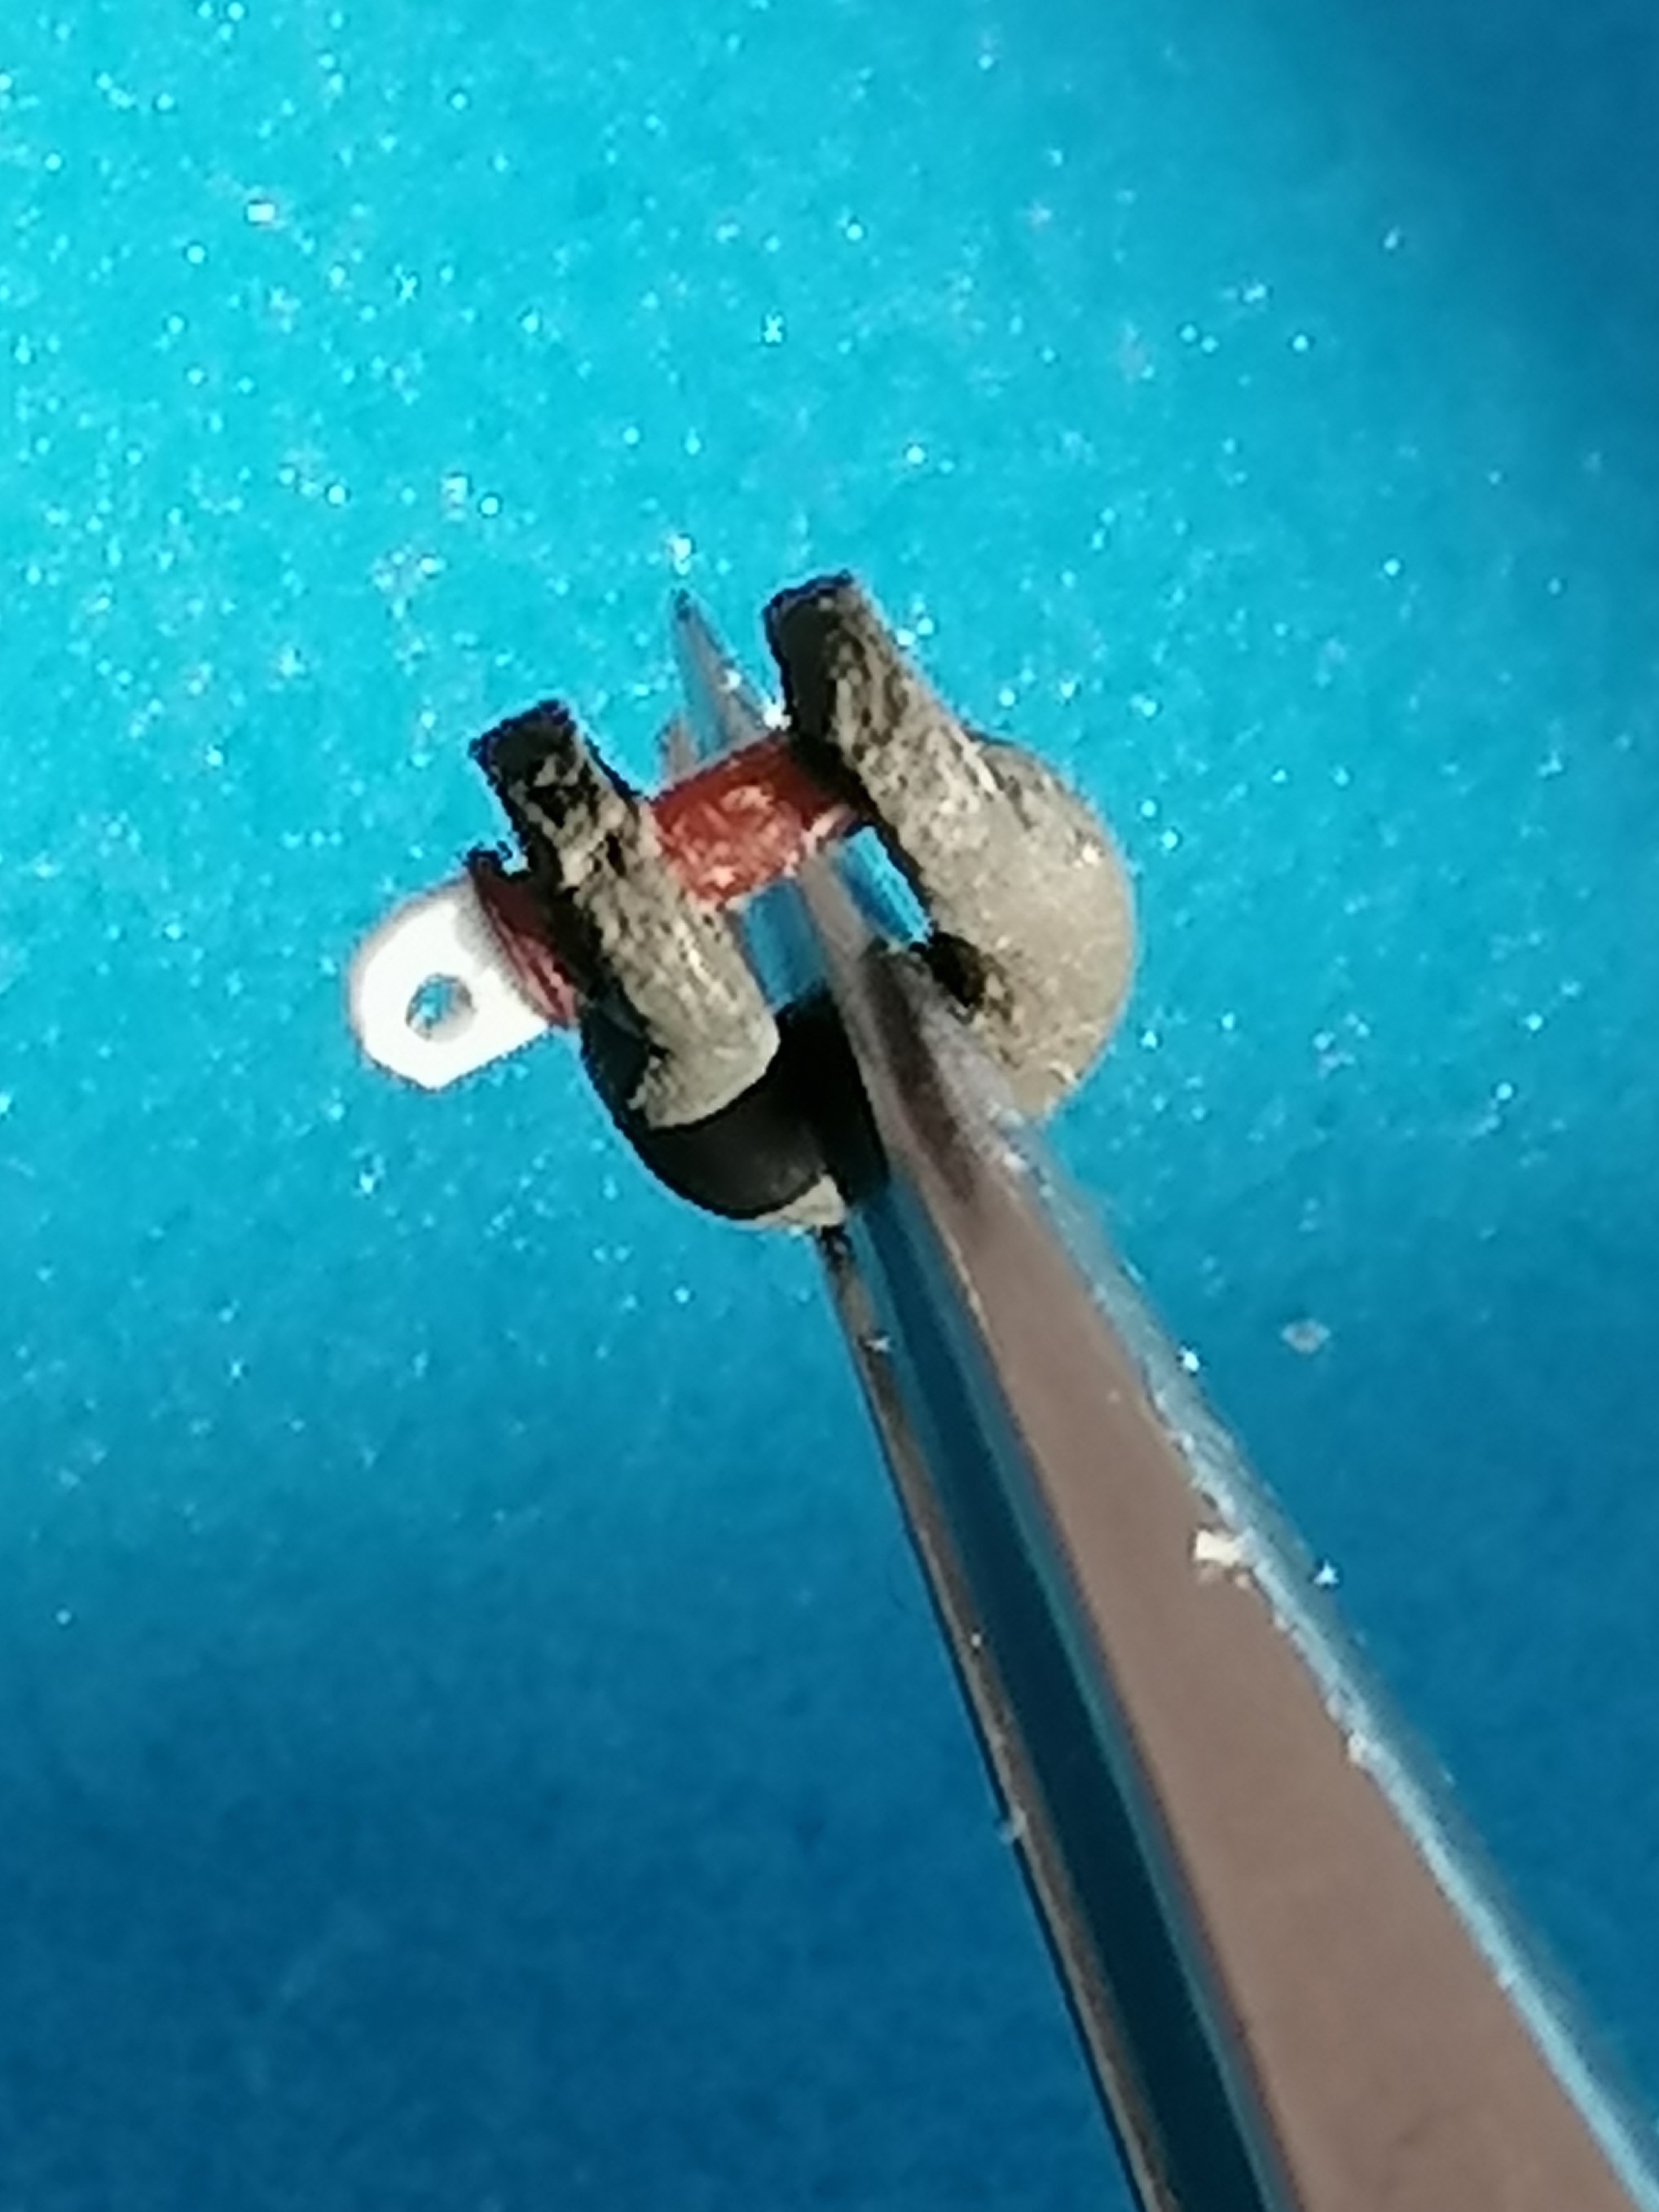
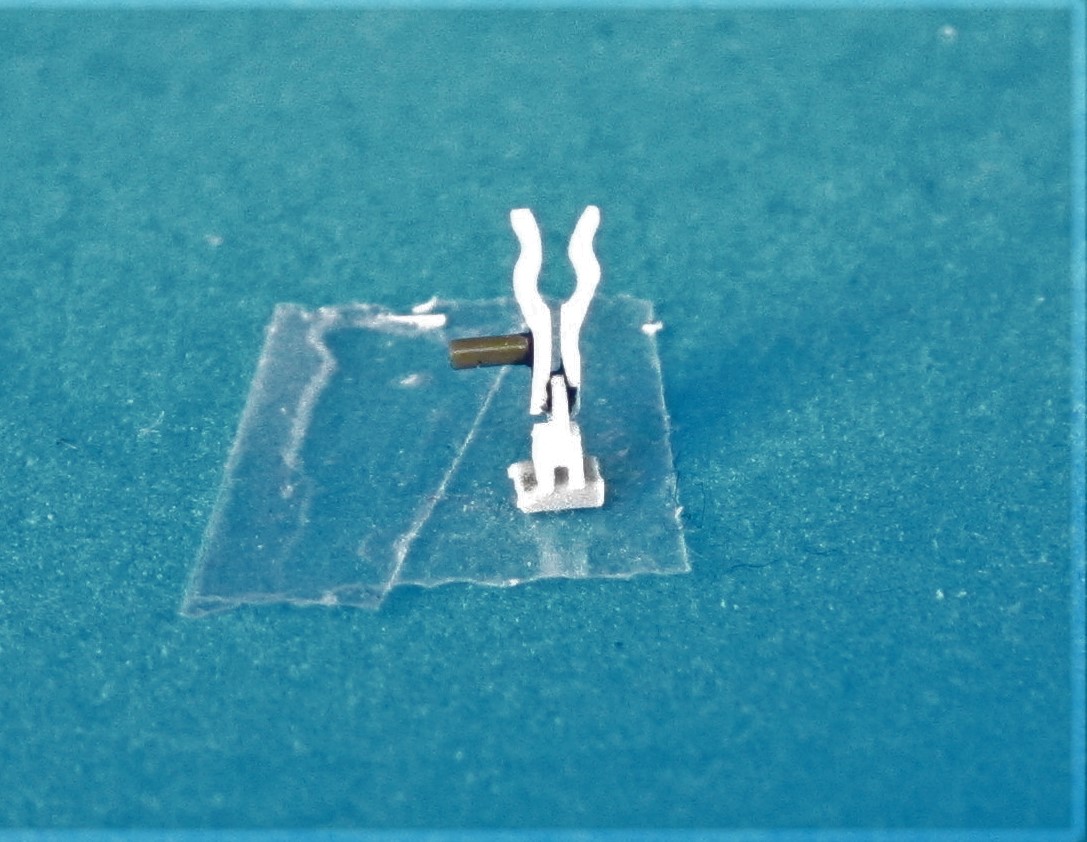
Meanwhile, back at the bench, I mobilized the lifting/towing shackles by drilling out their bolt representations and replacing them with plastic rod that had one end molten and filed down to receive a perforated and rounded piece of plastic strip. Procrastinating at its best!
3 Likes
wow, that is all I can say…
1 Like
Absolutely unbelievable results on that shackle, and some of it’s paint…
Thank you for the friendly words - however, I must confess that the shackle bolts are only held in place by a little paint, as I couldn’t cut in threads!
Peter
3 Likes
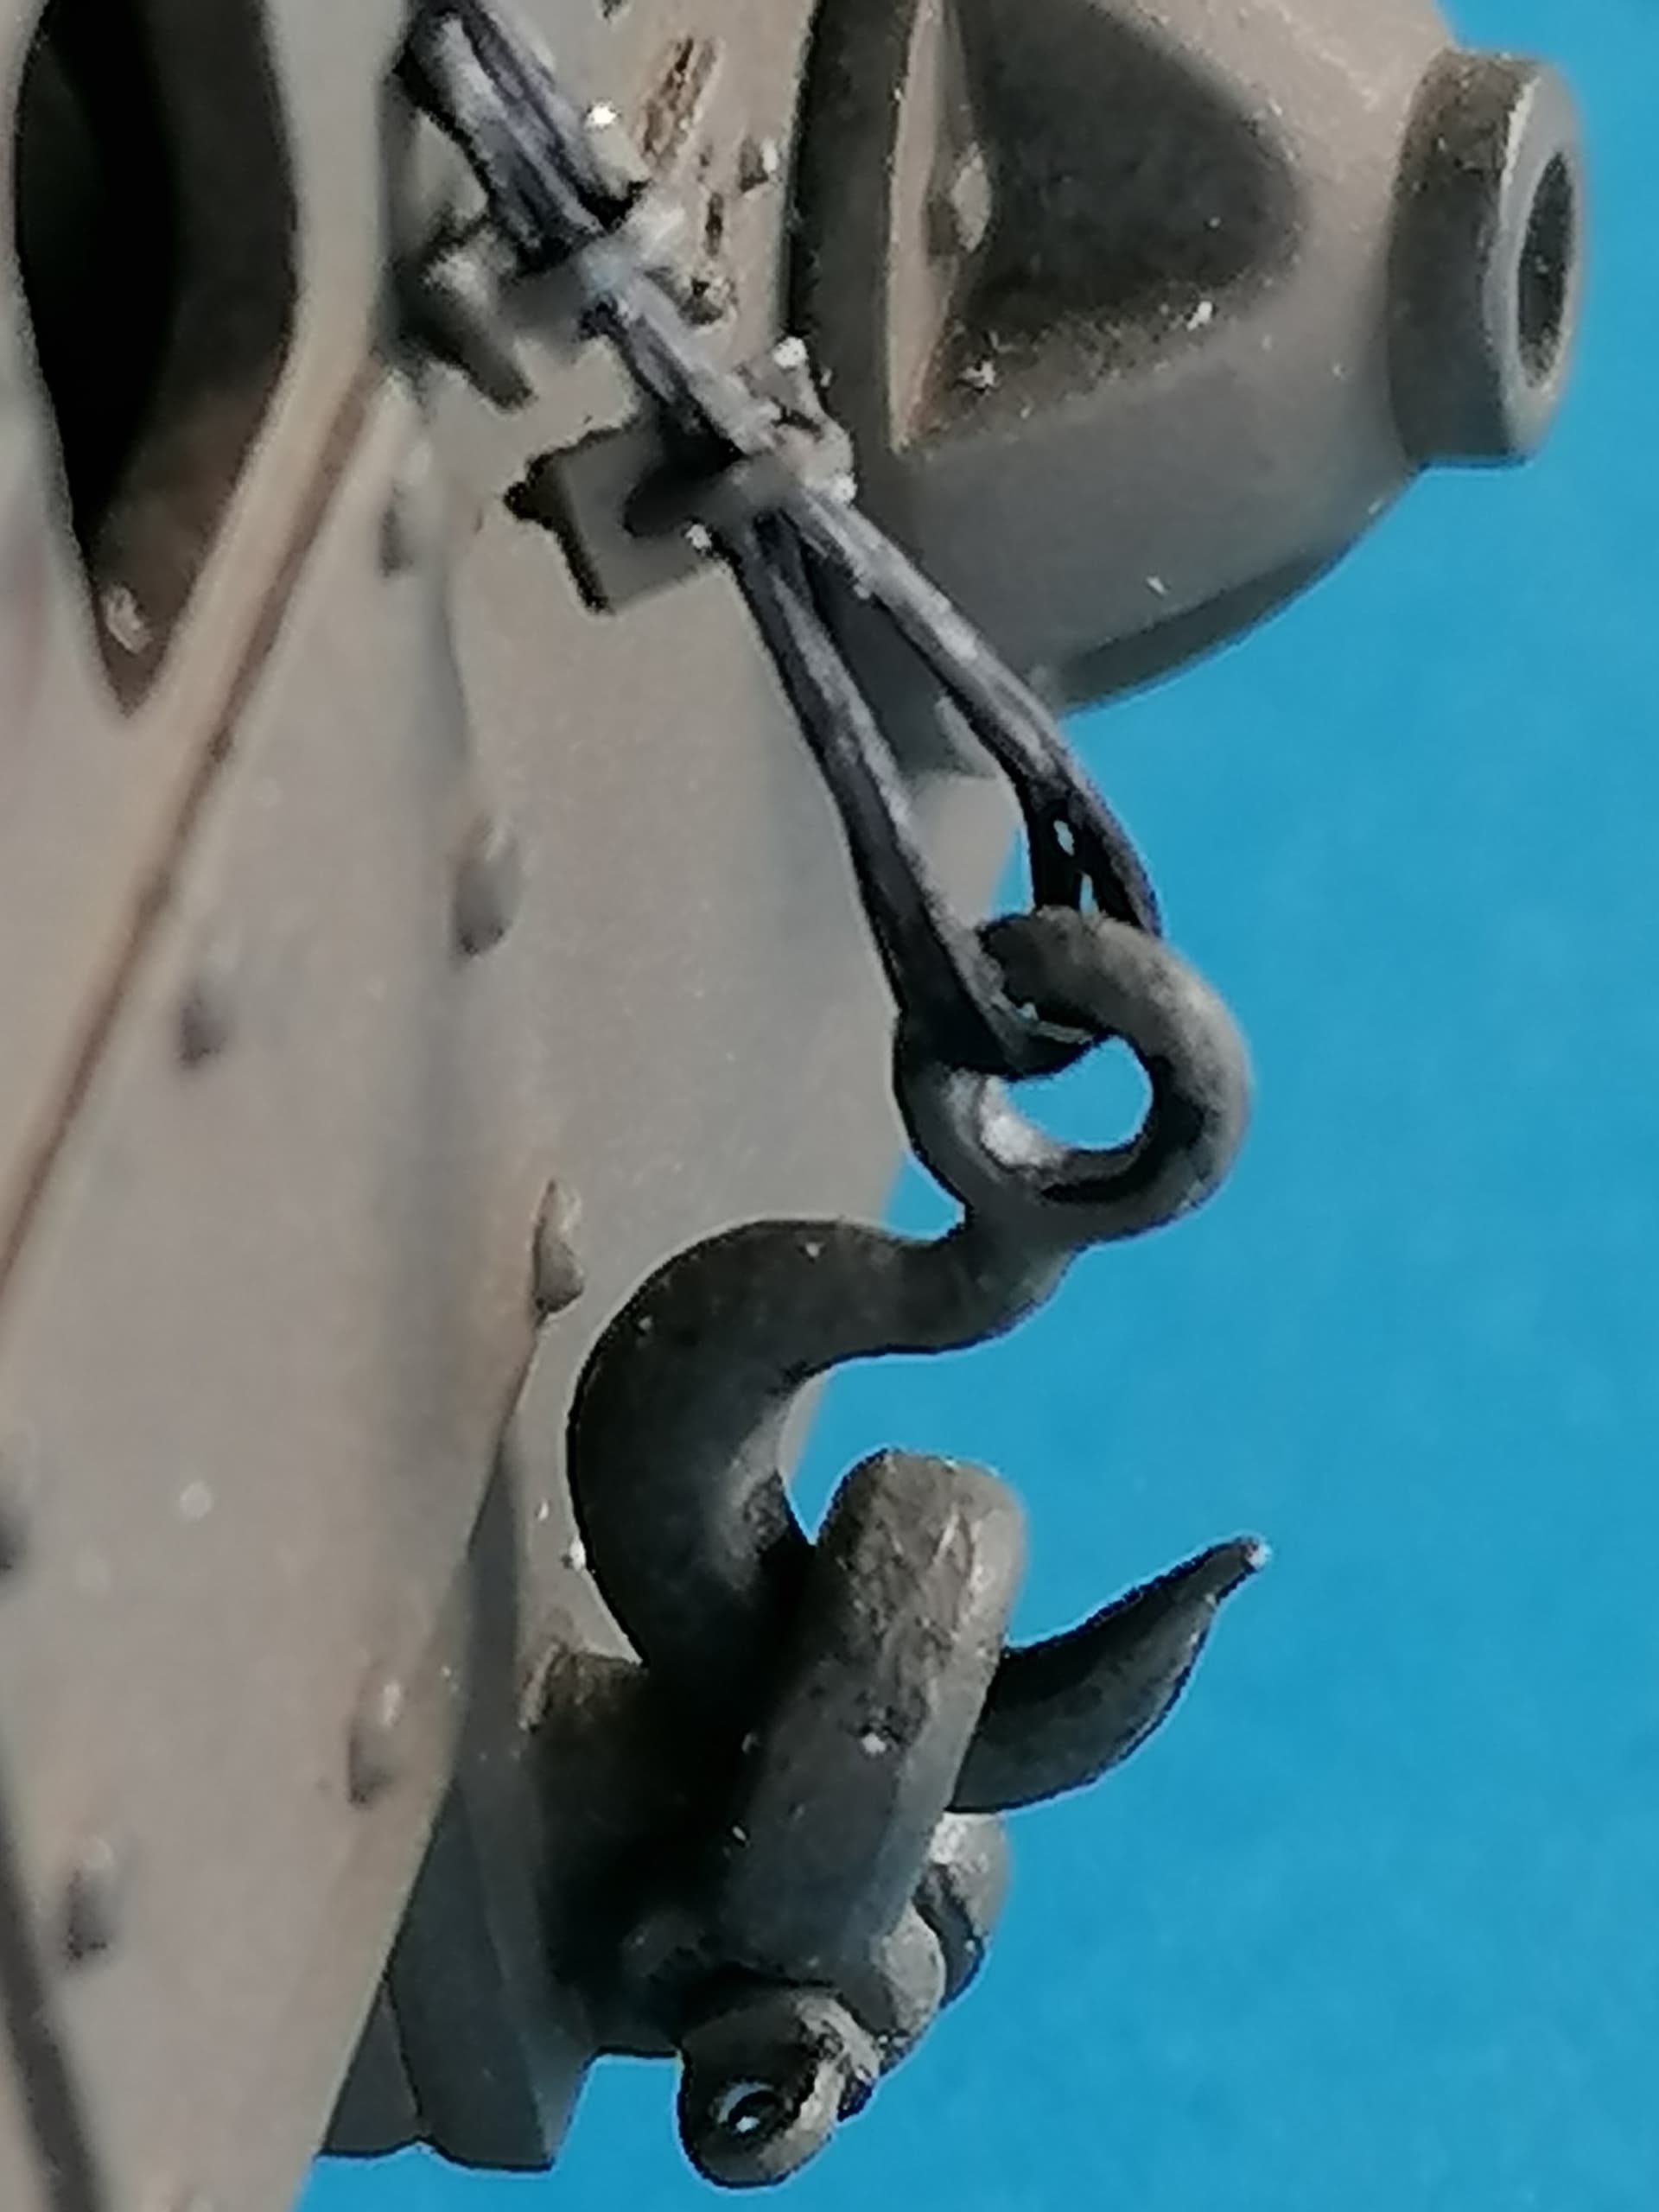
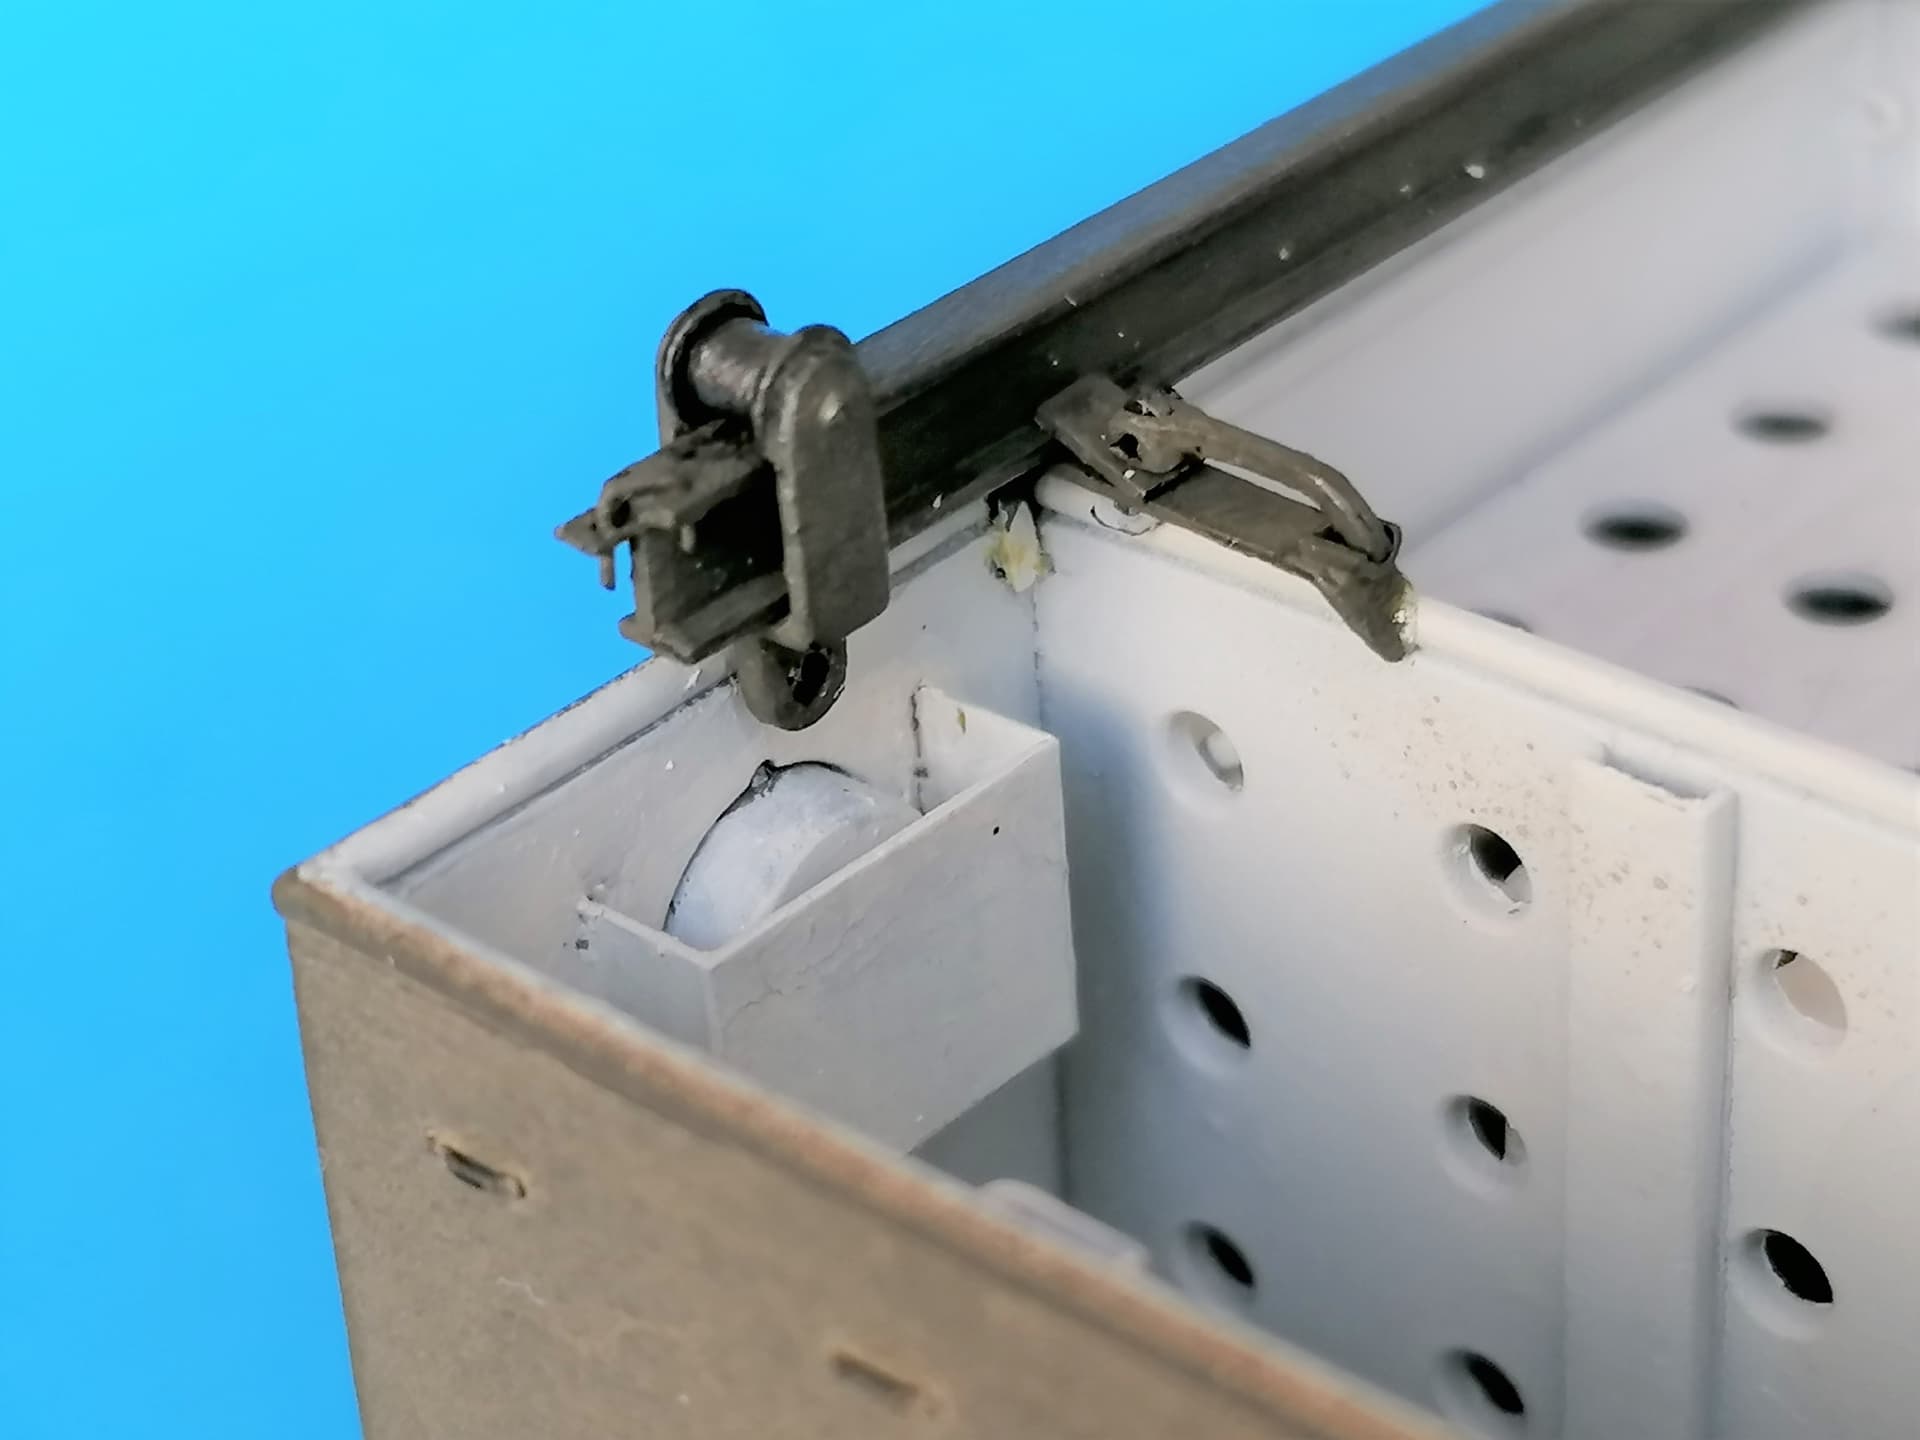
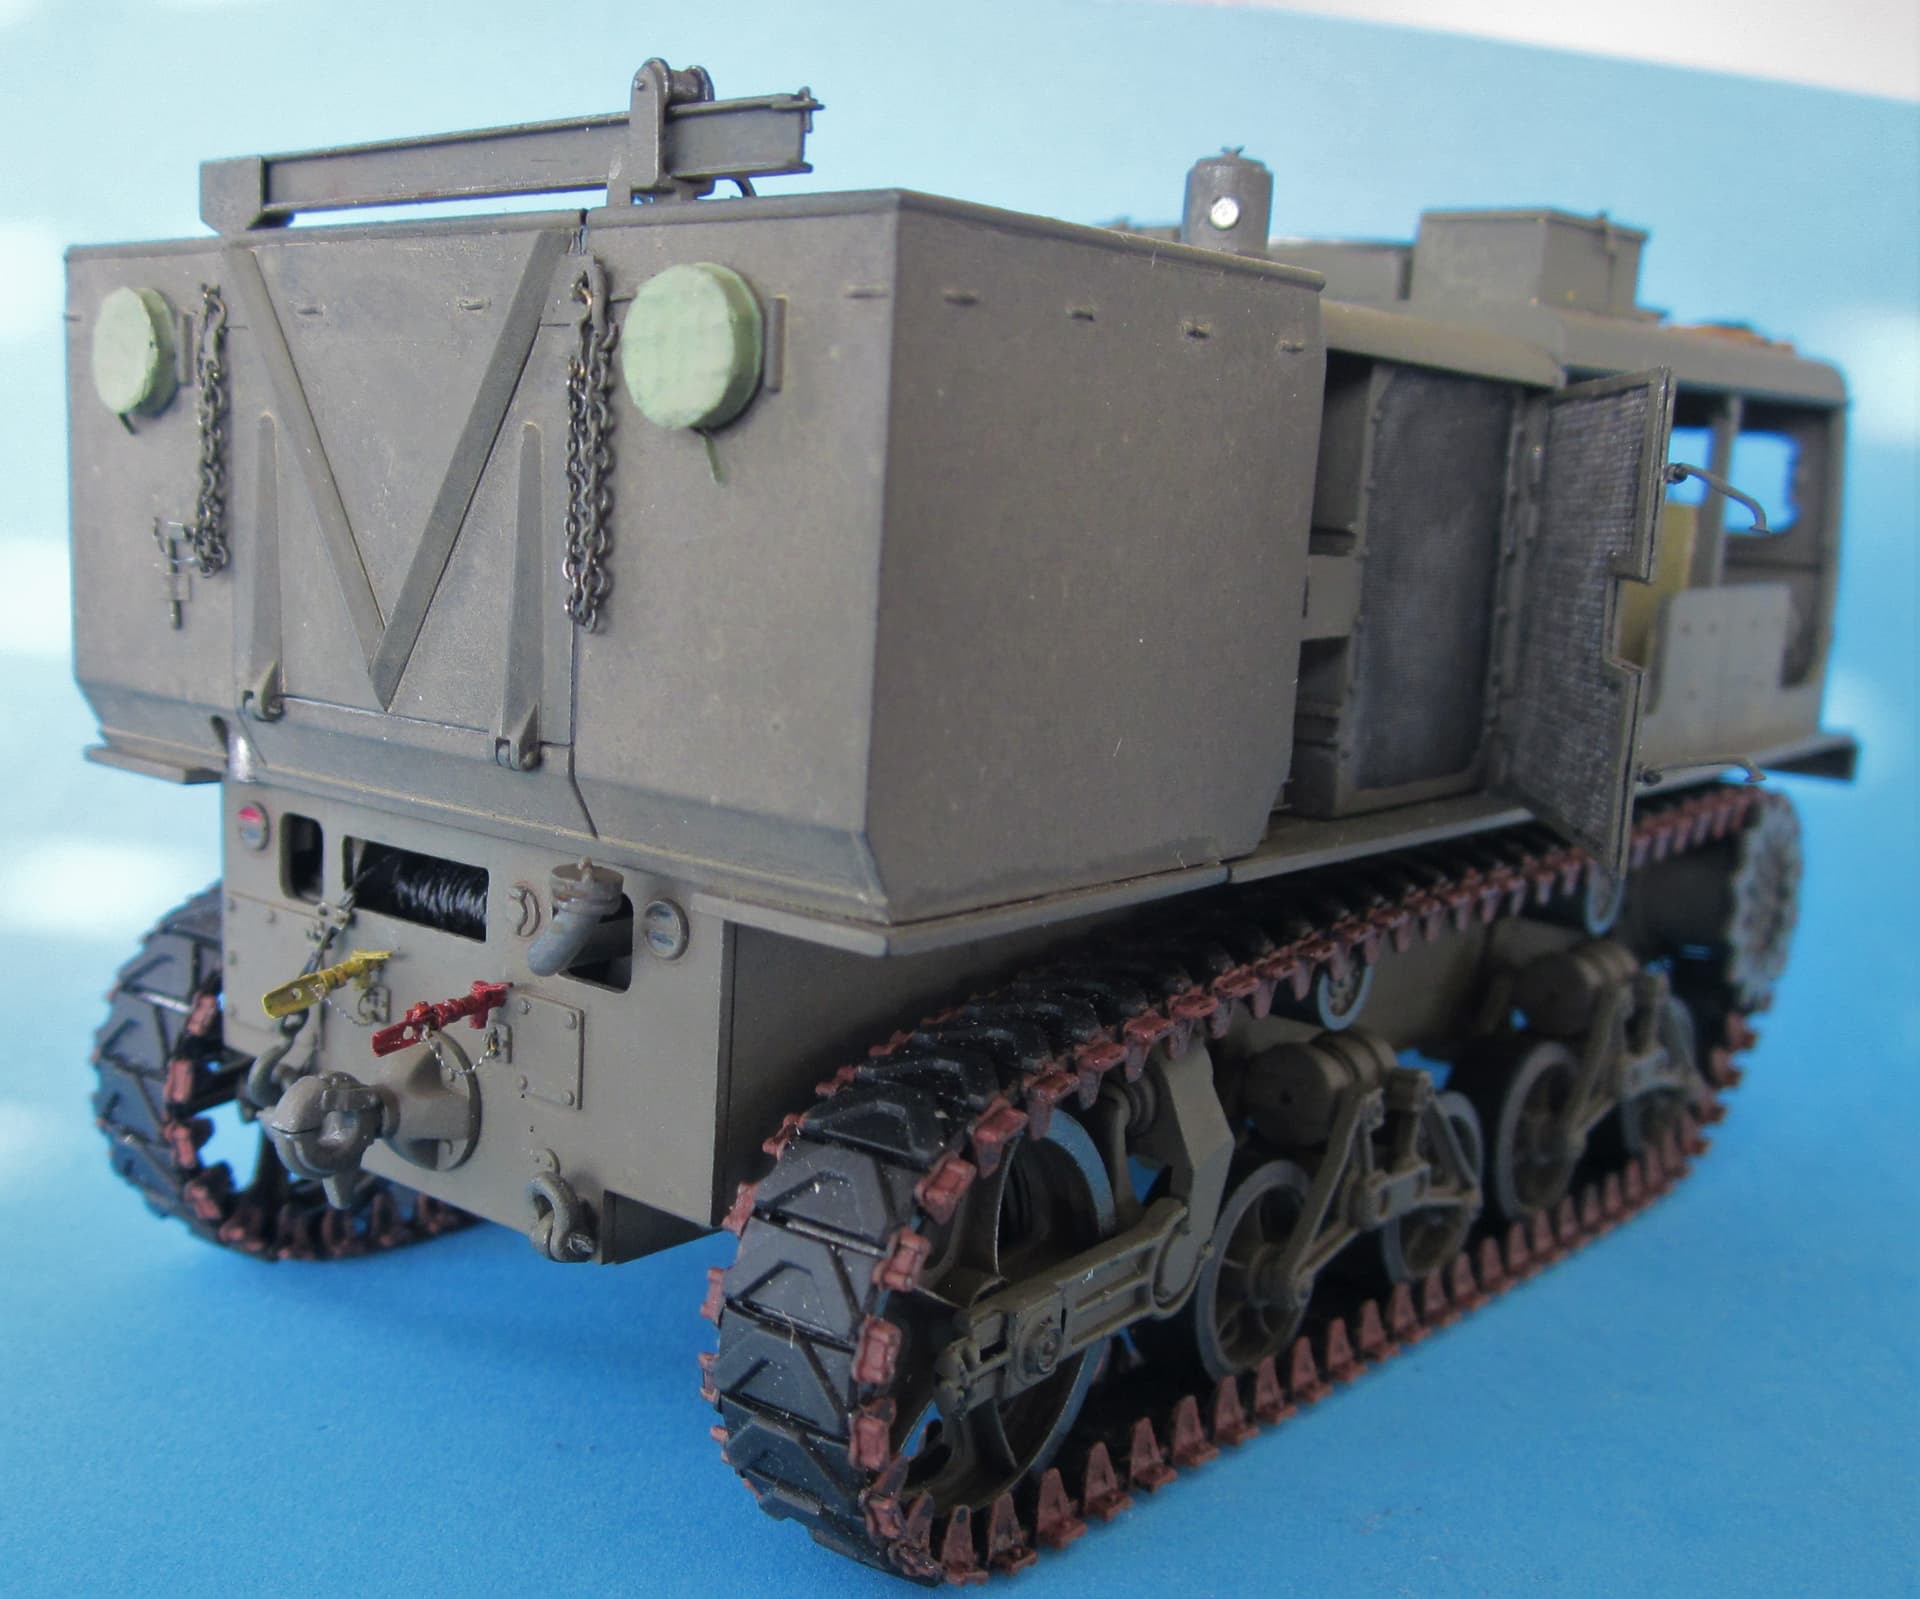
Another Procrastination Product: the front mounted gun emplacing pintle and securing chain.

And where I got that “chain”
Anything but painting!
Peter
3 Likes
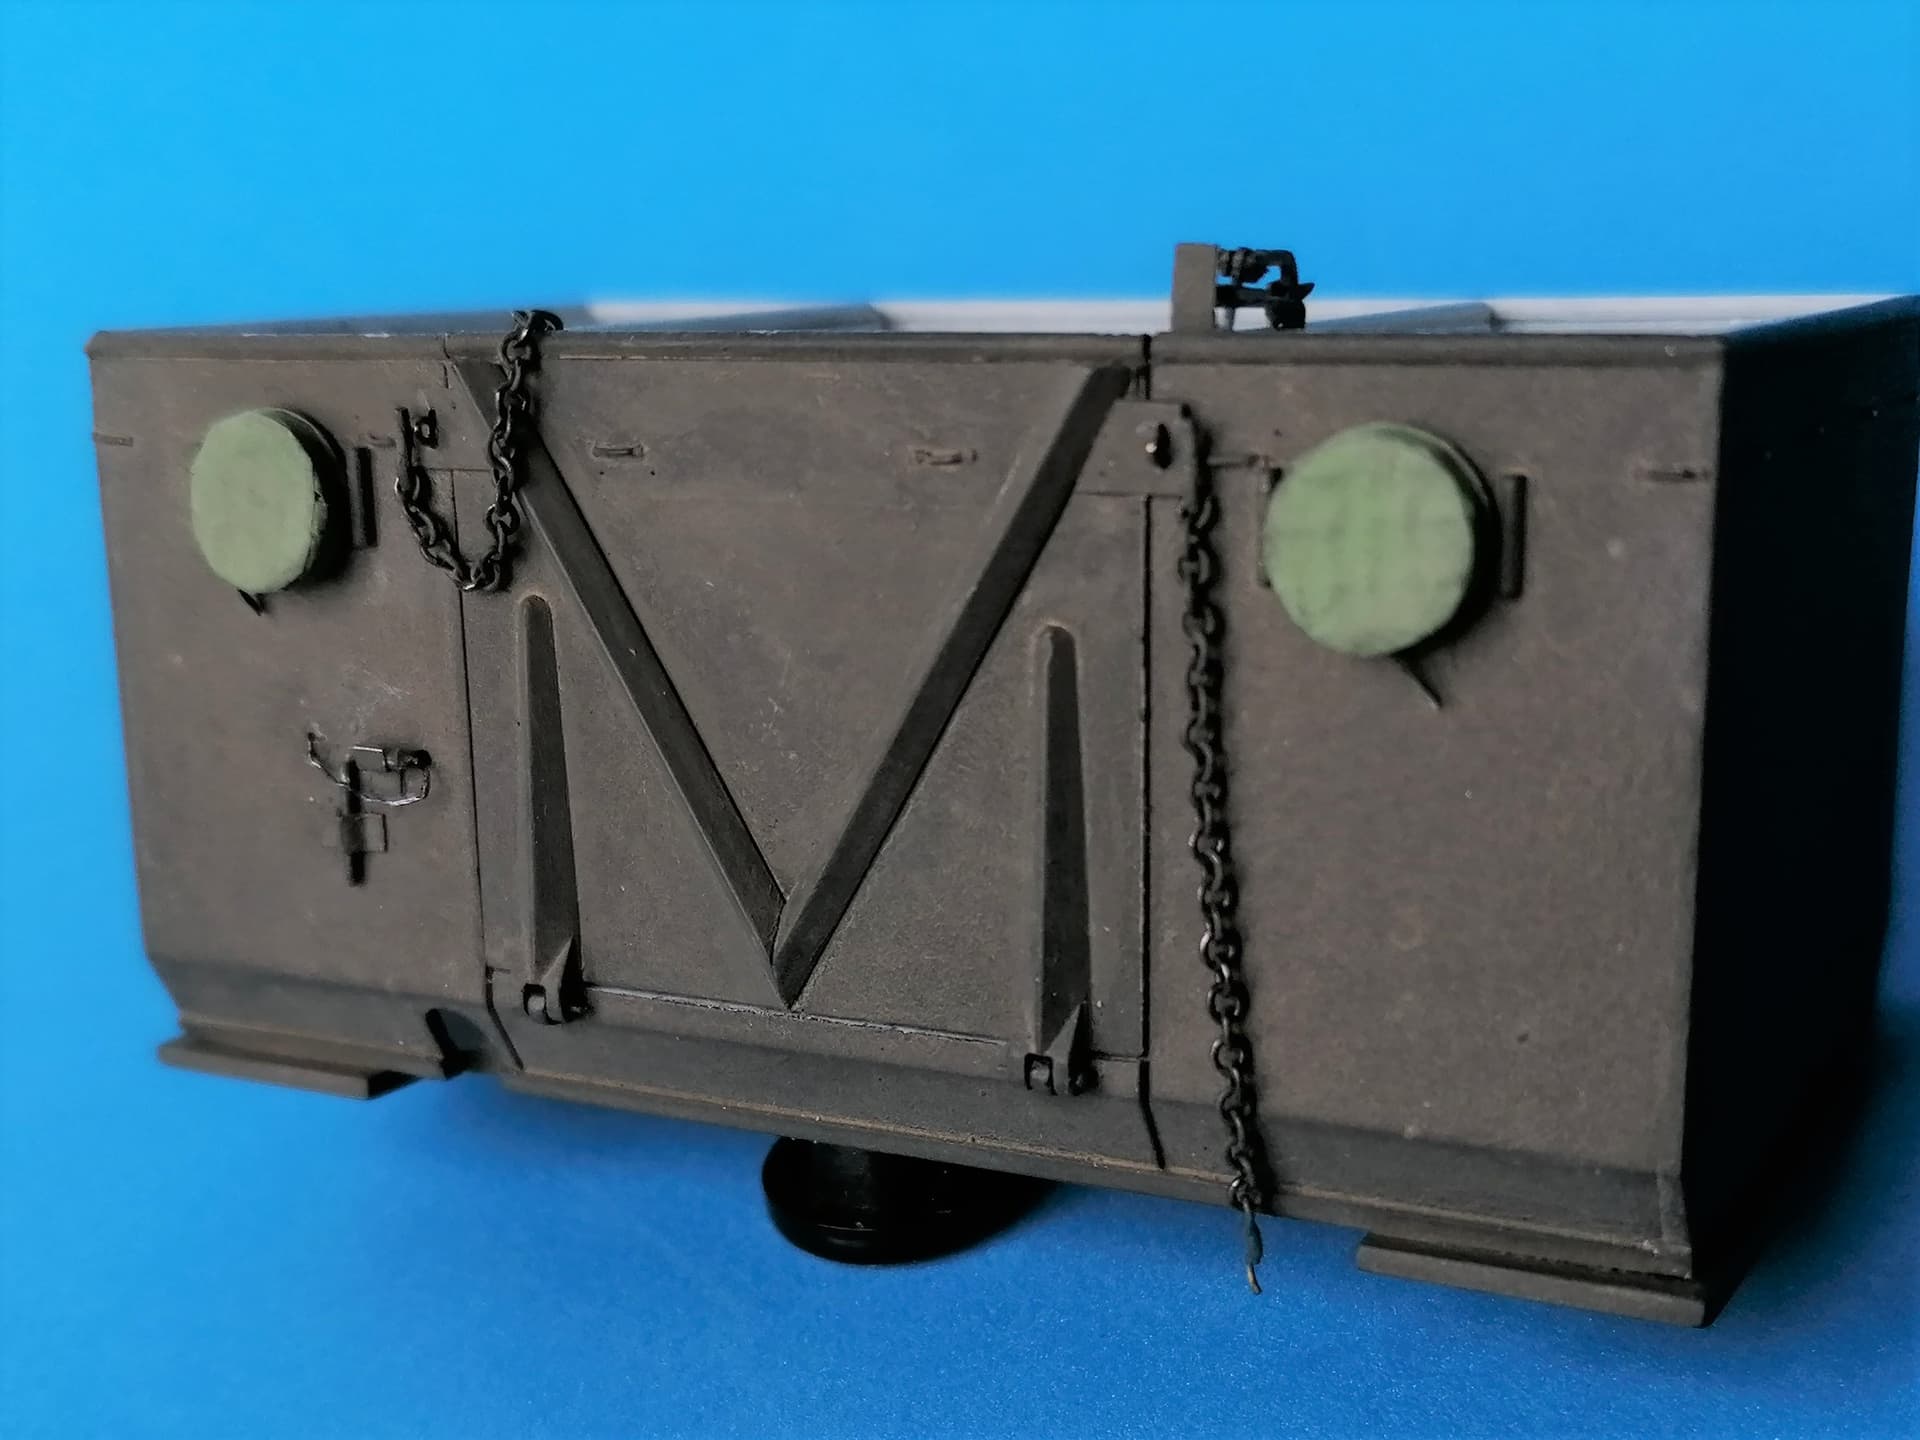
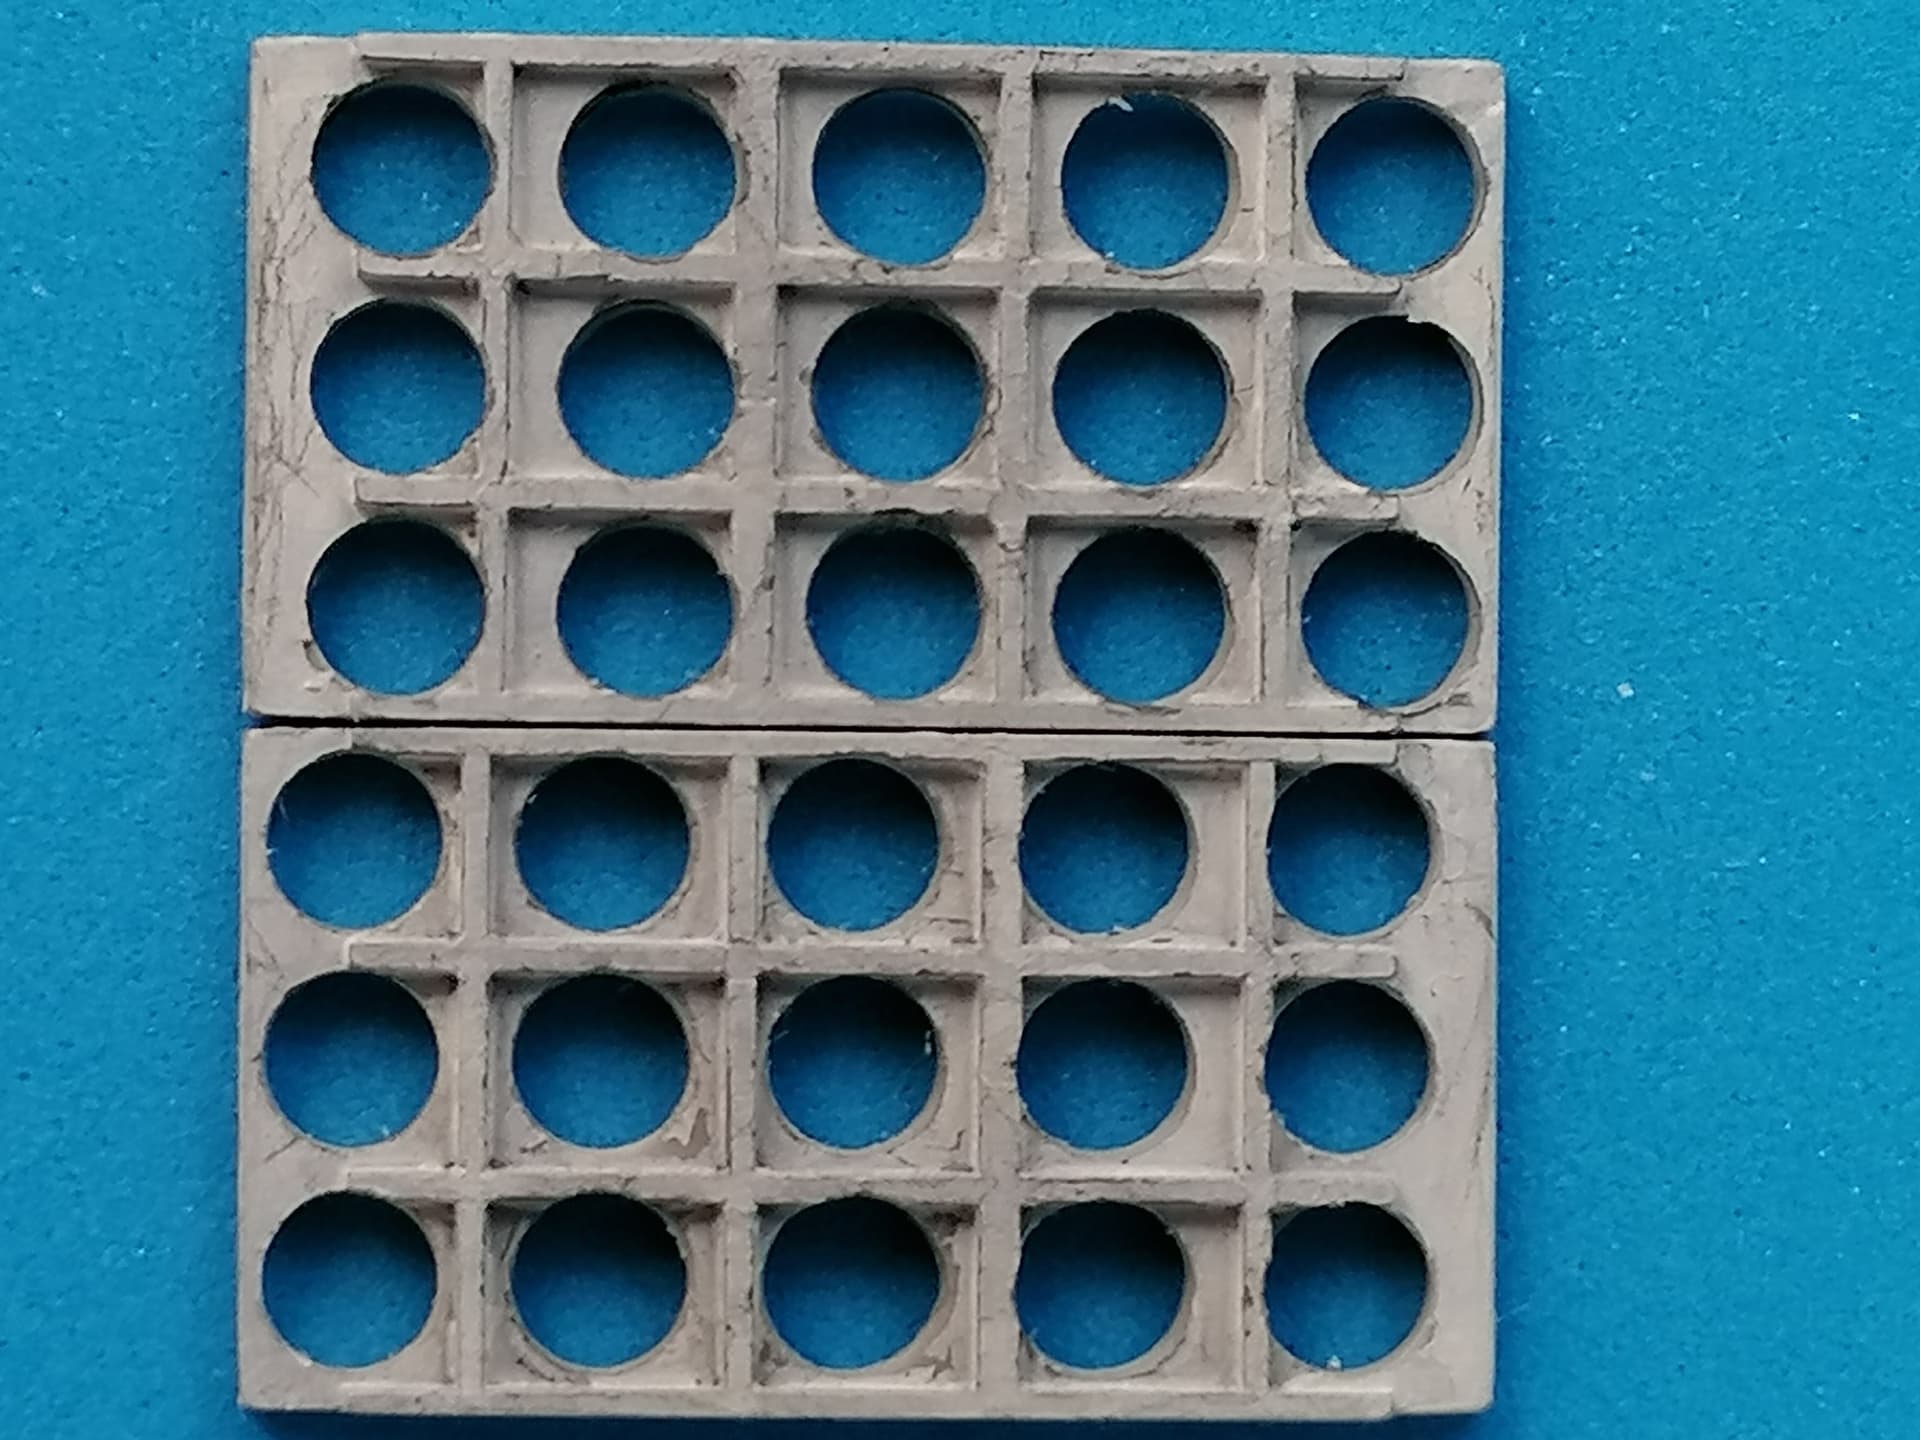
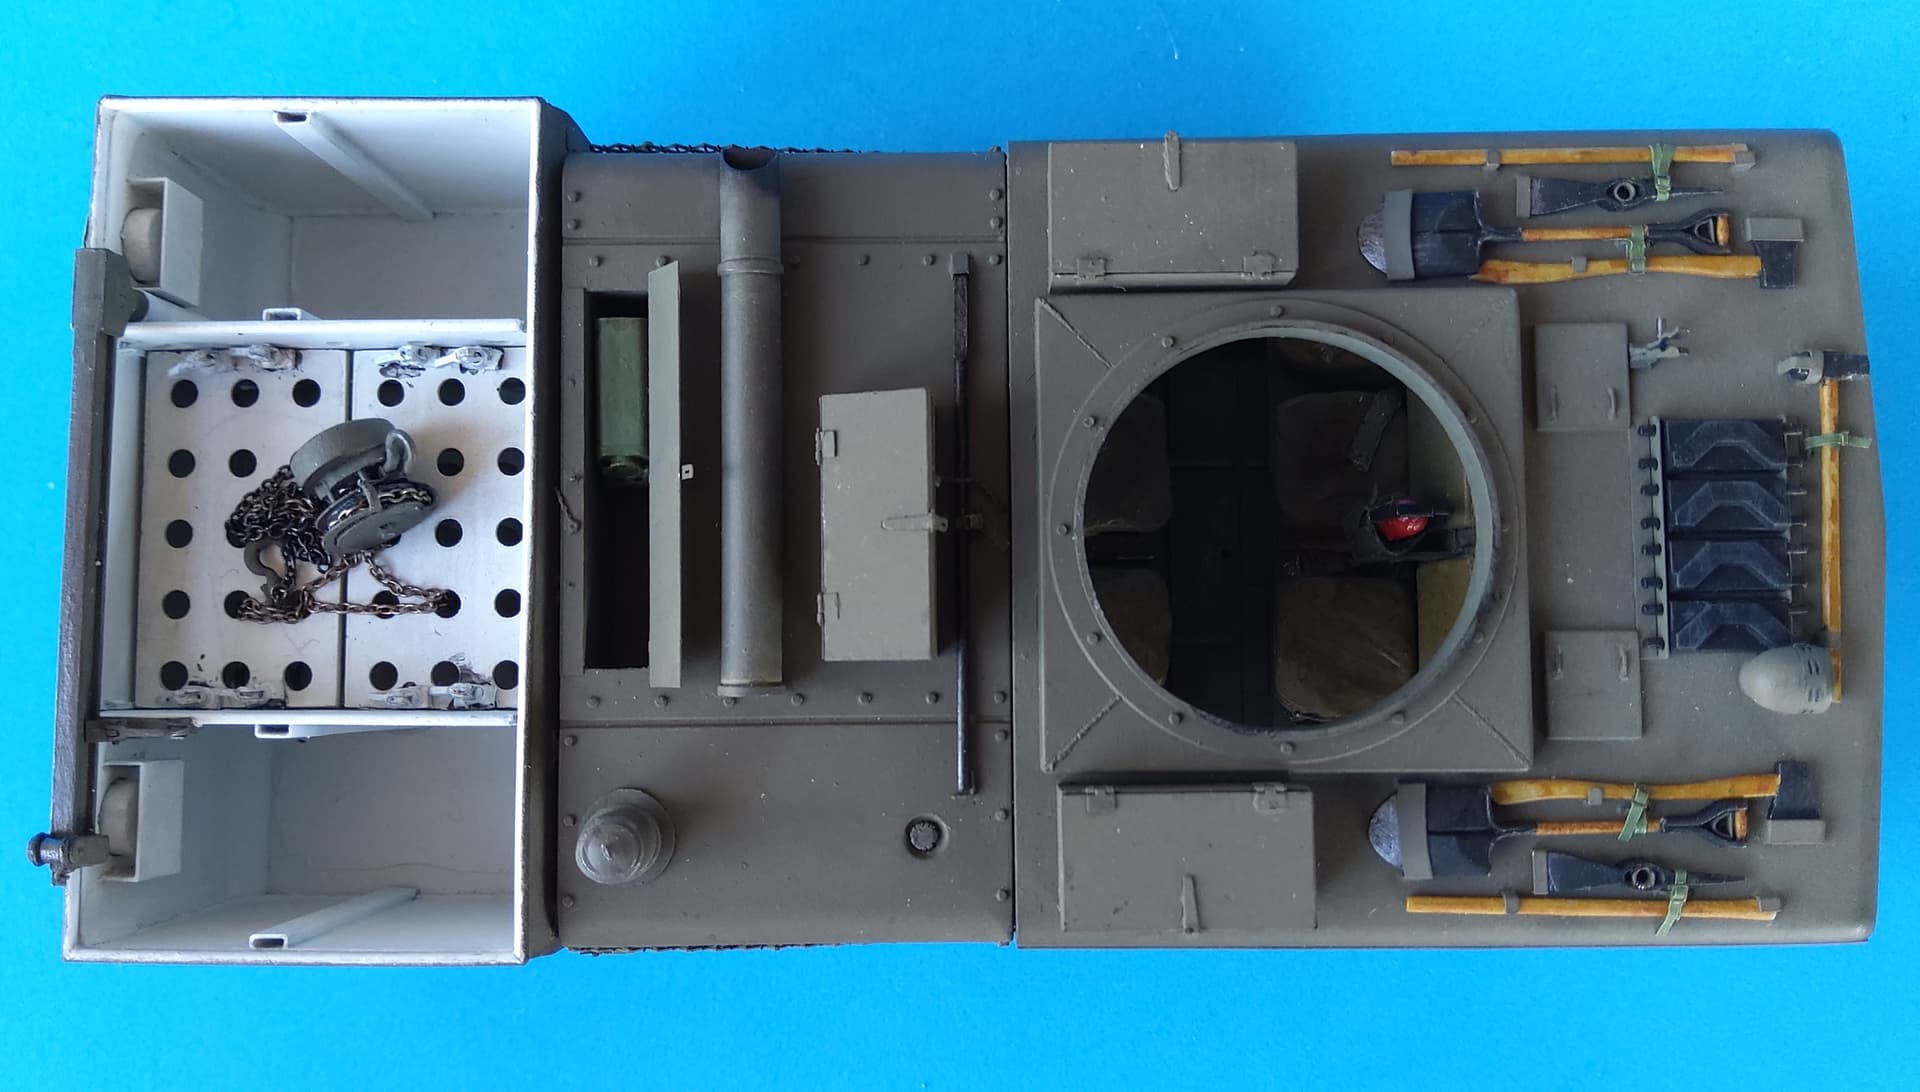
Well, it’s been a long time since my last post - but 1:1 life got in the way more than usual. I haven’t been totally idle, however: the 155mm Ammo Box has been declared finished, see here:
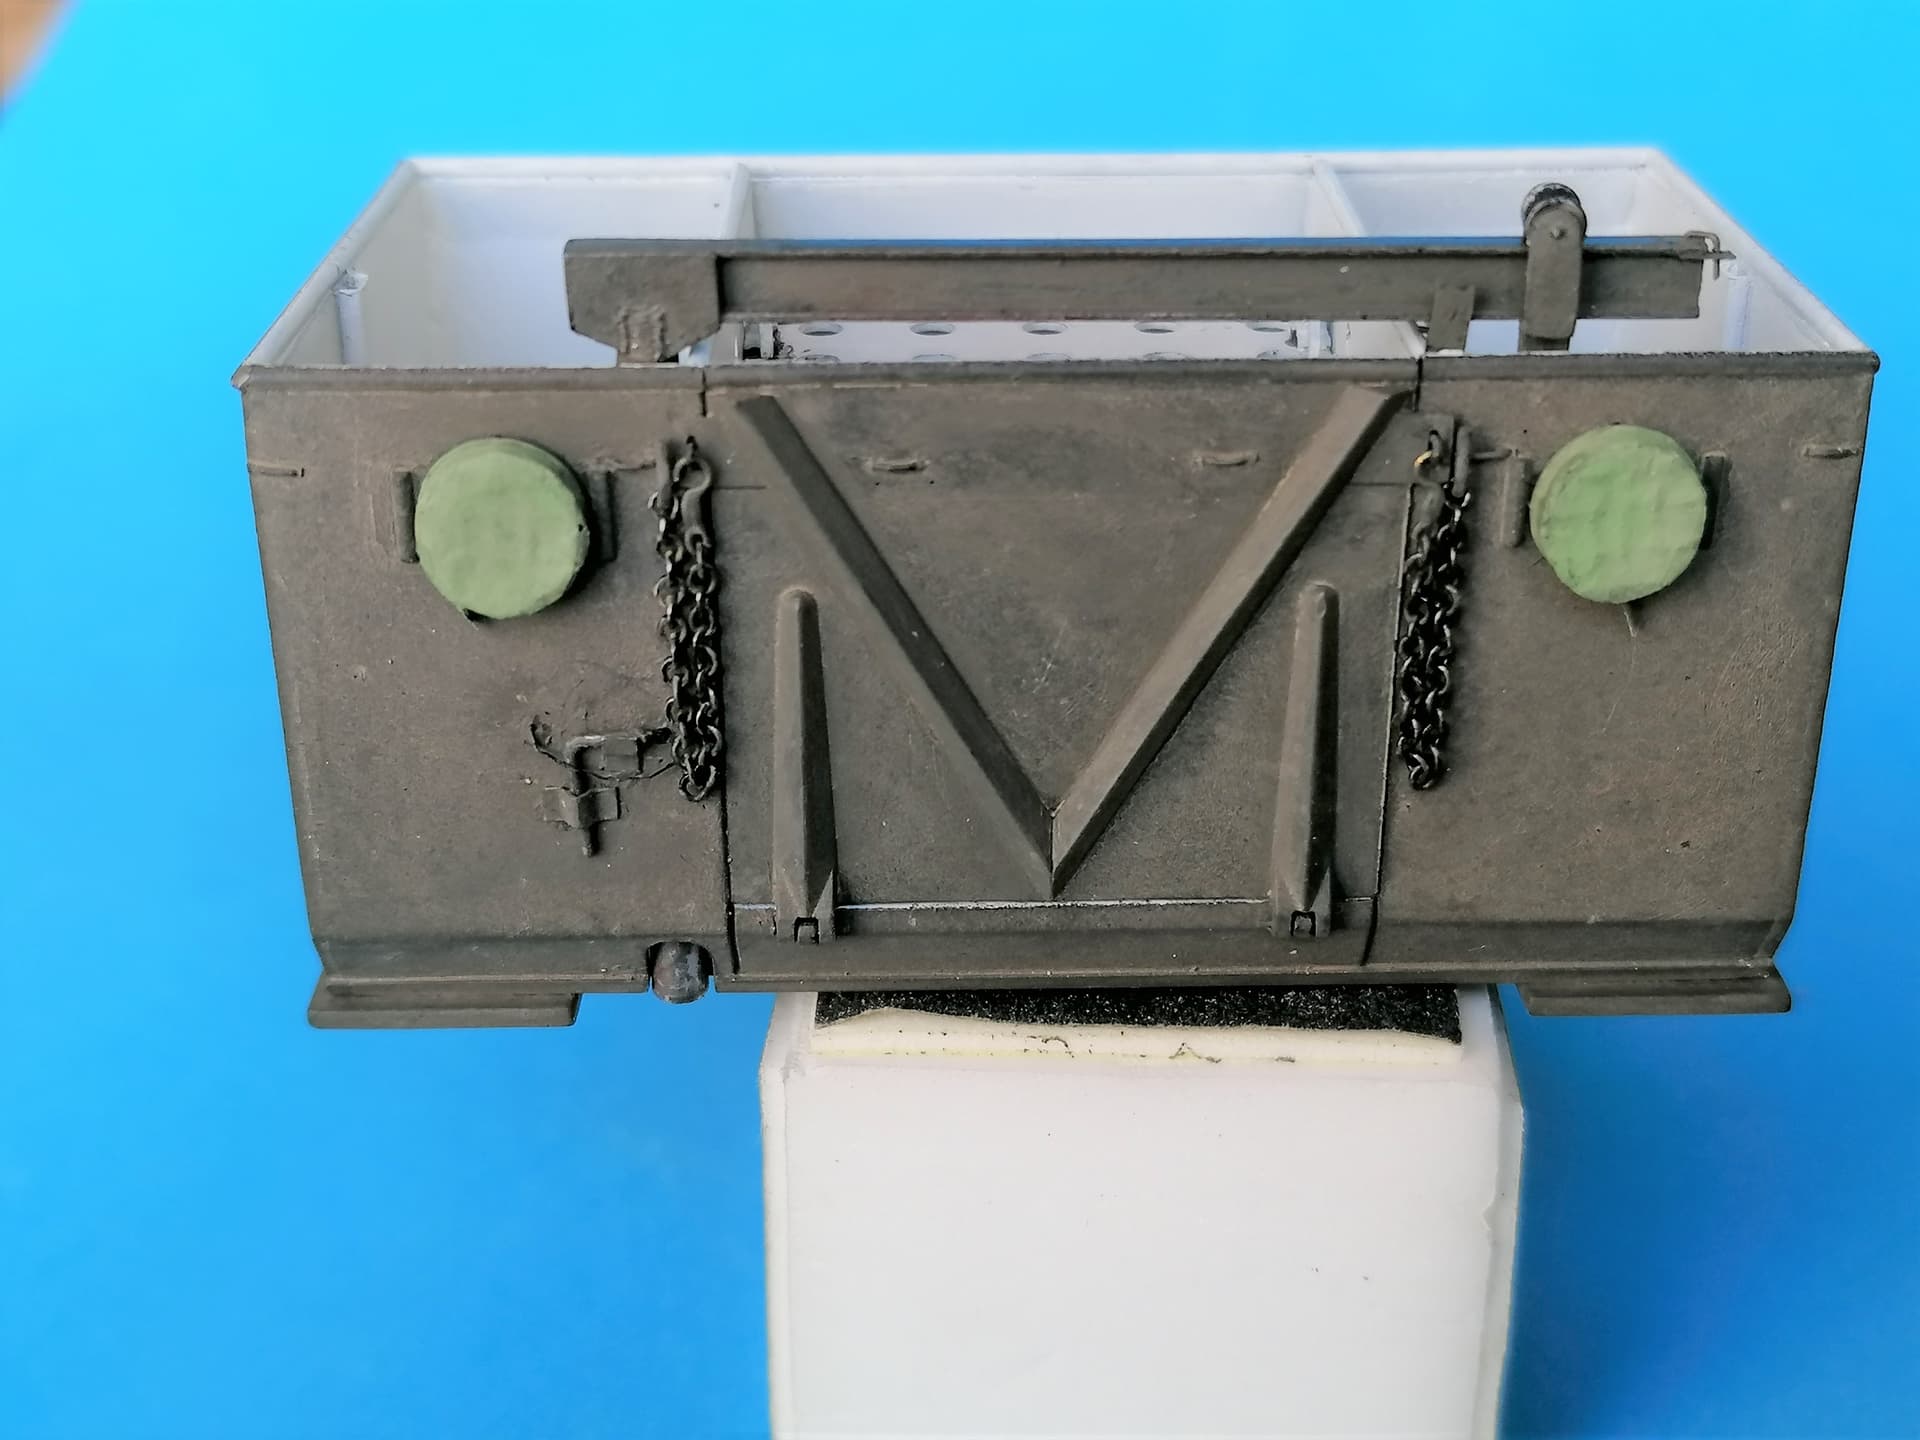
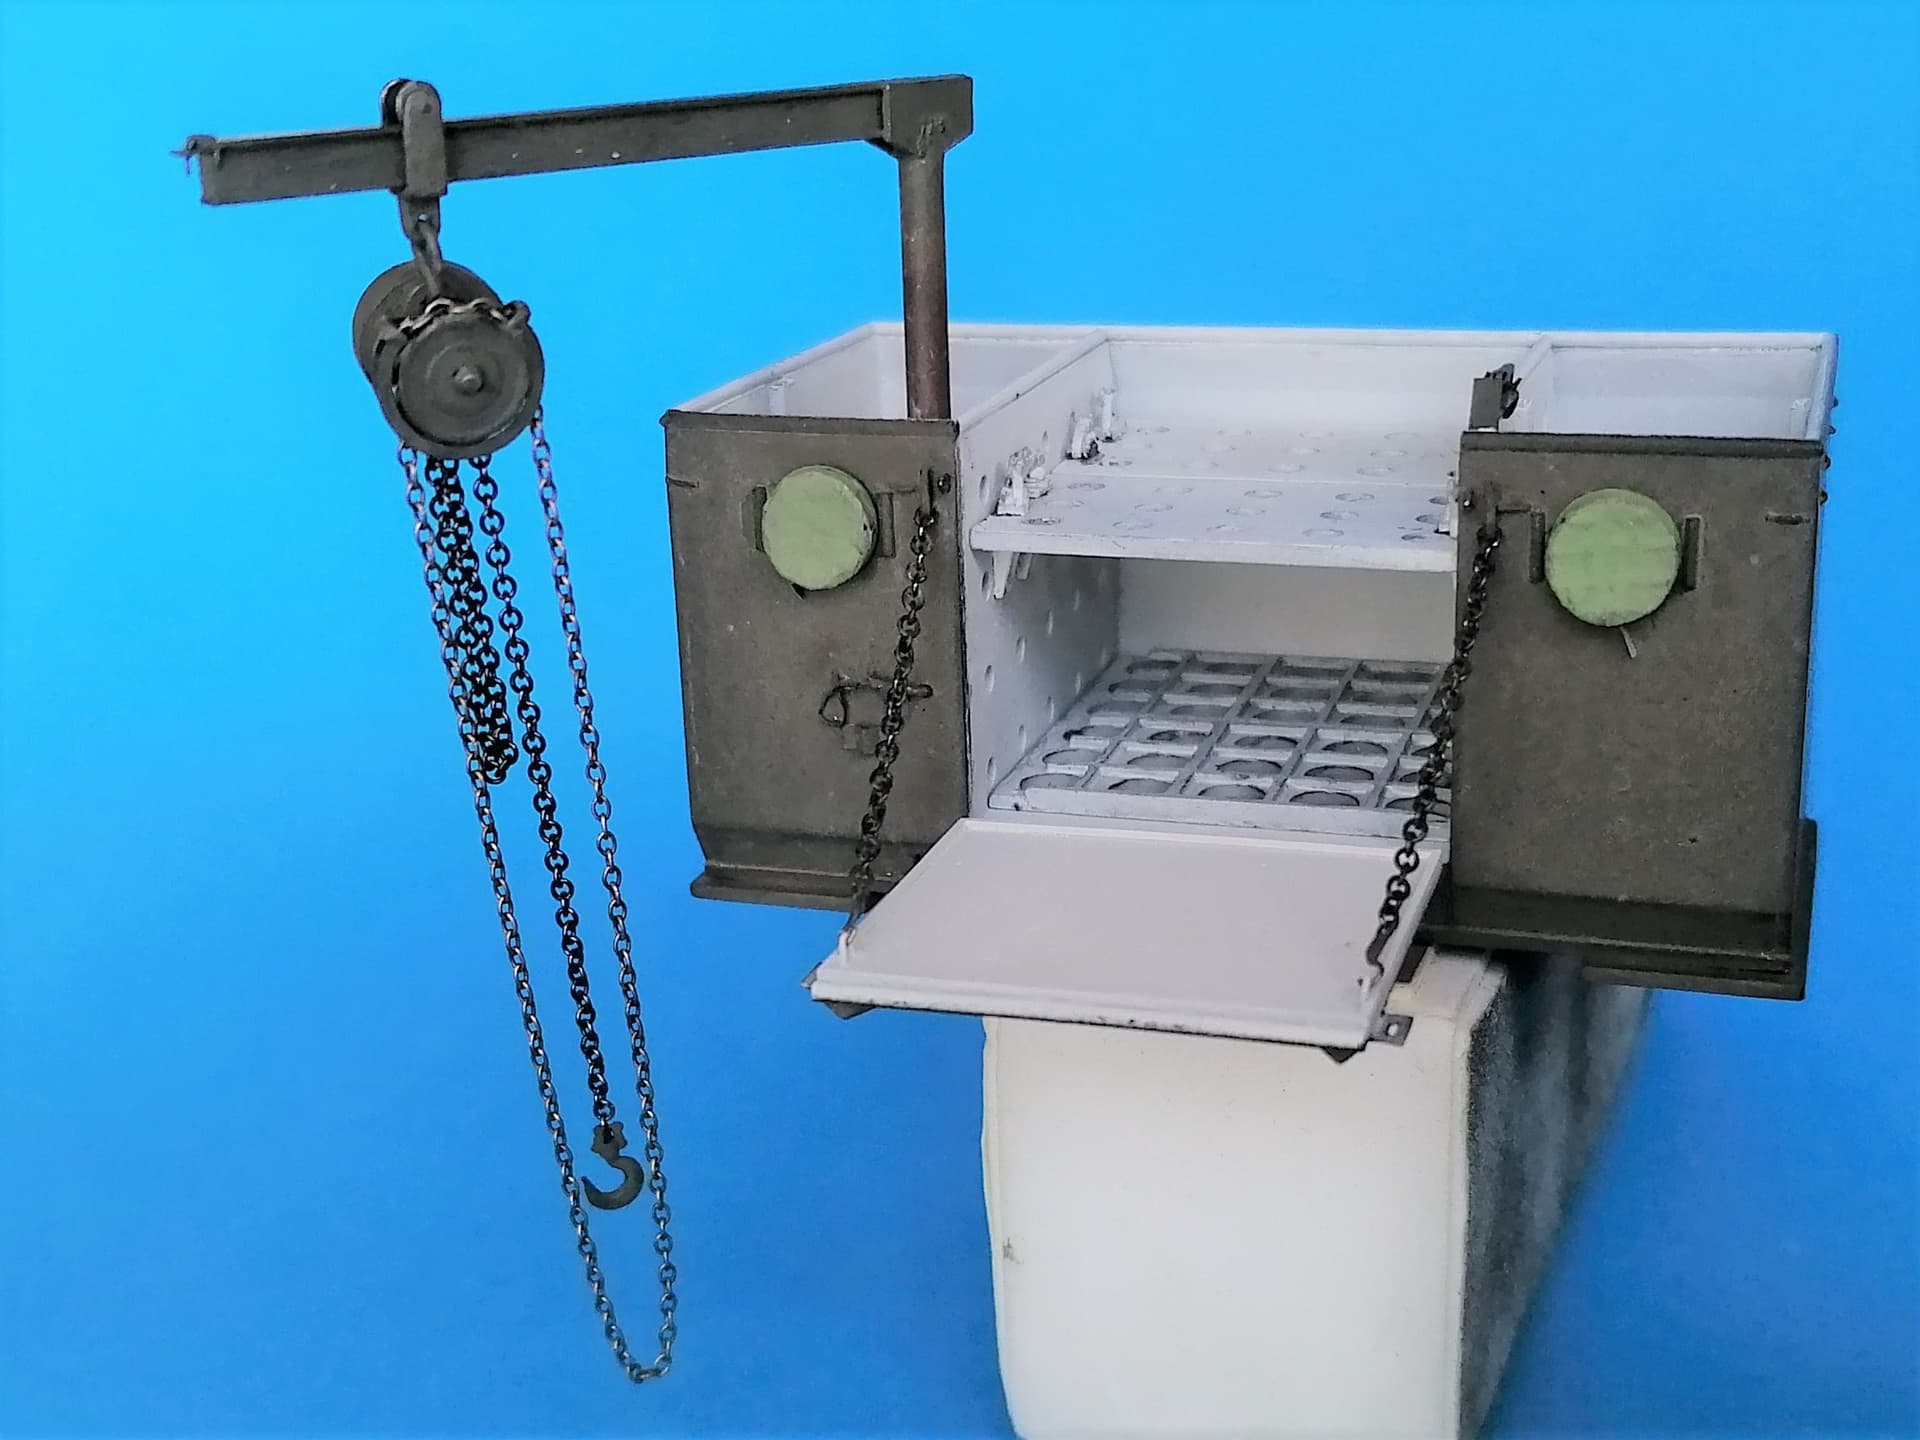
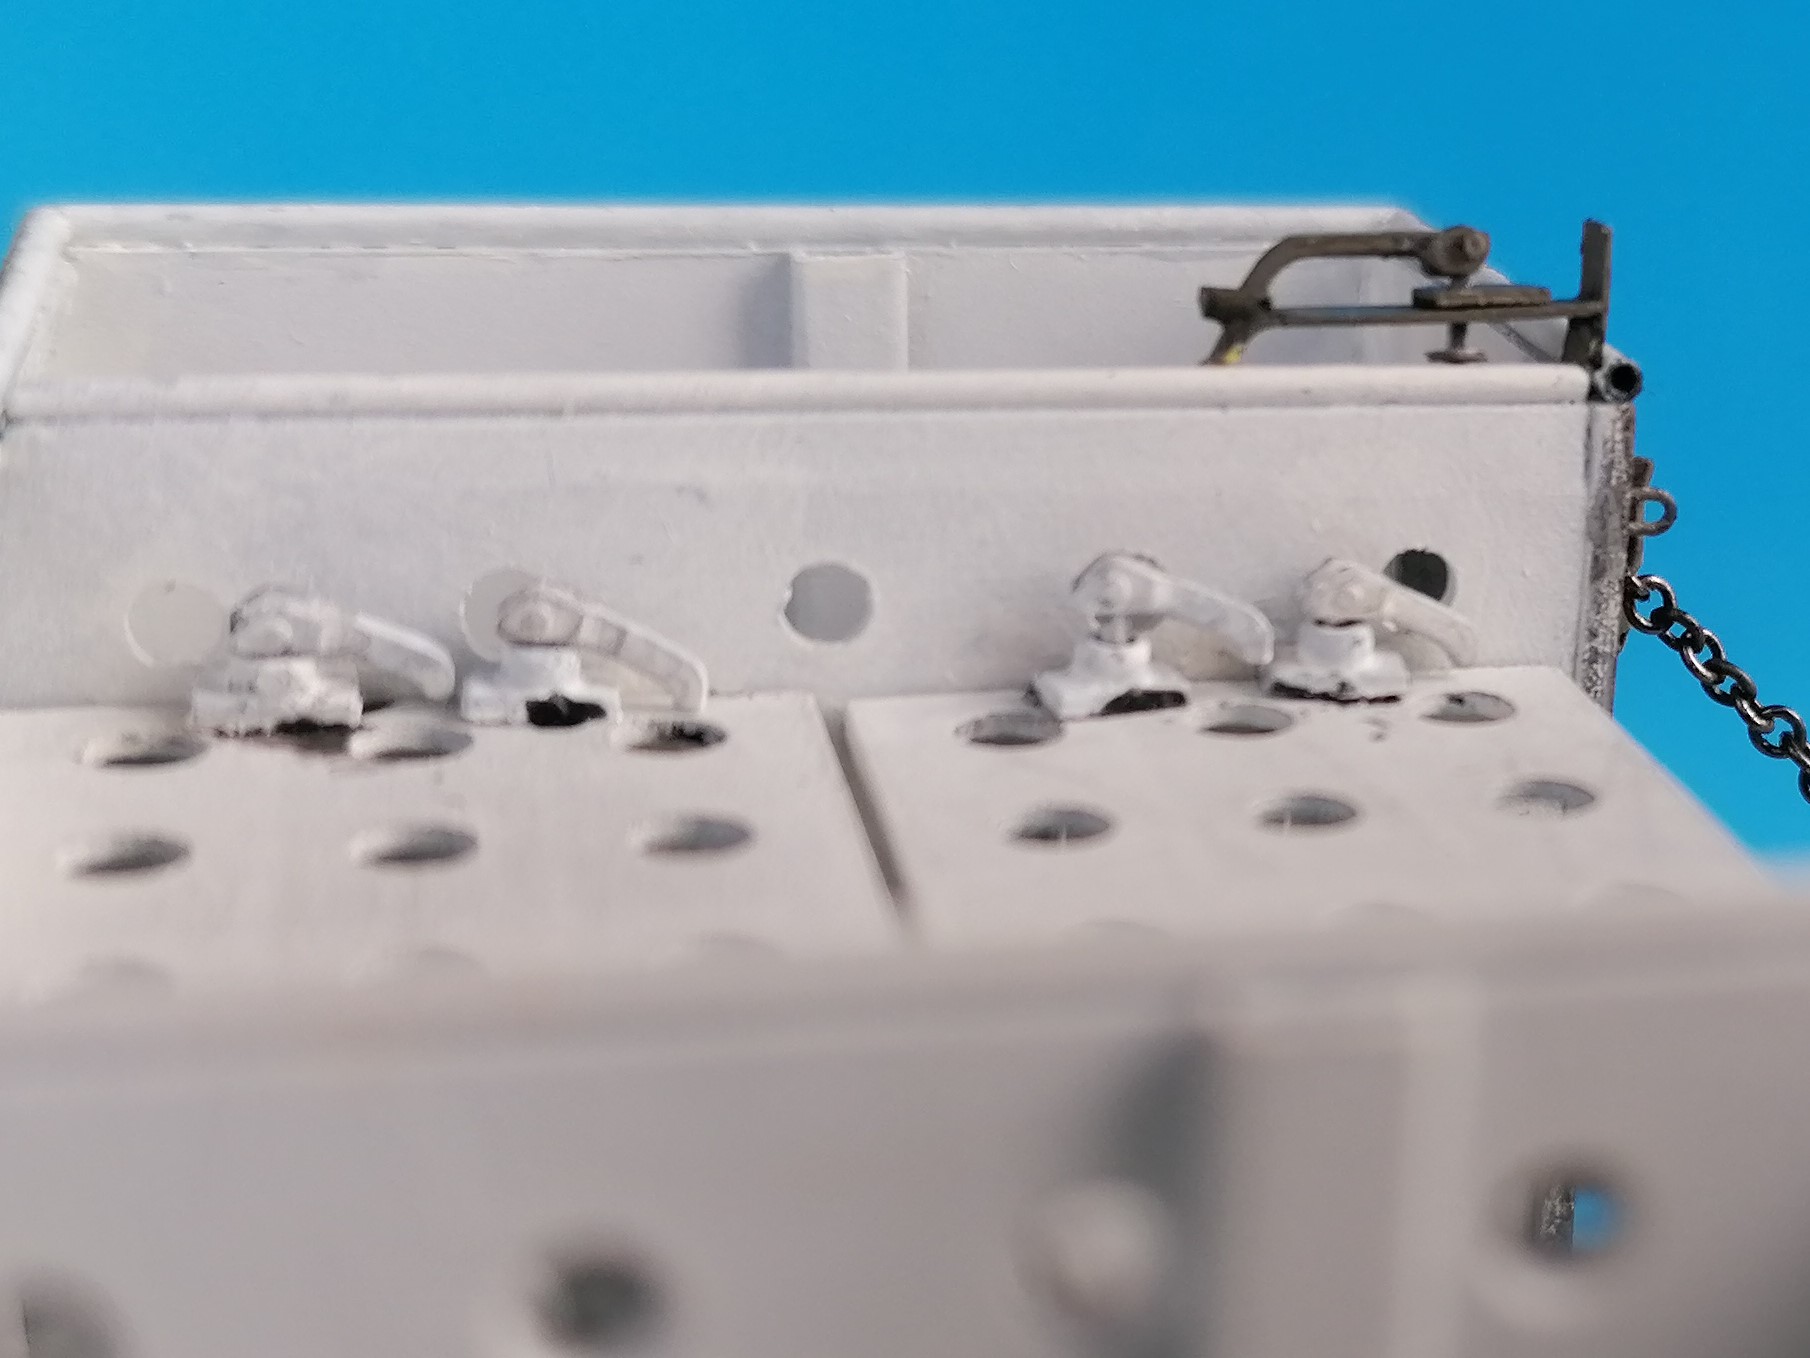
While I was there, I found that the ammo fixing plates F25, F26 aren’t really symmetrical, so install them with their wider ends at the same side to avoid (slightly) canting any projos:
And as for the coloration, please remember that I’m a builder, not a painter - what you see isn’t intricate weathering but failed “clean” painting. But I’m just happy to have come this far and don’t care.
Peter
4 Likes
This is amazing!
Thank you (I’m sure you don’t mean my paint job)!
That made me chuckle- the paint job aint too bad either. 
10,000 Likes on your “Source” for the tiny chain!
Good job!
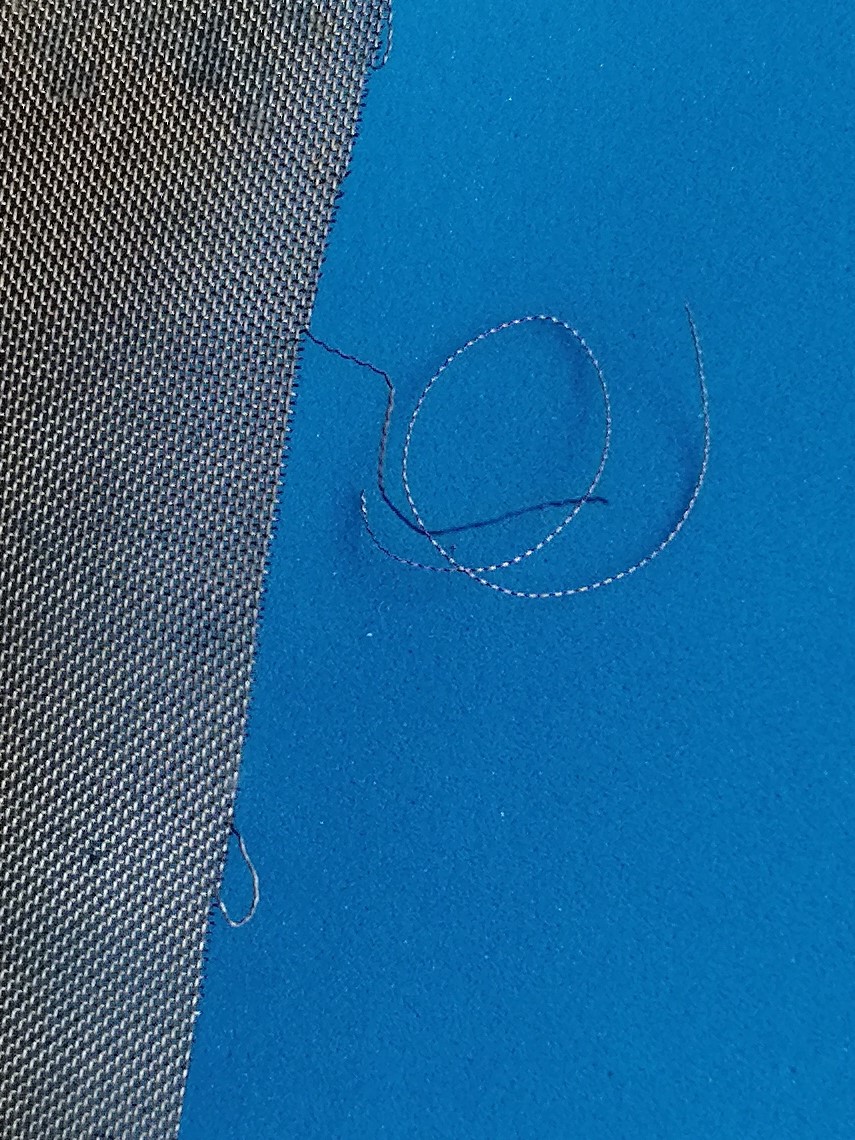
Thank you, Mike! The chains on the hatch and on the lift hook are from ship model supplies, the brighter, “endless”, one on the lift is part of a silver necklace, no less. And the hoist lock pin is secured by a piece of latex thread out of the upper part of black pantyhose - gotta look everywhere to find the right materials …
Those latex threads can be found in mens socks too,
a good reason for getting close to pantyhoses though …


1 Like
Here’s what chains I have:
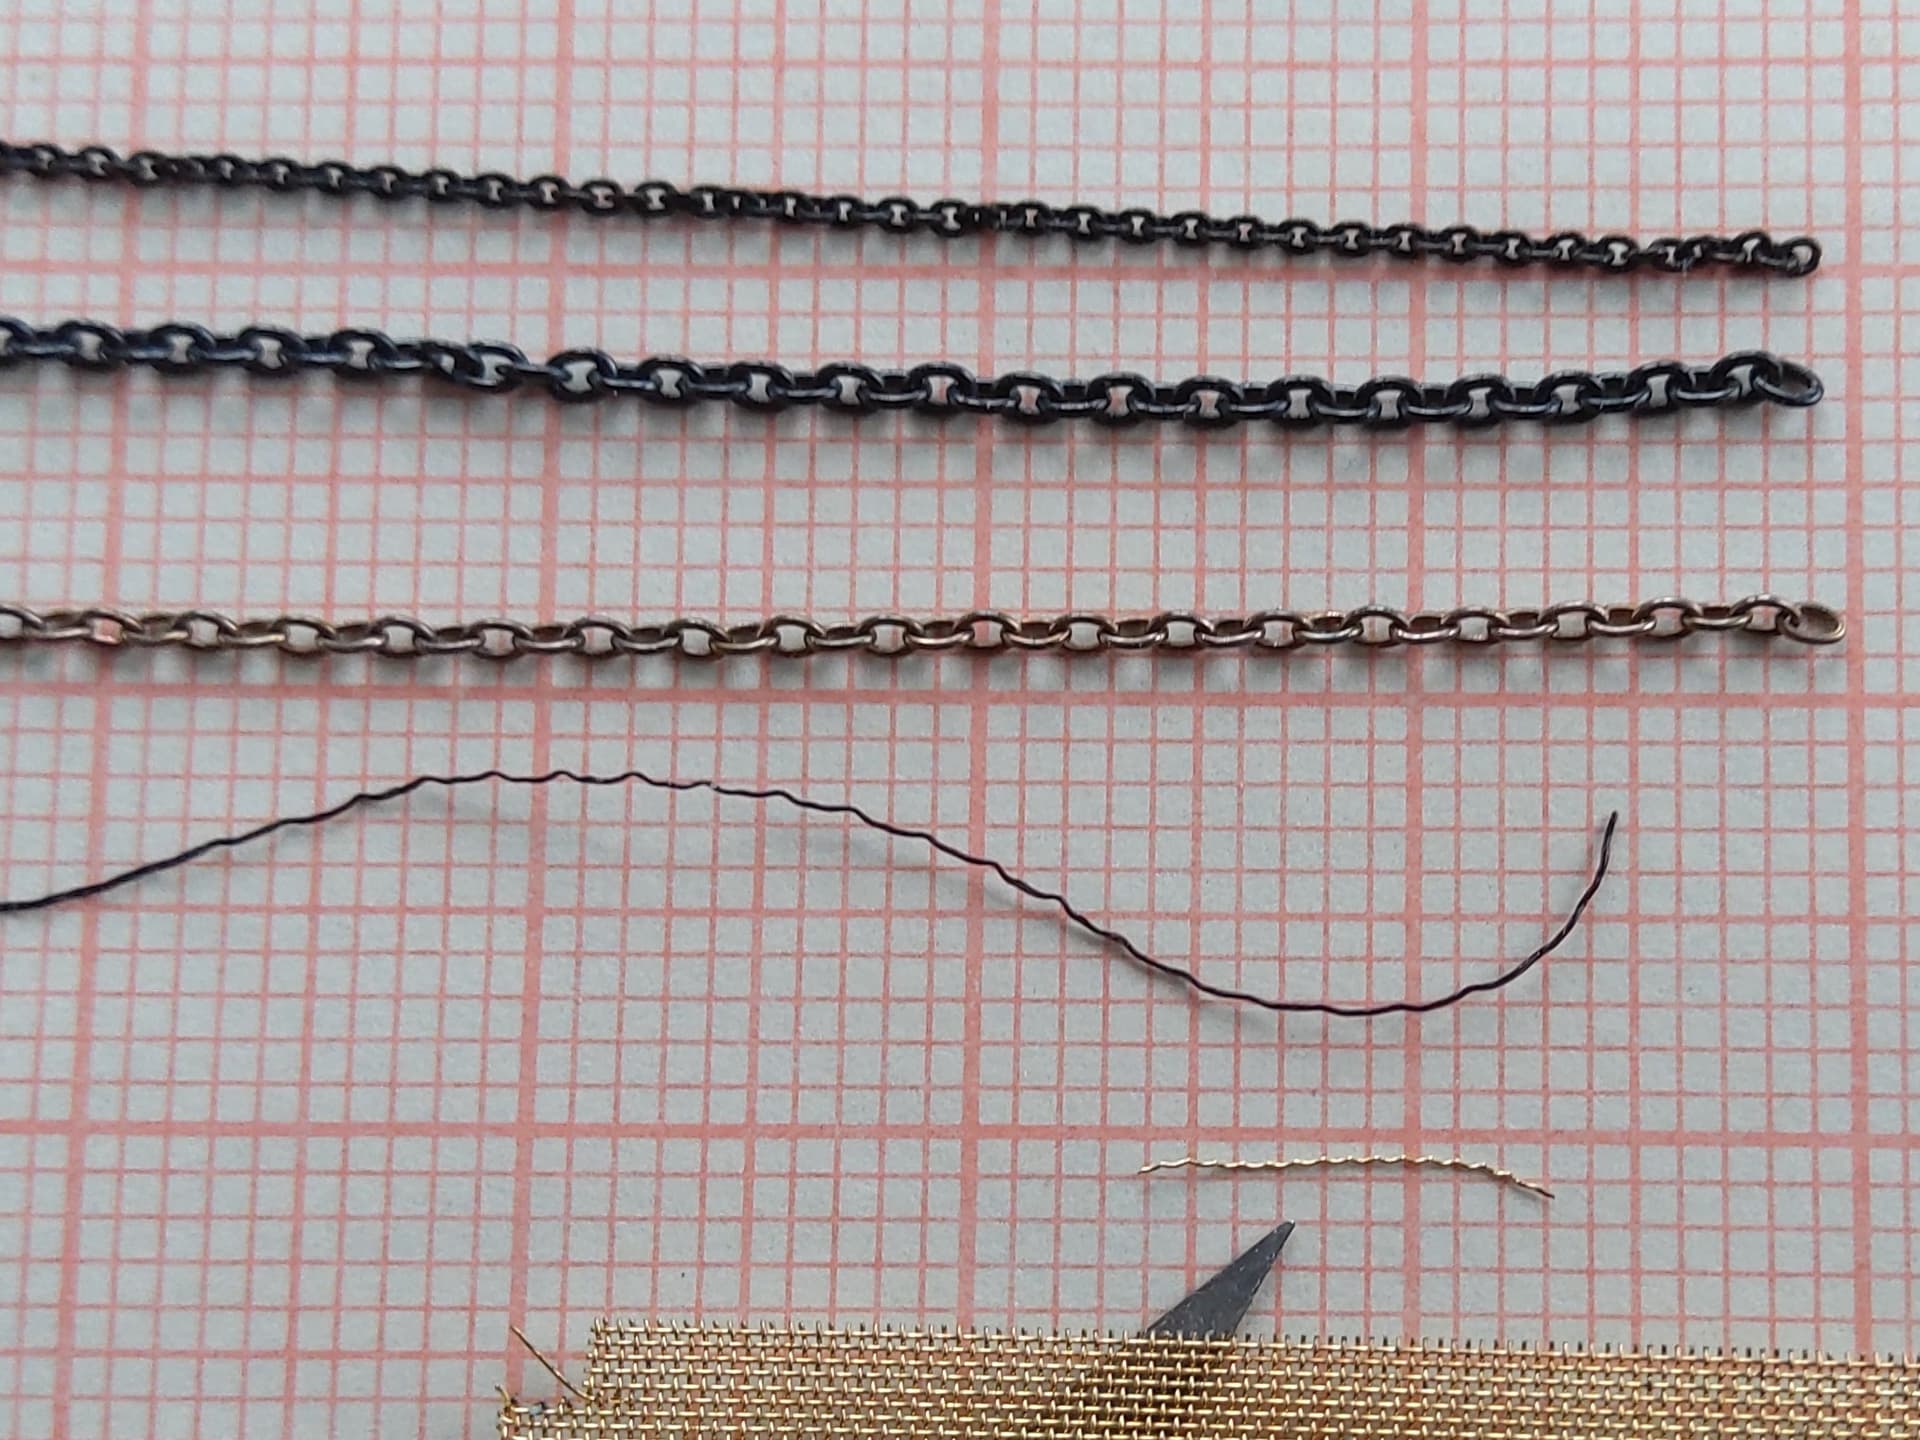
The top two are blackened brass from ship modeling suppliers, the third is part of a silver necklace, then comes pantyhose latex, and at the bottom is brass wire mesh with a single strand that can be used for rigid representations of finest chain.
HTH, Peter
2 Likes
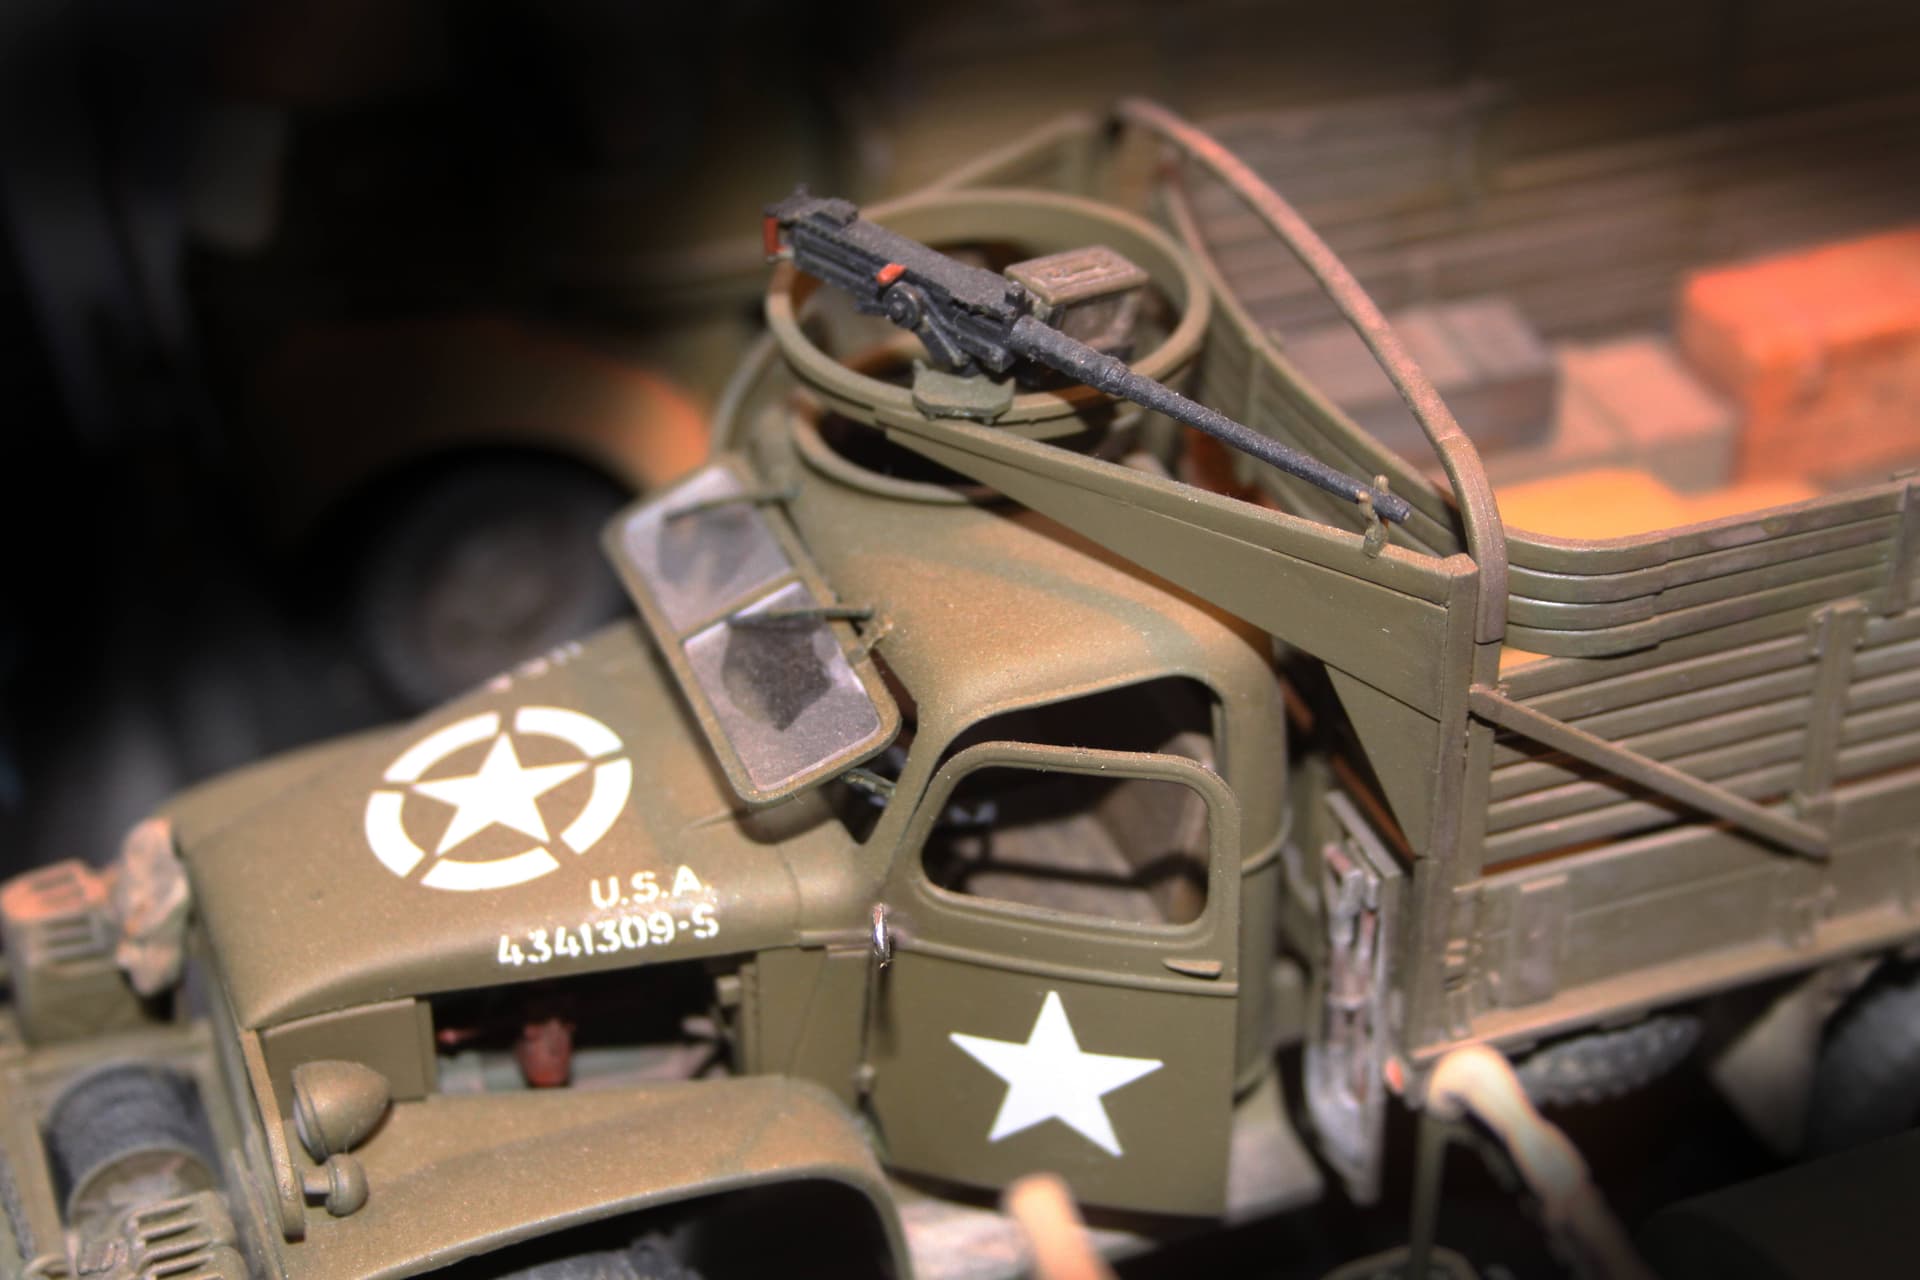
… and then I noticed that neither HB nor PART felt the need to supply an MG barrel clamp, while what the Eduard PE instructions show doesn’t look too much like what can be guessed from two pics at Toadman’s. So far, I’ve whittled the clamp proper from 1mm styrene sheet but am utterly doubtful about what there should be beneath it, as all the photos I know either don’t show that area at all or are so much back-lit as to obscure the details. Can anybody help, please?
Peter
1 Like
If memory serves, there is to be some sort of wing nut used to tighten down the clamp to grip the barrel.
Tamiya’s AM gun ring kit for the Deuce and a Half has a fairly nice one.
Sorry but best photo I can find.
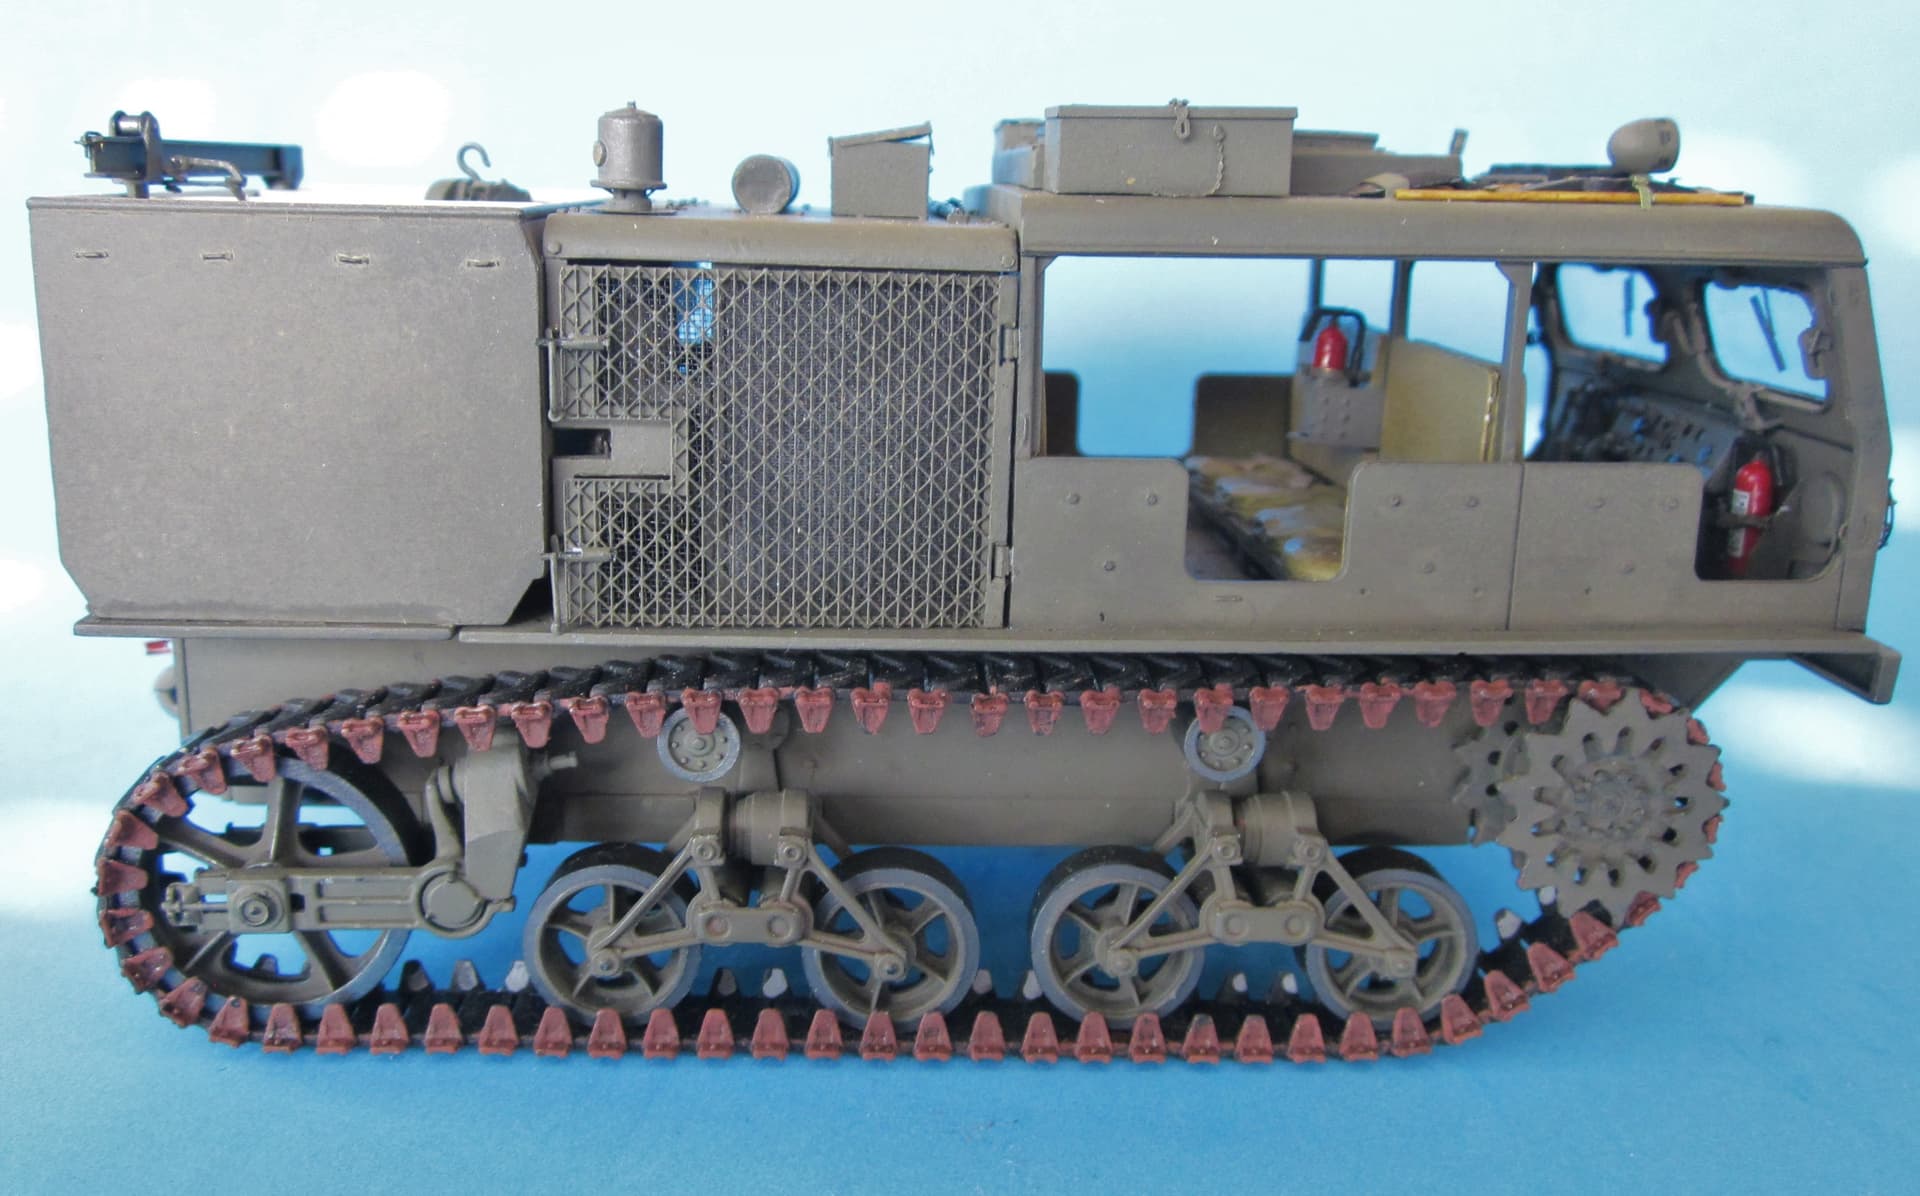
The End Is Near!
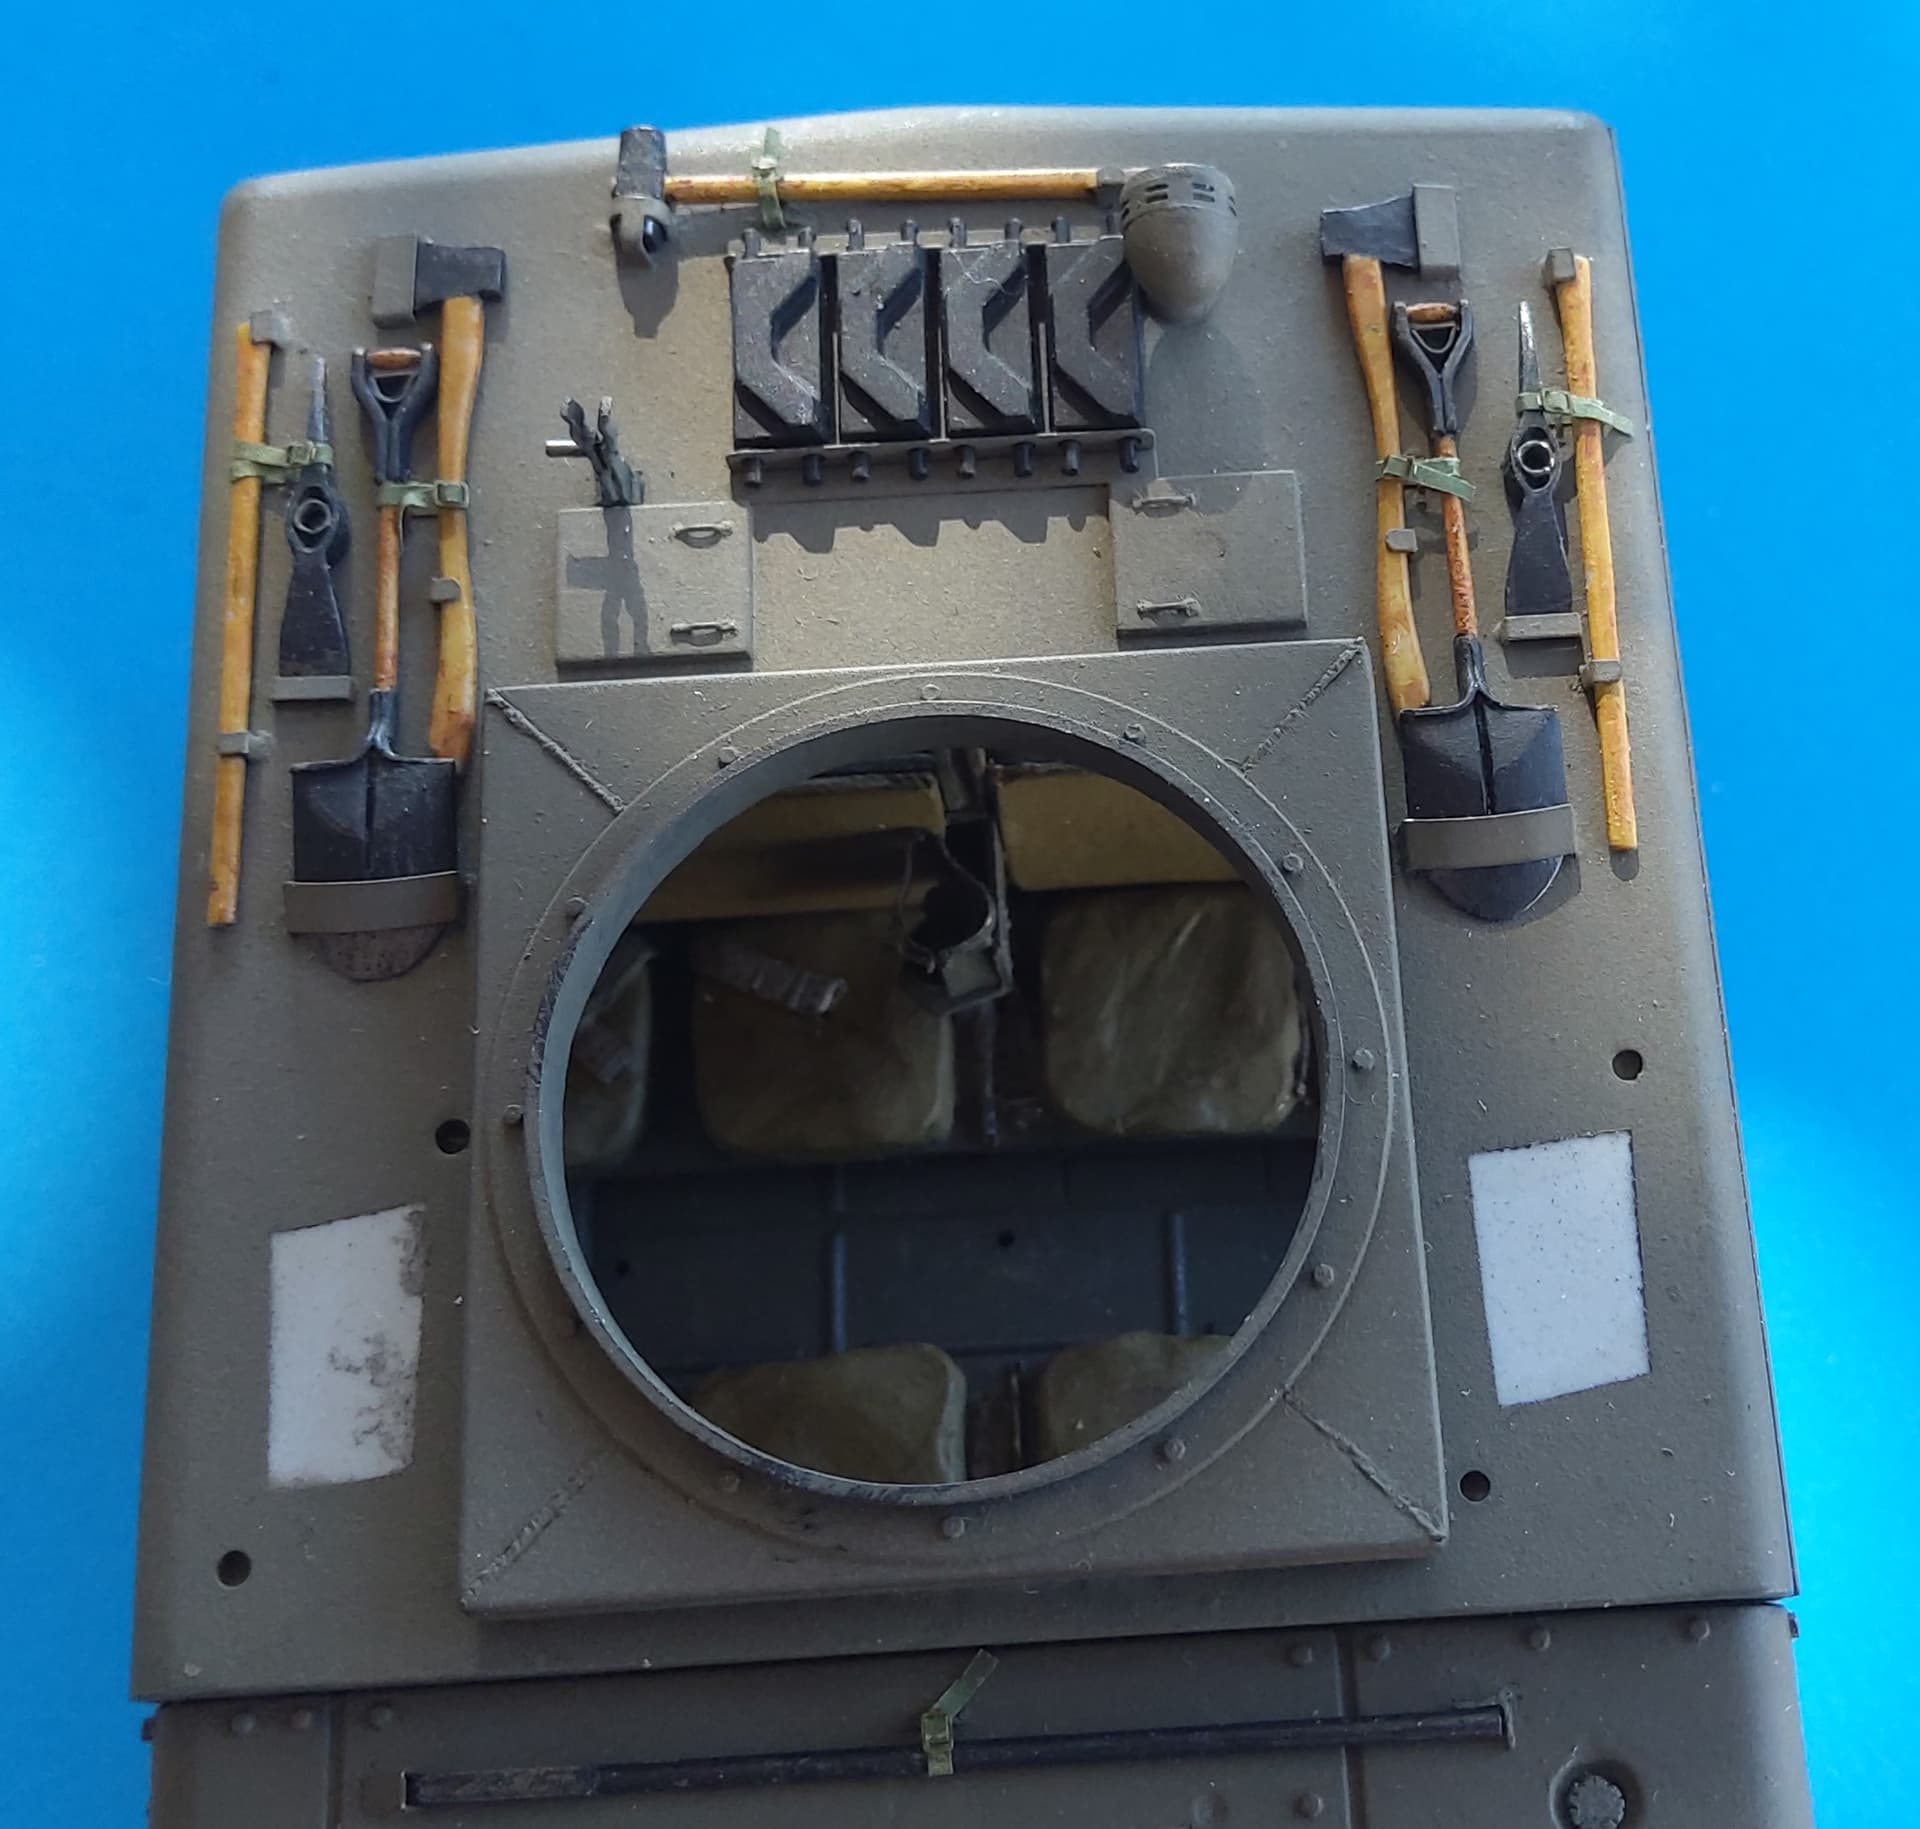
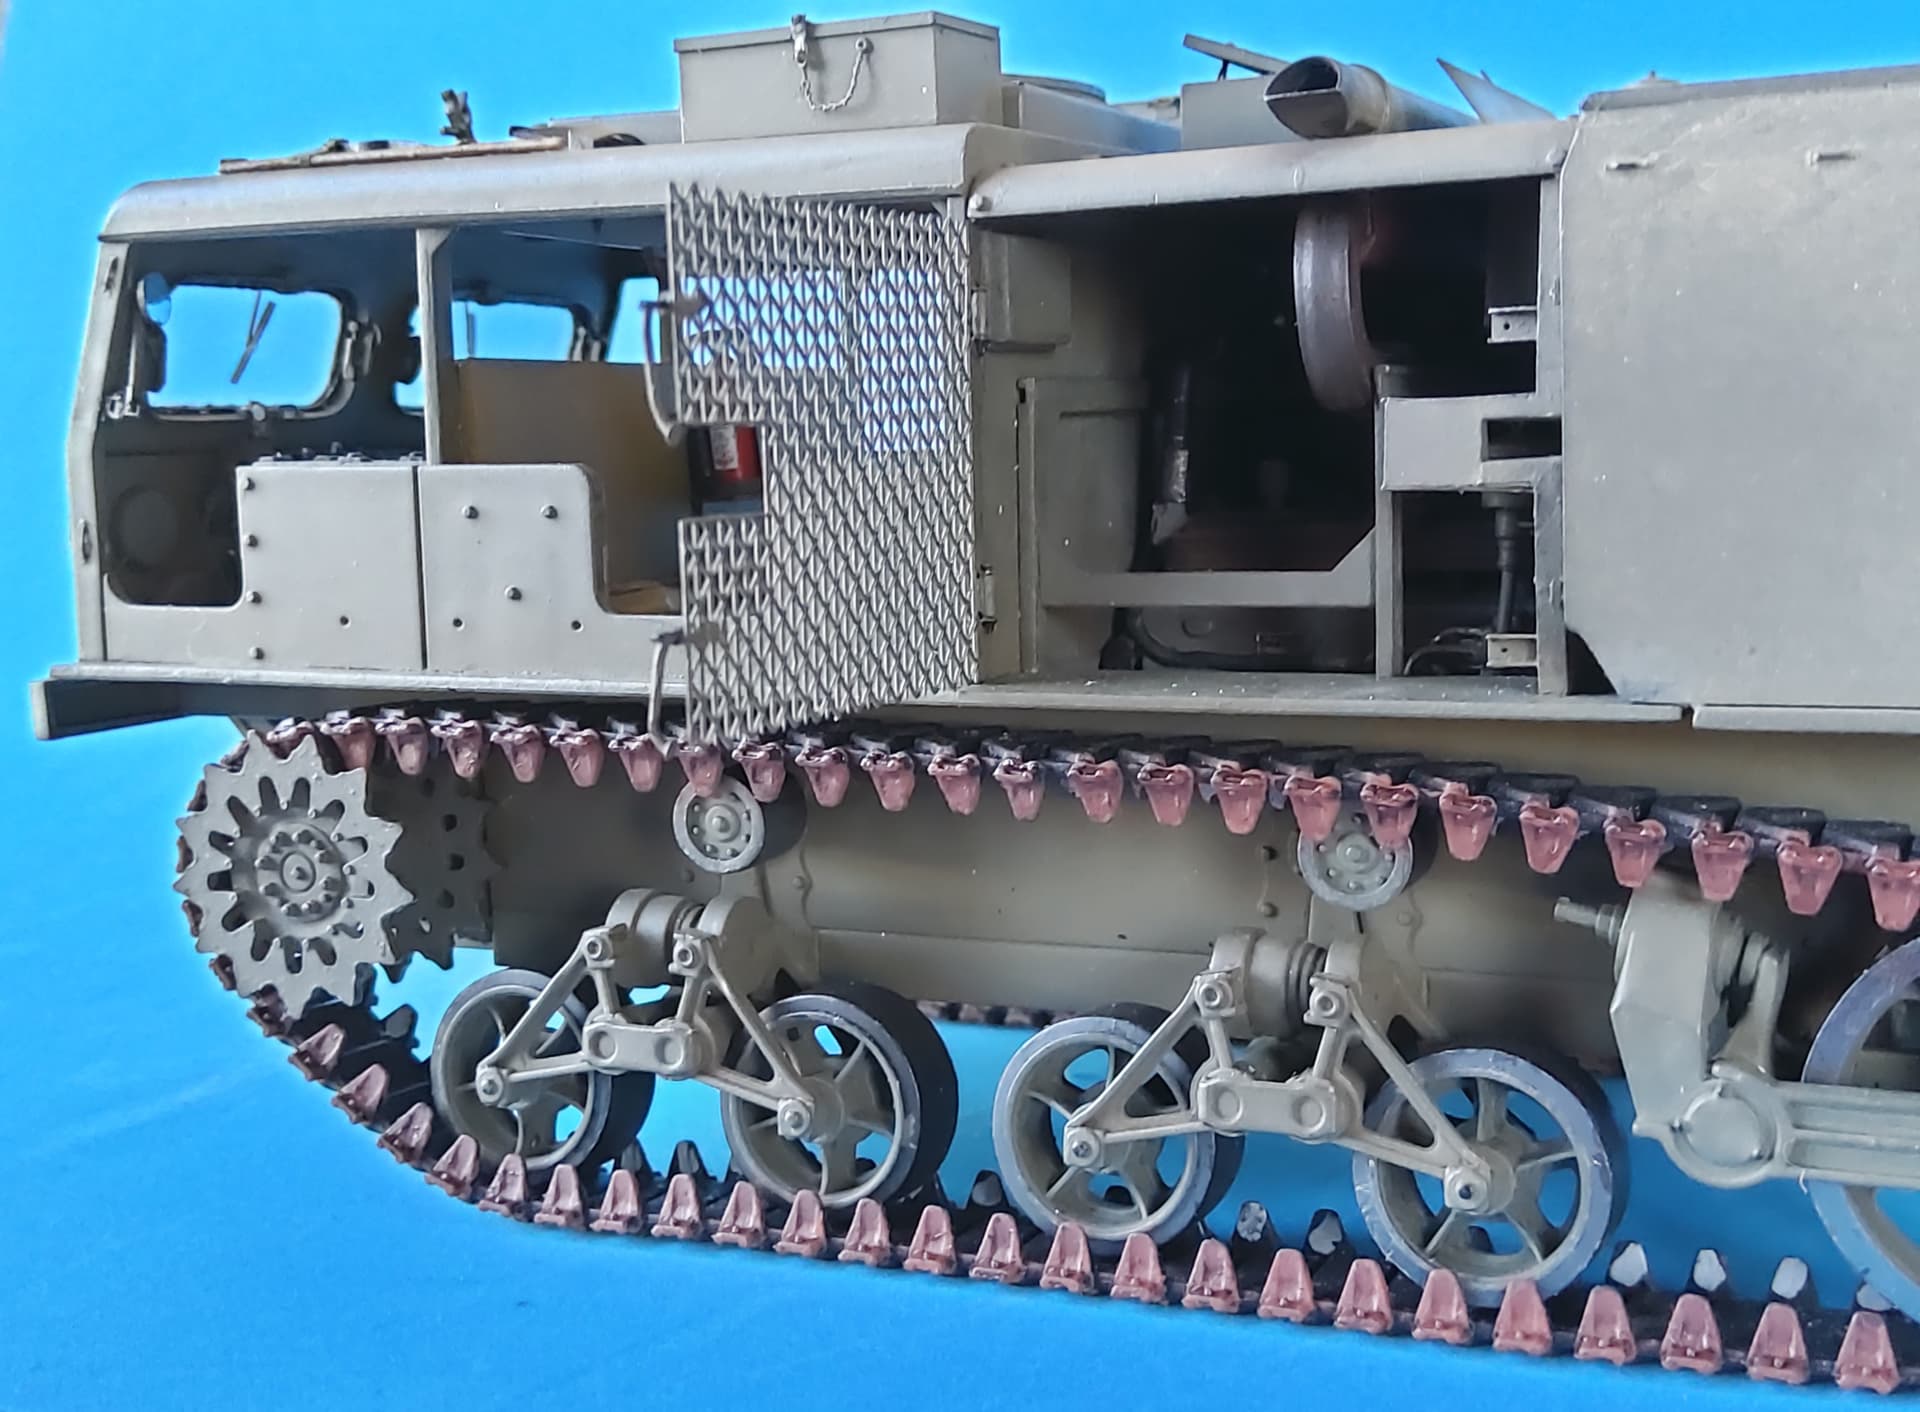
All tools have been lashed down:
Thank you, Mike K., but toadmanstankpictures and the Ampersand HST book show a short ‘stick’ or handle on the clamp, so I modeled that.
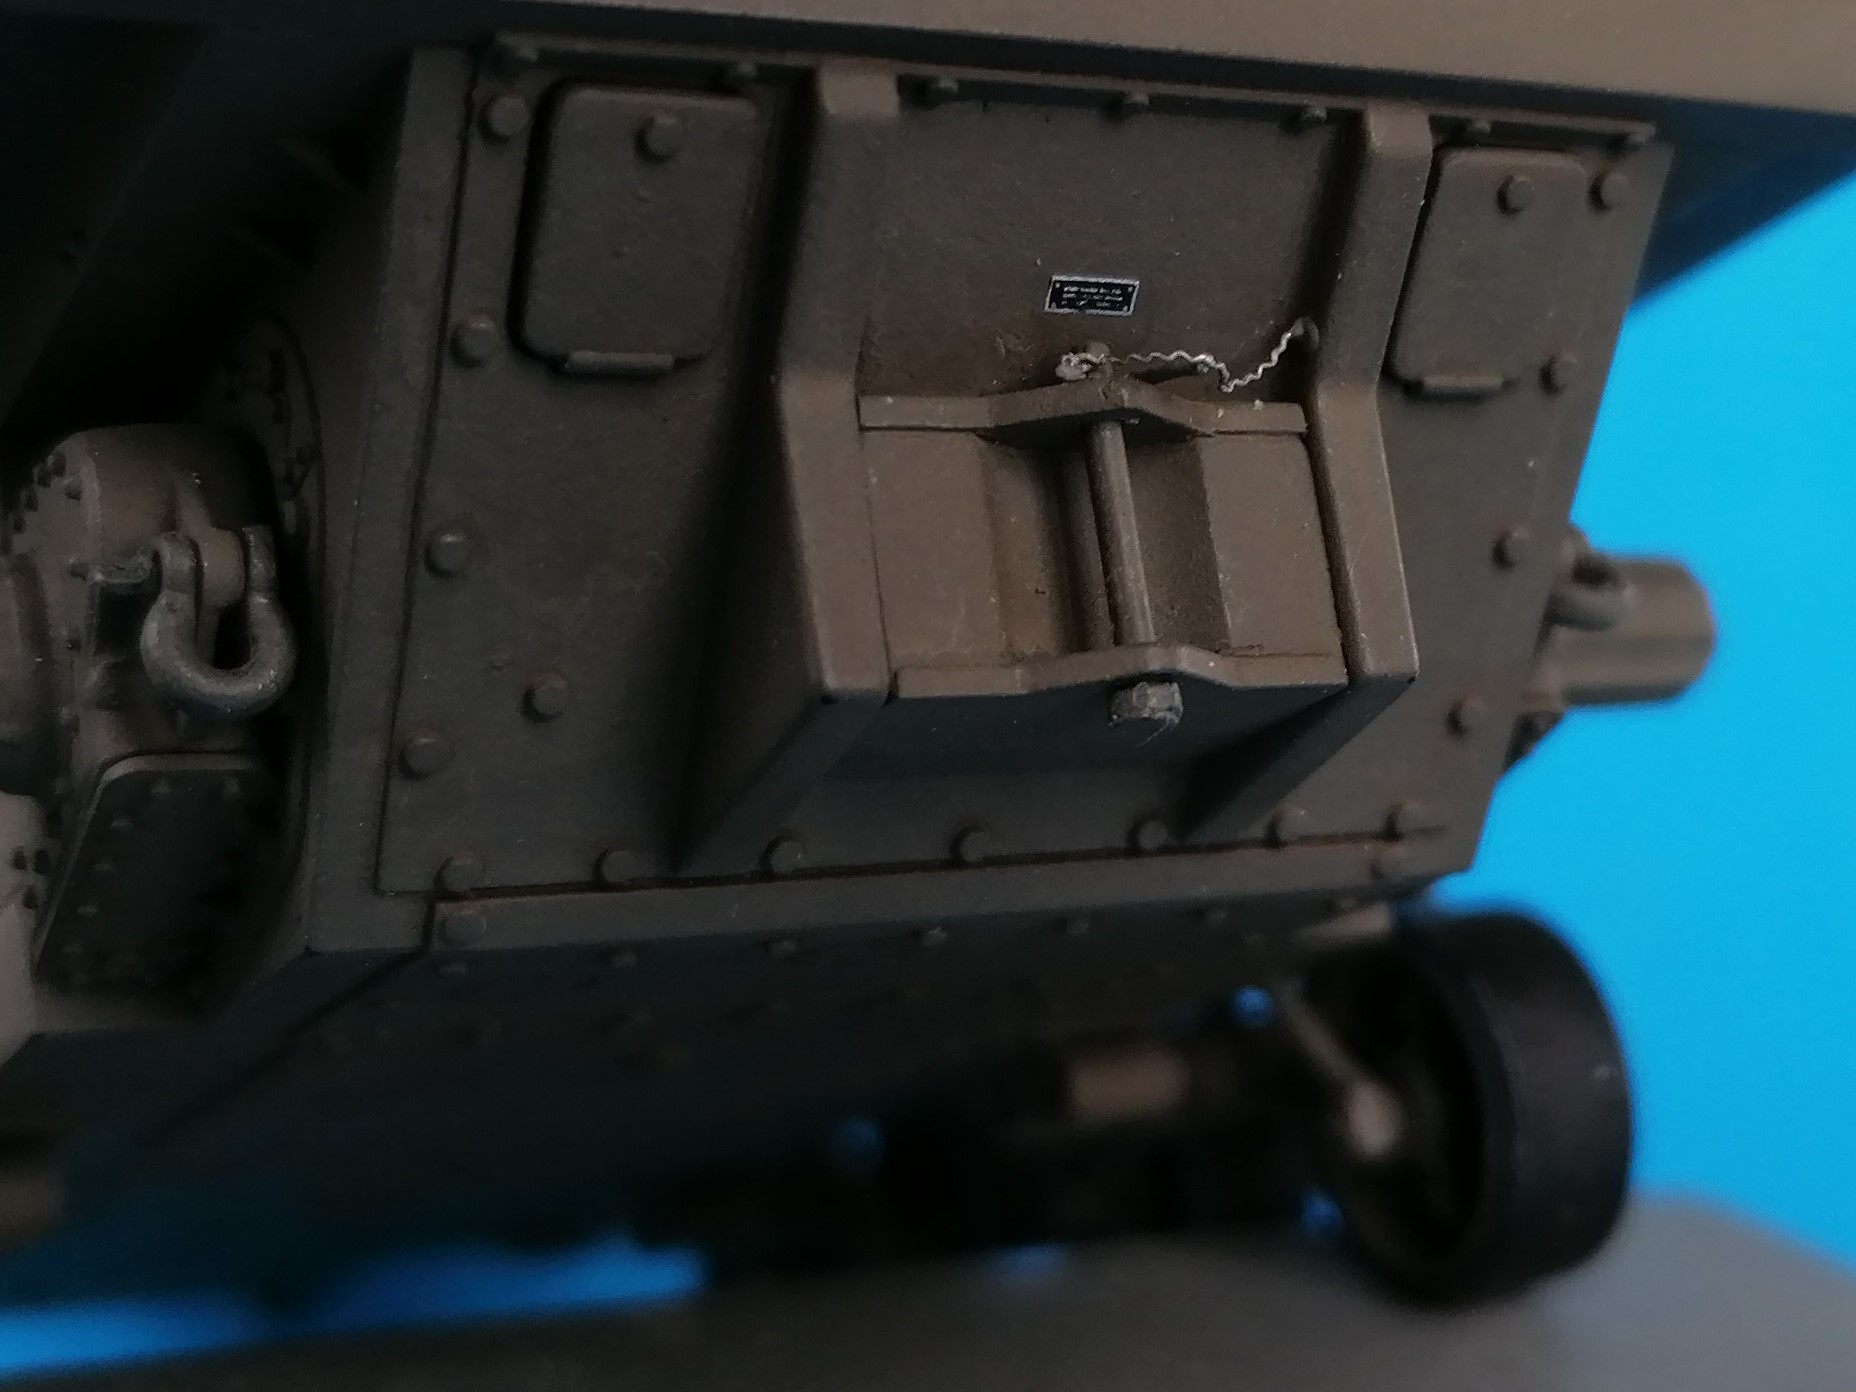
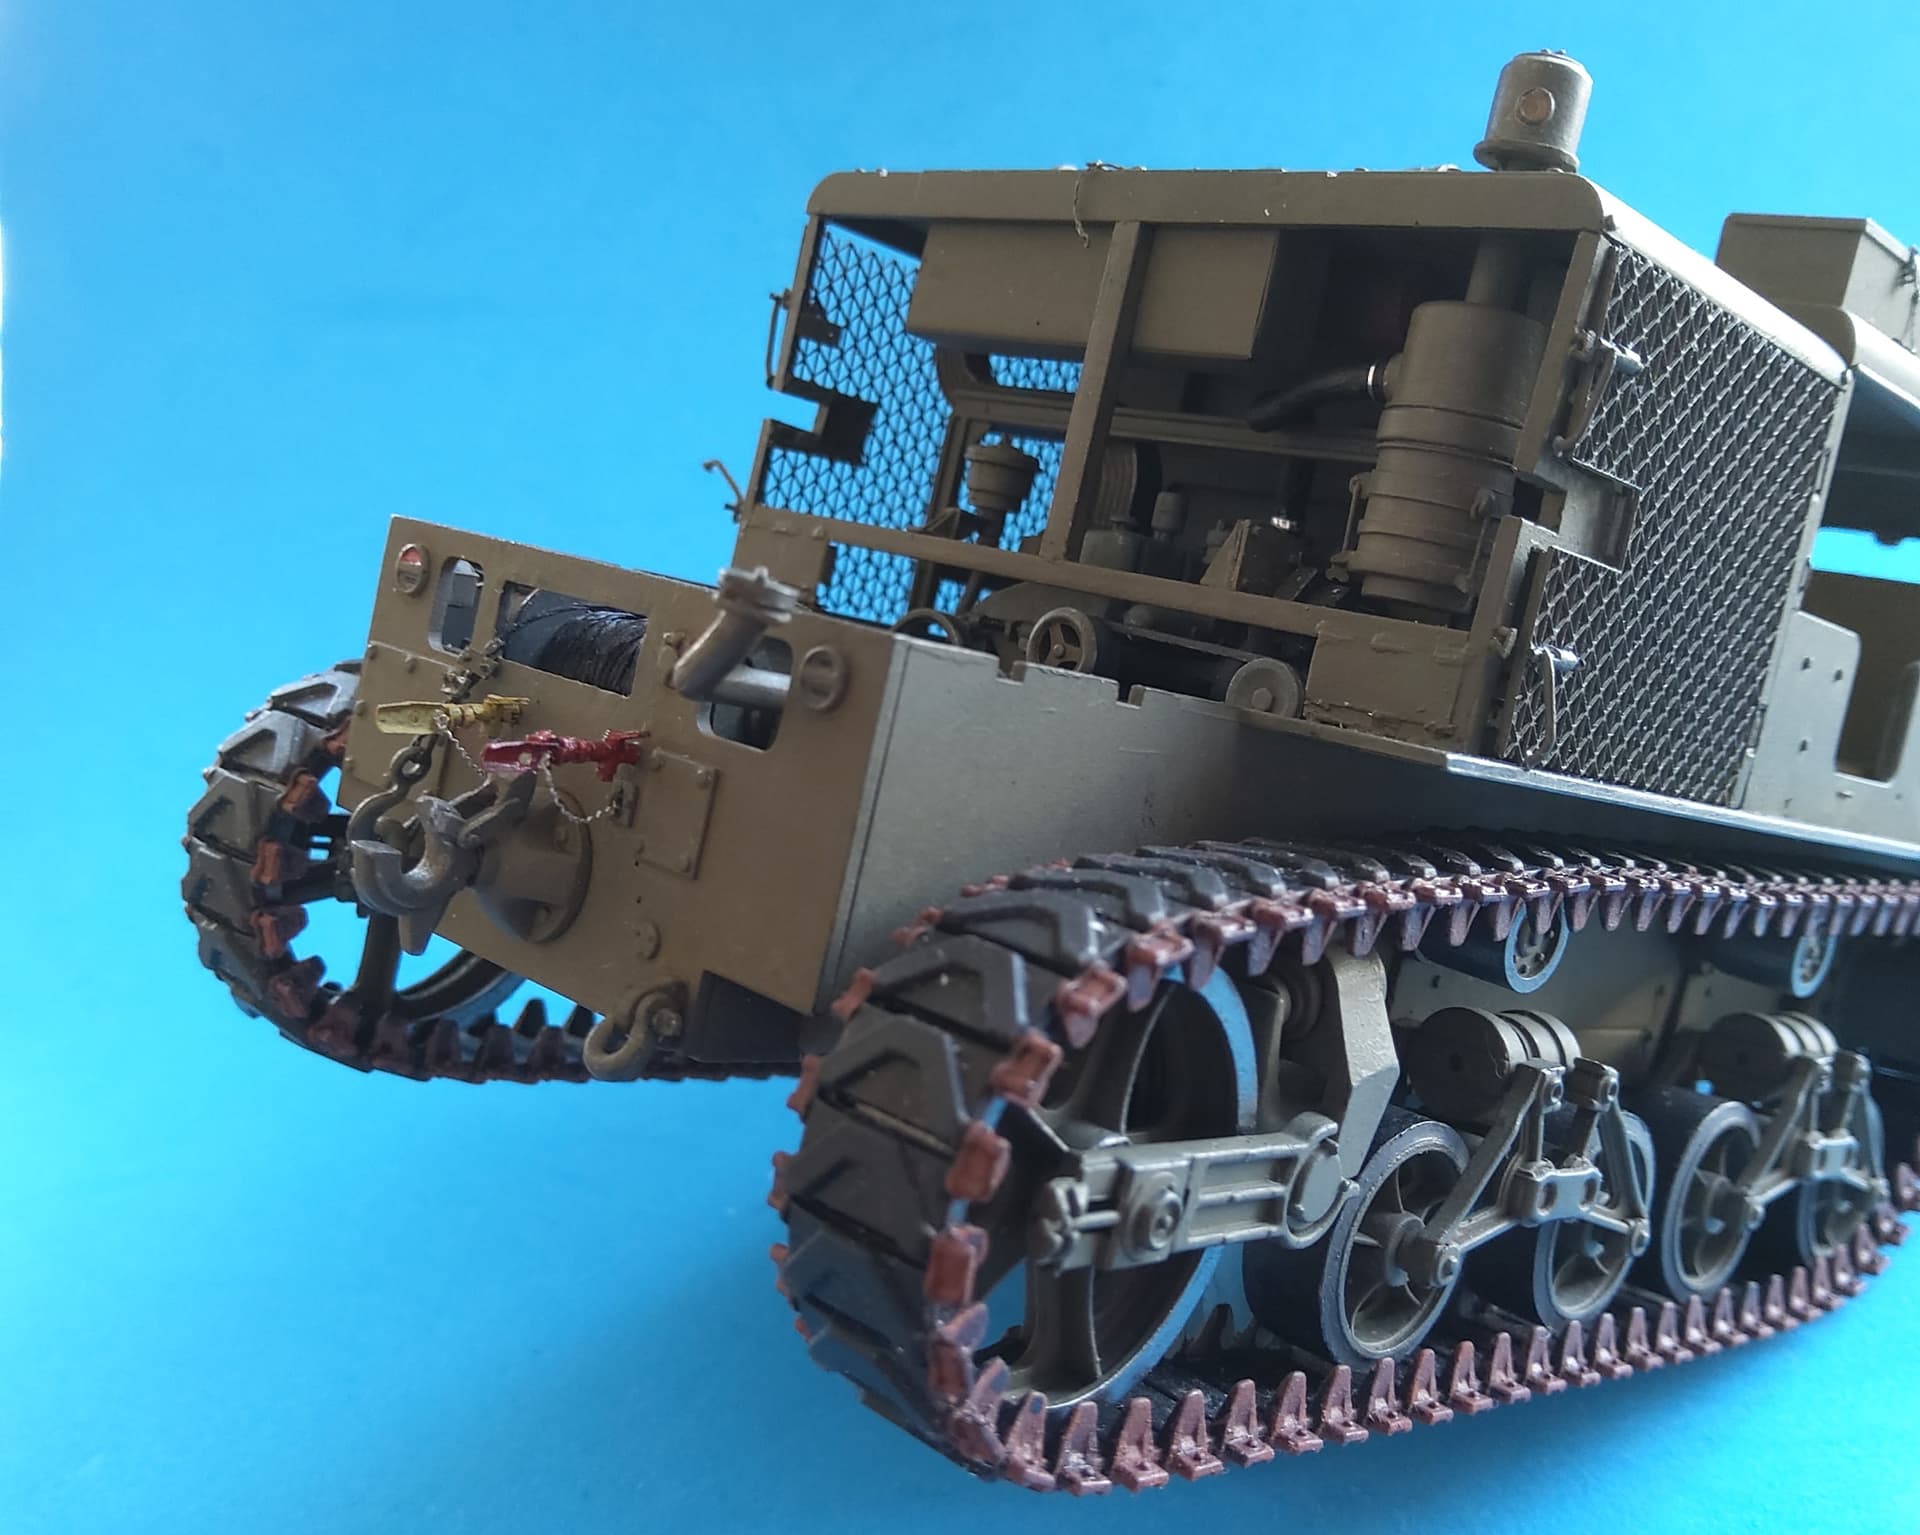
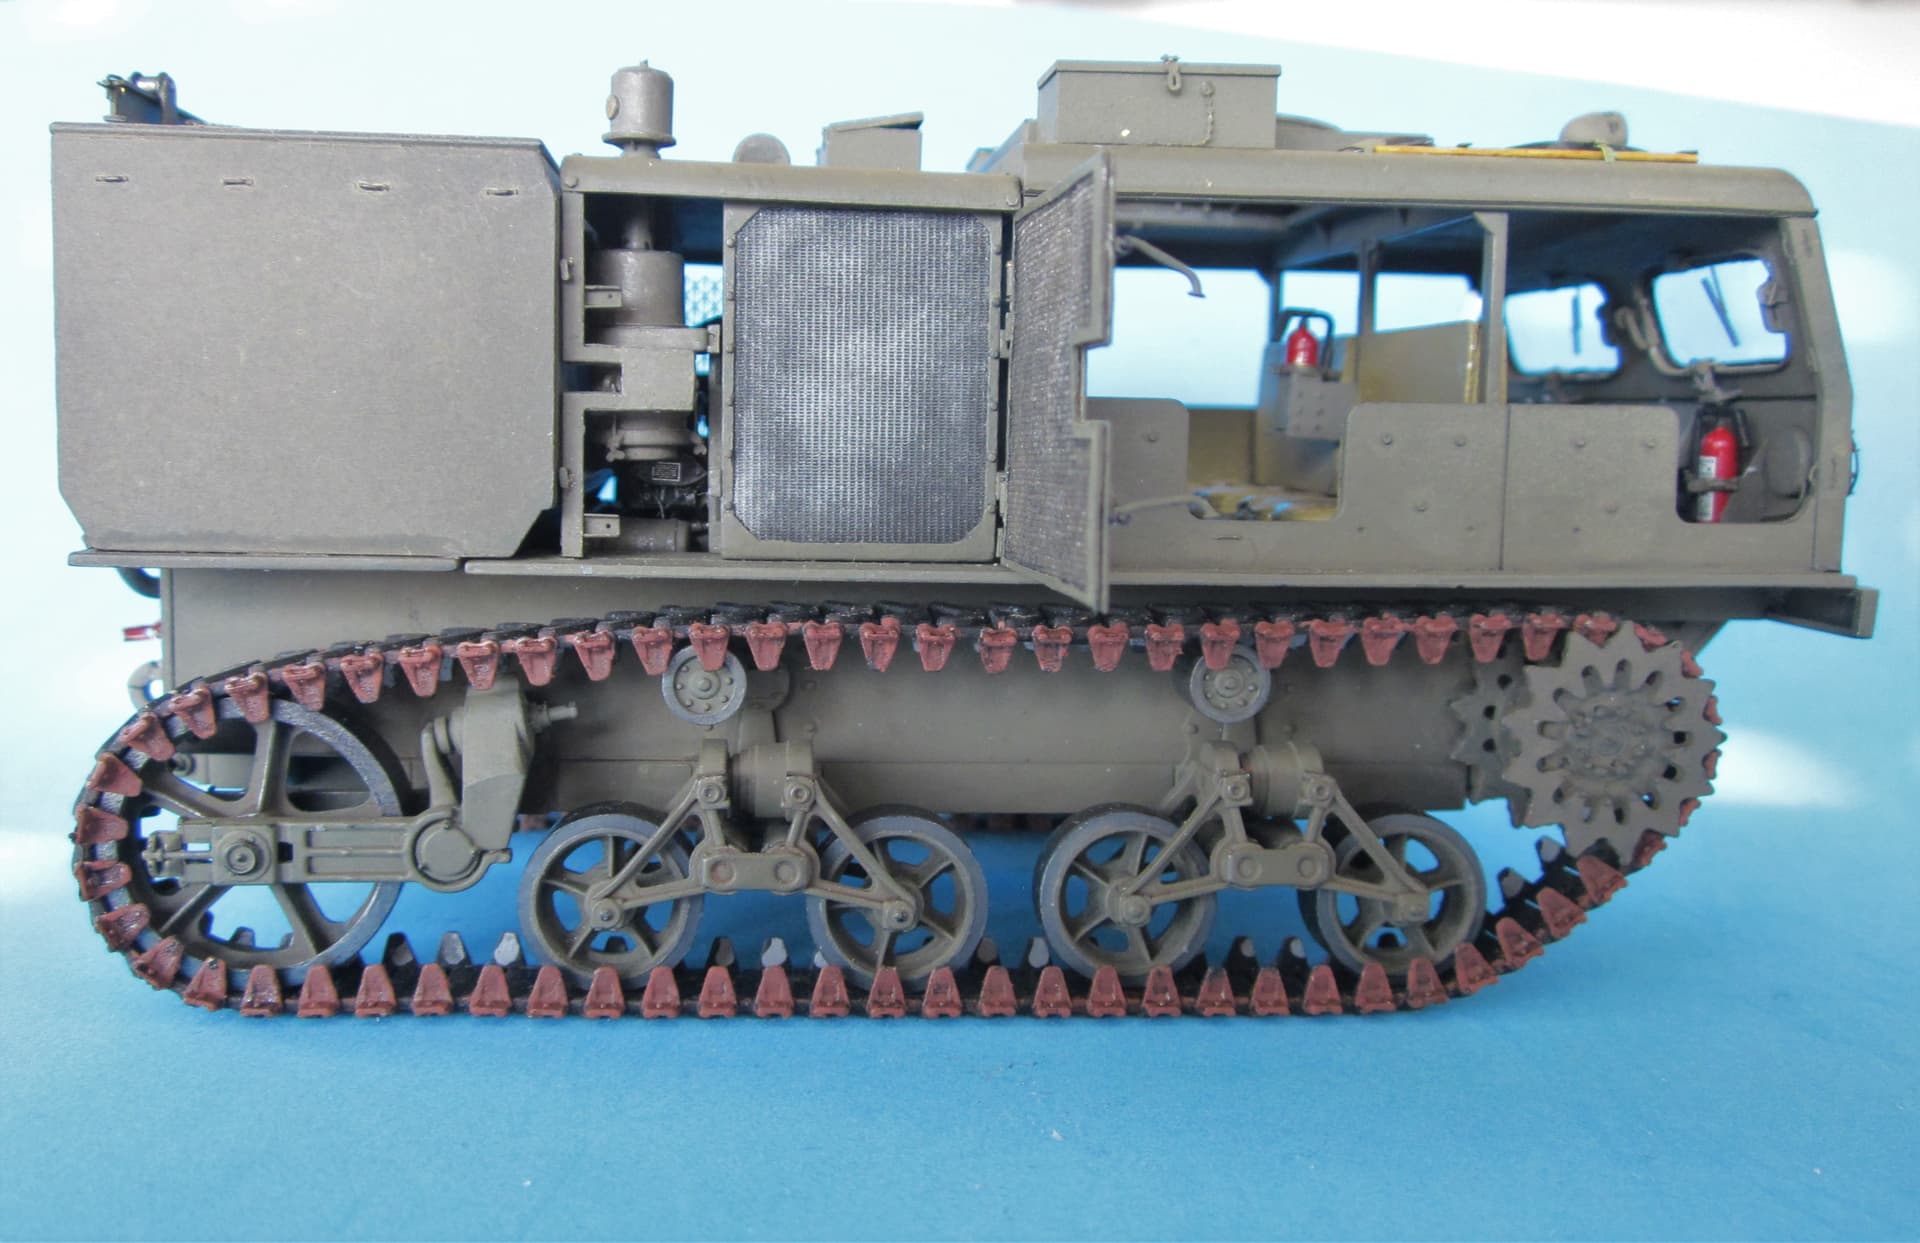
Meanwhile at the rear, the gladhands received some detailing, and the towing hitch is operating:
Having started on this kit in early april of 2020, it seems like I can finish it before two years are complete - how’s that for a fast build?
Peter
5 Likes
Final scratchbuilt detail added: rear view mirror, folded inside to avoid transport damages.
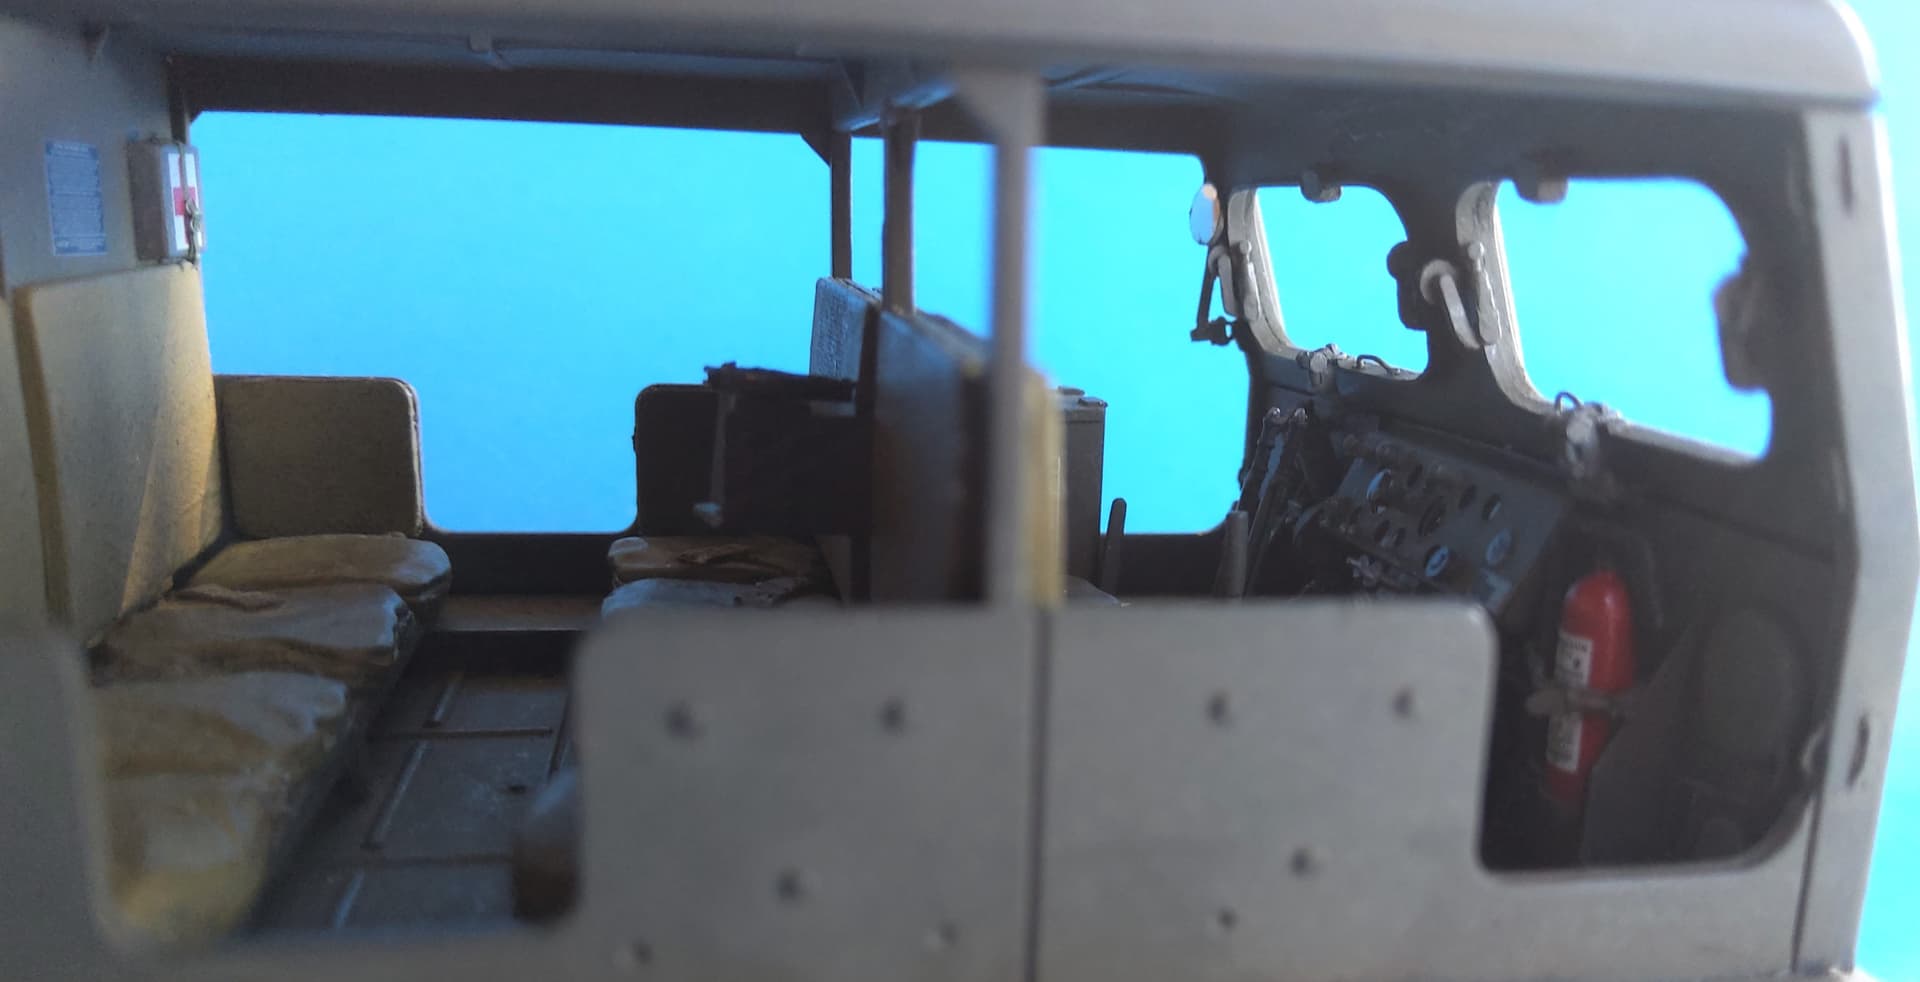
And with that, I declare this model finished! Markings will be added once I’ve decided which army deserves this vehicle. Here are some photos, and I apologize for their sub-ideal quality, but I had to take them in a hurry before leaving for vacations which I think I now deserve. While I’m away, I intend to finish my elaborate bilingual build report so it can be published at panzer-modell.de . I’ll let you know when that has happened.
Until then, a huge thank you to all who supported me during the build and helped clarify problems and answer technical questions - without you all, I couldn’t have demonstrated my madness so clearly!
I hope you like the pics,
Peter

7 Likes
That’s an epic build, man!!!