Holland Submarine 1899 - 1/48 Scale - 3D Printed

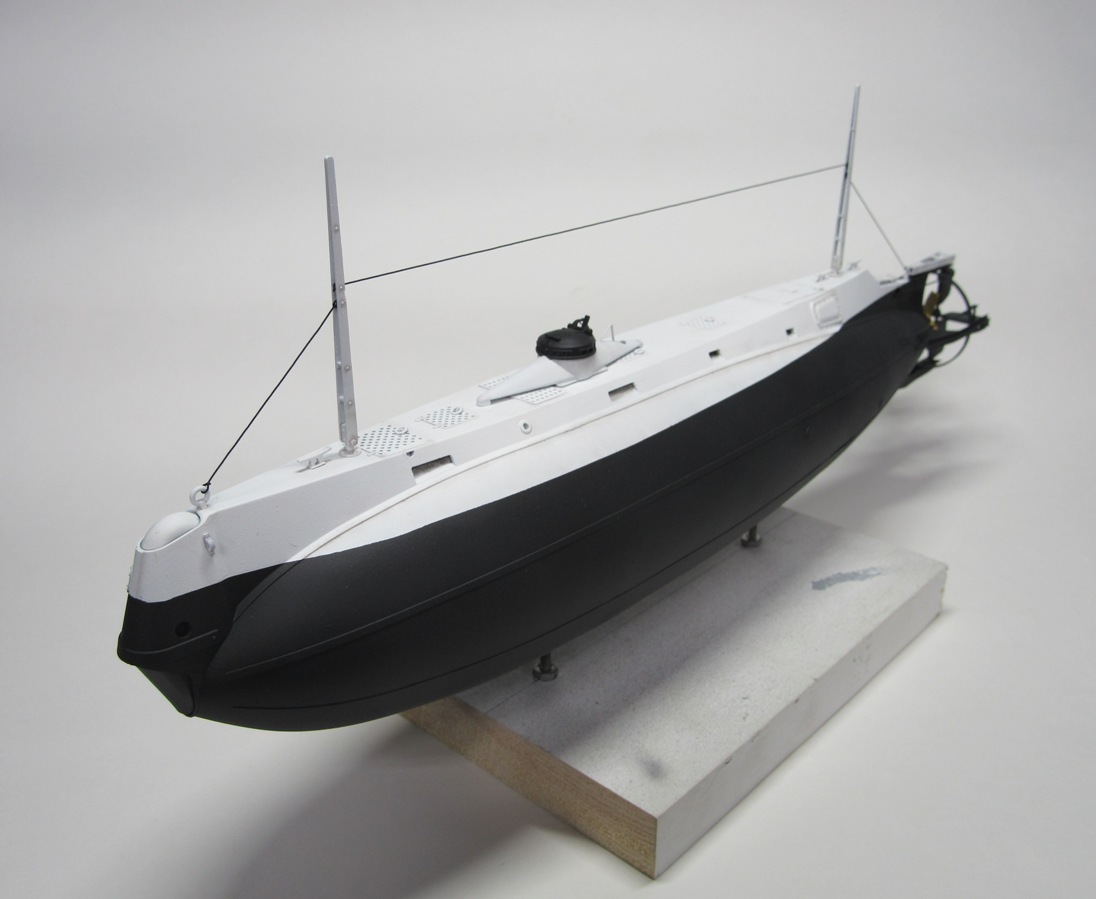
I’ve been wanting to build a Holland submarine for a while now since it relates to my current career. But with nothing readily available I decided to design one myself and 3d print it. 1/48 is a nice scale for smaller boats which will bring this thing to a little over 13.5" long. Making the 3d model was a learning curve, with a few false starts. It’s a safe bet it took me over 80hrs just to get to this point

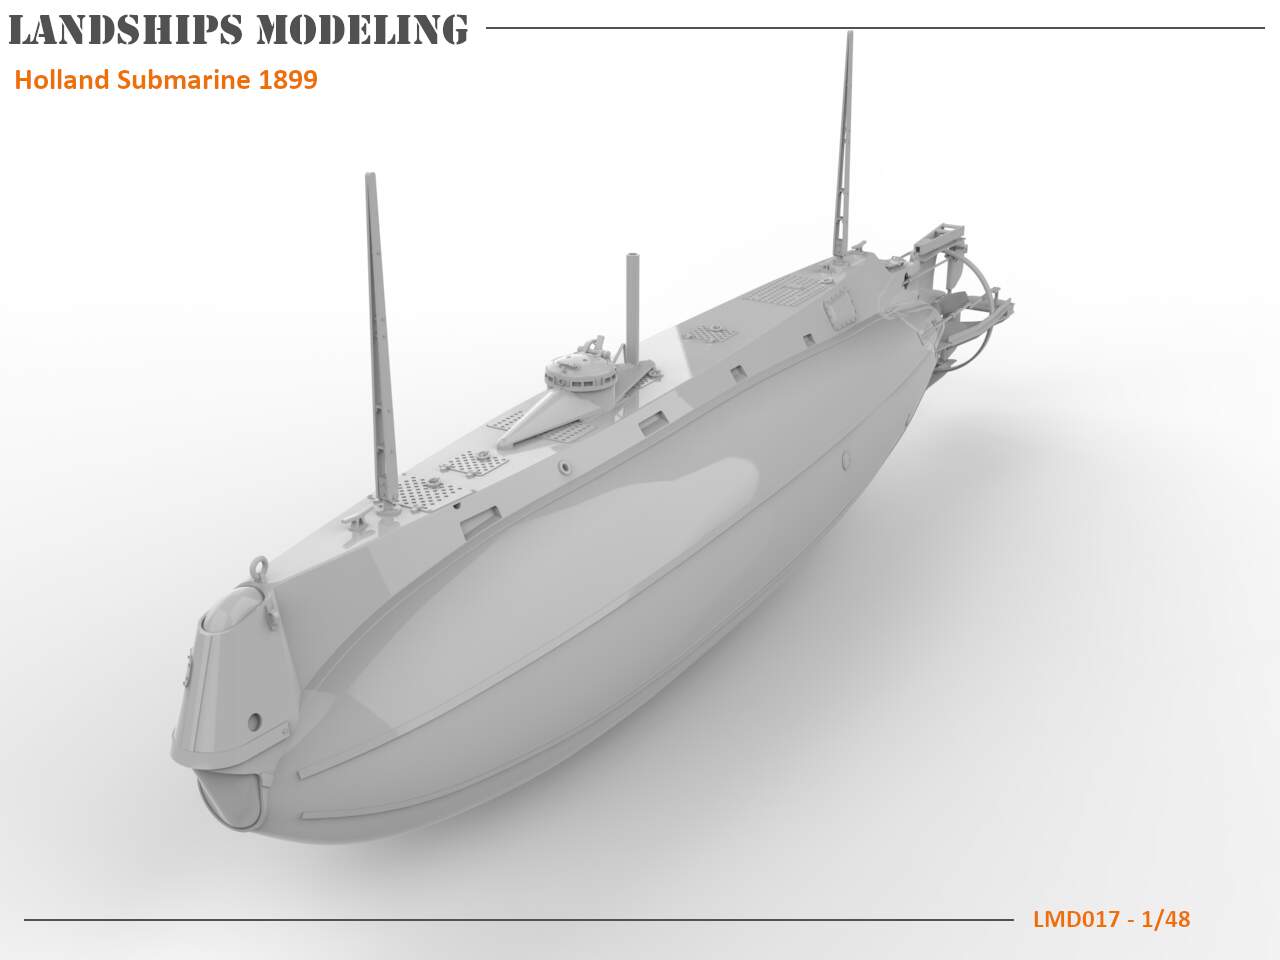
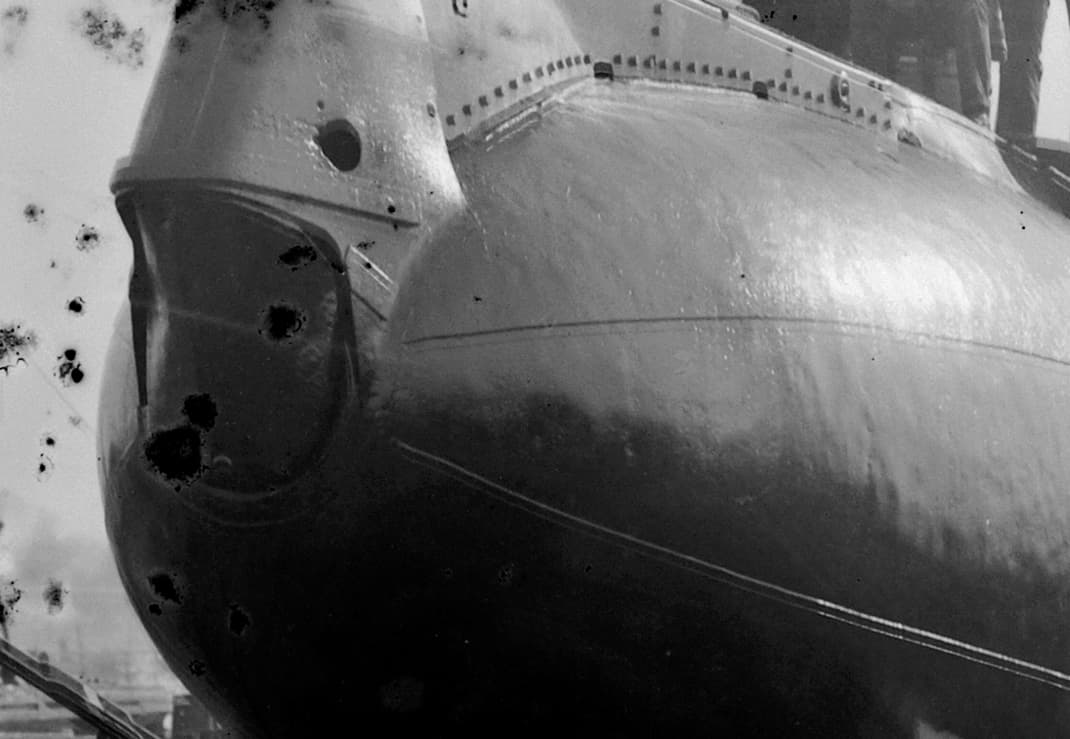
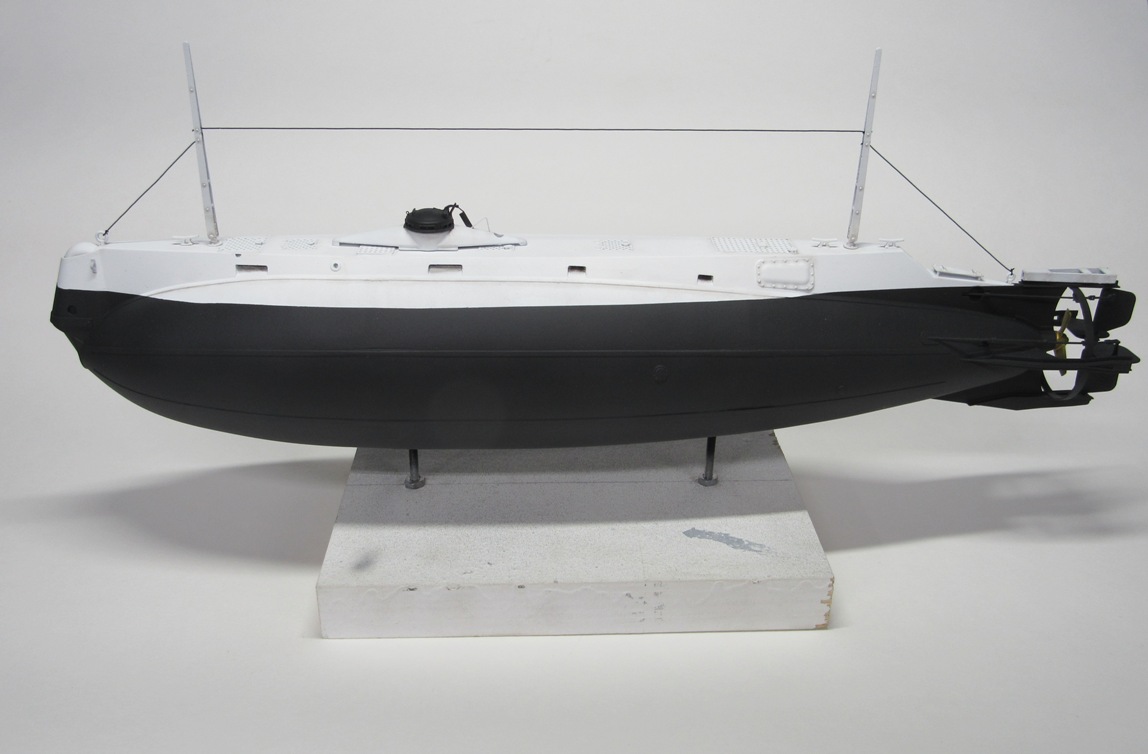
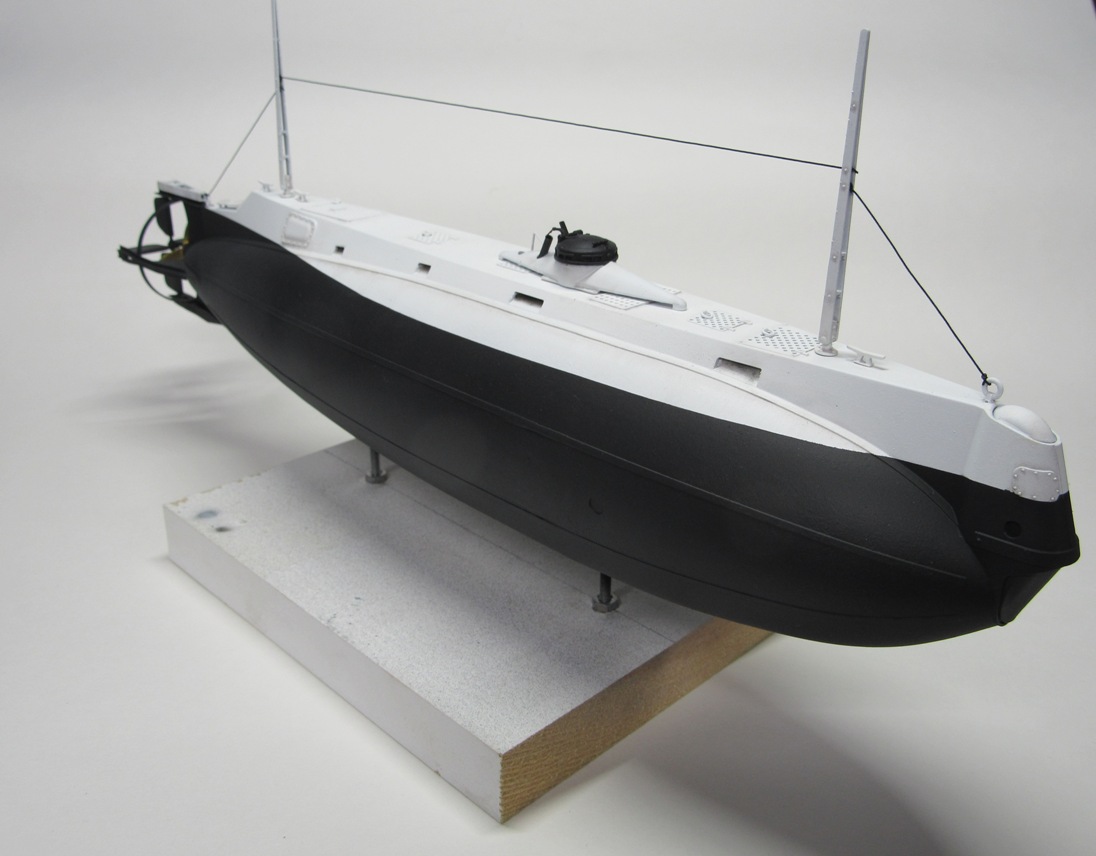
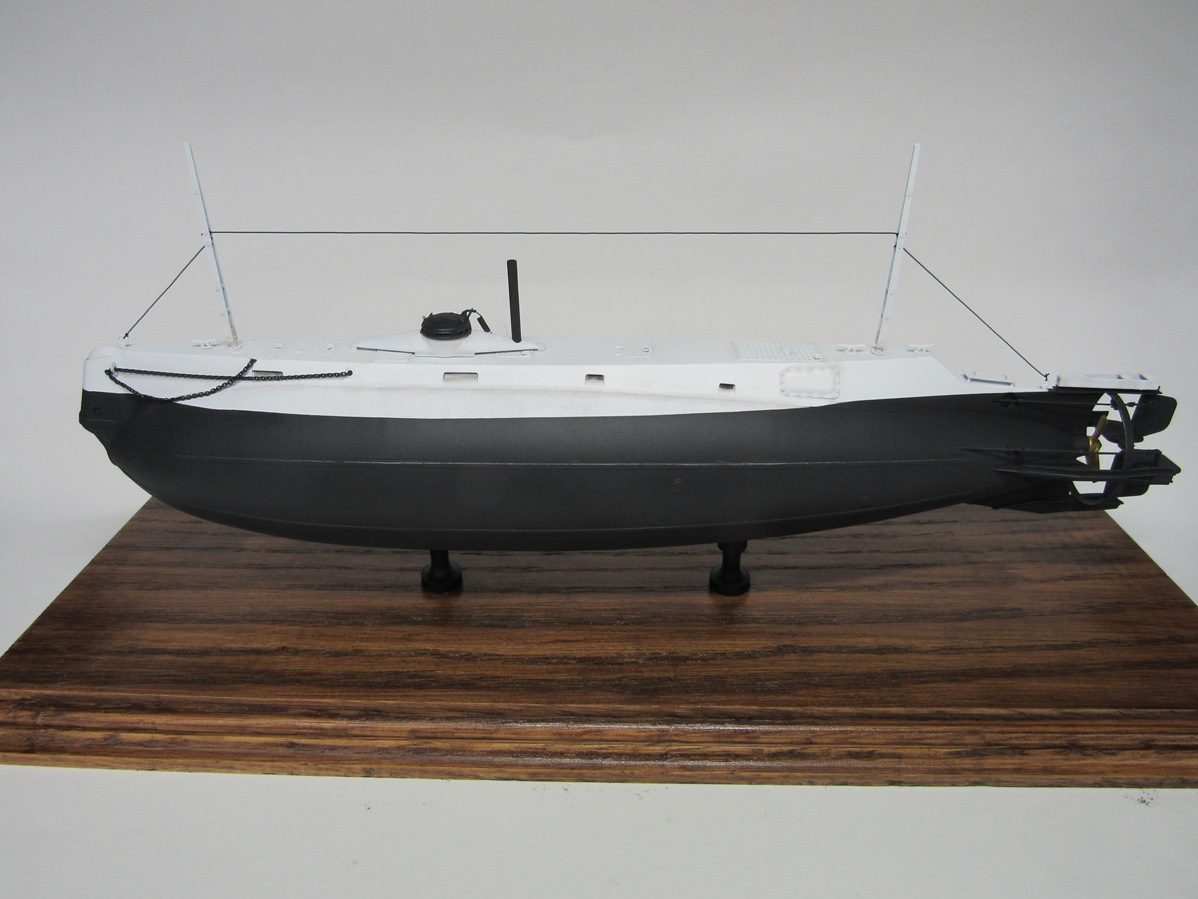
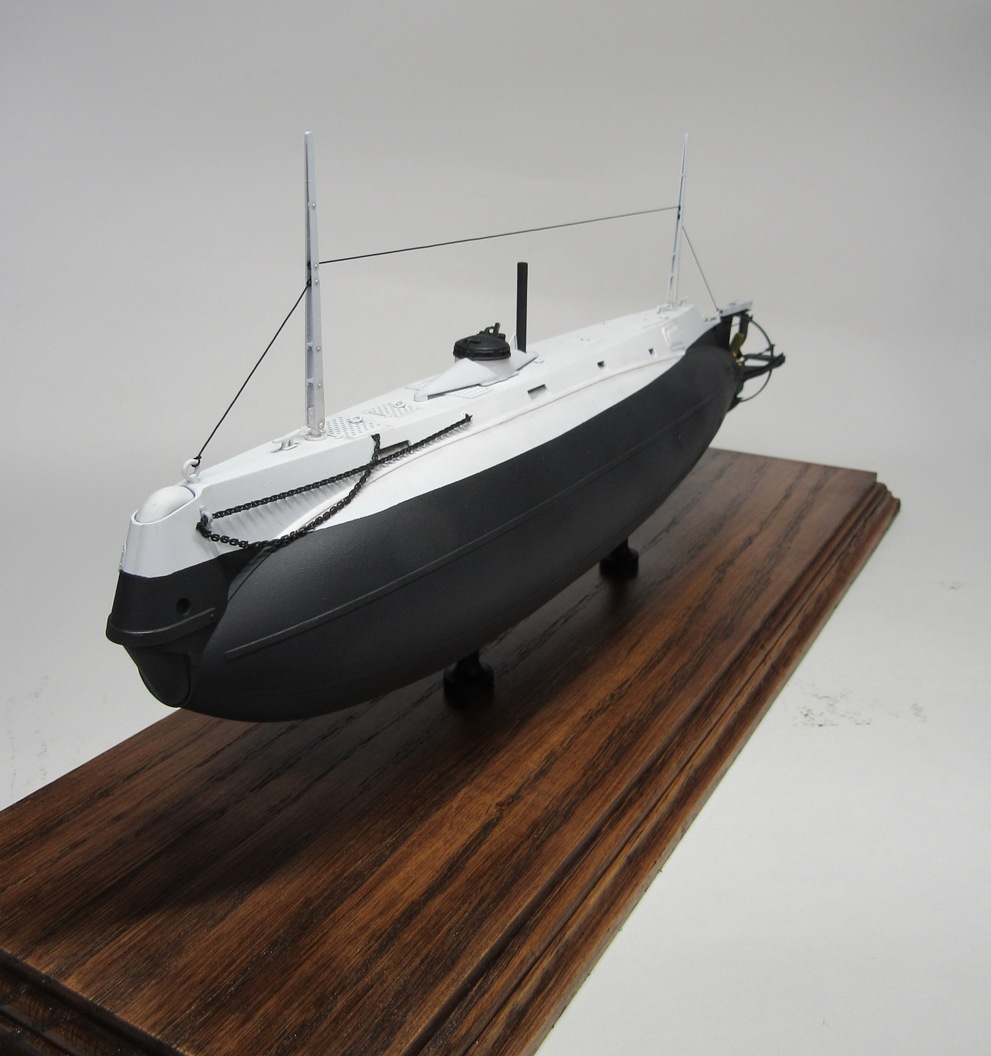
This is the Holland as it was at some point in 1899, before Navy trials. It went through some heavy modifications during its trial years, the most noticeable change between this and when it was commissioned was the front superstructure being narrowed.

Naturally, I managed to brick my 3d printer a few weeks before I was ready to start printing this. Turned out to be a blessing, as I picked up an Elegoo Mars 2 for only $100 more than a replacement screen for the old printer. I invested in a heating unit too, and now I have prints that are actually presentable.

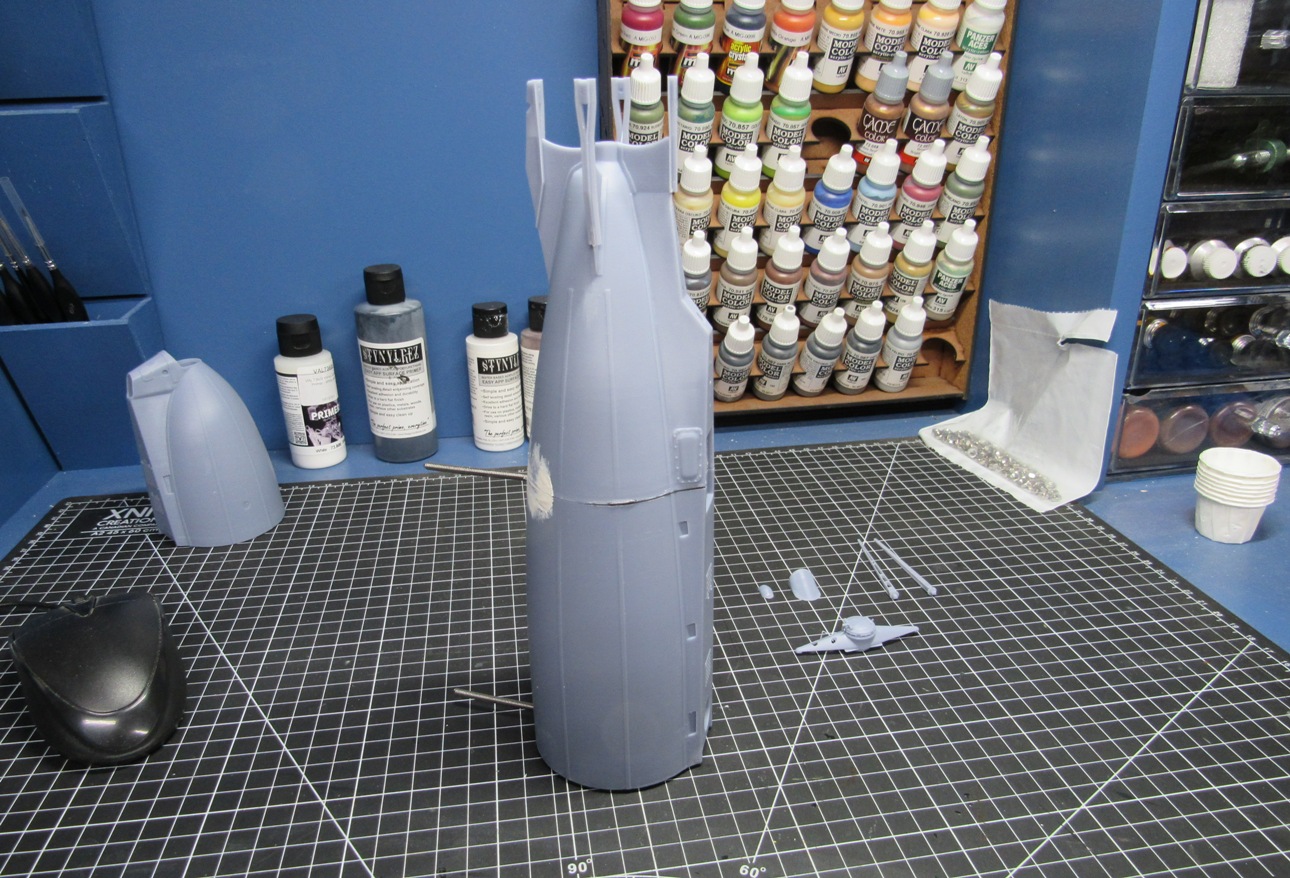
Time to start churning out parts,

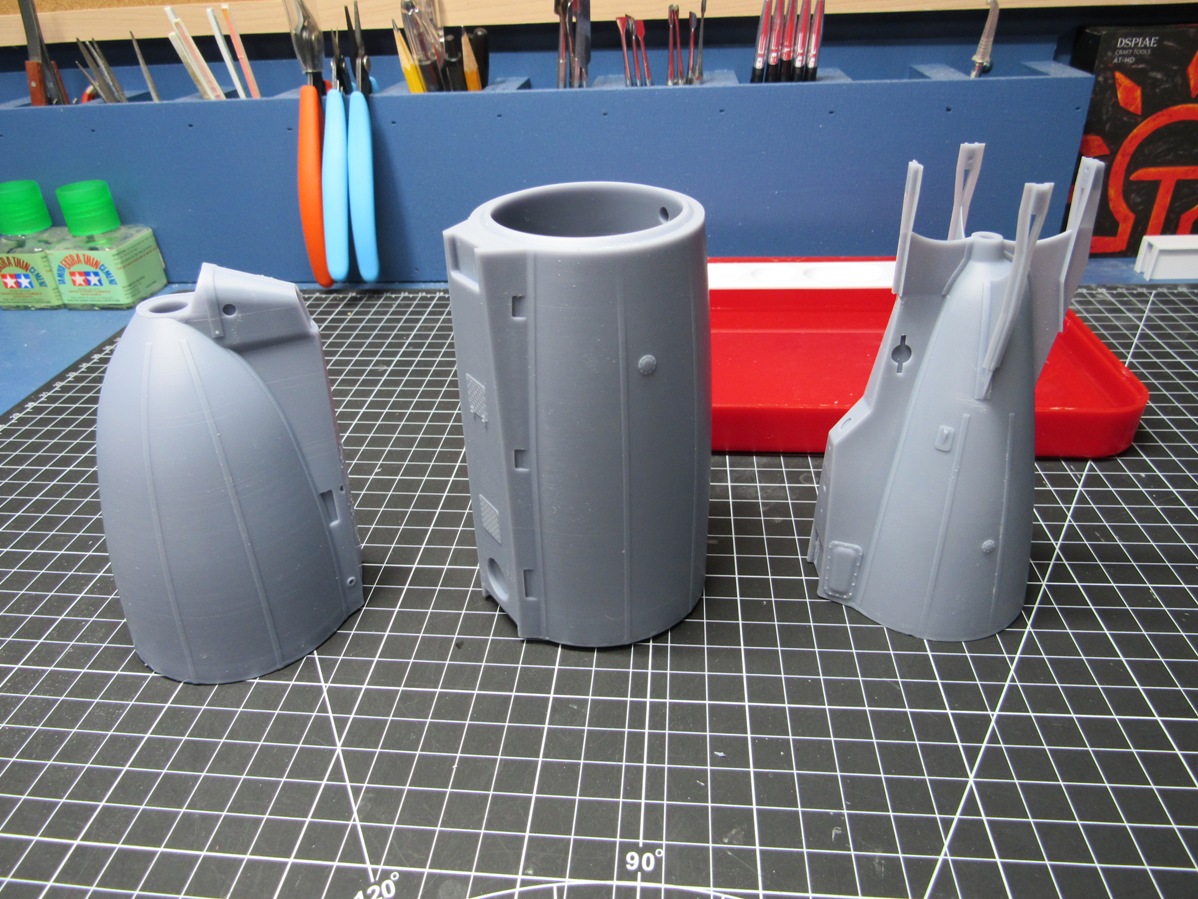
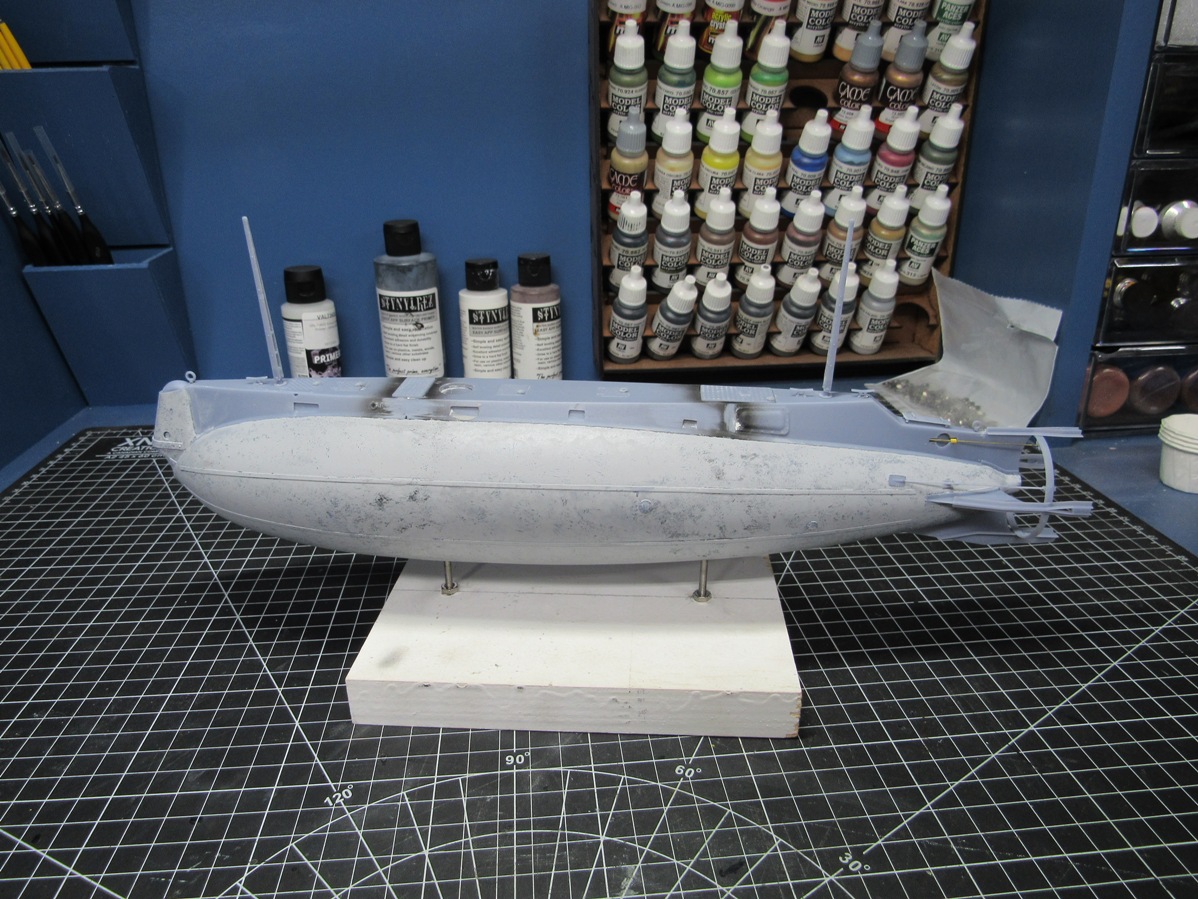
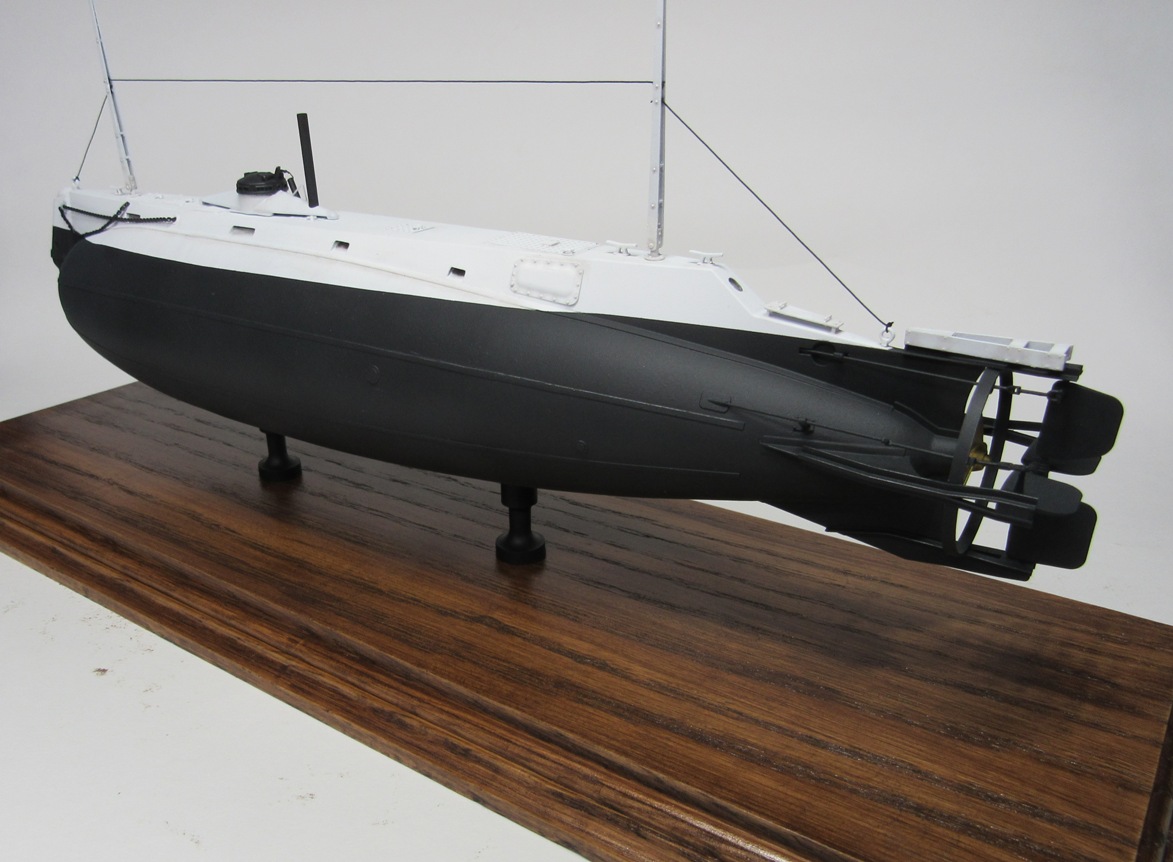
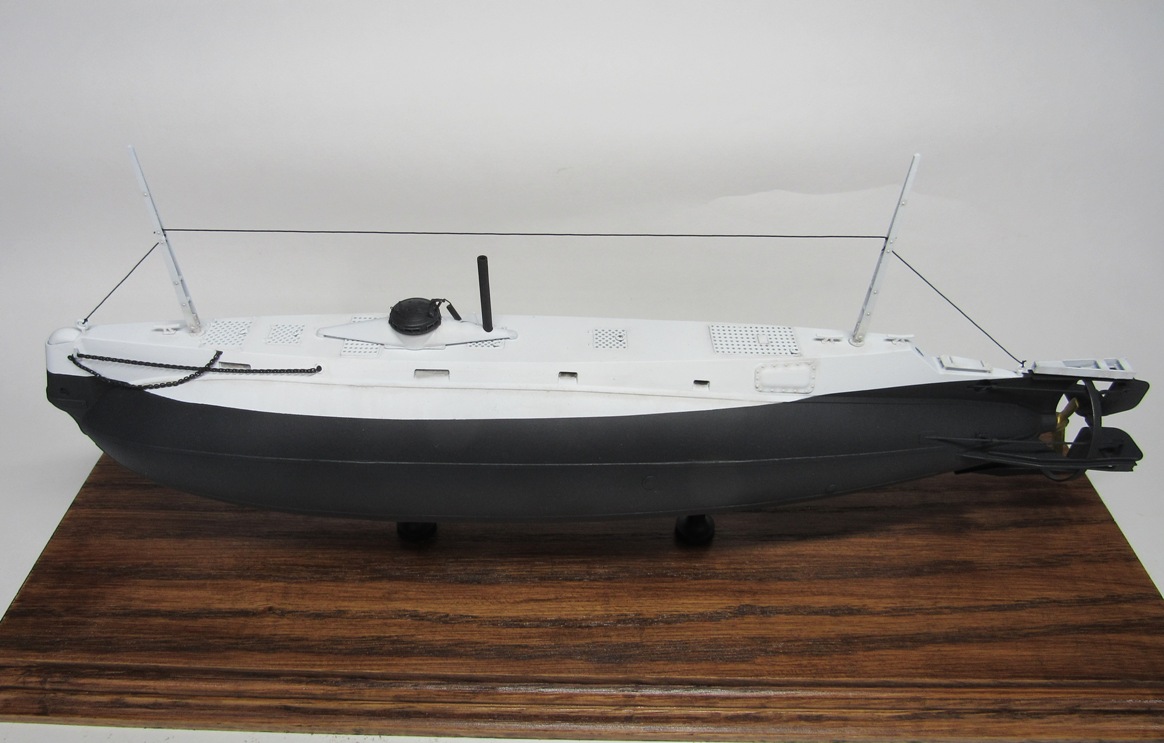
I divided the hull into 3 sections, forward, mid and aft. Each one takes about 18hrs to print. I had a couple failures due to parts of the raft peeling from the build plate, but upping exposure time on the first layers, and the layer count fixed it. The forward section will need to get reprinted because of this, you can kind of see how it doesn’t sit level.

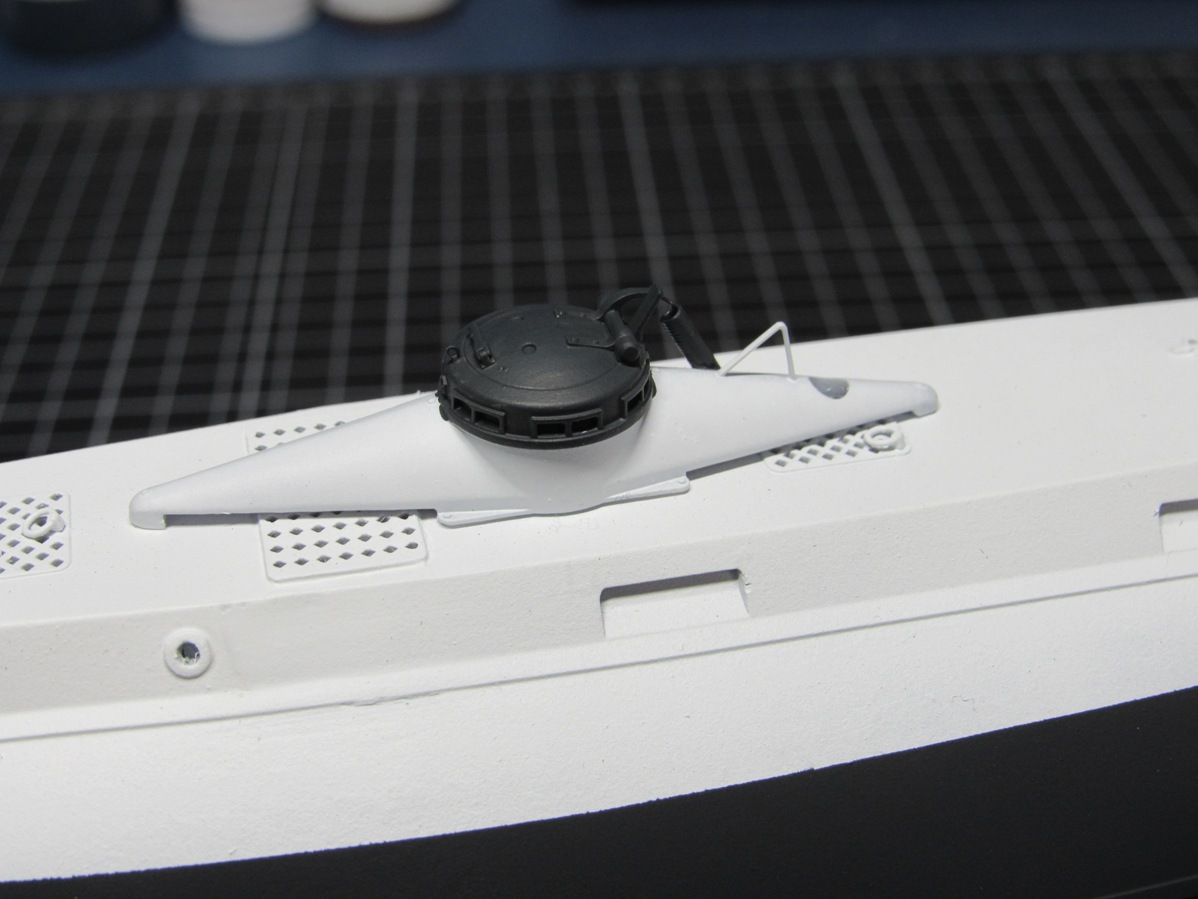
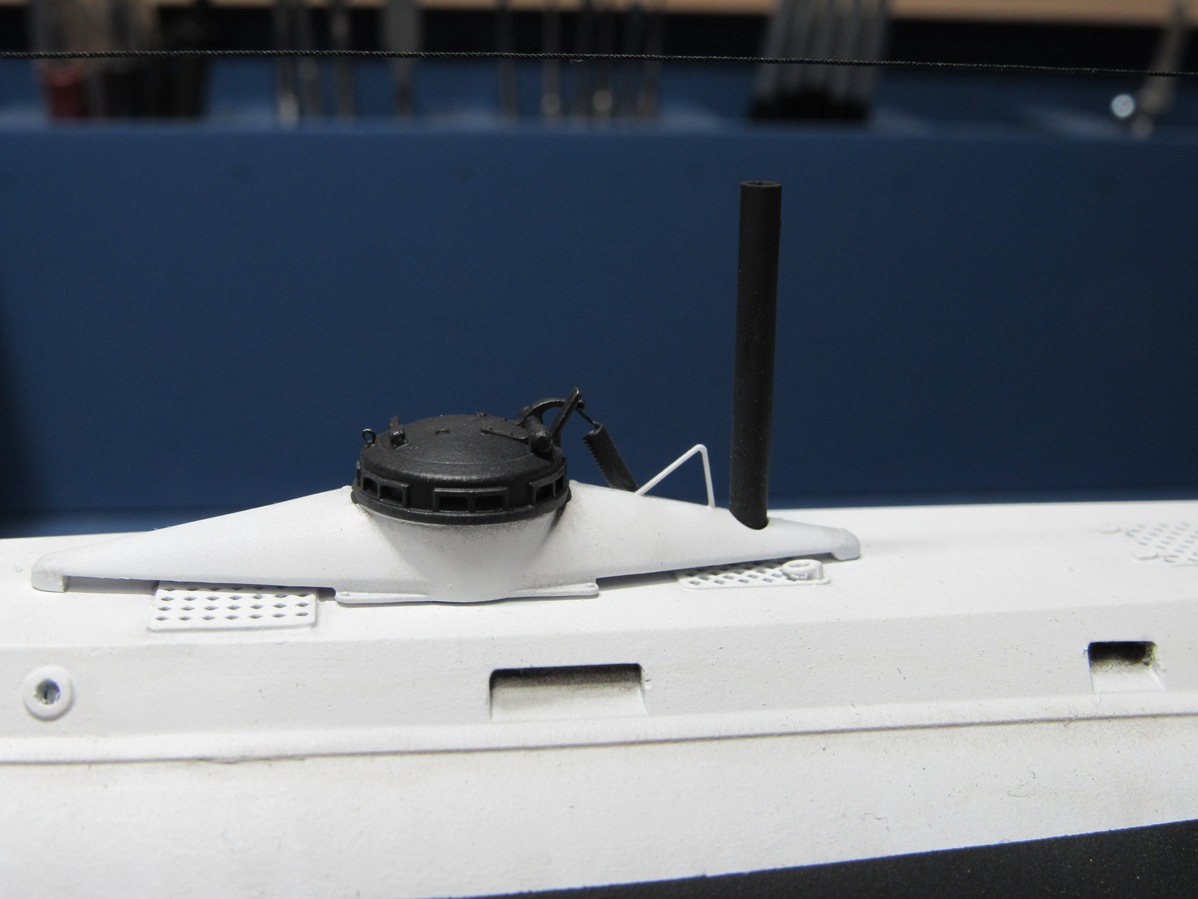
Got some detail parts out too, like the conning tower,

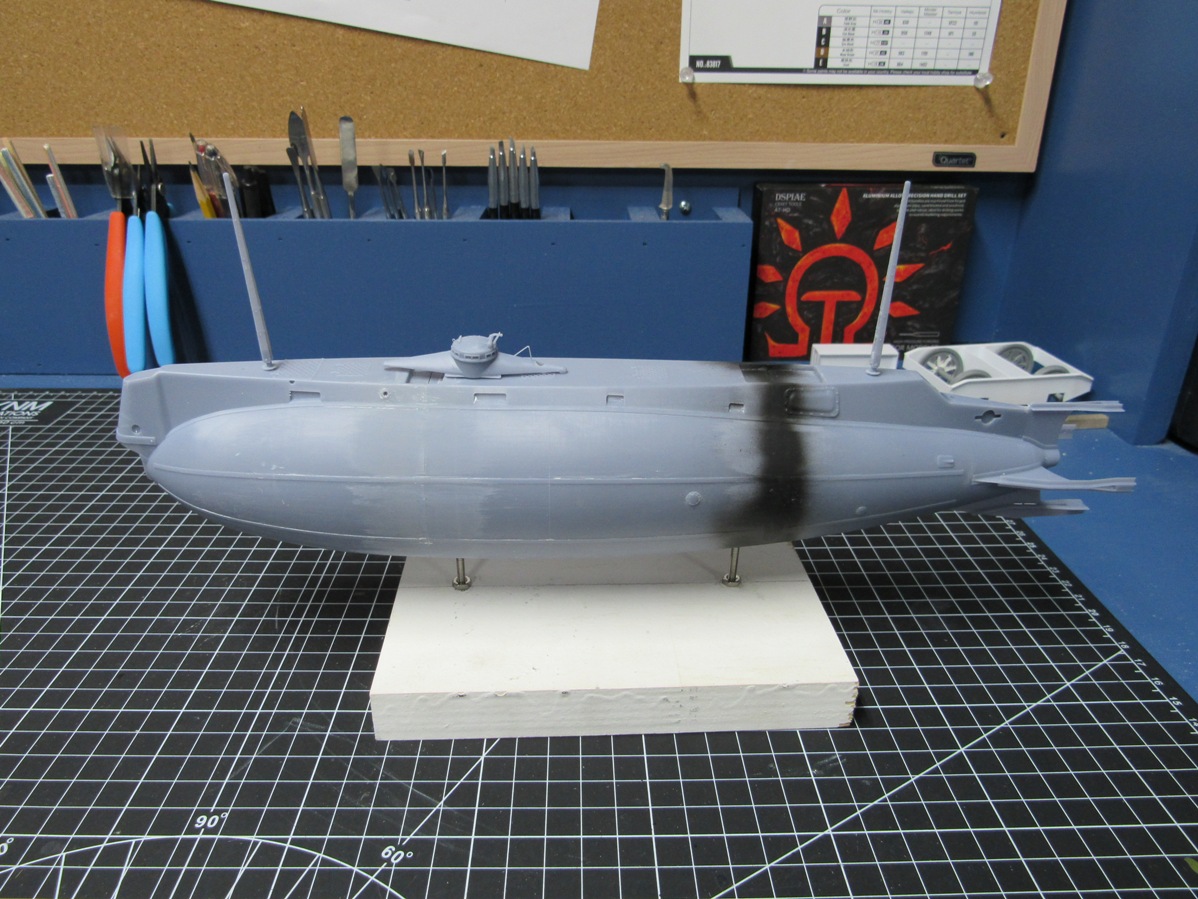
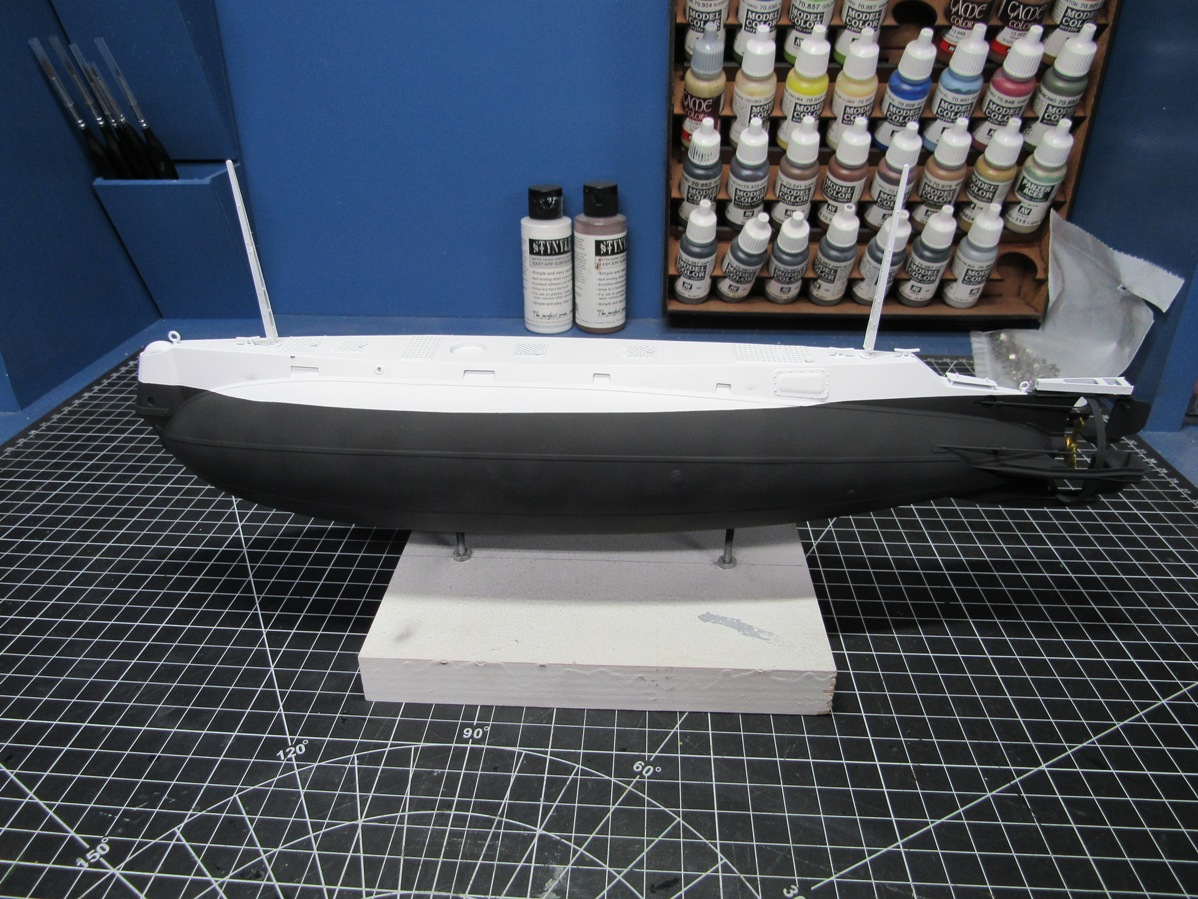
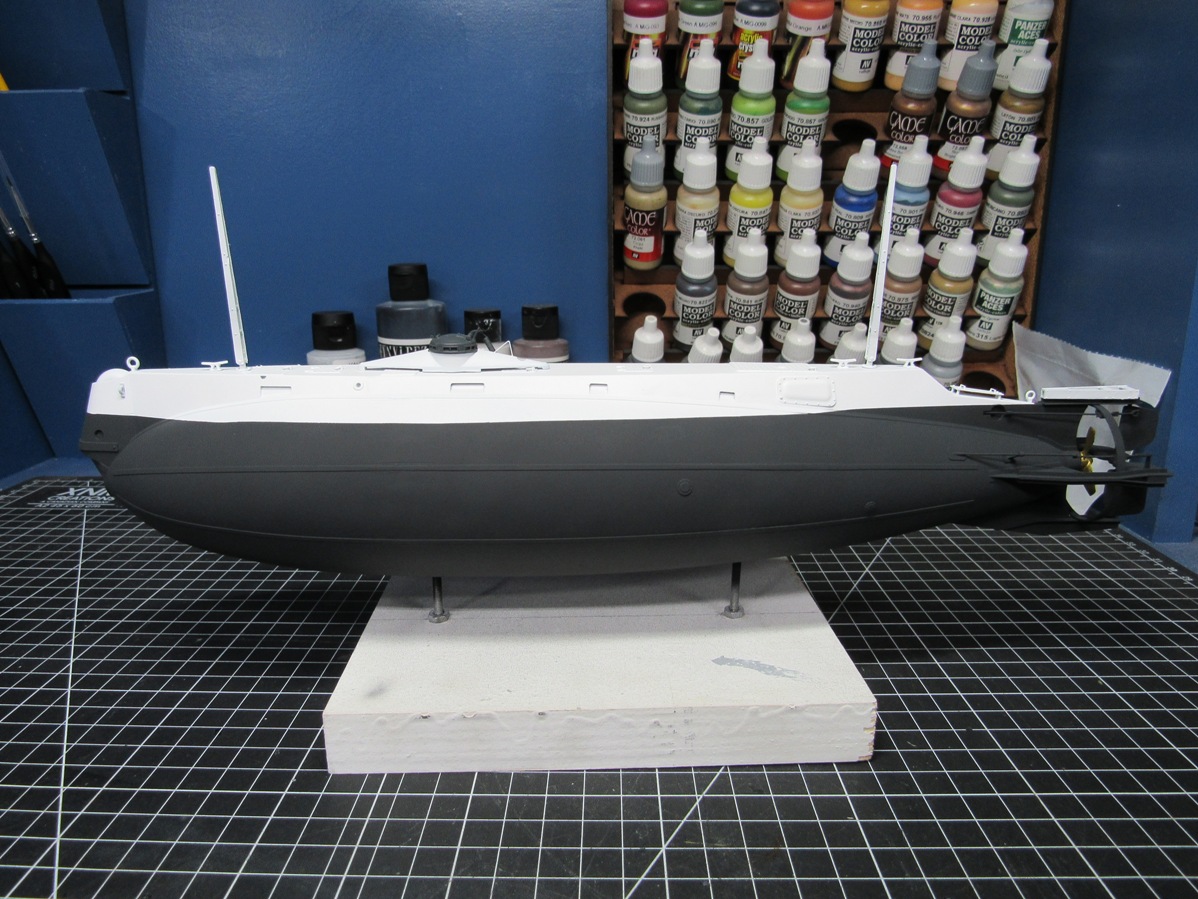
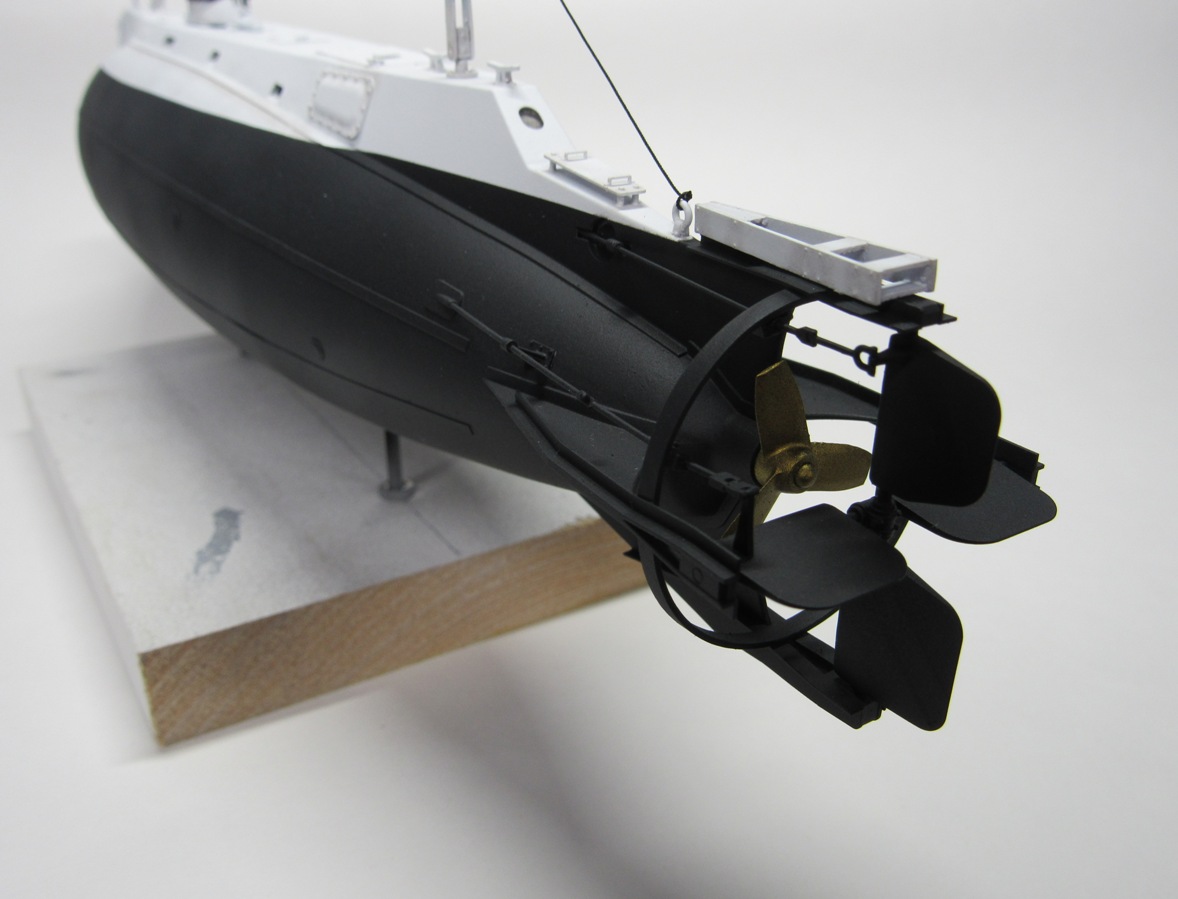
Due to the shape of the submarine, standard mounting pedestals won’t work, so I made my own that comes with the kit.

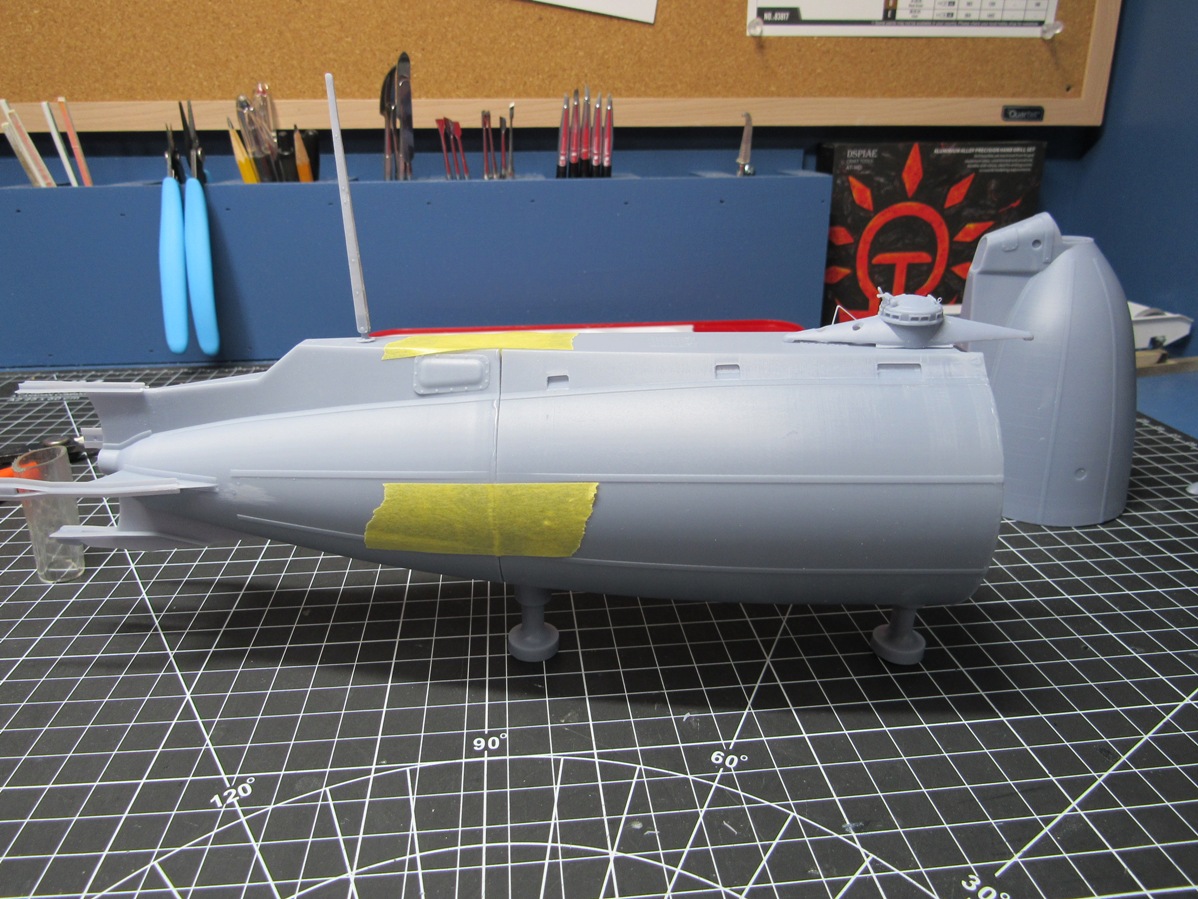
Pinned in place right now with a plastic tube, but it’s designed to easily take a 1/8" threaded rod, so you can bolt this guy down to a base.

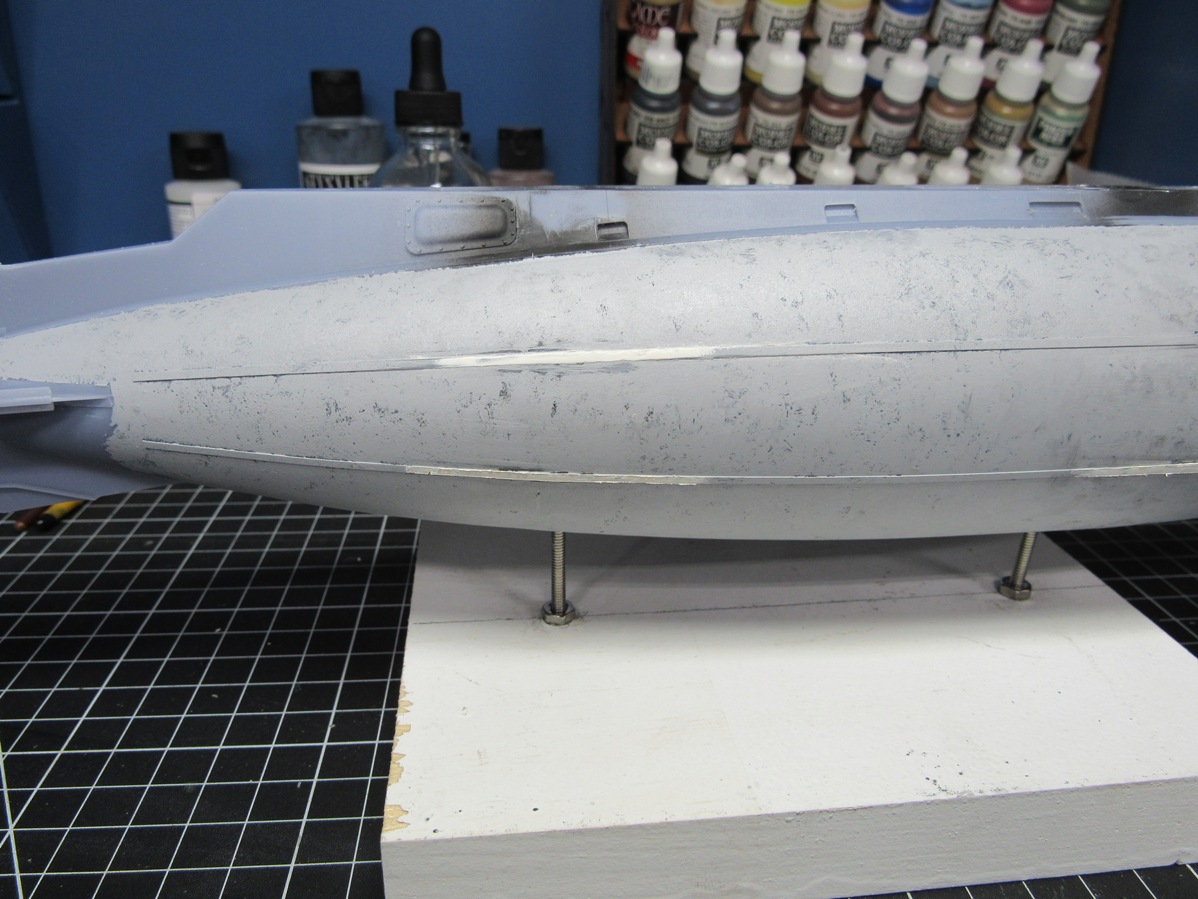
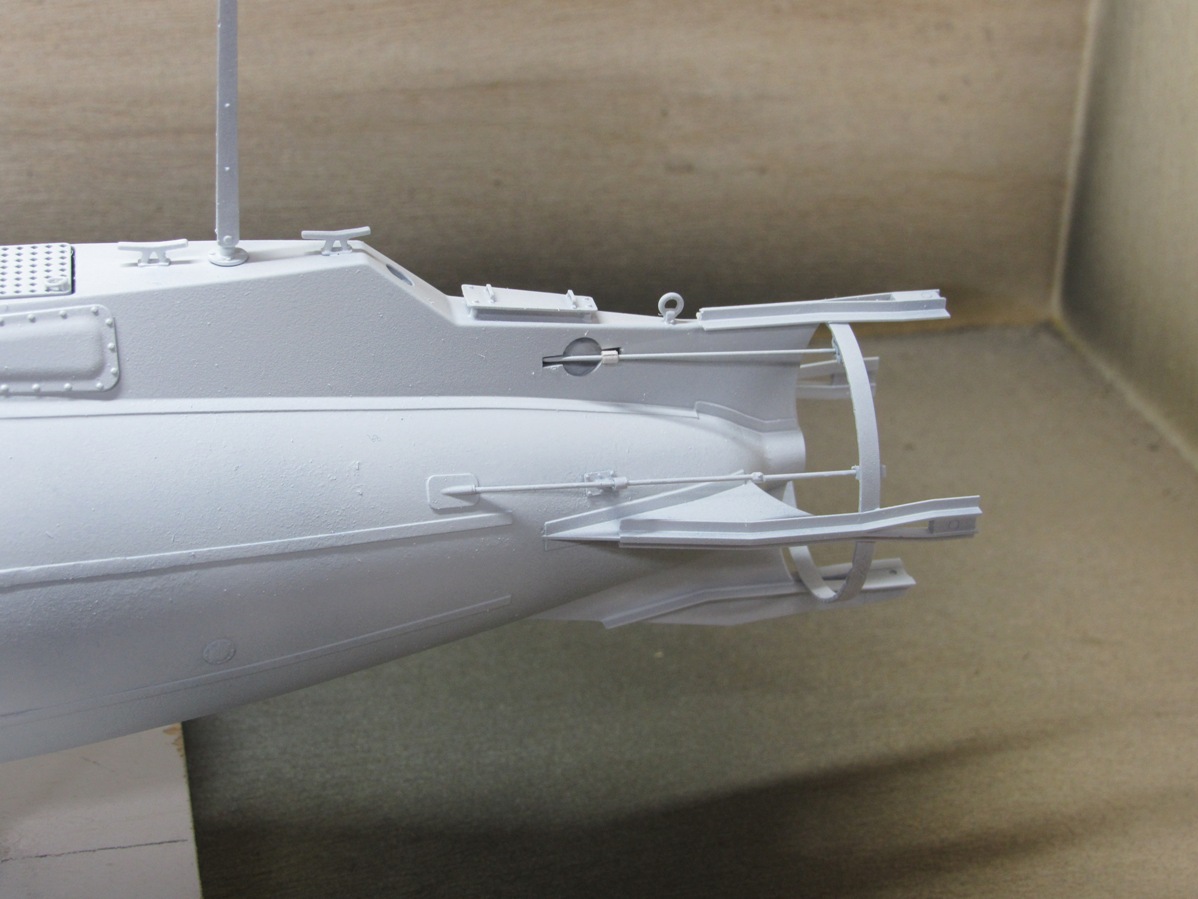
I did catch an error that you can see in the last picture. The bands that run along the hull taper to nothing where the aft and mid sections join. It was a modeling error that has since been corrected, but I don’t want to reprint, so I’m gonna try and fix with some 1.5mm plastic strip.

That’s all for now. I burned through almost all my resin, so no more printing until Tuesday when another shipment arrives. No fit issues outside of my own printing mistakes. Lots of sanding and filling ahead, but this will be a fun one.

15 Likes

Interesting subject James. Looking forward to the next update. :+1::+1:

3 Likes

Thanks Ryan. New batch of resin arrived earlier than expected, but haven’t gotten the chance to do any more prints as I had some minor flooding in the basement. With any luck I’ll be able to start gluing tomorrow.

2 Likes

Cut some 1/8" threaded rod to length and fixed it in the hull. No need to glue it in, I threaded it through a nut until the rod presses against the top of the hull. Glued on the aft section and went a little happy with the putty.

I’ll do an initial rough sanding to cut it back. And with the major gaps filled, I’ll paint on some resin to fill the rest, then cure it with a UV flashlight. Printing a new forward section now, if there are no issues, it’ll be done printing tomorrow afternoon.

6 Likes

I was gonna start ripping out my bathroom this weekend, but a late delivery means time for the Holland. Two rounds of sanding, filling and priming for the aft to mid section join. The forward section has been joined and gone through one round of sanding and filling.

Of course, I had to pose it with conning tower and masts dry fit in place

It’s been fixed to a temporary base for now, which makes handling easier. I said earlier that the nuts internal to the hull can just be tightened, but rough sanding has loosened them. I’d recommend gluing them in place to anyone else who plans on building this.

I’m OK with a rough finish on the majority of the hull, the main hull and nose section had some rough texture on it. I gonna try replicating it with diluted Tamiya putty. Should also help fill and small imperfections between hull sections. Picture below is the later Holland, after being commissioned into the Navy with a modified superstructure, but the same hull.

Might make a start on the texturing tomorrow, after that it should be smooth sailing building the rest.

6 Likes

Sanding and filling doesn’t make for exciting builds, but I’m getting there. The error I had on the ribs along the hull, where they faded away at the hull join, has been a pain, but I’ve hit on a solution. First I packed it out with styrene strip and tried to blend it in with sanding. That didn’t turn out great, so I masked off both edges and smeared some Tamiya white putty over it, then pulled the tape.

The top rib has been rough sanded, lower one is how it looks after the tape’s been pulled. I think it looks promising. And as you can tell I’ve made a start at texturing the hull with diluted Tamiya grey putty.

And just for fun, some dry-fitting of the aft end parts,

Getting close to wrapping up the most time consuming steps, then it’s running downhill. Looking forward to getting paint on this thing.

7 Likes

It wasn’t until this afternoon that it really hit me how close to painting this is. So I set aside a few hours and made some progress.

Ribs were sanded and texture was added. Then I started putting on the parts. Cleats, gratings, rings and the like, plus the control rods for the rudder and planes.

I managed to break the rudder control rod. I tried gluing it back together and getting it into place, but was not successful. I could reprint it, but who wants to wait a couple hours. Cut some brass rod to length, and since I didn’t have a suitable piece of tubing to go over it, I wrapped it with some tape.

I can’t put the planes and rudder assembly in yet as it blocks me from placing the propeller which will be painted a brass color. And with that it’s ready for some primer

The ribs could still use some work, and the gratings have an unfortunately large gap in the fore-aft direction, likely because the mating surfaces weren’t sanded completely flush after removing supports. I think I’ll shim and putty them to match the printed gratings.

I went with white first because I think it will be easier to mask for the black when the surface is curving up to the centerline, should prevent any masking tape crinkling up on me. And whenever I use white acrylic paint I get nasty flakes. I’m gonna have to thin this down to water after sanding.

That’s all for tonight. It’s a 3 day weekend but I got a gutted kitchen to worry about, can’t say when the next update will be.

7 Likes

Like any normal person that wakes up at midnight 6hrs before work, I went down to the shop and did some masking and painting.

I used Vallejo’s NATO black, following that modelers rule of thumb to avoid pure blacks as a finish. Naturally there are a couple spots that need touch up, but overall not bad.

Propeller was painted up yesterday and could now be glued in place. Same for that white mystery detail above the rudder framing. Planes and rudder were also attached. Originally they were a little loose, so I punched out some small 0.5mm circles and packed out the ends where they attach to the framing. It’s a snug fit now and doesn’t need any glue.

Only a few more parts left. A spring and stack for the conning tower, yokes for the rudders and planes, then a chain and bracket, and of course, a proper wood base. Got rain coming the next few days, may just use that as an excuse to stay in make some more progress.

7 Likes

Getting there. What I’ve been calling the ‘yokes’ for the planes and rudders have been added and painted,

I’ve also completed the conning tower. It was a pain to get it to sit right, not sure if the conning tower itself was a little warped, or there was a misalignment between hull sections. In the end it required a half millimeter shim under the front breakwater. I printed 3 copies of the hatch spring in anticipation of breaking a couple, got it on my 2nd try.

The chain bracket was also added to the side of the nose section, which you can barely see.

I’m thinking of keeping the exhaust stack separate for now, I want a satin finish overall but I’m thinking of leaving the stack a matte dark grey. Not completely sure yet, but I’m still gonna go ahead with a satin coat once this dries to get ready for some light weathering.

7 Likes

More work done. Did some oil shading in the scuttles to simulate depth and a light pinwash on the white parts. It got a little out of hand on the upper superstructure, so I had to do some touchups with the airbrush. I also repainted the top of the conning tower the same black as the hull. I thought the contrast would add some interest, but I didn’t really like it. Sealed it all up with a satin coat. Then came the part I was most looking forward to, the rigging. I bought some sizes of black rope from Ropes of Scale (and they even threw in a free sample). I settled on the 0.35mm diameter black rope.

Call me biased but I really like the level of detail on the aft end.

The stack is painted and ready for some smoke pigments, and I still need to make another anchor chain as the latest print failed (I believe it was underexposed).

This thing’s crying for a proper wood base, which I may finally get to tomorrow. Buttoning up the new kitchen window may take precedence, but we’ll see. The tar paper handled this weeks rain just fine.

Oh yea, ordered a brass name plate to make it official. Should be in next week. Will be a nice touch.

8 Likes

Turning into a very sharp looking model. The wood base and brass name plate will be a welcomed addition to set the right tone of the build.

3 Likes

Outstanding project James! I just binged through this thread and I’m amazed. What a fantastic looking boat. Your 3D design expertise has caught up to your excellent modeling skills. Incredible project.

3 Likes

Thank you guys! I agree, brass and wood will class this build up, but unfortunately my measuring skills haven’t caught up to my modeling ones. Made up the wood base and noticed the Holland sits noticeably off center. But, if I put the brass plate on the forward end, it may kinda balance out? I just stained it up for fun, and it’s a little splotchy. It is poplar after all, so maybe it’s a sign to pickup some oak instead of rooting around the scrap pile.

2 Likes

This model deserves an A-1 first class base!

1 Like

Poplar has grain very close to walnut - walnut color stain works very well with it . Poplar was /is used in lower price furniture/ gun stocks for that reason.

2 Likes

I just got back from the home cheapo with some oak 1x, ready to be cut and routered. Printer cleaned out and ready for another go at the anchor chain.

I actually used a dark walnut stain, and normally I don’t have issues with poplar, think I’ve used it for 6 bases or so without a problem. But I have heard wood workers complain about uneven staining with it.

I’ll have a few more pics later today

2 Likes

Alright, so I took another stab at a base. Towards the back is my first try, up front is the oak 1x6.

Same stain color, dark walnut. Can says a 1hr drying time before topcoating, but I’m a little skeptical of that. Also notice that the mount holes are off center. Spacing is 100mm, then shifted ~14mm off center to get the boat to sit right. Forward will be to the right.

And last night’s work,

Drybrushed the conning tower, and added the stack behind it. I also took a pencil to the black raised edges around the hull, not pictured though because it wasn’t showing up well on camera.

6 Likes

Mounted it to the base and fiddled with the chain and I think that’s going to be it. I know I have a nameplate coming, but I think I’m gonna bring this into the office tomorrow and I’ll just attach the nameplate whenever it comes in.

Pretty hard to get good pics when my ‘photobooth’ is just a sheet of white poster board that’s only a little wider than this build. Might be my next investment.

The chain was delicate and needed to be split into two parts as it was just too tight to get through the chain bracket easily. With some gentle bending you can snap the links free to act just like the real thing. Between printing and handling it without breaking, I wouldn’t fault anyone for going with an aftermarket replacement.

And that’s it. Thanks for riding along on this one guys.

8 Likes

Looks lovely James, congrats. :+1::+1:

3 Likes

Nice work- I enjoyed following.
Thanks for sharing.

3 Likes