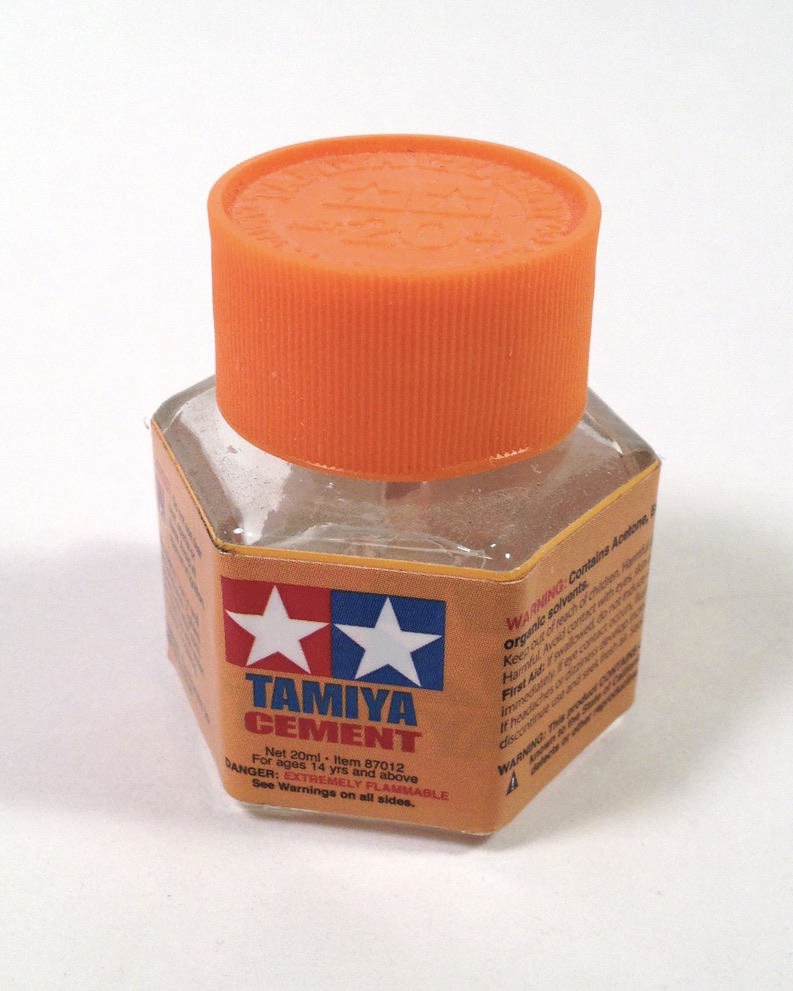
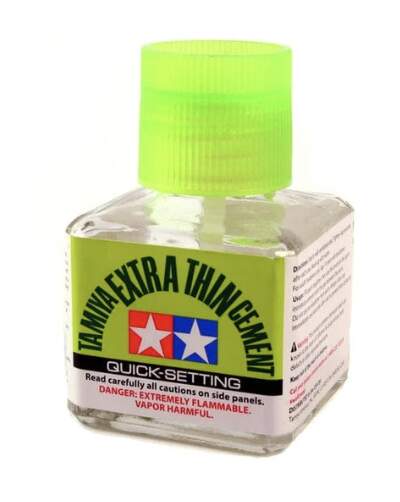
A few thoughts on the three basic Tamiya Cements…
No. 1: Tamiya (87012) Regular: Long setting time… basic part-to-part application.
No. 2: Tamiya (87038) Extra Thin: Medium setting time. For larger assemblies, hold/tape/clamp parts together and apply cement along joints. Allow capillary action and curing to do the rest.
No. 3: Tamiya (87182) Extra Thin Quick-Setting: Fast setting time. Good for quick attachments usually to be followed by an additional application of “Extra Thin.”
• The “Thins” evaporate extremely fast, especially in dry climates. Be sure to close bottles immediately after use.
• Styrene compositions can differ vastly between kit manufacturers.
• A light sanding/scraping before attaching parts usually improves adhesion.
• When possible, remove paint from surfaces for best adhesion.
• Applying cement and then squeezing parts together often causes unwanted oozage.
• Allow plenty of curing time before handling assemblies. Keep an eye on them, they can drift when you’re not looking.
HTH
—mike 
I moved to Extra Thin/Quick-setting from the more syrupy stuff several years ago and never regretted it - maybe because I don’t seem to need to glue big chunky parts together anymore, I’d certainly use thicker stuff for that. Apart from ease of application & invisible bonding result, I’ve found that TET’s the easiest to separate again in the event of a cementing snafu. For me at least, not an inconsiderable plus.
When I purchase an armor kit, usually the first thing I do before shelving it is to cement the barrel halves together. When I eventually get to it, the barrel is ready.
I don’t do that when I first buy a kit, but it is one of the first steps that I do when I start a kit. In fact, I actually look through the instructions and find all of the two-part cylinder and box assemblies and glue those up (using the “squeeze out” technique) and assemble all of them before I start work on the rest. As you note, the extra drying time usually eliminates the shrinkage issue along the seams after they are tooled.
There are usually any number of cylindrical or boxy structures that are molded in multiple parts and which shouldn’t have any seams where the parts breakdowns place them. Depending on how slow I’m going (LOL! Like I ever build fast! LOL!), I’ll often tool these seams some days or weeks later for a first time, and then add any required filler and let them continue to dry / cure for later. Most fillers also exhibit some amount of shrinkage, but patience, time and prior planning with a deliberate construction sequence usually solve that problem.
Which is why I use CA in most cases. Plus it cures instantly with a drop of accellerator.
A whole 'nuther discussion, right there! But, yes (sometimes… LOL!).
Oh wow! I totally lost track of the thread 
Sorry I haven’t had time to respond earlier. I assume that one or the other did get my question not serious and might thought I am trolling - I am not.
And I may got missunderstood. My Model does not have any big junks of glue hanging off somewhere or you can spot right away that it’s more glue than model. I personally just noticed that I was a bit sloppy with some spots and the glue is visible by the reflection of the light on the unpainted body. I was mostly wondering if that will bleed through or will end up in a bump or something similar when I prime the vehicle. - My question got answered and I don’t ned to worry. 
I do use the Tamiya Extra fine cement (dark green cap). After reading some of the responses I got myself in addition the light green cap as well - I did notice that in some scenarios I would have wished that it would settle a bit faster. The idea of using a different brush than the one that is attached to the cap is new to me and I am wondering if the cement will not end up drying too fast on the brush and making it too stiff.
Some people also mentioned that they don’t use Tamiya cement, I am wondering what else to use. I do only know from 30 years ago the little Revell glue bottle with that needle and my memory tells me that it was horrible to apply properly and always did a big mess
Again sorry for my late reply! I hope everyone has a good week so far and will have a good start in the weekend soon!
No single glue works in all cases. The type of glue you need depends on the glue joint and type of plastic. For the sake of this thread, I am assuming styrene plastic. If the joint is tight fitting, a liquid glue like Tamiya’s extra thin, works well. If the seam has some small issues a thicker glue like Tamiya’s orange lid glue works well. It has resins in the glue that thicken the glue and help fill the seam. It takes longer for the solvents to evaporate. If you have dissimilar materials, some type of super glue probably be needed. However, the fumes from super glue will fog clear plastic. There is a glue to use on clear plastic that will not fog the clear plastic, best used on windshields and headlights.
Use the minimum needed to do the job. Pooling/running of liquid glue indicates too much. A thicker glue can be an issue if the glue joint is pressed together and glue squeezes out forming a seam or ridge that will need to be cleaned up. Sometimes you want strength. When I glue hull haves together, I want a strong bond so if some glue squeezes out of the seam it is OK and I just know I will have to go back and clean the joint.
I was being facetious; mia culpa! My “go to” glue is Tamiya thin (green top). If you appy too much and get a shallow puddle, don’t try to remove it…you’ll probably smear the softened plastic. Leave it to dry on it’s own - a few minutes. If undisturbed, the solvent will evaporate on it’s own, and if it does leave a mark, it will disappear under a coat of paint.


Even if the “glue” is pure solvent it could change the surface texture of the joined parts.
Solvent “glue” works by softening/releasing the bonds between the styrene molecules
and when the solvent evaporates the bonds will form again. This process of softening
followed by hardening is not 100% reversible. The structure of the styrene can change
slightly, causing a barely noticeable swelling.
This is visible as a slightly different patch. When you prime/paint the first time you will
see if it shines through or not.
If it is pure solvent there will not be a problem, if it does indeed make the brush slightly
stiff the next use (dipping in solvent) will make it soft again.
My favourite is ethyl acetate, acetone also works.