Ahhhh… Formlabs… if only… LOL!
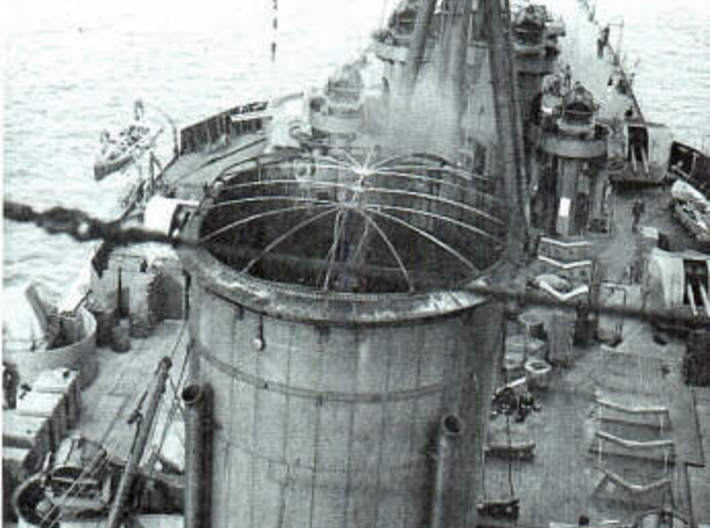
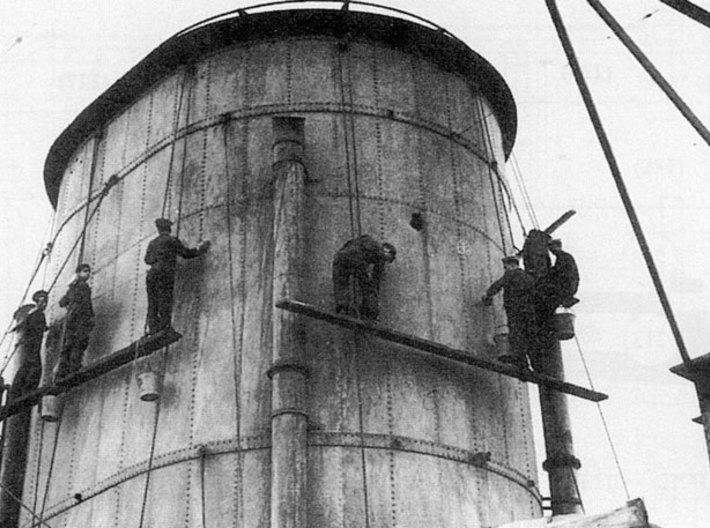
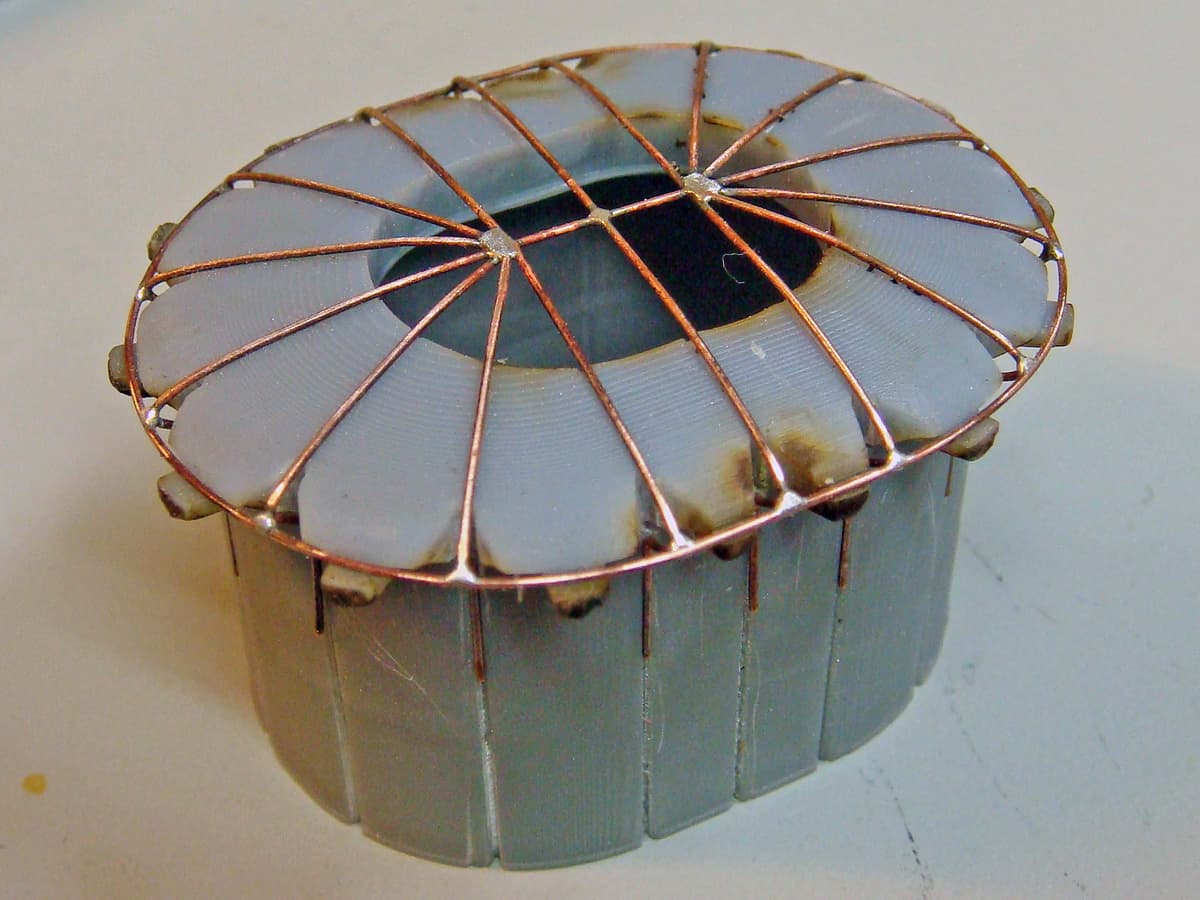
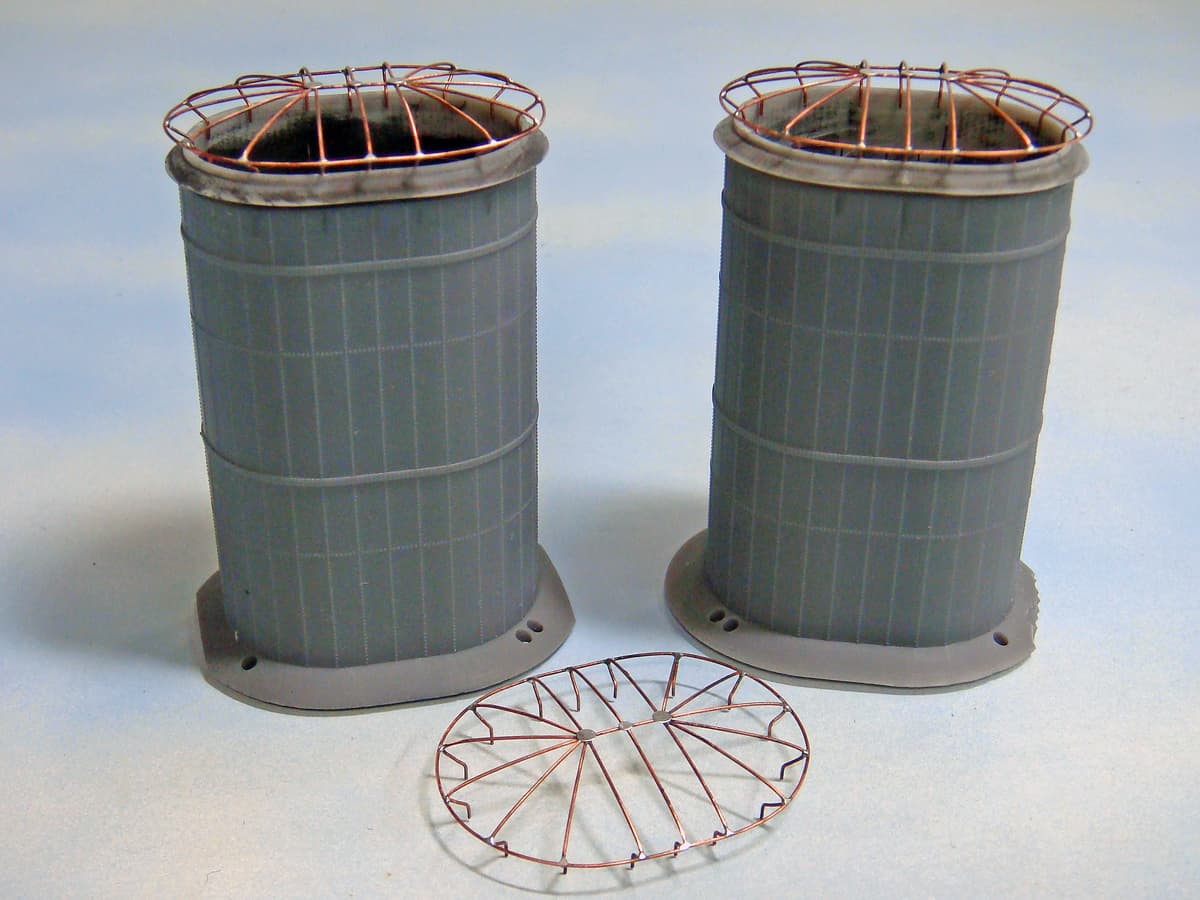
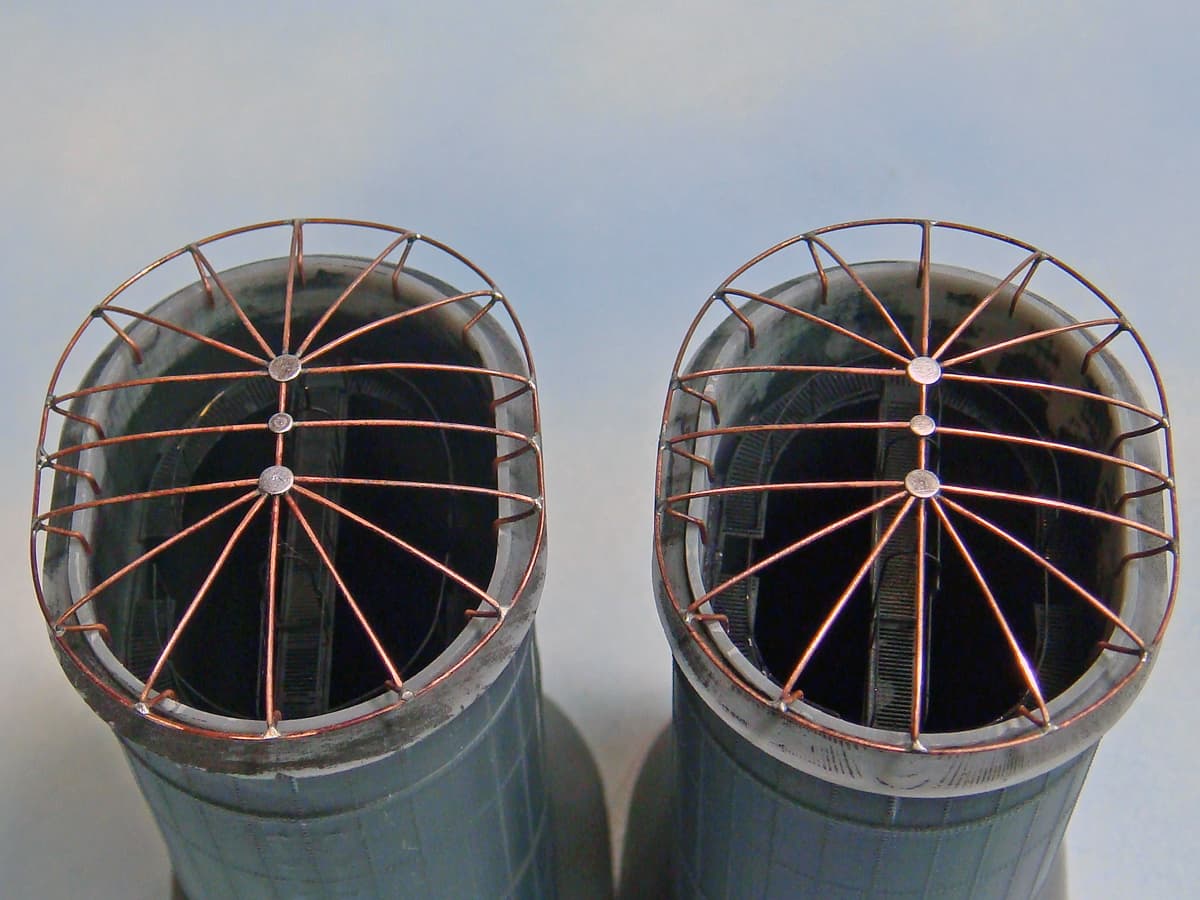
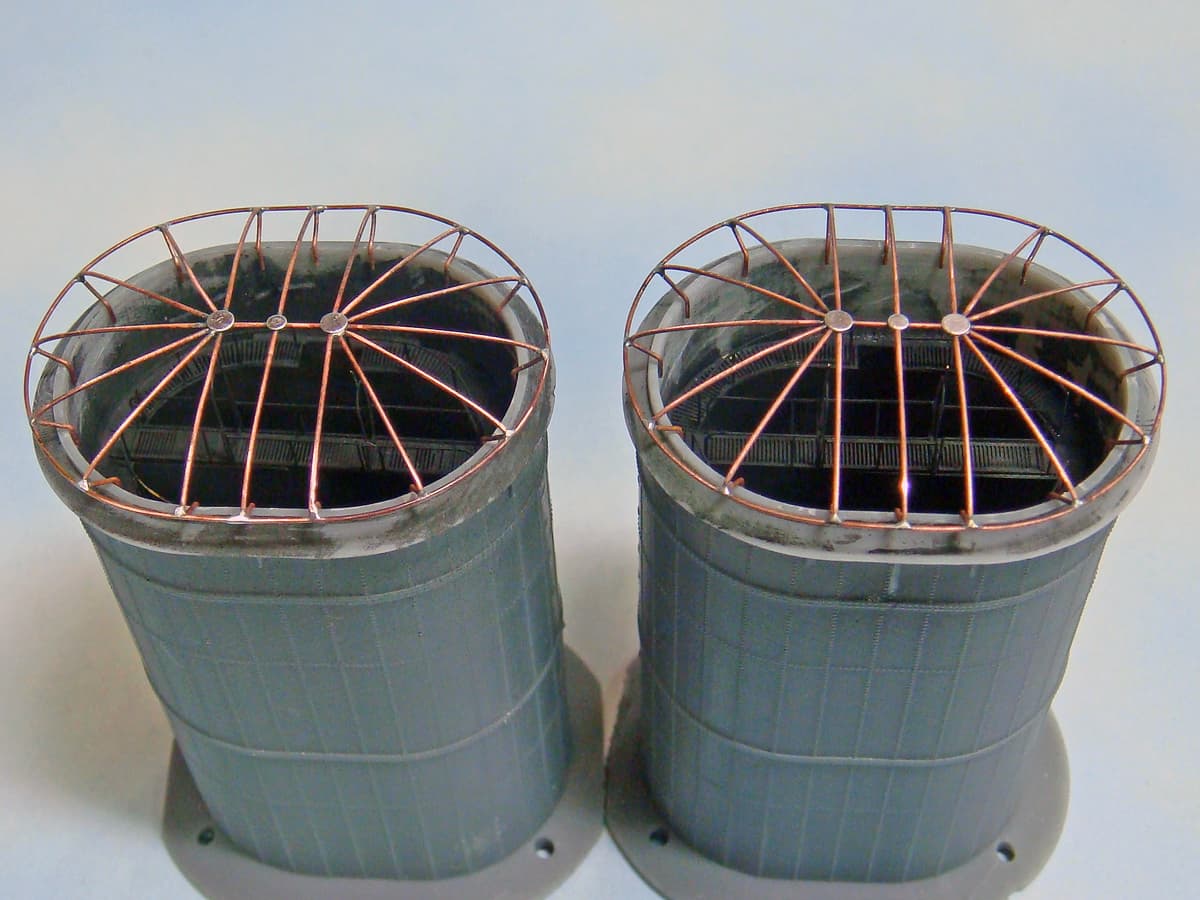
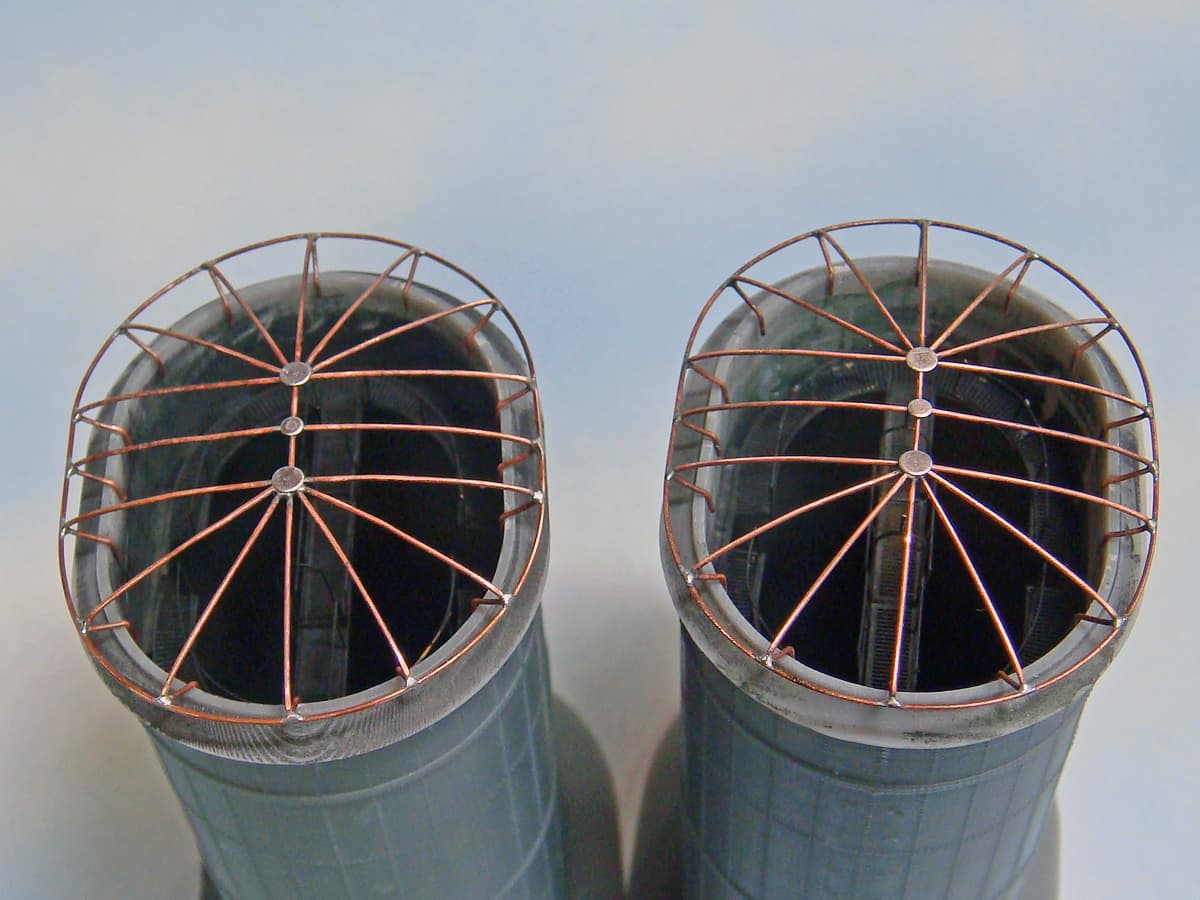
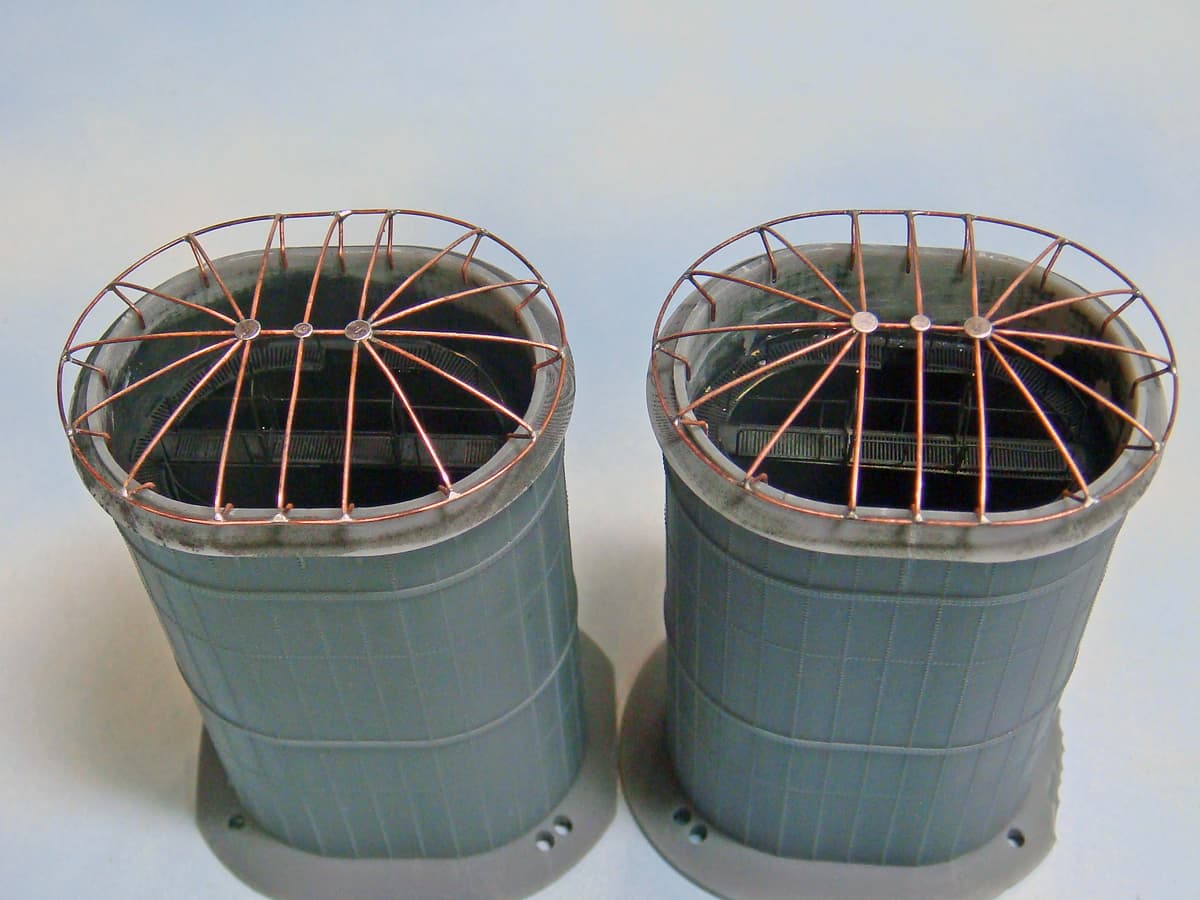
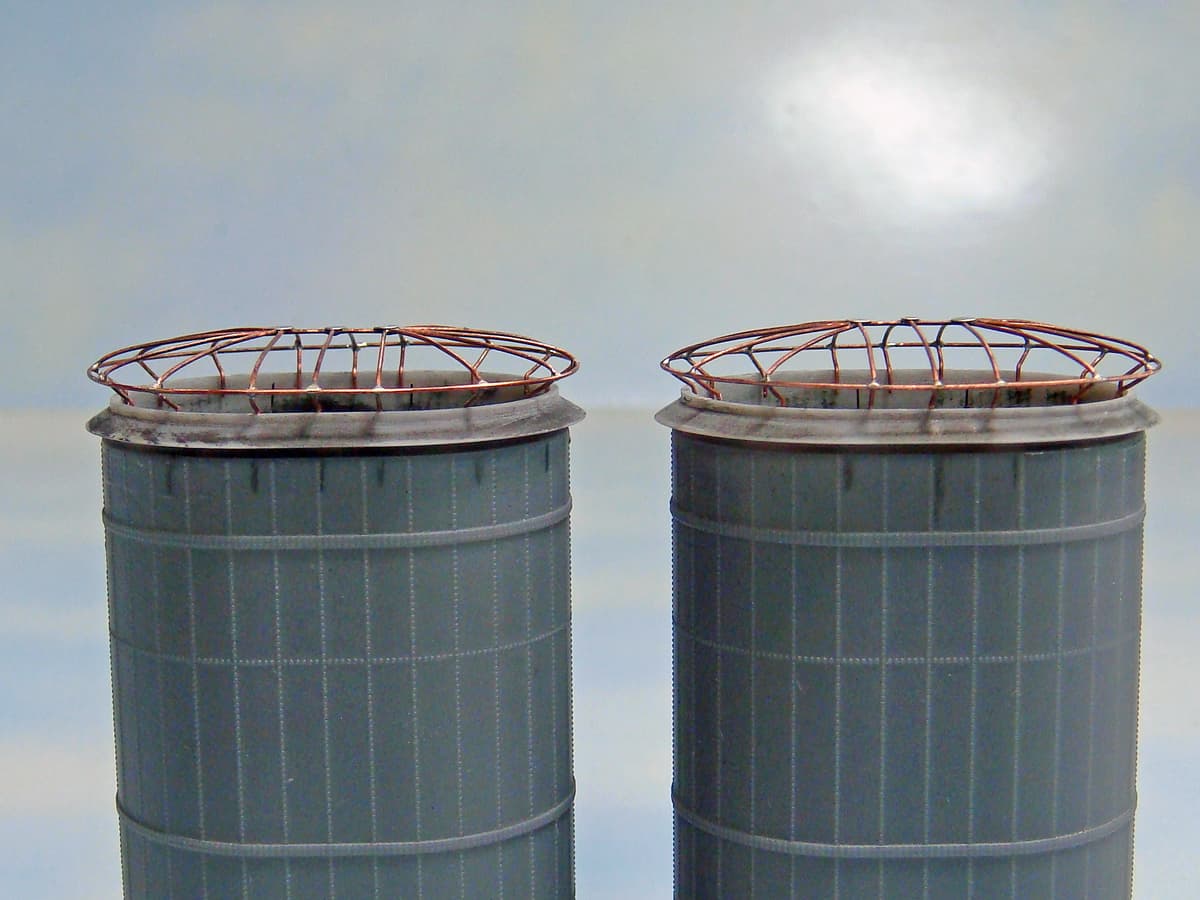
I had the opportunity a couple of years ago to get a pair of the Model Monkey HMS Hood ship funnels in my shop to handle. To say that I was impressed by the quality of the parts and detail would be an understatement. Beautiful design and printing!
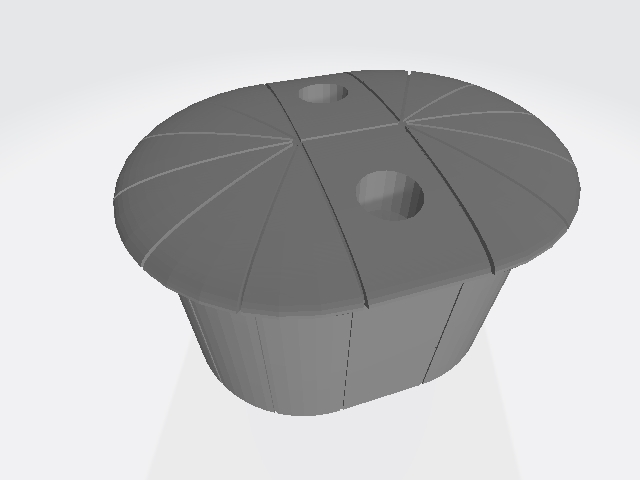
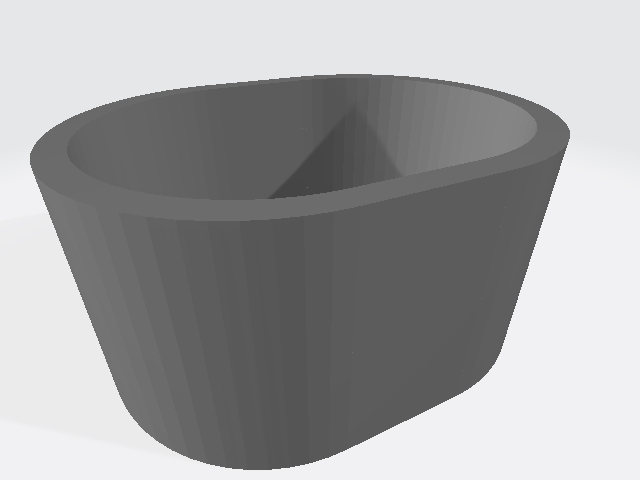
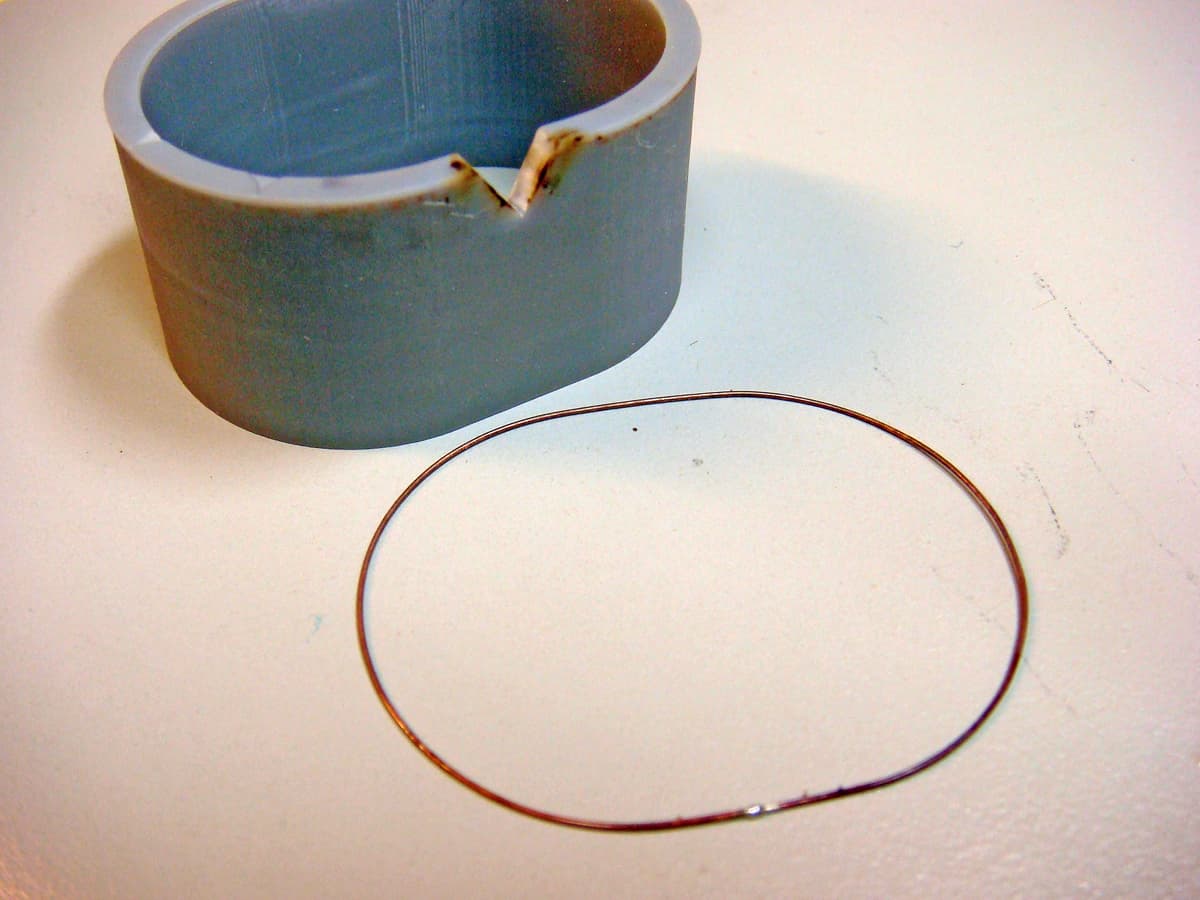
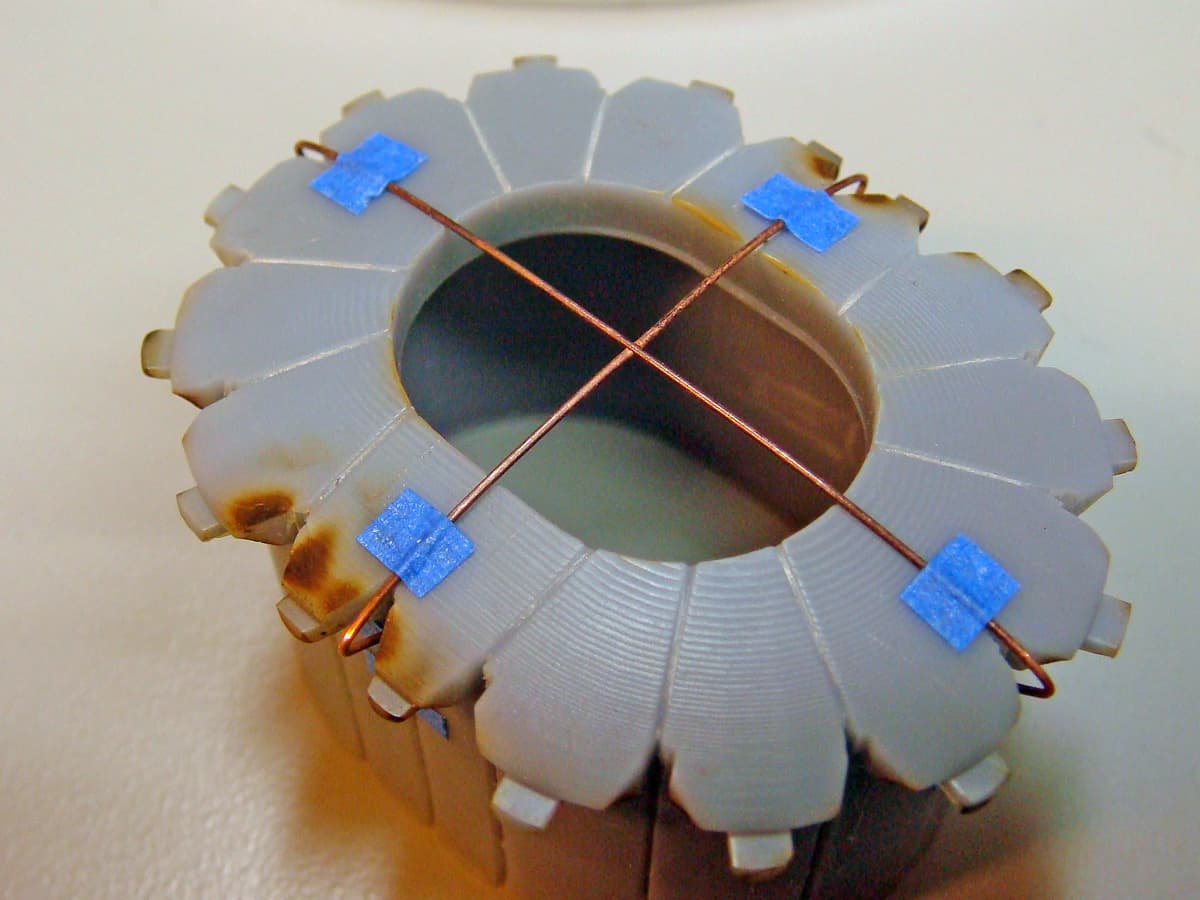
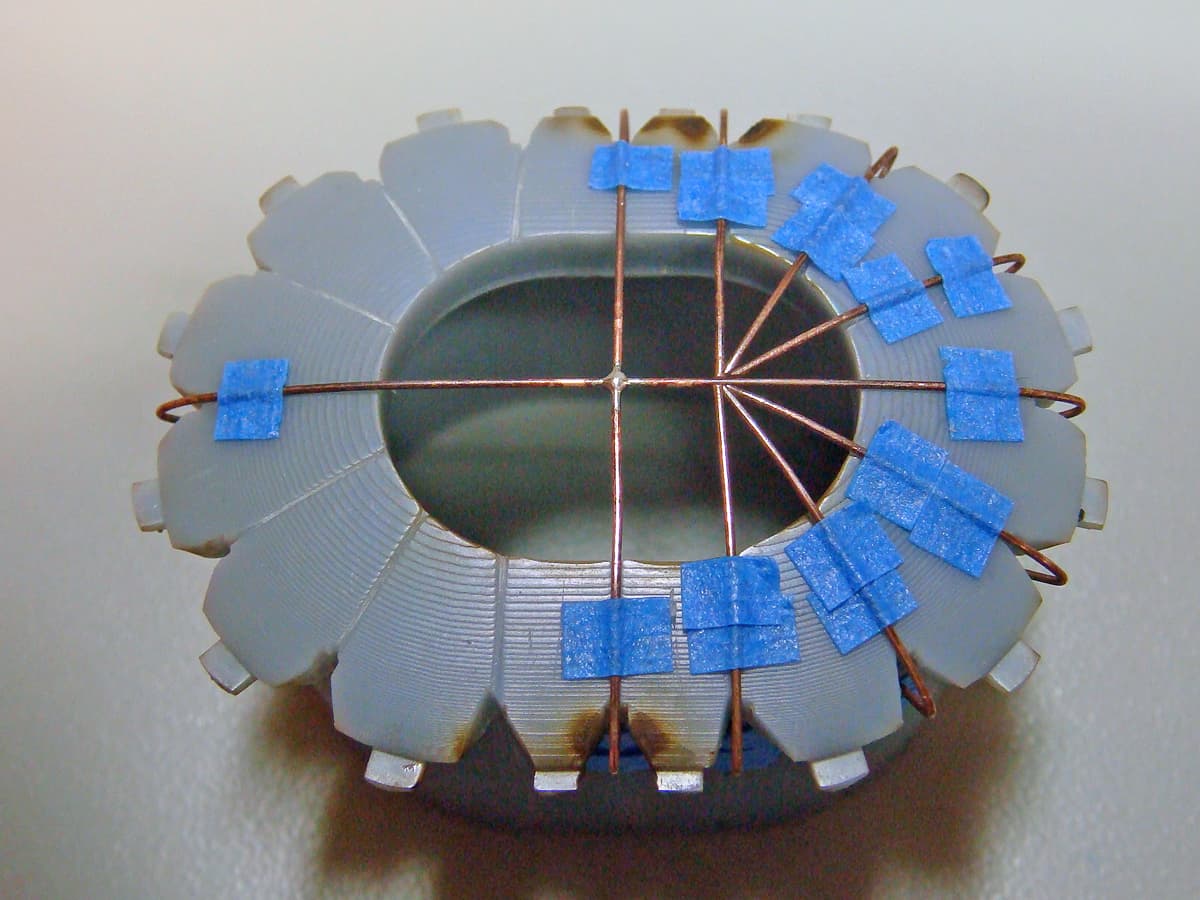
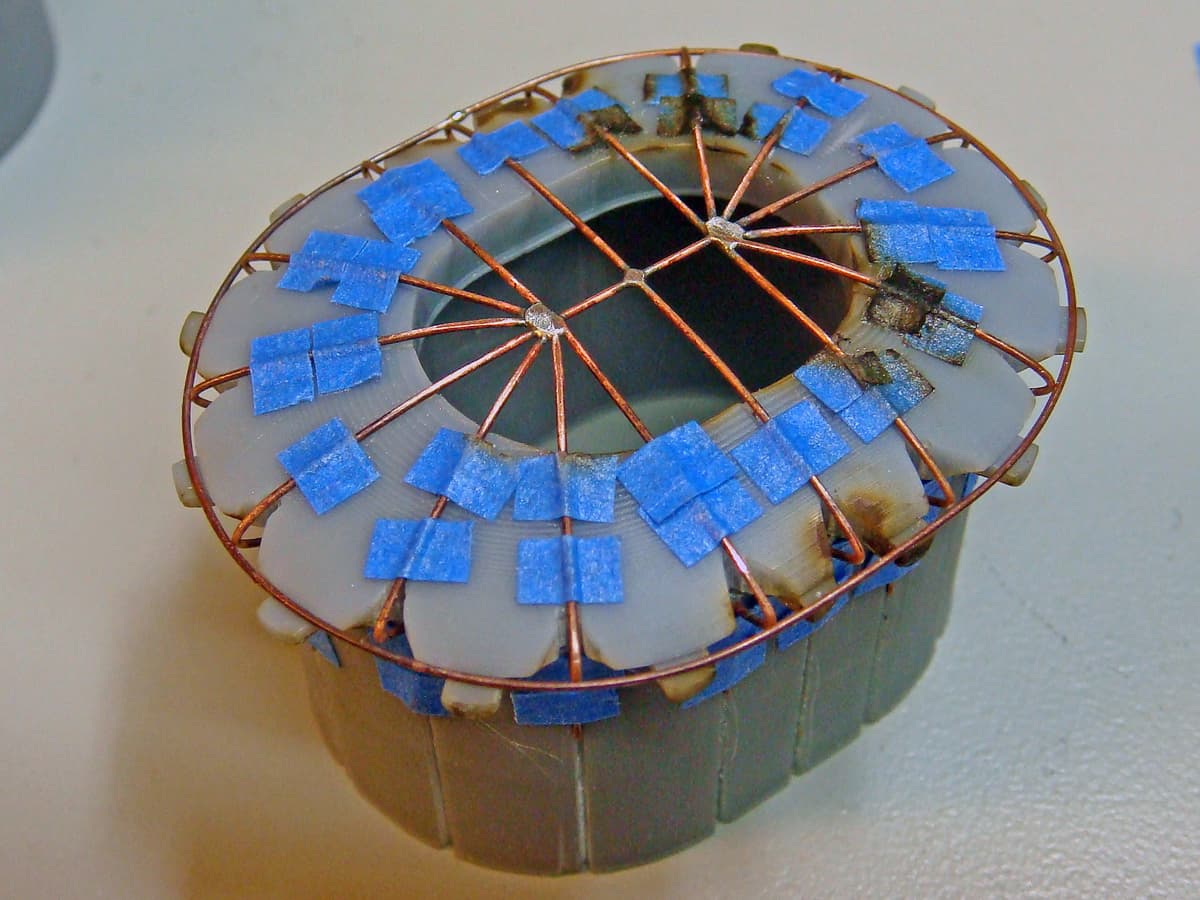
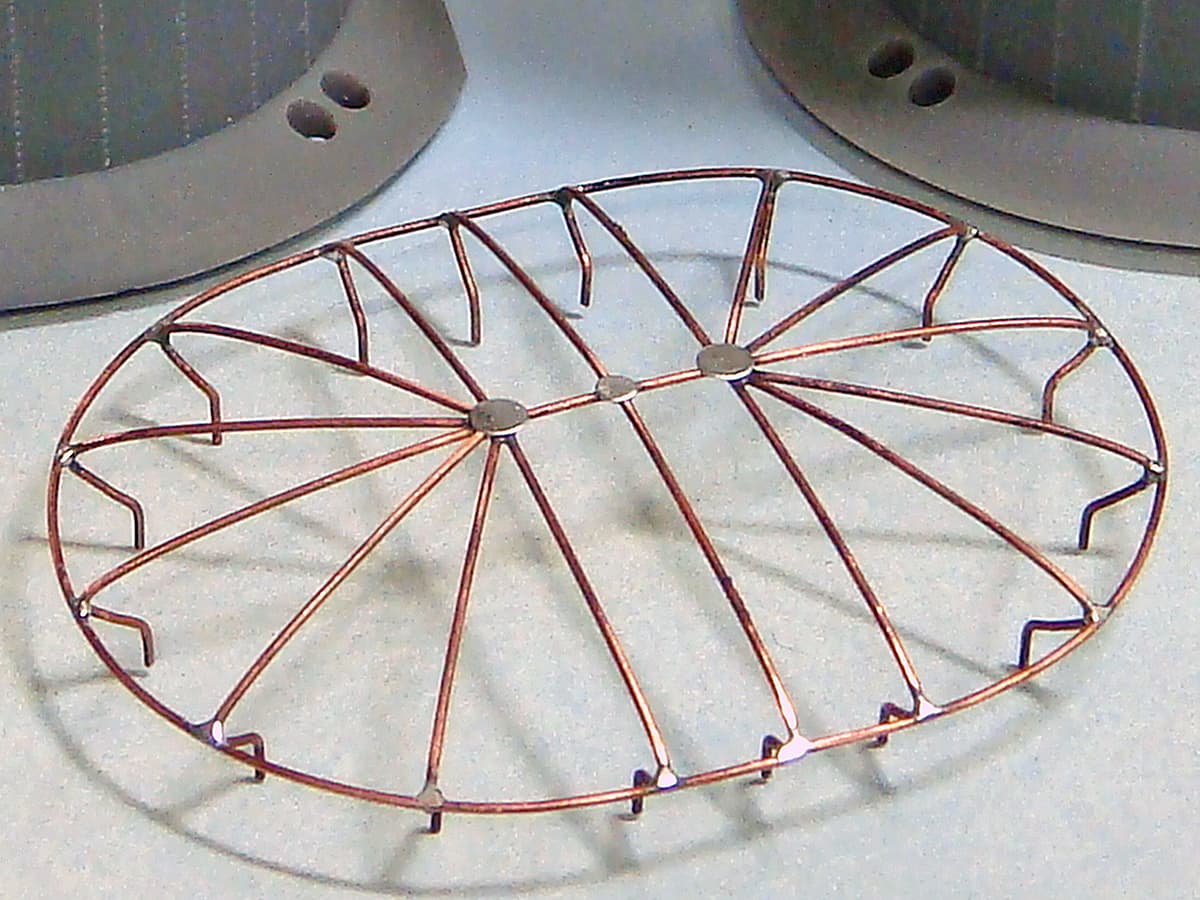
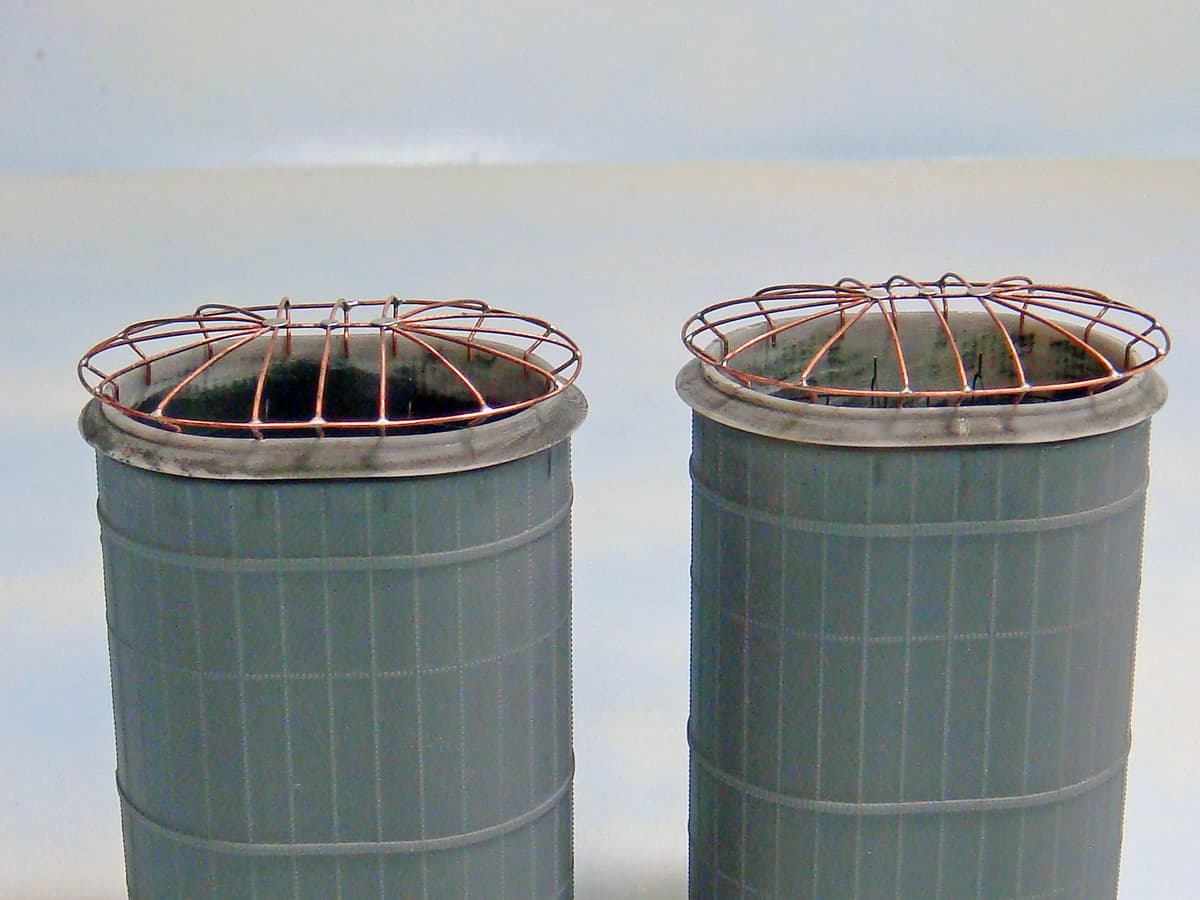
My client sent them to me to make a pair of the distinctive cages that cap the funnels and which support large canvas funnel covers used when the ship is docked.
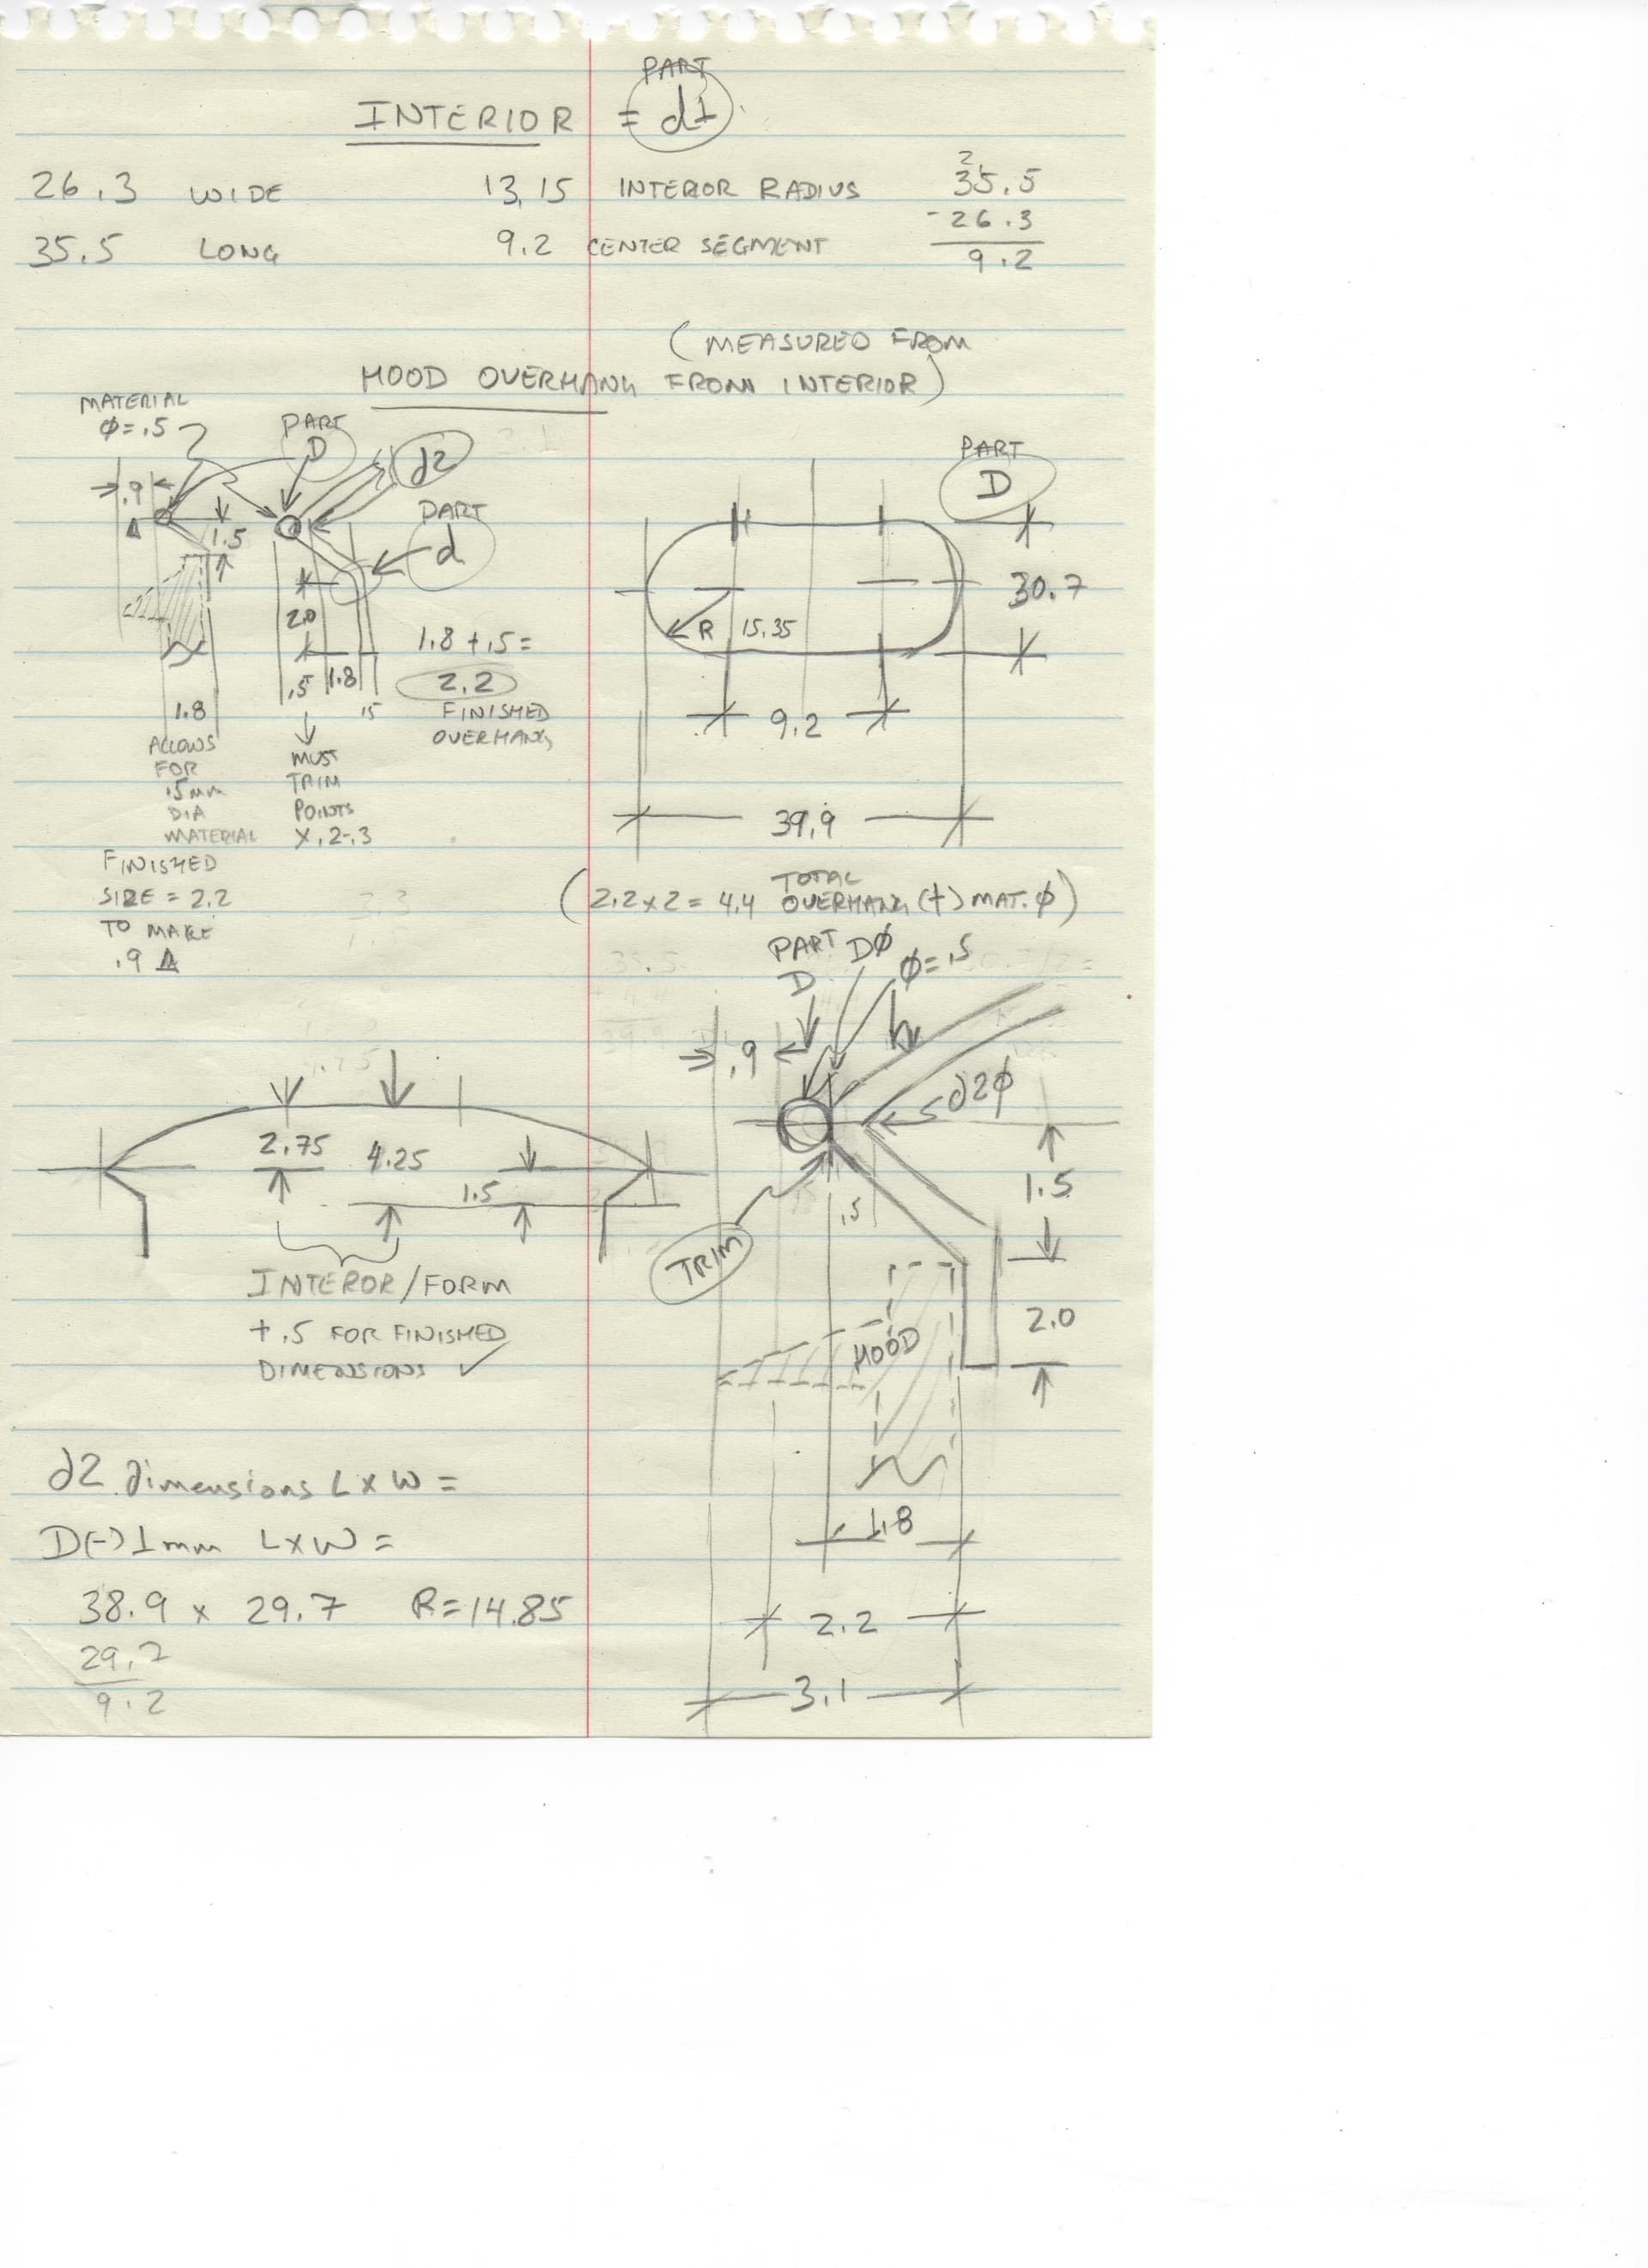
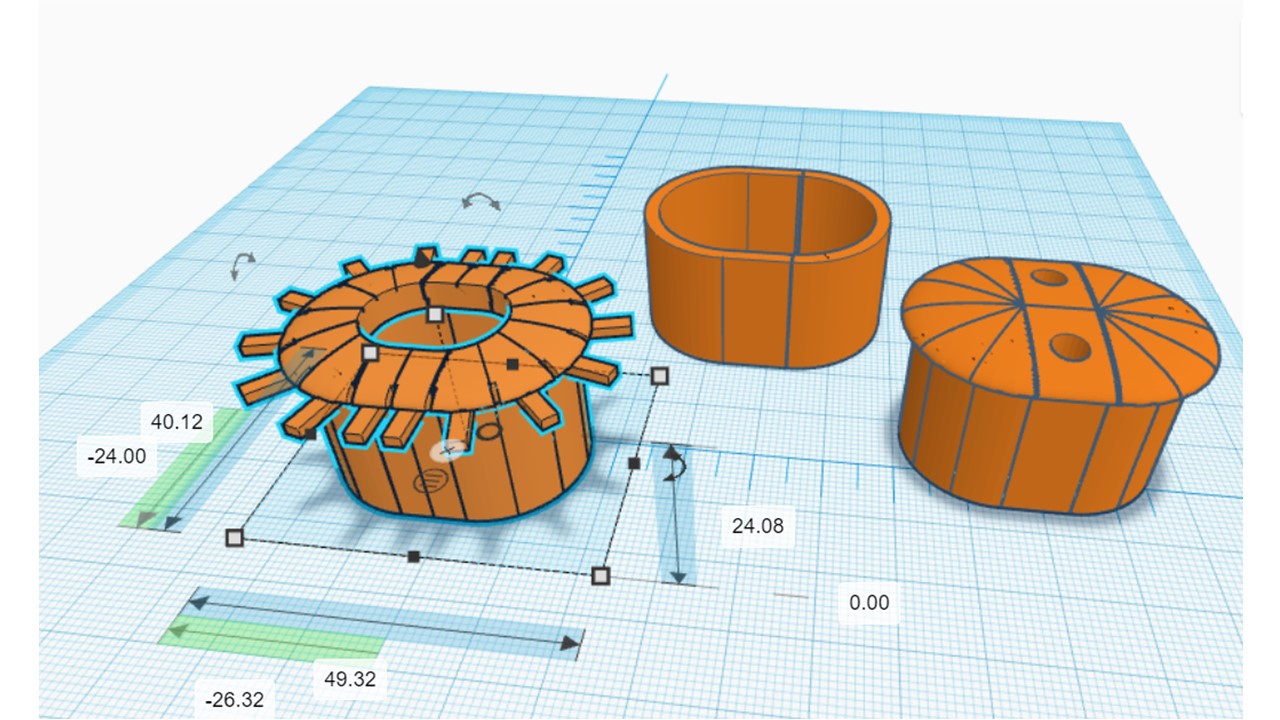
However, I did use my little AnyCubic Photon to print up the bending forms to fabricate the brass rod parts and the assembly fixtures used to solder those parts together. These 3D tools were dimensioned directly from the Model Monkey parts.
A bit of a segue to the main topic, I guess. I suppose though it might offer up another example of just how useful a small 3D printer can be in your model shop. There are uses for them other than just directly making parts. Printing fabrication forms, molding bucks (for vacuum forming), molds for resin casting, assembly fixtures and tool jigs to enable other model making jobs or tasks is one of the things I use my 3D printer most often for. Making special “industrial” parts for custom modeling projects is another related use. (I recently printed battery boxes to hold 15 each, 1.5 V AAA batteries to be used in reproduction vintage radio batteries. A different kind of model making project, but model making nevertheless.)
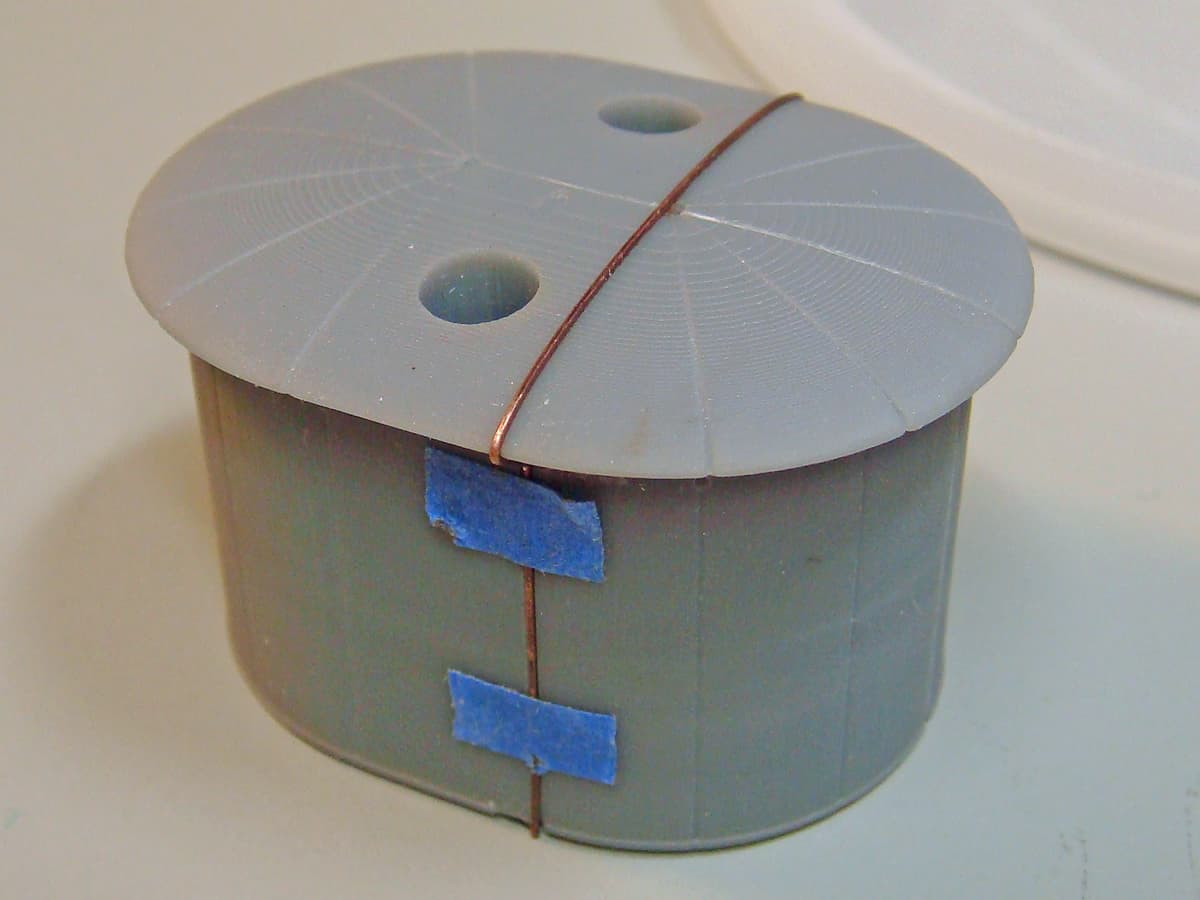
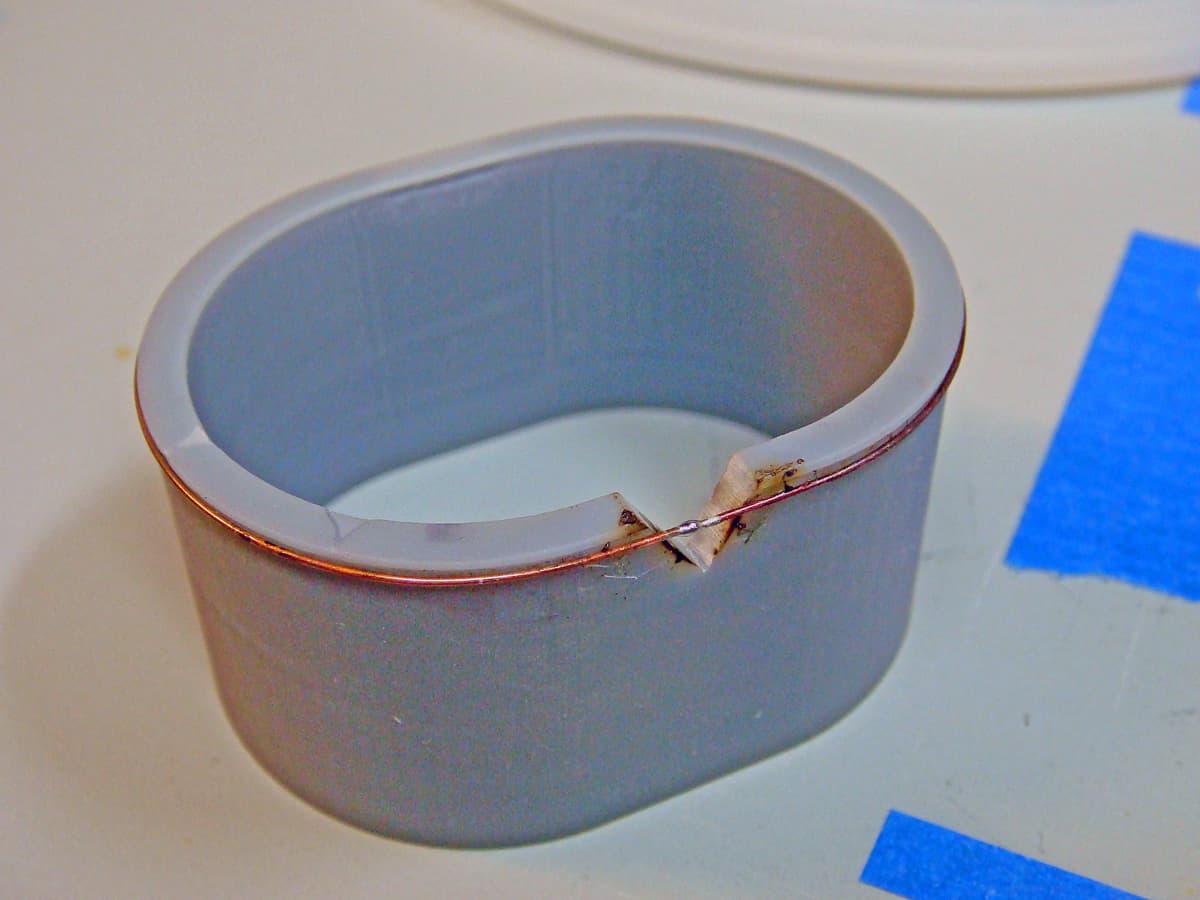
To complete the Model Monkey HMS Hood funnel story, here’re a few happy snaps of the project (to illustrate that 3D printing is not only about directly making model parts). (Note that my client had already tried to assemble and install a couple of different PE funnel cages before he sent the project to me. This accounts for the black primer paint and tooling marks where those PE parts had been glued on and then removed.)