I’ve received a few requests to explain how you apply those reverse Tamiya and Fujimi tire decals. To be perfectly honest about it, I’ve not only struggled at times applying them, but have ruined more of those decal sheets then I care to admit. One of my friends on my model racing cars site posted his method after finally successfully applying them on his latest build, but still had some issues. So I googled the topic and was amazed at just how many modelers have all sorts of issues applying these decals. Eventually, I was able to piece together a application process that works.
Before decaling, you need to carefully clean the tire with Iso Alcohol, when dry mount the tires on their wheels. Mounting the tires after decaling depending on the tire sidewall width, could damage the decals as they flex during mounting.
Lets start off by understanding exactly what these decals are, and why they’re designed that way. Tamiya and Fujimi kit decals are rather thick, hard to work with over compound curves, and require a lot of setting solutions to hopefully lay down correctly. So they designed what we’ll refer to as a reverse decal and method.
For starters, the tire decals are extremely thin with little flash, and will rip or deform with the slightest of manipulation, so the soak, slide into position system just won’t work on them. The decals come in what I’ll refer to as a 3 part sheet:
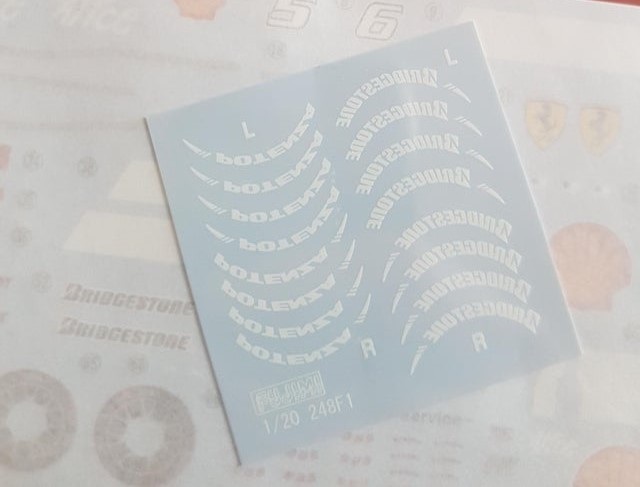
the top translucent layer is just a thin protective film and needs to be removed as the 1st step by gently pealing it from one corner across the sheet.
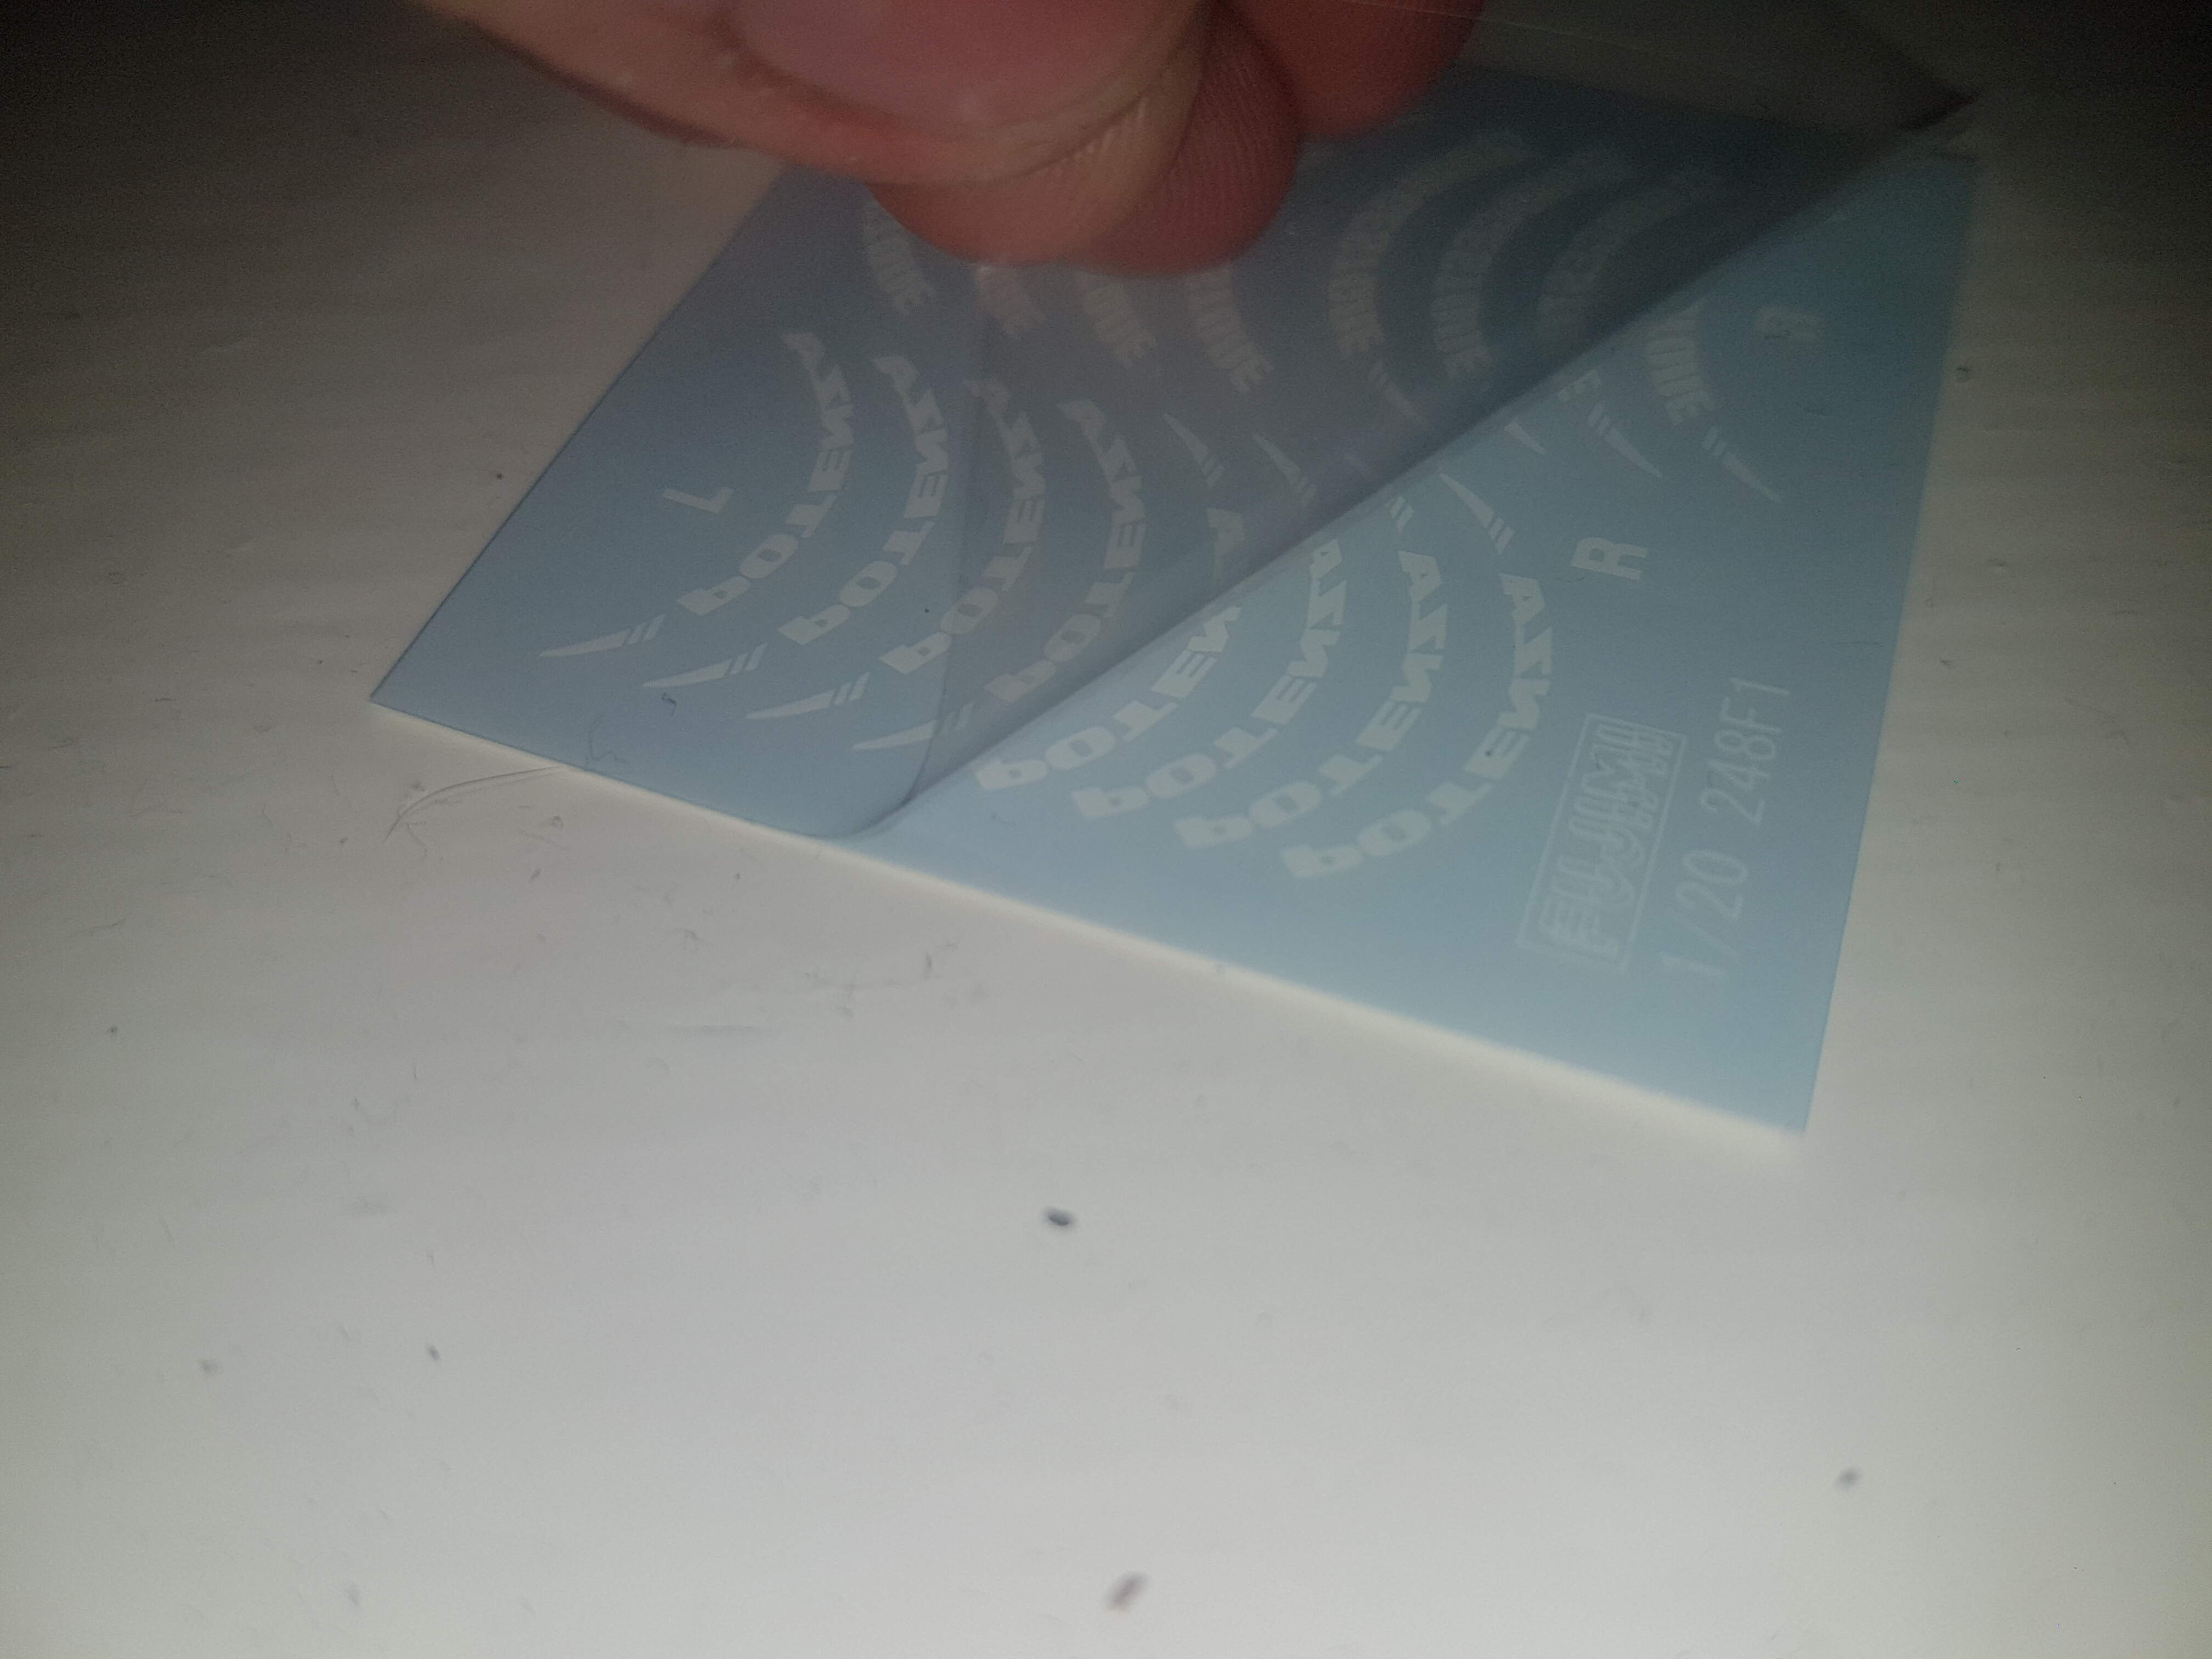
The exposed sheet has the decal attached face up on the bottom of it. But they both rest on top of a thicker piece of backing protective paper. You need to carefully remove the decal sheet from it. The easiest way for me to accomplish that is with a pin in a pin vice and prick at a corner till the translucent decal sheet starts to lift up, then very carefully pull the decal sheet off the backing paper. You’ve now ready to actually decal the tires.
I start by cutting off the decals for the tire I’m going to decal 1st. Usually there’s two different decals per tire and Tamiya lays them out as A & B columns. I use a very sharp pair of scissors to cut off each decal. Then I work each decal separately. I place the decal in the exact position I want it, then hold it in place with a wet small brush. Using another brush I apply water to the decal sheet. The objective is to soak the entire paper. You’ll see it actually turn almost clear. keep on applying more water till the sheet starts to almost float off, then using a pair of Tweezers very carefully peel away the backing paper. The decal should stay in place. If not, apply more water and wait another min, then remove it.
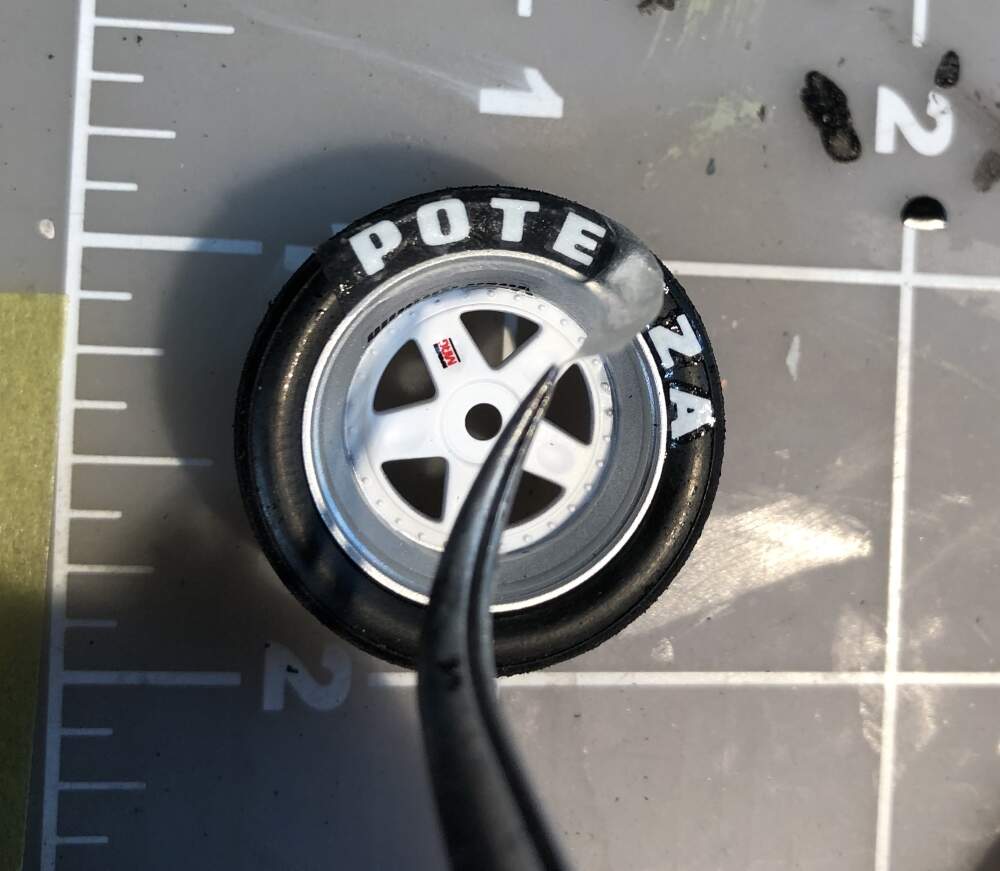
Take a damp Q-tip and dab the decal working from the center out in each direction, Do Not Roll the Q-Tip like you do on a regular decal. The decal should have settled down perfectly. You can apply Micro Sol (Red Bottle) to make sure it’s settled down, and you can gently roll the decal with a damp Q-tip.
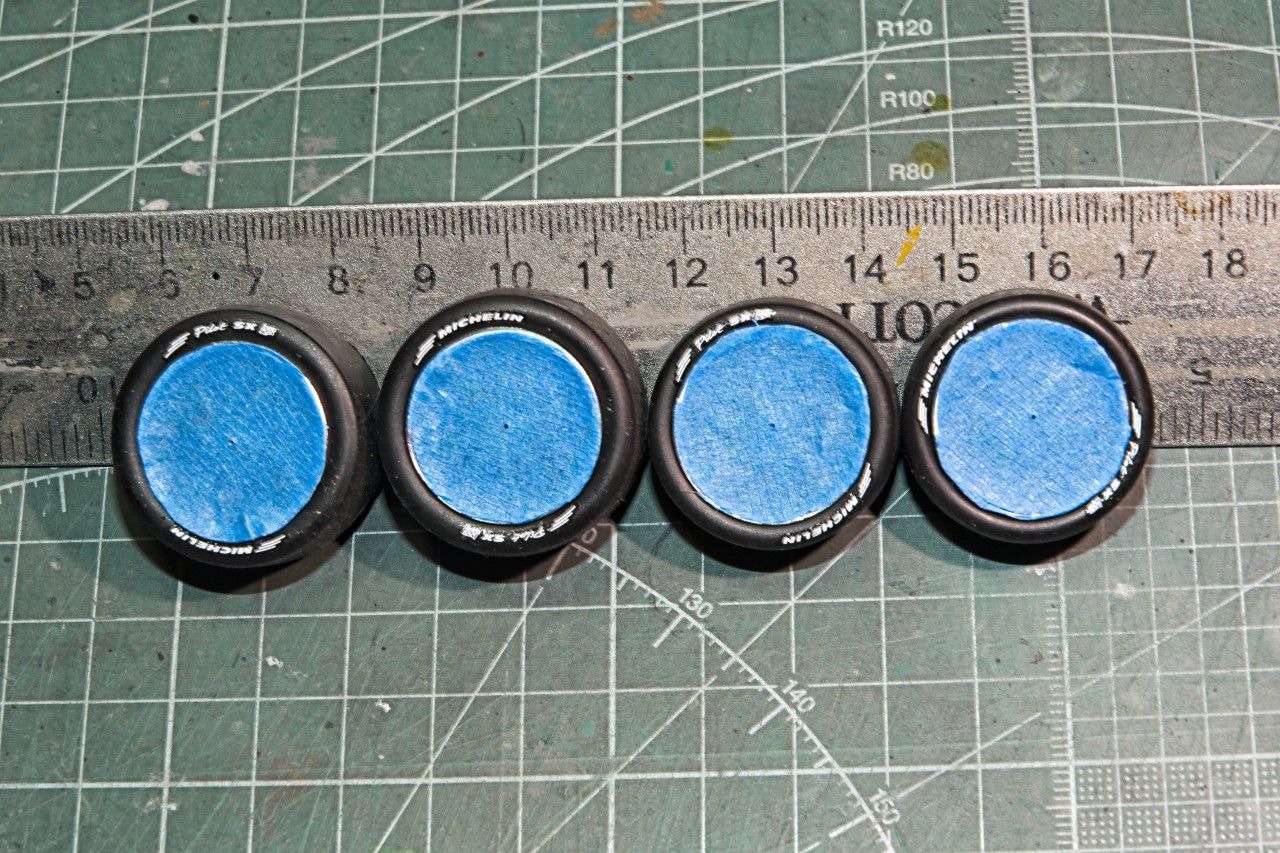
Let the tire decals dry for 24 hrs, and then you can weather them and or just clearcoat them, Just make sure that you cover the wheels with a mask, and air brush not brush on any clearcoat.
Remove the masks and you’ve got perfect tires every time.

By the time you’re on your last tire, you’ll be a seasoned pro at this.
joel