I agree with hand painting. I did a St Chamond in similar 4-colour scheme by priming in grey, then using Vallejo and a brush to add each of the colours. The black lines were done with a very fine brush, black paint, and a VERY steady hand! It takes time, but the results are worth it.
Thank you for your reply.
But I’m not sure if they handpainted their camouflage schemes, here is an scene from Renault R35 footage that makes me suspect that they did spray colors on their tanks. Especially factory applied cammo schemes that most French tanks did have.
WWII R35 Renault footage. - YouTube at around 22 seconds is the piece of footage I mean that makes me suspect that they did spray their camouflage patterns indeed on their tanks instead of handpainting them.
Furthermore, I’m using mostly Tamiya acrylics to paint the current model. Plus I’m liking it to airbrush.
One last thing, I have airbrushed my Tamiya B1 Bis French variant with my airbrush to. Using AK Interactive camouflage masking putty. And I’m planning on using that again on my current project.
Thanks for replying.
1 Like
If you are talking about the Tamiya French B1 Bis, I did make that model as well and did paint it also in the variant made by St. Chamond. But the painting instructions didn’t tell me anything about black lines to include. Why did the French most of the time include black border lines in their camouflage schemes anyway? I did however paint the black lines with a brush, but I didn’t like the results as much as I would like to. For this project I was thinking of using my masking putty as well for the black outlines that are present on this camouflage scheme as well.
It looks like they sprayed the black lines on first. I wonder how they proceeded from there and still maintained the black lines? Maybe… the lines as seen in your link video showed where each color would go?
I was talking about the HobbyBoss St Chamond kit - big slab sides with acres of paint!
I never thought of it like this and it makes perfectly sense to me.
First make a drawing of black lines on the tank.
And then just fill in the blank spaces with the specified colors.
I could imagine that this is making the painting process a lot easier and faster then it would be otherwise be.
Thanks for the suggestion/idea.
The segment in you video link at .22 was the eye-opener.
That is a cool video. I think you have the right idea, do the black lines then fill in the color areas.
Ken.
Just another play on what was said, paint the tank sand. Paint the red and green areas black. Now paint the red leaving a black edge between the sand and red areas. Paint the lighter green leaving a black edge between the red and sand. Then paint the dark green leaving a black edge around it. My lazy preference would be a fine tiped Sharpie followed up with maybe some future then a dull coat. I just did this line with a fine line sharpie in 15 seconds. The line was hand painted in real life and would not be a perfect width through out. I have not sprayed any clear over it yet. I tried an artist pen and a Sharpie, The sharpie did better. Note. You will have to intermittently use the sharpie on some paper to keep the point wet. The paper draws out the ink more than the paint does.

1 Like
I try to determine what the overall base color is that the camouflage pattern is painted over. I spray that last.
This generally makes the least amount of masking. Spray color one, then mask. Spray color two, then mask (without having removed the mask for color one). Finally, spray color three all over.
I paint the the thin black lines with a liner brush.
This is the old Heller kit with On the Mark PE. Painted ocher, brown, then green. Black lines hand brushed.
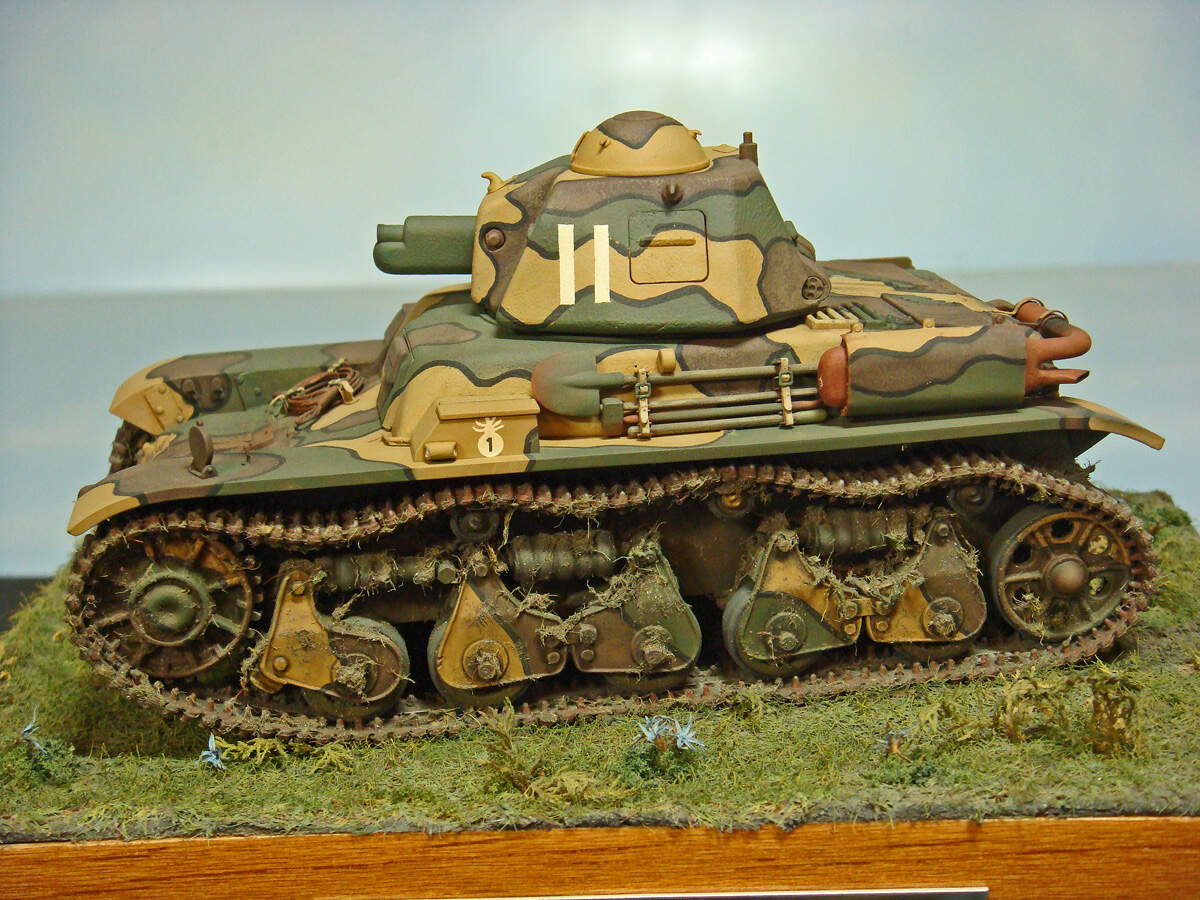
This is the Tamiya B-1bis with the Lion Roar PE. Only the turret on this particular tank had the black outlined cammo (the hull cammo was soft-edged). Again, though, ocher, brown followed by the green with the black lines hand-brushed.
For hand-brushing the line, use a 10x0 liner brush and keep the paint well thinned so that it will flow readily. If the tips of the bristles start to dry out, wash the brush, then continue. Don’t try to force the paint flow by increasing the pressure on the bristles. This will just make them spring open and create a blob when the paint does flow out.
5 Likes
If you were hand painting the line I would add some retarder to slow the drying time giving you more time to work with the line.
1 Like
For hand brushing acrylics (Vallejo Model Color, Citadel, Reaper, etc.), I use my own thinner which includes 5% by volume retarder and 5% by volume flow aide. The rest is 1:1 water + acrylic matt medium. (I actually mix up measured amounts of the water and matt medium, then do the quick math to calculate what 5% of that total is. That 5% volume amount is how much I add of each - retarder and flow aide).
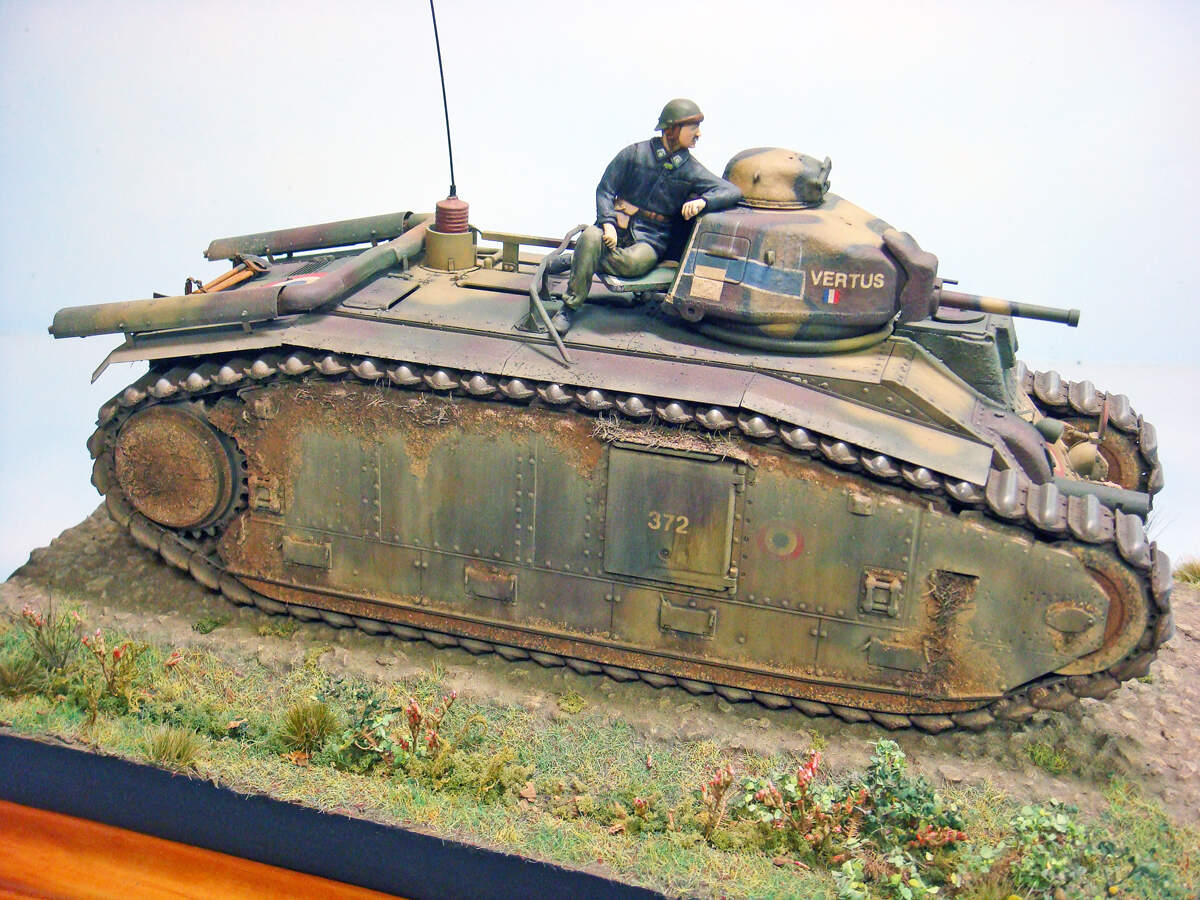
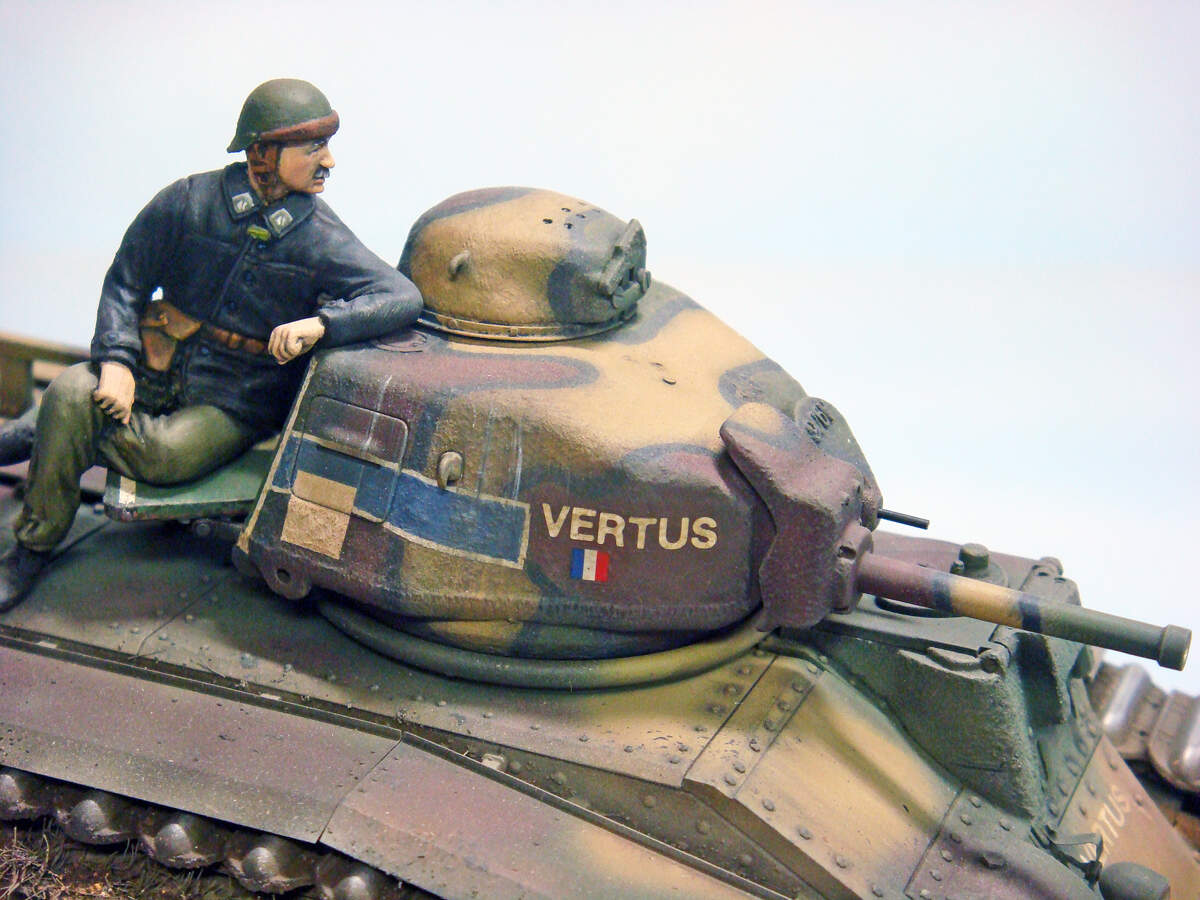
Wow those two tanks came great Mike, and the figure too!
Rich
1 Like
I think I have to tell that this project is currently on hold.
Because I don’t have enough pipettes anymore.
And I had problems with spraying the different colors on the model.
So the project is set ‘on hold’.
Sorry for informing so late, but I just had other things on my mind in that time.
Thanks for replying to my topic.
1 Like