I have both the Tamiya and Meng kit and I’m just a bit intimidated by Meng’s hull compared to Tamiya 1 piece hull.
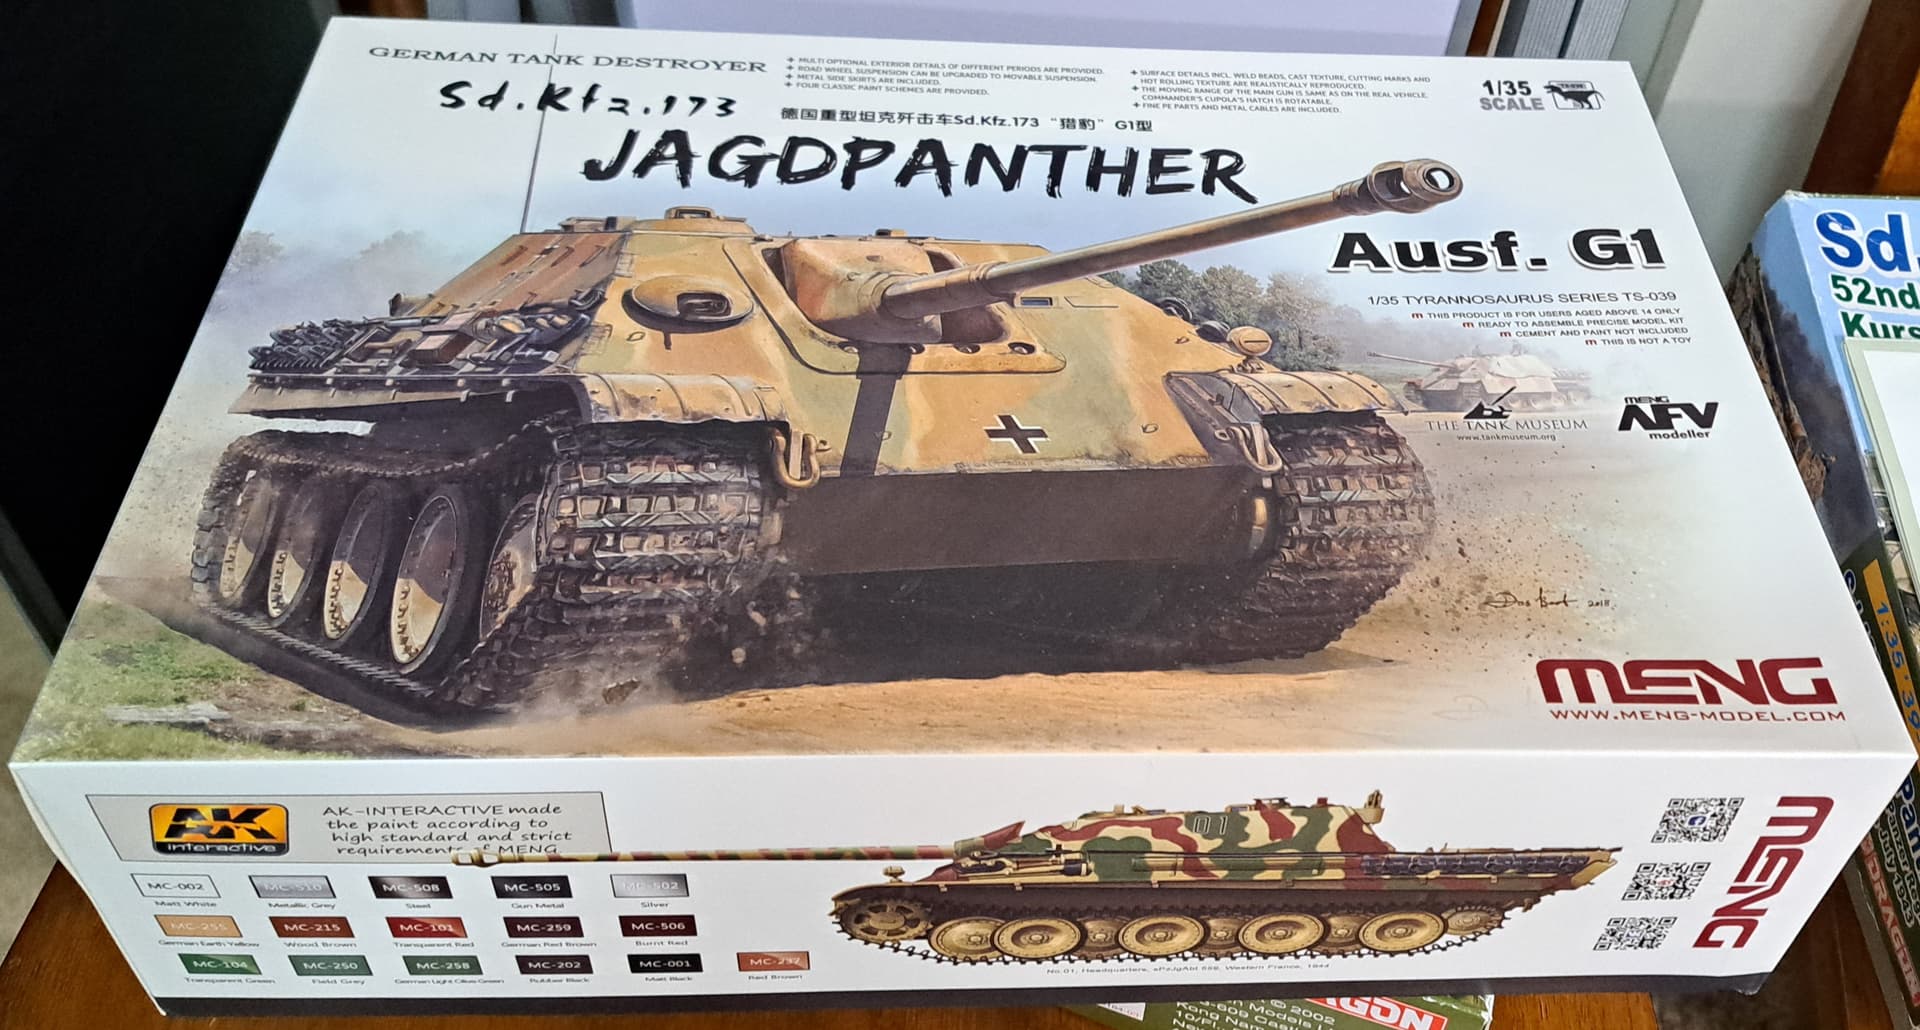
I have the Meng JagdPanther G1 kit, haven’t built it yet but have looked it over.
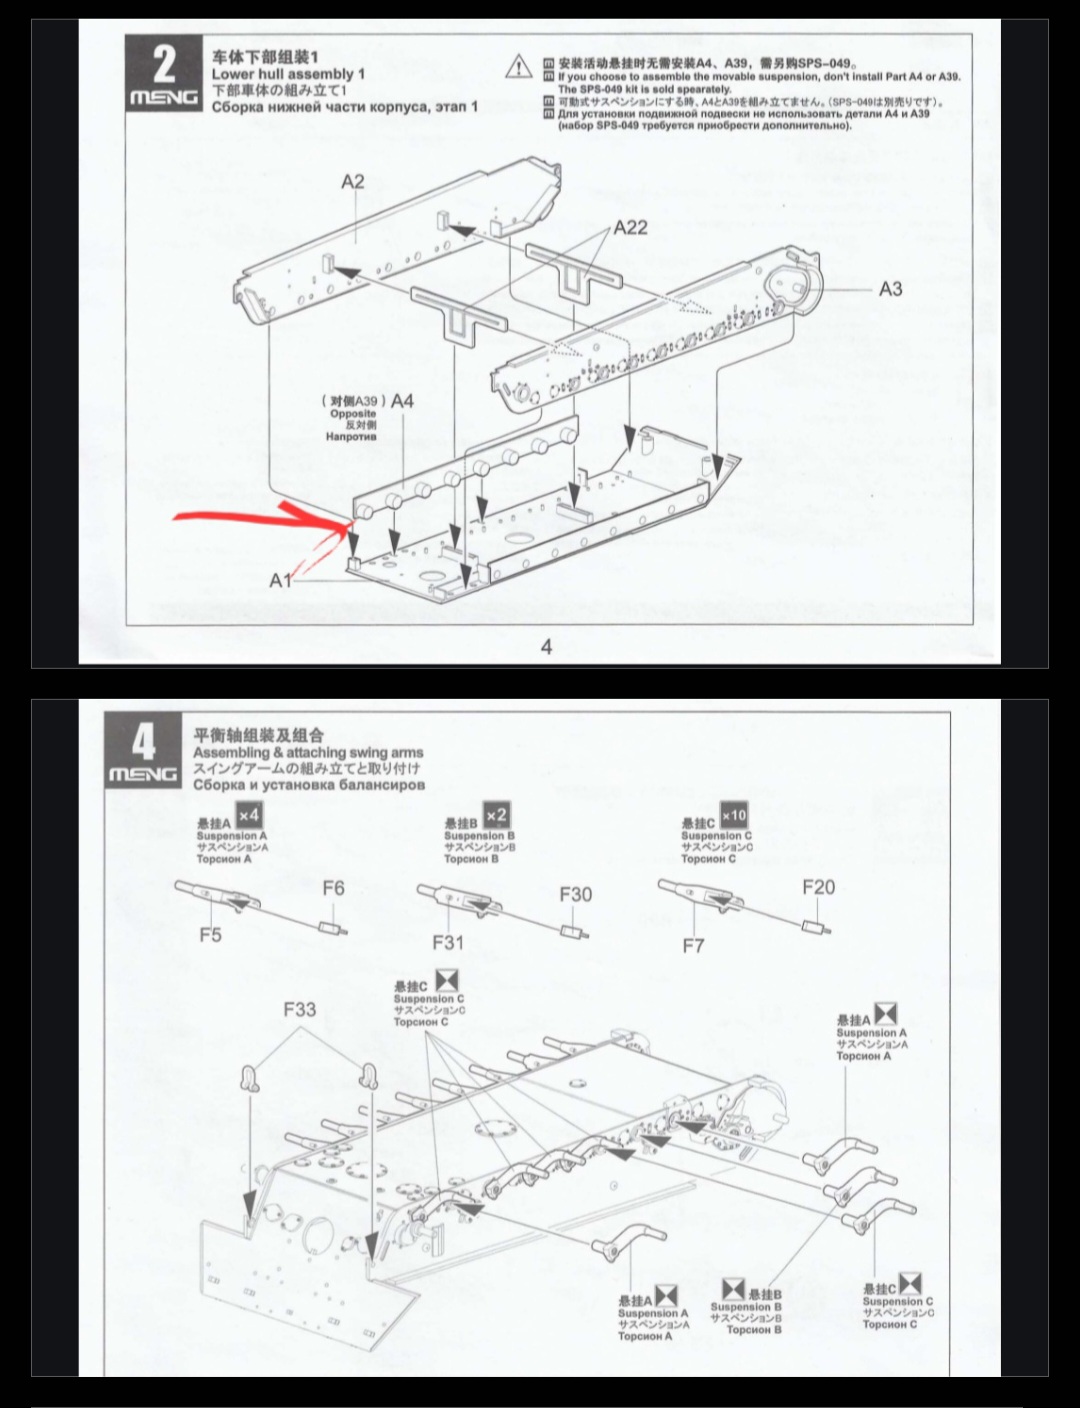
More concerned with step #2 and fitting the A4 parts correctly myself. If those are off, the suspension torsion arms will be out of alignment. Then the model may sit too high or too low or not level. There’s an issue with this in the Meng King Tiger kit, so being careful with the JagdPanther kit using the same parts design seems reasonable.
If a modeler’s parts clean up is perfect as in no mold seams and no burrs left etc, I think the upper hull will fit together without much fuss. However, if the parts are poorly cleaned then there’s a likelihood of issues.
Parts slappers that glue first and don’t test fit may have fit issues.
I’d definitely clean all the major upper hull parts properly and test fit all of them together before using any liquid cement etc.
With good part clean up, I think the kit should build up pretty well based on Meng’s overall excellent reputation.
4 Likes
With Meng’s fit and engineering, I don’t foresee any problems at all with those upper hull panels coming together flawlessly with no gaps, needing no putty. Just have clean seams and pay attention to your alignment. You can do it.
2 Likes
@oyoy23 Sean & I had some additional discussion away from the thread about the Meng JagdPanther. Looking at the parts layout I realized, Sean had asked an outstandingly good question.
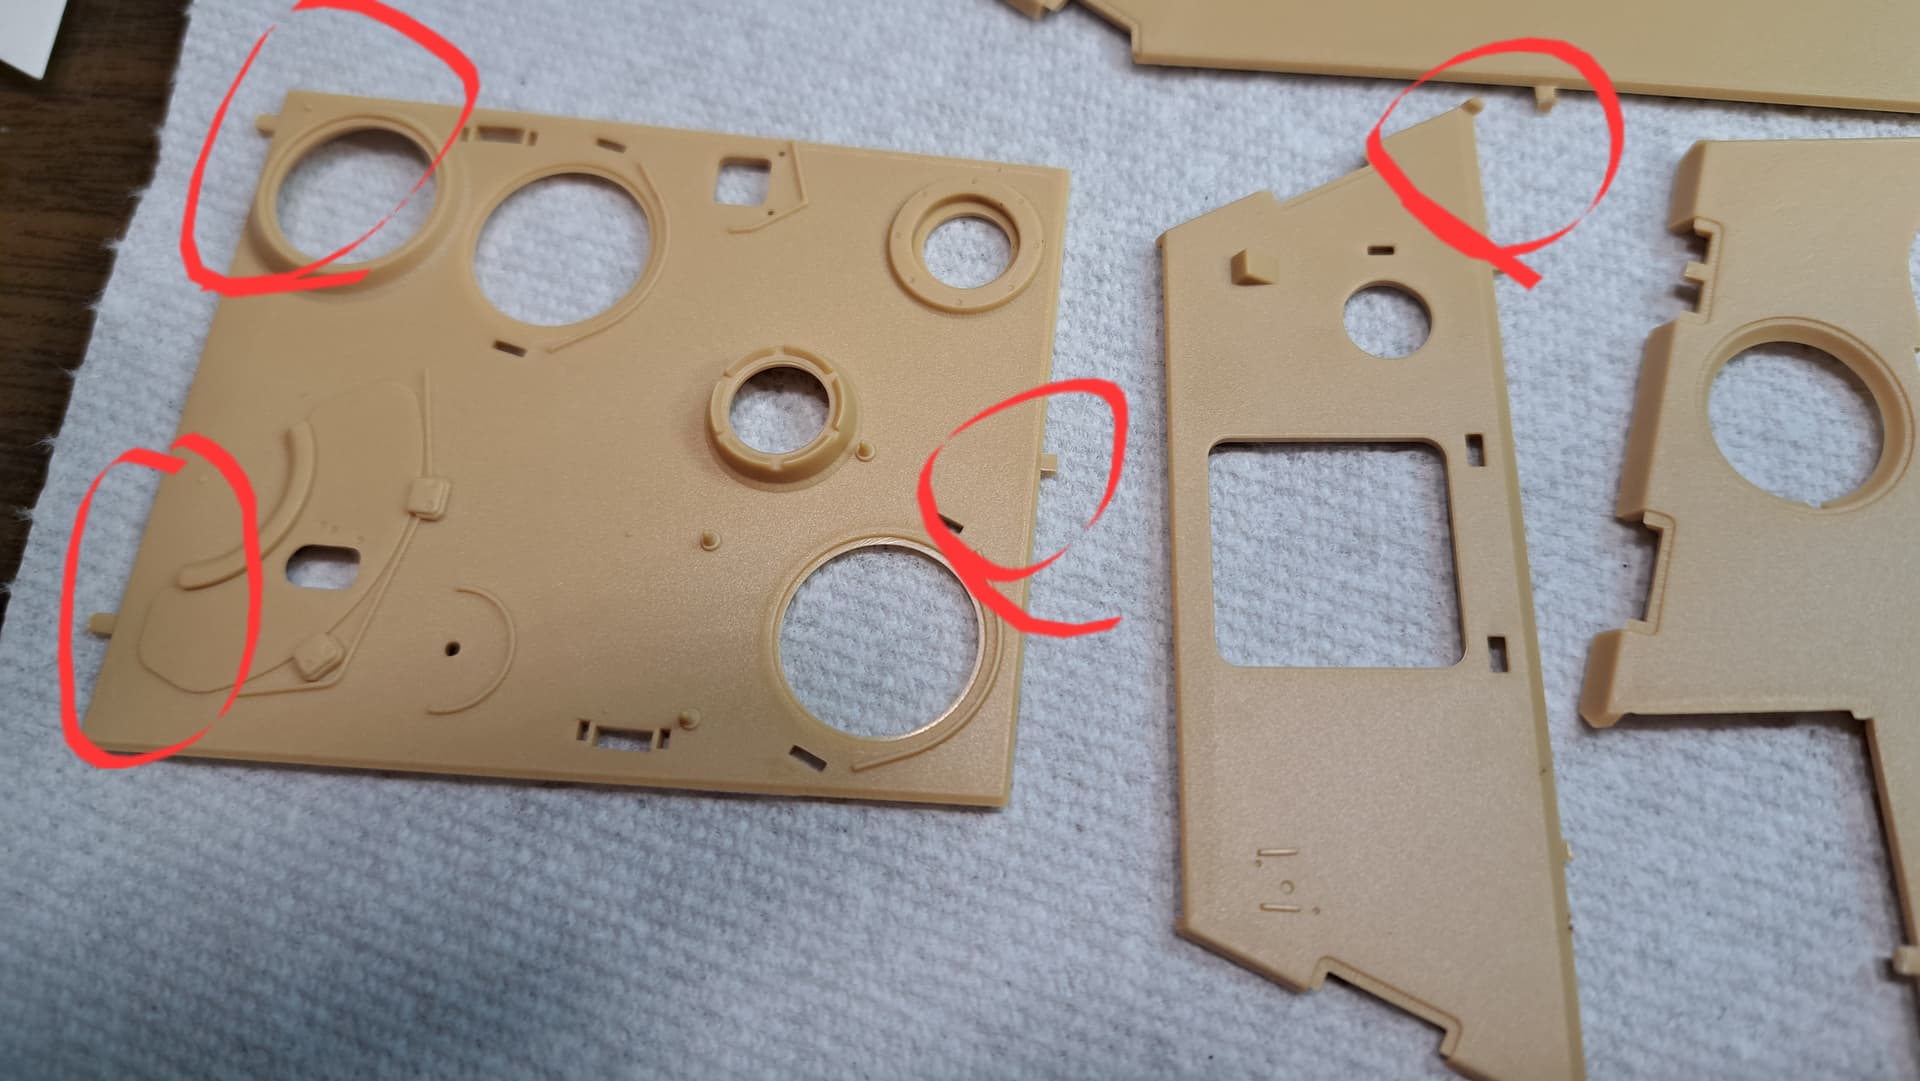
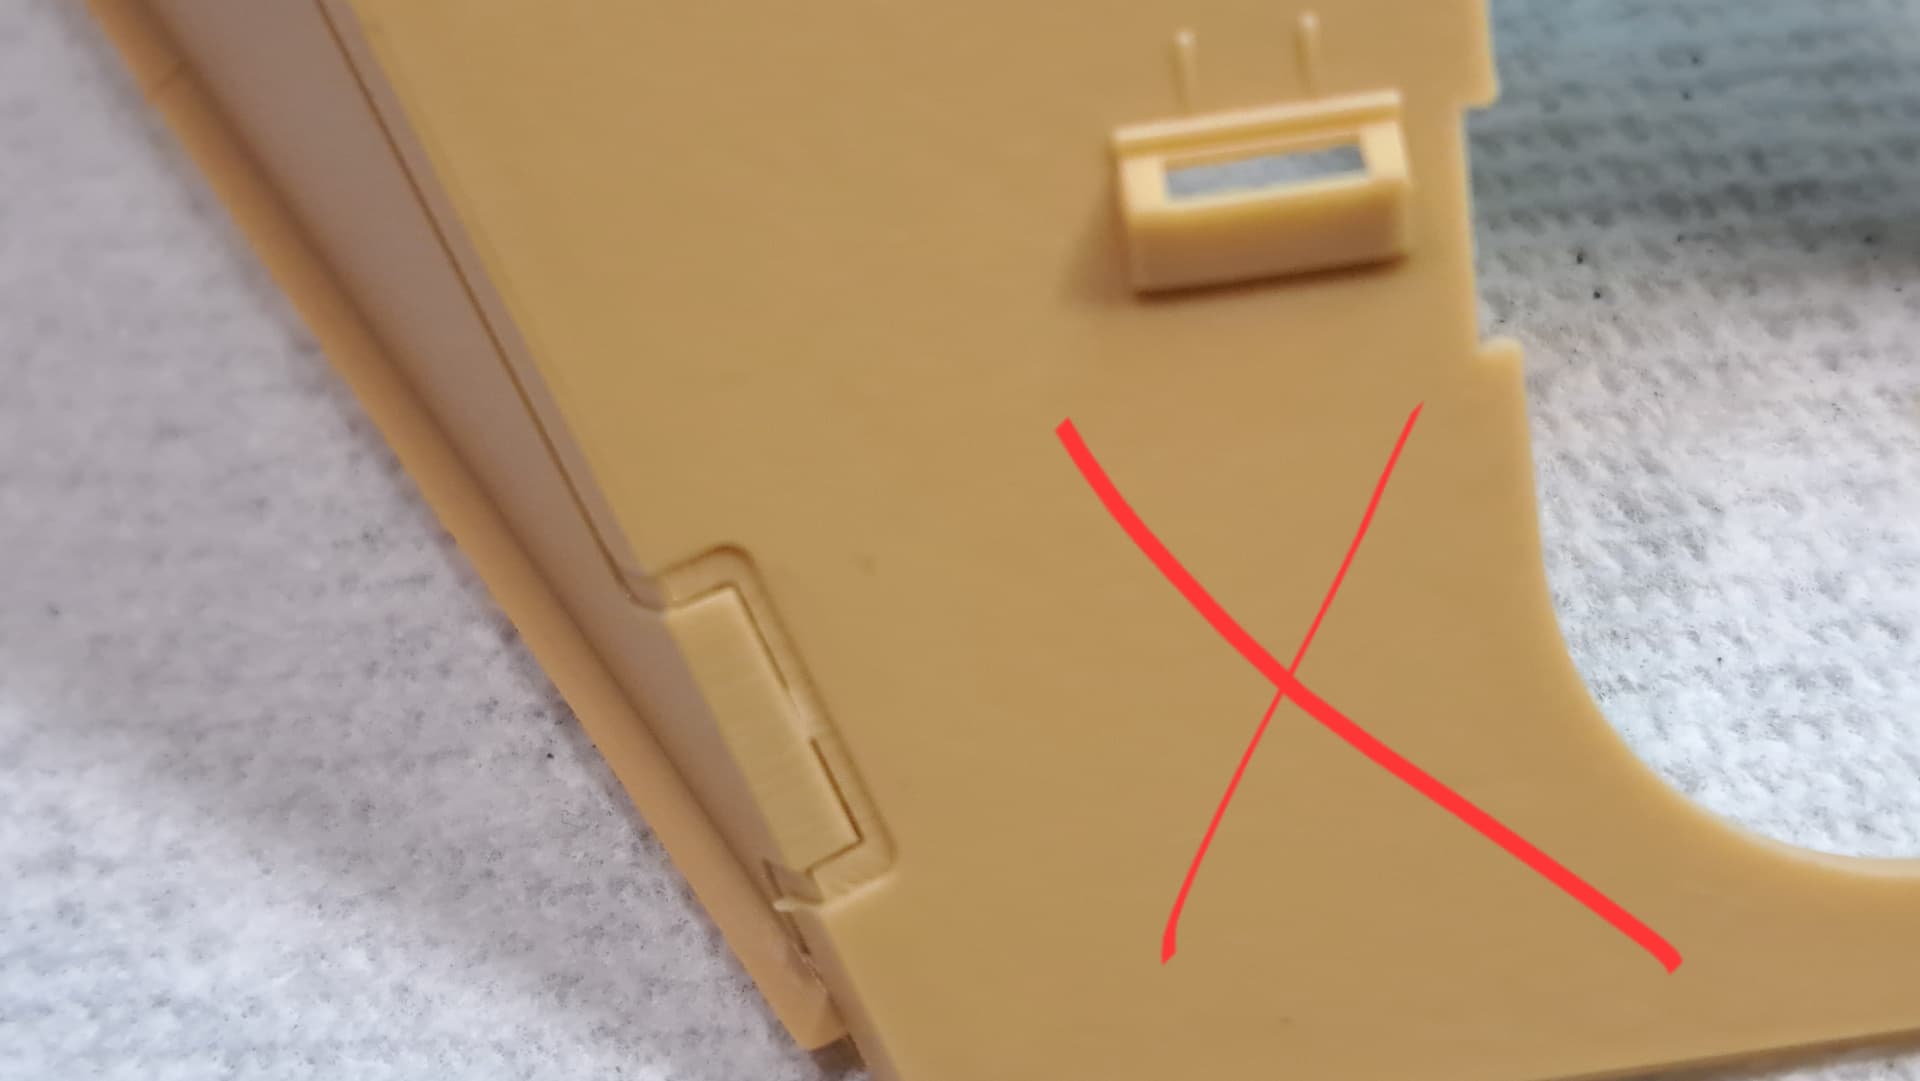
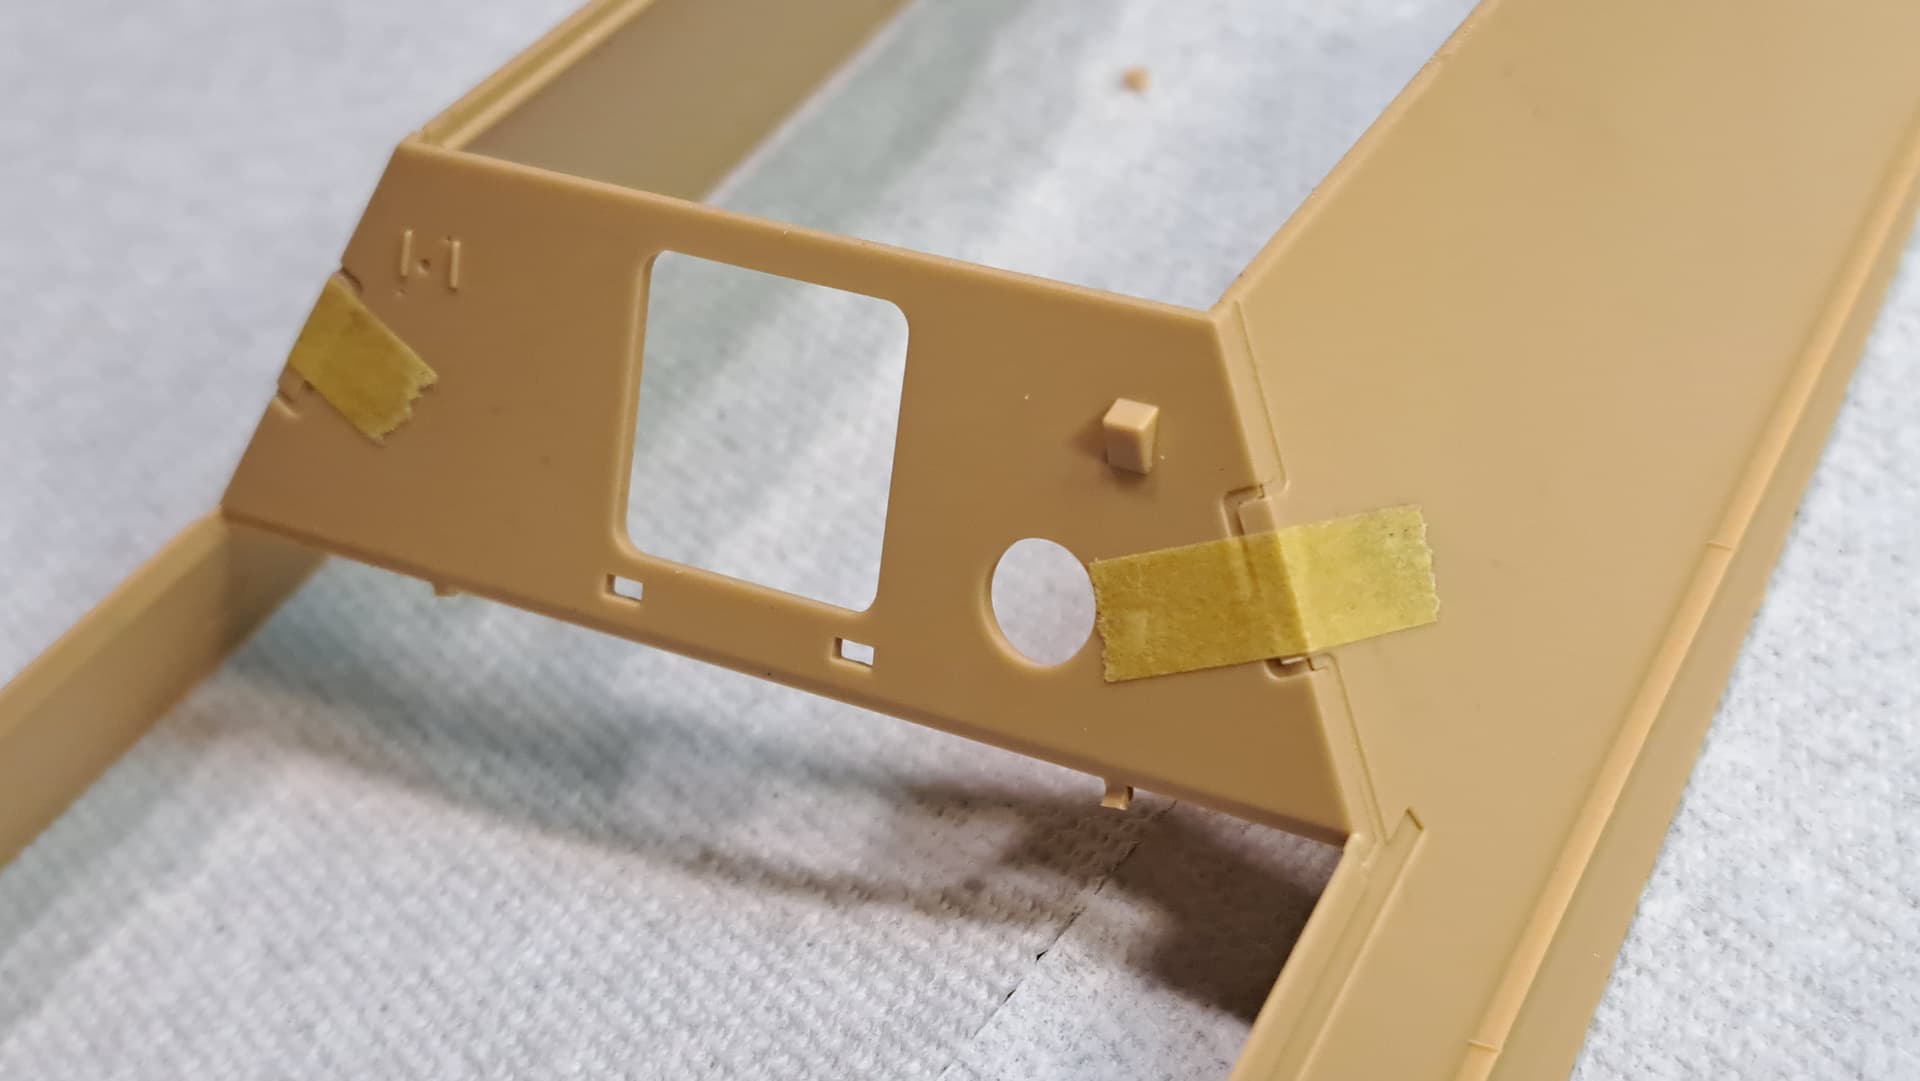
The attachment points to the main upper hull parts are so ugly they look like something from an old Dragon kit. That’s not a compliment in Wade’s World.
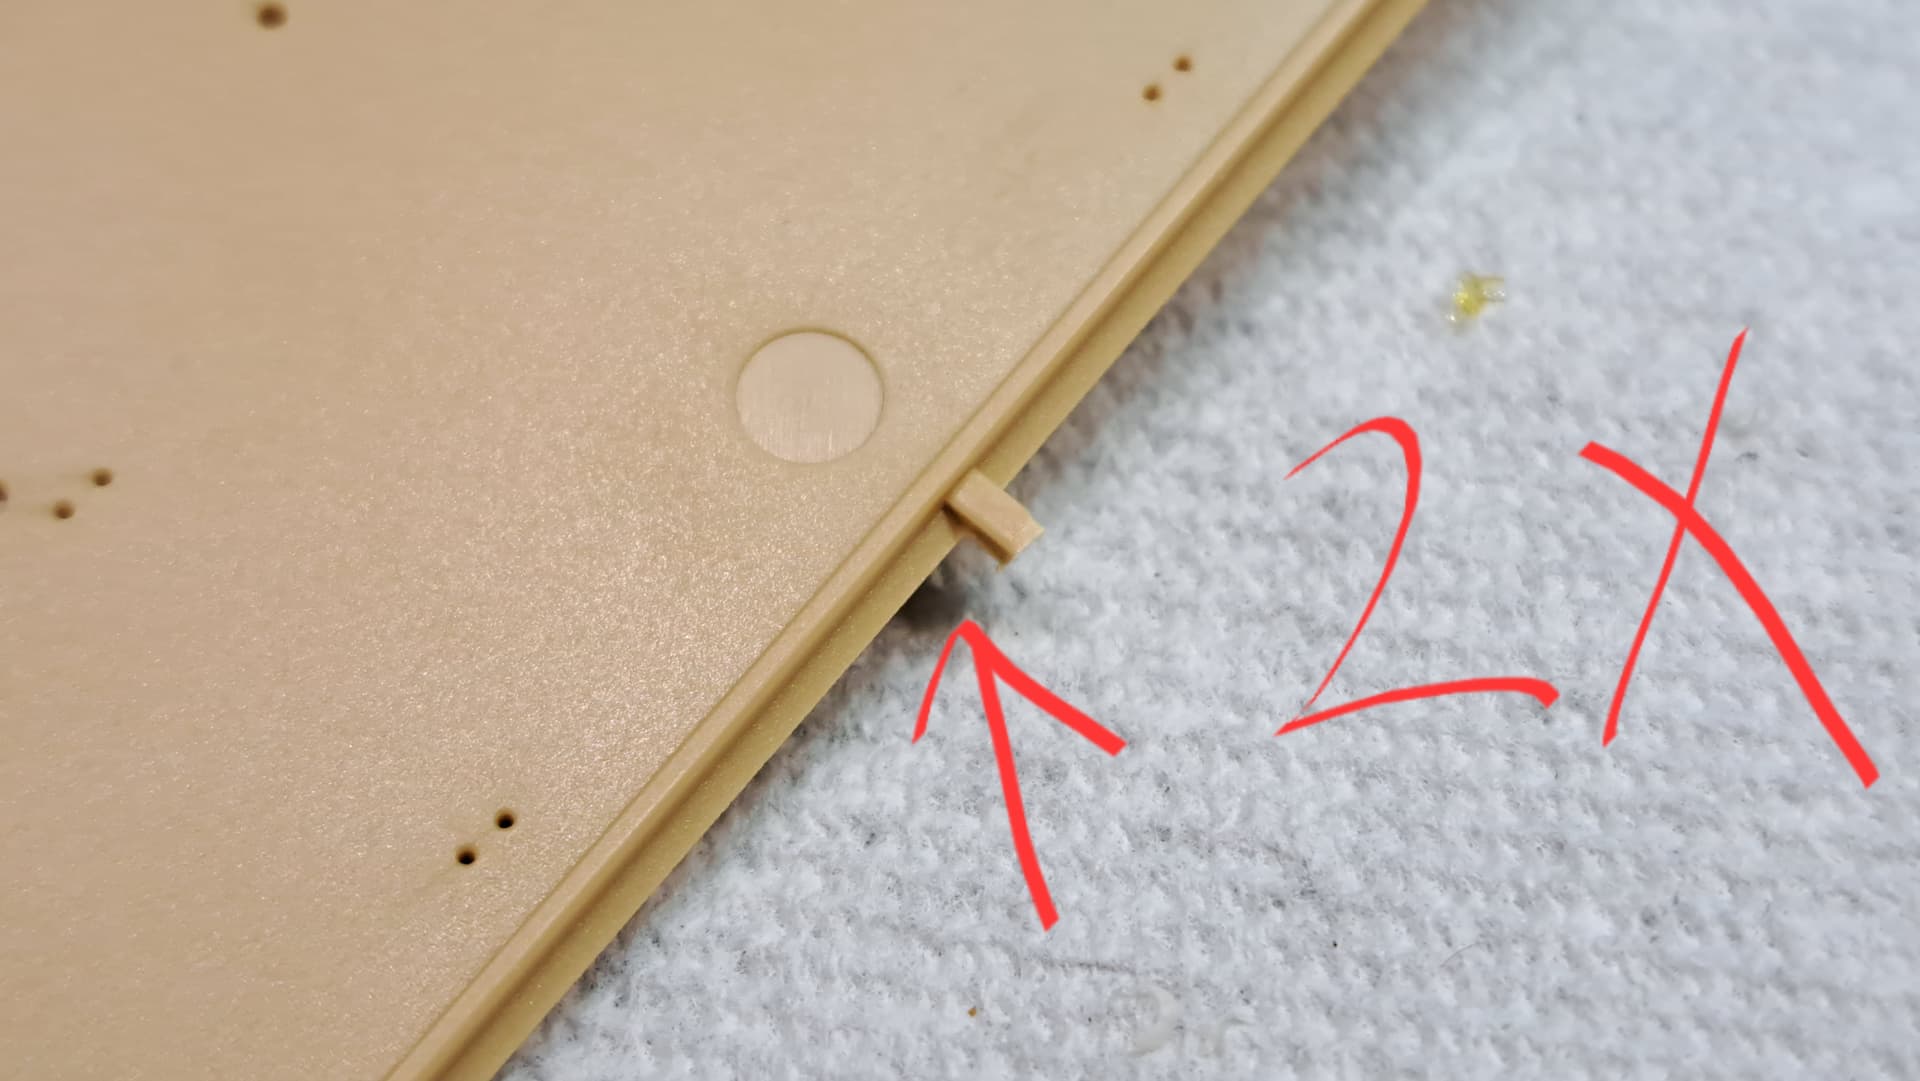
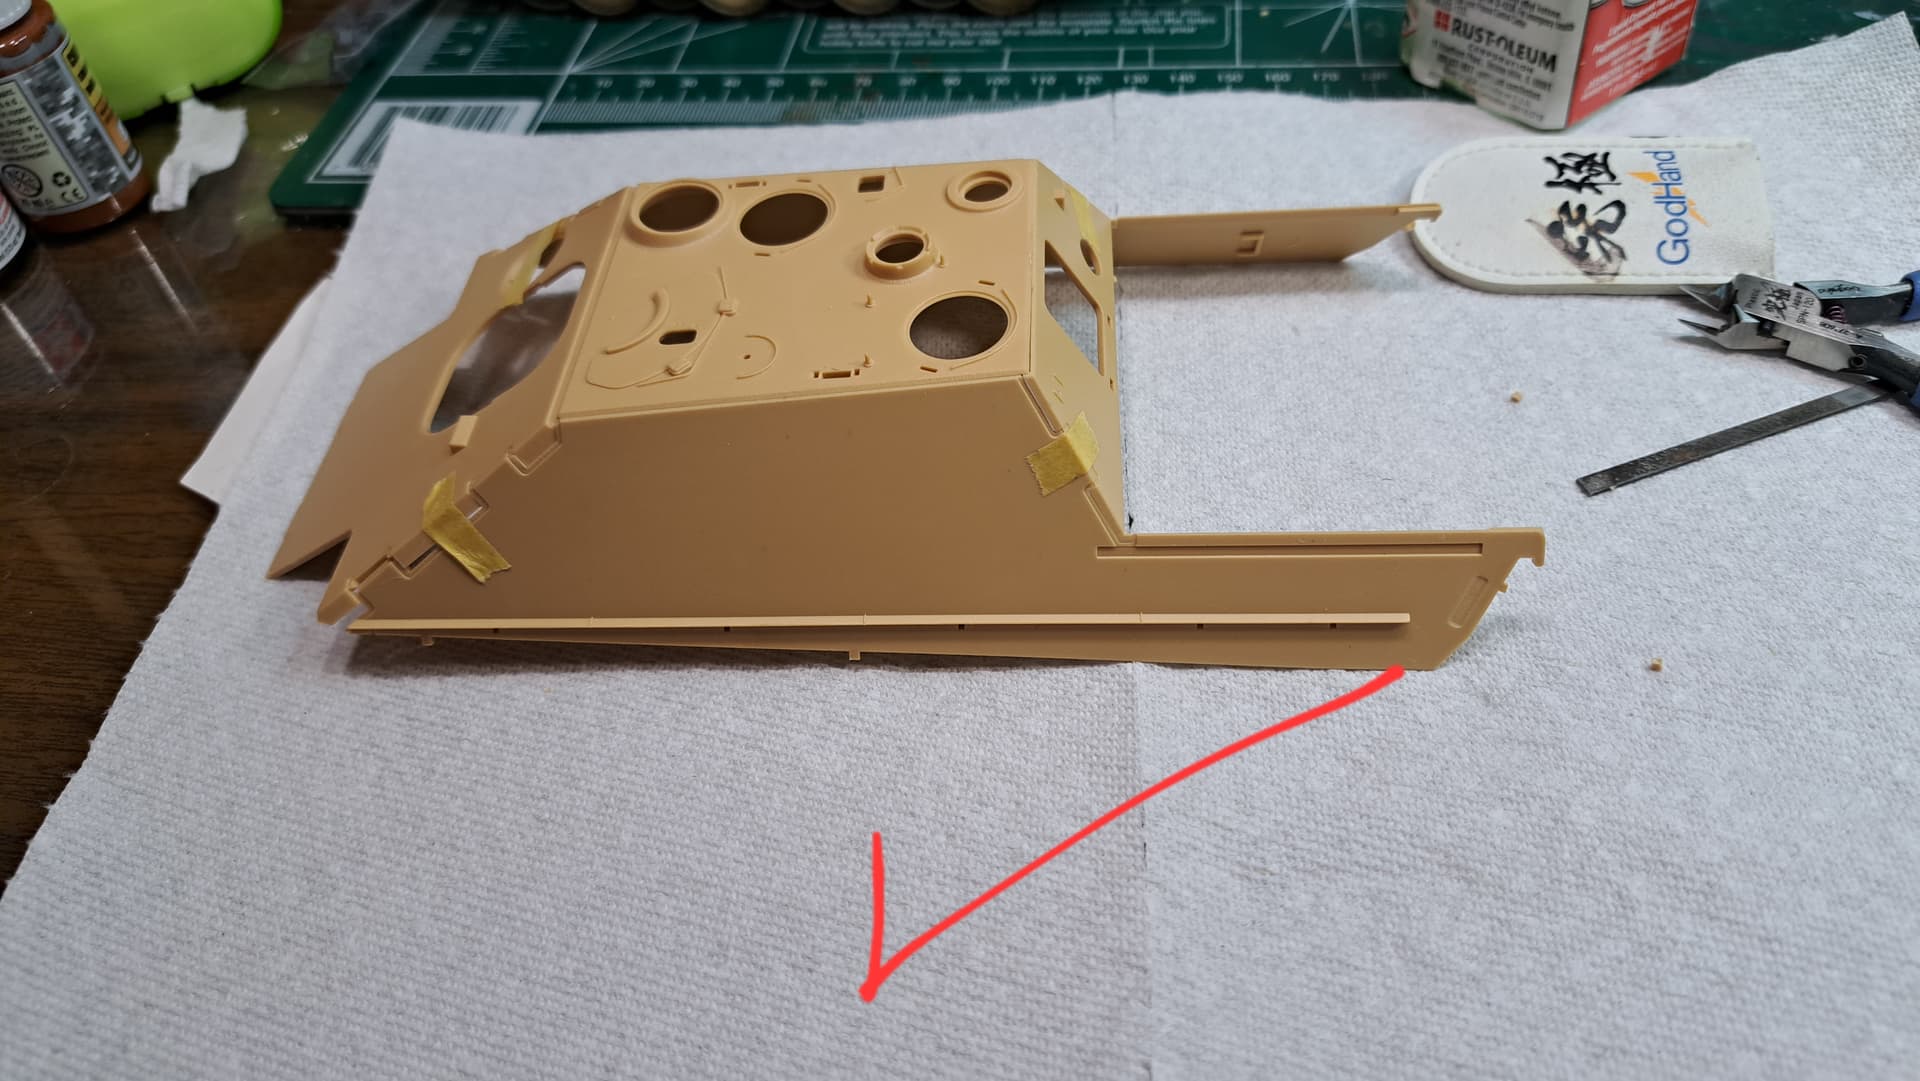
So here’s a fitment test to see what happens in detail. What it is…
In my opinion an outstandingly excellent set of flush, near flush nippers are required. GodHand, Zoukei-Mura or DSPIAE ideally or equivalent. Likewise, a small curved #15 scapel blade is one of my favorite tools for cleaning up nasty burrs on parts like these. File, sand paper and bit of liquid cement as needed.
What’s being checked.

The parts are loaded with many nubs that will cause several fit issues in my opinion unless they completely removed.
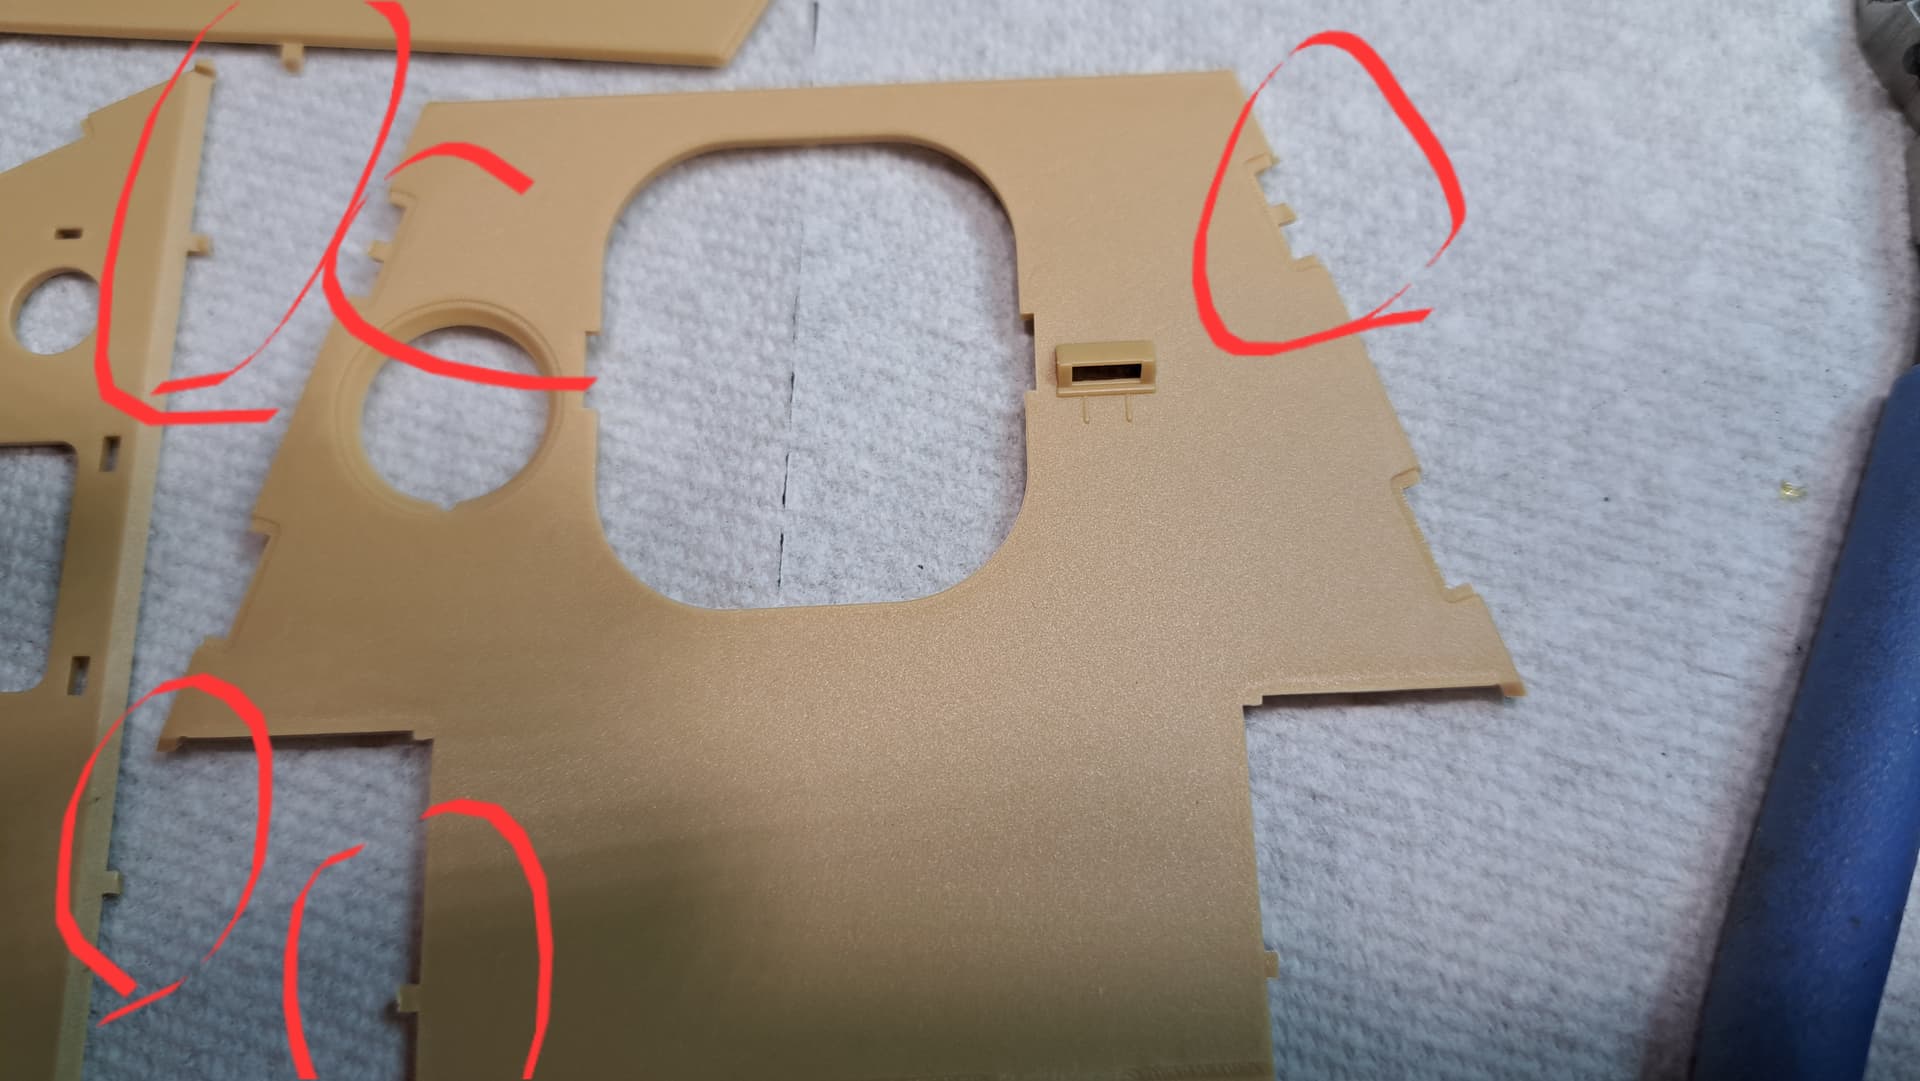
Nipped burrs…
…that’s not good enough ![]()
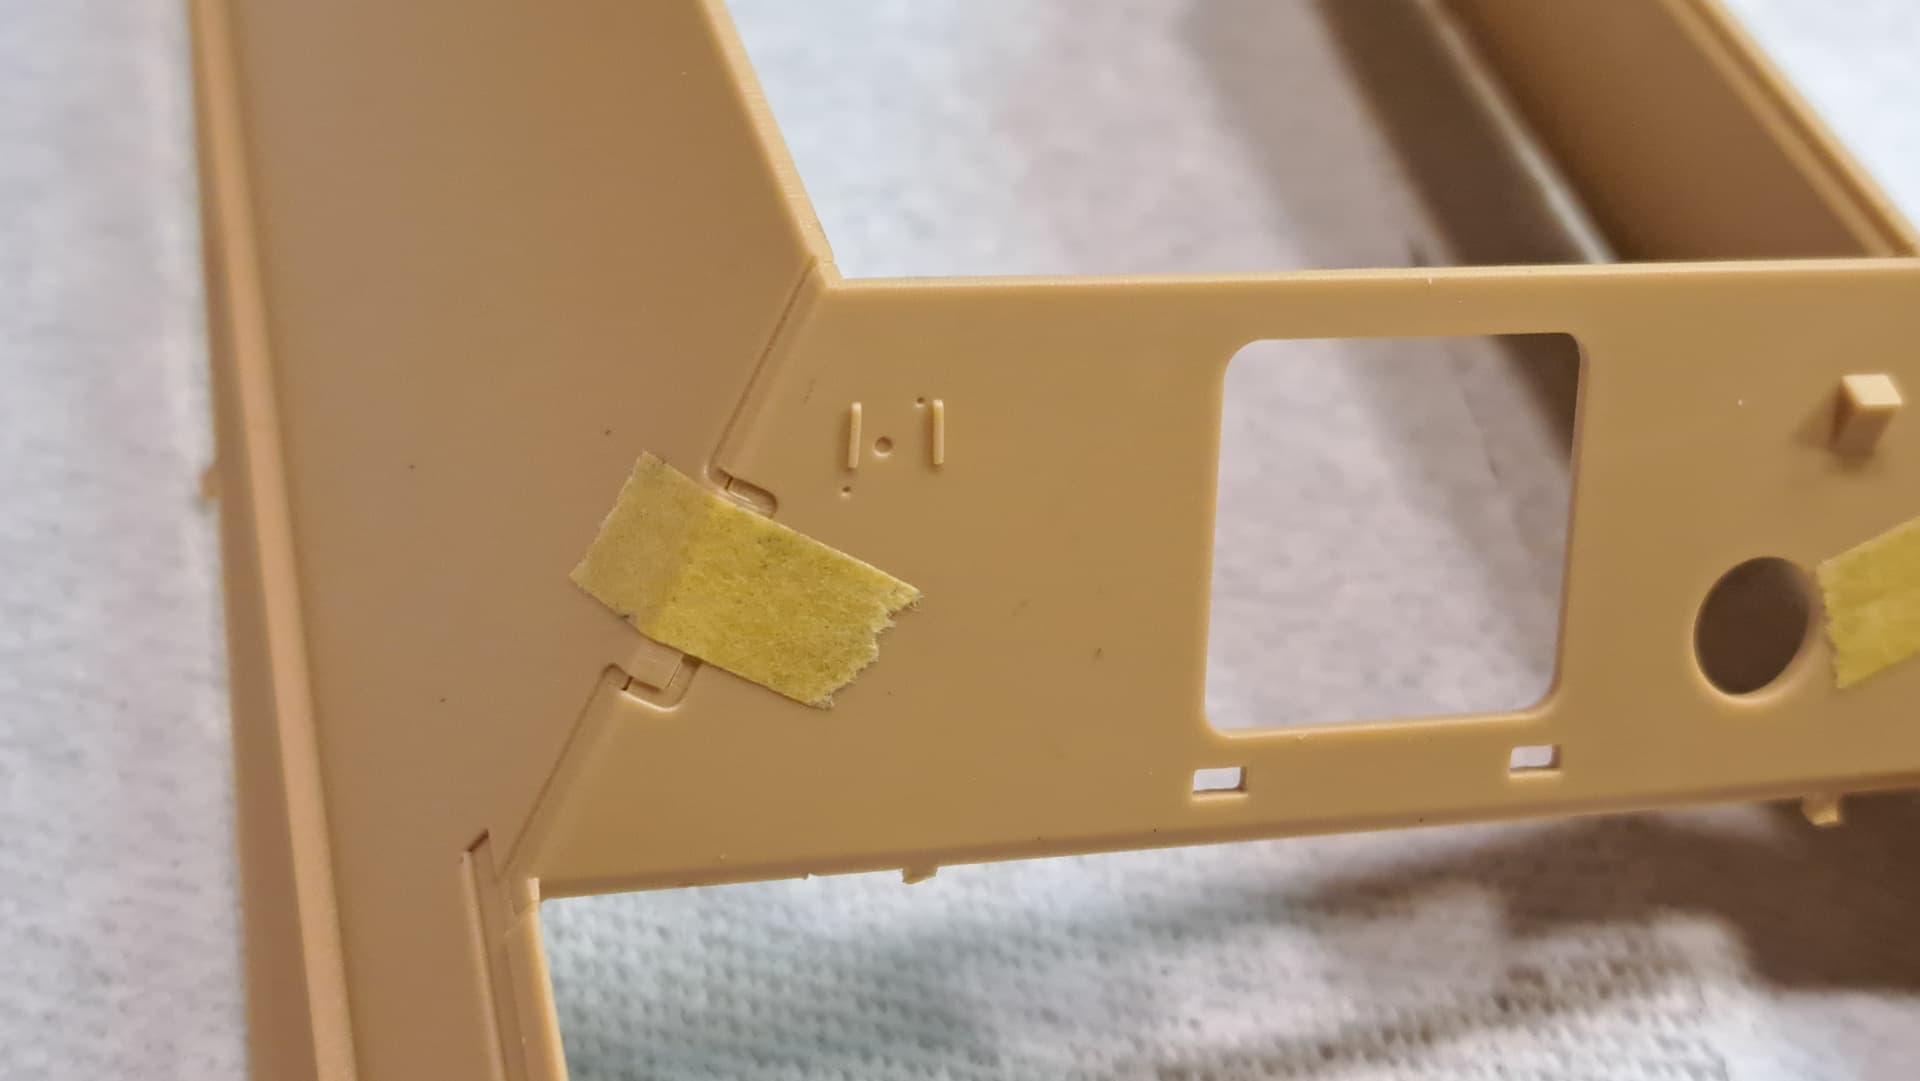
Definitely a fit issue at a low level of clean up.
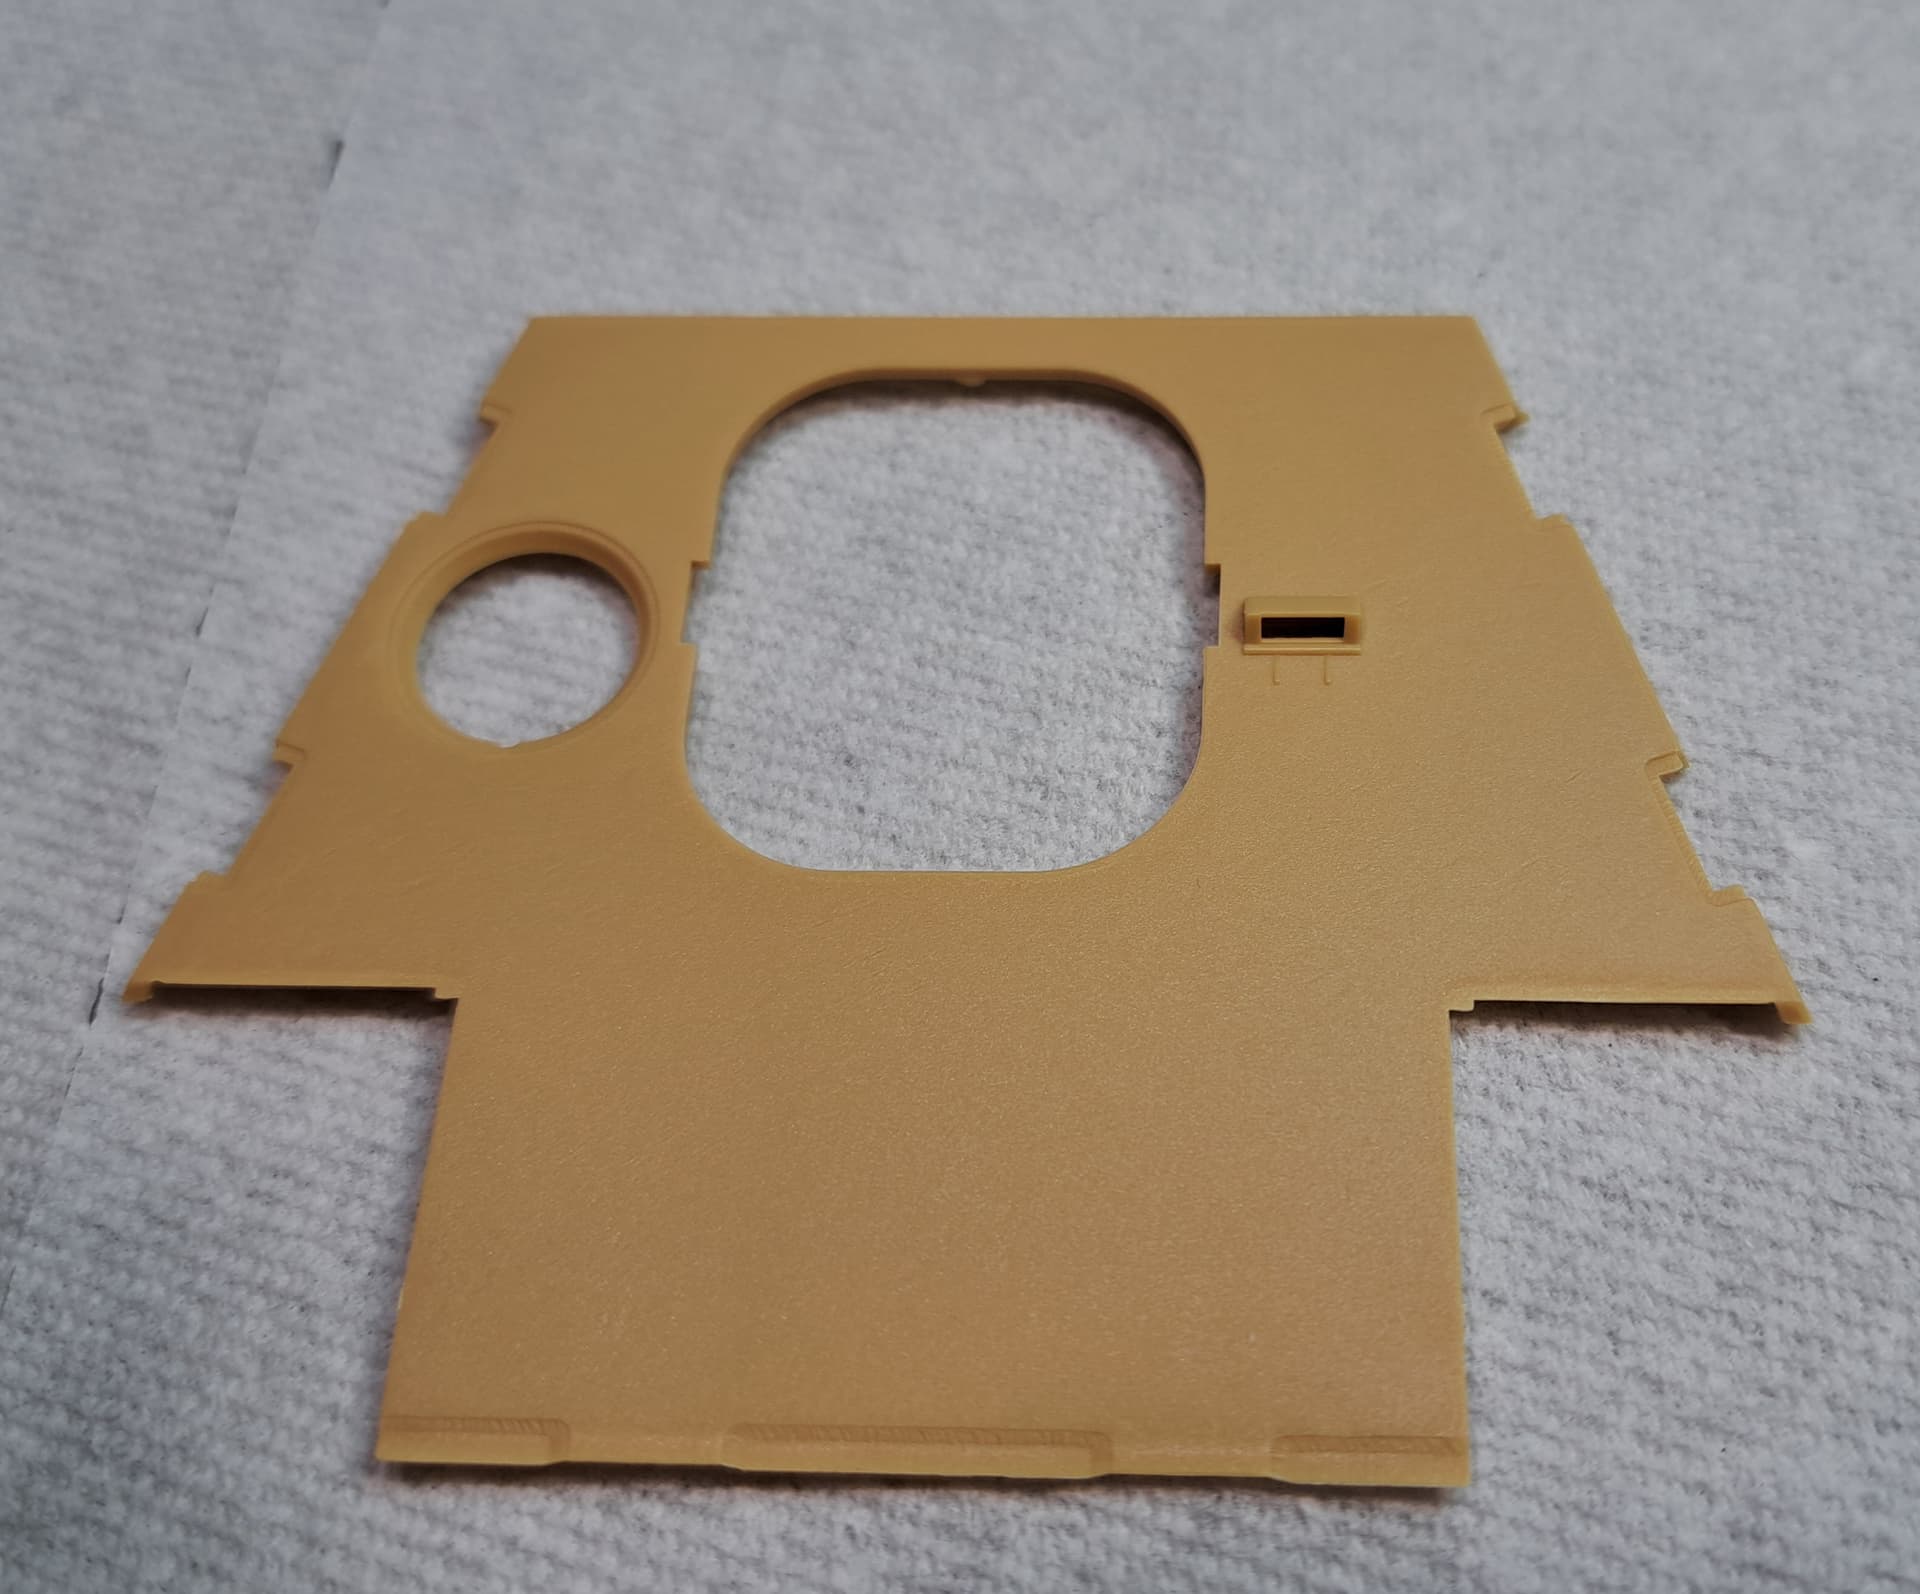
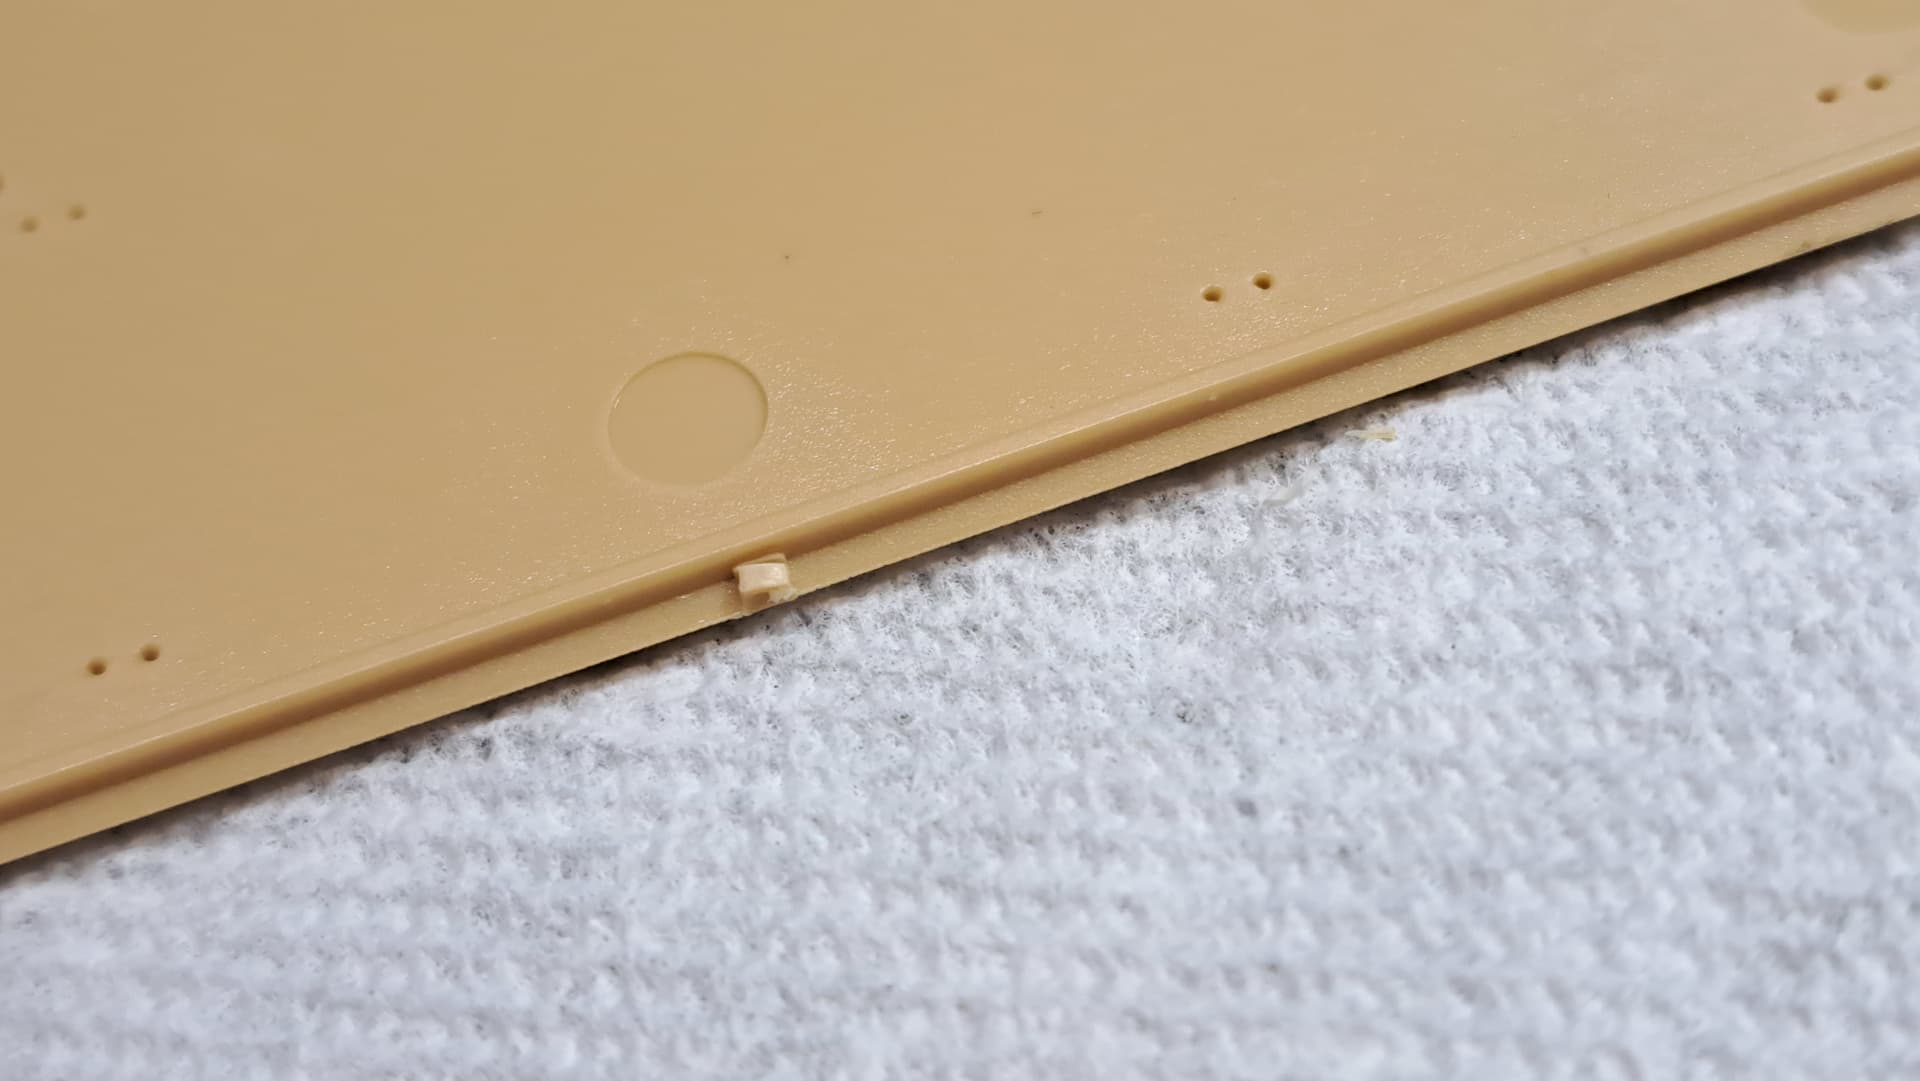
Trimmed away with knife blade and touched up with tiny bit of liquid cement to ensure smooth mating surface.
Roof plate has burrs on an angle and lip so care is needed to clean them up. There was just a touch of flash on the ejector pin mark and slightly raised lip. To be safe this was scrapped flush on the facing edge with the #15 blade.
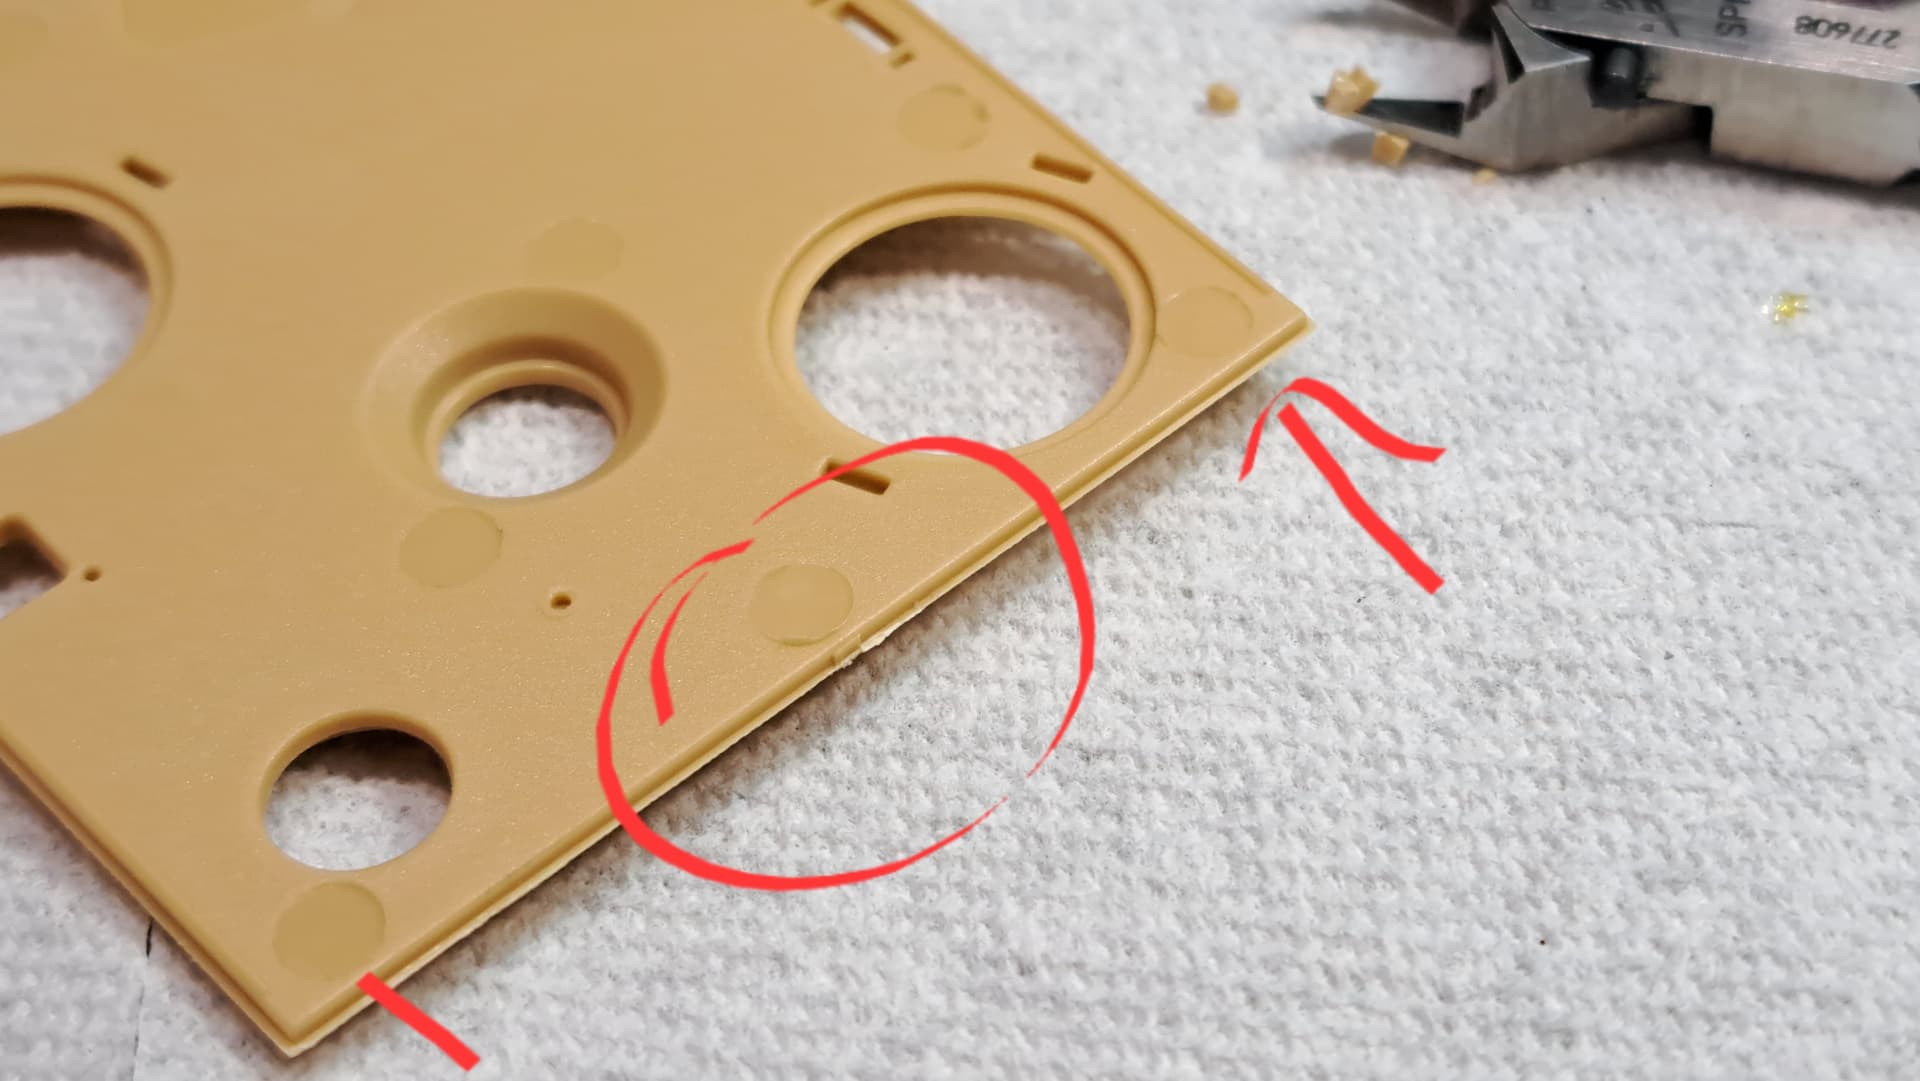
Sanded and touched up with bit of LC.

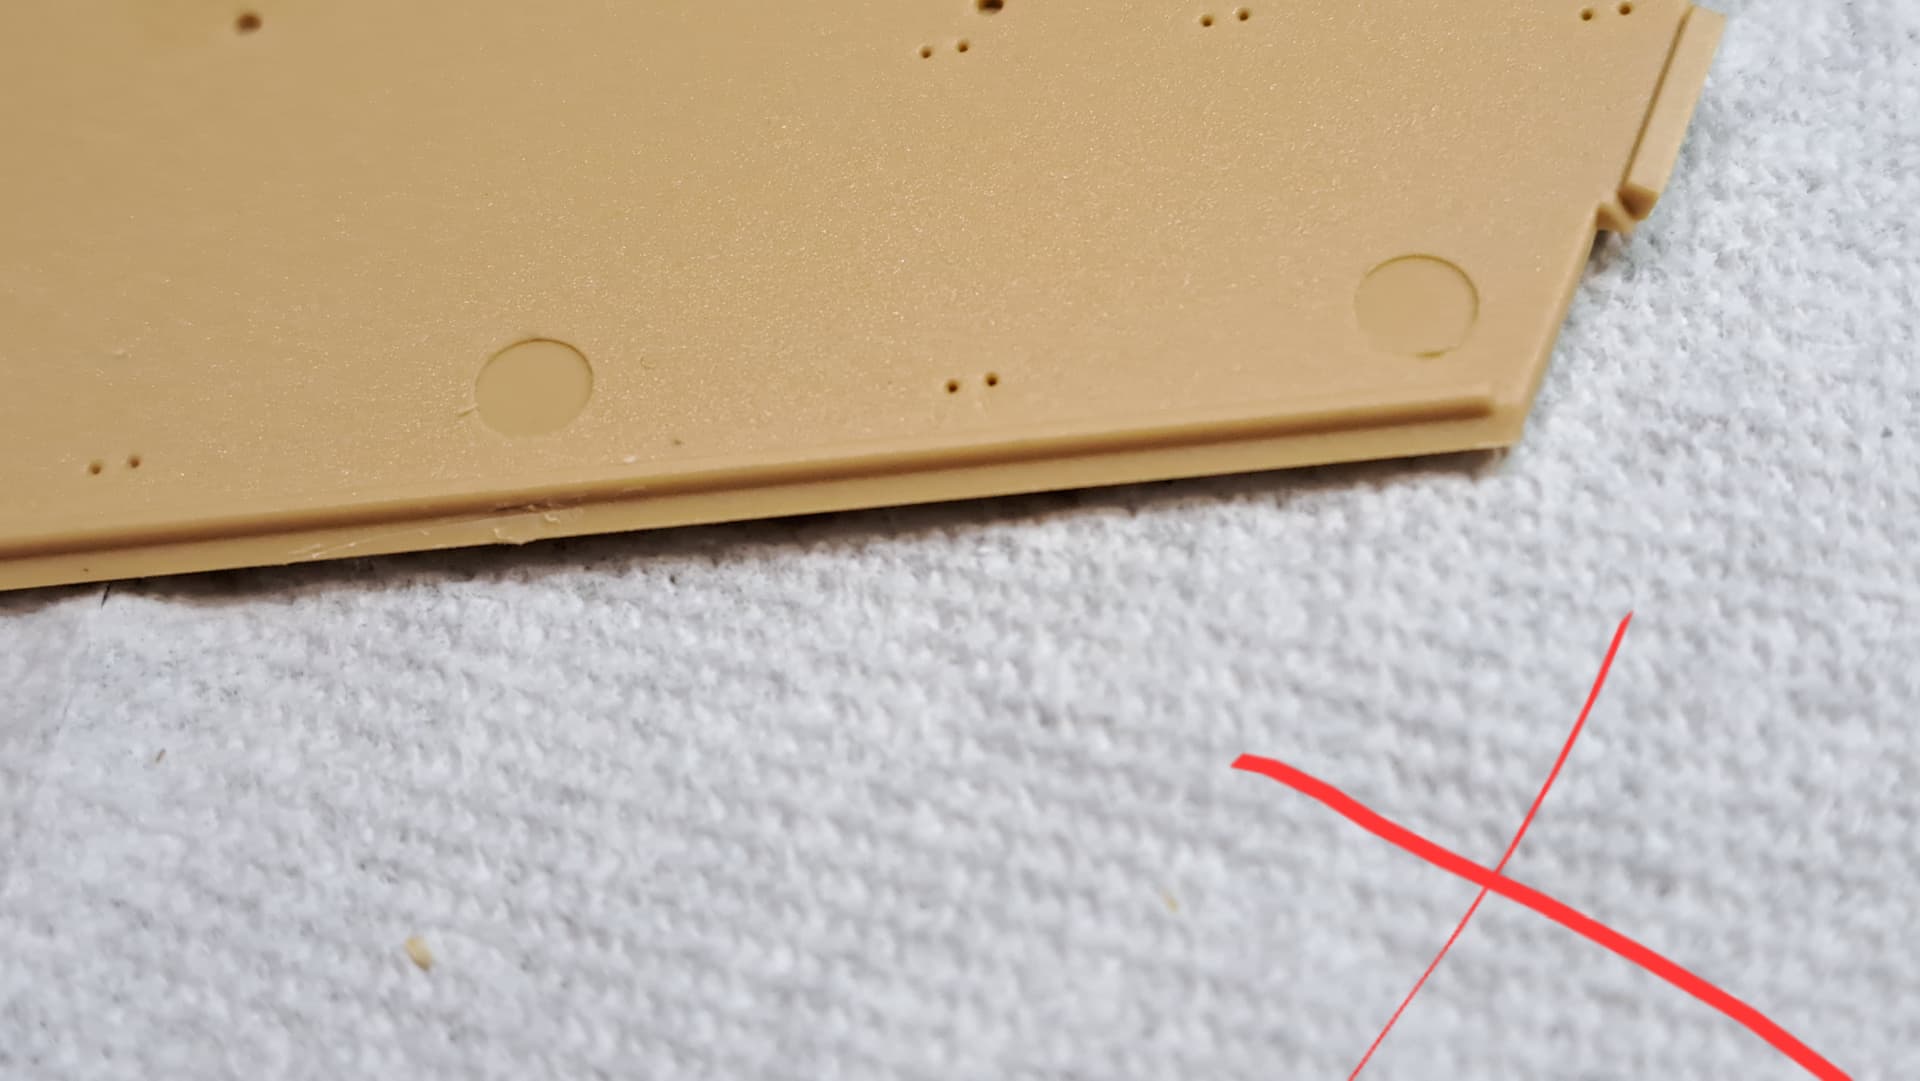
Wow! So ugly Dragon could have done it. Two mating faces must be cleaned up and made flush.
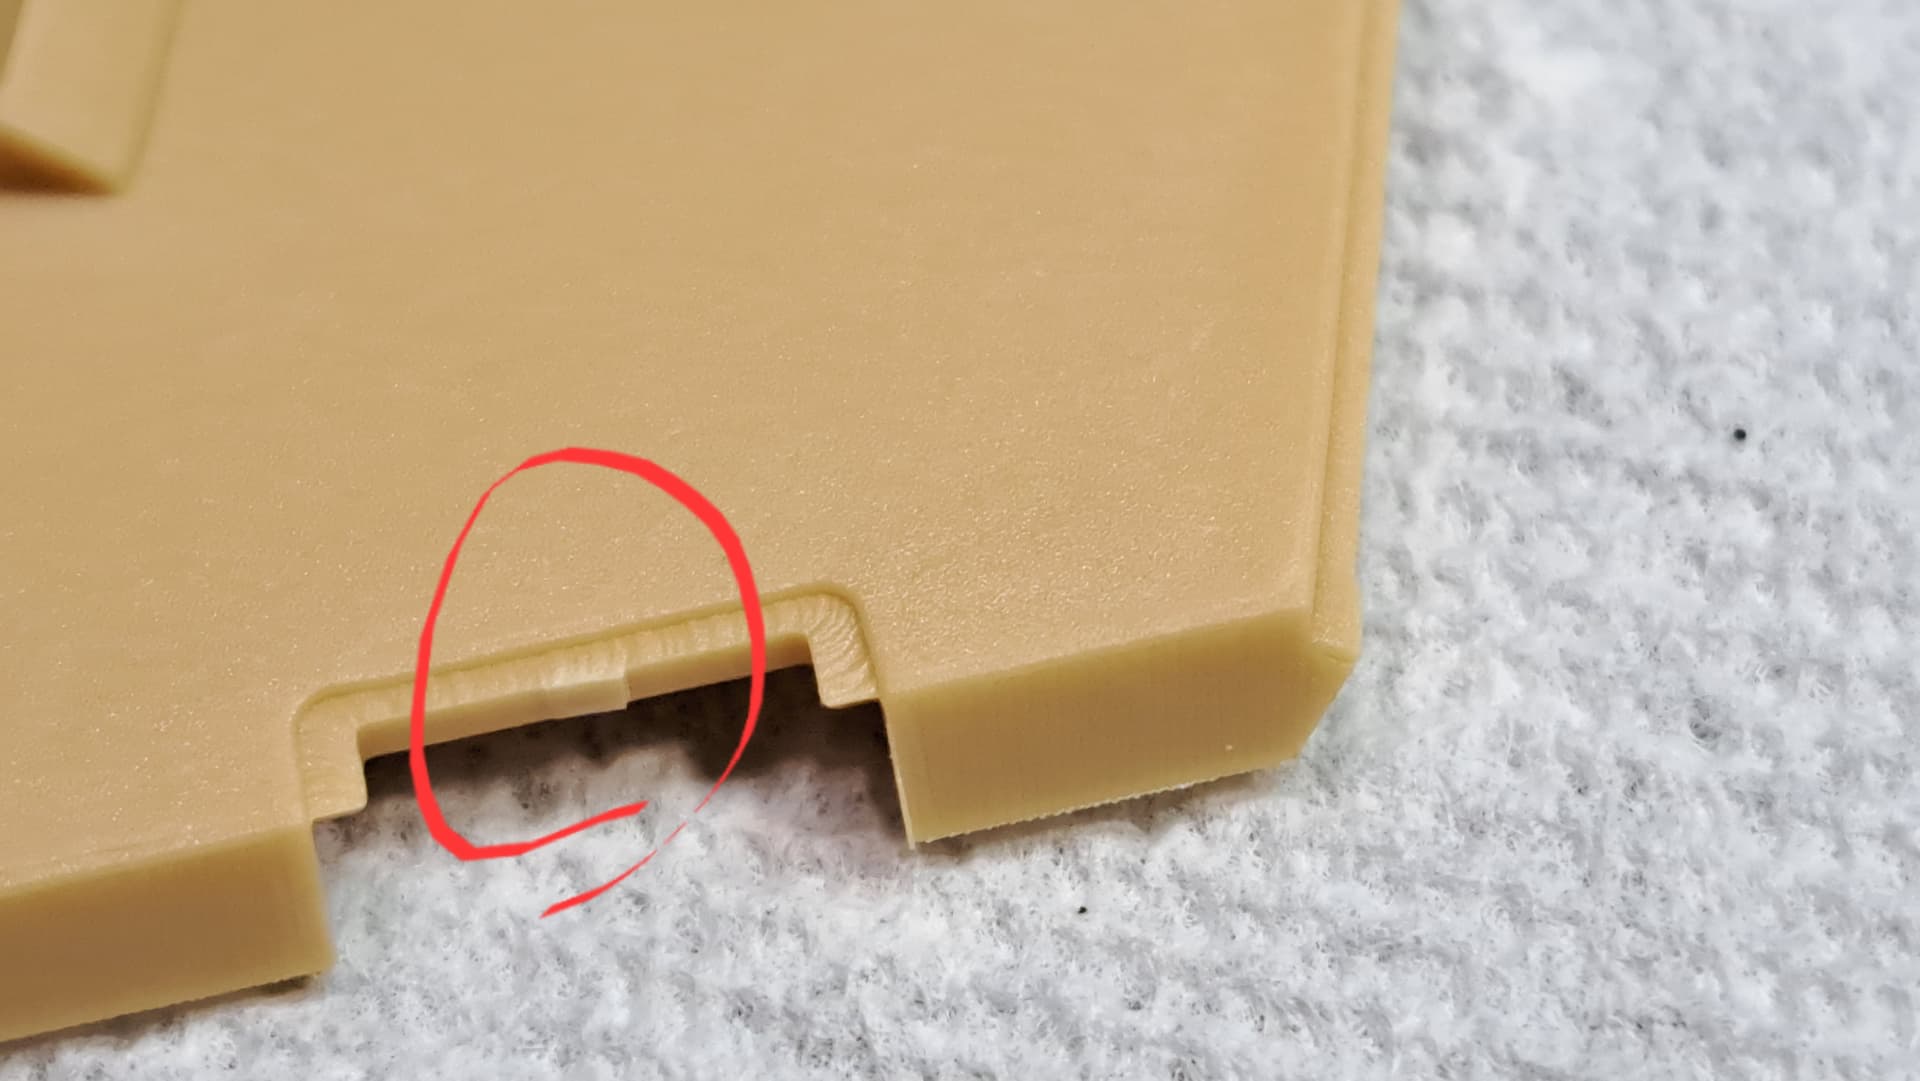
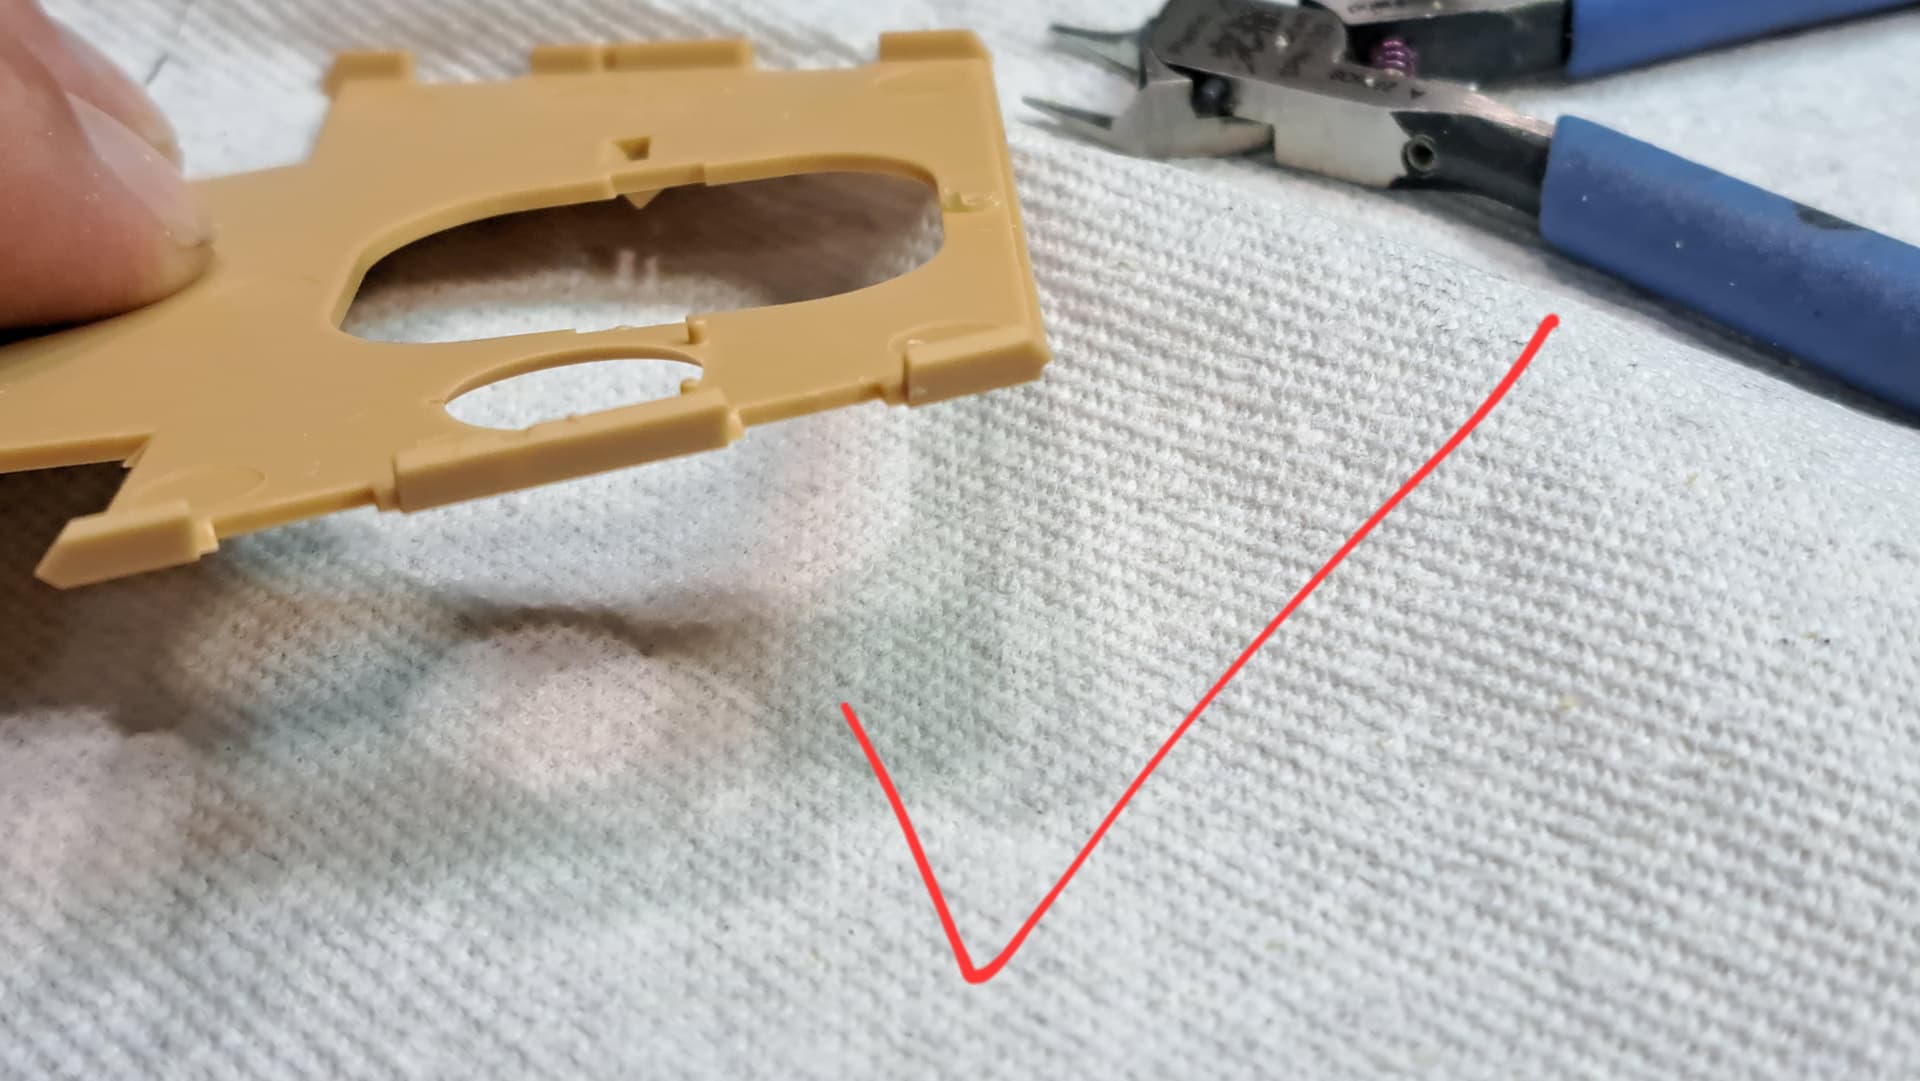
Snipped top of nub away flush.
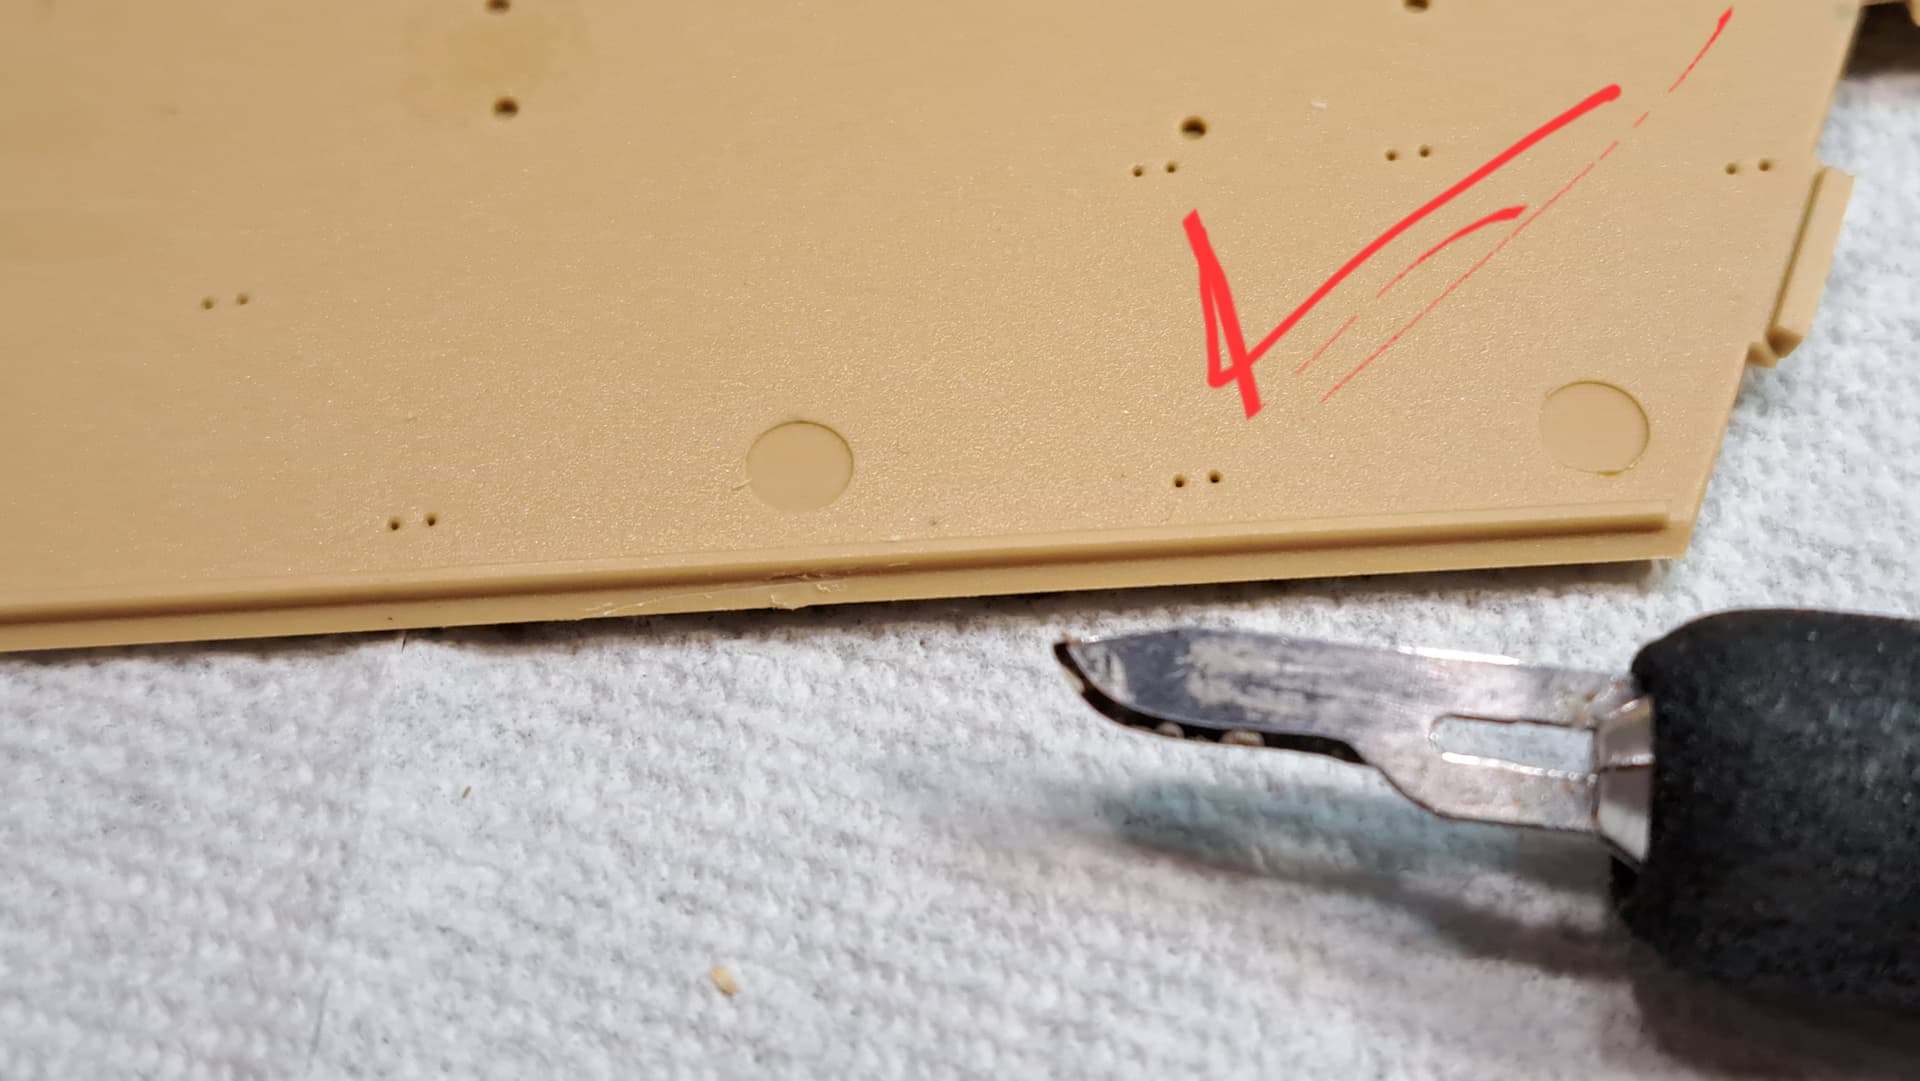
Snipped parallel to each surface to get rid of bulk of burr. Love the small God-Hand’s for this sort of crappy clean up task.

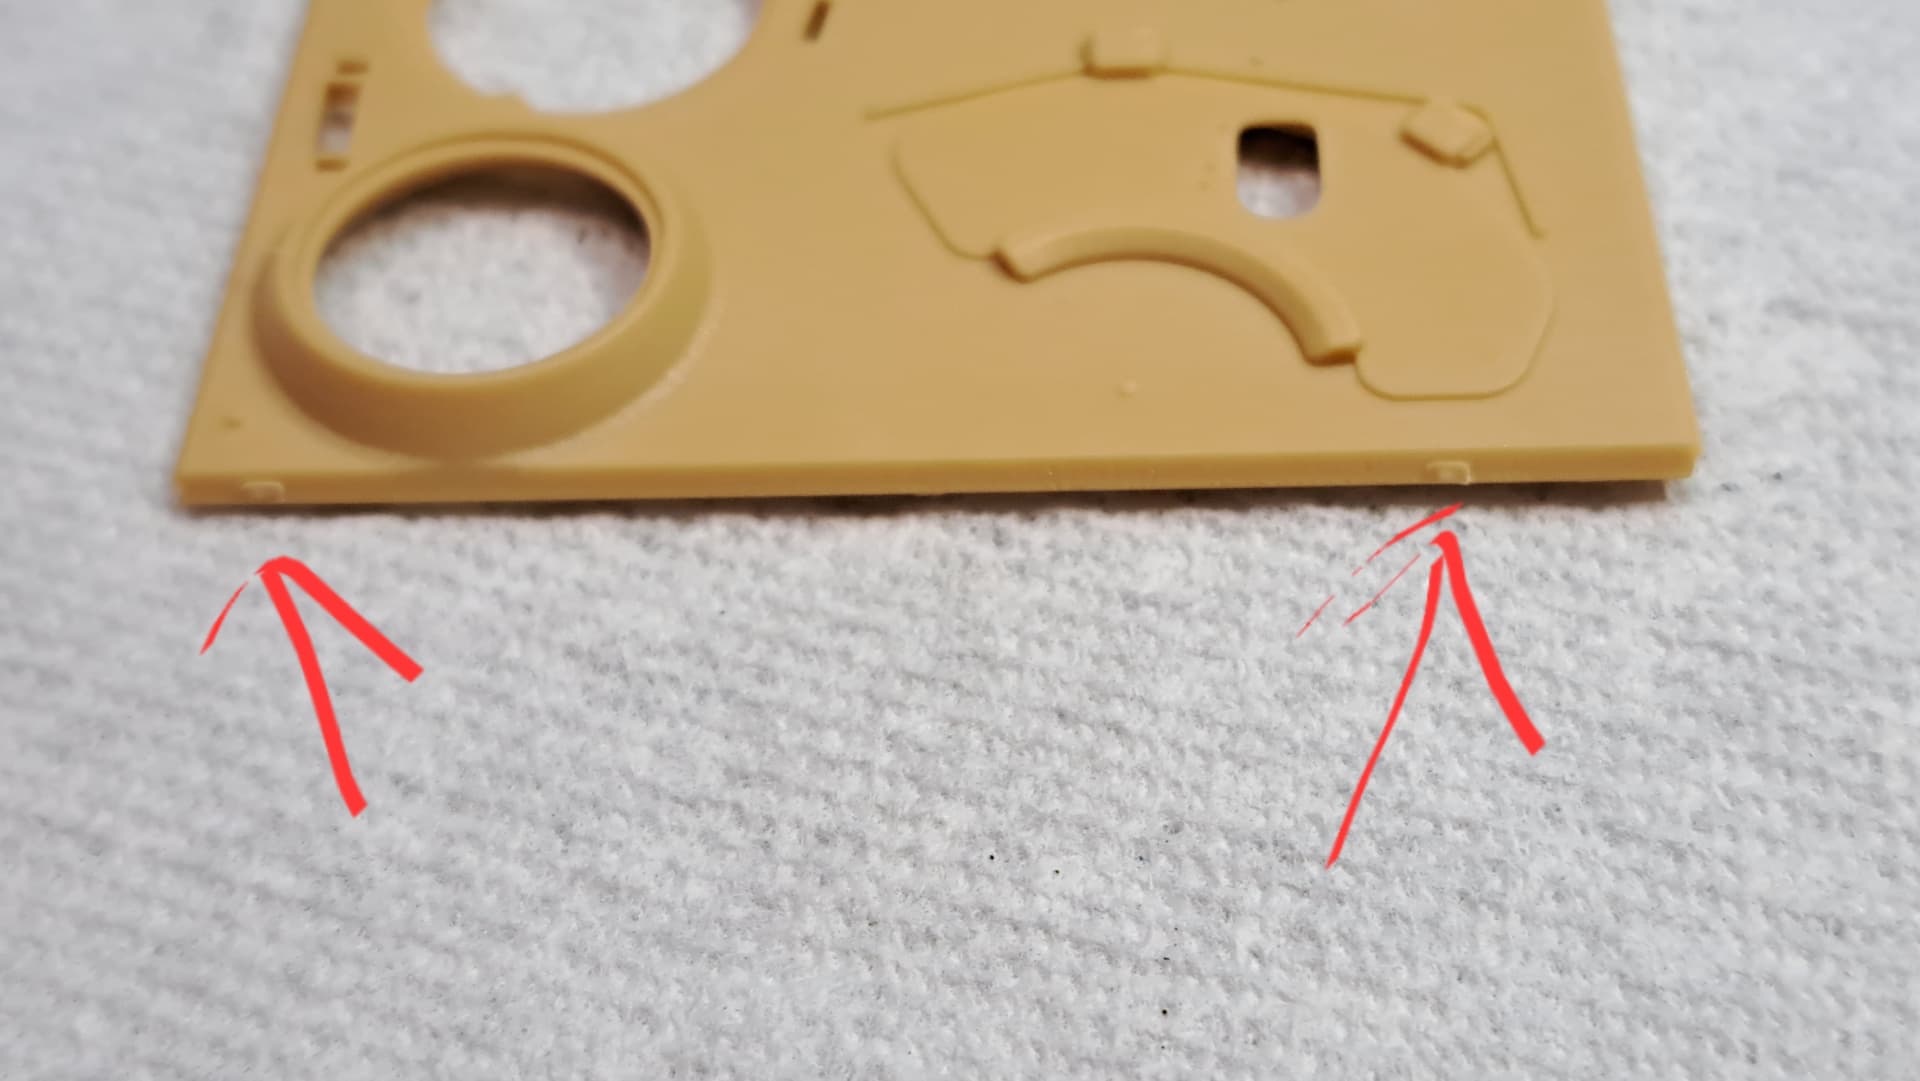
Takes a bit of fiddling with the #15 to scrap out the burr. Both faces need to be flush.
Flush enough
Tiny bit of LC to make the two surfaces nice.

With all the burrs cleaned up on the surfaces being tested, time to test fit. I used tape so the test is a hair sloppy.
Rear plate is fiddly to align but fits near perfect.
Front plate is fiddly to align but fits near perfect.
If parts were wet with liquid cement, I don’t think any of the hair lines showing with the tape would be present.
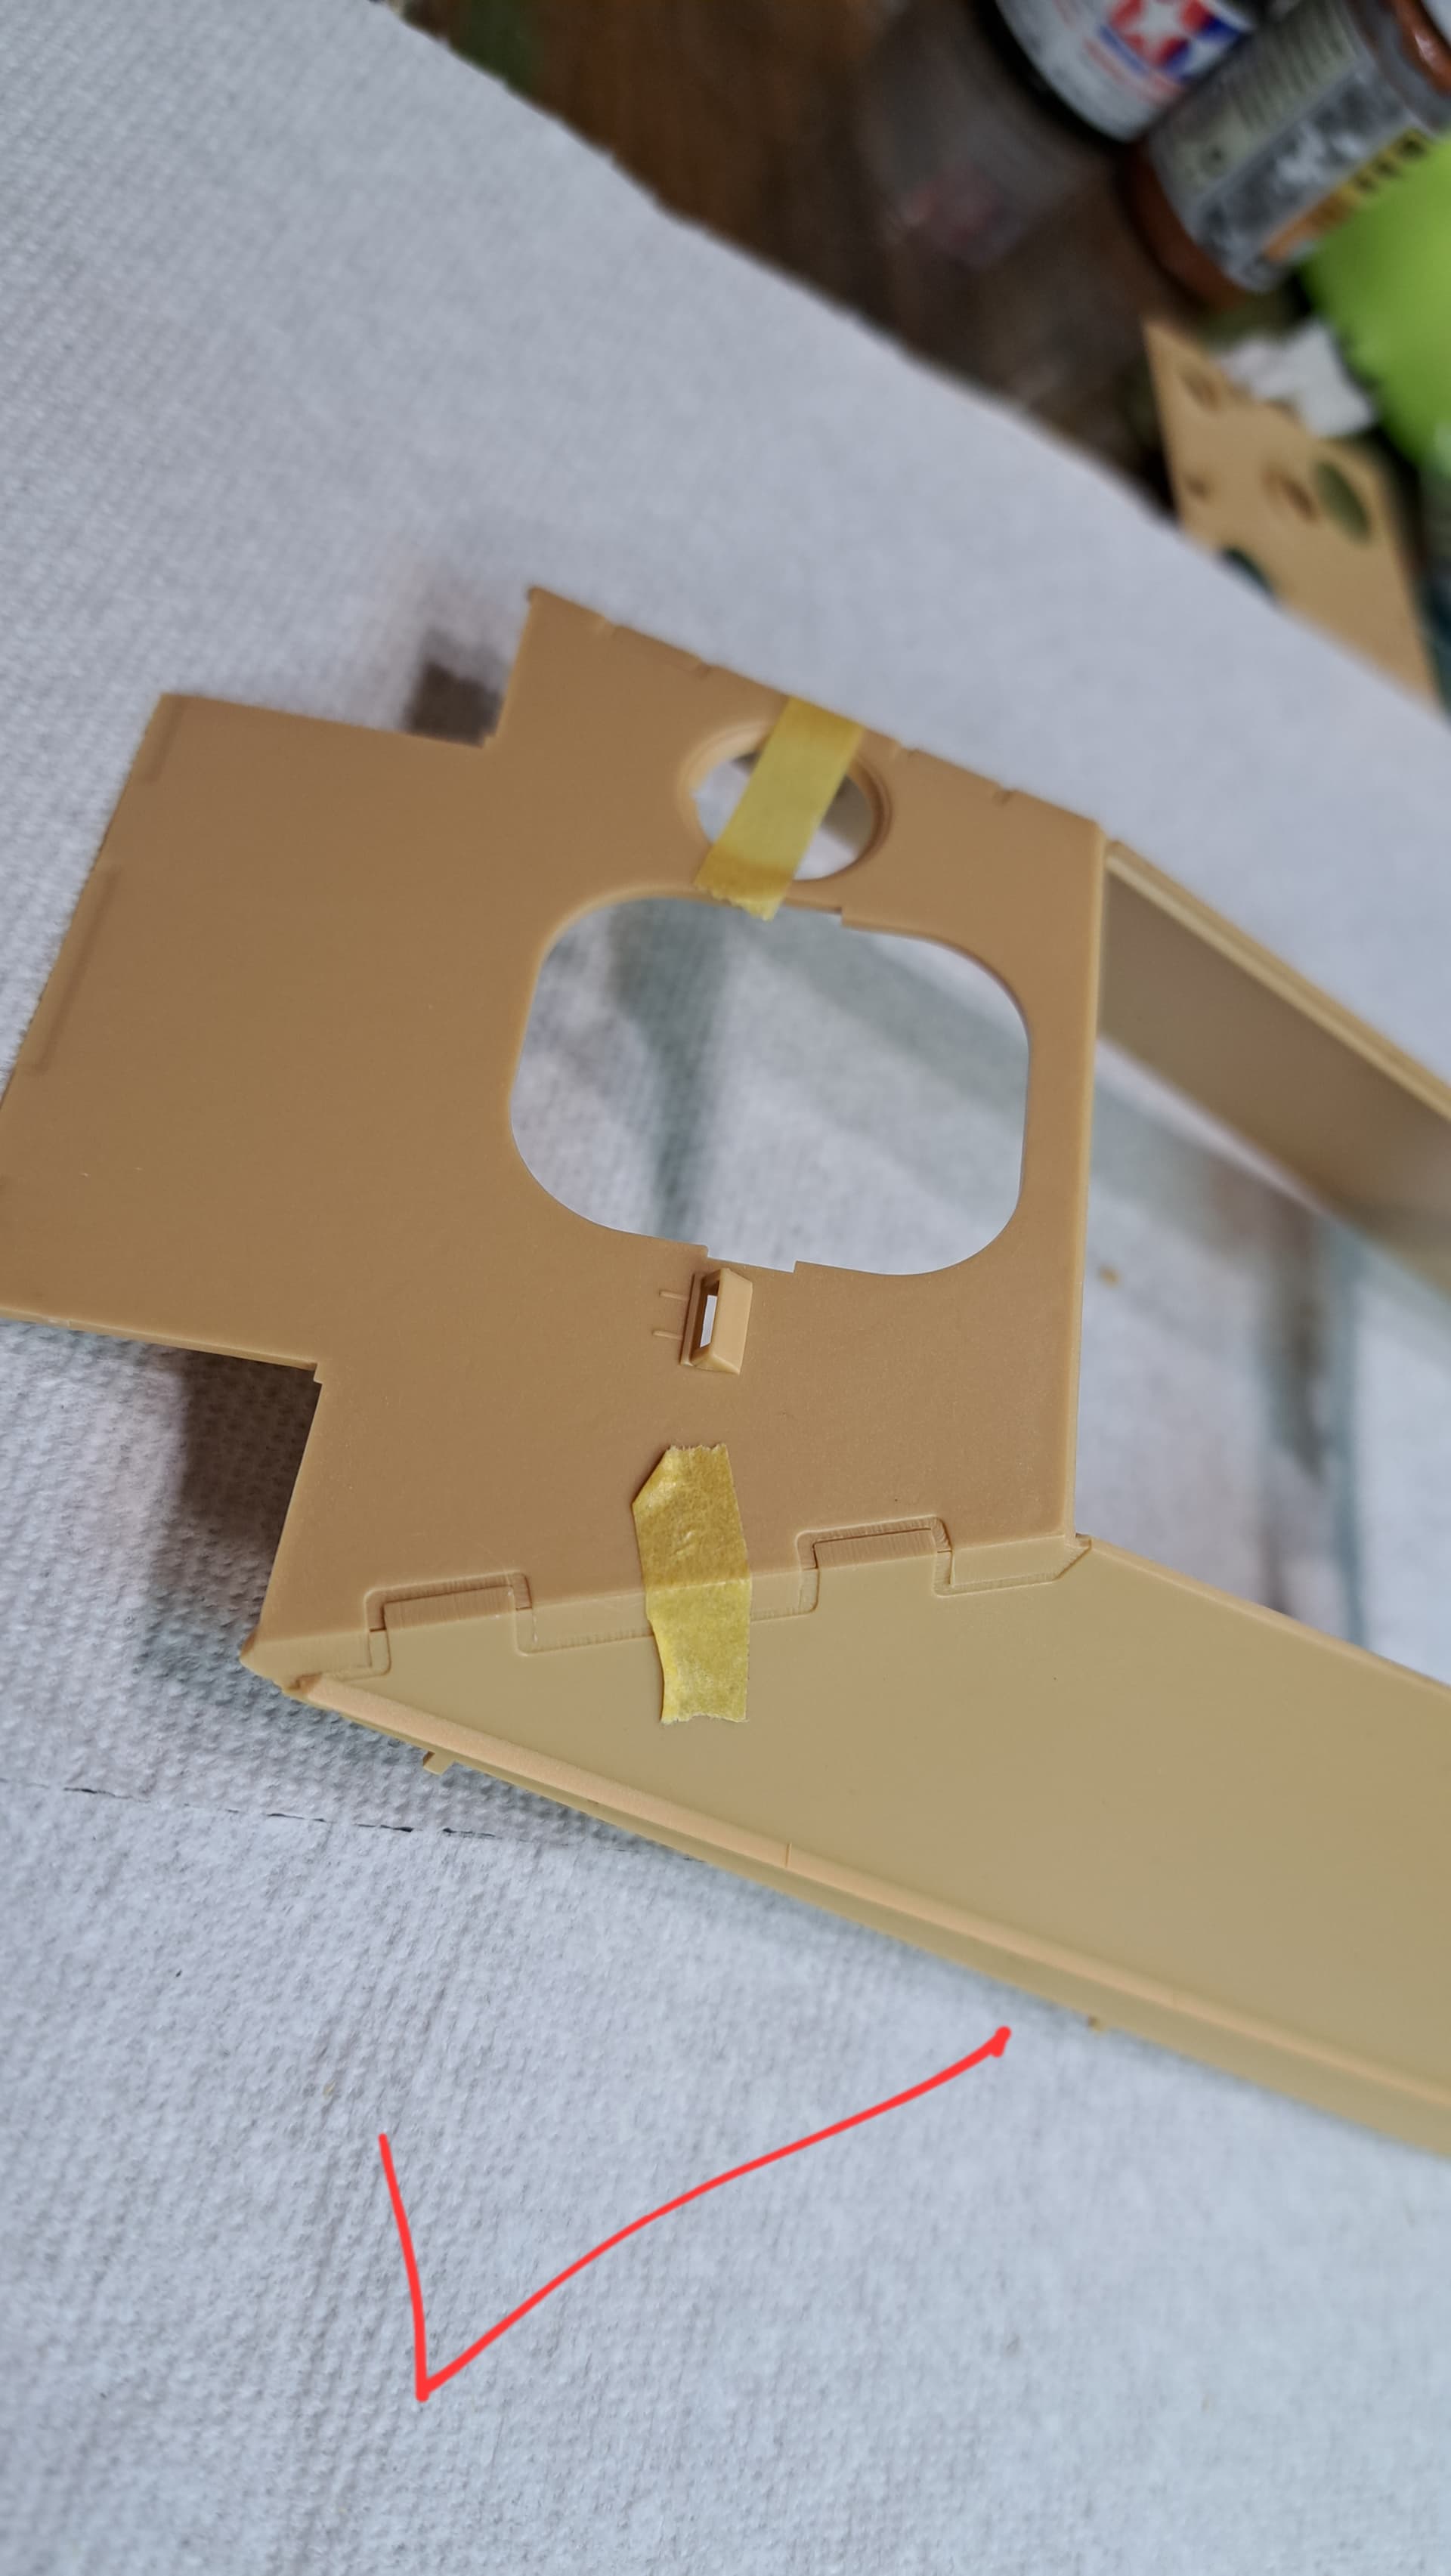

The top is fiddly as hell to place with upper hull just taped together.
If the parts were all being assembled with liquid cement I think the top would go in place easily.

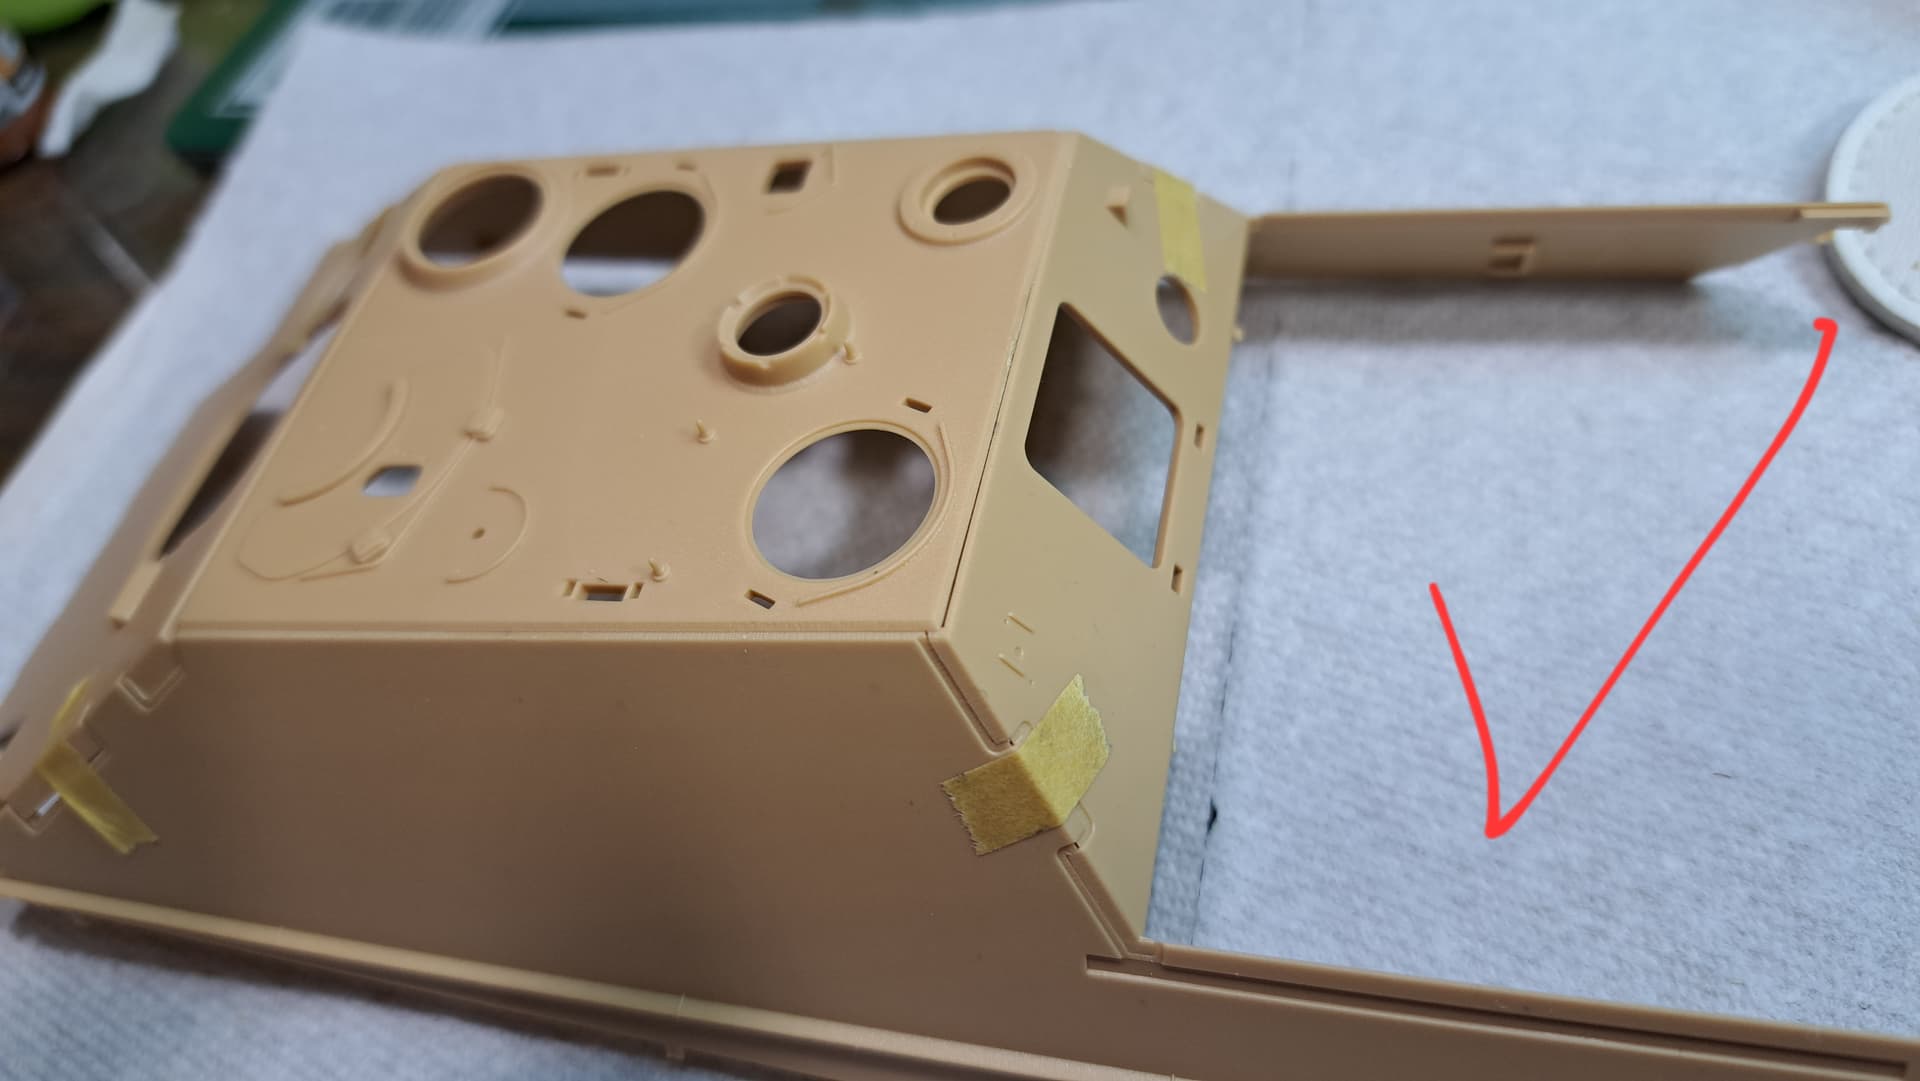
Fit is very good, won’t be an issue if one has the right tools and is careful to remove all the burŕs. Total time to clean parts and test parts one hour.
I’m sure many of the expert builders could do this far more efficiently in time and words.
Hope that helps.
10 Likes
Yes it does thank you so much, maybe it’s just me but why as Me g does make things harder than they should be. Both Tamiya and Dragon have a one piece upper hull which is extremely nice and doesn’t require all the pain of building a tank as they did in factories in Germany. My buddy in the club is working on one as well and he basically said about 90% complete he’s not impressed by the fit and stated it’s close to as bad as their King Tiger which I have build and will not build another.
3 Likes
… I was under the impression that this was standard practice with all models …
![]()
4 Likes
I’ve built this kit and Meng gets 2 thumbs up from me.
Splitting the upper hull into different flatter parts enables more detail to be added to the various parts for less cost I guess (alternatively to do the same with a 1 part upper hull could be done with more expensive slide moulding technology).
Anyhow, @Armor_Buff is spot on with his checks and fitment process. 1 hour doesn’t sound like an excessive amount of work to me?
My results on the same kit below, similar process to Wade:
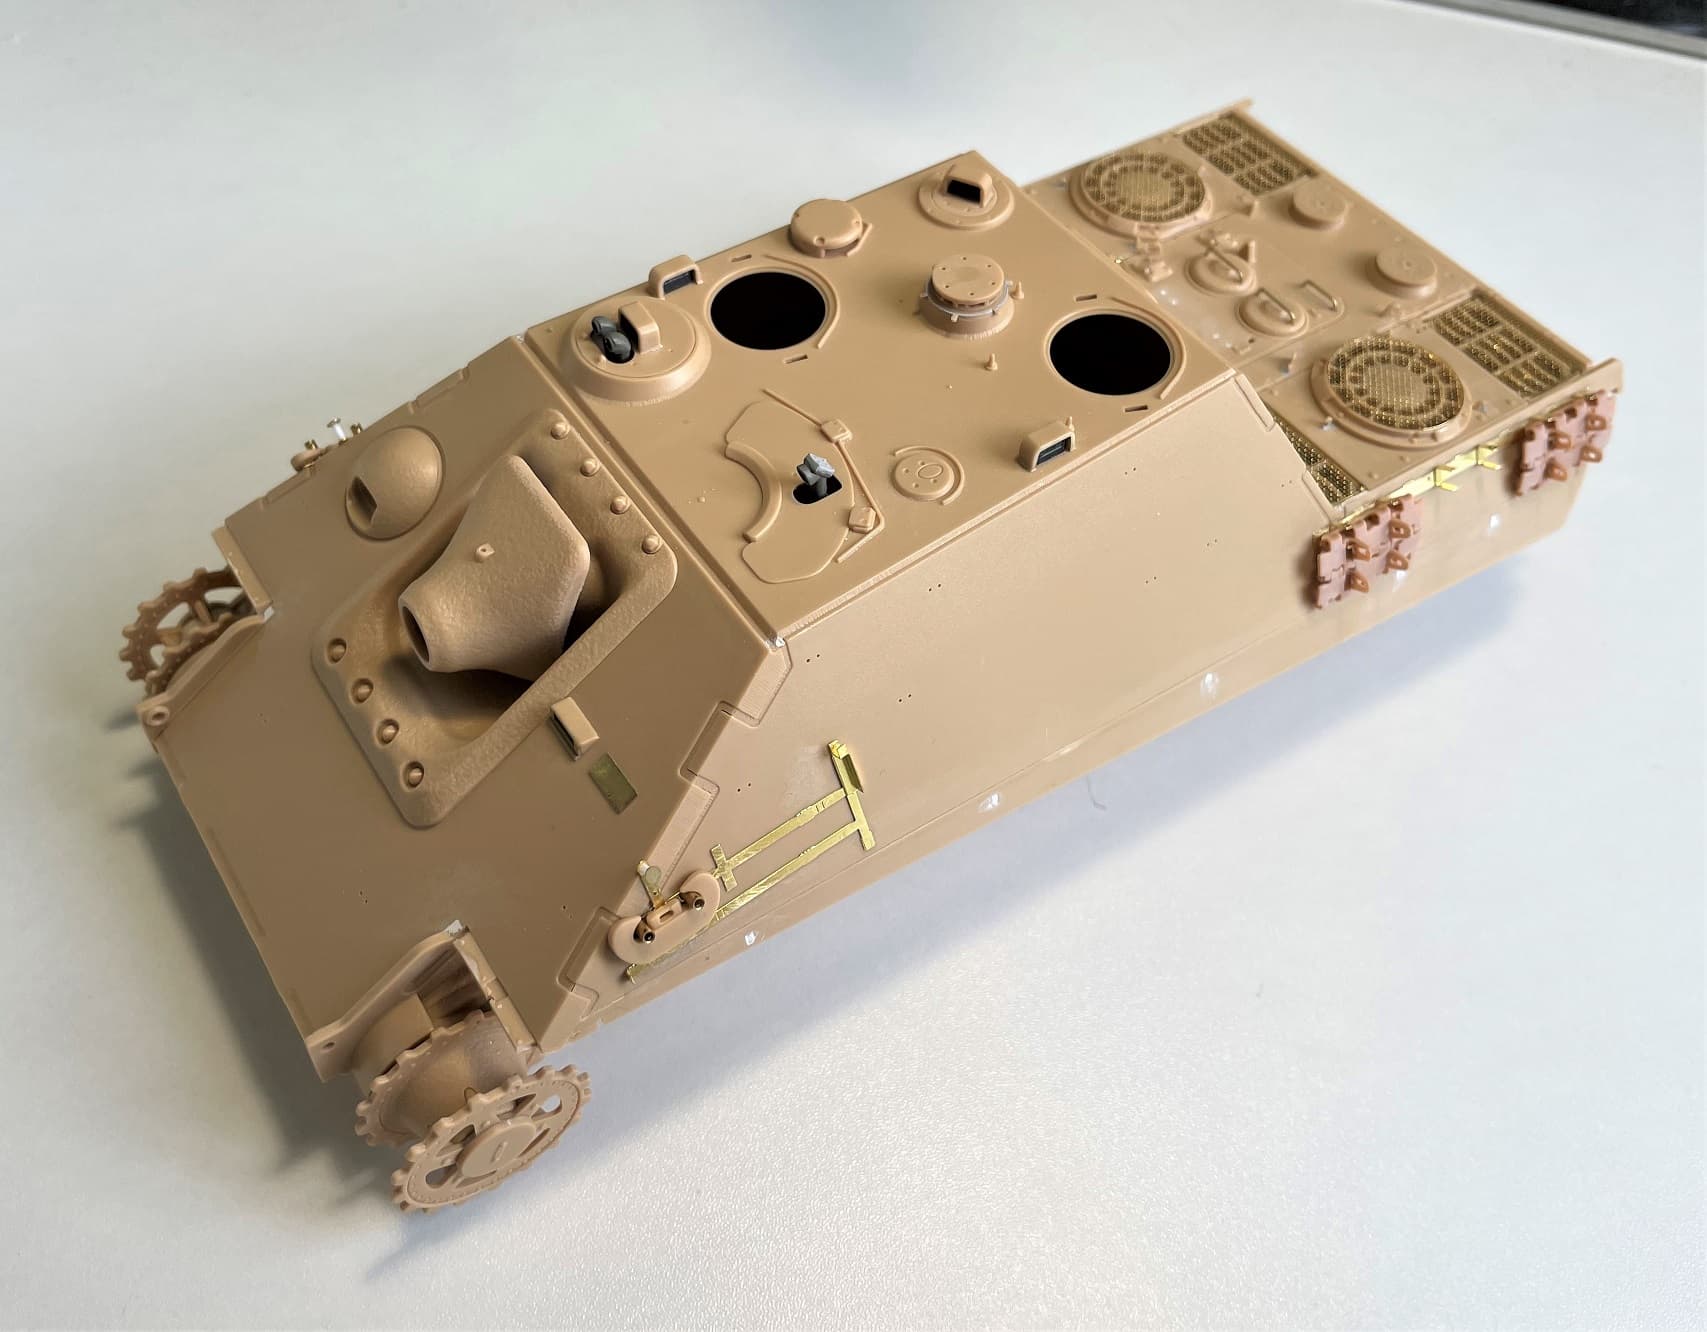
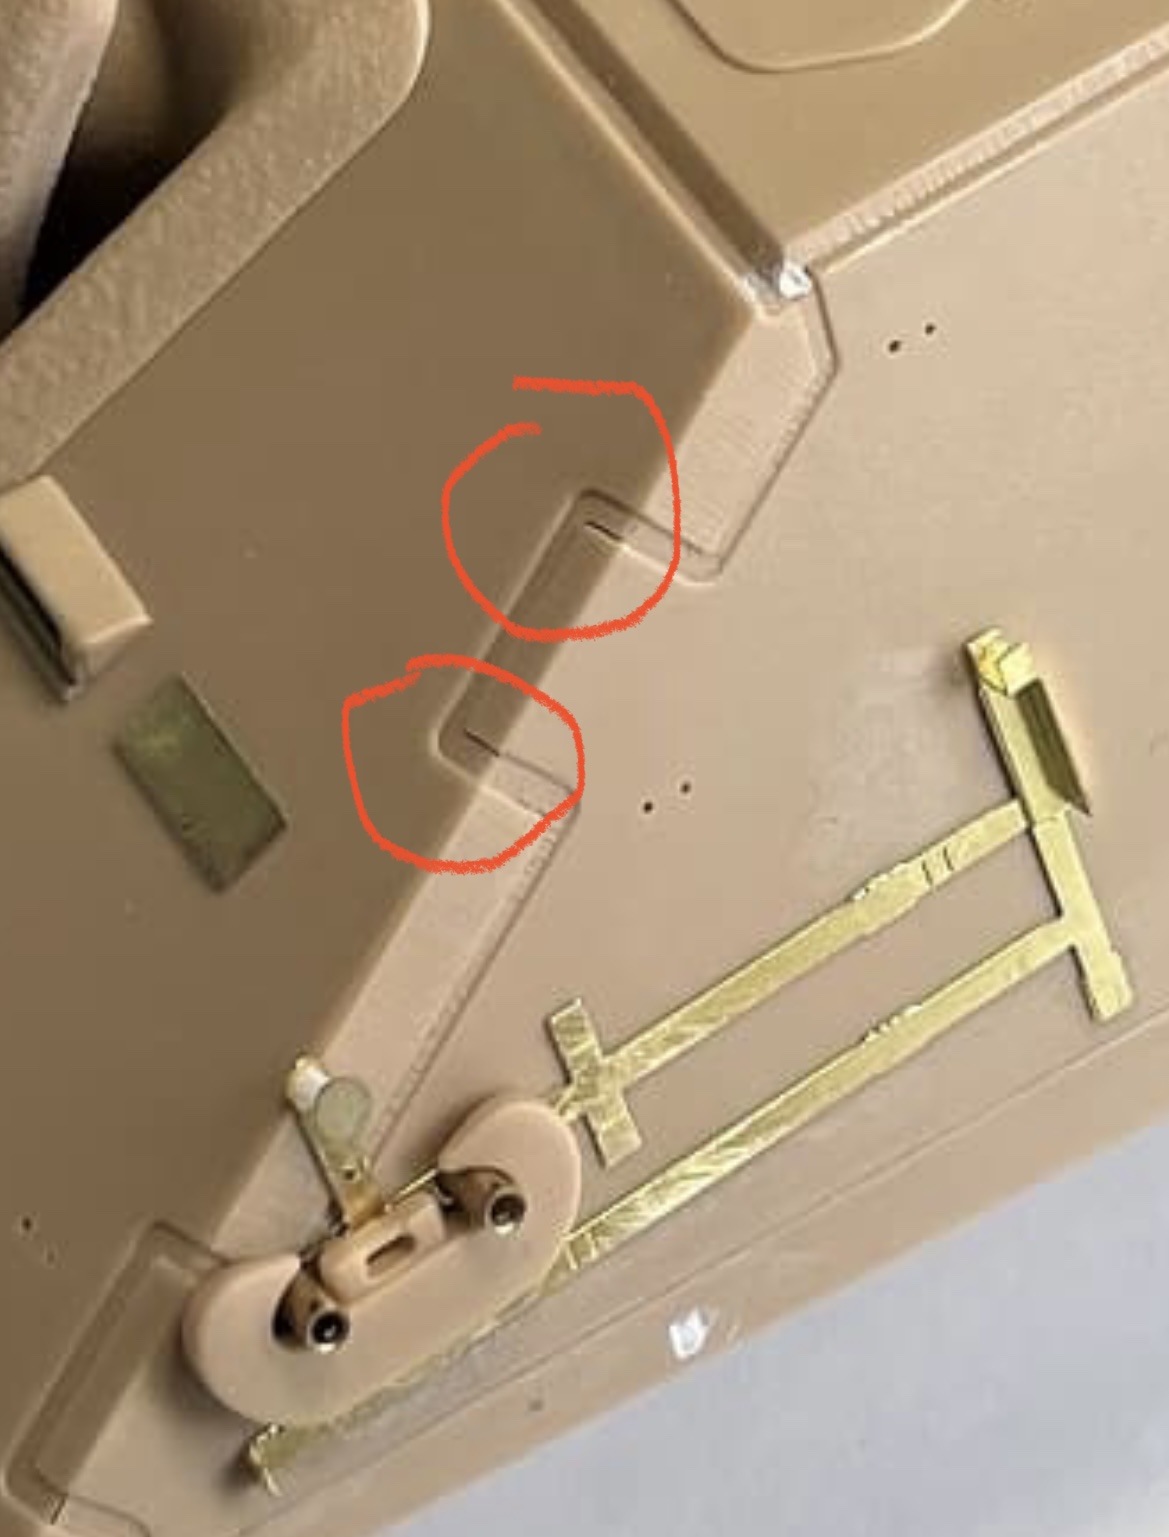
Close up of some very slight gaps, which I ended up closing with some diluted tamiya white putty on the end of a fine paintbrush:
7 Likes
I’ve not built the kit, or seen it in the flesh, but looking at the photos I get the impression that the intention is to get the interlocking armour plates as close to the real thing as possible. Moulding the upper hull in one piece will make that more difficult, but Tamiya and Dragon have probably chosen for ease of assembly over accuracy. So it’s, as so often, a case of picking the kit that’s right for you.
5 Likes
@oyoy23 Sean, with what Barleeni says and the fit test what’s your thoughts on building the Meng kit? There a lot of fantastic looking kit in the box for sure. The Tamiya kit is a good kit but overshadowed by the newer Meng.
@barleeni David, that’s a sharp looking JagdPanther! It’s good to know Meng has a two thumbs up kit. I think you’re right about Meng’s design having sharper details with build by panels approach. It’s good to know an hour is in the ballpark for those parts!
@Uncle-Heavy, one would think and hope.
Maybe meticulous parts clean up is a “serious modeler” characteristic?
3 Likes
It is, and a definite attribute of skill level between an advanced builder and a beginner or junior modeler. It’s also more important with modern kits and their tighter fit. Old kits from the 60s and 70s had such a loose fit that a little nub had no effect on the final outcome. Sometimes it even helped fill in the gap. The first thing I learned that really improved my modeling was the use of putty to fill in all those gaps and seams.
Ken
3 Likes
Good points Ken.
In 1995, when I learned how to consistently mix Molak Stucco Putty with Testor’s Liquid Cement and apply it like thin paint to fix seams, hair lines, sinkmarks, divits, depressions, punch marks and blend was my magic moment.
Saw this and thought it may be of interest…
missinglynx: rye-field-wins-the-jagdpanther-race
It has a nice summary of the strengths of the various popular 1/35 JagdPanther kits.
1 Like
Haha! I received a Meng G2 as a Christmas present. Figures it would be the worst of the lot according to that forum discussion.
2 Likes
Doug, I’m jealous!
It’s socks for Christmas or occasionally a book of car wash coupons here.
My impression, the Meng JagdPanther will make an outstanding build. Finding time is my biggest concern with the newer JagdPanther kits.
Worst JagdPanther? Italeri’s garbage for the win due to the lower hull, tracks & wheels.
I happy RFM gets the nod in the hair splitting contest. All of the four kits discussed (Takom, RFM, Tamiya (1997) & Dragon are light years beyond what we used to have available. It’s astounding we have so many excellent kits!
Just for fun…


3 Likes