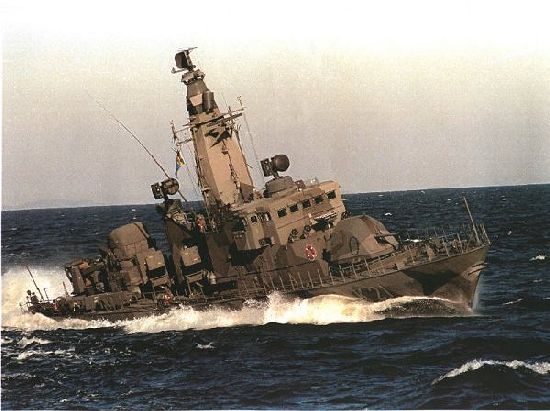
In the 1970s, Hollandse Signaalapparaten (HSA) developed a close-in weapon system (CIWS) named Goalkeeper, as an alternative to the American Phalanx. The basic idea is the same: a radar-guided, automated gatling gun to shoot down incoming missiles. Rather than the 20 mm M61A1 Vulcan gun, though, HSA picked the 30 mm GAU-8 that the USAF had developed for the A-10 ground attack aircraft, on the basis that the bigger gun meant more hitting power and greater range.
Here’s an advertising film for it from the 1980s:

Though, of course, it’s an ad so it probably makes it a little better than it really is, tracking relatively tiny anti-tank missiles and even artillery shells seems pretty impressive to me.
The system was adopted by the Royal Netherlands Navy (of course) as well as a couple of others, including the British Royal Navy, though that replaced them some years ago. Apparently, one of the reasons for it not being more popular (other than it fairly high price) is that Goalkeeper needs ammunition storage below deck — unlike Phalanx, which carries everything above-deck, making it much simpler to install on a warship.
For modelling, a few years back, RPG Model released a kit of the above-deck part of the Goalkeeper system in 1:35 scale:
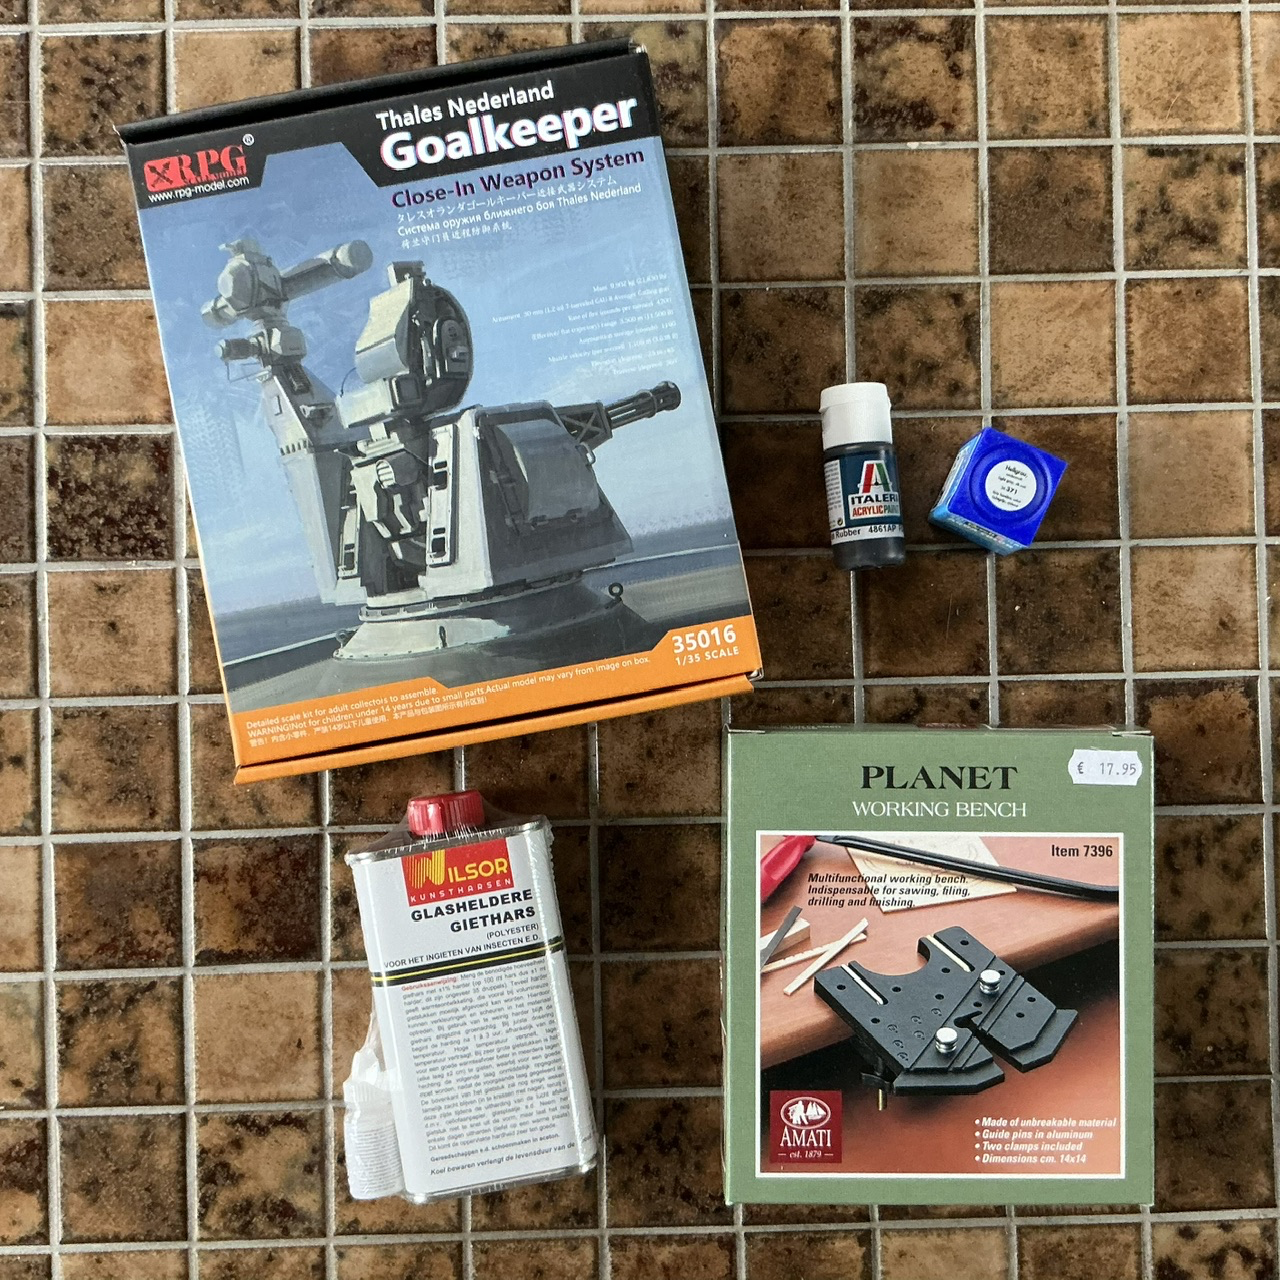
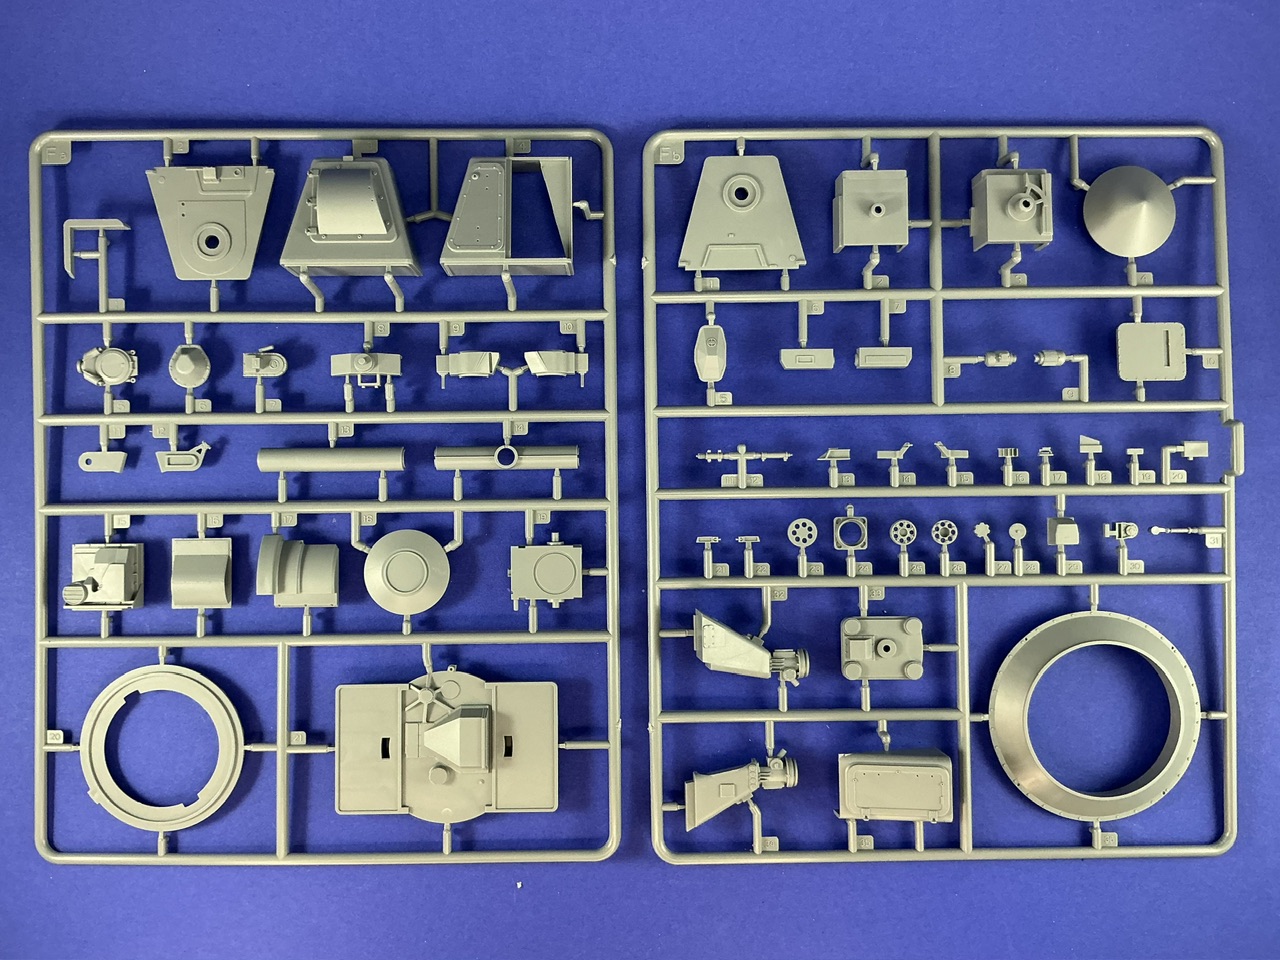
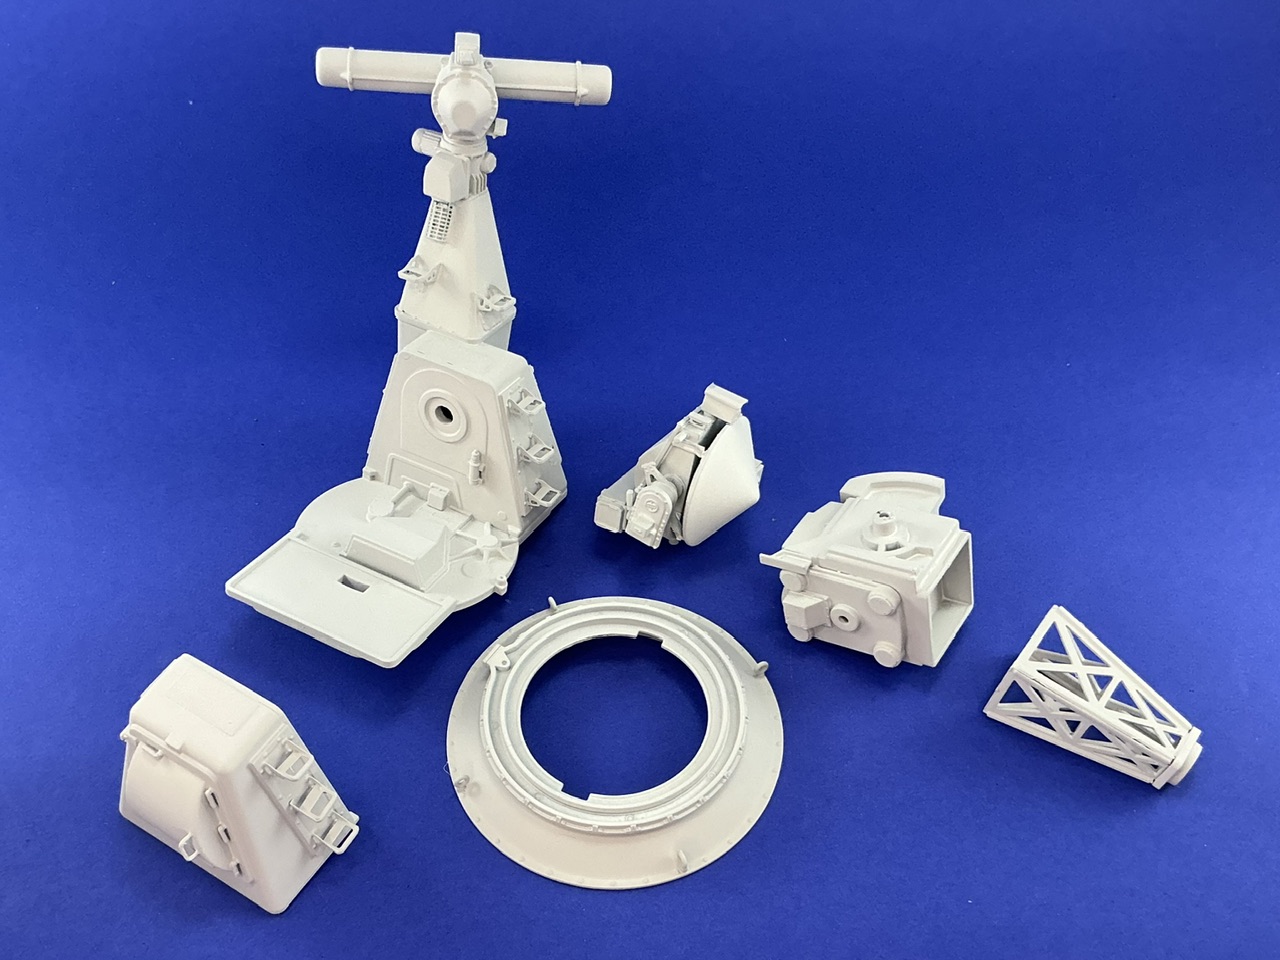
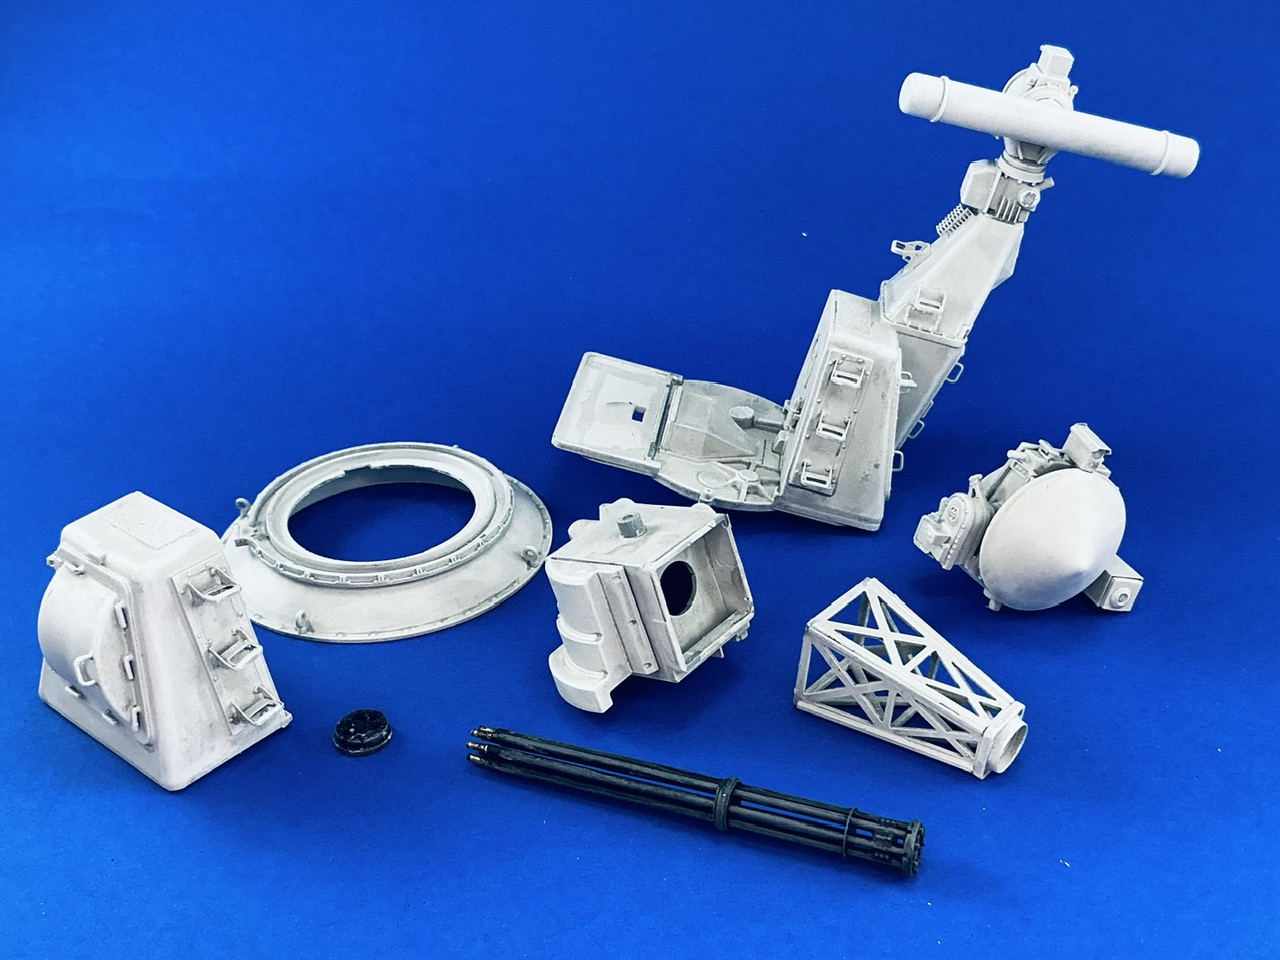
Inside the box, you get this:
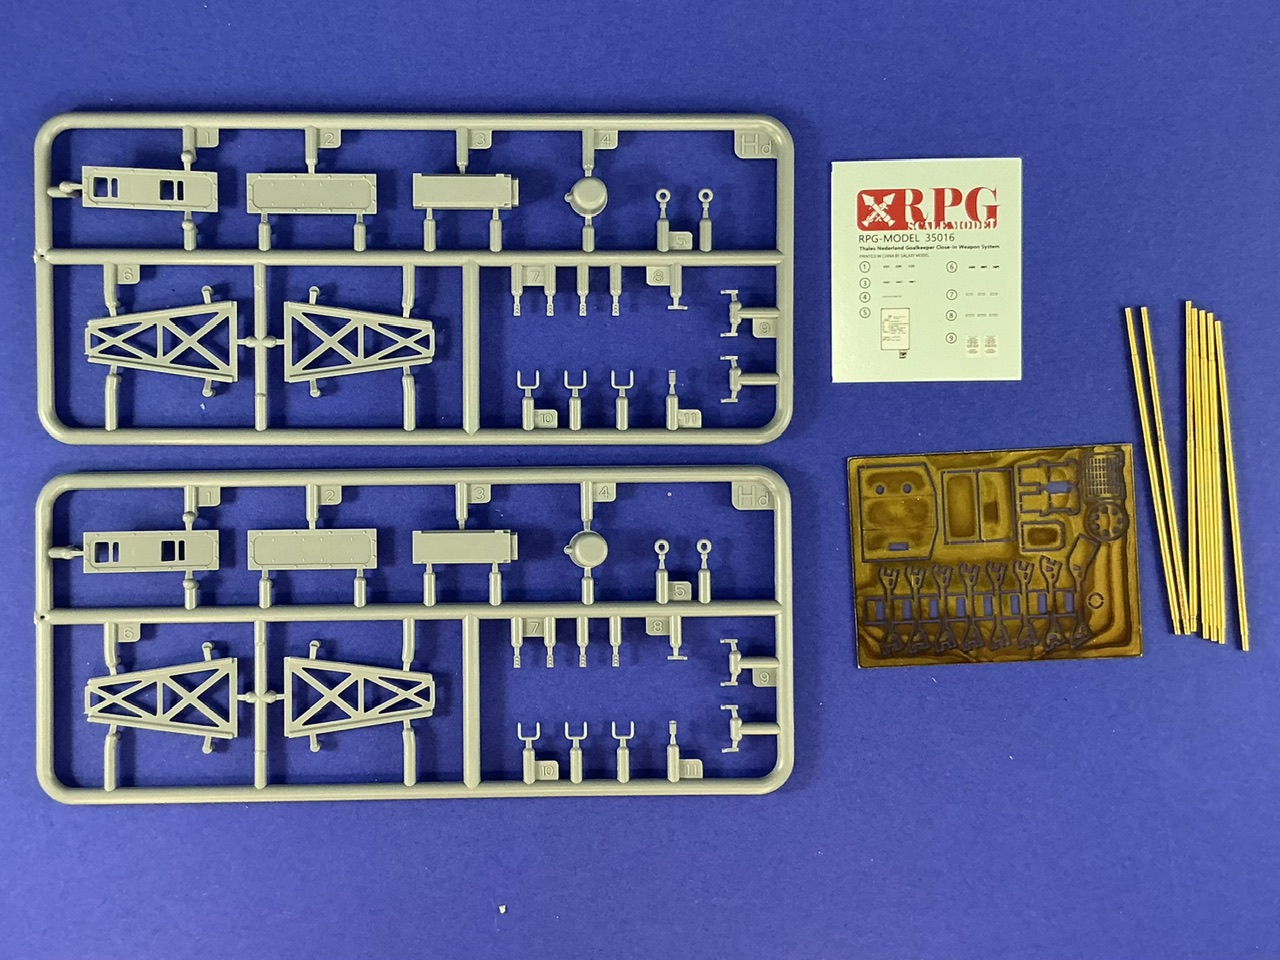
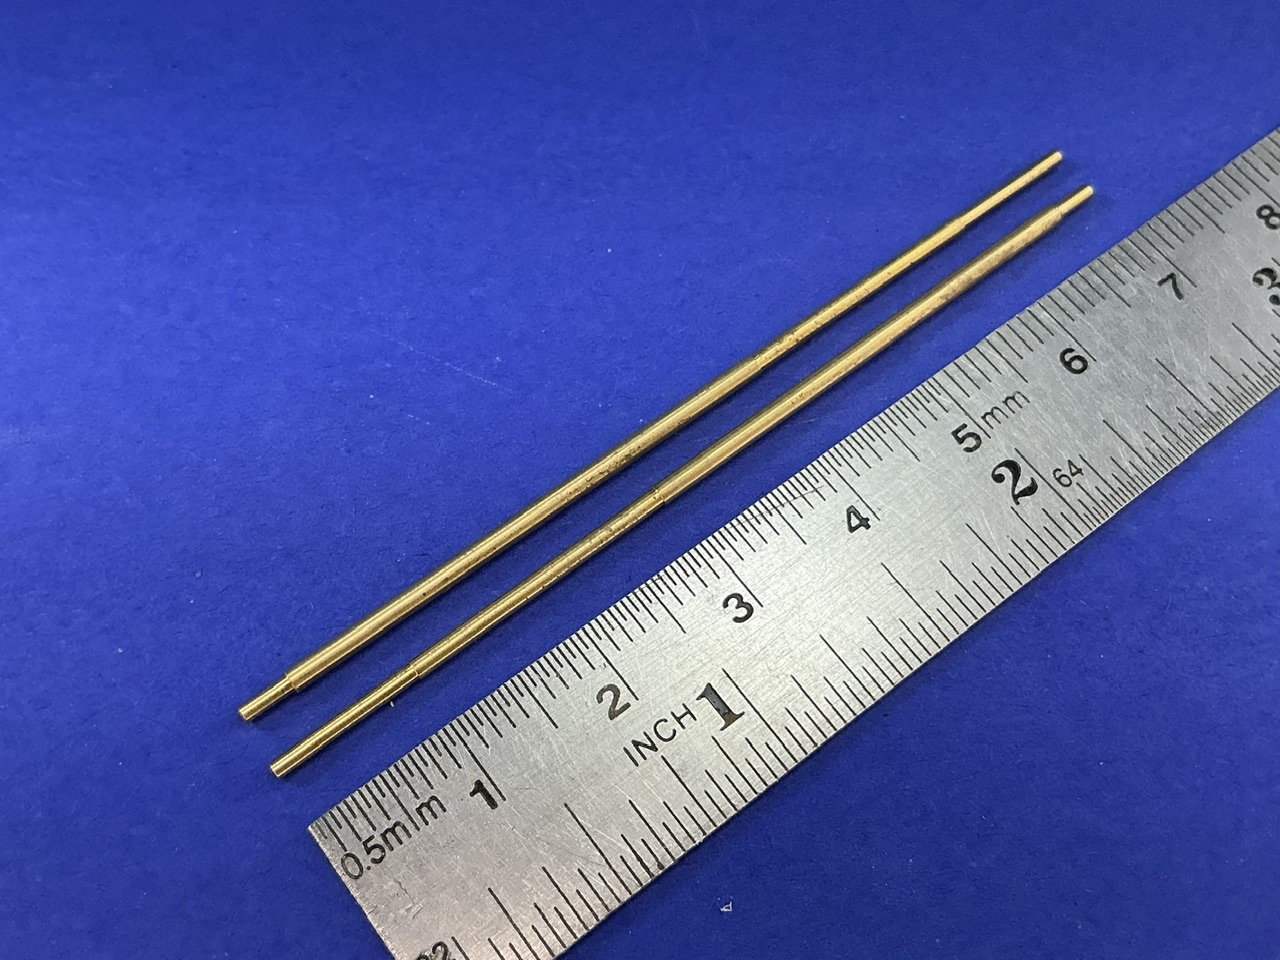
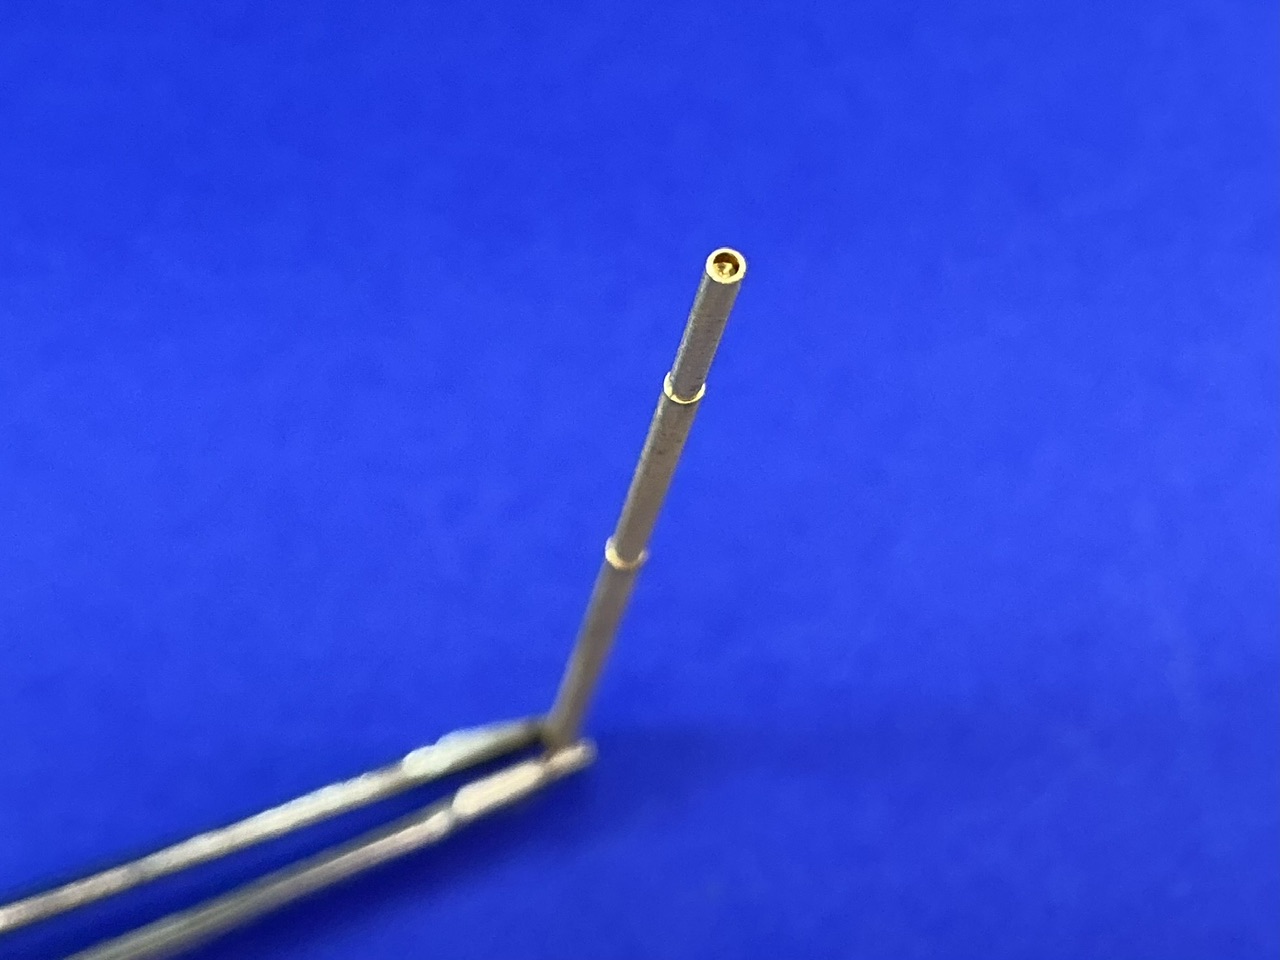
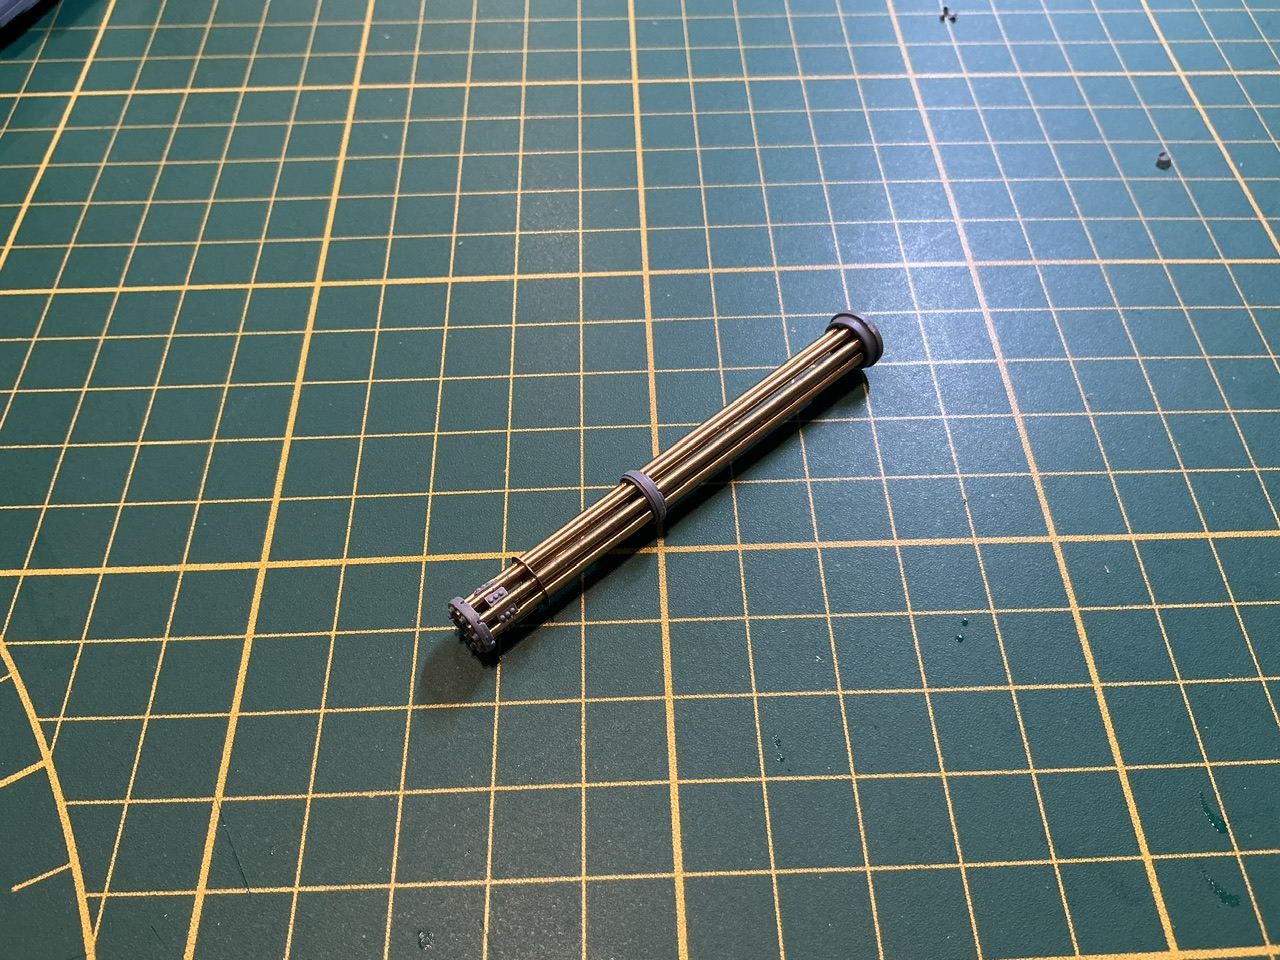
Plus instructions, of course, which is a small, thin book with just twelve steps (off the top of my head). The gun barrels are turned brass, and fairly impressive:
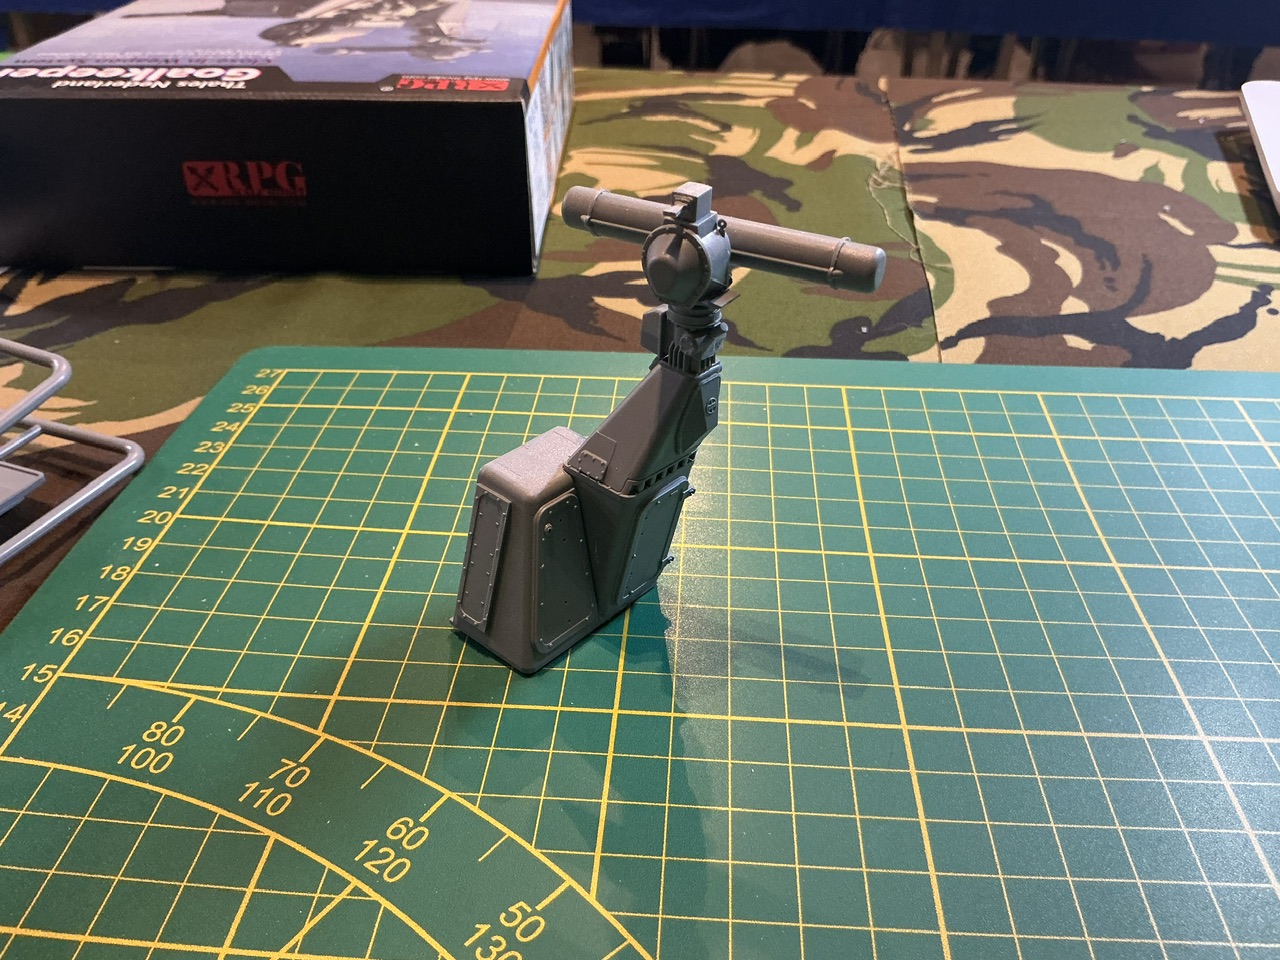
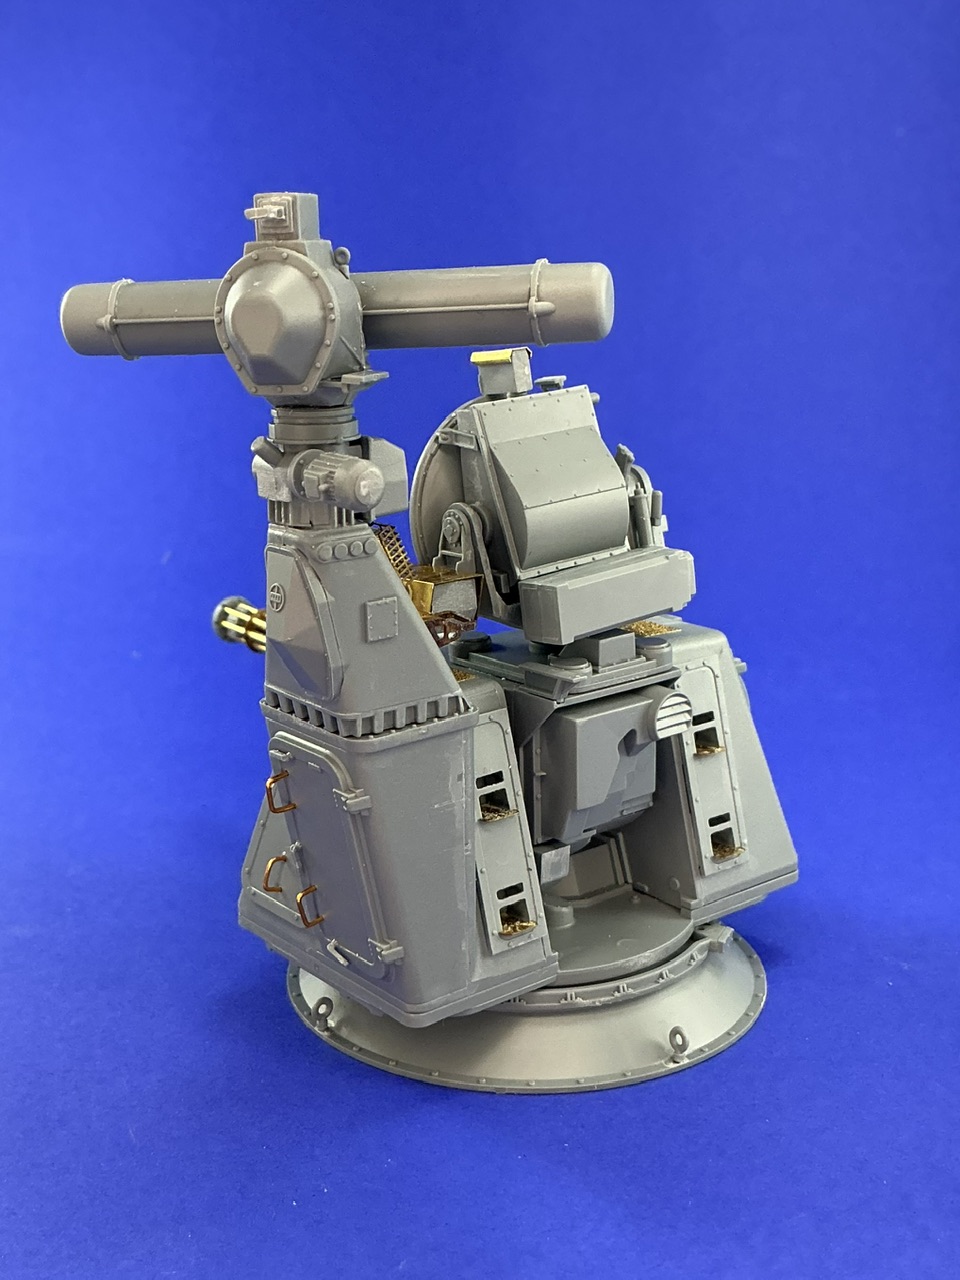
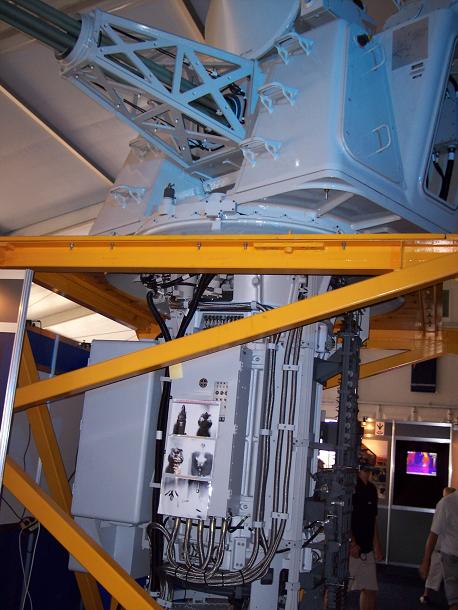
At a local model meeting about two months ago, I started putting the kit together. Here’s the left side with the radar system:
One thing I noticed at this point already is that one or two parts are misnumbered in the instructions, but that was immediately clear when looking at the part on the sprue because it clearly isn’t one that will fit. Since there are only four sprues and two are identical, it’s easy enough to find the part you do need.
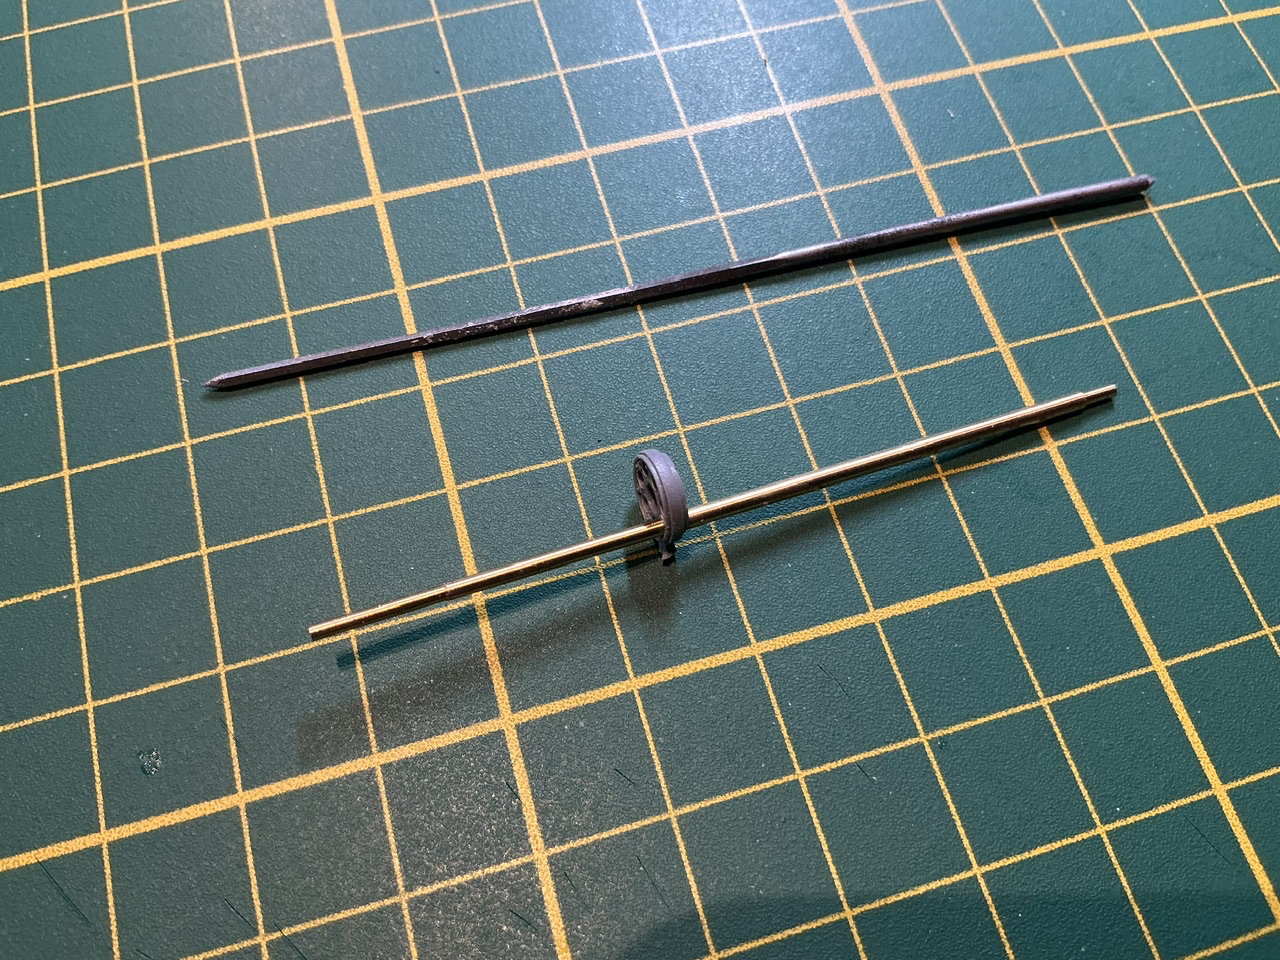
For the gun, the barrels don’t properly fit in one of the rings that they’re supposed to go through:

They will only go in to the first step you can see in the barrel photo (second to last above), but the ring should rest on the second step. Handily, I had brought my sets of reamers ![]()
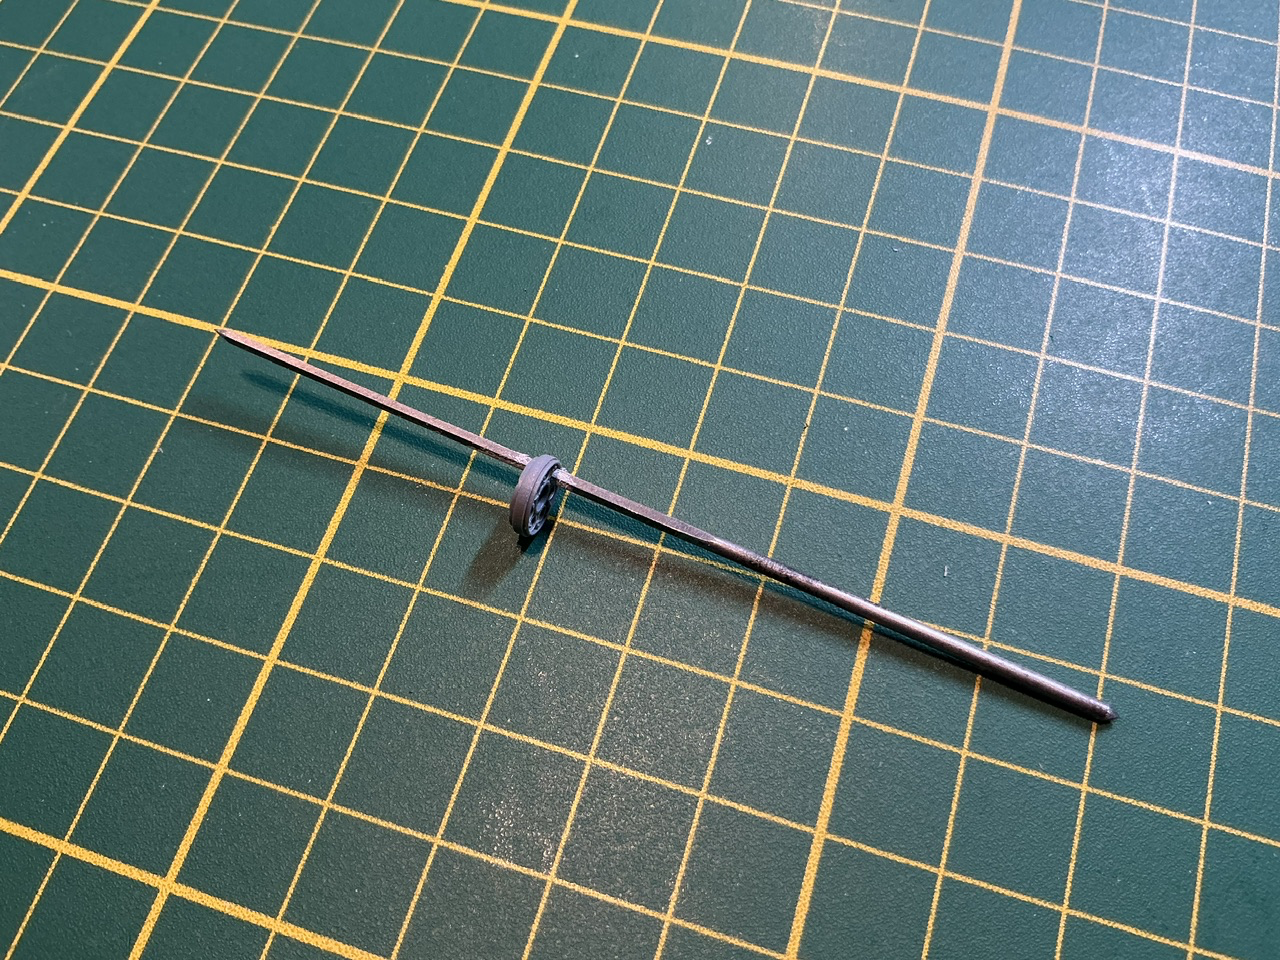
Twirling one of those around in the hole let the barrel fit nicely:
Repeat six more times and fit the other rings, and:
That’s easier said than done, though. Getting all seven barrels into the first ring is simple. Getting a second on is rather trickier because they all want to twist in different directions. Eventually, though, it worked and I could also add the other hardware. I first put the plastic ring in the middle and the etched one in front of that on, then added the ring at the breech end (on the right in the photo above), all without glue. I then applied glue to the middle and front rings, after which the most important thing to do right after is ensuring the barrels are parallel. It’s very easy to get them angled, which means your barrels are mounted helically rather than straight. The best way I found was the rotate the whole bundle against the light, so I could see if the ones away from me where parallel to the ones towards me. Then carefully set it down for the glue to dry.
Once that had dried a bit, I fit the rest of the hardware at the muzzle, but I still left the ring at the breech end loose because I want to have the barrel assembly separate until after painting. The breech ring doesn’t fit through the hole in the barrel supports, though, so it has to remain separate.
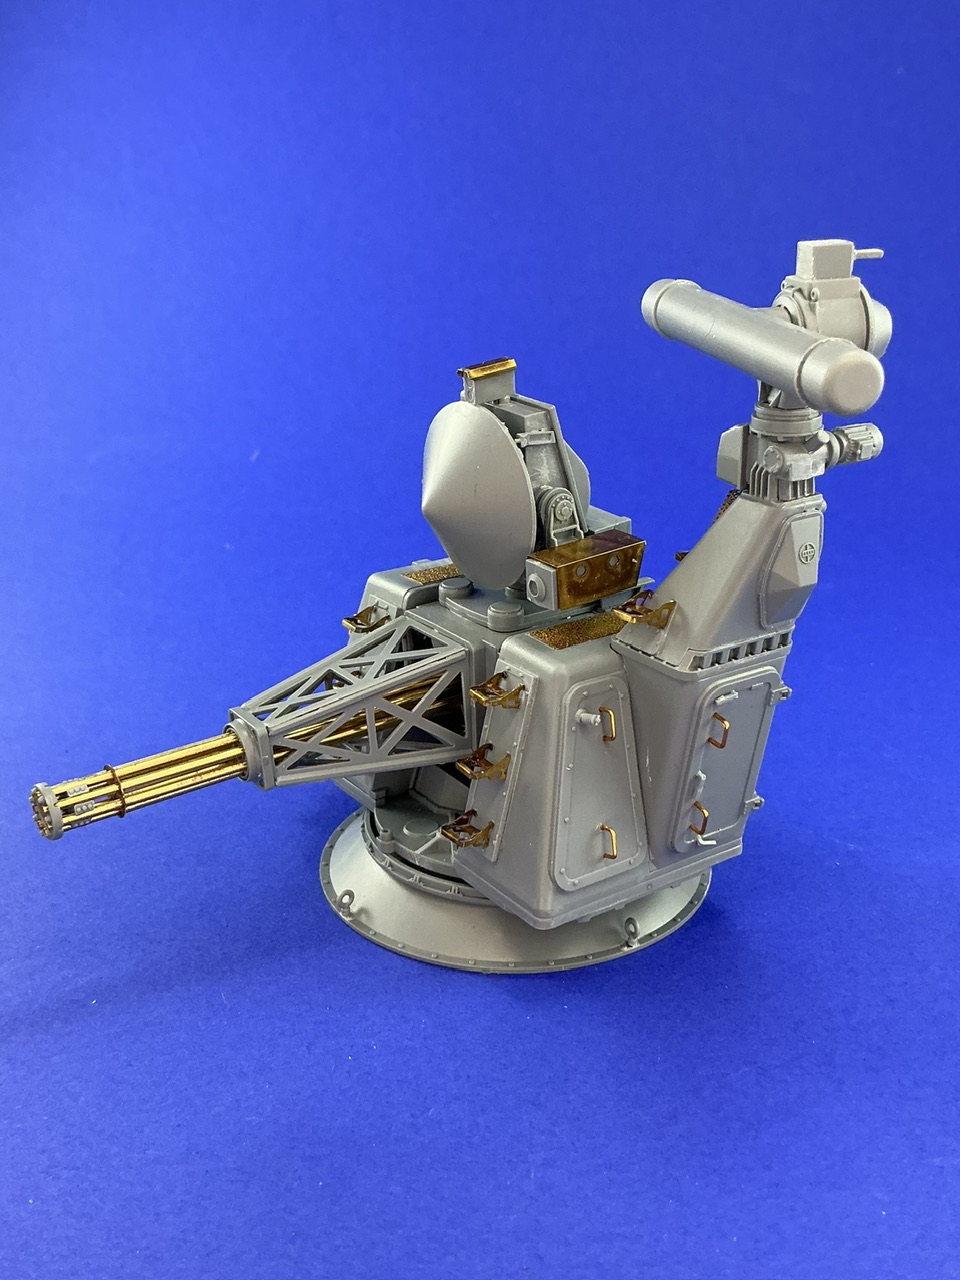
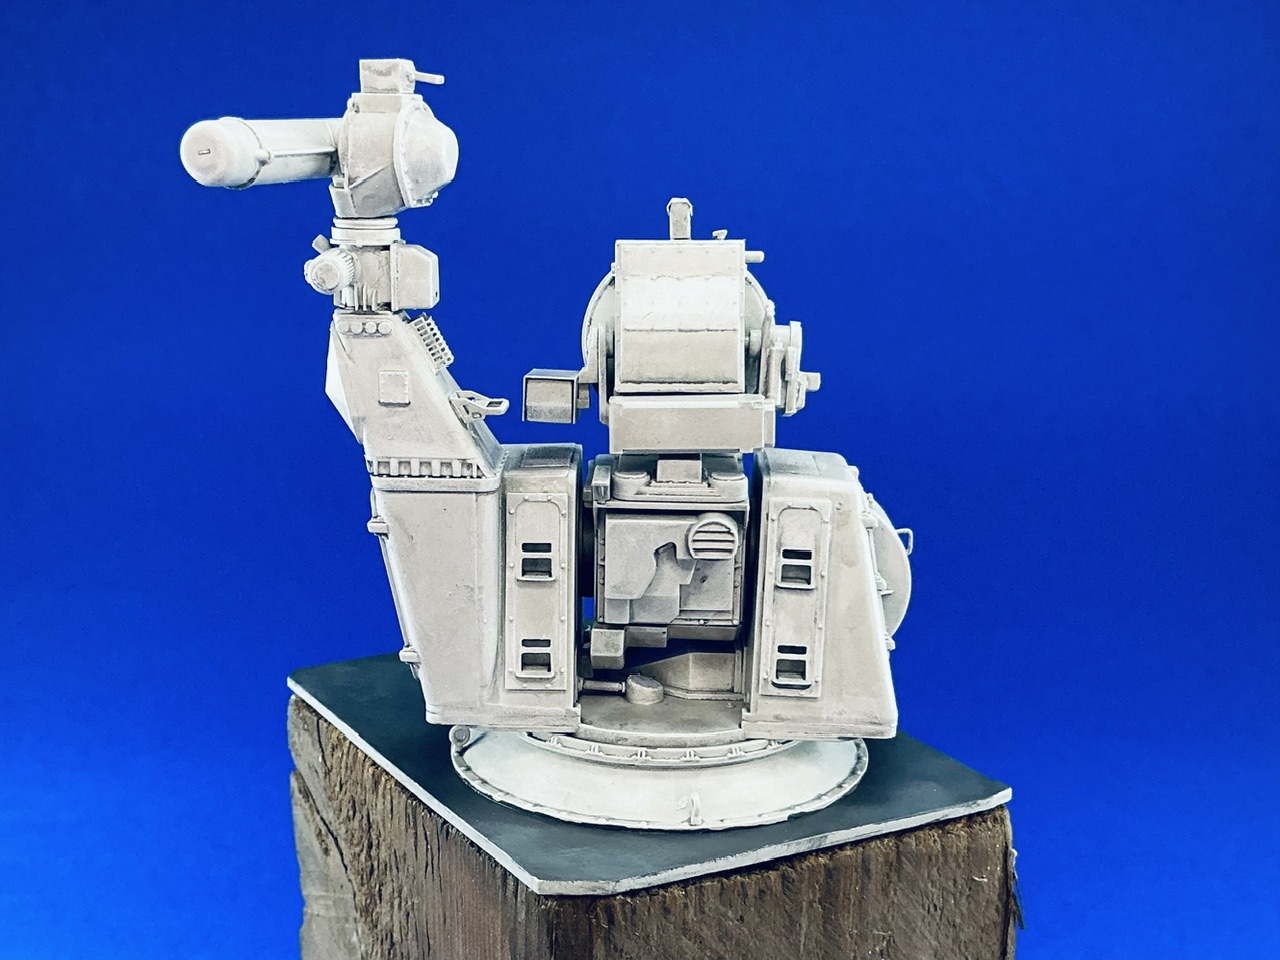
Here’s the basic “turret”:
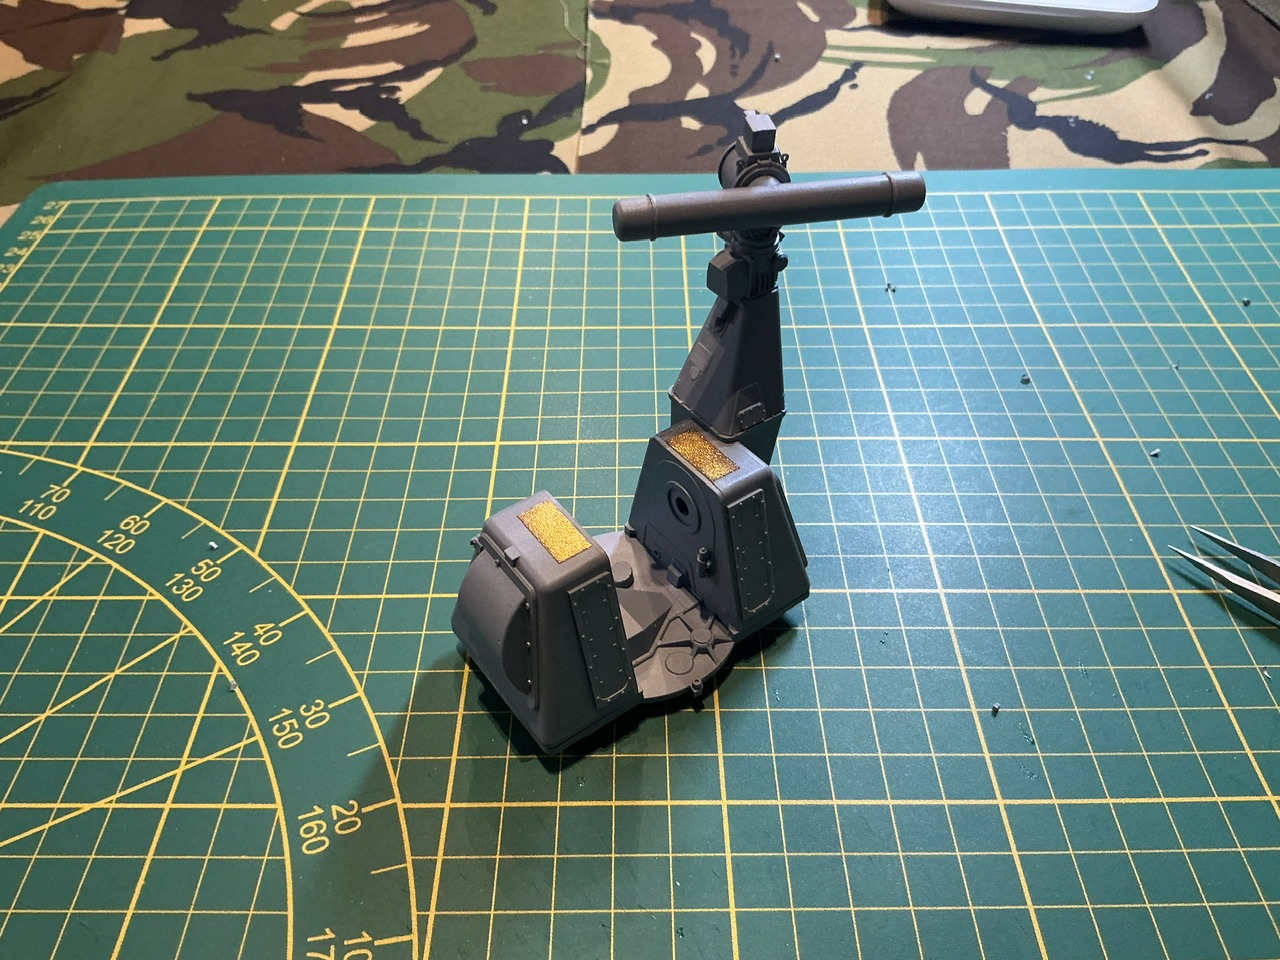
Both sides are loose on the base plate, because of course the gun and its shrouds still have to go between them.
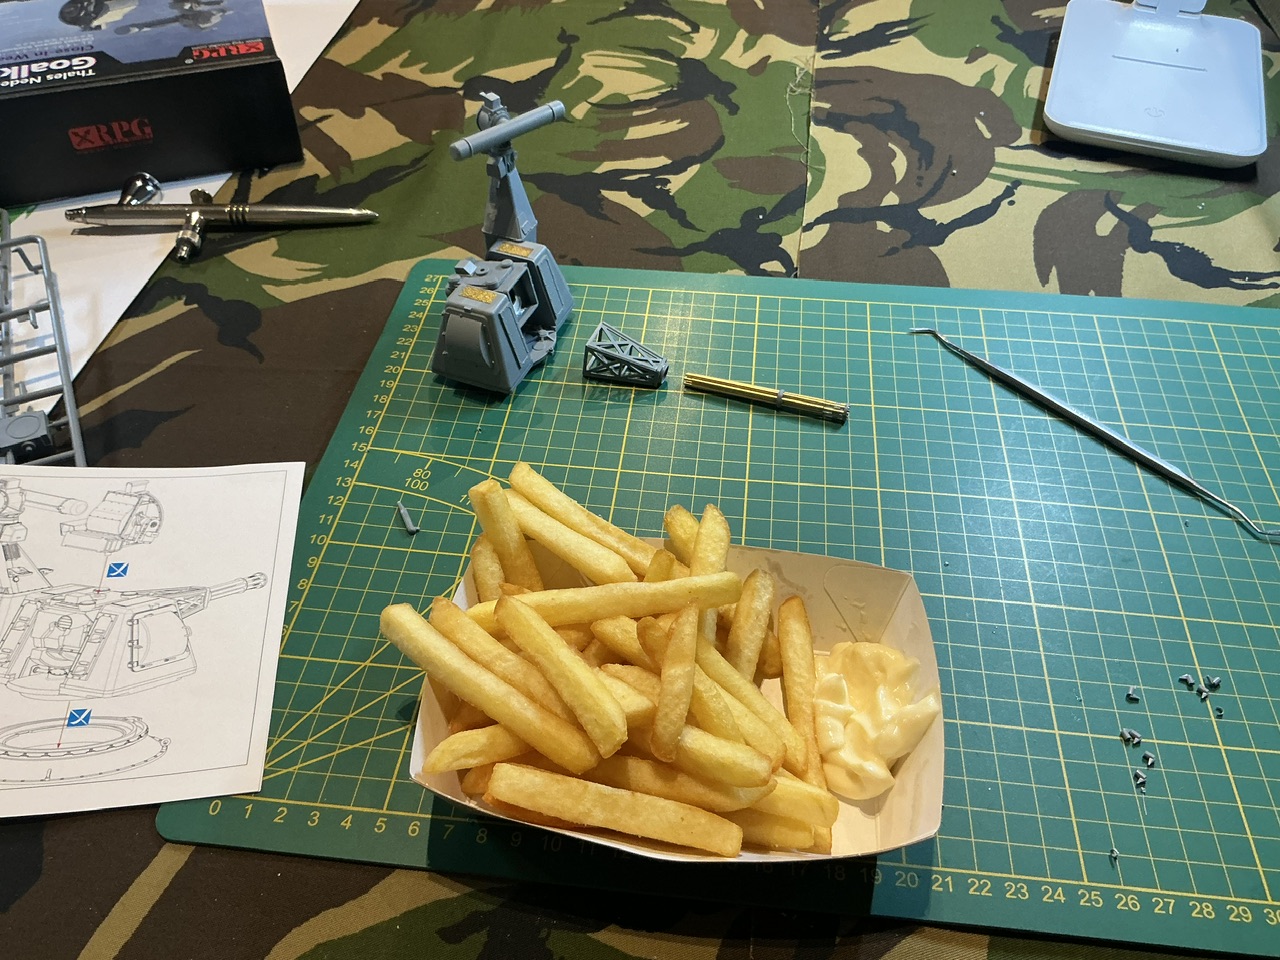
Early afternoon, and I was at this point:
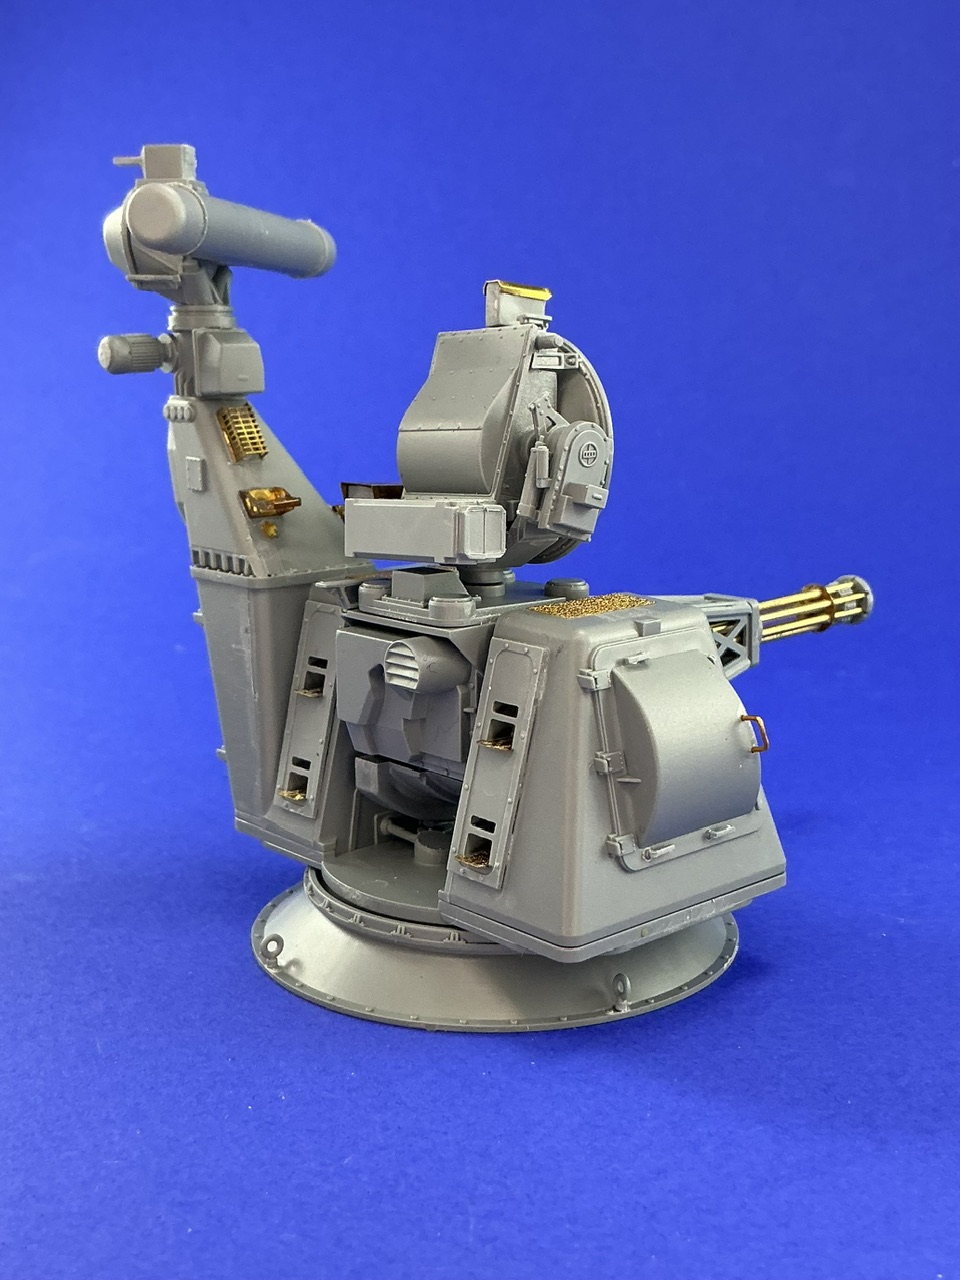
More work on the various parts basically completed the gun:
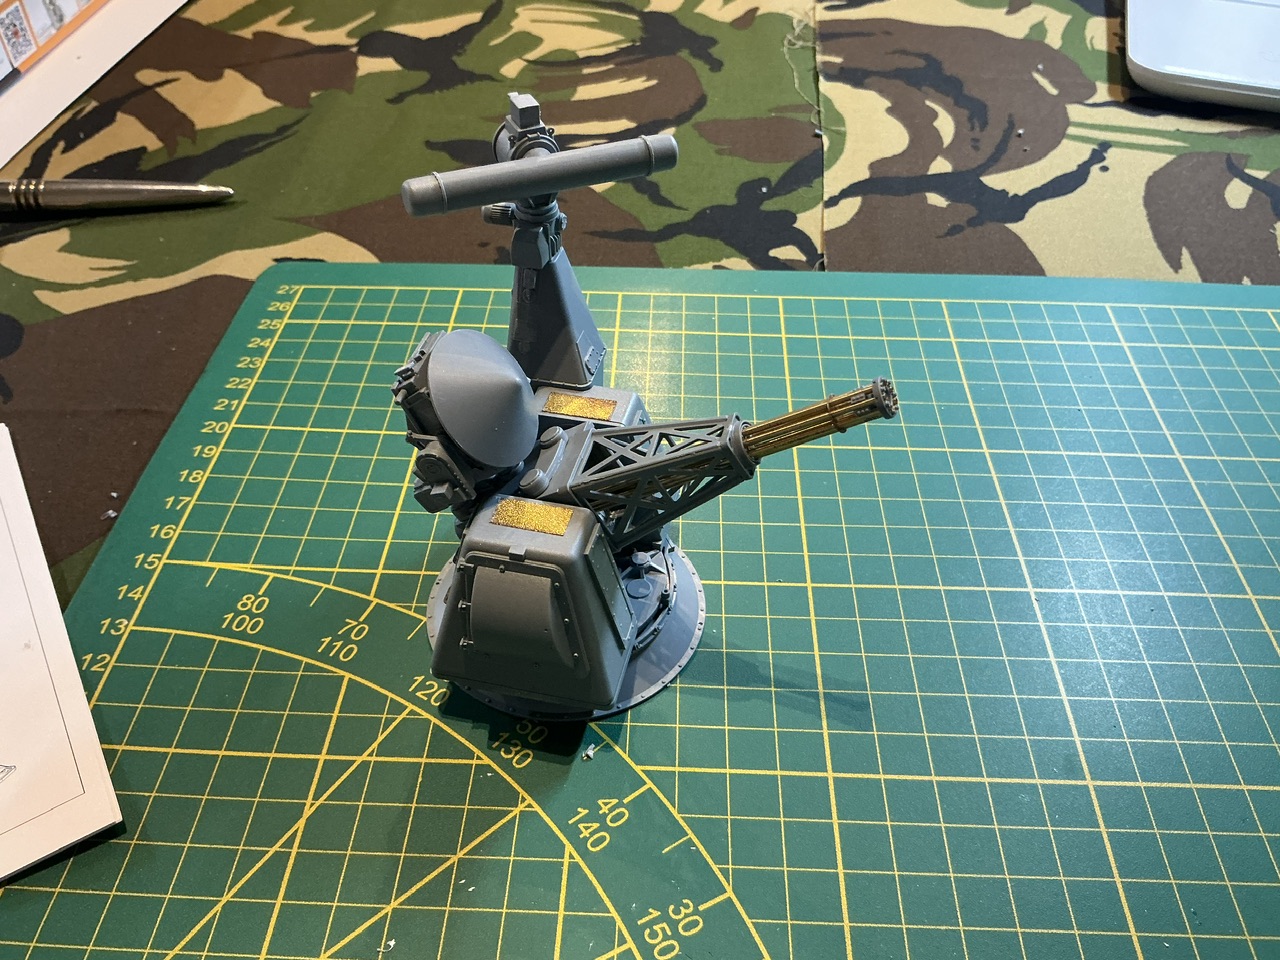
It’s still in a bunch of subassemblies here: the fixed base, the rotating base plate, the two “boxes” on the sides, the gun mount, the latticework gun support, the barrels (next to the gun here because their weight causes the support to fall out ![]() ) and the tracking radar on top of the gun.
) and the tracking radar on top of the gun.
Still missing are most of the ladder-steps and the handles for the access doors, because they’re all fairly fragile and I didn’t want them breaking off in transport on the way home.
All in all, not bad for a day’s work ![]()
A week and a half later, construction was done, after a frustrating time with the steps that go up the front on both sides. They’re provided as etched parts that you have to fold together, but they’re intricate and difficult to get into the right shape, so every time I did two or three I had had enough for now. Had these also been provided in plastic, I would have fitted those after trying to fold a couple of the etched ones, but alas, RPG Model seems to be one of those manufacturers who don’t consider modellers who don’t like etched parts (which I’m not in general, but I do dislike these particular ones ![]() ). I also replaced the plastic grab handles for the various doors by bent copper wire, glued into holes I drilled through the locating points for the plastic handles.
). I also replaced the plastic grab handles for the various doors by bent copper wire, glued into holes I drilled through the locating points for the plastic handles.


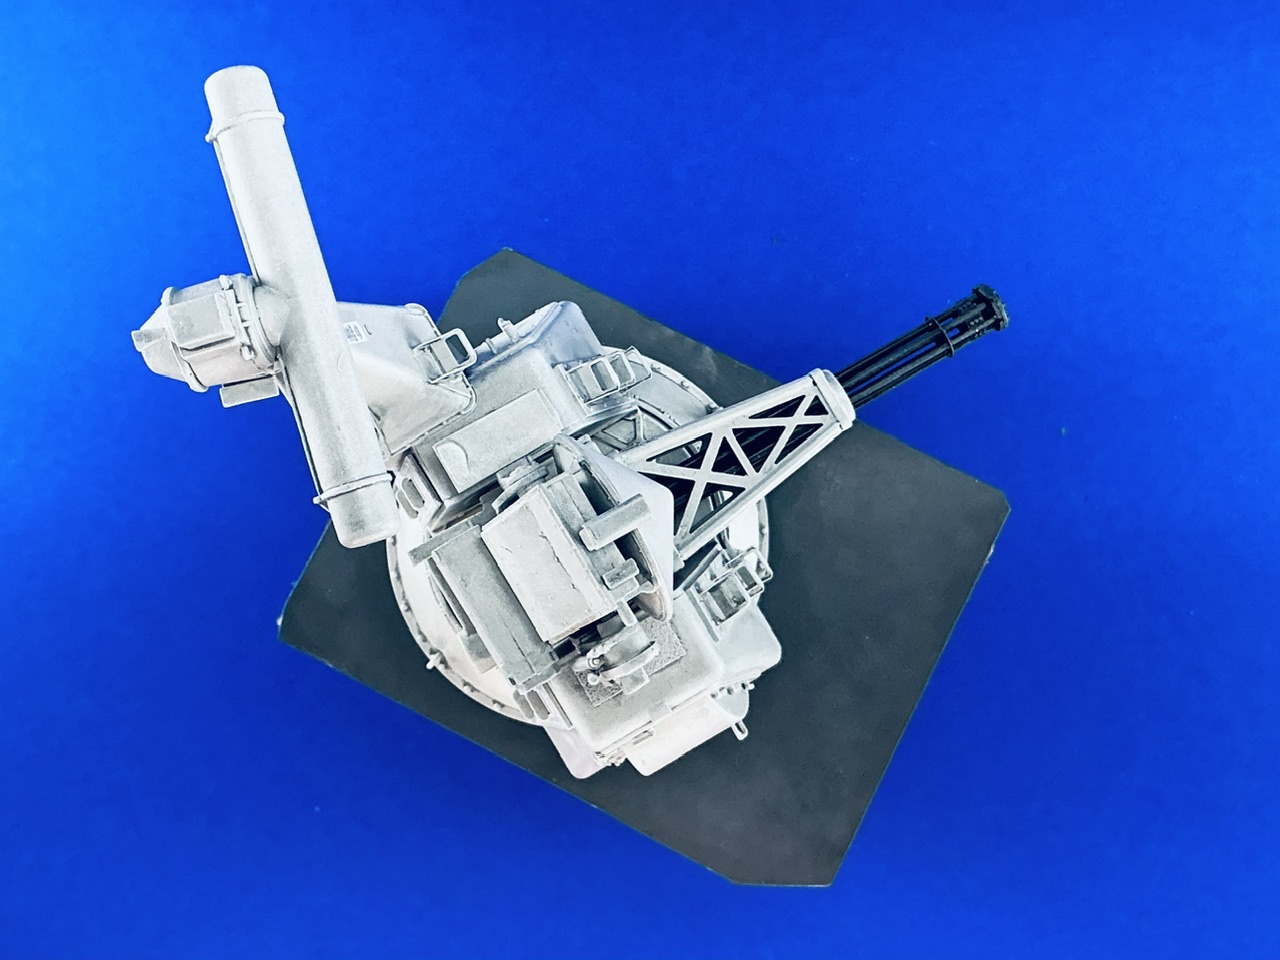
A bit of Blu-Tack holds the gun in, which is why it’s actually in place here ![]() The model is in these subassemblies:
The model is in these subassemblies:

I glued the side with the radar to the base, as a little trial showed it’s possible to install the gun housing and the structure on the right side with the radar firmly in place.
Notice that the circular thing that goes on the rear of the barrels is loose, too. I reamed out the hole in the gun housing so it will fit through — this way, I can paint the barrels and the insides of both the gun housing and the barrel support latticework, slide the gun through the latter, glue the round bit on the barrels, and fit the whole into the housing.
My tip would be to glue the rear round part inside the gun housing when you’re putting the main halves of that together. Unless you want the gun to rotate, this will work fine — but I forgot to do it, even though I had planned to do it that way when looking at the parts ![]()
Next, I put some white primer on the model, except for the barrels that I primed in black. Once that had dried, I began spraying grey on the model, but it turns out the colour I bought for that is far lighter than I thought it was. I had deliberately used white primer because I figured that meant it would be easy to see where I had — and had not — sprayed grey yet. However, the light grey is almost white itself … On top of that, the paint didn’t want to cooperate that well, so I quit before I put in a ton of work when I remembered that I have an aerosol can of Games Workshop Corax White, which is actually a very light grey, so I gave the model a coat of that instead:
At that point, about six weeks ago, I began doing all kinds of stuff other than building models (doing some major rearranging of my modelling room, for example) and only continued two days ago.
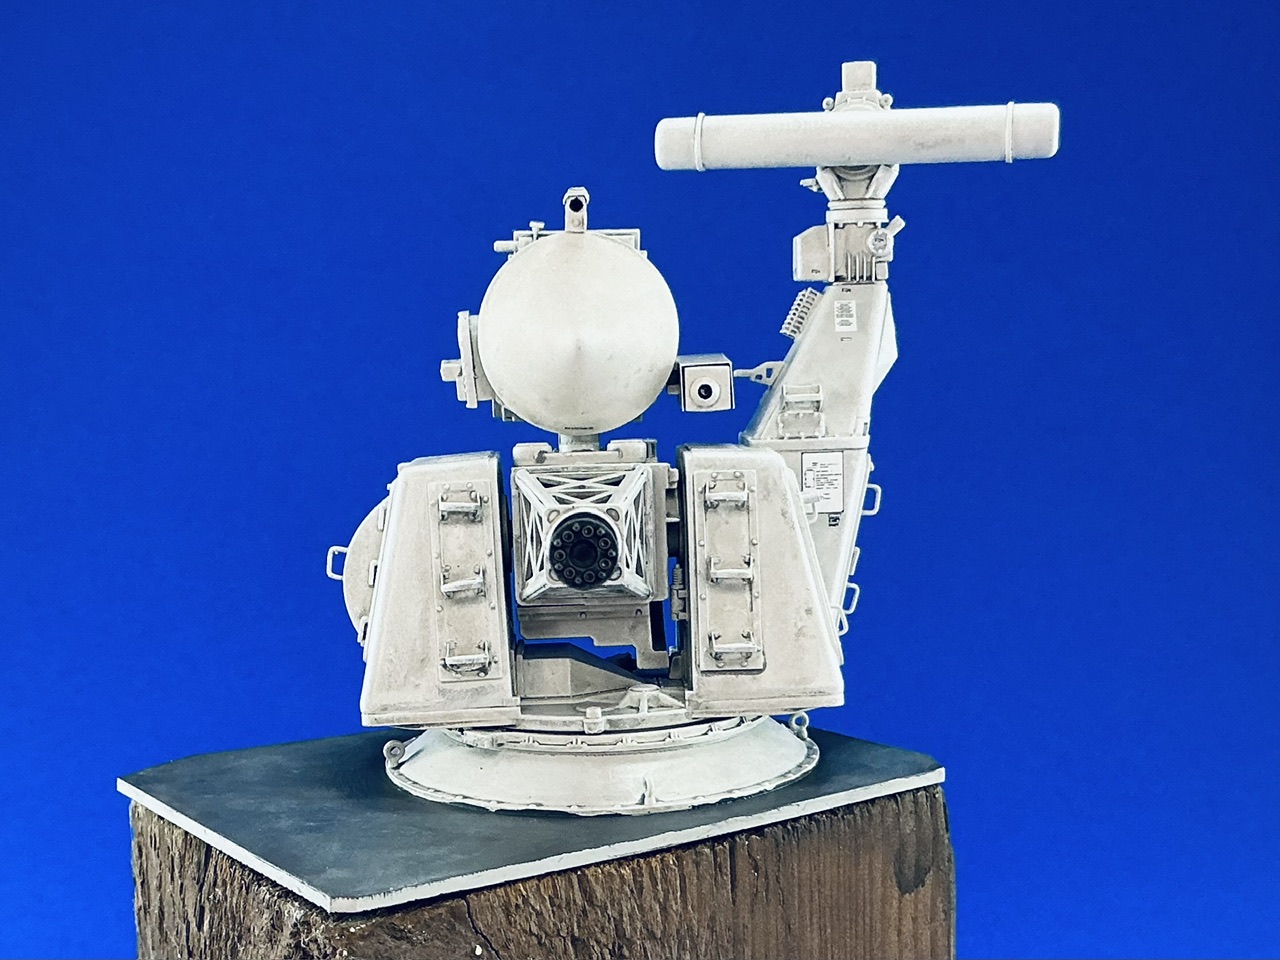
I gave the model a wash of thinned Humbrol 140 Gull Grey enamel to create some shadows, and then drybrushed it with Revell Aqua Color 371 Light Grey (which is apparently a colour match to that used on real Dutch Navy ships) followed by Vallejo Model Color white to add highlights. That particular Revell paint is pretty much useless for drybrushing, though: it’s thin and feels transparent, so it didn’t actually do very much. The white did create the highlights I was after, though.
The gun barrels got a drybrush with a few shades of dark to medium grey. On modern ships they’re painted the same grey as the mounting, but I find that boring and odd-looking, so I went with the earlier dark grey.
After taking this photo, I painted all of the light grey parts with Humbrol Model Cote satin varnish (an ancient bottle, bought 15–20 years ago at a guess ![]() ) because in photos the colour used on these ships seems to be semi-gloss.
) because in photos the colour used on these ships seems to be semi-gloss.
I also began making a base, because putting this gun straight on a shelf just looks odd. I wanted a raised base, and debated making part of a ship, but decided I didn’t want to go to that trouble. I then hit on a wooden base with just a representation of the deck on top. It took some searching before I found a suitable old beam of about 10 by 7.5 cm that I sawed a length off. I then cut a piece of plastic card to fit on top and clipped some of the corners to better fit the shape of the wood. After drilling some holes through it and into the wood to screw it down, I sprayed the underside black and painted the edges grey before attaching it to the wood:
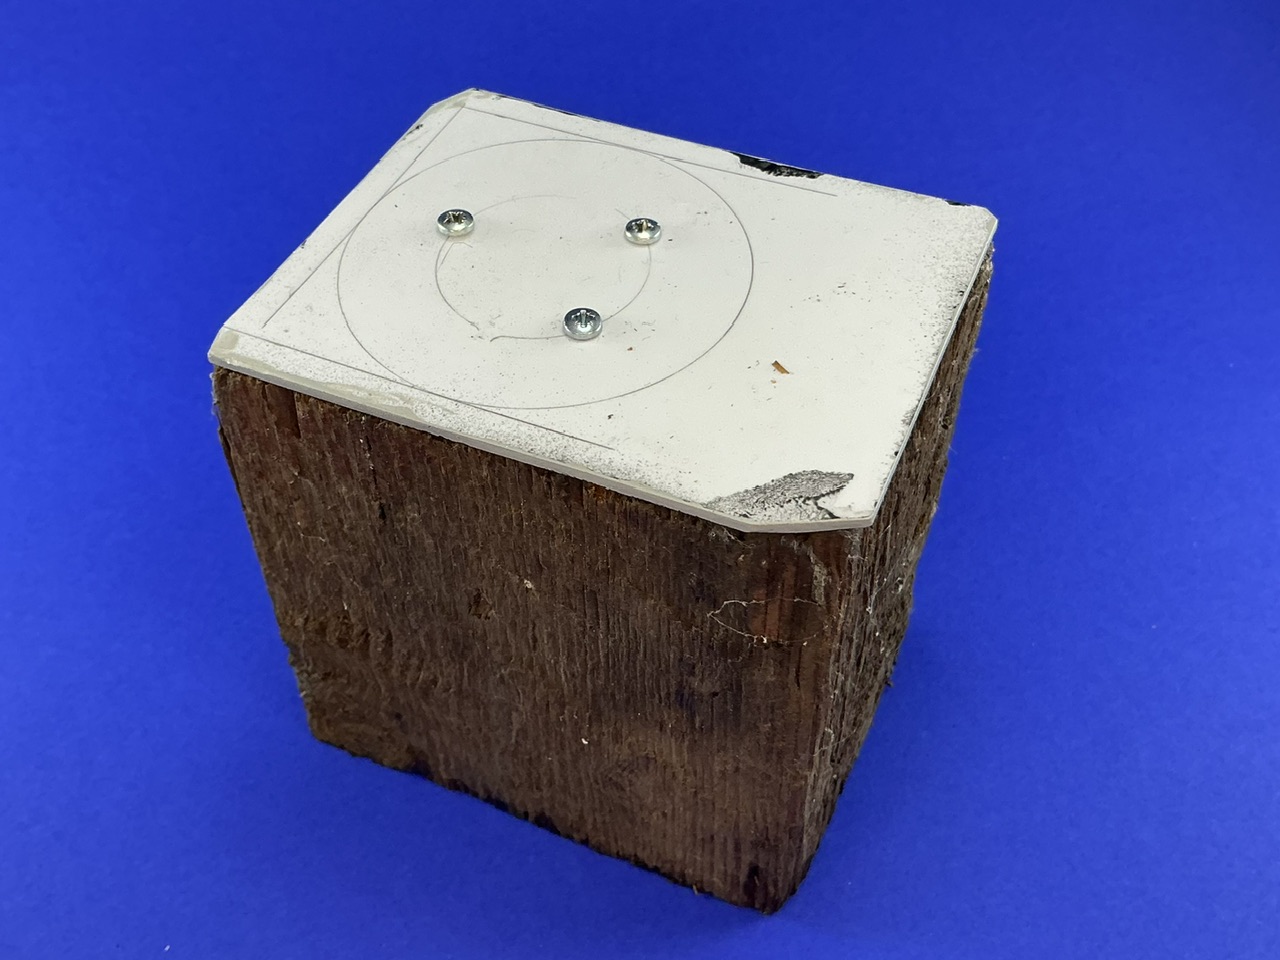
The screws will be hidden under the conical base of the Goalkeeper, but I really should have drilled the holes slightly further in: the screws end up under the ring so they need to be put in first before the ring is glued on. OTOH, the plate should be attached slightly more securely now because the screws are further apart ![]()
There a couple of funny things about the decals:
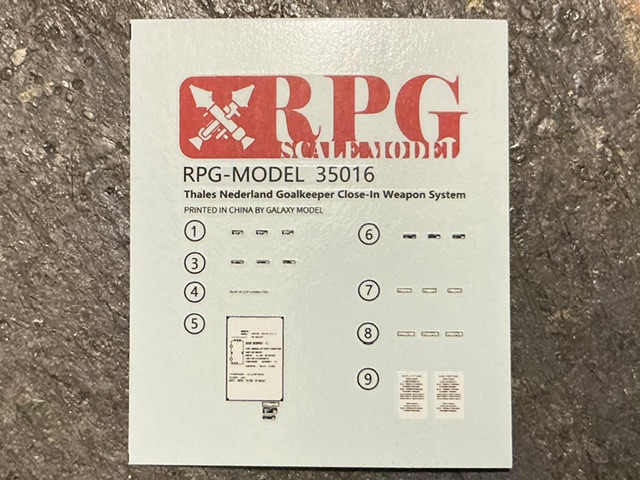
Look closely, and compare that sheet to the instructions for where to place them:

Spotted it?
There is no decal No. 2 on the sheet, and the instructions have no No. 2 *or* 3! Also, only two of the three Nos. 6 are used.With them on, I painted the deck Tamiya XF-24 Dark Grey and then made lighter patches by brushing Vallejo 70.867 Dark Bluegrey on in blotches, then lightening that with more and more 70.903 Intermediate Blue and trying to smudge the paint with both my brush and my fingers to create an effect like you would get if you airbrushed lighter parts like this.
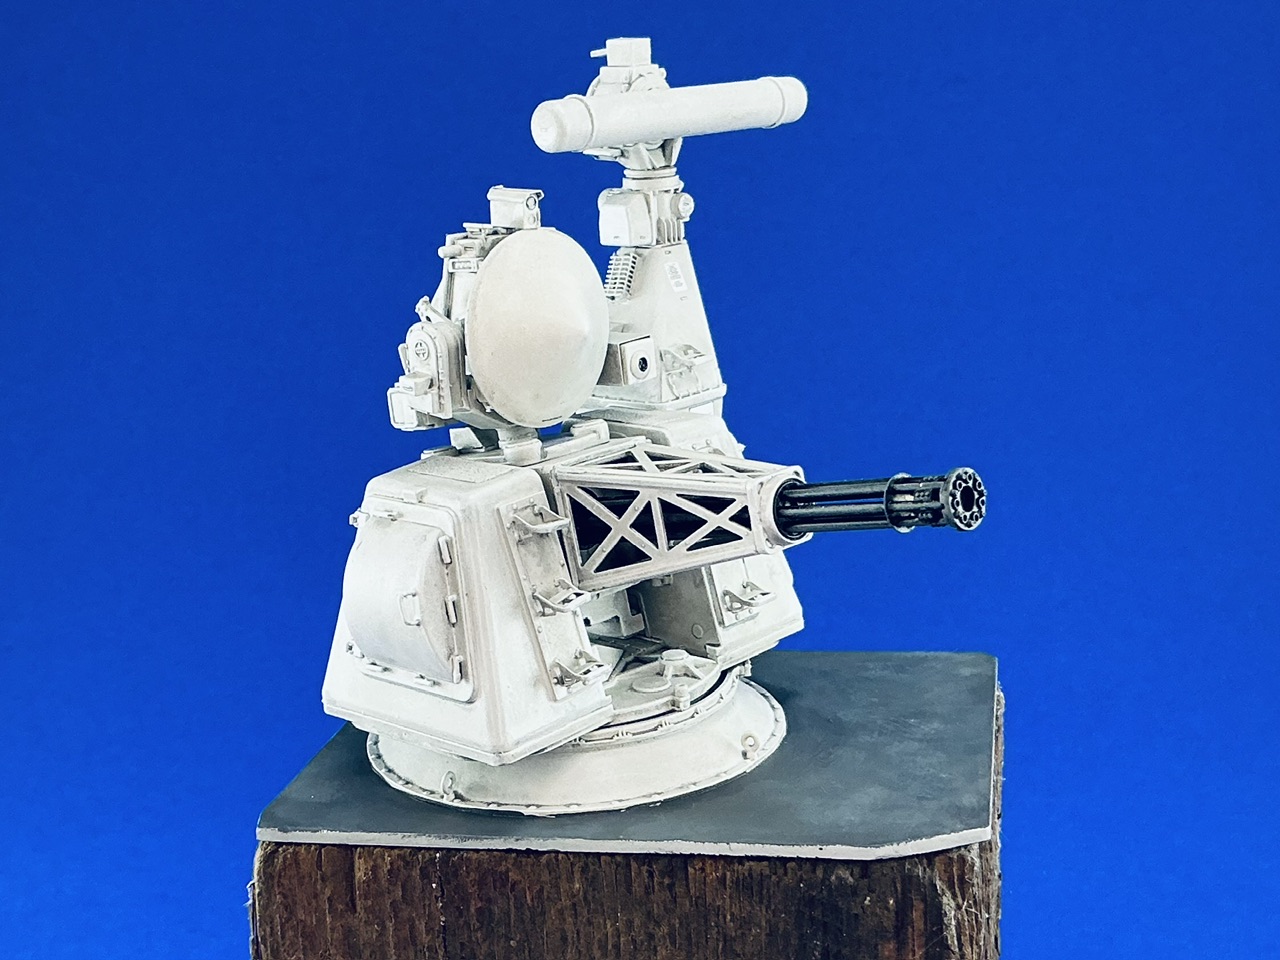
After bringing all the bits together, the model is done:

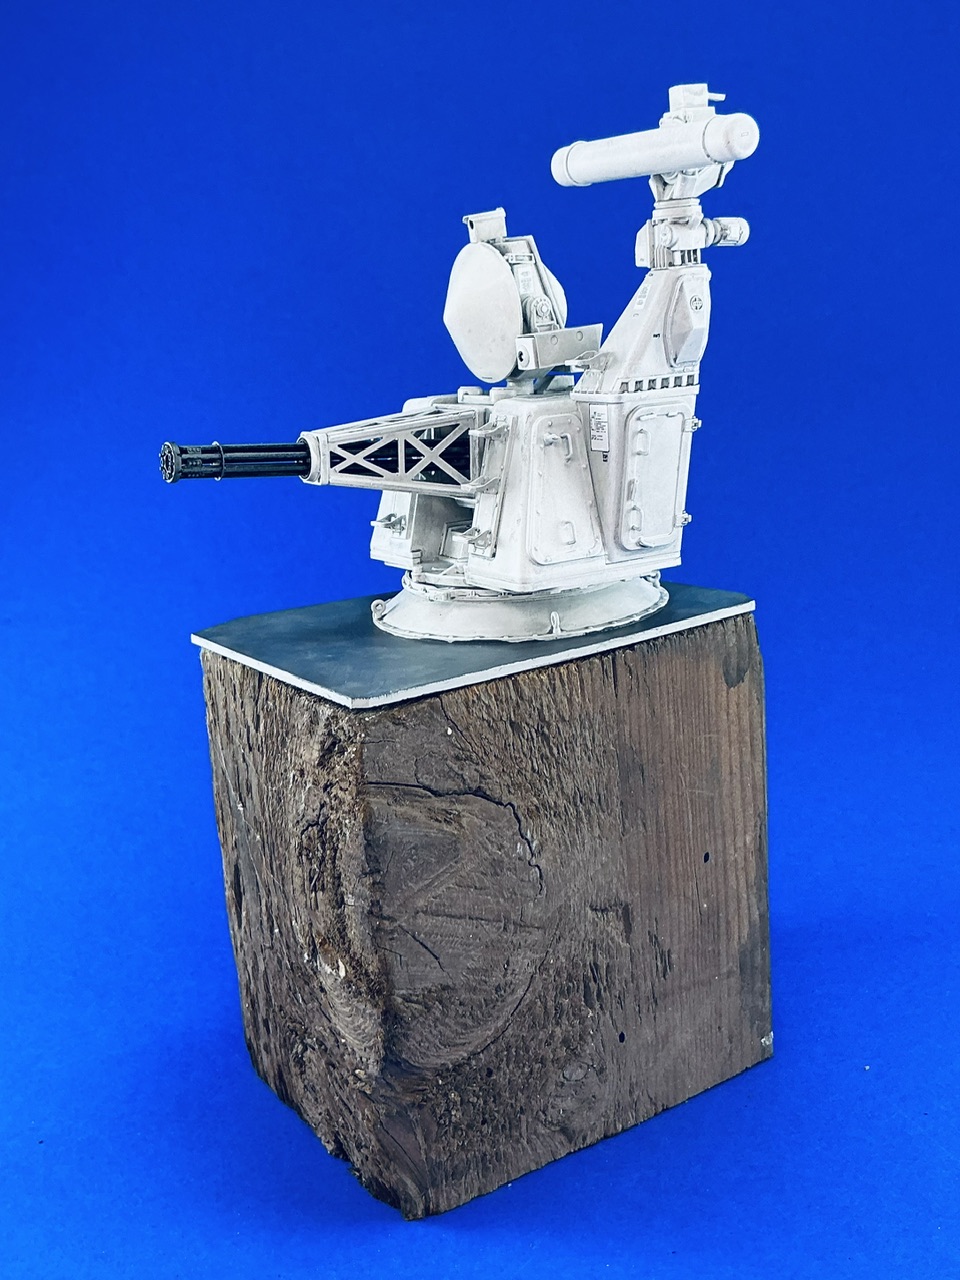