There is also Zimmerit as cast resin, moulded into thin sheets:
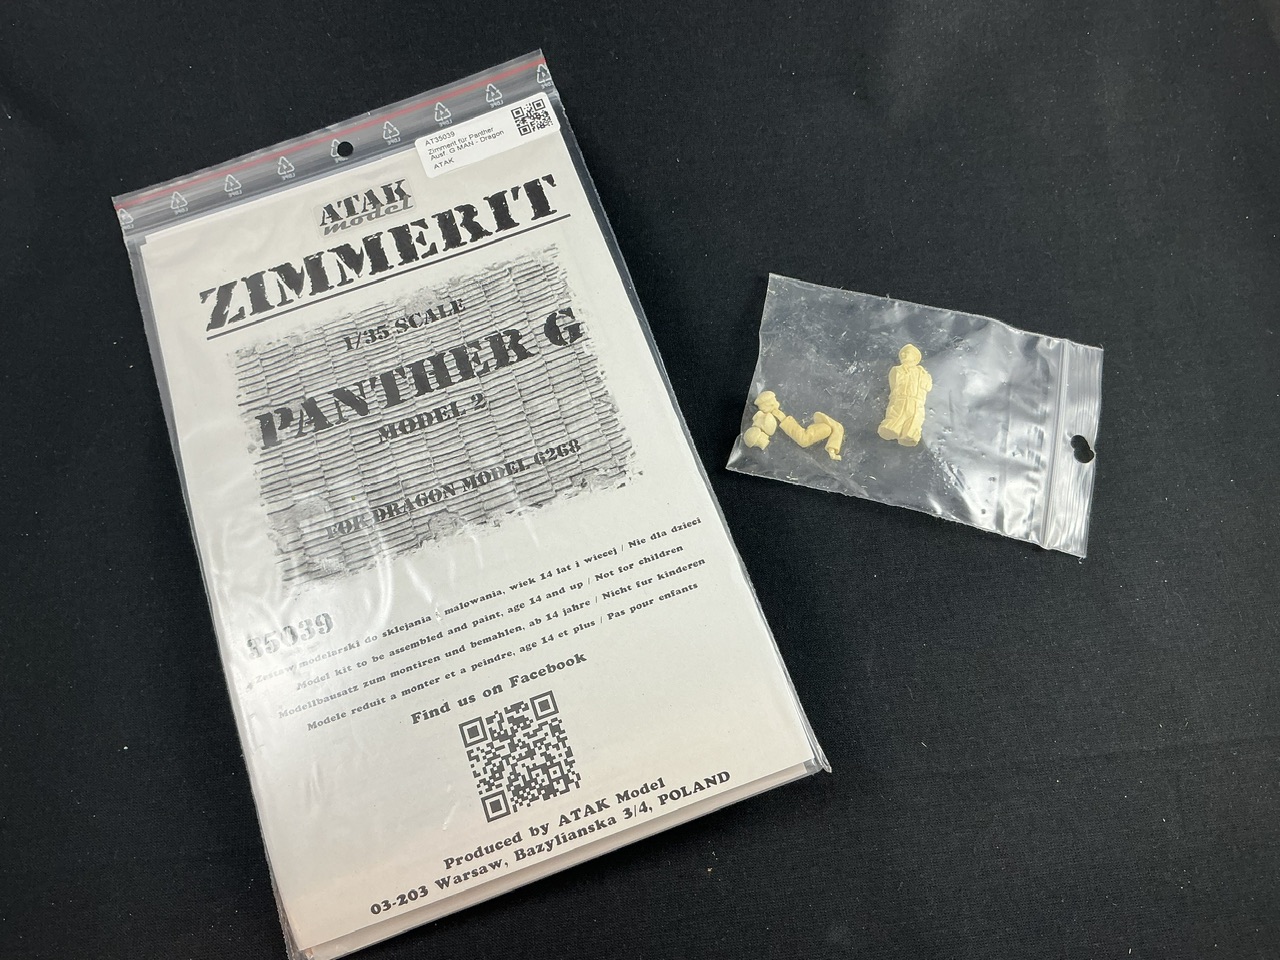
These come as a single sheet from which all the actual parts are slightly raised, and you cut them out along the outside before glueing them to the model with superglue.
There is also Zimmerit as cast resin, moulded into thin sheets:
These come as a single sheet from which all the actual parts are slightly raised, and you cut them out along the outside before glueing them to the model with superglue.
They’re not just stickers. The Atak, Cavalier, and Tamiya sheets are excellently scale detailed and very thin. Unless you’re determined to do your own zim, you should be shopping for one of these sheets. Save yourself some aggravation.
Well, alright then, I went ahead and ordered Tamiya’s Panzer IV Ausf J zimmerit sheet
As far as i know the J looks the same but without the hull schurtzen, so, no problem there
I hope it looks good and has a good texture
I’ll be honest, even though zimmerit is a pain in the ass, I really like the idea of the novelty of having one model with that interesting ridged texture.
The Panzer IV will be my only tank with zimmerit, my Tiger I is an early, so no zimmerit, and my Panther G and Tiger II are lates, so no zimmerit either.
So I really hope the zimmerit sheet will be noticeably ridged and grooved enough
I gotta say I still don’t understand how these stickers are textured and how they don’t disappear under paint, but obviously I trust you guys!
Anyway, while I wait for it to arrive, I guess I’ll try practicing some more with the putty, just in case
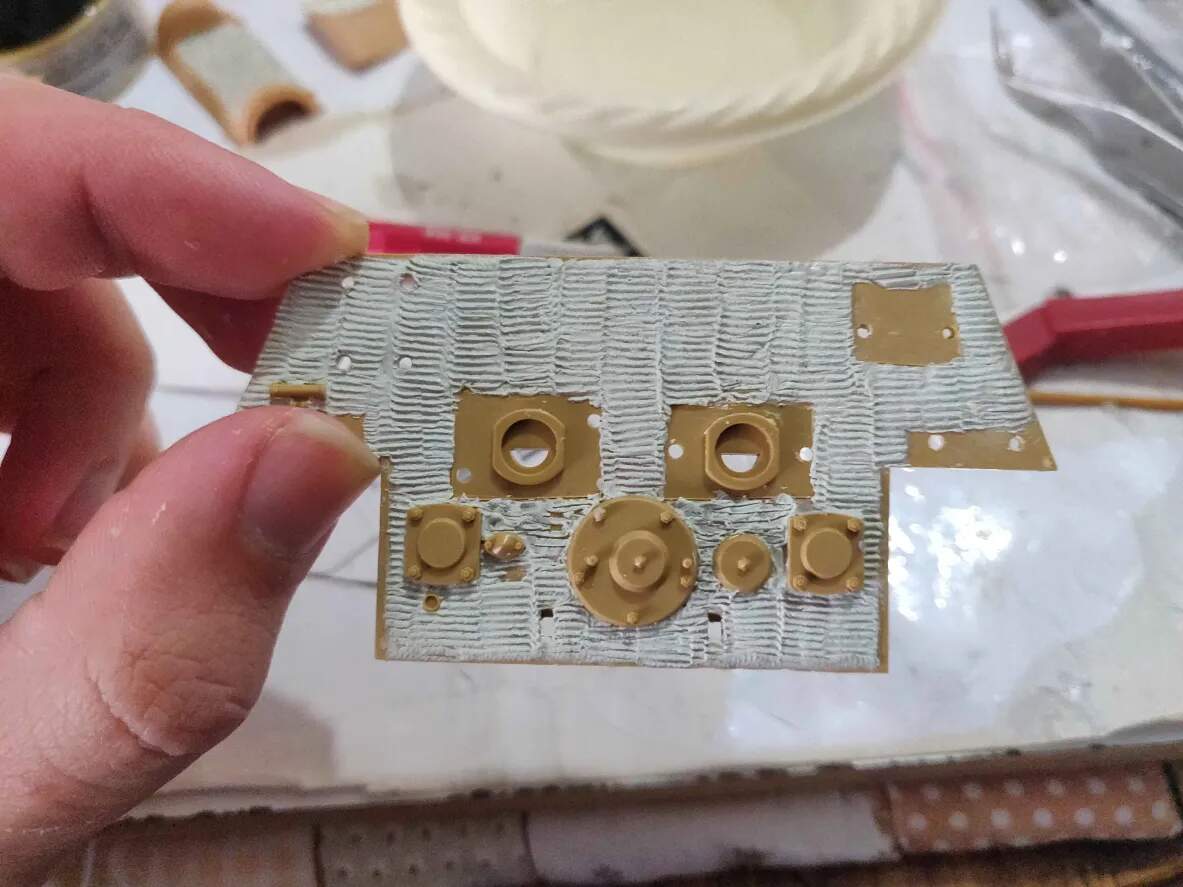
This is ATAK zimmerit on my late Tiger 1. I had to use superglue as ATAK are not decals, but pre cut sheets of raised resin. They also include the mantlet, loaders door out of a piece of resin, as they would be hard to get the sheet over the mantlet. After you do a wash after painting….all the raised detail pops out.
They’re embossed paper, so basically, paper that has been put into a press with a Zimmerit pattern in it, thereby pressing the ridges into the paper.
Oh okay! Interesting!
Well again, I already ordered the sheet, but it seems like either way I’ll need to do some of my own, because the Tamiya sheet doesn’t include zimmerit for the turret for some reason on the Panzer IV…
So honestly, I think what you did was pretty good. Like everything, it takes a little practice to get it to where you like it. My opinion is you need to make the putty just a little thicker.
So, is the look you’re going for Pre 1944, Was it applied int he factory or in the field? if it was the field, there wouldn’t be much consistency at all.
I also recommend build a test tank. I have an old brumbar tank that has it’s share of mess ups and hey, that worked pretty good!.
Keep at it…
I’ll be honest I also kind of prefer the look of the putty zimmerit… I mean, the one good example I showed was pretty nice!
I don’t know the precise date my Panzer IV will be haha, I suppose I’ll stay pretty faithful to this:
Yes: it was applied from December 1943 until September 1944. As your tank overlaps that range, it could have Zimmerit and it could also not have it. IIRC, the reason for abolishing it was that it was feared that the sawdust in it made it inflammable, when in fact it wasn’t. Oddly, the huge amount of labour and rare resources (especially fuel for blowtorches) expended on applying it doesn’t seem to have figured into the decision as far as I know.
Not only that……but the Russians did not use magnetic charges…..it was a total waste of time, money and effort.
And conceivably, not proof against the British Anti Tank Grenade No 74 (the sticky bomb)!
Not, I hasten to add, that I’m suggesting it was ever used against a Zimmerit-clad AFV.
To be fair, they didn’t know that in advance — the Germans figured that magnetic anti-tank weapons were something their enemies were likely to copy, so they also developed a countermeasure for it.
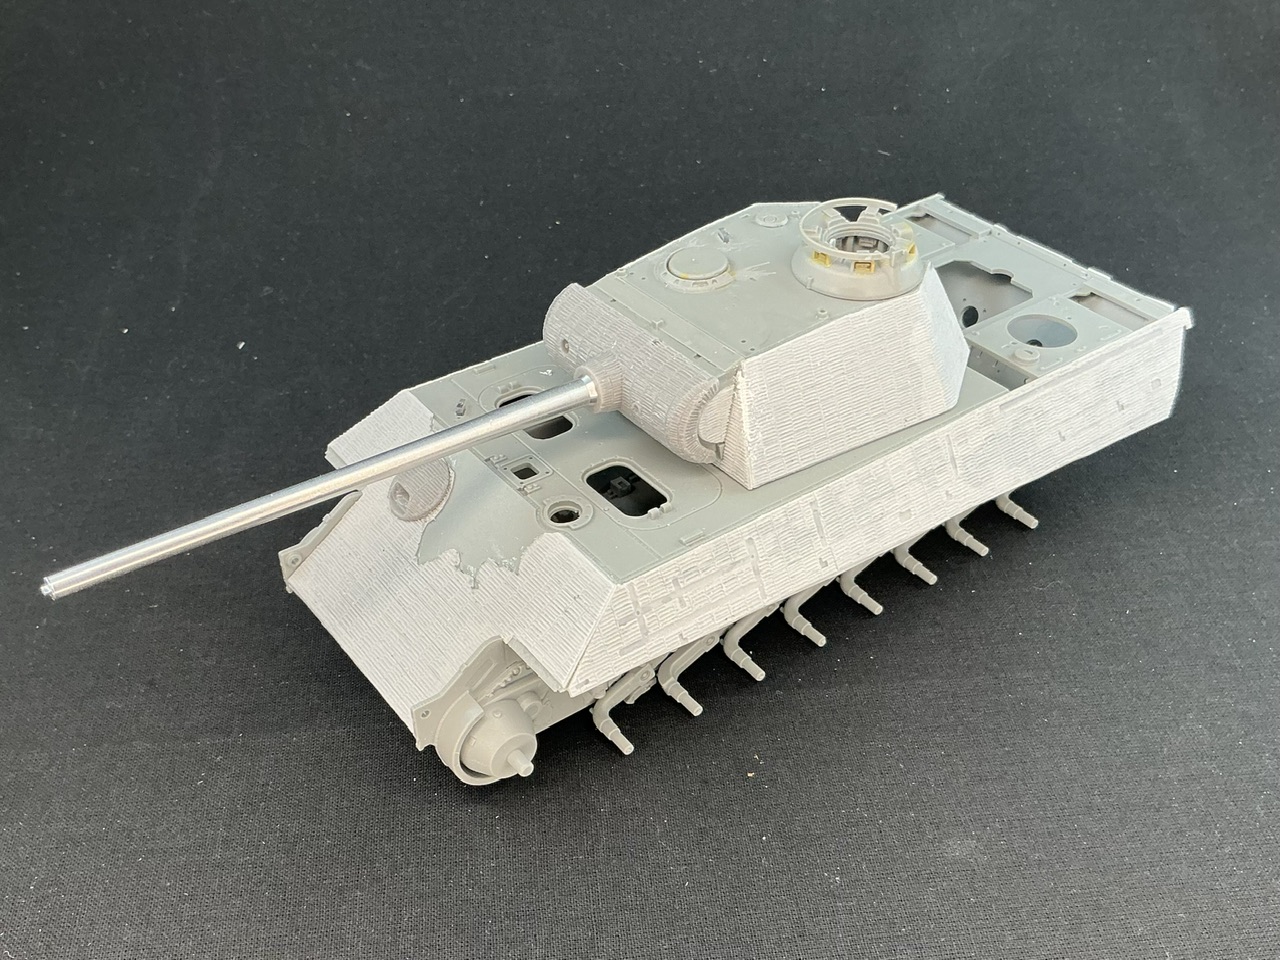
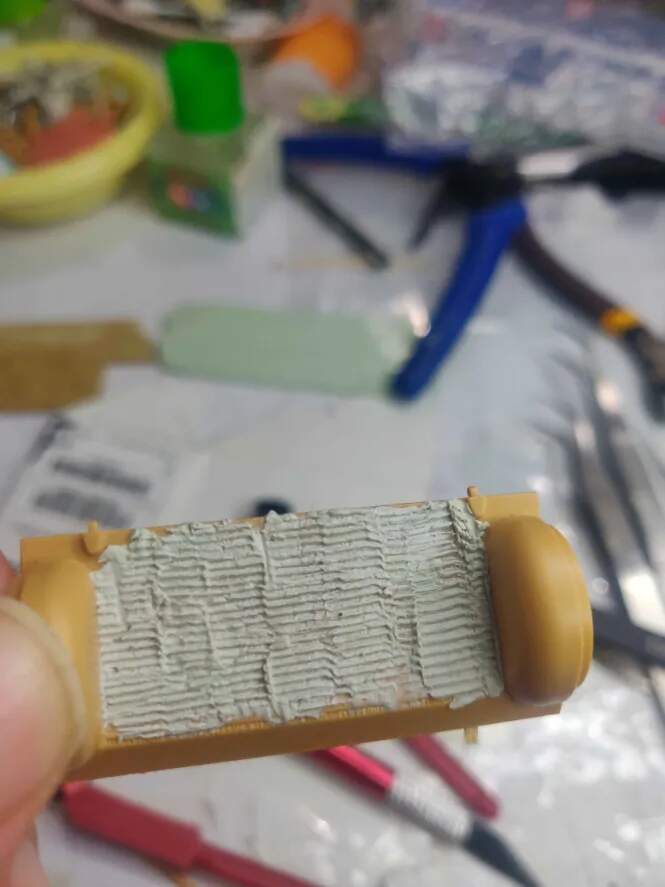
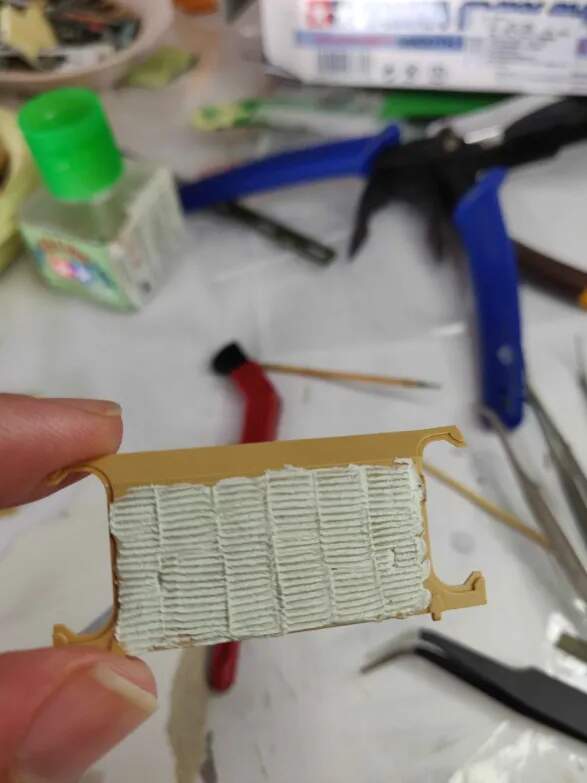
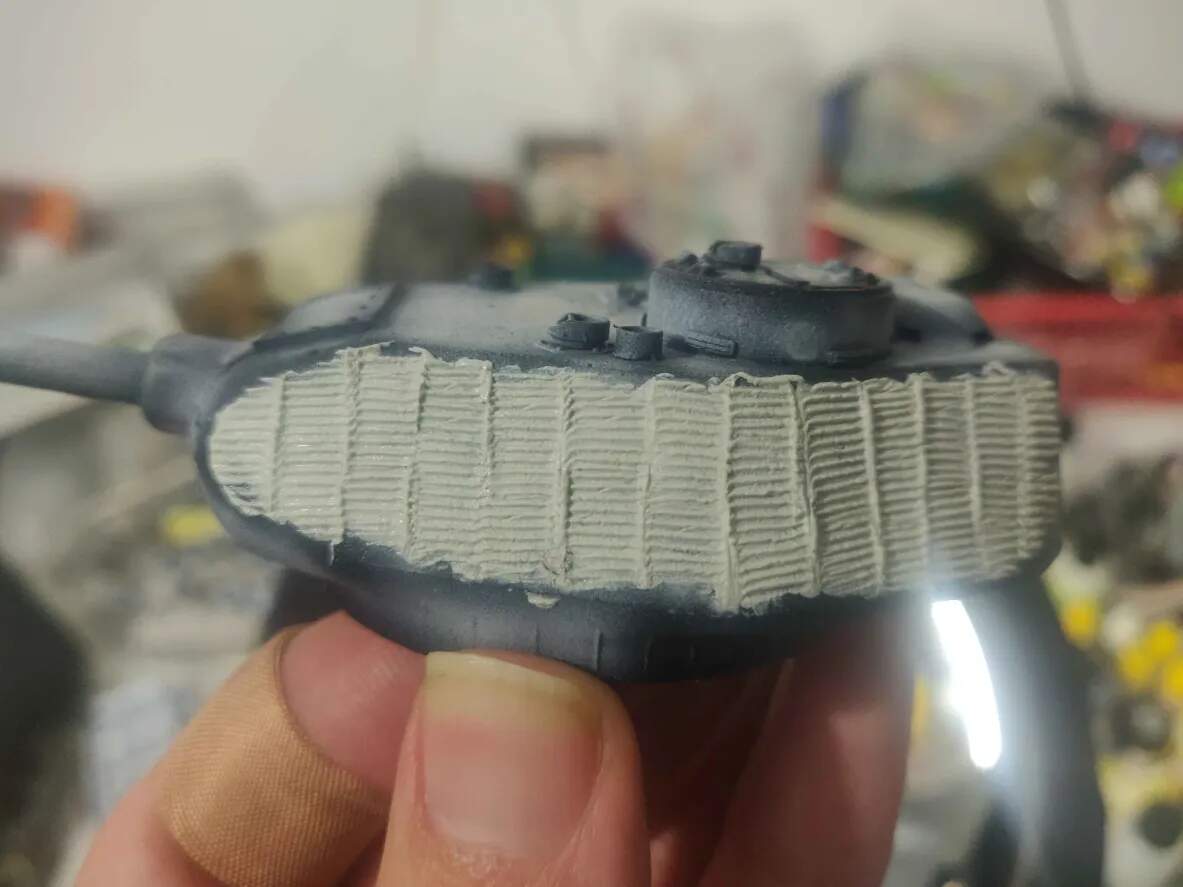
Alright lads, here are my latest attempts, in order:
I think I’m getting better?
But I’m also coming to suspect that my tools are to blame…
That is looking good! Practice is key as they say.
You ARE getting better. The third attempt, on the turret, looks fantastic. You just have to keep the rows vertical. You can do zim.
It certainly looks like you are ![]() It’s a nice illustration of why it’s a good idea to practice new techniques first, if you ask me
It’s a nice illustration of why it’s a good idea to practice new techniques first, if you ask me ![]()
Yes, I always practice new things on scrap models before!
I actually practiced airbrushing on the same scrap M48A2 for a year until I was confident enough to start actually painting real models.
Then abused him more with weathering, and decal work, and varnish practice.
The old boy… Sure has seen better days, haha.
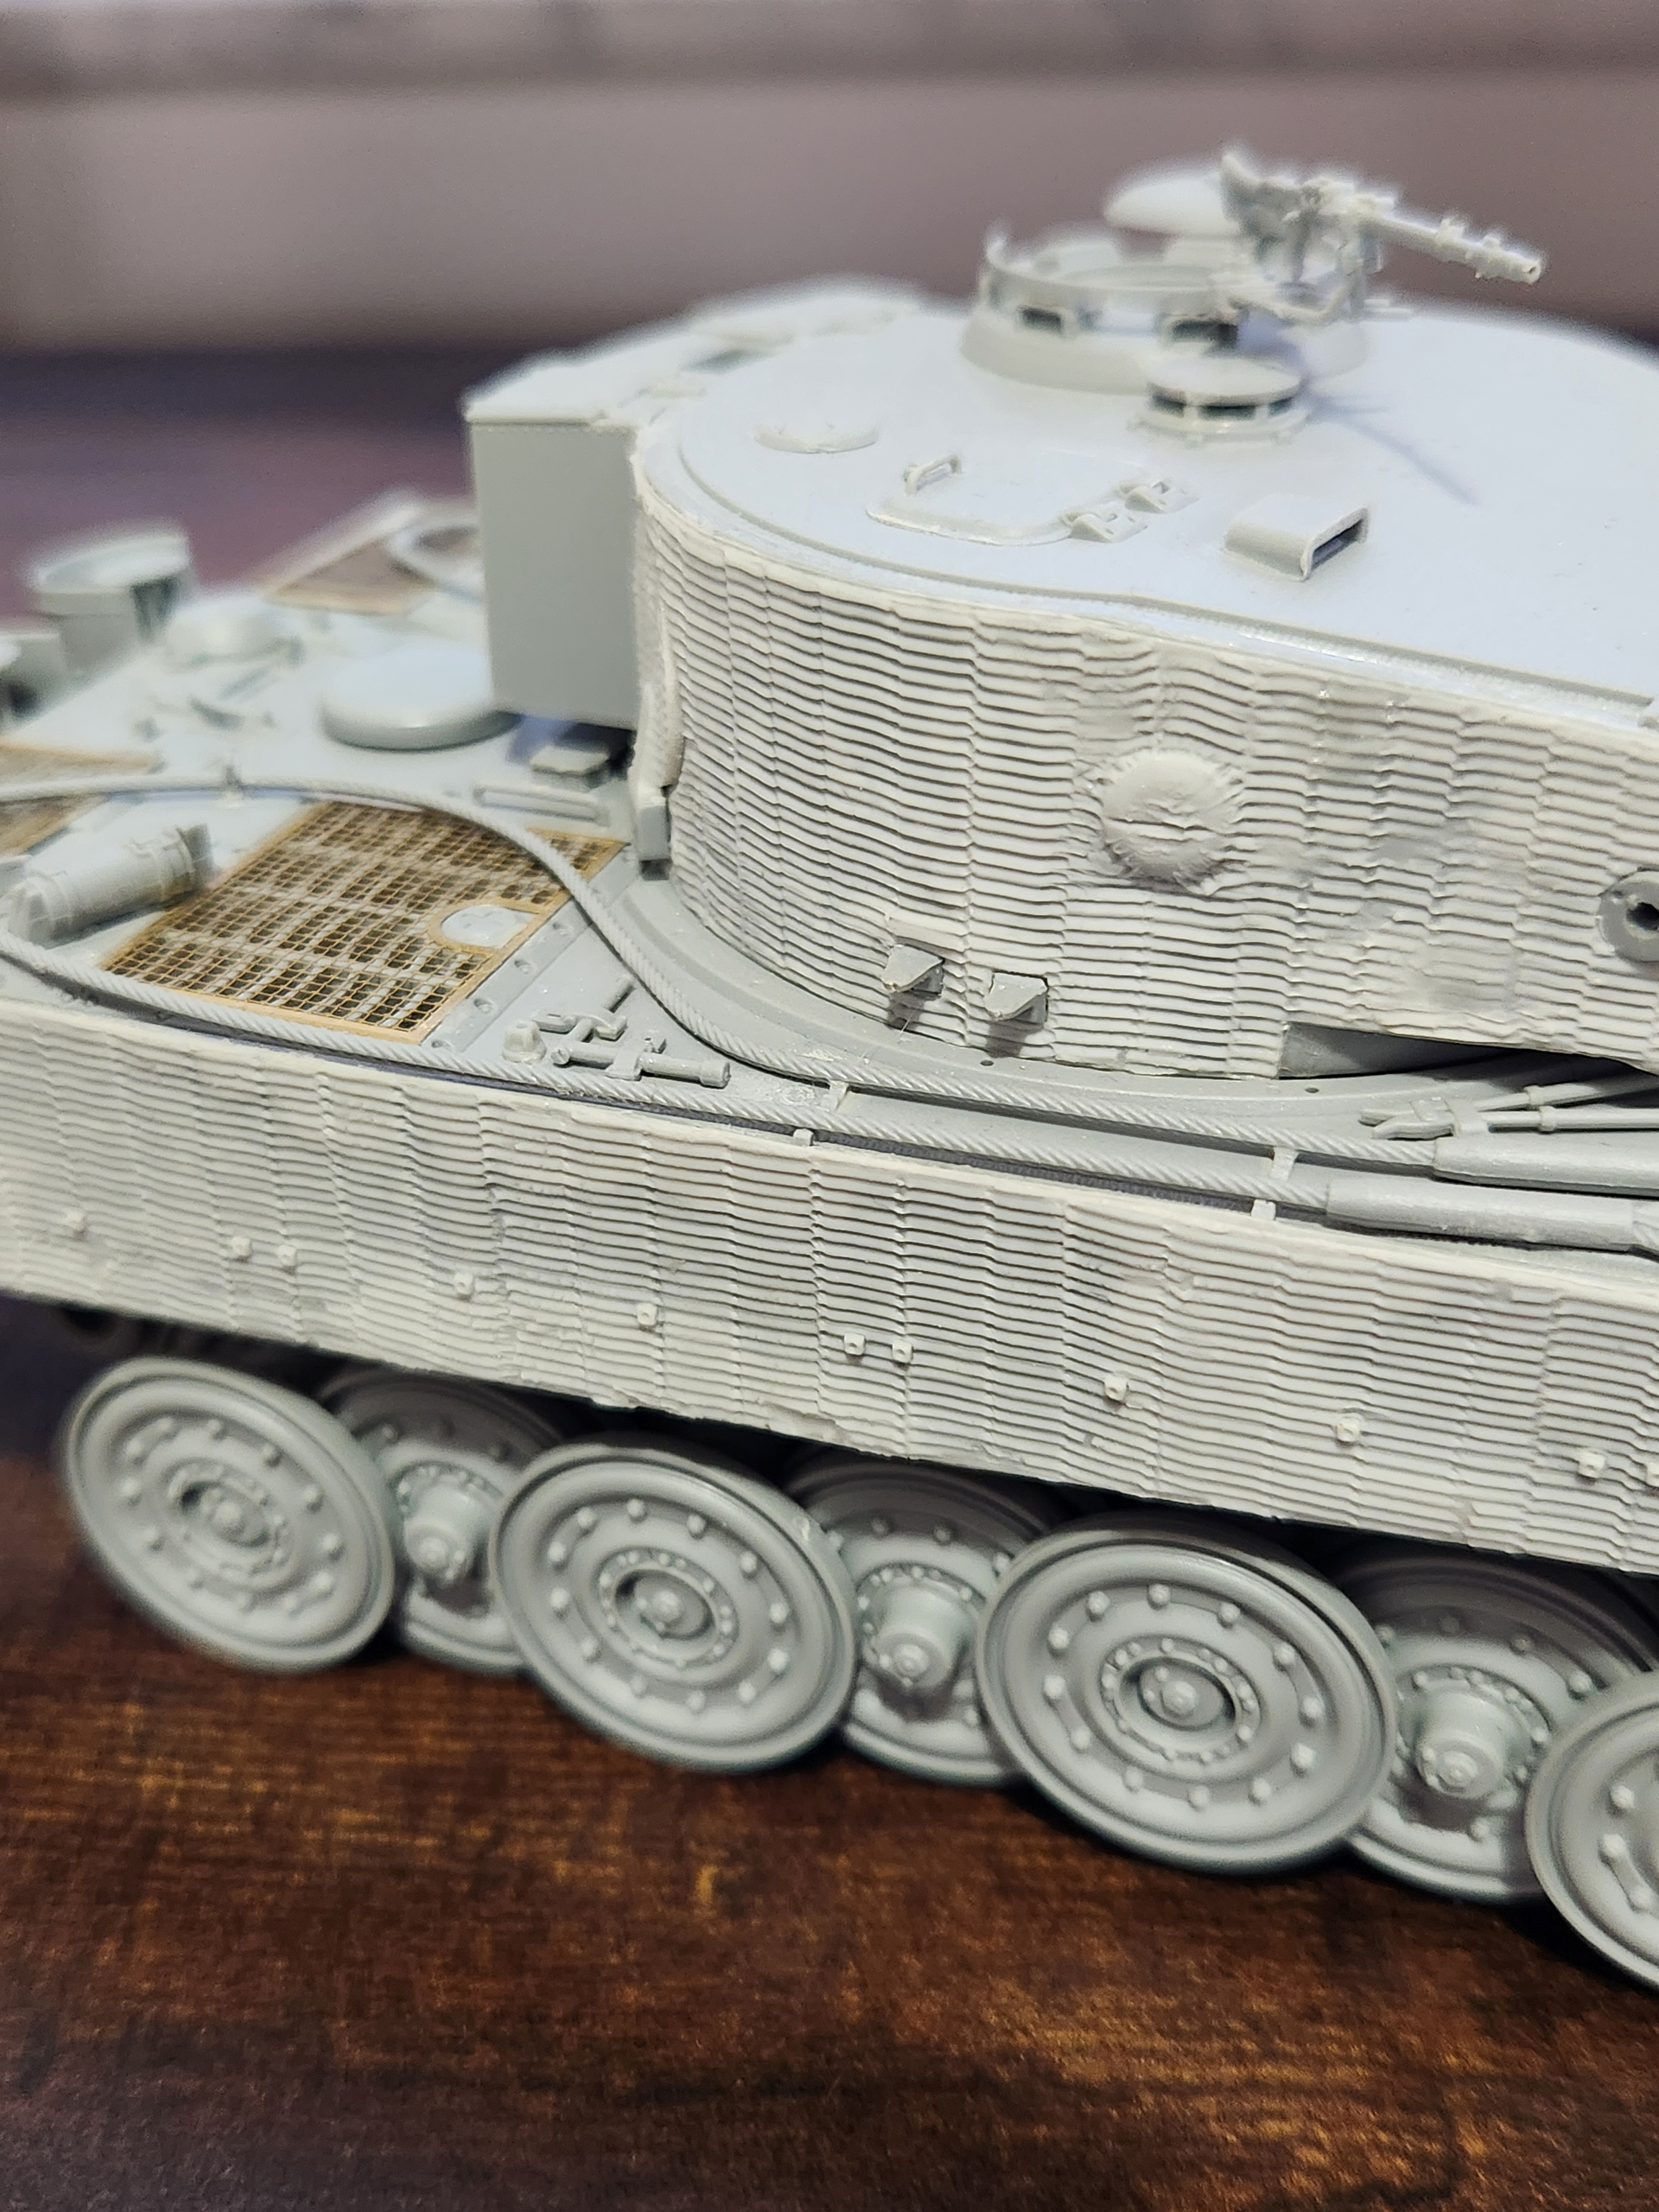
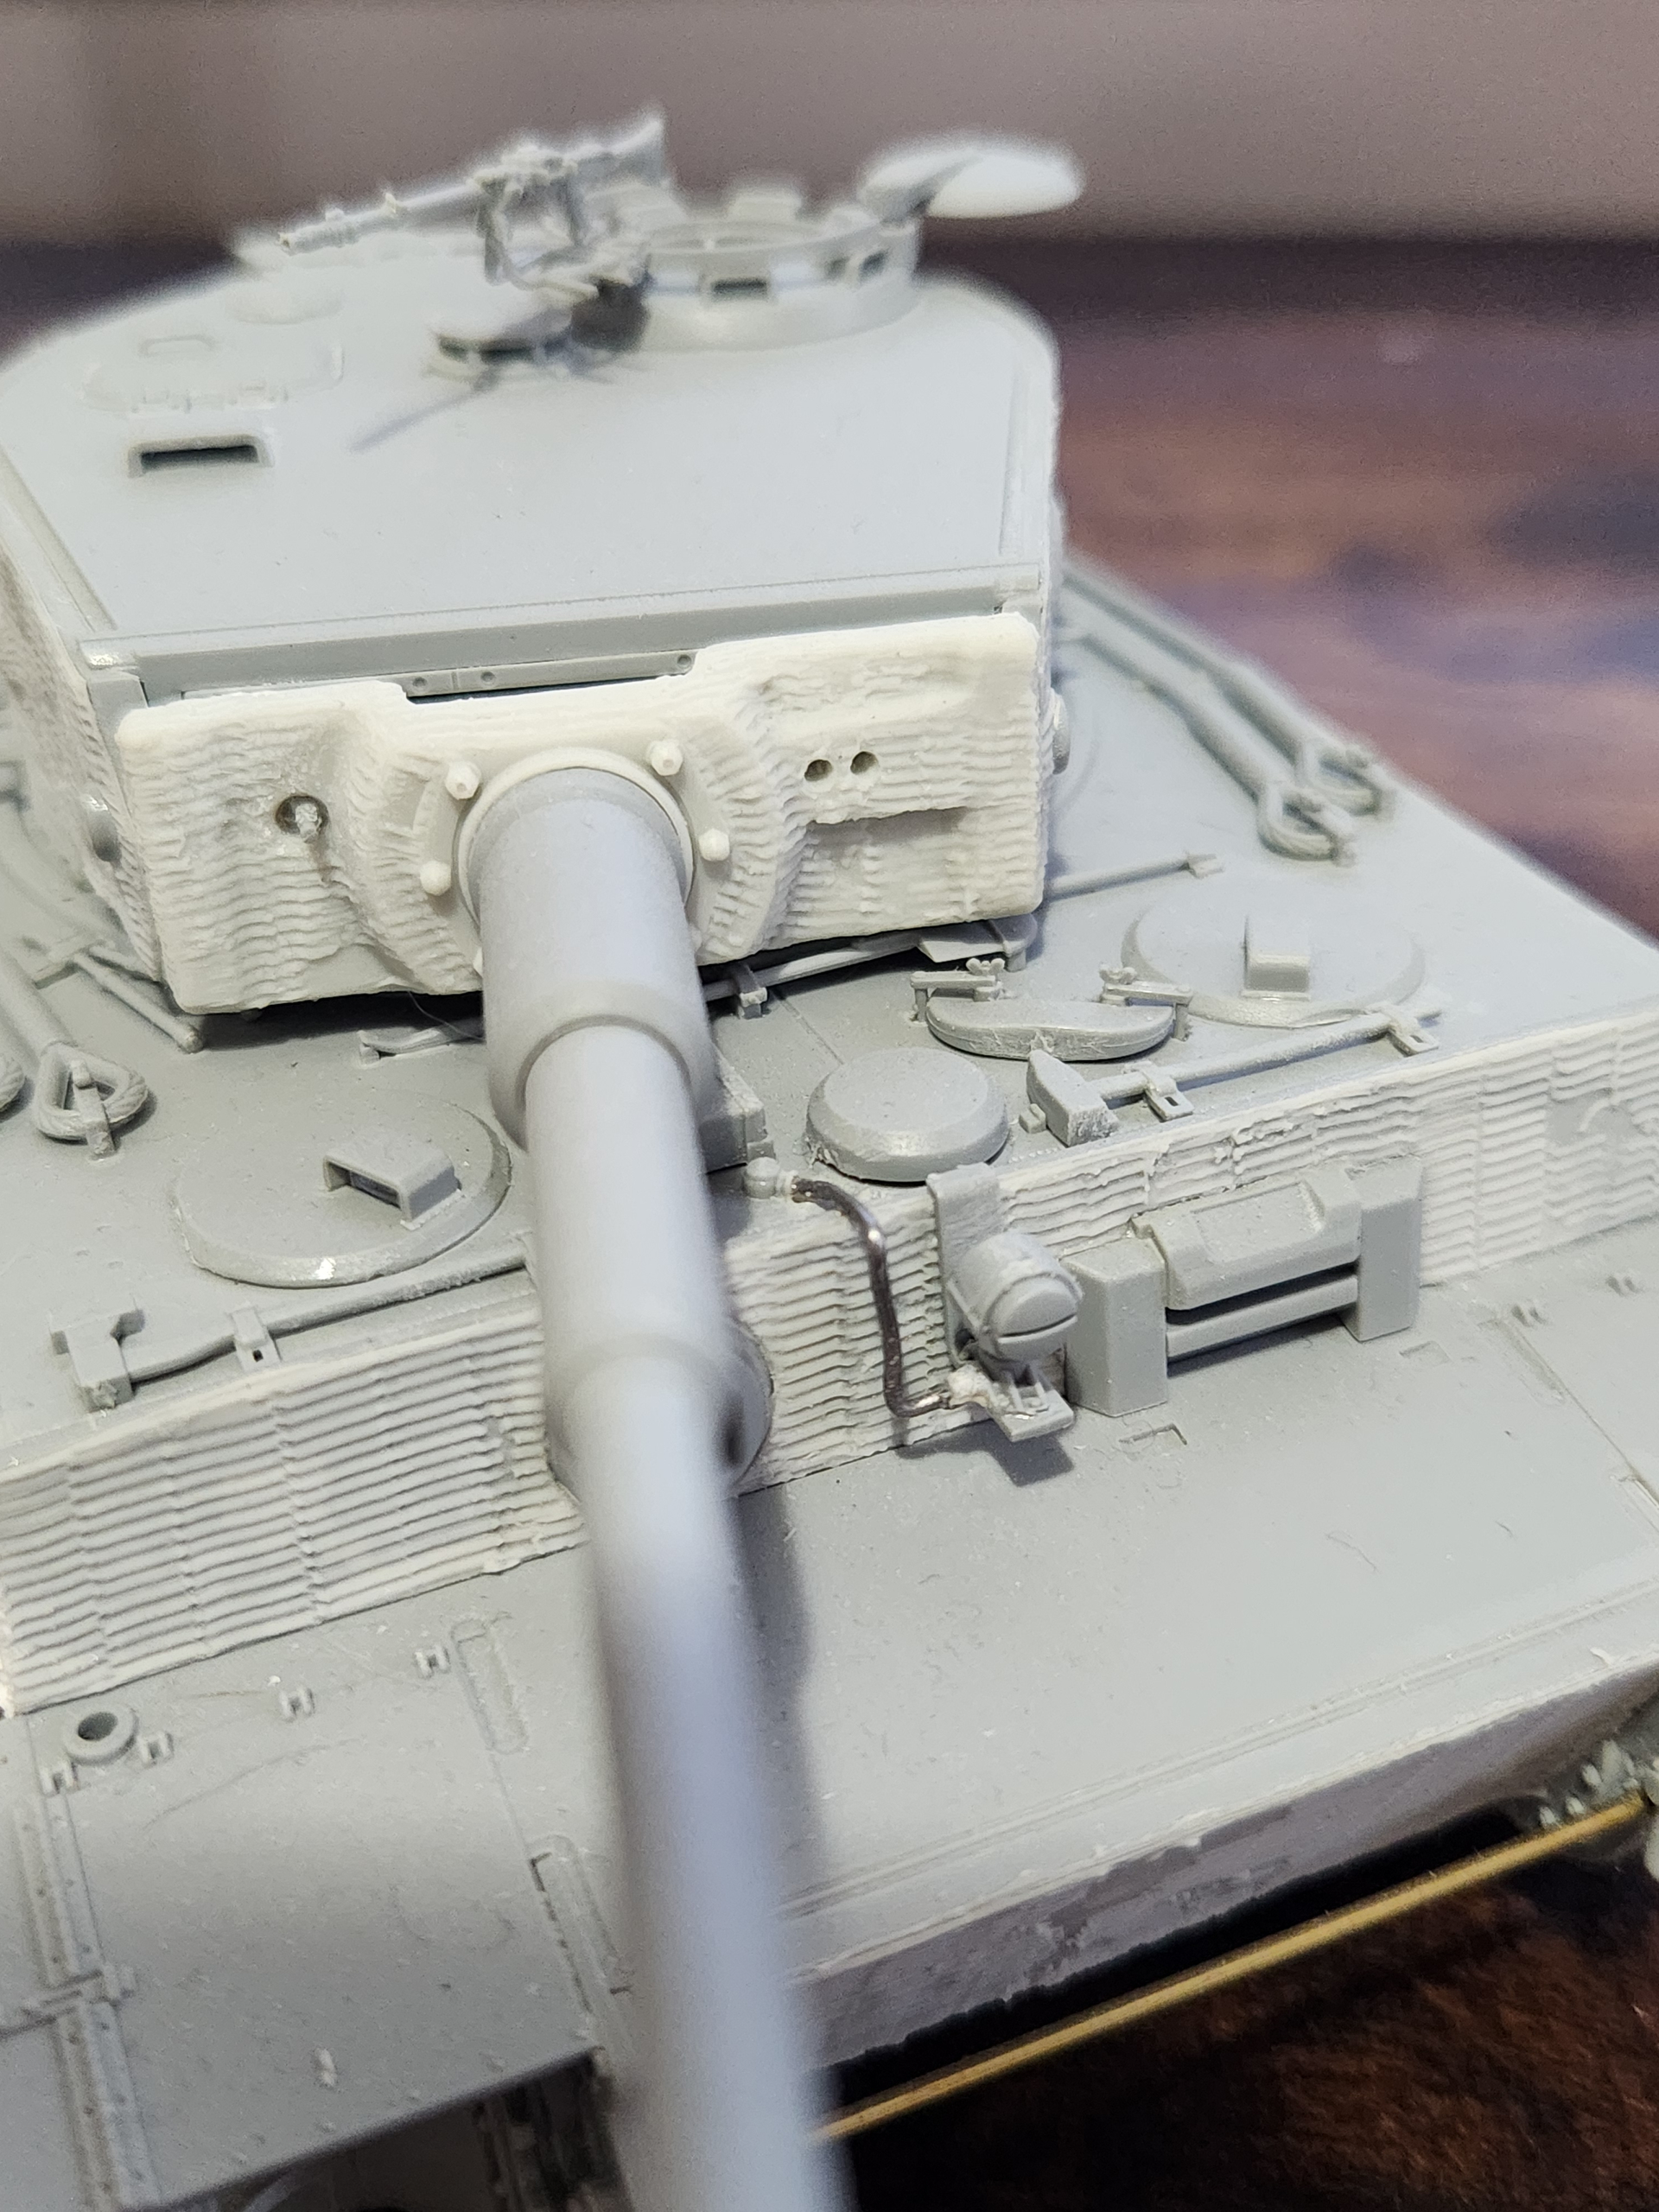
Alright here’s my attempt on the actual Tiger II itself:
Also, it was impossible to worm my tools into these place, so I had to do my best with a knife. As you can see, results aren’t stellar. But this is what I can do, unfortunately.
Anyway, that’s enough incremental updates for now.
Guess I’ll just show the entire Tiger II with zimmerit when I get there, and call it a day!