I need help with zimmerit paste please!

Hello hello once again guys, I come to you with yet another conundrum…
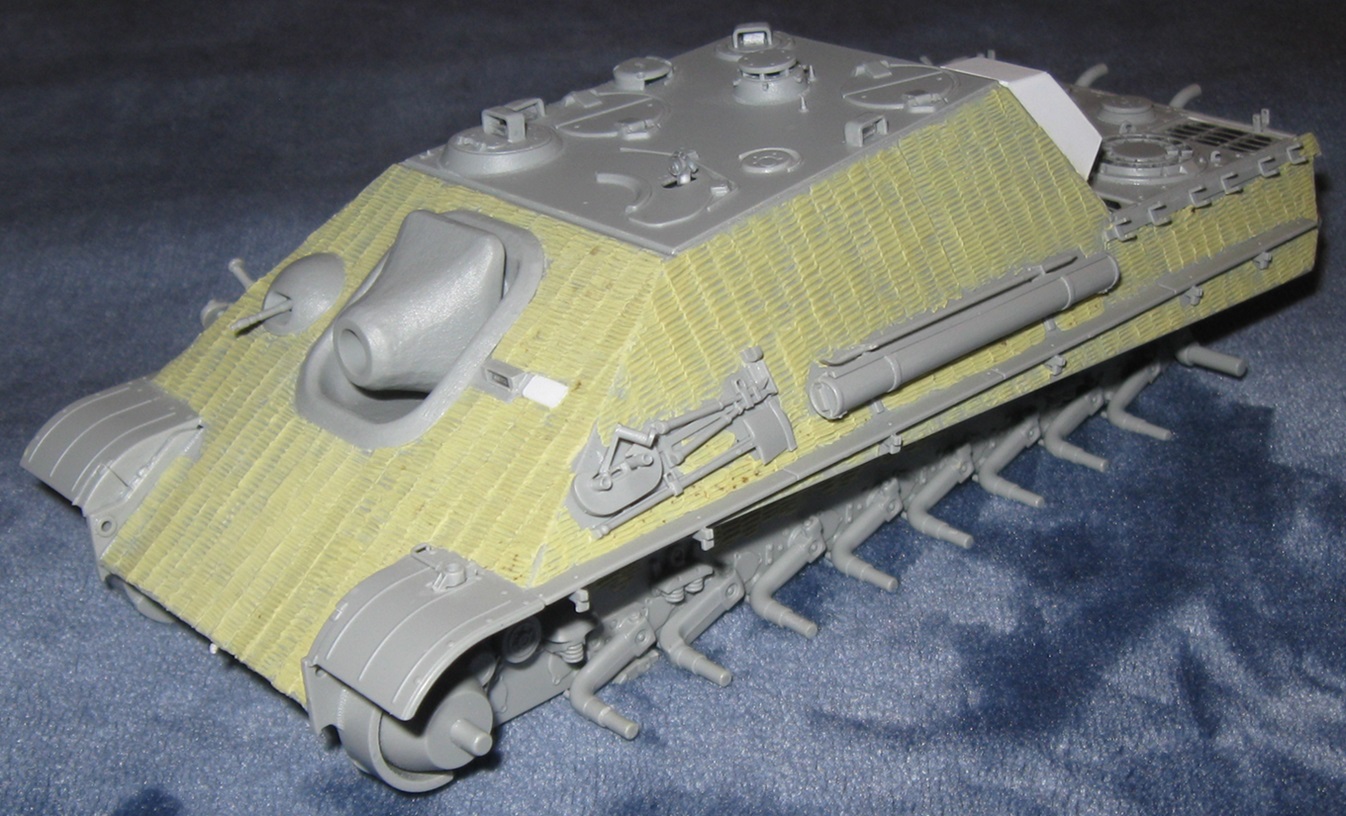
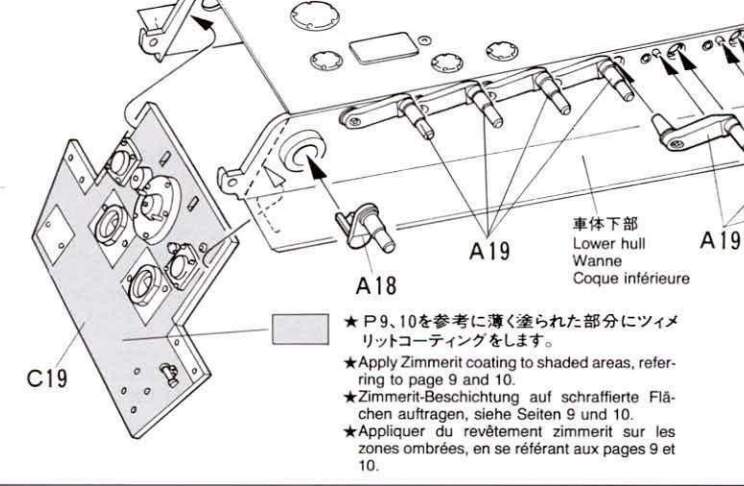
I am currently in the progress of building a spare scrap Tiger II model (Tamiya), because I want to practice both Zimmerit and 3-tone camo on it before I need to do it for real on my German tank models, and I’ve never done either cuz I’m still very much a newbie
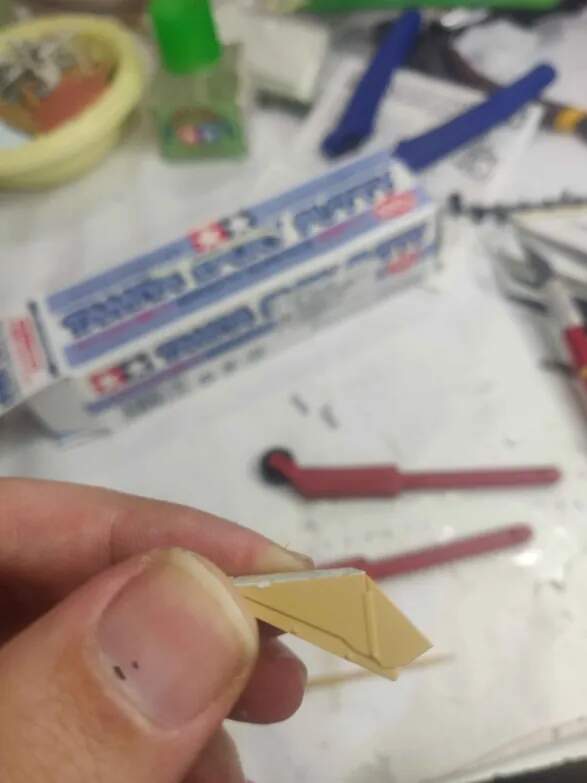
So I bought myself zimmerit paste and zimmerit tools
But when I got to the point of needing to apply the zimmerit, it was a catastrophe. I couldn’t apply the zimmerit in a nice even, or hell, even consistent layer. It just smeared and blobbed all over. I tried to apply it with a hobby knife first, than a popsicle stick, then an actual kitchen knife (like you would peanut butter), but nothing worked, it just plopped and smooshed and was horrible.

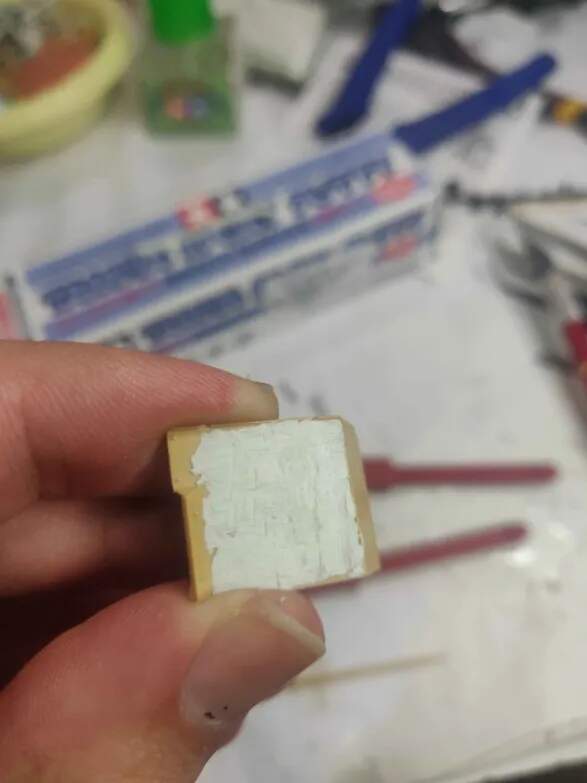
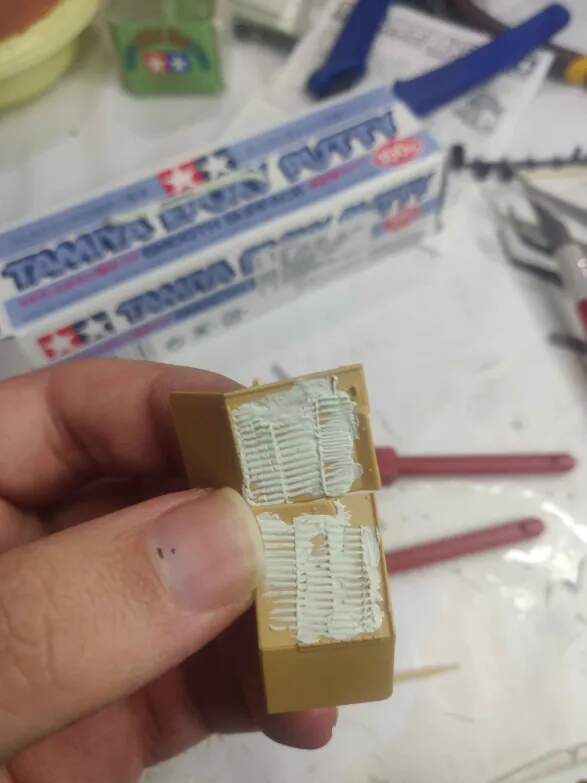
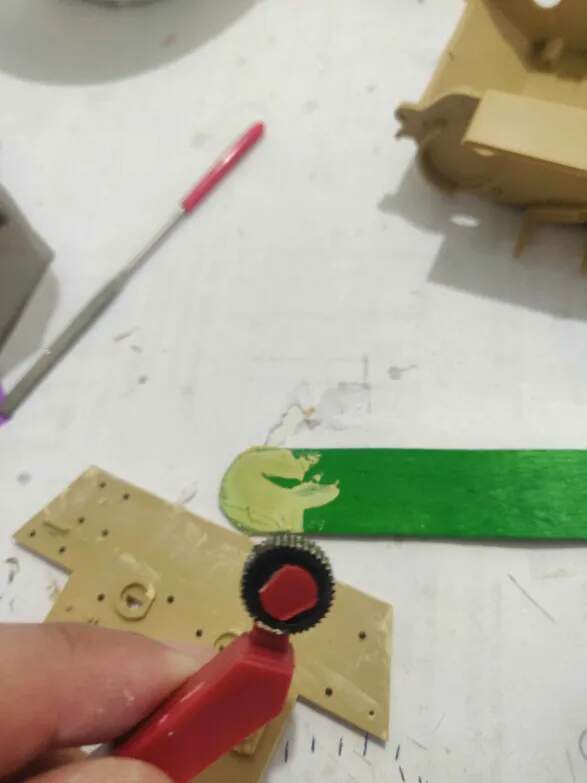
Now I figured it doesn’t need to be a nice even layer, when I use the zimmerit tools, they’ll work it out and spread and push aside the excess when I use them, right? No, they worked horribly. I tried the roller first, and this was the result:

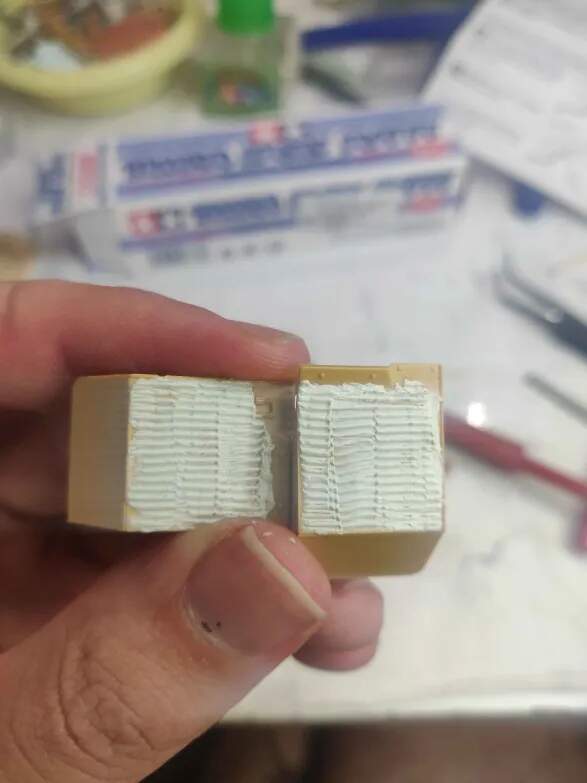
I figured it was just because the paste was too wet. so I let it dry, and also used the zimmerit press next. Didn’t help, same problem.

The zimmerit paste just clung to the tool, and it tore it off. And if I have let the paste dry anymore, it’d be like hard clay, and not workable at all.
Both my zimmerit tools are now clogged with paste

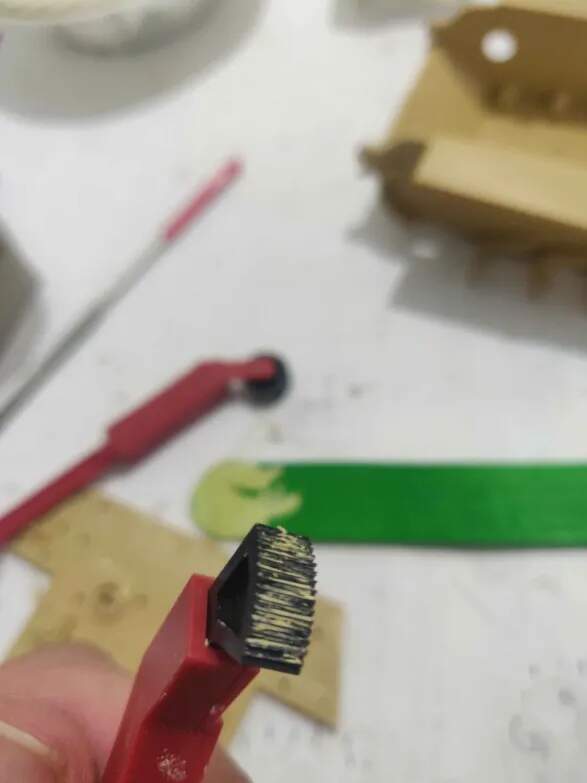
I soaked them in water, I hope I can salvage them…
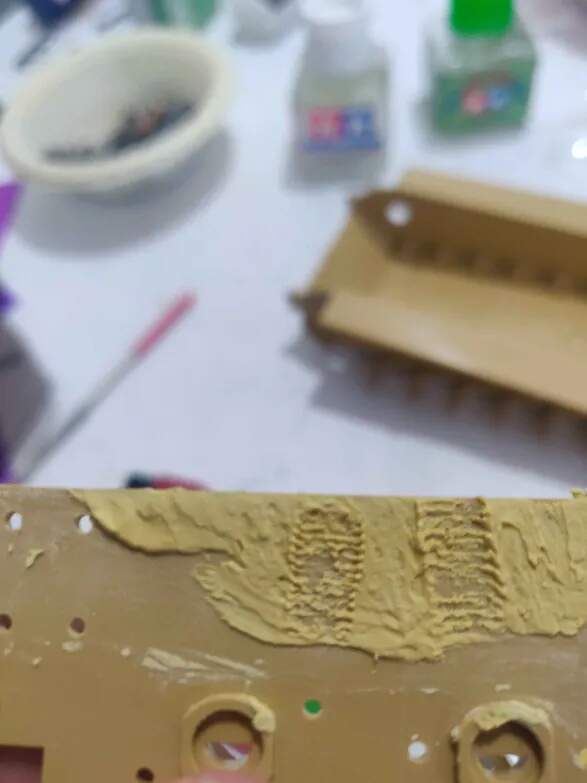
Anyway, total disaster.
I have no idea how I am supposed to apply the paste, let alone how I am supposed to do so without it getting on where it shouldn’t be


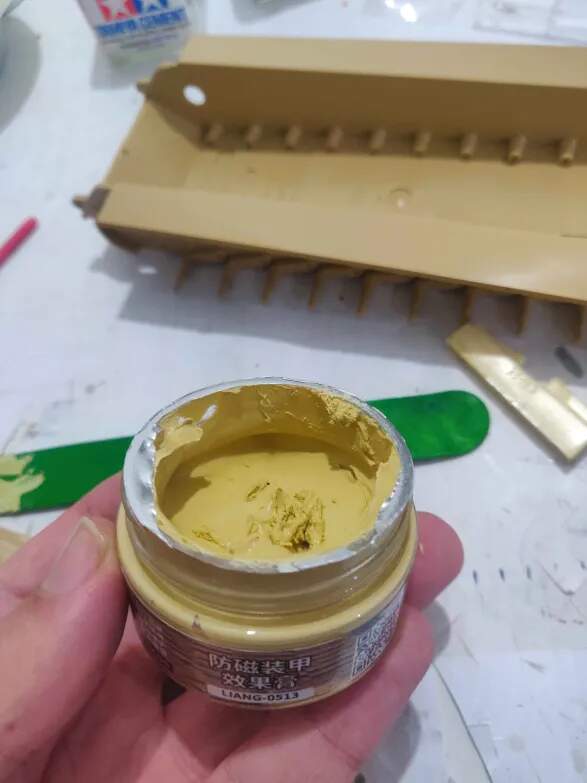
By the way, if it’s of any concern, I use/d Liang Model’s zimmerit paste:

I know this entire post is a huge jumbled mess, I apologize for that
I’m sure I’m doing something, or everything wrong, so, I’d love some help and/or advice from people experienced with zimmerit paste
Thanks in advance as always!

2 Likes

Yikes! I ran into the same problems. So here is what worked for me.

I like the Tamiya 2 part epoxy, and Milliput. Both are pretty forgiving. I like it because I can roll it out to the thickness I wanted. If I wasn’t happy with the coverage, I had time to pull it off and restart the process.

The tools you have, (roller with the red handle) you’ll find works really well. I also used a pocket comb. (The making one layer at a rime with a flat blade drove me to drink… And so it didn’t look good.

3 Likes

Same as Glenn, I have used Milliput several times and it has not been that bad. I make thin sheets of paste to attach to the kit and trim the excess, then pass the roller. I have heard that Tamiya 2 part epoxy is even better, but I have not tried myself.

1 Like

Have you tried given your Zimmerit tools a coat of Baby Powder periodically. This should help keep the putty from sticking to them. When I’m working with two-part putty and am rolling it out in a sheet, I always could the surface and the rolling pin with Baby Powder to keep it from sticking.

2 Likes

Never heard of Liang Model Zimmerit Paste until now. Cannot recall anyone around here using it. Looked it up and watched a guy on YouTube applying the stuff. My impression is that it is very expensive spackle. Based on the video I watched, I would be very concerned about crumbling and/or peeling. The fast dry time will make it very hard to sculpt the stuff and correct mistakes.

The usual method to prevent putty from sticking to tools is to use an appropriate solvent. The idea it to create a very thin layer of solvent on the tool. When putty starts to stick to the tool, clean it off and refresh the solvent barrier layer.

Not that long ago, Wade (Armor_Buff) wrote a journal in which he tried various products to apply zimmerit: Make your own Zimmerit with Tamiya Gray Putty & Testor’s Liquid Cement. Even if you use a different product, his explanation of the application method may be useful.

There are lots of YouTube videos on making zimmerit using all sorts of products and tools. I suggesting watching a few videos until you find a system and result you like.

Here is a Jagdpanther I recent built. The zimmerit is Standard Milliput applied with a popsicle stick using water as a solvent. I am not saying you should use standard Milliput. I am suggesting that some versions of zimmerit are pretty easy to do and do not require any special tools.

In my opinion, you are doing exactly the right thing–experiment. You need not even sacrifice a model. It is super easy to practice making zimmerit rows and squares on a piece of box cardboard.

Here is good website describing zimmerit patterns: Zimmerit.

7 Likes

Alright so basically everyone is in agreement that the paste is the problem, alright, good to know!
It’s a bit hard to find Tamiya products other than their cement where I live, so I might have to indeed research alternatives
And yup, good thing I’m practicing before doing it on an actual model!
Putty is almost like play dough, right? it’s easy to work with? It will go on in a nice even layer without much fuss, and I will be able to coax it away from the marked areas it shouldn’t be on?

2 Likes

I’ve had good results using regular modelling putty from a tube, especially Revell Plasto after removing most of the glue-like stuff that’s in that. By squeezing that out, you end up with a much drier putty which doesn’t stick well to tools. Also, leave the putty to dry for a bit first after applying it — again to make it less sticky.

1 Like

Alright, I ordered Tamiya’s 2 part epoxy putty, I read that it’s a favourite for zimmerit and easy to work with
Will update how it goes once it arrives!

2 Likes

Keep in mind that The real Zimm is not as thick of a layer as you would imagine.

4 Likes

Yeah haha, and in a 1/35 scale it would probably need to be even thinner, but, the problem is that it needs to be thick enough to be sculpt-able… :confounded_face:
Really not looking forward to messing with the zimmerit again when the putty arrives…
The zimmerit and 3-tone camo are the bane and terror of my existence right now!

2 Likes

A long long tiime ago I wanted to put Zimmeret on a Tiger. I didn’t think about thickness I just took some Squadron (1970’s ) Green Stuff and put it on. I spread to what ( I) thought was the right thickness. Then useing an Exacto knife that looks like a ( Z ) made my steps or Zimmerets. Remember The Zimmeret used Germans was applied by hand and there would be thick and thin spots. I don’t if the consistency of the Green Stuff is the same as it was in the ‘70s but give it a try. I was happy with the results.

1 Like

I completely get being a bit scared over zim and ambush camo! :joy:

I haven’t done either of them myself, but I’d highly recommend using the Tamiya two part putty, I use it to fill in holes and make details such as weld beads normally. Just try to keep your tools, fingers, and rolling surfaces wet (but not flooded). Also if you haven’t already, you should definitely check out this Nightshift video! (He uses the tamiya putty and even has the same tools as you)

Good luck!

1 Like

I use old electrical saw and tamyia putty

Welp…
So the putty arrived, I watched the video @LiterallyHorrigon kindly provided several times over, and…
Meh?
First of all, this is the thinnest I could get the putty. Any attempts to get it thinner than this resulted in it tearing:


And so, I got to work. Followed all the techniques in the video, and, it didn’t come out so good:


Despite making sure my tools are coated in water, the putty still clung to them.
I tried again, this time applying a drop of water directly on the putty surface as well. It helped, there was no clinging anymore, but the shape still didn’t come out good at all:


I tried a few more times, and this is the best result I managed to get, even though I only got it once and was unable to replicate it, and even it’s not very good:


These are the results I’m able to get consistently right now, and they still look awful, I think:

The only difference between what I’m doing and what Mr. Nightshift is doing is that I’m using normal Tamiya epoxy putty, rather than the quick type, but, surely that’s not a problem? I figured it would just give me more working time.

Regardless, this is where things stand now.
Is this just a skill issue? Is it just a matter of practice? Or am I doing something wrong, or something else?

1 Like

Have you tried talcum powder instead of water? I’ve used it on putty in the past and it worked okay.

1 Like

At the risk of stating the obvious, doesn’t it make more sense - unless you’re an absolute Ninja in using putty/whatever, to utilise the many pre-made sheets that are available, viz Atak, Cavalier Tamiya?

Even if they’re deemed expensive - and I’ve no real idea what they go for - but at a stroke it would remove all the angst over possible inexpert use and the possible tragedy of ruining a model.

Just a thought.

2 Likes

Well talc might help with the sticking, but, I’d say my biggest problem is the shaping! Water is sufficient, I don’t know if reducing sticking more will help…

1 Like

Well, a zimmerit sheet is just… Stickers
Which are flat… And while they’re probably easy and straightforward, I’d personally much prefer actual real physical textured zimmerit, real grooves and bumps
Either way, I’m currently practicing on scrap T-34 parts, before I practice on a full scrap Tiger II model, before I do zimmerit on the actual model I want it on, a Panzer IV ausf H, so, ruining a model is hopefully not in the cards :slight_smile:
I just hope it’s practice that I need, and not going back to the drawing board…

1 Like

Well, the real thing is flat albeit ridged; it might be applied to curves but it is still pretty flat. Just look at the pics above; some war damage sure, and time has taken its toll, as other images will prove, but almost meticulous in its application.

If you eventually master it all well and good, but if I was a WW2 panzer modeller - I’m not - I know what I’d be doing(!)

The thing is, in 1/35 it might be easy to inadvertently over-emphasise the Zimmerit, whereas the sheets I refer to look pretty much in-scale, or as far as they can be.

1 Like

a zimmerit sheet is just… Stickers

Not really. There are a few types.

The old style is actual styrene sheets with the zimmerit embossed onto it. It is thin and has a nice, fine texture.

This one is laser cut to fit.

Eduard does/did photo etch metal zimmerit as well.

The newer style is 3D printed resin zimmerit. It looks like decals and comes off a backer sheet w/water, but they are resin printed onto the backer and have very fine definition and texture.

3 Likes