I think my water trap is leaking air

I have one of those very cheap Chinese airbrush kits, about 50 euros on Amazon.

The little thing is perfect for a beginner like me and it worked flawlessly for 4 models’ work (for its price range obviously)
The compressor has no tank, it builds up the pressure as soon as it’s turned on.

Now in the last session I noticed that the compressor tries to build up pressure every 3-4 seconds, like there’s a leak of air.
It still works fine while spraying, but while on “stand by” it continously ties to to build up the pressure.
It also becomes incredibly hot, the hose’s metal connection was painful to touch.

I tried to screw all the parts tighter, but it didn’t work.

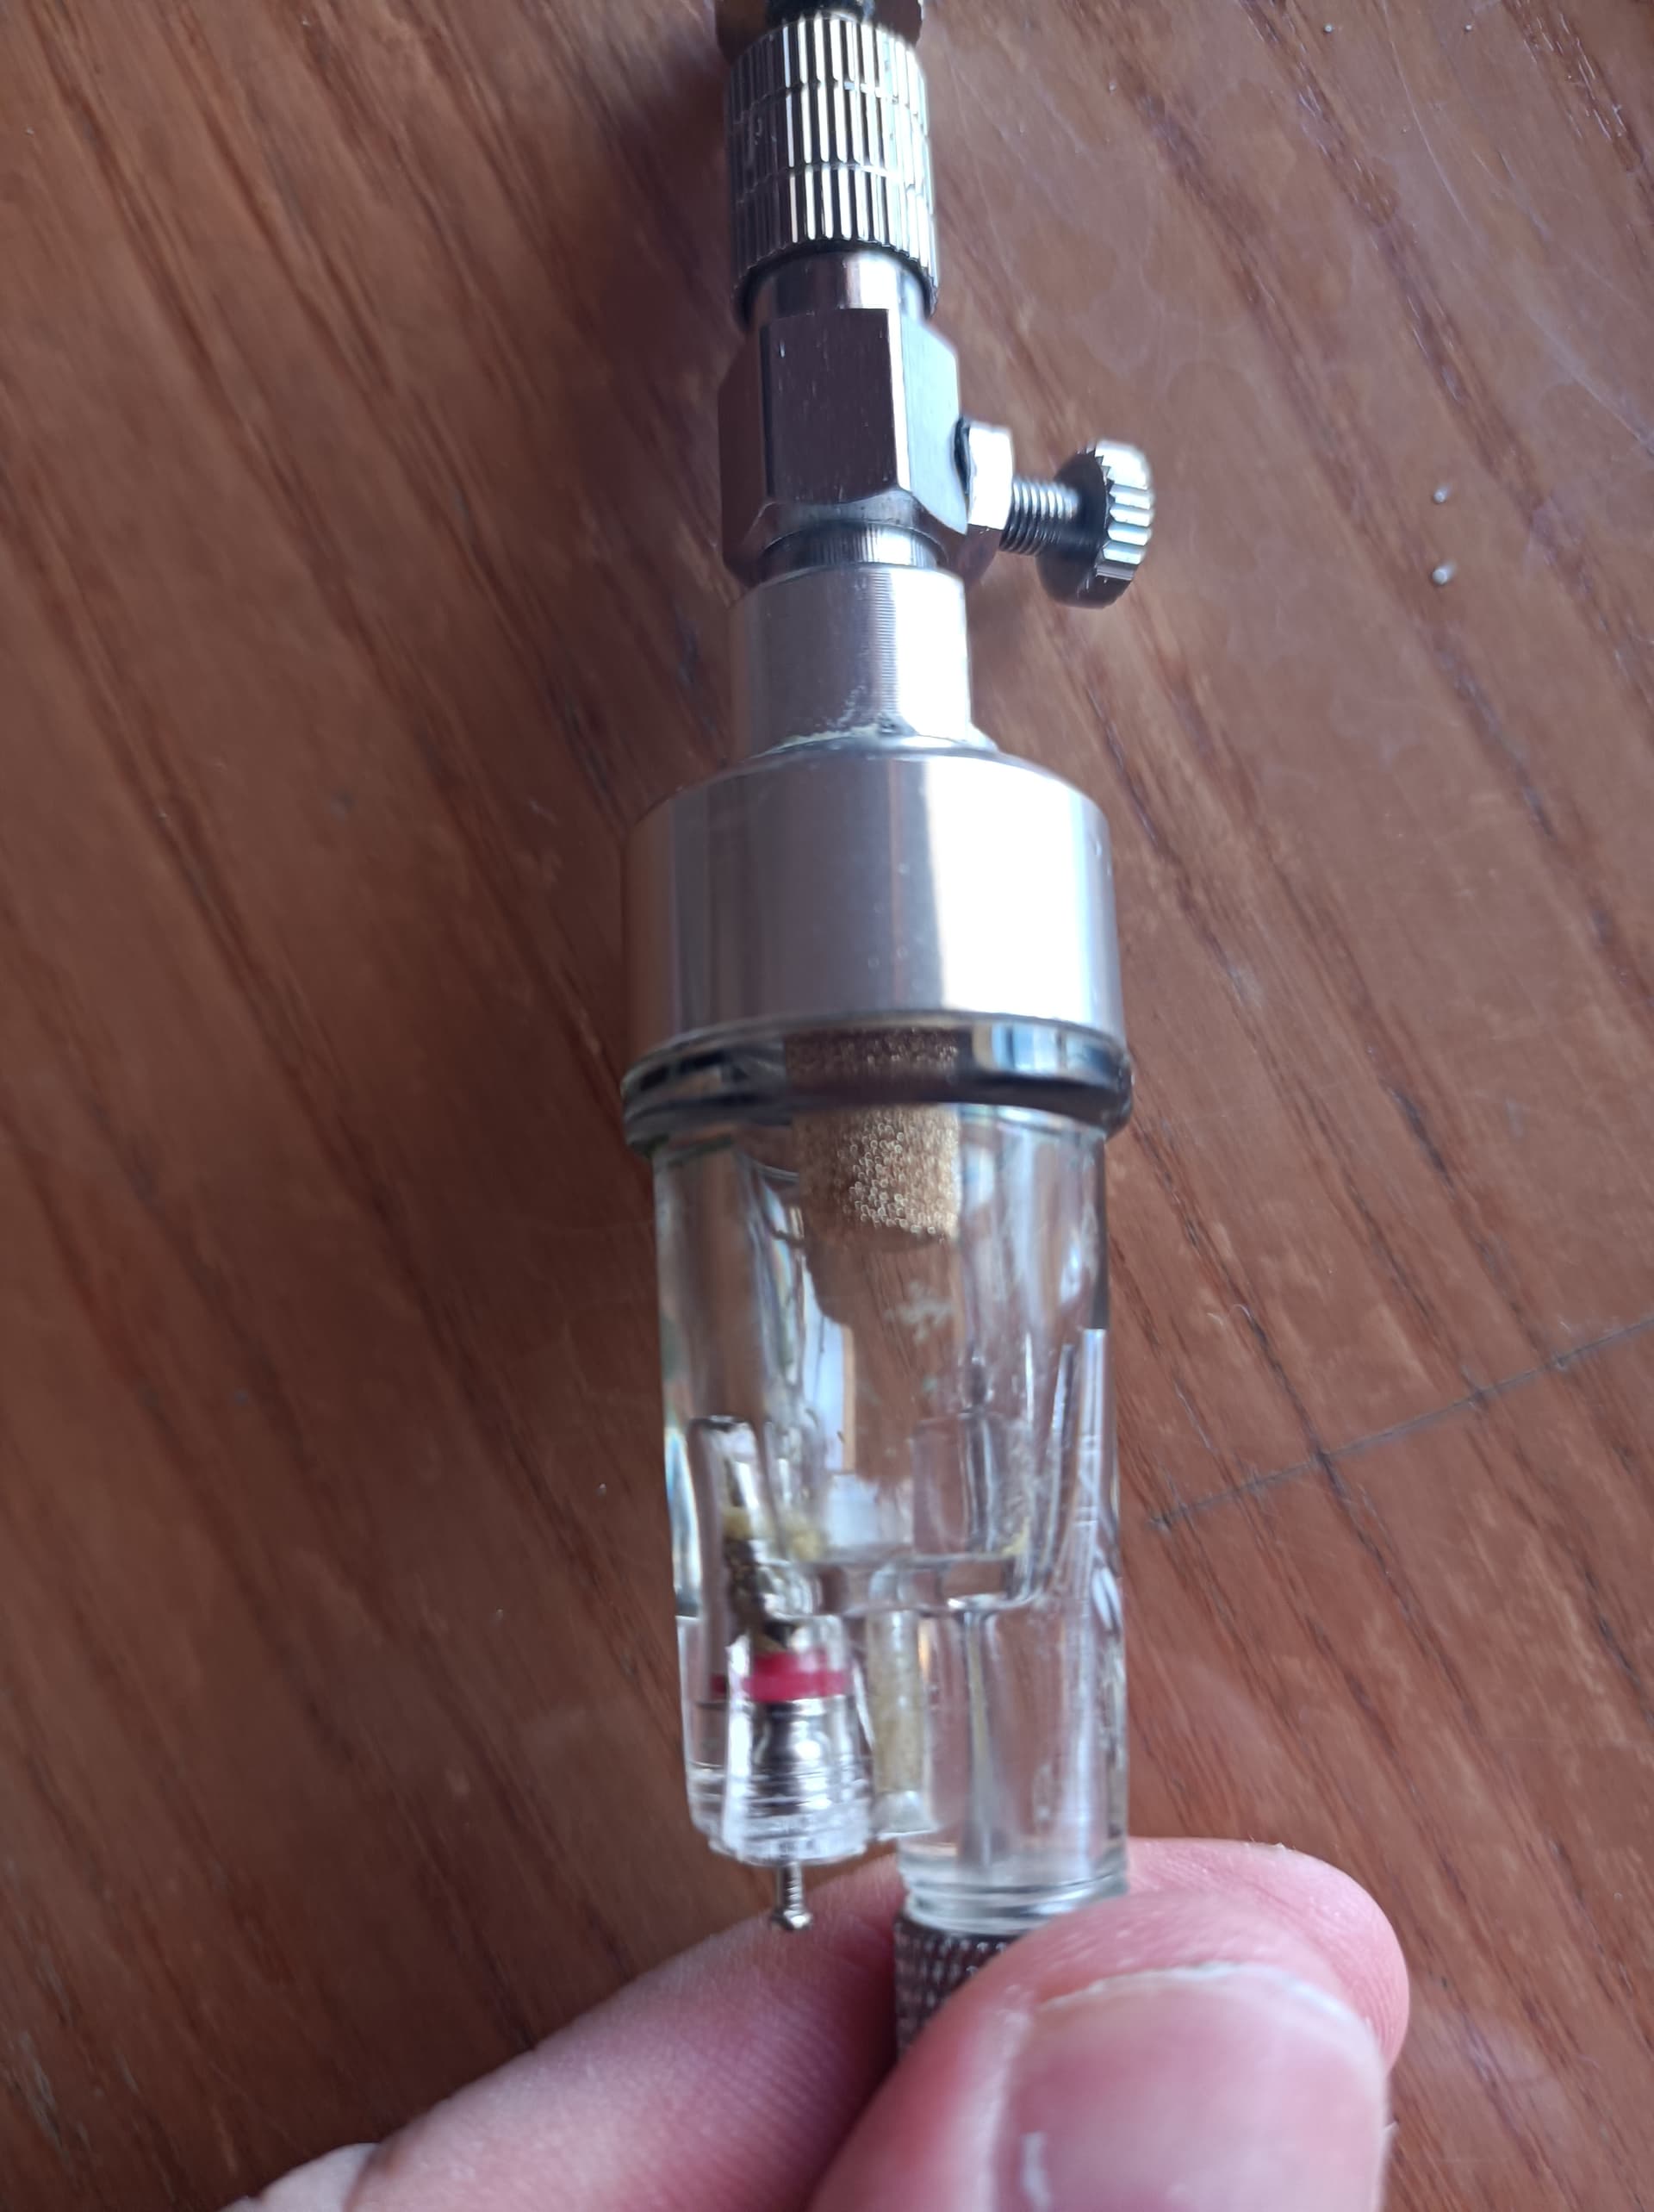
In the end I tried to remove the water trap and connected the compressor straight to the airbrush…and it worked.

Now…
I know these things are a small miracle just by not breaking on day 1, but I would like to make it last as long as possible.

Looking at the trap itself I can notice there’s some “dirt” you can see in this picture.

So I was wondering:

-Is there anything I can try?
-Can I safely airbrush without the trap? What consequences could I face? Keep in mind that I’m not a pro and my paint works are far from stellar to begin with.

-Suppose I need to buy a new compressor (I know sooner or later I’ll need it) . Is there anything decent I can buy for about 100 €?

1 Like

Did you check the seal where the hose connection screws into the moisture trap? The trap looks similar to the Iwata one. Maybe needs an O ring between the connection.
:grinning: :canada:

1 Like

I checked, there’s no ring there…I wonder if a common hardware store could have it.

Use some water mixed with dishwashing liquid and brush it onto the joints while air is on. Bubbles will show you where the issue is at least. And maybe some ptfe tape on the thread that leaks could sort it, if that is the issue.

Could also be debris in the seal where you drain the trap, not allowing it to seat properly again.

4 Likes

There are several airbrush makers that offer in-line water-trap-filters. Some attach to the airbrush and others are truly in-line (installed mid hose somewhere).

If I was otherwise satisfied with the airbrush and compressor performance, I think I’d try to find a replacement water-trap-filter before I replaced the whole system.

I’d also try to trouble-shoot the current filter to see if I could ID and eliminate the air leak. Might require a small dab of wax lip balm on the threads or o-ring area where the hose connects or where the drain valve is located.

1 Like

The hose connections usually have a sort of flat cork O-ring to seal them - if it is missing that’ll be your leak! Best to add a new ring, as PTFE tape on the threads won’t help - the outer threaded cup rotates on the hose so air will escape there even with tape.

Heating of the pipe is due to the small compressor running hot because it is small and runs constantly to keep the pressure up - you would do well to invest in a better one.

1 Like

Yep confirmed, I can actually hear air escaping from the plastic screw attachment of the trap.
Probably there’s some warping or damage in the plastic.
Wonder if it wasn’t my fault by screwing it too tight once.
The cable seals should be ok as they do not leak when the airbrush is connected alone.
I suppose I could buy a replacement from Amazon, that’s about 15 €.

But I also would like to know what kind of troubles would I face by not using a trap at all, I find the air jet much more powerful and it probably causes less strain on the poor underpowered compressor.

The air is likely stronger because a lot of moisture traps have a micrometer type dial that allows you to fine tune pressure. For example my compressor sits at 100 psi and kicks on at 75 psi. The outlet pressure on my compressor is 50 psi, but the outlet on my moisture trap varies between 10 and 20. Make sure you aren’t spraying at too high a pressures

Moisture traps aren’t critical depending on where you live. In dry climates you’ll likely not notice a difference. In humid climates your compressor will make condensation as it compresses air. Compressed air is colder than the inlet air and therefore ambient air temperature and can lead to condensation. This normally collects in the bottom of the compressor but can be sucked up the air hose. If this happens your paint session that is going well will suddenly not go well as that moisture leads to thinner paint and the possibility of a splatter on your kit. Moisture traps prevent this by allowing the water somewhere to displace before it enters the airbrush

1 Like

Thanks, I guess avoiding that is worth 15€.

My only gripe is that all the traps I find online still have this plastic screw part, unless you want to spend outrageous amount of money.

I guess I just need to screw it more carefully and then just never remove it from the hose.

Are you talking the screw for making pressure adjustments or for screwing the hose in? My is metal where the hose screws in and was cheap I think $10 or so

My two cents worth.
The fitting is hot because the air is being compressed. Compressing air heats the air. So if the compressor constantly runs it will get hot.
You do not need a water trap to paint with, however when the compressed warm air moves through the air hose, it cools and moisture that was in the warm air collects on the inside of the hose. Just like the coils on a moonshine still. I don’t know the magic humidity percentage for this to happen but you will know when water drops suddenly appear under the paint you are applying.
A water trap closer to the airbrush is better than one attached to the compressor because you need to trap the moisture after the air has cooled.
I agree that some soapy water will help discover the air leak.

The hose screw, all I find on Amazon is plastic.
Anyway, got one for 7€, I’ll just be more careful.

This airbrush has been a great training for me, I bought it almost blindly without even knowing how it worked. Now I can field strip it and clean it like a Marine.
I also think I dropped all parts at least once on the floor, I am really glad I didn’t got a more expensive one. I even managed to salvage a bent needle.

2 Likes

LOL! That’s what first airbrushes are for! I think before I finally had to buy a second one, I had broken or replaced just about every part on my first airbrush. I did learn a lot doing it, though.

I bought my second airbrush, a Badger 200 (same model as my first) in 1979, and it’s still going strong today. (It has made the trip back to Badger for re-build, though!). I’d attribute more than a little to this longevity to making all of my really bad first mistakes on its predecessor… :slight_smile:

2 Likes

I am curious, what parts did fail?

Apart from the needle and the nozzle, the thing appears to be quite sturdy…

I bent needles. I split tips. I cross-threaded the handle. I failed to clean it properly. I gummed up the air valve. You name it! If it was wrong, I did it! LOL!

Of course, I was 14 years old when I bought that first airbrush and there was no such thing as the internet. I knew no one who owned one, and I had only what I’d read in magazines or the little two-page instruction pam that came with it for guidance and help. Spattering, spidering, orange peel and runs were all my nemesis at first.

There was no way in hack that I’d ever be able to buy a compressor, so I relied on cans of “compressed air” (Badger Propel) to run it until I got a valve that would allow me to use a spare tire as a compressed air source.

However, me, my airbrush and many cans of lighter fluid and many bottles of Pactra, Testors, and Humbrol enamel paint were eventually sprayed on many, many models over the 4-5 years that I used that first airbrush.

Best airbrushing education ever!

2 Likes

Using a spare tire was very smart (especially if you had free access to a tire compressor nearby), how long did it last?

IIRC, a “normal” car-sized tire filled to about 50 psi would get me through the base coat of most models. I’d usually have to get it refilled, though, before I could finish everything on that build, so generally at least two fillings. Unfortunately for me, since we lived in the country, I had to impose on my parents to drive me into town to the nearest gas station for refills… Waiting on a ride to town for air was also a lesson that I learned! LOL!

Needless to say, the pressure constantly varied as the air was used up, so learning to airbrush at many different air pressures by modulating the trigger on the airbrush is another lesson. Even today with a compressor and air pressure regulator, I’ll find myself modulating the air trigger rather than adjusting the pressure regulator.

The spare tire adaptor was something that Badger sold (I believe it’s still in their catalog). Unfortunately, it was only suitable for the proprietary small diameter Badger hose. There are other adaptors, though, that are sold to mate the larger, more standard sized airbrush hoses to that small (1/8"?) Badger connector.

Interestingly, I believe that Badger used (still uses, actually) that small diameter hose because it mitigates the issue of water condensation in the hose, itself. With a diaphragm type compressor that runs continuously, a large hose can act like an air reservoirs or tank, the larger it is, the more compressed air it holds between the user triggering the airbrush. As the airbrush is triggered, the pressure in the hose drops allowing moisture to condense out and form droplets that migrate with the air flow to the airbrush (and the work surface).

Old school diaphragm compressors usually have a pressure relief/bleed port in their hose connectors, so when the airbrush trigger is closed, air bleeding out of this hole can also carry condensed moisture with it. The system handles the problem differently (though I’d say less efficiently) and without needing a separate water-trap / air filter.

I think the Badger design engineers also considered the hose to be more flexible and therefore suitable for many light-duty user environments. They may have also thought that the smaller diameter hose was better for use with their proprietary Propel canned air since there was theoretically less wasted air lost than might be in a larger hose with more internal volume. In the end, the smaller hose is also likely cheaper to make.

Any hoo… the Badger Spare Tire Adaptor.

I always had visions of some poor modeler sitting in the parking lot at a model show with his airbrush hooked up the one of the tires on his car finishing up his model before registration. LOL!

1 Like

Interesting read, thank you.

Ah the old Badger tyre adapter. I still have that somewhere… I bought that in my early teens after I decided the cost of the air cans was eating into my meagre weekend earnings. I used to fill the old tyre from Dad’s air compressor. I never realised I could simply have bought an adapter for the air brush hose to fit to the compressor outlet… Dumbass kid - much older and very much wiser now.

The new trap has arrived, it works now.

I guess I 'll have to be more careful when screwing/unscrewing it from the cable, that plastic part must be very fragile