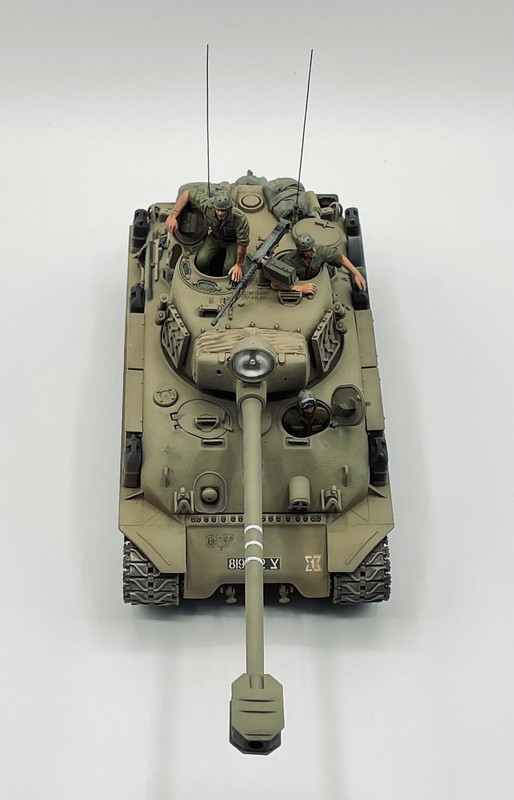
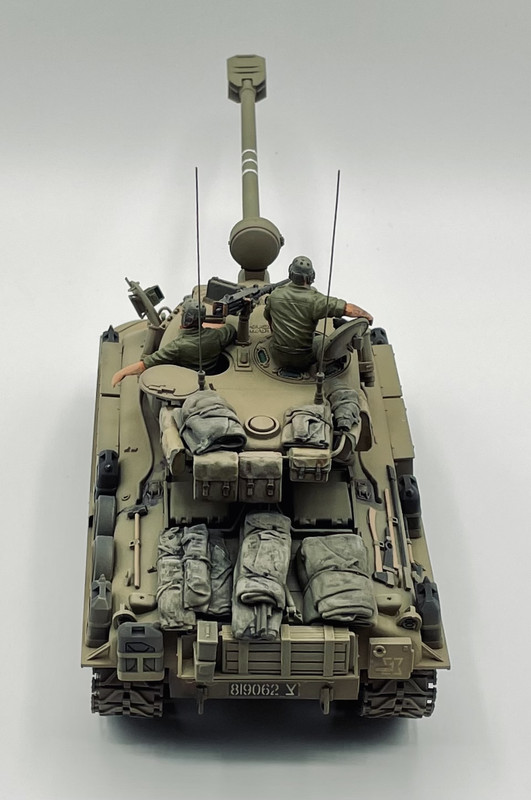
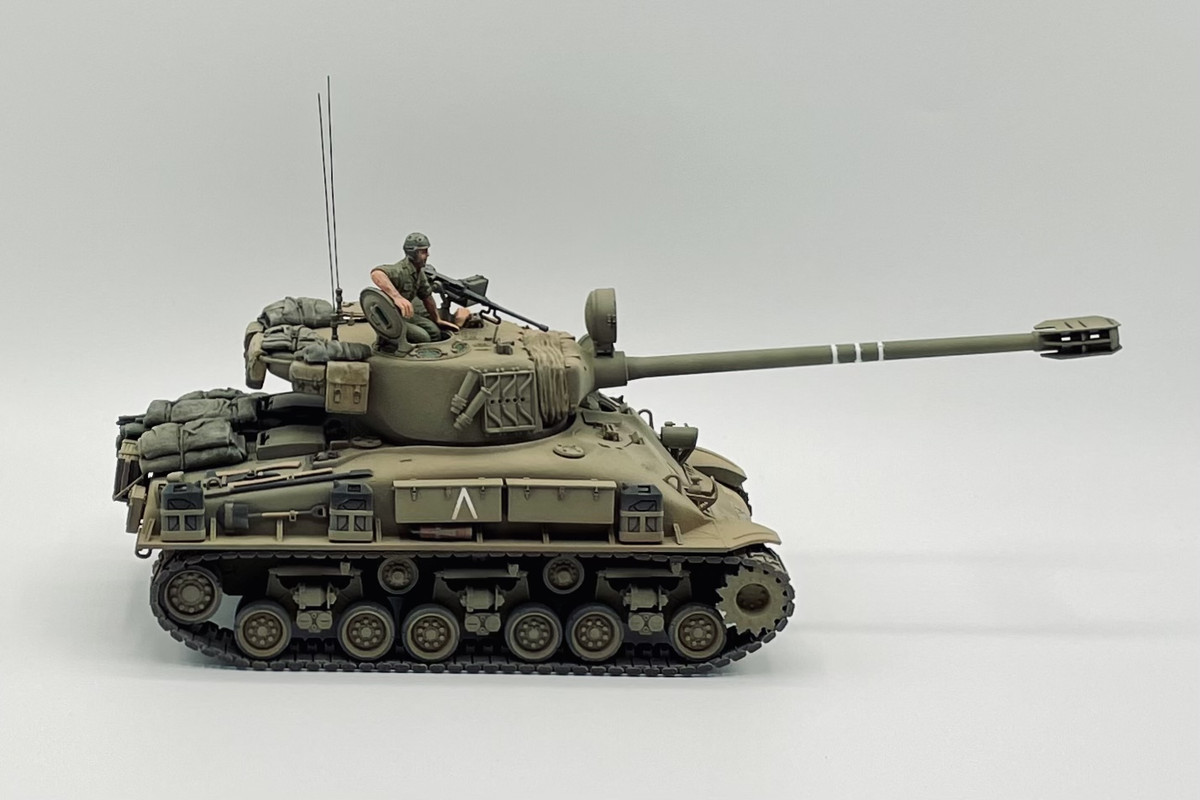
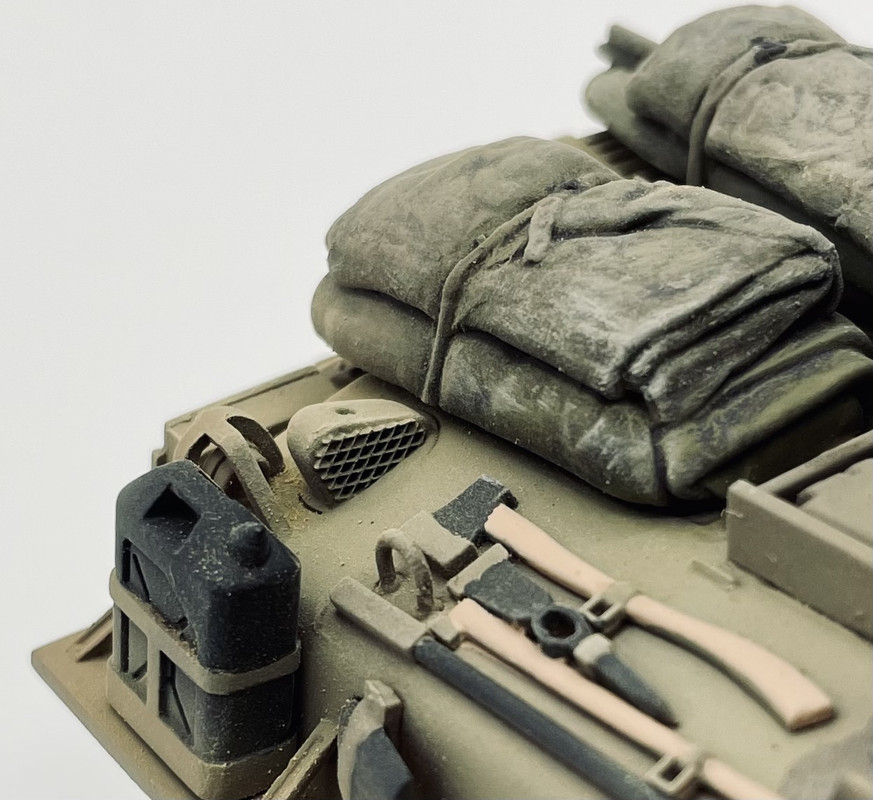
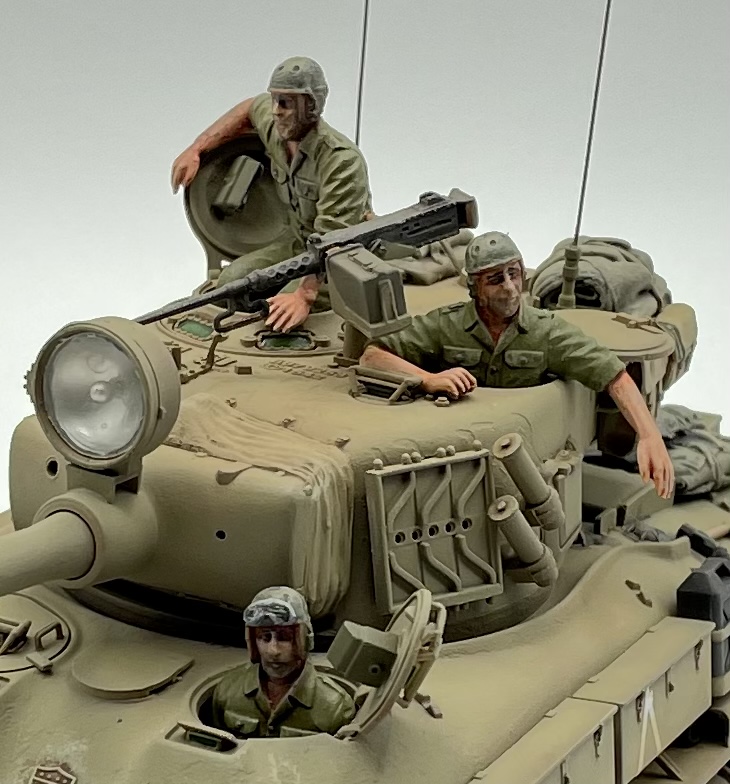
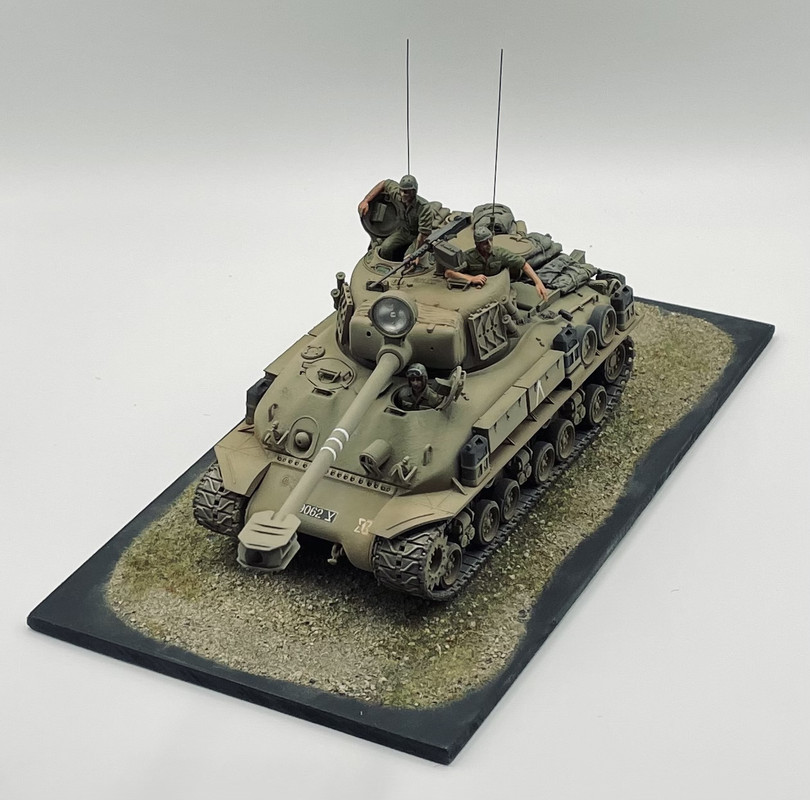
So my first project of the year is now complete. I built this as part of the “Curvy Tanks” campaign here. This is Academy’s 1/35 M51 Sherman, an Israeli/French upgrade to the basic M4A1E8. I built it mostly OOB, aside from adding a clear acetate lens to the spotlight (no lens was provided), some .010 wire for the antennas, and replacing the nylon mesh for the grouser compartment vents with some brass mesh - the kit stuff was horrid to try to cut to size & shape. Base color is Model Master Acrylic IDF Sand. I based the markings off what few photos that I could find of M51s in the Golan during the October 1973 War, where the Israelis had to bring these old war horses out of war reserve to assist the Centurions in stopping then pushing back the Syrian onslaught and subsequently driving towards Damascus.
Thanks for looking, comments and critiques are welcome…
Thanks guys! The figures came with the kit. The bodies are good, and I do like the poses, but the heads could use replacement. I really need to figure out a technique for eyes that works for me.
The base is just static grass, some sifted dirt/pebbles and such on a piece of sign board that I’ve had for several years. I use it as a generic base from time to time in photos with some new builds.
The kit was fairly simple in most parts, but there are some ambiguities in the instructions. It offers early and late type exhausts, along with a few other accessory variants that are not fully explained in the directions. Also the exhaust on the left rear hull (auxiliary motor?) is shown installed reversed on the instructions. Unfortunately I did not come across that tidbit until it was past the point of me fixing that gaffe. Check references for the details. And like I mentioned, the nylon mesh for the grouser compartment vents is crap. Replace it with something better. But honestly, these are small gripes, as it builds up fairly quick and easy. Having good references handy and deciding beforehand if you want to build an early or late configuration would help immensely.
Lovely work Carlos- to me the color of the tank is particularly impressive- you’ve managed to give it a beautiful paint job and the detail on the stowage is the icing on the cake. Gotta love how mean the Sherman looks with that gnarly looking barrel!
You mentioned you needed a technique for eyes and they can be very tricky in 1/35- as you mentioned the heads were not great quality. That’s basically your first port of call to improve- get better 1/35 heads! You can’t go wrong with Hornet- the better the sculpt the easier it is to paint.
Thank you Karl. I do have a set or two of Hornet heads, along with more of a few other brands in my stash. One obstacle I do keep encountering is proportions of resin heads to plastic figures. Sometimes the heads are too large for the bodies, or vice versa. But what else can you do, aside from spending a fortune on replacement resin figures that may or may not exist for the vehicle needs?
Hated every minute watching this build - it made me very jealous!
Great work Carlos, it was actually a real pleasure watch this gradually come together in the Curvy Tanks GB. It is a great result. The feel and vibe is just what you would expect to see in a no nonsense IDF vehicle. Looking forward to see what you do in future.
@petbat, thanks Peter… no jealousy intended here You are far too kind. As far as my next tank build, I’m gonna do an Elvis M48A1. Thank you very much. @MartinJQuinn, I’ve had this one in the stash for many years, along with a MB Models M50 Sherman and no real desire to build either one. Then before Christmas I started watching “Valley of Tears” on HBO so I wanted to build something from that time & place. The upgunned Sherman’s sure grew on me during this project. I’ll tackle the M50 one day. It’s a “limited run” type kit with all of those associated challenges. That one I’ll likely do in June ‘67 War markings.
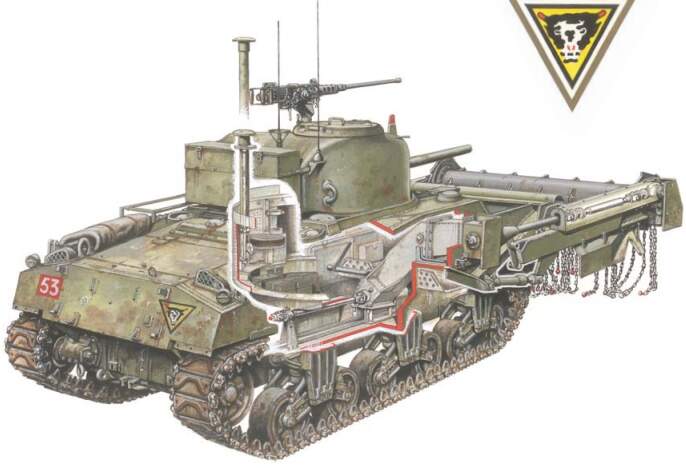
“Grouser compartment,” never heard that one before. Do they actually store grousers in there?
As for the heads, people come in different sizes with different size heads, arms, and legs. Just mix and match until you get something that looks right to you. If the size still looks a little off, just add a helmet.
Ken
Yes, on the original M4, that was where the grousers were to be stored when not in use. Apparently they had to add vented scoops due to fuel leaks from adjacent fuel tanks.
A bit of Trivia. If you ever build a Sherman Crab flail tank, the grouser compartment cover was reversed. They found that soil kicked up by the flails would fill the compartment up if left facing forward!