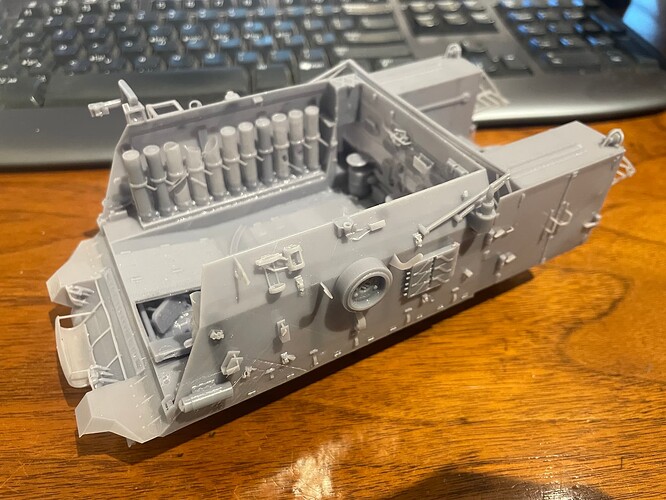
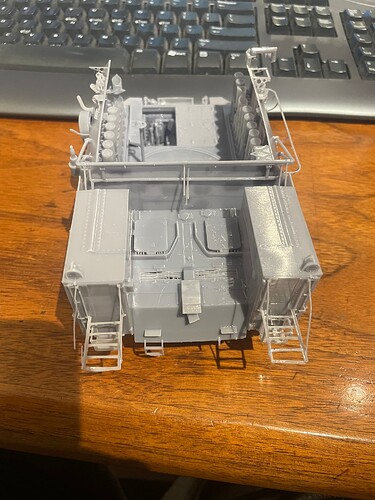
I wanted to post an update on how this is going. I have been focusing alot on the L-33, but also on the Makmat.
Quite a bit of the L-33 is done. I am working on the gun right now. For the Makmat, i am modelling the mortar currently. I will continue to chip away at this and will periodically post updates. Once these two are done, i will start working on the M50, which i have not done much at all with so far.
14 Likes
If these prove to be as detailed as the drawings look, I’ll be a buyer…and in 1/35?
1 Like
Yes, 1/35. I am working to make them as accurate as i can. The issue is that i have not found great drawings of these vehicles, lots of photos and some dimensions yes, but not super accurate 3-view drawings. That is complicating it a little bit and forcing occasional rework of the model. They are a labor of love
3 Likes
Surely there are people here who can help? I look at some of the posts in Op Iron Swords thread, someone must have access to the museum vehicles. And ability to measure for you.
2 Likes
Looking fantastic! Do you plan on selling kits or 3D files?
Cheers
Chris
When the are ready yes, i have alot of designs up on Cults3D, and eventually these will get there too.
I am still knee deep in CAD, and have not even attempted to print them yet outside of making sure that they will fit onto my printer.
I have had someone reach out and offer a great walkaround of the L-33 and some help with the m-50 gun, but i have still come up short on drawings of the actual vehicles.
the best i have found thus far is this one form Hubert Cance.
The issue with this one is that it depicts a ‘Bet’ gun on a short hulled sherman (M4A1 hull). He states that but you can also tell by the distance between the wheel boagies. There is a common misconception that the straight rear hulled (Bet) guns were on short hulls, while the guns with the rear step (Alef) were on long hulls, this is wrong. Both versions were on long hulls, either A4 hulls or hulls with plates added to lengthen them to the A4 length. The Bet was created to make more room inside for the gun crew.
I just wanted to provide an example of what i am seeing when i look for information.
Absolutely great, so I’ll be following. A friend of mine just bought 12k printer and he’s eager to challenge it!!
Another Update. I have been focusing on the Makmat more than the L33 lately. Alot of progress, but i am now into the nitty gritty detail work.
I have modelled the mortar in three positions, firing (shown), loading and transport. The rear and side bins are done.
I am working on some of the internal storage bins, and then will move onto the rear wall, the equipment mounts on the sidewalls, and then shortly thereafter on to test prints
6 Likes
First test prints. Second attempt tonight. Hopefully i will have all the files posted this week at some point. I will put the link here.
8 Likes
Very excellent work! Well done on that, I’m impressed with the level of detail you achieved in this.
OK, it is up. I will be posting printed photos to the listing soon, but the second print came out well. The only issue was that i went a little too aggressive on the hollowing of the ammo containers and some collapsed, which i can work with. I fixed that before posting the files.
If you would like a custom variation on this, let me know and i can get them together.
2 Likes
That looks superb, I am fairly new to 3d printing but have purchased this. It will be slow work for me but worth it. Is that hull a 1 piece print ?
It is a single piece hull. I have thought about making it a multi part assembly but i have not gone in to rework the design yet
I have just printed the hull from the chitu folder and am absolutely gob smacked at the level of detail as printed. Also just how easy the supports could be removed. May I ask what the support settings are.


