AEF Designs?
Everything I ever saw by AEF or bought from AEF was absolute garbage of the lowest order. I hope AEF is out of business.
@smolensk, you’re project is very inspiring and looking great👍
AEF Designs?
Everything I ever saw by AEF or bought from AEF was absolute garbage of the lowest order. I hope AEF is out of business.
@smolensk, you’re project is very inspiring and looking great👍
Very impressive scratching. Shep Paine must be smiling from above. 
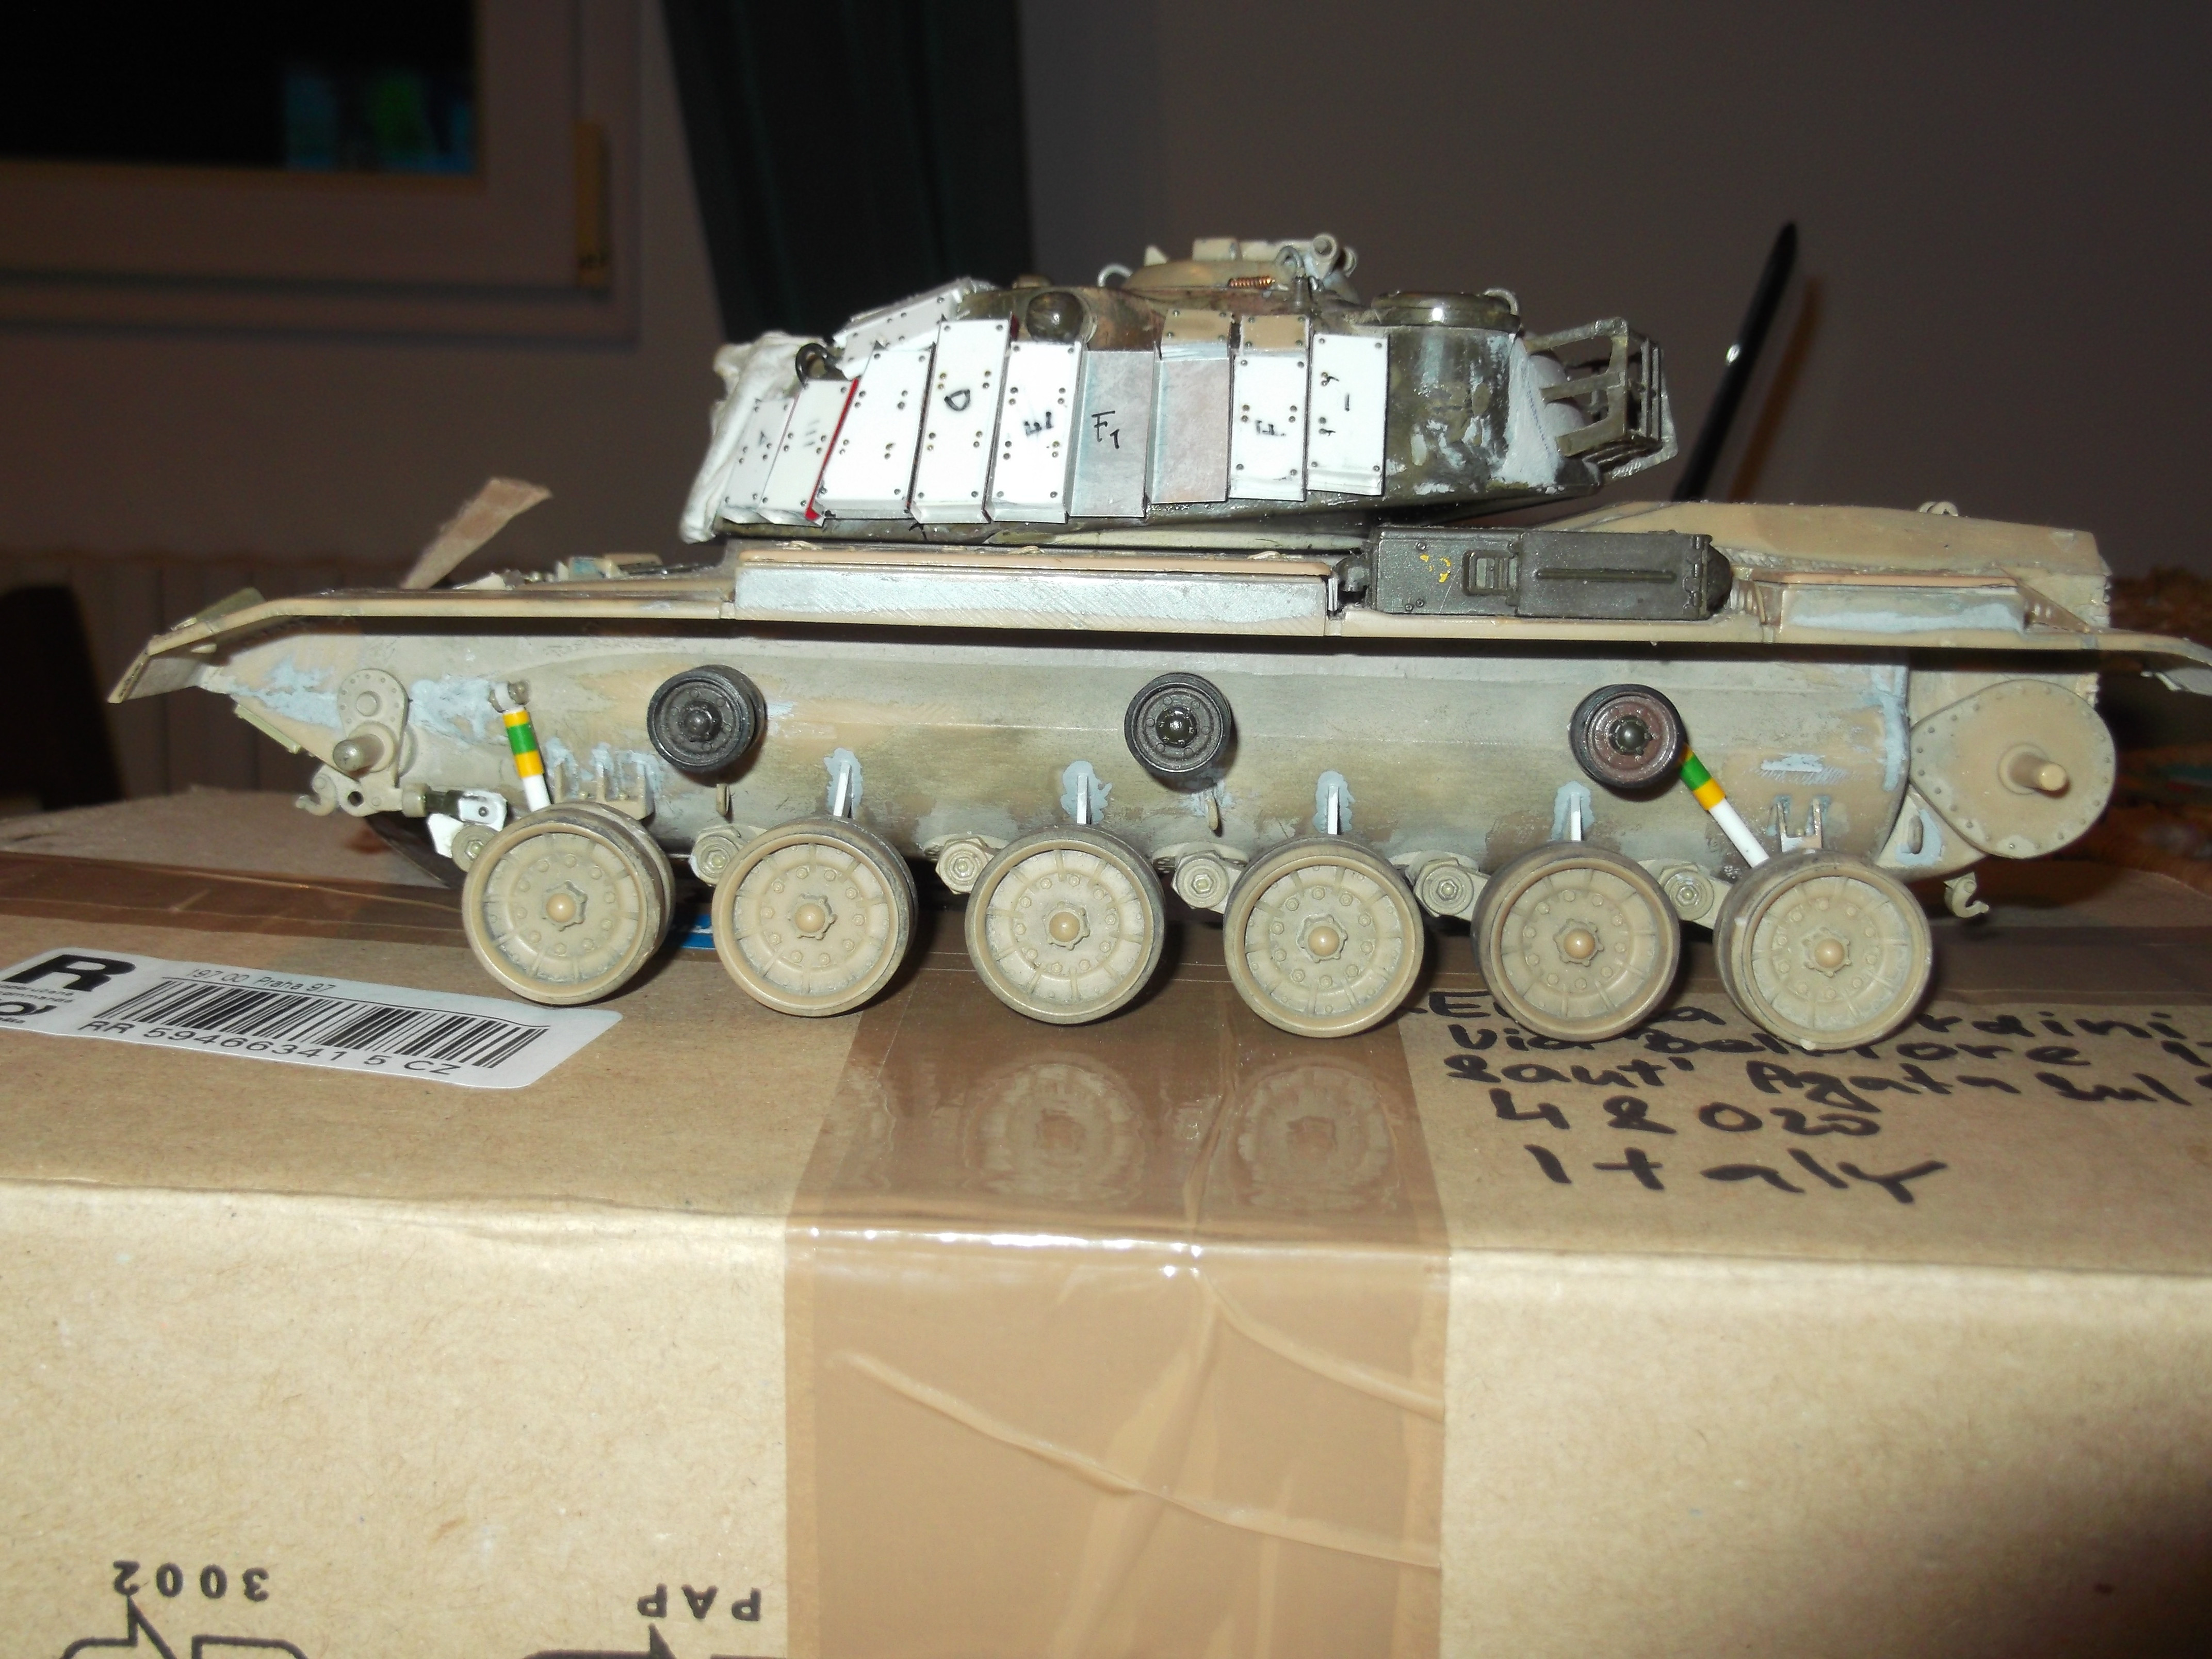
At this point a reflection is needed and I consult my tire manager (my father) who offers me several treads available for the chosen period: 1982
In the end, if the Pirelli / Exit tires have been sculpted, they play my game and I can start with an engraving work that recalls what was done on model aircraft some time ago. “On the front axle, however, you should mount the directional” I am immediately informed by the expert. Therefore, the wheels with the classic zigzag tread pattern would be needed on the front axle.
After several unsatisfactory attempts, my grandmother’s sewing scissors come to mind which are requisitioned and tried on a very thin strip of plastcard
With this technique I make the front tires on the carcass of the Revell ones, then on the rear I mount Leopard 2 rims that act as drum brakes.
The rear rims are valid you only need to change the central hub.
In front, however, I modified the front rims of the Monogram fire truck
The cart wheels are also not perfect they are made in two slightly different trances. in my case it matters little but if one were to use them on his trailer Rogers would not be satisfied.
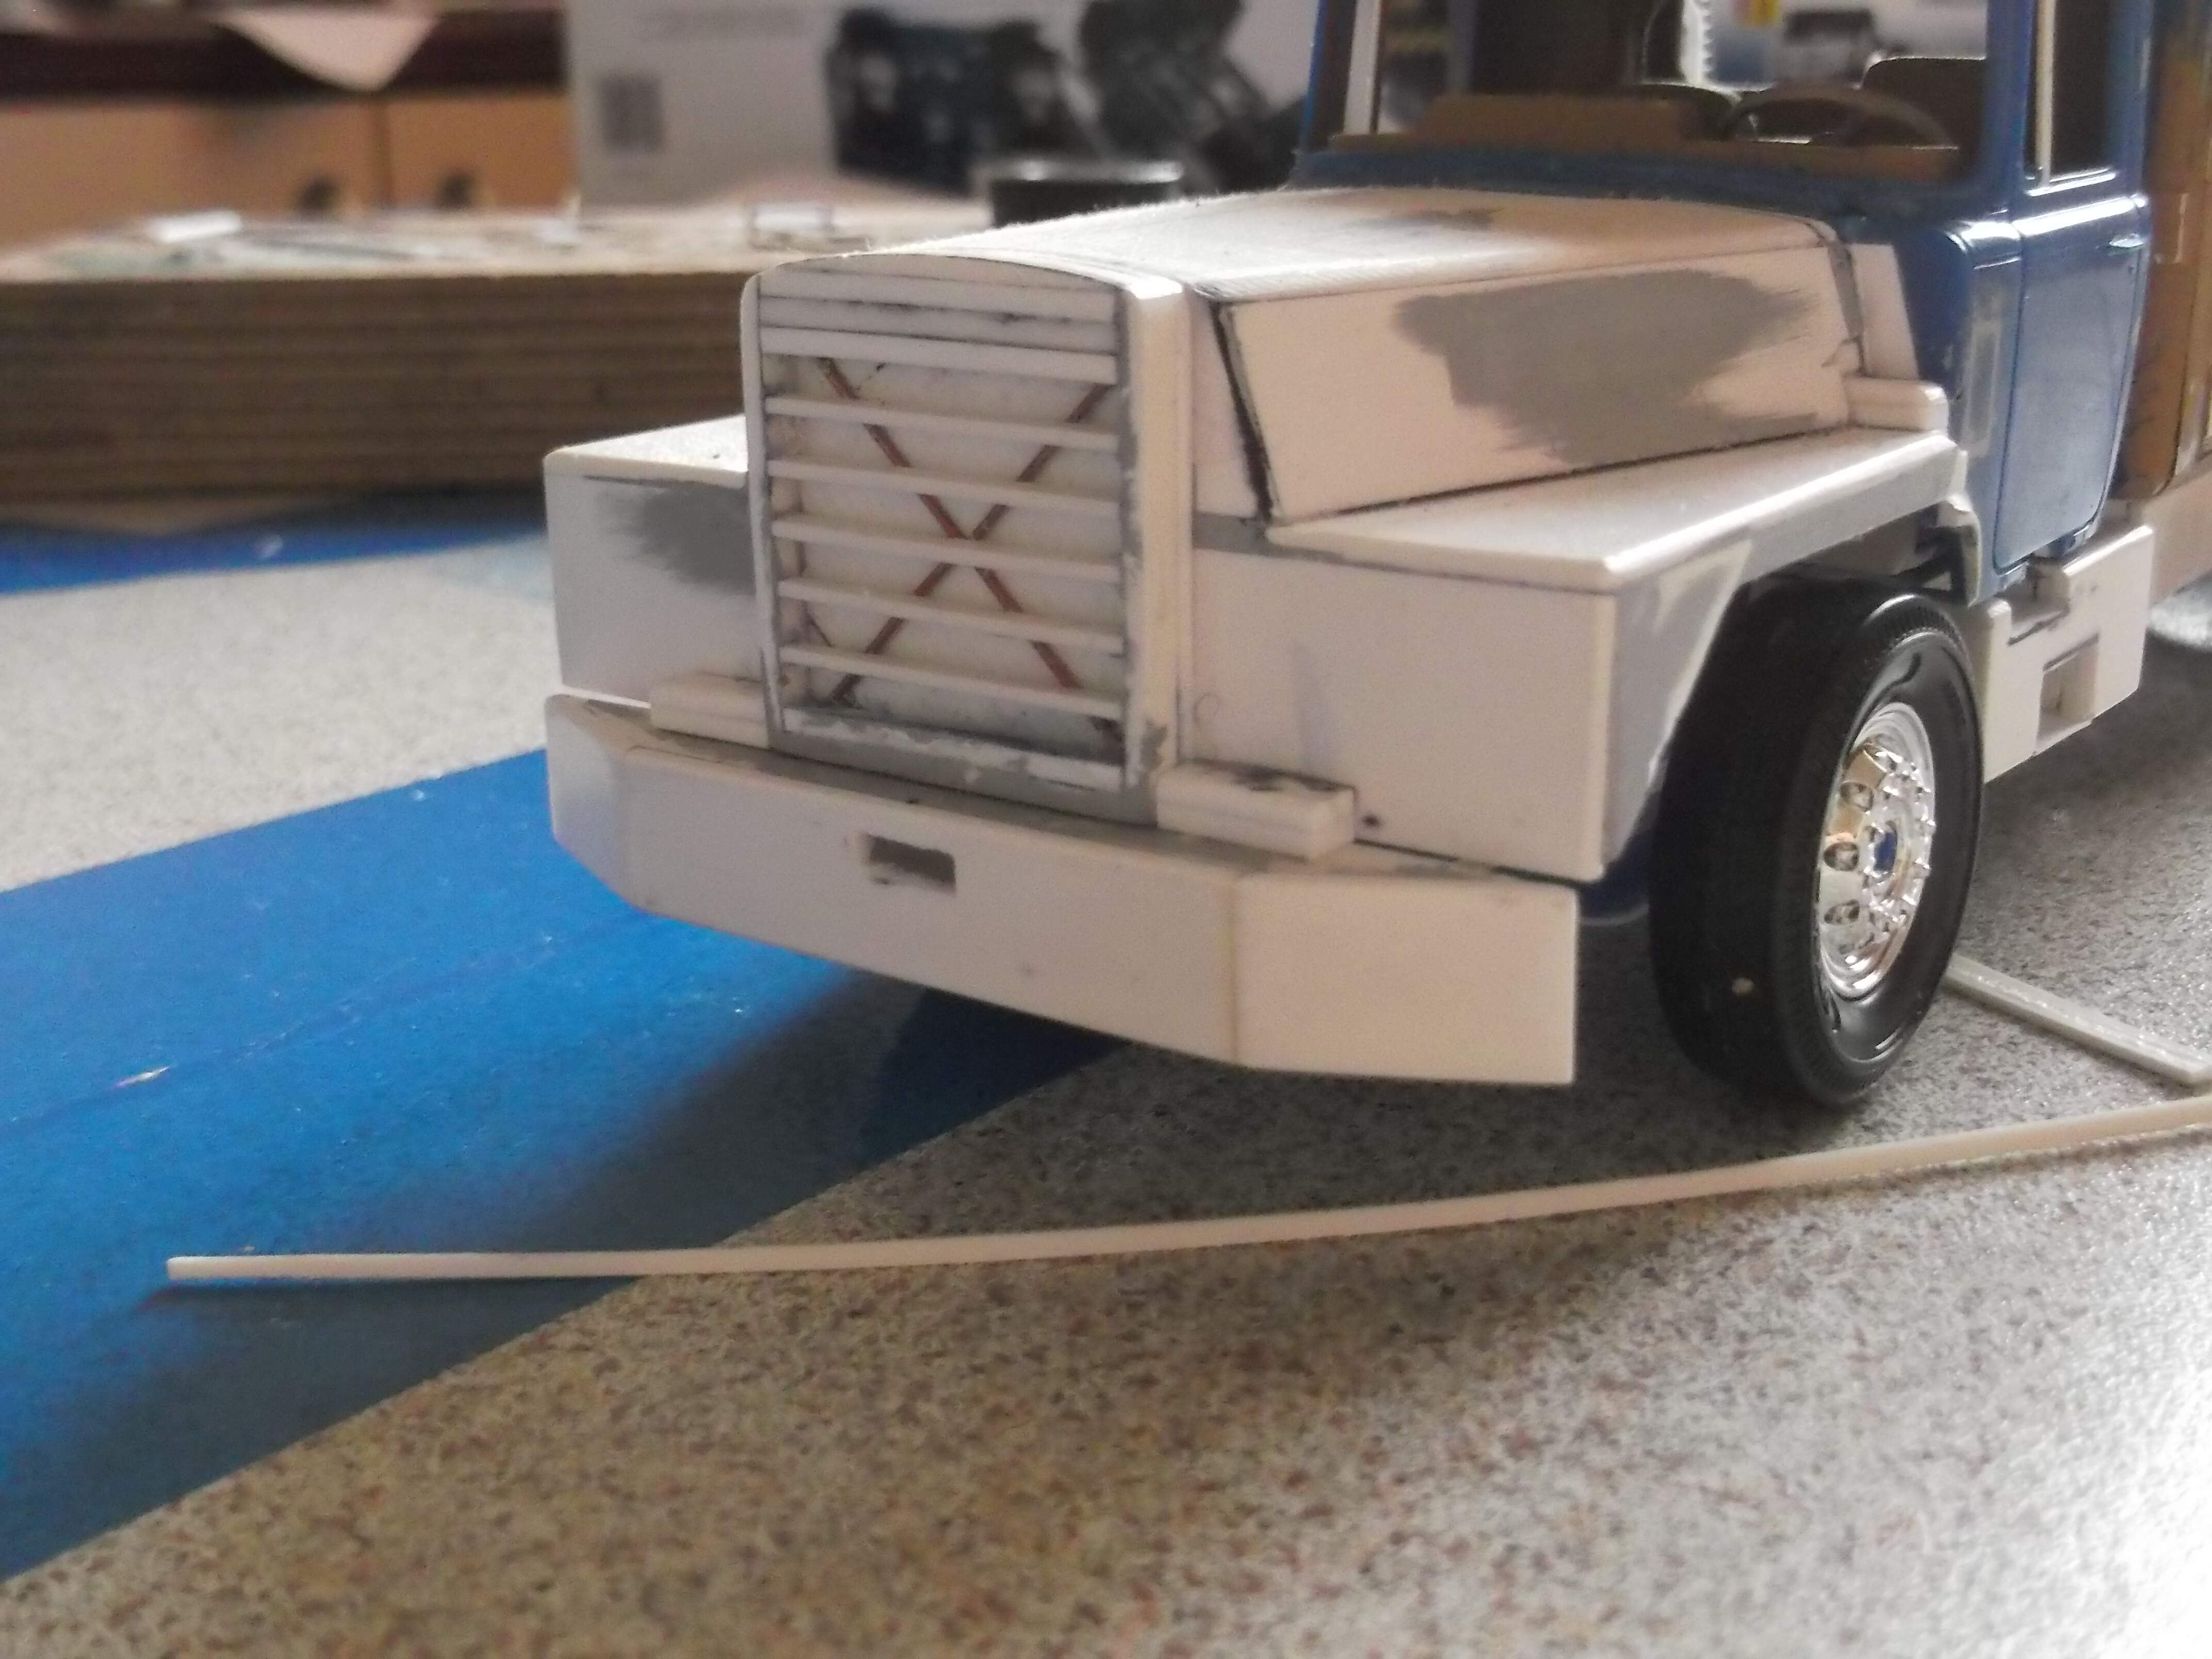
At this point a phase of detail begins, starting from the tanks which are built in almond plate
And that this time I buy on the internet; two sheets are enough to cover the tanks properly. Once covered, I put them up and then I mount the supports to make them appear bolted. Also the rear-view mirrors will be obtained from the fire truck.
Then I have to decide how to put the signs and how to do them
Old soldiers never die … (and never stop to upset me)
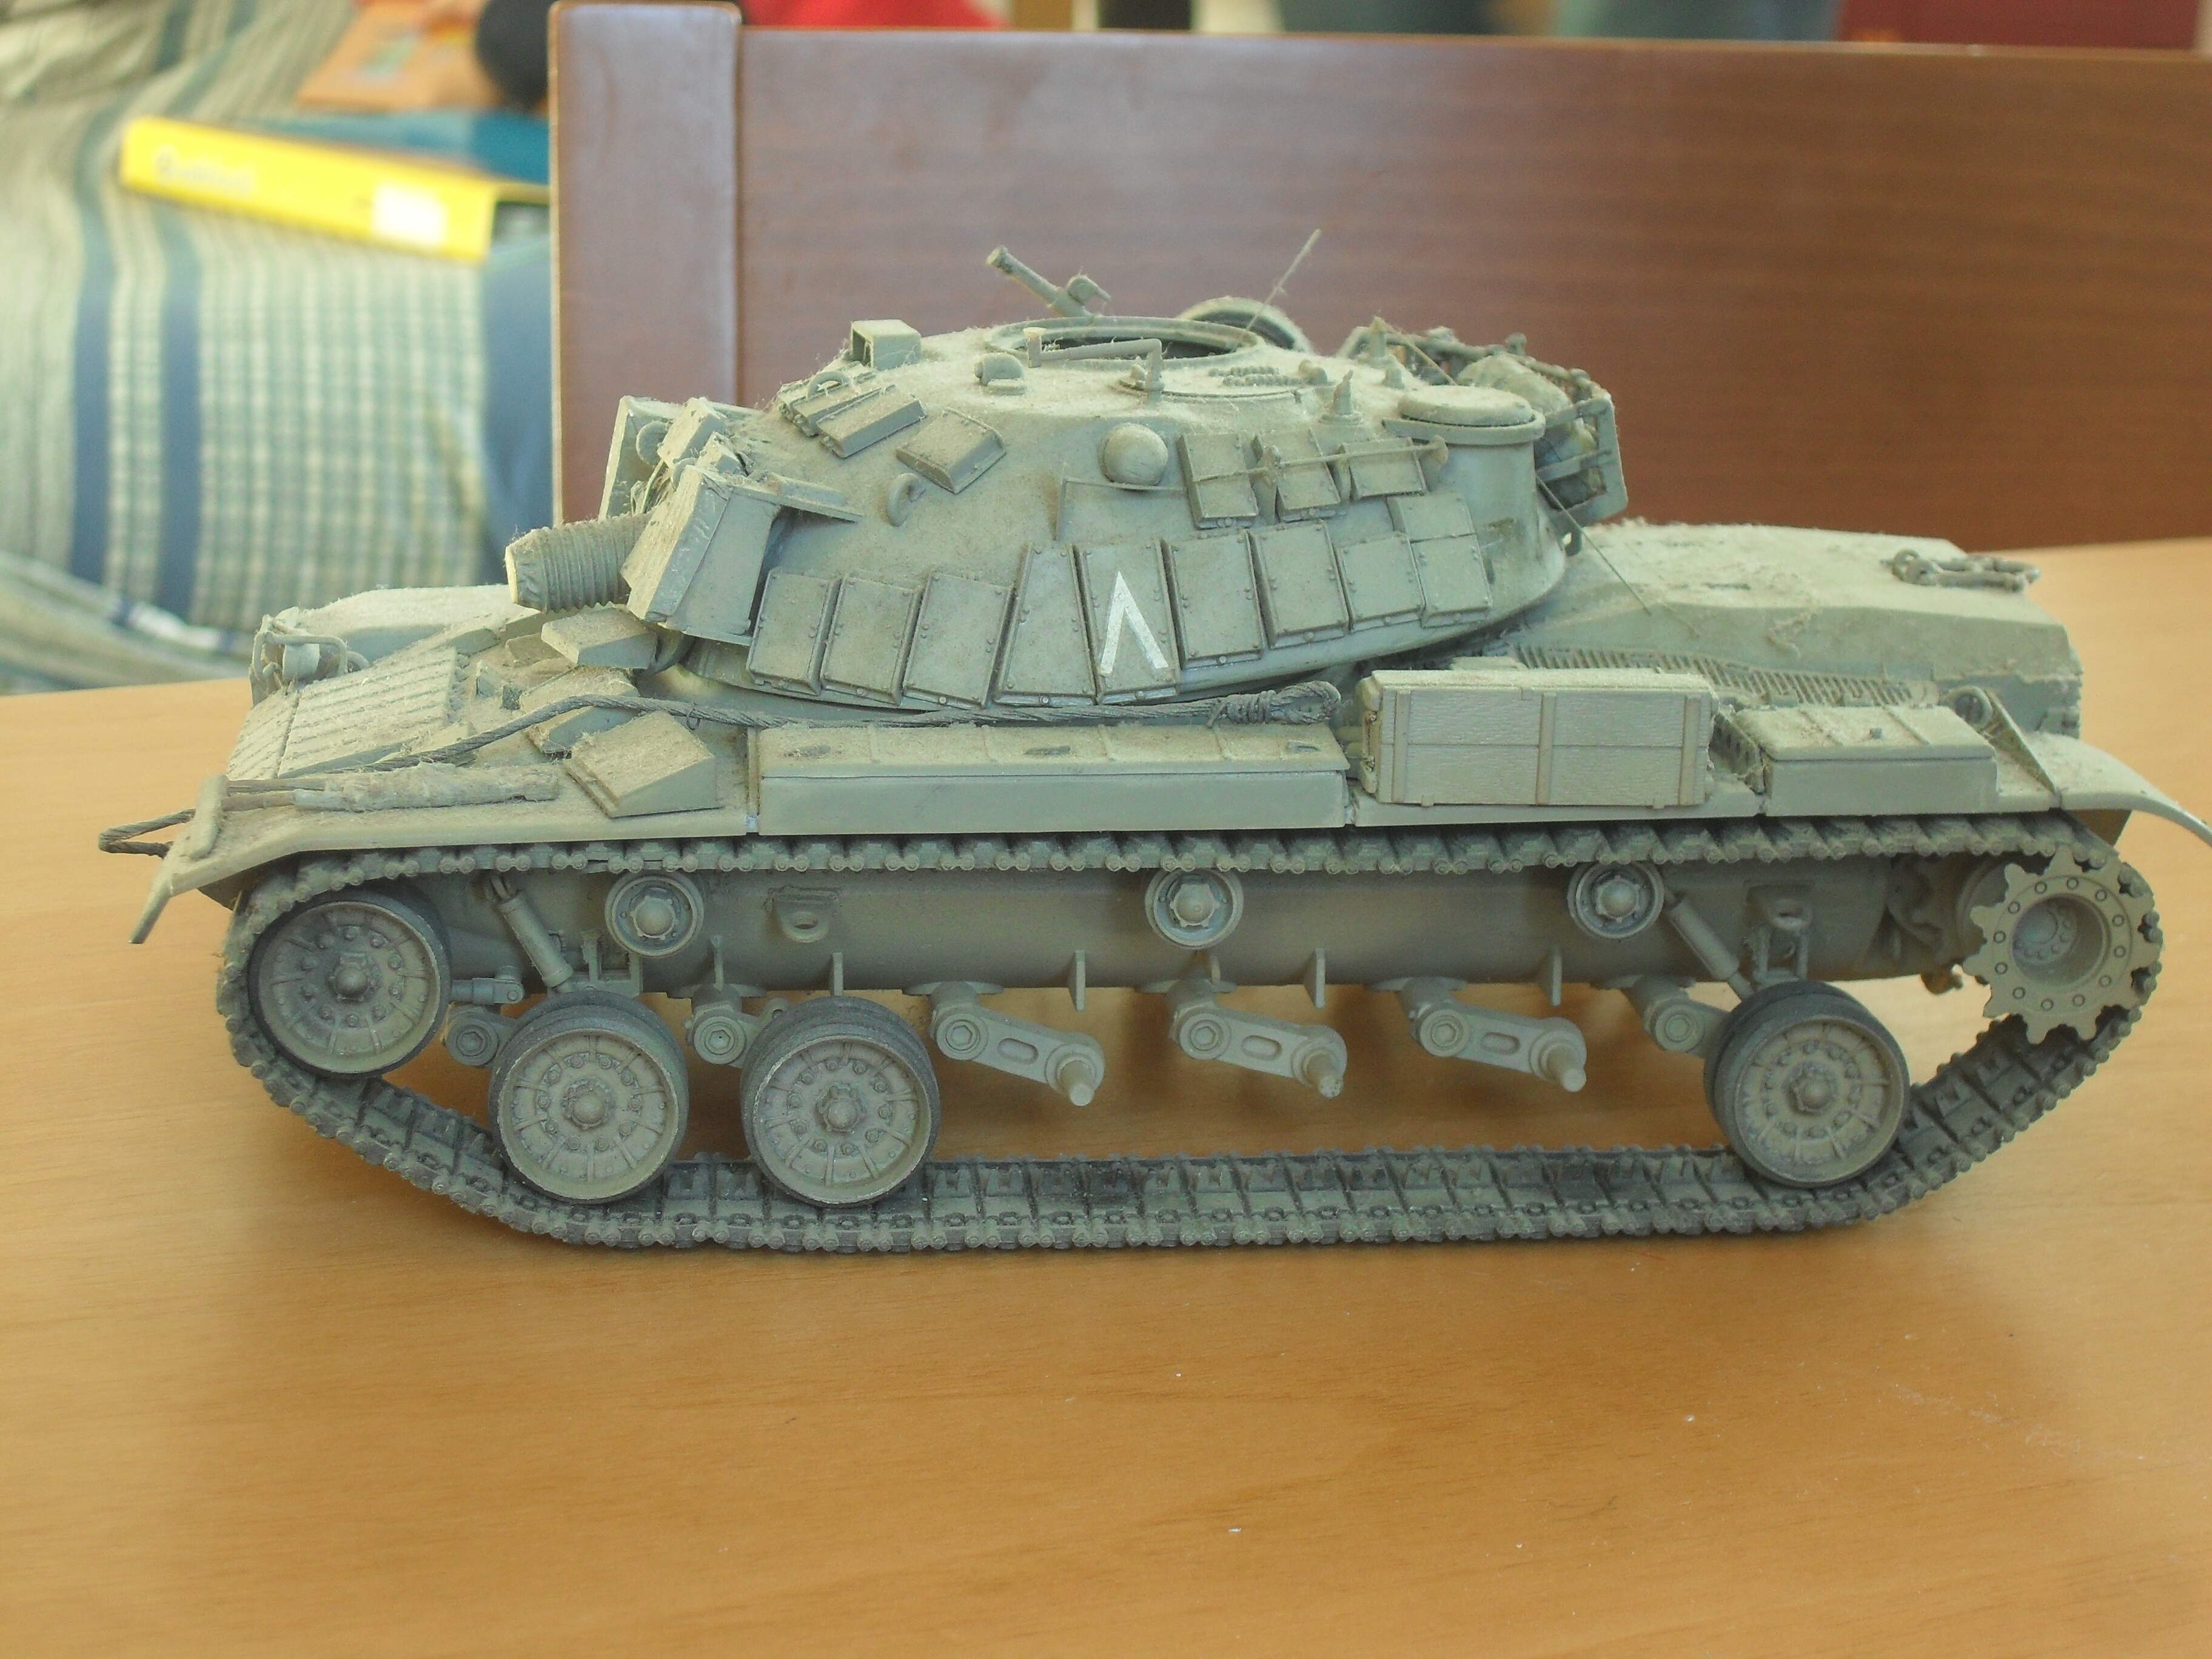
Now I can devote myself to the wagon to put on the trailer: frankly I wanted to choose something simple but still large, to give the size of how imposing the cart was so I could choose between M48, M60 and Merkava and their respective declinations. Since I did not want to undertake the construction of a whole wagon I thought of using something that I already had available.
In the end I choose the M60 with the Blazer armor of which I had an old realization of mine born from the encounter between an M60A1 Esci and the M48 Tamiya tower; and then I move on to the overhaul of the wagon in question, it had remained in the shoebox for at least 20 years.
The operation should not have been too brigand (poor deluded):
in absolute terms I just wanted to put something big on the semi-trailer, however, the restoration phase was decidedly more complex than I had planned; starting with the tower, which should be modified to be that of the M60, therefore it is necessary to mount the rotation ring of the foreman’s tower and the rear must be modified with a more angled shape.
To update the wagon, I have a fairly long list of jobs (much more than I thought at the beginning of the previous paragraph):
• I have to replace the air filters,
• run the lights in the drive wheels and move the first return roller that goes where usually there is the attachment of the second shock absorber (already eliminated during the first draft),
• the track rollers must be replaced with those of the M48 much more similar to the originals,
• the pilot hatch must be replaced, as on the Italian M60, with the M48 ones
So the M60 returns to its original form, let’s say, before the Israeli cure.
That a great looking Trailer! The Mack is not looking too bad either! Keep up the good work.
is the best compliment you could have given me
Under the star of David
First of all, after cleaning it for so many years of oblivion, I re-insert the Urdan turret.
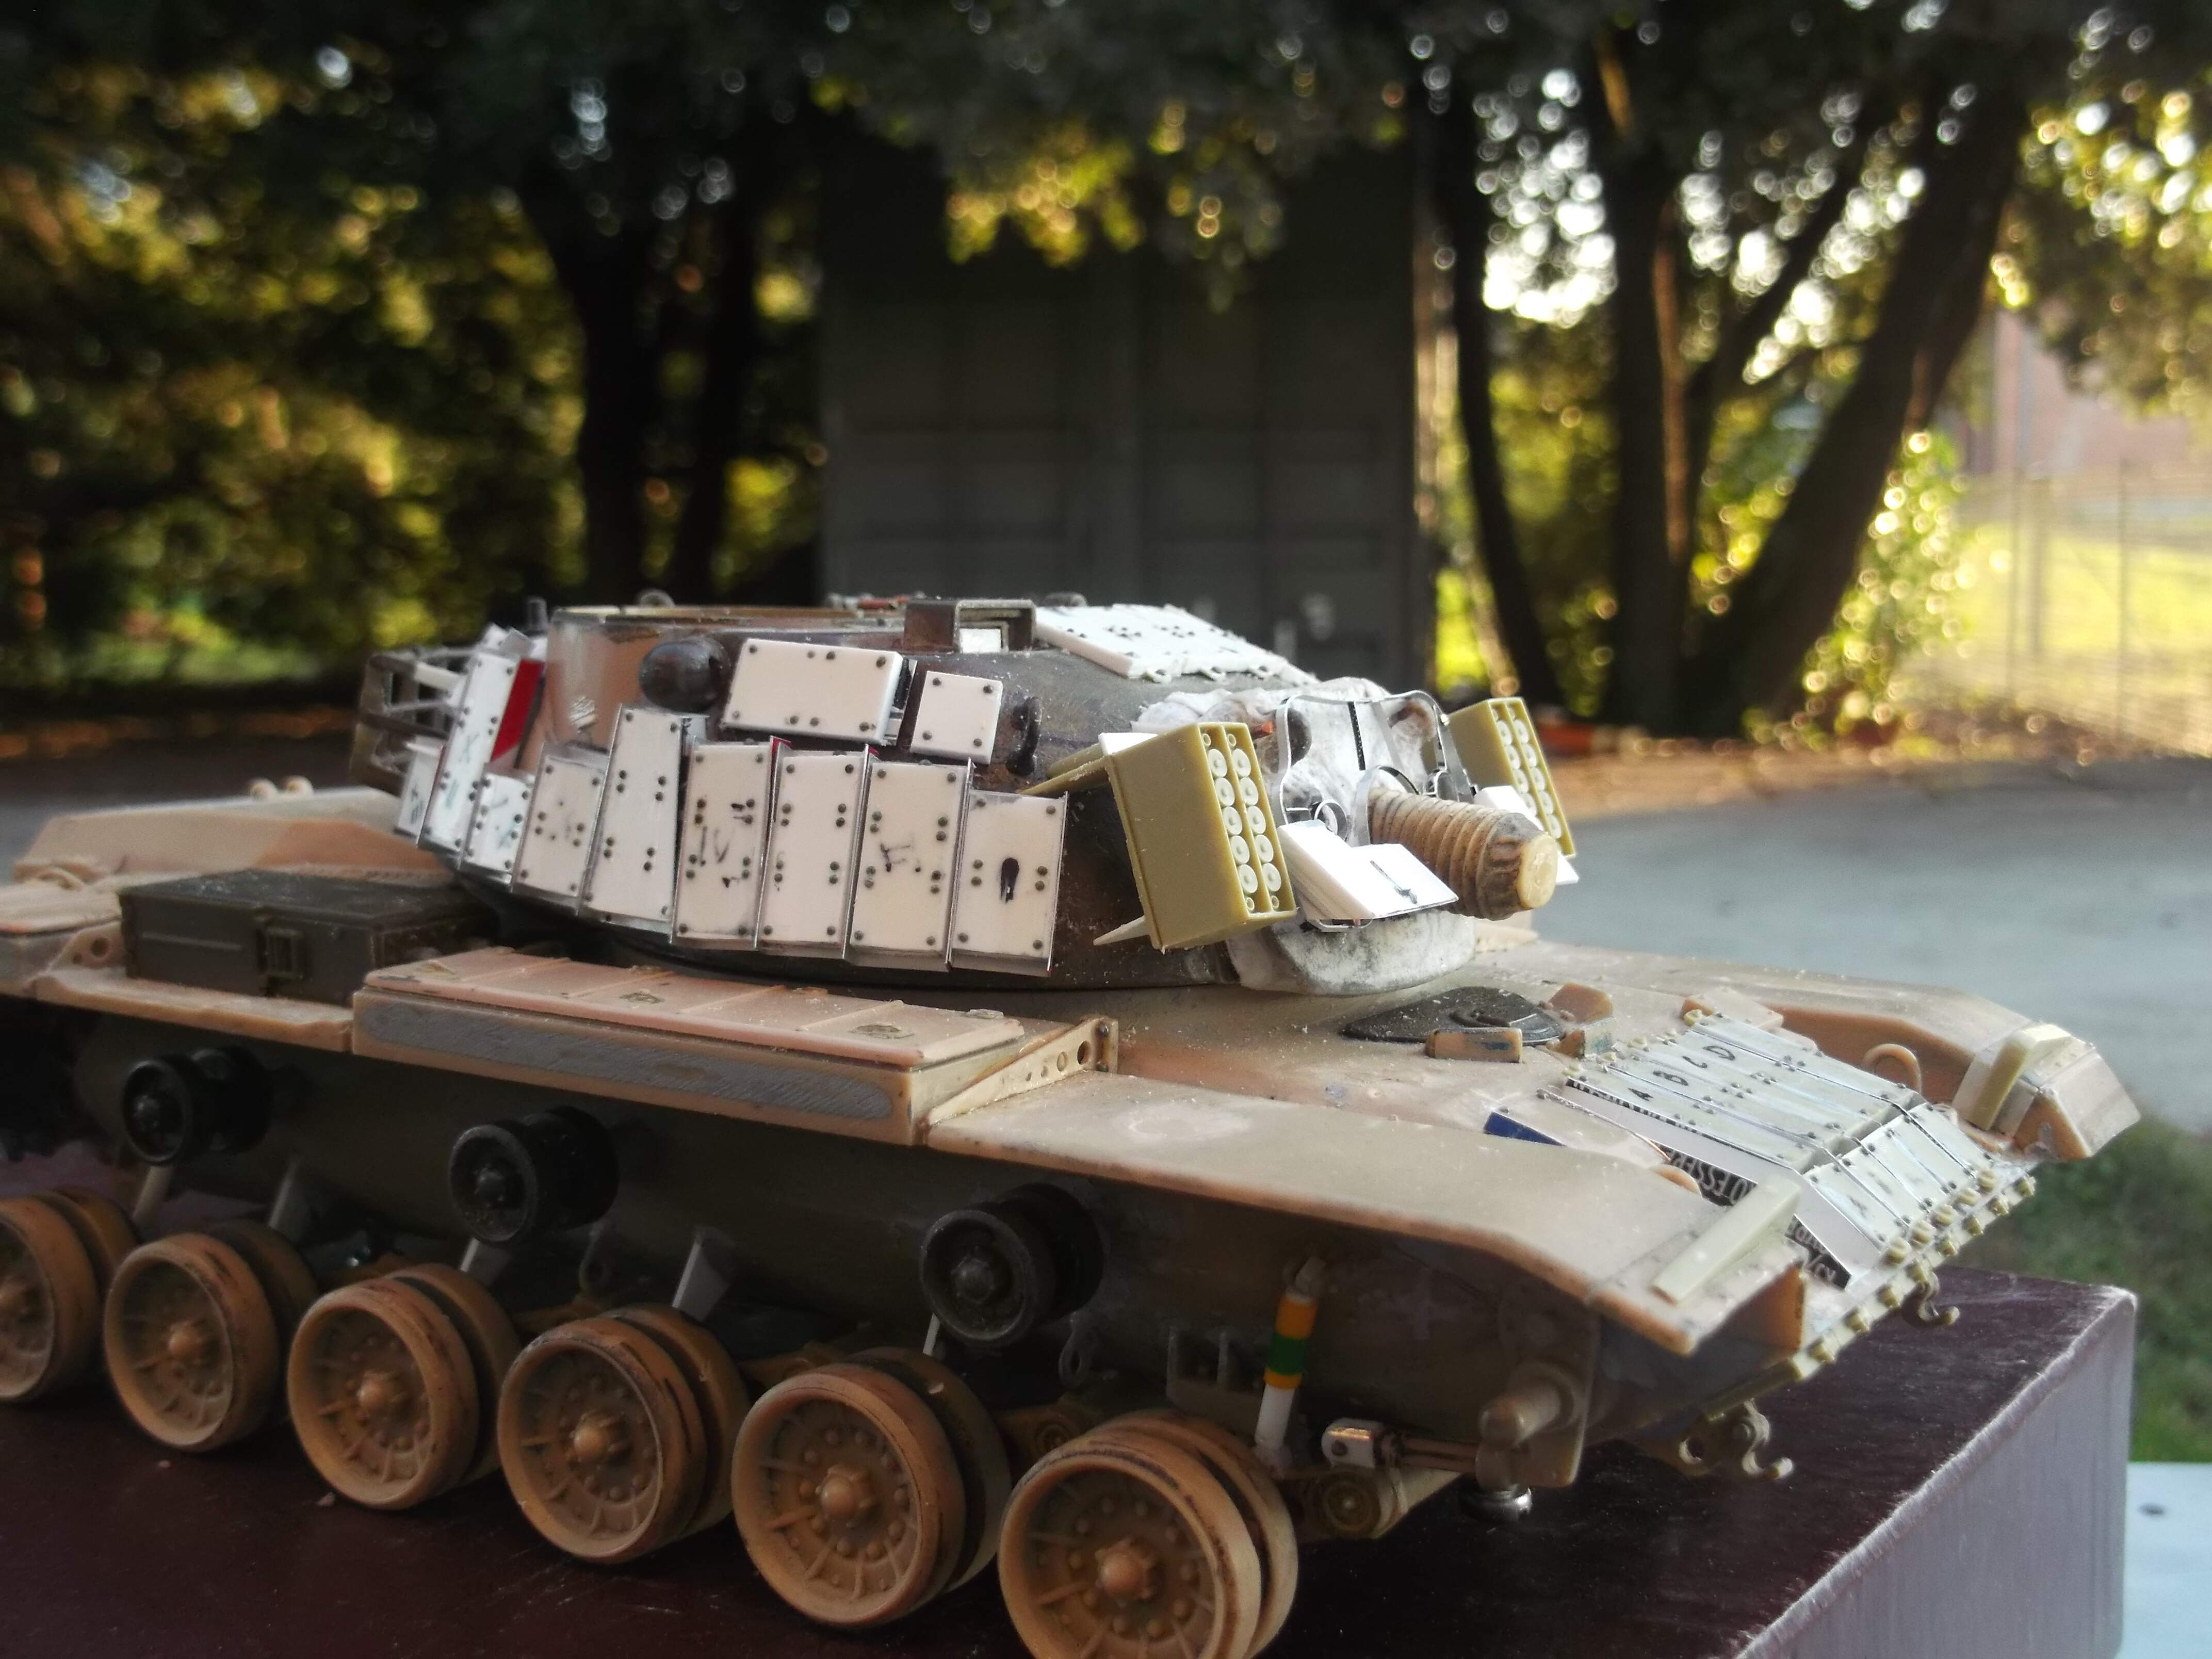
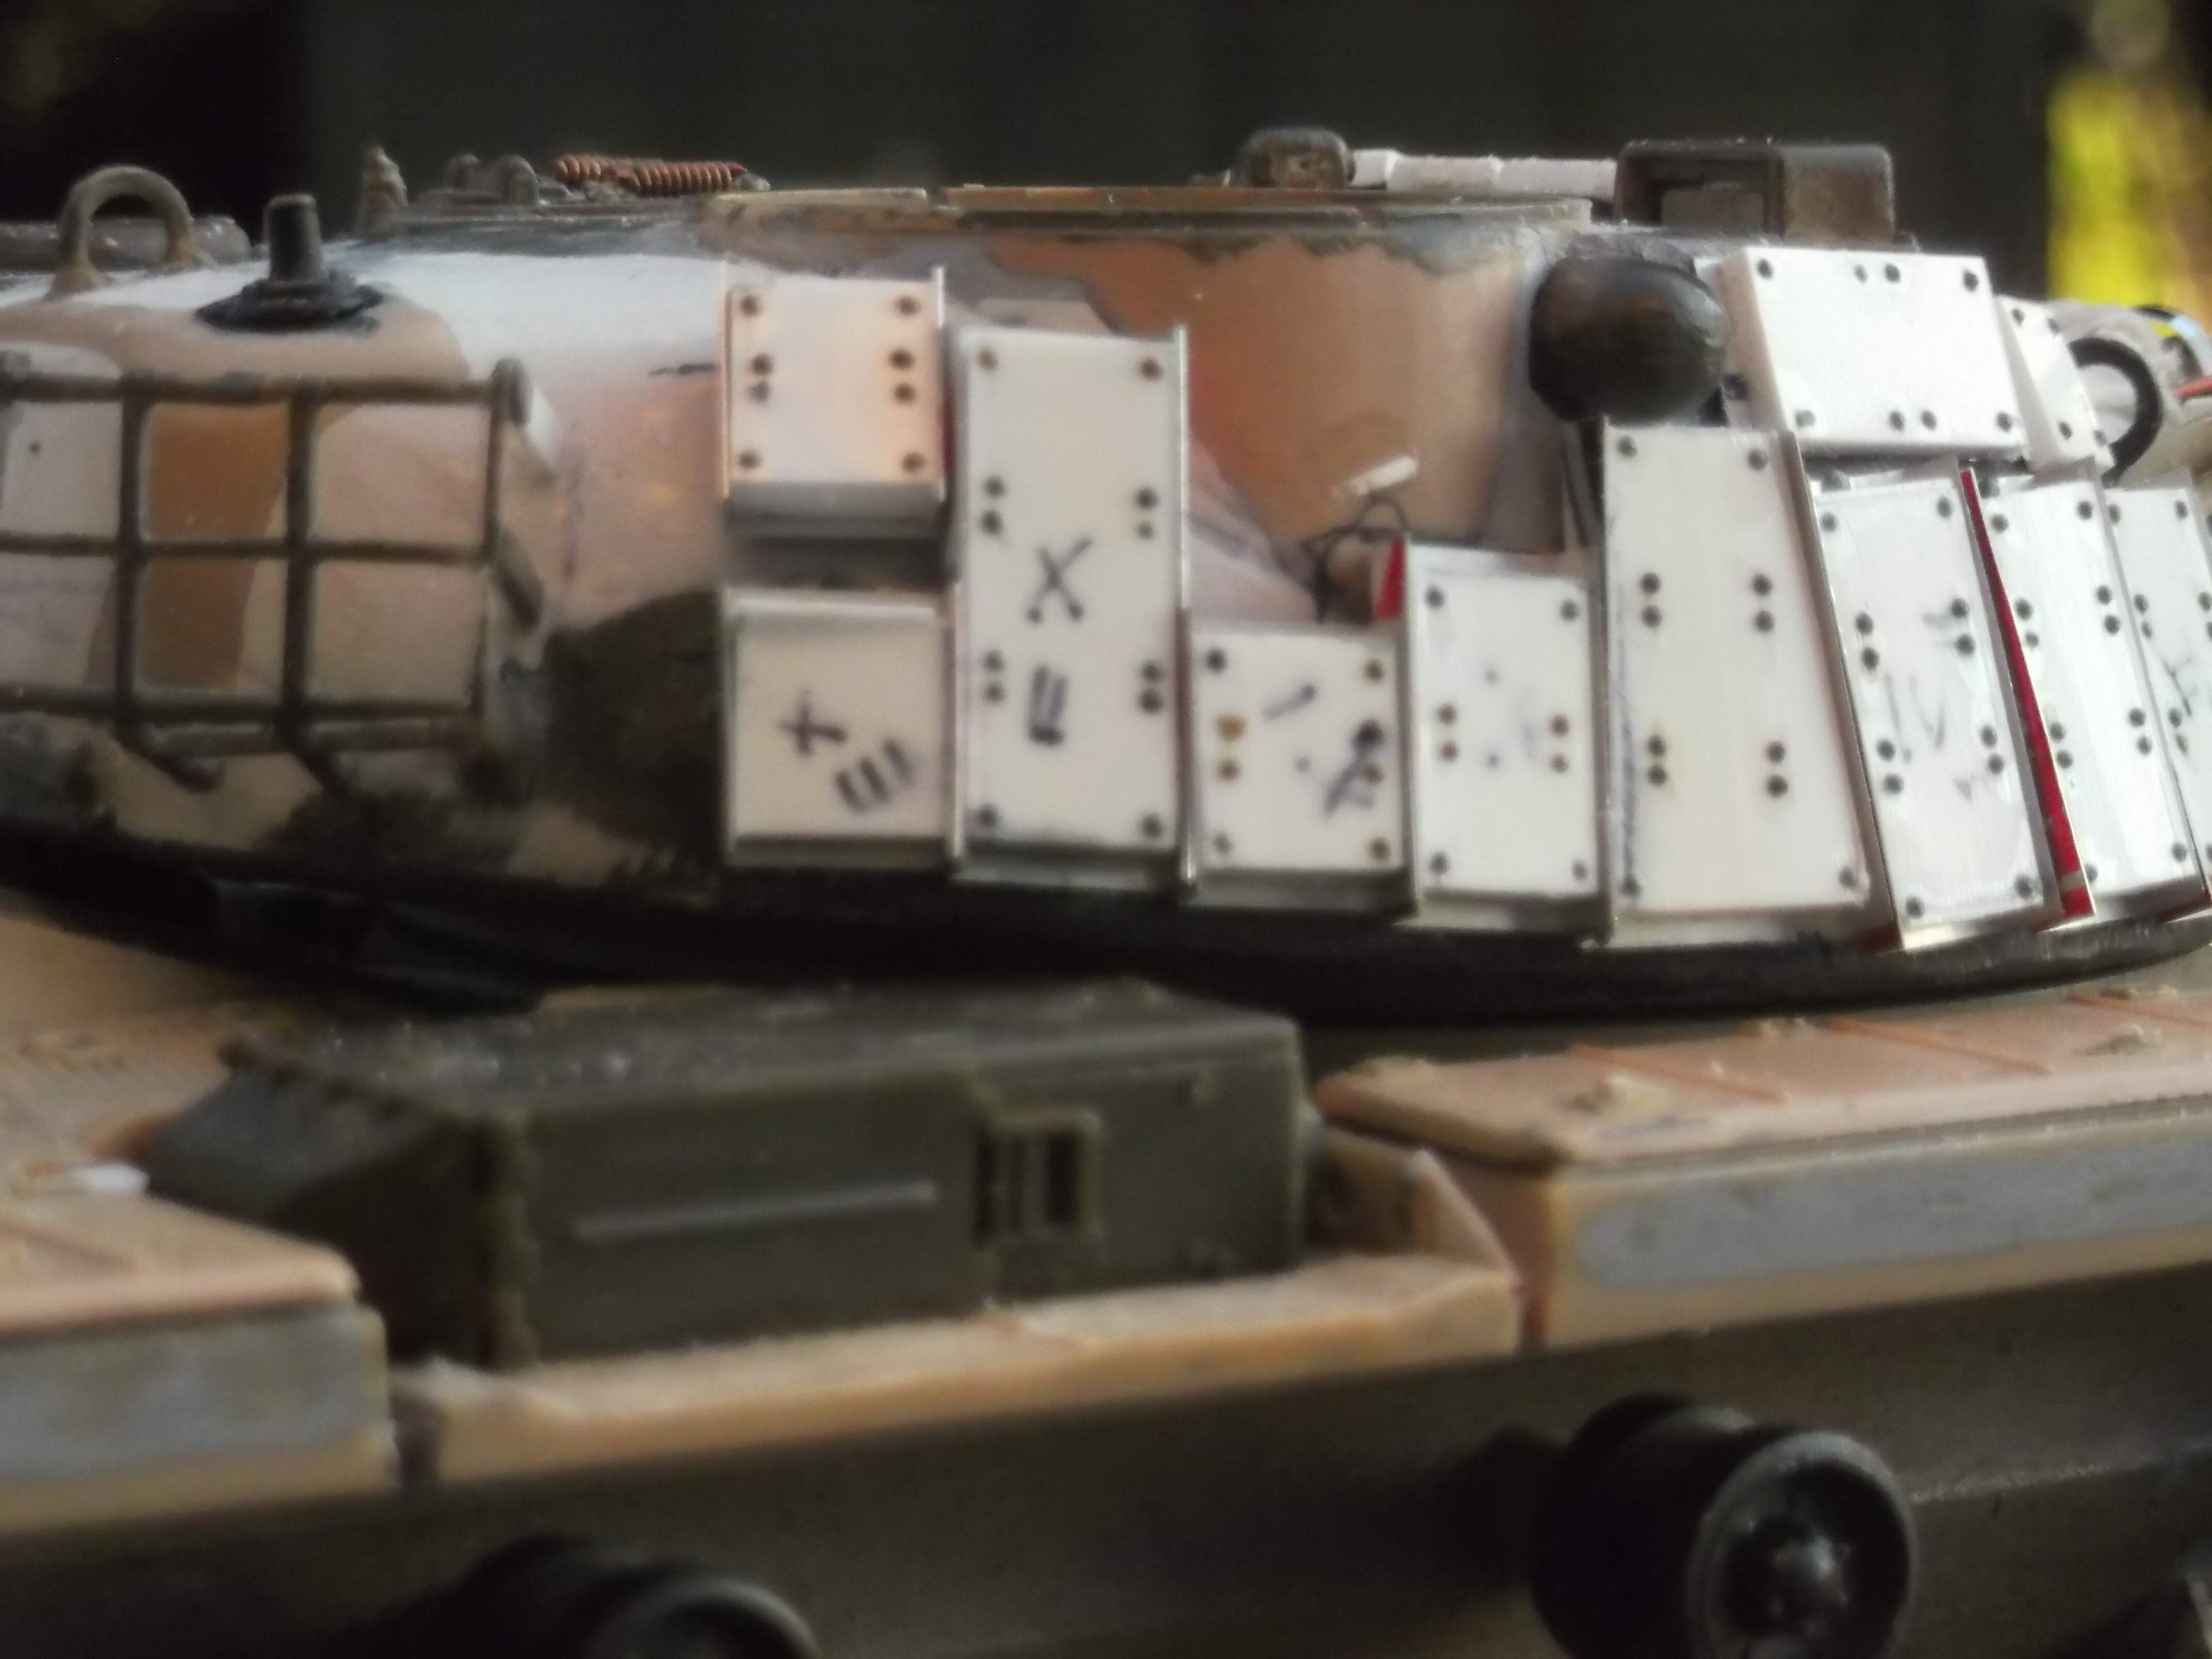
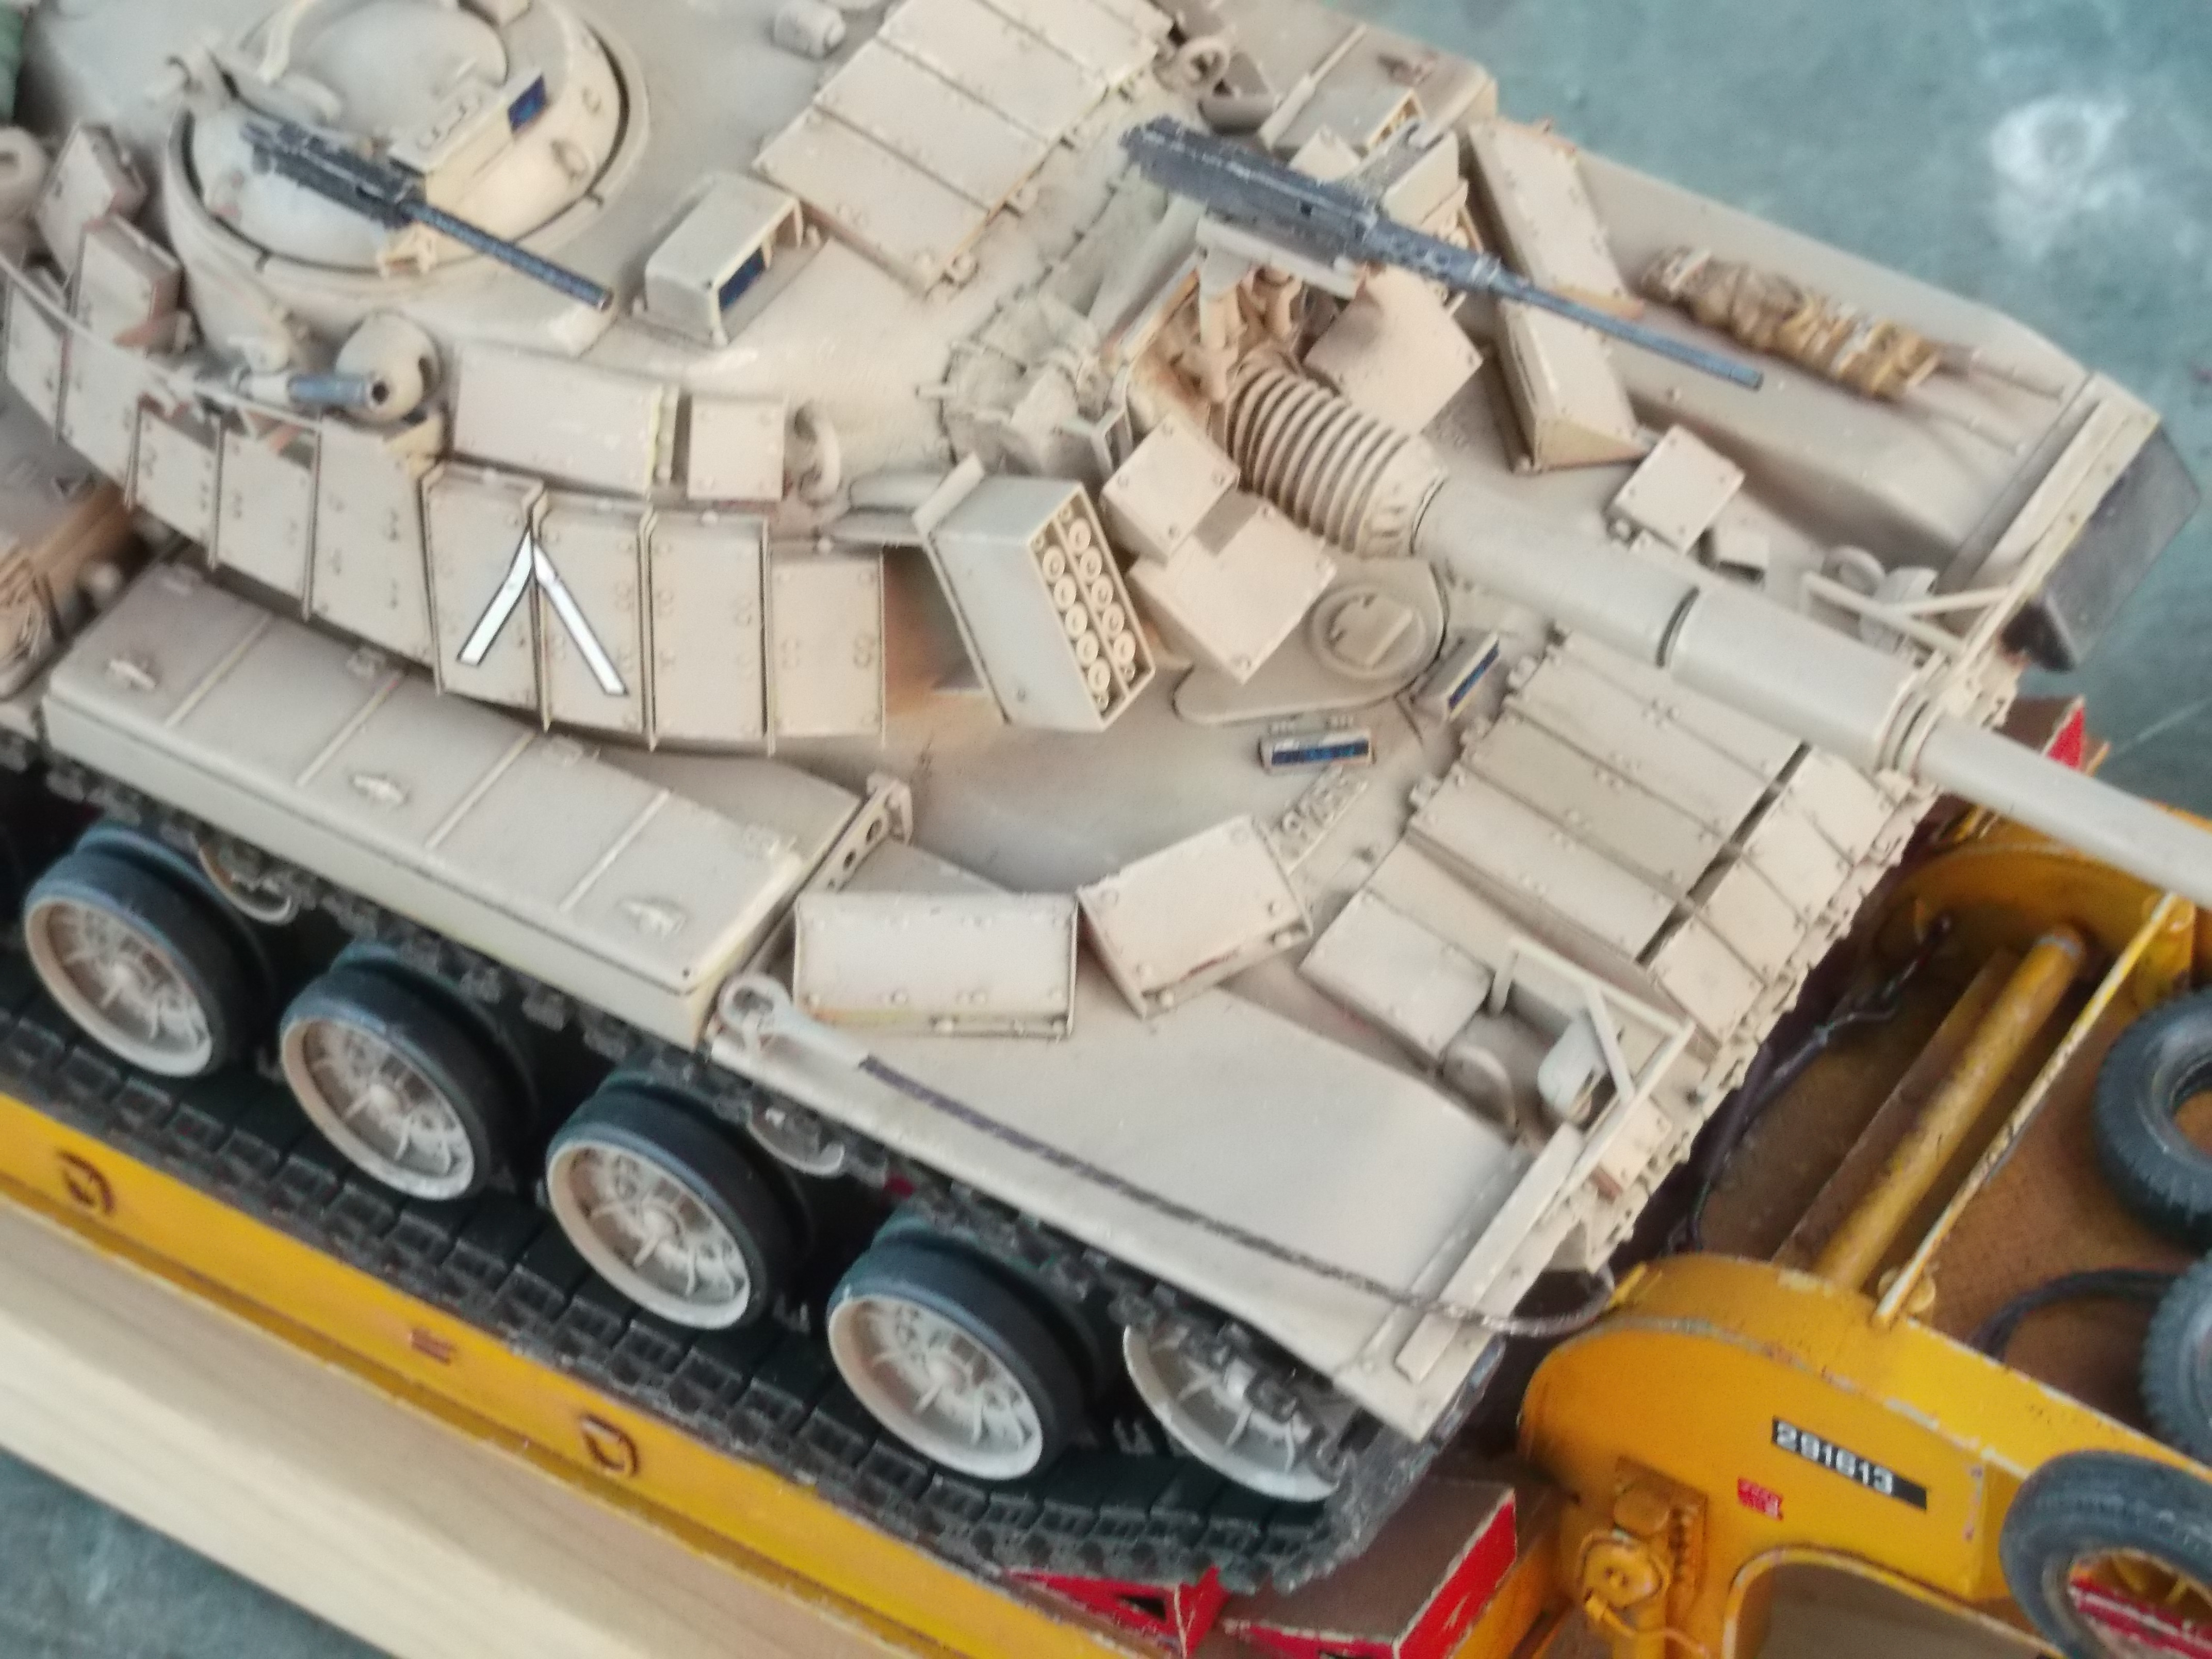
I then dedicate my attention to Blazer armor; in the M60A1 version there are different sizes. I use both those of the Academy kit and those of the Esci with both hands, but even so I have to intervene with the self-construction of the upper panels on the tower and several tests with double-sided tape are needed to see how to fix them
Yet I am not convinced of the result on the turret and after some “Shakespearean” analyzes (like with the skull … to be or not to be) I realize that you have to insert the attacks between the reactive armor and the turret because the plates badly join with it of the “focaccia” shape
But even so I’m not convinced… blazers don’t have hips!
So I proceed to rebuild them under the shocked gaze of my wife who looks at me in a pitiful way …
I try again, and now it seems to me that they go in their place.
Now only ten thousand rivets have to be made …
The operation succeeds on the third attempt.
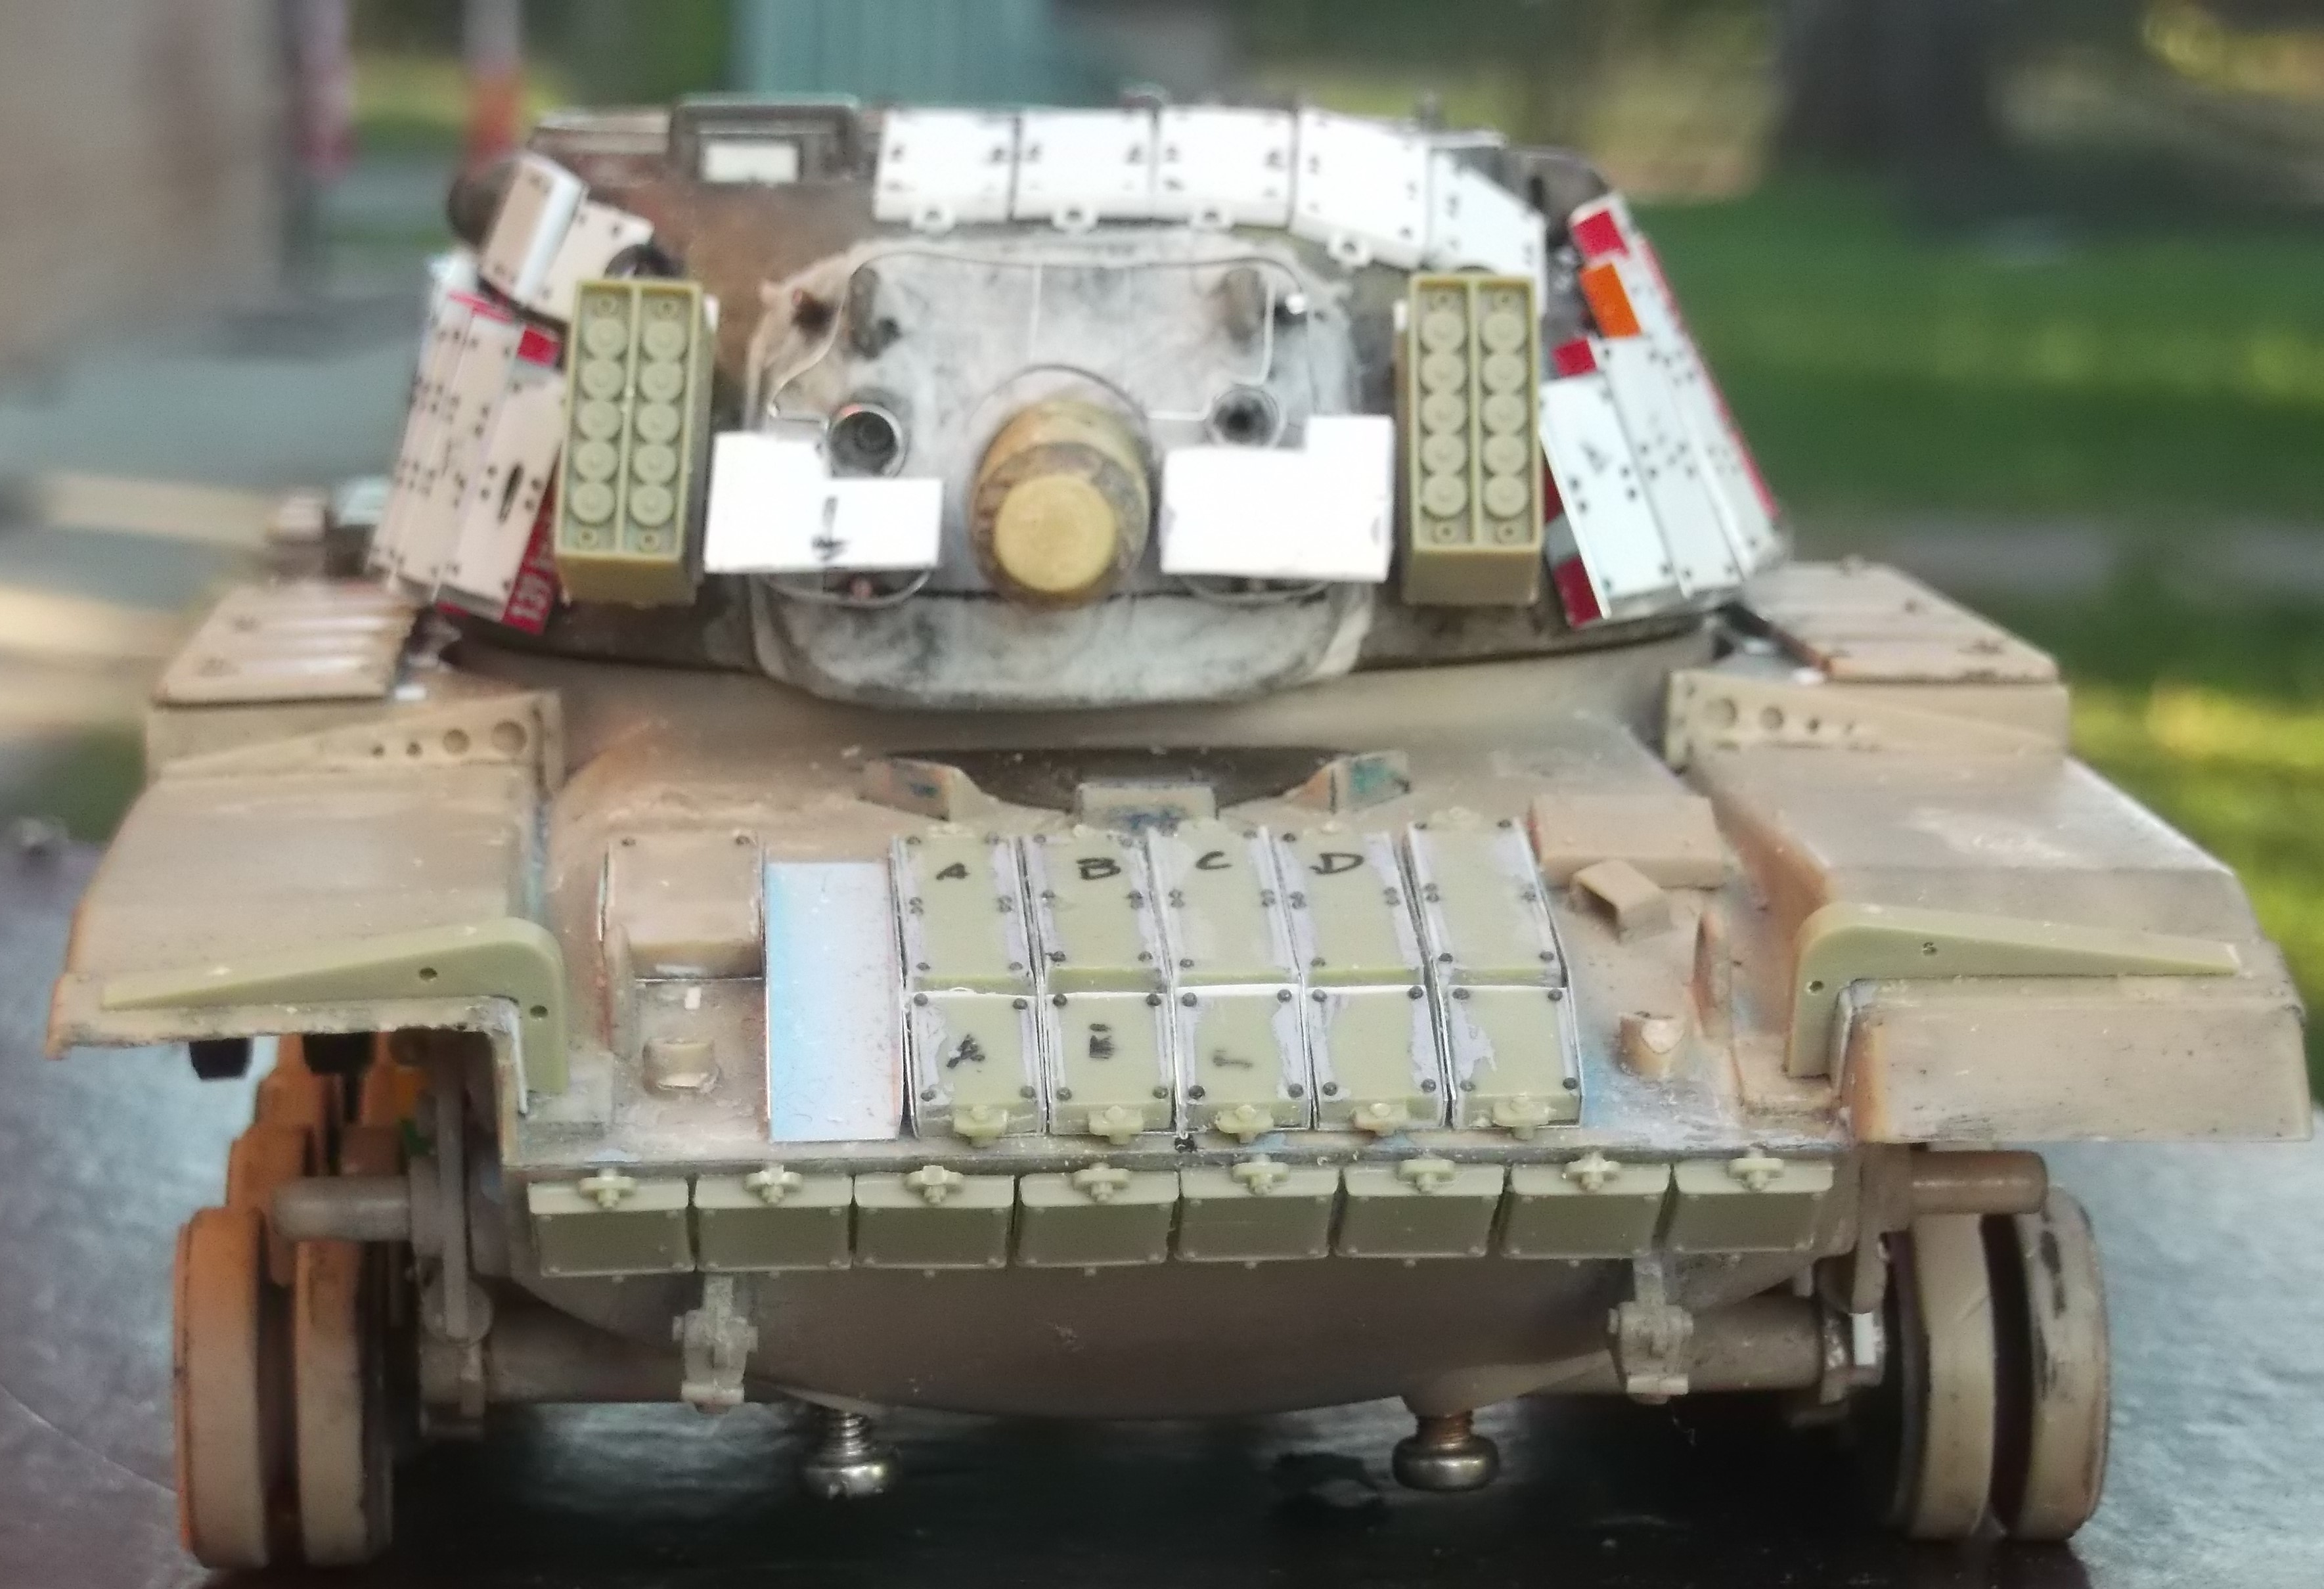
Even those installed on the hull are redone (the Verlinden ones seem too big and the Academy ones too small…).
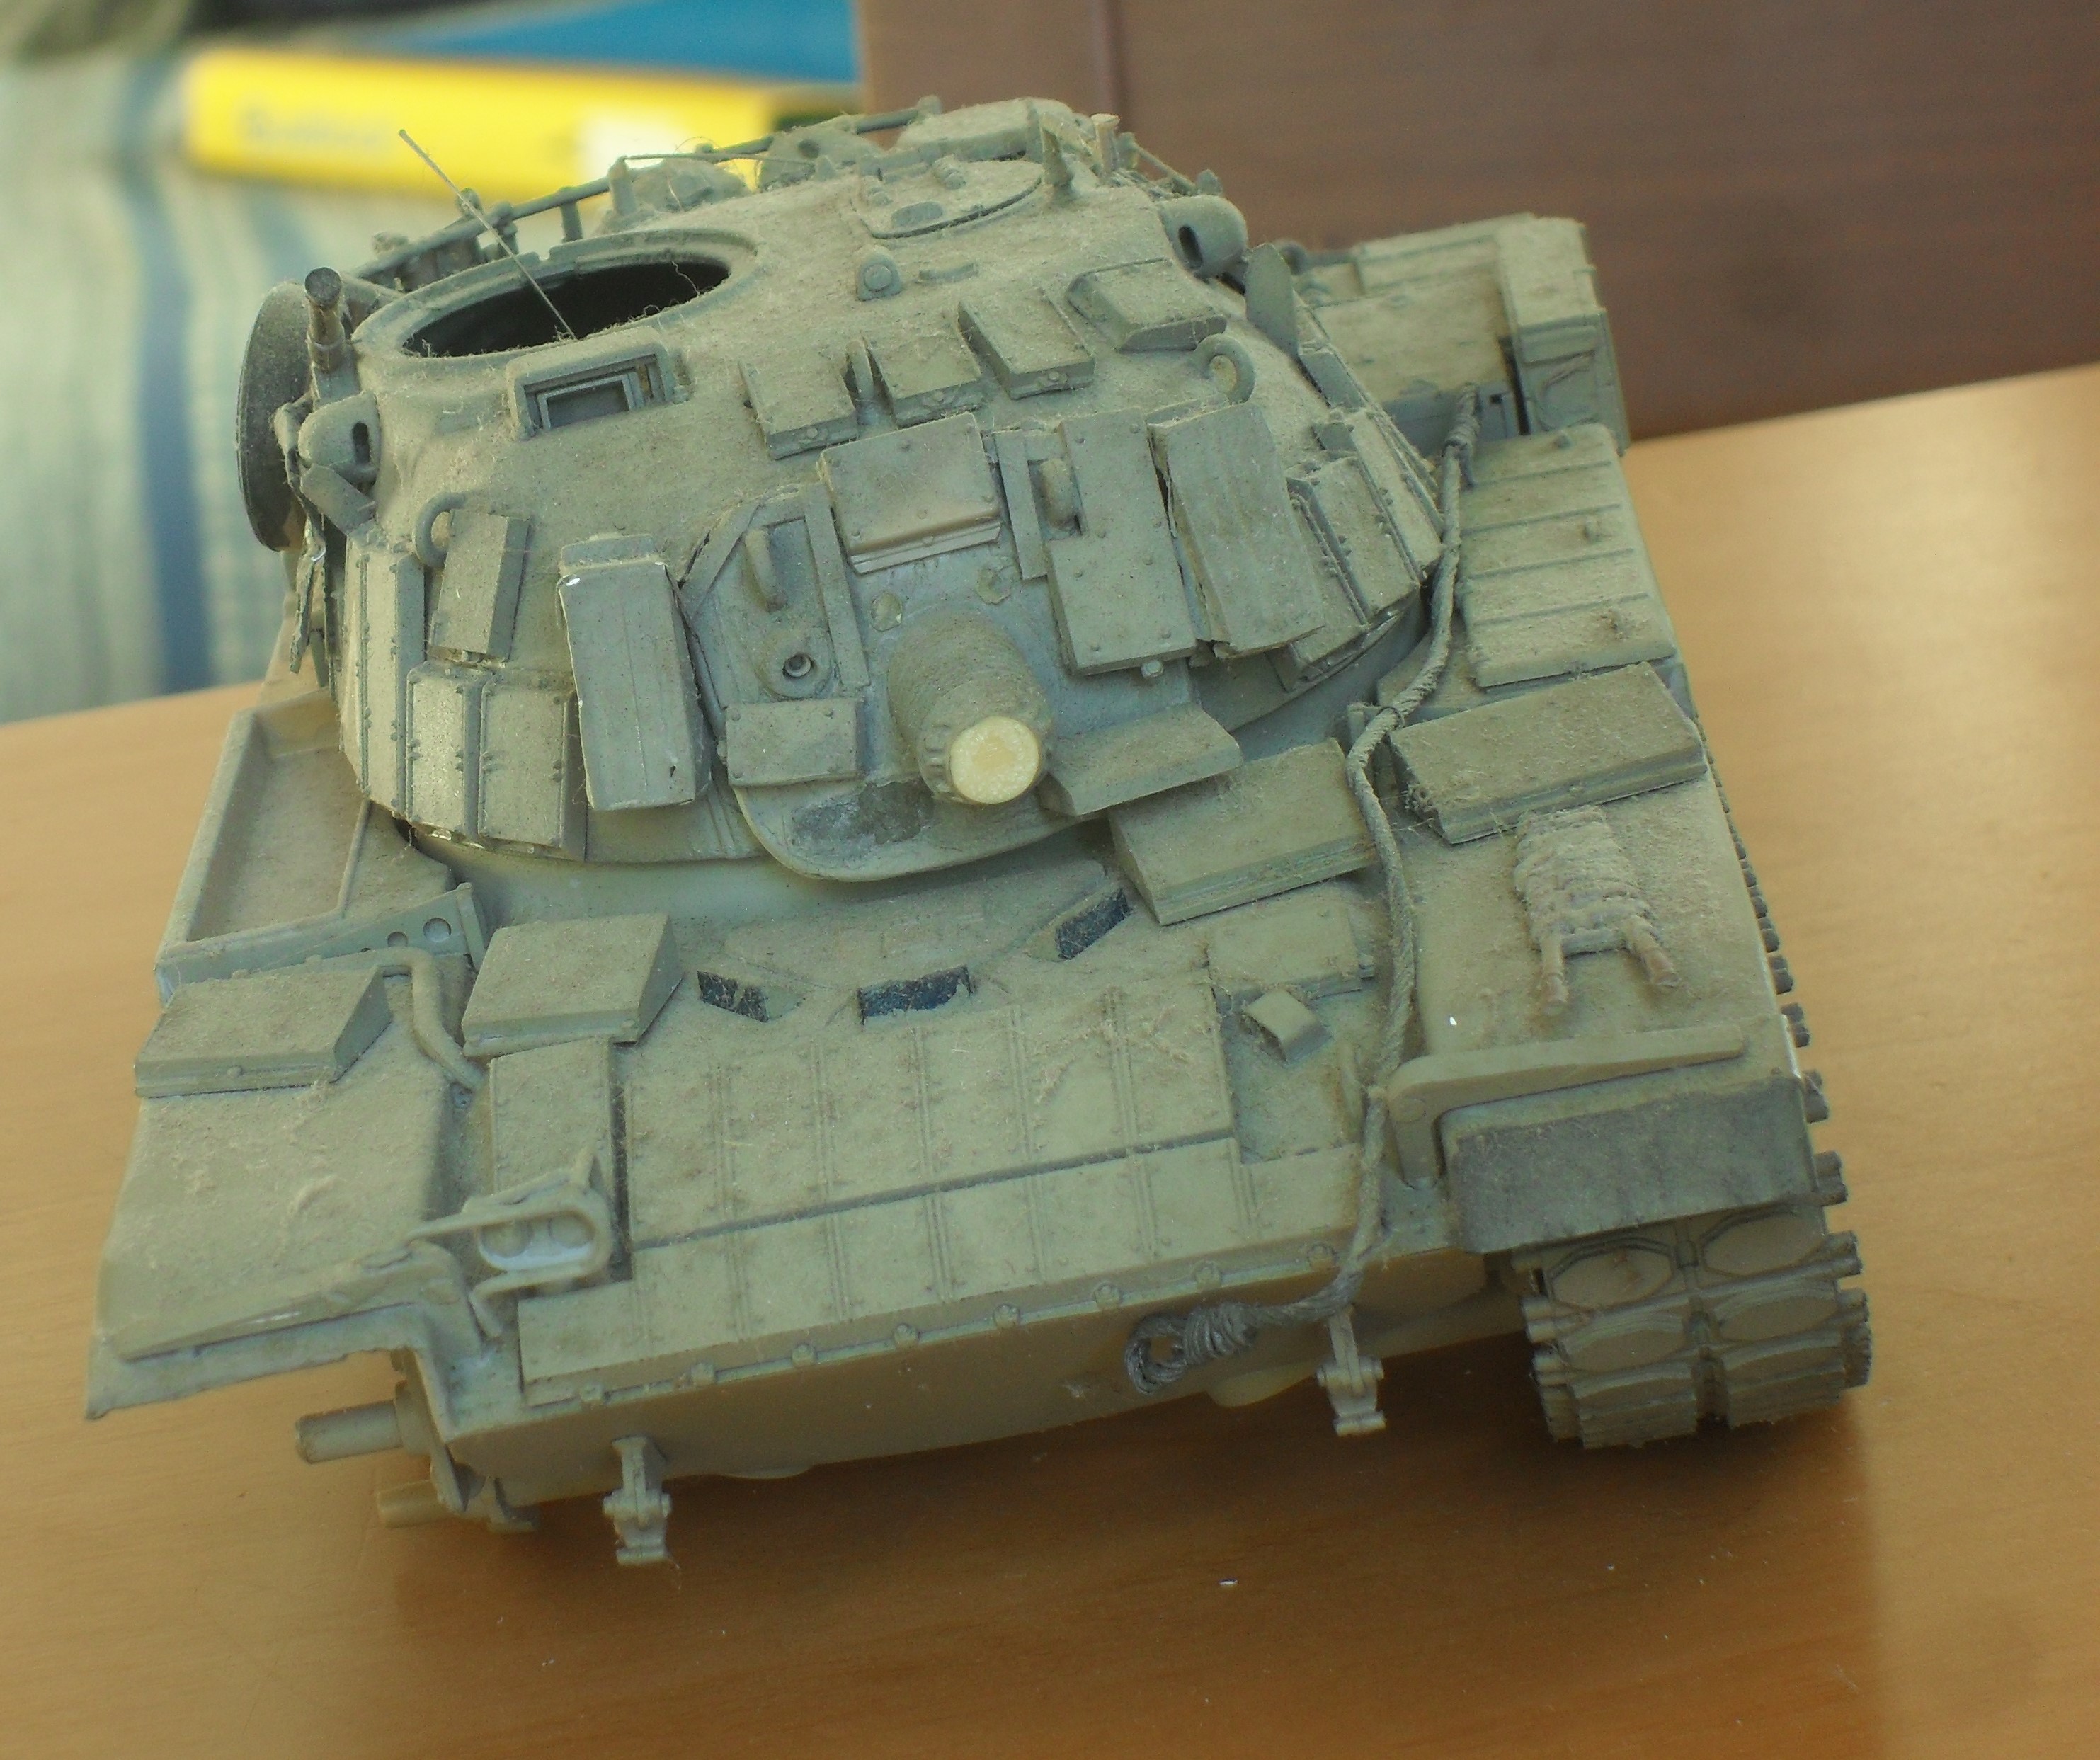
I try to dilute the hardware work and I also begin to put the support of the 0.50 "coaxial mounted on the gun trying not to make it fight with the trellis that supports the blazers on the gun shield
So I build the supports for the two 0.30 "machine guns
NOTE: the 0.30 "of the Esci seem oversized in reality it is enough to shorten the barrels by one millimeter.
I also make the support for the night vision beacon with 3 cursed spheres that I get by rolling 3 pieces of tin. I put the two boxes of ammunition in front of the air filters as a final tinsel.
A separate note are the two metal plates typical of Israeli vehicles: I made them using the figures coming from the printed matter
Only the external loads remain to be defined, but I want to see them as a whole
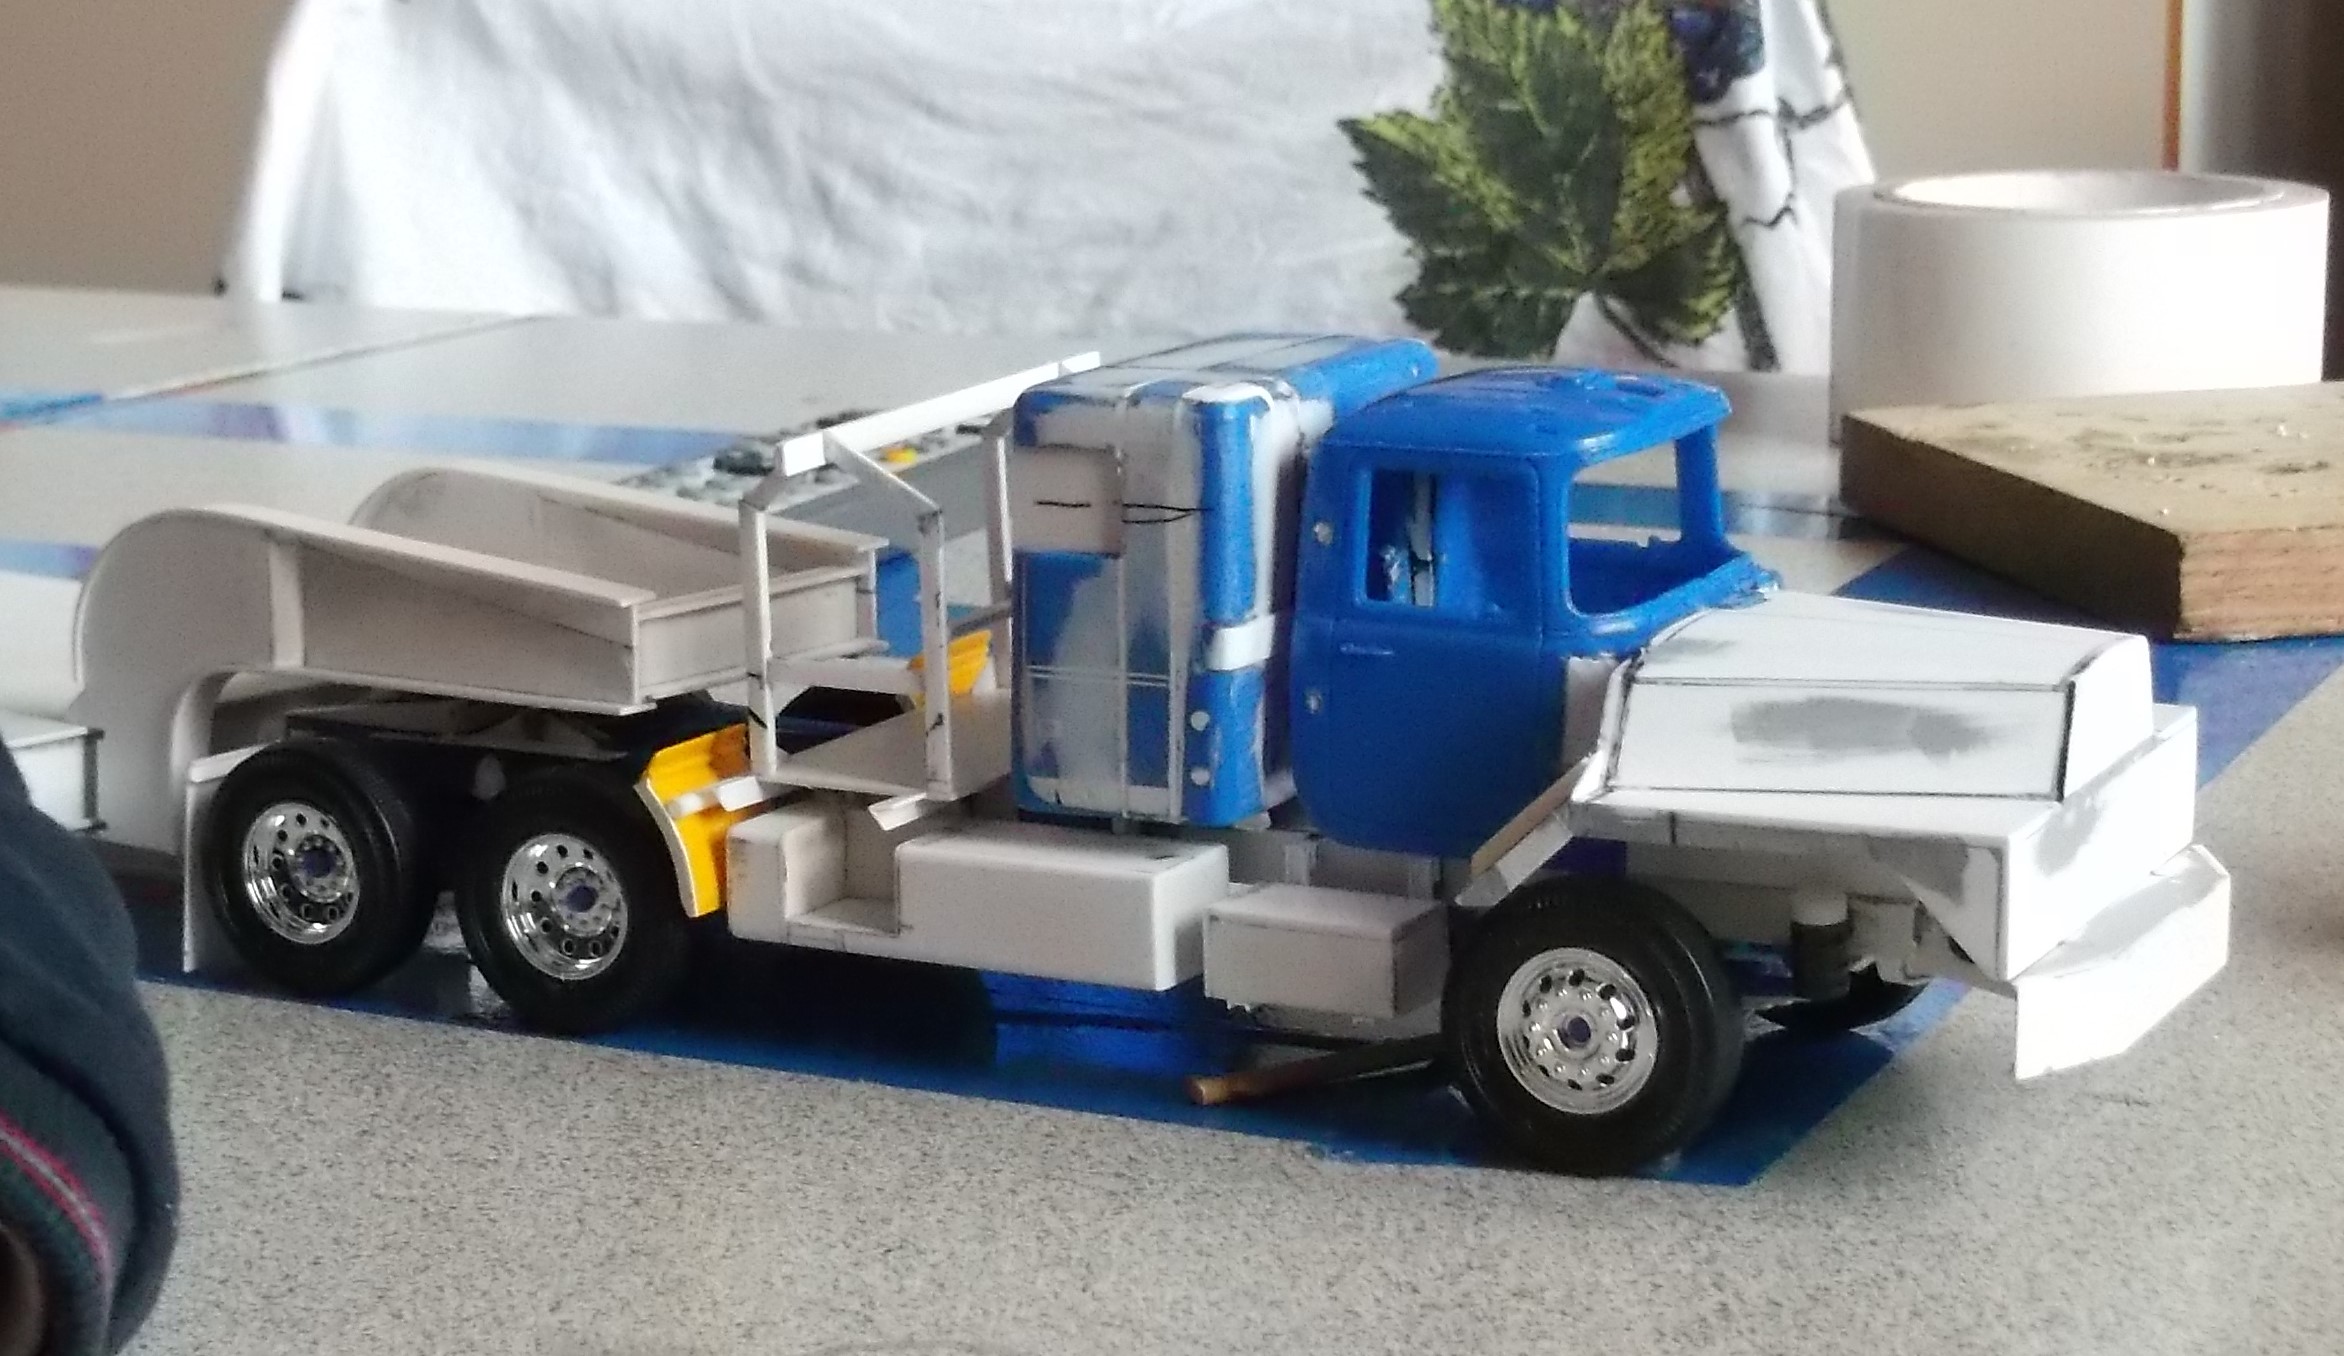
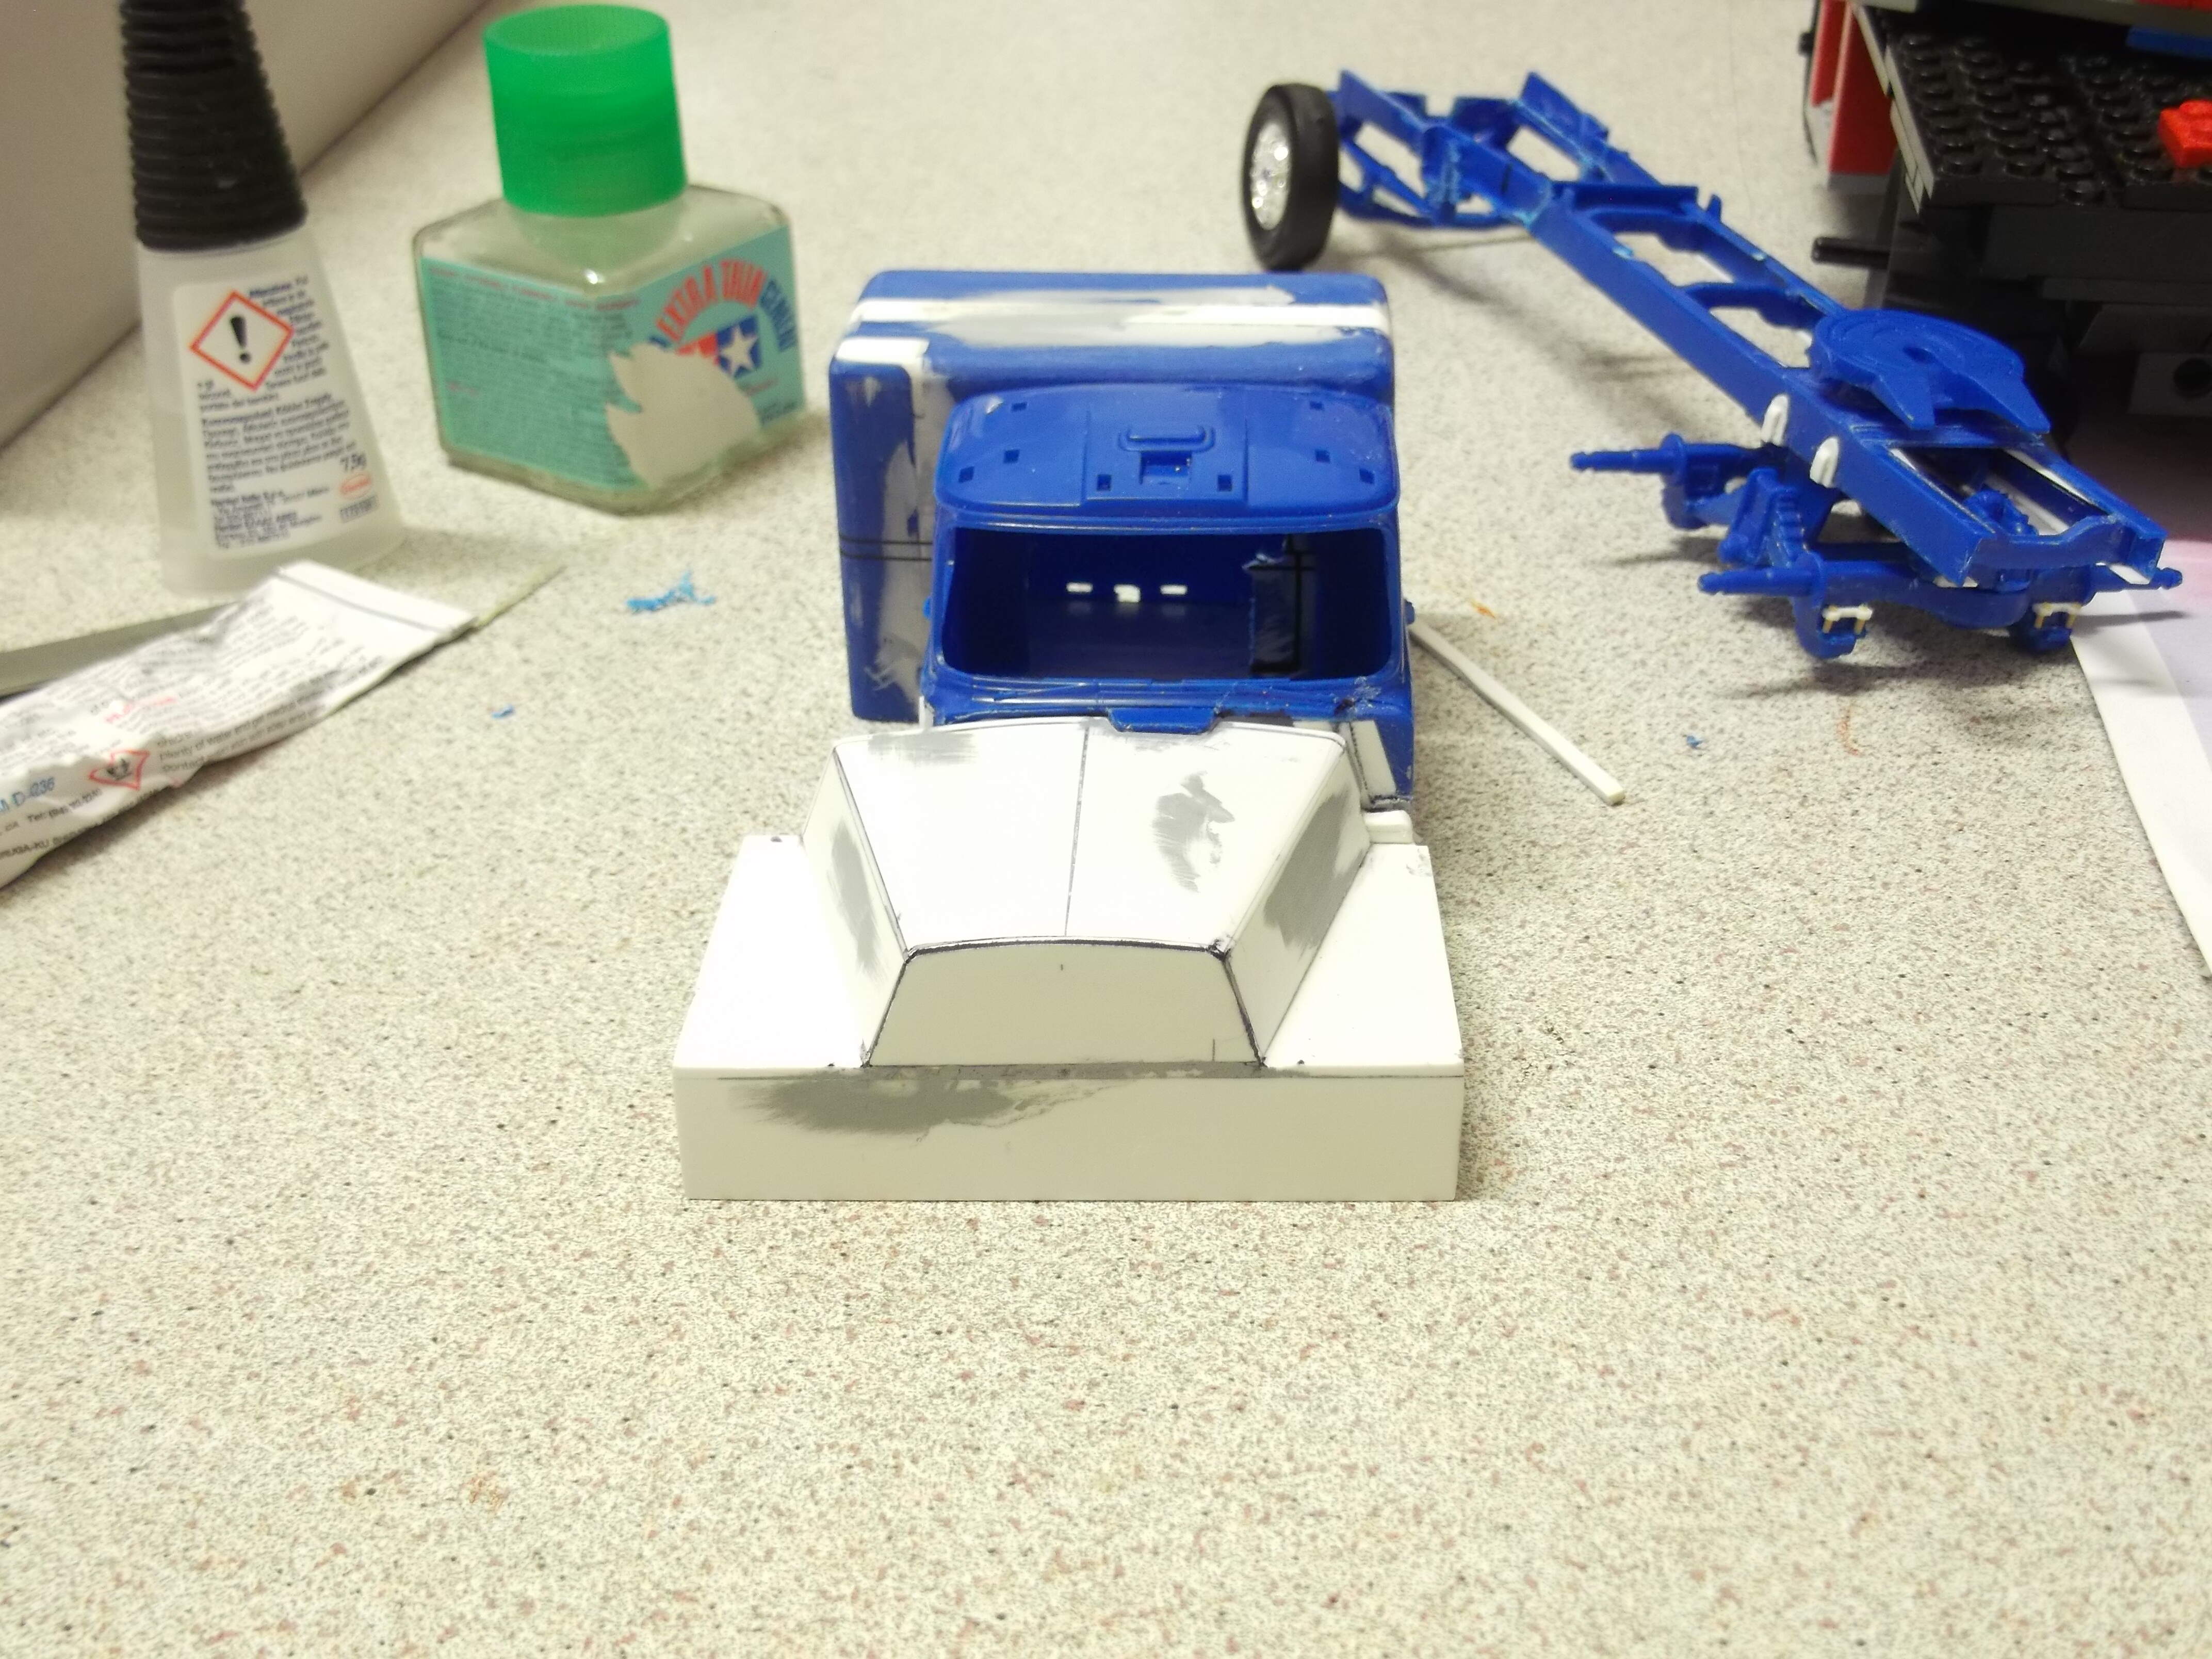
Let’s move on to the next phase: “Paint your truck”
Painting such a tool is already a great challenge in itself, adding pathos is then all the black part of the engine that risks causing the model to sink
Several options were possible: hazelnut or white tractor and yellow bulldozer or hazelnut trailer
I opt for hazelnut tractor n.H321 light brown and yellow tractor trailer n. H413 RLM04 yellow
Yellow is a second choice… before I had opted for basic signal yellow but it was too photonic….
So Gunze at full throttle….
Having spread the background color in the components, I carry out an evaluation.
At first glance, the trolley is a fair punch in the eye because even if it is a slightly muted yellow it beats a lot and for this I begin aging (that’s right! Without having decided on the last components yet, but for me modeling is not a science … exact) and I want to understand if to the eye it does not become a big toy
Given the particular wear of the transport surface, I also intervene with the sponge technique to make the surface that I had previously treated extensively with color H84 mahogany credible
… It takes about three tries to get something that convinces me
In the end, the idea was for a trolley that was somehow more dragged than taken for a walk by the tractor, perhaps left outside and not in covered storage areas, as happens with tractors
I then used all the shades of rust and yellow ruined by sunlight
Wow! That’s turning into an AWESOME looking Tank transporter! Love, what you have completed so far! I wish a model company, would come out with a Kit! Waiting to see the finished project!
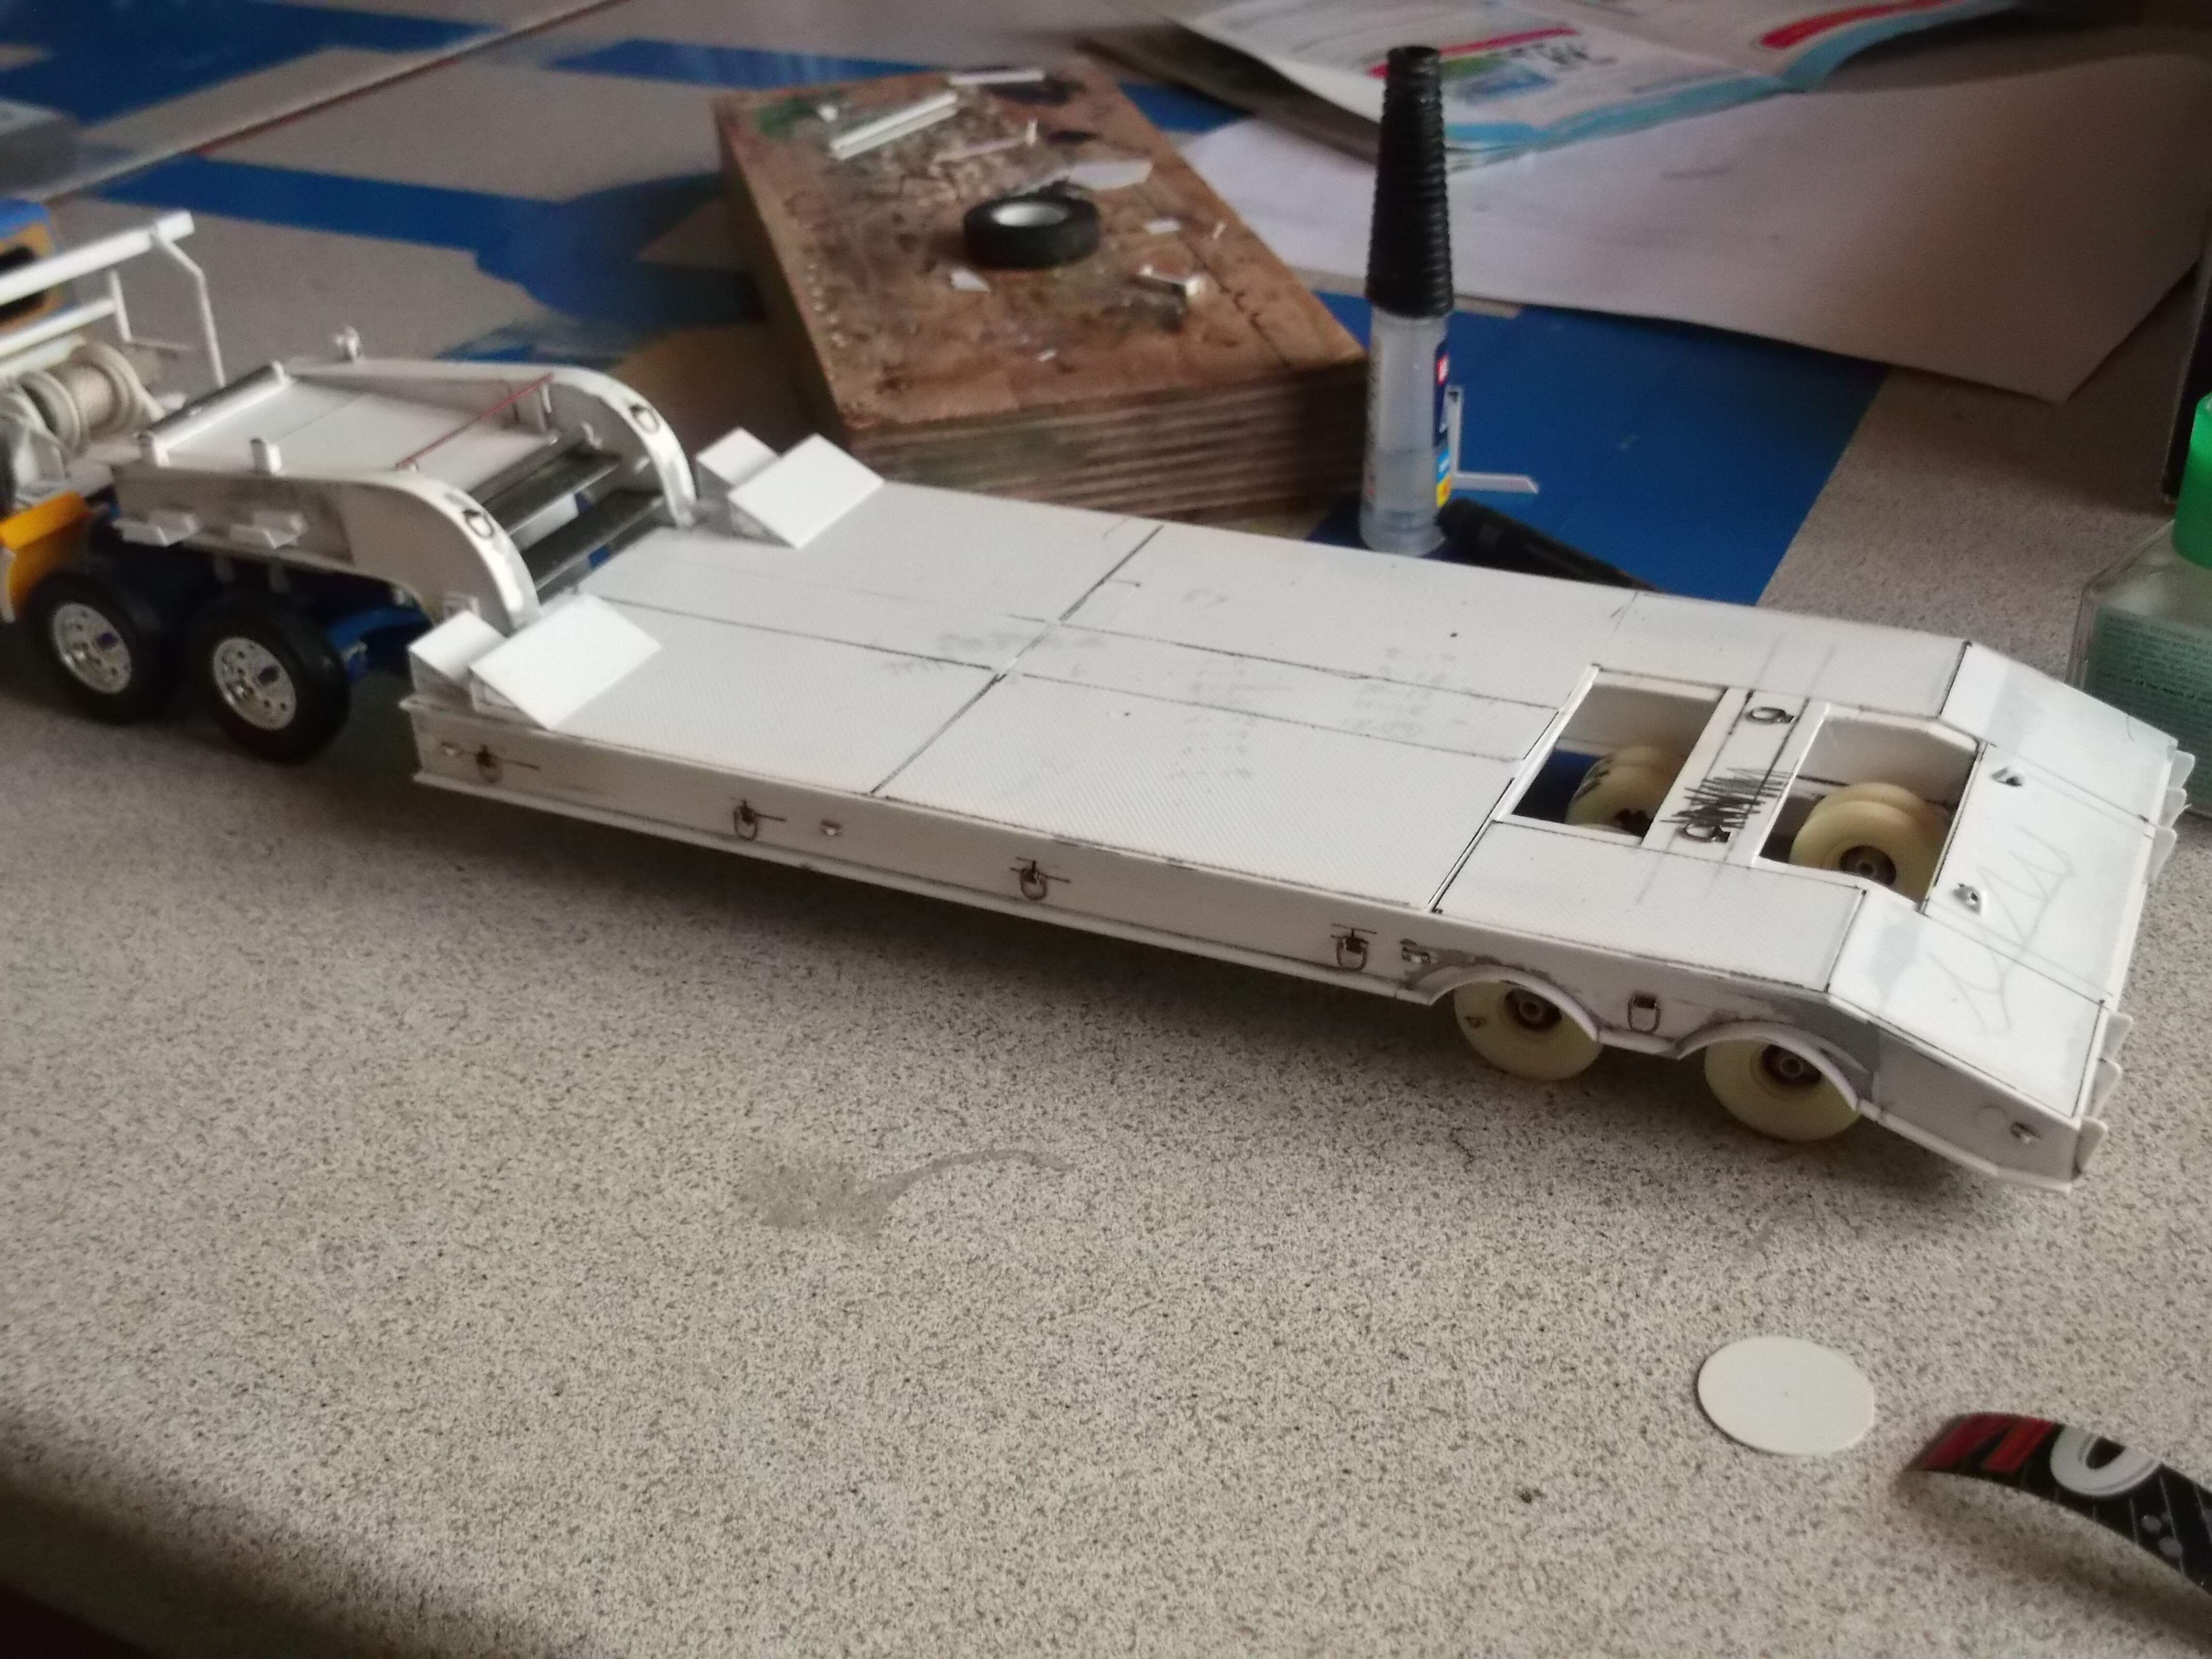
I have decided that on the gooseneck of the trailer I will insert some elements related to the transport and recovery activity, such as pulleys and wooden wedges
While I complete the front part of the trailer, I take the opportunity to review its rear lights which I insert by opening two gaps in the bottom … the first version, set, was not that great.
In the engine, on the other hand, I only tried to desaturate (does it seem to understand it?) The black and give some evidence to the details
Signs and works left behind
As in my best tradition, I am only now deciding how to contextualize the model … so I look for inspiration from the photos I have recovered to find the one that suits me best, however I cannot identify the exact unit that the carrier uses so I strictly adhere to what seen in the photos.
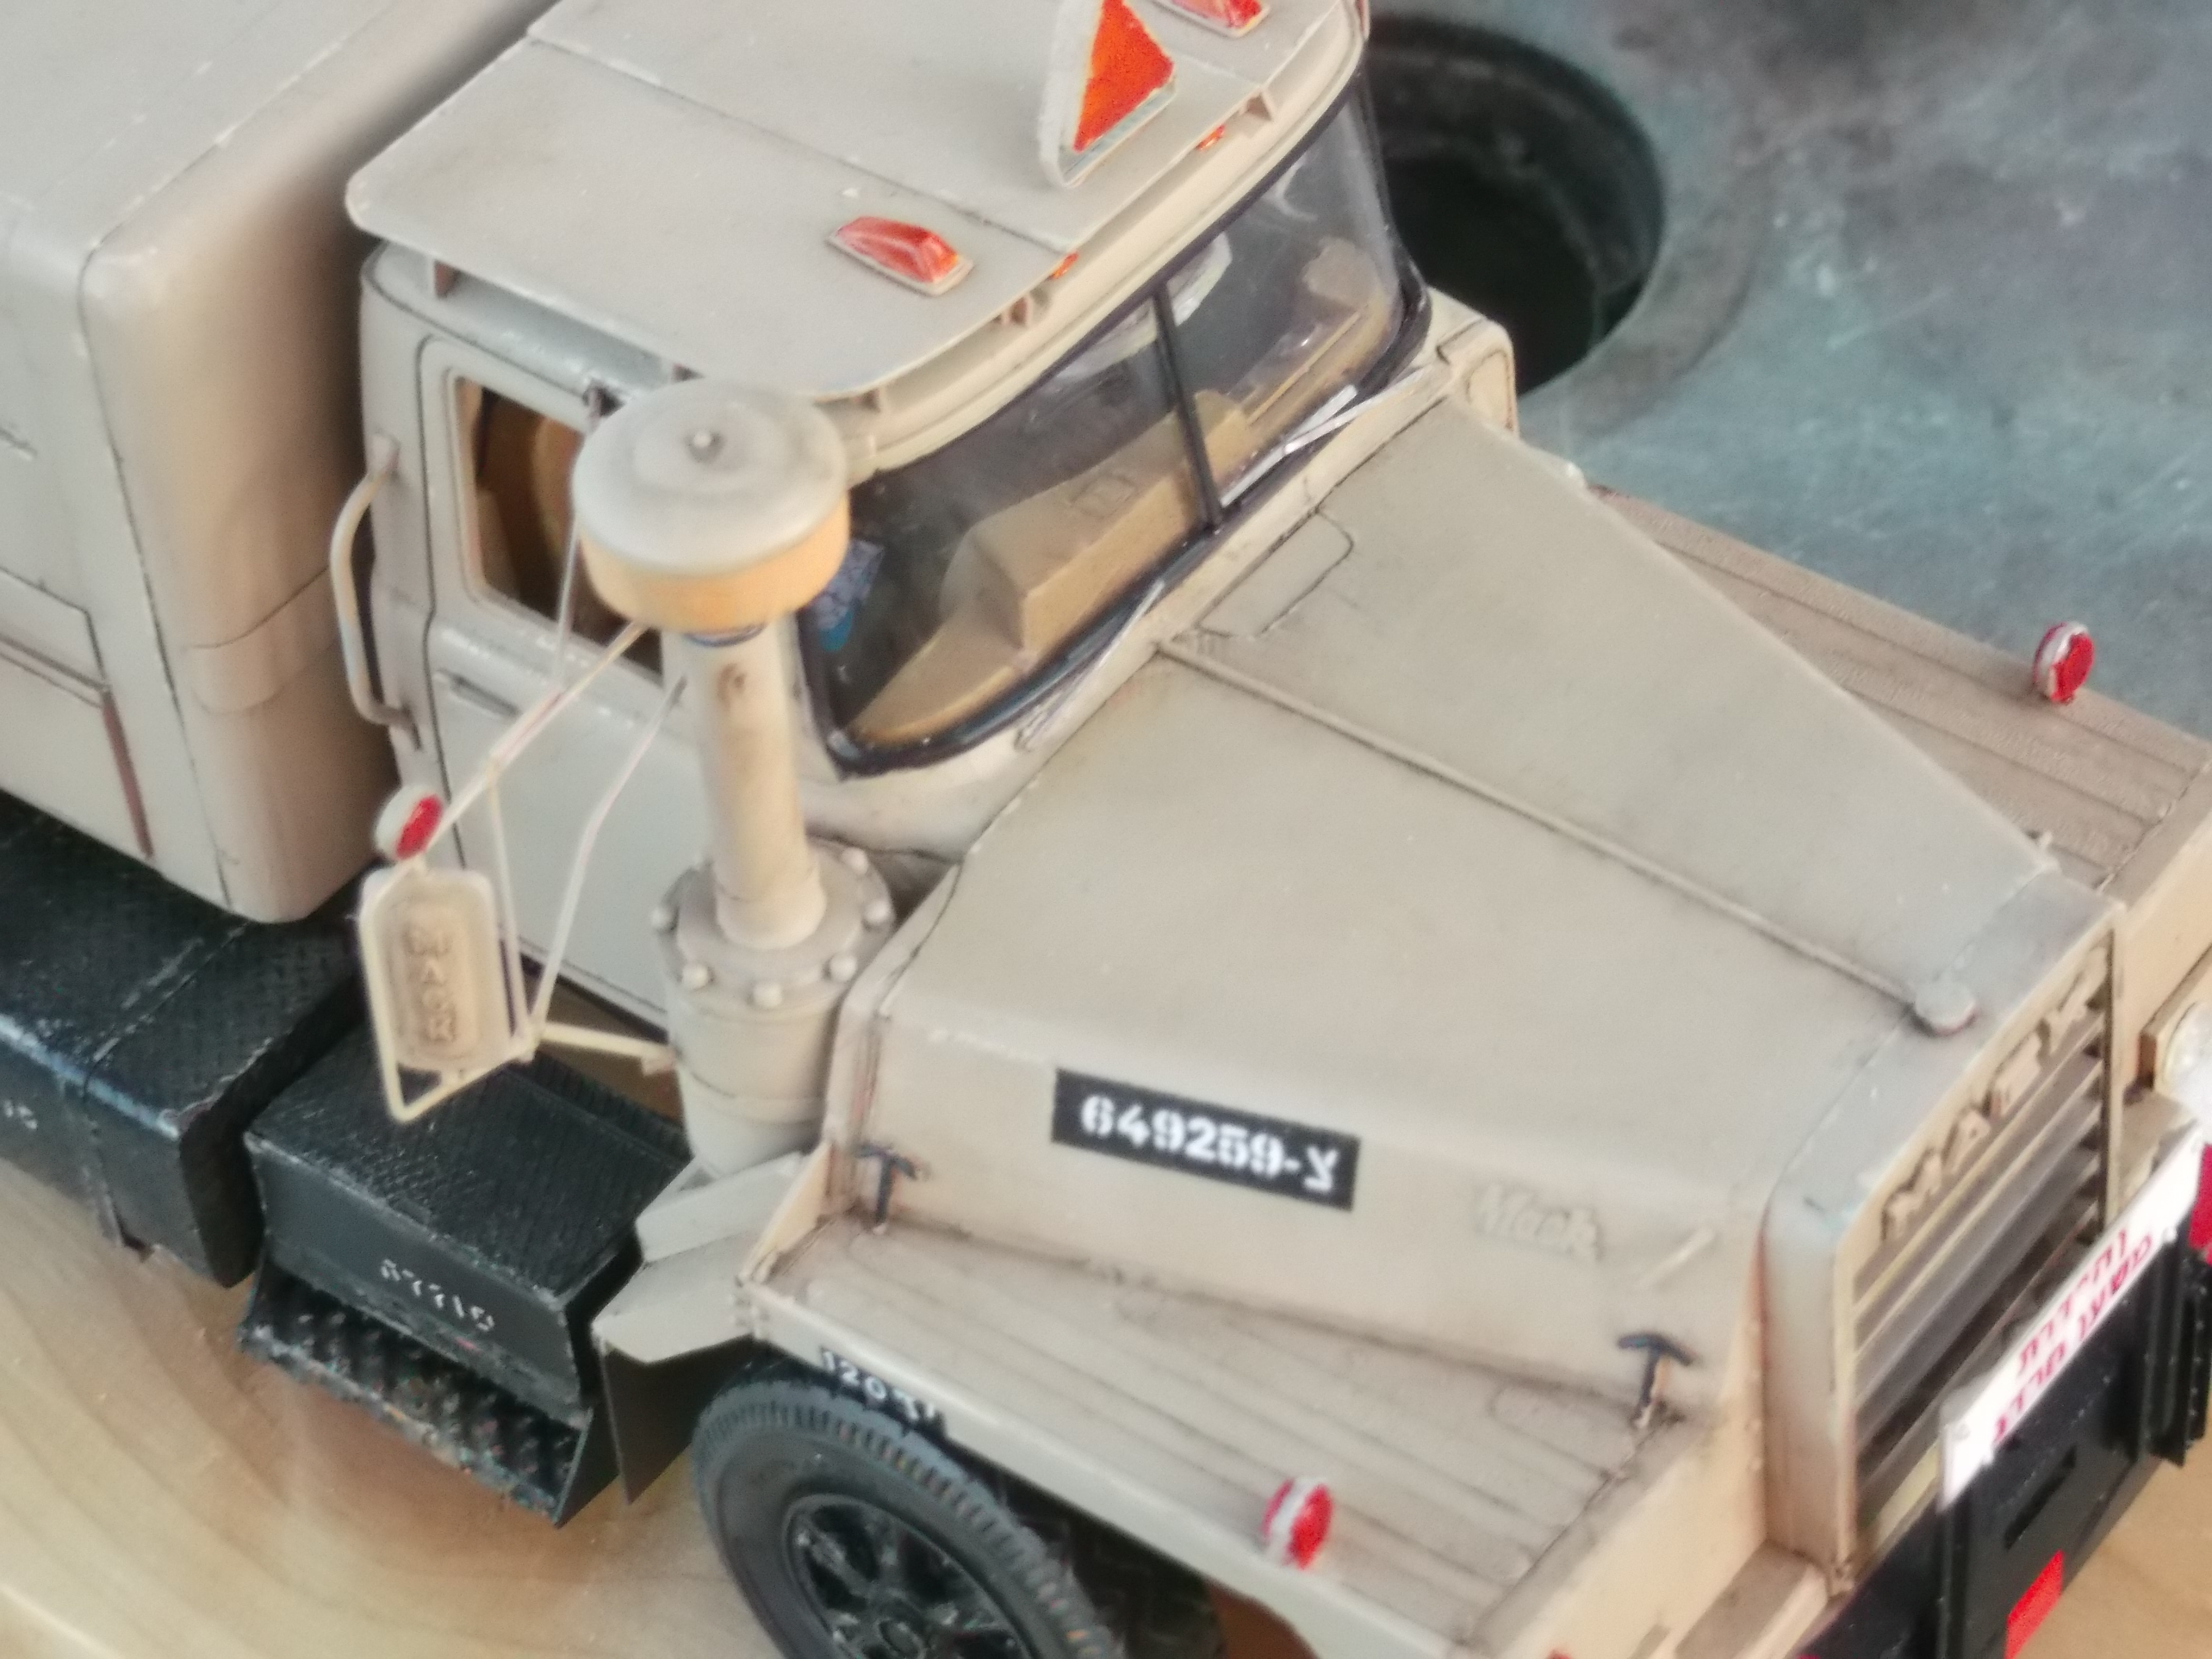
So I start by making the plates of the tractor: all the tractors in question begin their plates with “49” while on trailers the plates begin with the numbers “29” and as Israeli tradition dictates they are made with different characters (characters intended as styles of writing like: Comic Sans ms, Arial, etc.); note in the license plates of the trailers sometimes the “Y” is missing.
On the front panel I made a warning, the translation of which made me suffer a lot
Even the writings on the tanks must be deciphered and done by hand, in the sense that after the translation I built a stencil to obtain the small writings to be inserted on the tanks and on the battery compartment …
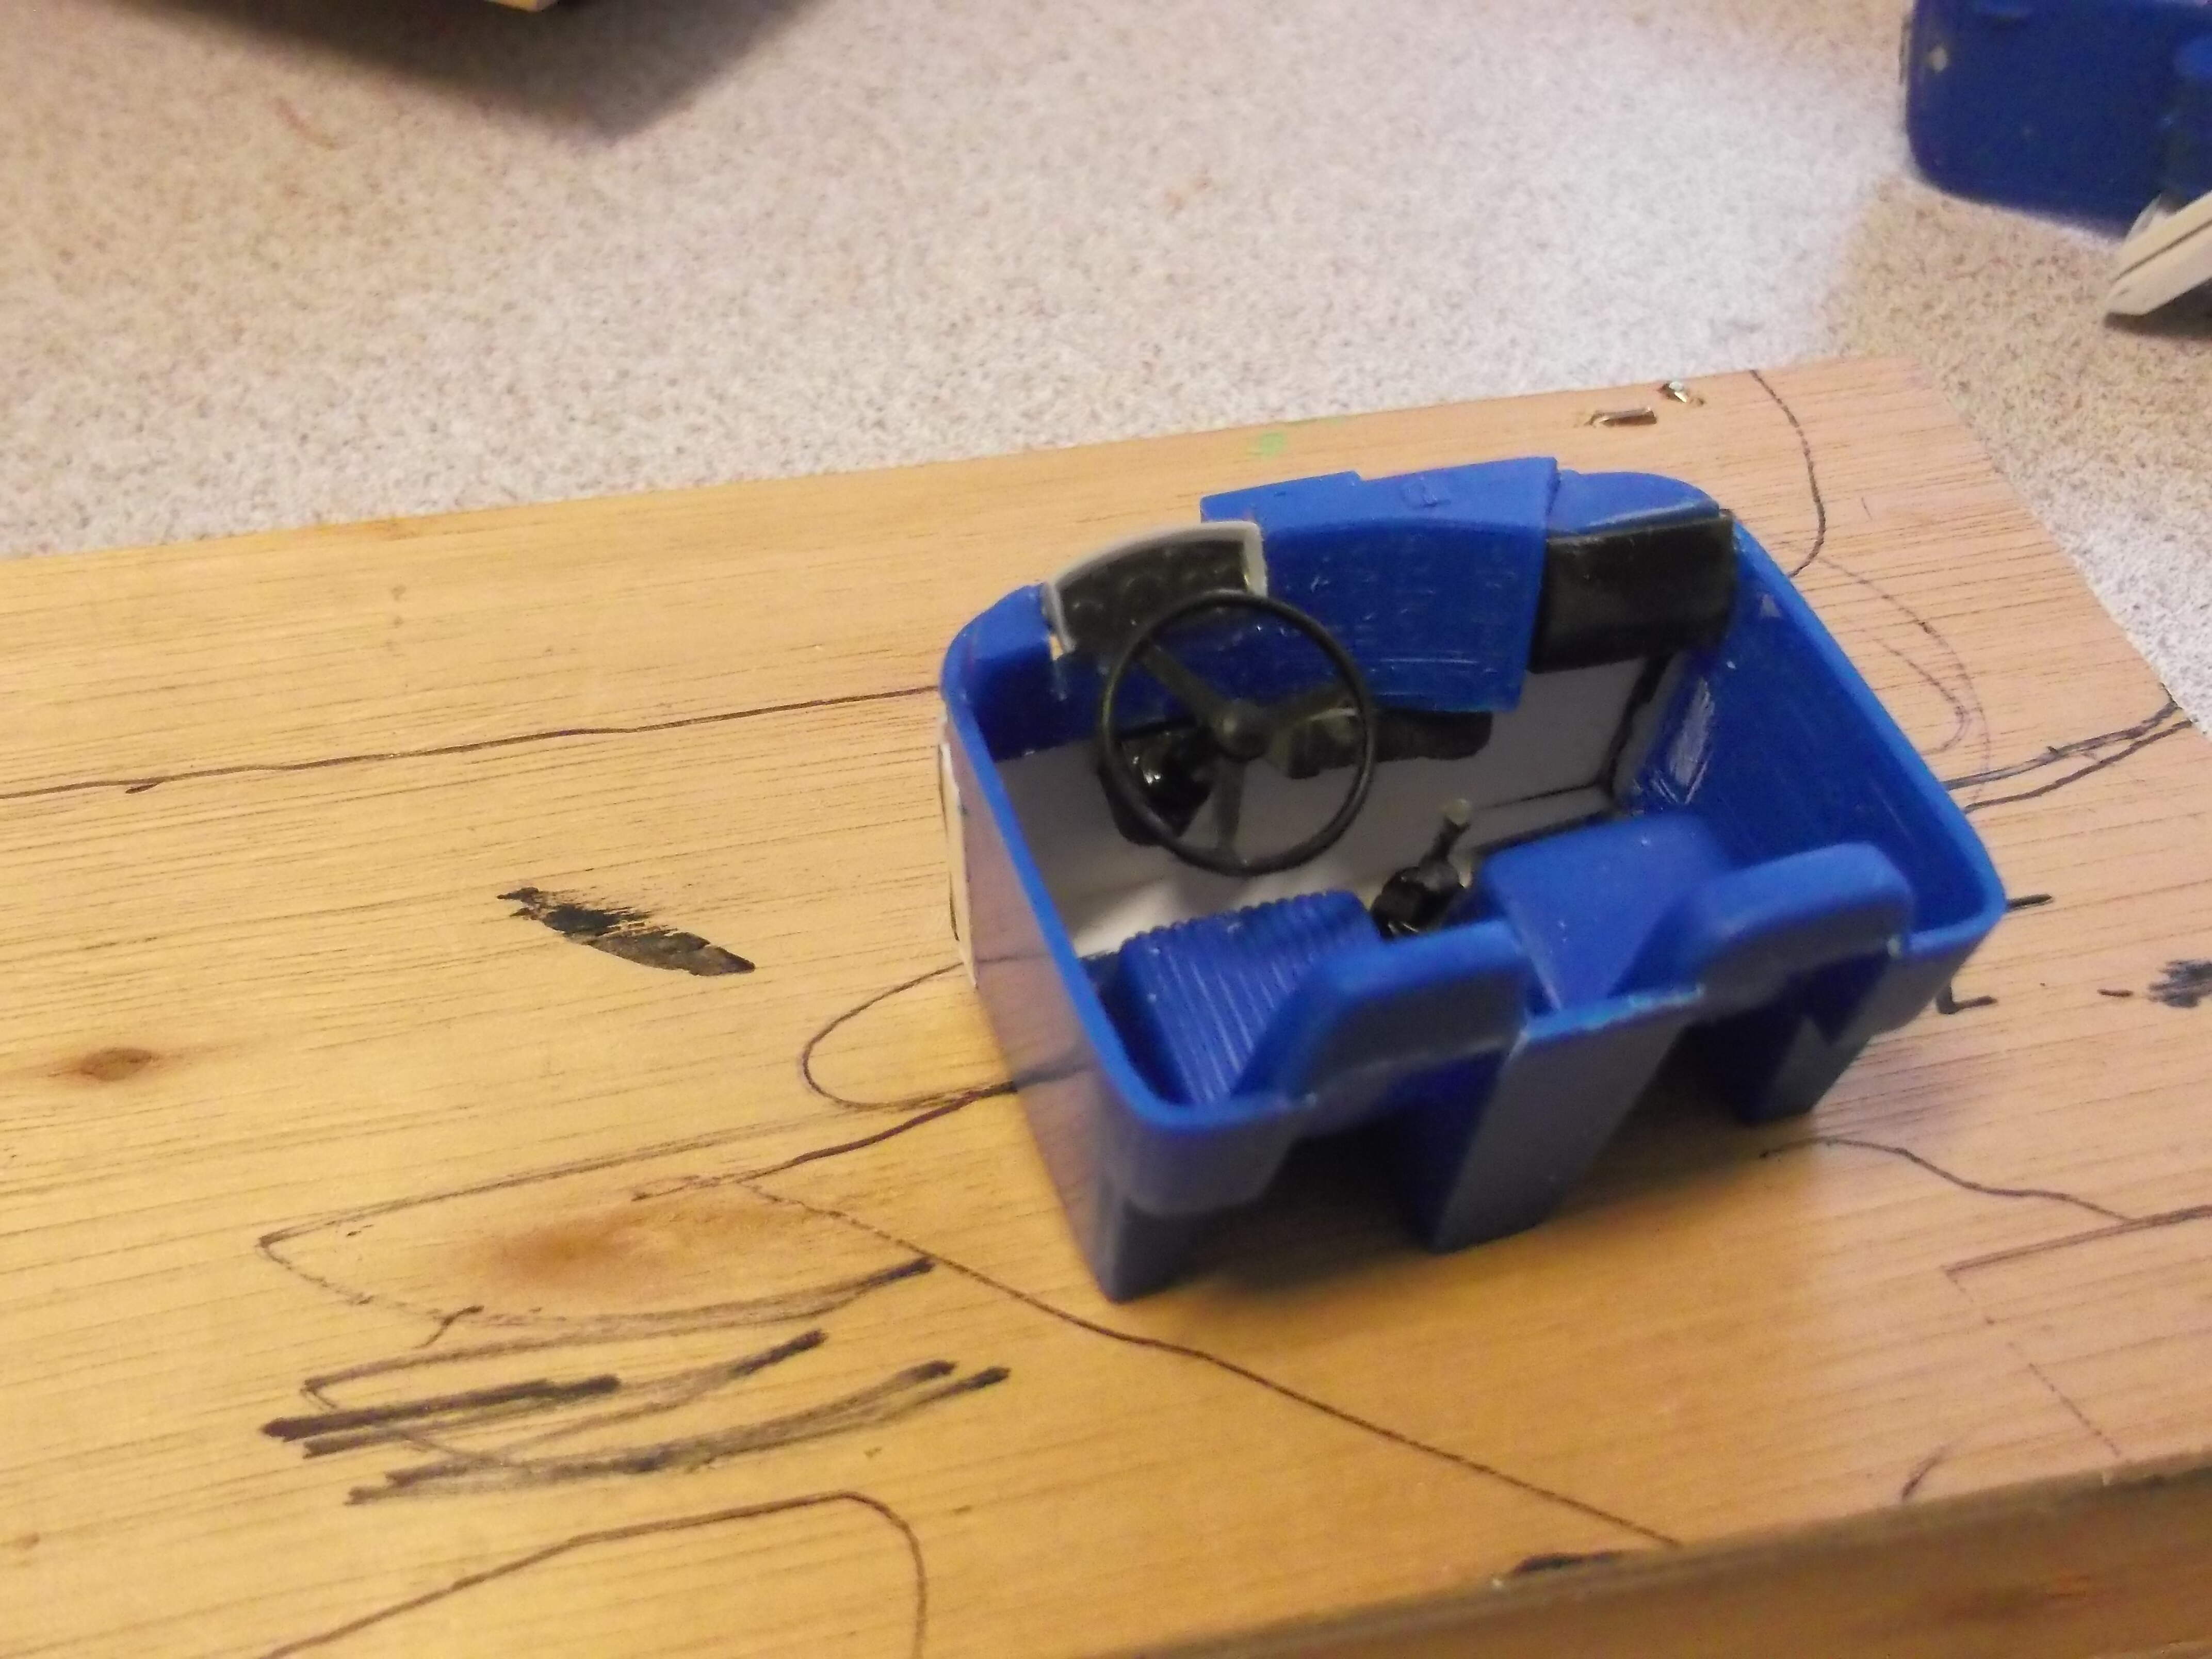
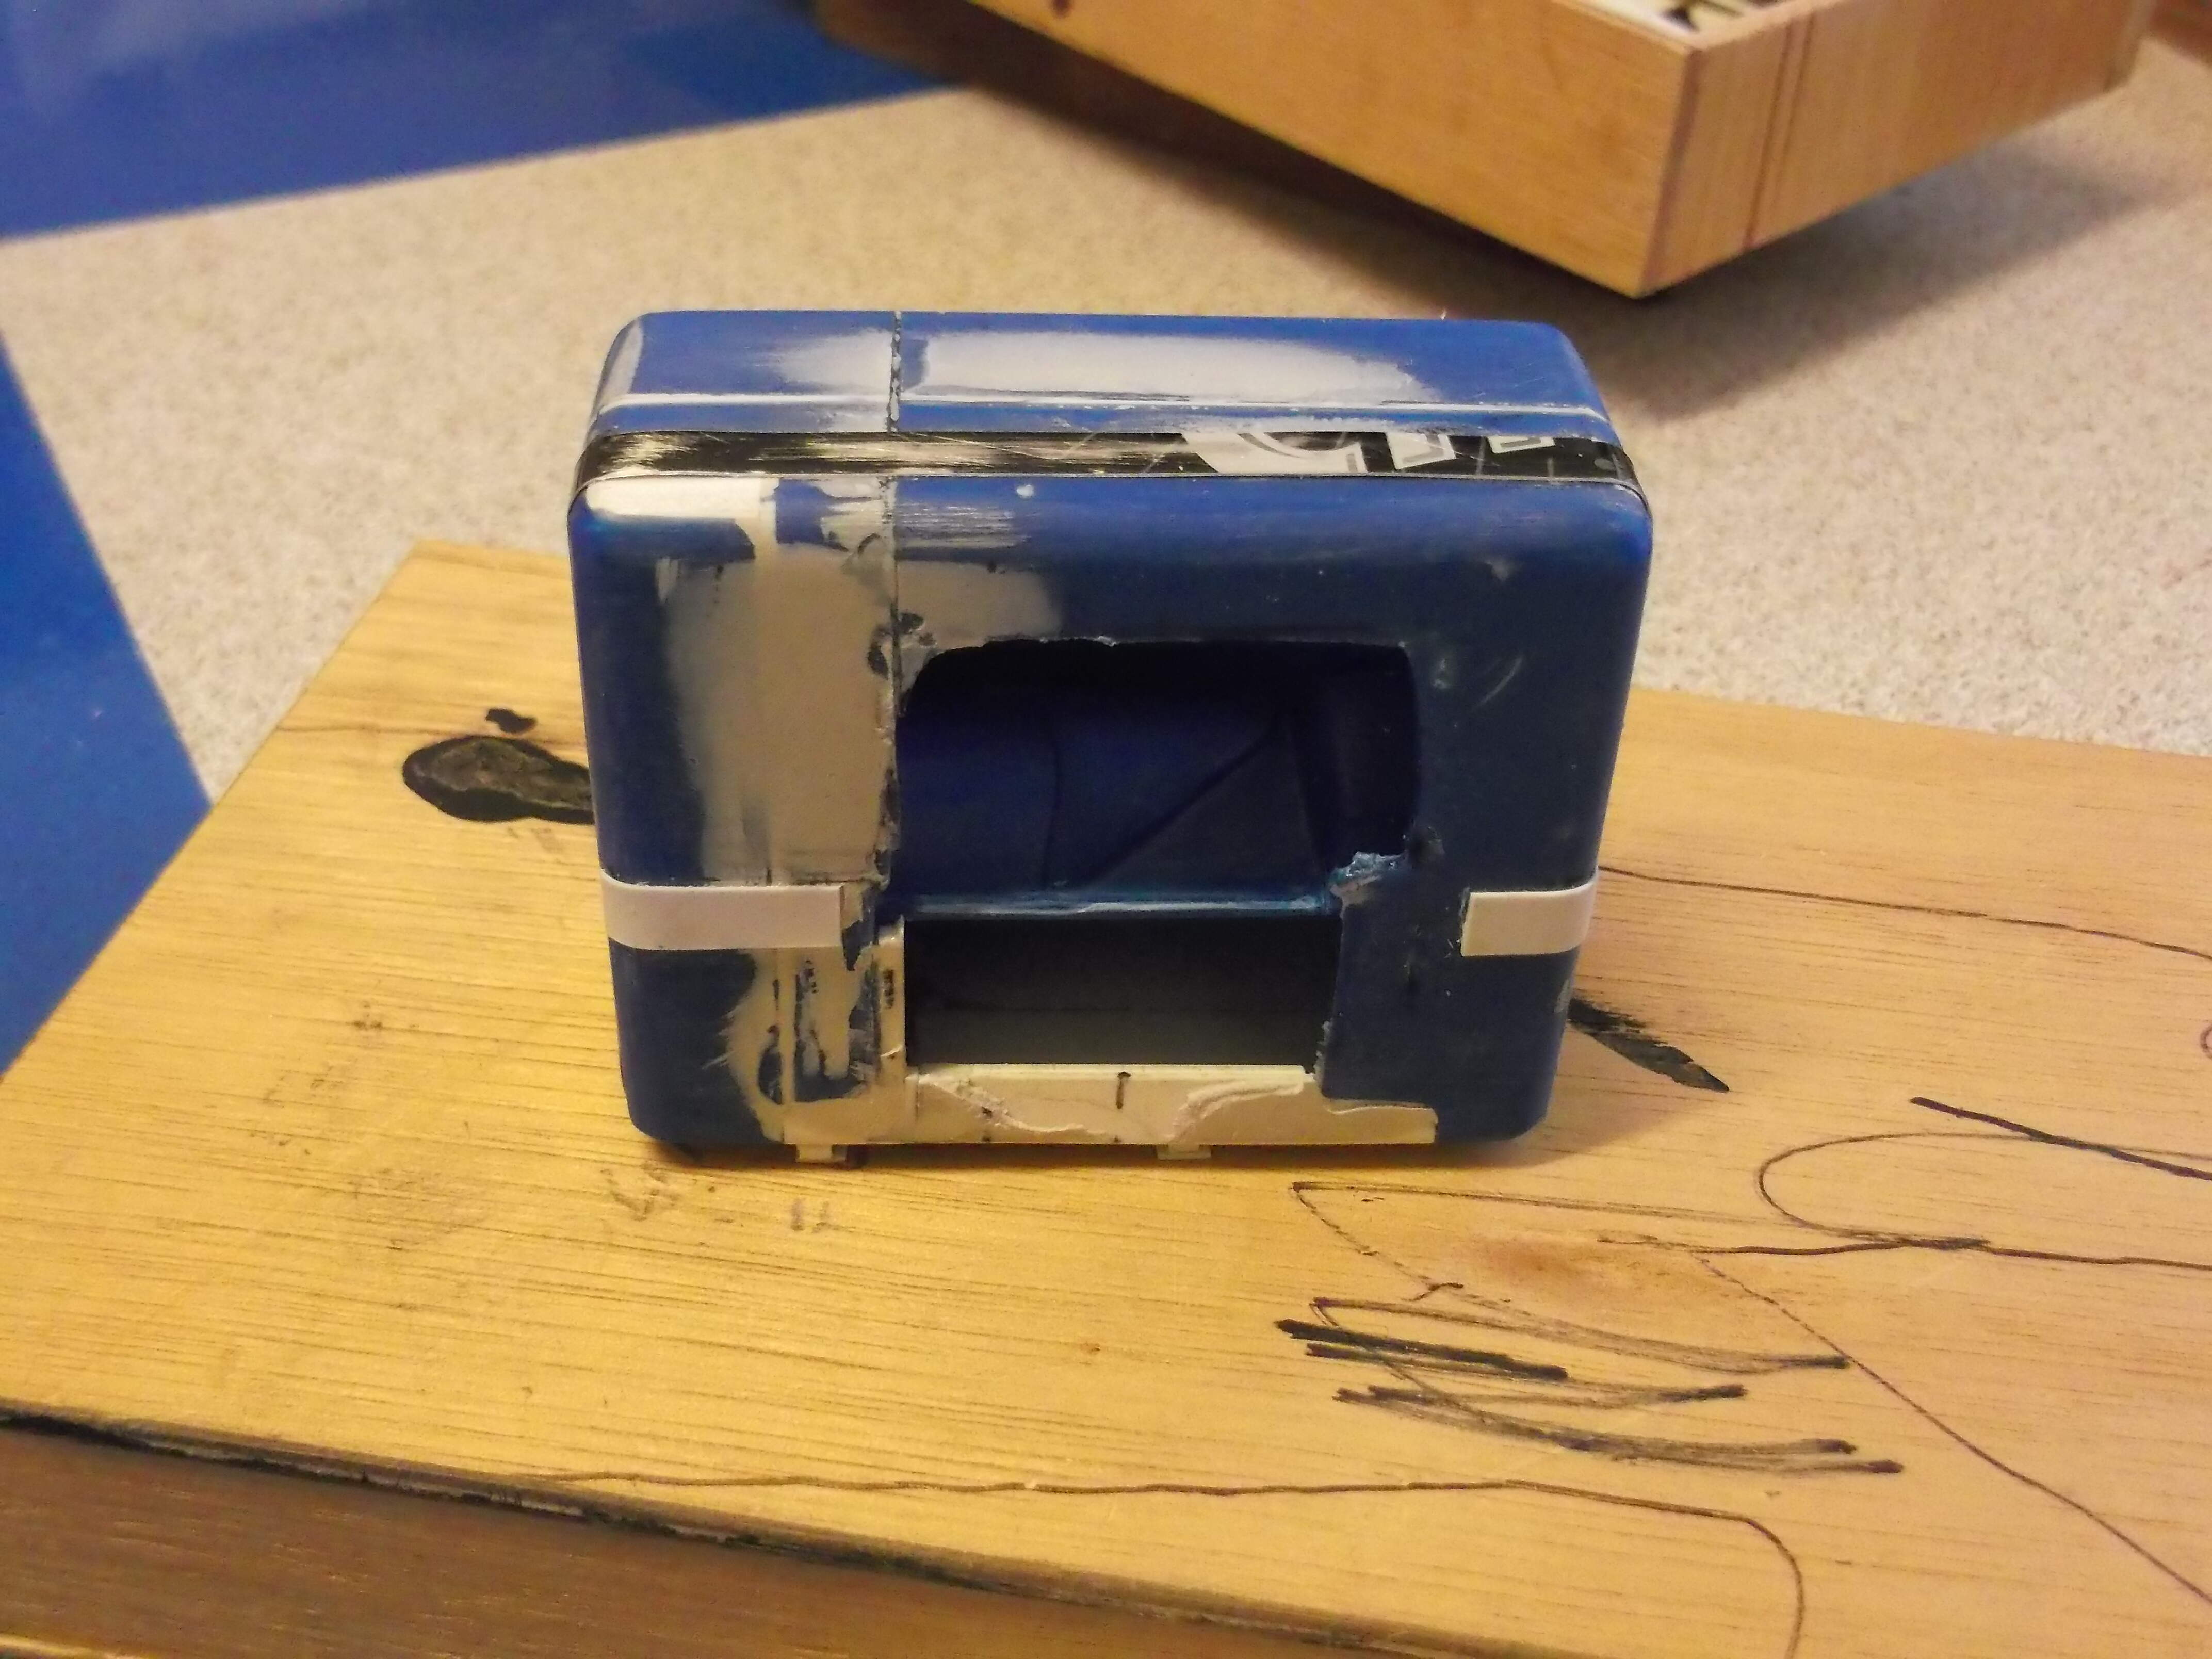
Thanks to the fact that I have not yet fixed the cabin, I can still work on the inside while I prepare the rear window.
I decide to install the curtains that separates the sleeping area, since I have not cared too much about the interior of the sleeping area, as usual the dilemma: you need an interior that you can’t see or realize in the end that you can see some horror from the outside through the transparent ones?
I take the time to add packets of cigarettes and micro-photocopies of newspapers of the time … just to give the cabin a little life.
It is time to definitively insert the interiors into the cabin, at the last I inserted a curtain to improve the transition between the living area and the sleeping area, also because this was only sketchy.
Lots of additional crafts and scratching are really great! I need to skill up.
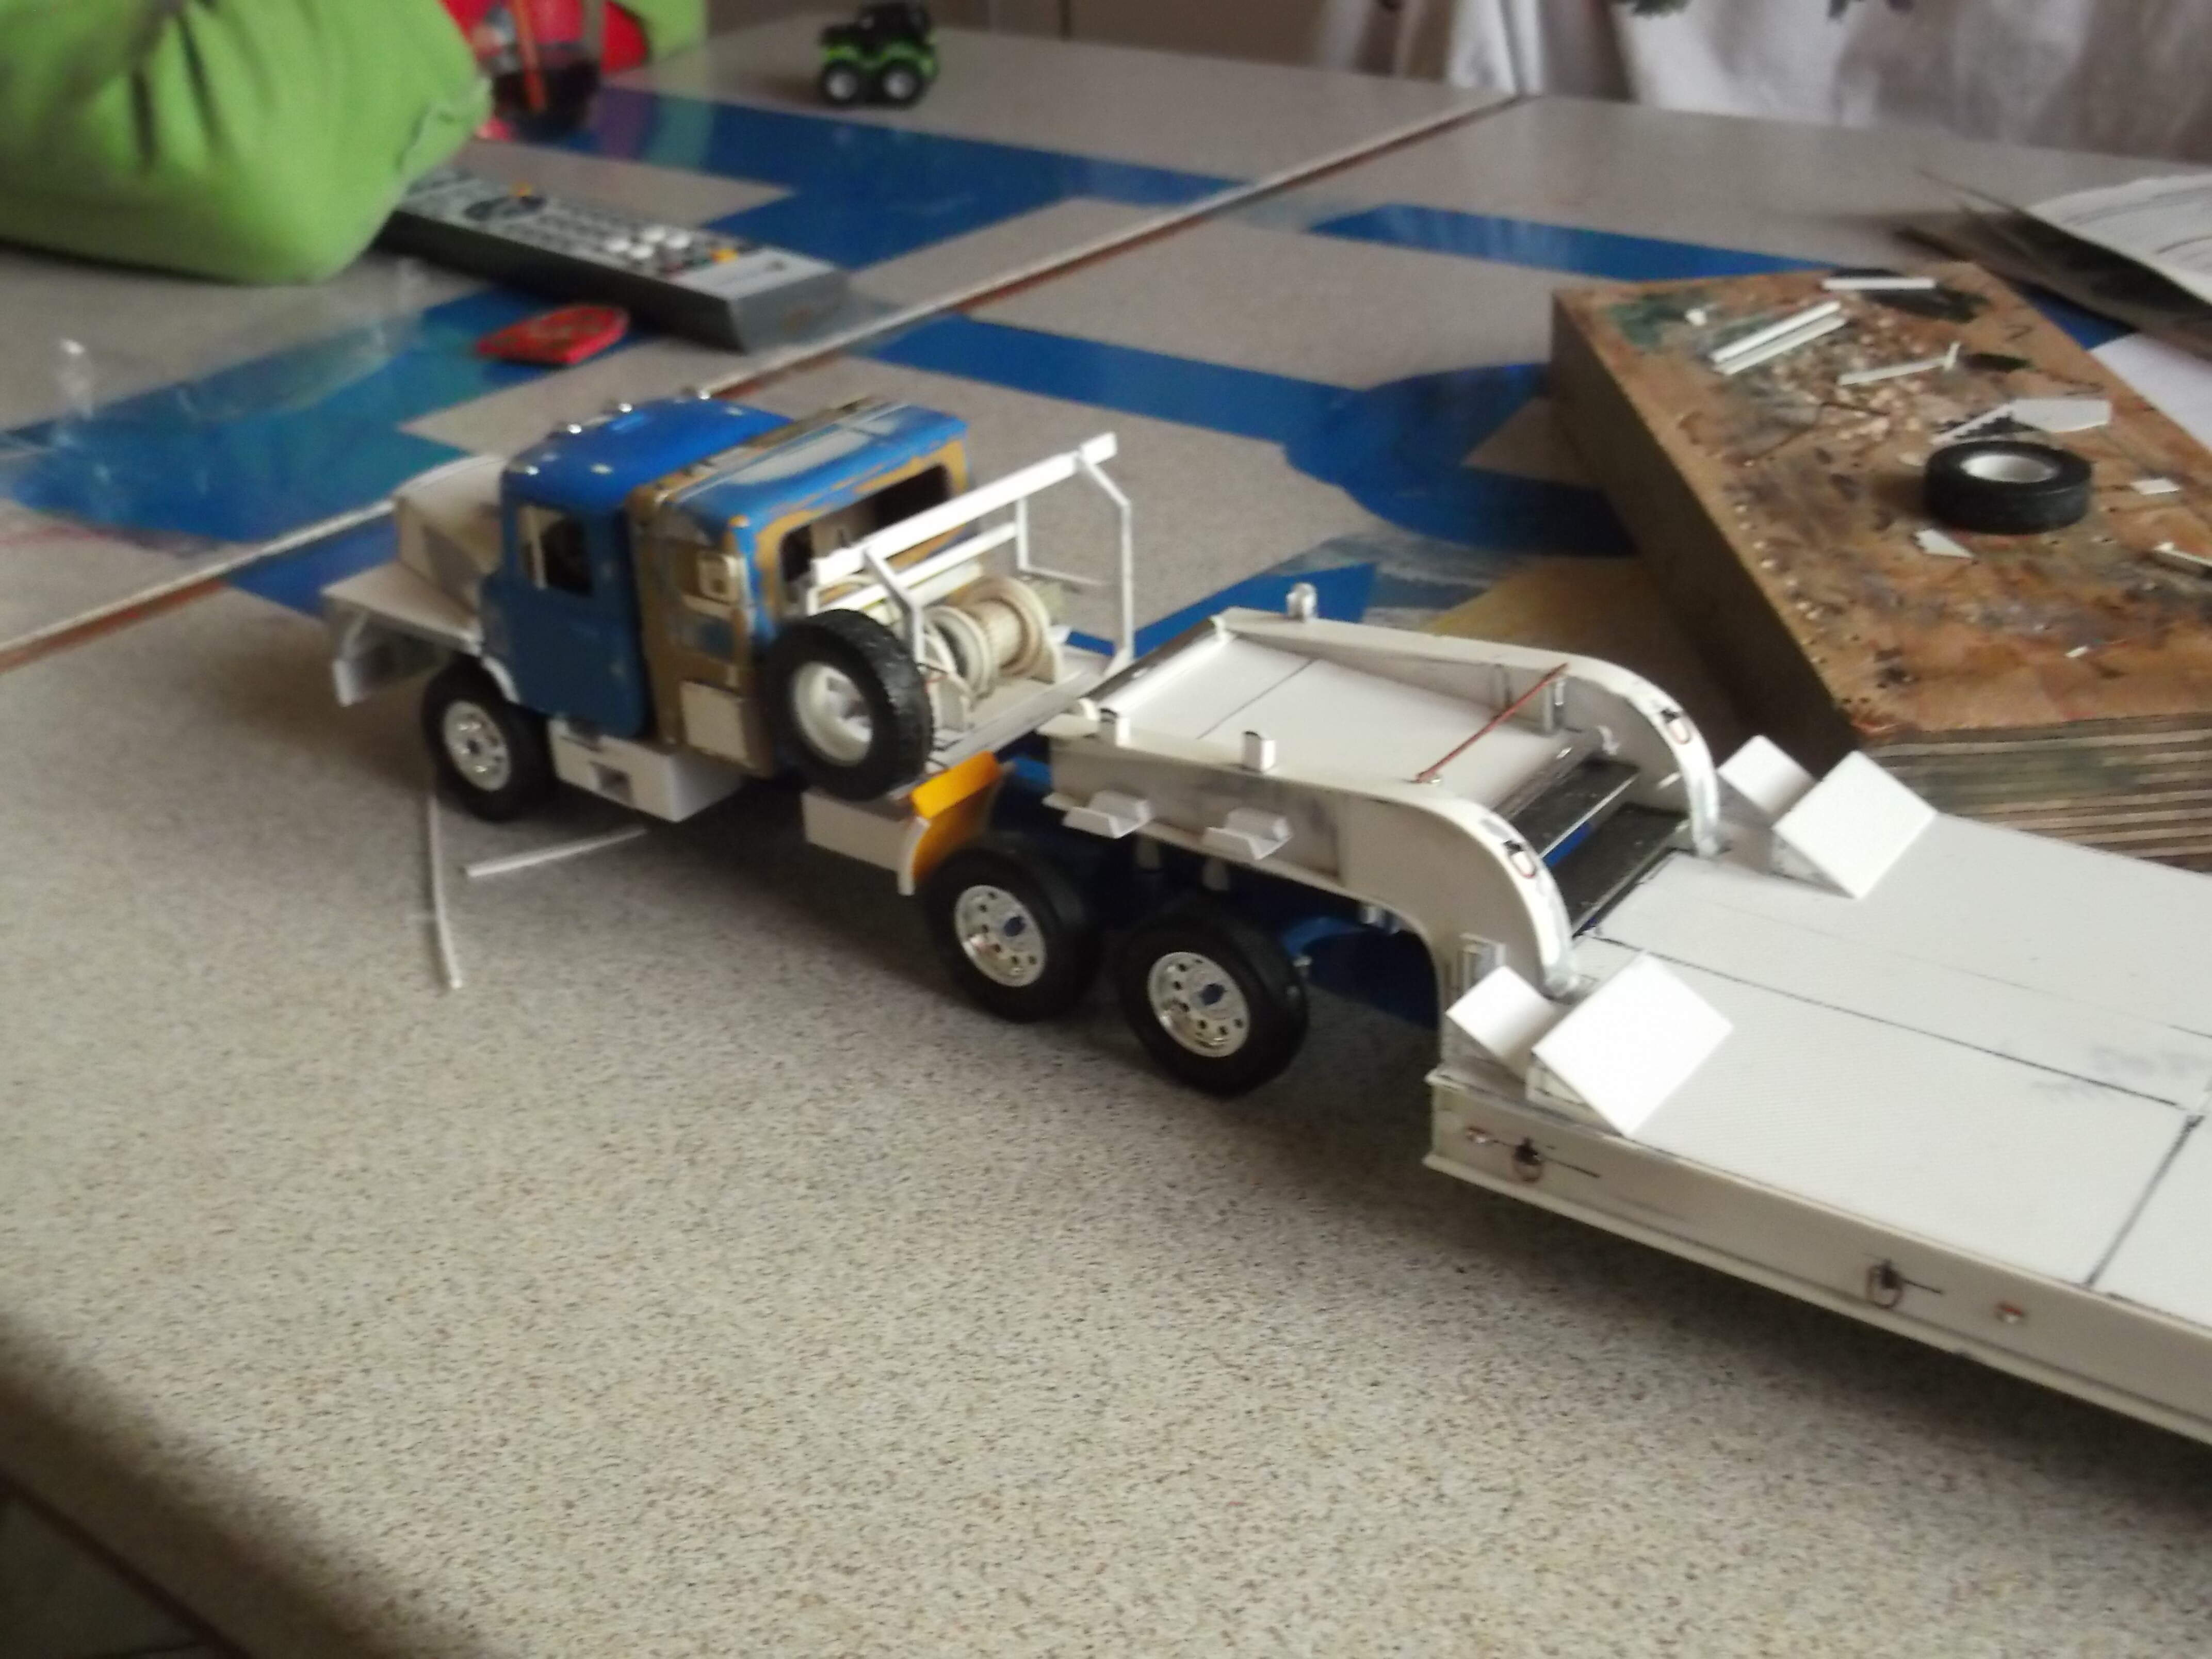
German winch ROTZLER BRAND H-170 MODEL
Hi,
I’m interested in IDF tank transporter and found your built in the internet. I have the old drawing of verlinden but there are low details.
Is it possible to show and/or describe more details about the construction of the trailer especially the mounting of the axles ?
Best from germany
Rafael
yes
I support you with all material in my hands
write me with a mail
I will do but how get I get your eMail ?
I can share you my material. at first I send you all with a wetransfer