It sure looks good!
2 Likes
More fantastic work here, Tim!
Glad you found a proper solution with the joint-herringbone issue! And more nice work to the anchors - yes, those chains look amazing, way better indeed than metal ones…
Cheers
Jan
1 Like
Great progess, have been a bit absent since early April, catching up.
All these little scrachbuilt detail touches and new parts add so much.
Cheers, Si
2 Likes
Finally caught up with it all again … So much fantastic detailing and scratch building add on’s. … The vent, breakwater supports and herringbone joints are exquisite… ![]()
![]()
2 Likes
We are “brothers from a different mother” as the ol’ saying goes. The number of hours and care invested in your project is jaw dropping.
Please forgive me doing a basic Bismarck build… it’s what was asked for.
2 Likes

It sure looks good!

More fantastic work here, Tim!
Glad you found a proper solution with the joint-herringbone issue! And more nice work to the anchors - yes, those chains look amazing, way better indeed than metal ones…
Cheers
Jan

Great progress, have been a bit absent since early April, catching up. All these little scrachbuilt detail touches and new parts add so much.
Cheers, Si

Finally caught up with it all again … So much fantastic detailing and scratch building add on’s. … The vent, breakwater supports and herringbone joints are exquisite…
We are “brothers from a different mother” as the ol’ saying goes. The number of hours and care invested in your project is jaw dropping.Please forgive me doing a basic Bismarck build… it’s what was asked for.
Wouter, Jan, Si, John, and H.G., thank you all for your kind comments! I’m so glad all these silly little details aren’t becoming tedious. I was starting to wonder if posting all that was getting to be too much…
Anyway, at the moment I’m in the process of adding handrails to the small superstructure beneath No. 2 gunhouse. Plodding along… ![]()
And by the way, H.G., no need to apologize for your “basic” Bismarck build! It is a great reminder that there are many ways of enjoying our hobby - driving yourself crazy with seemingly endless details like I do isn’t the only way to have fun…! ![]()
10 Likes
Tim, you are blowing my mind with all the excellent detail work. Interested to see your upcoming artistry on the gun house structure. I’ll be really surprised if it’s just handrails.
John
1 Like

Tim, you are blowing my mind with all the excellent detail work. Interested to see your upcoming artistry on the gun house structure. I’ll be really surprised if it’s just handrails.
John
Hi John, good to hear from you!
I don’t suppose it will be much in the way of artistry, but you are right, the structure does need a few details – the handrails, grabs, two small cable reels, a cowl vent, fender rack, a door…

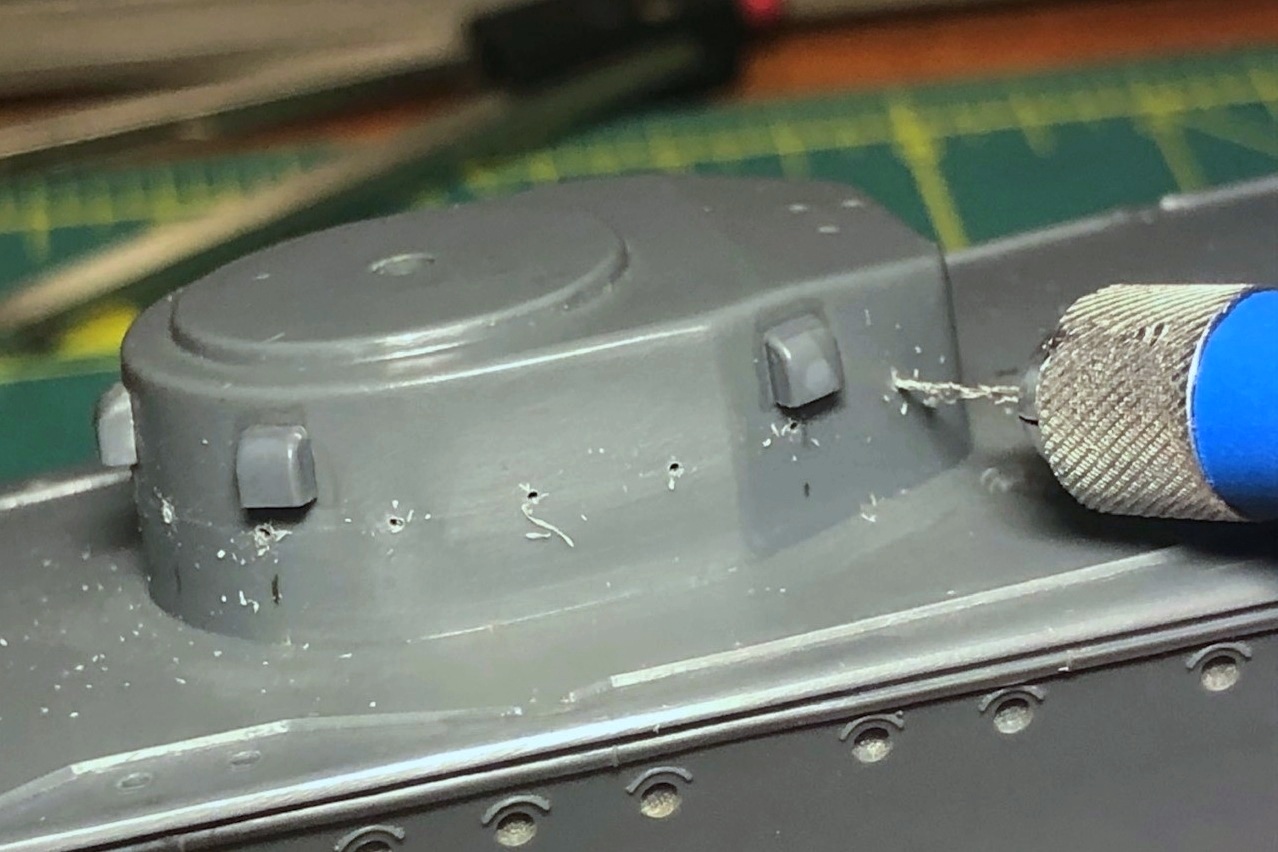
To start, there is no depiction of the handrails around the base in the kit, so I marked out intervals for their stanchions using a bit of scrap photoetch as a guide.

The holes are now drilled out for them, but before installing the fragile handrails it makes sense to first fit the numerous handgrabs that were also attached to the structure. That way the delicate rails won’t be damaged while drilling out the holes for the grabs.
Unfortunately, I’ve already used all the handgrabs that came with the GMM 1/200 railing set I have and so now must wait for the White Ensign 1/200 etched handgrabs set on order to arrive… ![]()
10 Likes
Great work Tim,
and just doubling what John said!
The detailing you’re doing continues to amaze me, it’s anything but becoming tedious! Please keep posting all of those!
Cheers
Jan
1 Like
Great work Tim,and just doubling what John said!
The detailing you’re doing continues to amaze me, it’s anything but becoming tedious! Please keep posting all of those!Cheers
Jan
Thanks Jan!
While I cool my heels waiting for the handgrabs to arrive there is time to prep some of the other details that will go on the gunhouse superstructure…

The kit provides a small cowl vent for the superstructure roof, but the part was poorly molded and badly out of round. A .010 inch plastic disc cemented to the front and blended in with super glue helped restore the round face. It was then opened up with a small round Dremel burr twisted by hand.

Also, although Nichimo included eight mooring fenders located throughout the ship, the Kagero Publications plans for both the Akizuki and Suzutsuki show that there was one on the gunhouse support structure as well.

Since I’ve already used all the kit fenders, this ninth one will be represented by just the empty rack (made from a bit of scrap 1/400 scale railing). Apparently the fender itself was lost by a sloppy boatswain!
8 Likes
More great and super intricate detailing updates… Magical work Tim… ![]()
1 Like
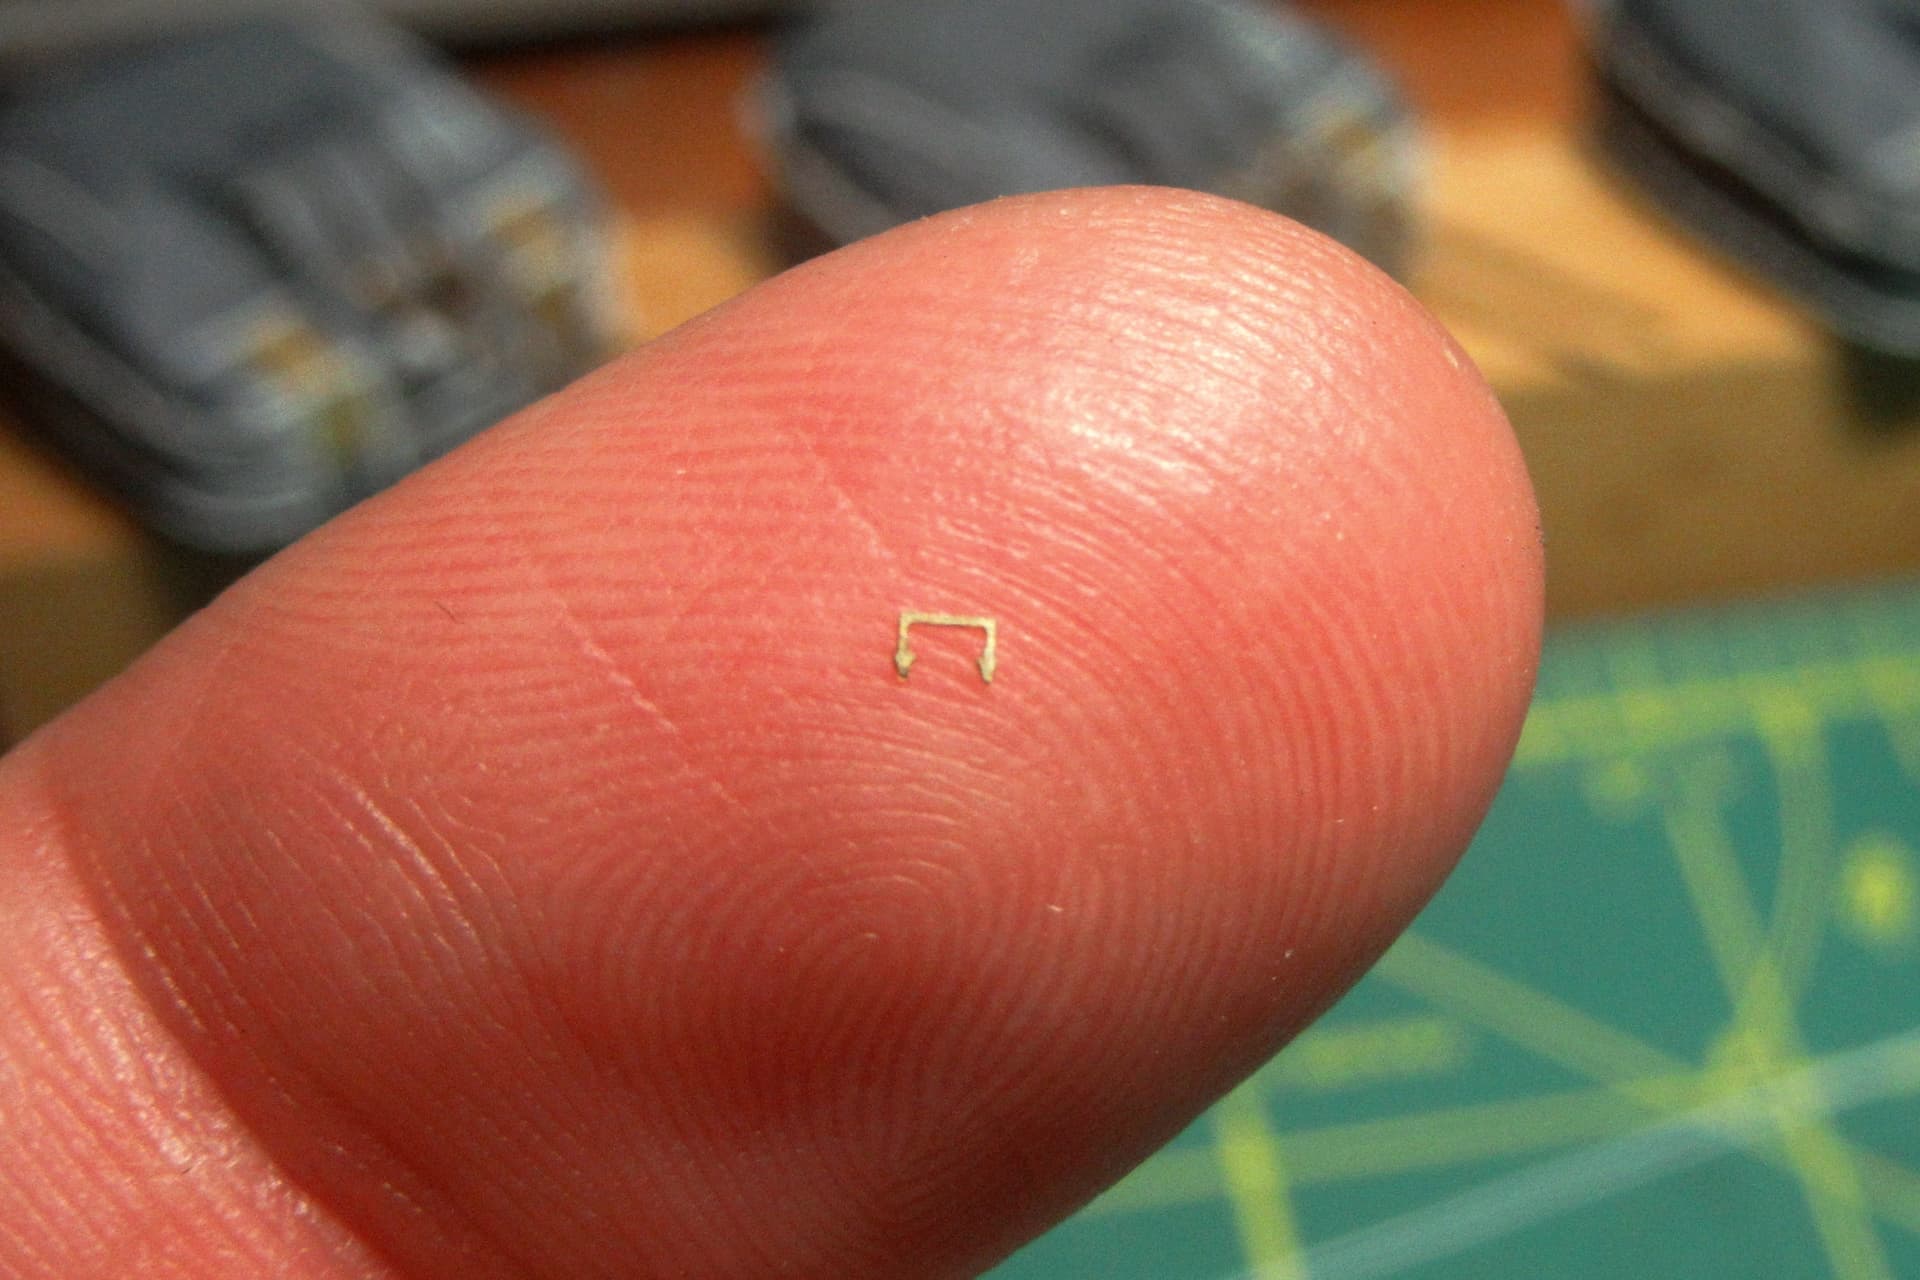
OMG Tím, i am astounded at how tiny those parts are ![]()
![]()
1 Like
Wow Tim,
The details just keep coming. Are there any areas of the ship left after this structure? I’m eager to see some paint on all these details. I’m really curious to see how you paint some of these details, so they don’t get lost in the navy grey background.
John
1 Like
More great and super intricate detailing updates… Magical work Tim…

OMG Tím, i am astounded at how tiny those parts are
John and Russ, thanks. You know, It seemed like switching from miniscule 1/700 to larger 1/200 scale should get me out of the tiny parts business… but the bigger models are, the more detail you can see!
![]()
1 Like
Wow Tim,
The details just keep coming. Are there any areas of the ship left after this structure? I’m eager to see some paint on all these details. I’m really curious to see how you paint some of these details, so they don’t get lost in the navy grey background.
John
John, most of the big structures are assembled, but there are a bunch of smaller details (ten cable reels that I intend to make a start on this weekend, for example) still to come. As for things getting lost in the navy grey, well, Japanese ships were pretty plain as you can see in my signature image from the old MSW site:

Any color you want, as long as it is Kure Grey!
2 Likes
Hi Tim,
I think I know what you mean…even though I’ve only done one 1/700 and 1/350 otherwise… However, believe it or not, even 1:1 tends to have some very tiny detail ![]()
Great work and let the details (and updates, and pictures) come!
Cheers
Jan
Hey Tim,
Looking forward to the future details. Regarding the paint, I was wondering if you had thoughts about weathering, or shading areas under other structures like overhangs, or new equipment not being as faded as older stuff. Things like that. However you do it I know it’s going to look spectacular.
John
1 Like
Hey Tim,
Looking forward to the future details. Regarding the paint, I was wondering if you had thoughts about weathering, or shading areas under other structures like overhangs, or new equipment not being as faded as older stuff. Things like that. However you do it I know it’s going to look spectacular.
John
Thanks John. I’m all for weathering, shading, fading, and the like, but the Hatsuzuki had just finished a four month yard period at Kure when she sailed off for Leyte Gulf, so her paintwork would have been newly refreshed. Also, my personal taste is to have pedestal mounted models shown without weathering, so the final model will be fairly plain chromatically. Still, I’ll most likely apply some darker pin washes and some lighter grey highlights for interest. I actually am anxious to get to the painting phase!
1 Like
Hi Tim,
I’m the same way on painting models on pedestal mounts. Wasn’t aware of the refurbishment prior to the battle. Sure makes sense to me. Looking forward to what’s next.
John
1 Like
Hi Tim,
I’m the same way on painting models on pedestal mounts. Wasn’t aware of the refurbishment prior to the battle. Sure makes sense to me. Looking forward to what’s next.
John
Thanks John… still waiting for the handgrabs for the No. 2 gunhouse structure arrive, so for the moment I’ve been working on various ancillary pieces.
Two small cable reels to be fitted to the back of the structure seemed to be a reasonable place to start, so I built these up using parts from Tom’s Modelworks 1/350 scale IJN Reels (set 3547).

Technically the wrong scale, many of these 1/350 reels actually match Hatsuzuki’s smaller ones in 1/200 perfectly. I like these parts very much; even though the design leaves connecting nubs in visible spots which make for some awkward cleanup, the relief-etched parts are beautifully detailed.

The “cable” for the reels was made with 34 gauge brass wire wrapped around a plastic rod core. The springy wire tended to pop off the rod, so I lightly secured the assembly by brushing liquid plastic cement over it. Not effective on brass, the cement still melted the plastic beneath just enough to hold the wire in place.


The wire-wrapped rod was cut into lengths to form the cable drums which were then secured between the etched reel parts with super glue. Although fiddly to assemble, the new reels are definitely better than the simplified kit parts.

8 Likes