I’ve been following your outstanding build!
Can’t tell you how many times I thought my work was done only to find the styrene had grown when I wasn’t looking! ![]()
![]()
—mike
1 Like
That was an excellent decision, Tim…they now look much better!
Cheers,
1 Like
Michael and Joe, thanks; two steps forward, one step back, it seems! Still, there is some progress…
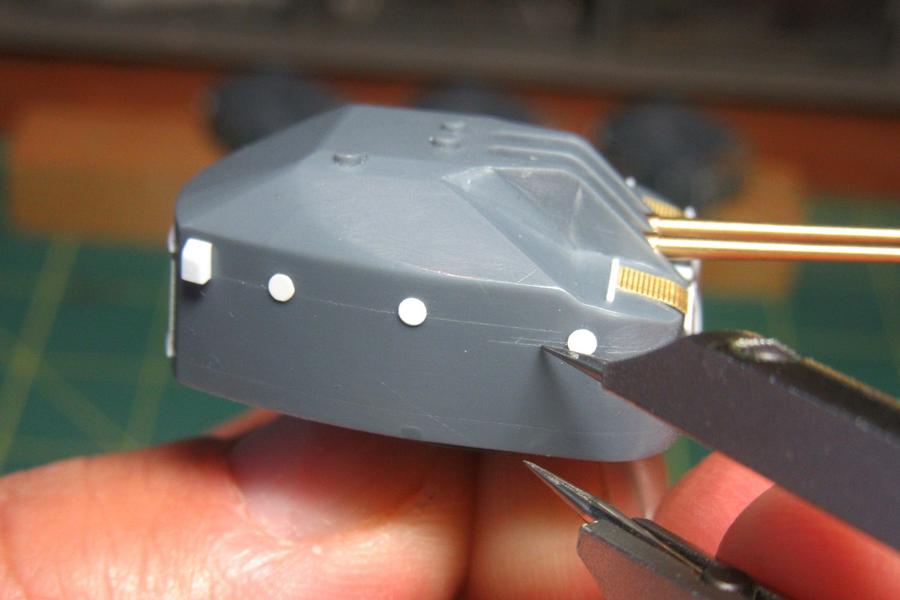
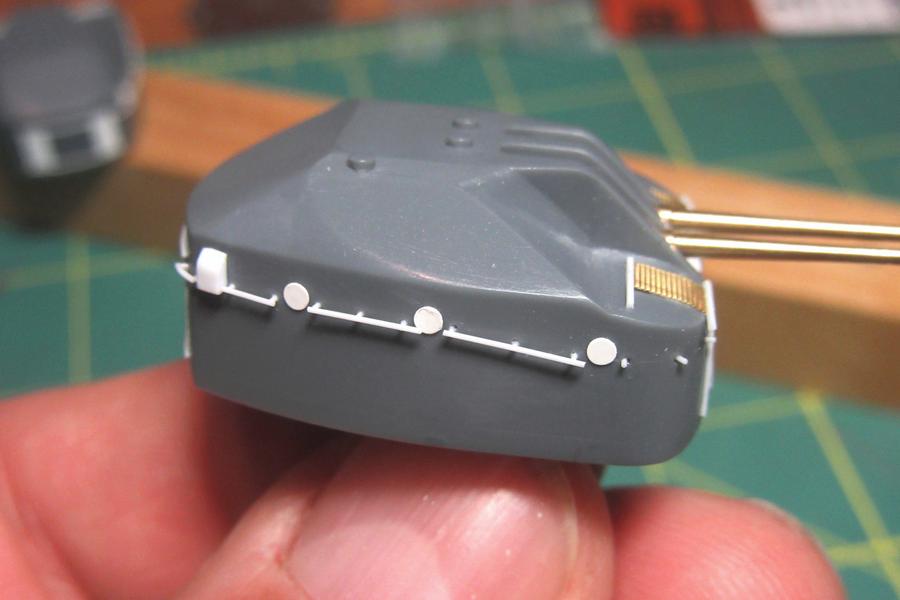
Since Nichimo didn’t provide any detail on the aft gunhouse exteriors, I added sliding doors cut from .005 inch plastic.
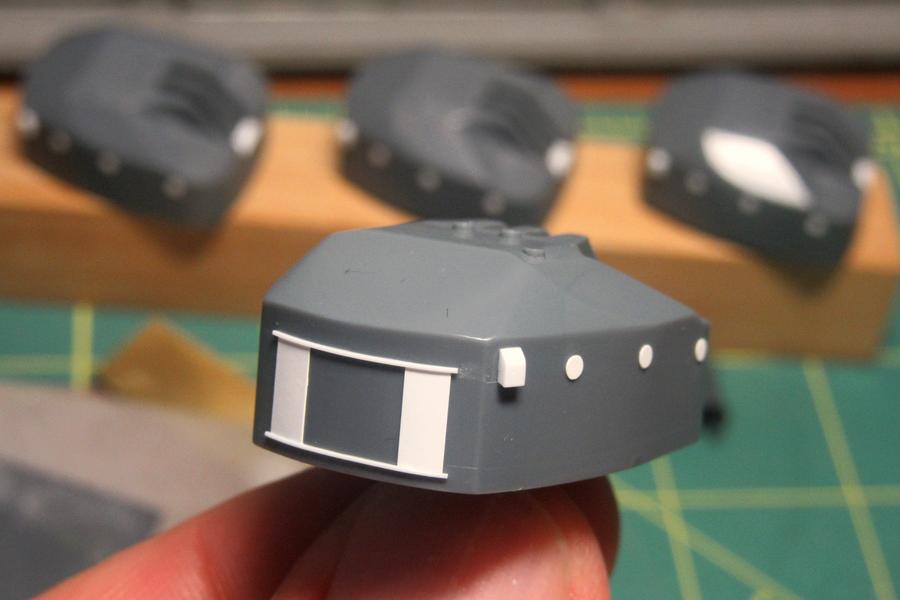
The tracks for the doors were made with .010 X .010 inch plastic strip.
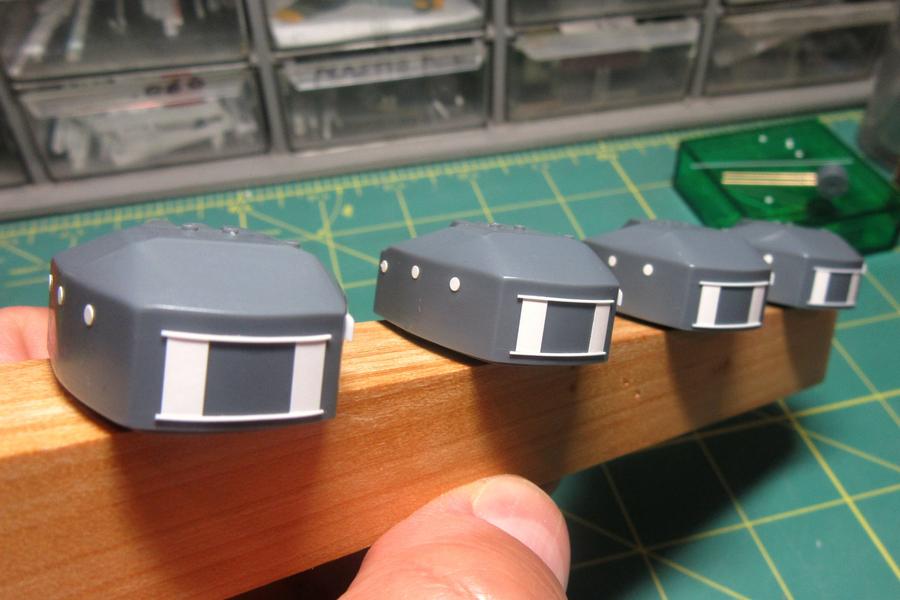
Although simple, these parts had to be gently curved around a paintbrush handle before installation so they would fit snugly around the curved gunhouse. Since I’d probably knock them off while adding details to other parts of the structures, I’ll add the door handles later.
6 Likes
This is getting better and better!..keep it up. your on your way to
creating a real MASTERPIECE!
Cheers,
1 Like
Excellent work Tim, your scratchbuild modifications look great! As Joe says, on the way to your next masterpiece!
Cheers
Jan
1 Like
Tim,
Nice upgrades to the turrets but yet I feel you are not quite done yet.
Mark 
1 Like
Yet more great work Tim ! Glad to see this up and running again .
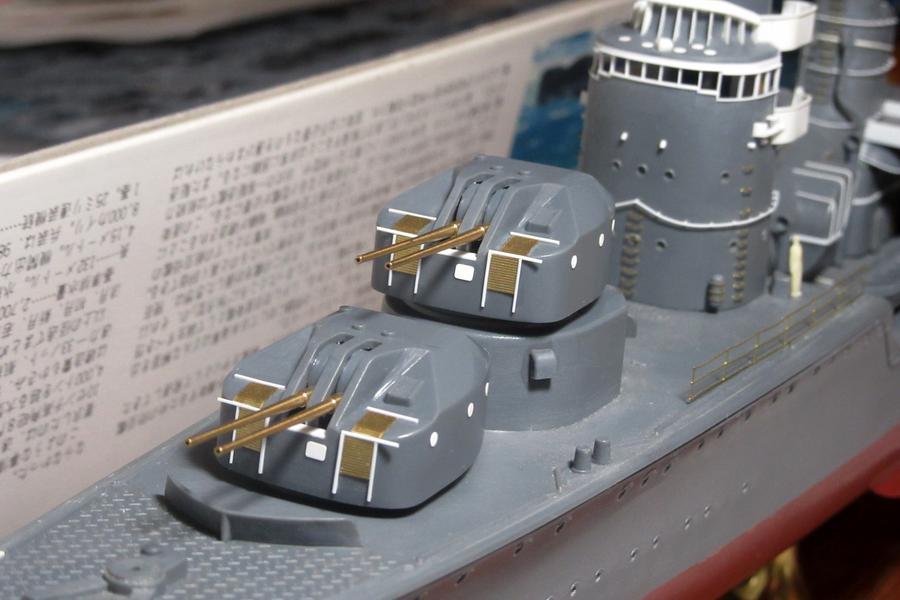
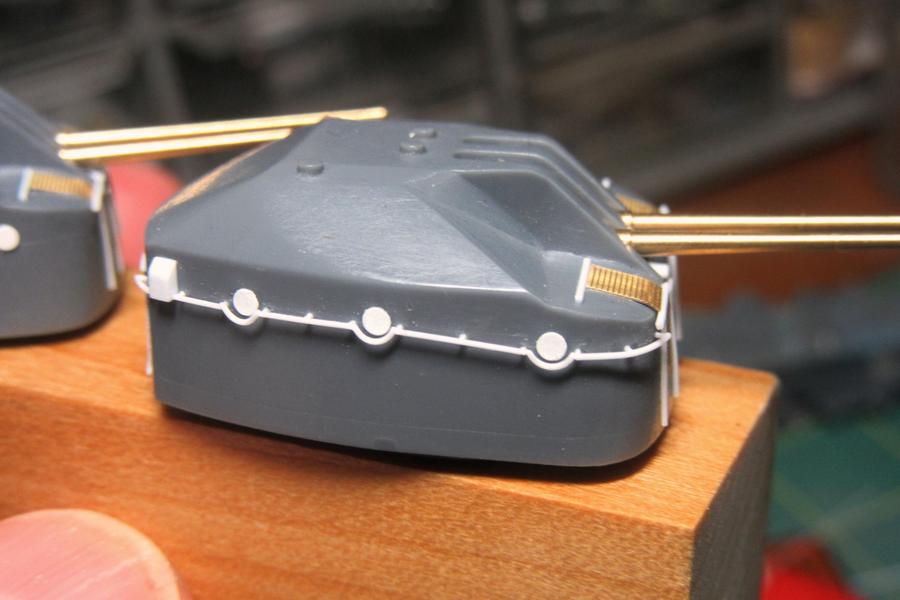
I notice in the photo of the turrets that they are heavily riveted. I don’t know if you are familiar with them but the Archer resin rivet decals work wonderfully- give them a try if you haven’t already done so .
Cheers- Richard
1 Like
Yet more great work Tim ! Glad to see this up and running again .
I notice in the photo of the turrets that they are heavily riveted. I don’t know if you are familiar with them but the Archer resin rivet decals work wonderfully- give them a try if you haven’t already done so .
Cheers- Richard
Interesting idea… I just might try them!
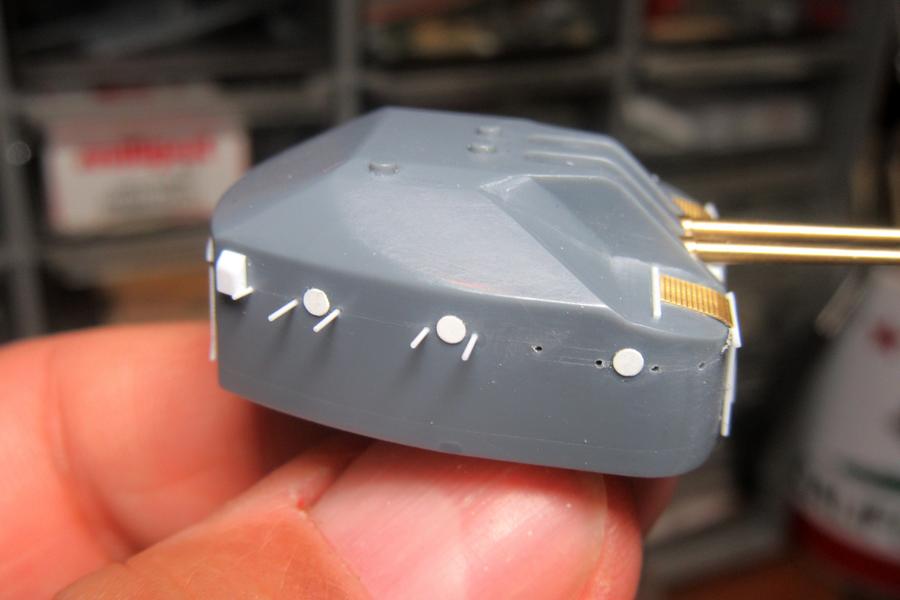
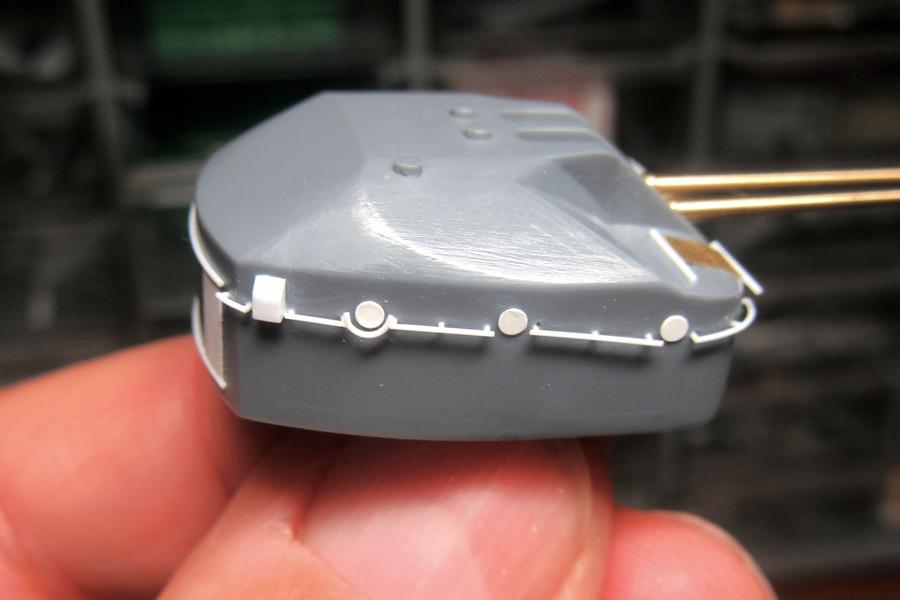
Meanwhile, I’ve attached the louvered sliding doors to the gunhouse fronts.
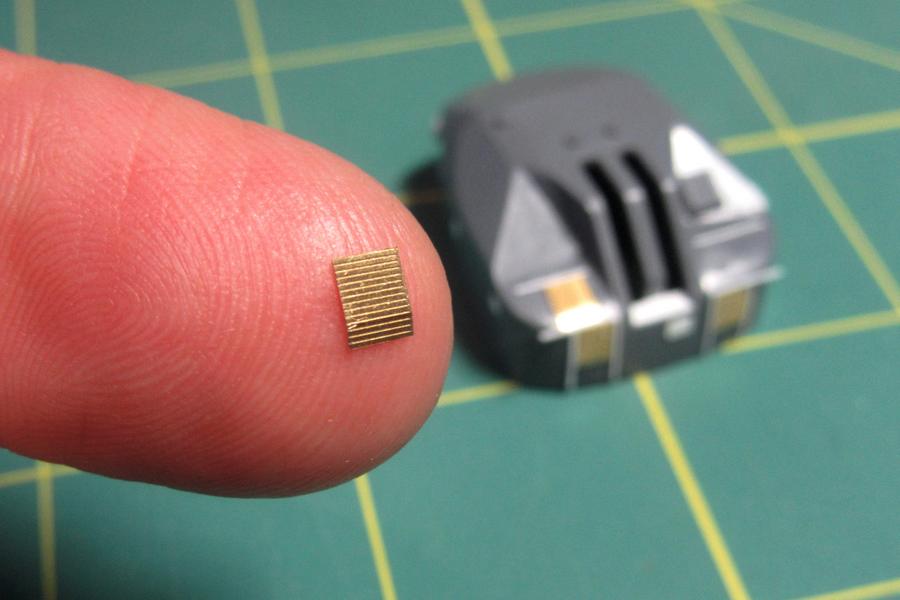
The sections of brass were shaped slightly over a paintbrush handle to conform to the curved gunhouse surfaces.
The tracks for the doors were made with .010 X .010 inch plastic strip.
8 Likes
Tim,
I continue to be astounded by your skills that allow this level of detail. Awesome work on the turrets.
John
1 Like
Tim,
what John says, nothing to add. I’m really enjoying your build log.
Cheers
Jan
John and Jan, thanks! I’m afraid it is less a matter of skills than dogged perseverance, though…
The gunhouse side footrails come next.
I started by lightly scoring the lines of stanchions with a divider.
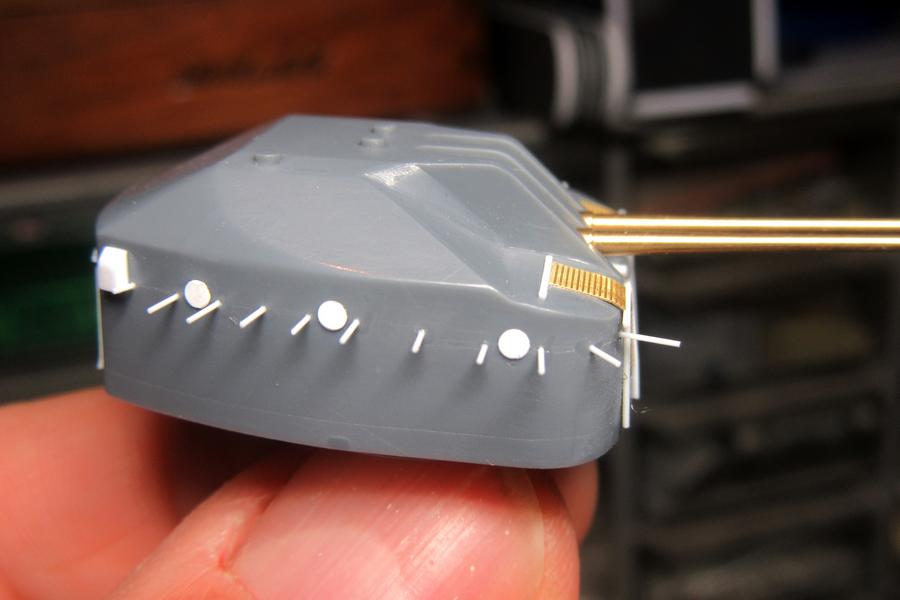
Using the lines as references, I drilled out the stanchion positions with a No. 80 drill bit. The stanchions themselves were .010 inch plastic rod. I left them long to make it easier to adjust their orientation.

As with the footrails on the bridge and torpedo launcher, I used a simple tool made from a piece of .015 inch plastic sheet with a .018 inch hole made with the smallest punch from the Waldon Model Products Sub-Miniature punch & die set. Placed over the stanchions, it made it easy to trim the stanchions down to uniform .015 inch lengths.
Then I cemented short lengths of rod over them to form the horizontal footrails.

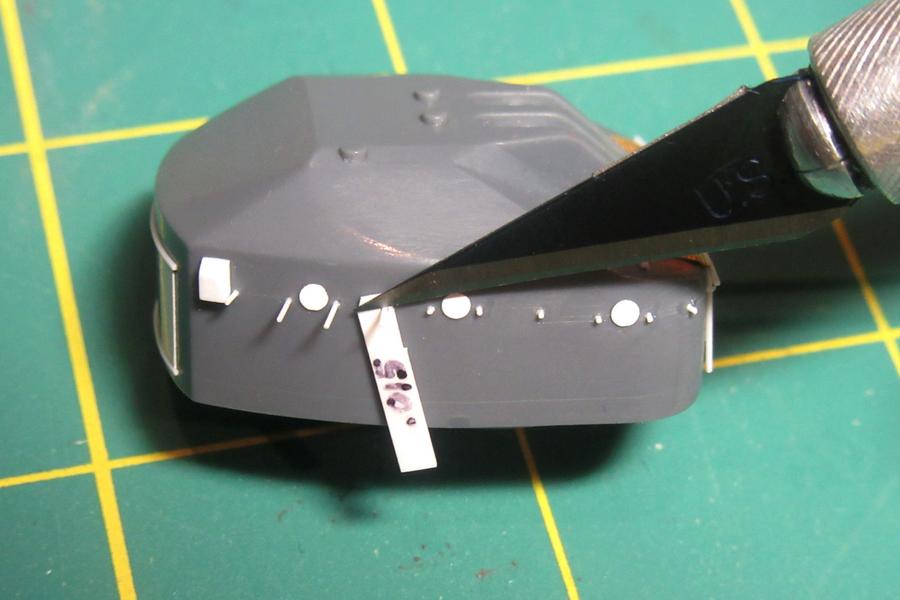
An oddity of Japanese design was that the footrails crossed over the openable ports. To keep from blocking them, the rail segments below the ports had to be curved downward. I have no idea why they didn’t simply mount the rails a few inches lower to clear the ports entirely and spare themselves this needless expenditure of labor, but that is how the IJN did it.
And so this is how I did it as well! Having left spaces by the ports, I now added curved sections beneath the ports to connect the rods into a single continuous unit.
Set in place and trimmed, the little dips blend nicely into the rail.
Now to repeat this another seven times…!

8 Likes
Amazing work as always Tim!
1 Like
Thanks Ezra.
It has taken nearly a week, but I’ve now completed all eight rows of footrails below the scuttles on the gunhouses.

They don’t look like much, but there are 100 miniscule stanchions supporting 36 straight and 24 curved sections of .3mm round footrails. The lower footrail rows are next.
13 Likes
Hi Tim, I have not responded before but it is fantastic to see how you continue to build this ship. Incredibly beautiful work that I look at with admiration and a lot of joy. I think you have to start a fan club. 
Cheers Pieter.
1 Like
Thank you Pieter!

Once again, Tim…SUPER JOB on all the extra detailing!
Cheers,
1 Like
Ditto what Joe said!
Keep it coming Tim ! No more “ Constellation vacations “ - LOL
Keep it coming Tim! No more “ Constellation vacations “ - LOL
LOL! ![]()
You may have a point, Richard - it seems I’m always being diverted by other projects…
but now with Constellation safely completed, I’m back on the job with Hatsuzuki!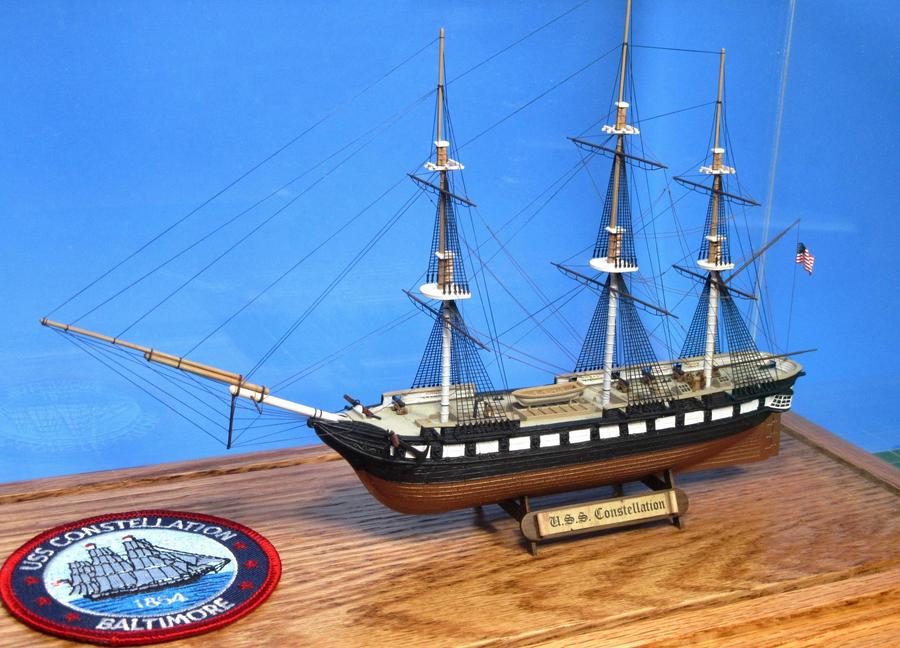
…although there is that Pyro Roman Merchant Ship that continues to call to me from the stash… ![]()
2 Likes
As much as I am enjoying your build of the Hatsuzuki… if you decide to take a “Roman Holiday” it is fine with me. The thing is, I know that I will enjoy it just as much, that I will learn some interesting “Ship Stuff”, and that you will get back to the Hatsuzuki in time.
Waiting for the next update, or model…
1 Like