This looks clean.
How or rather what glue do you use with photo etch to stick it to primer on plastic so cleanly. I cant stop leaving glue traces.
2 Likes
@18bravo, it’s the Tamiya paint stand. I got it a few years ago but forgot I even had it. Earlier this year I was digging through the garage for something else and came across it.
@Punchinpaper, thanks! I use Bob Smith Industries odorless CA thin. I put some in a plastic bottle cap and use a piece of thin wire to dip into the CA then lightly brush it on the back of the PE parts. You need to be quick and precise though as the thin dries very fast, sometimes before I even reach the model. It says 5-10 seconds but it is more like maybe 1-2 seconds. I have tried the medium CA but it is maybe only 2-3 seconds so you still need to be quick and precise with placing the PE parts.
I read that the Ammo Mig Ultra Glue is good for PE and has a slower drying time but have not tried it. I also read that the Stedi slow-drying glue (MG-02) was also good but again, have not tried them.
2 Likes
thanks for the reply. I will try the bottle cap and wire method
2 Likes
Hope it works out for you. I used to really hate PE and resin because I have allergic reactions to regular CA. I have to use the odorless CA but not all odorless is the same. I still have allergic reactions to some of them. I found that the BSI odorless is the best for me. It is more expensive but is the only one I can use that doesn’t affect me.
3 Likes
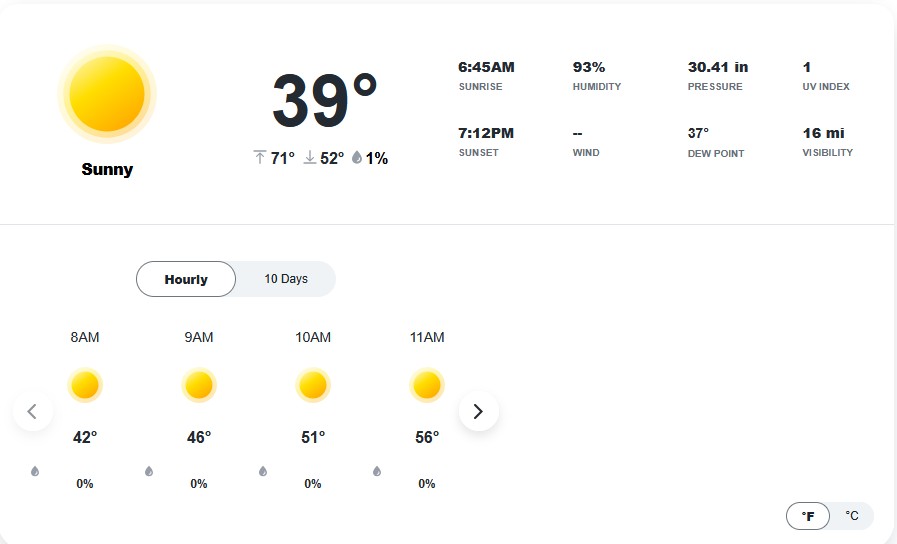
No more painting for me today. It is only 39F (4C). Way too cold. That’s mountain life. The high of 71F for later today doesn’t mean anything. It was warmer yesterday and the forecast claimed a high of 73 but it never broke 60F so I highly doubt it will get anywhere near 71F today.
2 Likes

Yes, it got here faster than I care for.
3 Likes
Not to brag, but still pool weather in southern Nevada 

3 Likes
Nice! I am sick and tired of the cold, snow and ice. I need to move somewhere that’s warm year round. It is currently only 59F and raining. Supposed to rain all week this week with the highs only maybe 62F. Besides the lousy weather stopping me from painting, I also have to take my elderly parents to their doctor visits this week too so not much bench time this week. I can only do small bits here and there.
3 Likes
I hear ya, I’m retired out of Alaska, was done with 9 months of winter and cold, dreary summers.
But now we miss weather of any kind! lol
3 Likes
I can’t imagine living in Alaska. The mountains of PA are cold enough.
With the dreary weather, I spent Friday and Saturday binge watching Reacher season 4 and Neagley season 1. Been waiting for Ballard season 2 for a while now.
2 Likes
Hey, I grew up in PA, South Philly to be exact, 2nd and Ritner St, left in 1983 for the US Army and never looked back.
But Alaska was cool, had a great career, but we were done with it after all those years, but we still have family and friends up there, so we’re not completely disconnected
3 Likes
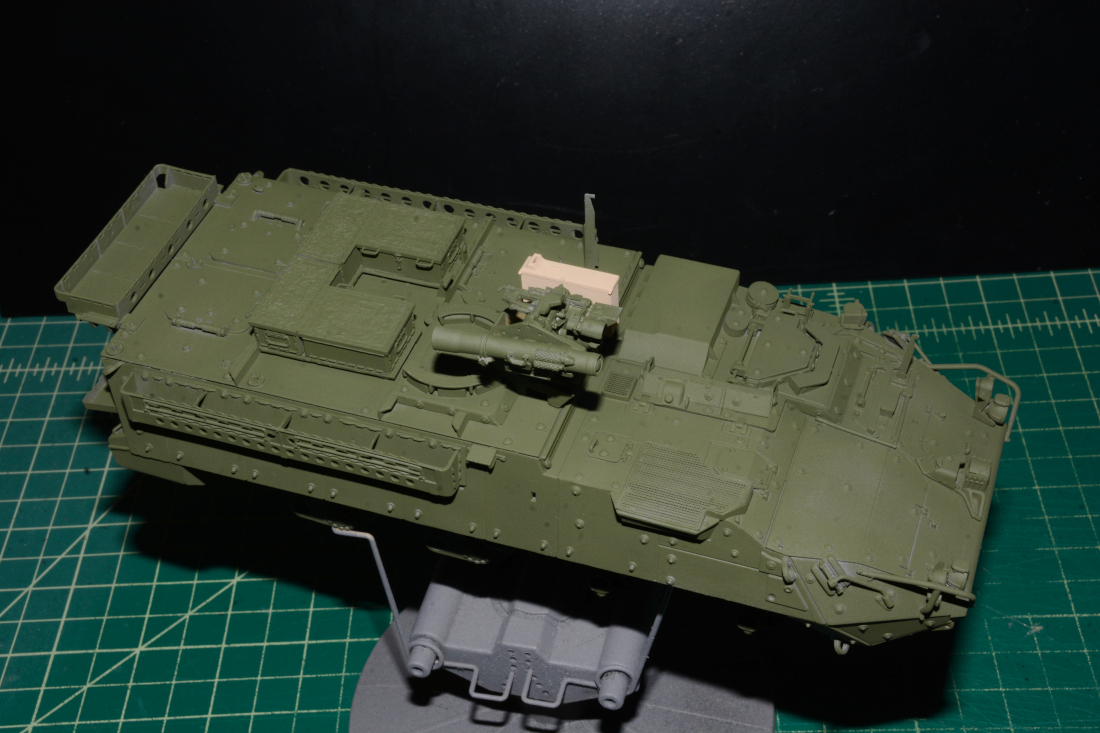
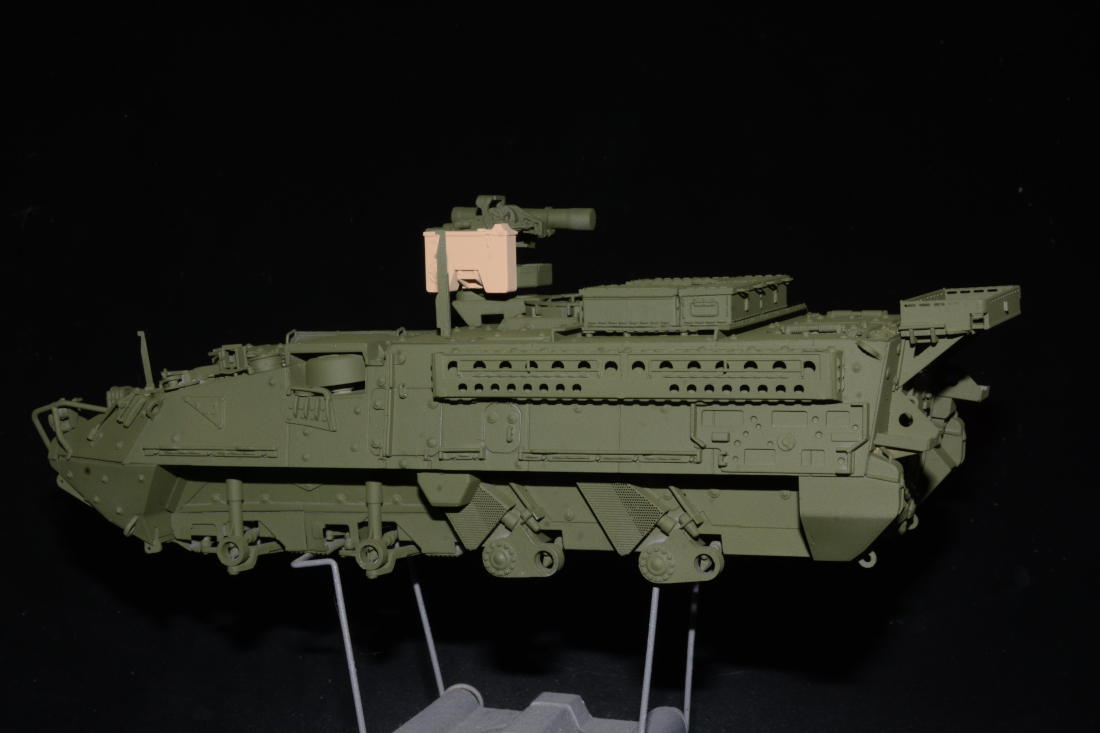
While I was working on the Trumpeter M1135 NBC RV, I also started on a Trumpeter M1126 at the same time. I used some Blast Models and AFV Stryker parts on the M1126. The upper hull storage bins are from Blast Models and the rear storage basket is from AFV. I didn’t take too many in progress photos but here it is from just over a week ago.
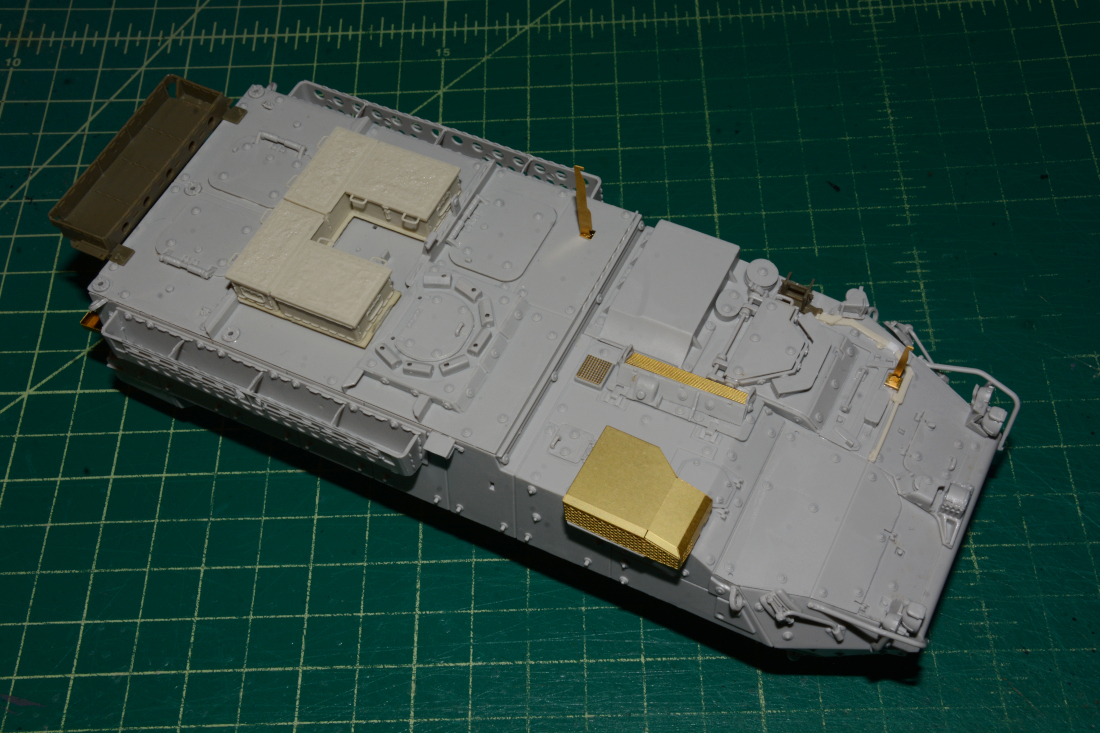
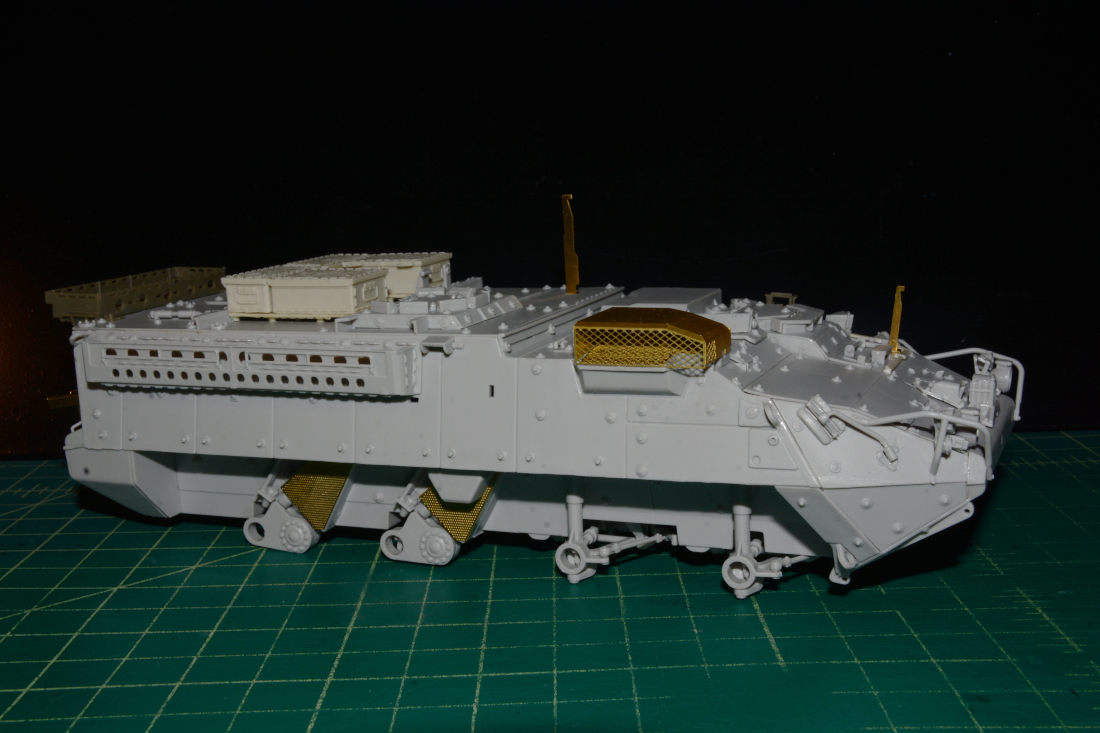

Primed it the same time I primed the M1135.

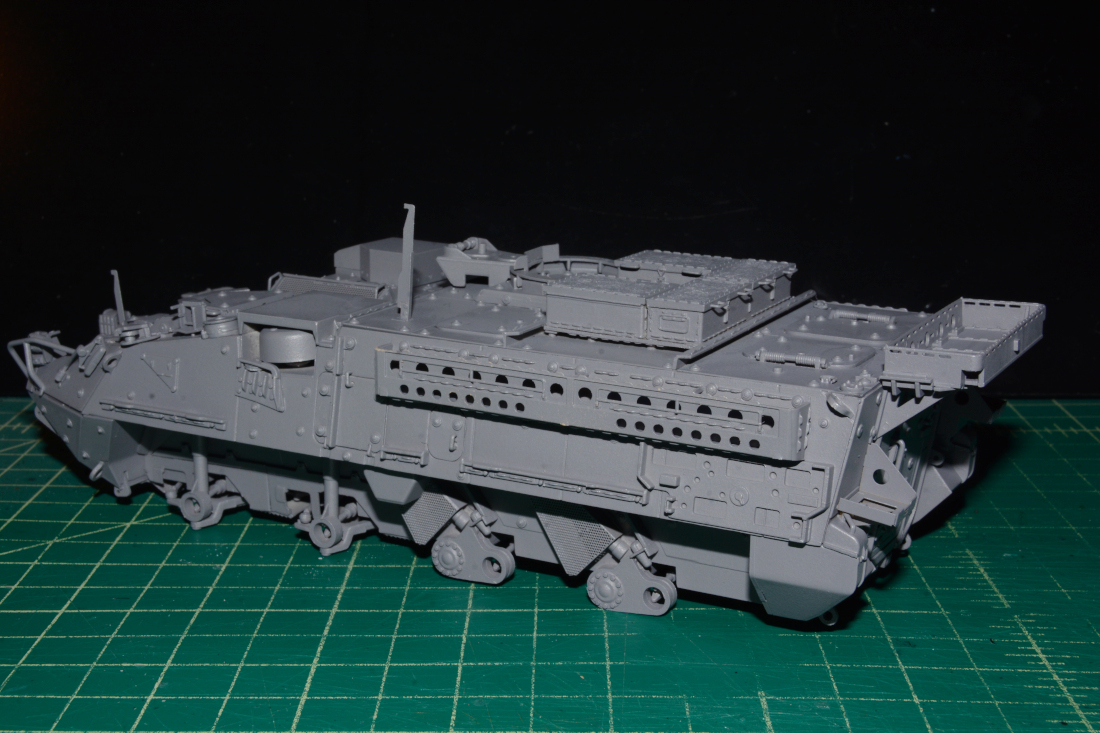
Also painted it in the Tamiya NATO green the same time I painted the M1135. This one will stay in overall green though. The CROWS-J is also from Blast Models but modified with the larger ammo can from RFM. I missed a few spots s need to go back over it with the NATO green. Yes, I know the AFV M1126 Stryker CROWS-J kit can be built like this OOB but I have other plans for the AFV kit.

7 Likes
Looking good.
2 Likes
Thanks!
1 Like
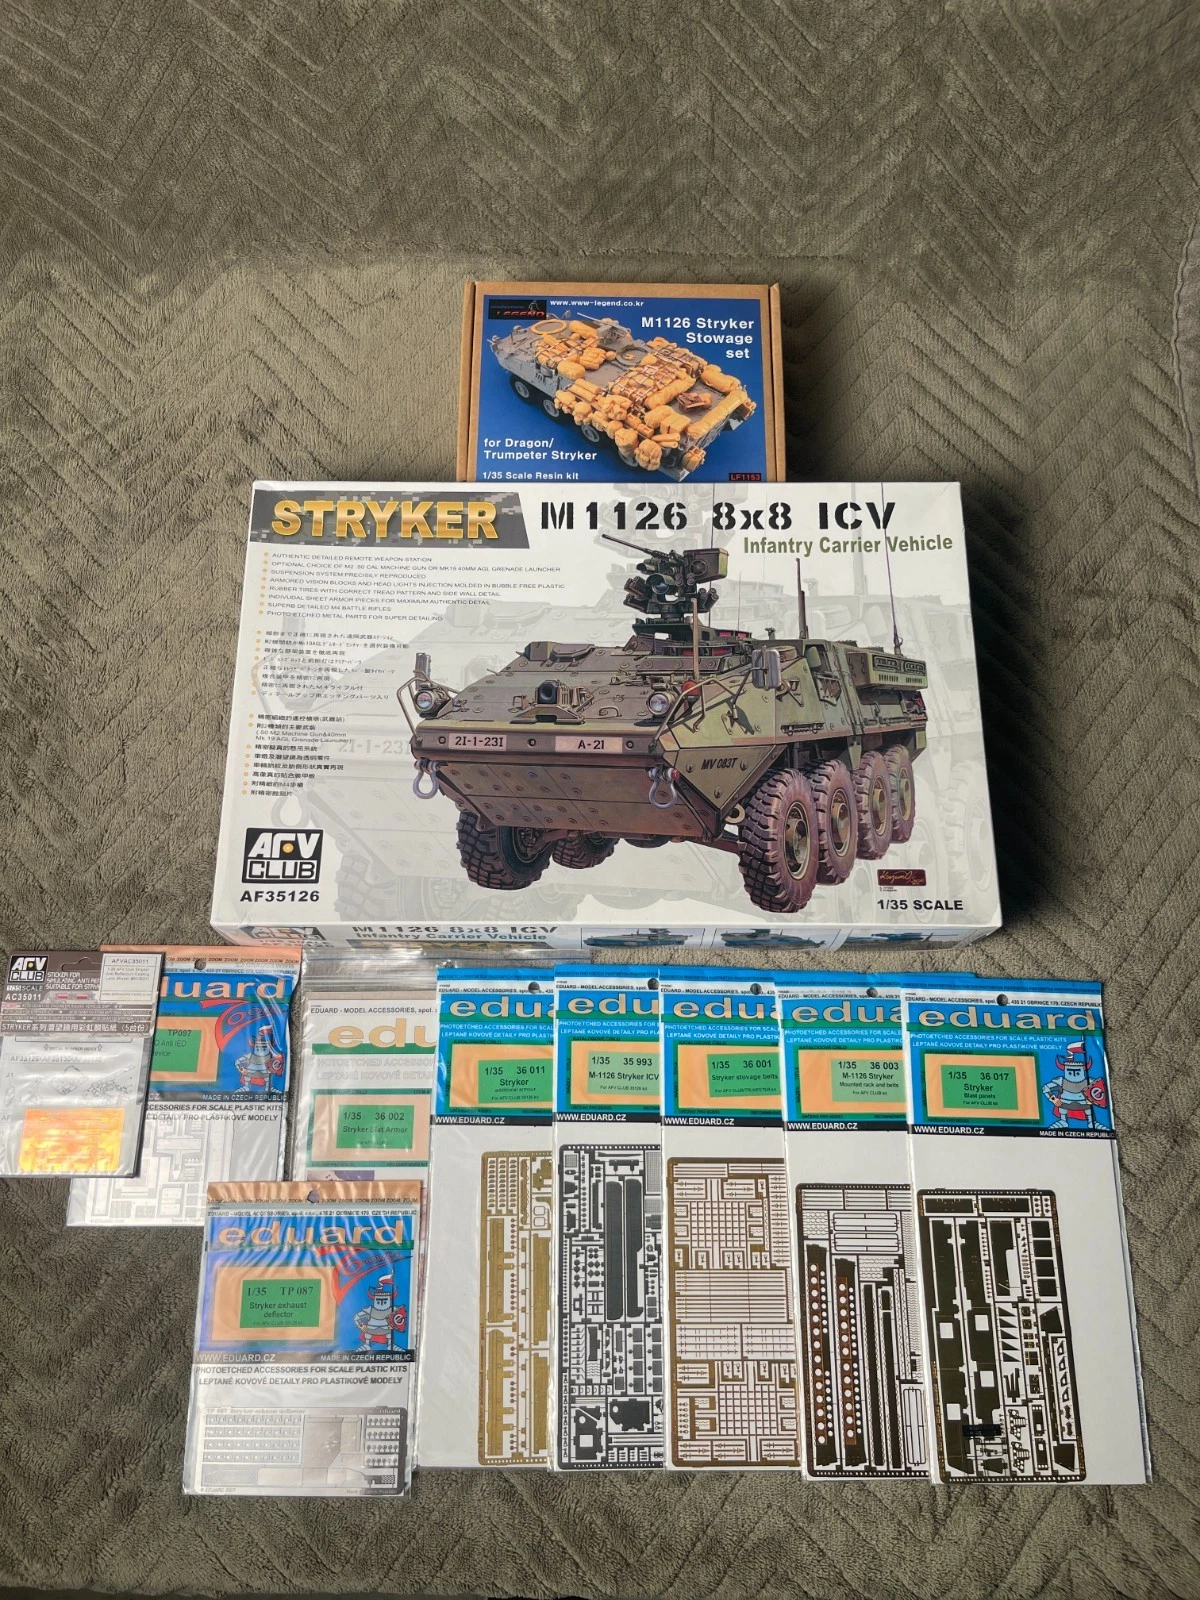
I just joined the Stryker bandwagon. I found a deal on evilbay for ~$150 shipped for the following items still in the packages. Seemed like a decent deal so here we go…
1. AFV Club AF35126 M1126 Stryker 8x8 ICV, 1/35 scale (made in Taiwan)
Detailed remote weapon station with a choice of M2 .50-caliber machine gun or Mk19 40mm grenade launcher, rubber tires with correct tread, clear vision blocks and headlights, individual add-on armor plates, M4 rifles, and photo-etched parts.
2. Legend Productions LF1153 M1126 Stryker Stowage Set (resin)
Bags, rucksacks, rolls, water cans, MRE boxes (Meals Ready to Eat) and cargo-net parts, plus a printed sheet of cardboard ration boxes. Resin parts are still in bubble wrap. Note: Legend labels this set for the Dragon/Trumpeter Stryker kits. Most stowage pieces sit on top of the vehicle and should work on the AFV Club kit, but some trimming may be needed.
3–10. Eduard photo-etched sets, 1/35 scale (made in Czech Republic)
- 35993 M-1126 Stryker ICV (for AFV Club 35126)
- 36001 Stryker Stowage Belts (for AFV Club/Trumpeter)
- 36002 Stryker Slat Armor (for AFV Club)
- 36003 M-1126 Stryker Mounted Rack and Belts (for AFV Club)
- 36011 Stryker Additional Armour (for AFV Club 35126)
- 36017 Stryker Blast Panels (for AFV Club)
- TP087 Stryker Exhaust Deflector, Zoom set (for AFV Club 35126)
- TP097 RHINO Anti-IED Device, Zoom set (IED stands for improvised explosive device; the RHINO is the rod-mounted device on the front of the vehicle)
11. AFV Club AC35011 anti-reflection lens stickers for Stryker
These simulate the rainbow coating on Stryker periscopes. Fits AF35126 and other AFV Club Strykers.
3 Likes
WOW! Great haul! I have most of the same parts and PE with the slat armor for a couple of my AFV Strykers as well.
I plan on doing these two besides the two Trumpeter kits I already started shown above in the previous posts. First one is from Afghanistan. I have the Priamide 3D printed Stryker DVH set, blast panels and the Live Resin Boomerang sniper detection device. The second one is from Iraq and I will use the Legend RHINO on this one.
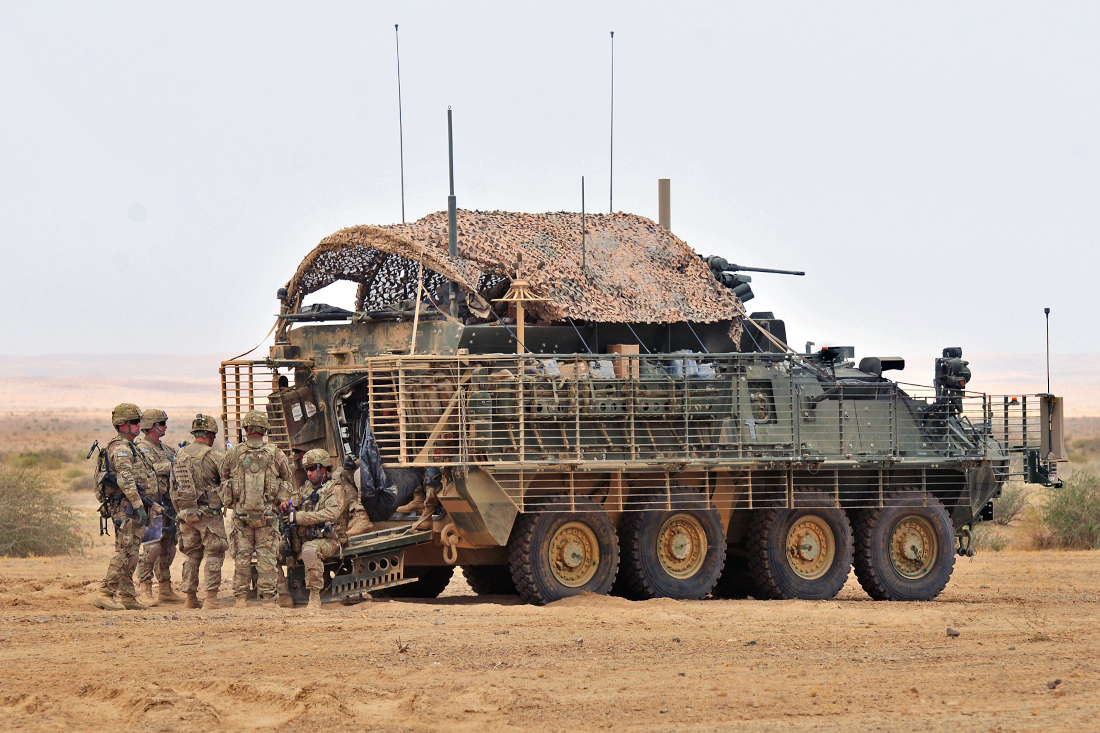
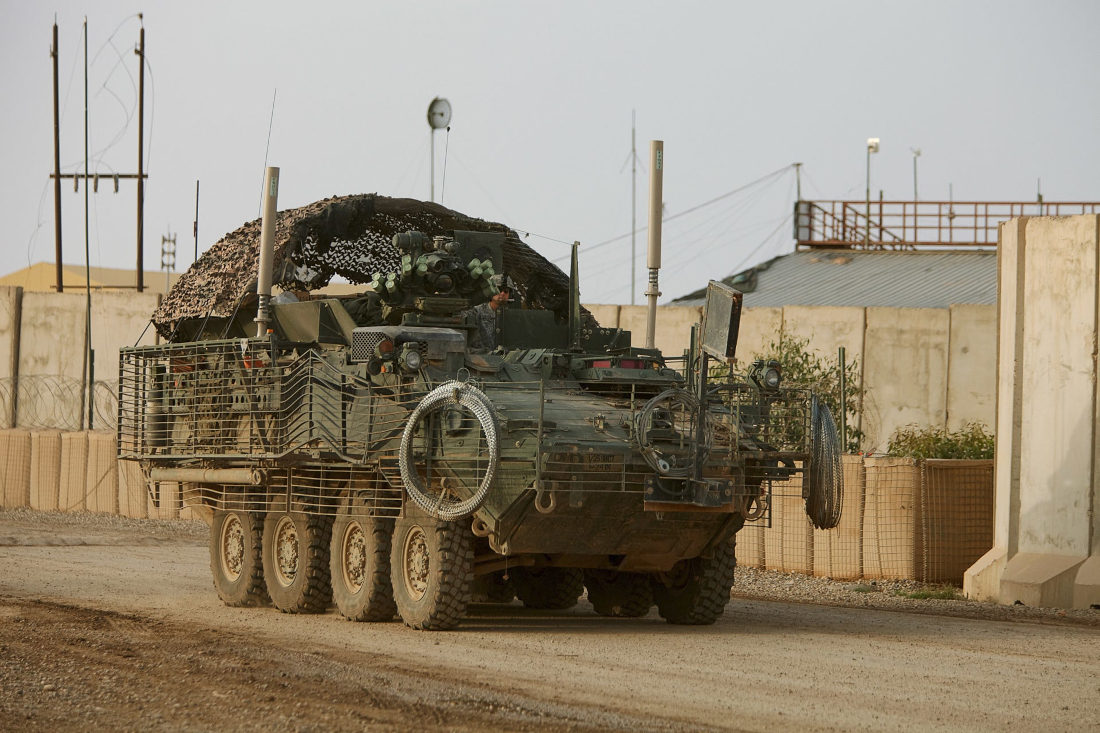
I also have this SOF one planned from Syria. I have the Priamide 3D printed Stryker DVH set and blast panels also for this one.

2 Likes
Here is one of the AFV M1126 Strykers I started a few years ago. I did have some in-progress photos but lost them all when my computer got fried last year. This one will be from Iraq with the Eduard PE blast panels, additional armor and slat armor. Still a ton of work to do on it. I also got the kit and the PE in a deal like you did. I got it quite a few years ago though, I think either sometime in 2018 or 2019.
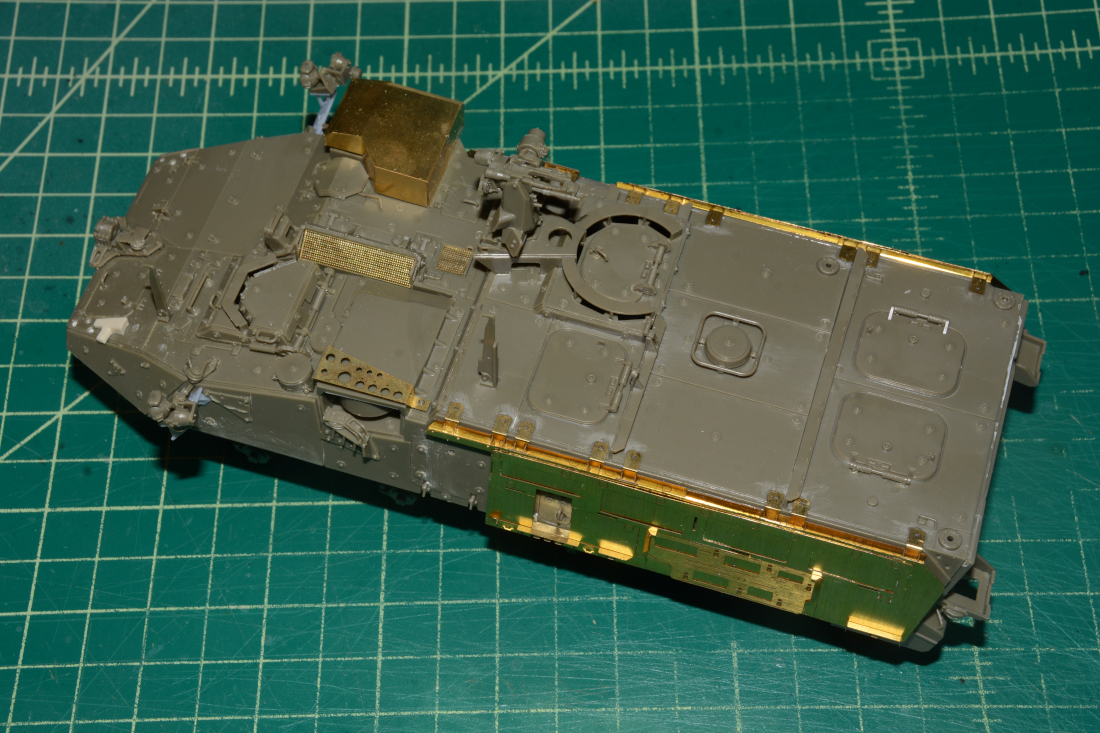
The Eduard PE additional armor was for the M1130 though so it had the cutout on the right side so I had to fill it in as mine is an M1126. I also lost the big PE piece for the right side that the stowage basket attaches to. I had cut it from the fret but then had stopped working on it for some unknown reason. I thought I had placed it back in the kit box but years later after picking it back up, it was not there. Once the stowage basket and slat armor are on, you won’t see it anyway.
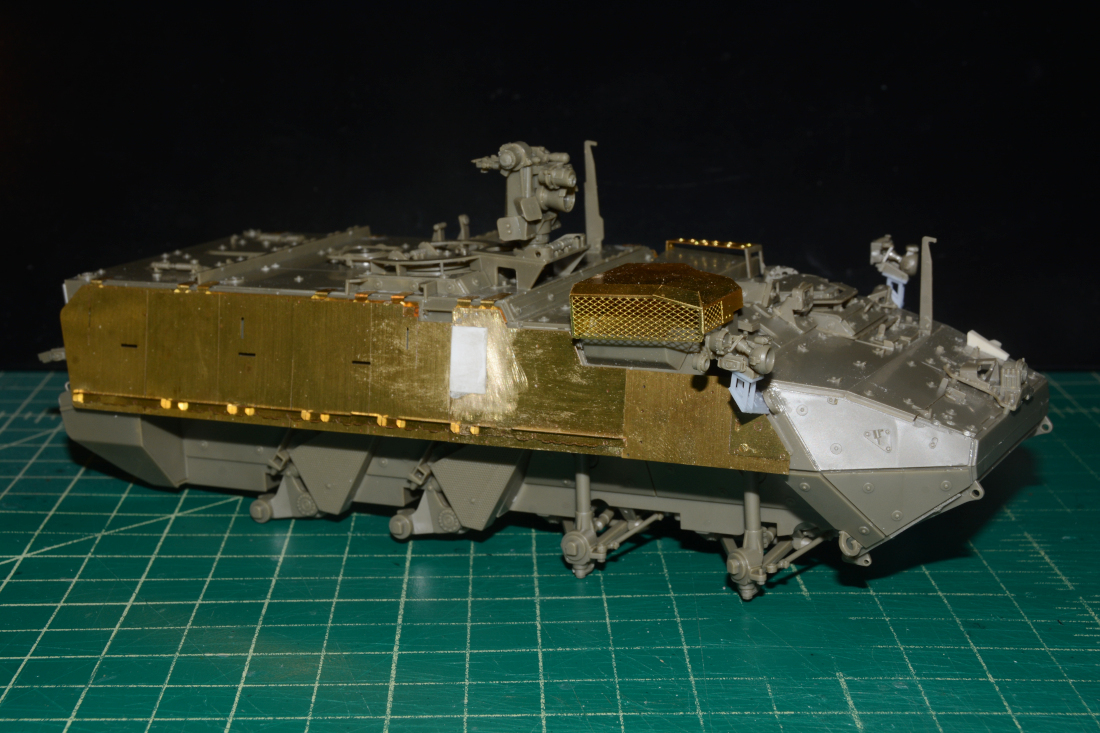
The headlight extension arms are from Priamide.

I bought the AFV M1126 CROWS-J DEK parts sprue off Ebay.
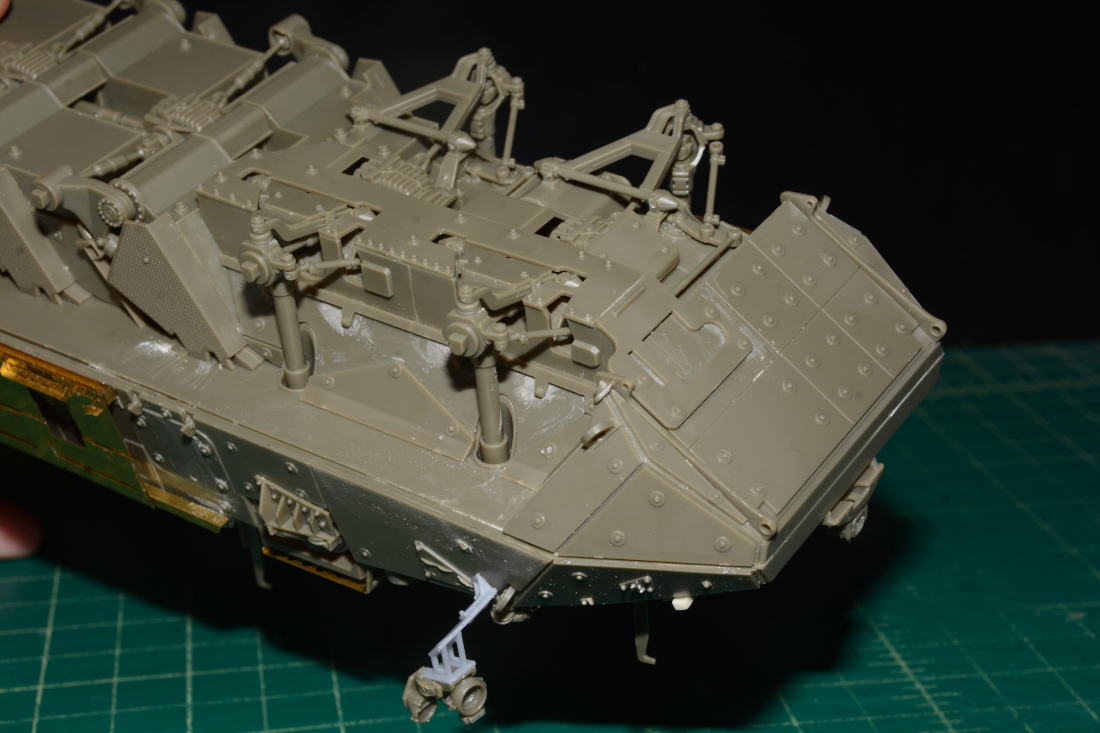
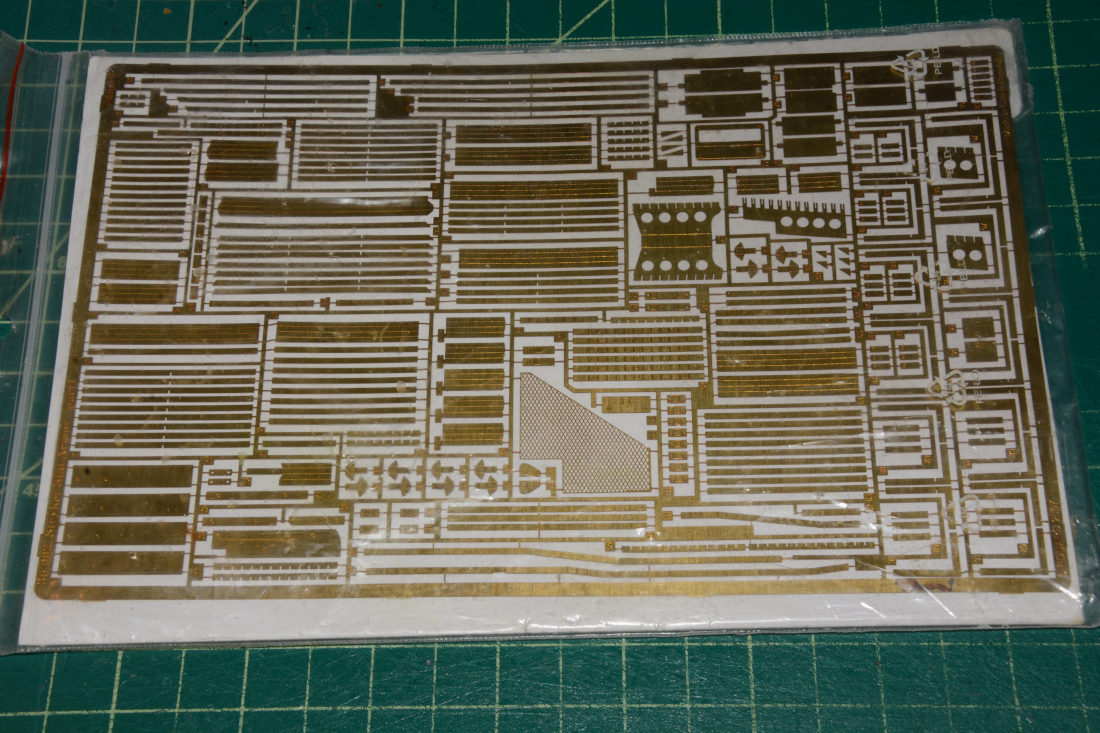
The Eduard PE slat armor. I am not very confident in assembling this set as it looks very intimidating.
4 Likes
Intimidating to say the least.
What are your thoughts on the black dog interior as a start to super detailing? The seats look wrong but im not too familiar with the Stryker as of yet
1 Like
While the side hull additional armor is on, I haven’t started the upper hull PE blast panels or slat armor yet.
Another daunting task is going to be scratch building the brackets that hold the rods for the camo net cover. Thanks to 18bravo for posting photos of the brackets in a different thread I had started about the Stryker. His photos show the brackets but not going to be easy to make.
I can’t comment on the Black Dog interior as I don’t have it. I haven’t researched the interior as I don’t have any planned with an interior.
2 Likes