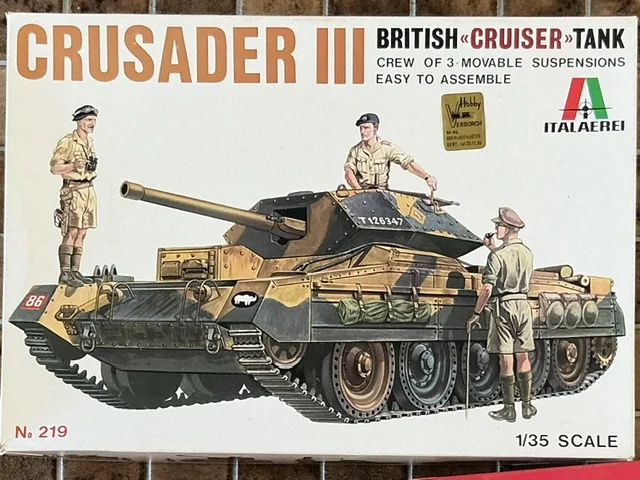
One of the few 1:35 scale Italeri tank kits I never built is the Crusader. Thirty-five years ago my best friend at the time, Micha, did have one and I always thought it was a good-looking tank. A few months ago, therefore, I bought this kit for an Old-School Italeri group build on the TWENOT forum:
But because this is an original issue from nineteenseventysomething, I couldn’t let myself open the plastic bag with the sprues, let alone remove parts from those ![]() Therefore, I bought this one as well:
Therefore, I bought this one as well:
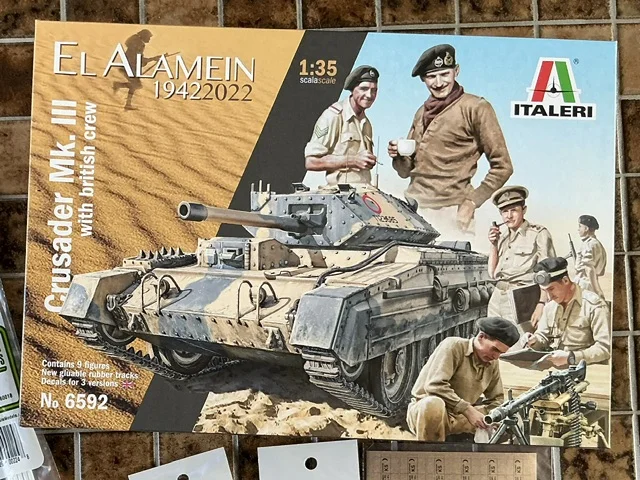
The same kit, but with a few small corrections to problems that modellers have complained about for decades. It also includes a set of six figures of British Tank Troops, but don’t be fooled by the text on the box that it comes with nine figures. Yes, that’s technically true, but three of those figures are also included on the Crusader sprues … Regardless, I didn’t intend to build a diorama with the kit, nor to use any of the figures.
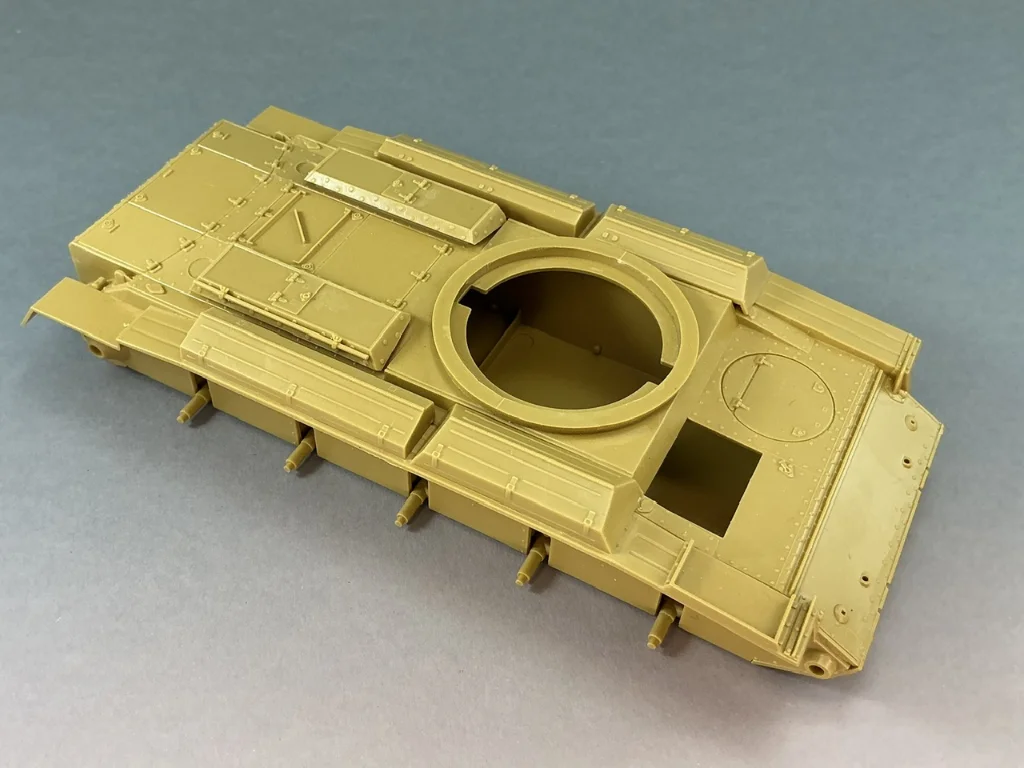
The build started with the lower hull:

Nothing has been glued to it here yet, but I’m showing it because of late I’ve been seeing comments on forums that hold that a model is “old school” if its hull is made up from flat plates. This is a model from 1976, and everything in this photo is a single part. Where do they get the idea that flat plates are old-fashioned?
Anyway, despite the fact that you won’t see anything of them later, the kit provides a full set of springs:
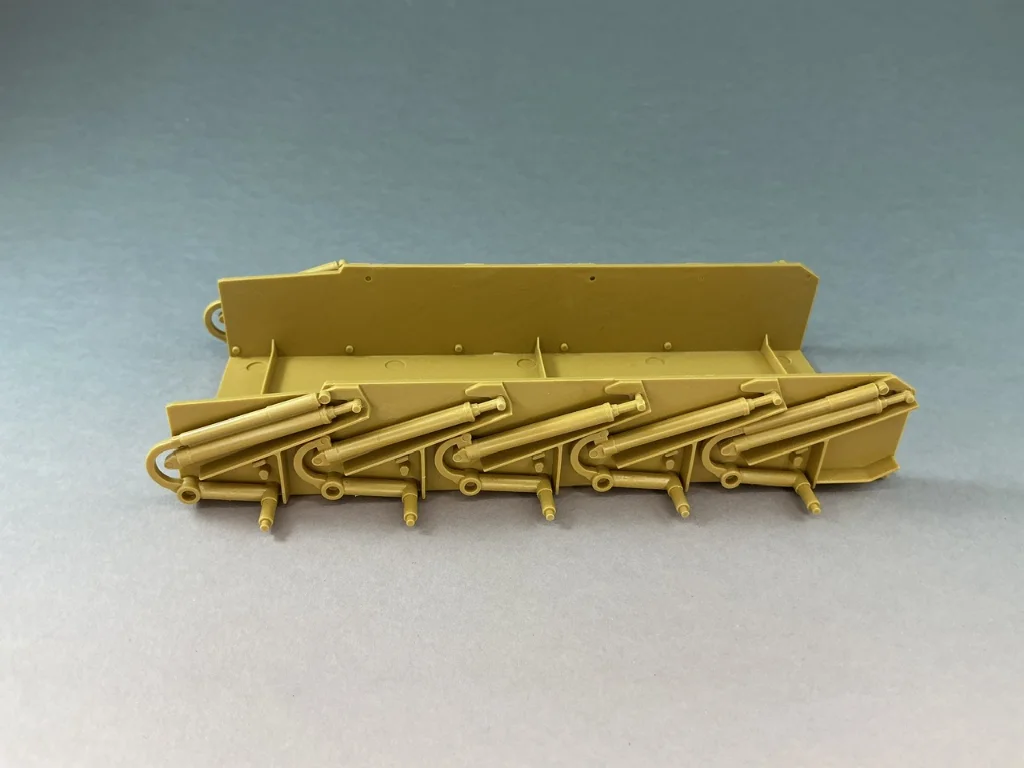
And if you don’t put any glue on the lower locating pins, the suspension even works. I think Italeri was ahead of its time with this kit ![]()
But like I said, you won’t see a thing of it:
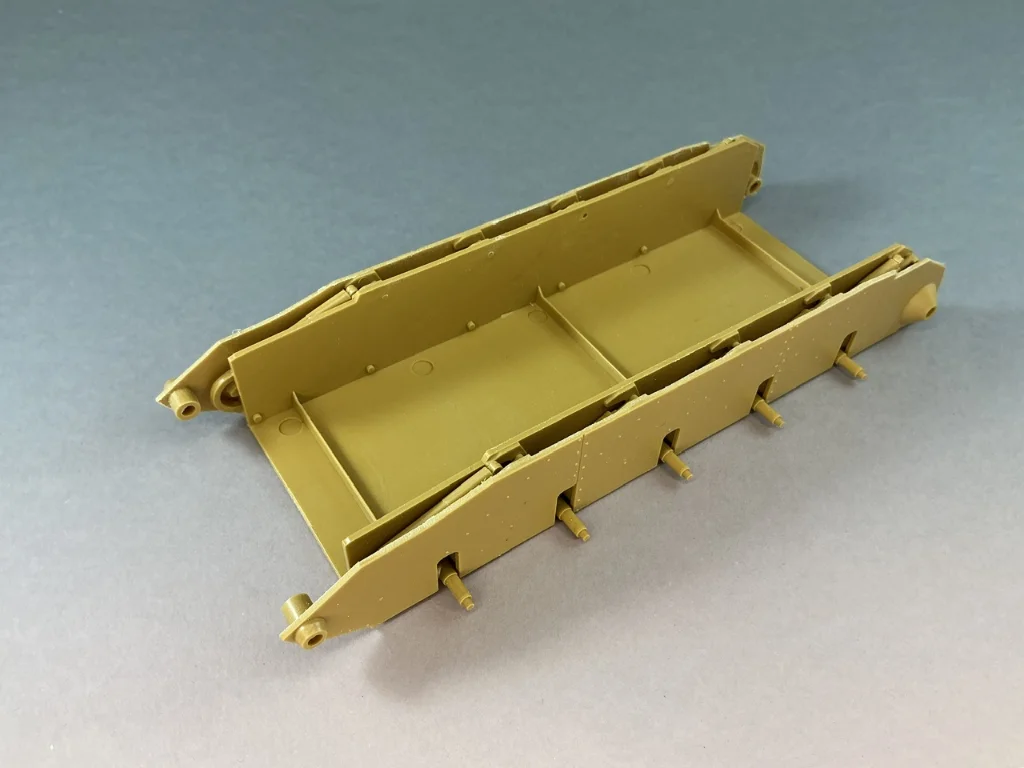
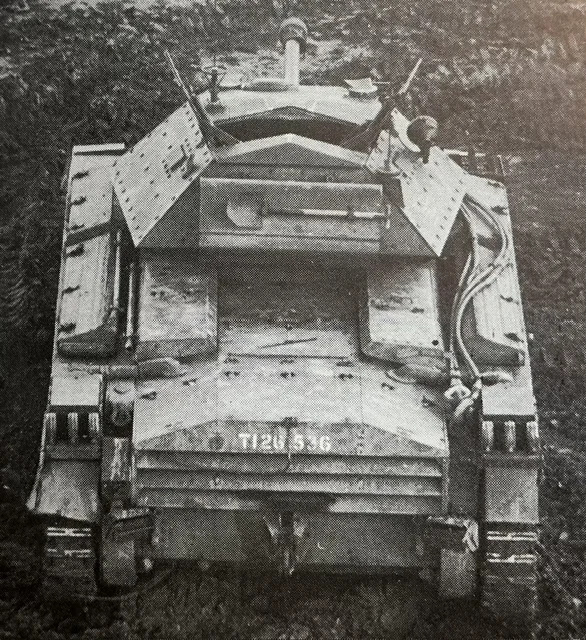
… because all British tanks with Christie suspension, from the A13 through the A34 Comet, have additional plates over most of it. No idea why Italeri bothered to put the springs and shock absorbers in. But they’re not in the way and you don’t have the really clean up the parts, so I just let them be.
After building this, though, I do think it will be easier to leave off the side plates until later, after putting on the upper hull instead of before like the instructions tell you to. If you only add the upper hull after the side plates, you can only glue it to the outer plates for most of its length. By leaving the plates off you can glue the upper hull to the lower properly.
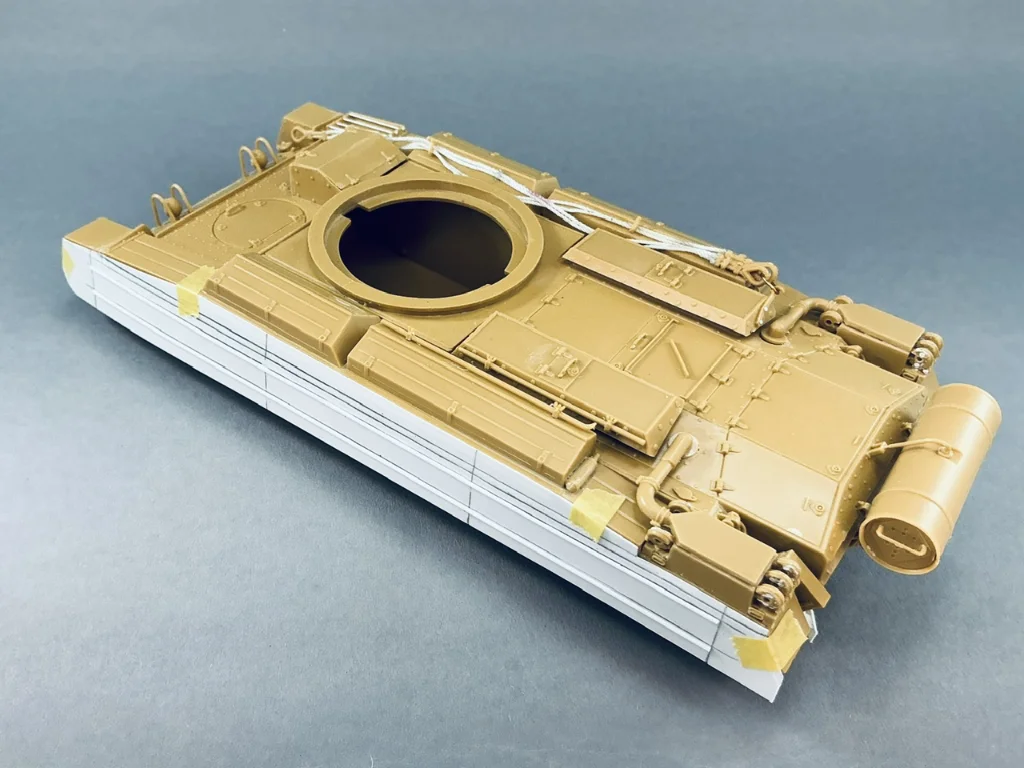
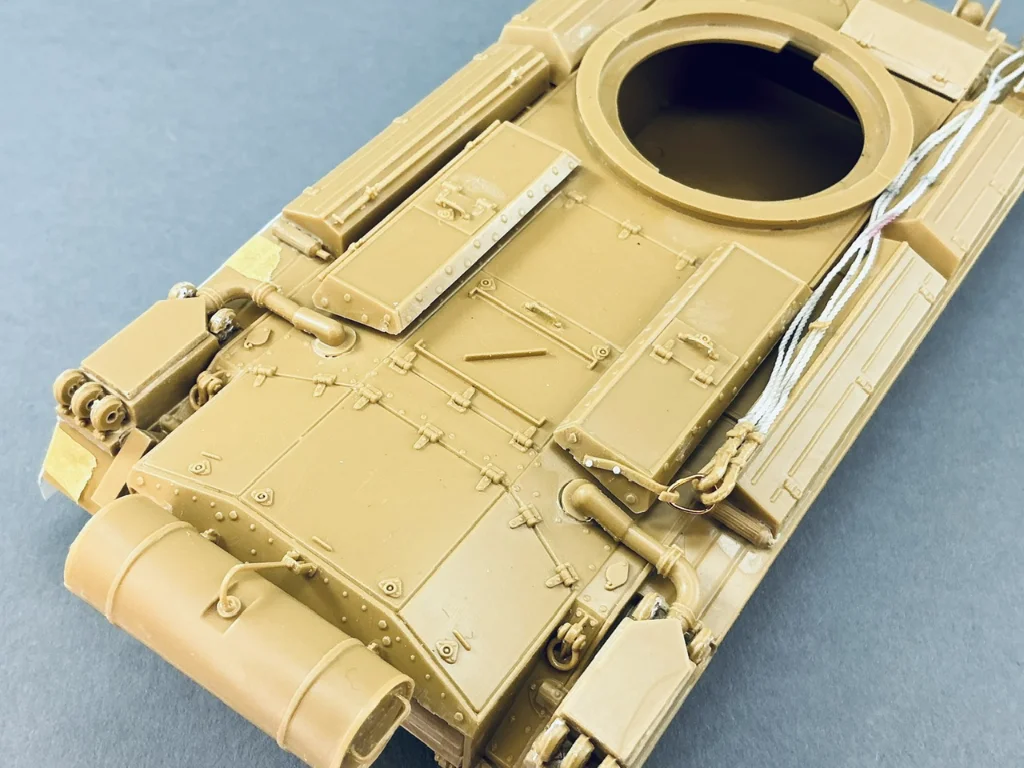
Talking about the upper hull:
At the rear, I added some missing details:

Bottom centre is the exhaust, made form a piece of plastic card 1 mm tick and 12 mm wide, which I filed down to a very flat oval shape. Also some supports from plastic strip that sat between the louvres on the real tank. The upper ones can really only be added once you glue the grille to the tank, but the lower ones and the exhaust are best fitted while it’s still loose.
There were also small brackets on the sides to attach the louvres to the hull plates, but I didn’t add those because they’ll be barely visible on the finished model.
Oh yeah, and here’s a good book that’s about as old as this kit:

This has a good description of the development and combat use of the Crusader, followed by a chapter on modelling it. That, of course, is aimed at the 1:32 scale Airfix kit, but it definitely also comes in handy for the Italeri one in 1:35. If you want to add an interior to a Crusader I would also recommend it, because one of the projects in the book is just that.
Italeri made a bit of a mistake with the stowage bins:
The instructions tell you to put the pry bar (?) on the right (on the outer face of the air intake cover), but it should be on the left in that same position. I had put it in per the instructions, but moved it when I discovered this.
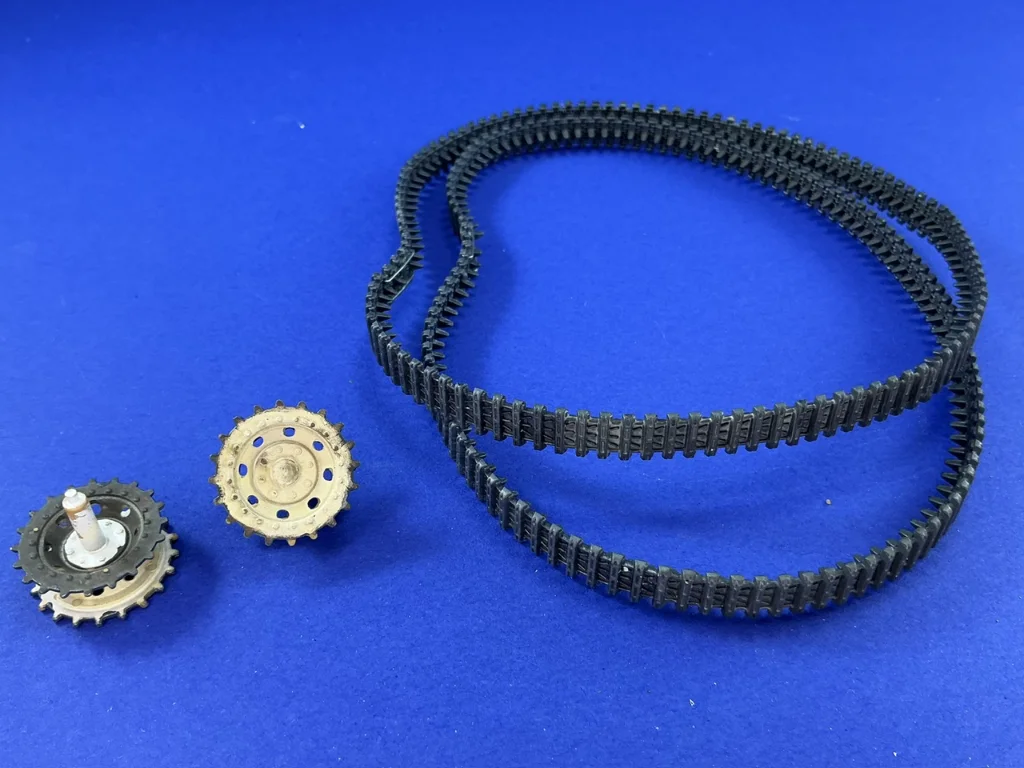
I then put together the wheels:

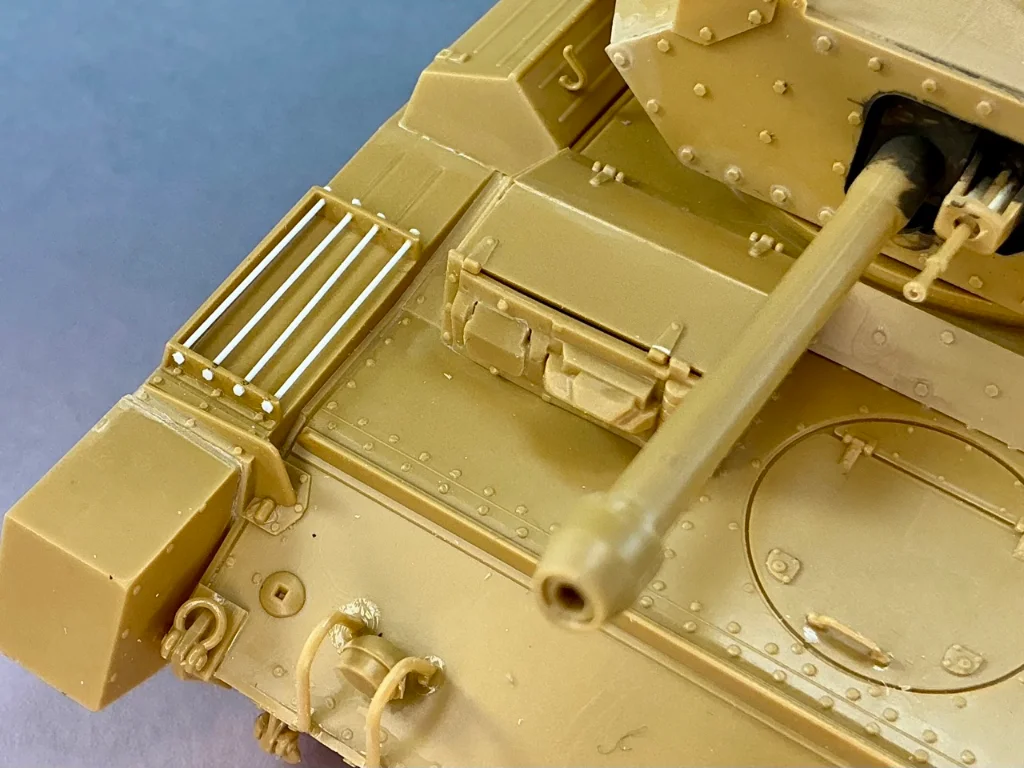
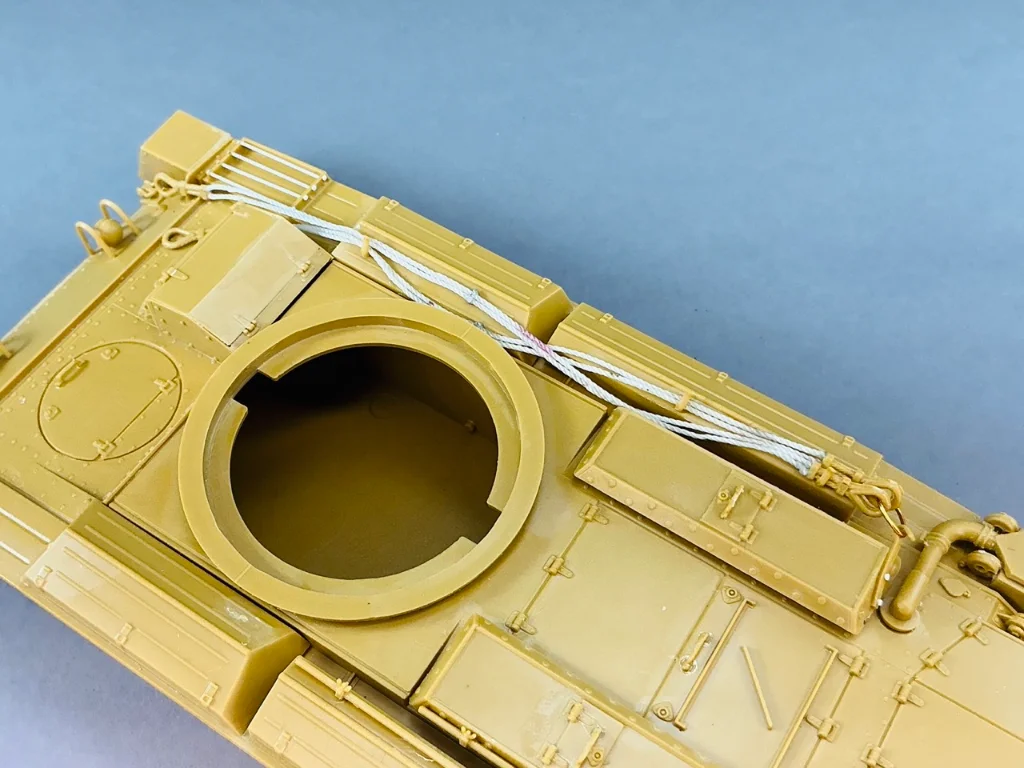
And the turret is done (?) as well:
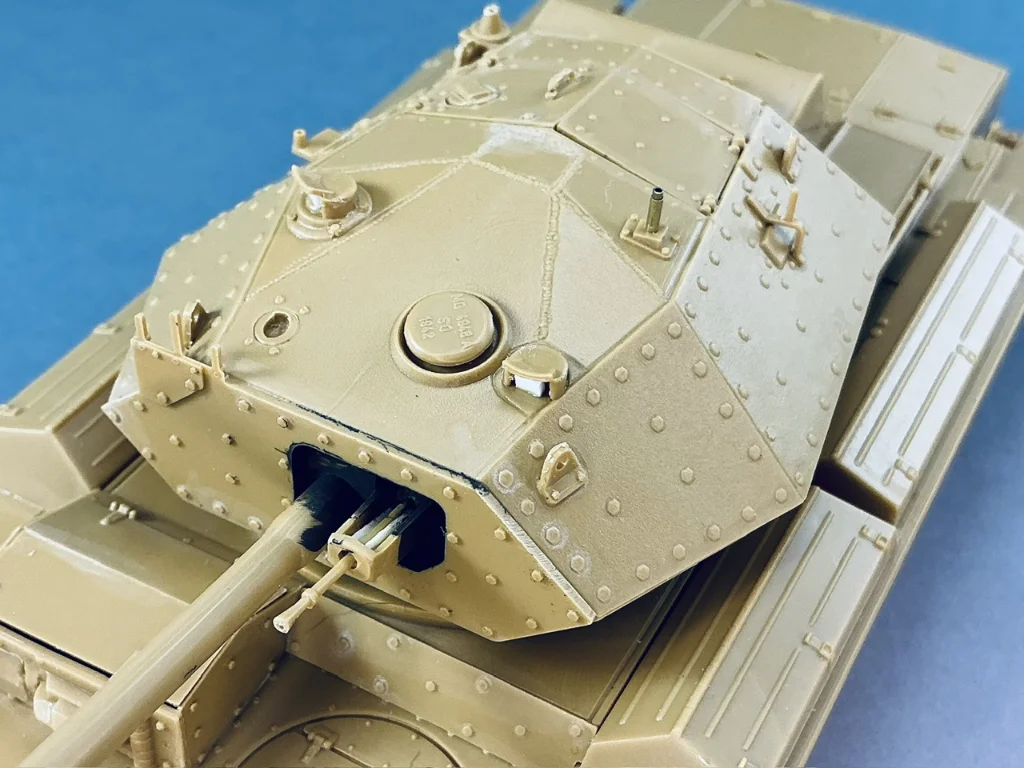
The paint on the gun shield is Khaki Green No. 3, despite the fact that I was going to paint this model in desert camouflage, because this is the kind of spot that might be missed when overpainting the tank in real life. The white plastic next to the coaxial machine gun is a couple of pieces to represent the forward end of the Besa’s receiver, since that’s missing in the kit but it’s very obvious next to the bare barrel.
The mounting for the ‘B’ antenna is copper tube, two thicknesses telescoped into each other, because when when I was trying to drill out the kit part, it slipped from my fingers and disappeared on the floor. This happened just as I was thinking that it would be simpler to replace it ![]() I also added periscopes underneath the hoods, because oddly enough, those aren’t in the kit at all.
I also added periscopes underneath the hoods, because oddly enough, those aren’t in the kit at all.
Next, I added the headlights and air filters (the boxes on the rear mudguards):
The round thingies on the air filters have thick mould seams, but don’t remove those! The real ones also had a big seam between the two halves of sheet metal they were made of. Italeri also did a great job, BTW, of putting two ejector pin marks onto each of those parts …
The kit would have you glue four small plates with handles on them to the sides of the air filter boxes, but they would end up proud of the surface while photos appear to show they were removable drawers or something similar, with the outer face level with the sides. I filed a slot into the air filters and glued the plates in those. (I only did three, by the way, because the fourth one should go inboard at the front, where it’s completely out of sight.)
It turns out Italeri made a fairly major gaffe with the pry bar etc. As mentioned, the instructions tell you to put the pry bar and the other bar on the right, and three hooks on top of the bins on the left. But on the real tank, they were exactly the other way around. Oddly, the rear hook for stowing the tow cables is supposed to be glued on the right side of the tank. The easiest solution is to glue the bins and air intake covers for the left-hand side on the right, and vice versa — this puts everything in the right place. I didn’t, though, because I only discovered this when the glue had well and truly dried on the boxes already. Instead, I shaved off the mounting points on the boxes and relocated everything to the correct sides (except I got slightly confused and put the hooks on the long box in the middle and towards the rear, when they should be at the front and in the middle).
To the rack on the right front mudguard, I added pieces of rod and bolt heads:
Italeri supplies two sections of spare track to put in this rack, but they’re soft plastic so you’ll never glue pieces of rod between them to represent the rods that held the links in the rack — let alone drill holes through the links for complete rods. Since I found plenty of photos of Crusaders with the racks empty, I added just the rods.
On the back, I added not only the fuel drum but also the mounting plates for the smoke grenade dischargers:

The kit does include these, but they’re thick, have sink marks and are incorrect because there’s an odd bar protruding to the side and the plate itself is shown bent as if the tank reversed into a wall. This model seems to be based on the Crusader III that was in the Aberdeen Proving Grounds museum in the USA, which had exactly that too, that Italeri faithfully replicated …
I also connected the ends of the tracks:
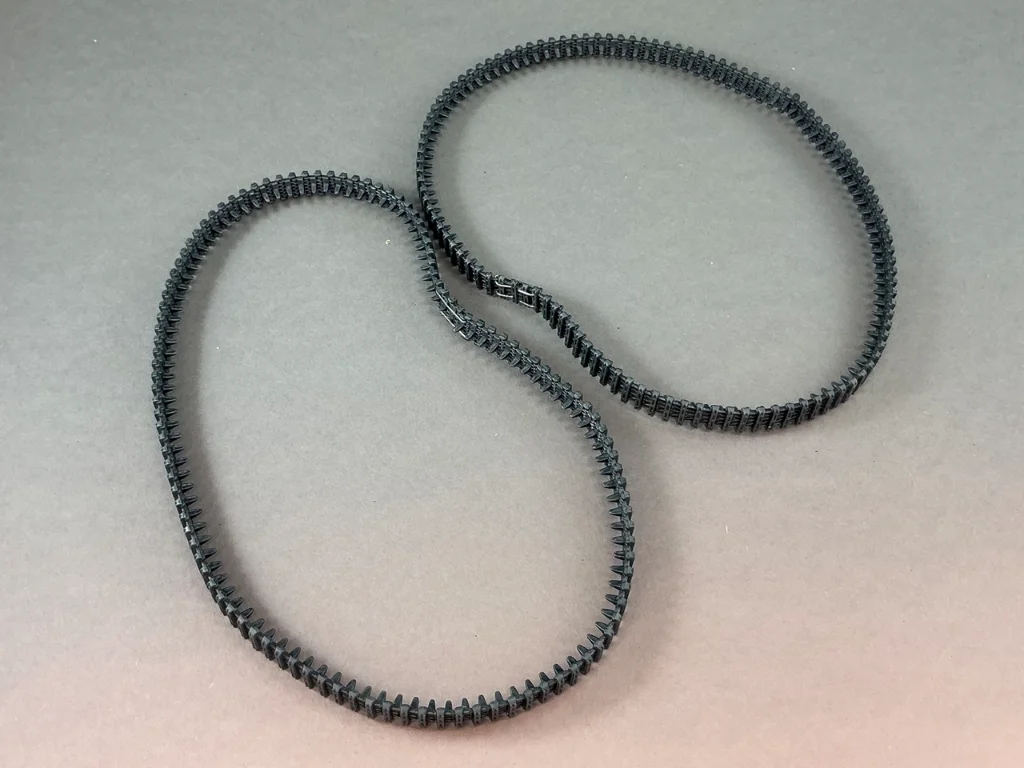
According to the instructions, they can be glued with superglue, but because the pins are long enough I used the old-fashioned way that much better suited this group build: a hot screwdriver ![]() That worked fine, as expected, but pulling the track a little, the ends came apart quite far, so I put two staples through each. All that will be hidden behind the side skirts anyway
That worked fine, as expected, but pulling the track a little, the ends came apart quite far, so I put two staples through each. All that will be hidden behind the side skirts anyway ![]()
The tow cables aren’t bad, but unfortunately they’re moulded in one piece, which makes them very hard to form to the model. Added to this, Italeri seems to not have understood how these cables were supposed to be stowed on the tank. The instructions say to put one on each side, attached to the upper shackle at the rear by means of an S-hook. S-hooks aren’t very British but do appear quite German, and anyway, the real cables were joined together by a teardrop-shaped eye.
Let’s improve them ![]()
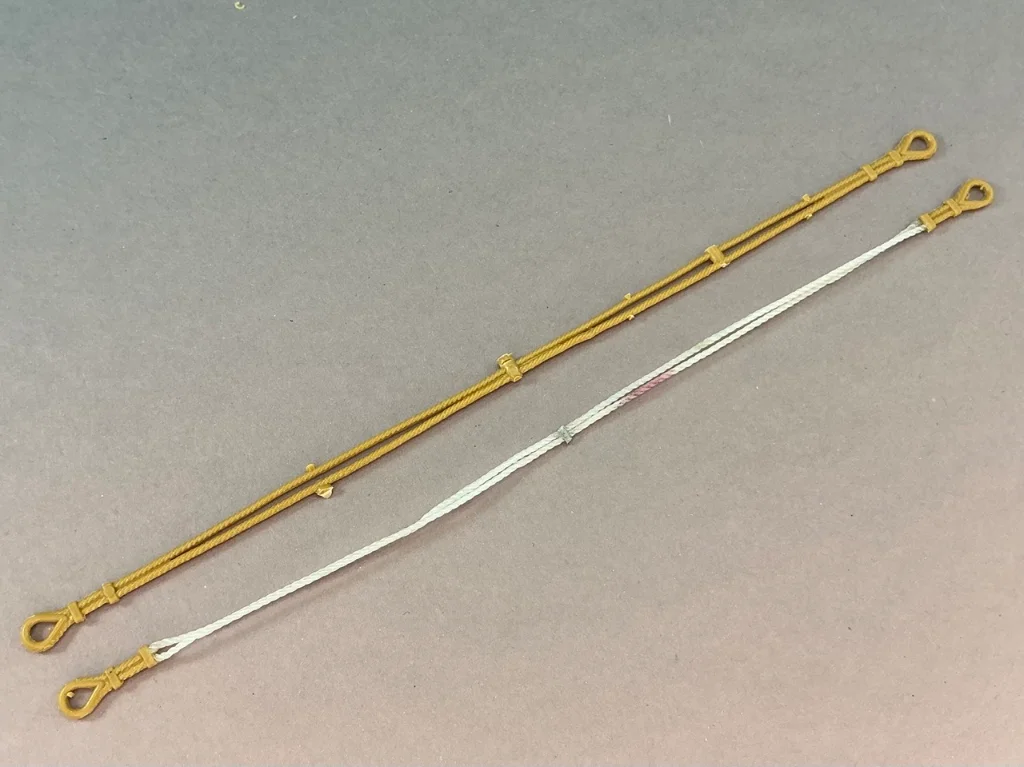
At the top the cables as they’re in the kit, below my improved version. I cut the eyes off, drilled them out slightly and made the cables from thin nylon thread, with a bit of aluminum strip wrapped around the midpoint. After also making the other one, I connected them with eye made from some copper wire:

On the tank:
They were often not very nearly stowed — more so than here ![]() In this case, that also serves to hide the fact that I made one a millimetre or two shorter than the other.
In this case, that also serves to hide the fact that I made one a millimetre or two shorter than the other.
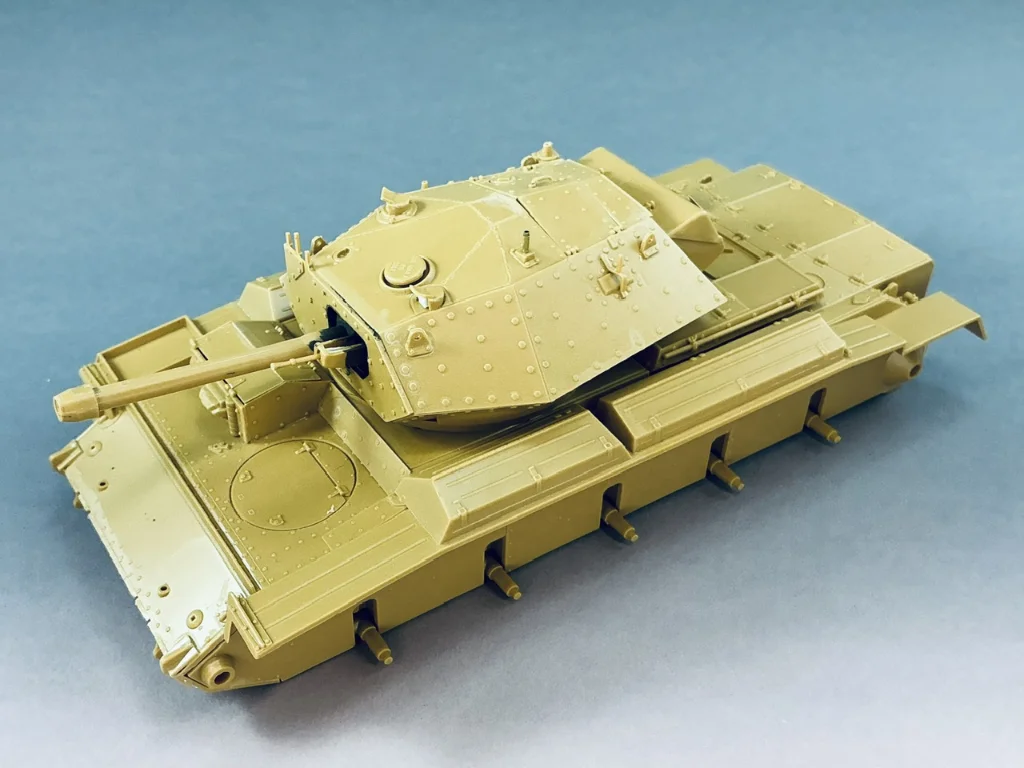
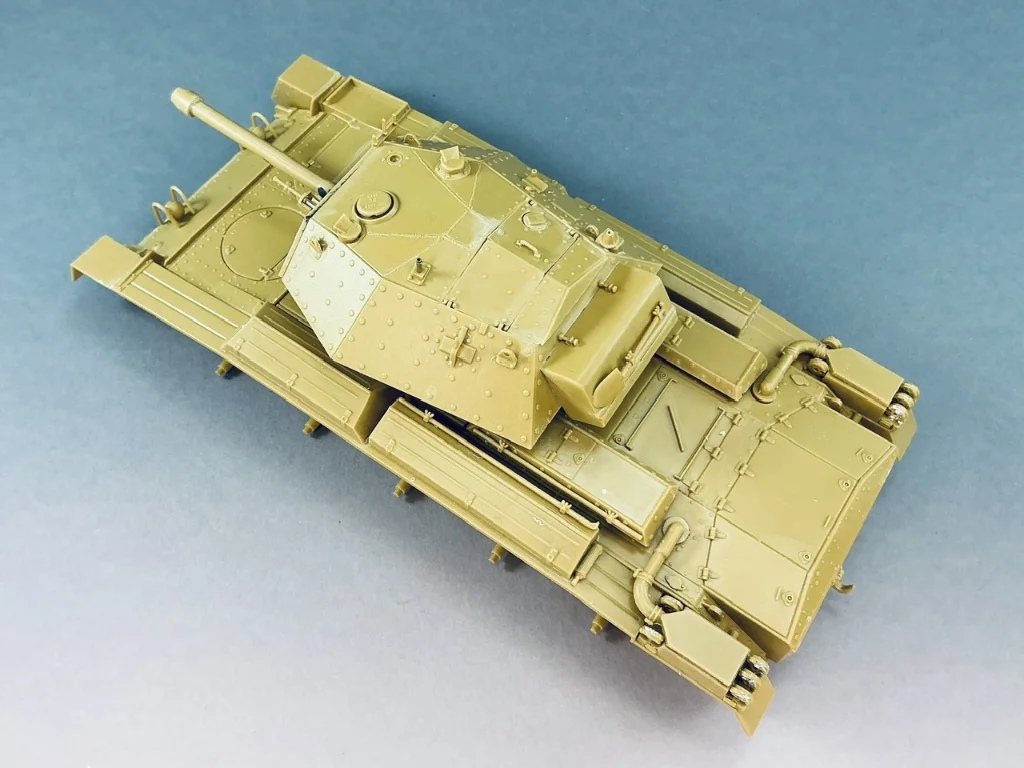
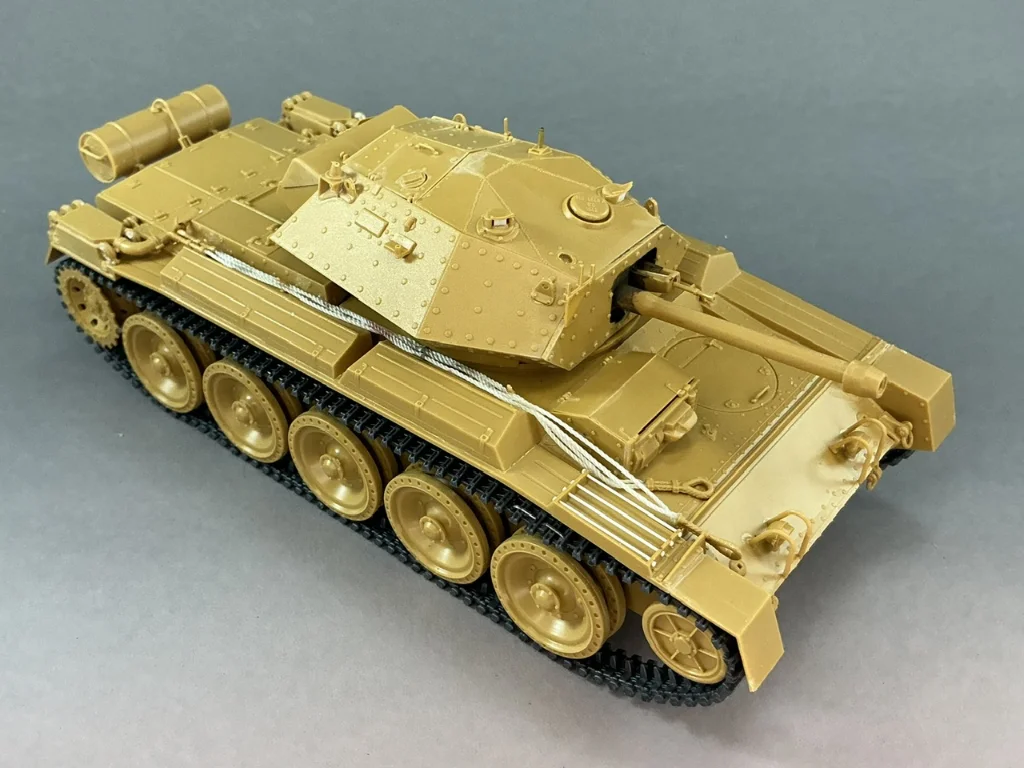
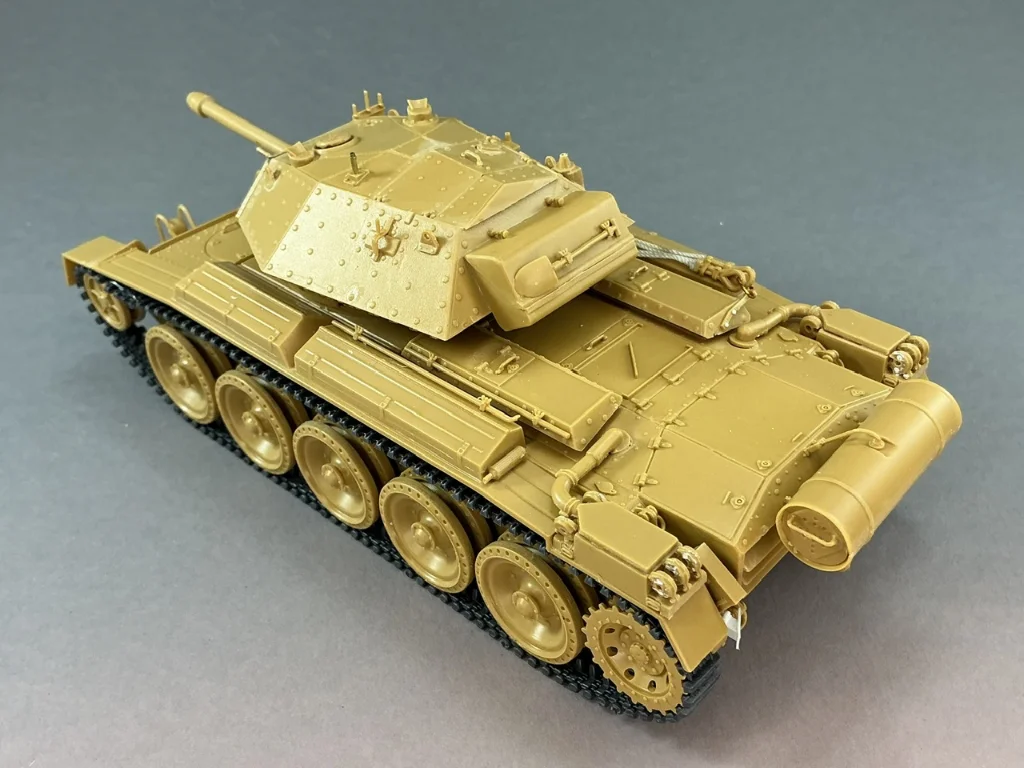
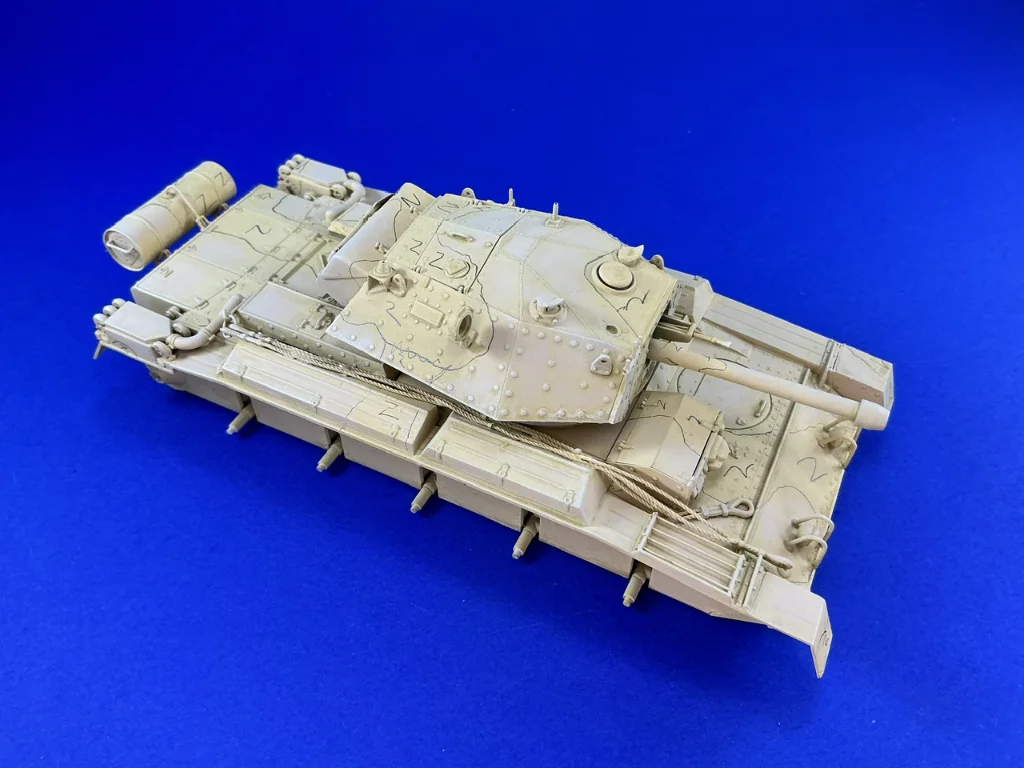
And then I thought I was done building the kit:

Time to spray!
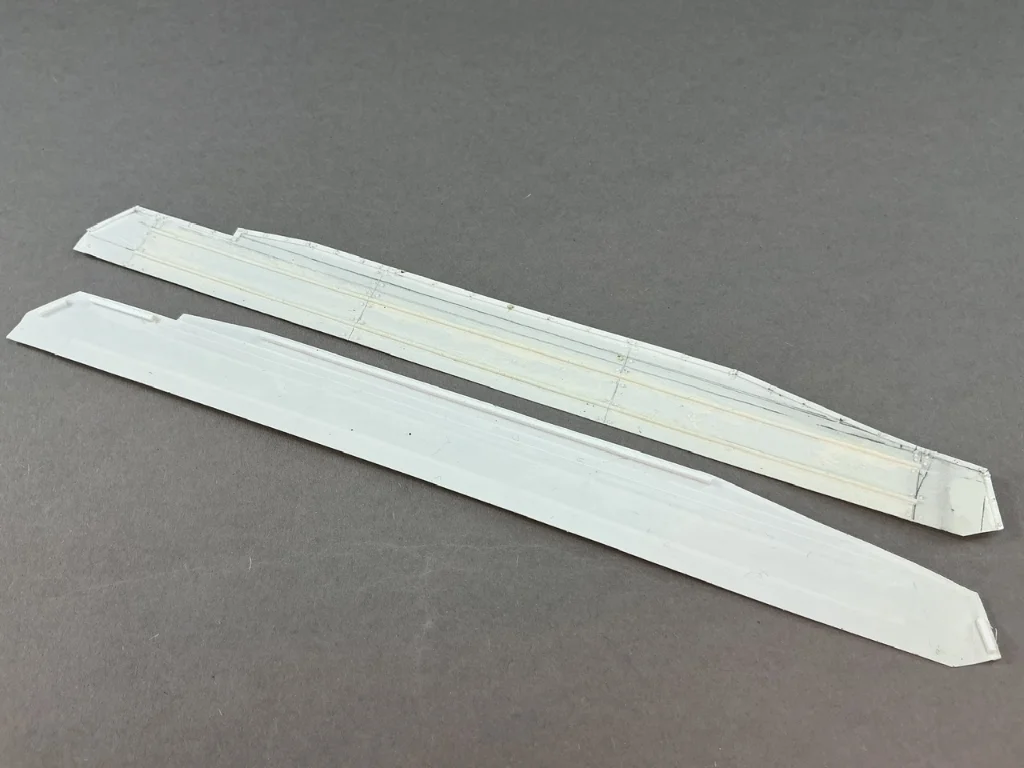
But at this point, I bought a second Crusader kit, of a different variant, and began browsing old magazines for articles about that one … And found that I had missed an important detail: the sand shields included with the kit are of a different type than what was usually seen in North Africa, except mainly Tunisia. The Italeri shields have three ribs, but photos of the real tank frequently show only two. Luckily, there’s an article by Vasko Barbić in a Military Modelling from 1992 with a drawing of the latter:

At the top the Italeri part, below it the drawing, and in that my conversion of its measurements to 1:35 scale.
And a comparison with a photo of the real thing:

Barbić says to sand the detail off Italeri’s parts, scribe new lines in them and add the two ribs. But … then you end up with kind of half one, half the other. The shields’ entire shape is different: the one with two ribs is vertical at the top, angles outward below that and then turns vertical again, but the one with three ribs is angled all the way along the top and then goes vertically down. This makes it very difficult to convert the Italeri parts. No half measures, then:
I copied the outer shape of an Italeri shield in 0.25 mm plastic card, then made that angled section in it by clamping the shield in a photoetch bending tool and pressing it with the rear of a hobby knife handle to make the two bends in it (along lines I had pencilled on). That’s harder than with metal sheet because the plastic springs back much more, but it’s doable. I then added two more bends at the front and rear with flat-nosed pliers.
Only after making the first one did I notice that the shape of the shield with two ribs is different than that of the one with three: the latter is cut at an angle at the lower rear while the shield with two ribs is vertical there. Because I had traced the shape of the Italeri shield, I had also included that cut-off. I solved that by glueing a triangle of plastic card to it, because I wasn’t going to make another shield if I could help it ![]()
Next, I glued a number of lengths of 1 mm square rod to the inside, to serve as locating ridges, because otherwise it would become very difficult to get the shields on the model neatly. When doing this, it’s vital to ensure the shield stays flat and doesn’t warp when you glue stuff to it. On the outside, I made the ribs by scraping a flat side to 0.75 mm round rod. While the glue on those was drying, I tacked the shield to the tank with some masking tape, again to prevent it from warping:

All that remained was to add some strip along the top edge and a ton of rivets … Oh, and make the other one, of course:
I also remembered that I had so far forgotten to add a second fire extinguisher, because there should be one behind each rear stowage bin, not only on the left as the kit supplies. My brilliant solution to that was:
Just buy a second kit for one part! ![]()
If you look closely, you may notice I cut the one on the left off and glued it back on in reverse (with the long protrusion inward instead of outward, as it was initially).
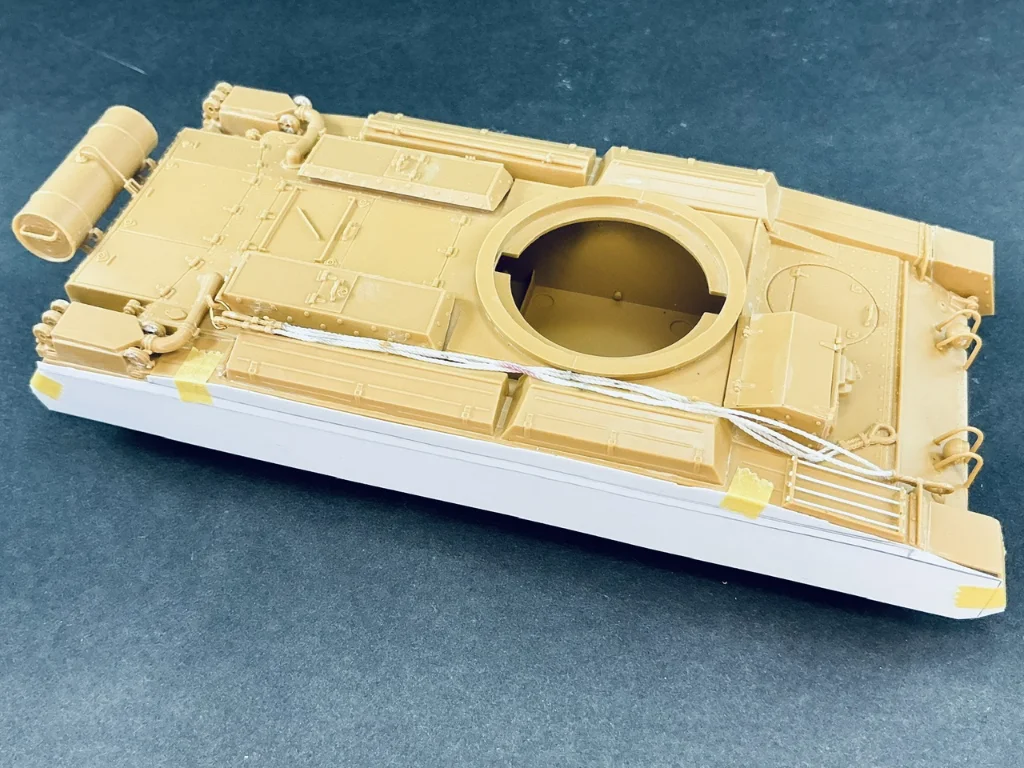
After doing that, here are the completed shields:
This is the outside of one and the inside of the other, to show the locating ribs I glued to both.
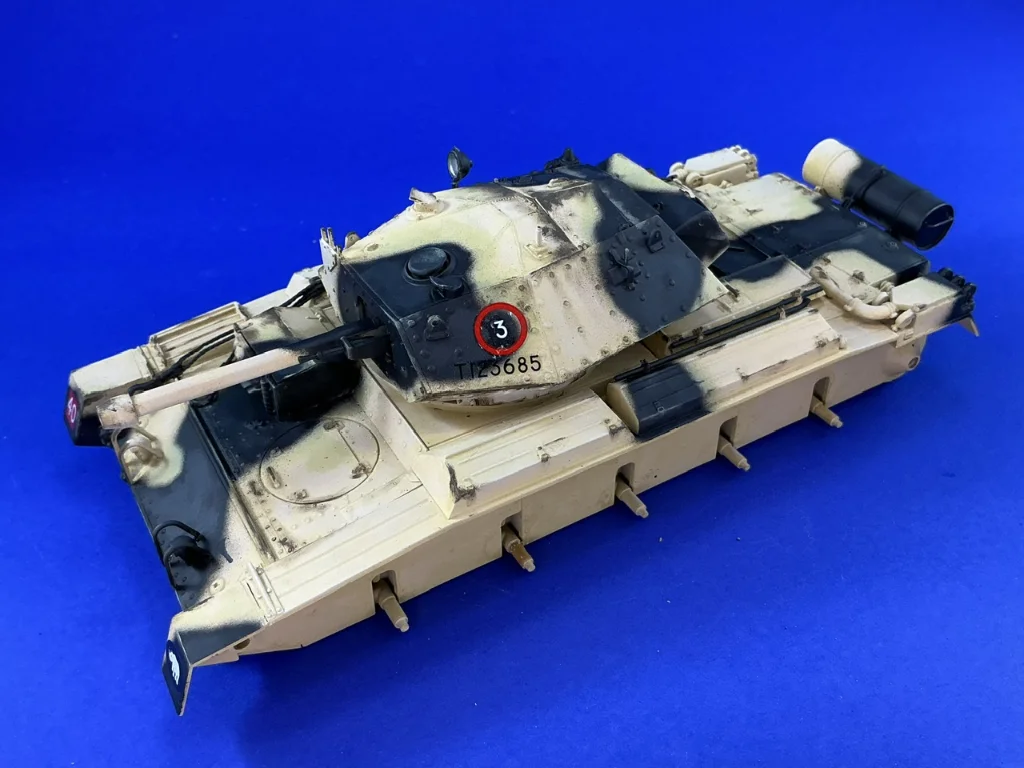
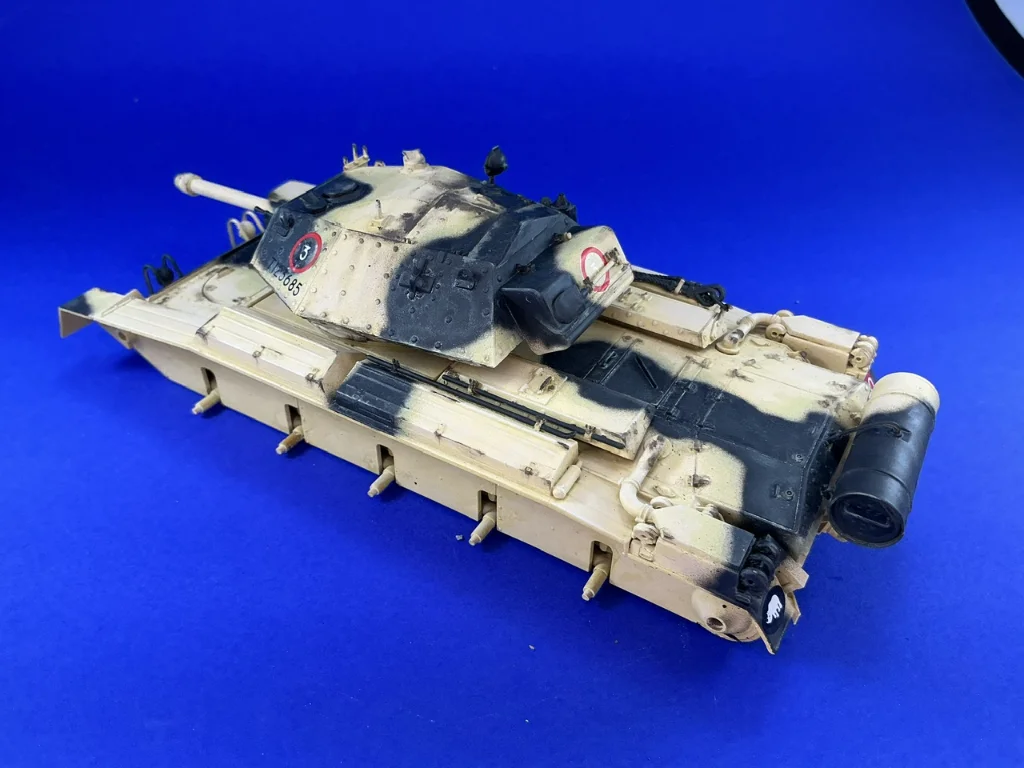
And that finally finishes the Crusader for real:
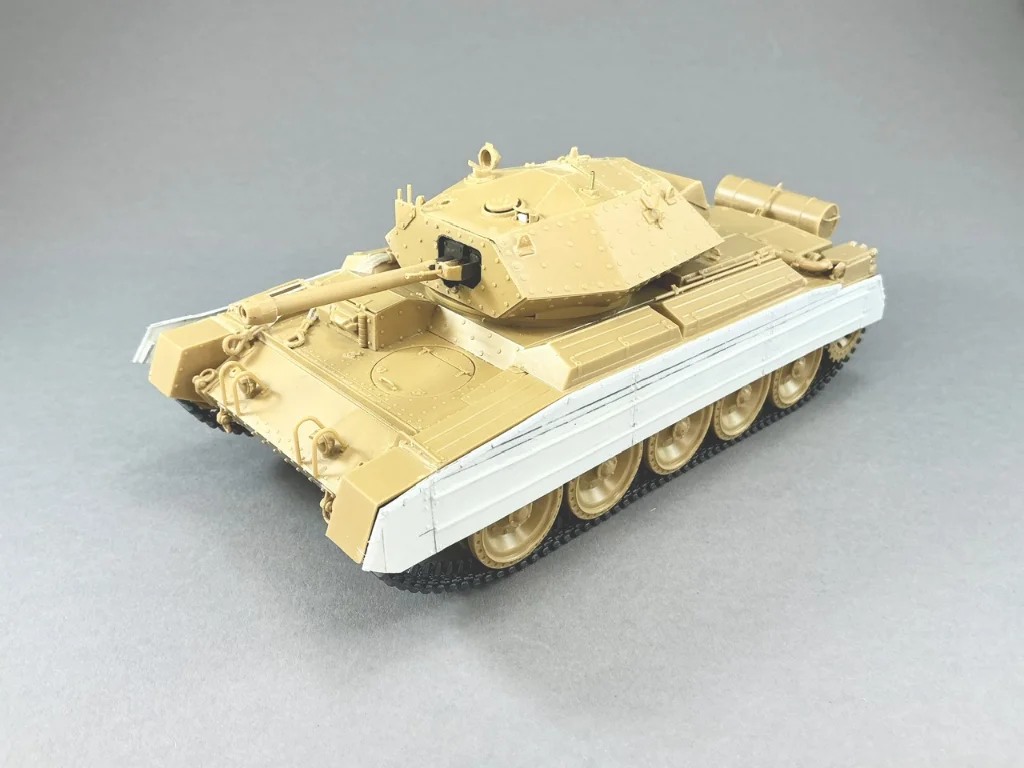
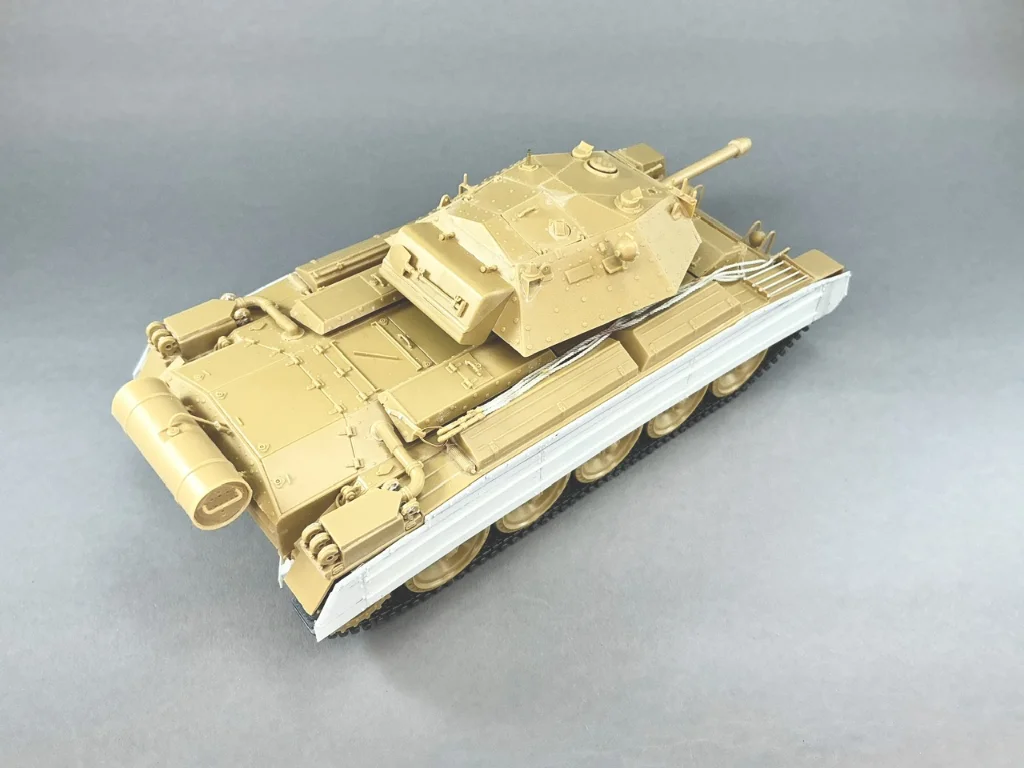
Well, as far as construction is concerned, anyway ![]() The sand shields, wheels and tracks are only temporarily attached for the photos.
The sand shields, wheels and tracks are only temporarily attached for the photos.
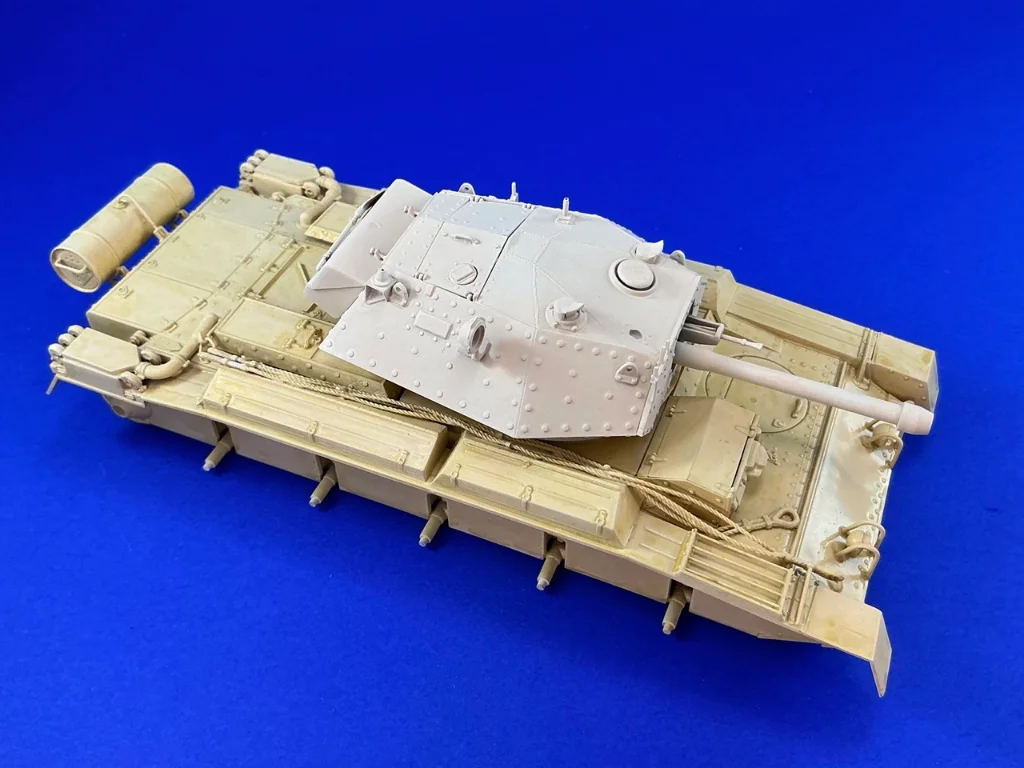
Next up: spraying the model. I began by putting on a coat of primer from an aerosol can, then followed that with Light Stone from LifeColor, but when I compared it to the colour samples in Mike Starmer’s books it proved to be far too light and not yellow enough. I also have Light Stone from AK 3Gen, which matches the samples much better, but I didn’t feel like respraying the whole model. So I decided to kill two birds with one stone: by making a wash from the AK paint and painting that over the whole model, I got both a much yellower colour and shading around the details. See the difference between the hull with wash and the turret without:
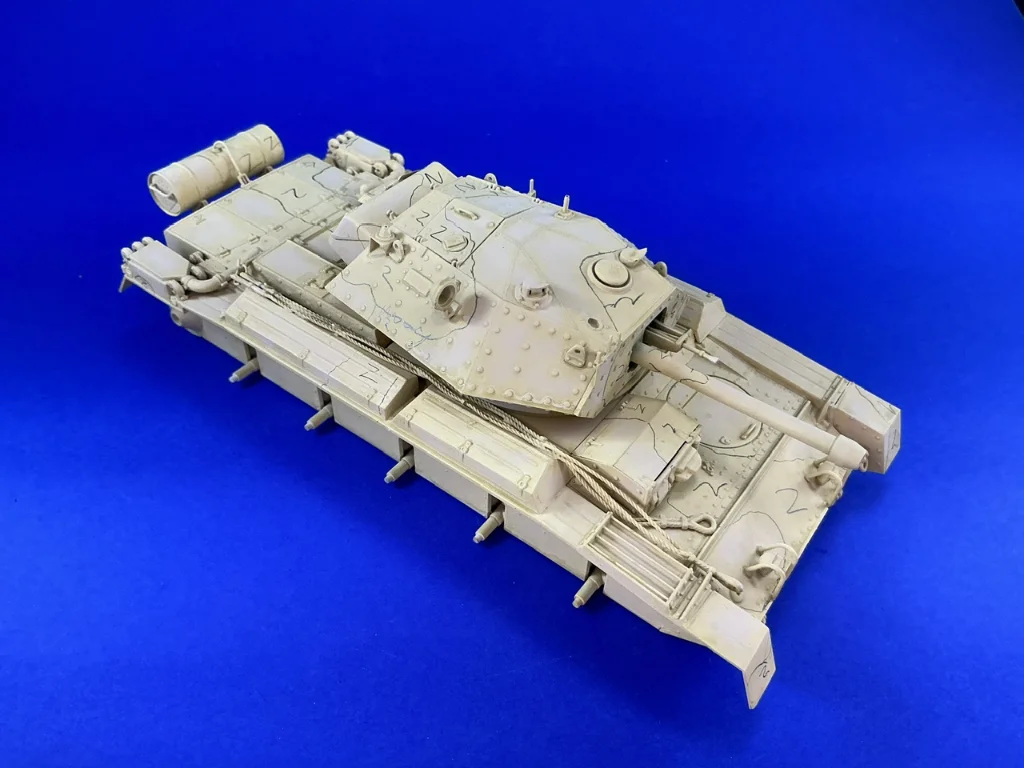
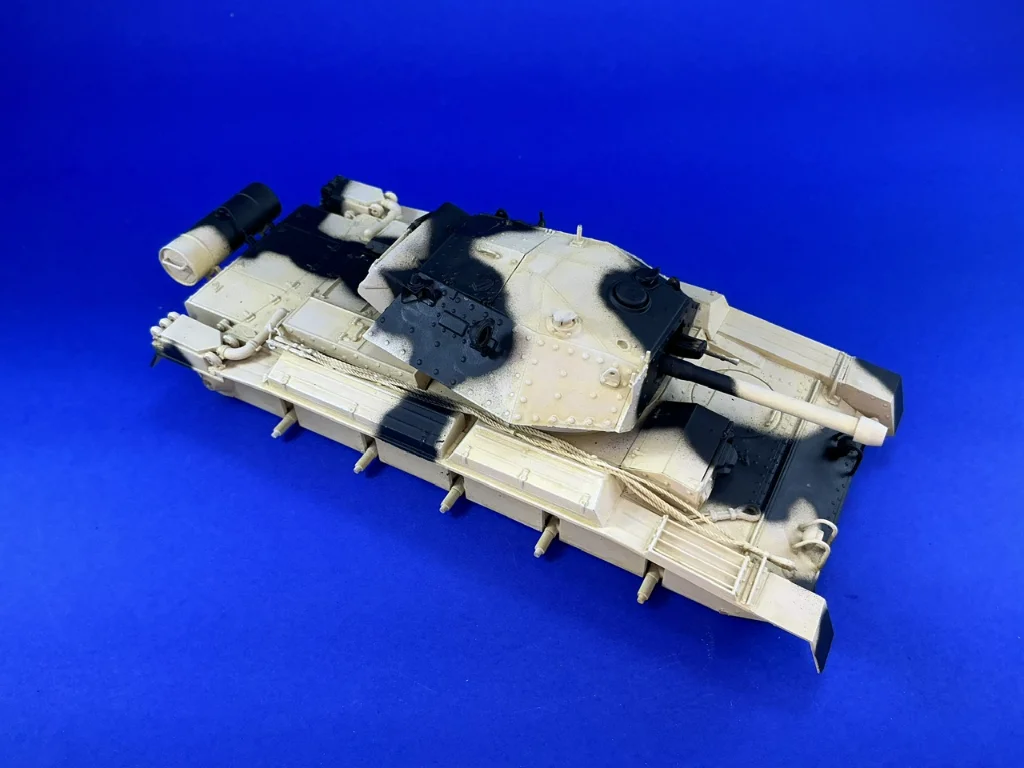
Once the whole model was in this better sand colour, I put on the camouflage pattern. I was debating whether to follow the instructions, a photograph of a real tank or the official pattern. In the end I picked the first, with the thought that this is likely correct for the markings, though it did mean I had to make up the patterns for the right side and top myself because those aren’t included. Here it is, drawn on the model in pencil:

All patches with a Z in them will be painted black (from Dutch zwart, “black”). But instead of doing that, I sprayed lighter patches with (oddly enough) the Light Stone from LifeColor that I just said is far too light. But it does work for this, over the better yellow, because it proved to be a reasonable colour to highlight that with:
The tank looks a little faded this way, but because the paint can be spayed thin it doesn’t cover anywhere near as well as a complete coat of the same paint would. The reason I did this after drawing the camouflage pattern is because this way, I didn’t need to waste effort spraying lighter areas that would only end up being covered by the black patches later on.
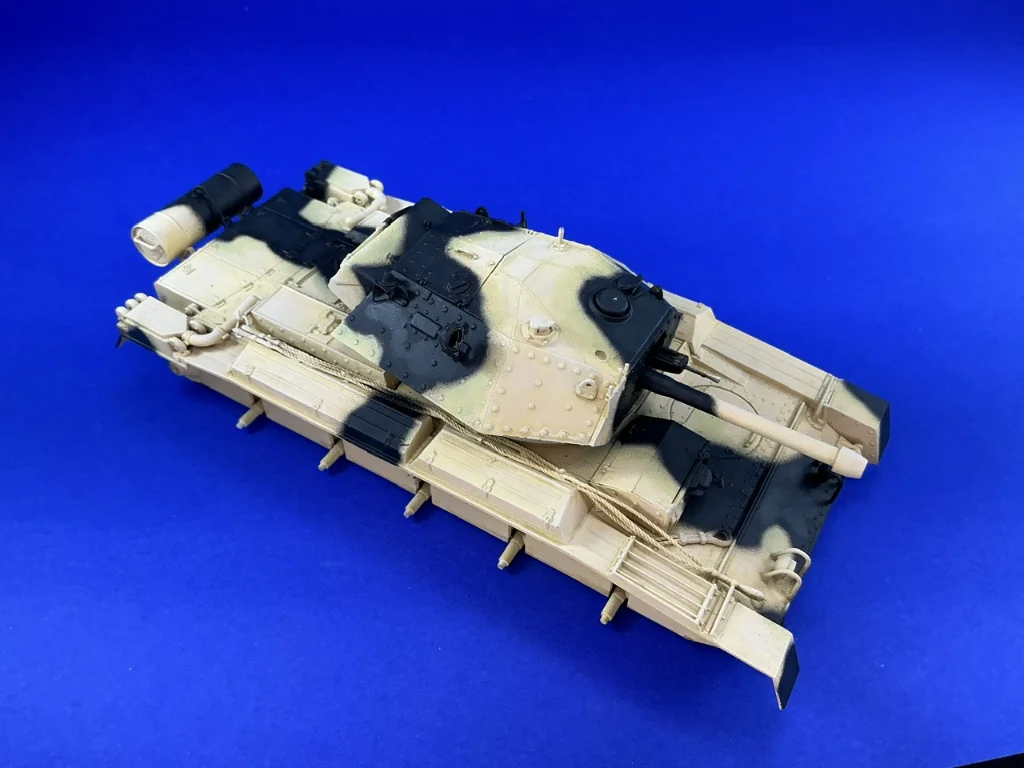
This done, I drybrushed all of the yellow parts with a very pale sand colour:
Next came the black:
This is a mixture of about half-and-half Ammo flat black and Vallejo Model Air US Navy Dark Sea Blue, to avoid stark, deep black. But: it didn’t go on well at all, with a ton of overspray. That will be fixed later, but the lighter patches I wanted to spray into the black areas got shelved for the moment because I had had enough of airbrushing at this point.
Oh yeah, something you can‘t see in the photo is that the overhanging parts of the turret as well as the bow and lower rear of the tank have been sprayed white, as is the underside of the barrel where that isn’t black.
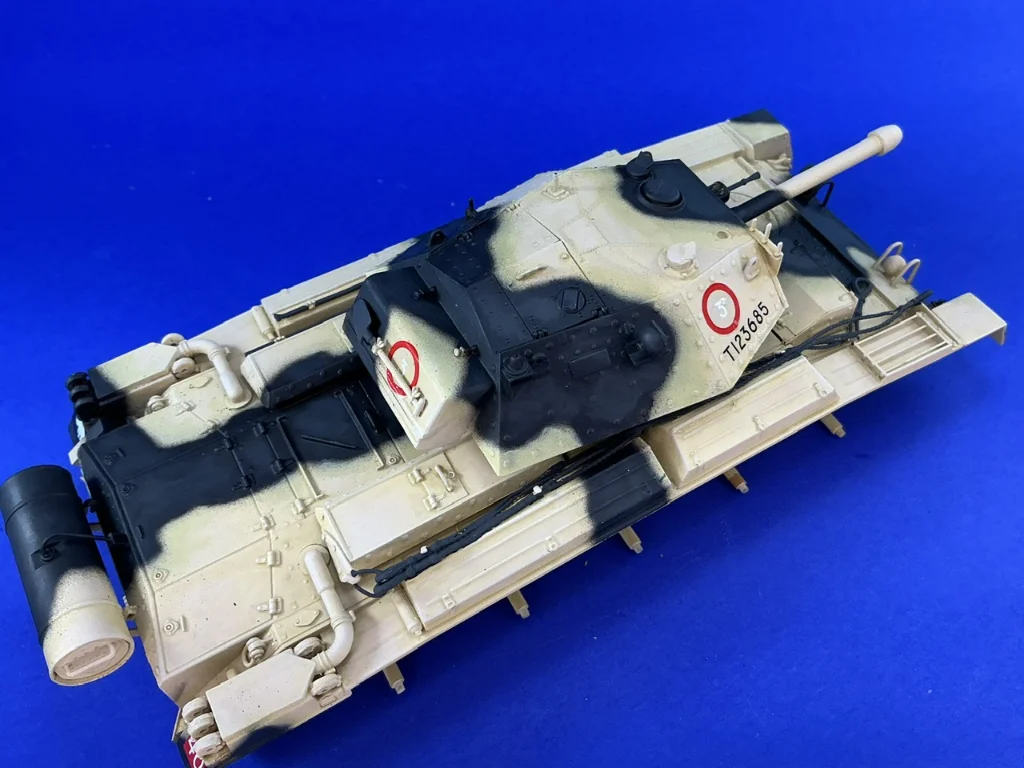
Some time later, I largely fixed the overspray problem:
What I did was “wet drybrush” over the unwanted black, using various mixtures of AK 3Gen Light Stone and Portland Stone. I used the latter mainly due to the Light Stone being too darkas a result of the lighter patches I had sprayed earlier.
That done, I added the lighter patches in the black areasin much the same way, but using Revell Aqua Color Anthracite, followed by a second pass with Humbrol Tank Grey. The effect is much the same as when airbrushing these kinds of patches, but without having to faff around with a temperamental piece of kit ![]()
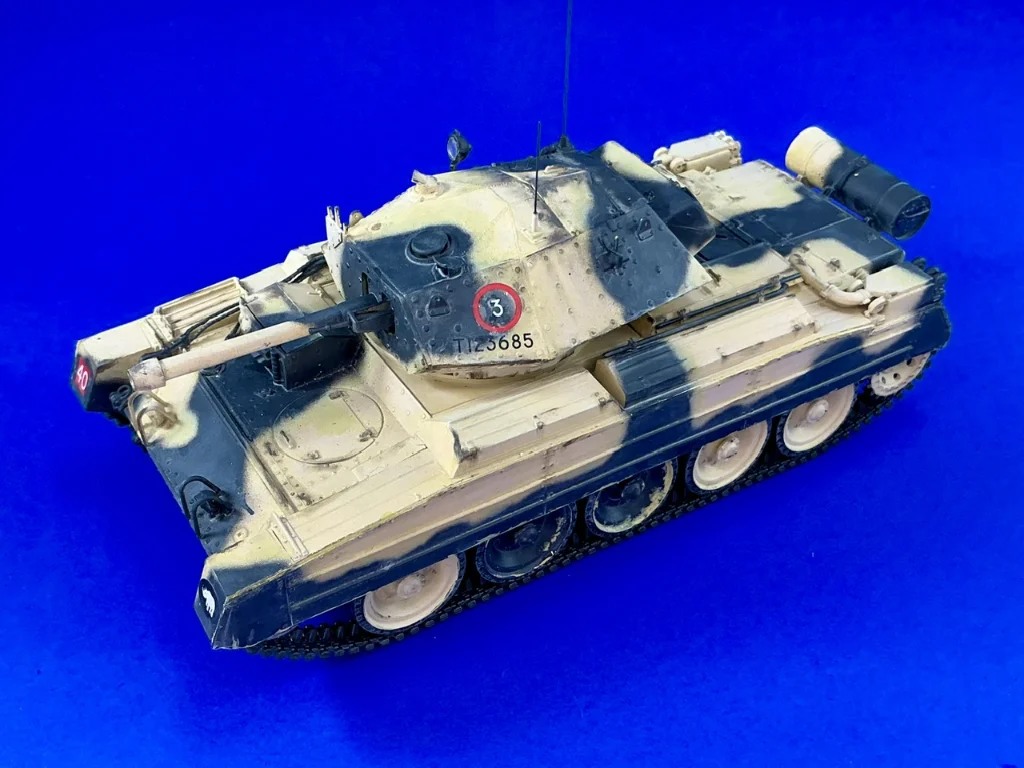
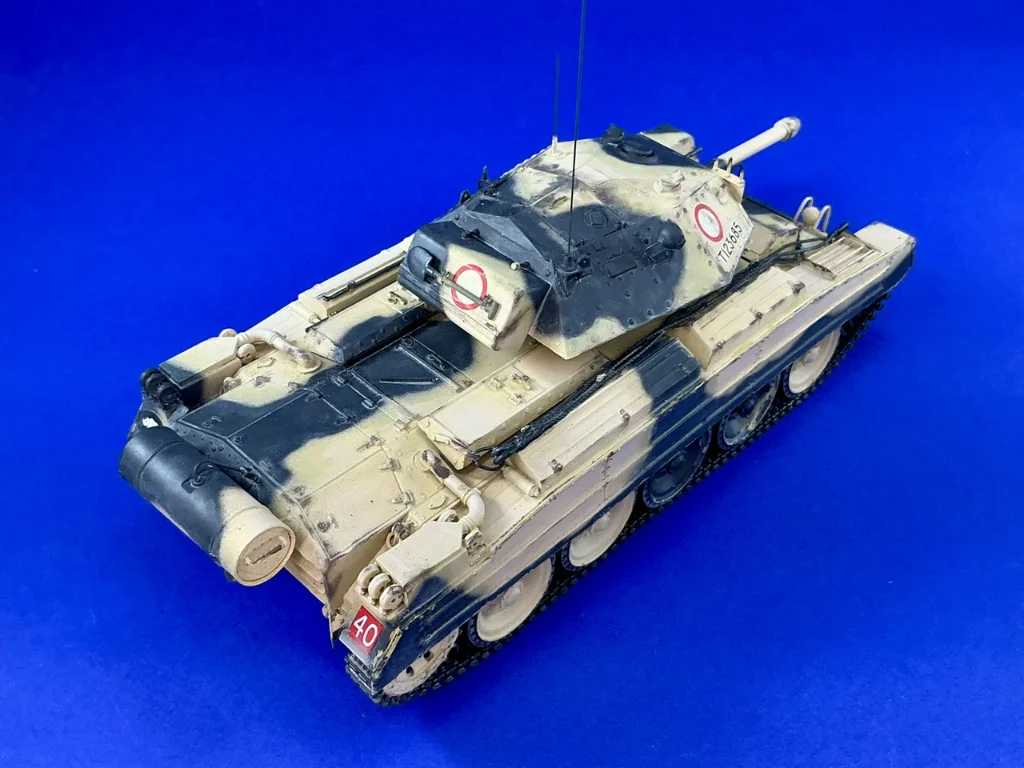
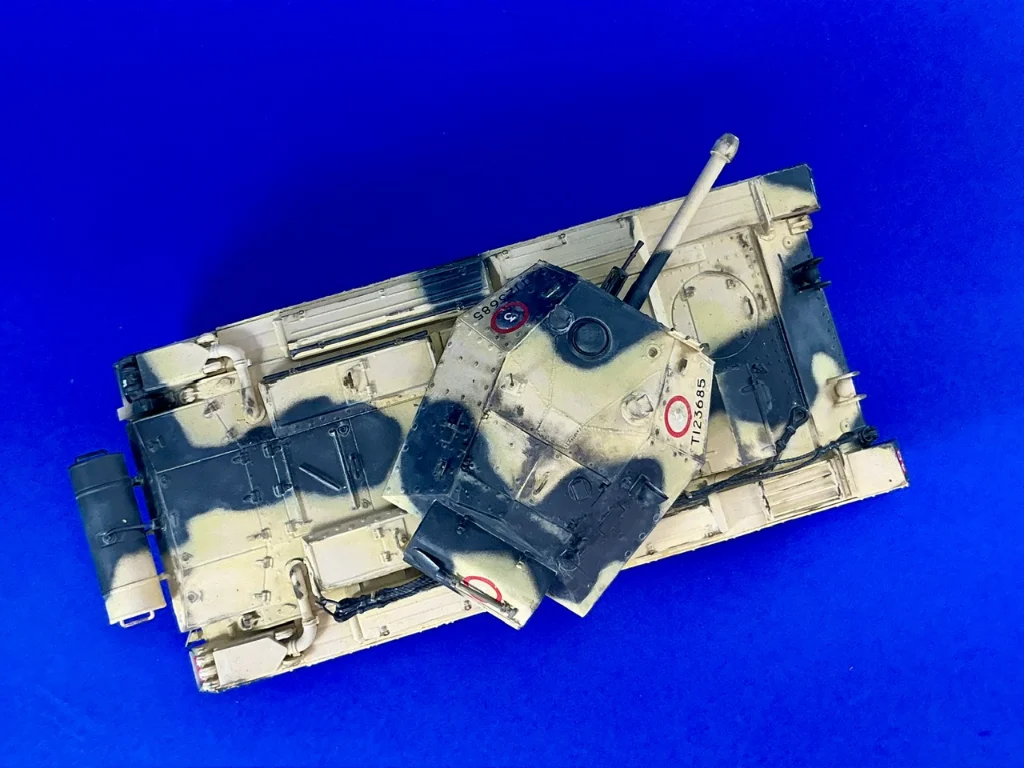
And the decals added:
I also painted the tow cables and the metal parts of the tools dark grey, as a basis for later metal effects. Next I started weathering the paint by drybrushing worn areas into the Portland Stone using Khaki Green No. 3 and into the black with Portland Stone:
The metal parts then got a wash of Army Painter Strong Tone, and the whole model then got a wash of sand-coloured paint from Army Painter, thinned using water:
This is one of those cases where the effect is much more visible in real life than in this photograph, though. However, I felt I needed to go over it a second time but with a paint with much finer pigments, so I did just that using Talens (a maker of artists’s paints) Titanium Buff Light. Once that had dried, I drybrushed the basic colours over it all once more to enhance the effect of dust being caught in seams and hollows.

One of the main things left to do at this point were the tracks:
I painted the parts that would remain visible in dark grey, followed by a darker wash to shade them, and when that was dry, a second wash of Titanium Buff Light to represent sand. When that too was dry, I drybrushed Humbrol Polished Steel over the track and buffed that with an old, soft toothbrush. The sprockets also got a bit of that where they touch the tracks.
And on the model:
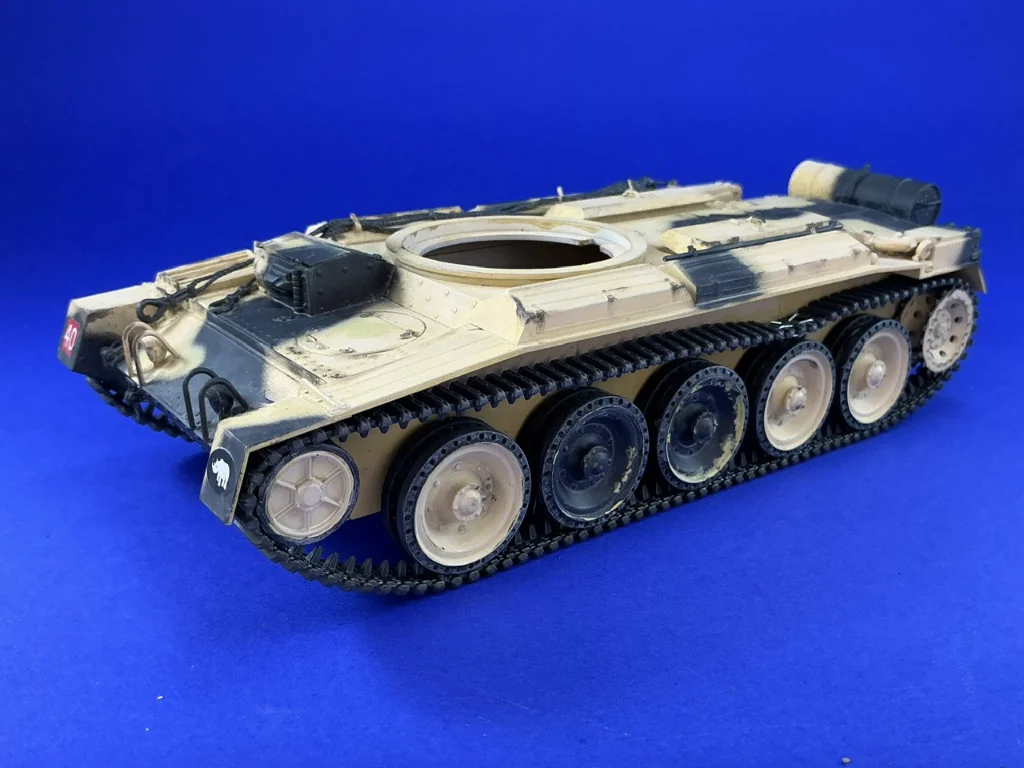
All that remained now was to glue the sand shields and some antennas on from 0.3 mm spring steel wire, and I think the model is done:
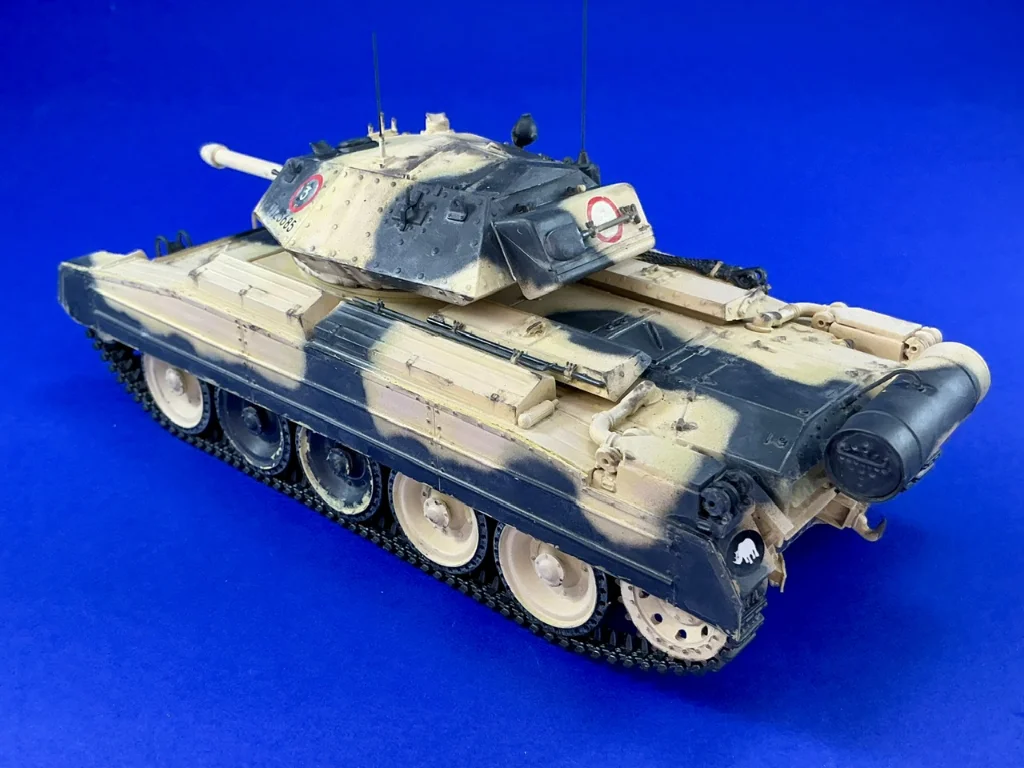

The shields didn’t work out as well as intended, mainly because the bends have worked themselves out a little bit. This results in the shields sitting almost against the wheels rather than a couple of millimetres away from them. If I were to build some more, I would make them from thin metal sheet instead of plastic, to ensure the bends remain as they should.
For fun, here are some Verlinden-style shots with a background:
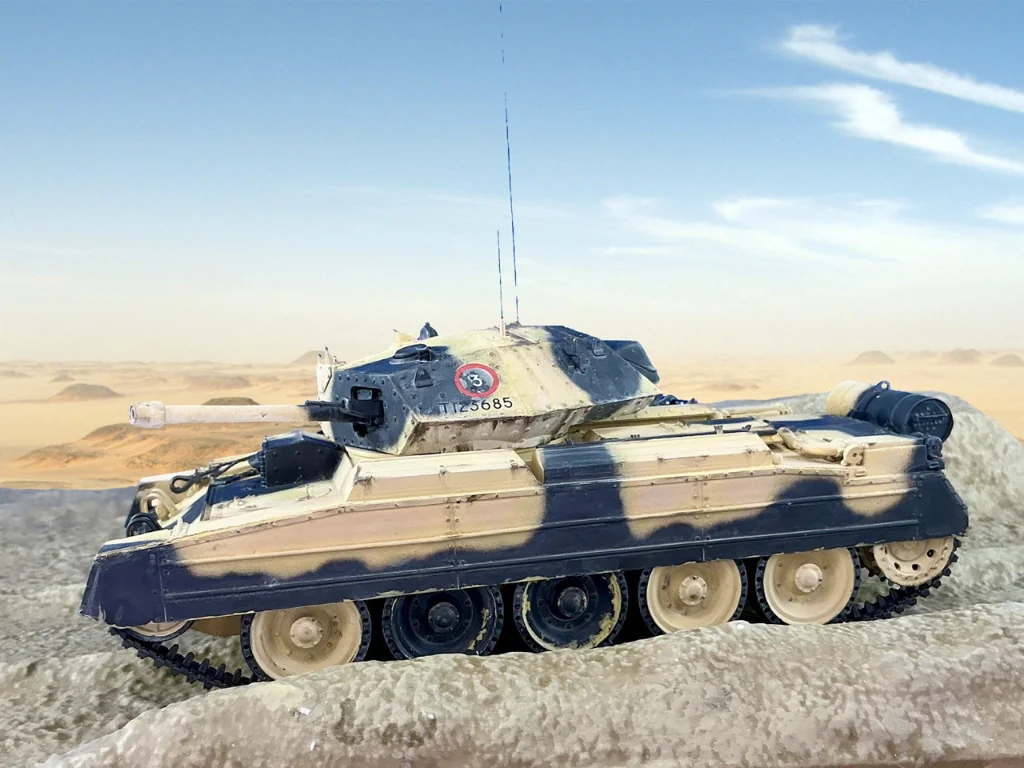
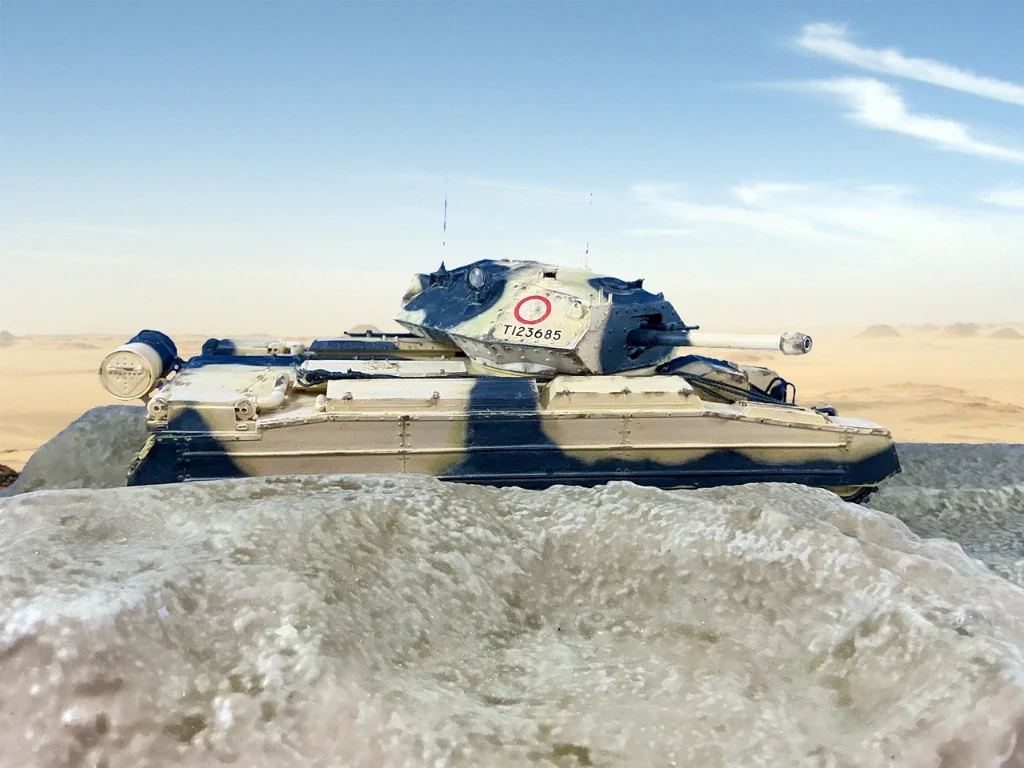
That background comes from Wikipedia, pasted behind the model in Photoshop. It’s not perfect, but then, neither was it in Verlinden’s photos ![]()