Good morning model builders, I managed to do some work on the JLTV.
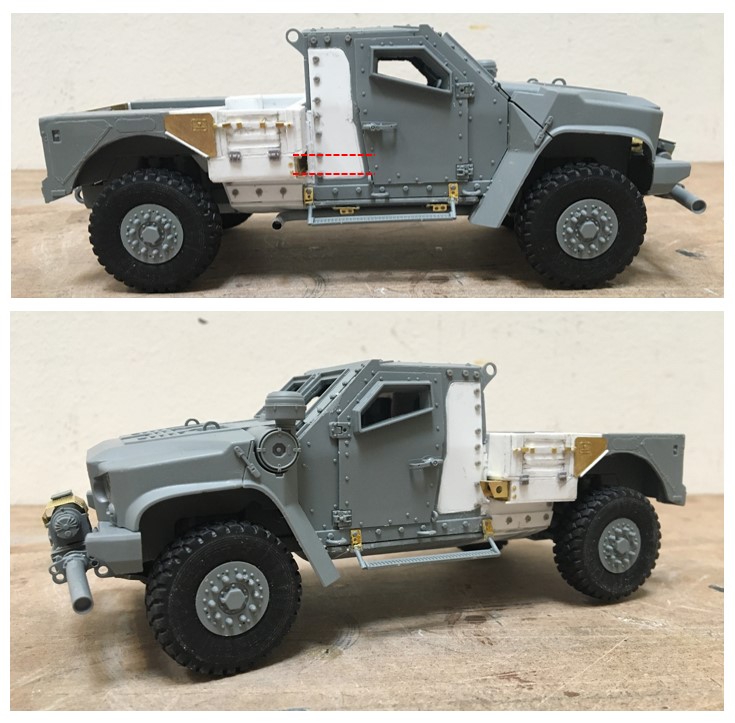
@Makinen, hi Piotr, well, like anything I suppose, with some practice, who knows? maybe you’d really like doing various conversions. If you decide to give it a go, I wouldn’t start with a really complicated project. I’ve found that paying attention to small things makes a big difference with this type of project. For example, if you don’t cut parts square or in the shape you really want, it will haunt you - in this case, as I didn’t initially set the chassis to the correct length. It turns out that if I had left it, the bed just wouldn’t look right. Similarly, some “un-square” cuts can lead to other things becoming unsquare, and can be a challenge to fix once you figure out your mistake. These unsquare parts can also become increasingly visually apparent in obvious places as the build moves forward.
@KoSprueone, hi KSO, thanks for dropping by, and hope this is helpful for your project. Once I was well into this it occurred to me to get in touch with @18bravo for some images - the info he sent over is really helpful - and again, I should have reached out sooner! There are a few details I built, only to discover I was off…well - there you go.
@SSGToms , ha! Thanks Matt - yes, I enjoy trying, but, I’m not quite at the level you suggest!
OK, on with today’s update:
You can see some headway. For this update, mostly adding kit parts and filling in some gaps.
@KoSprueone, I include the two dashed red lines (above) - there is indeed a piece of channel along the front edge of the bed. I used some leftover etch for this - as it is adequately thin and strong - unhappily, it’s a bit too tall - maybe 1/3 too tall. In some ways, this is fine, as it does allow for making a relatively strong frame beneath the deck. But, by using this, the area below the deck is too narrow.
It turns out, this truck has a whopping 20" of vertical travel at each wheel! wow! and this travel is regulated on-board. As near as I can gather, this is either pneumatic or hydraulic, with the pump/pto and related system, located in the space between the cab and the rear suspension. The way I built this basically passes, but, in reality, there should be more room between the rear rocker panels, and bed deck framing, to (I think ) allow for that system to fit. Again, not a deal breaker, but a bit of a bummer to know now!
This conversion is a bit deceptively simple - looking at the side elevation, it looks like you just cut the back of the cab off, and go - but, it’s not exactly that straight forward. You’ll need to modify the roof, fill the gunner’s opening, and use the upper portion of the kit’s rear wall - keeping a few connection points in tact. I suggest lots of tedious dryfitting and measuring ![]() , while keeping in mind, that you’ll need to attach a bed and extend the chassis hull - piece of cake!
, while keeping in mind, that you’ll need to attach a bed and extend the chassis hull - piece of cake! ![]()
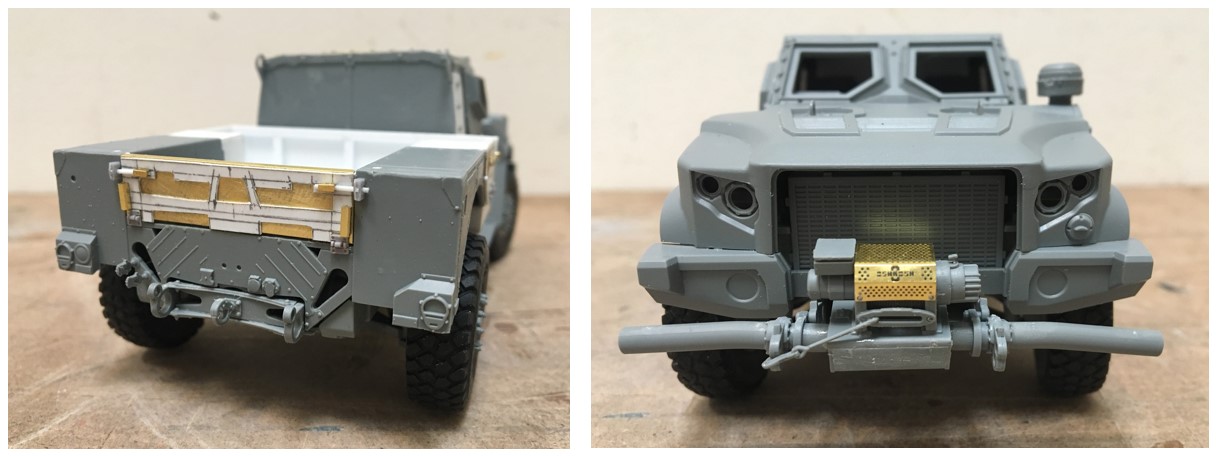
The kit comes with a nice front winch, that goes together easily. It’s only dryfit here, as the kit also includes a fine mesh grill, that will be painted black - and I want to paint it with an airbrush, whereas, I will hand paint the other parts black, over the base sand color.
It turns out there is a distinctive and interesting detail on the the tailgate - unhappily, I made the basic gate before I received the pics from @18bravo, which means my gate is about two scale inches too tall - I made it flush with the sides, and it should be lower…well…anyway, I did make up the rest of the gate with the appropriate details.
Regarding the overall conversion, I suggest you decide early on if you want the cab open or not. I vacillated about this, and might have made things harder than they had to be. If you decide to keep the cab open, I would not start work on the bed until you get the cab modified, painted/detailed (interior), buttoned up, and then start the bed. This will allow for a tighter fit for the bed and chassis hull. If you don’t want the cab open, still work to get the cab closed in then, get after the bed. The way I did it required making the bed as a module, that drops in place, requiring the builder to make some “floating” parts that get locked in when you go to assemble it.
Another subtle detail to be aware of is where you decide to cut the rocker panels. If I did this again, I would make the cut behind the last bolt head above the rear running board, but remember, the rear wall of the cab will be inside/forward of these bolts. I didn’t do this with the rockers, and had to go back and add a short segment of the rockers back - which led to some problems with aligning the PE brackets that visually hold up the running boards.
I have photo of this rig with a CROWS mounted on the roof - just over the windshield, which I will add - the kit comes with a nice 50 cal with a brass barrel - which I want to use!. As for the rest of the CROWS, I’ll raid a PANDA MATV kit I have and scratch the rest.
Ok gents, thanks for having a look.
Cheers,
Nick