I seem to have trouble keeping the chassis straight on my 1/35 scale trucks, Is there a tool or suggestion on how I can make this happen please?
Thanks in advance
Chris
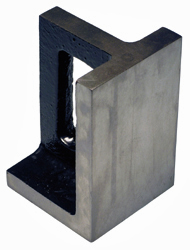
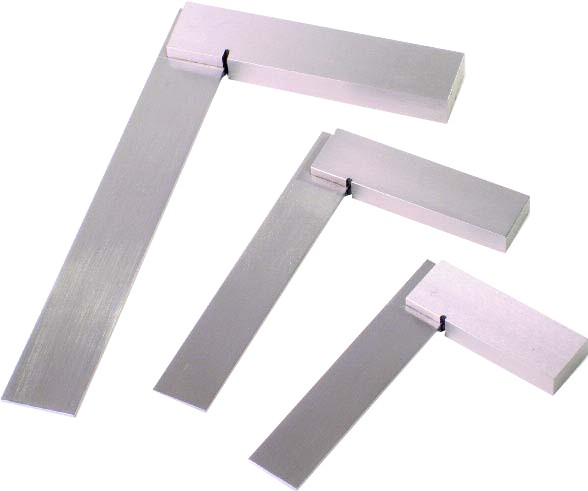
Pick up a set of Steel Squares and Steel Angle Blocks, and a thick piece of glass. The glass provides a smooth true surface to assemble your chassis parts. Steel rulers are helpful as well for their long straight edges.
The steel and glass materials alow you to use a razor blade or your hobby blade to separate the model assembly if some glue accidentally attaches the model to these sufaces.
hi thanks for the suggestion, would you know if there is anything on you tube to show or explain how this is done?
thanks again
You’re welcome. I don’t know of any videos but a search will reveal that if any have been made.
Note that many kit chassis beams have details sticking out on both the upper and lower side so they don’t adapt well to a flat surface.
If you have a piece of sheet glass:
- Take a sheet of squared paper (graph paper?) and tape it to one surface of the glass.
- Place the glass on you work table with the paper under the glass.
- Place the chassis beams on the glass and align them using the lines on the paper as guides.
If you don’t have a suitable sheet of glass you can either get some or work directly on the paper. Cutting mats for model hobby purposes usually have a square pattern …
The tricky part is to avoid twisting. Happens in real trucks when the engine puts out a lot of torque (heavy load uphill for instance) which makes the cab lean sideways or even a front wheel to lift off the ground.
Using the glass surface:
- If the top or bottom of the chassis is a straight line just place the beams on the glass and hold them down with weights or adhesive tape.
- If they have raised detail such as mounting points for loadbeds, attachments for axles et.c. you need to put the chassis on blocks (drilling holes in glass to make space for the raised detail is way too much work) so that the raised detail is lifted up above the glass surface. Straight pieces of sprue can work, otherwise you can use any suitable objects with two parallell surfaces.
Not a vid, but a picture how I straighten and square off a scratch build chassis(Pf.11 Pontonwagen):
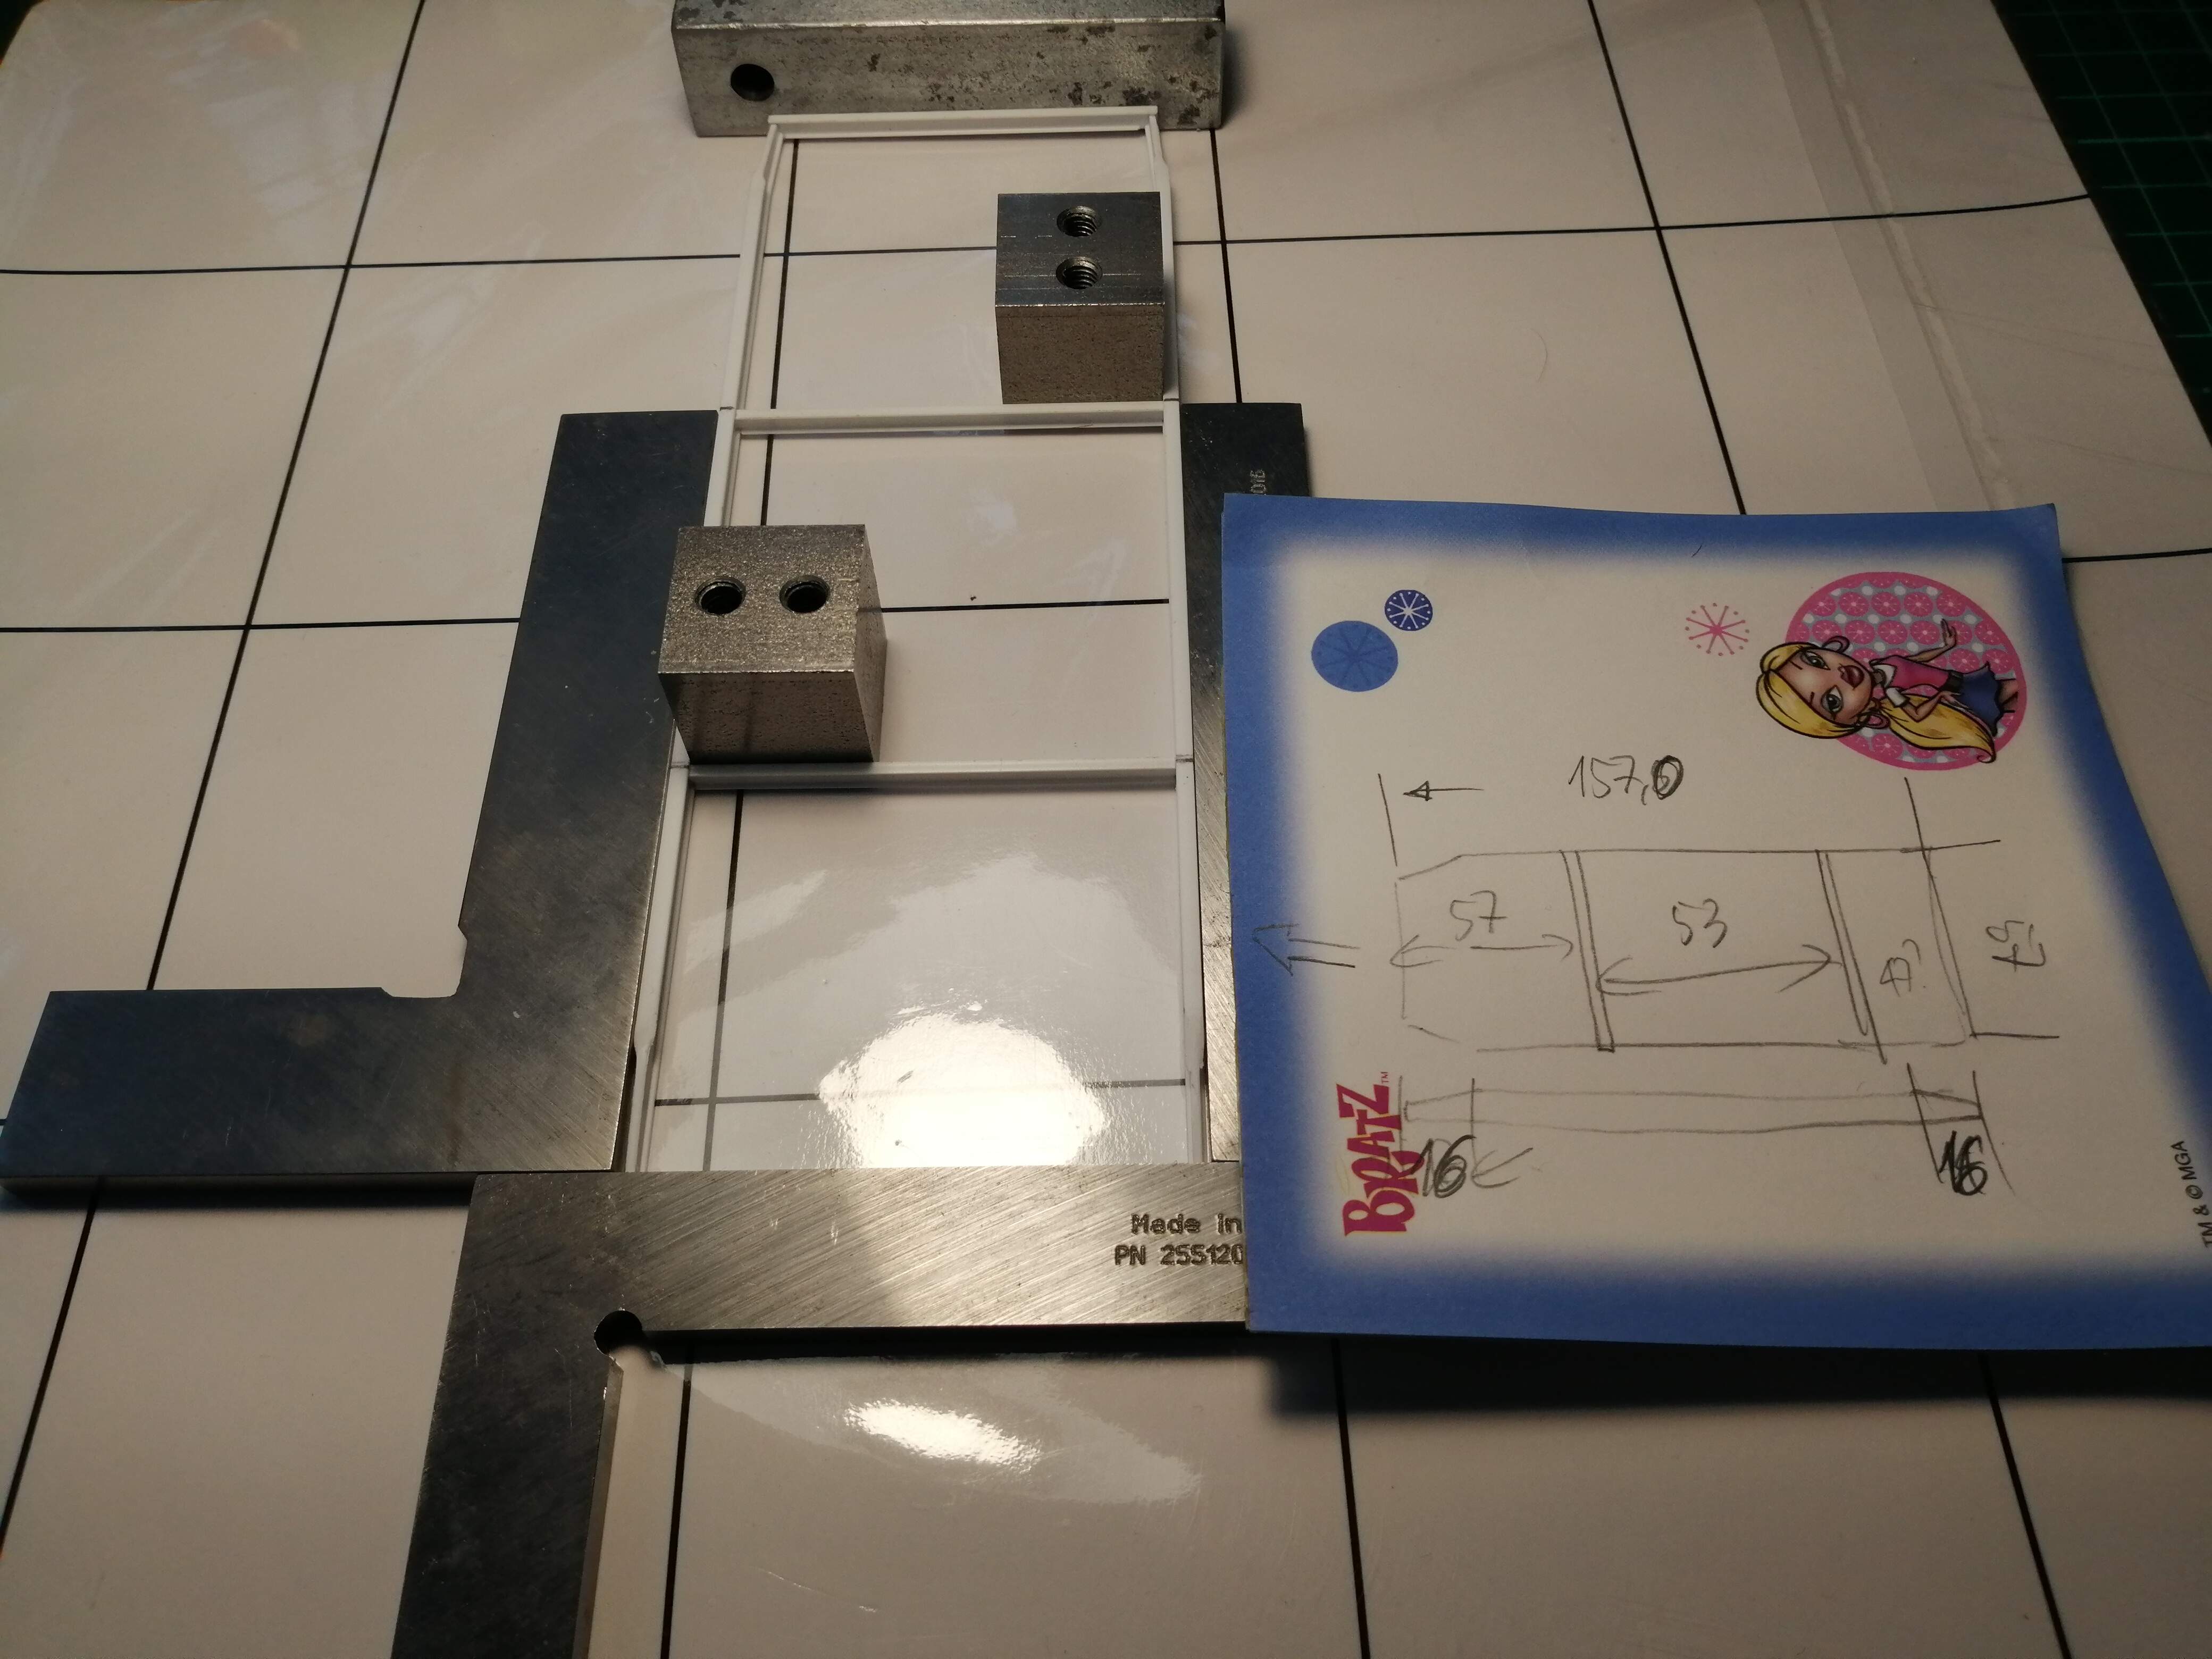
The white mat is magnetic cutting mat(found and ordered online).
The squares are Steel Machinist’s Squares I bought from a specialized lathe shop, I also used some Steel Cubes, cut by a friend of mine on his lathe.
One only needs to arrange a 90 degree angle using any of the true surfaces of the Squares, then the magnetic map holds all tools tight.
HTH,
Cheers,
Angel
Hmmm…I see you are still using Bratz note paper Angel.
Most of the time, the issue I have is that chassis rails are curved due to packing. A jig helps hold them together, but if both rails curve the same way, then you are going to have a problem even if a jig is used. Sometimes, you just have to add additional bracing where it will not be seen on the completed model.
Also, sometimes you are better off attaching a rail to the tray, cargo bed, etc first. Usually the bed has a flat surface, so put that face down on something flat that you can get a clamp around. Clamp a straight edge or little blocks like Angel shows you up against the rail where there are no protrusions (usually the inside of the rail) and where you can trap the bed between the straight edge and flat surface. Attach the rail, then push up some blocks on the other side of the rail and clamp them. Let that dry thoroughly. Then later add the internal cross members and braces and the other rail. Repeat the clamp process on the second rail - most of the time you only need blocks on the outside as the firmly set first rail gives adequate resistance. This method also helps when the rail is bent in two dimensions, as cementing to the bed helps pull the rail into line parallel to the bed.
When setting the suspension, I use a Lego jig and Post It notes. It depends on where you can support the chassis as to what shape the Lego should be. Usually a ‘Cross of Lorraine’ shape works. Turn the Lego upside down and rest the bumps on your flat surface. Make the height of the Lego so the wheels will be suspended above the flat surface. Assemble all the major components ready to fit to the chassis. Blu-tac the wheels in place if you are not attaching them. Add the springs and component to the chassis and rest it all on the jig, wheels down. Then peel off a block of Post-it leaves at the height needed to support the wheel highest off the flat surface and count the leaves. Peel off blocks of the same number of leaves for all the other wheels and slip them under the wheel and adjust your suspension so all wheels are now supported by the Post-its. When that is all cured, you will have a chassis where all wheels sit flat on the surface.
Tip#2. If you are removing wheels for painting, drill a hole in the tyre where it will touch the ground before temporarily attaching them to set the suspension height. Add a post it with the position number of the wheel to the tyre so you know where it came from and you know where the bottom is. That way, any wheels that are not perfectly round (e.g. resin ones) don’t become an issue as the wheels are all going back exactly as they were positioned for suspension set.
I race slotcars and some of the BRM cars have a plastic chassis and they are not always flat. We put them on a flat steel plate, put magnets on them and warm them in the oven. After a while we pull them out, let them cool and reassemble a now flat chassis. You could also put them in warm water, let them sit for a few minutes. Pull it out and torque it some.
I start my trucks by assembling the main frame parts, leaving off any details that stick up or down if I can so the frame can be laid flat on my cutting mat. The mat has a grid printed on it, so I just line up the rails and bumpers with the grid and let it dry nice & square. I leave them overnight just to be sure…
Thanks everyone a lot of good advice
These 1-2-3 blocks may be also useful for aligning parts:
https://www.ebay.com/itm/264291826442?hash=item3d89053b0a:g:nq4AAOSwkCdcuYFV
That seems a good way to go thanks.
I’m starting to make a 1/35 trumpeter Tactical Fire Truck. So I need the chassis straight because its a boxy type of shape and if the chassis is twisted I think it will show.
But thank you for your input so far.
Chris
I use the micro mark gluing jig I also picked up an extra set of magnets.
1 Like
That is my go to device as well, including the extra set of magnets, for building model railroad rolling stock and structures.
Hi great bit of kit, I’ll have to see if I can get it here in the uk.
Thanks
1 Like
I was going to post about buying 1/2/3 blocks instead of angle plates. Much cheaper and pretty easy to use and come by. Angle plates usually start out around 4" and go from there, and can be fairly expensive unless you find the ones that are unground (they expect you to finish them out). That’s much harder to than you’d think, and you need three masters to do it the right way. I was lucky as I had six master 6" angle plates that were all hand scraped. I sold them for $500 to a tool & die shop.
What I would do is simply buy a 24" long piece of 1" x 2" gauge stock (O-1), and maybe cut off the lengths you desire. Say three pieces 3" long, and then a couple 6" long. The material was pretty square out of the wrapper, and those numbers mean little. You could buy 3/4" x 2" and do the same thing for less money. If you have a small drill press, then you can drill and tap whatever holes you desire in it (machines very well). Just let it air cool when you cut it off!! Never quench it in oil and water may not do it any good as well (even though it’s oil hardening). Those pieces will be better than the hardened low carbon steel in the add, and you really don’t need them hardened anyway. My good ones are on size to about one arc second (.000048"), and no one touches them.
gary