Let’s get to it then - you’re on a roll ! LOL
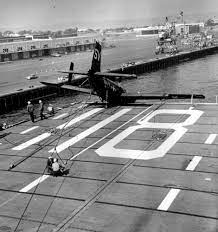
Yeah, a slow roll: 
But, this bird is going to be launched successfully, and not like this.
I do want to finish it.
3 Likes
That looks great Brian, nicely done ![]()
2 Likes
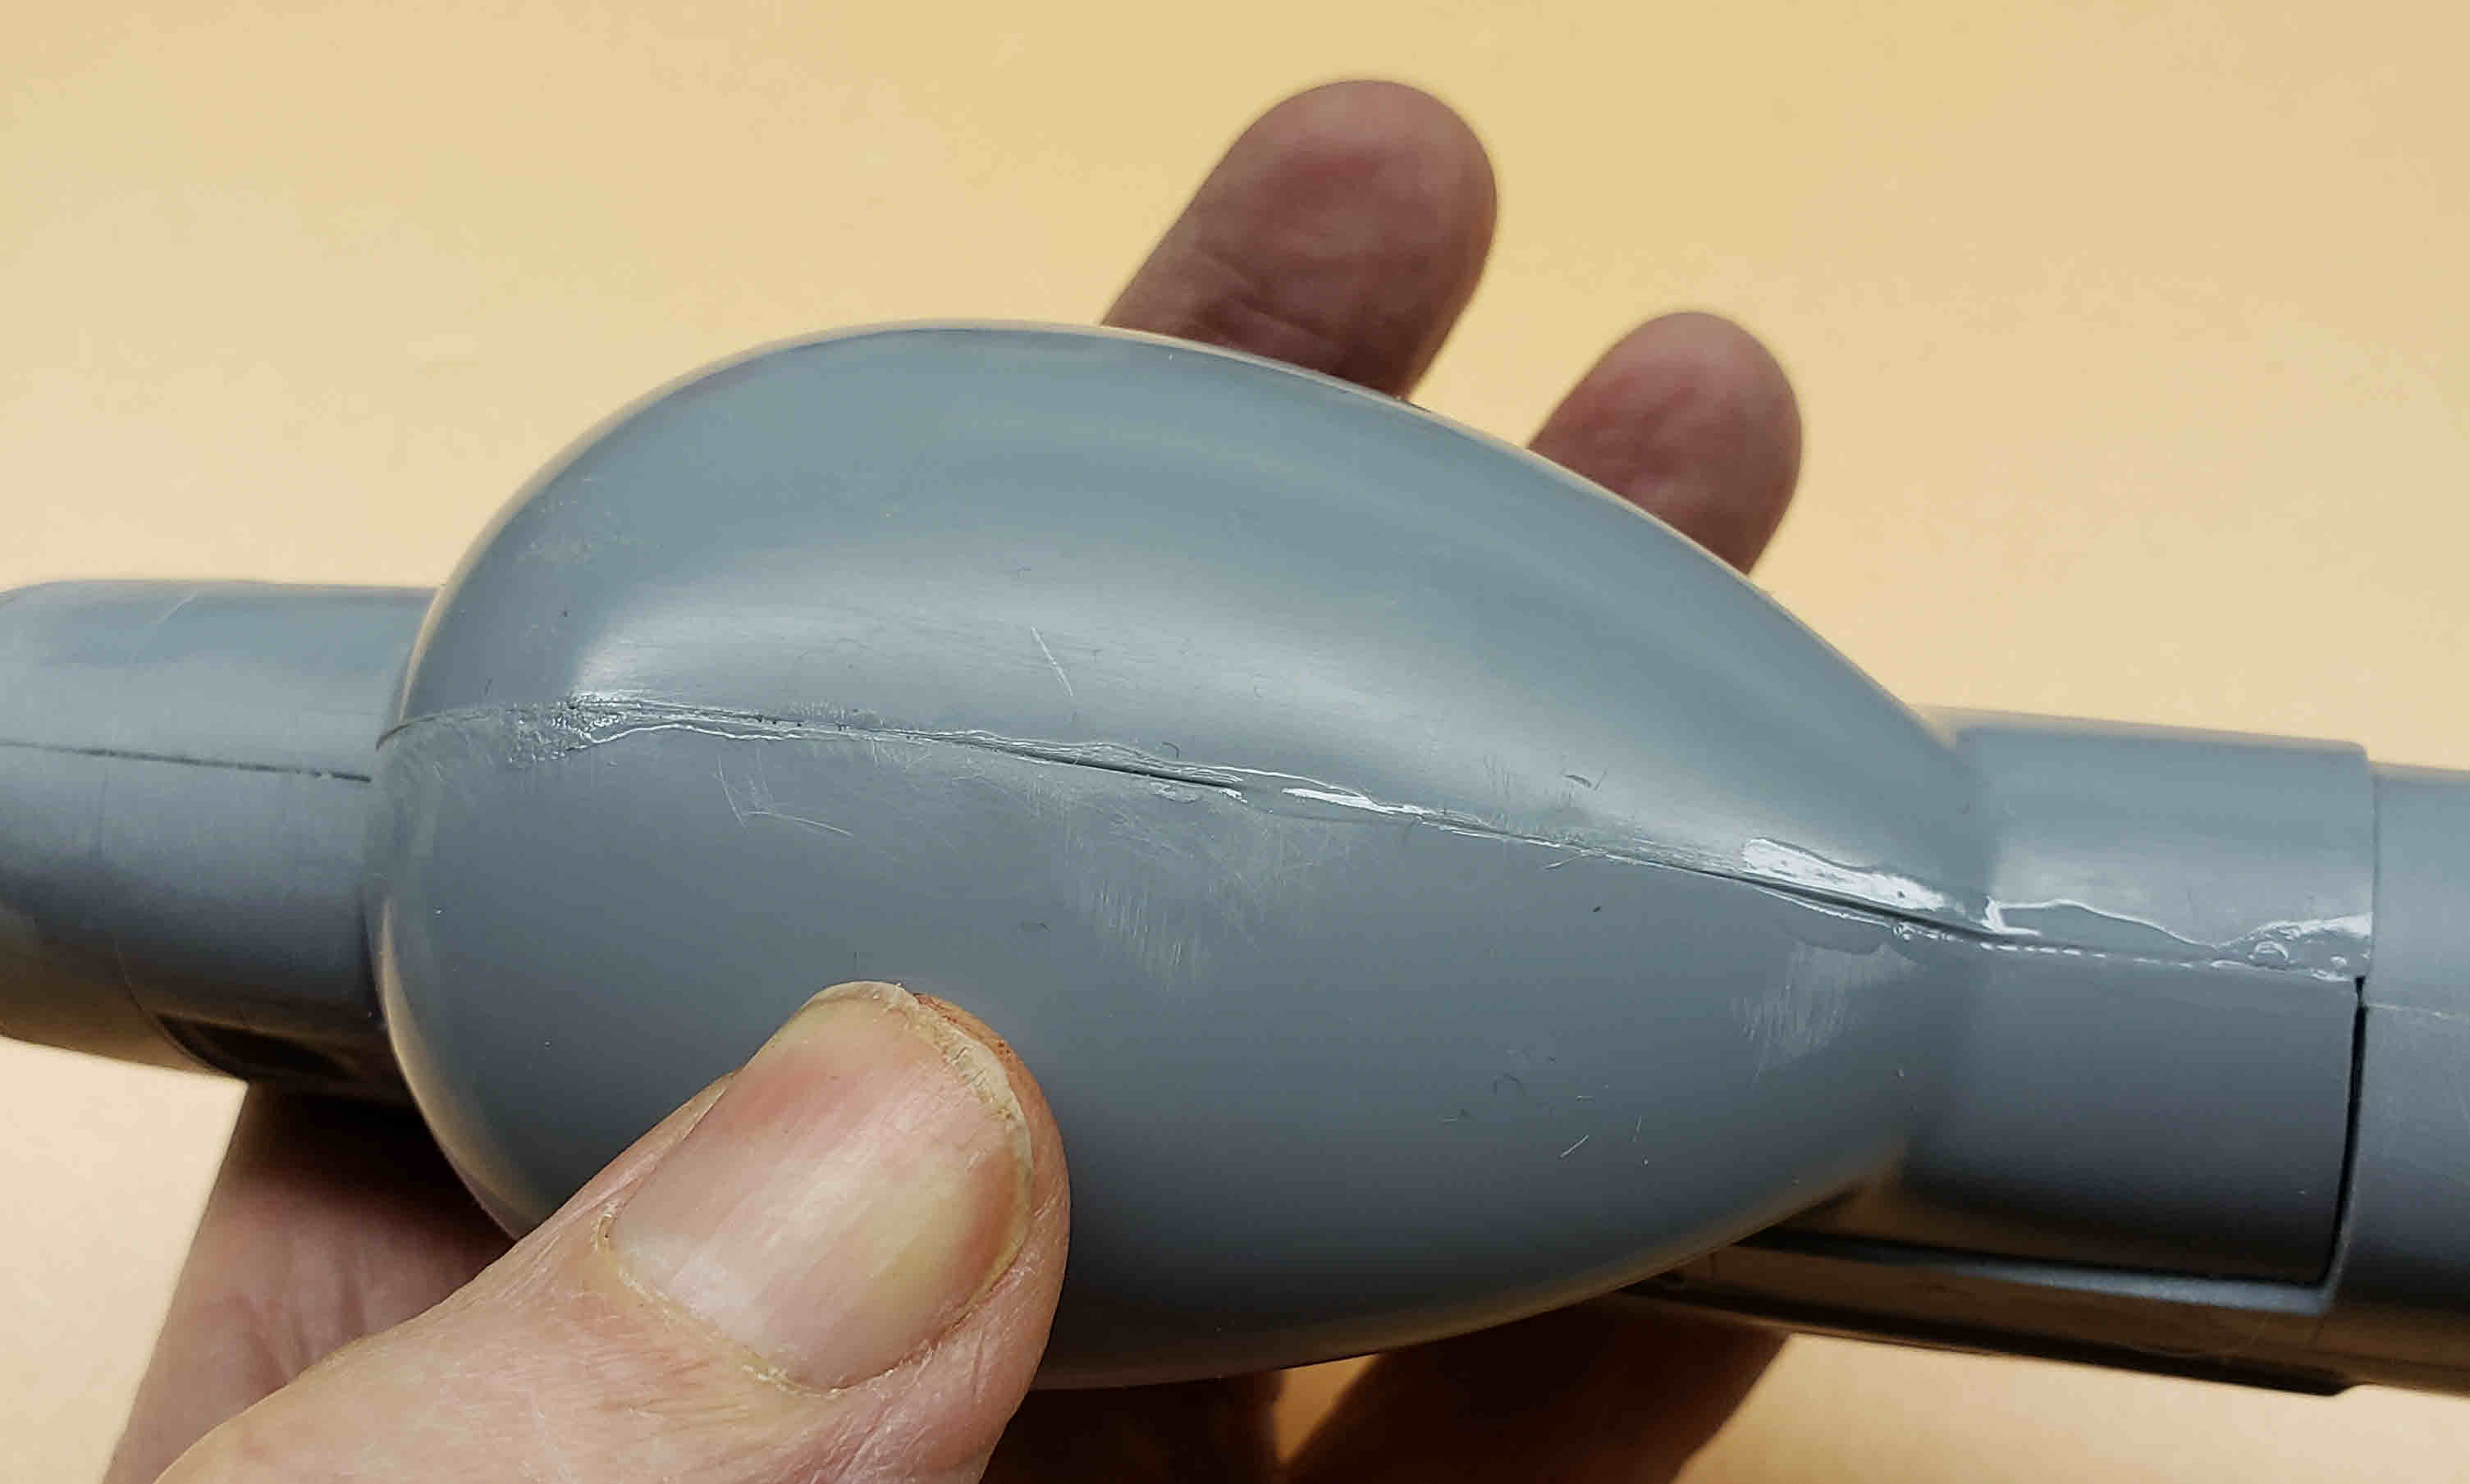
Fuselage Join - “I knew this was gonna happen!” 
First, Merry Christmas to all who celebrate the holiday, and peace to all men (and women) of “good will” regardless of faith or lack thereof. I won’t say more about my own beliefs, hewing to the old “never discuss religion and politics” maxim. Suffice it to say with an uber Irish name like mine (Brian O’Neill) I was raised in the Roman Catholic tradition.
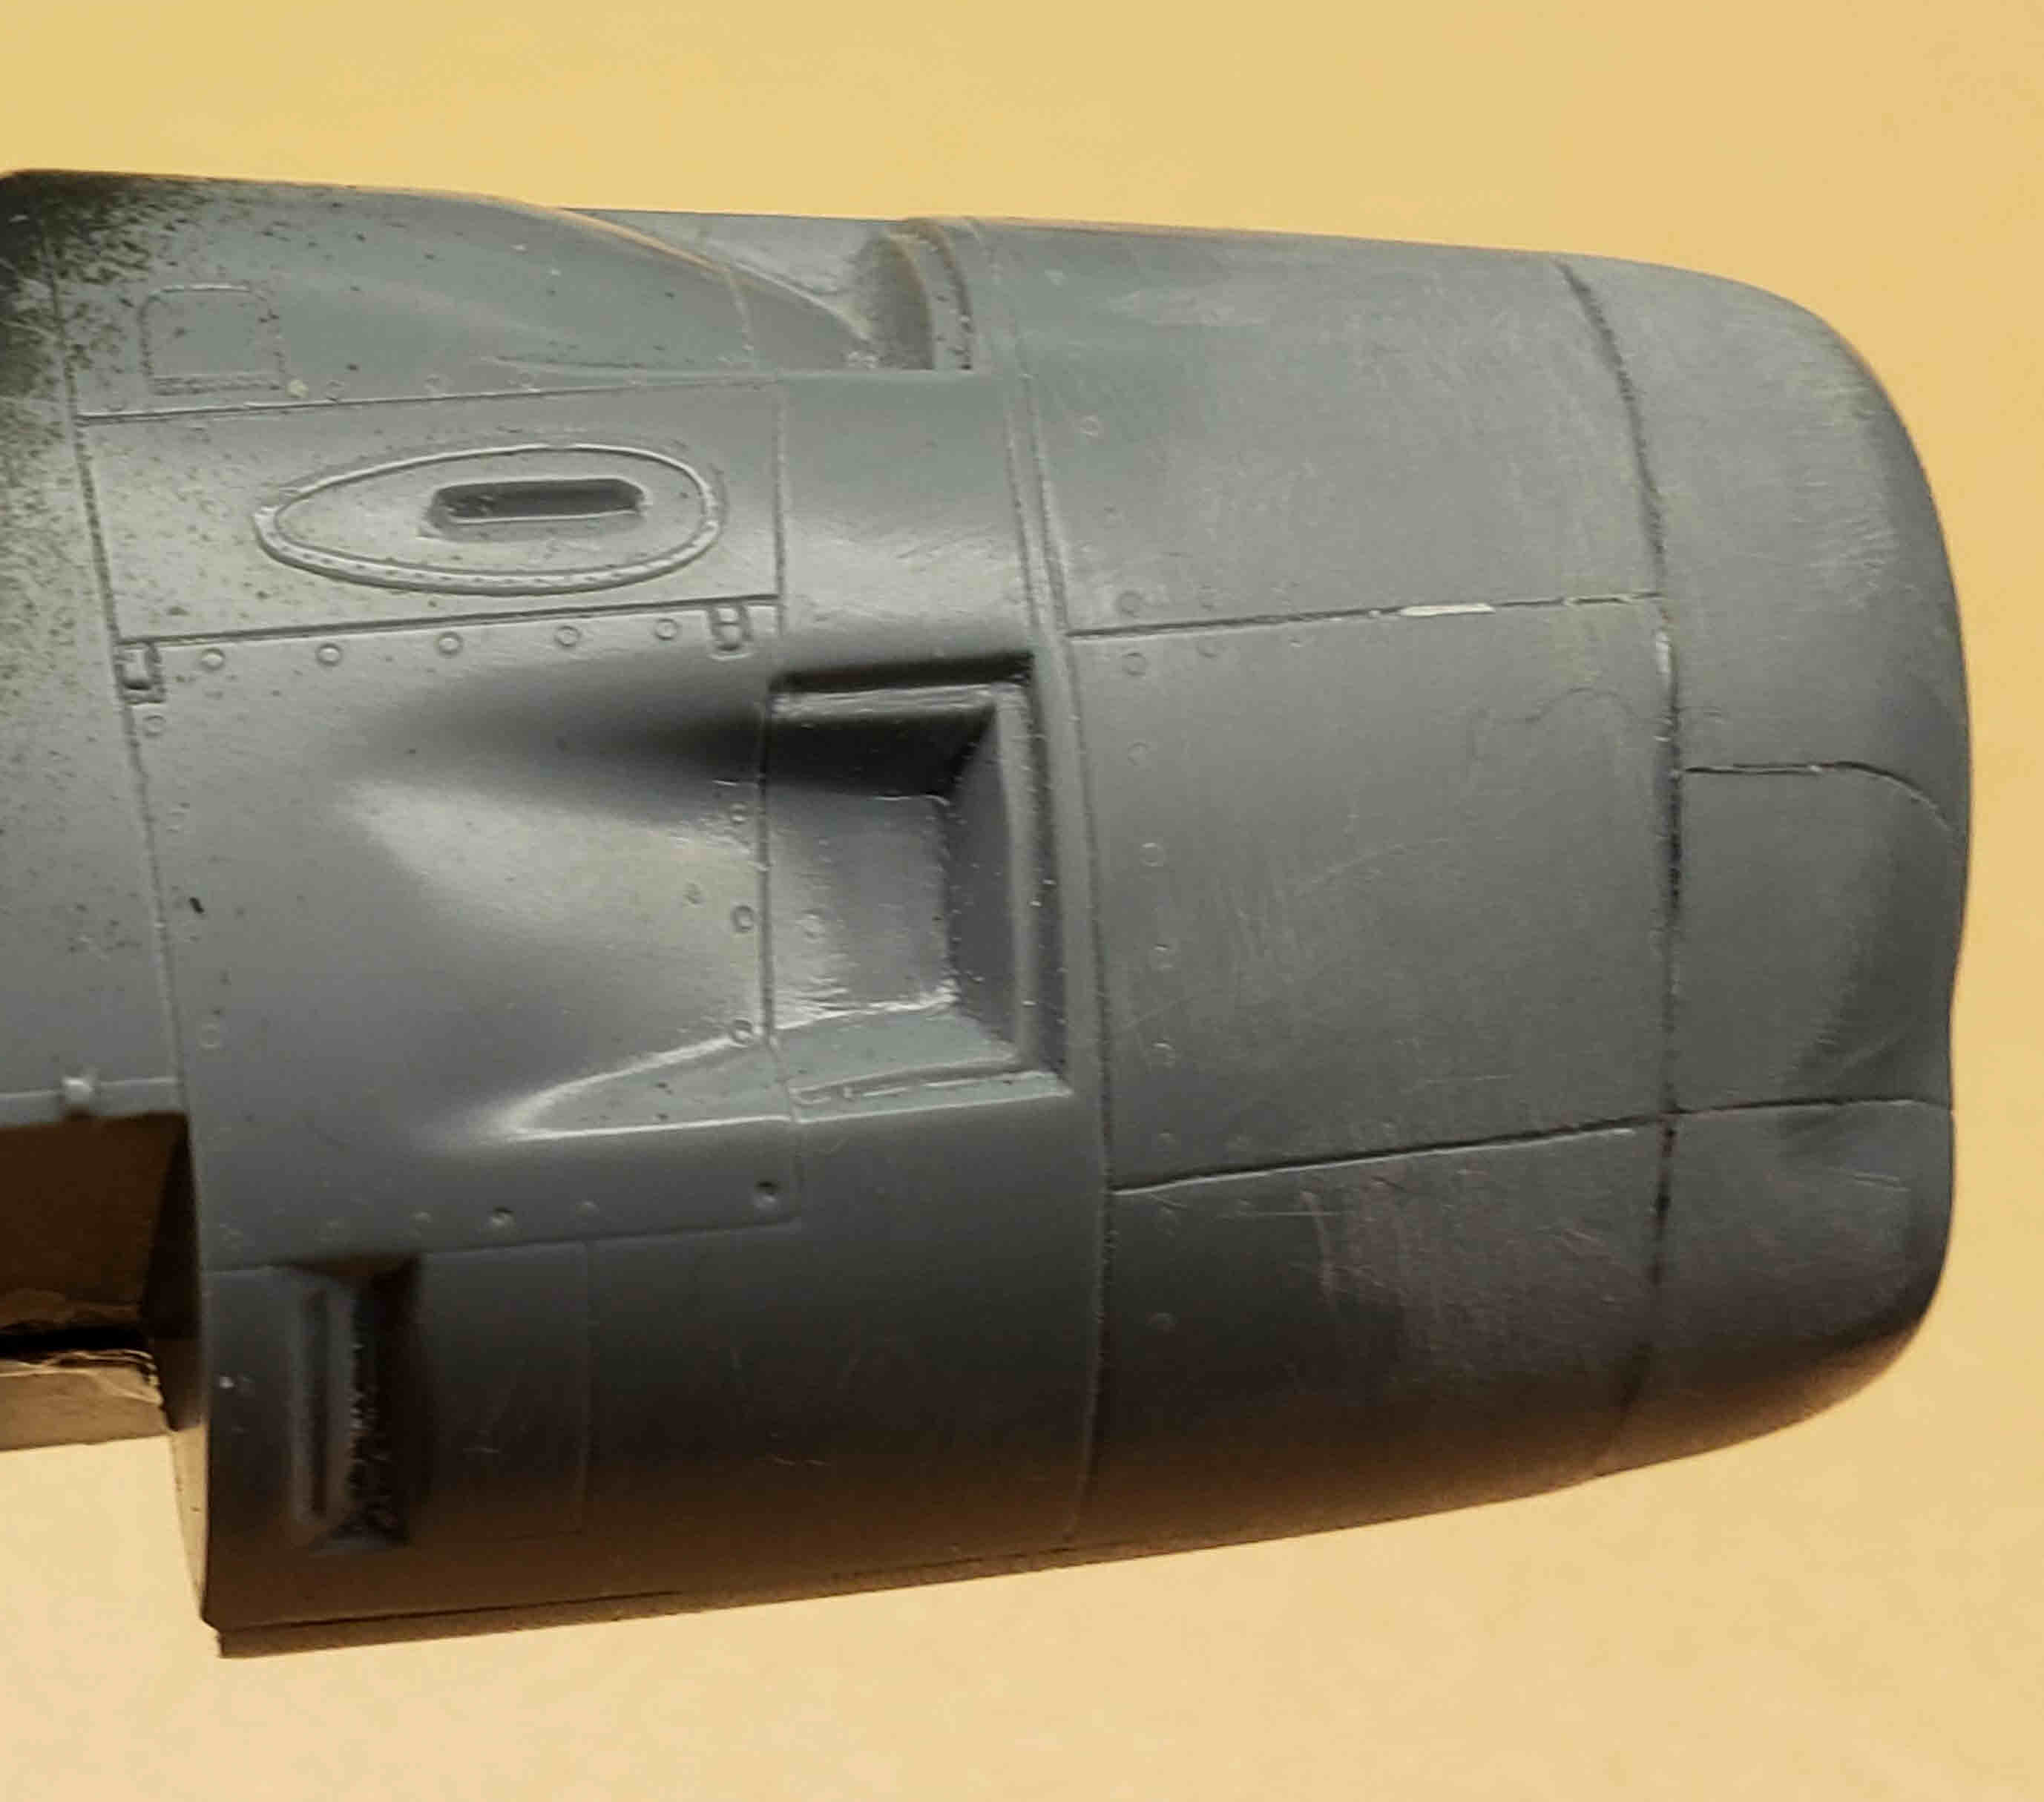
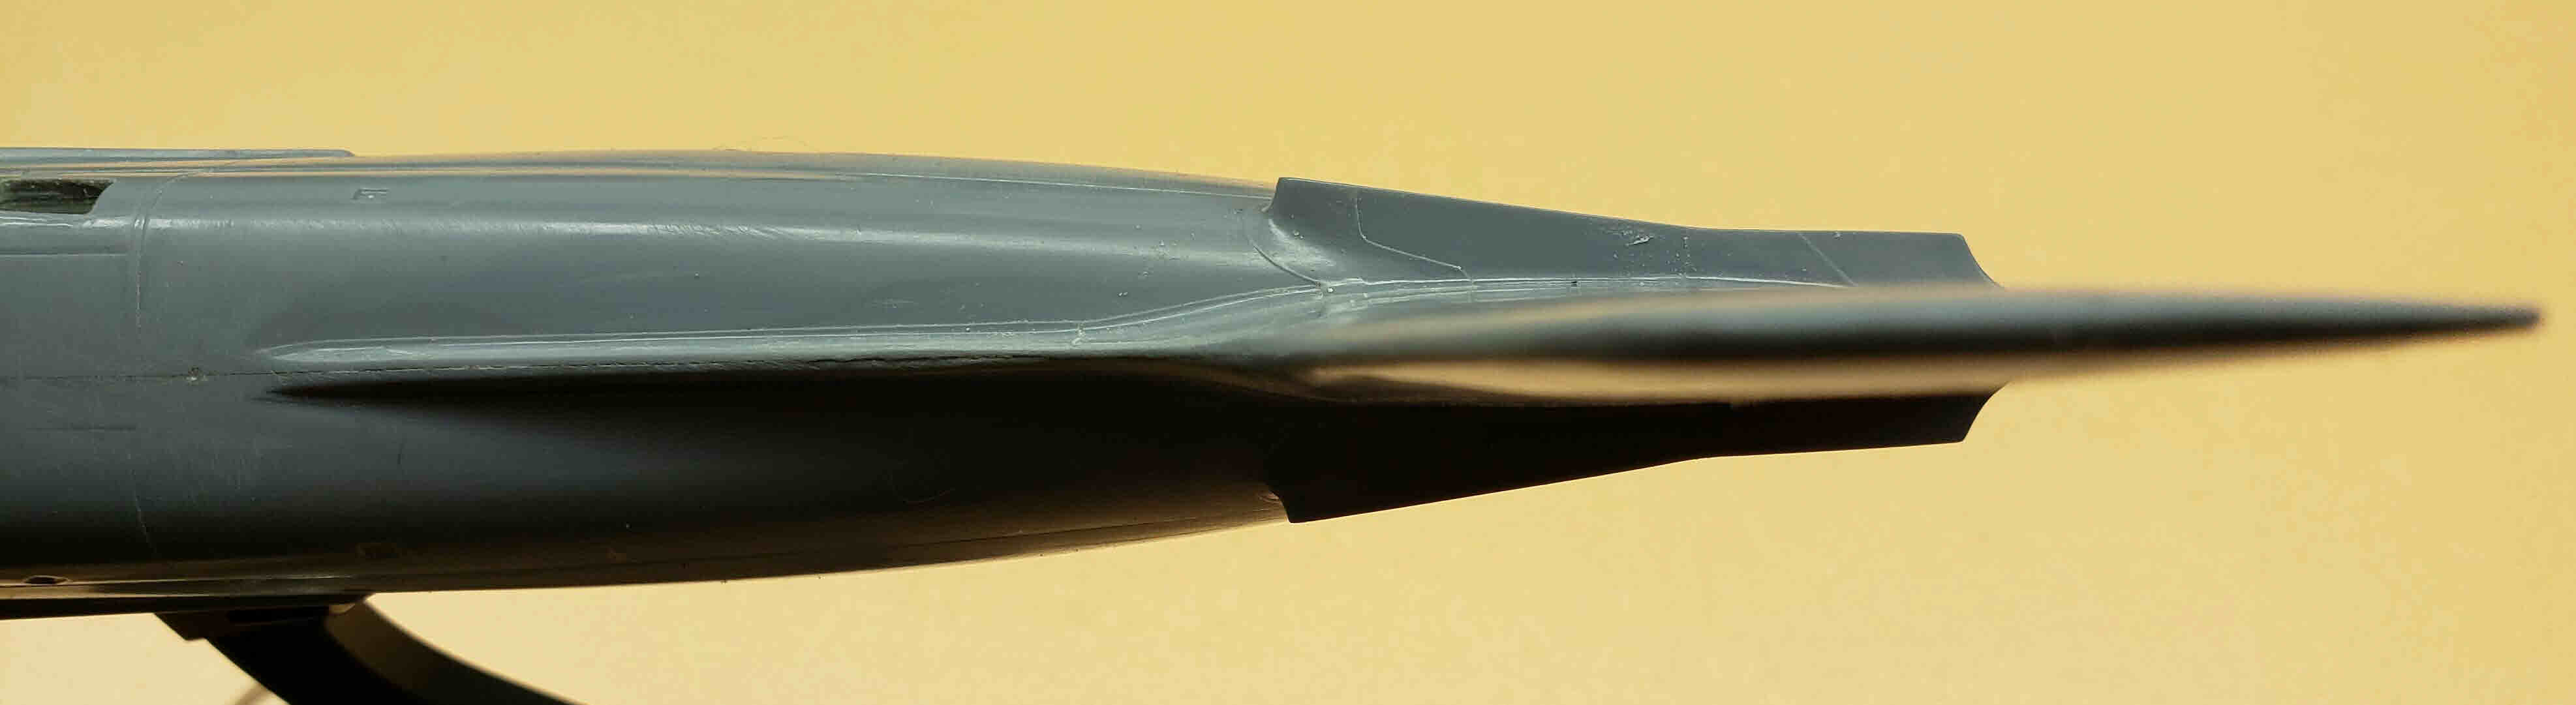
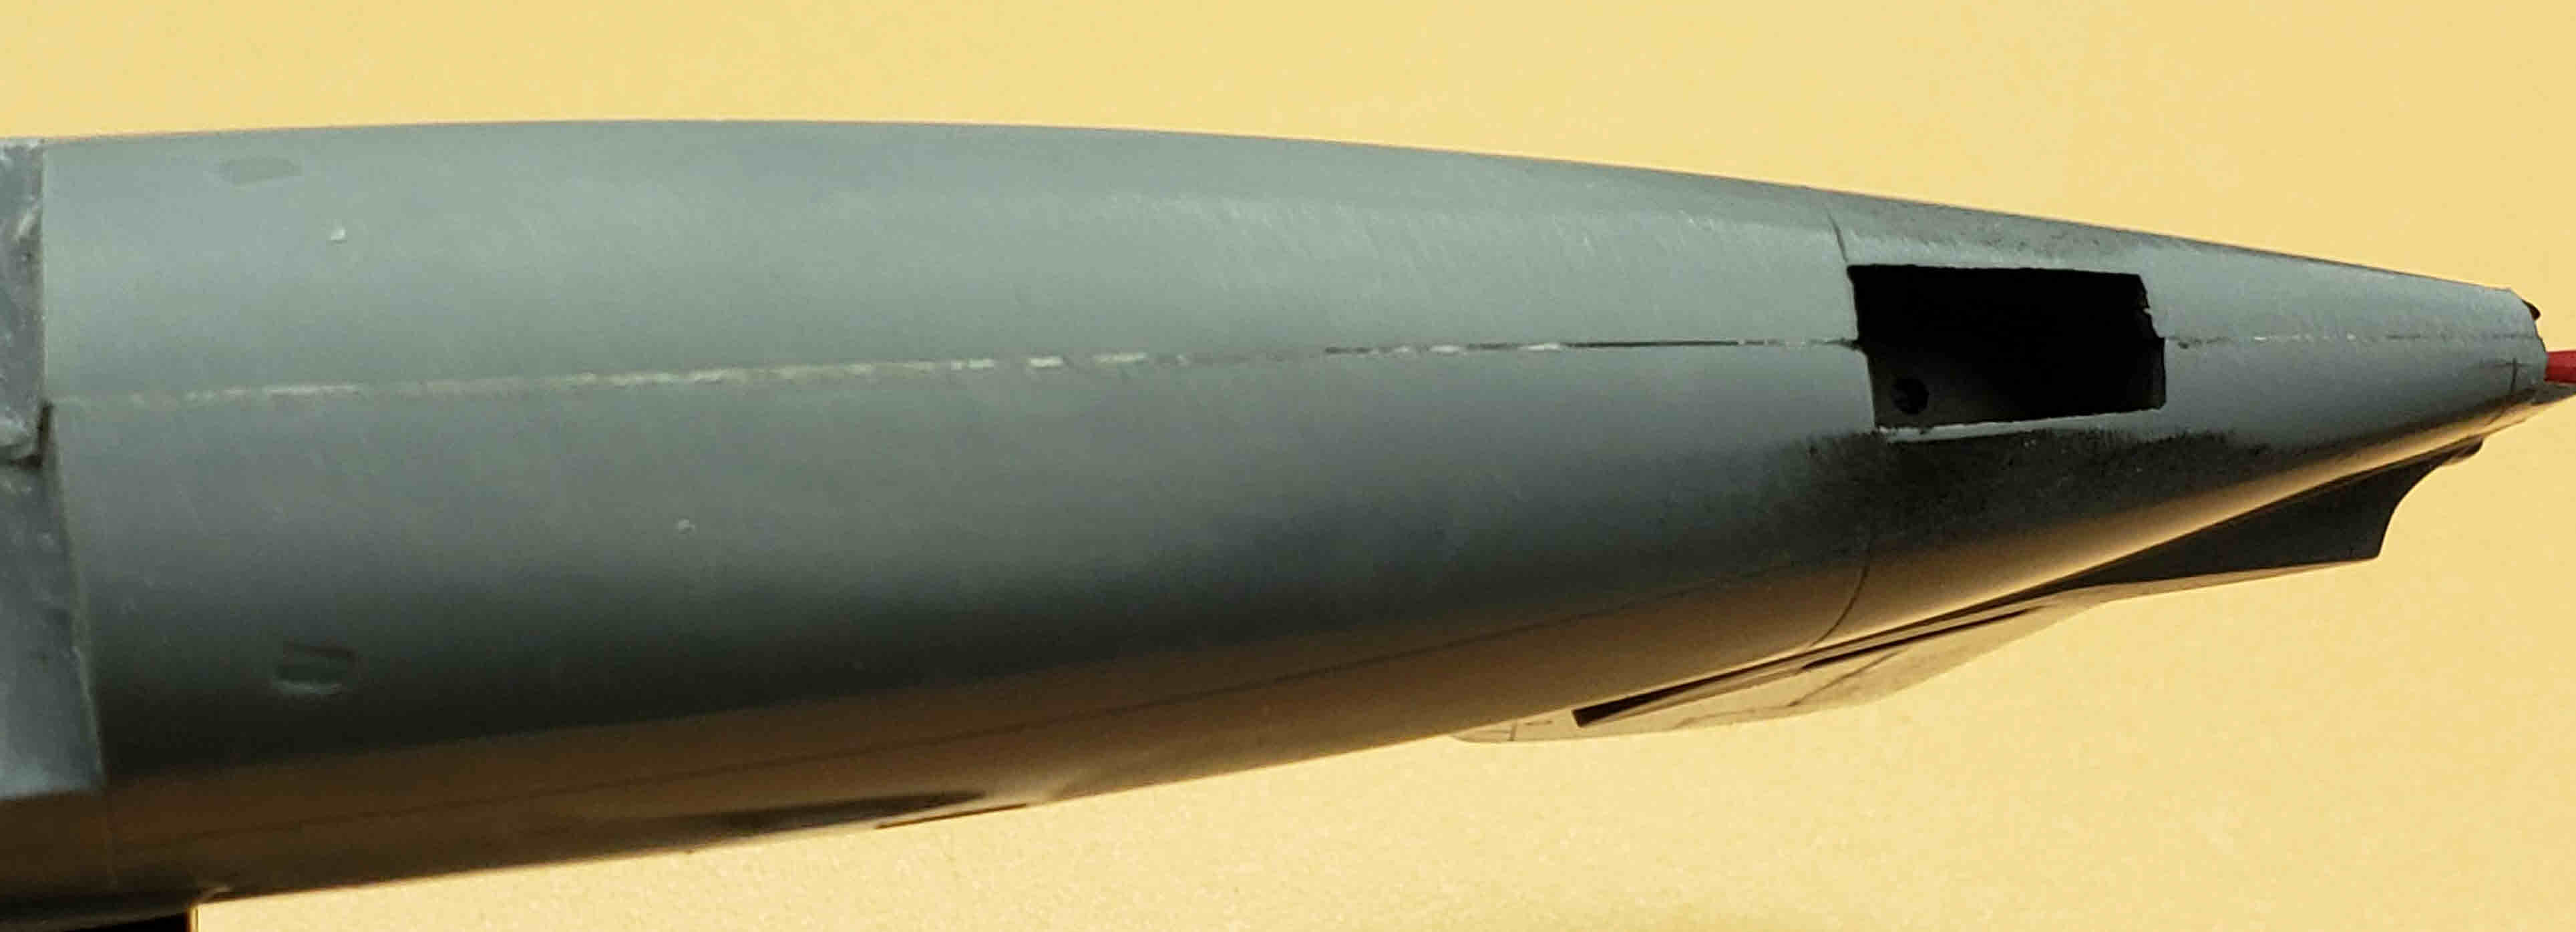
Okay, back to the Guardian, which was anything but a guardian angel at this step. I put off gluing the fuselage halves together as long as I could, but there comes a point where all the test fitting, pre-sanding, filing down of obvious troublesome contact points, and other myriad imperfections in a short run kit, or near short-run kit, no longer provide excuses for taking the next big step.
I glued the fuselage halves together, and despite all my efforts, it proved to be a mess. My conclusion is that no amount of initial prep work was going to overcome the warping of the two fuselage halves. You see the results below.
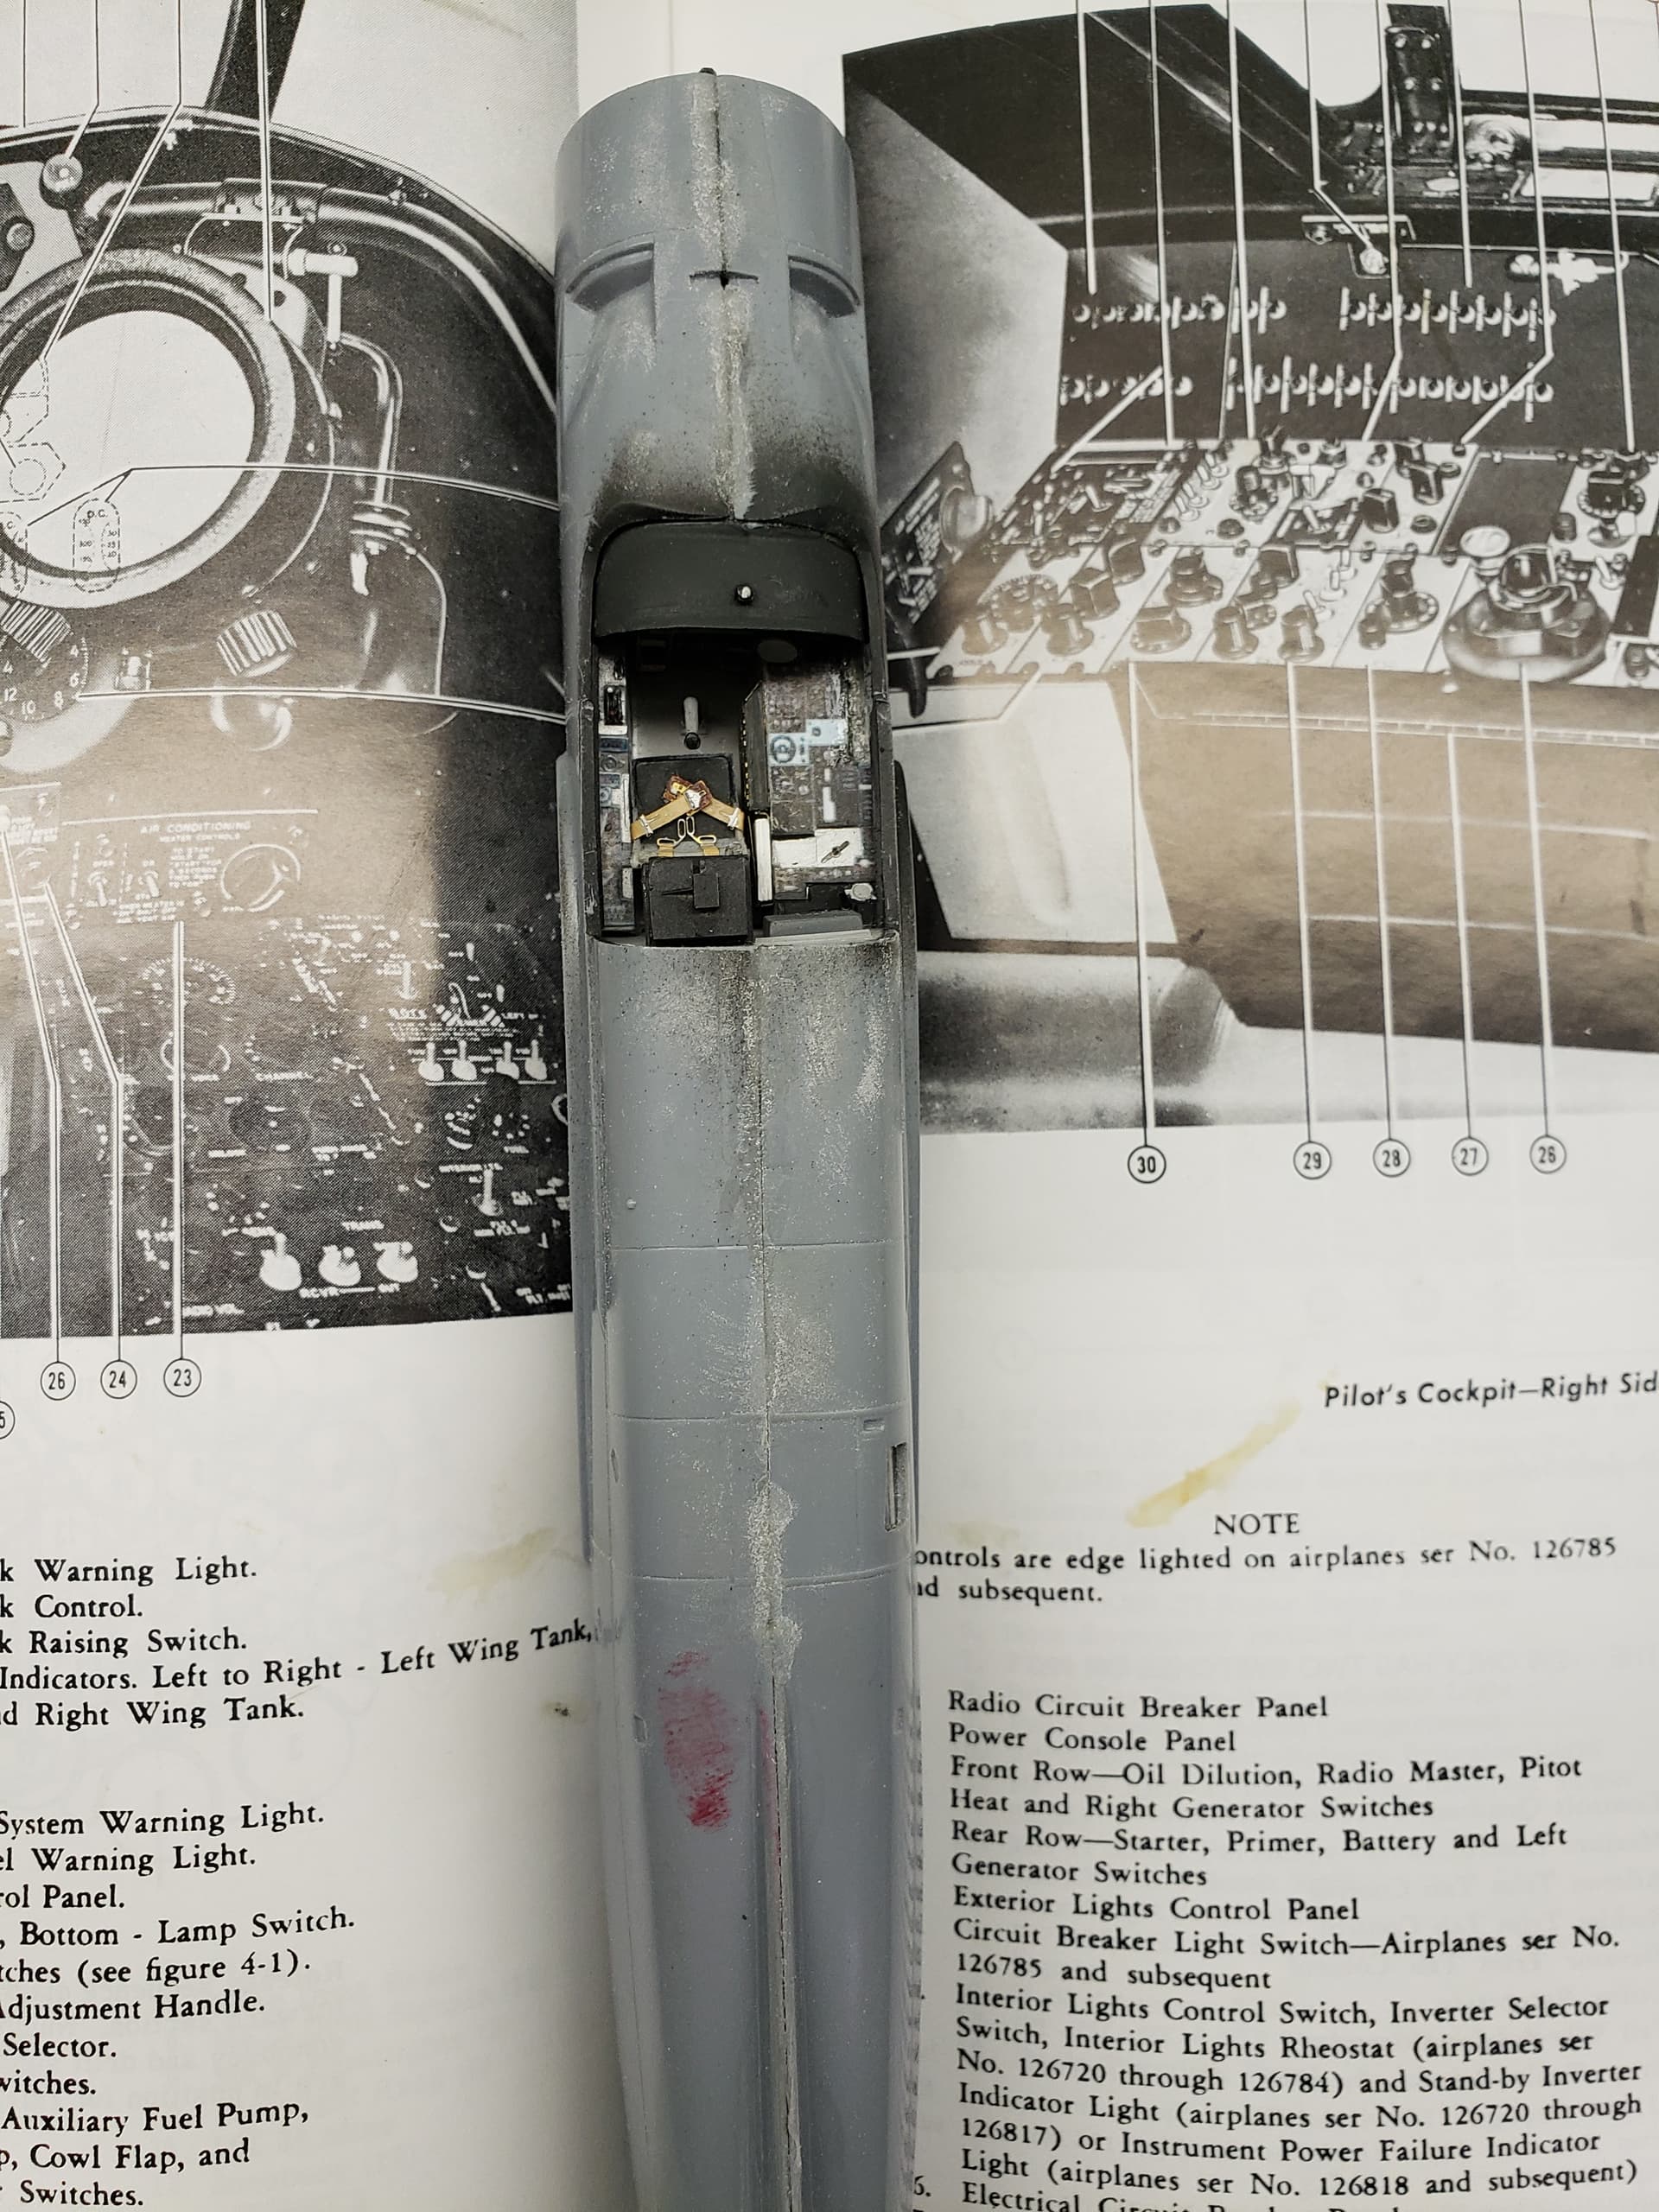
In the next exciting chapter, you’ll see how I try to fix this mess.
At times like this one needs inspiration and motivation. Happily, and by chance, I opened an end table in my bedroom and discovered that my loving spouse had stored a book there that had mysteriously gone missing for months. Here it is.
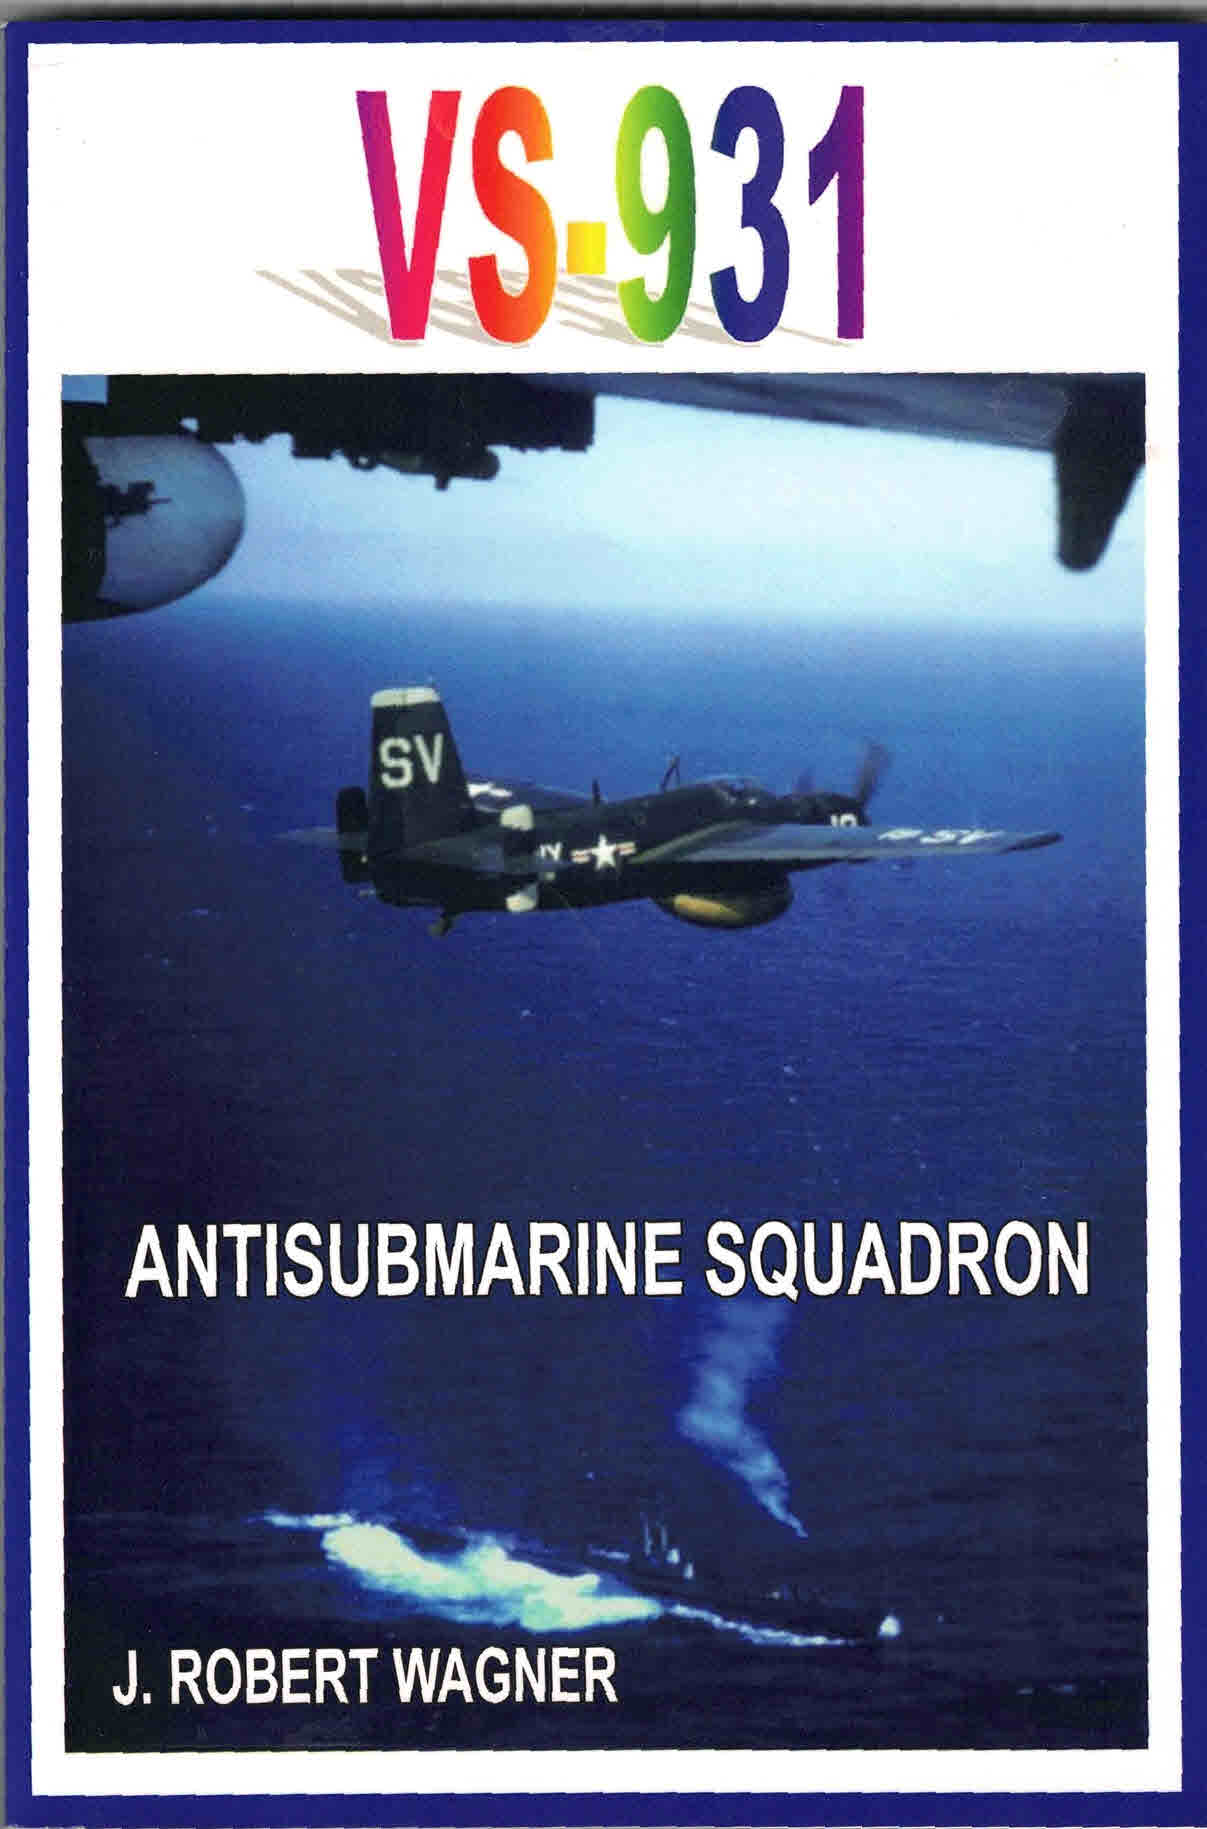
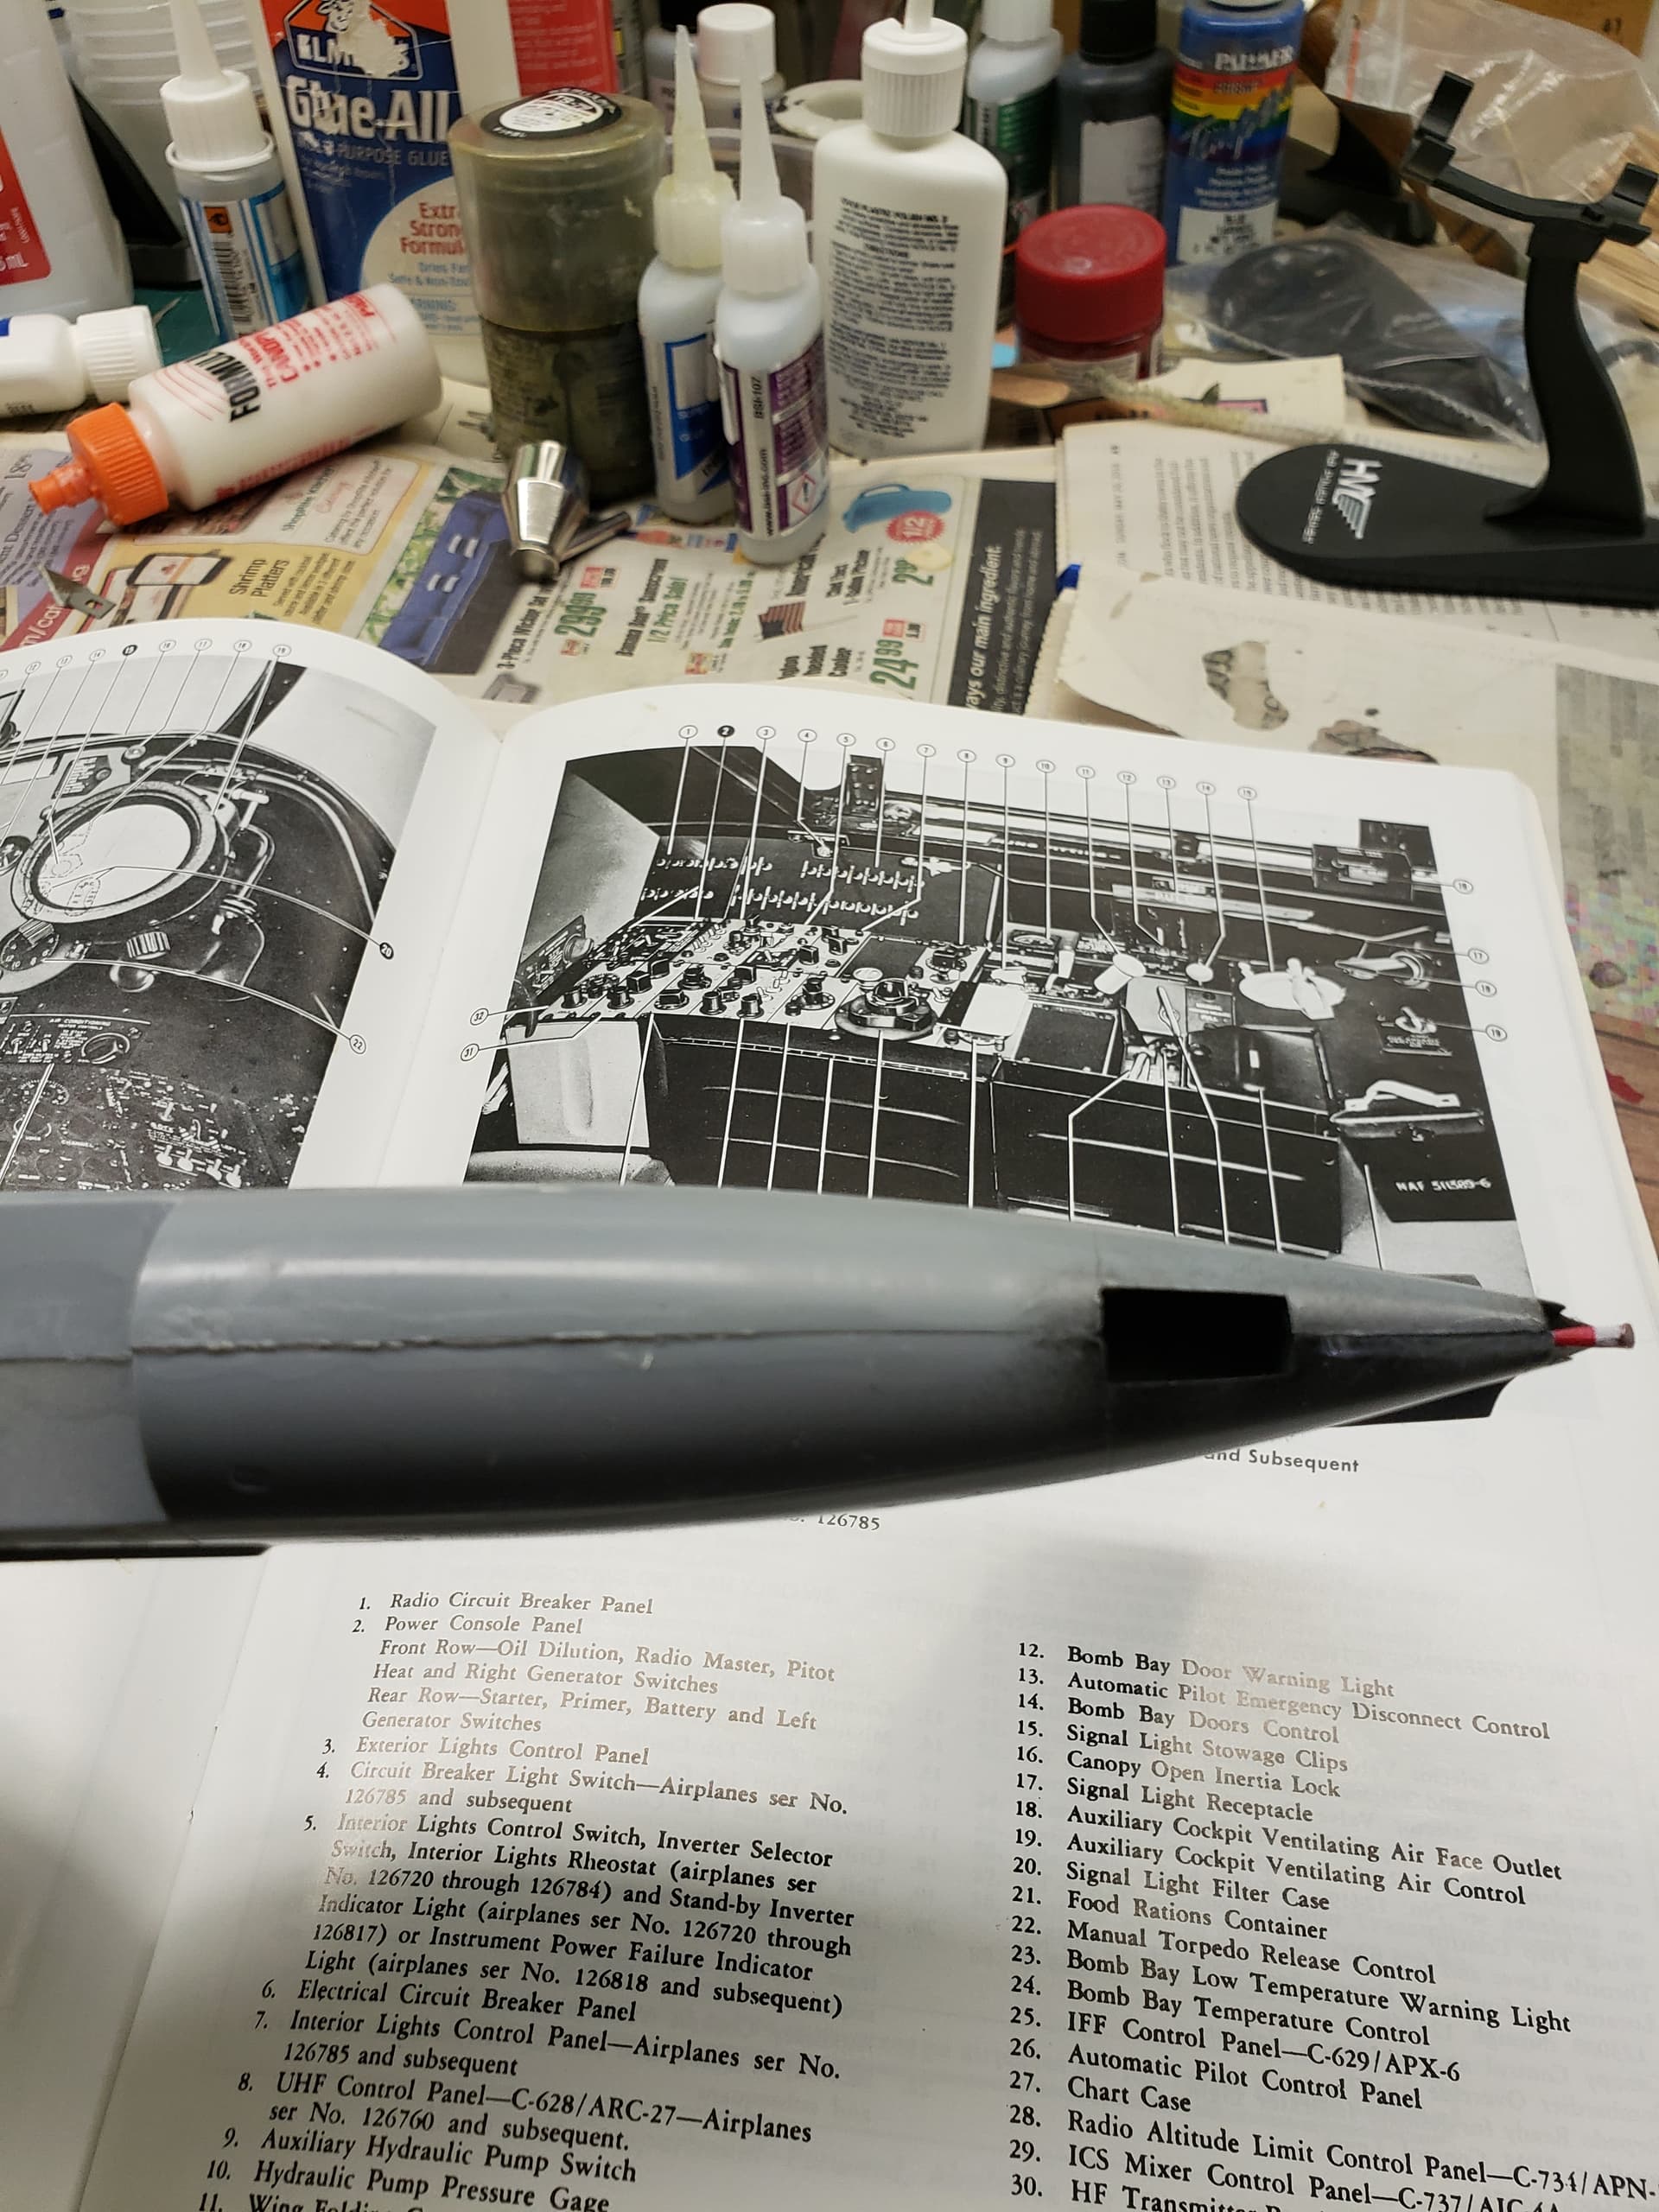
It is an account of the author’s service as an AF-2 aircrewman in VS-931, my modeling subject, at the very time my subject was in service! There are some extra photos in it that I can share with you along the way, but frankly, the best part is his account of what it was like to be a crewman in AF-2s when my subject was flying off escort carriers during the Korean “police action.”
It will provide some needed inspiration and motivation as I start working on all the rough edges of this beast at this stage of construction.
4 Likes
Merry Christmas Brian - Hope you had some free time over the holiday to chip away and hope it continues !
Cheers- Richard
1 Like
Thanks. Same to you re Christmas, Richard.
Yes, I’ve already started the sanding work, and also glued the cowling on. More soon, I think.
Its great having someones experience in the form of a book as a motivation for creating something. Despite the ill fitting fuselage I will be looking forward to seeing this beast buttoned up 
1 Like
That’s the plan!
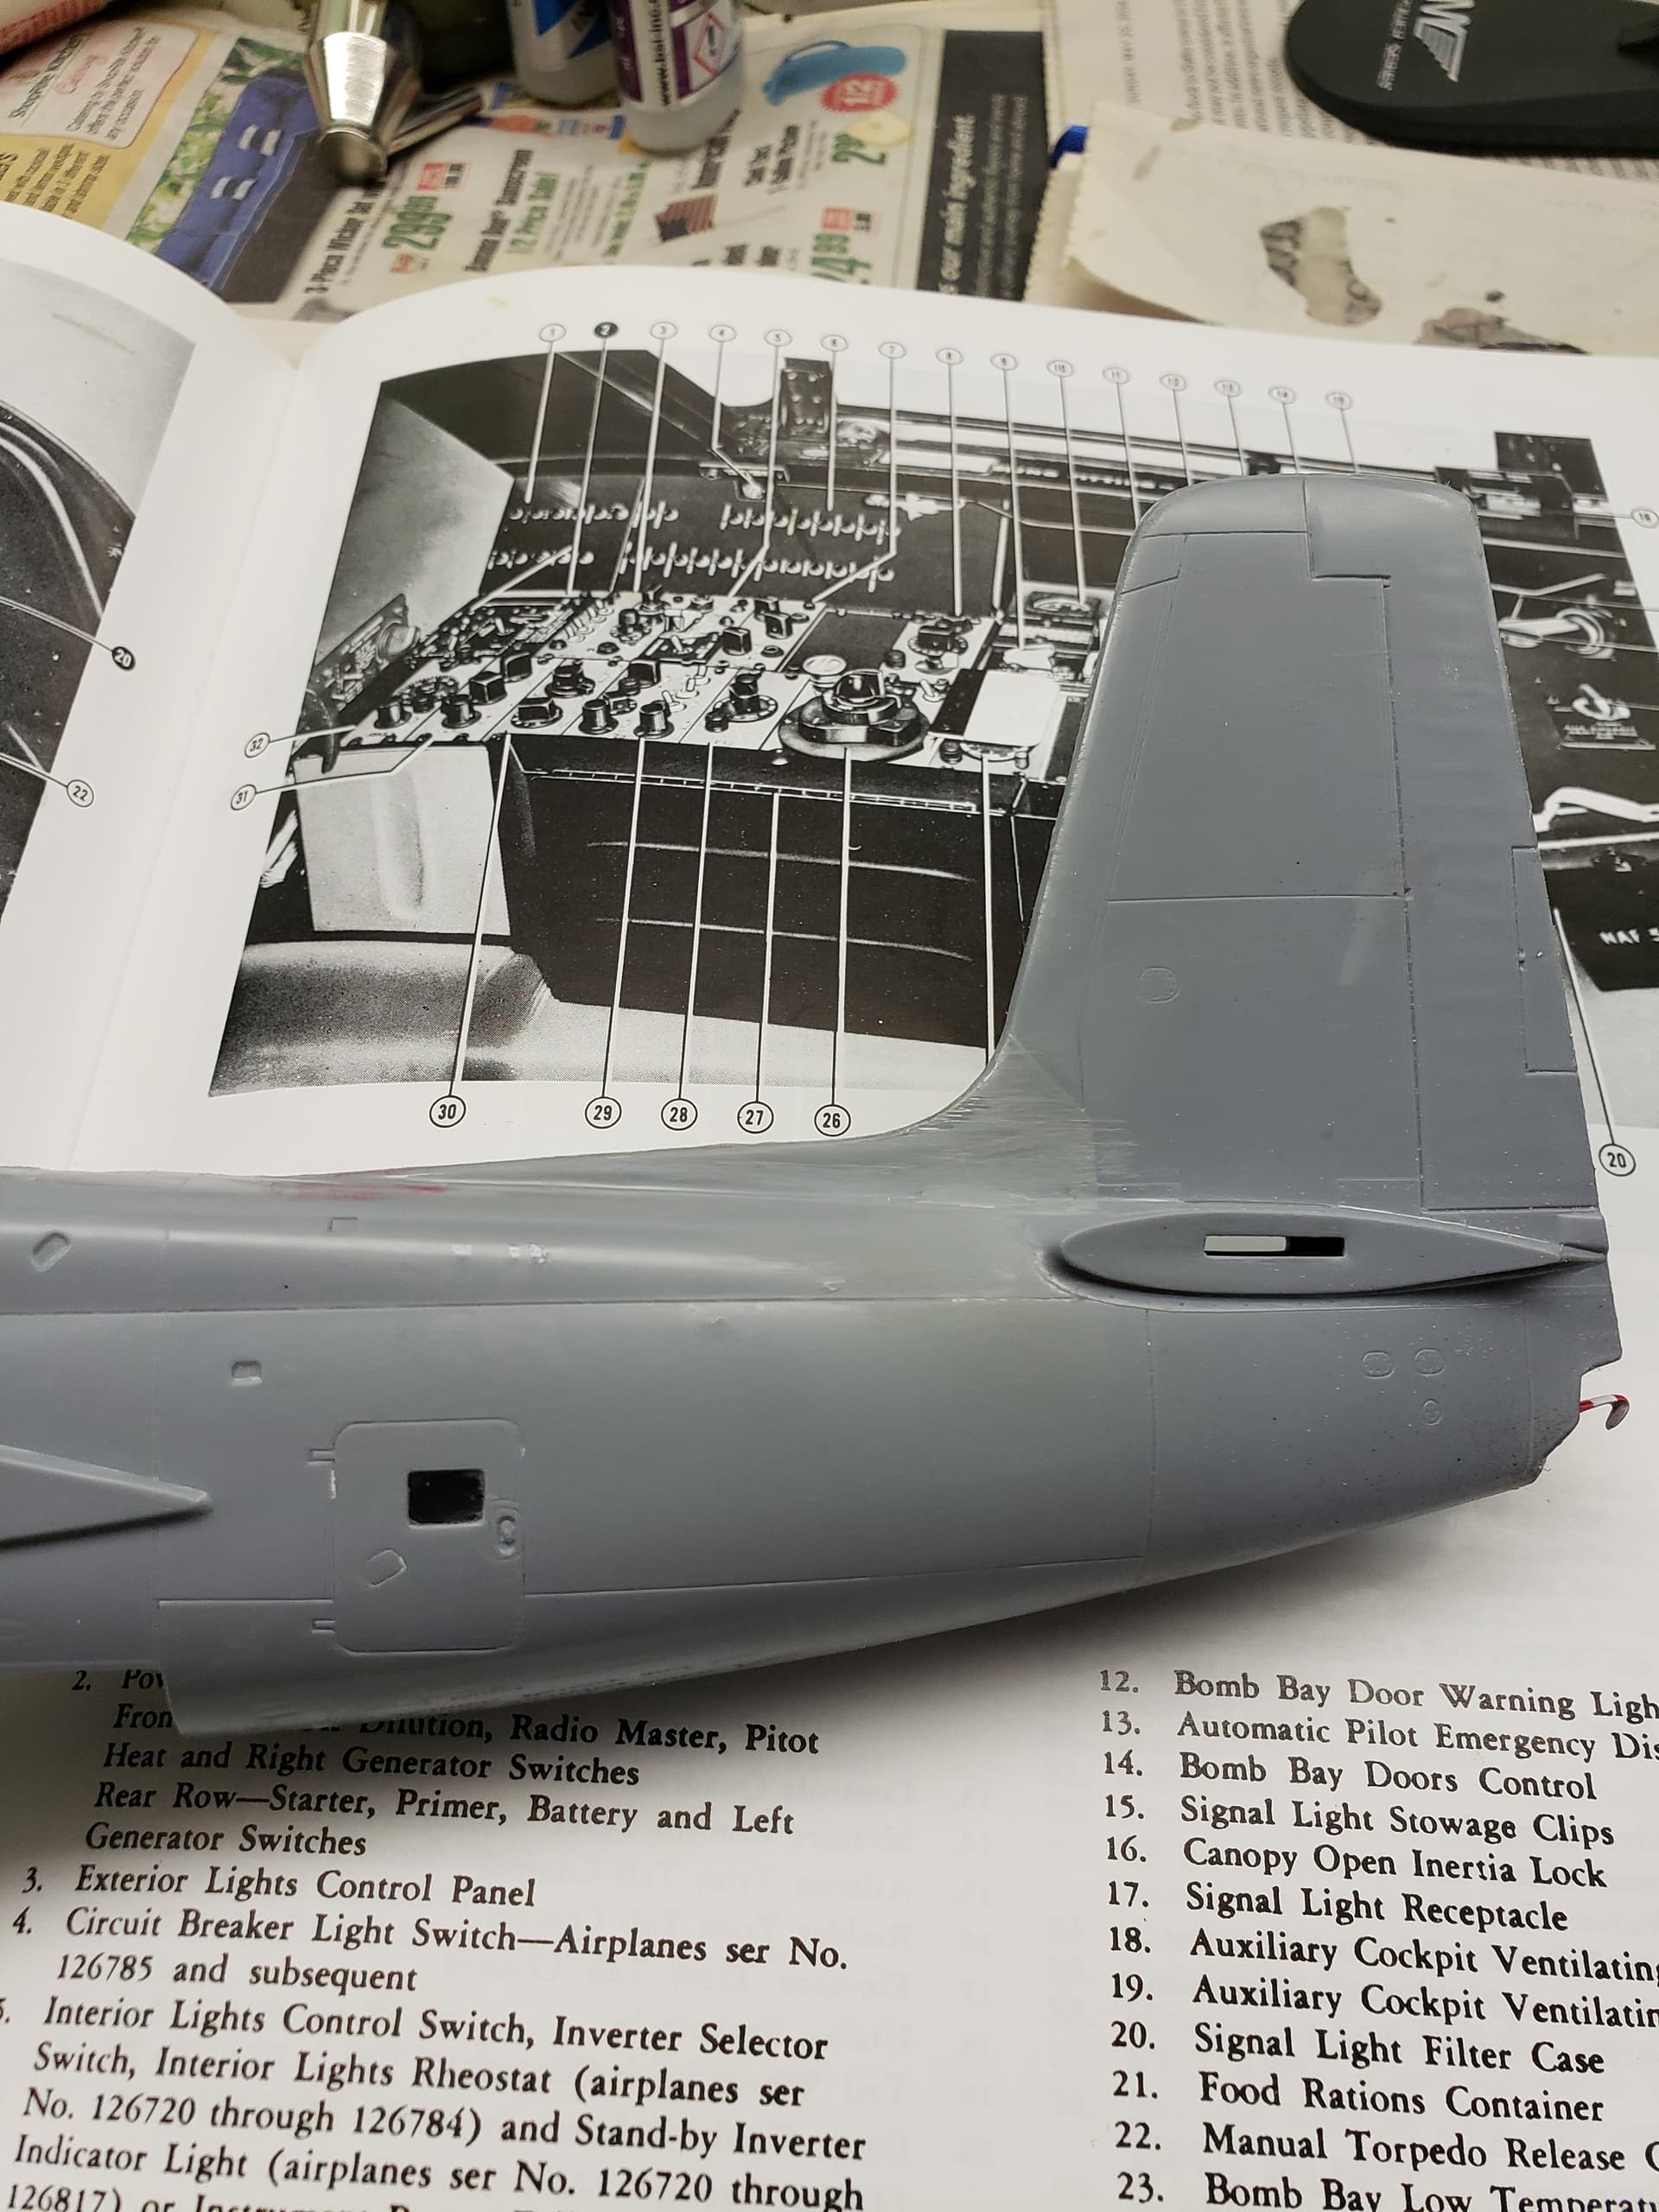
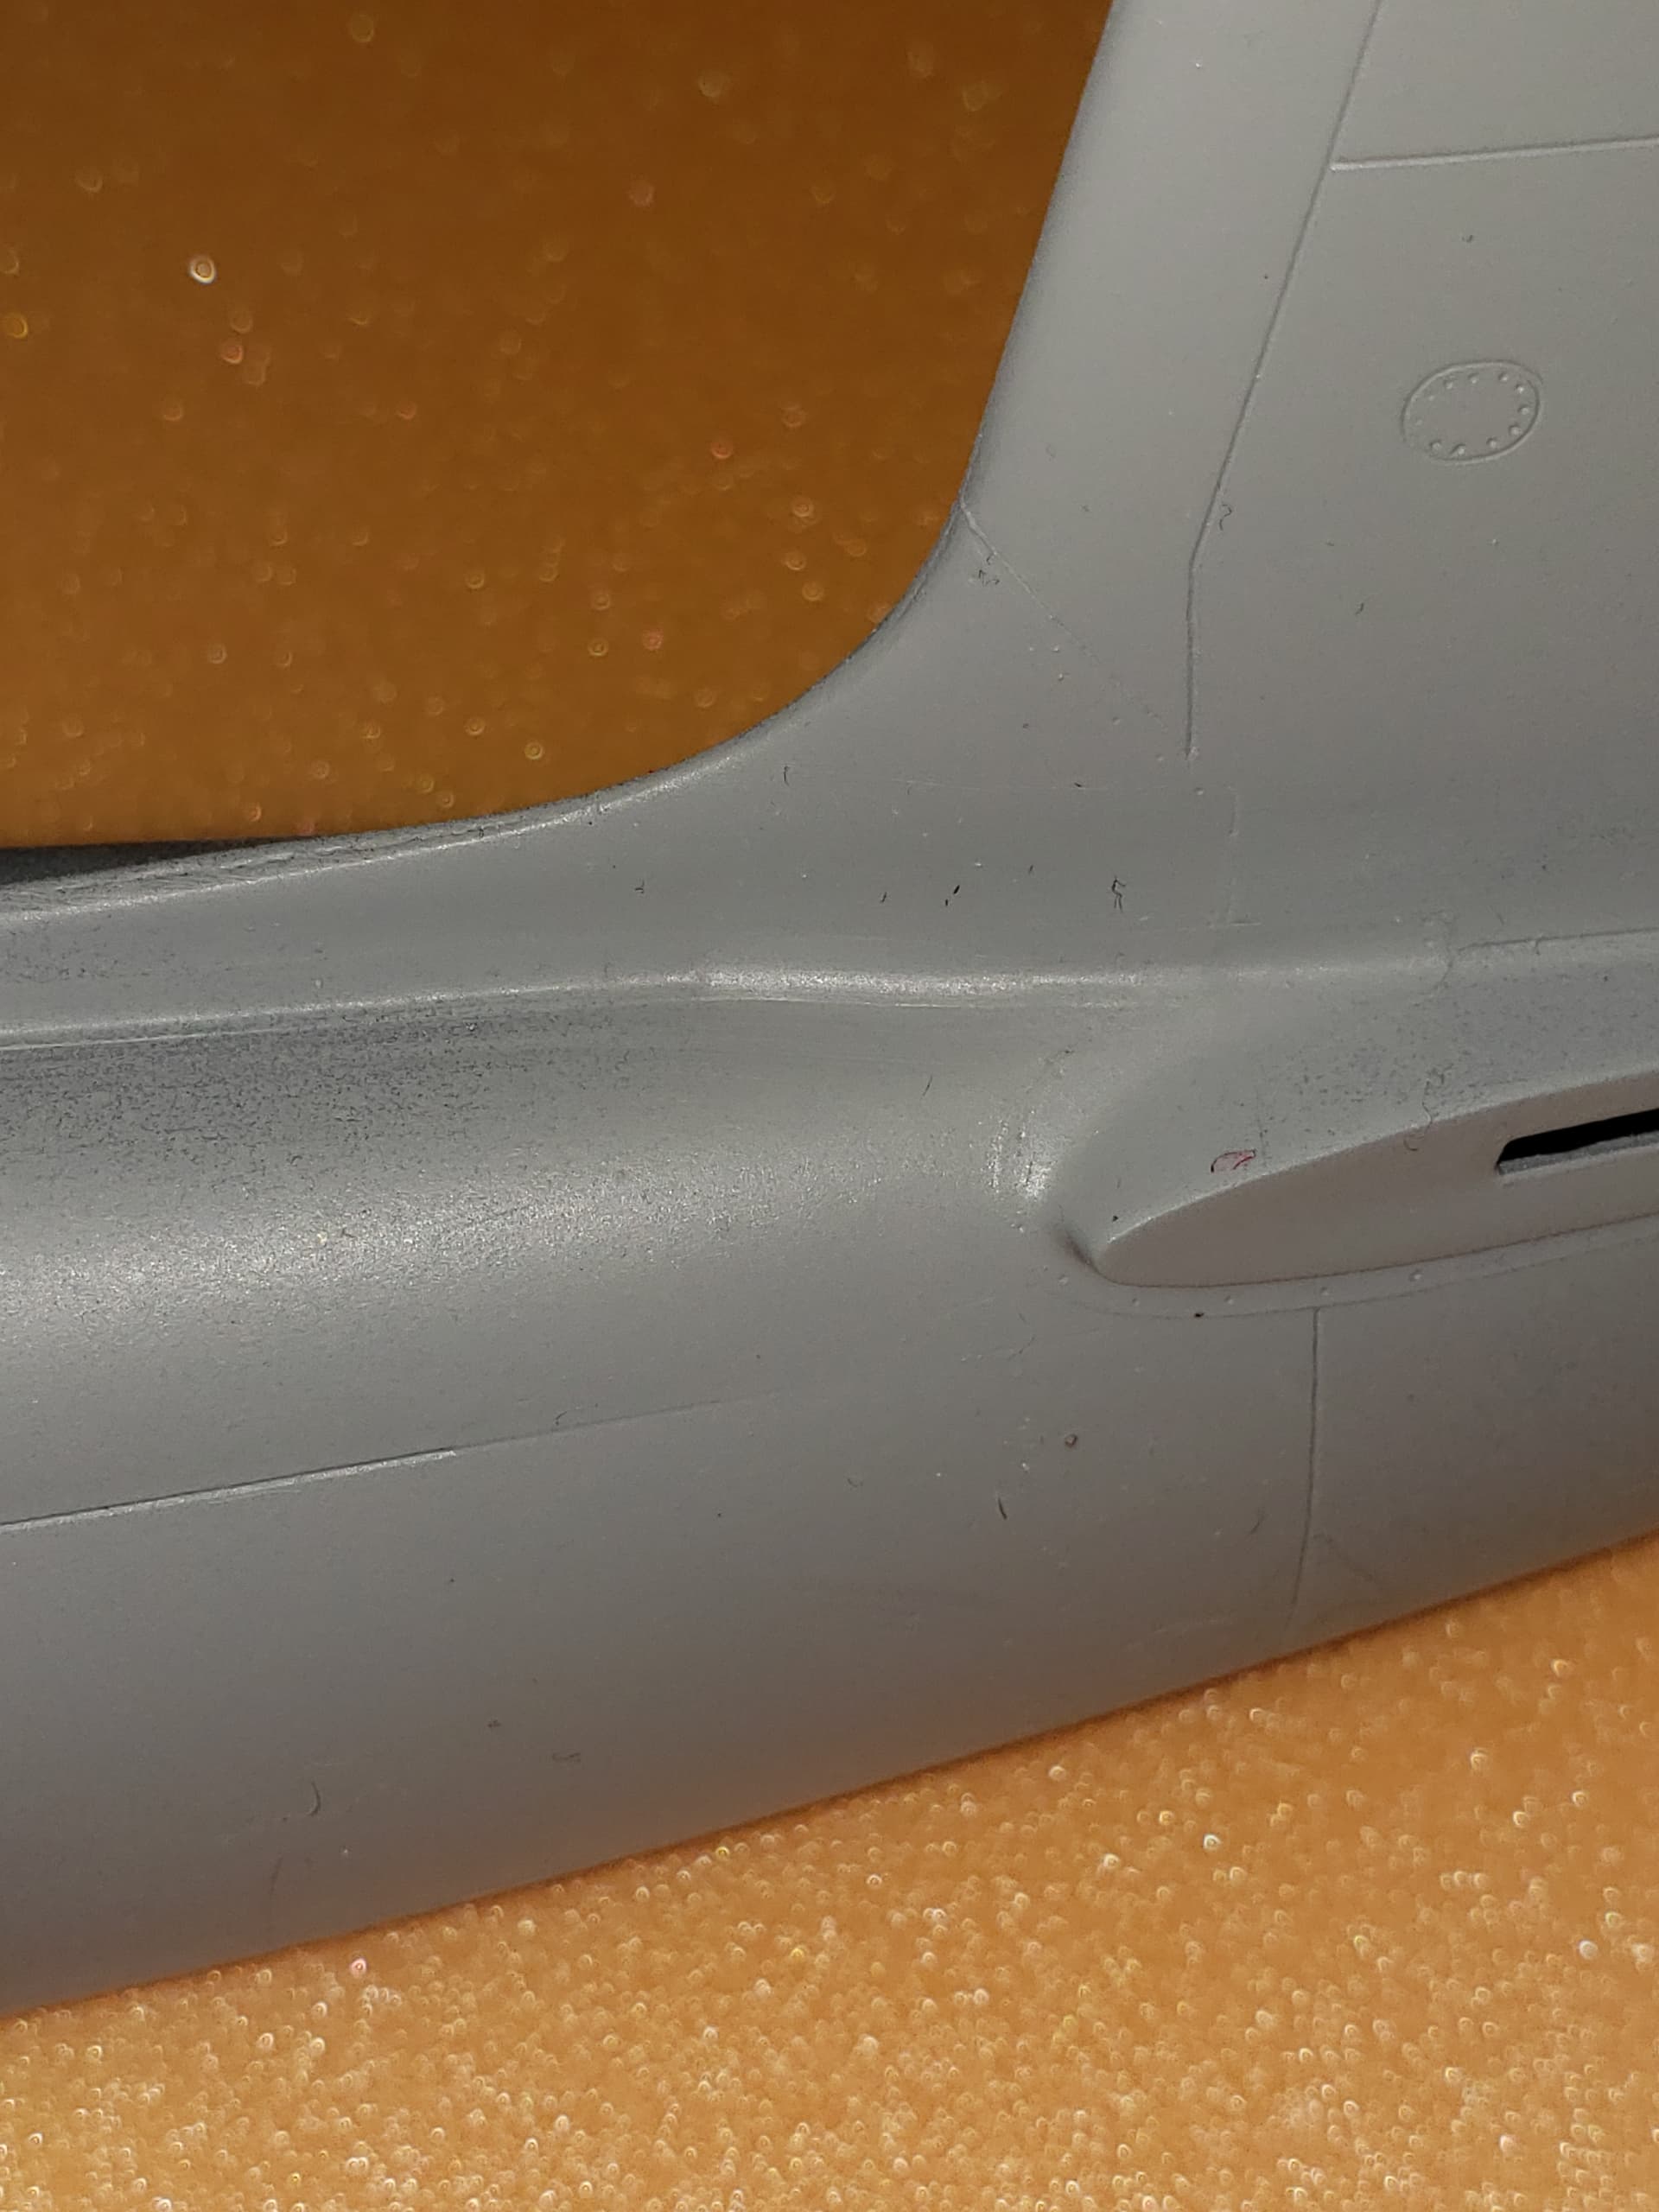
Fuselage Scut Work
Well, this is not glamorous, but inevitable with a “get together, dammit” fuselage like this.
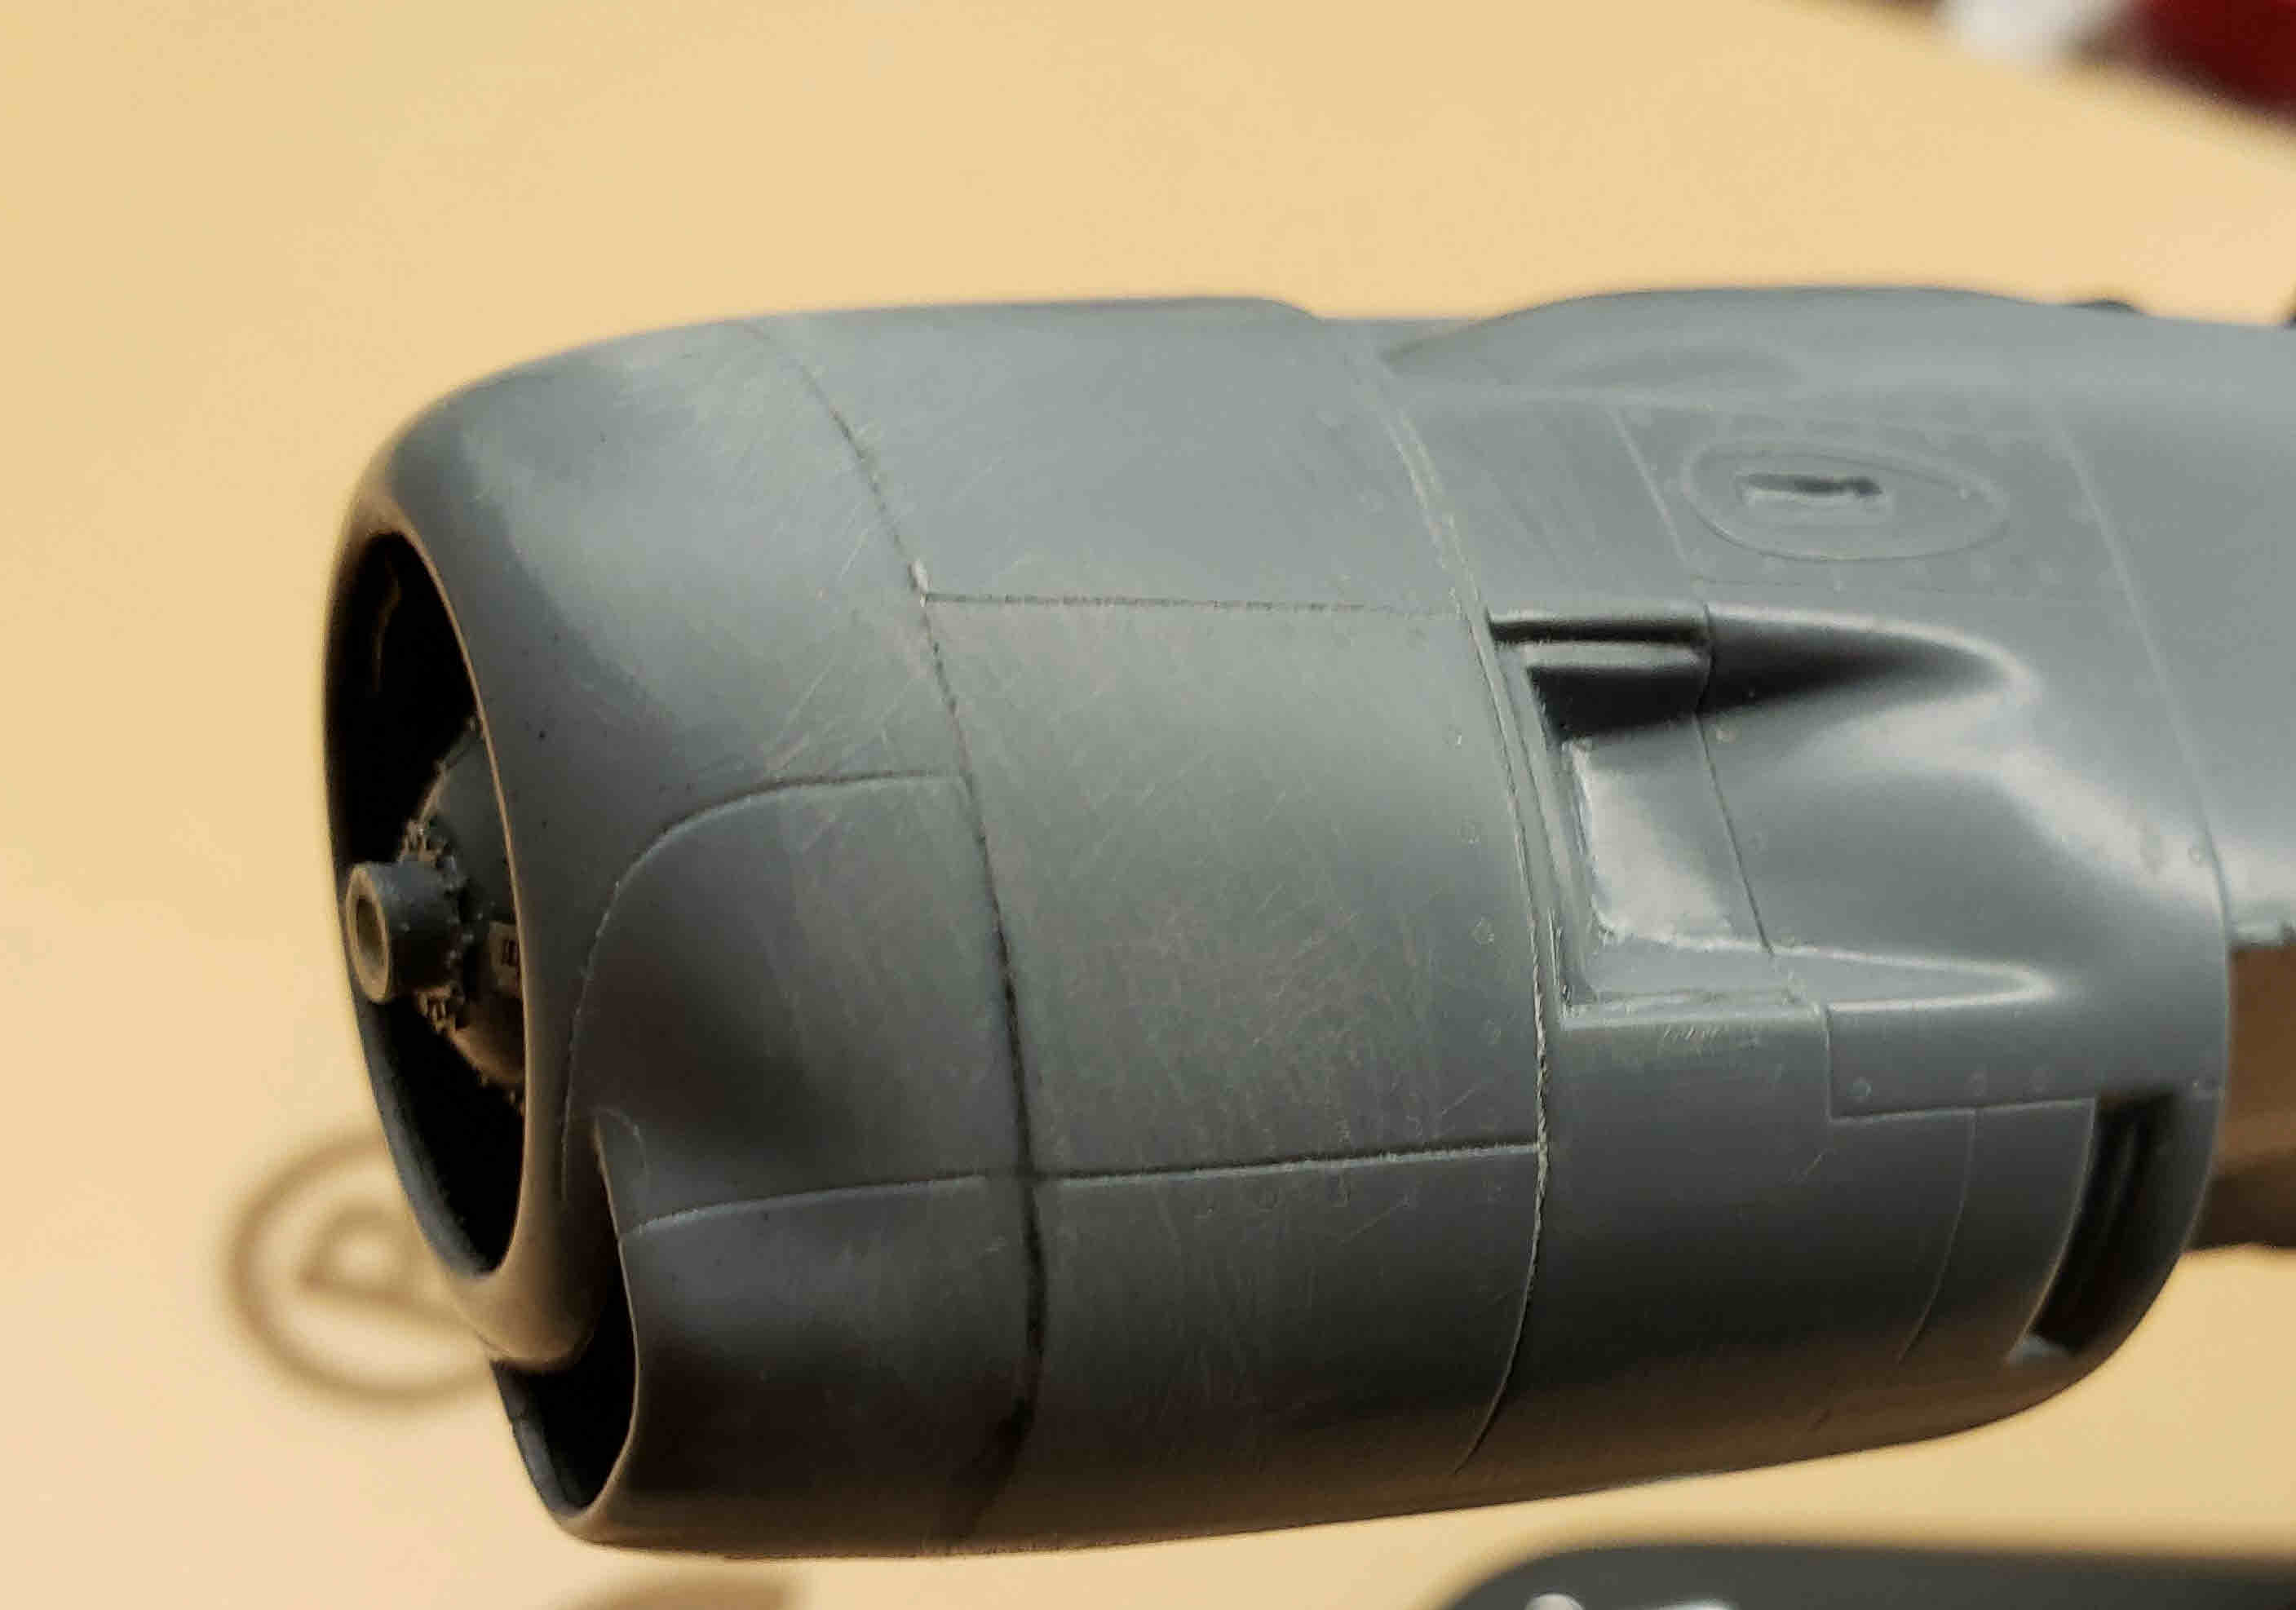
I refer to tedium cubed – sanding the fuselage joins to create a smooth enough surface for primer, then rescribing panel lines and re-punching the obliterated rivets. Sigh. 


Well, I got work to do, including fixing those fuselage windows. (I have a non-vacuform plan.)
I don’t want to use Tamiya spray can primer for this: too imprecise. Any recommendations?
Oh, and Happy New Year everyone.
3 Likes
Quis custodiet ipsos custodes? Who guards the guardians?
No, this is not a comment on current American politics (banish the thought!) but a reminder that it is you, dear reader, who brings me back to this dolorous subject, if only to address the dreaded question of fellow modeling friends, “So, how is the Guardian coming along?”
I also do this to remind myself that, like bicycle riding and human reproduction, scribing is something one never forgets how to do. (Some are better at these things than others, however.)
Anyway, the first thing is to find my scriber and punch set. Ah, that didn’t take too long:
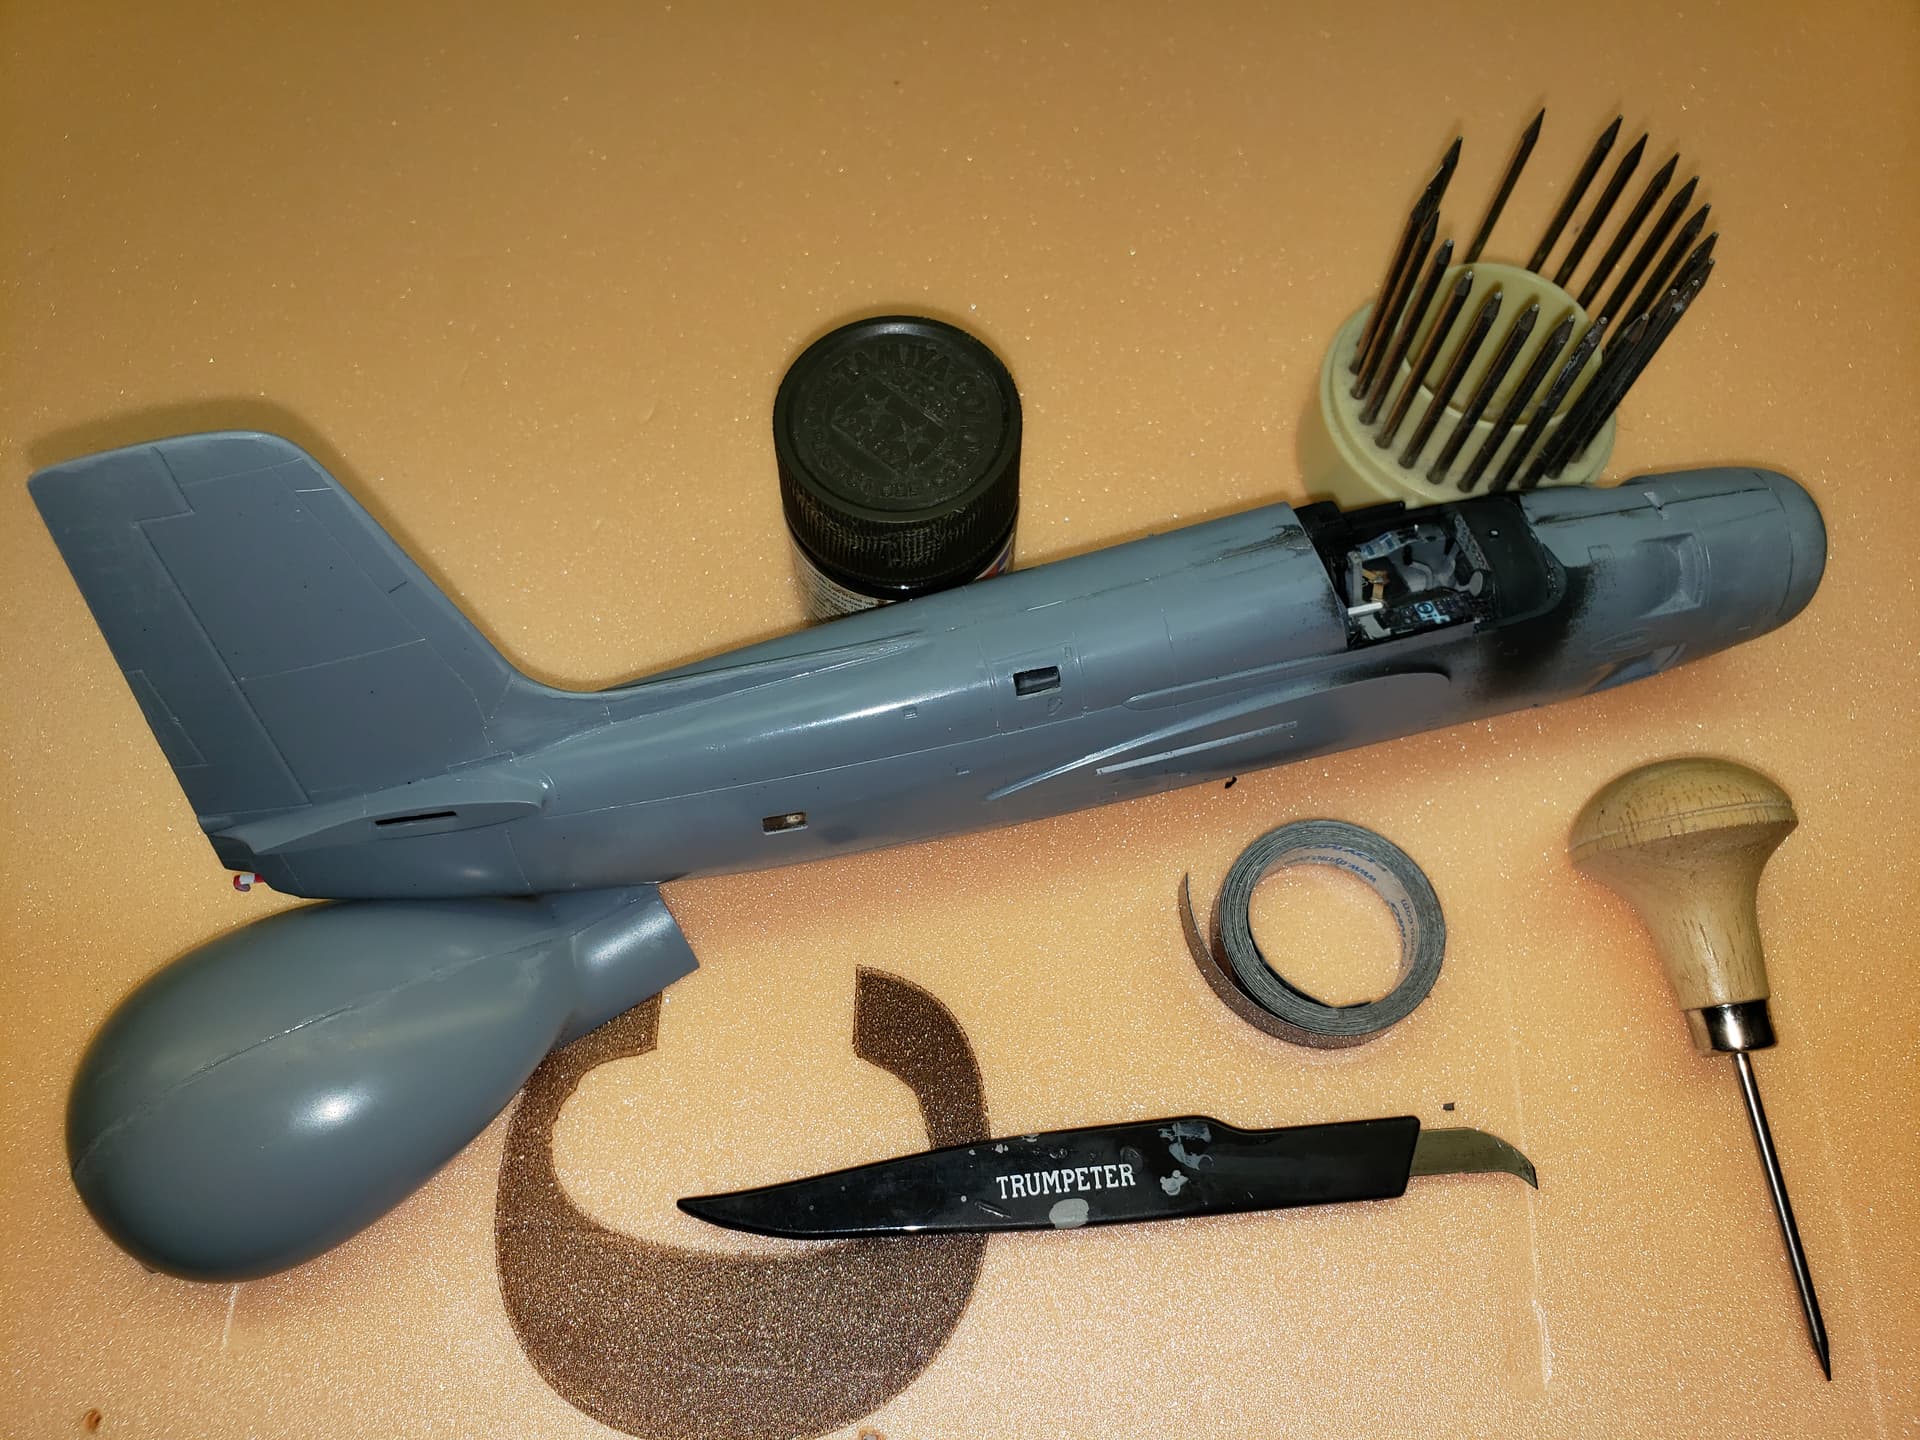
Notice how carefully composed the picture is – in order to hide the chaos that is my basement workspace:
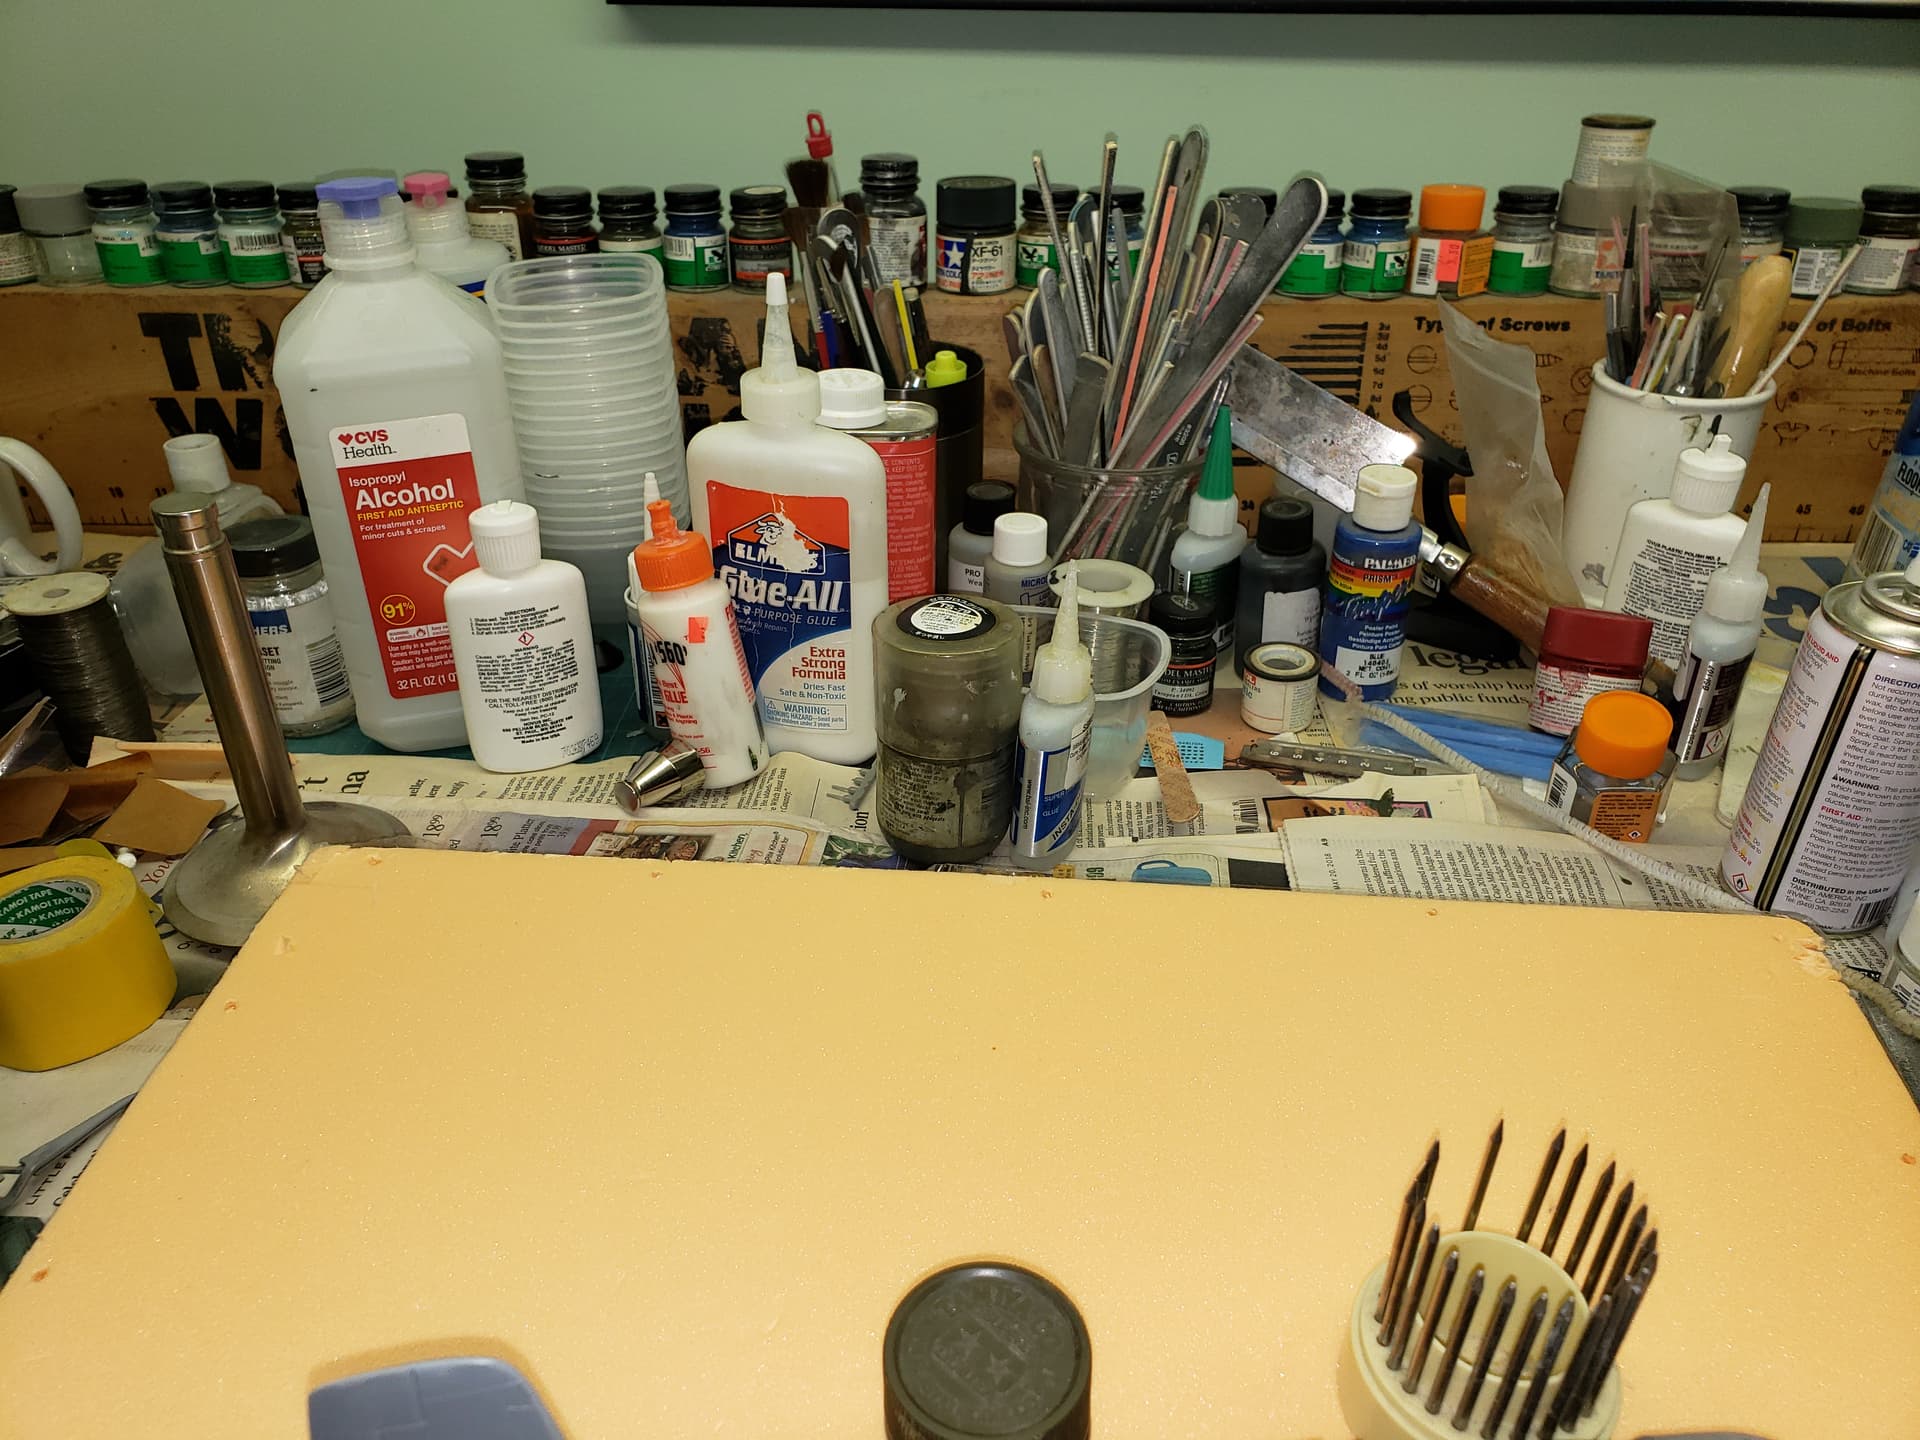
That metal thing off to the top left is a gen-u-ine inlet or outlet valve (with a manufacturing defect) that fits inside the cylinder head of a Wright R-3350 or R-1820 engine. It’s a memento of my time with Curtiss-Wright and makes an excellent paperweight.
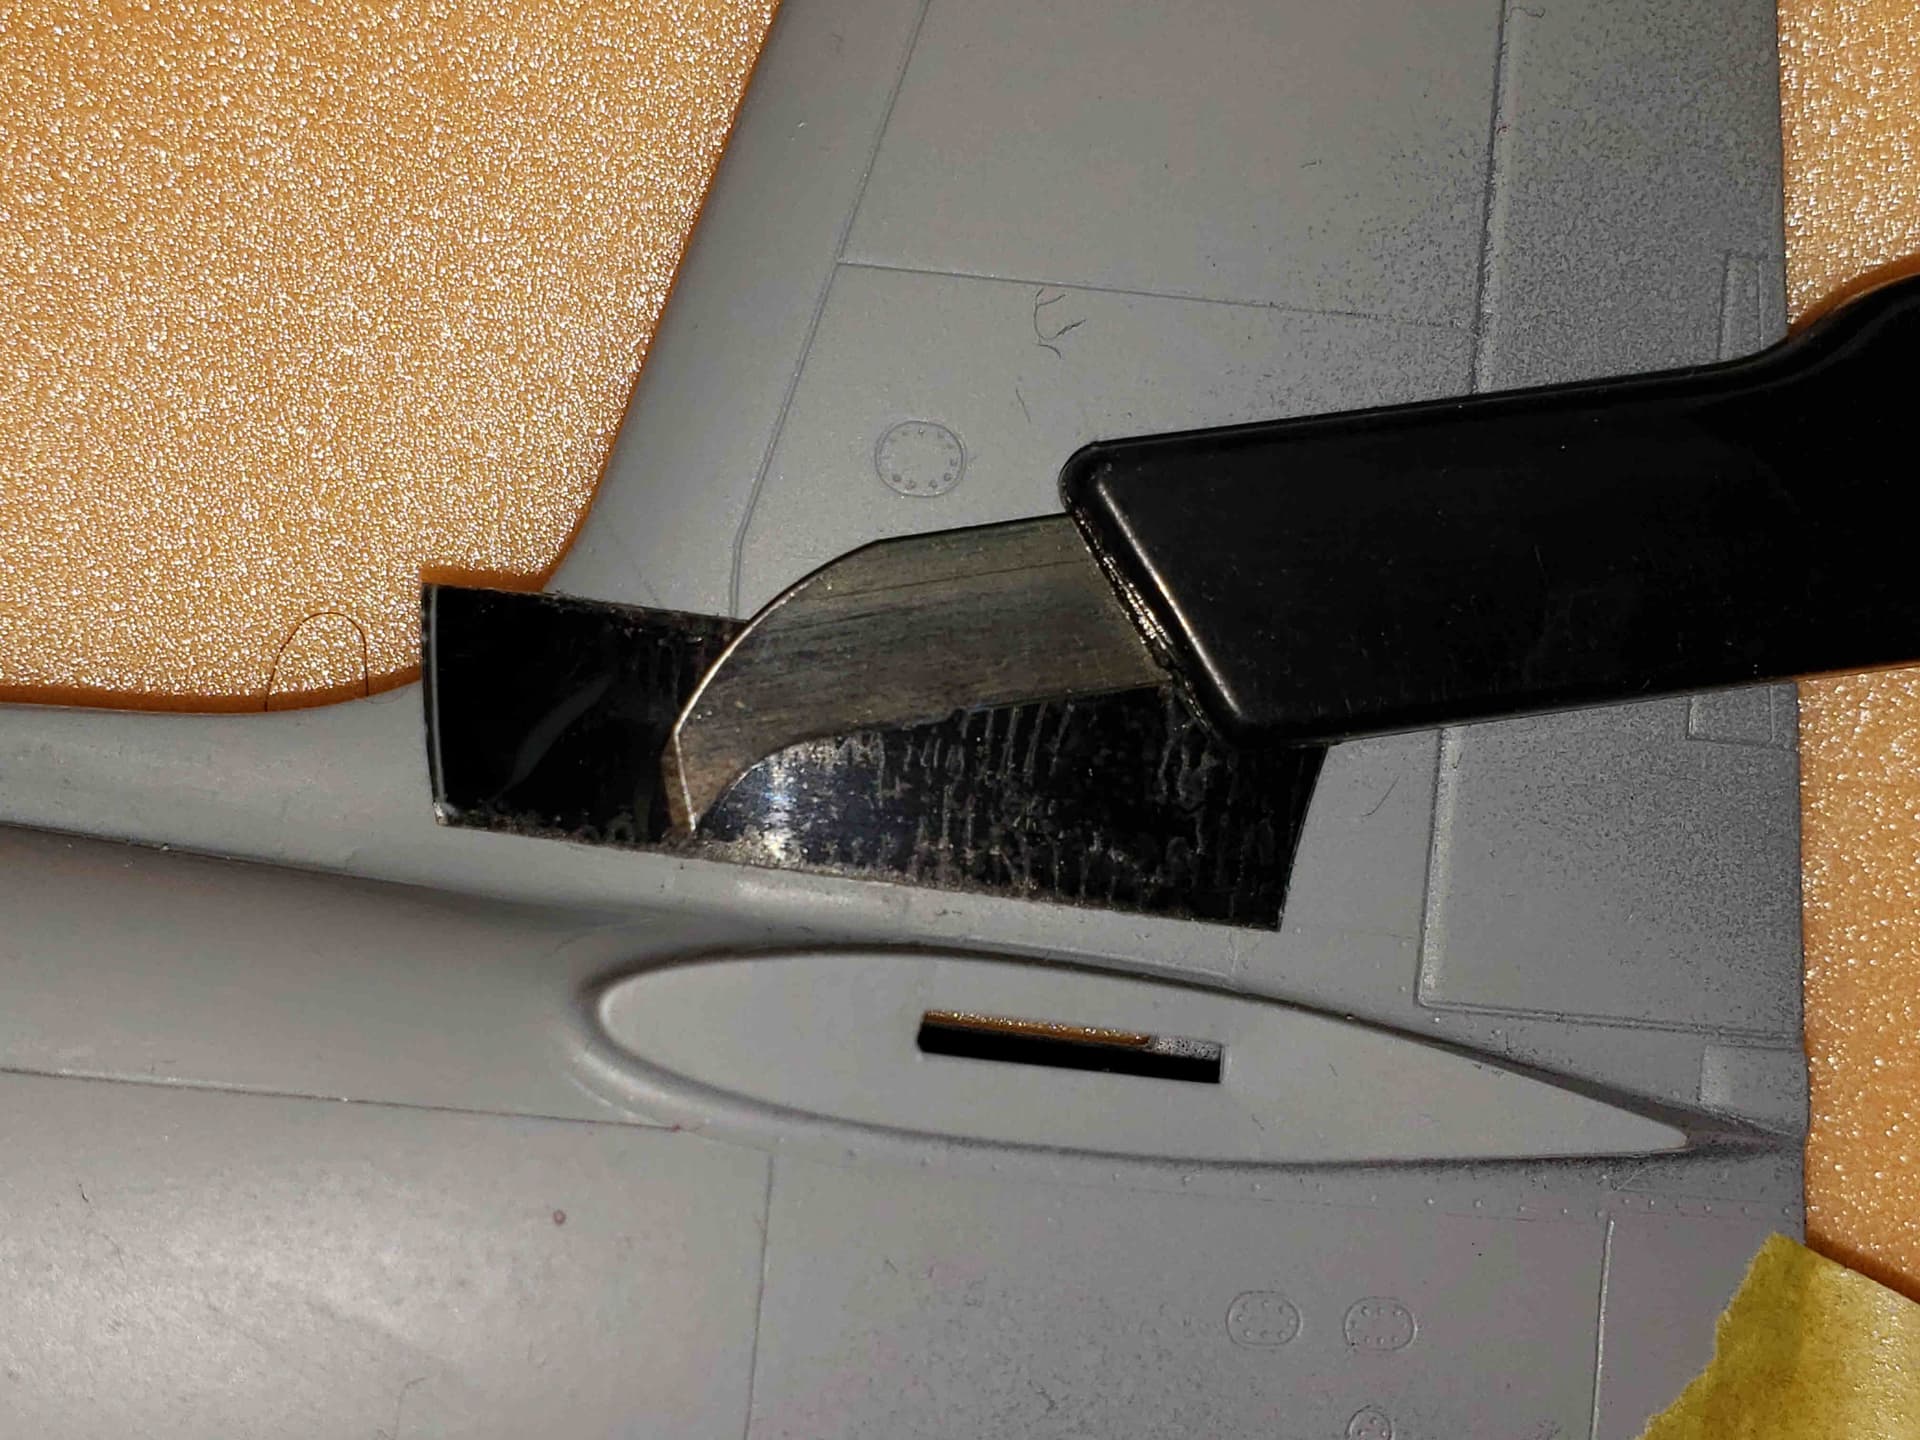
But I digress: On with the Dymo Tape!
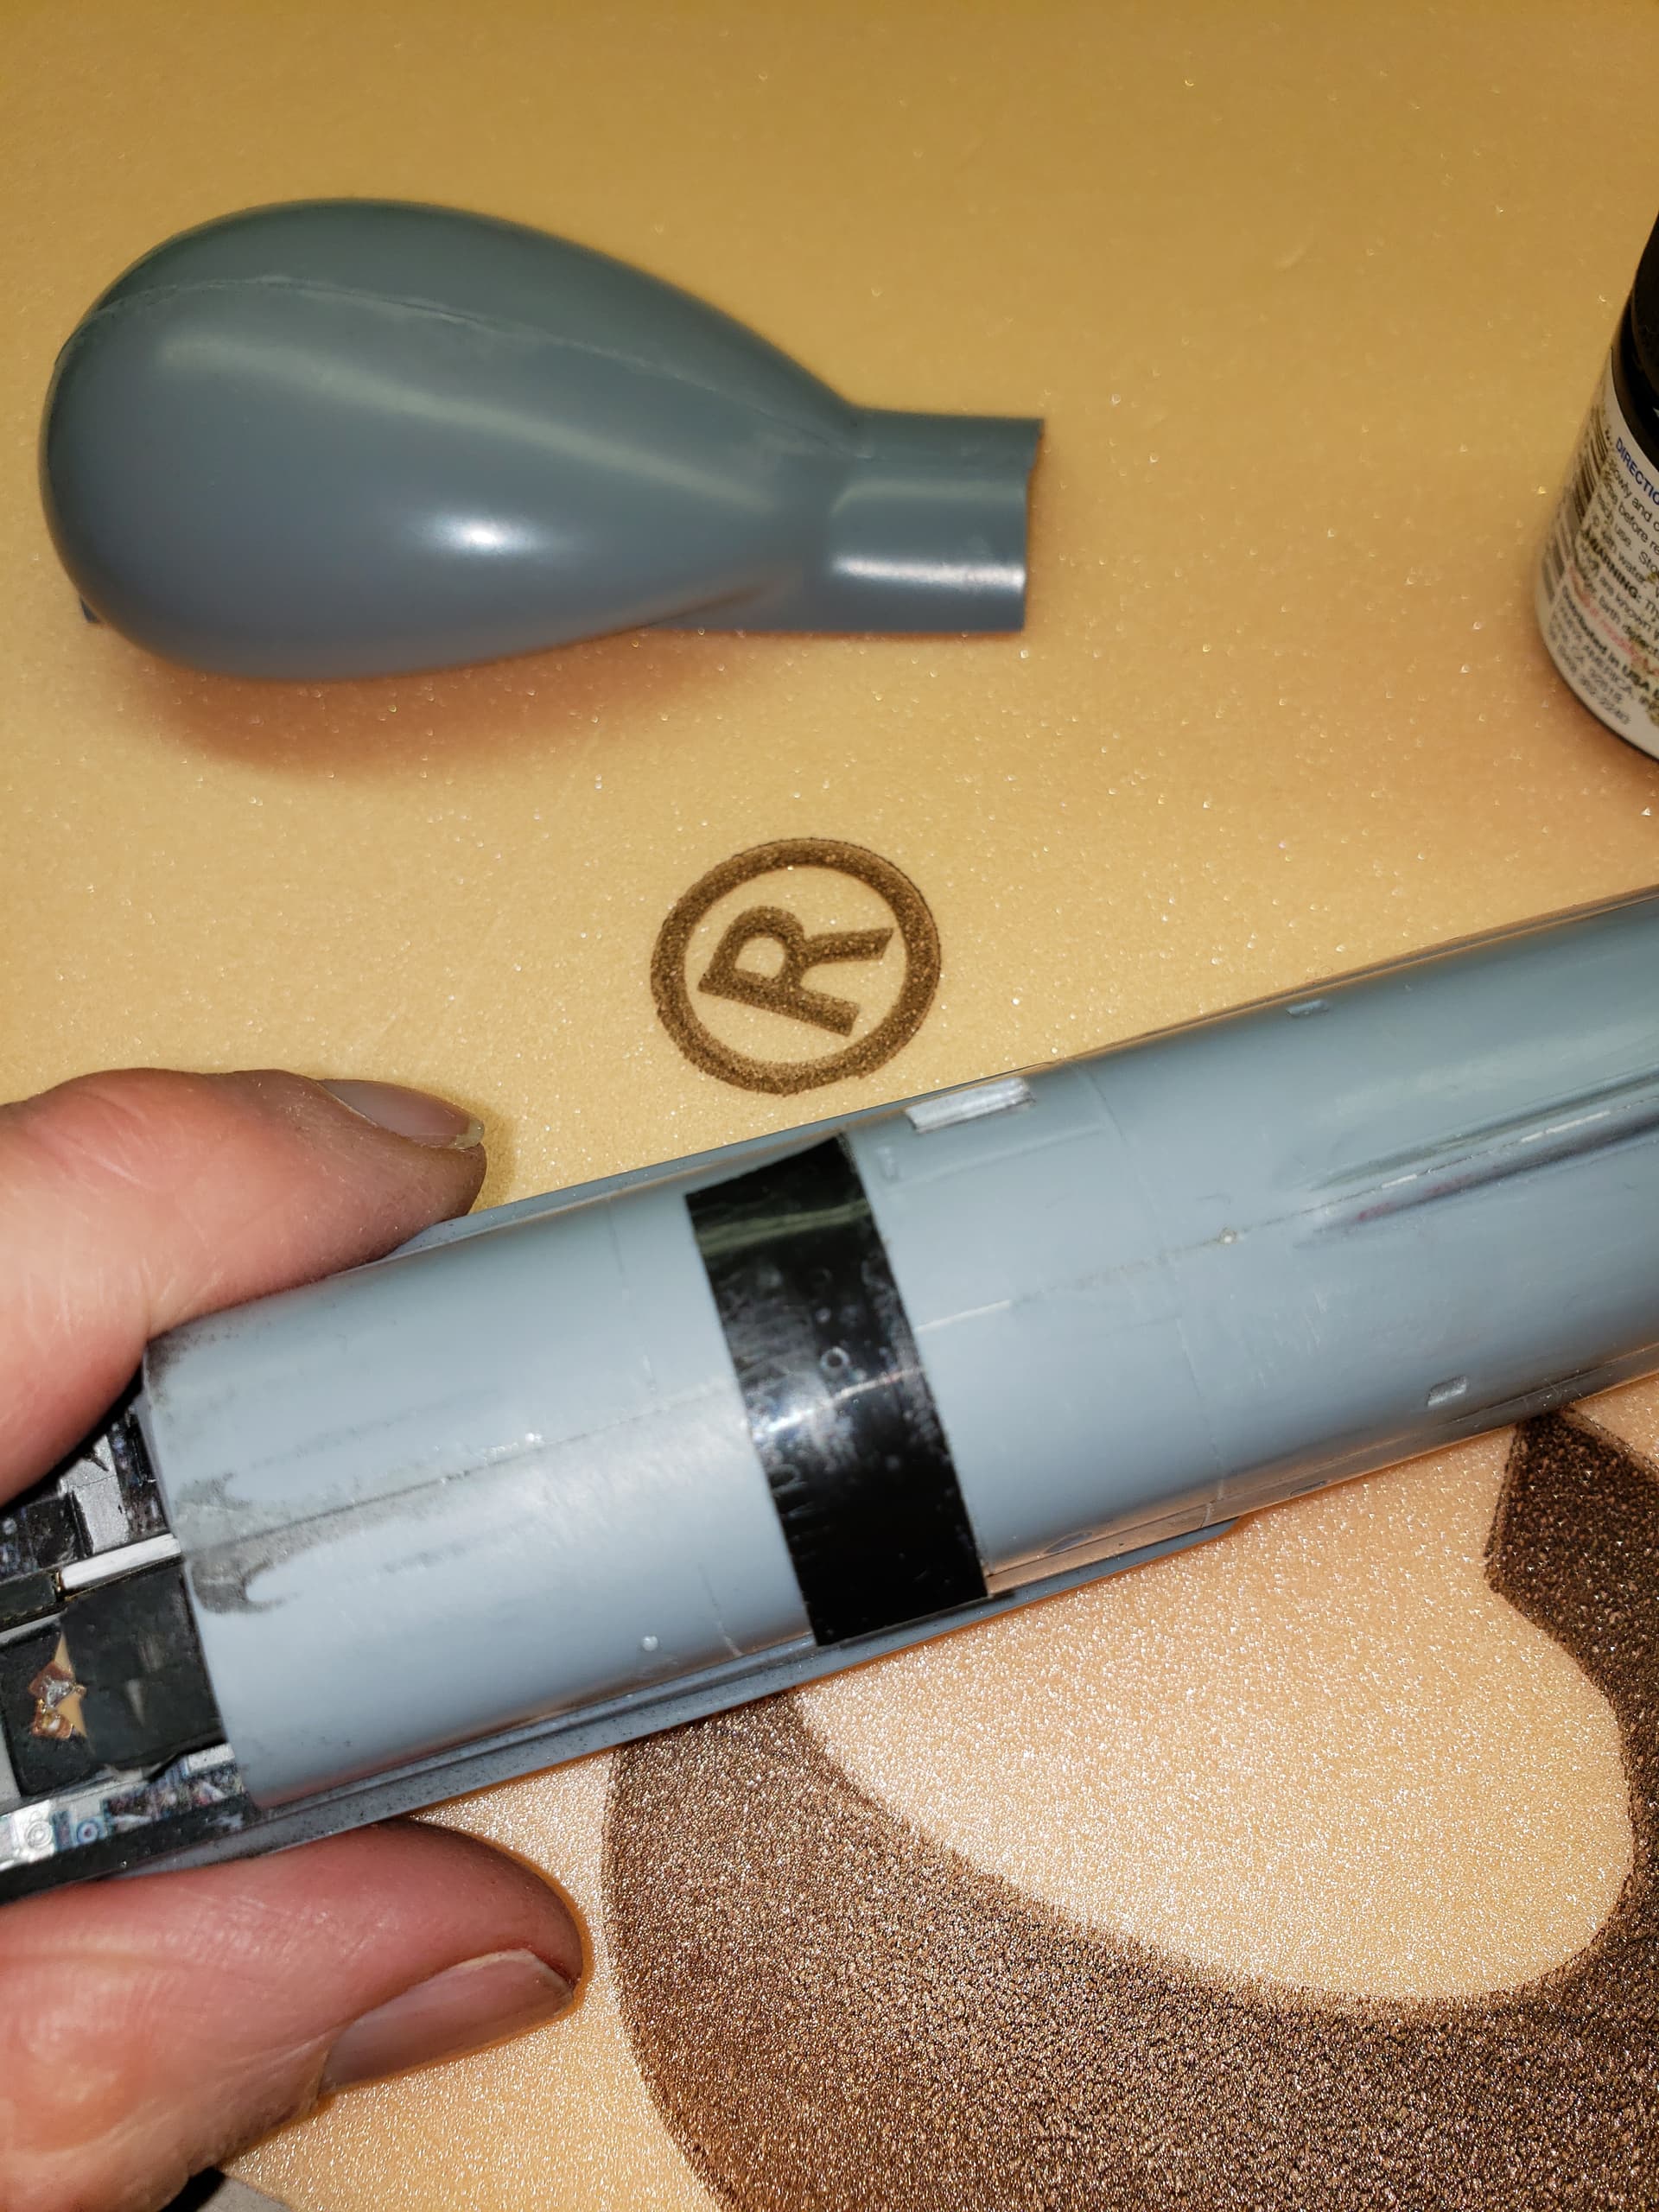
And so it begins.
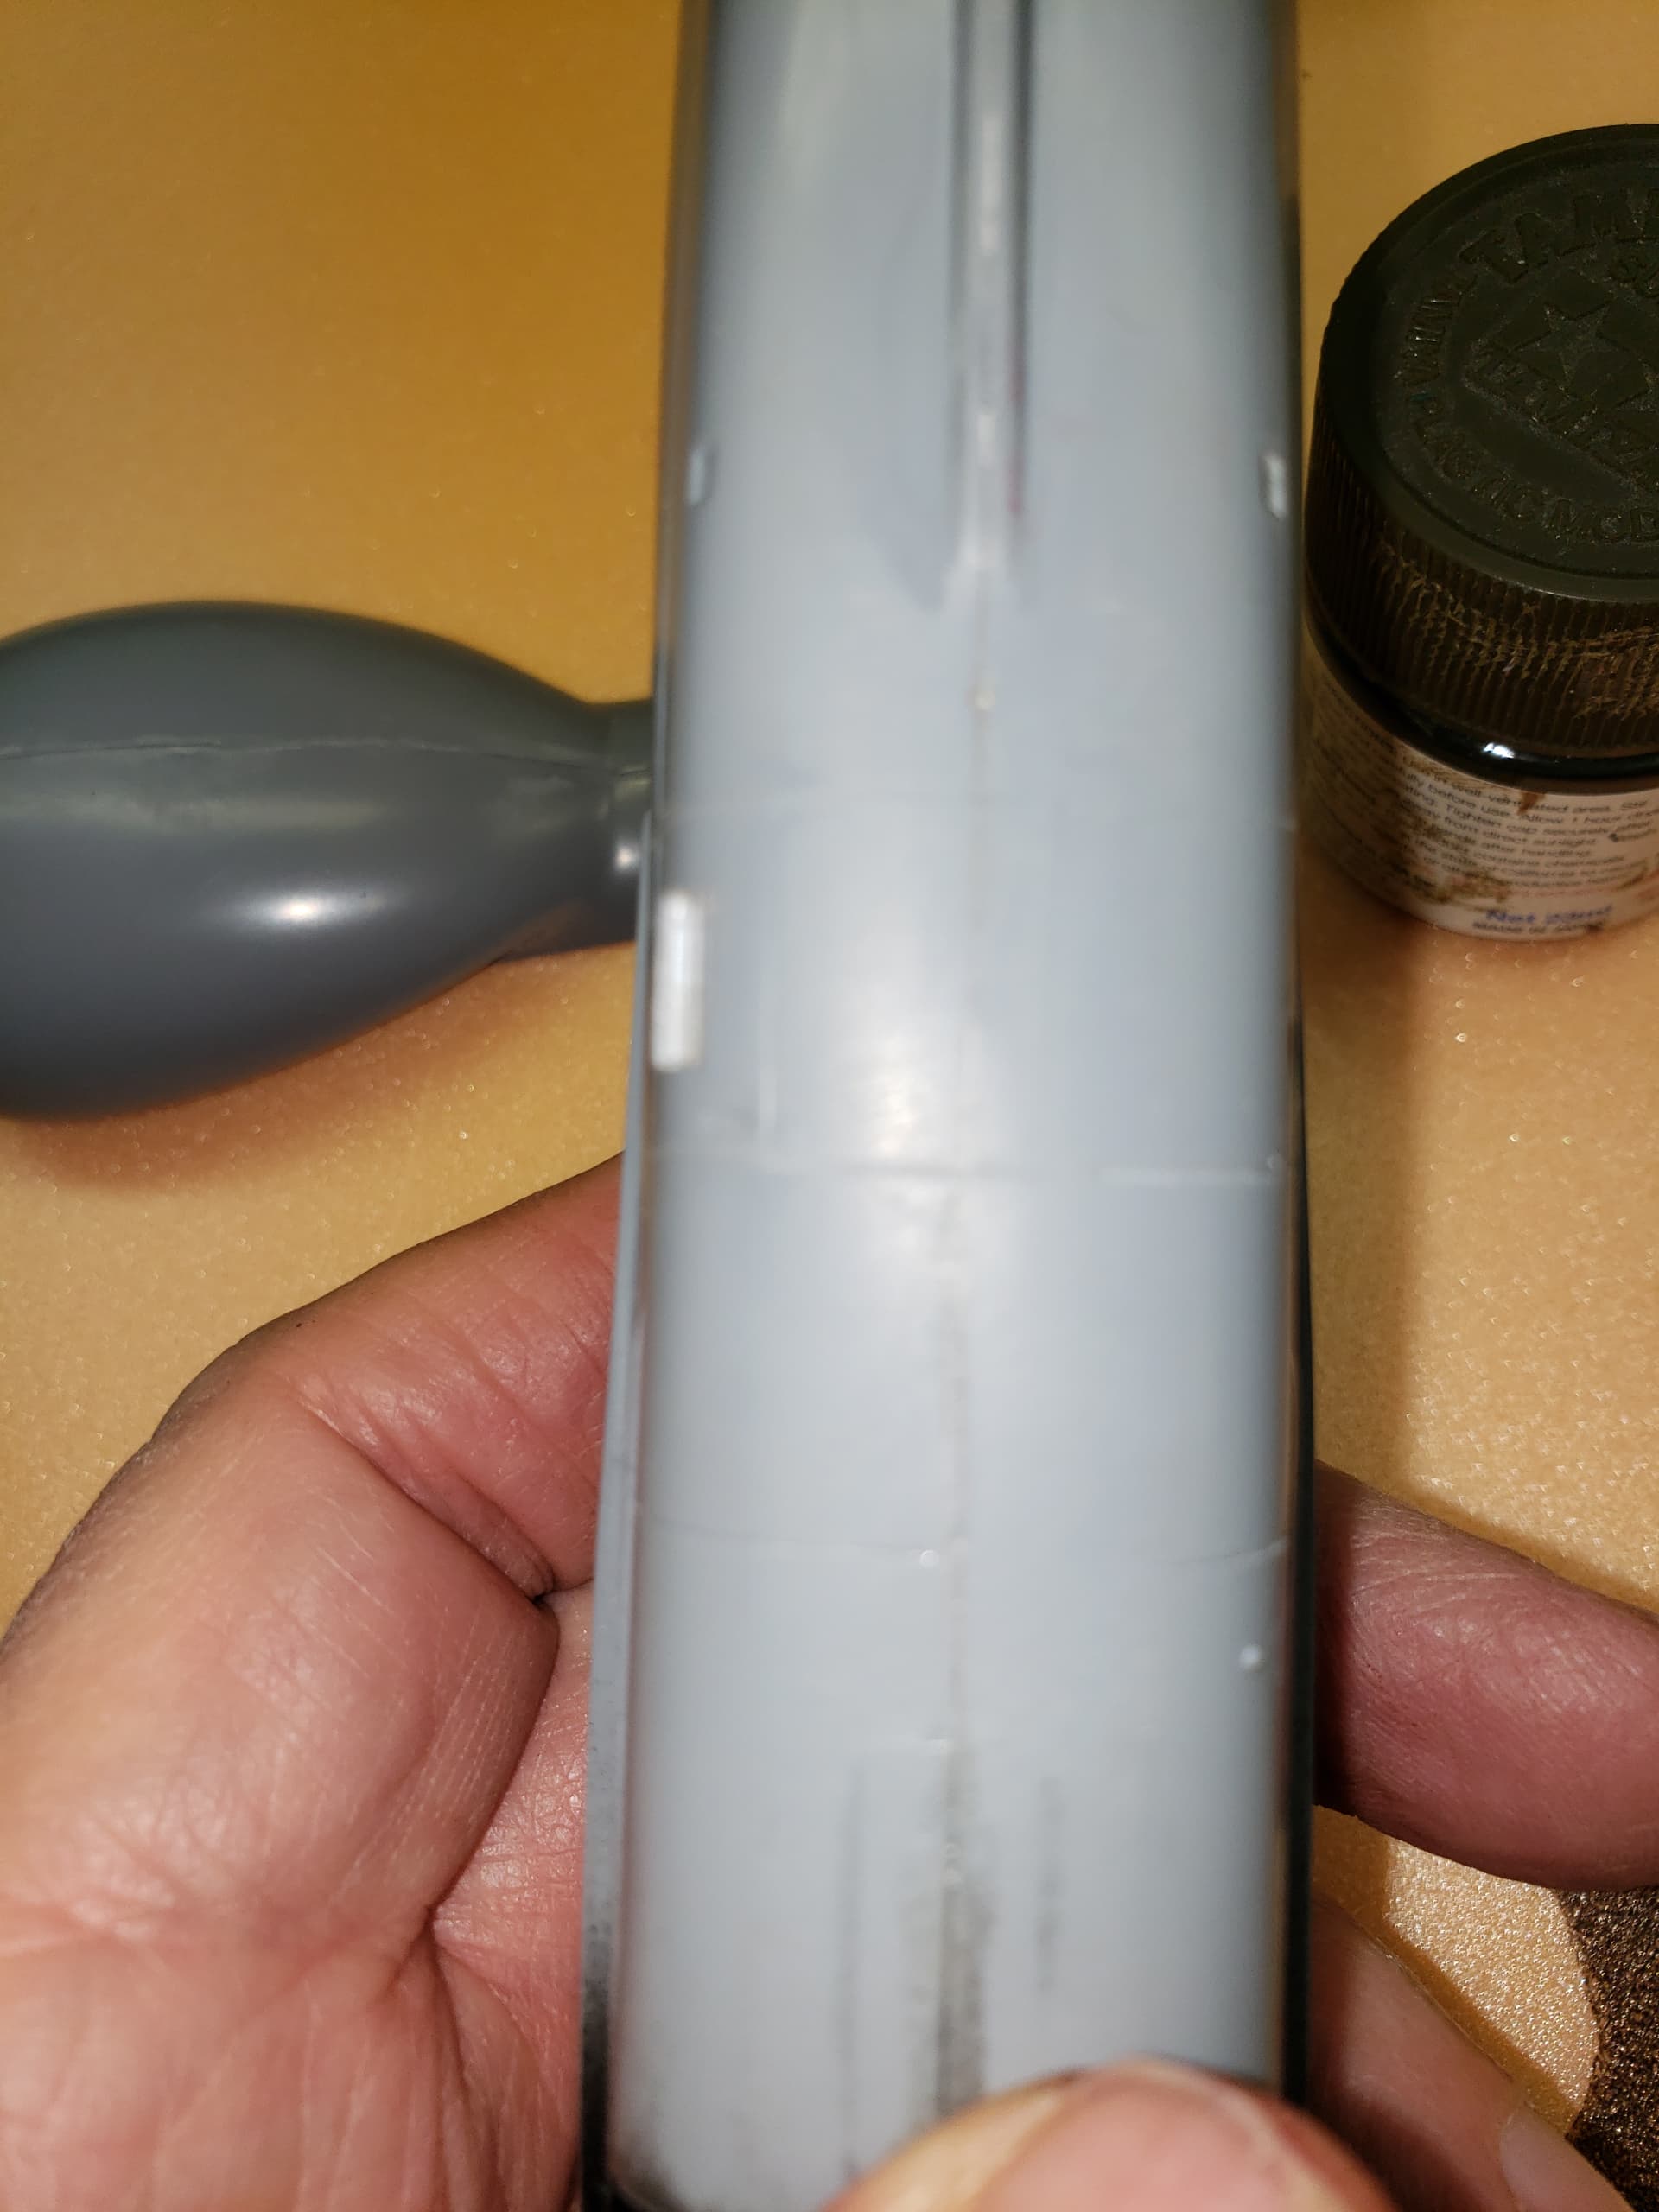
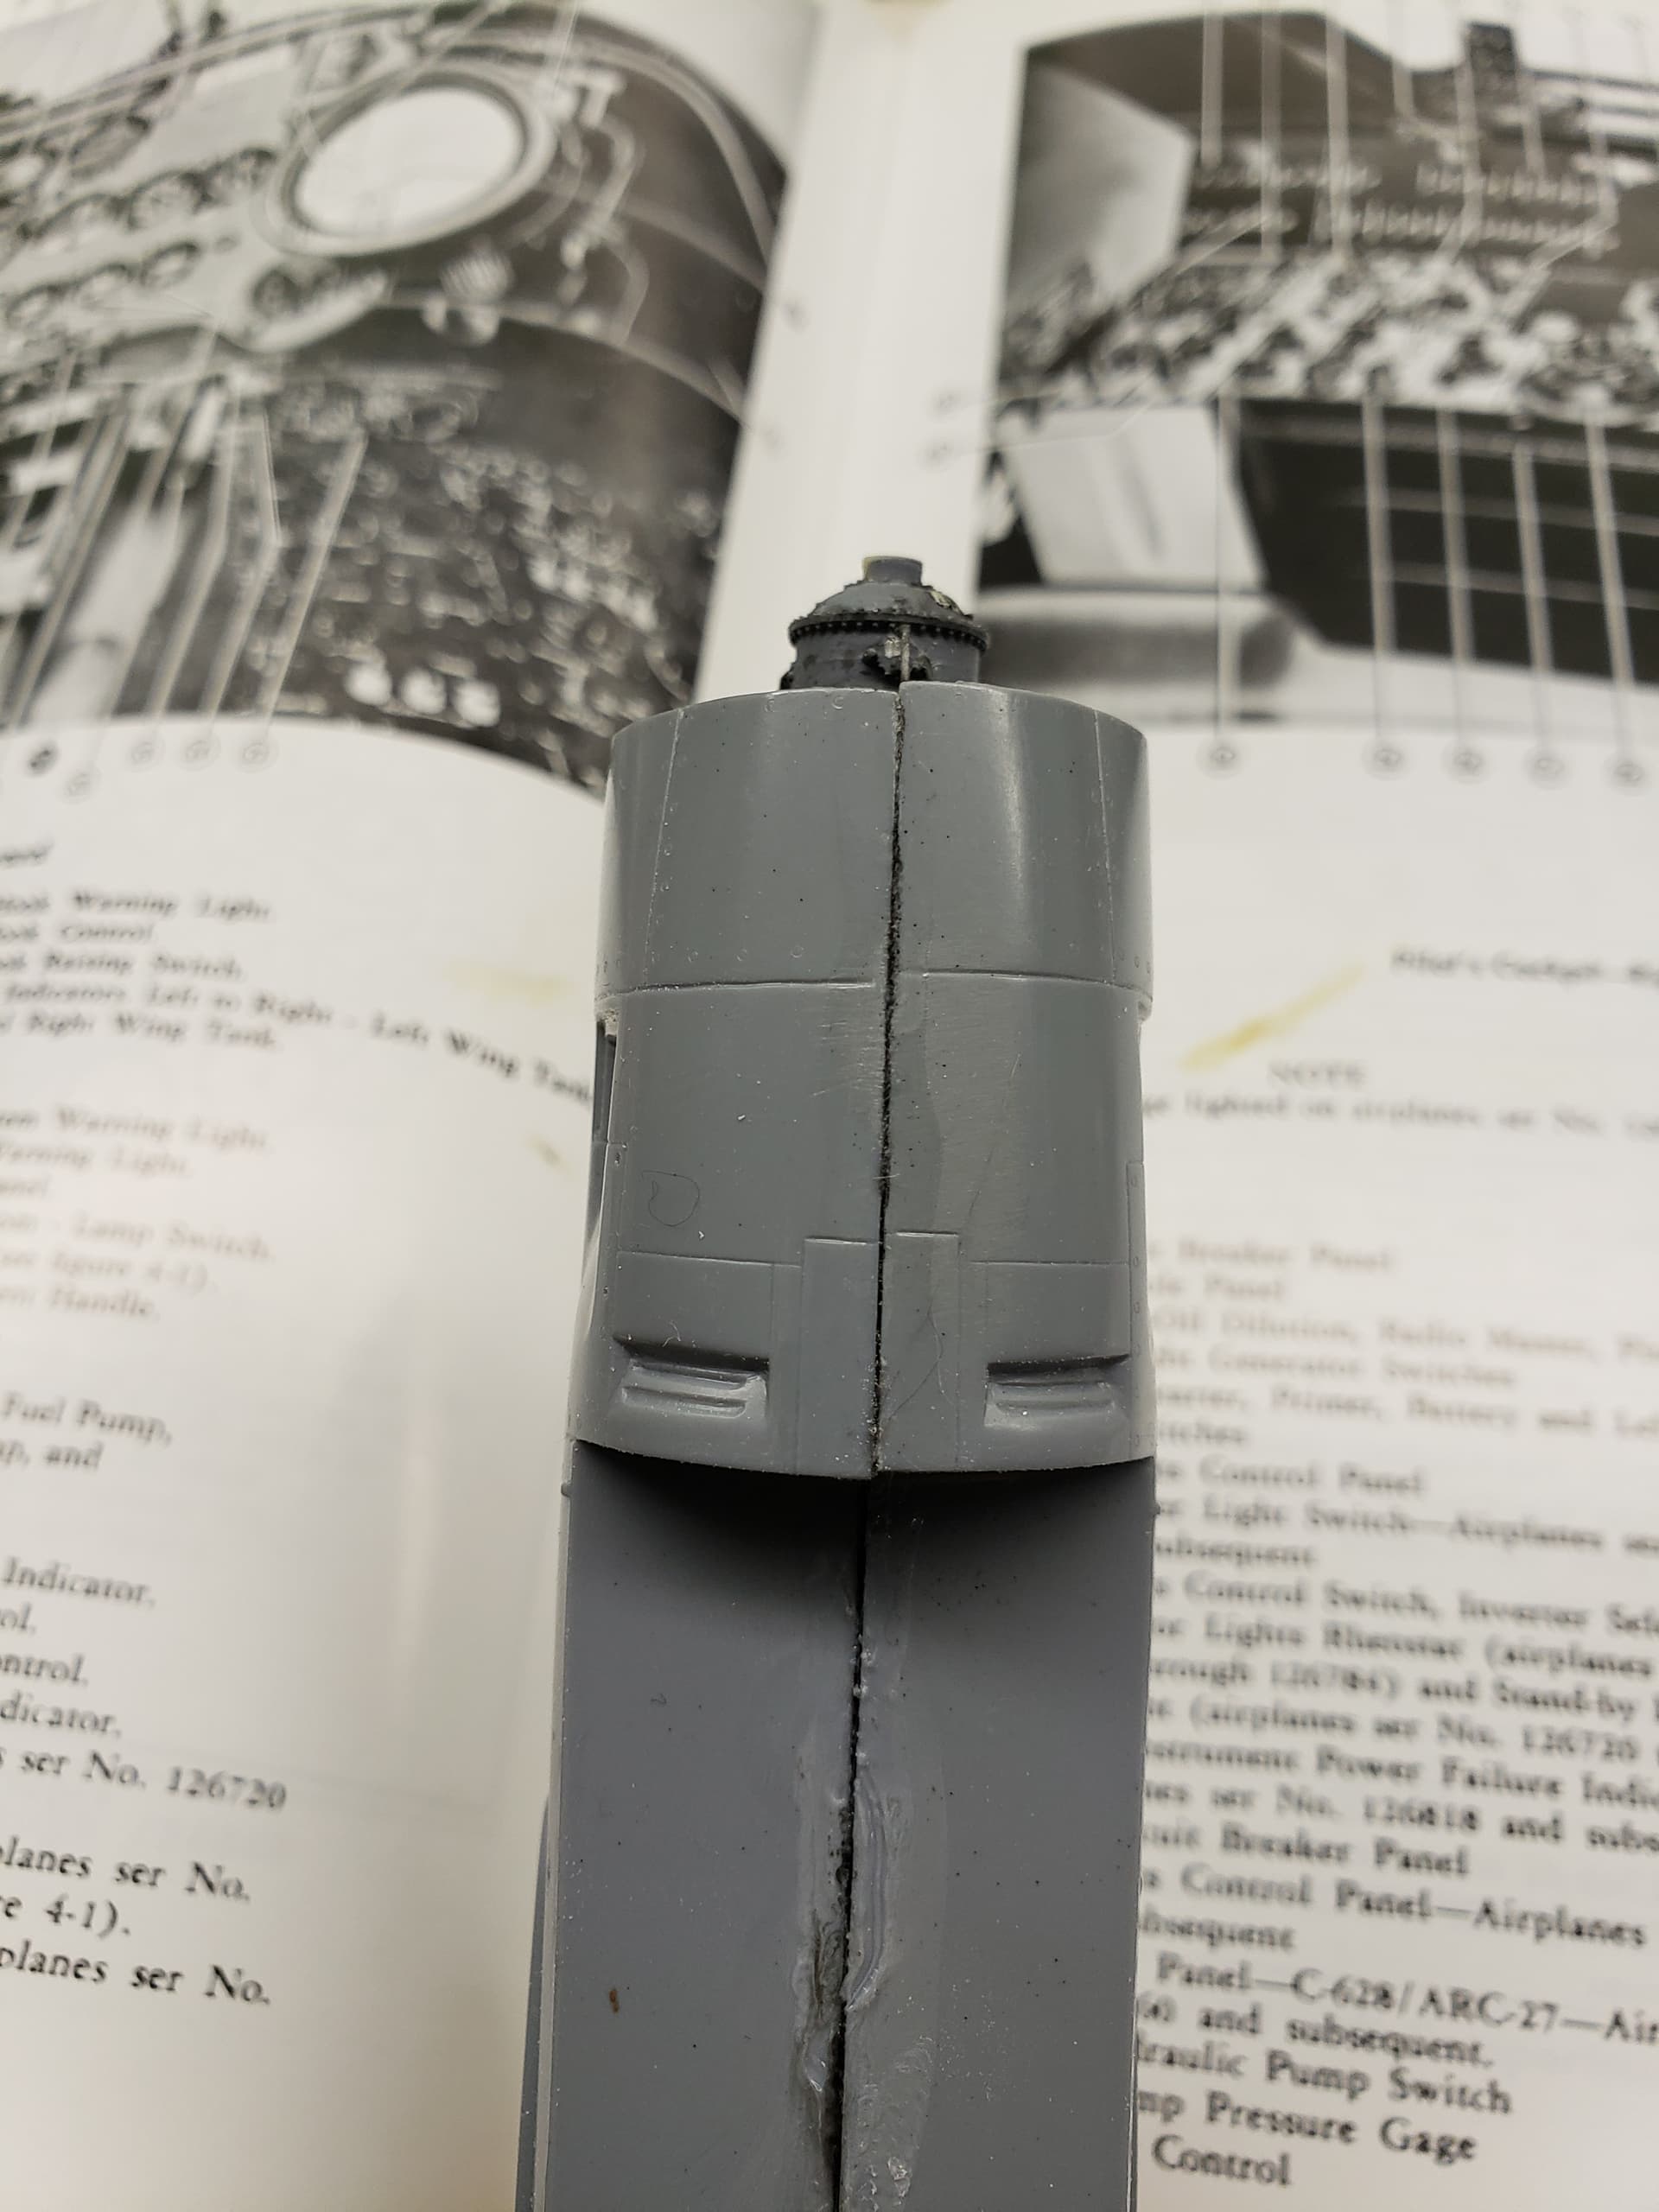
It will take more than a scriber to fix this, however:
3 Likes
Great Scribing set
2 Likes
Glad to see you keeping your hand in Brian .
Surprising to me how short the stem is on that poppet valve relative to the head . Do you have the rest of the engine ? LOL
1 Like
I do have a cylinder barrel and a piston! I’ll show those later. ![]()
1 Like
Panel Lines and Rivets - A Start
A professional model builder once told me, “There is no perfect model,” and as proof I offer the following as therapy for overwork in my day job–I have promised myself at least a few minutes every other day in the basement losing myself in plastic.
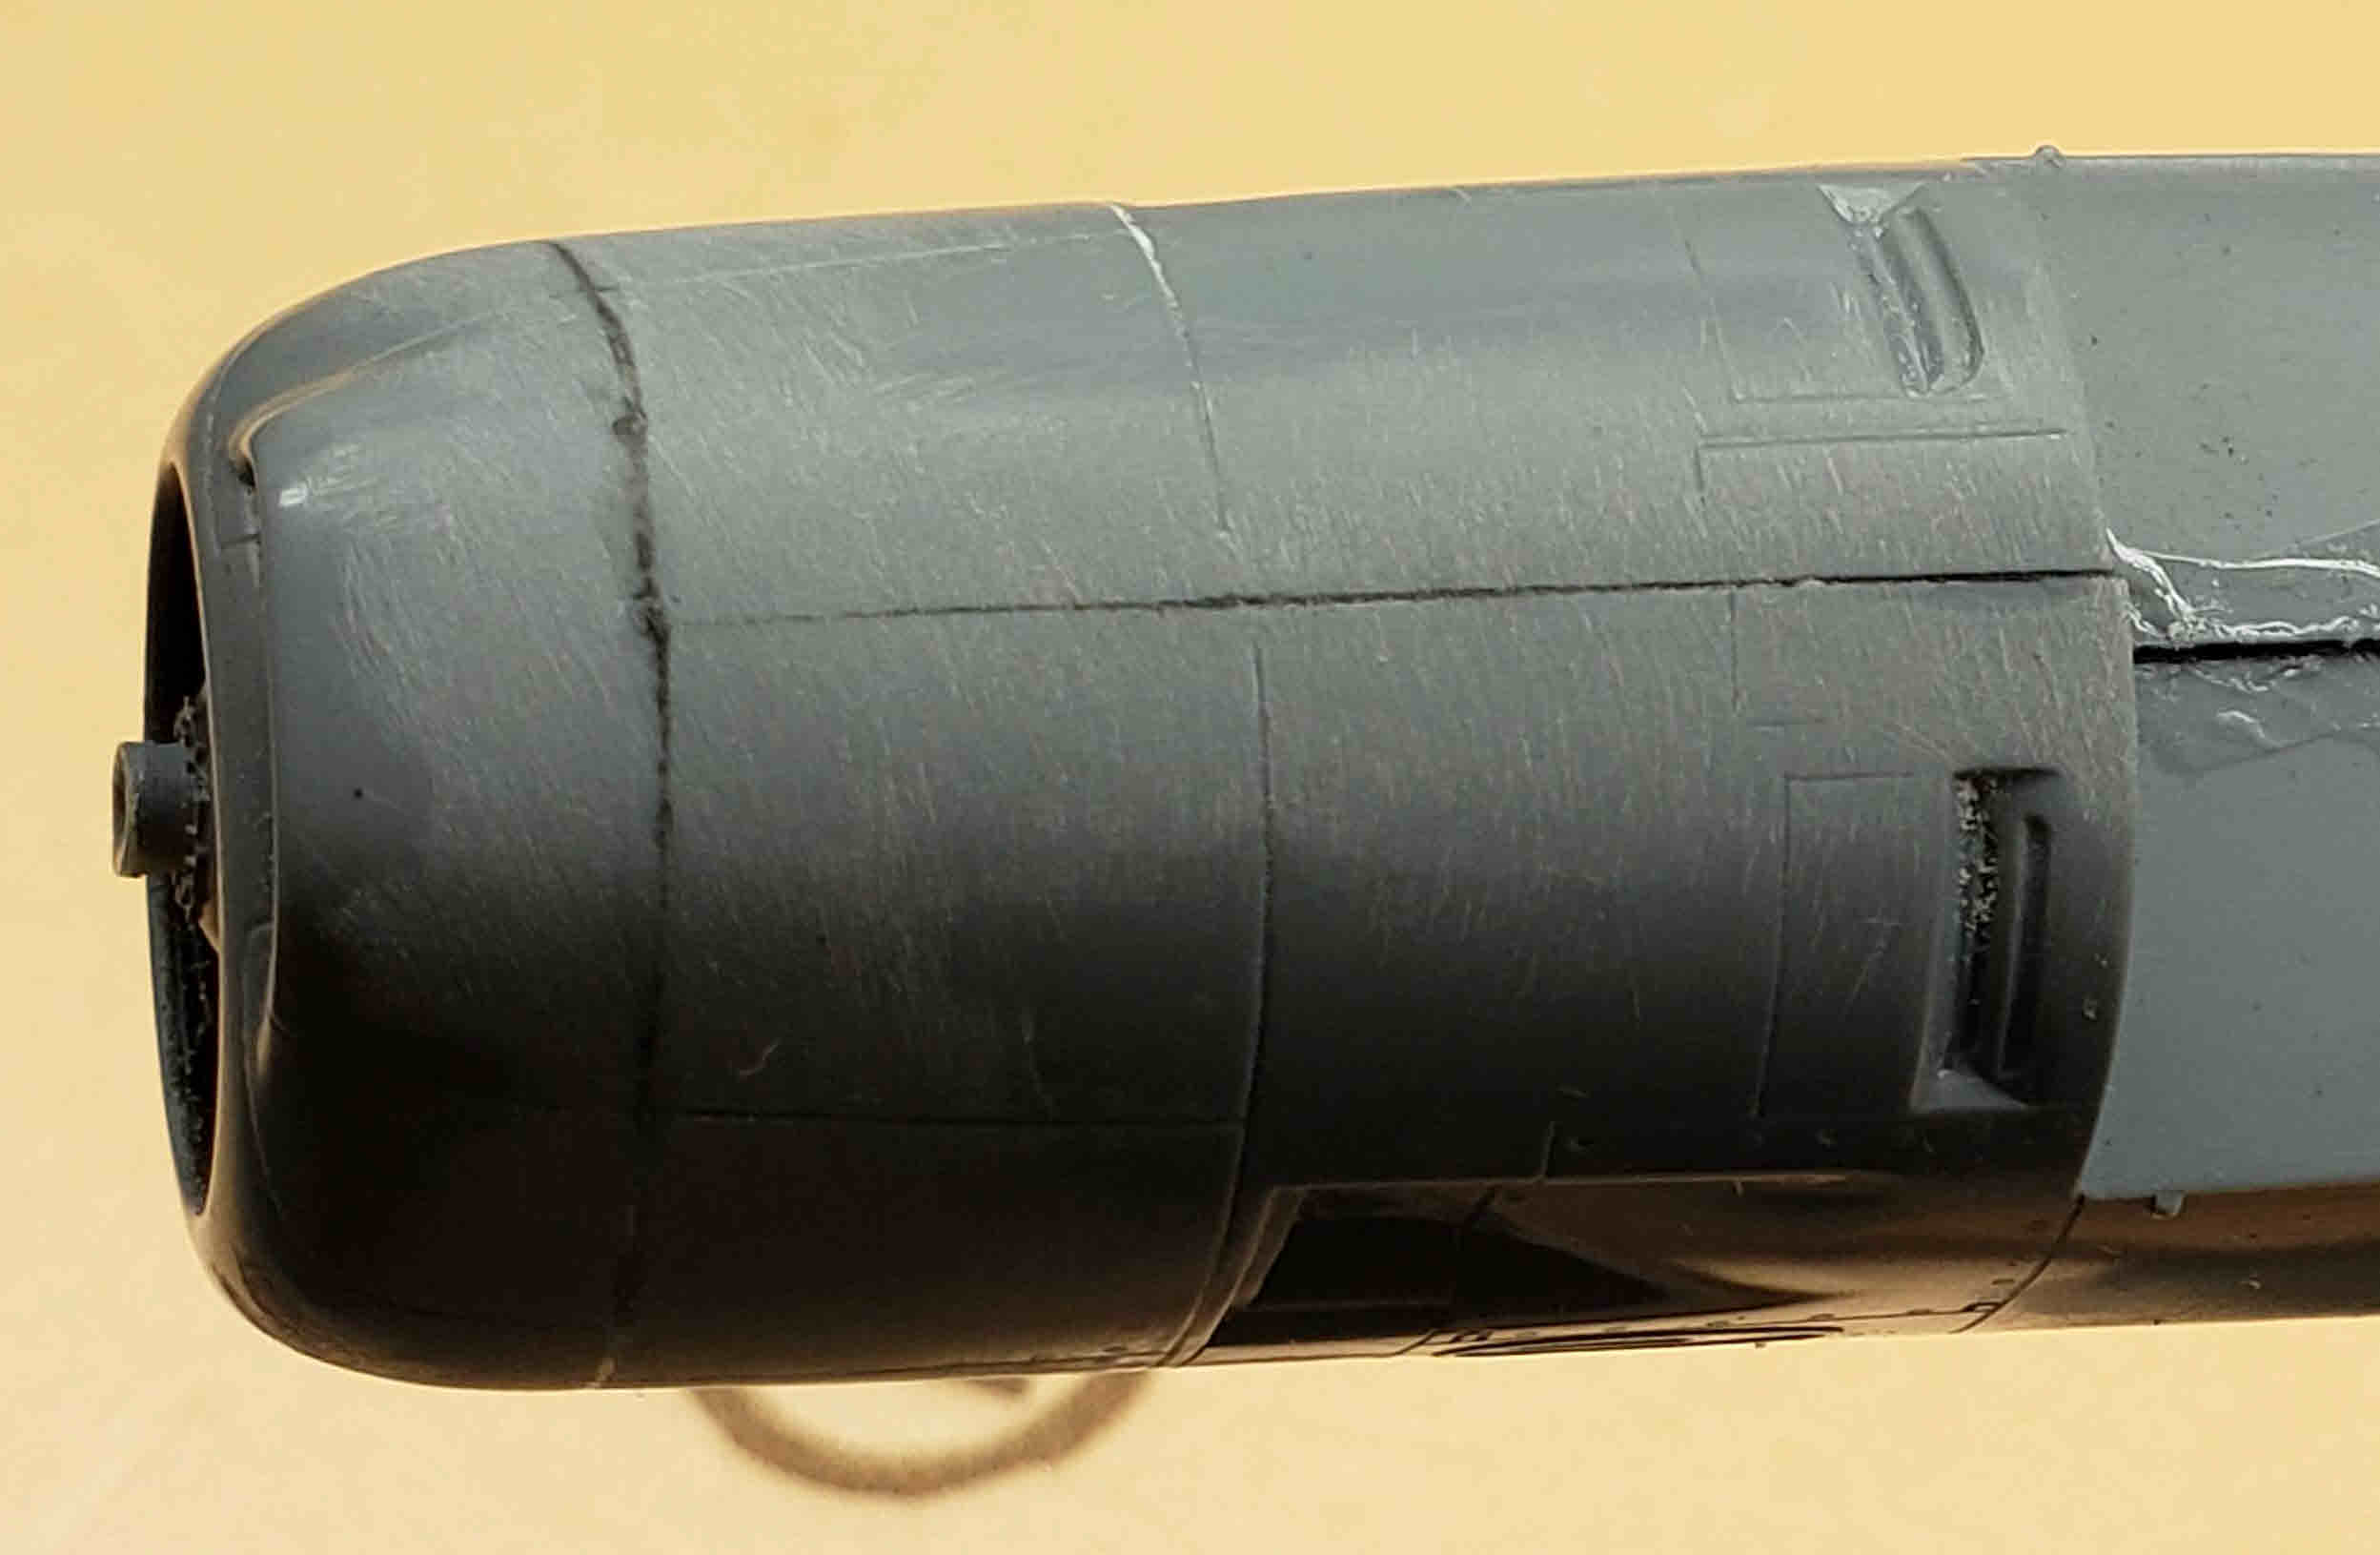
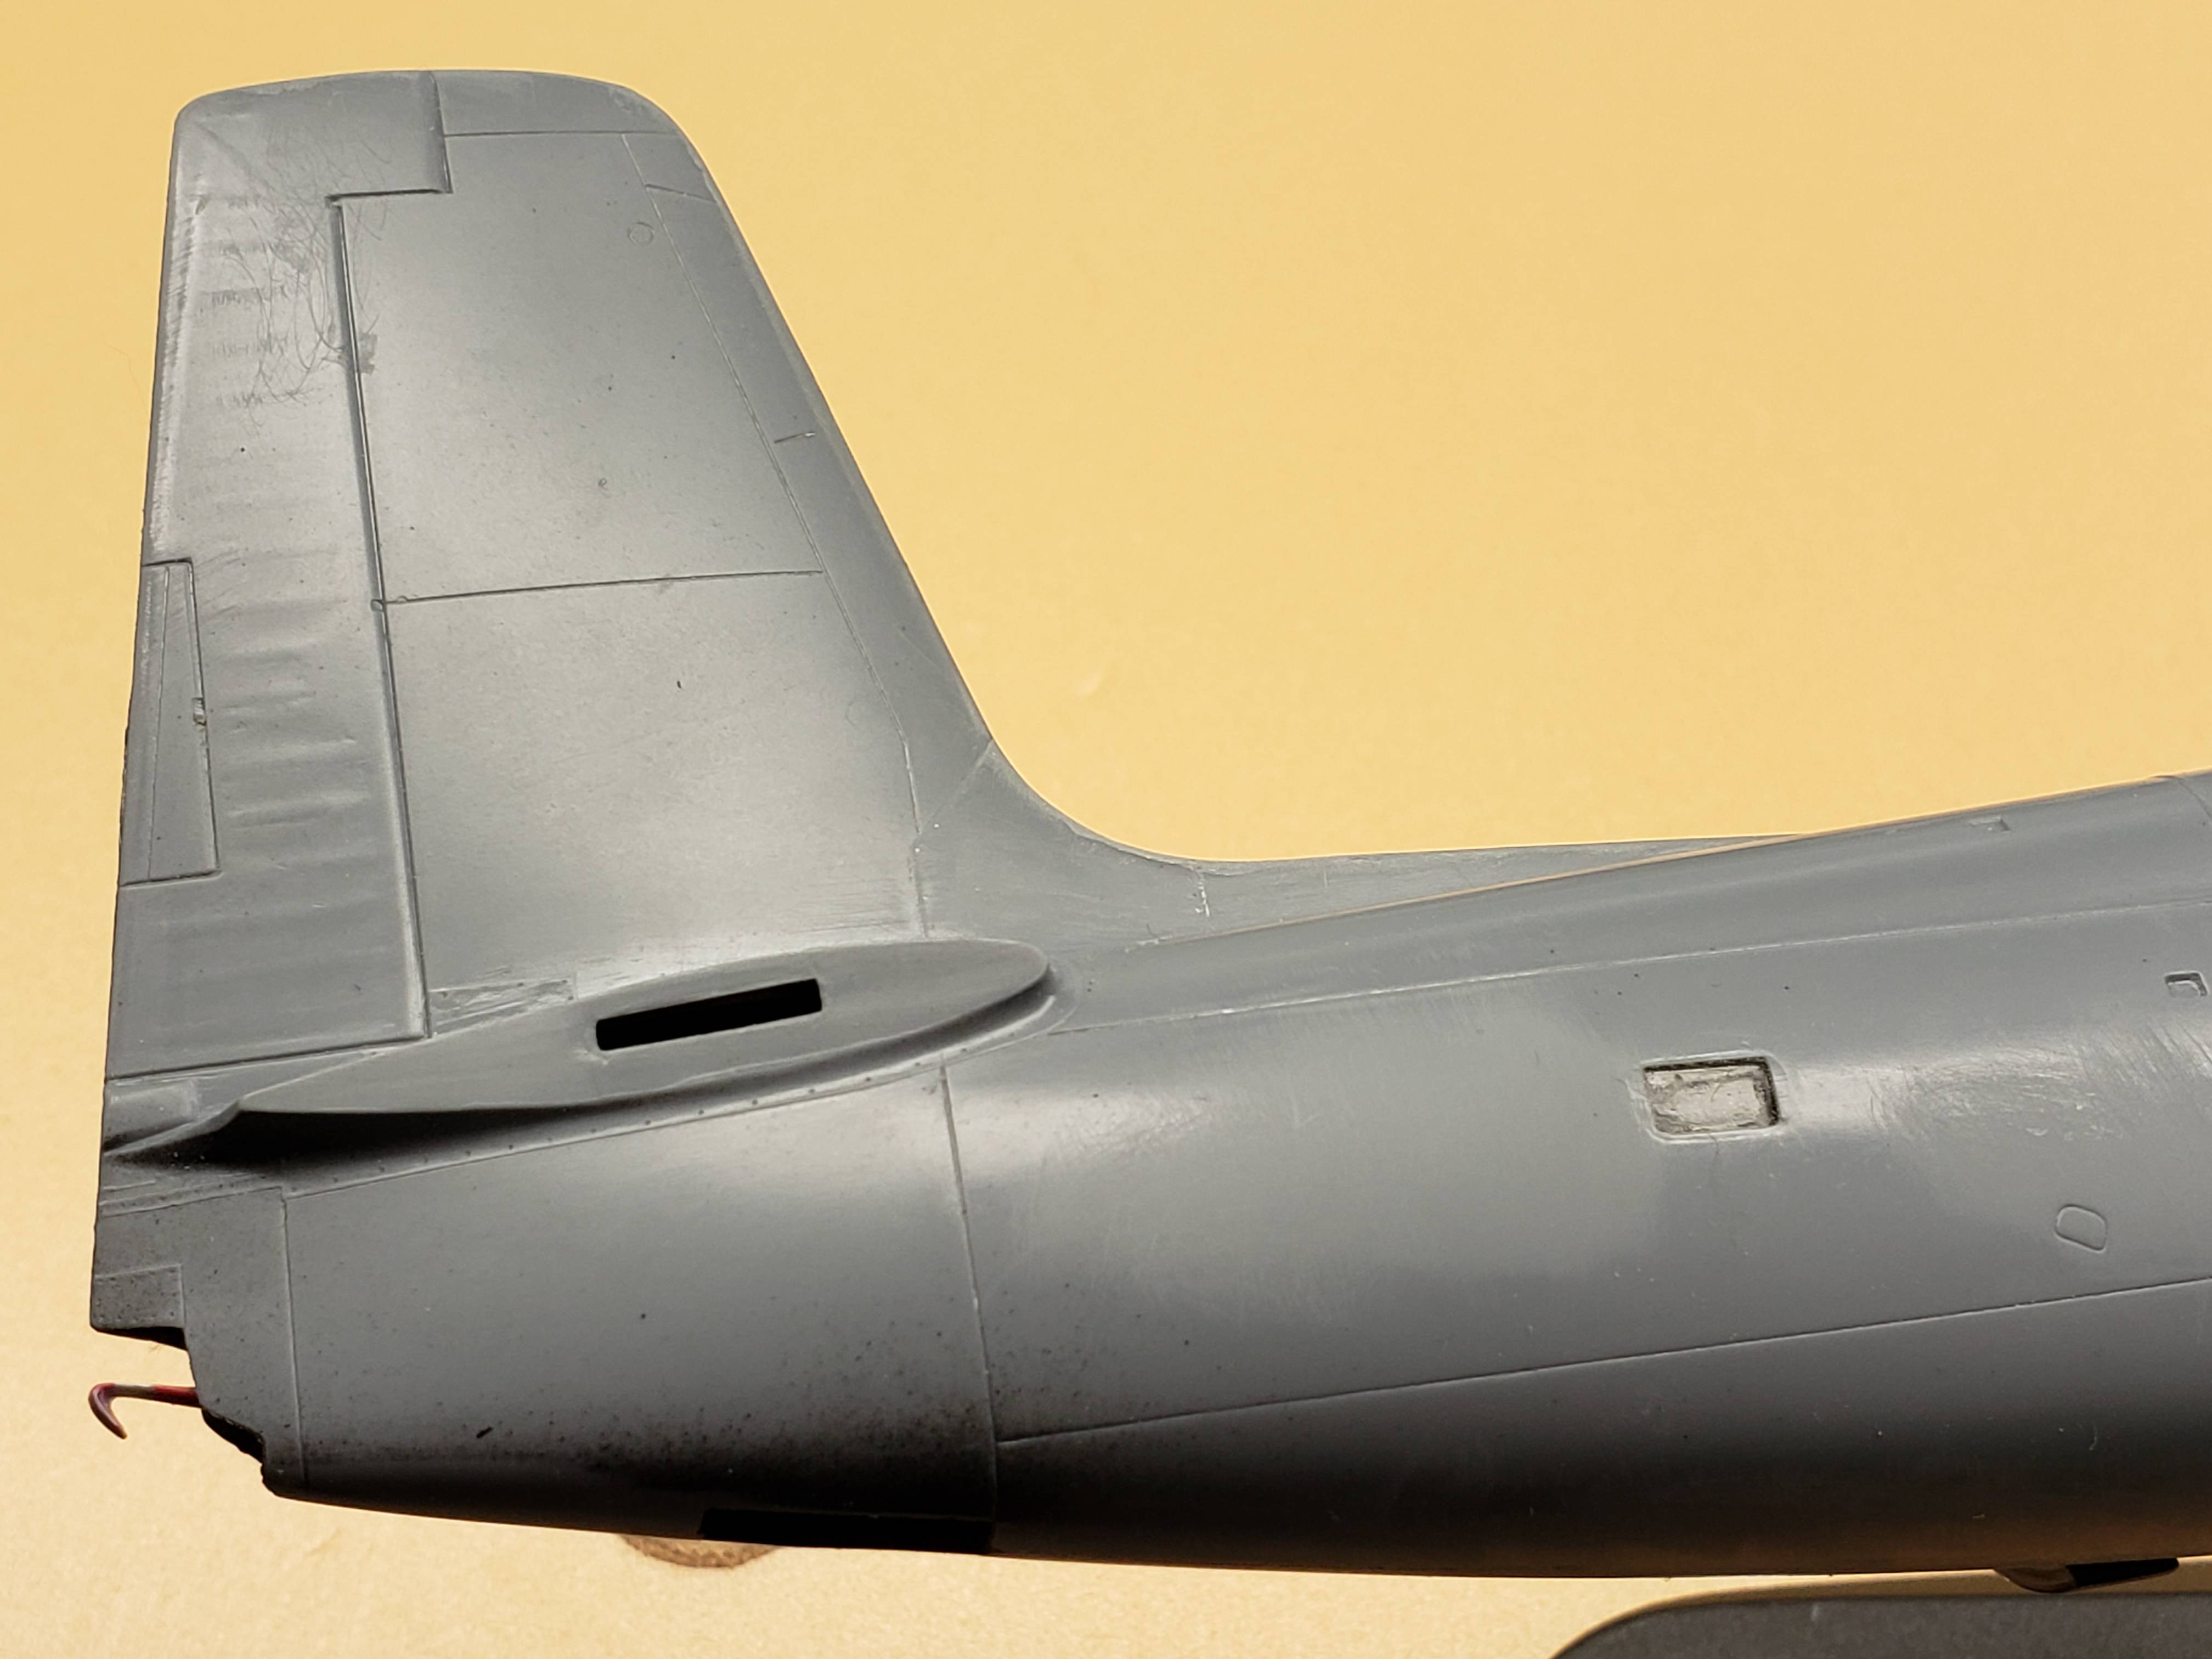
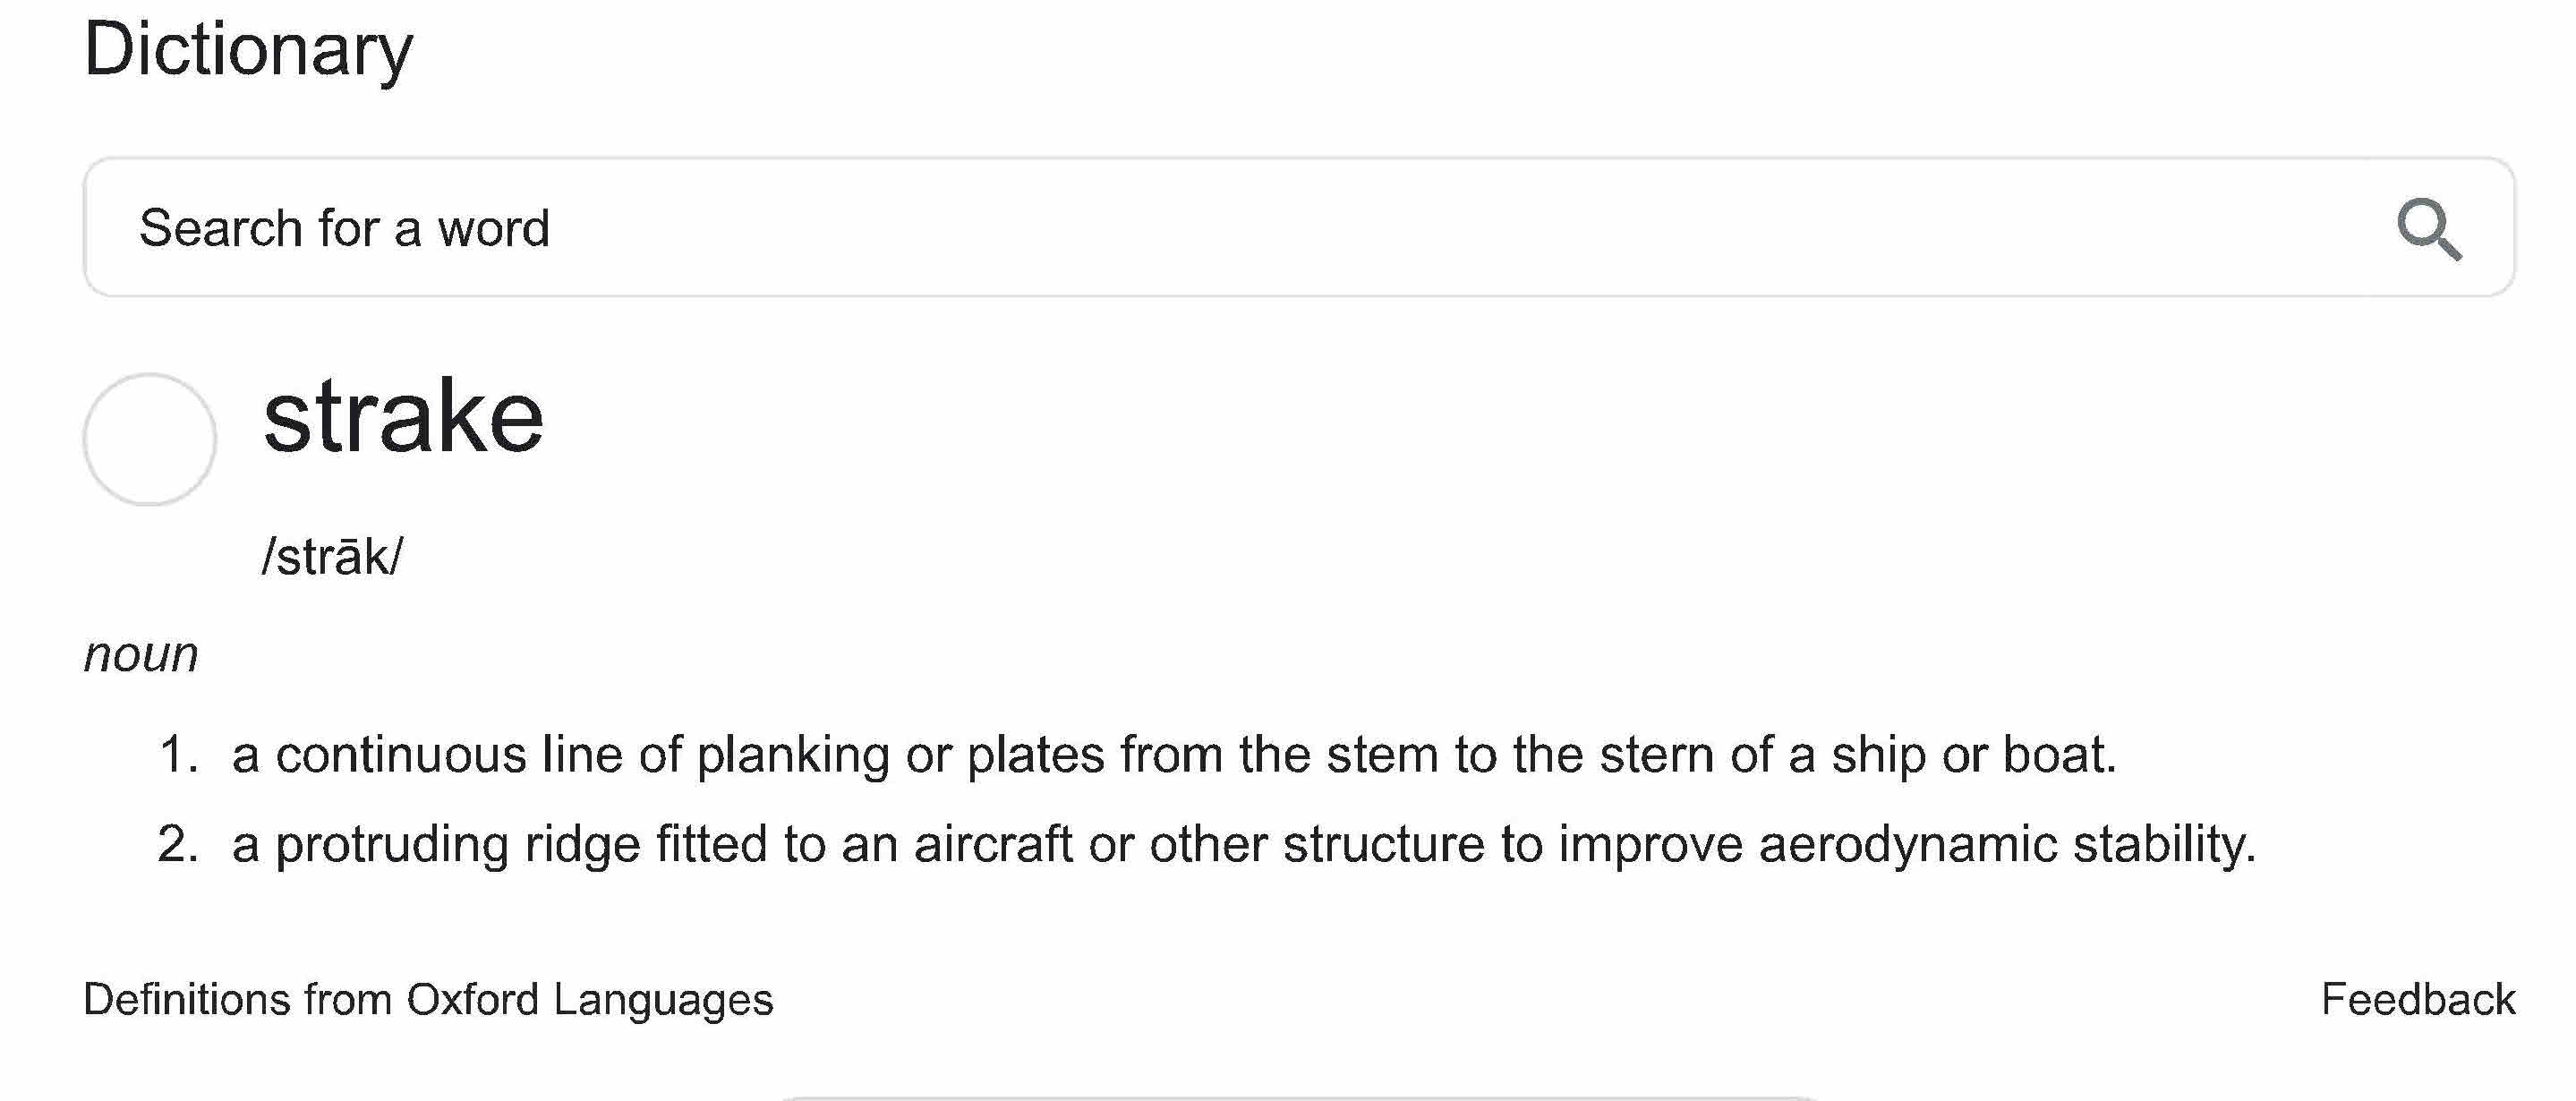
Here’s a start on re-scribing and re-riveting a section of the tail I had to clean up after an accident with glue on the strake (is that the right word?) leading to the vertical stabilizer.
So, the “before” view, which is to say after a lot of sanding to get the glue off.
Doing my thing with the Dymo tape:
After:
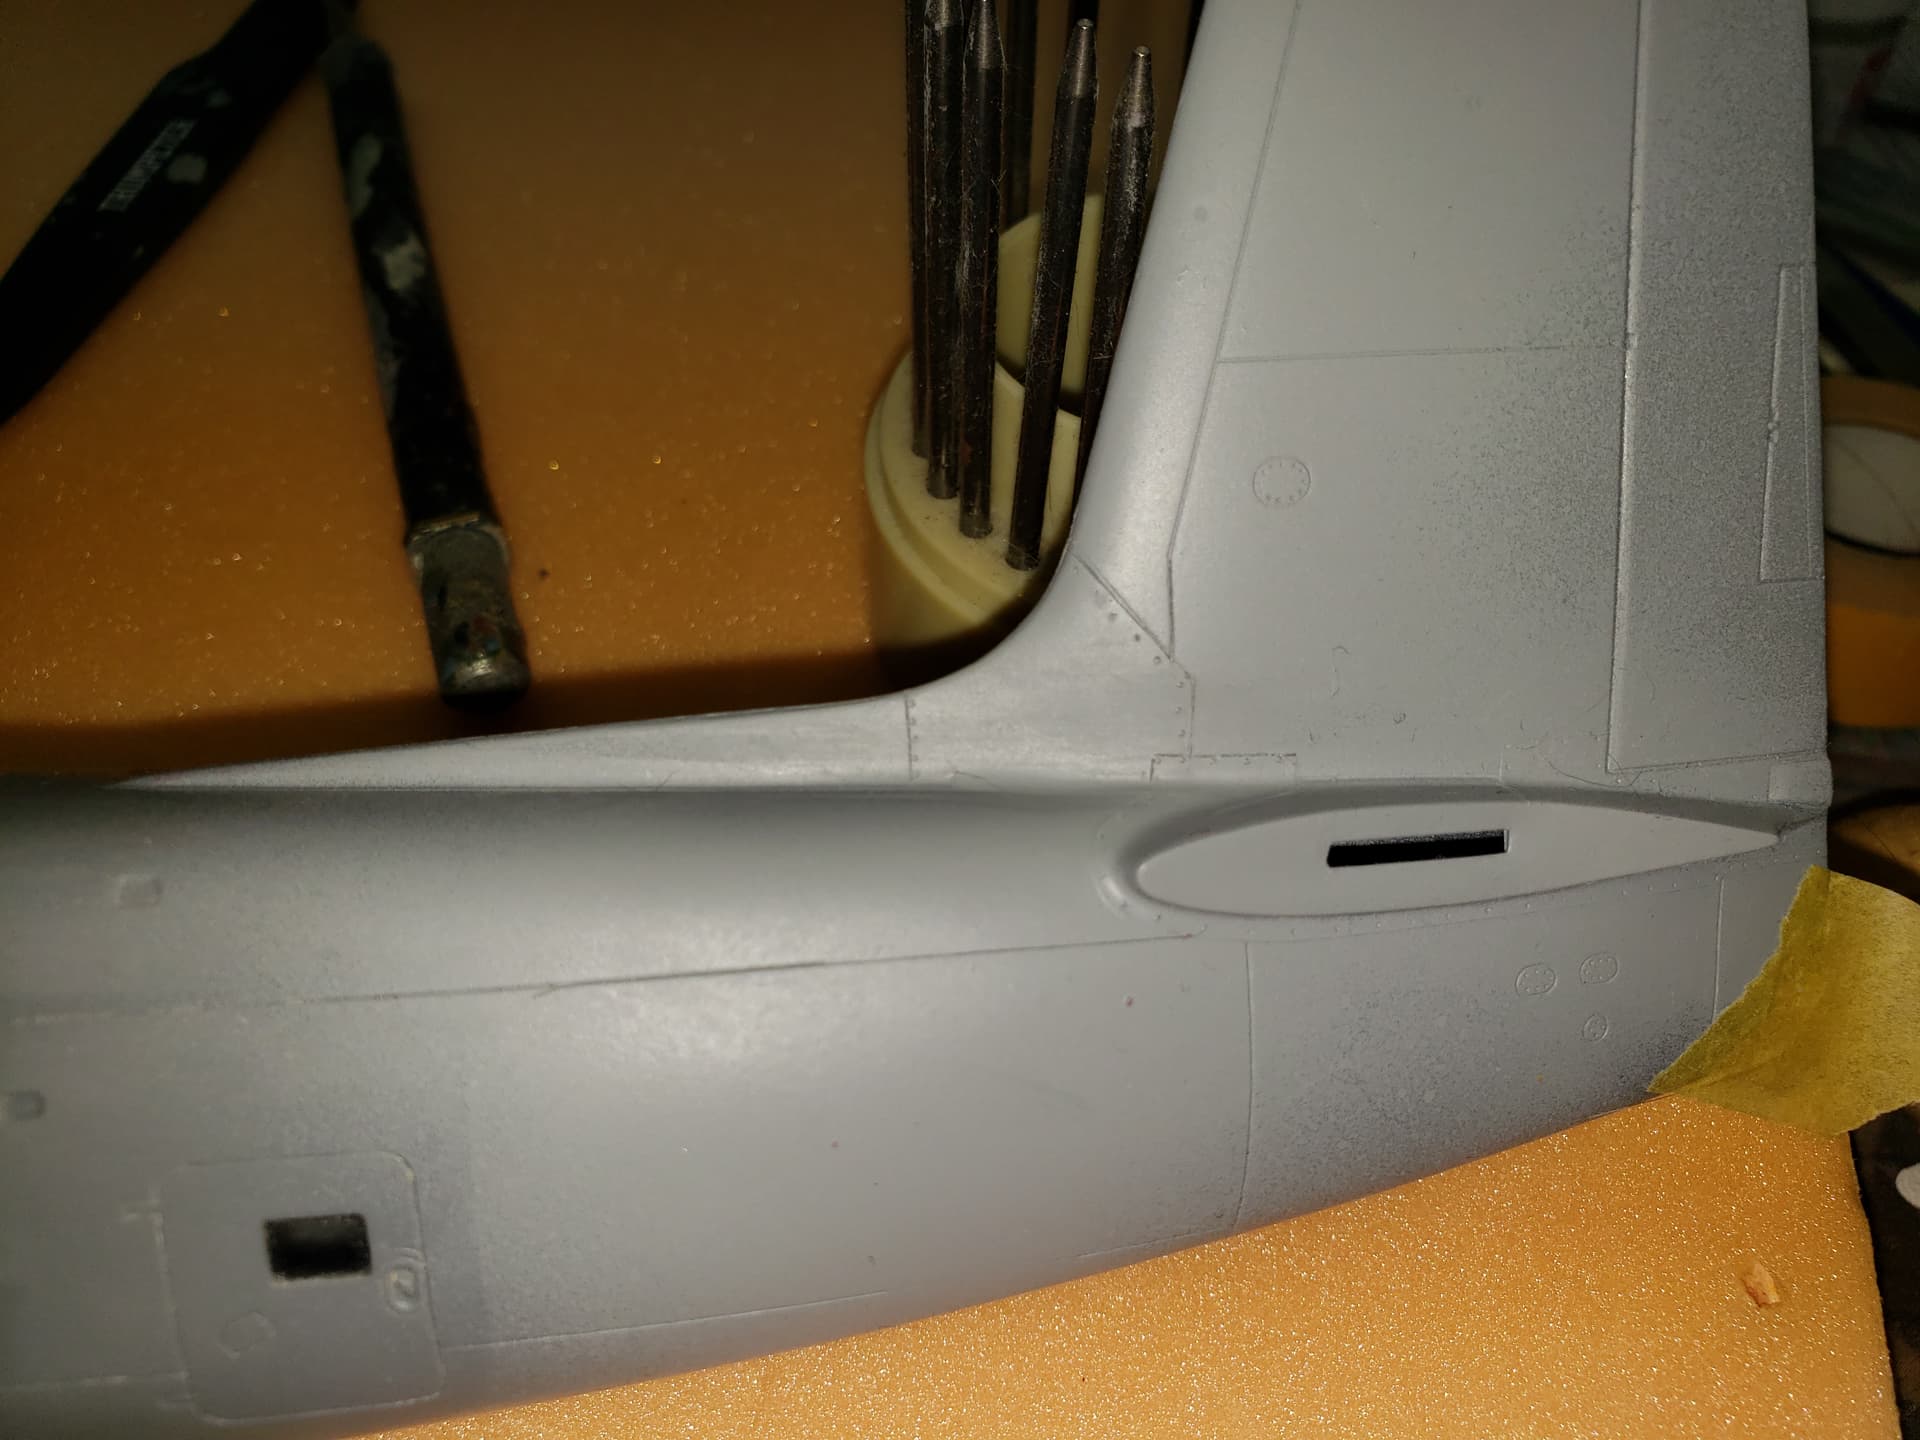
Far from perfect, but good enough for my model shelf, and objectively better than the first photo.
PS, I guessed right on the word: the internet defines “strake” as
More tomorrow (or the next day).
3 Likes
Brian, Looking great and thanks for all the great reference photographs of the engine
Ahem, I have to get moving on this.
Yes Brian - time to hang a “ Closed “ sign on the law office door ( in many languages) and get back to the important stuff - model aircraft. No need to thank me .
LOL - Richard