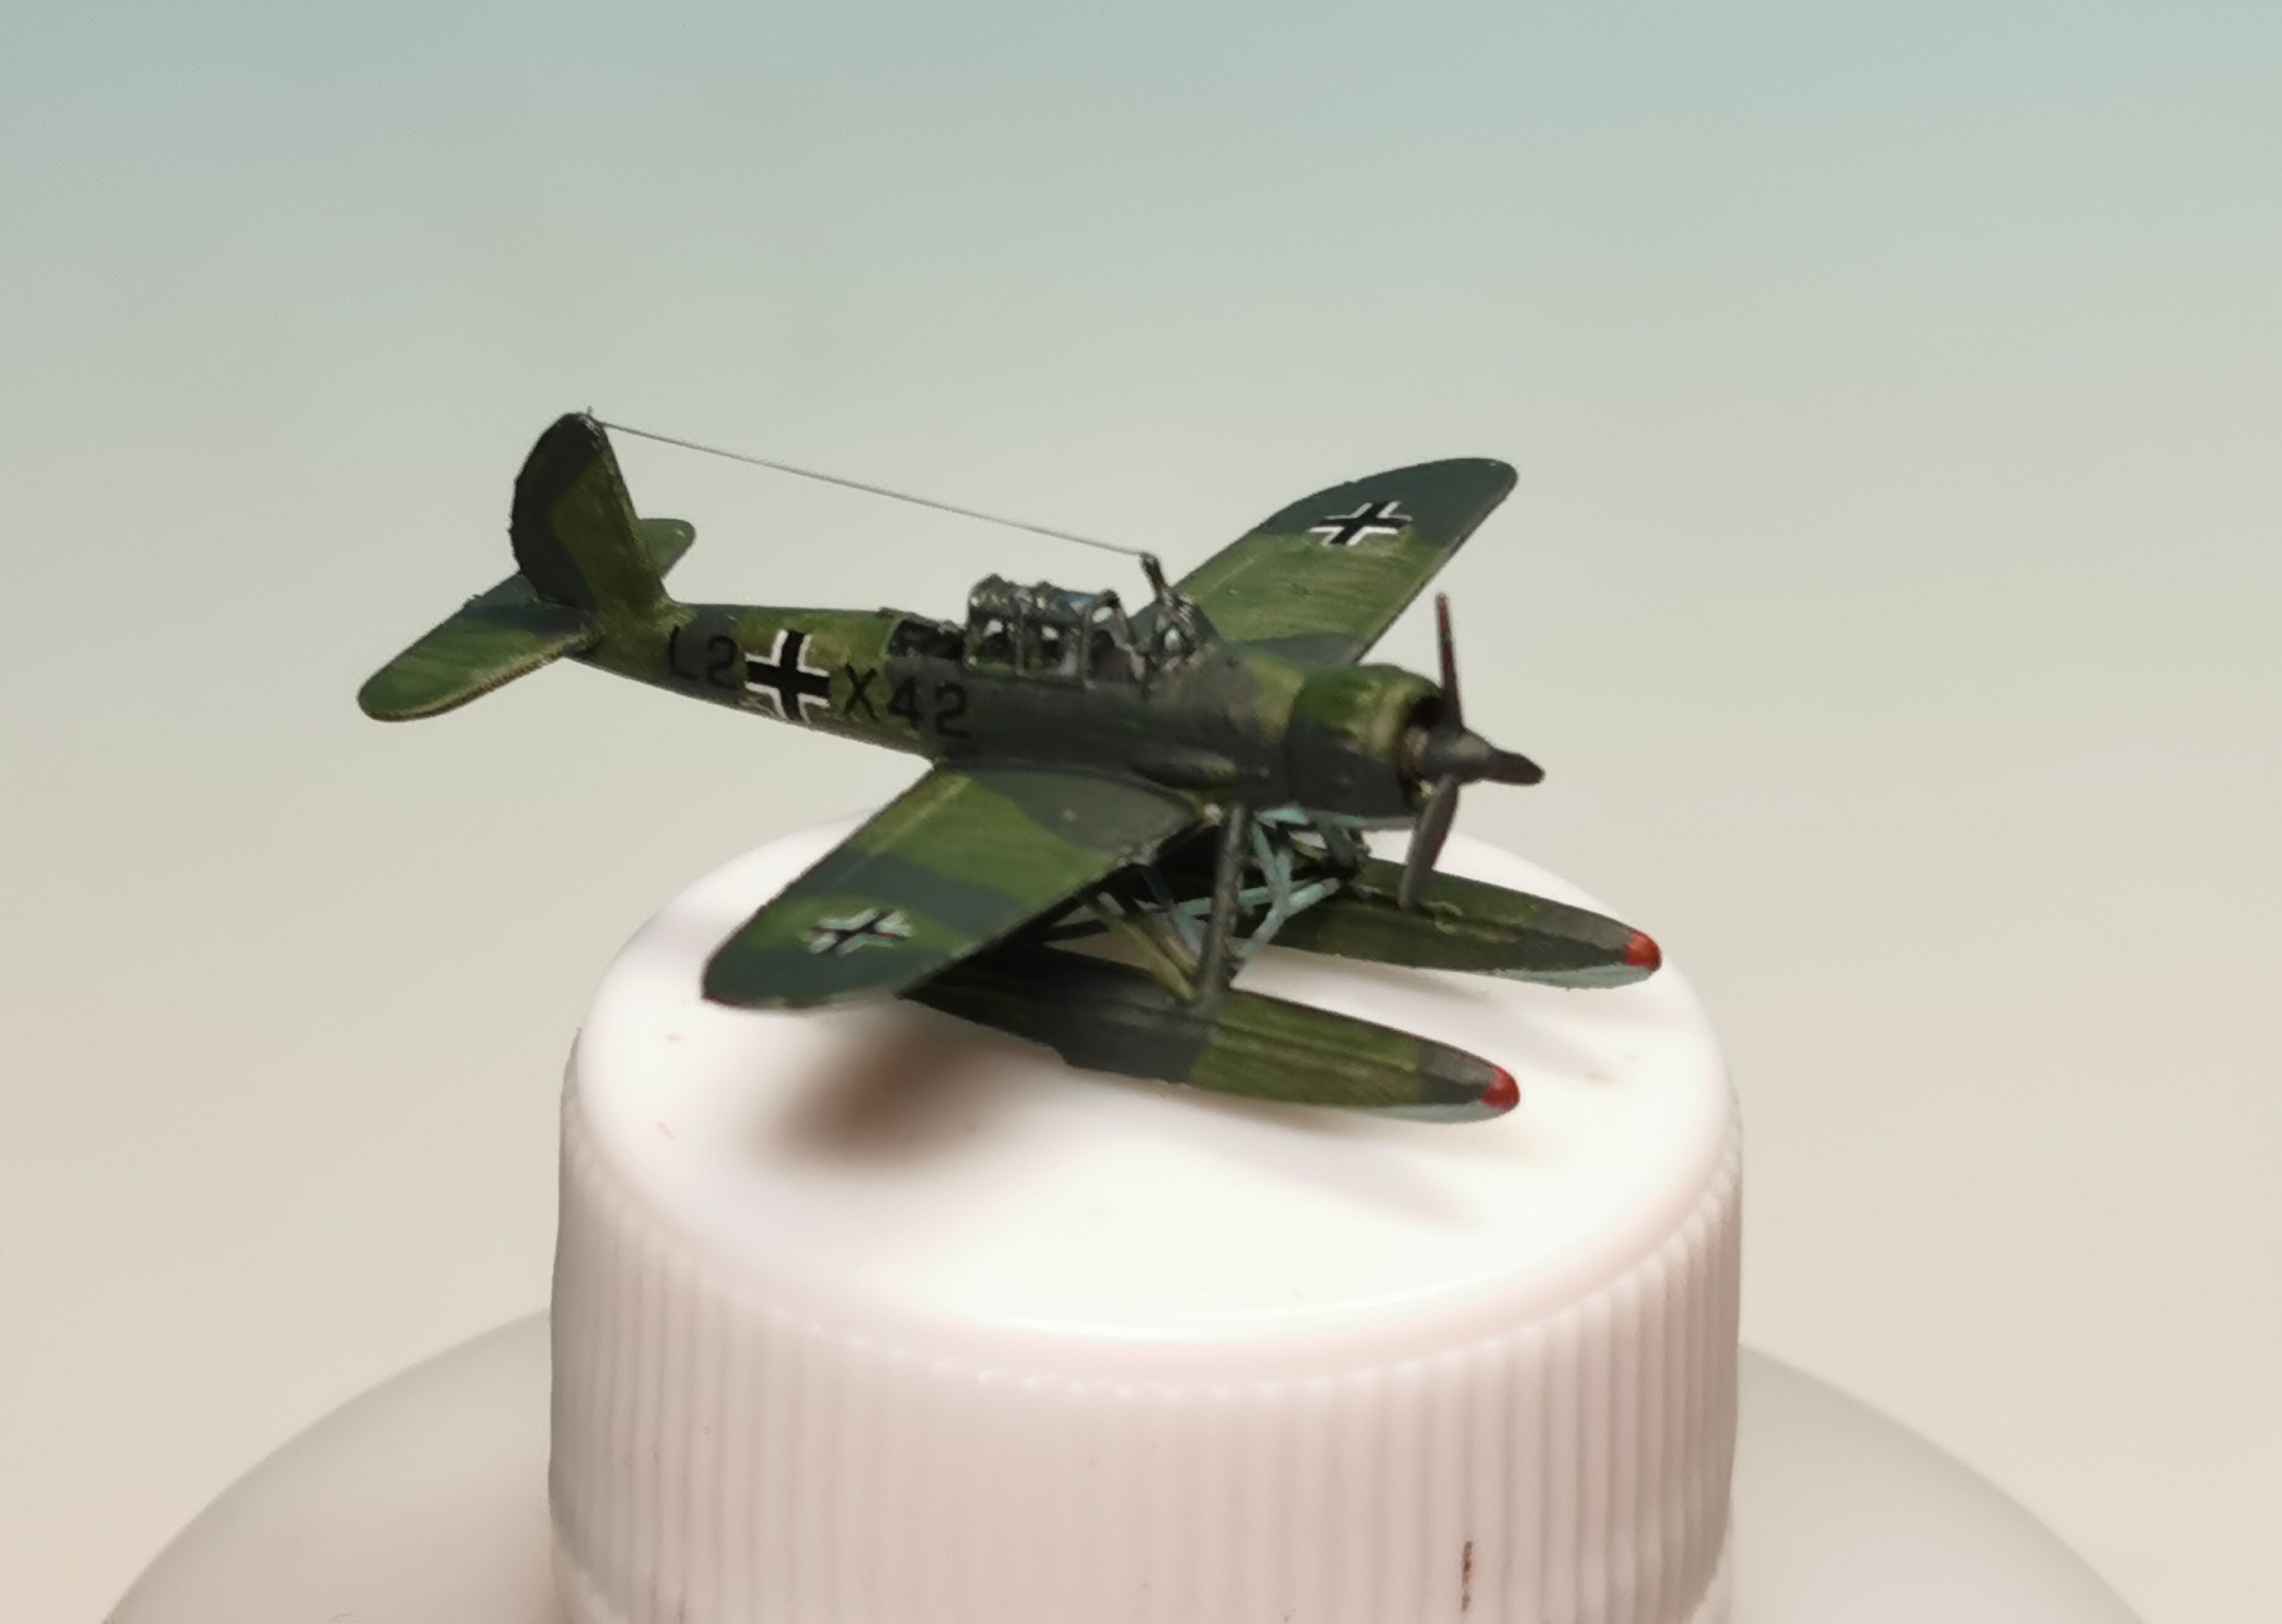
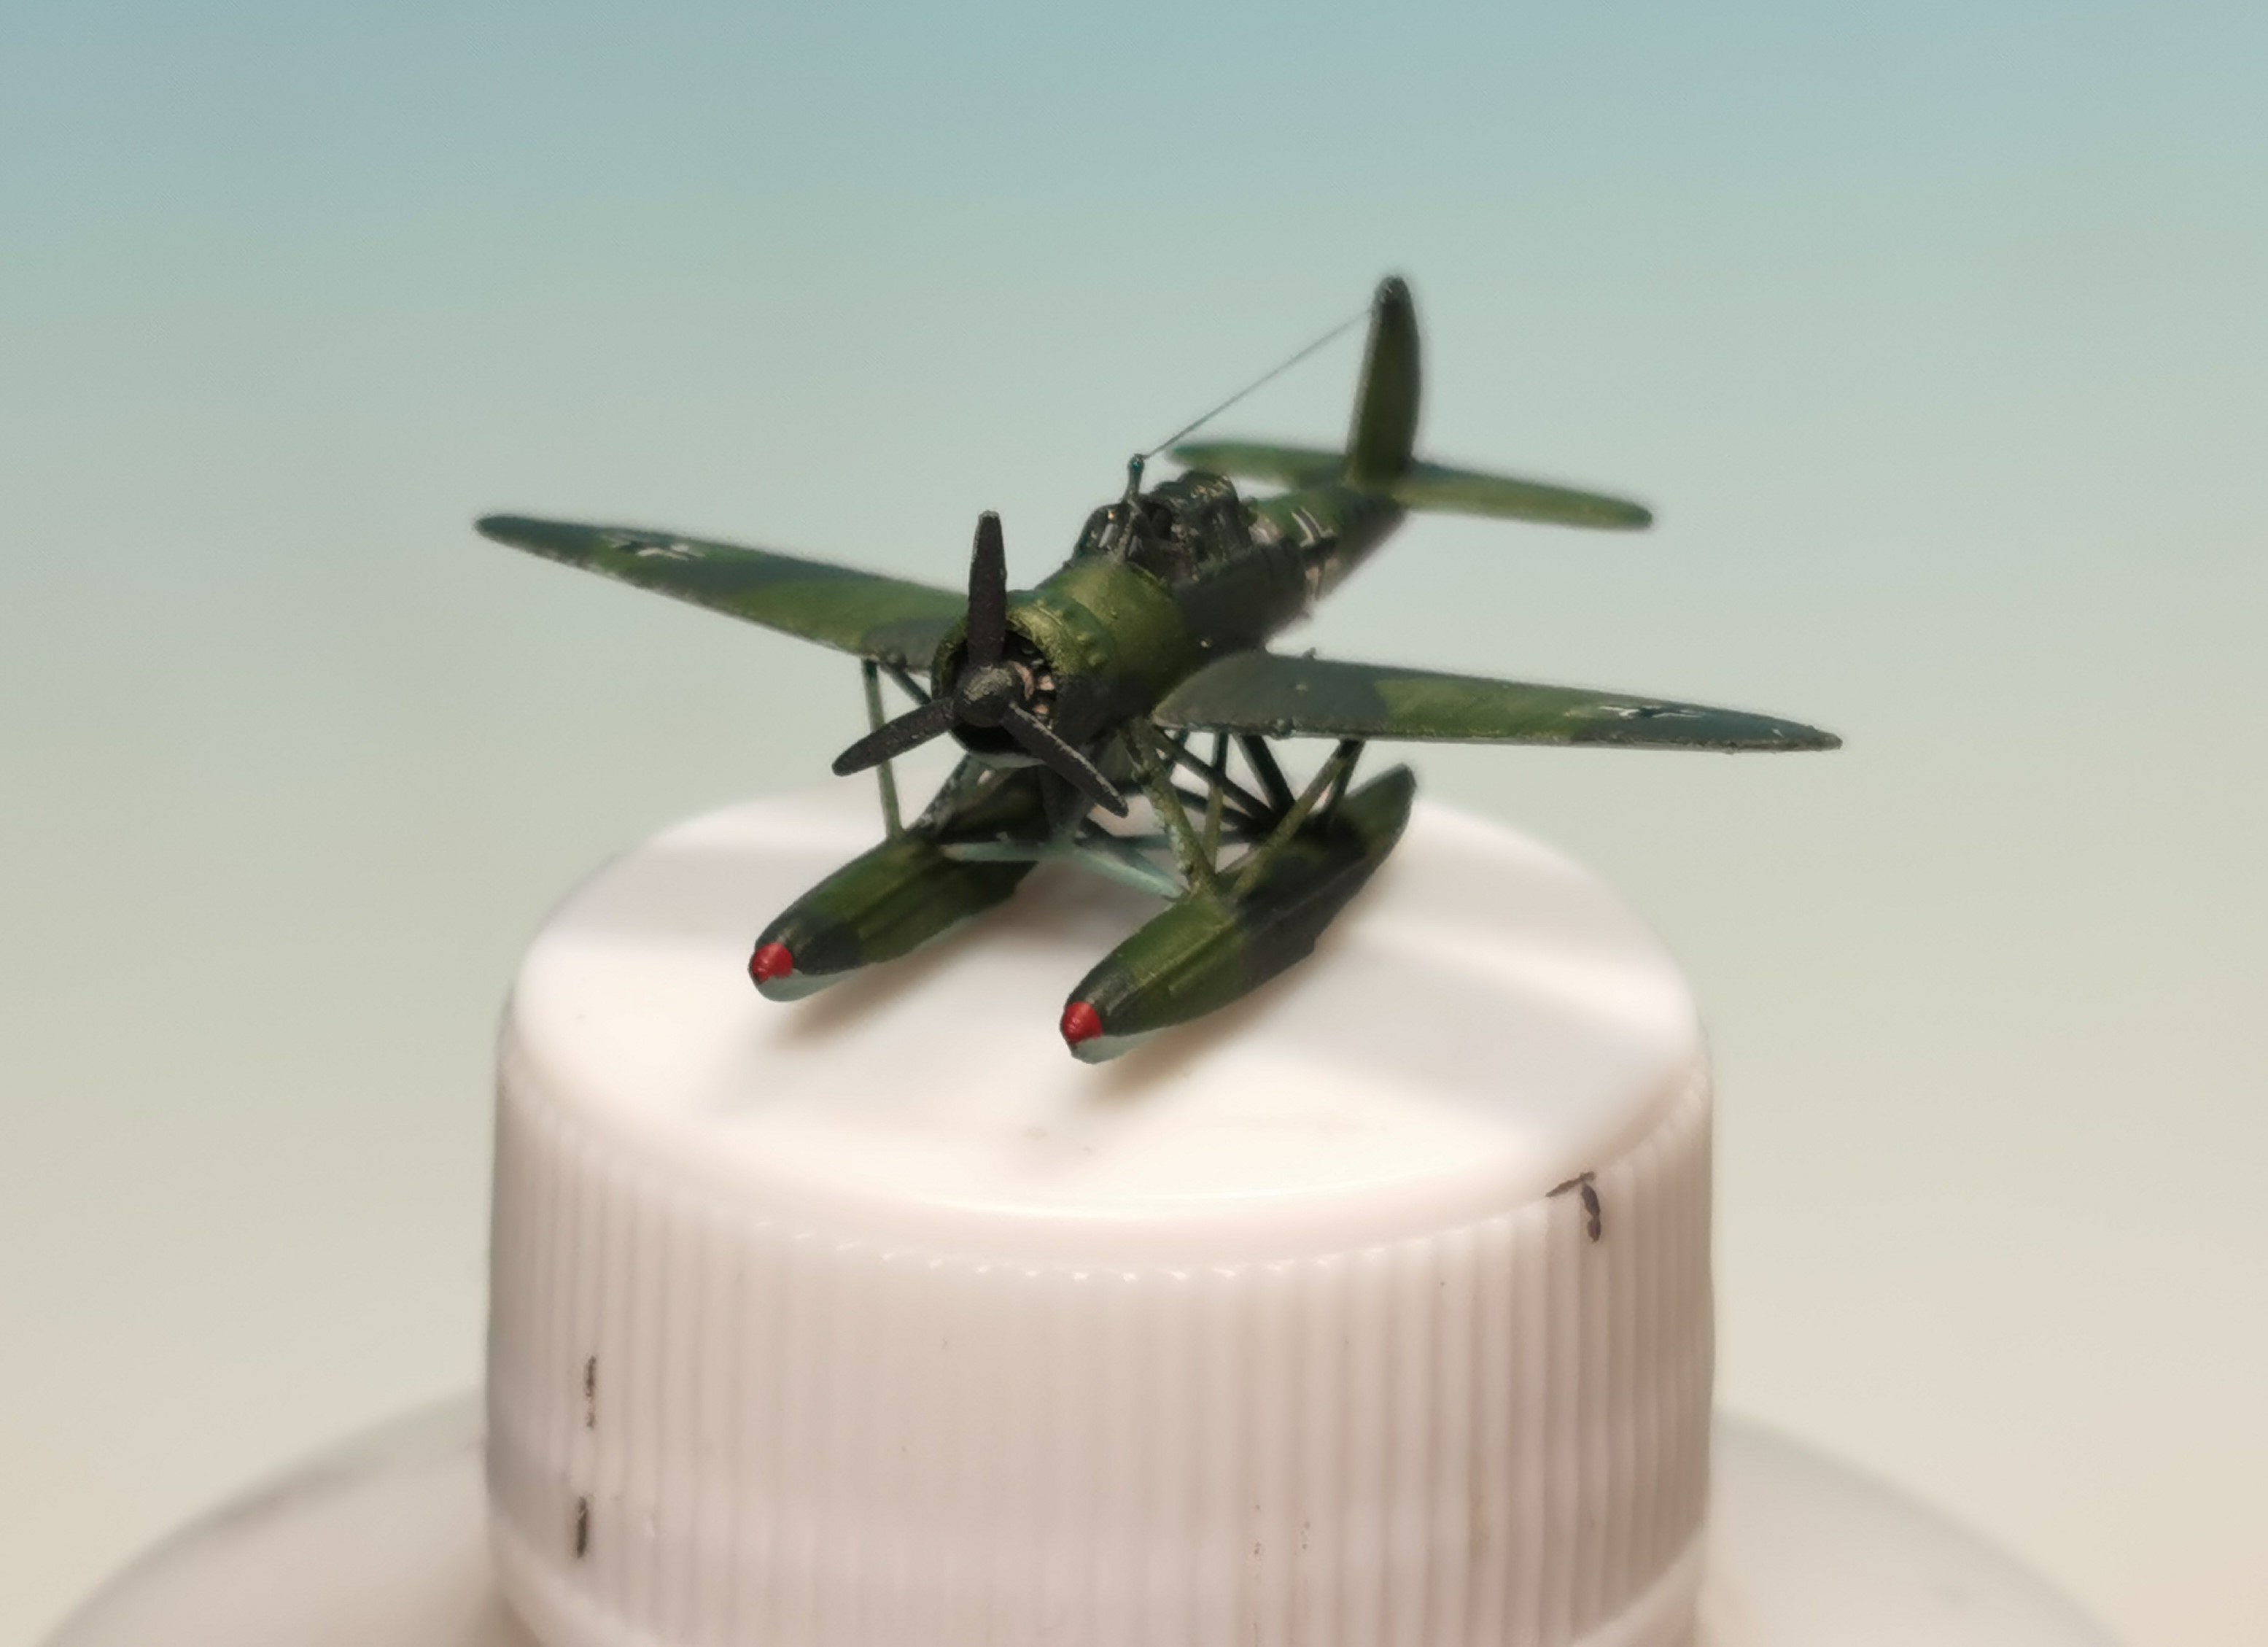
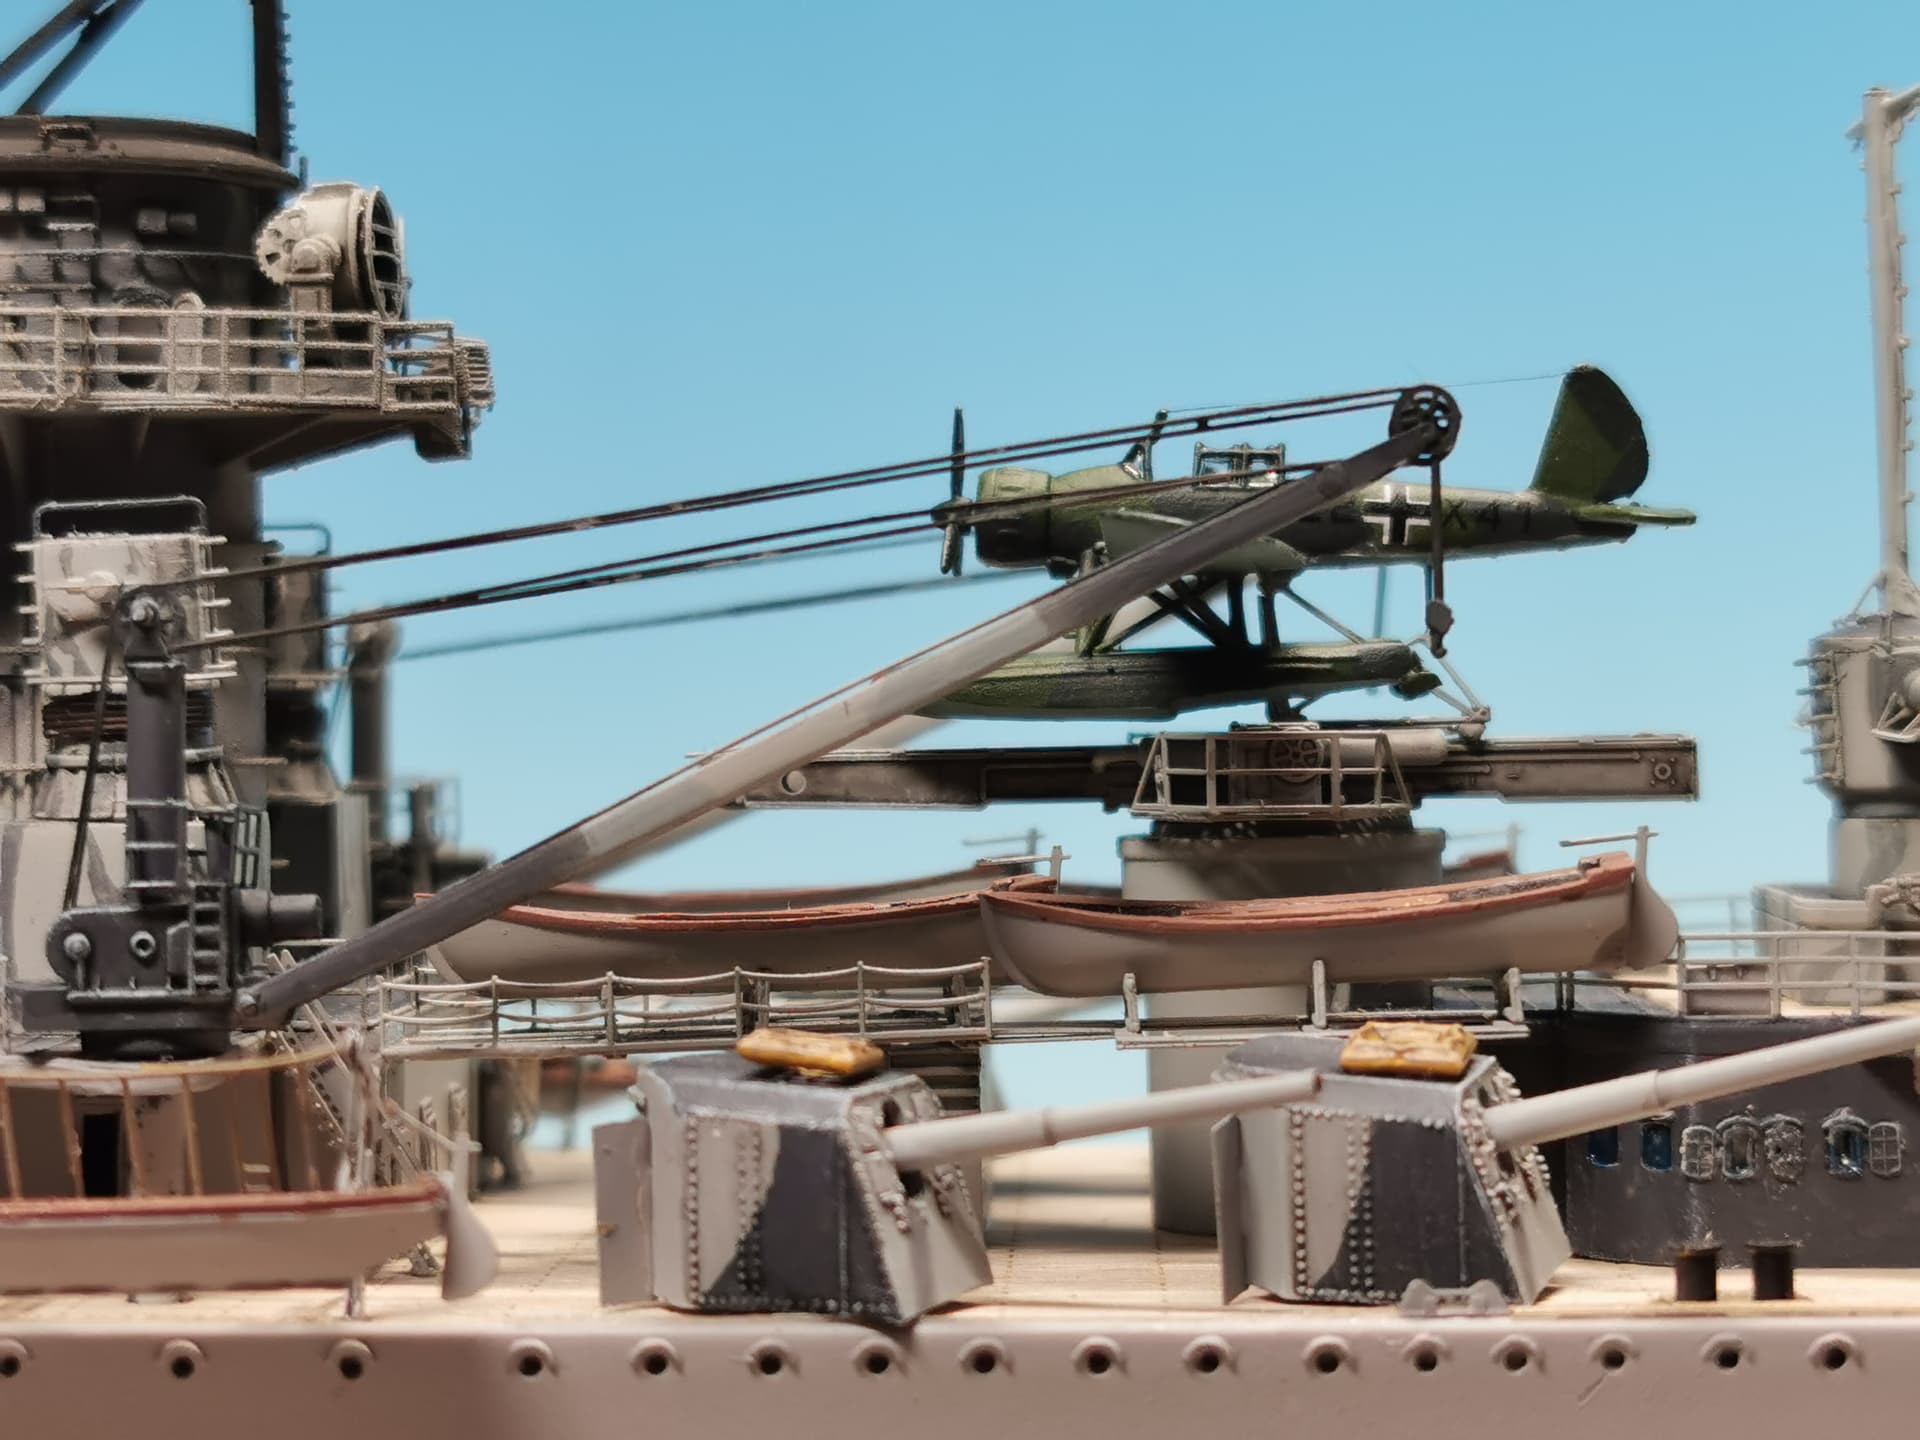
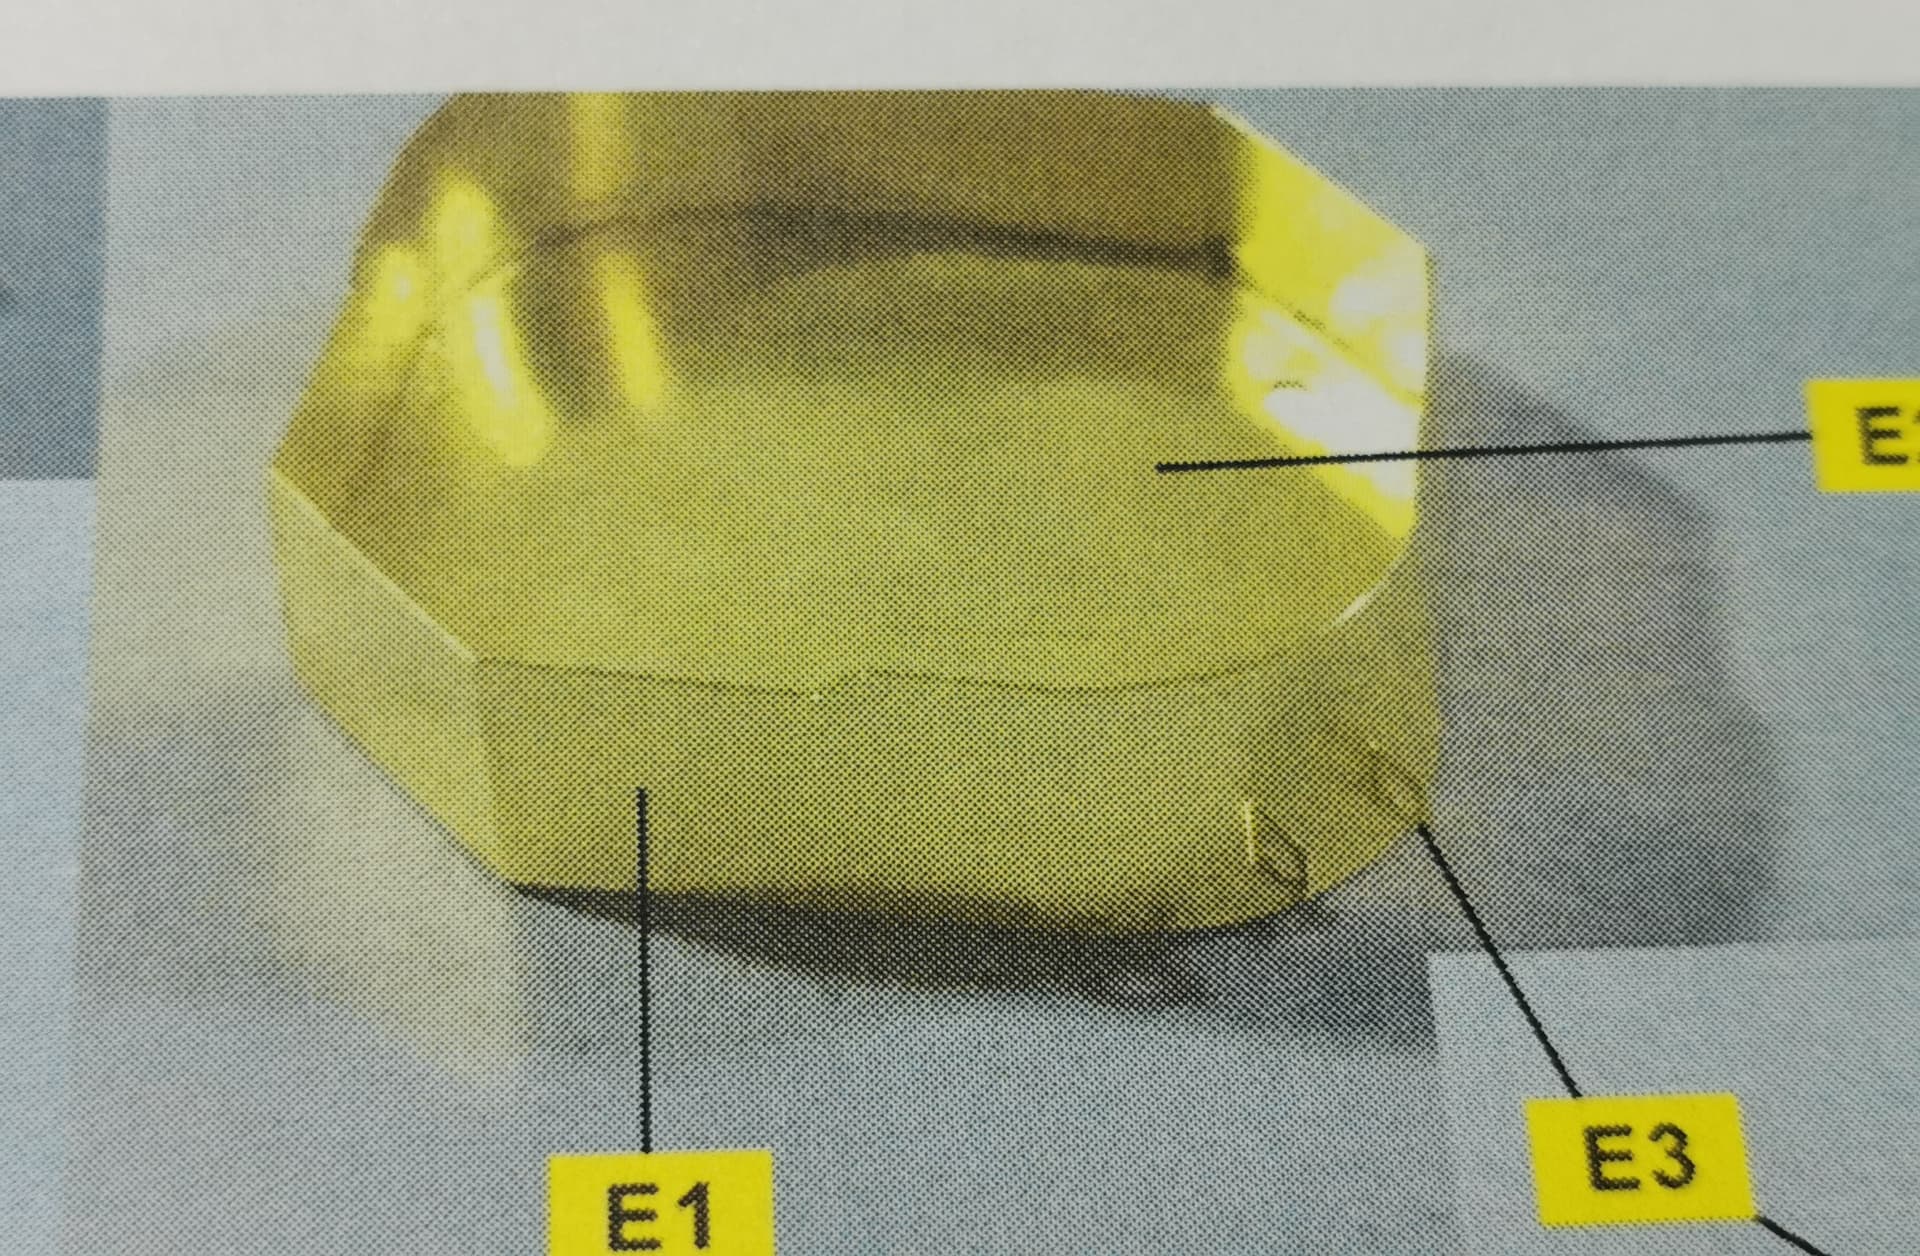
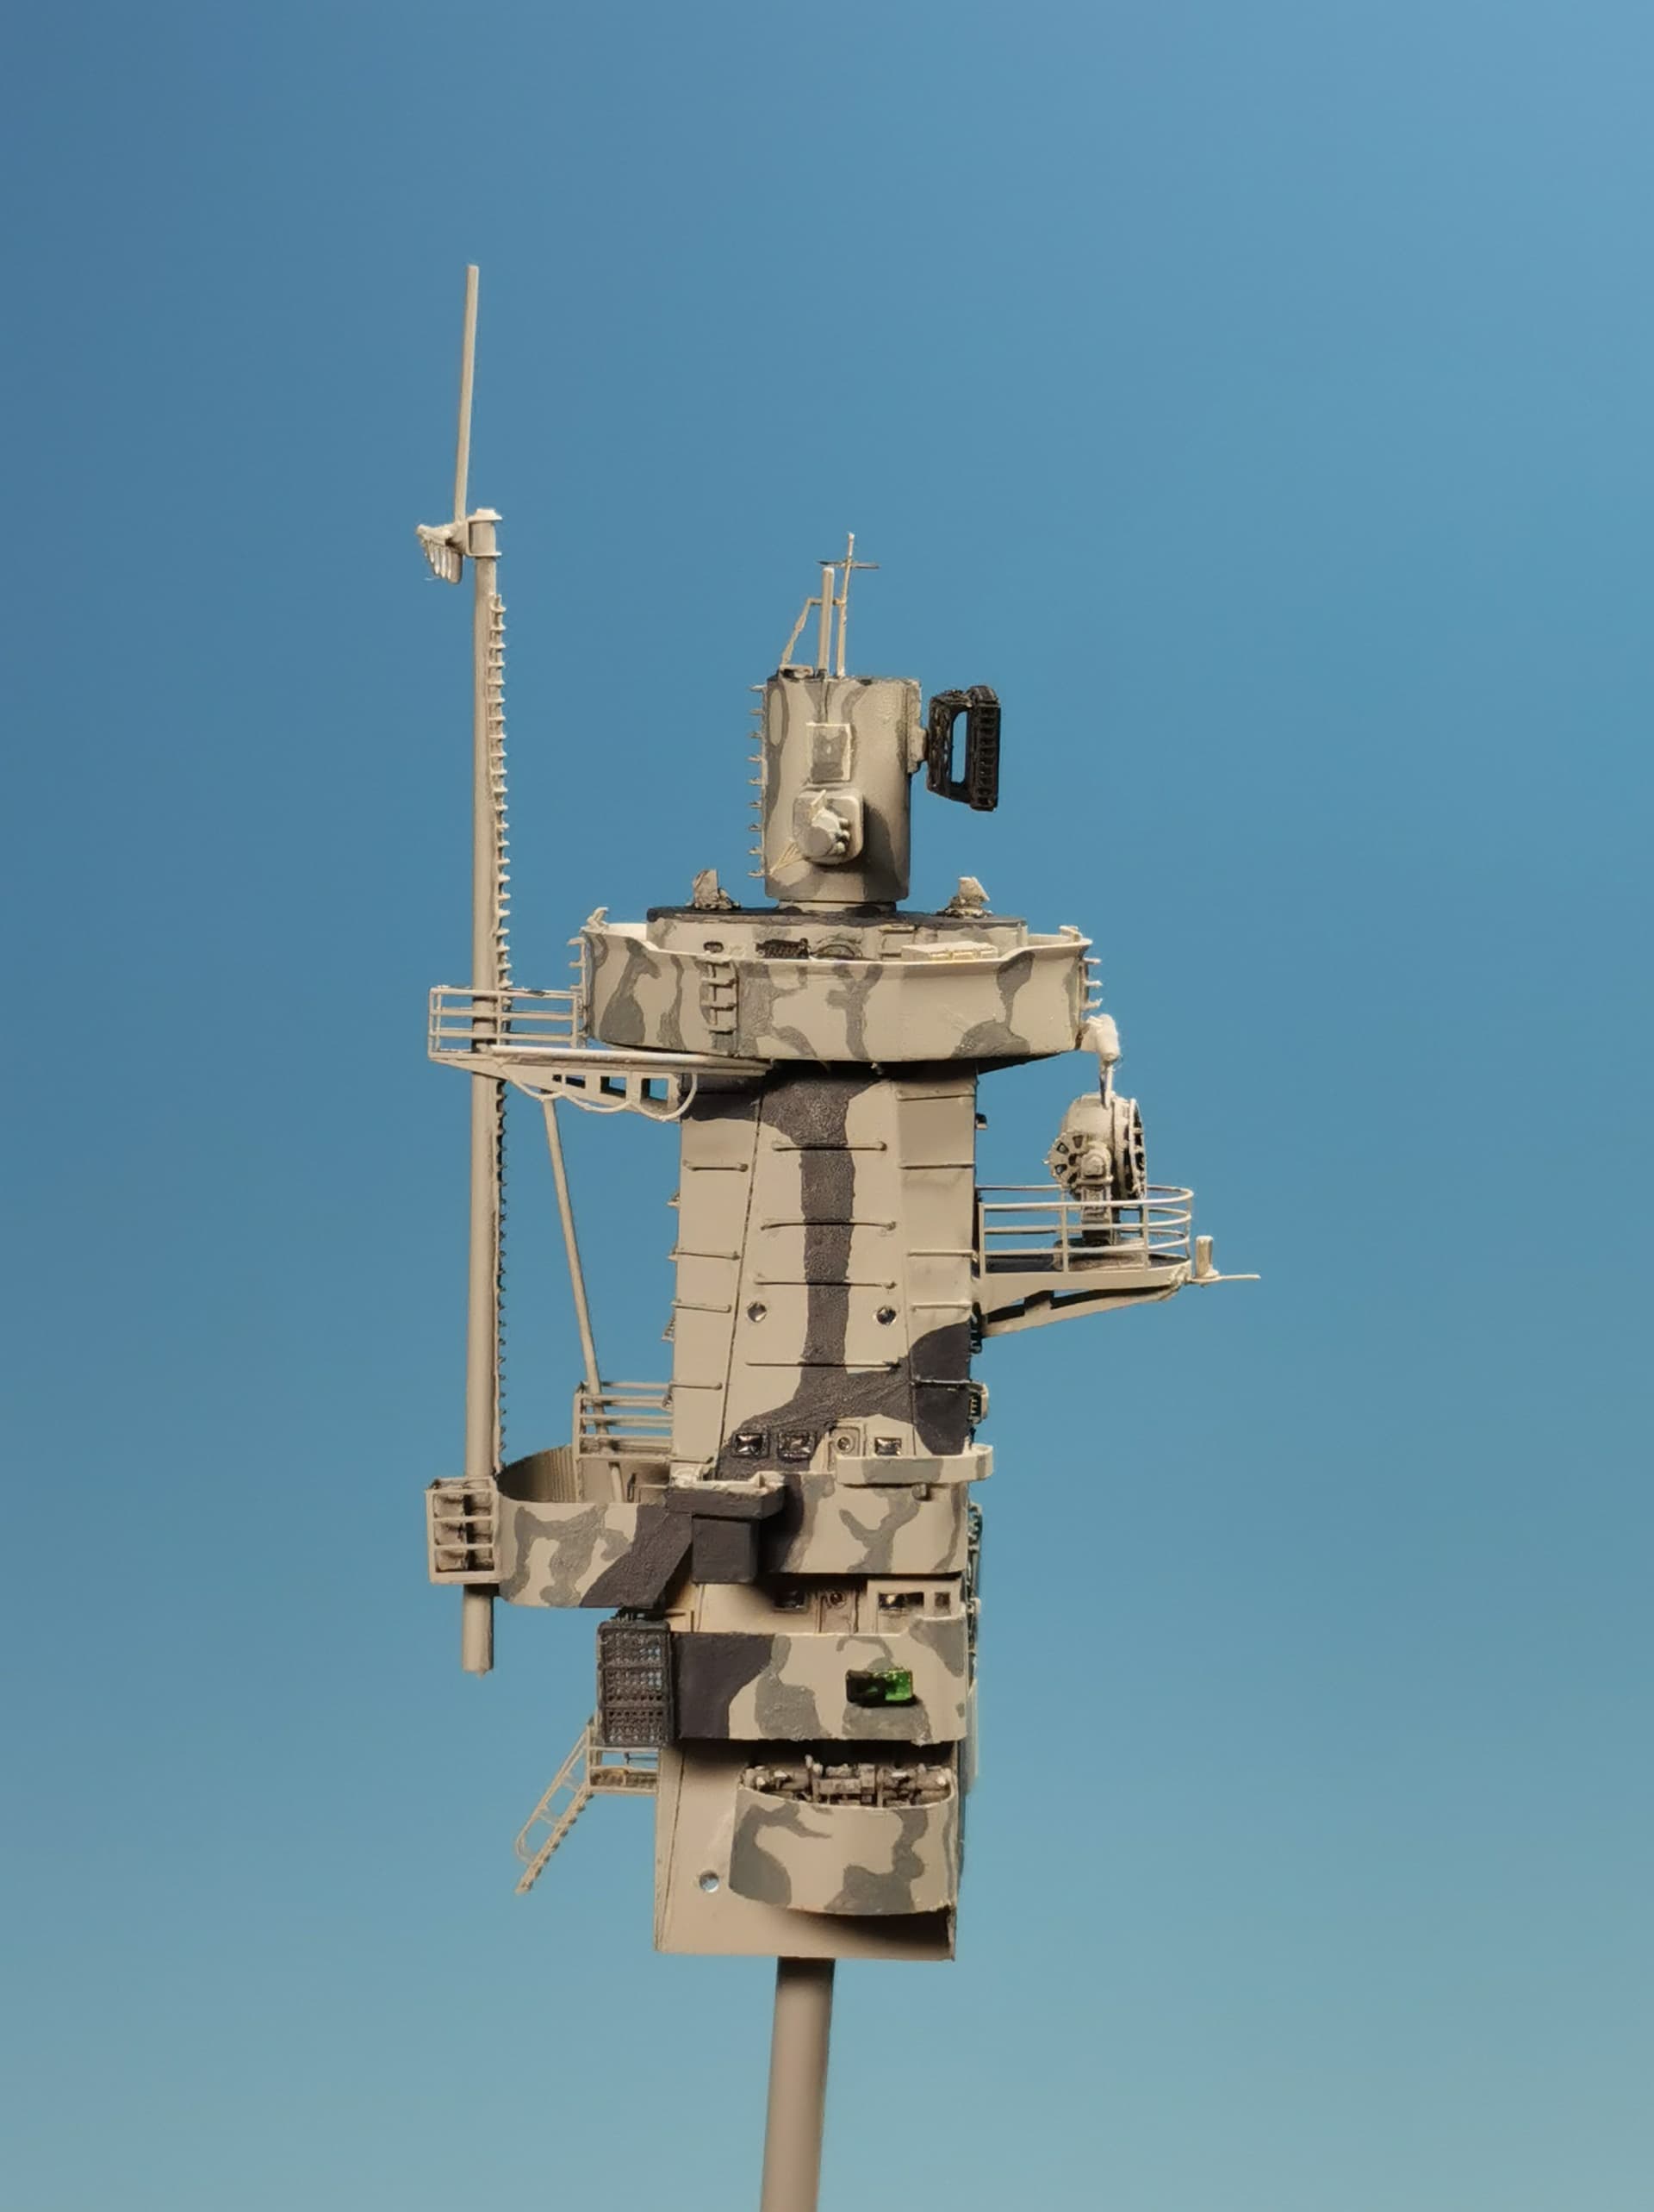
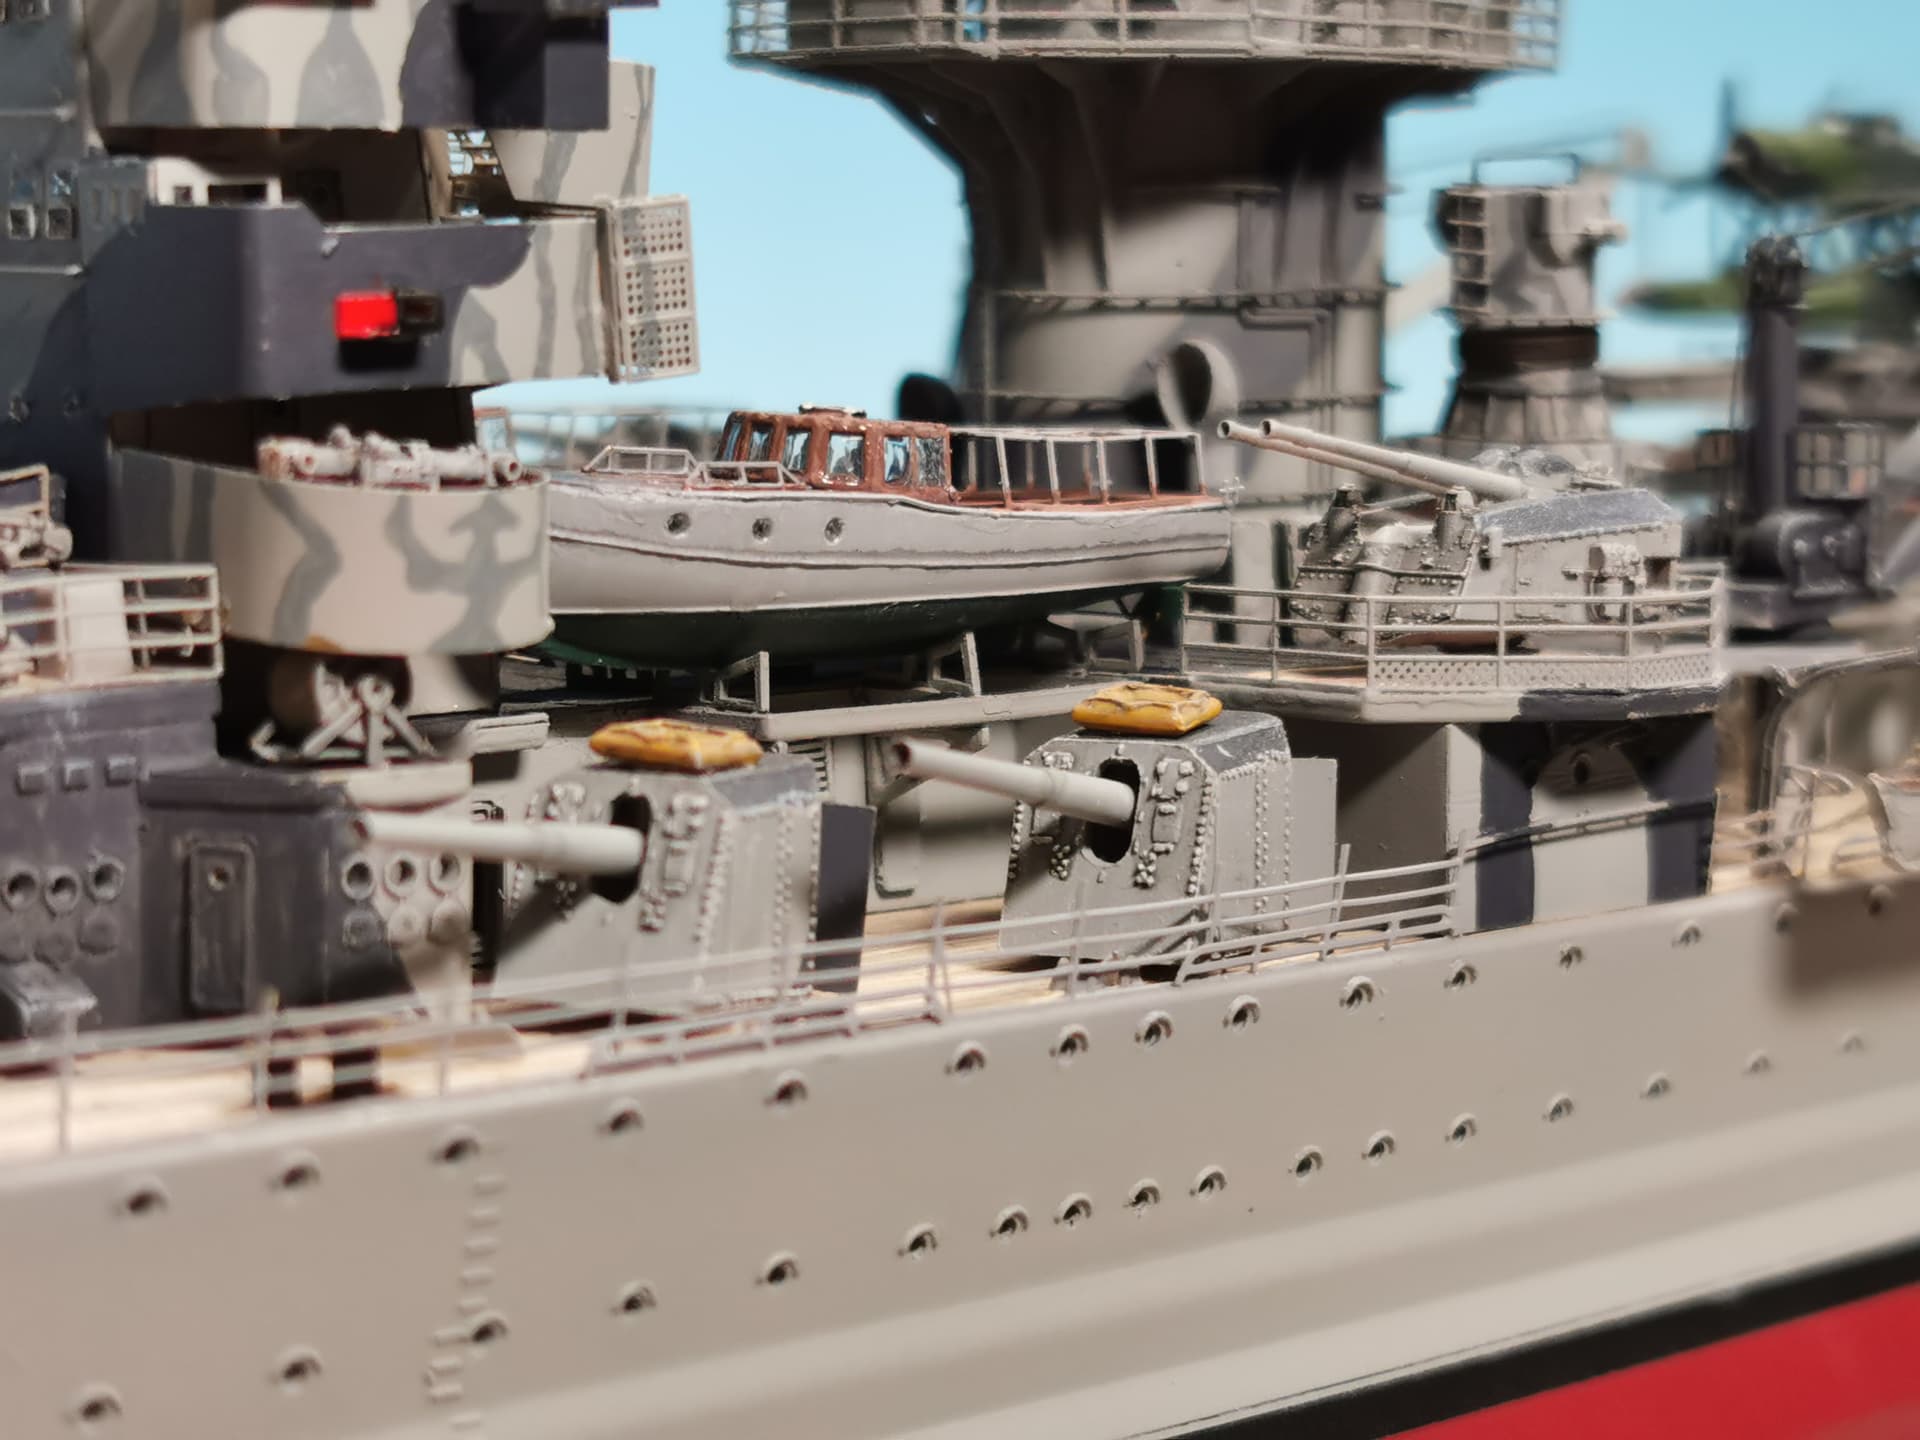
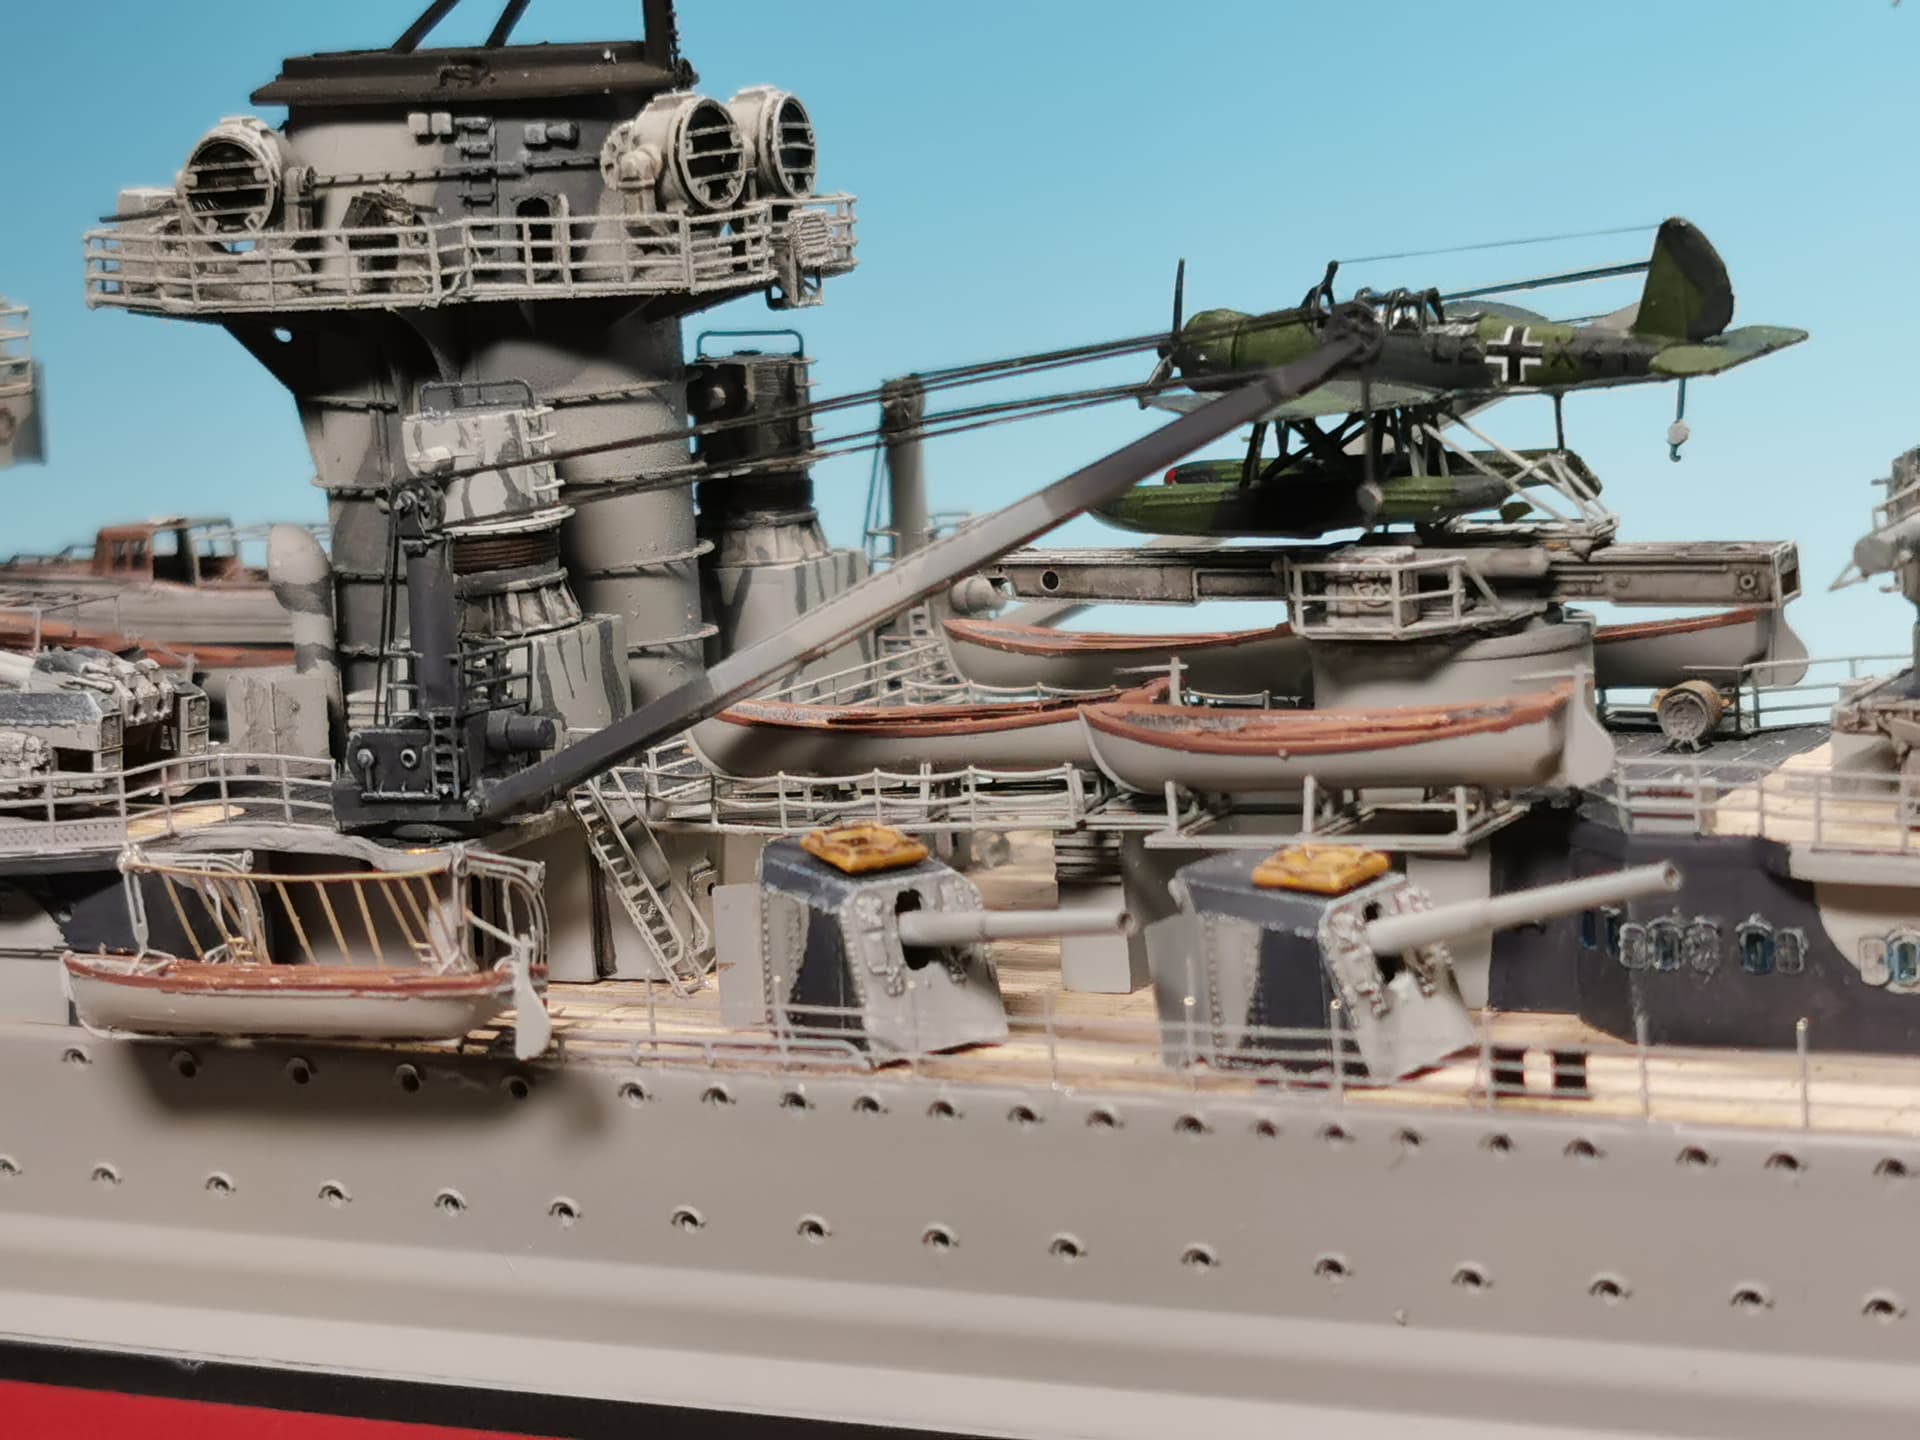
Finished my ship´s aircraft Arado Ar-196. Admiral Graf Spee´s Aircraft had bad luck as it had problems with its new engine. Although the mechanics changed the engine with a second spare aboard also the second one did show the same problem so the flying time was severely restricted. The aircraft neither showed the swastica at the tail nor the Balkenkreuz below to disguise a bit the true operating nation if spotted from below.
The aircraft model is a new released 3d kit from Black Cat Model and of outstanding quality. I bought also one with folded wings for my Bismarck later. Painting was easy and done with acrylics. I just added the antenna over the canopy with a very fine etched strip and 0,01 mm rigging wire. Canopy glasses were made with Kristal Klear again. Maybe I will add position lights at the outer wings later before I will glue the plane on top of the catapult. Sadly Trumpeter provided the wrong identification numbers for the plane aboard Graf Spee but hey, some mistakes have to get build in for the educated spectators  . I like this tiny hopper

17 Likes
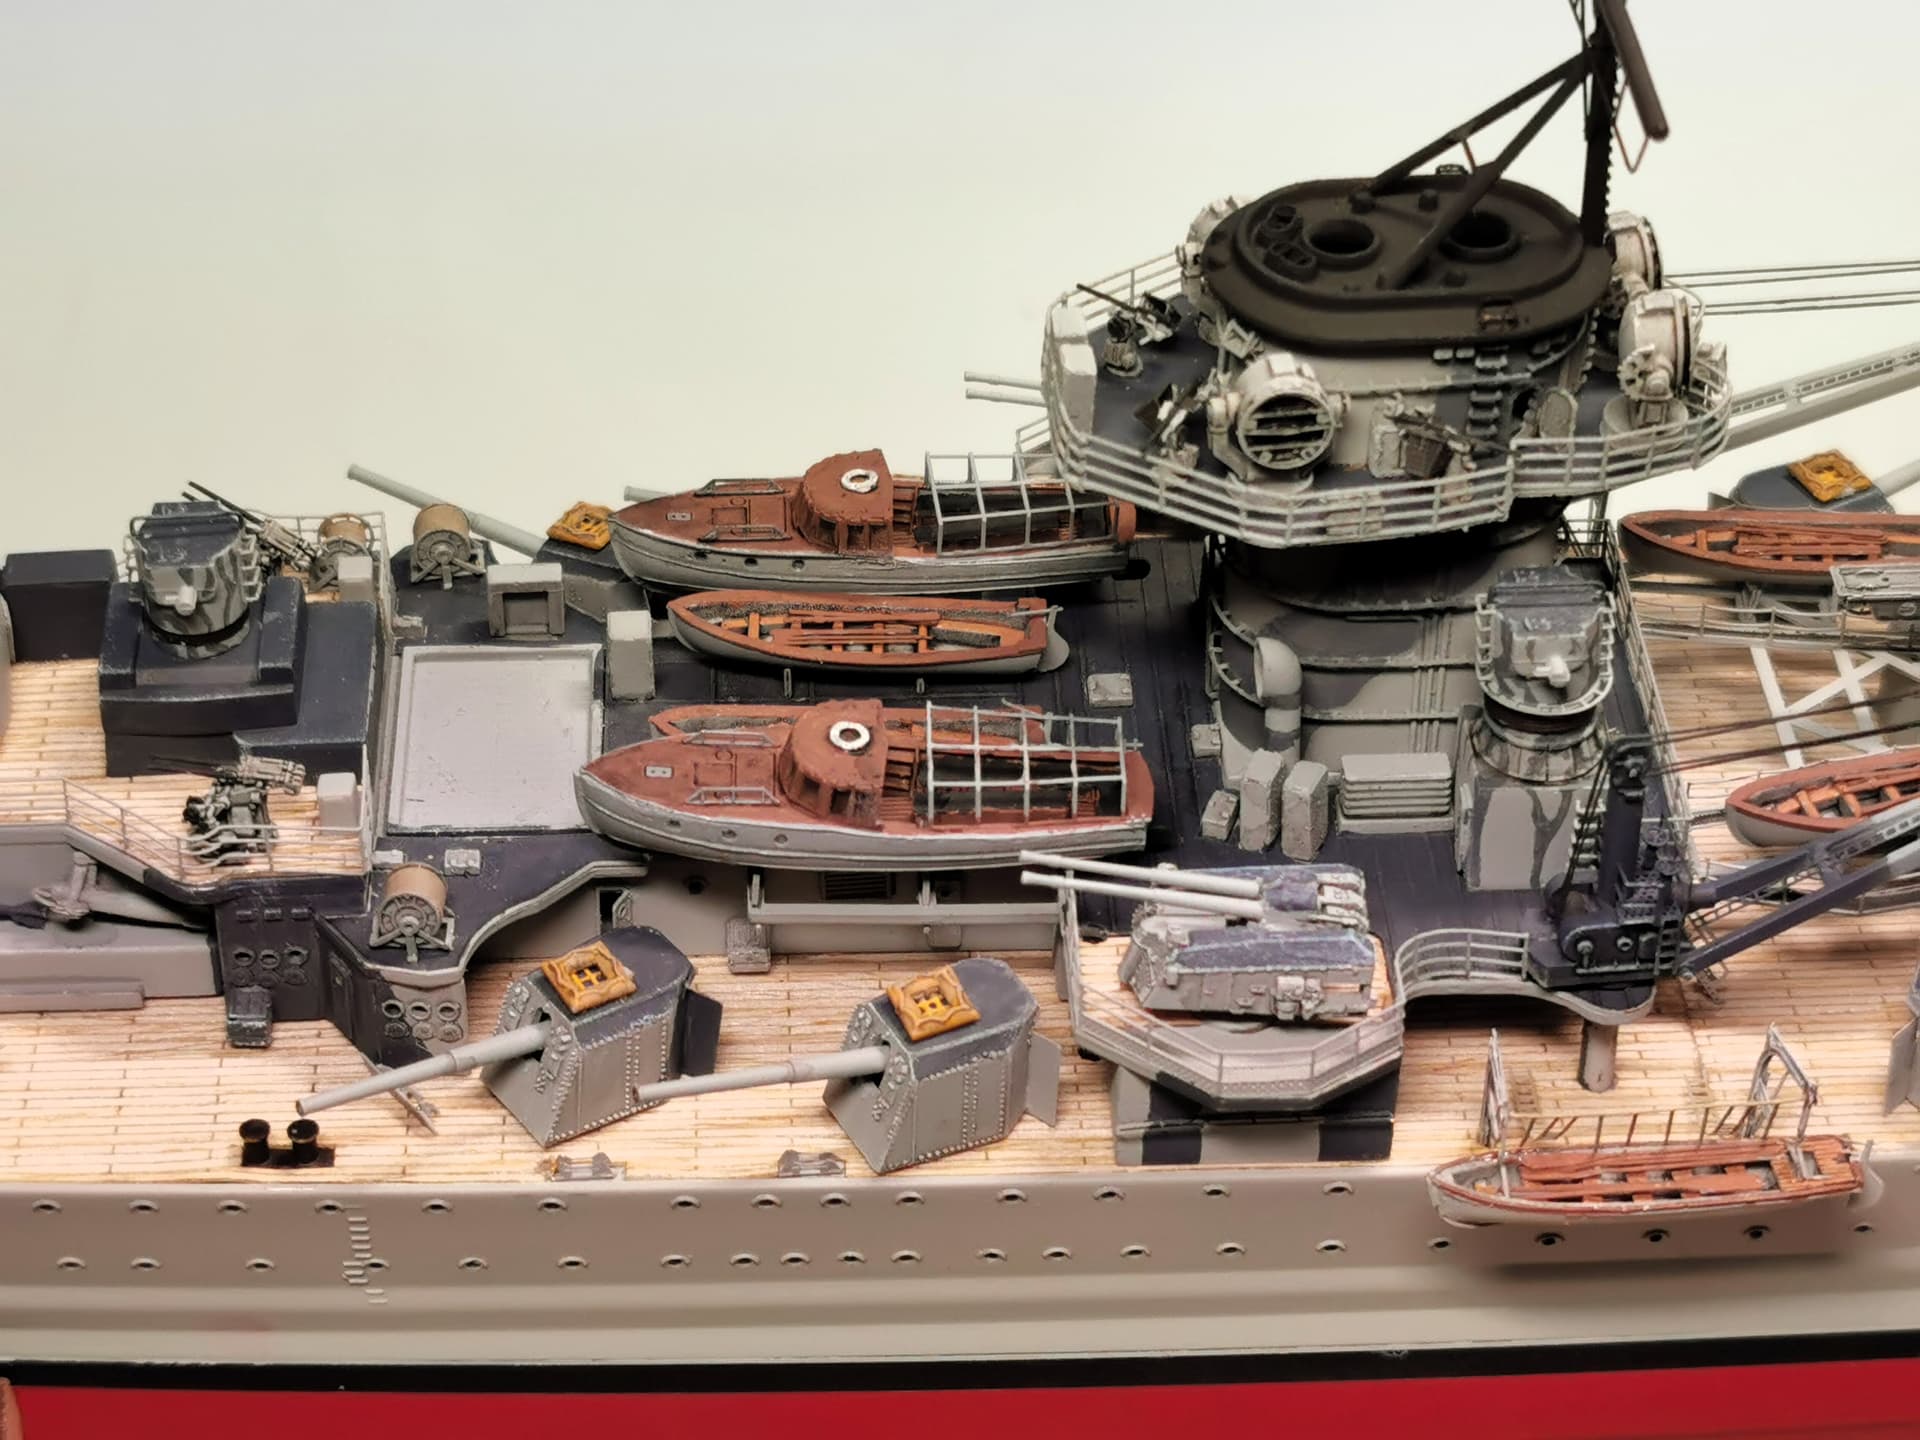
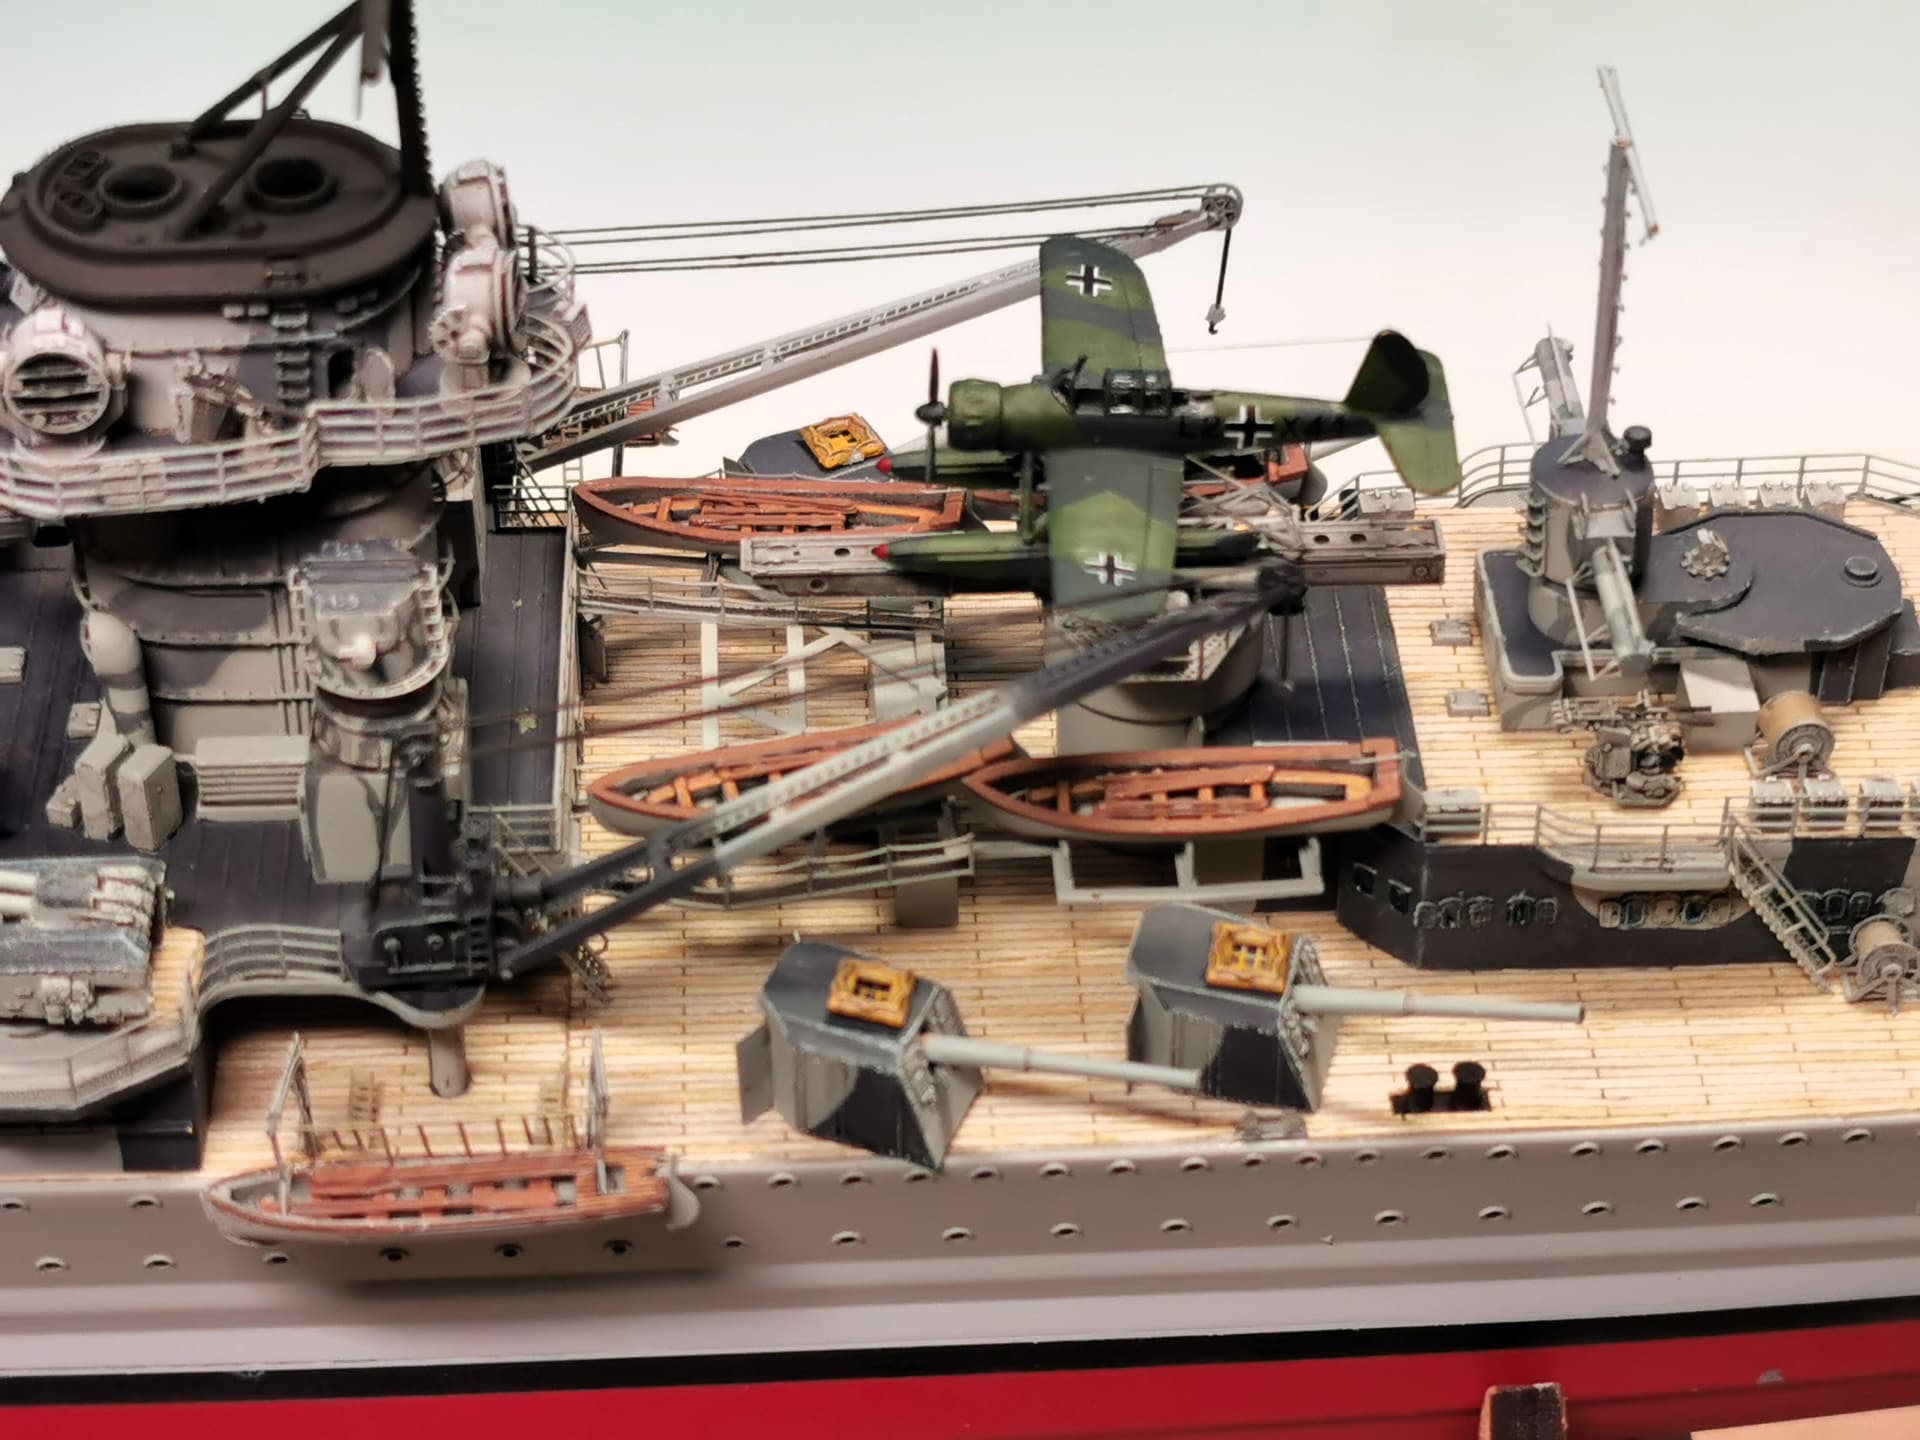
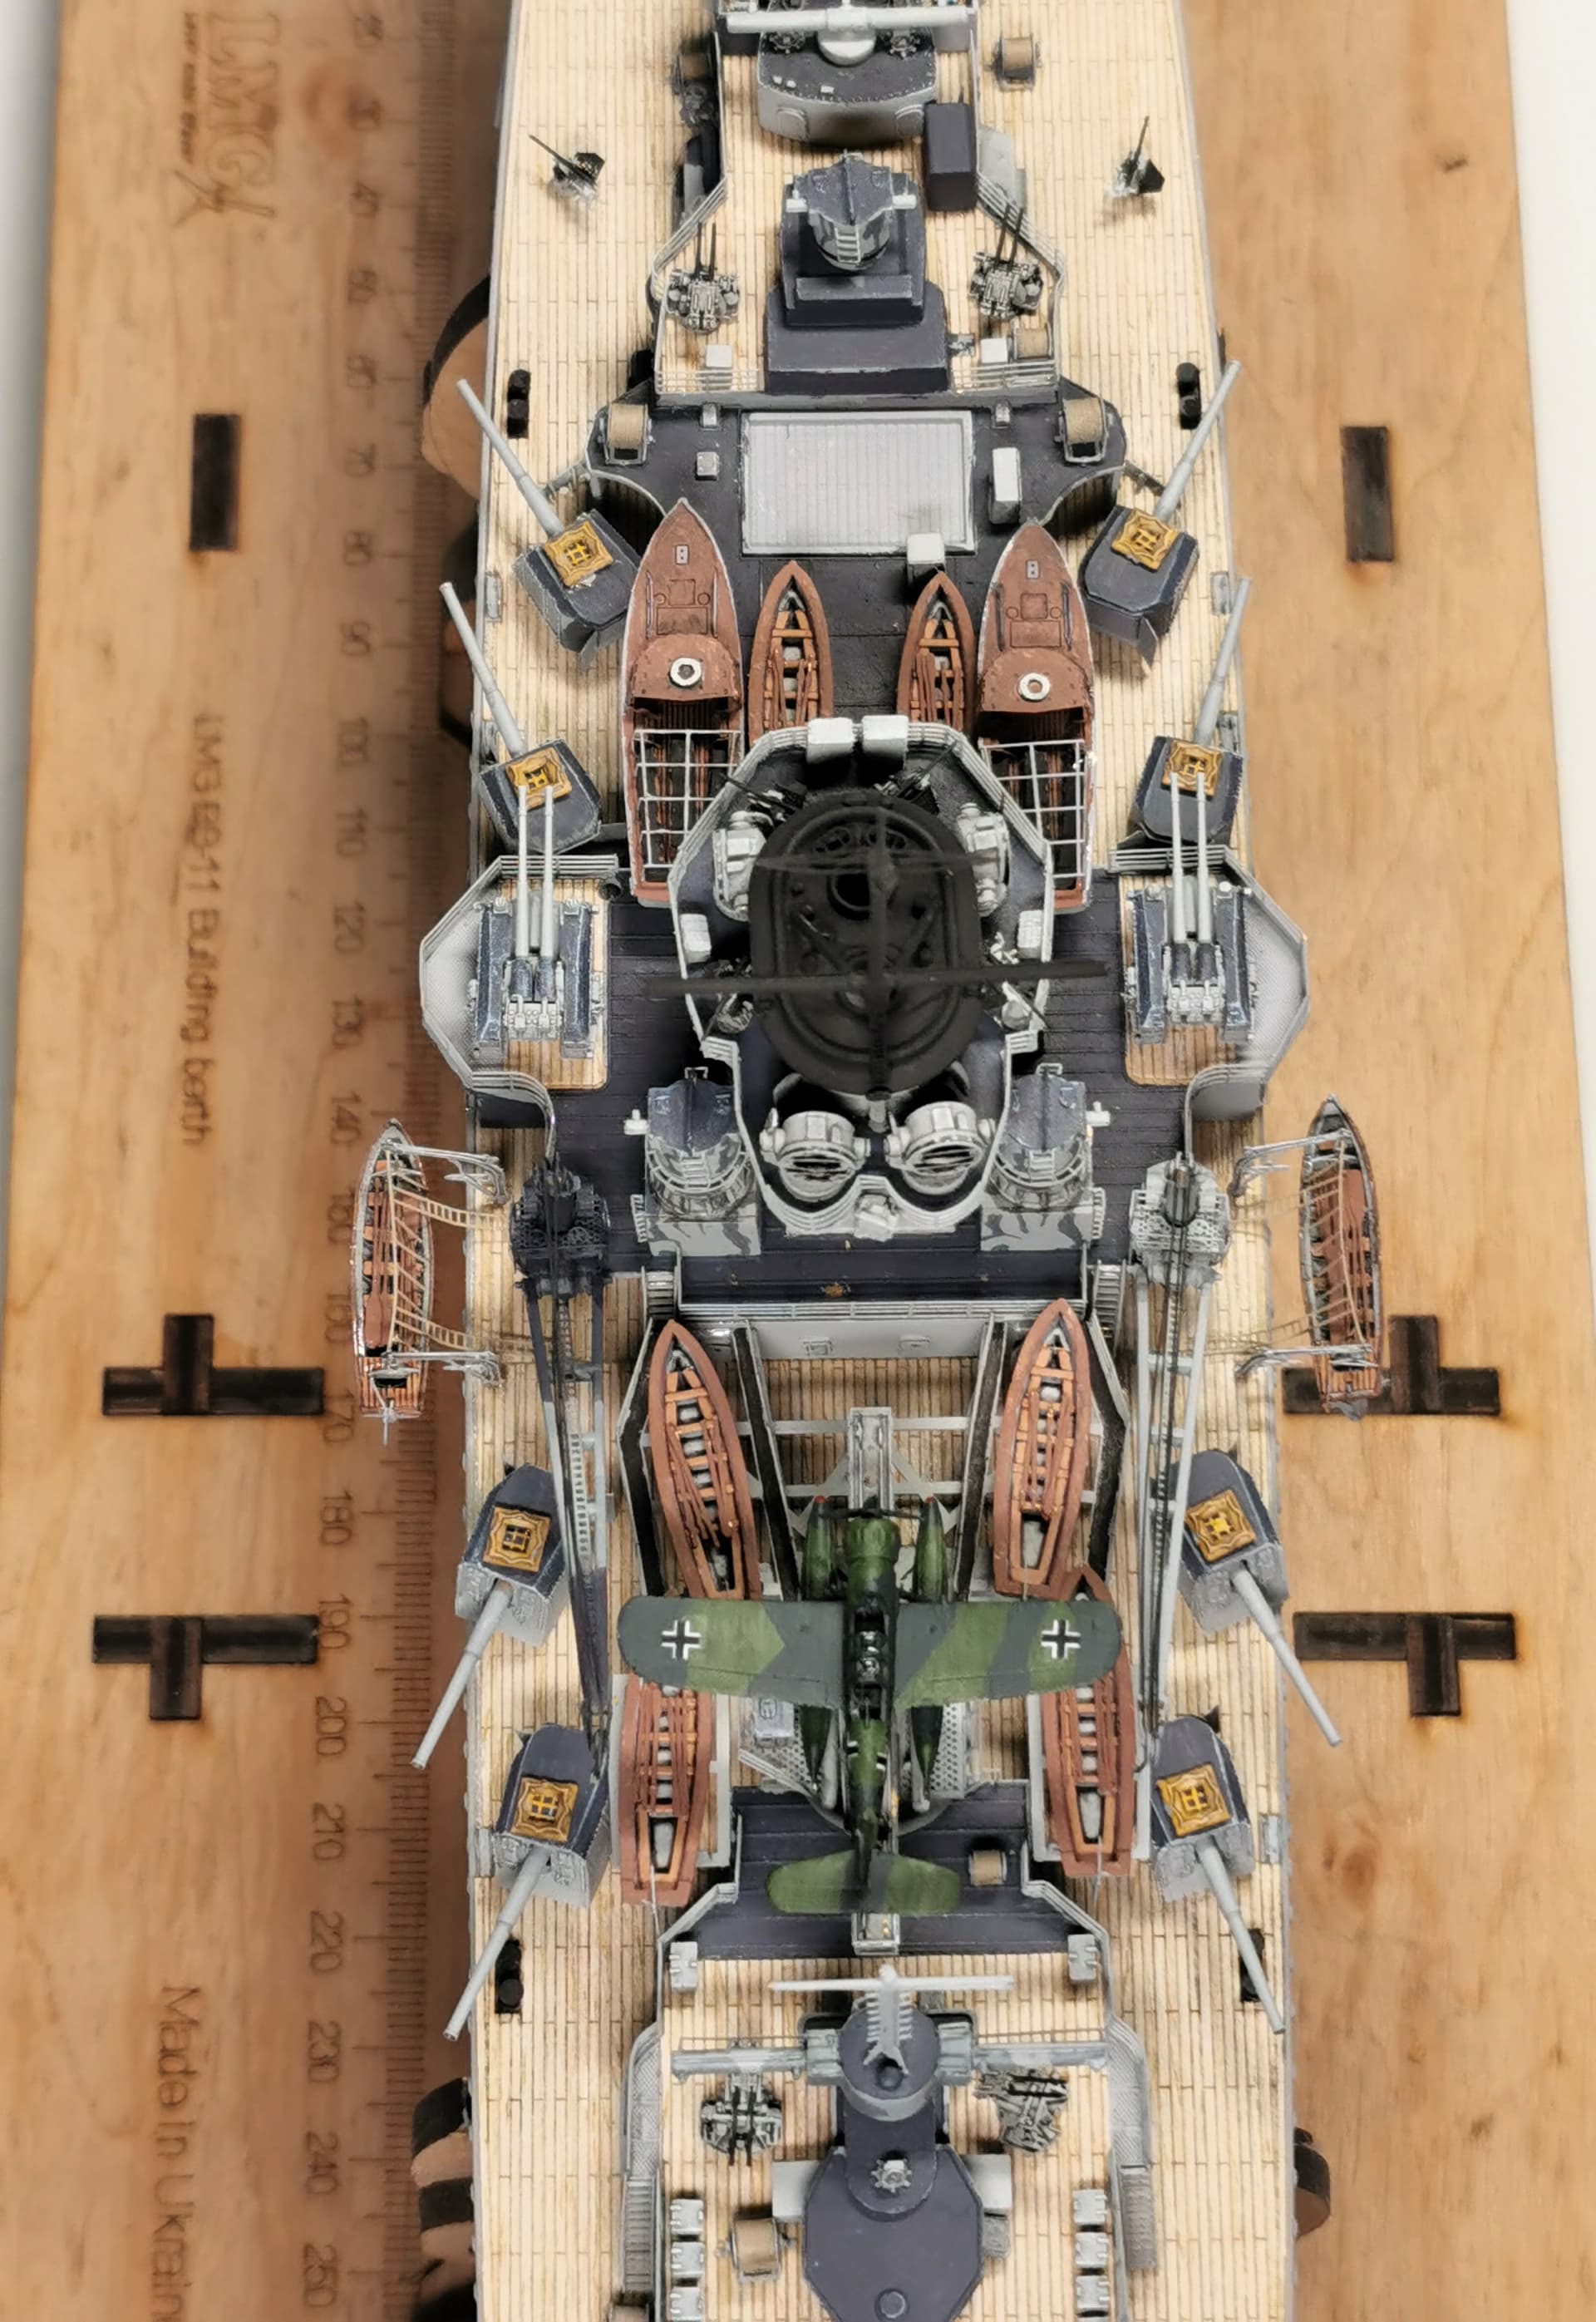
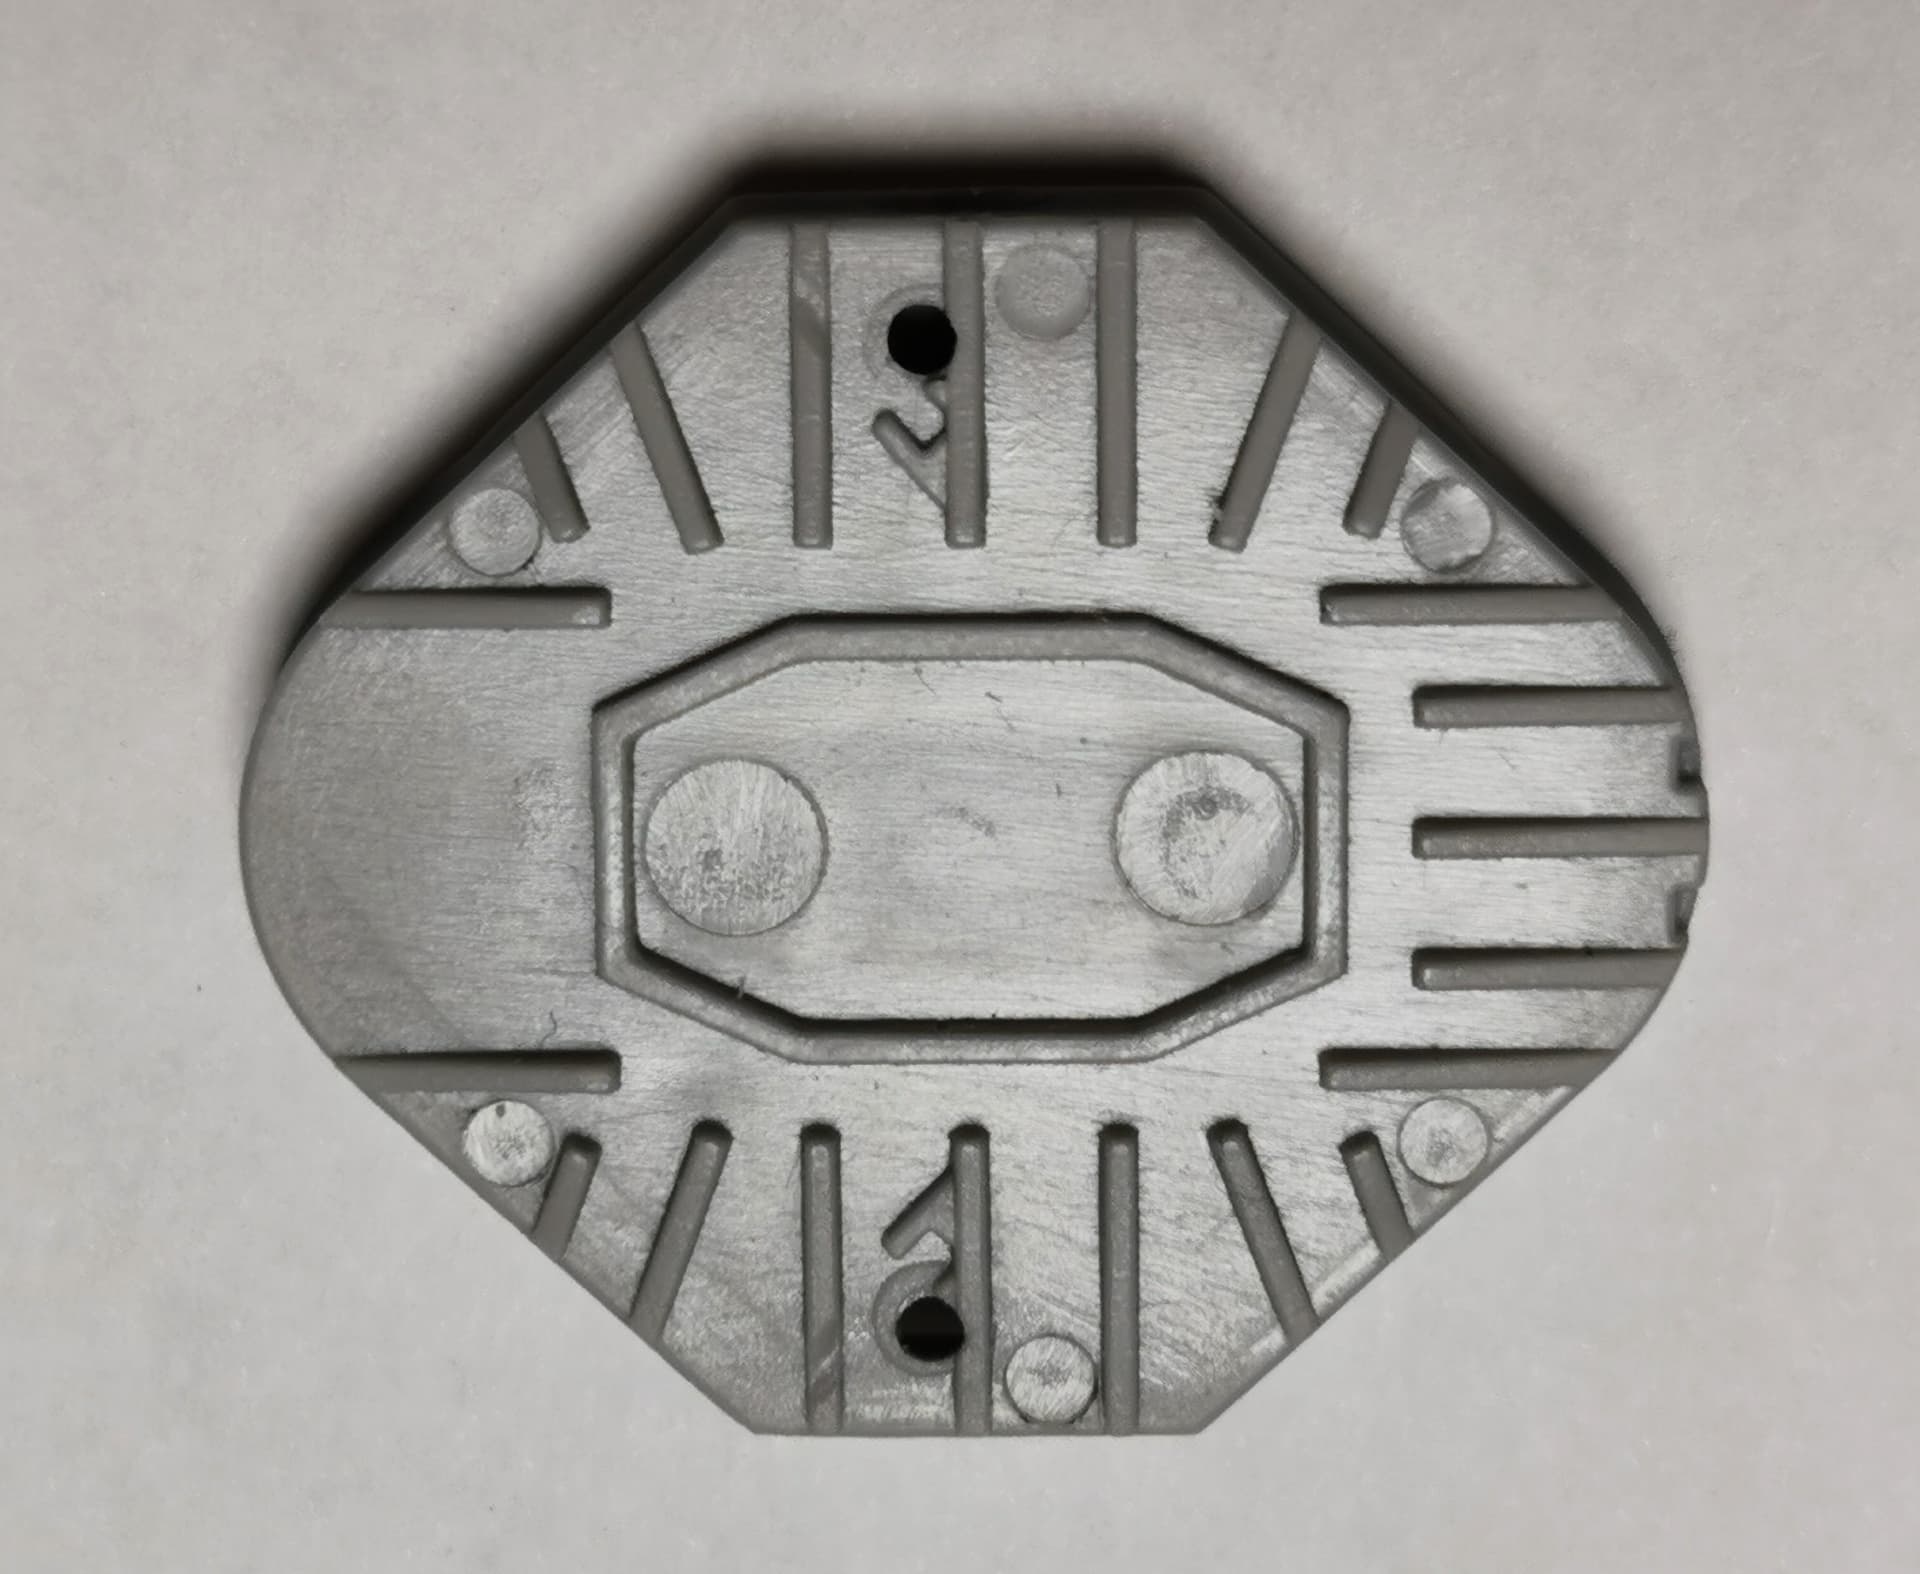
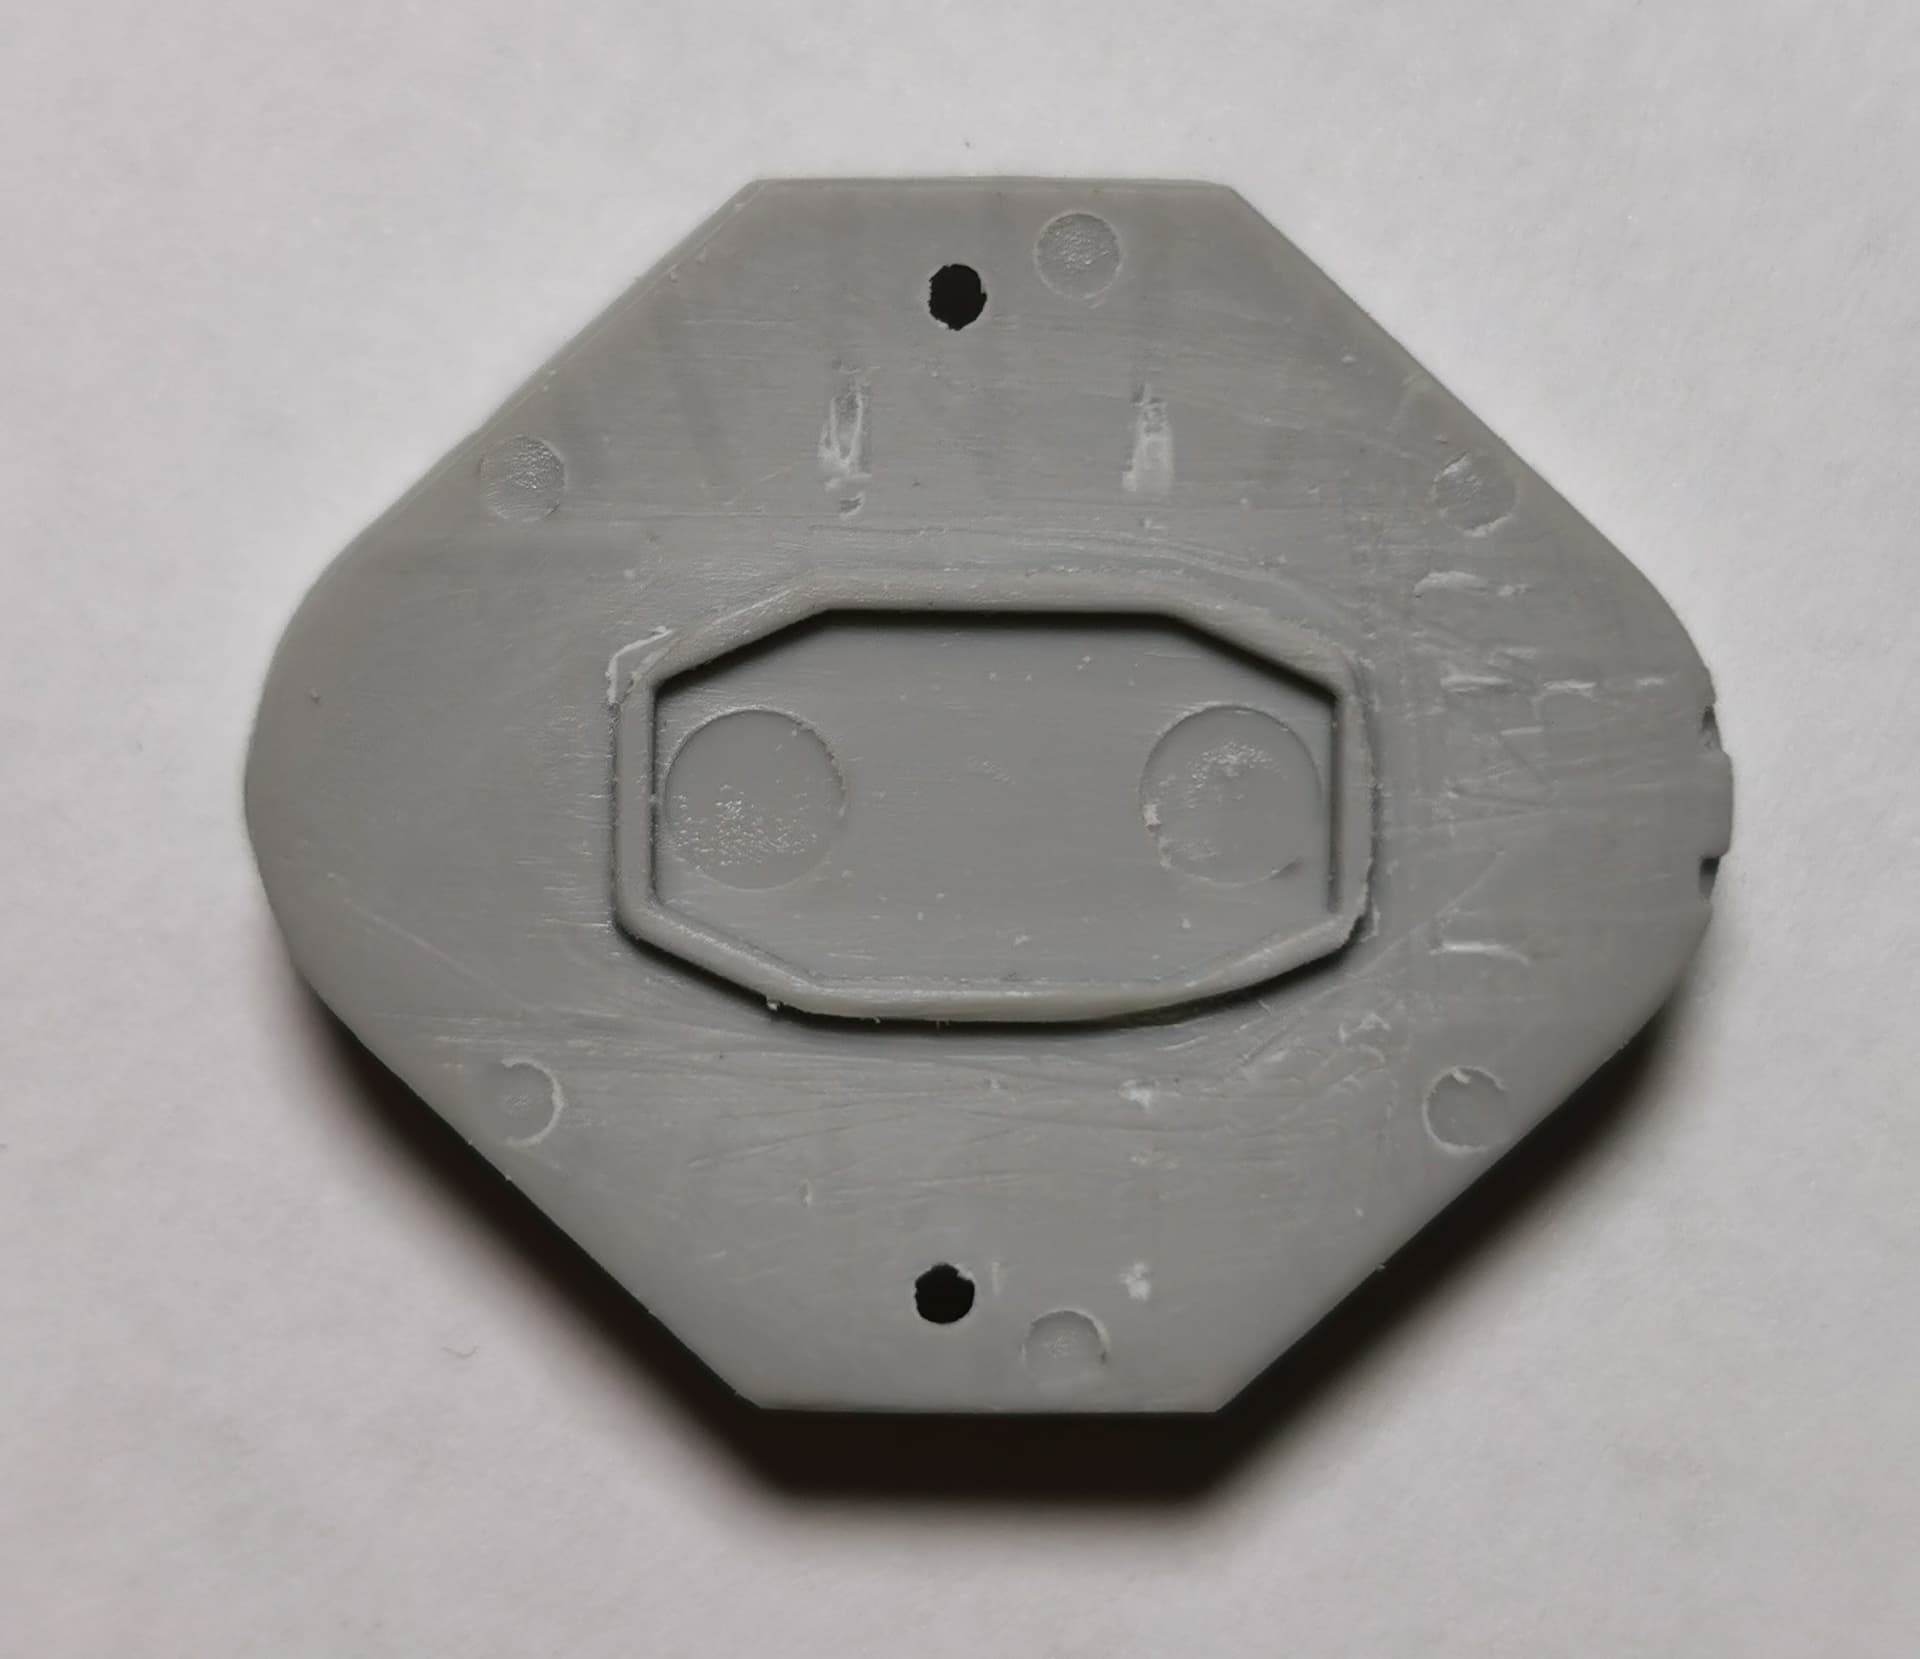
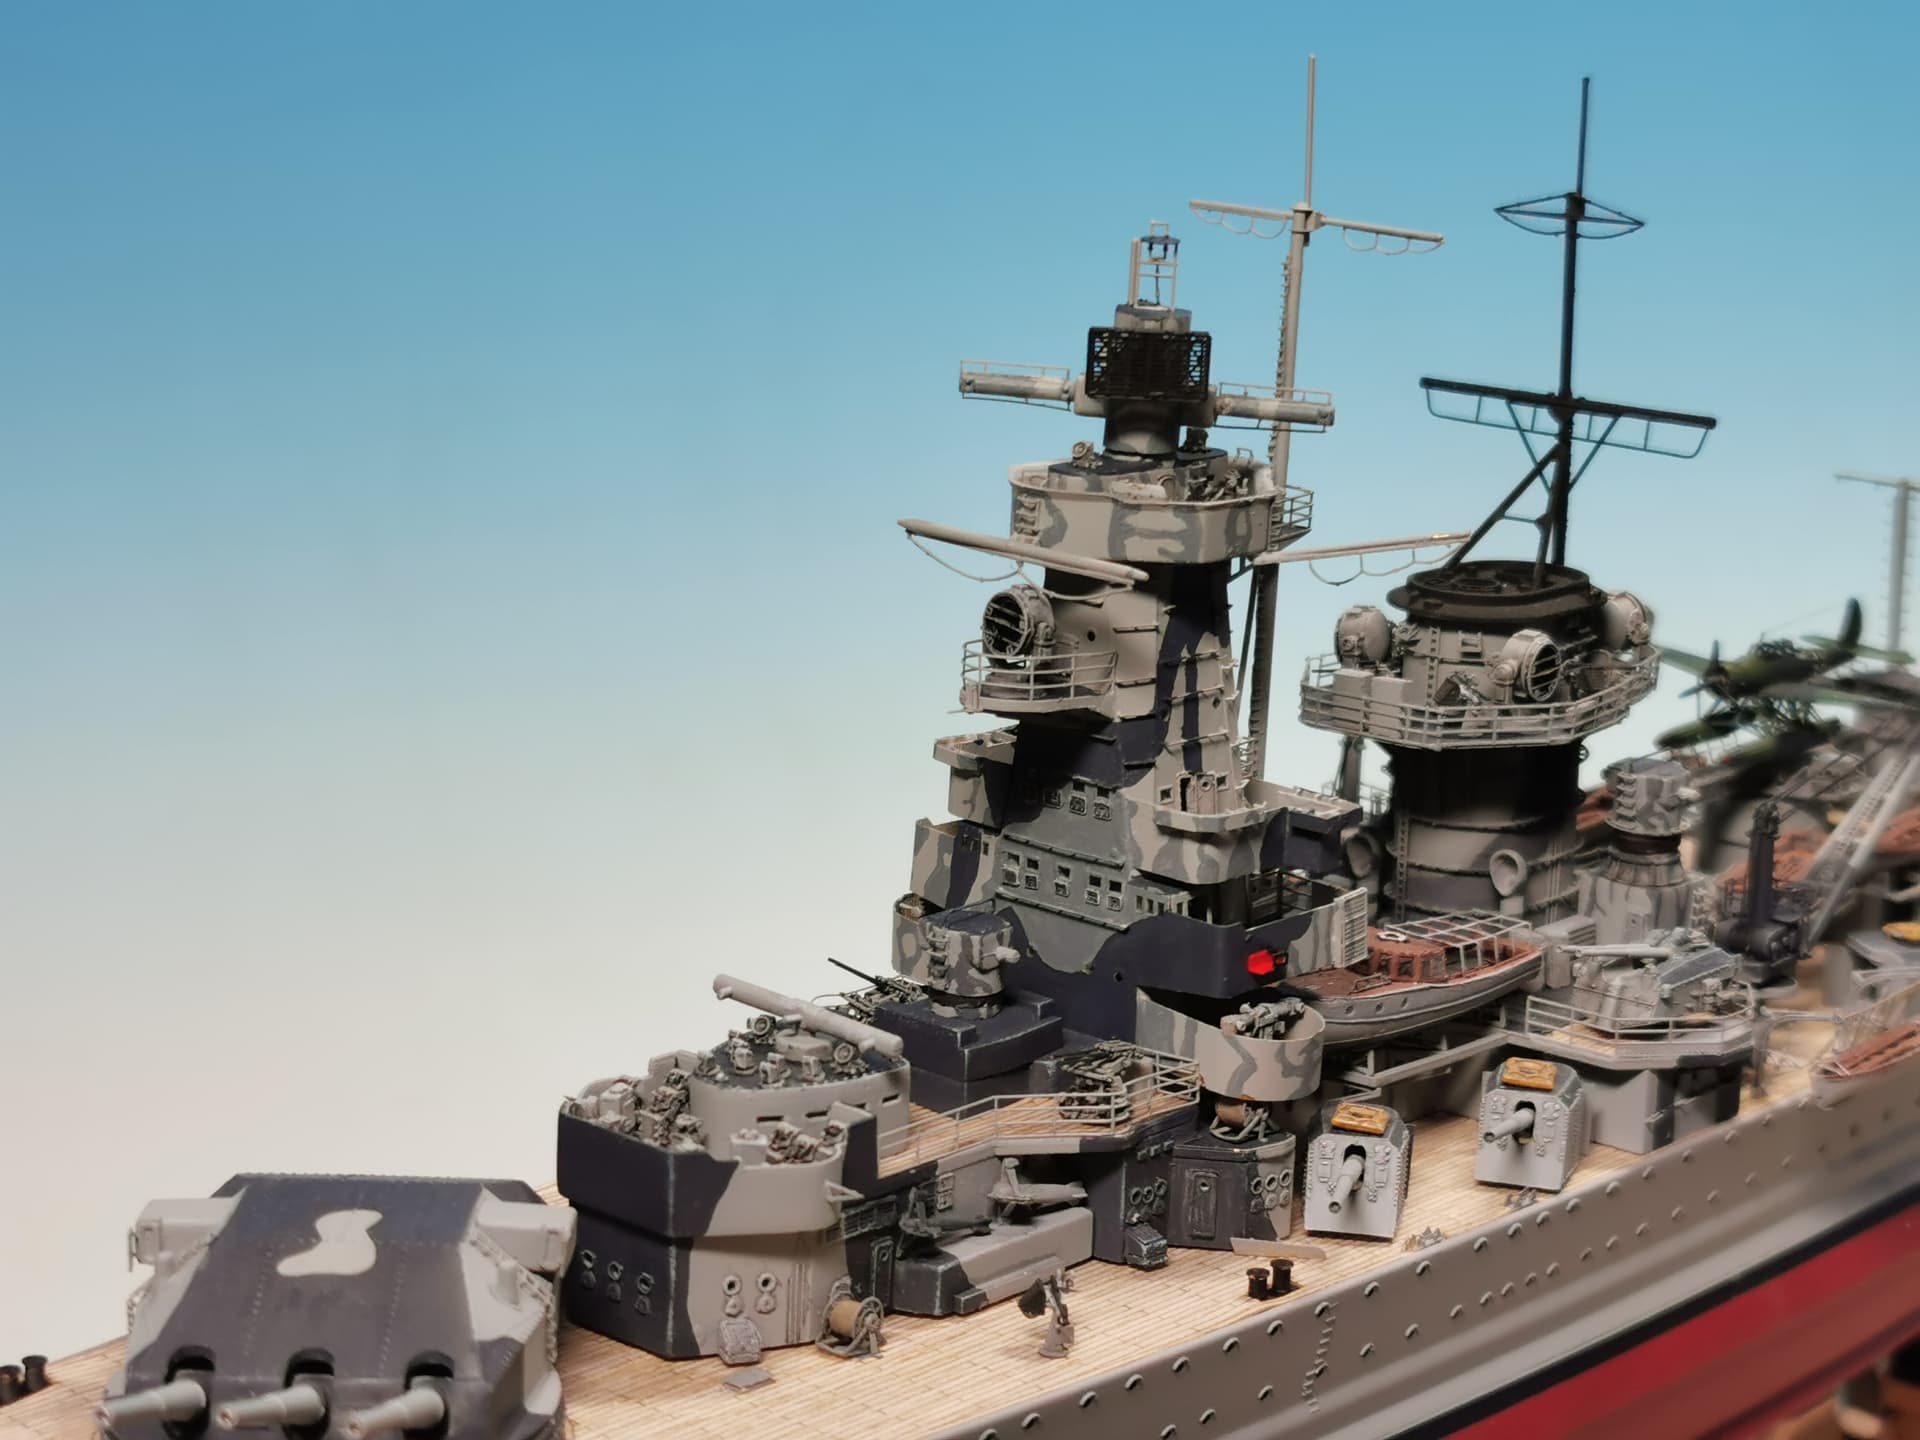
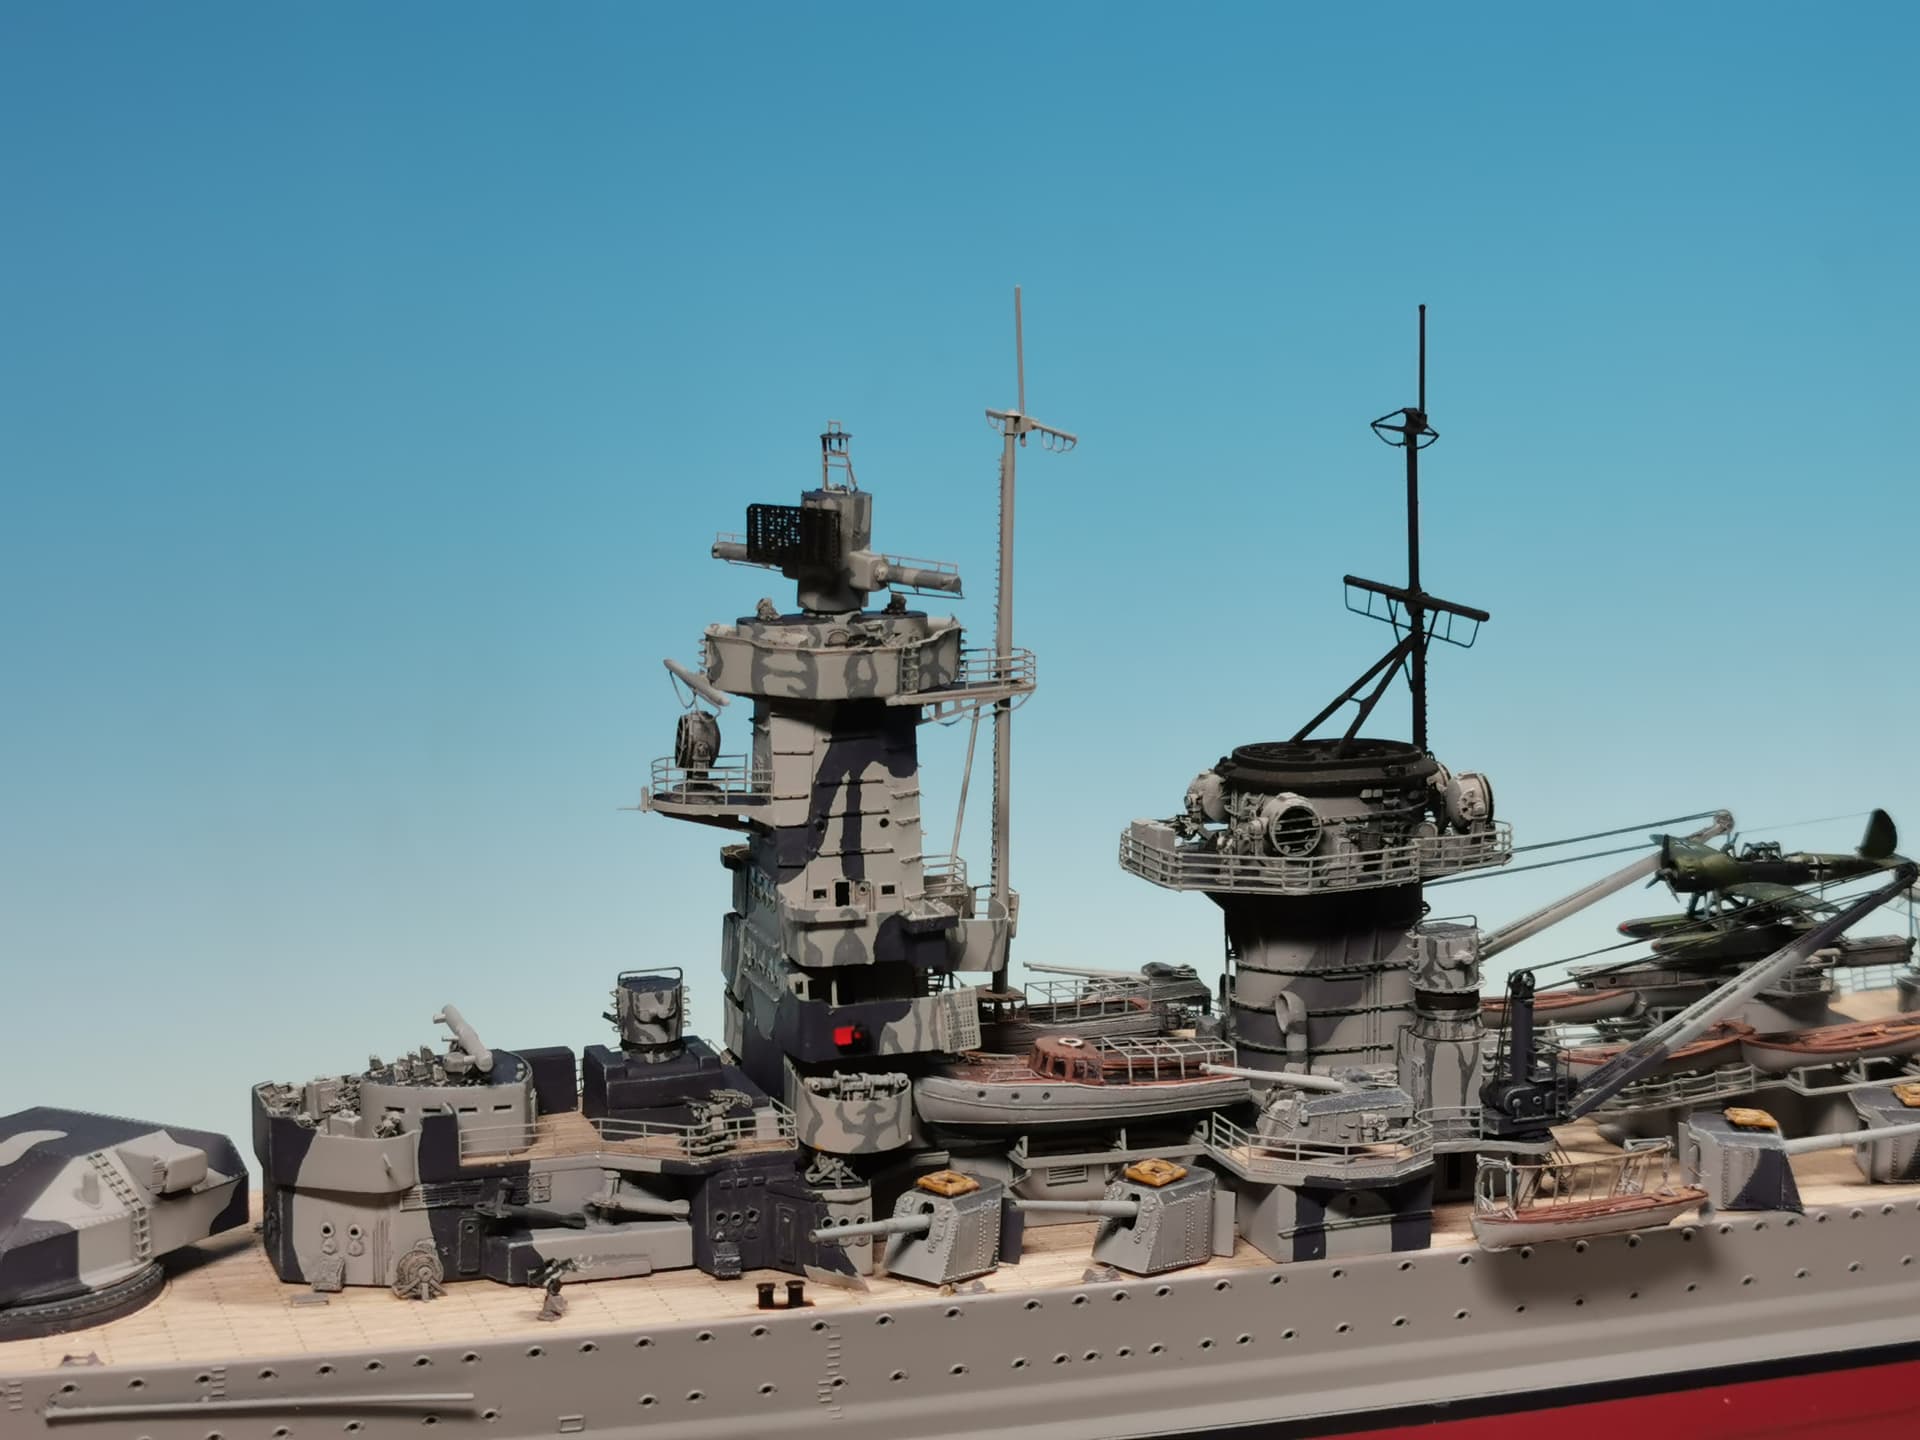
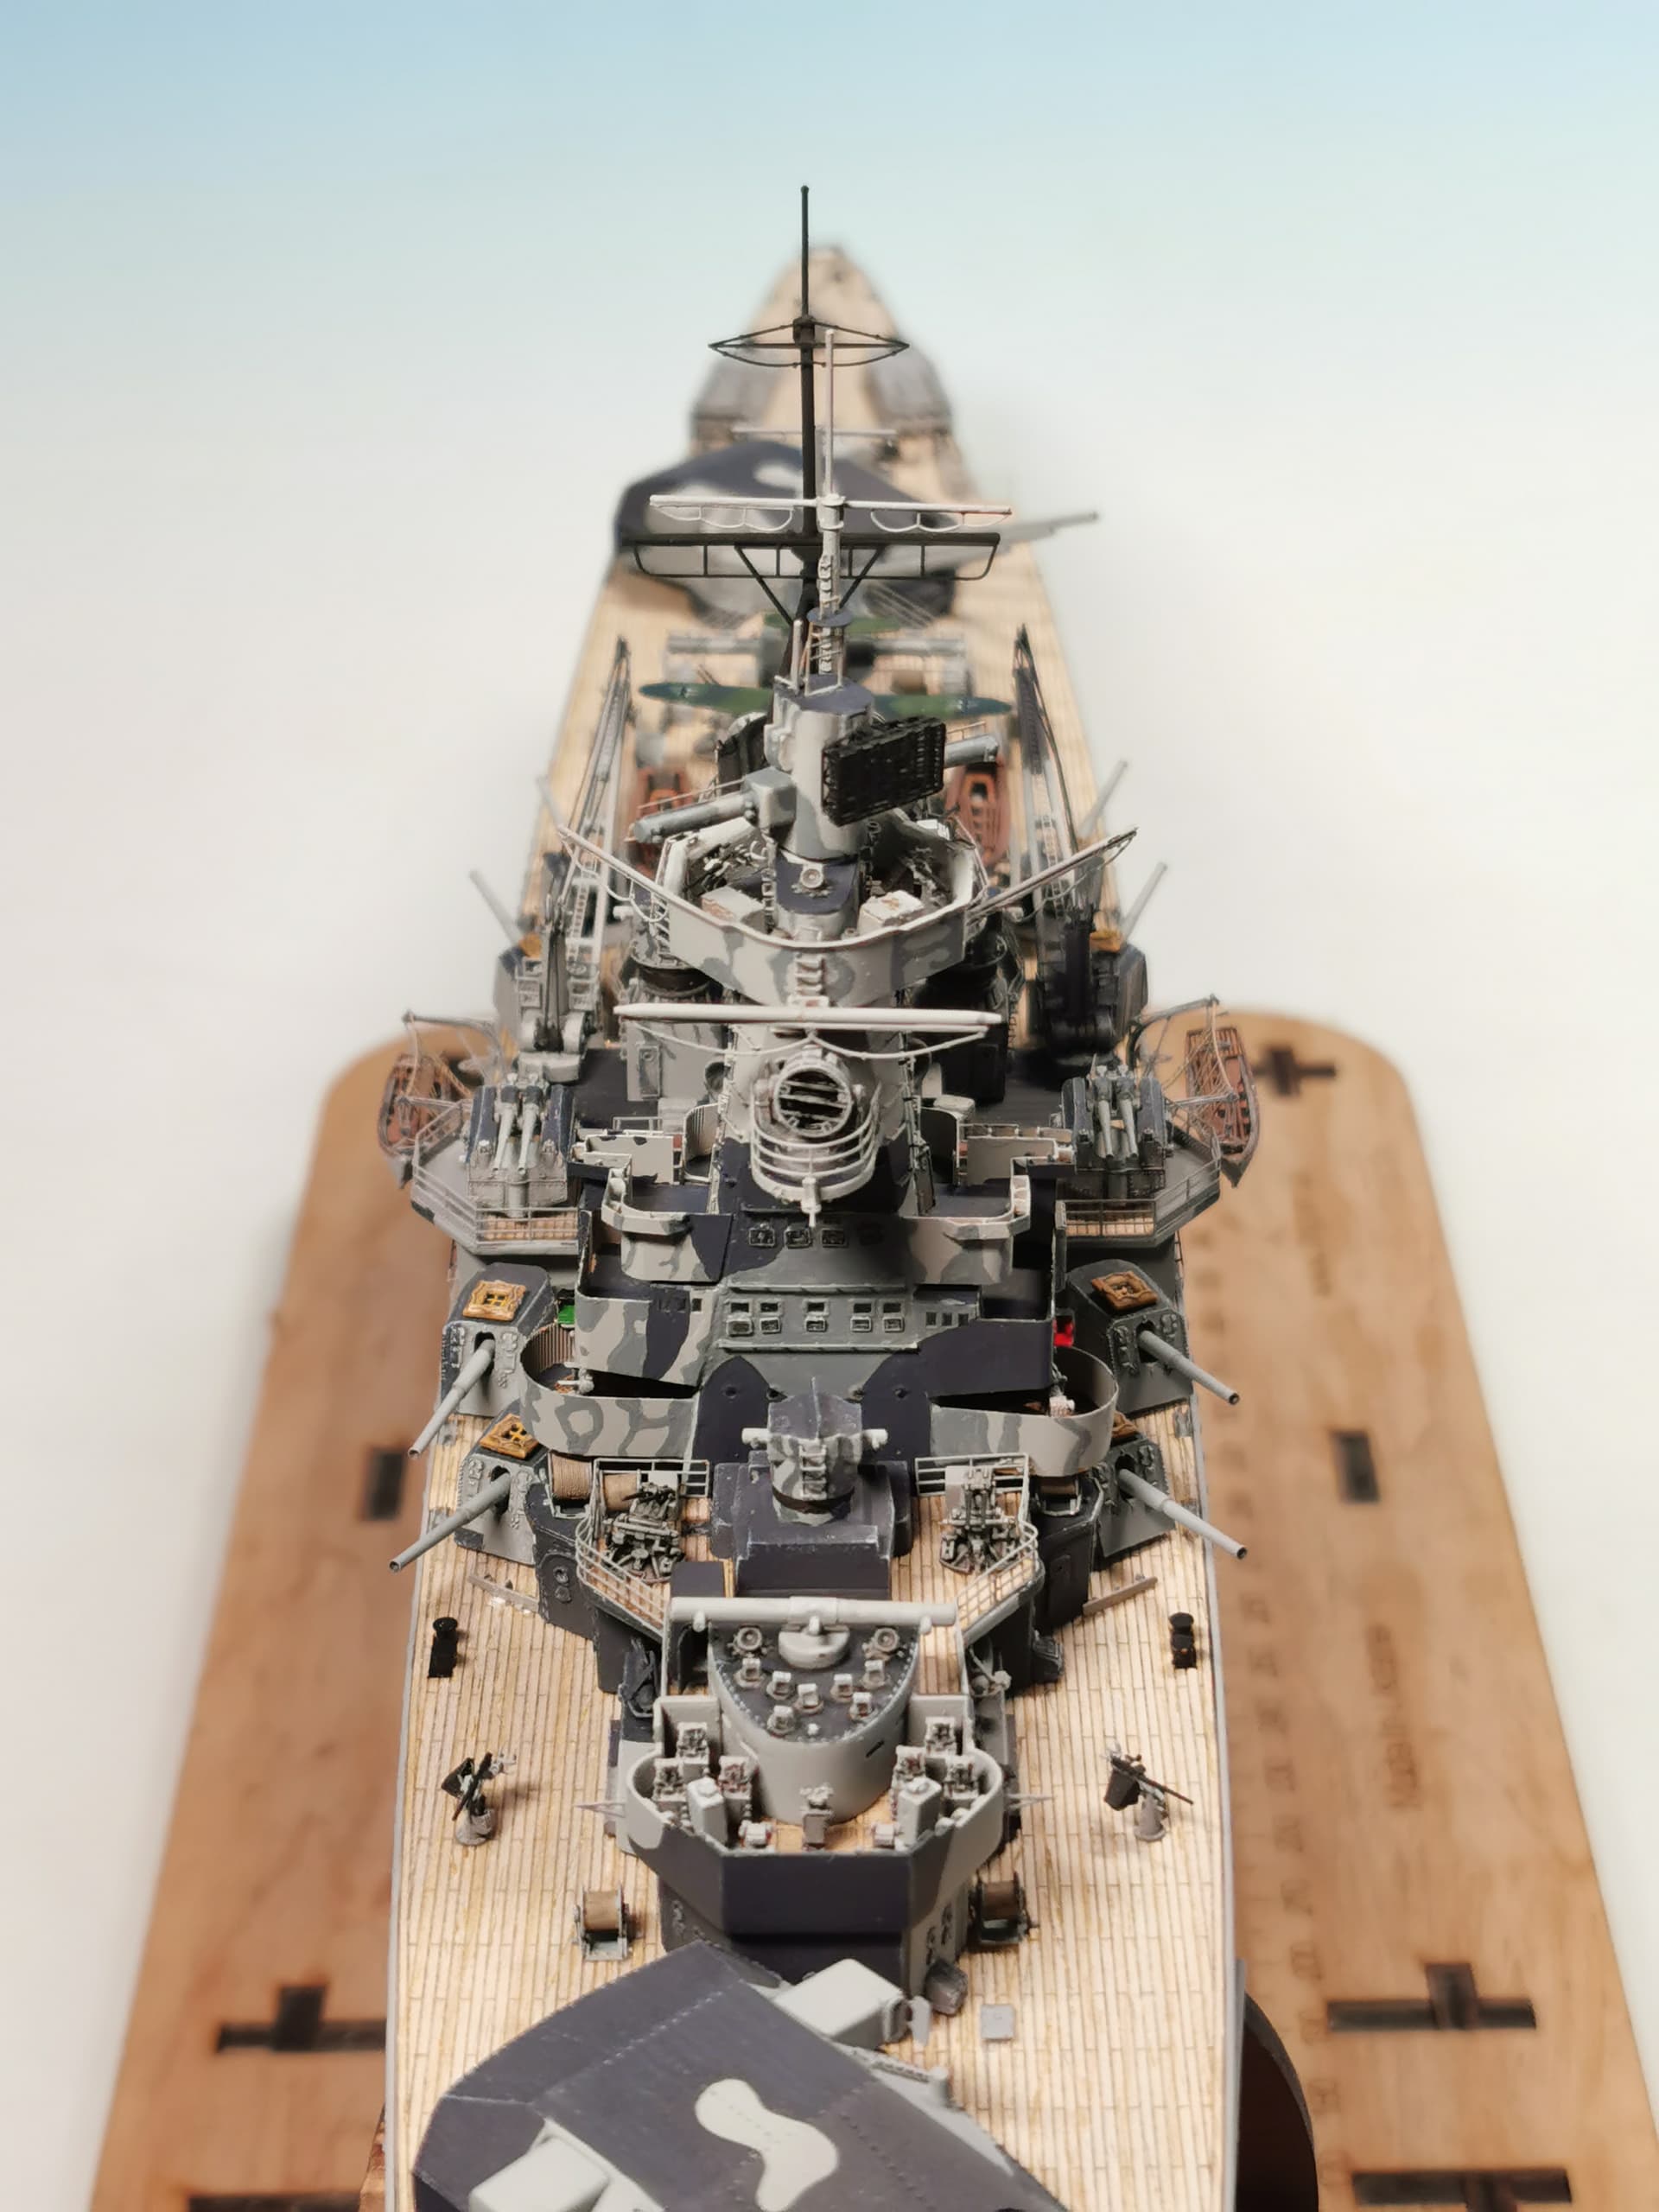
Ok gentlemen and now the view after all boats, cutters, dinghies, cranes and the aircraft are all attached where they are intended for. Sadly the to big barges did´t fit at all at their intended places at the most outside storage locations port and starboard of the catapult superstructure. Kagero show these boats there and also Very Fire shows pictures where the boats are sitting at their pedestals but somehow this won´t work at all at my model. I would have to remove the railings there which would interfere seriously with the boat´s lenghts but I don´t want to cut around at these sensible structures. Therefore I followed TRUMPETER´s manual which don´t mention these bigger boats at all and suggest just four cutters there which fit perfectly. Well now I have to bigger lifeboats in storage 
Now these are the pictures of every part in place. The ship is slowly get looking busy
16 Likes
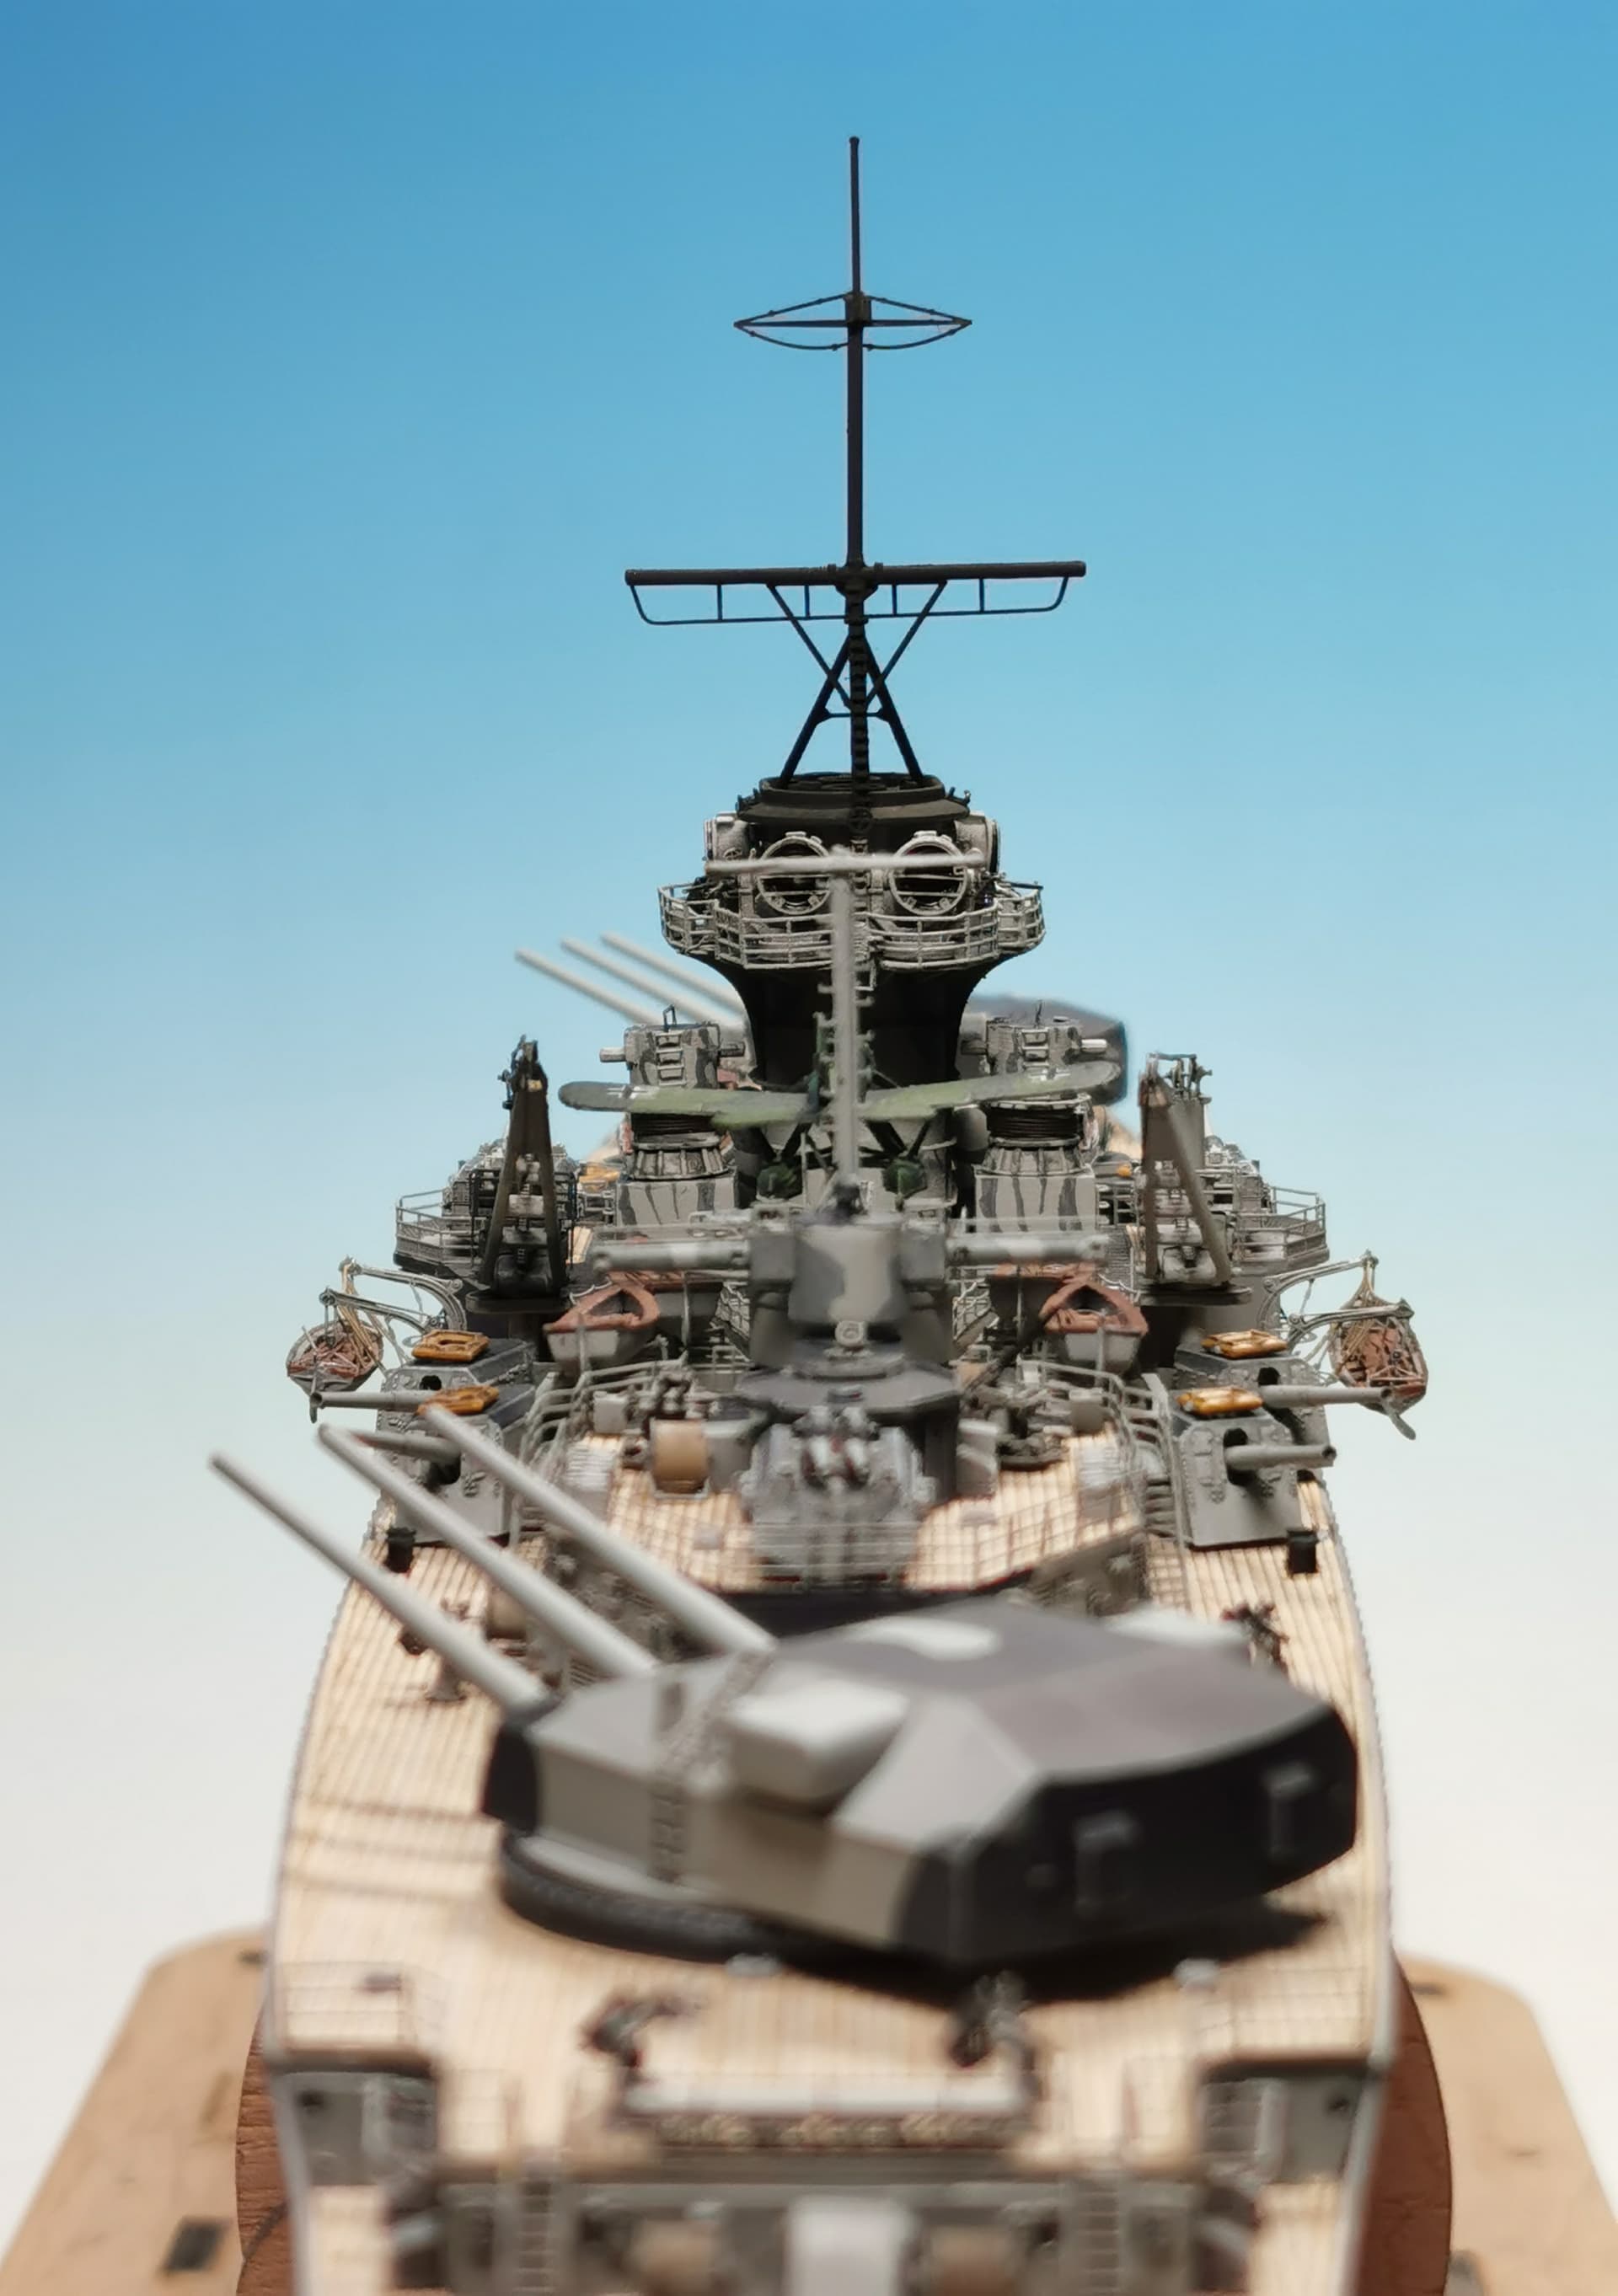
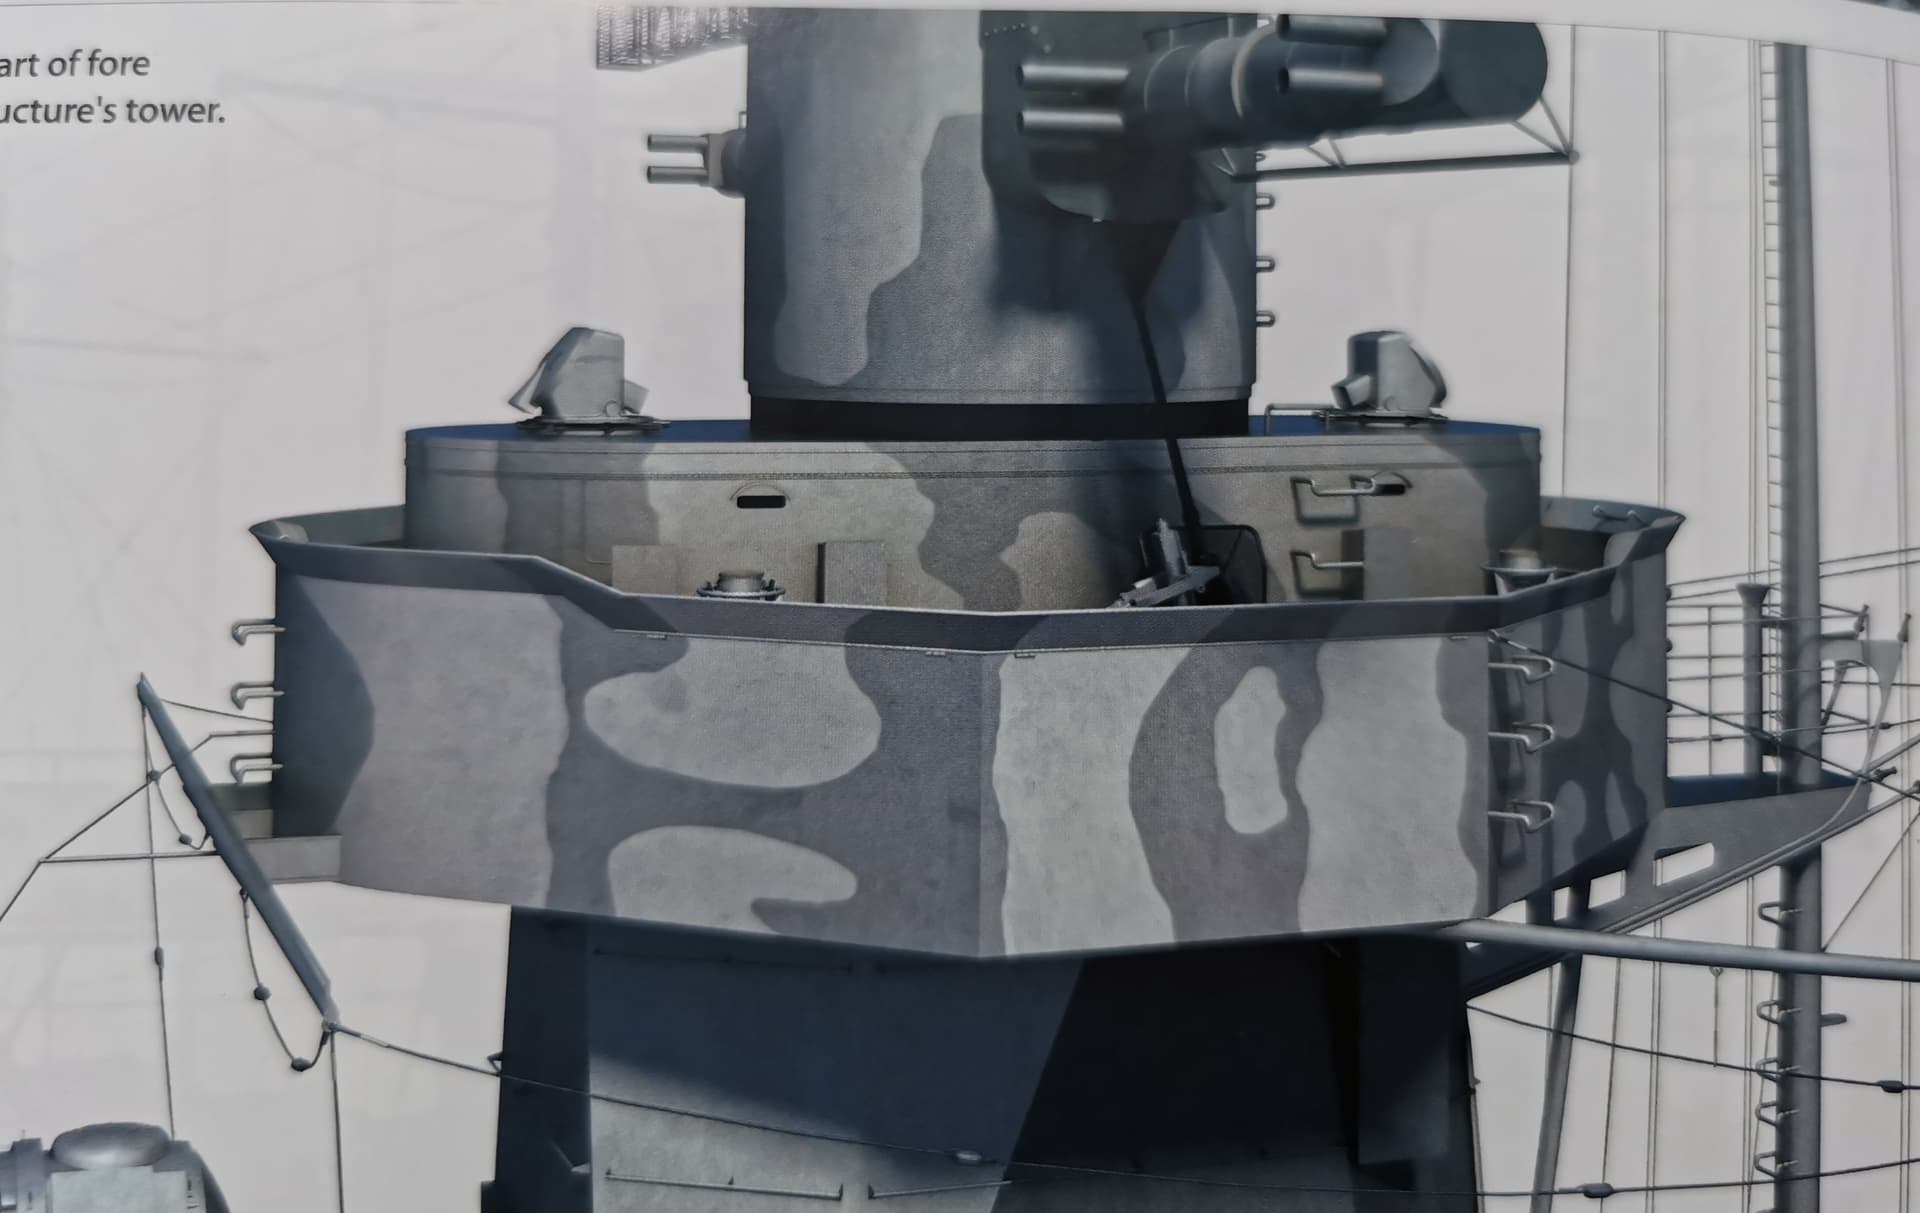
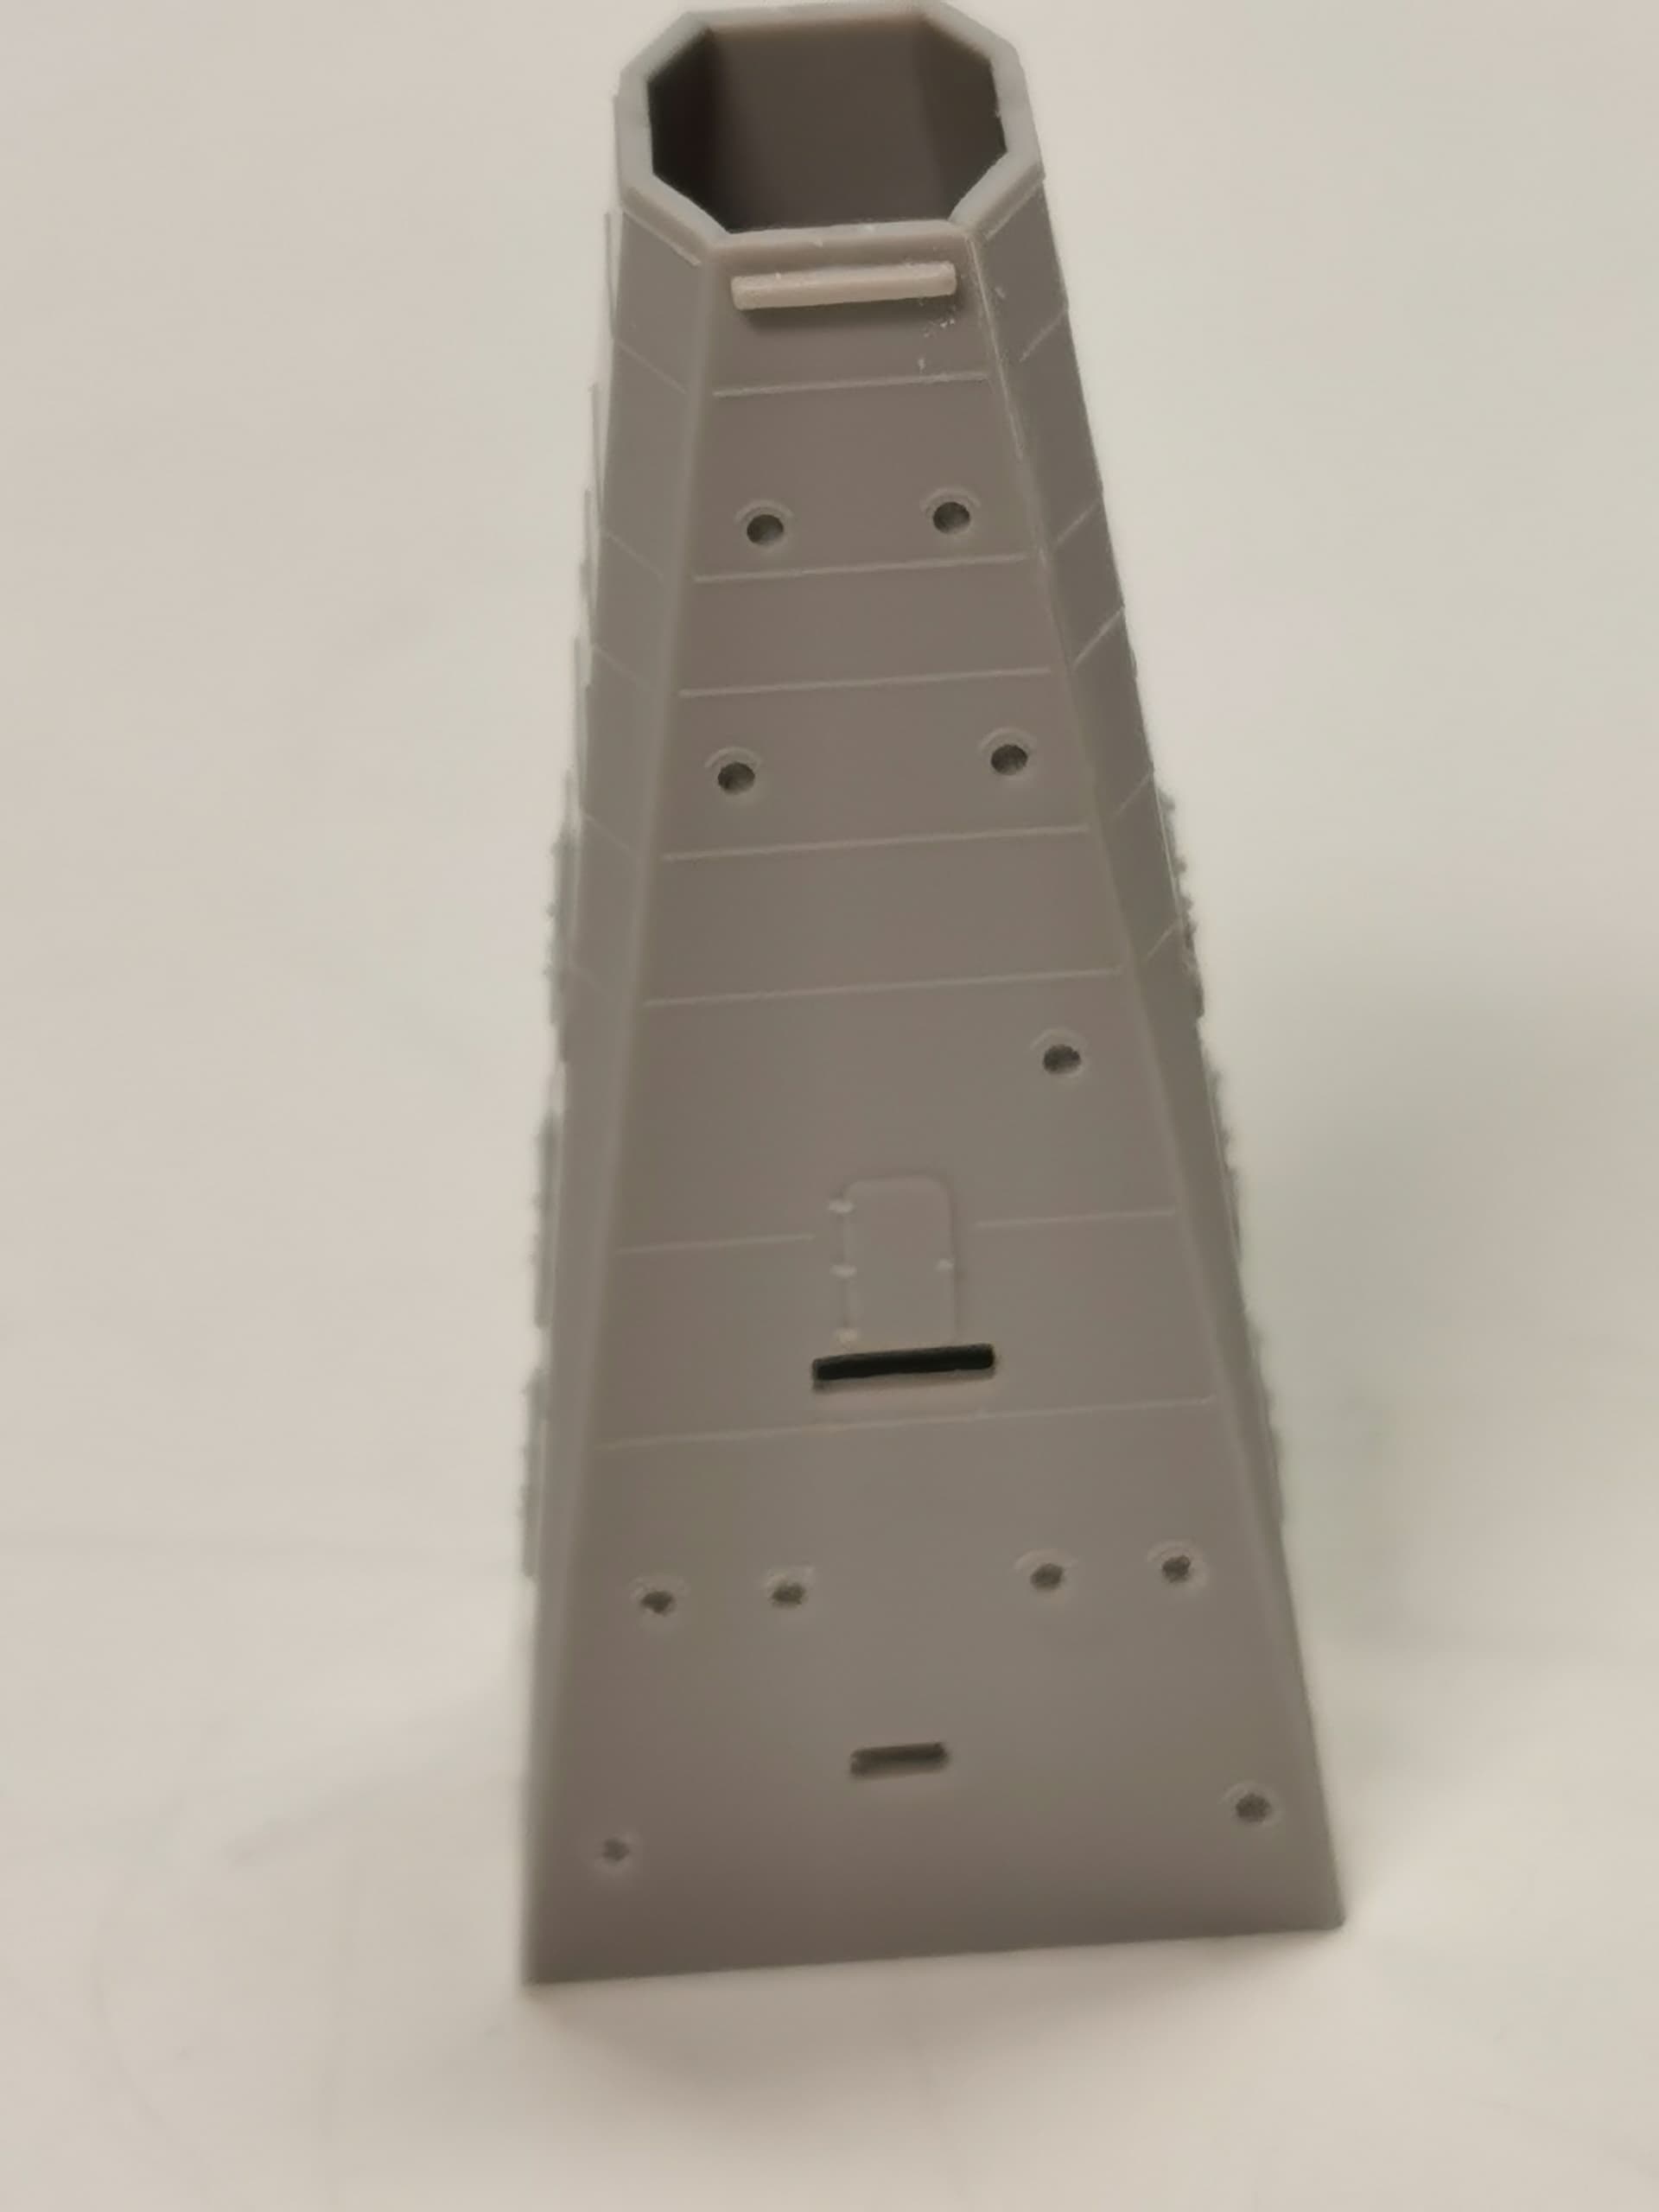
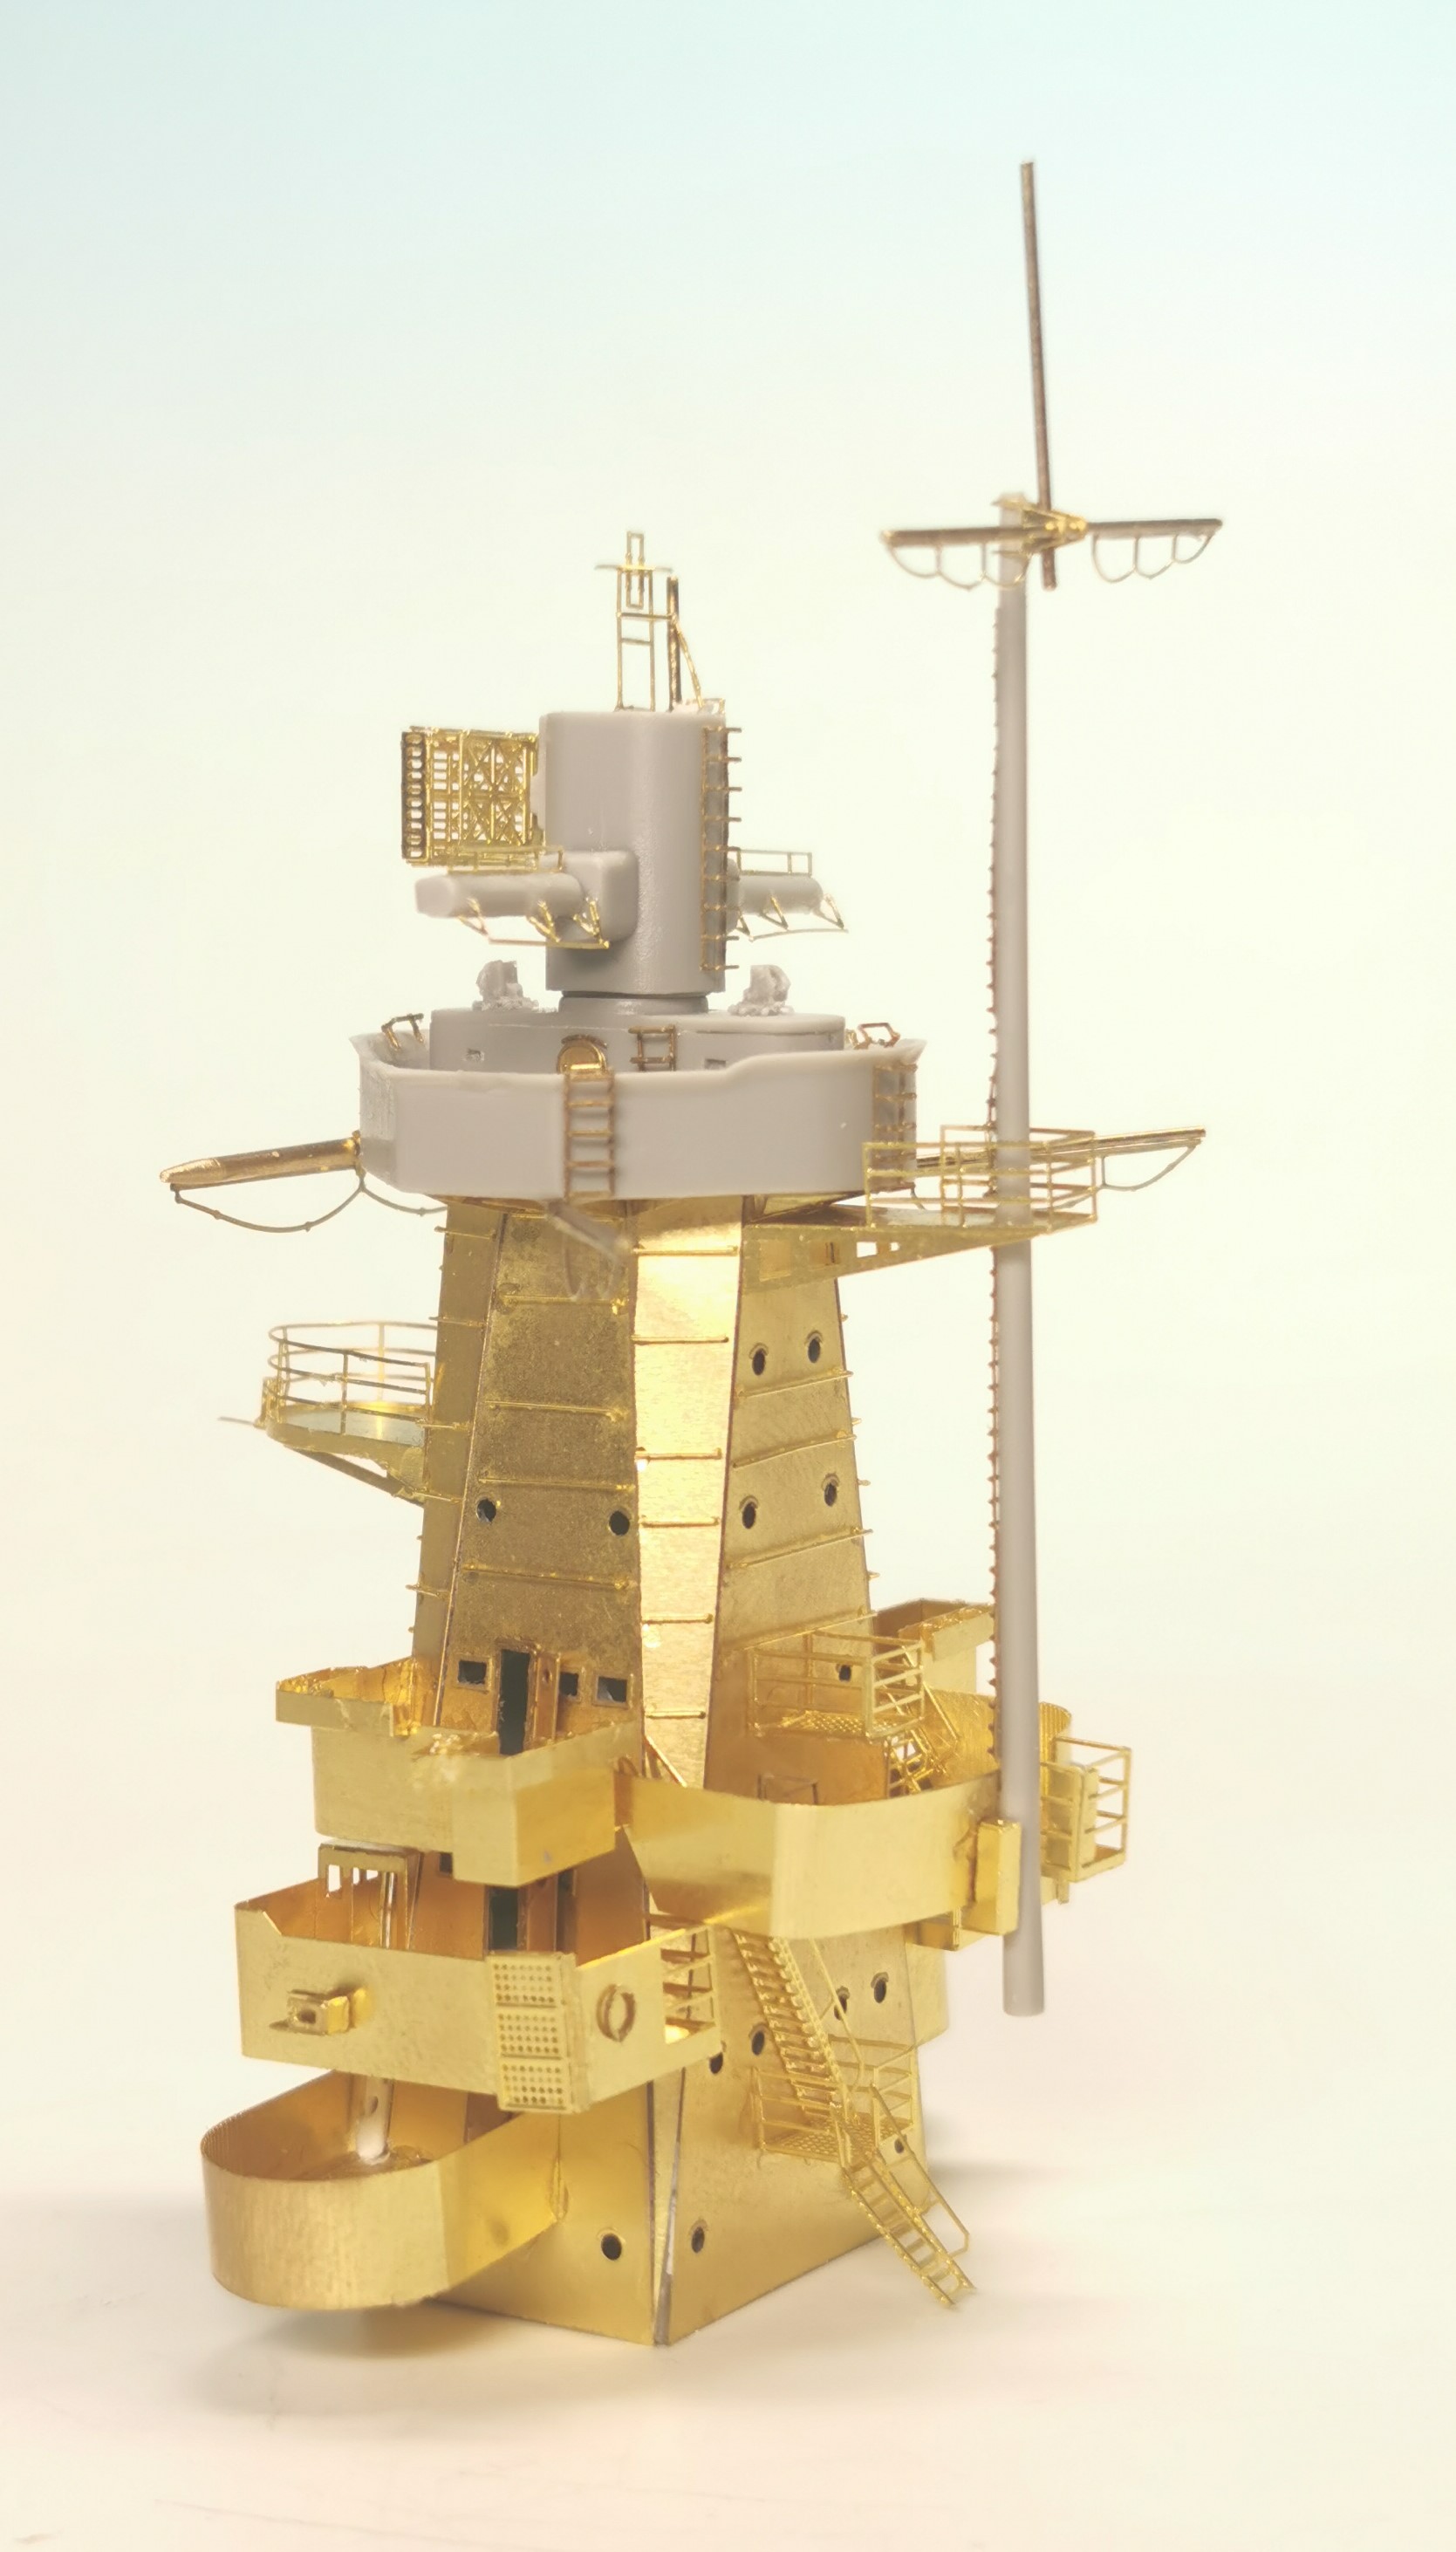
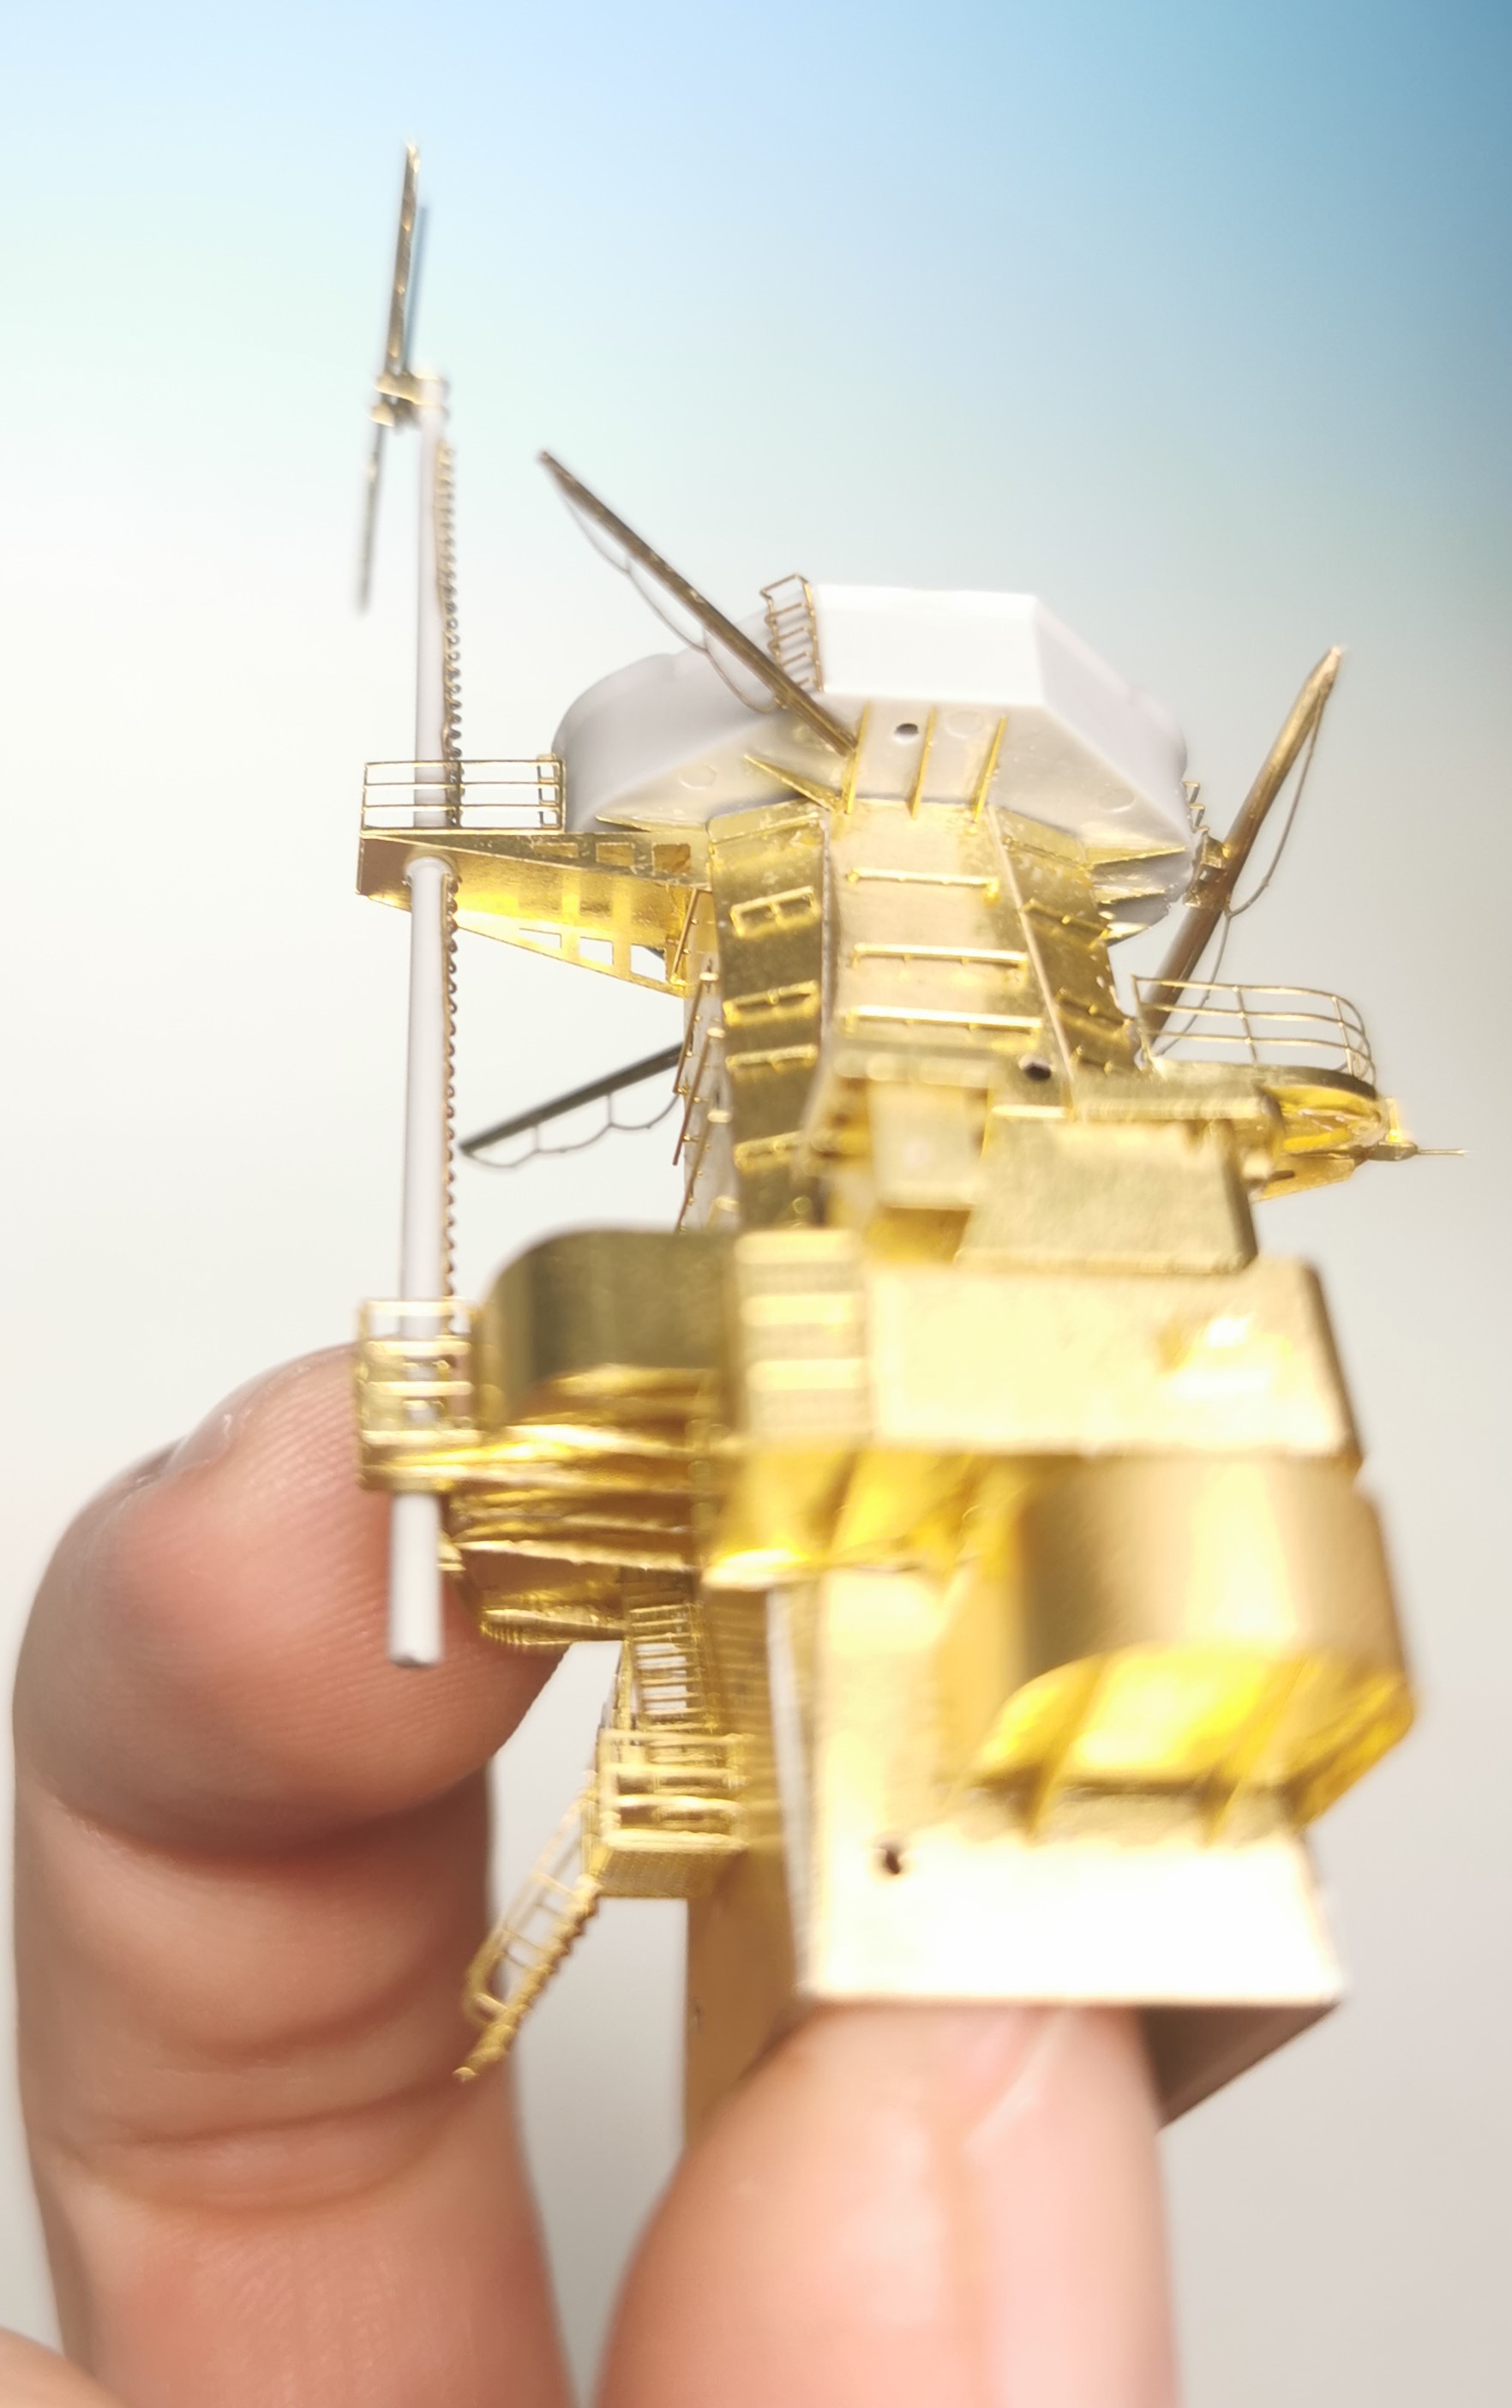
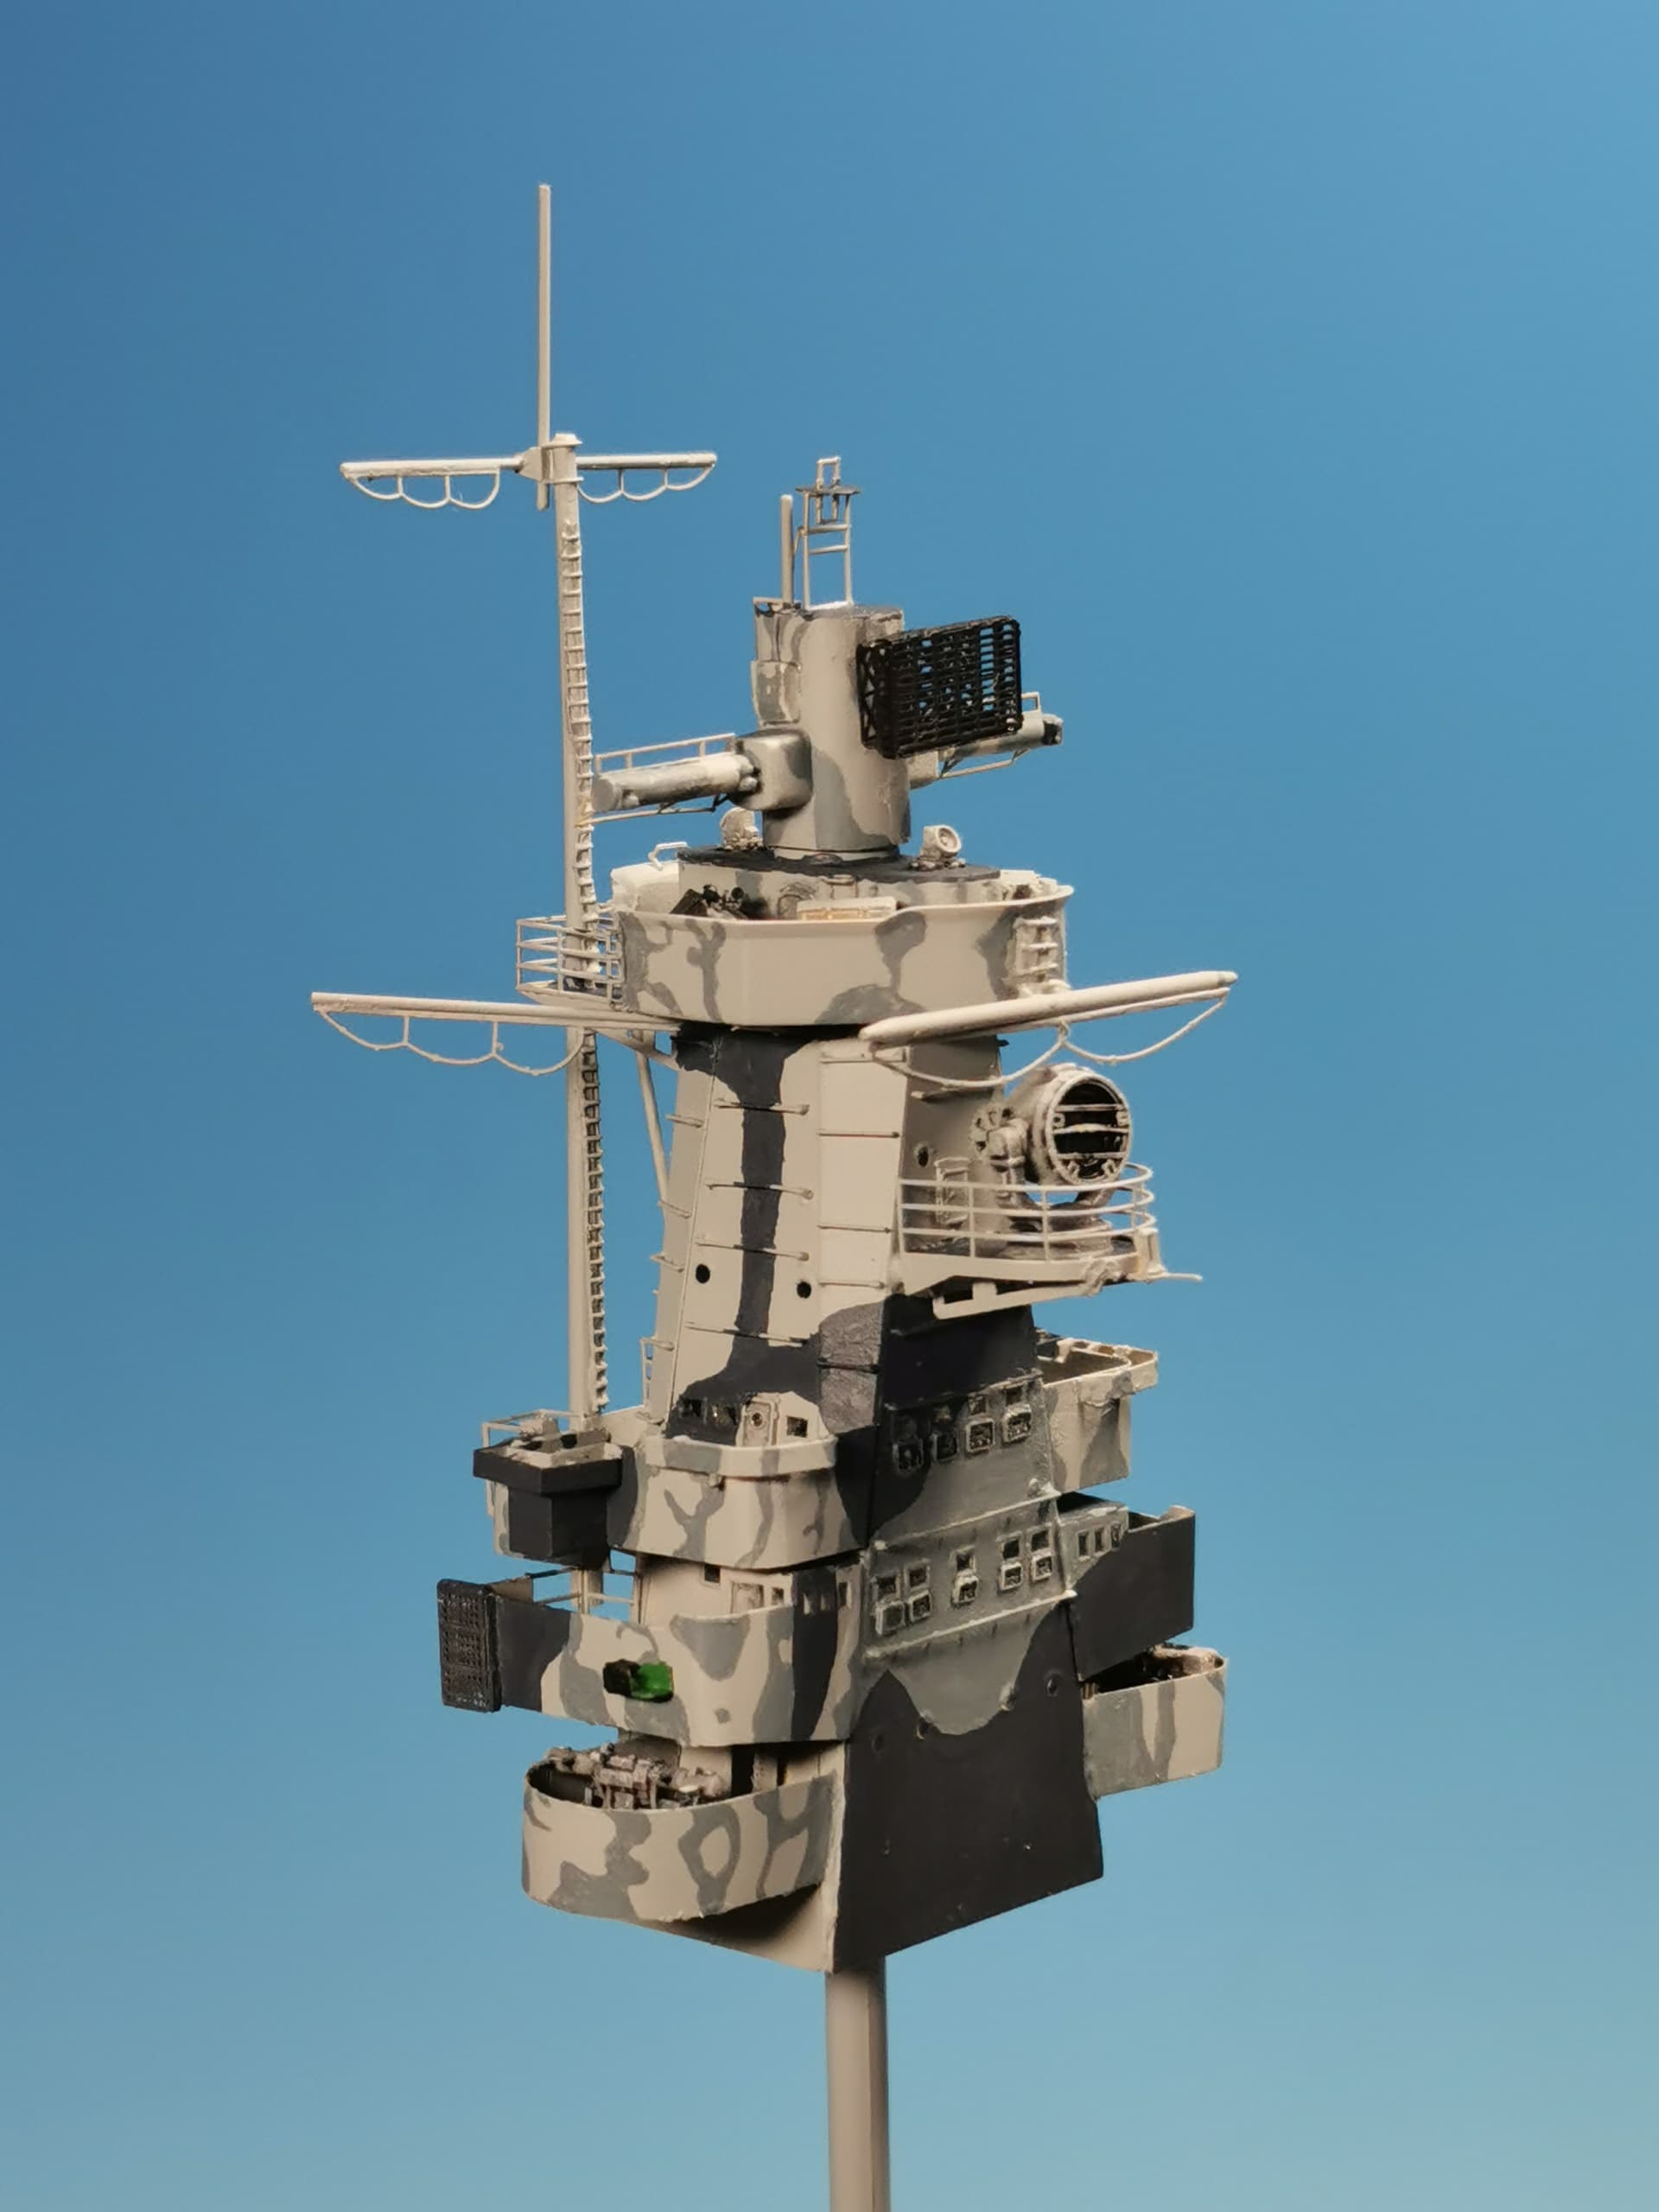
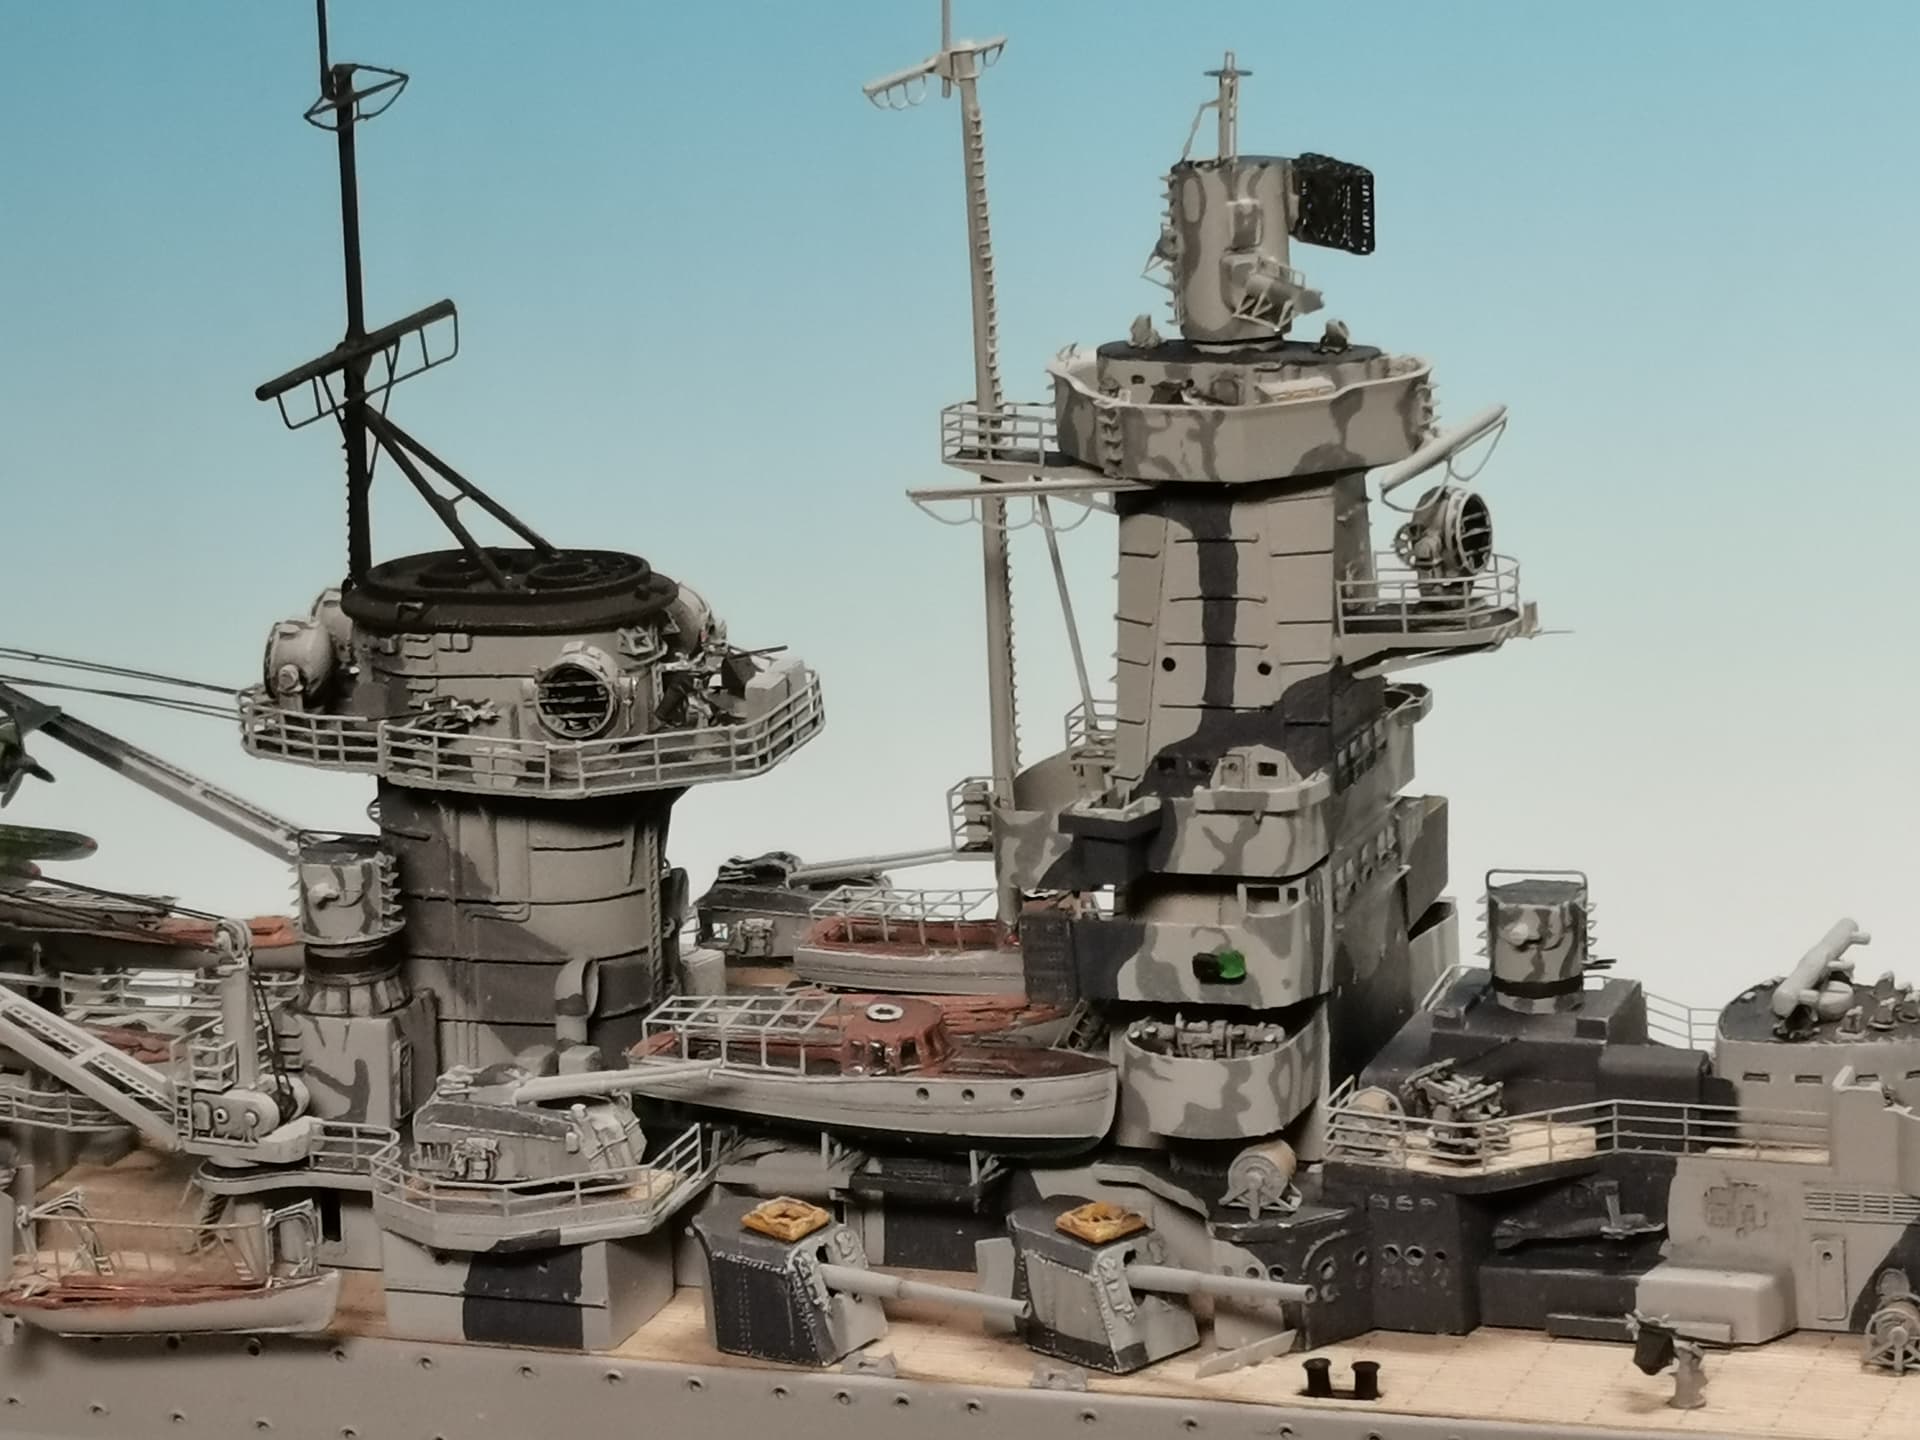
Now we come to the main attraction, the distinctive conical command bridge tower which let us recognize Graf Spee so easily. The real ship had the upper part of the tower´s railing bended outward at about 45 degree
Very Fire´s etched parts don´t show this characteristic bend which look somewhat wrong to me
The Trumpeter´s plastic kit part show the bending outward but keeps strait up inside and result in a much too thick wall
Decisions had to be made what to do and which part to use. I decided for the original kit part but thinned down the inner walls the way it looks like the real deal. I think I can use it now
Plastic beams at the underside were cut and sanded off - these will be replaced later with etched ones
Thats it for today 
14 Likes
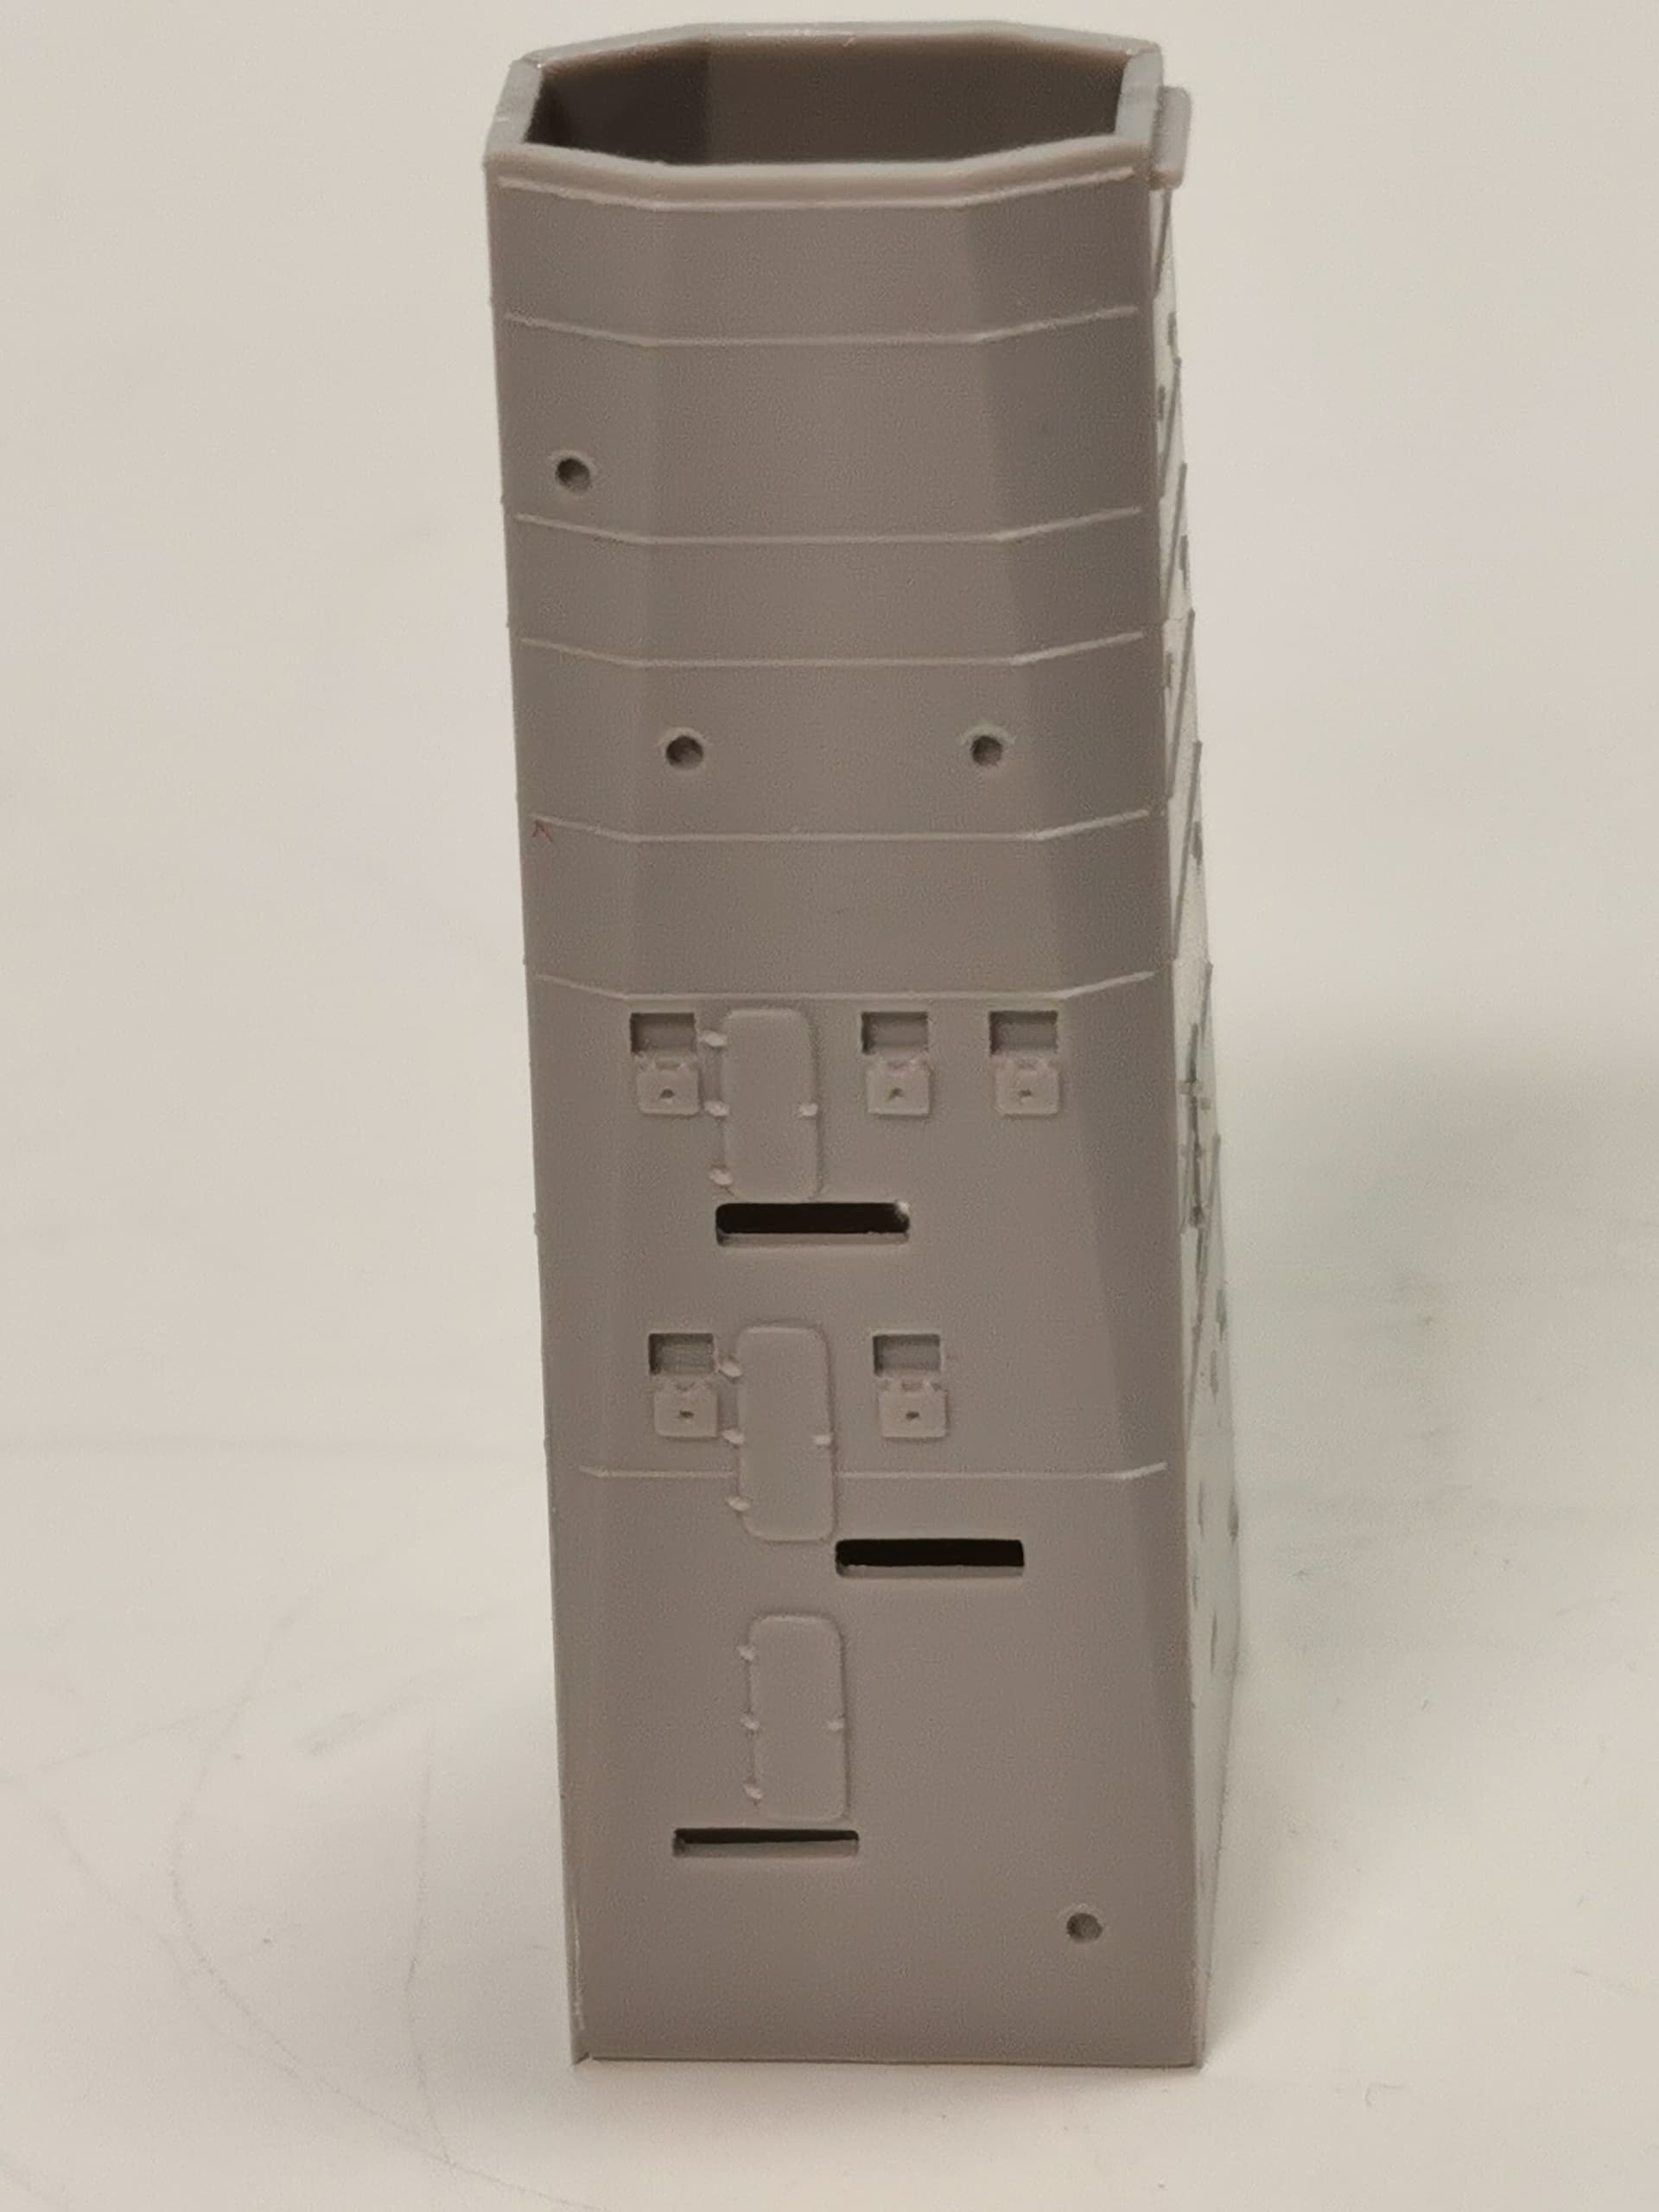
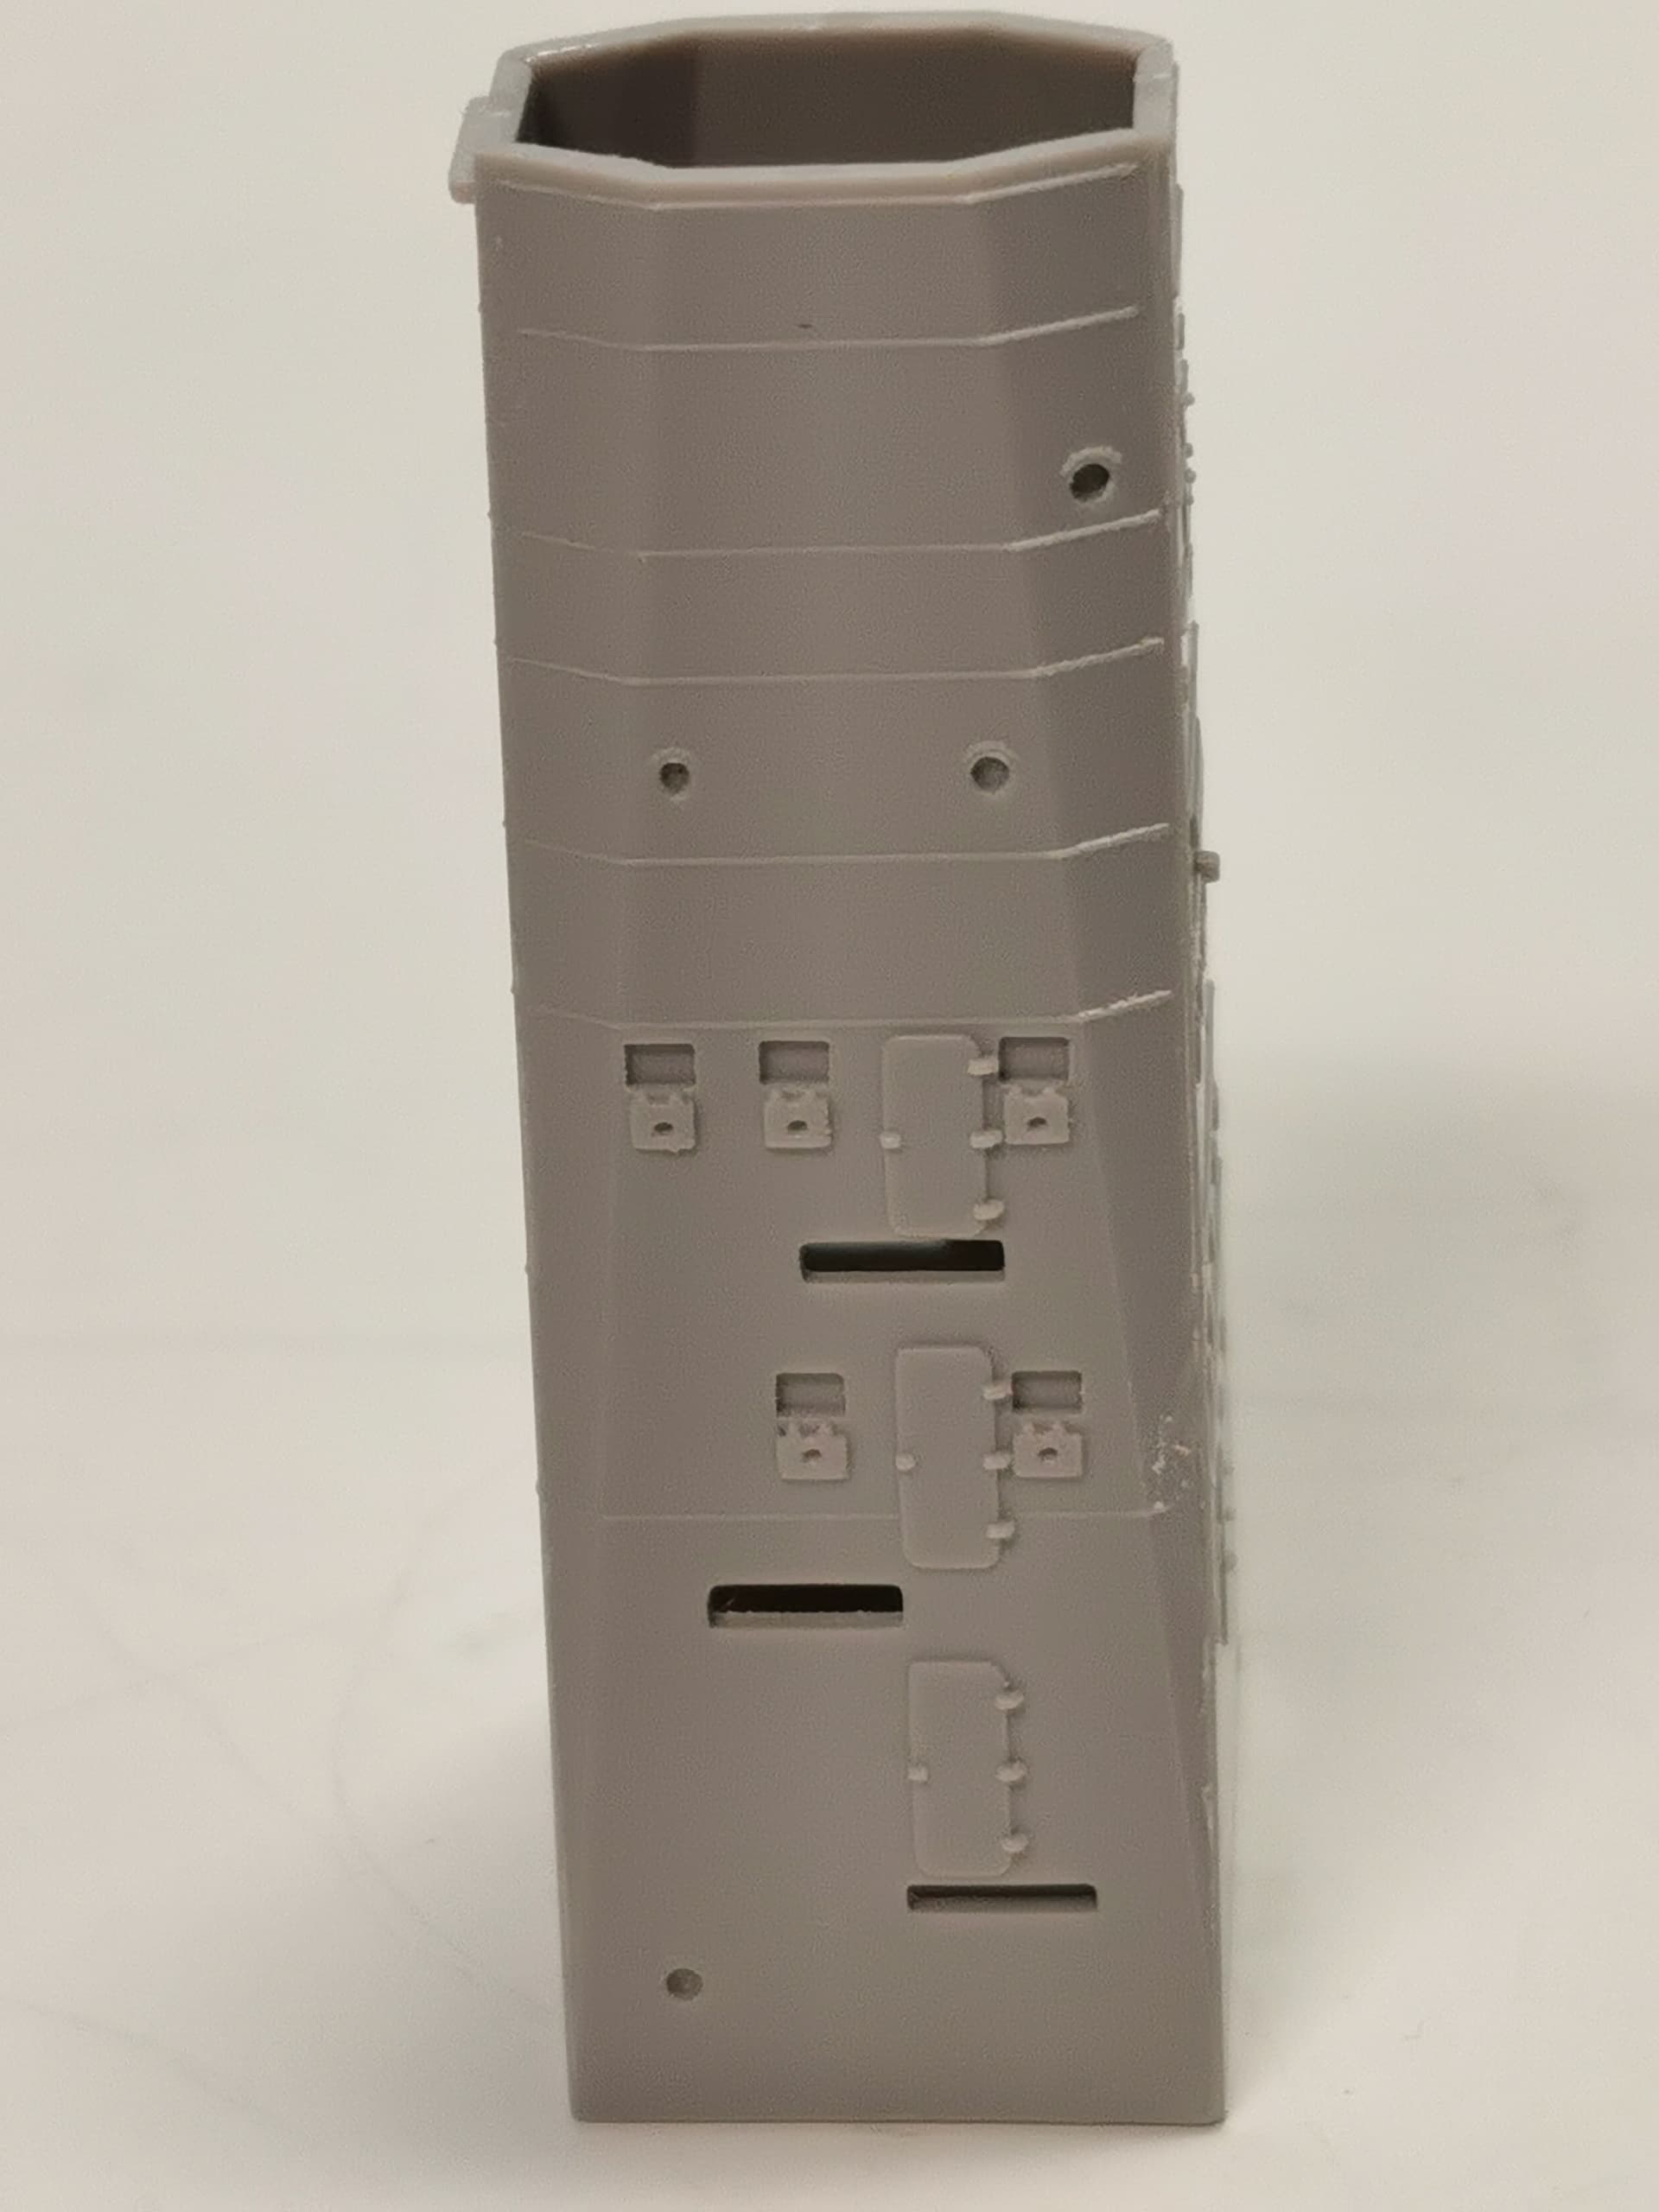
Started work at the tower bridge. The parts were extra thick glued inside the compartment side connections with superglue to give it more strength not to break during the attachments of the etched parts.
After some hesitation I sanded off all details at the assemblied tower structure with mixed feelings…
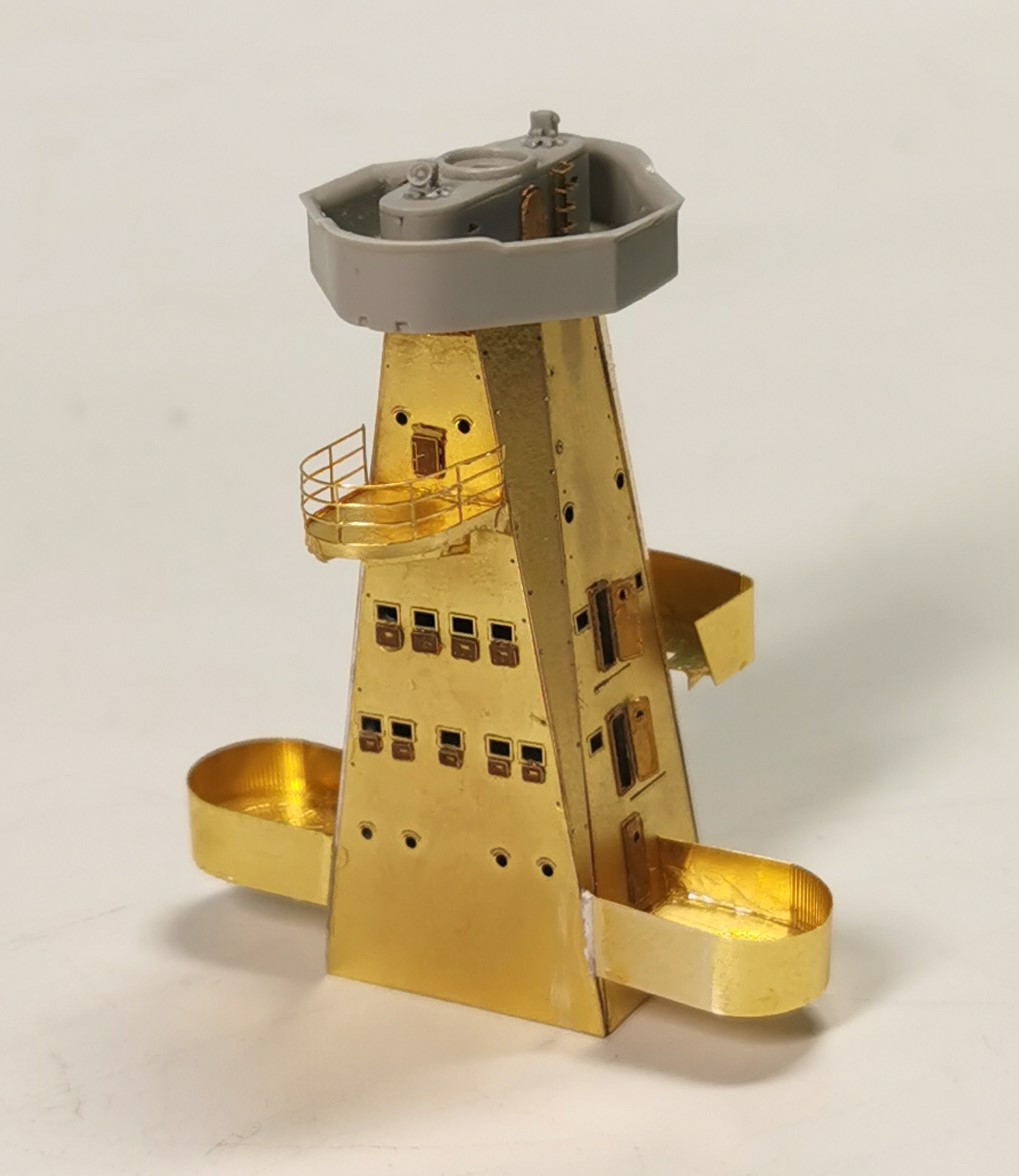
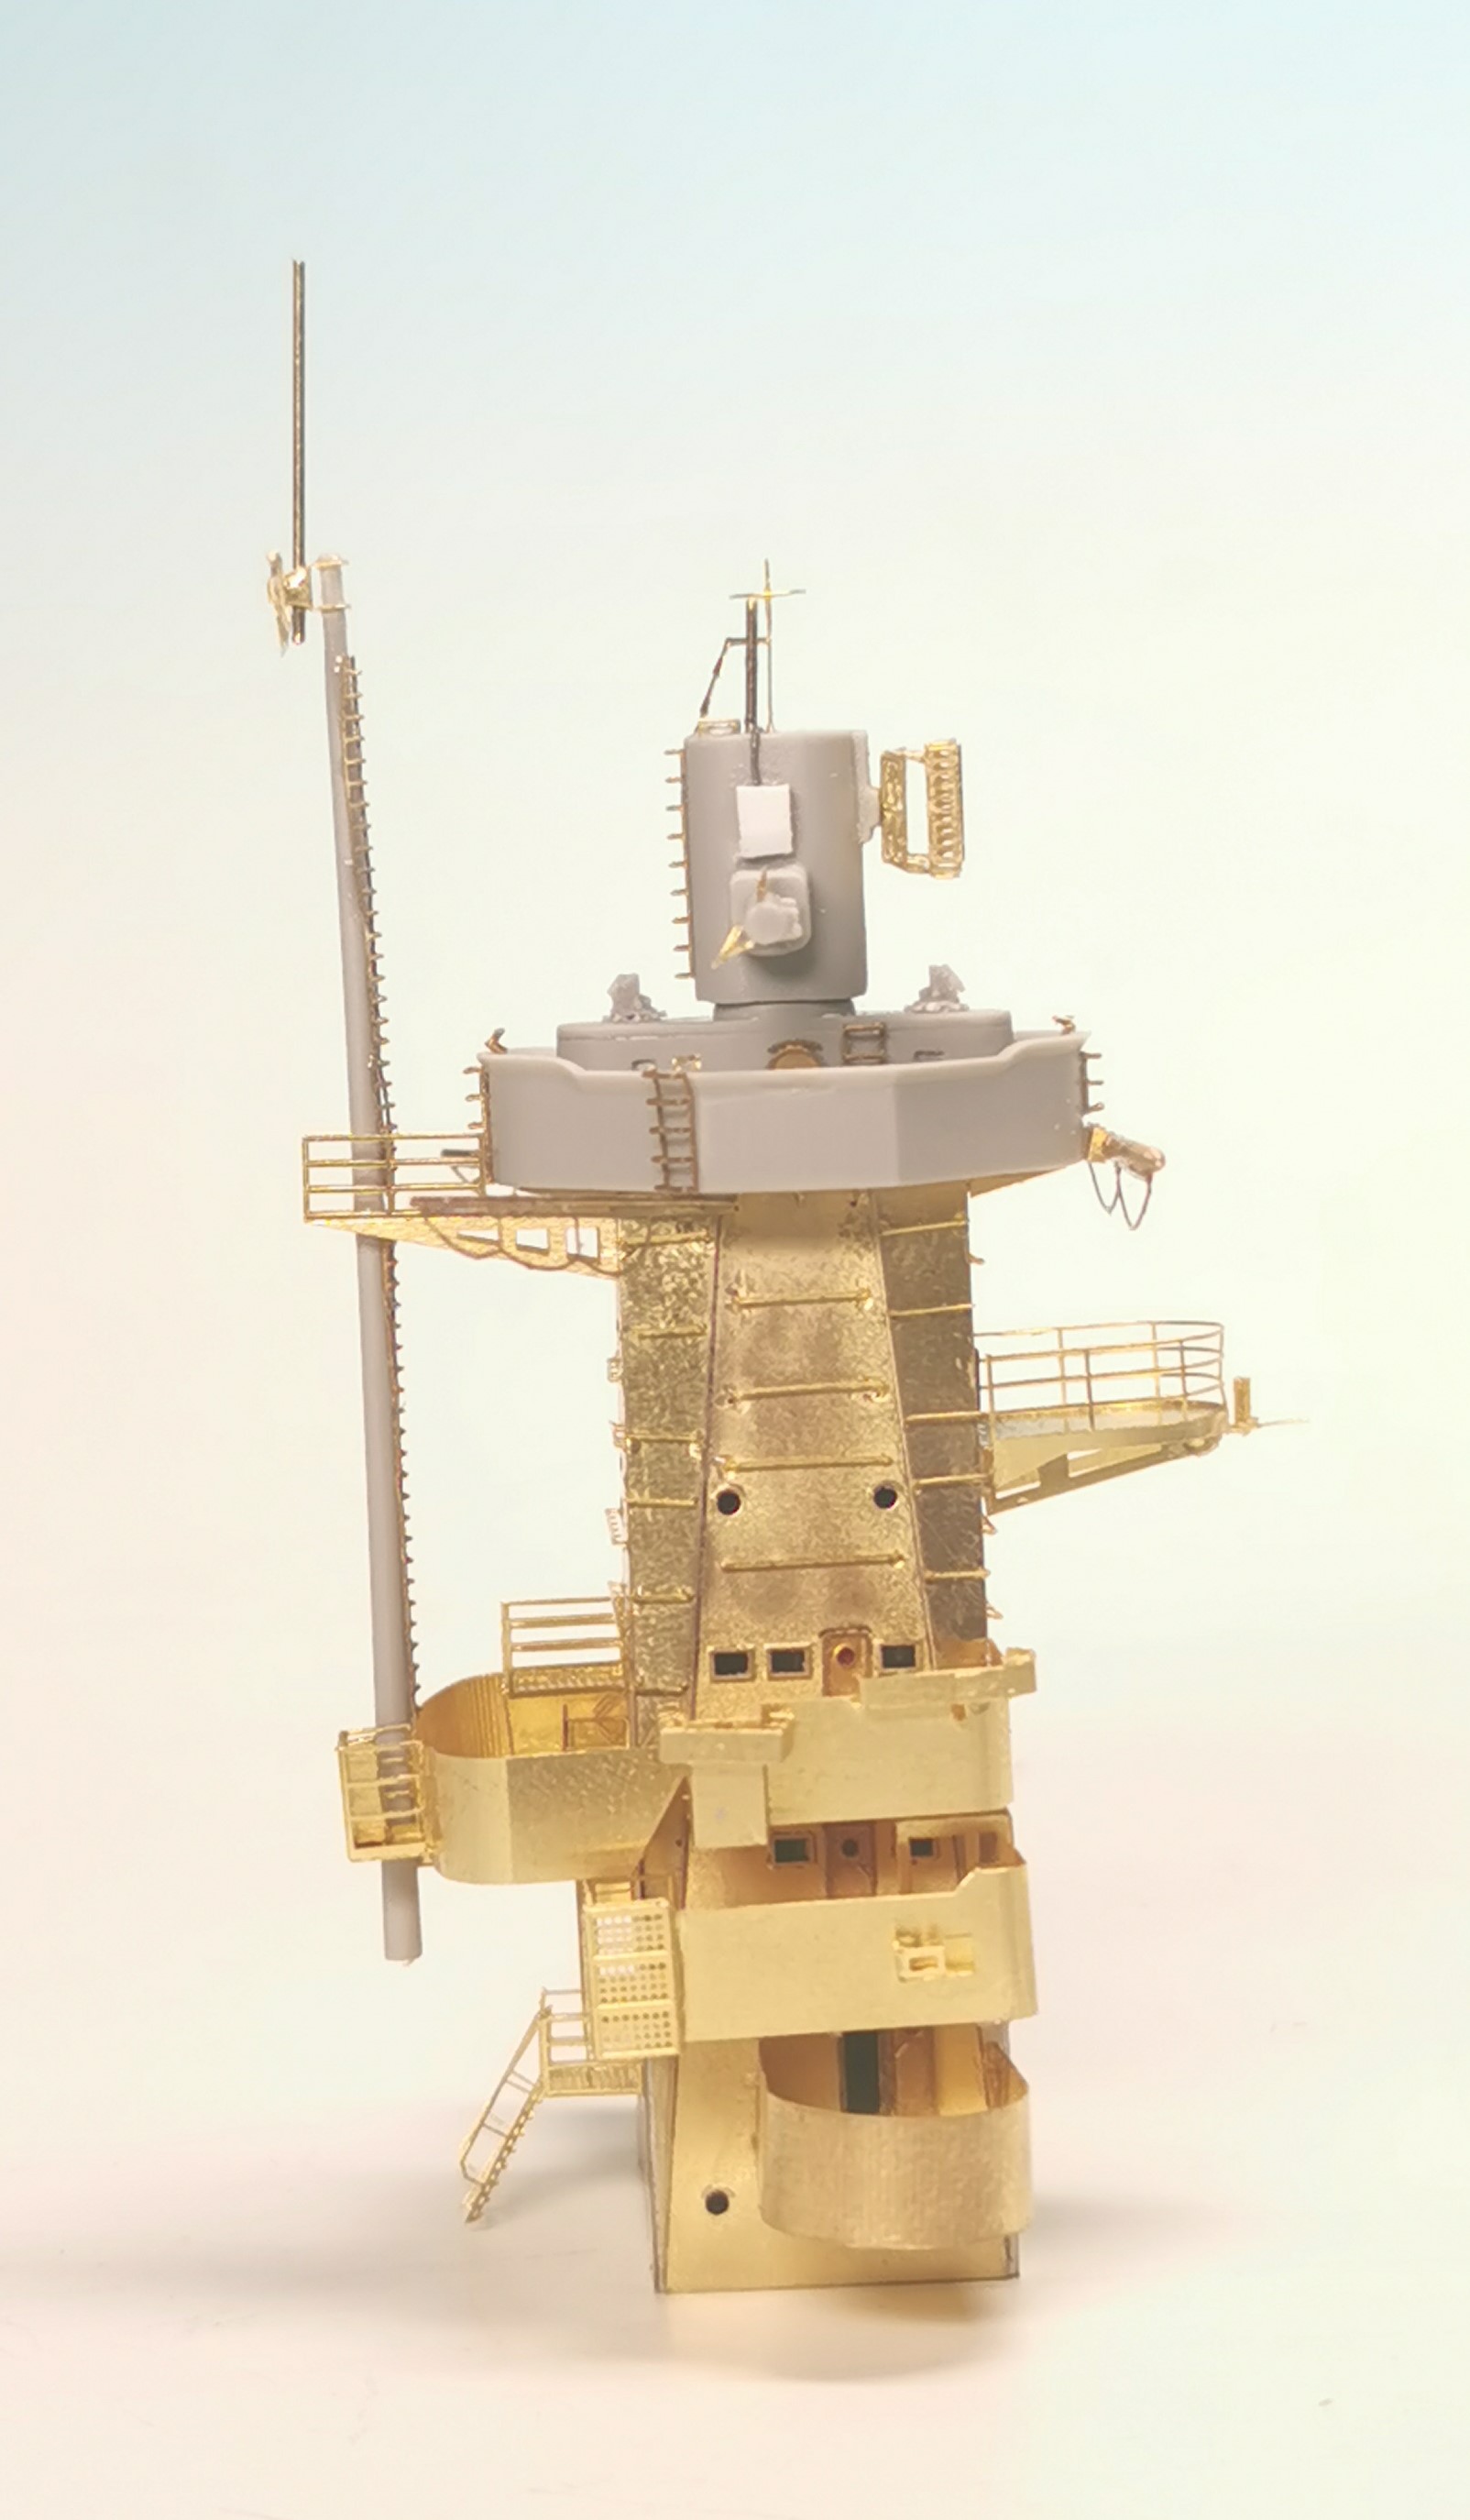
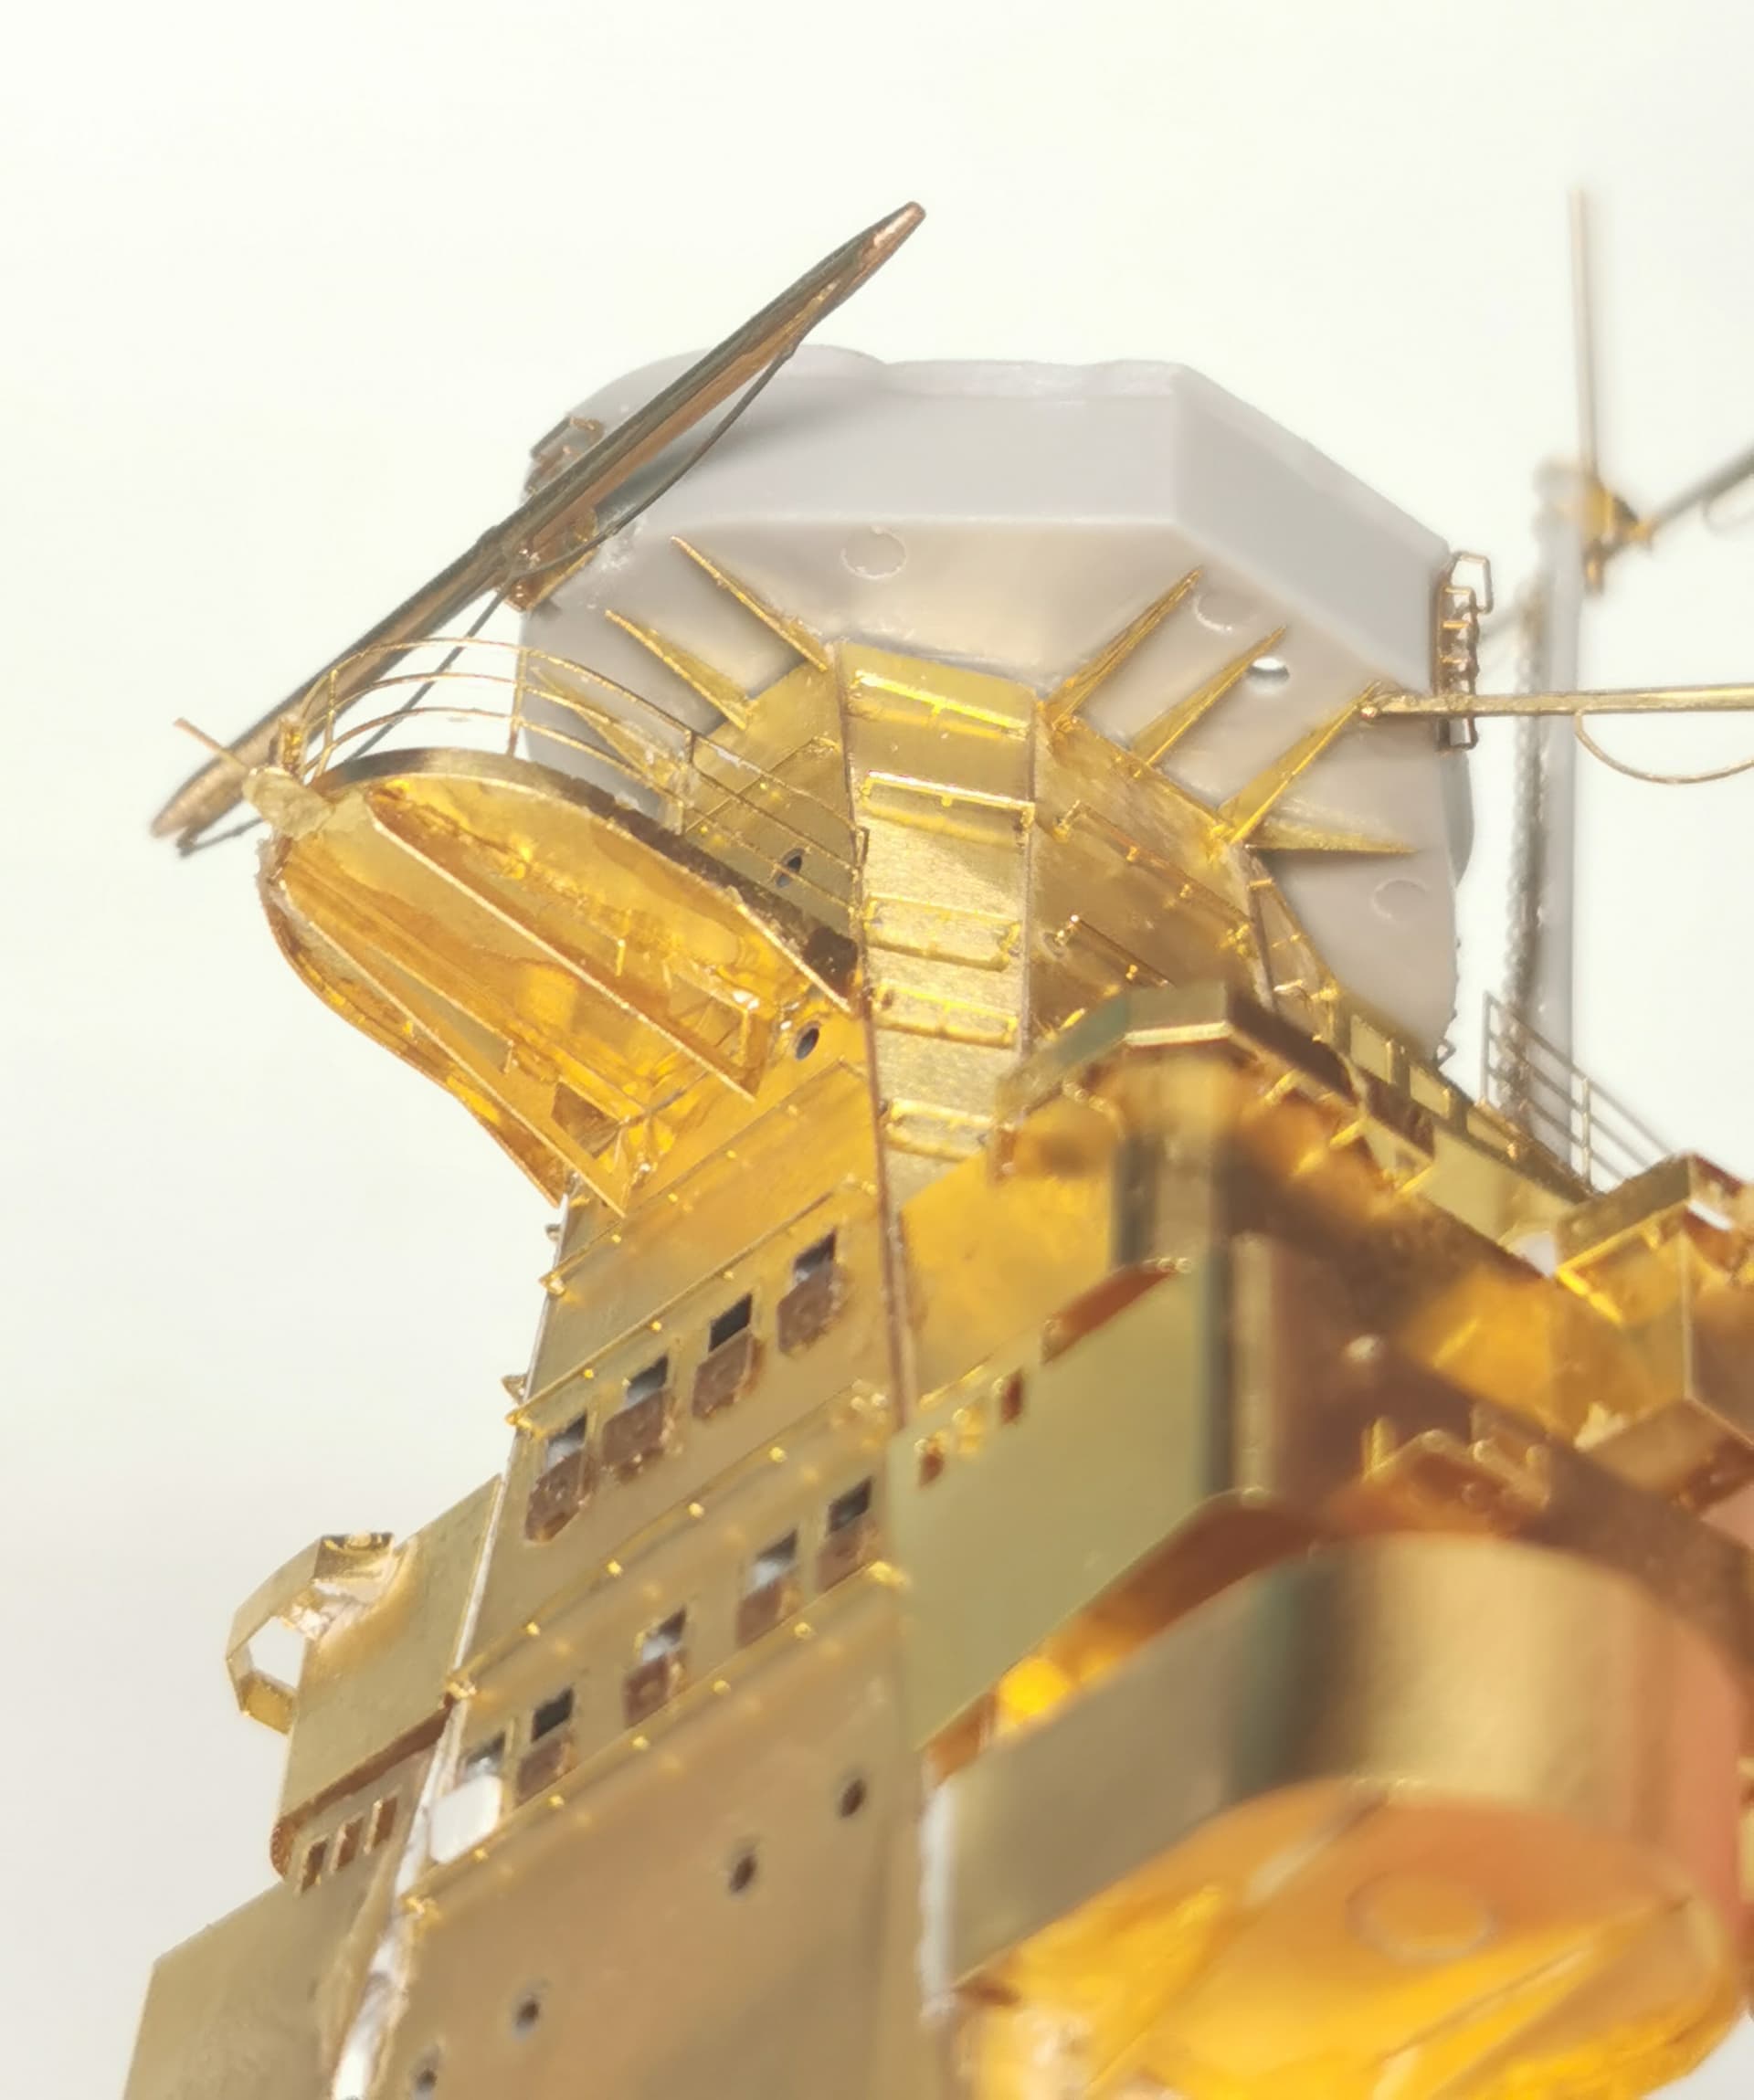
I drilled out all windows and installed some floors inside the tower bridge at the levels I show open doors. Then I carefully applied the first etched parts. This is the current state of my work. The lower right platform floor part was mirror-converted; these incidents always accompany this build… front bridge window flaps are from Eduard.
17 Likes
Wow, Thomas, that took guts to cut away all that good looking kit detail! The etched replacement parts already looking finer, though - so its a win!
2 Likes
That looks amazing. Really great PE skill there …
1 Like
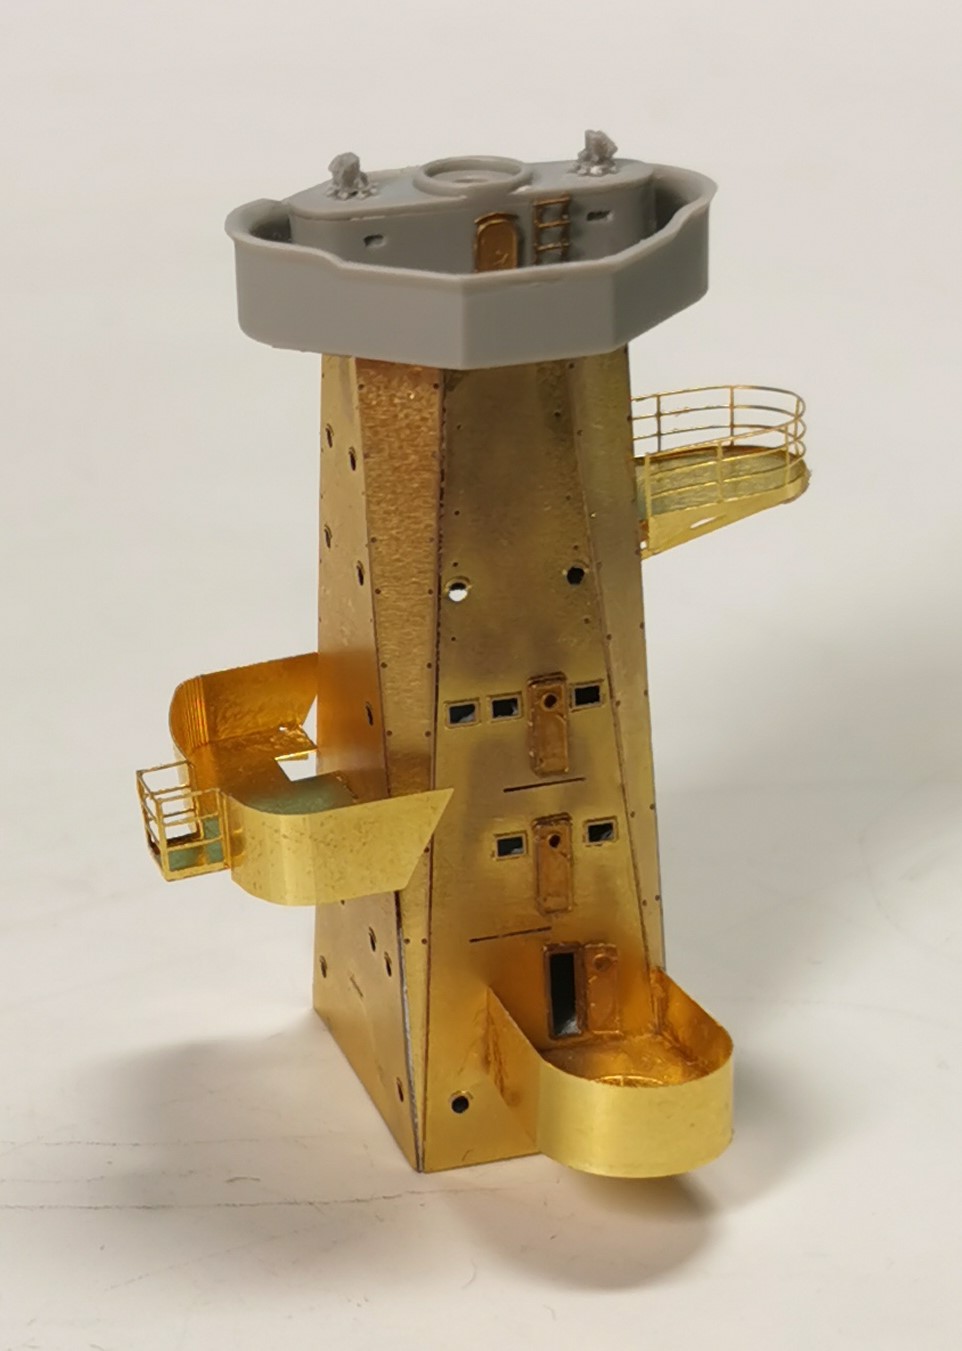
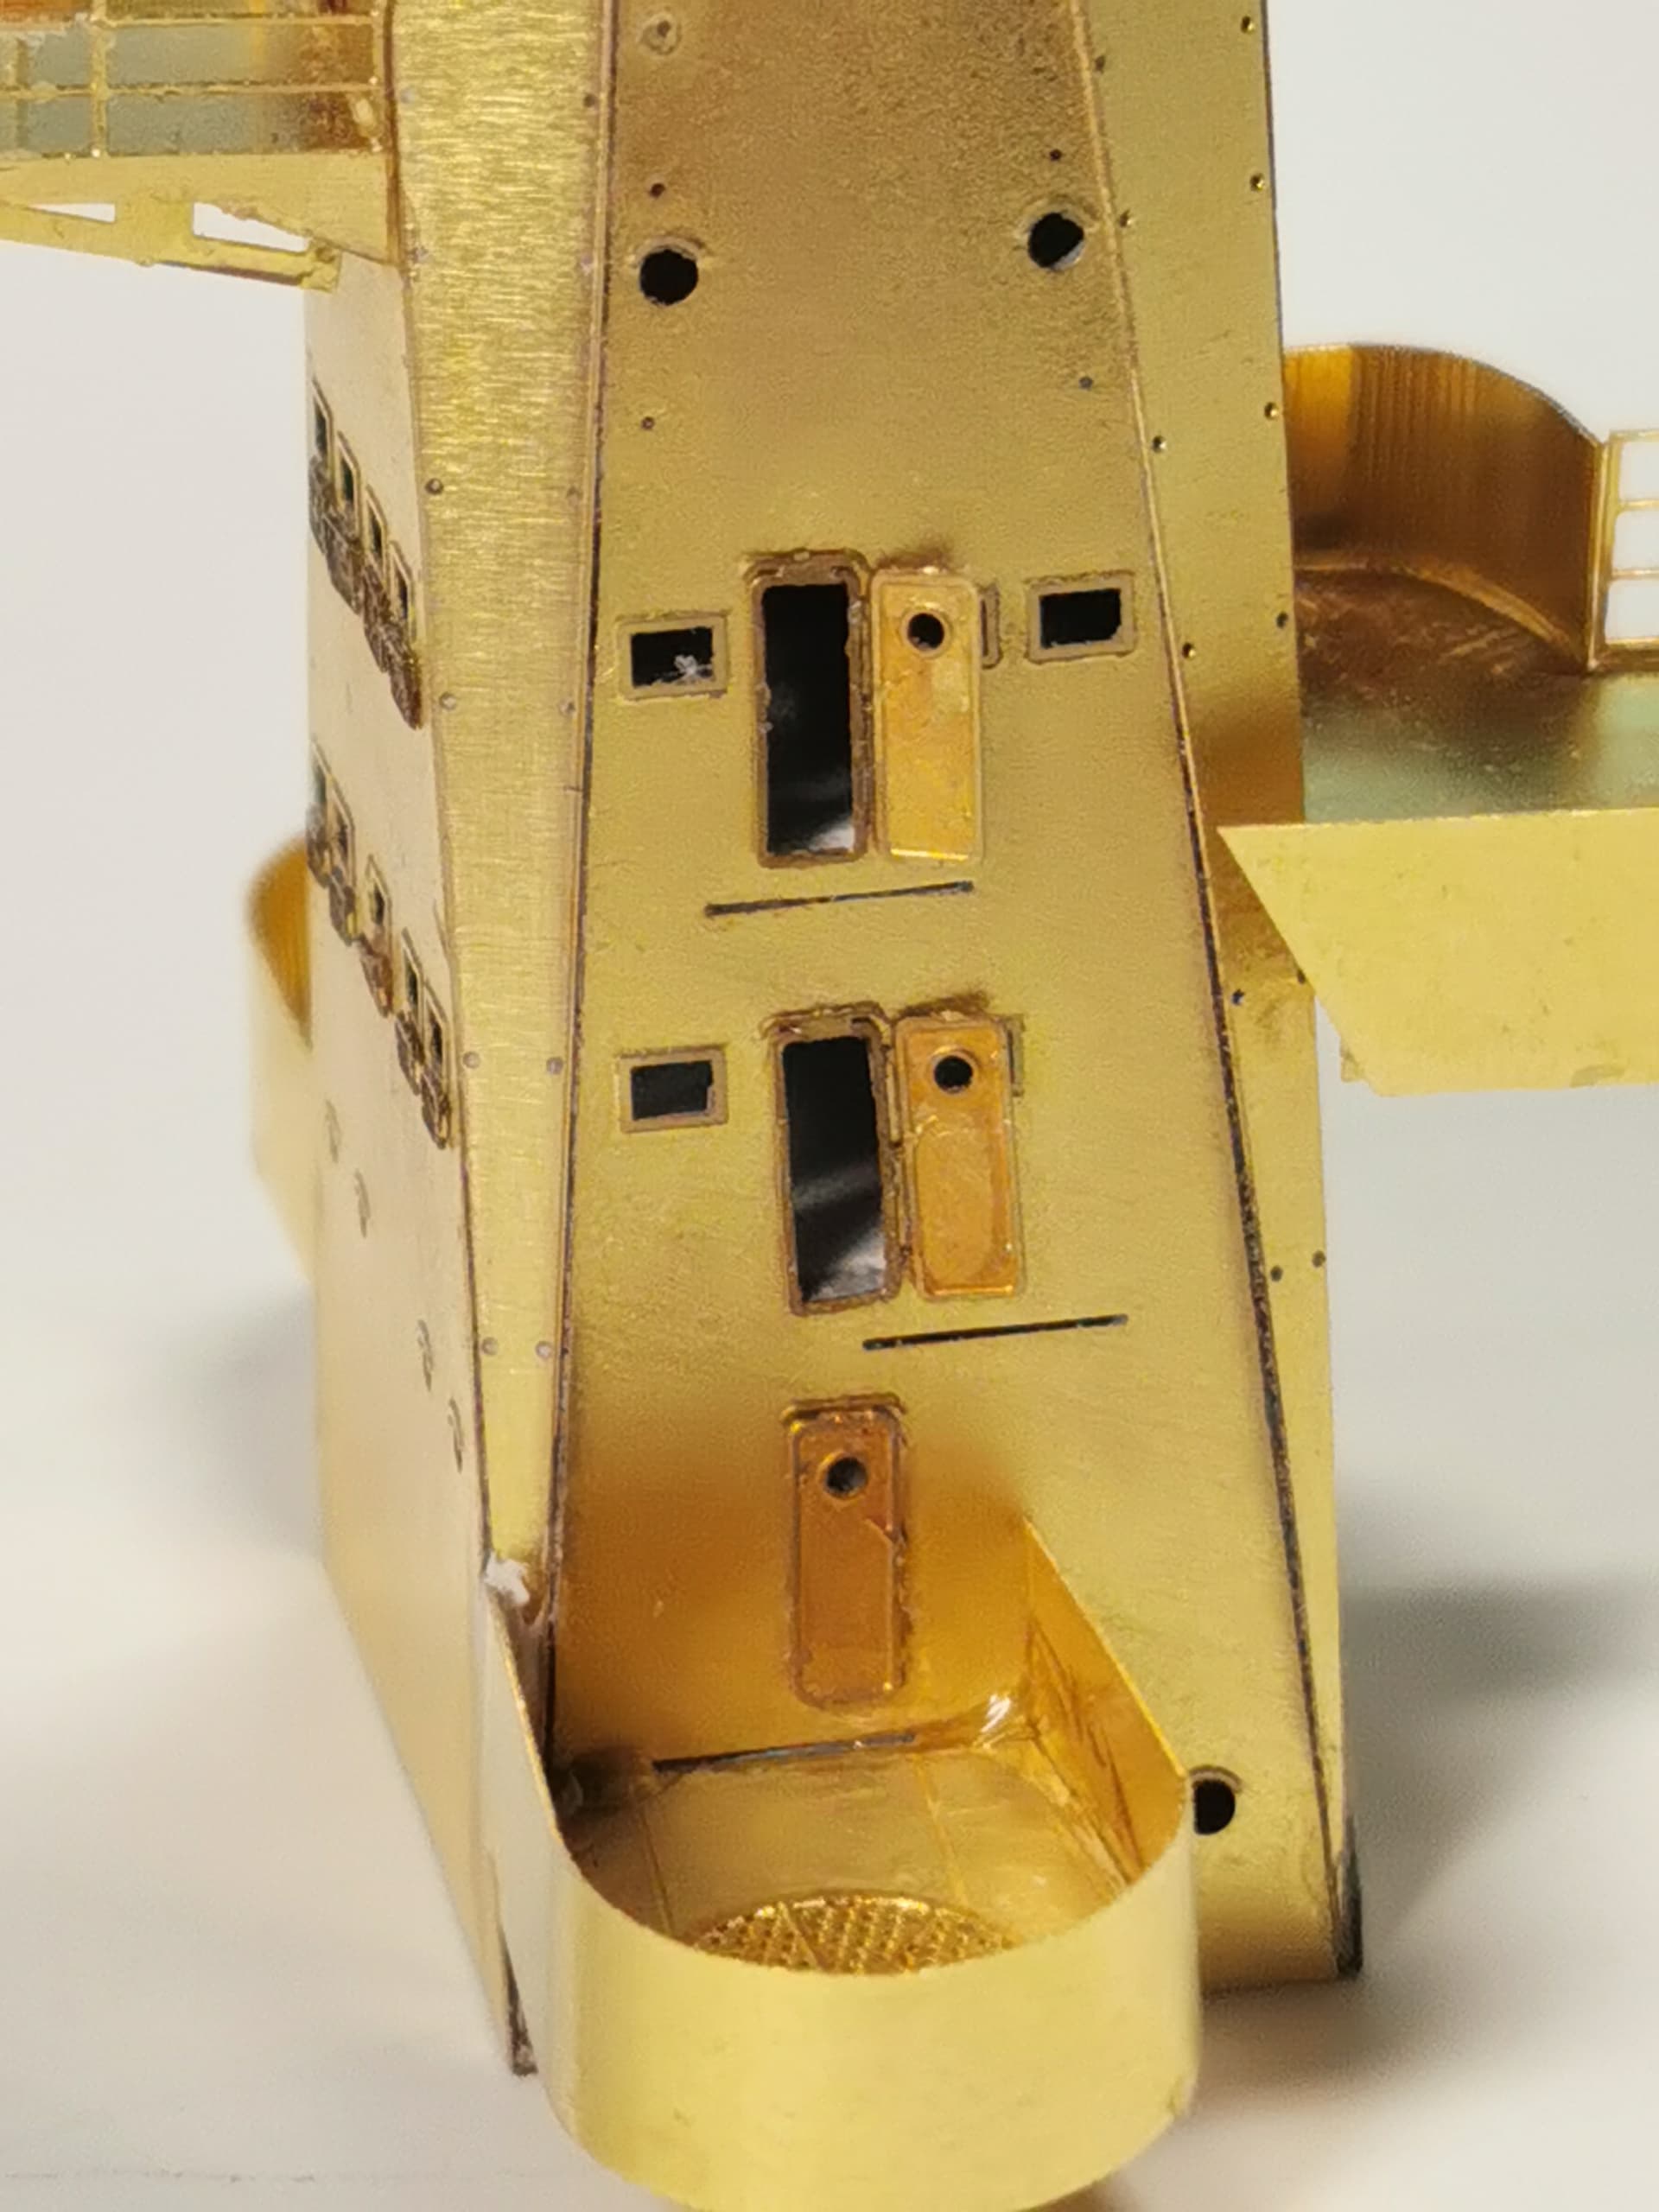
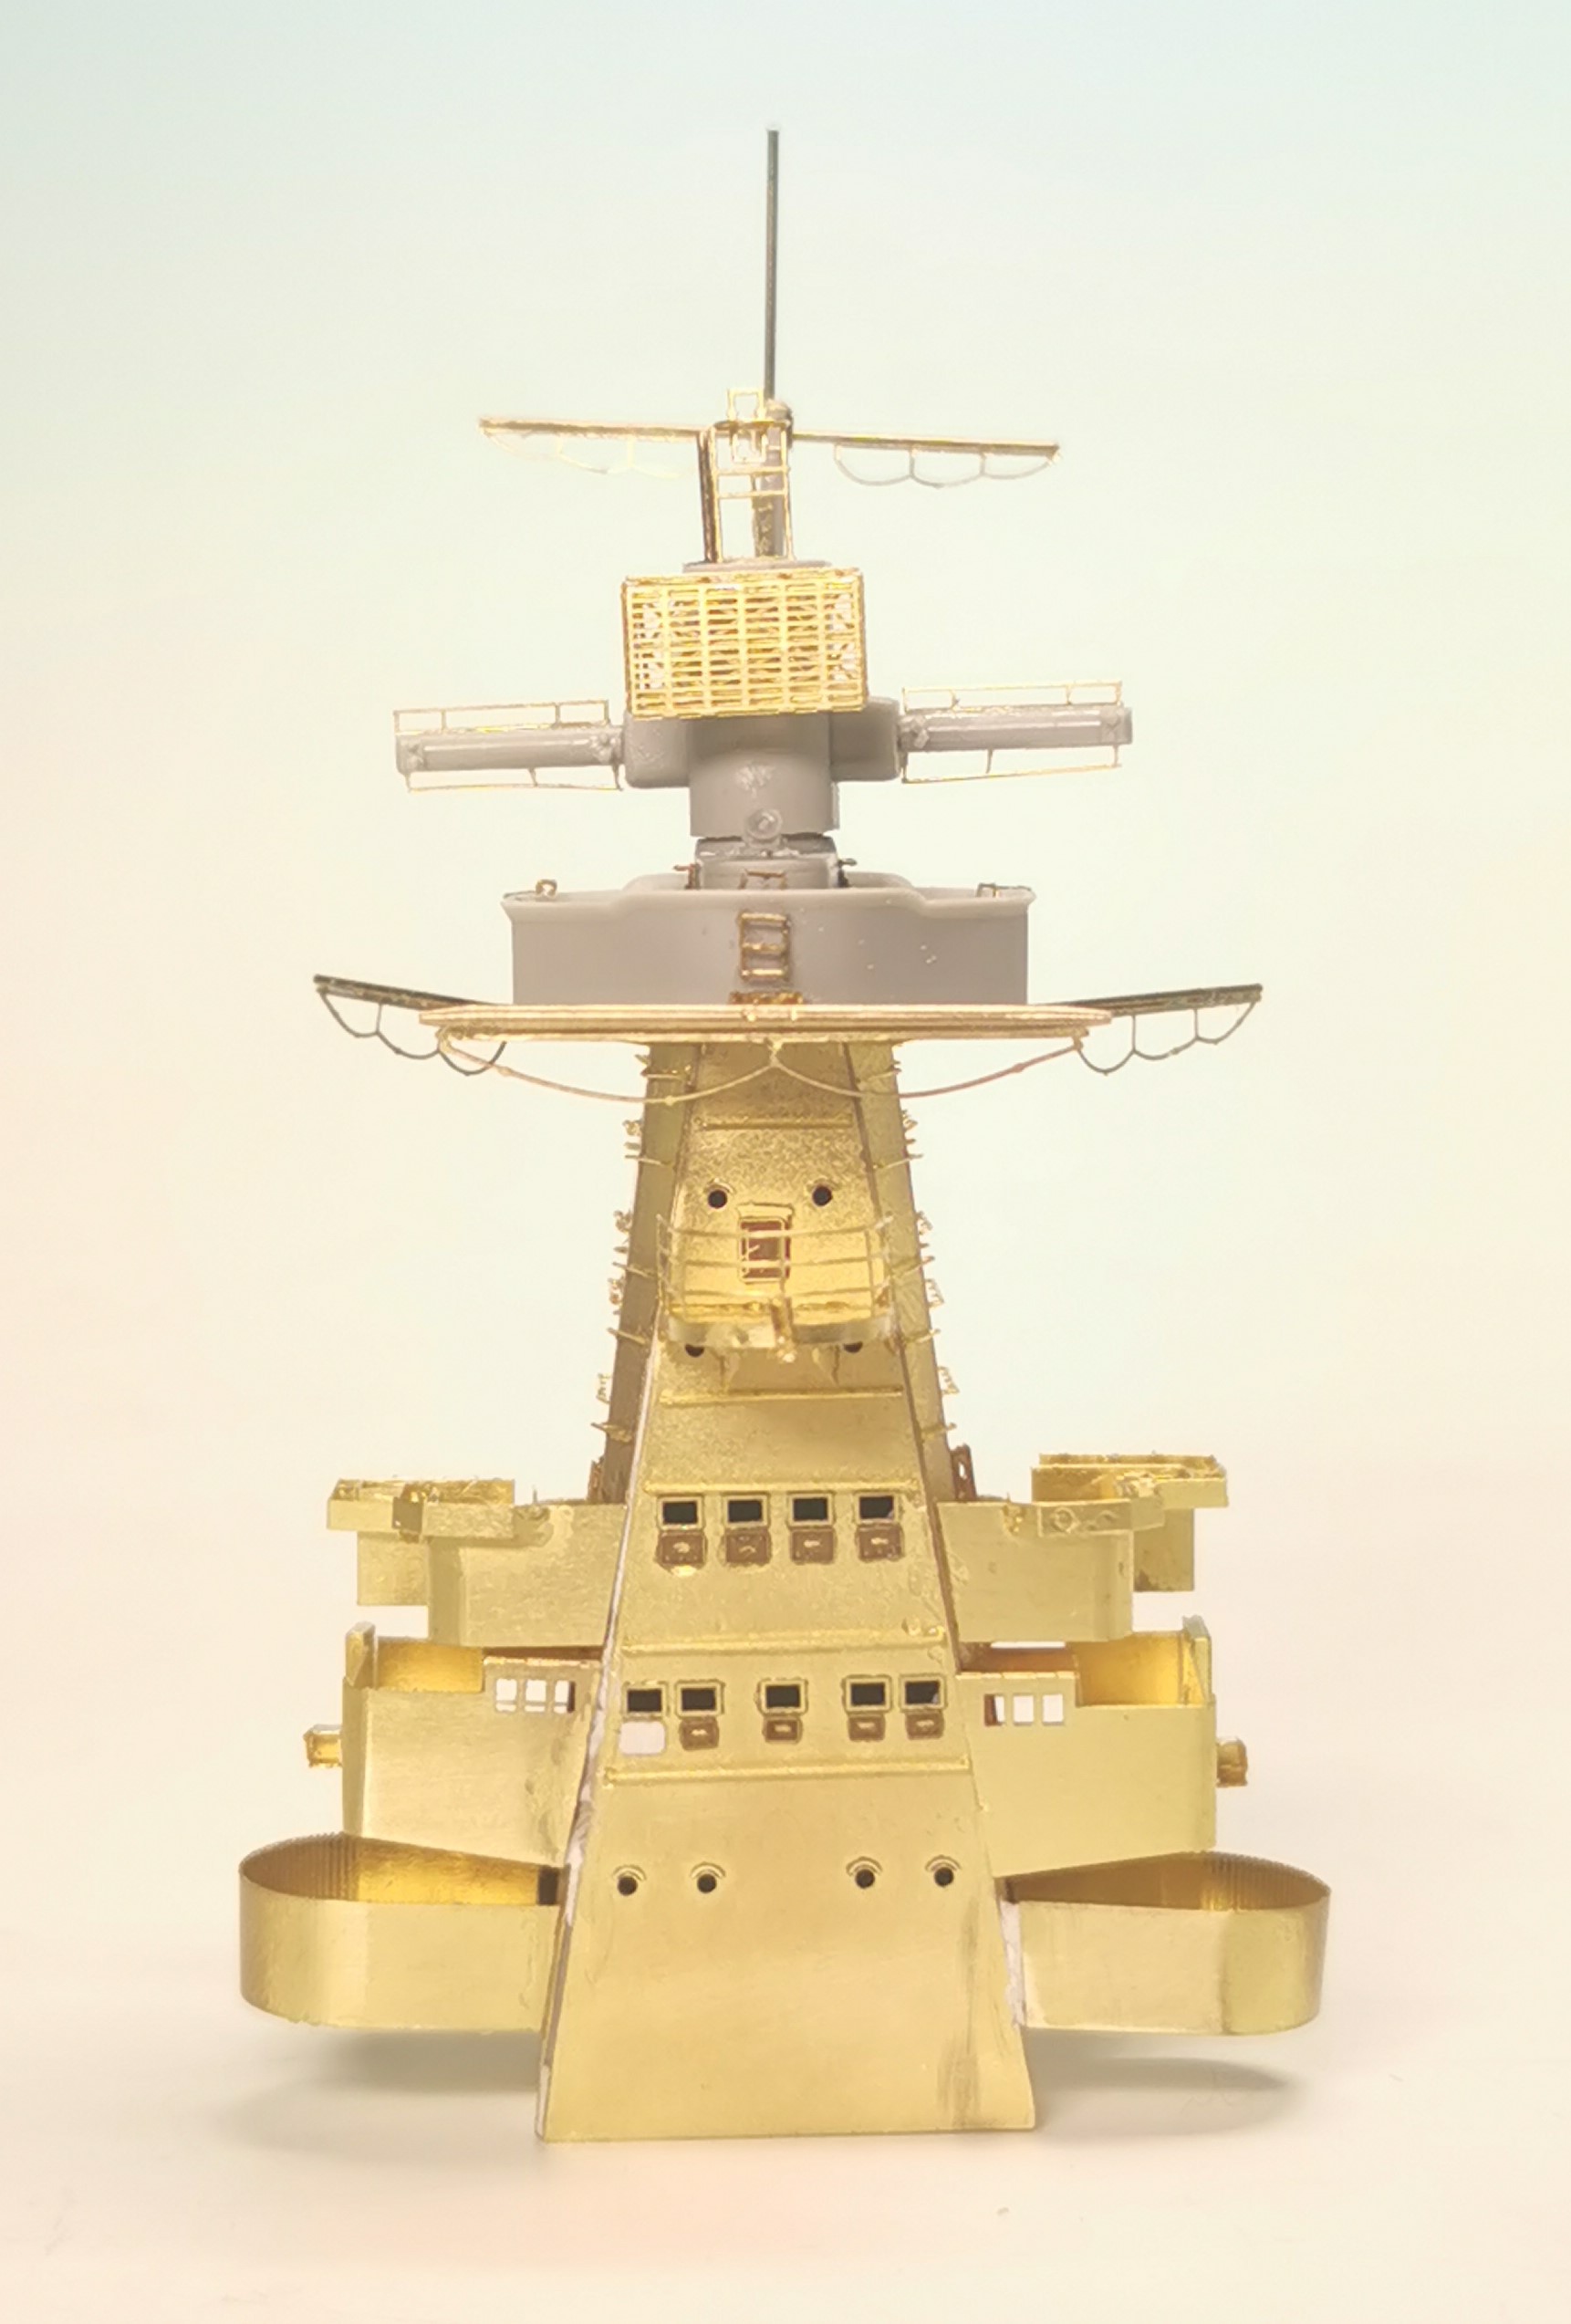
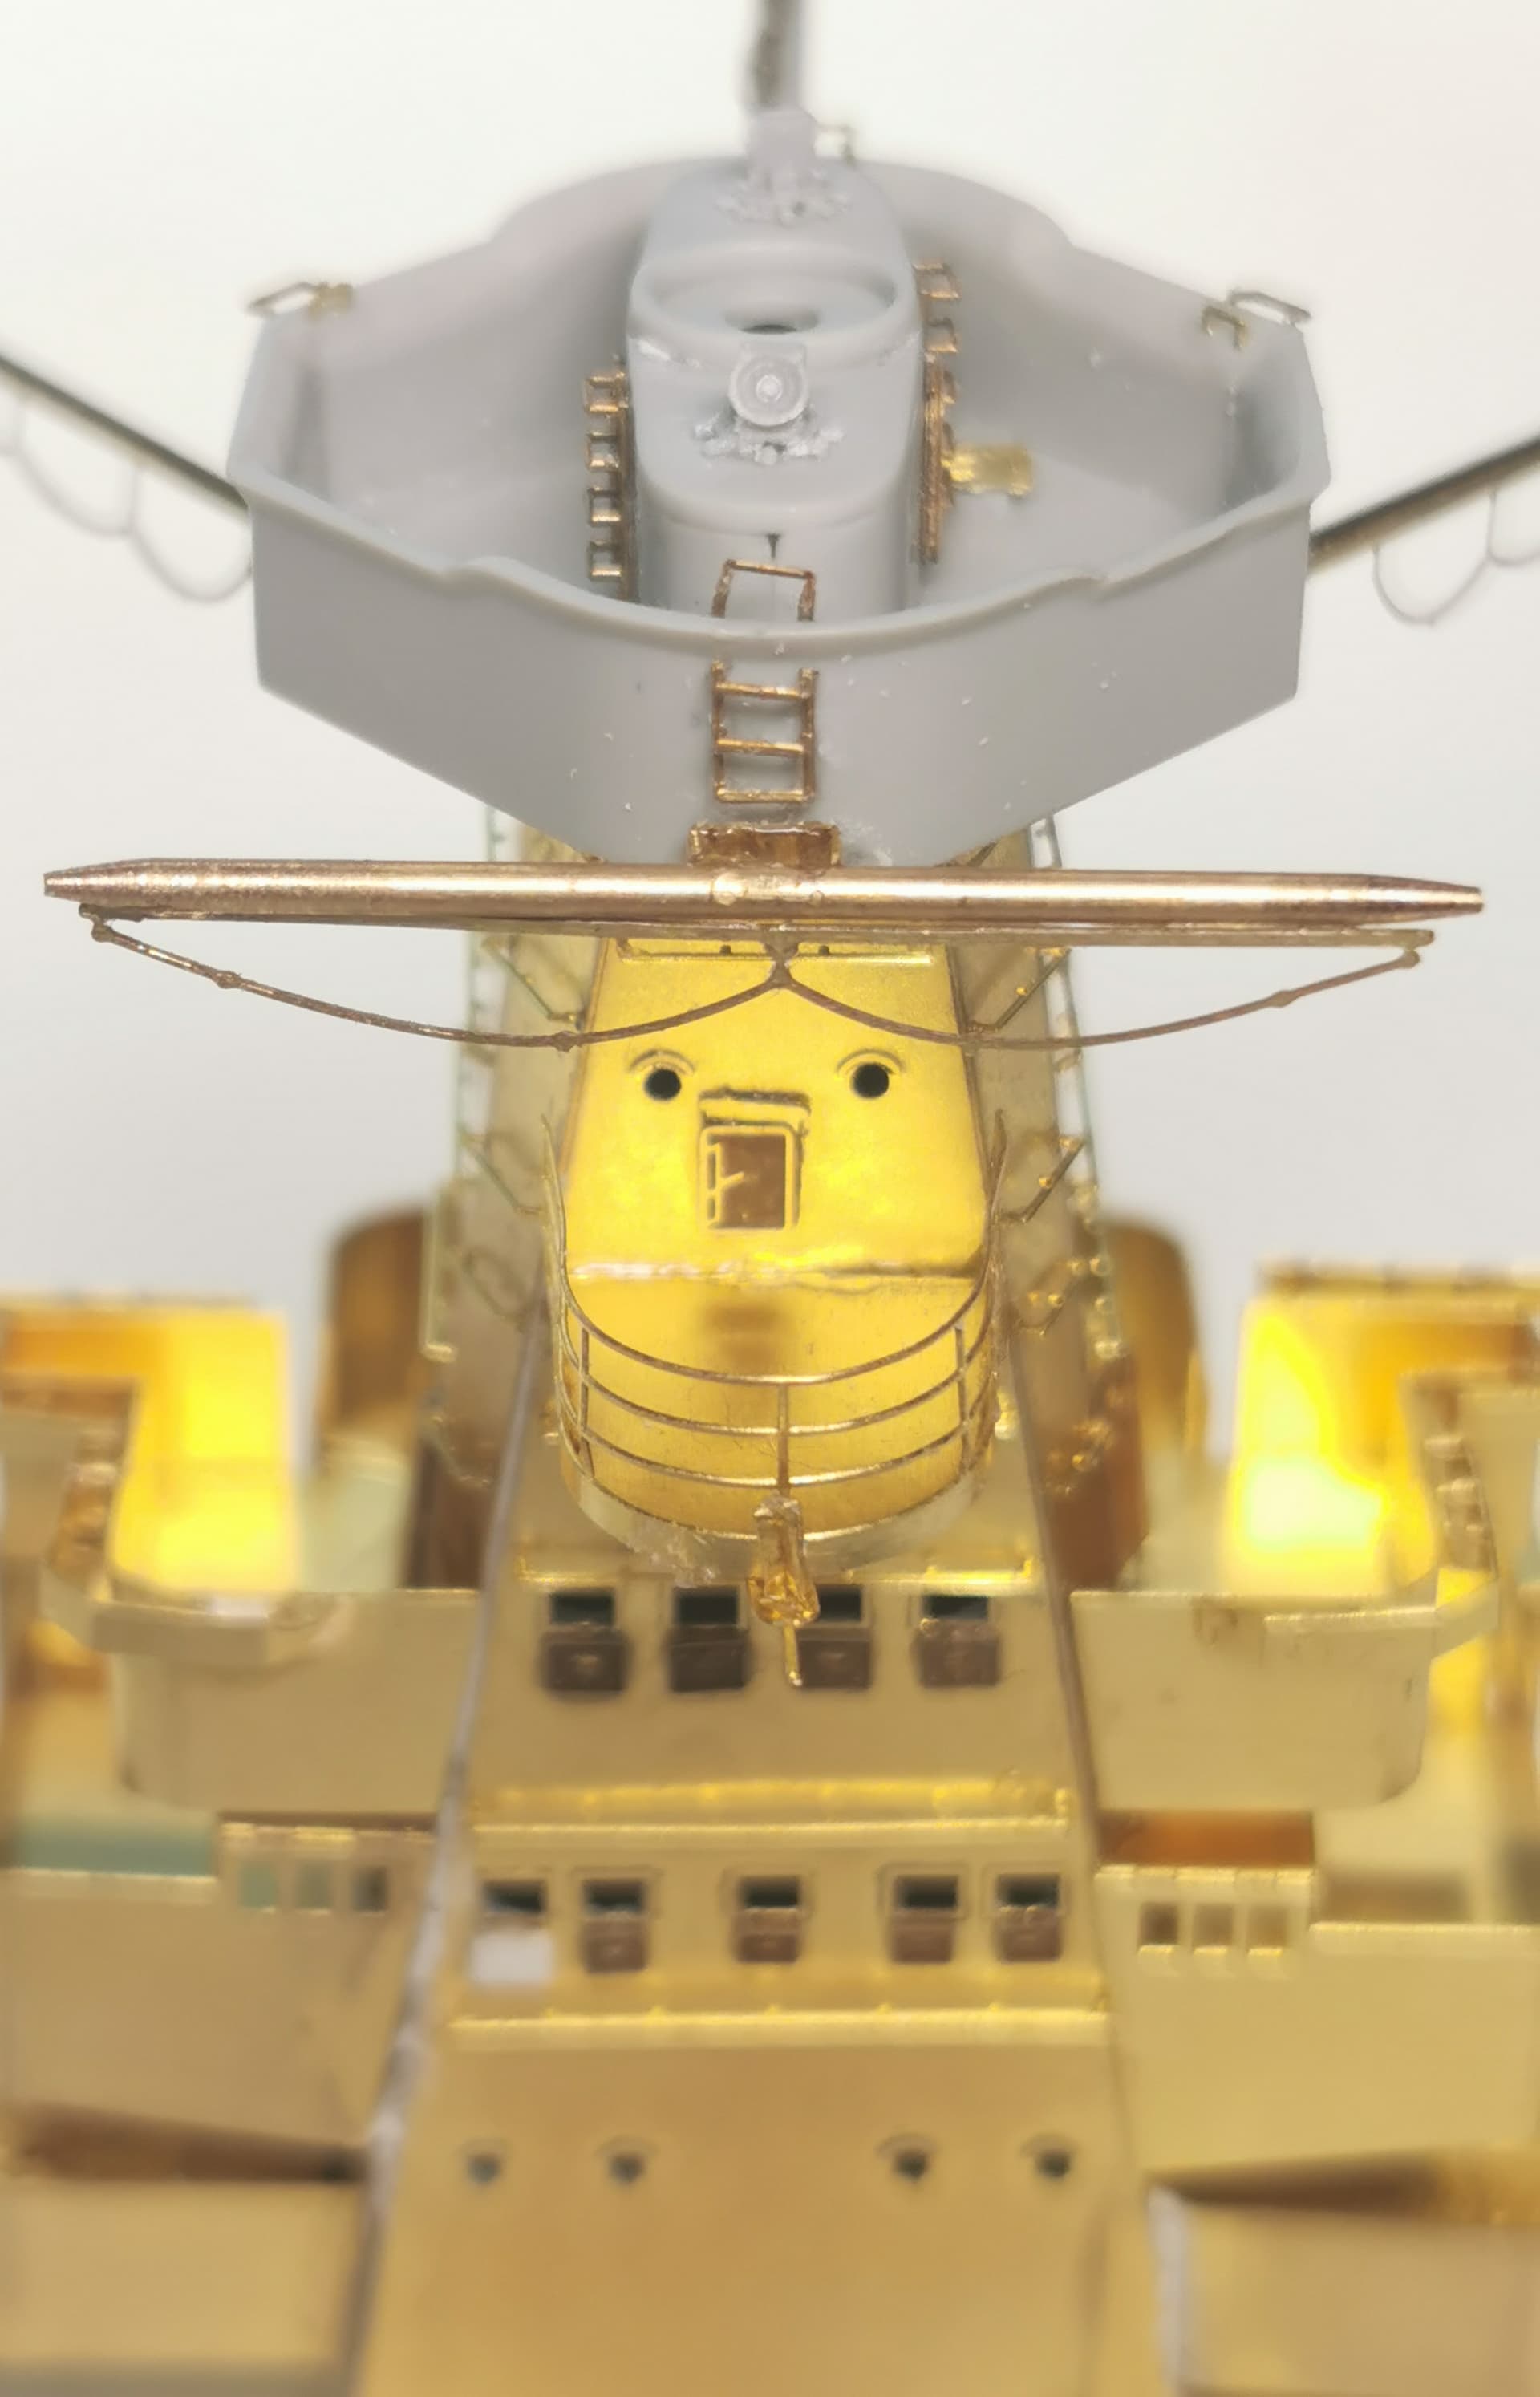
Urgh, its done! As expected this was the most demanding part of this build but I made it and was able to install every single etched parts necessary for complete this tower bridge. I don´t know how I did achived it; I really felt it was a model of its own but astonishingly I just lost one single footrail and an armored hatch at one frontal bridge window but these were easily replaced. But I am glad now I am finally finished with it. These are the pictures of the end result. The bended horizontal mast will be corrected later.
Curious how much footrails will remain after painting 
16 Likes
That is a great clean build up Thomas… All looks nicely mirrored on all sides … Well done
1 Like
Excellent result, really gleaming. It will be a challenge to paint the tubs under the overhangs, though!
1 Like
Thanks Tim, yes you´re right. I try to prime all with the airbrush first. The areas which are not accessible will be painted with the brush. The camouflage will be applied also by airbrush first and after this painting the hard edges by brush. This worked nicely at the funnel section. The camouflage at the turret bridge will be a bit more difficult, though.
1 Like
Wow! Thats some great work.
1 Like
Thomas,
splendid work, you’re a PE-artist! I can imagine how much work you put into this, but it’s worth it!
And I keep my fingers crossed for you that painting will work, I share Tim’s concerns, but on the other hand, I’m confident you’ll manage it!
Cheers
Jan
1 Like
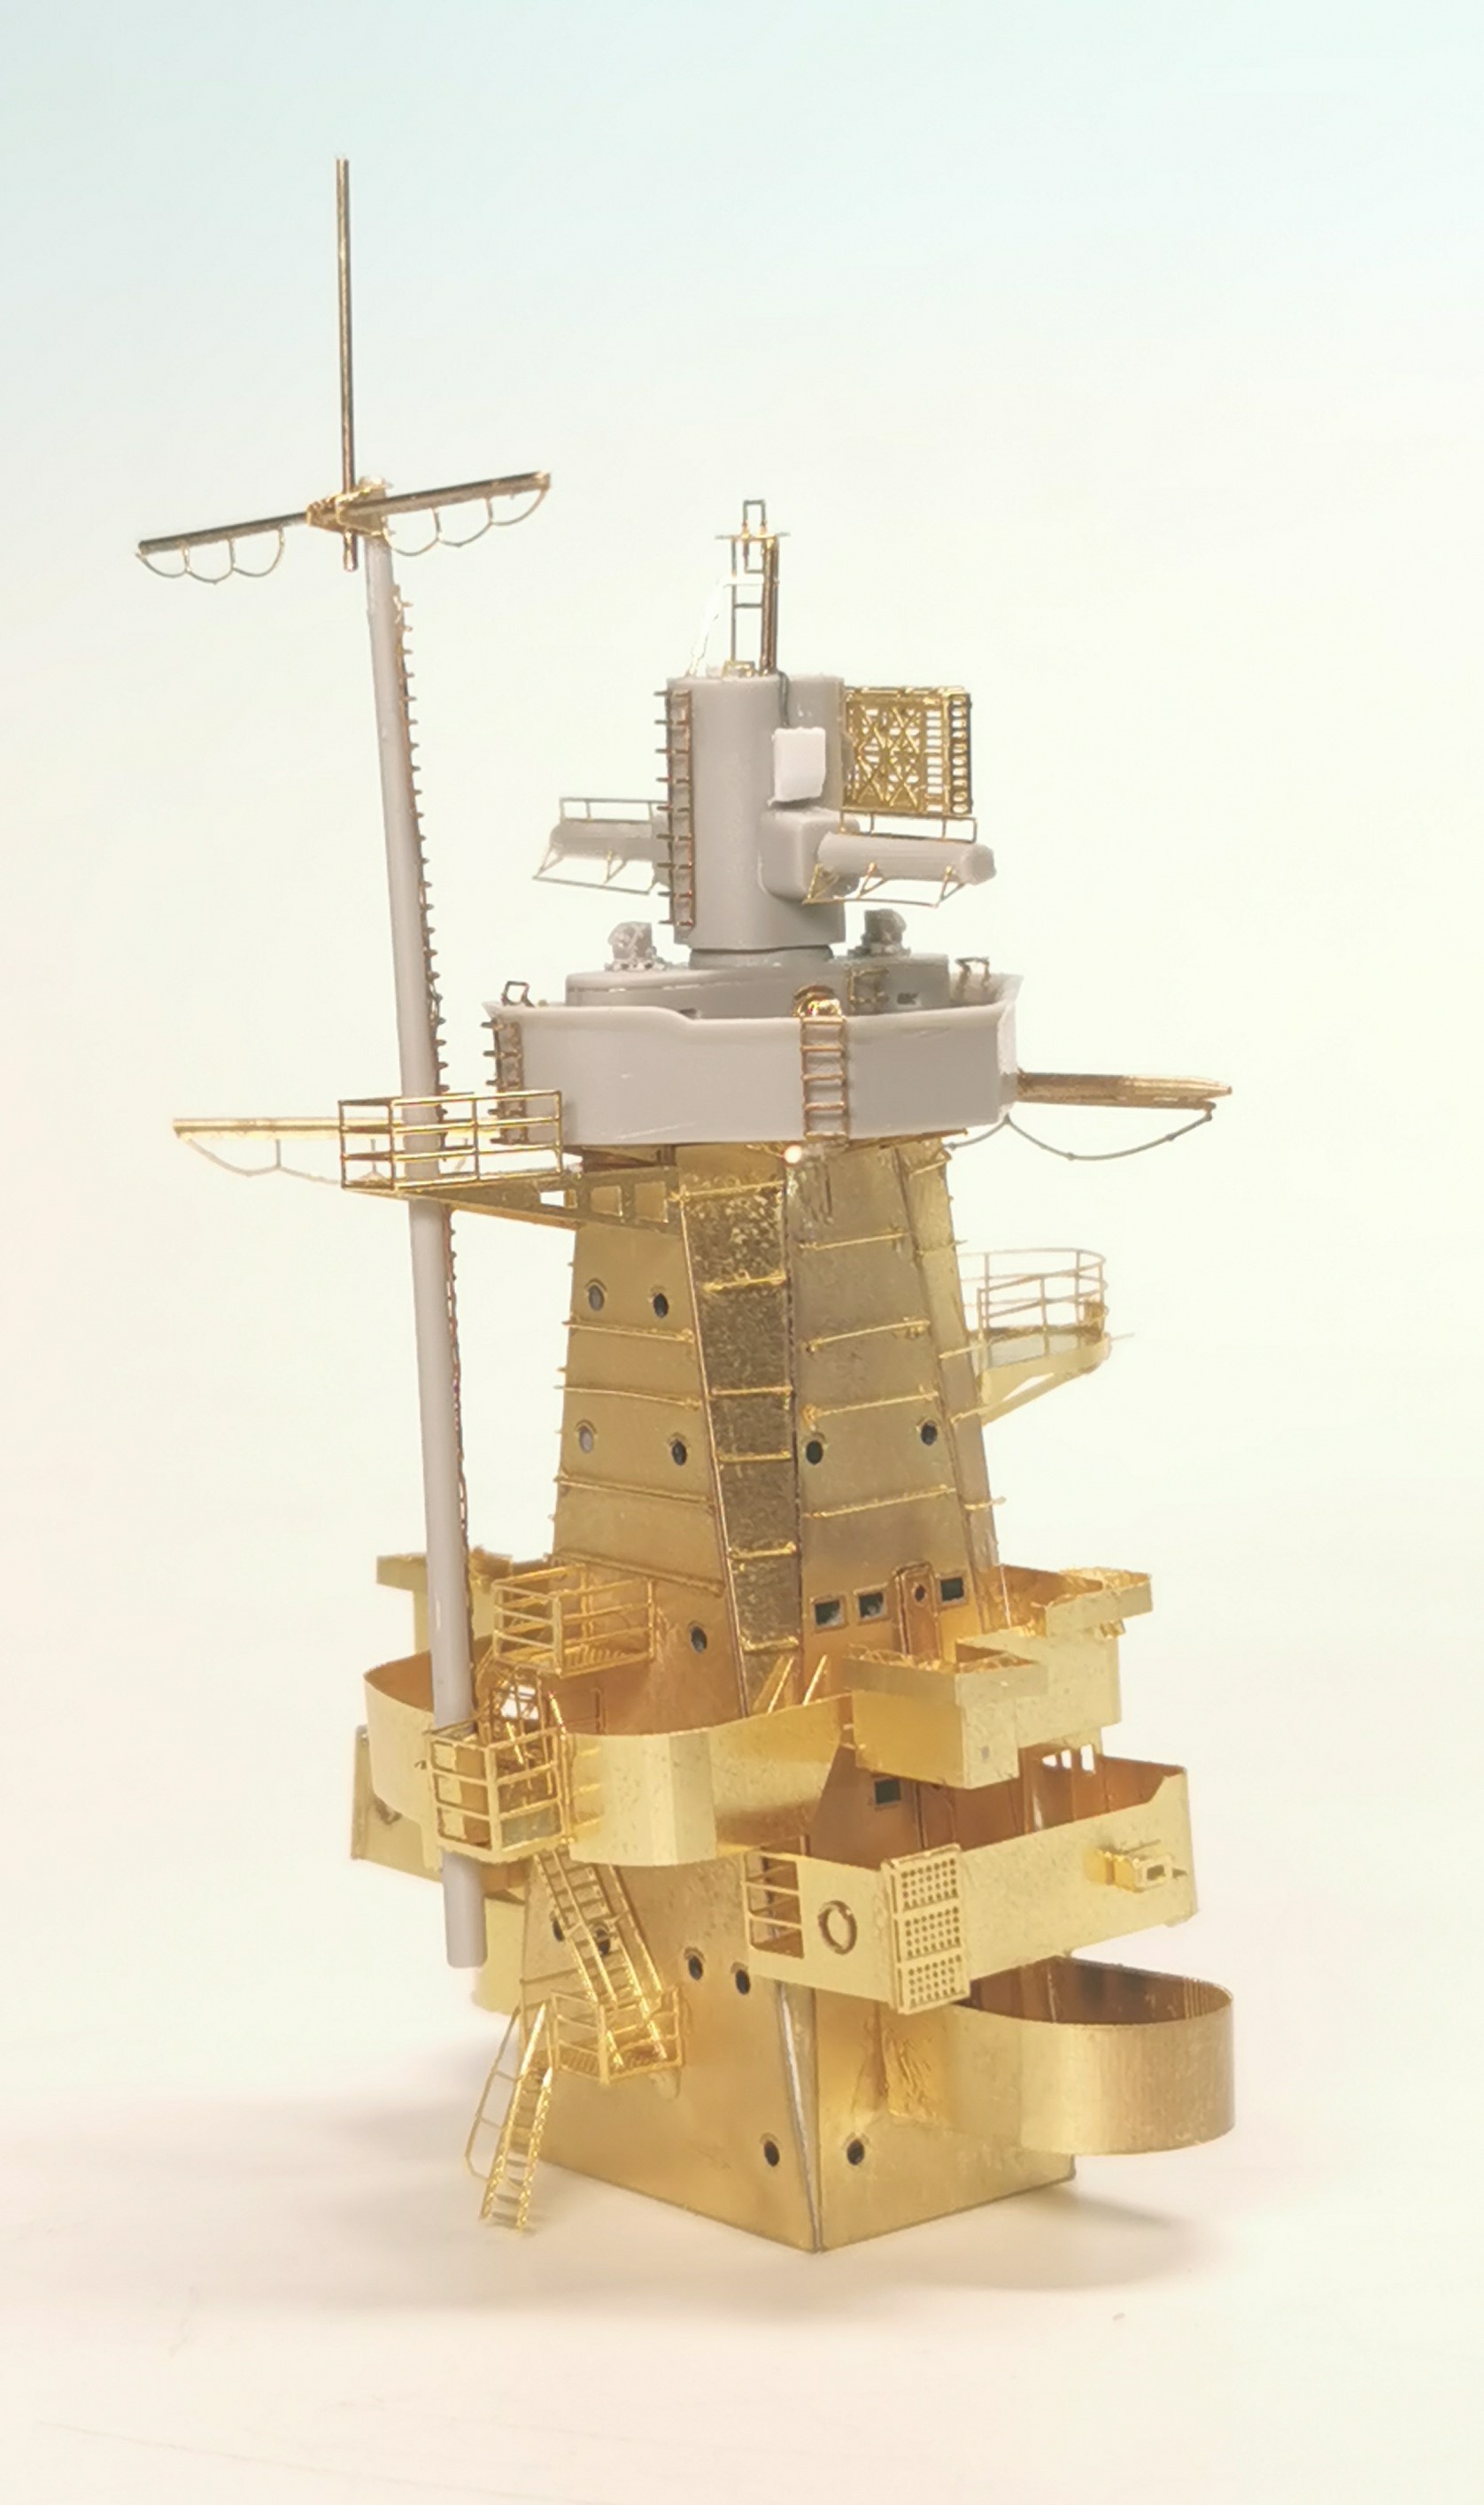
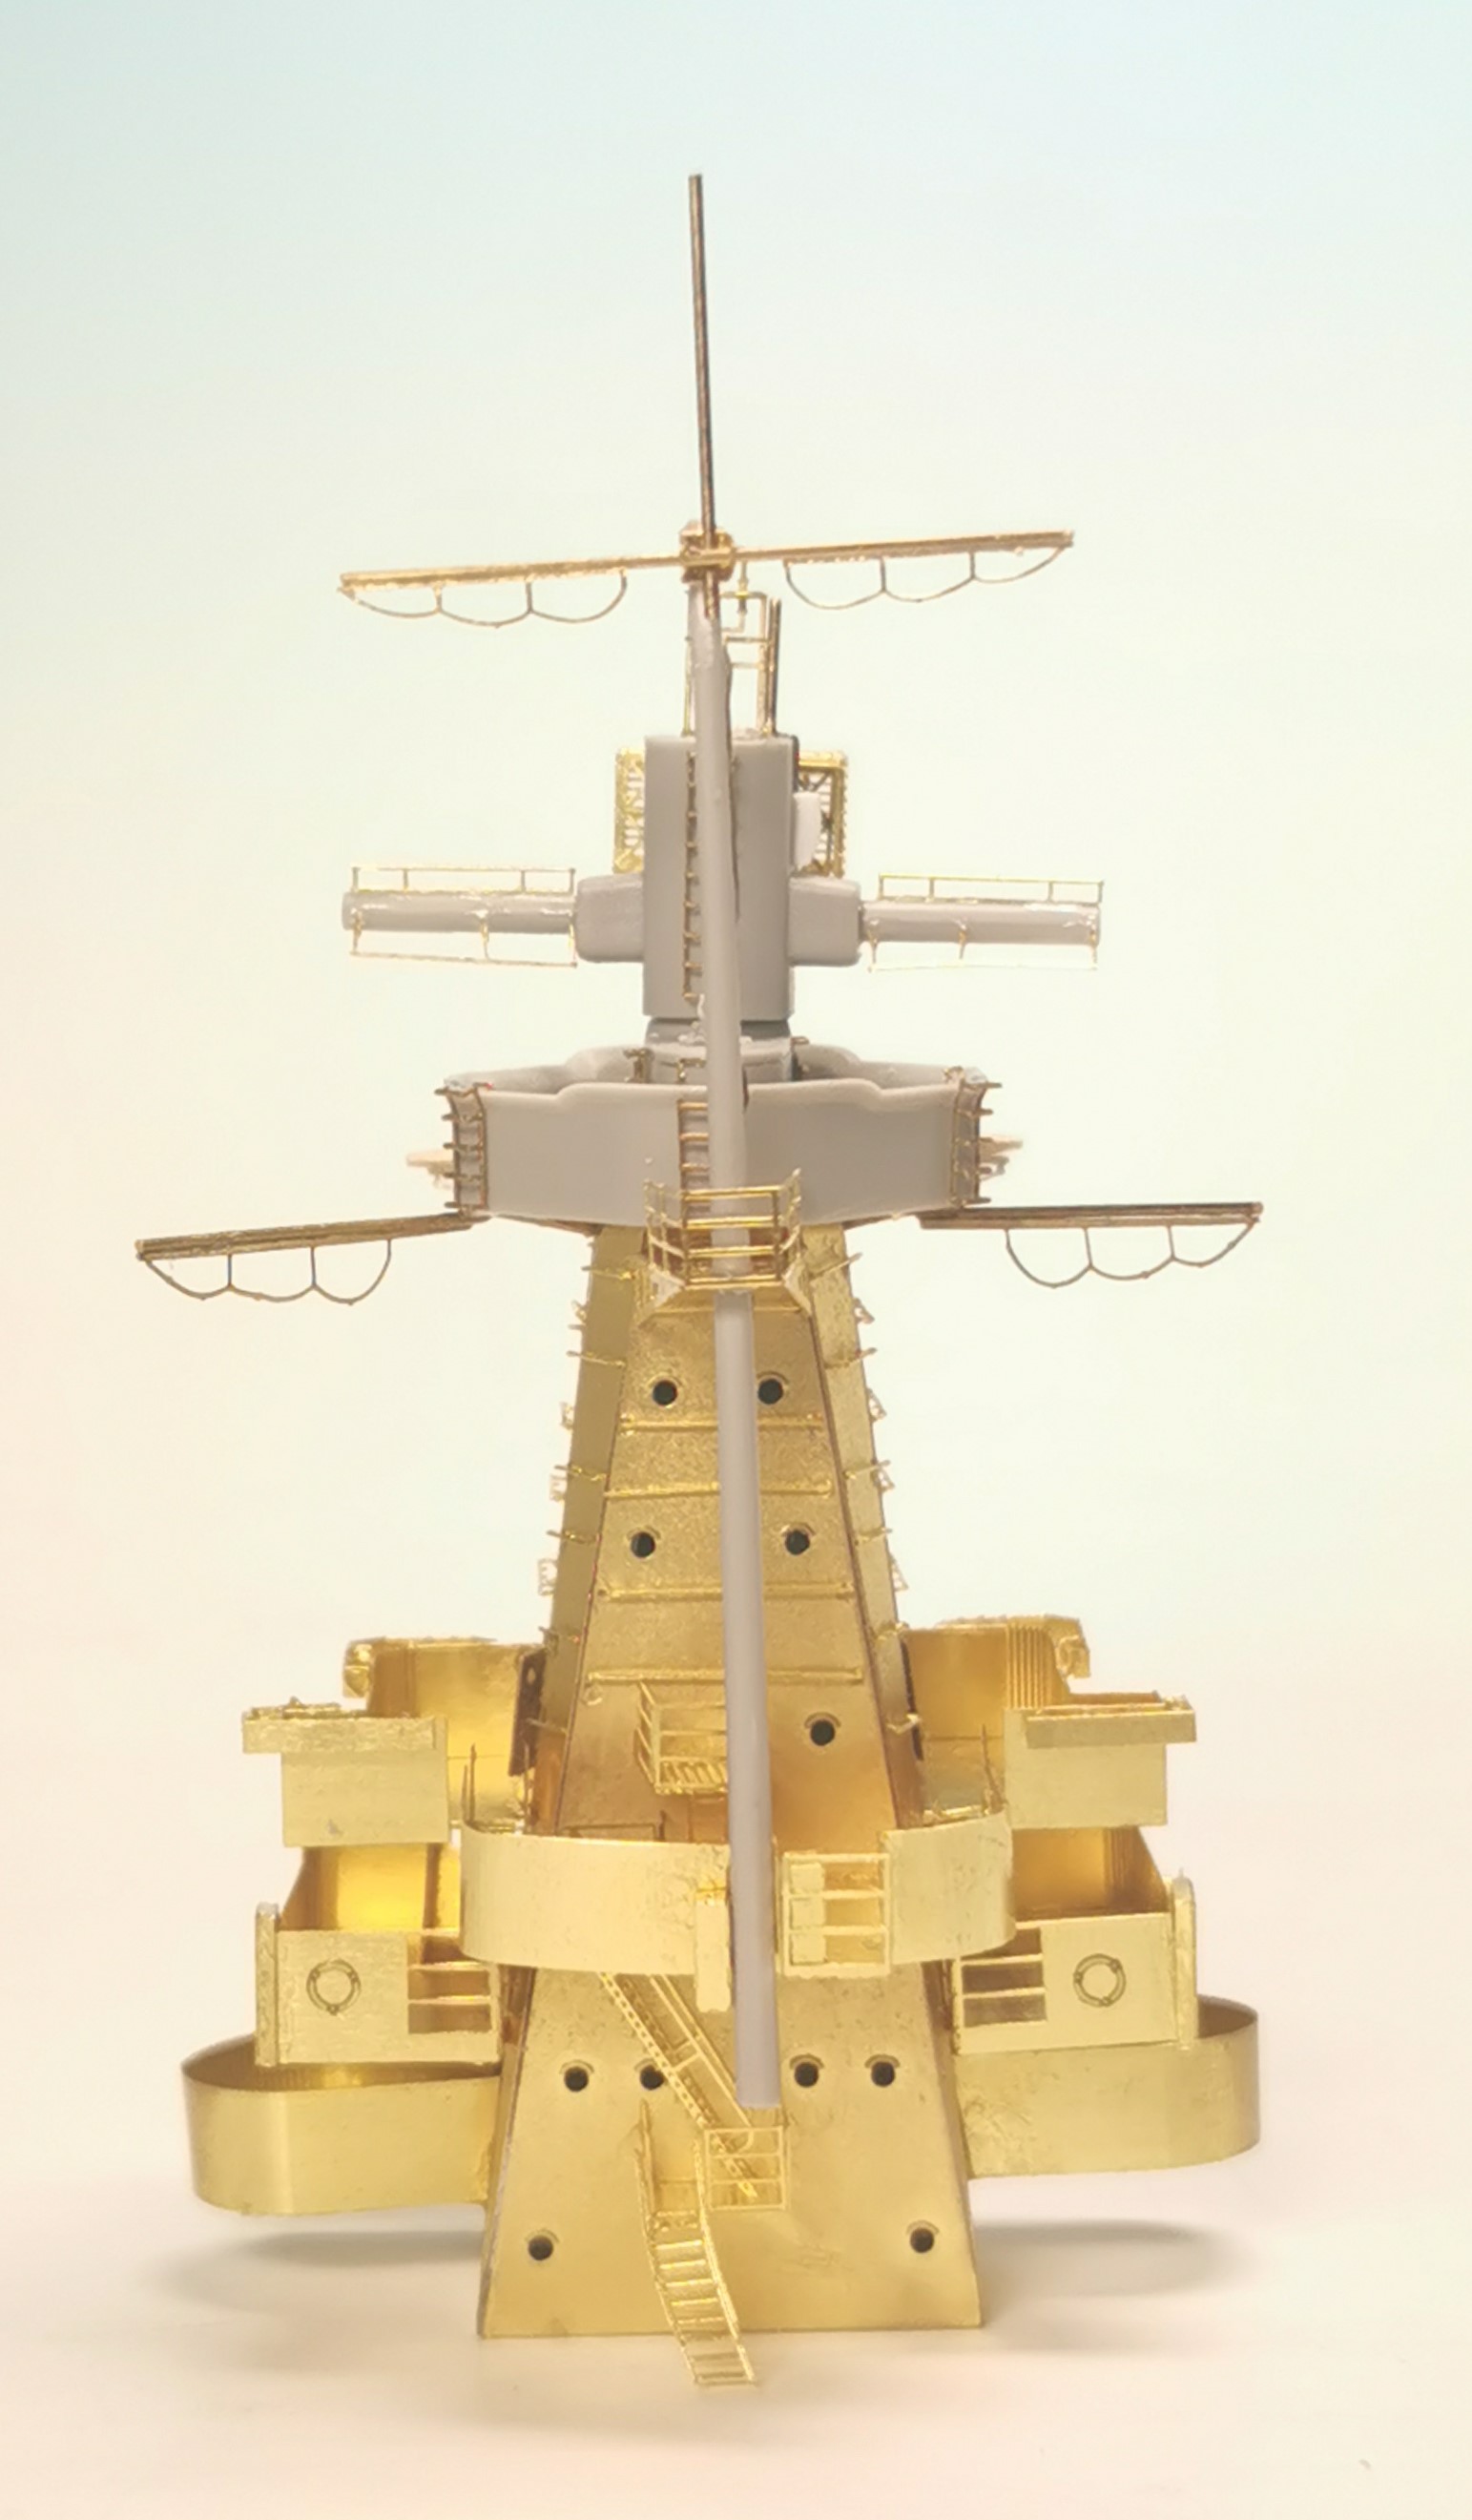
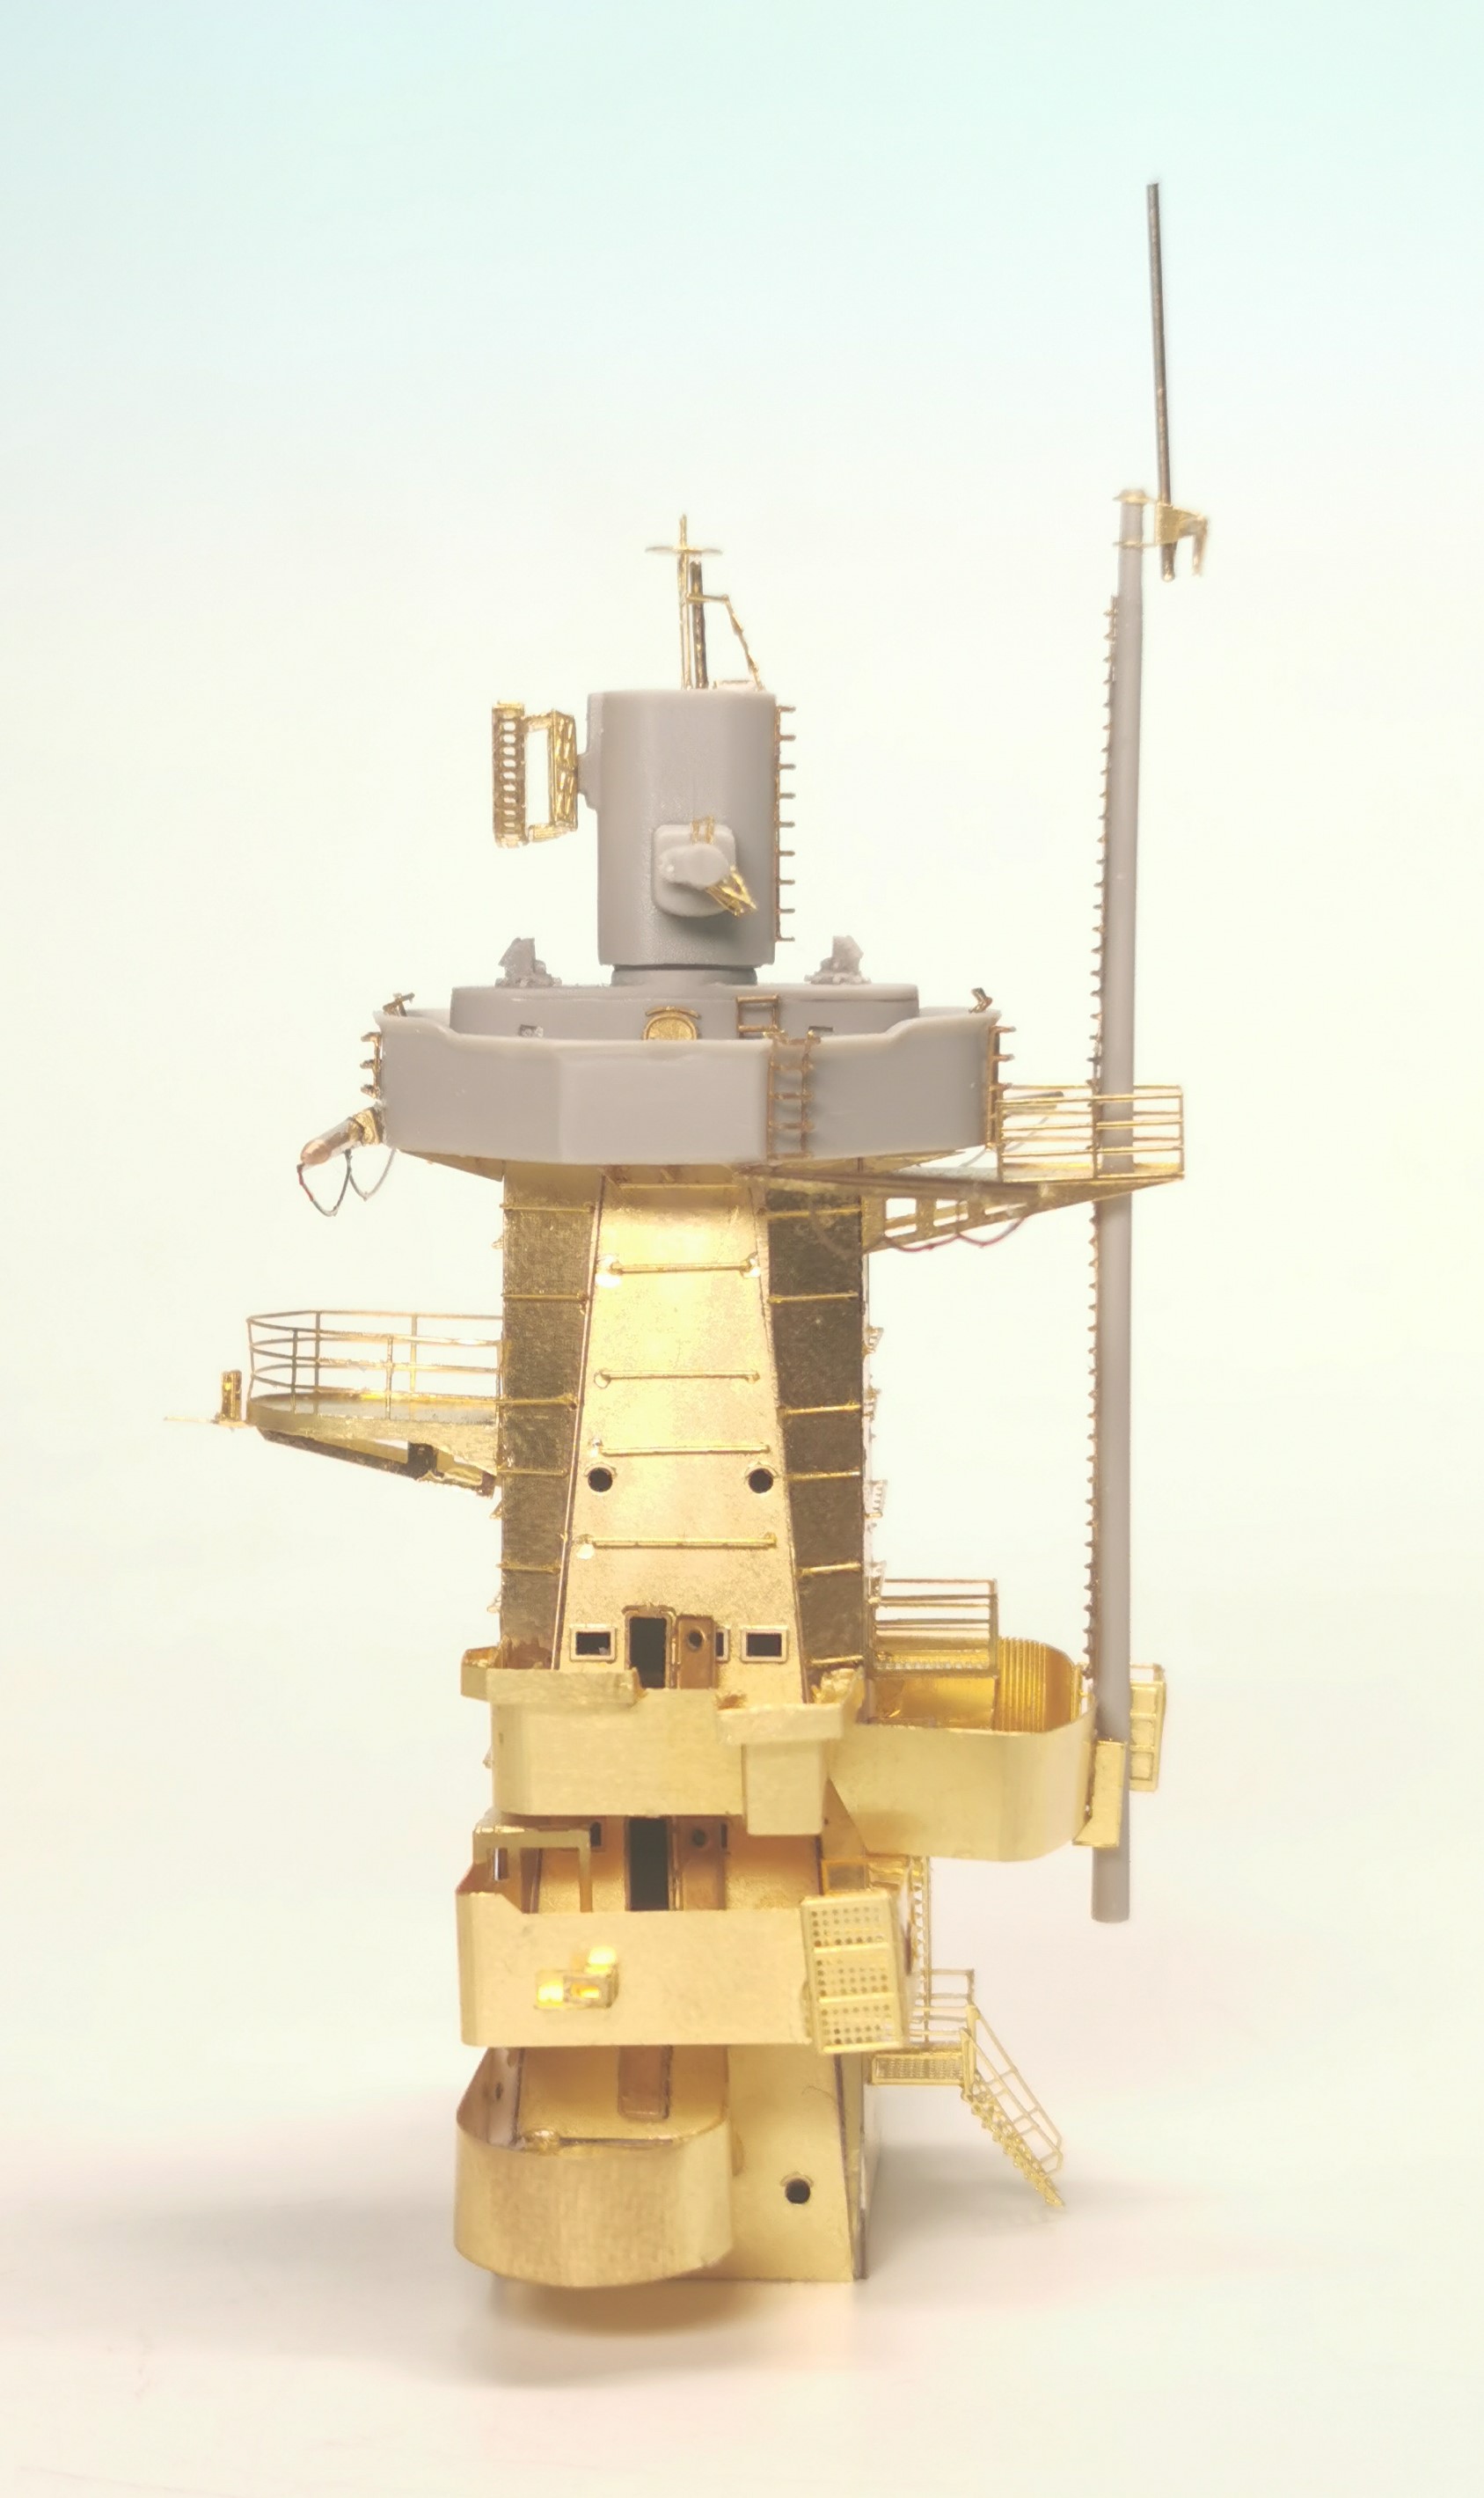
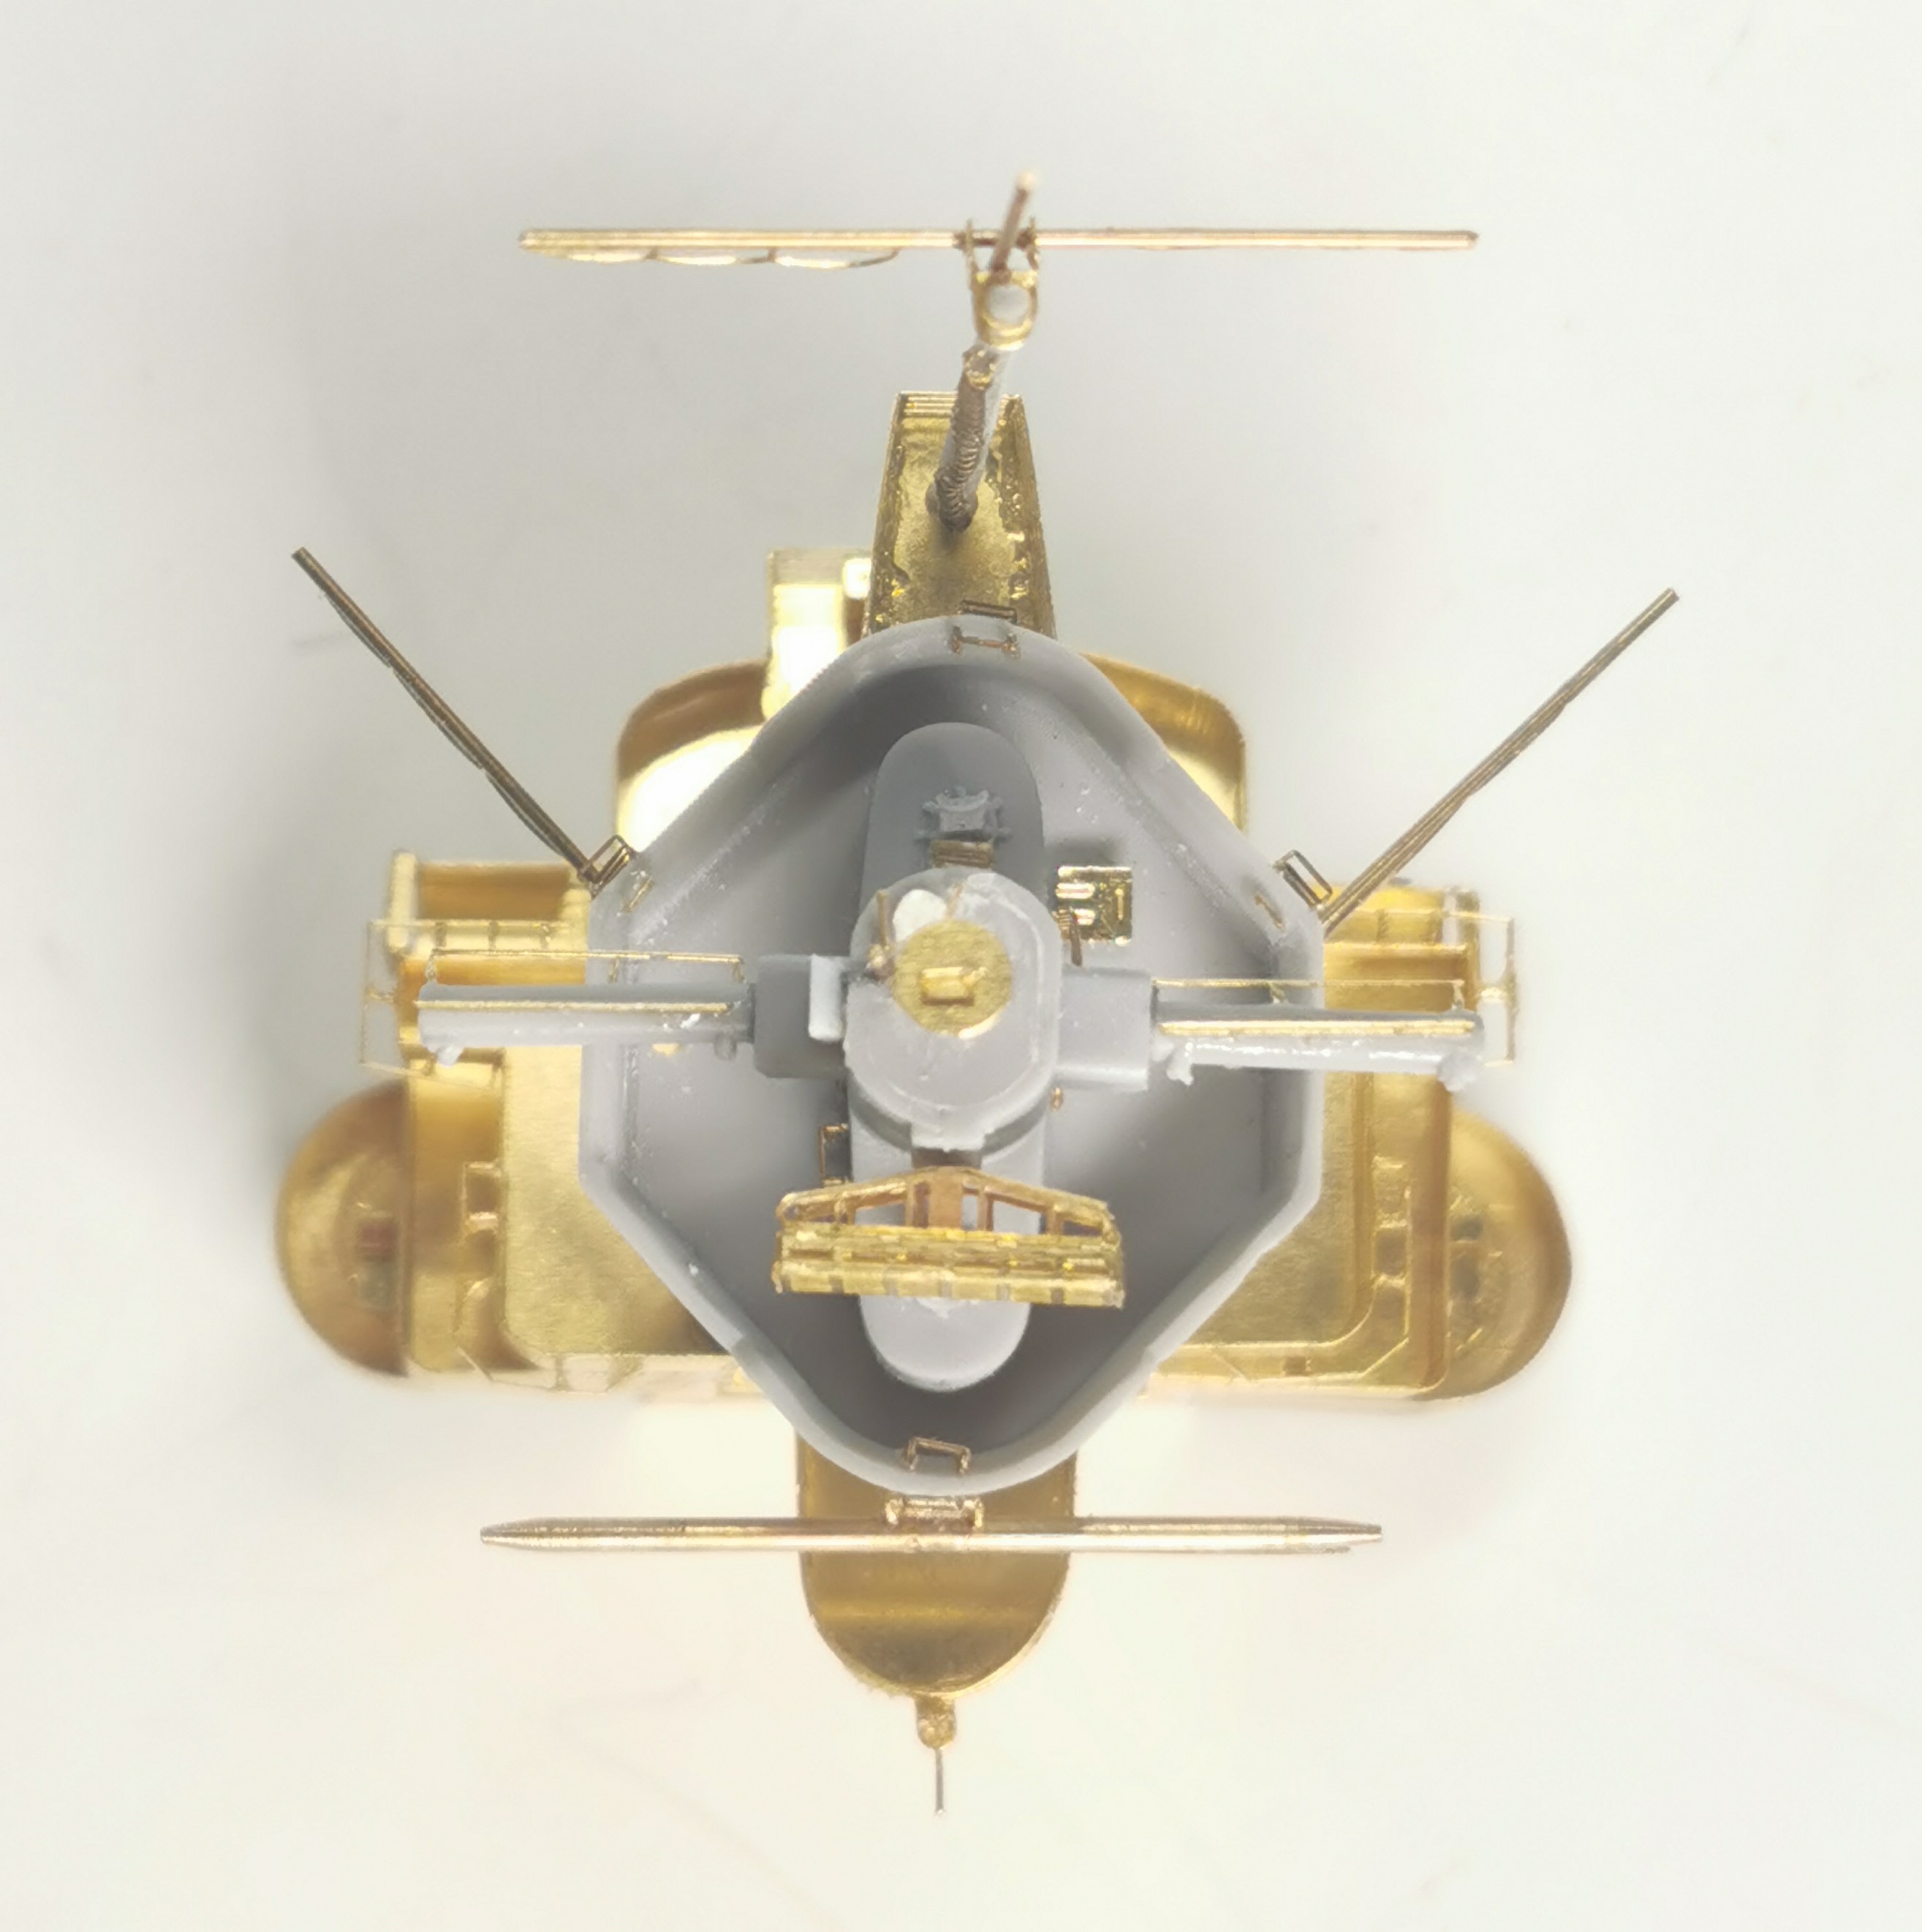
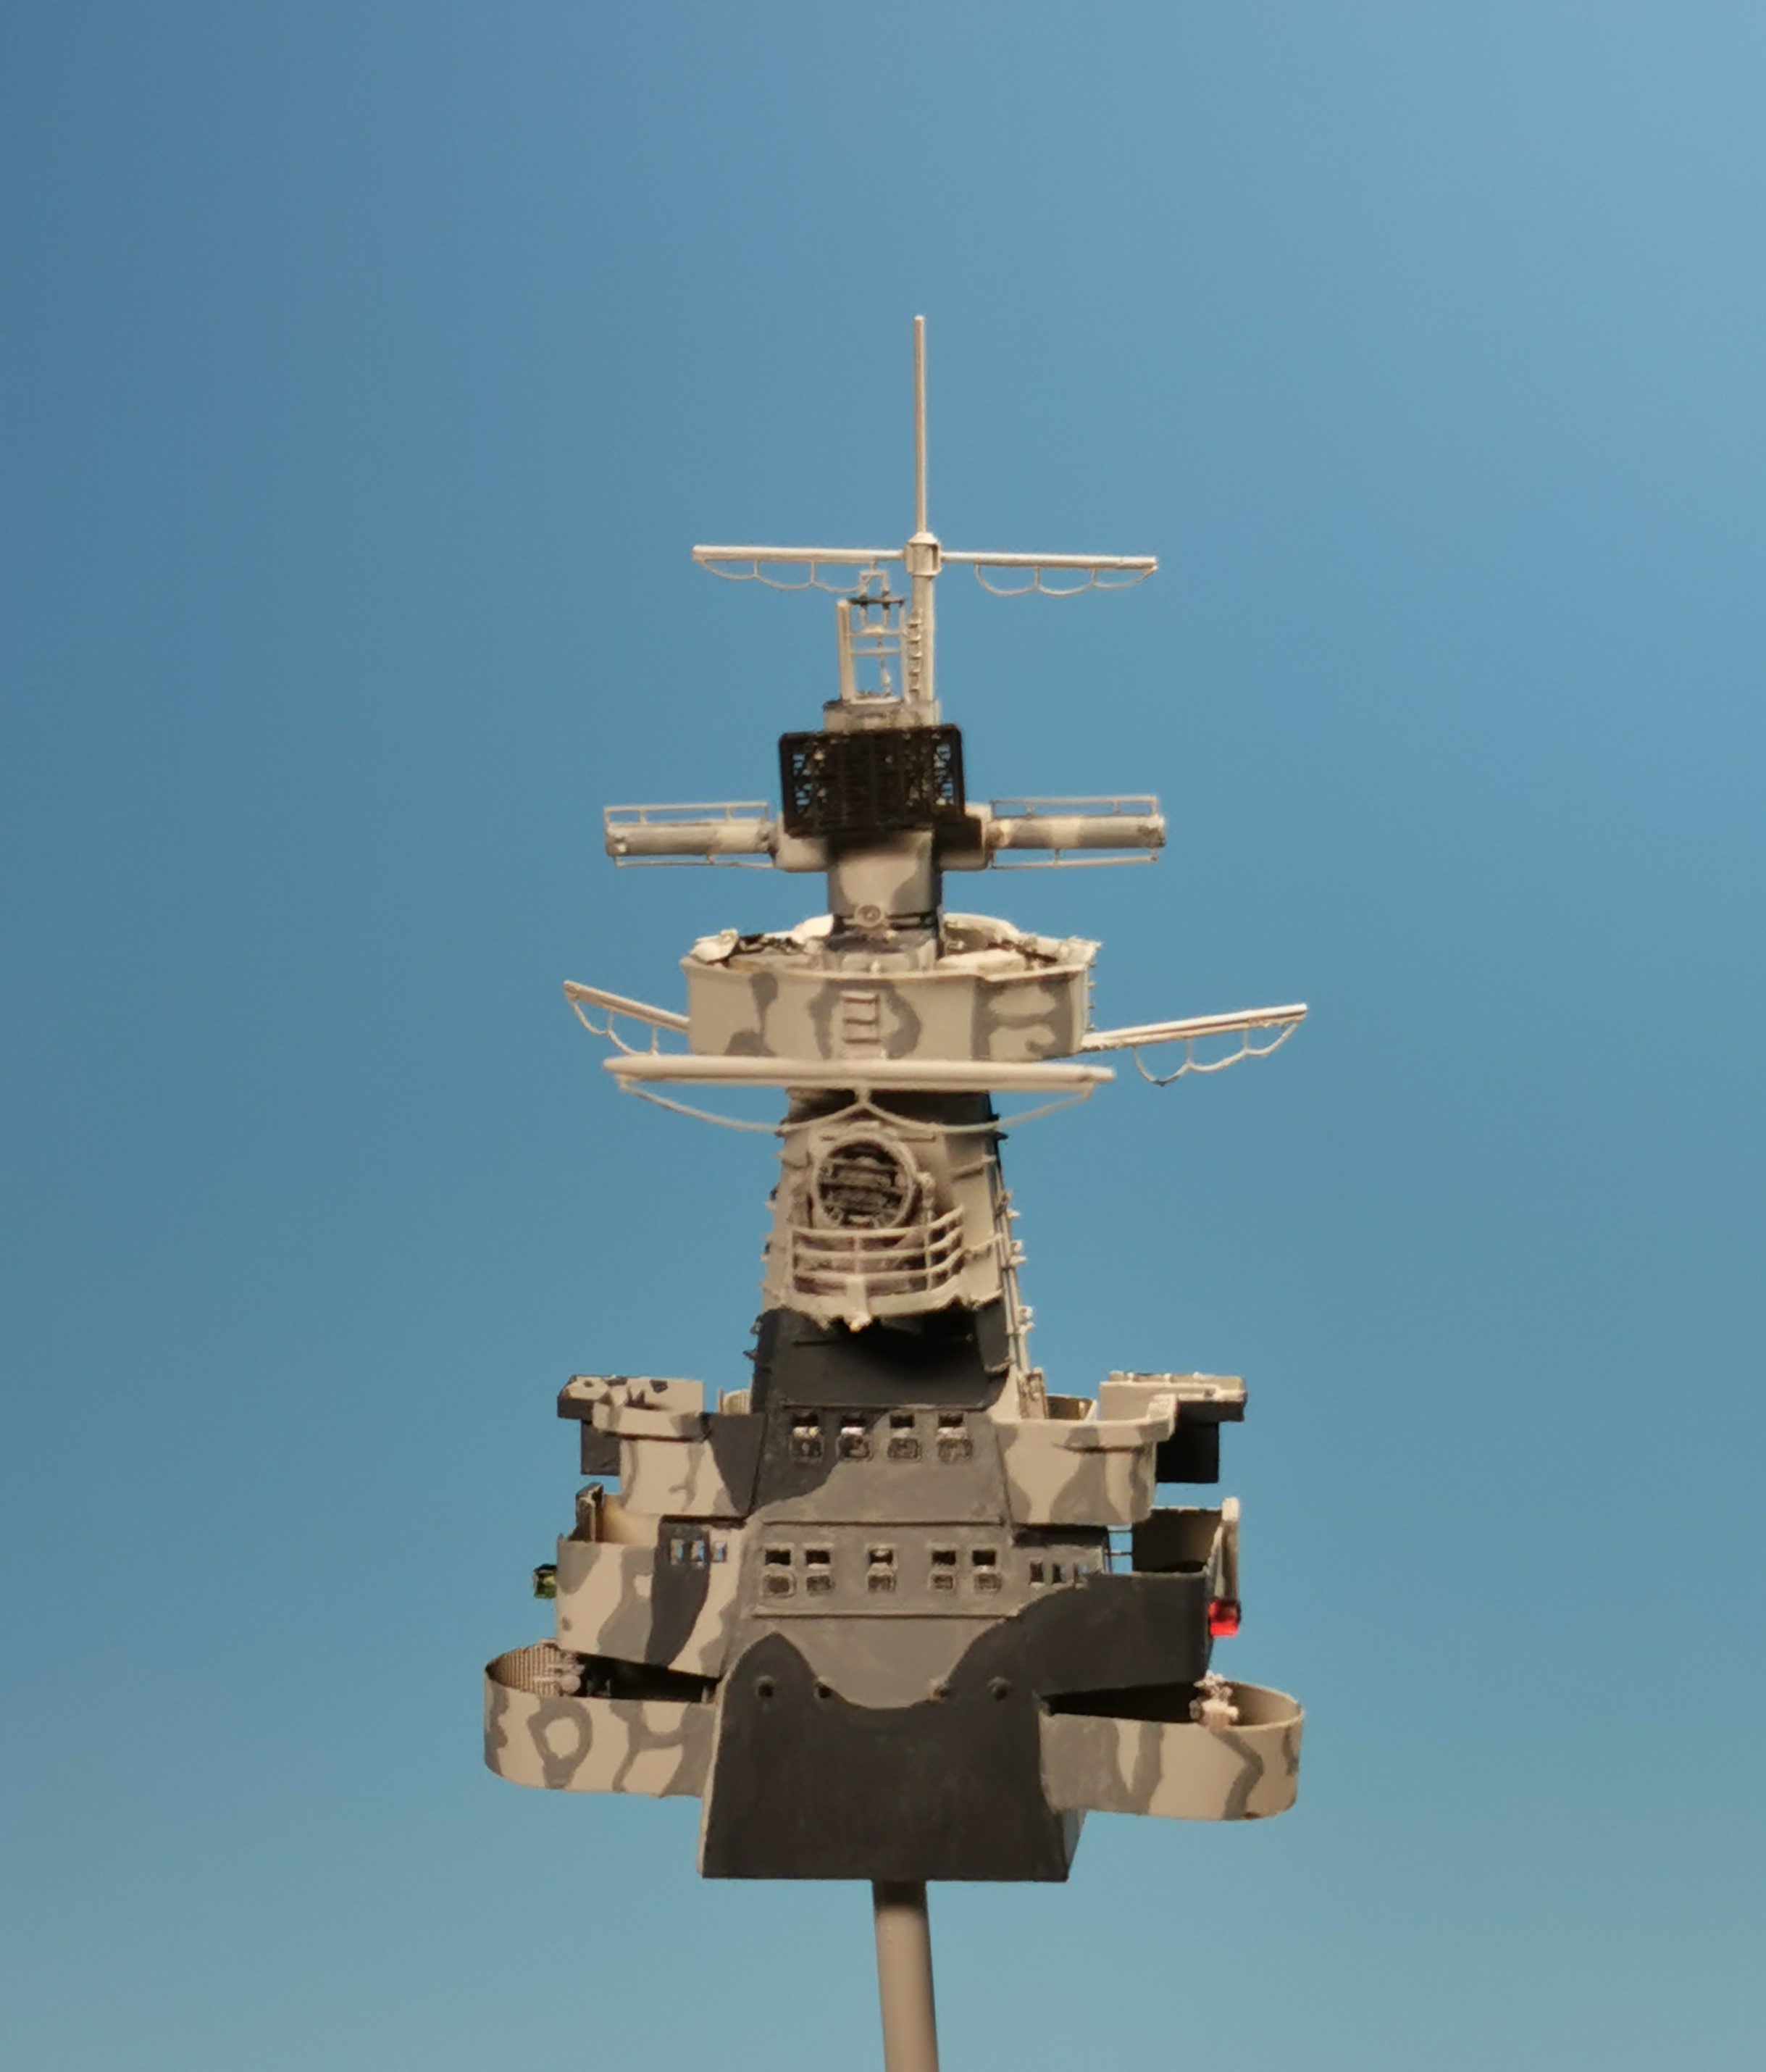
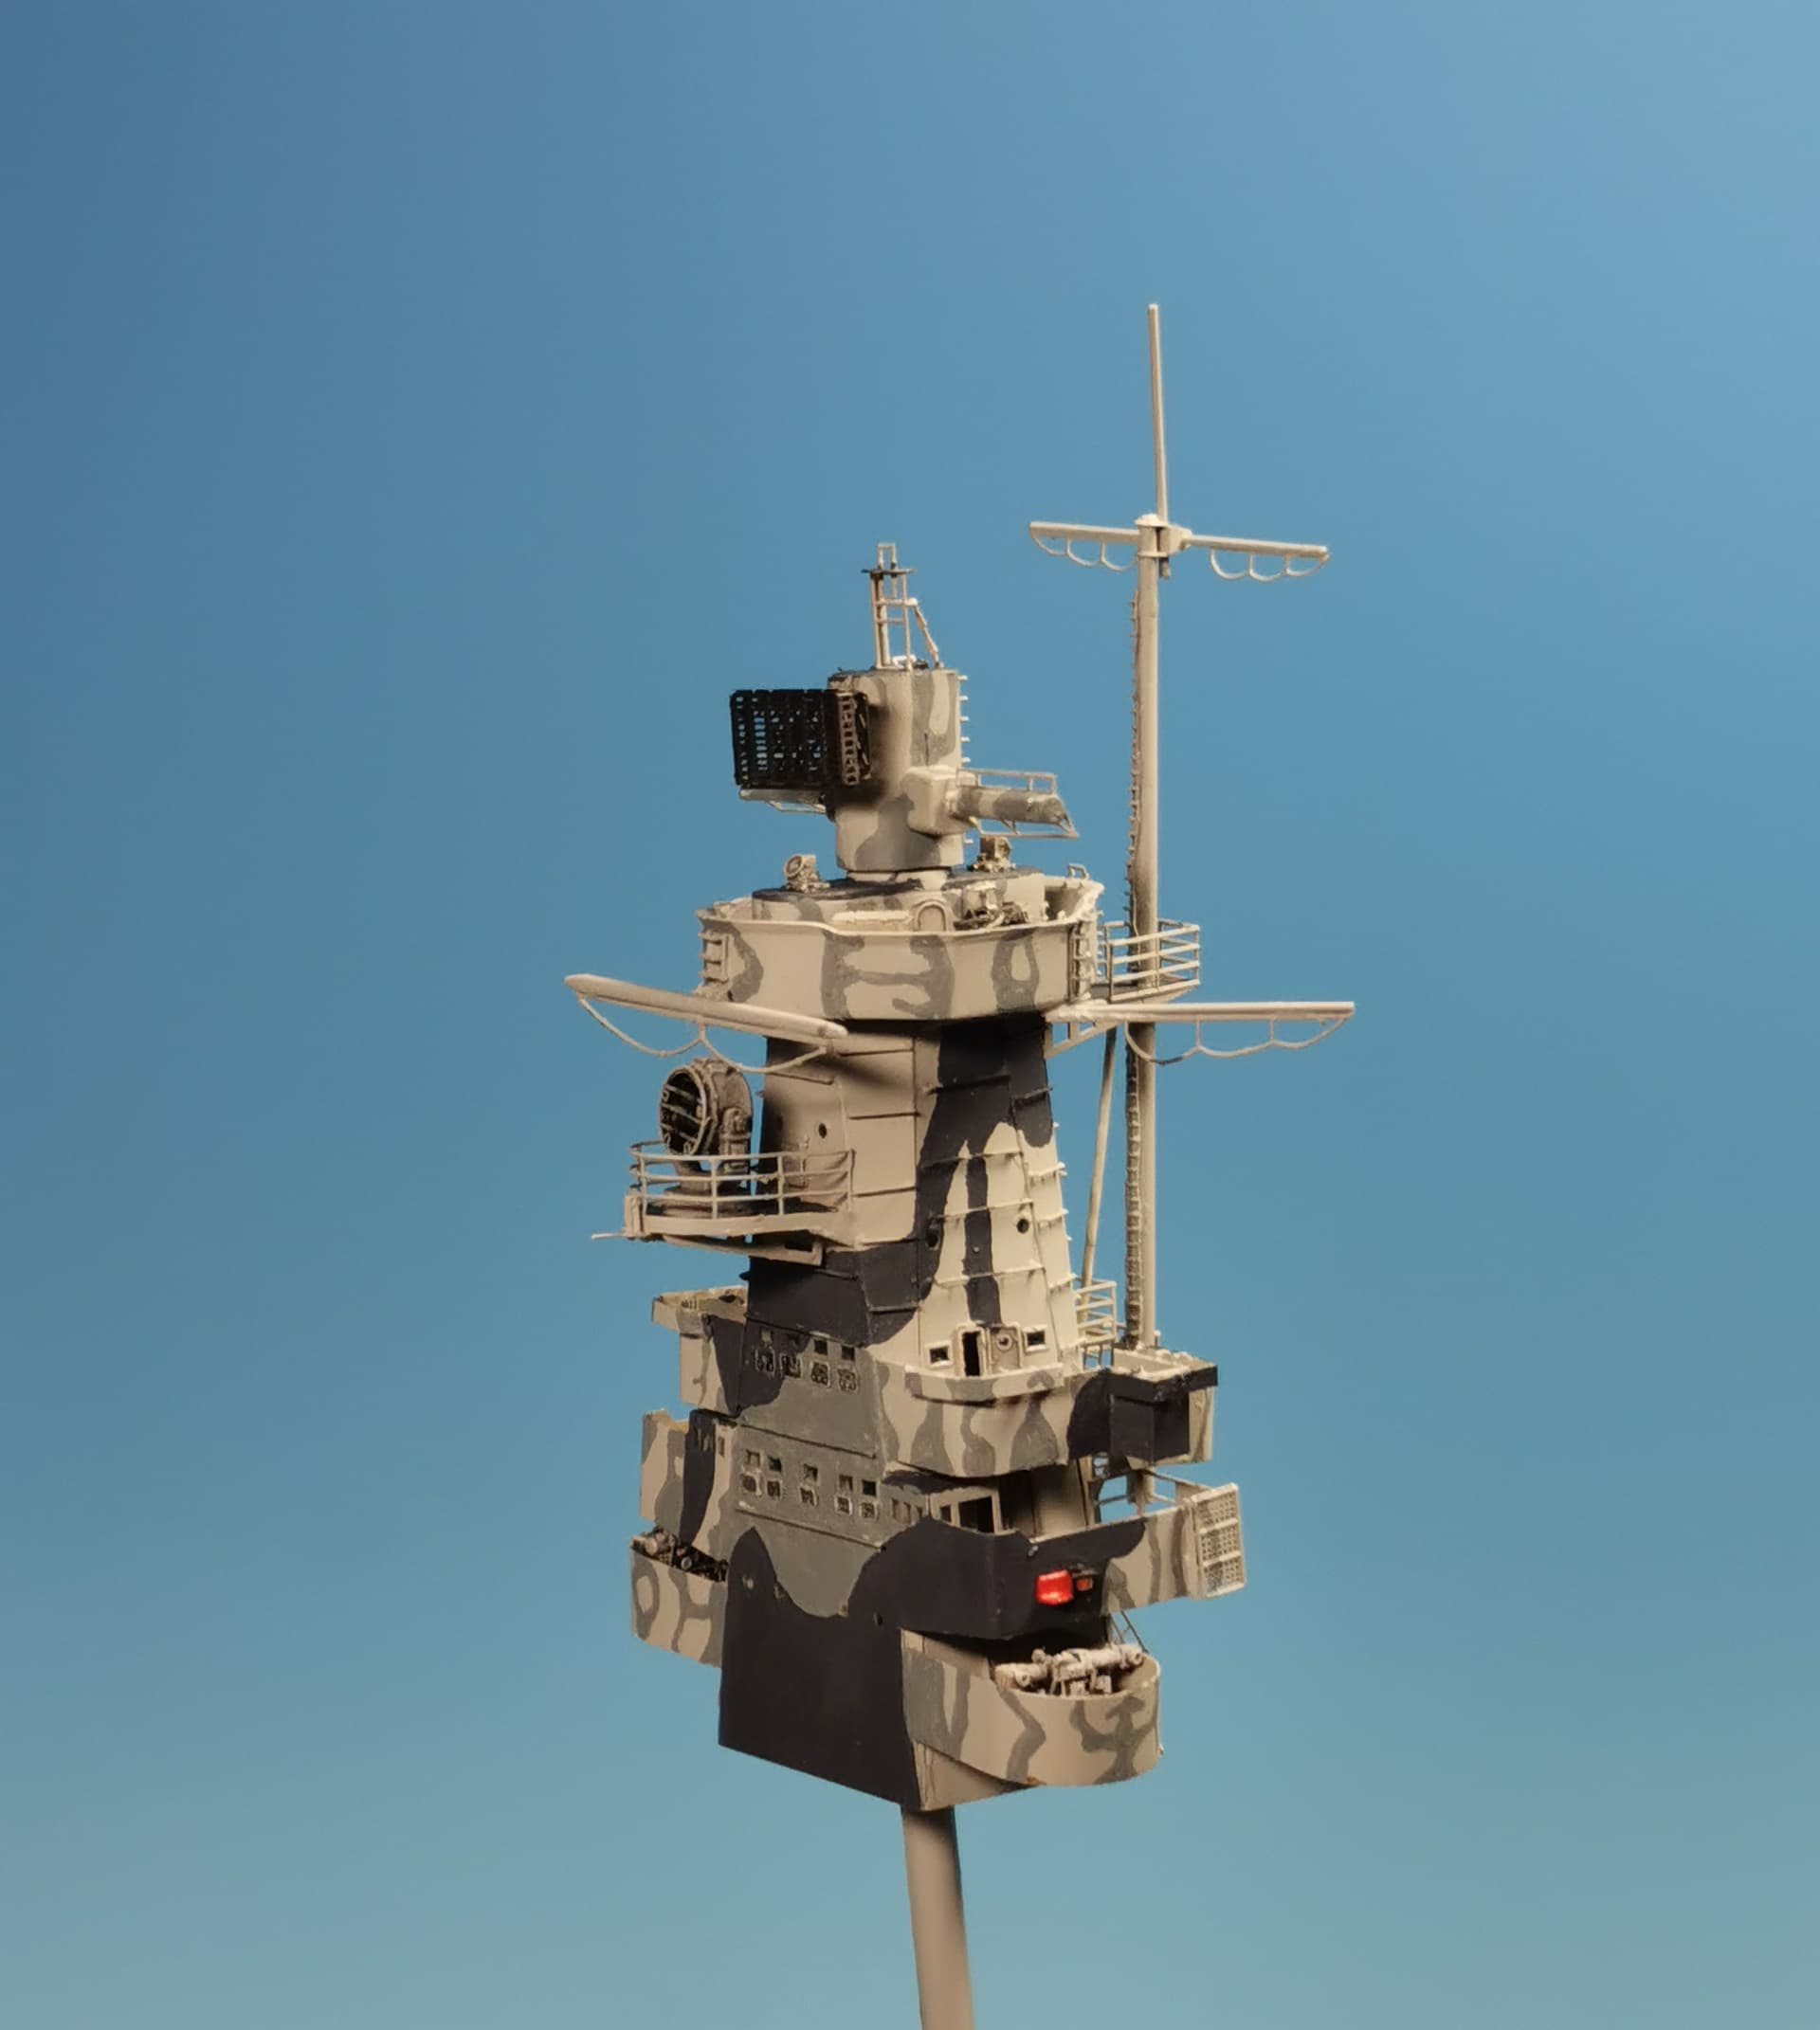
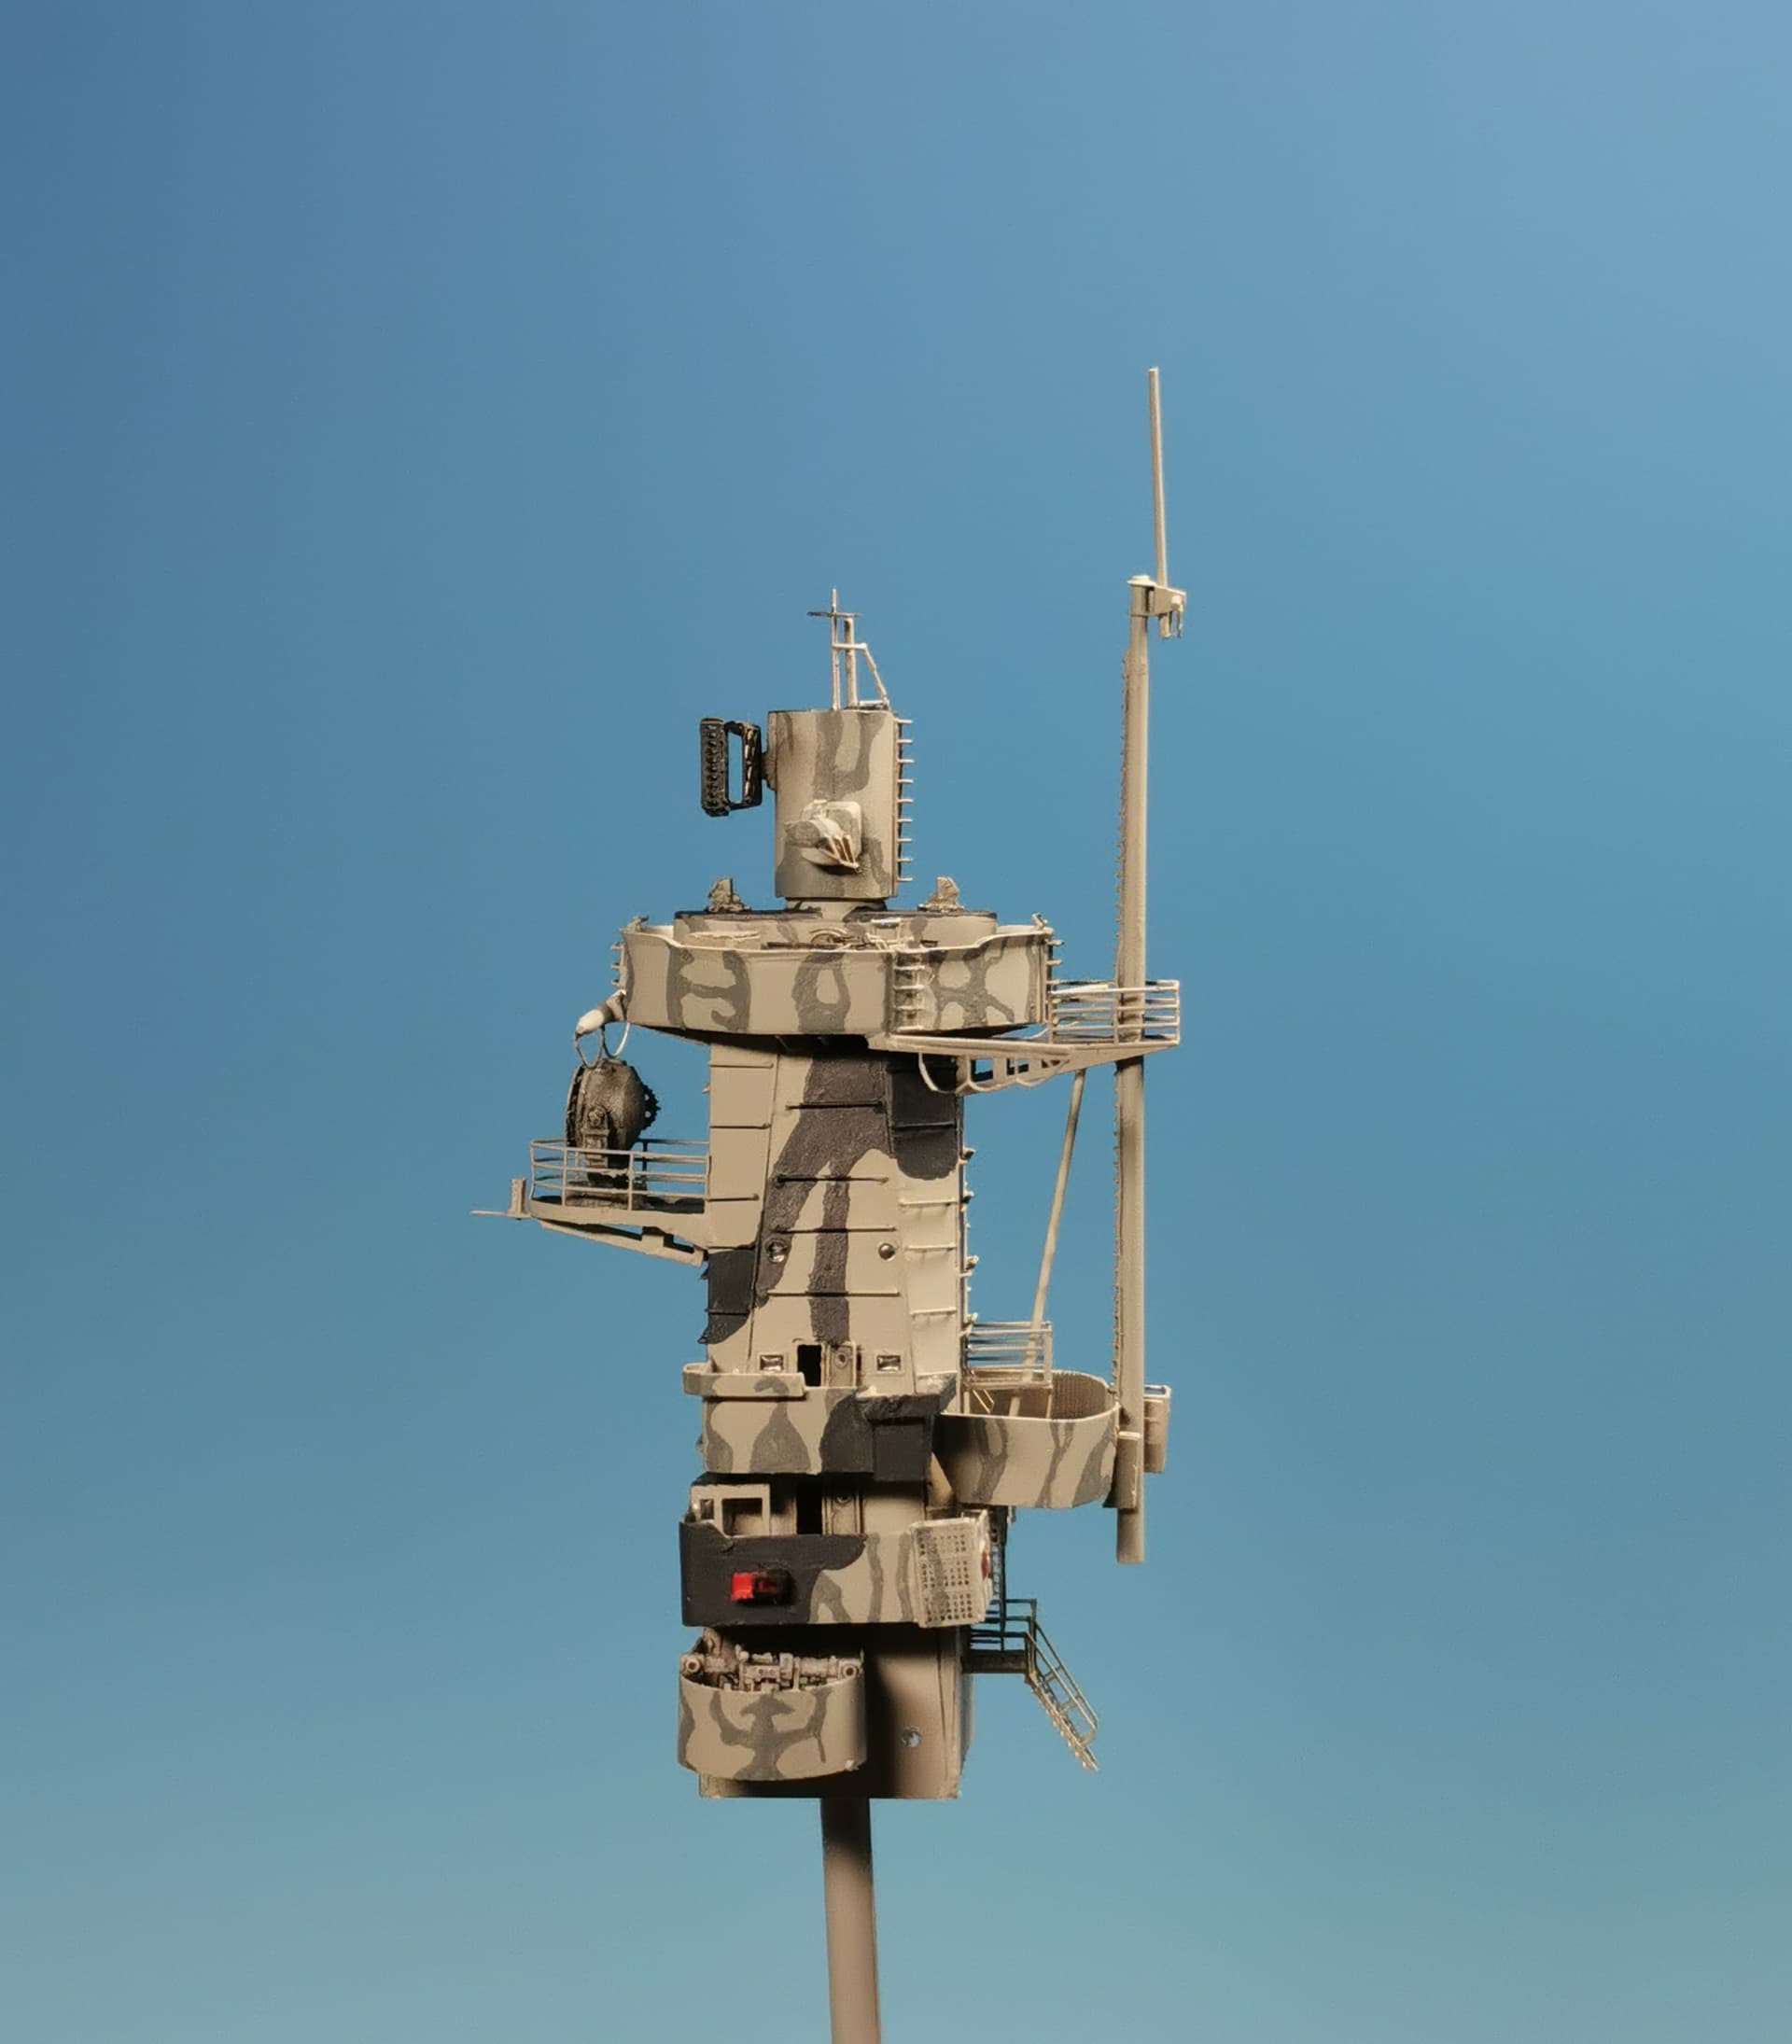
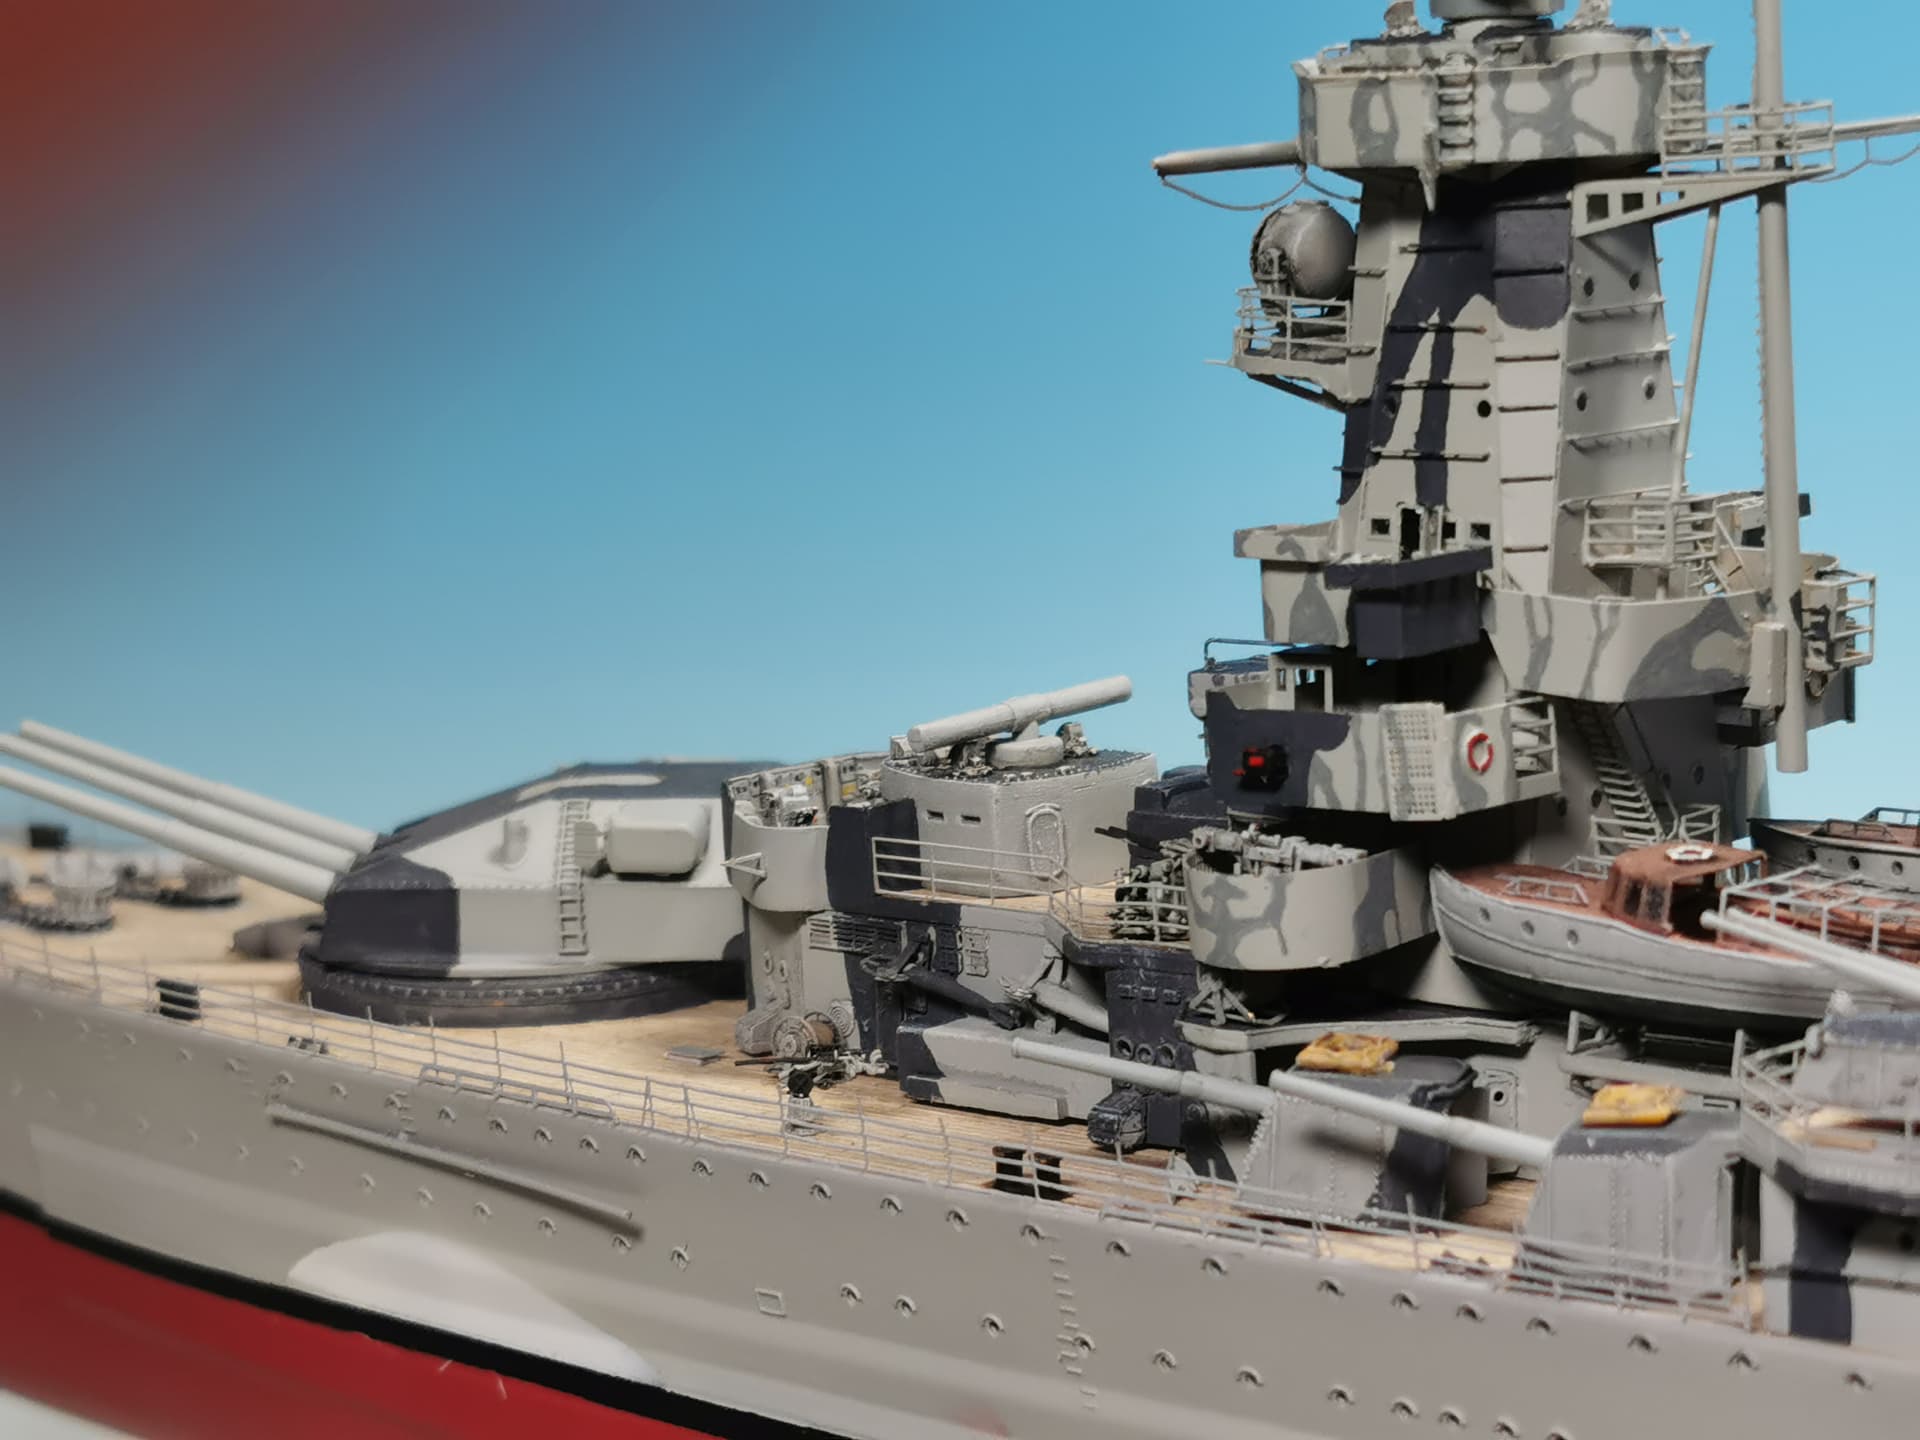
I made it! I was able to paint the bridge tower without loosing a single part. I changed plan and just airbrushed the lightgrey base. The other two darker colors were carefully brushed on with a small paintbrush. Position lights were painted with oils and the windows and portholes filled out with KristalKlear. Everything worked nicely and I continued to glue on the two side 3mtr. rangefinders, the top rangefinder tower and its radar hut on top, the two 2 cm single flak guns with their ammo containers and the four compasses at the turret´s deck.
The complete compartment was glued at the single free space at the ship´s deck. After some struggling it finally rests there and I think it looks good.
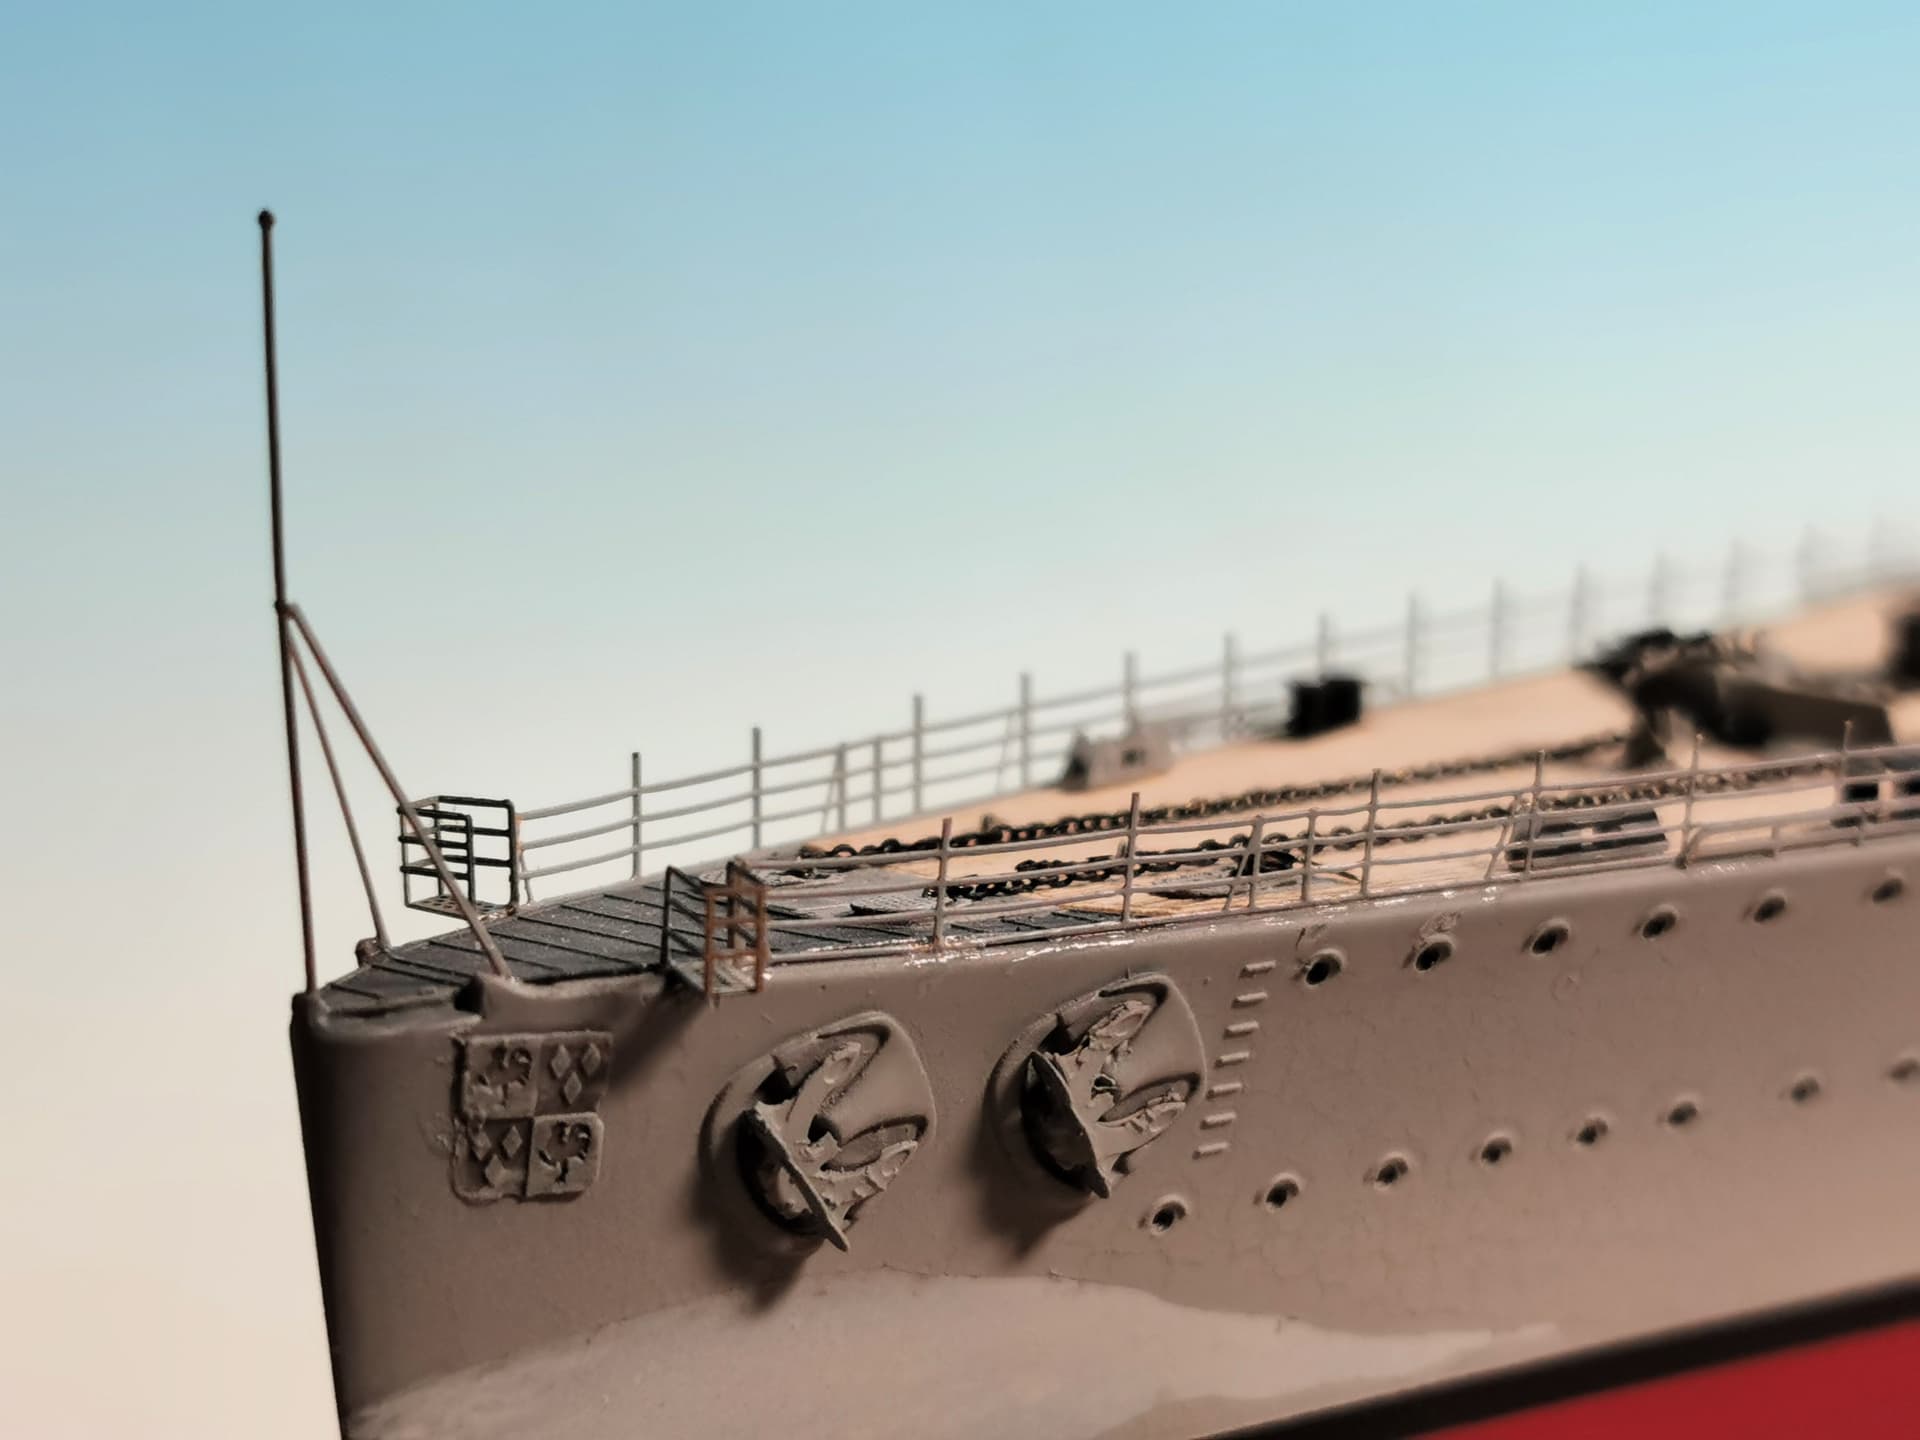
Now all whats remaining are some miles of railings, fill out the portholes of the ship´s hull and then finally start rigging it
21 Likes
Wow, what a fantastic tower. 
1 Like
Great neat work Thomas, looks splendid mate.
1 Like
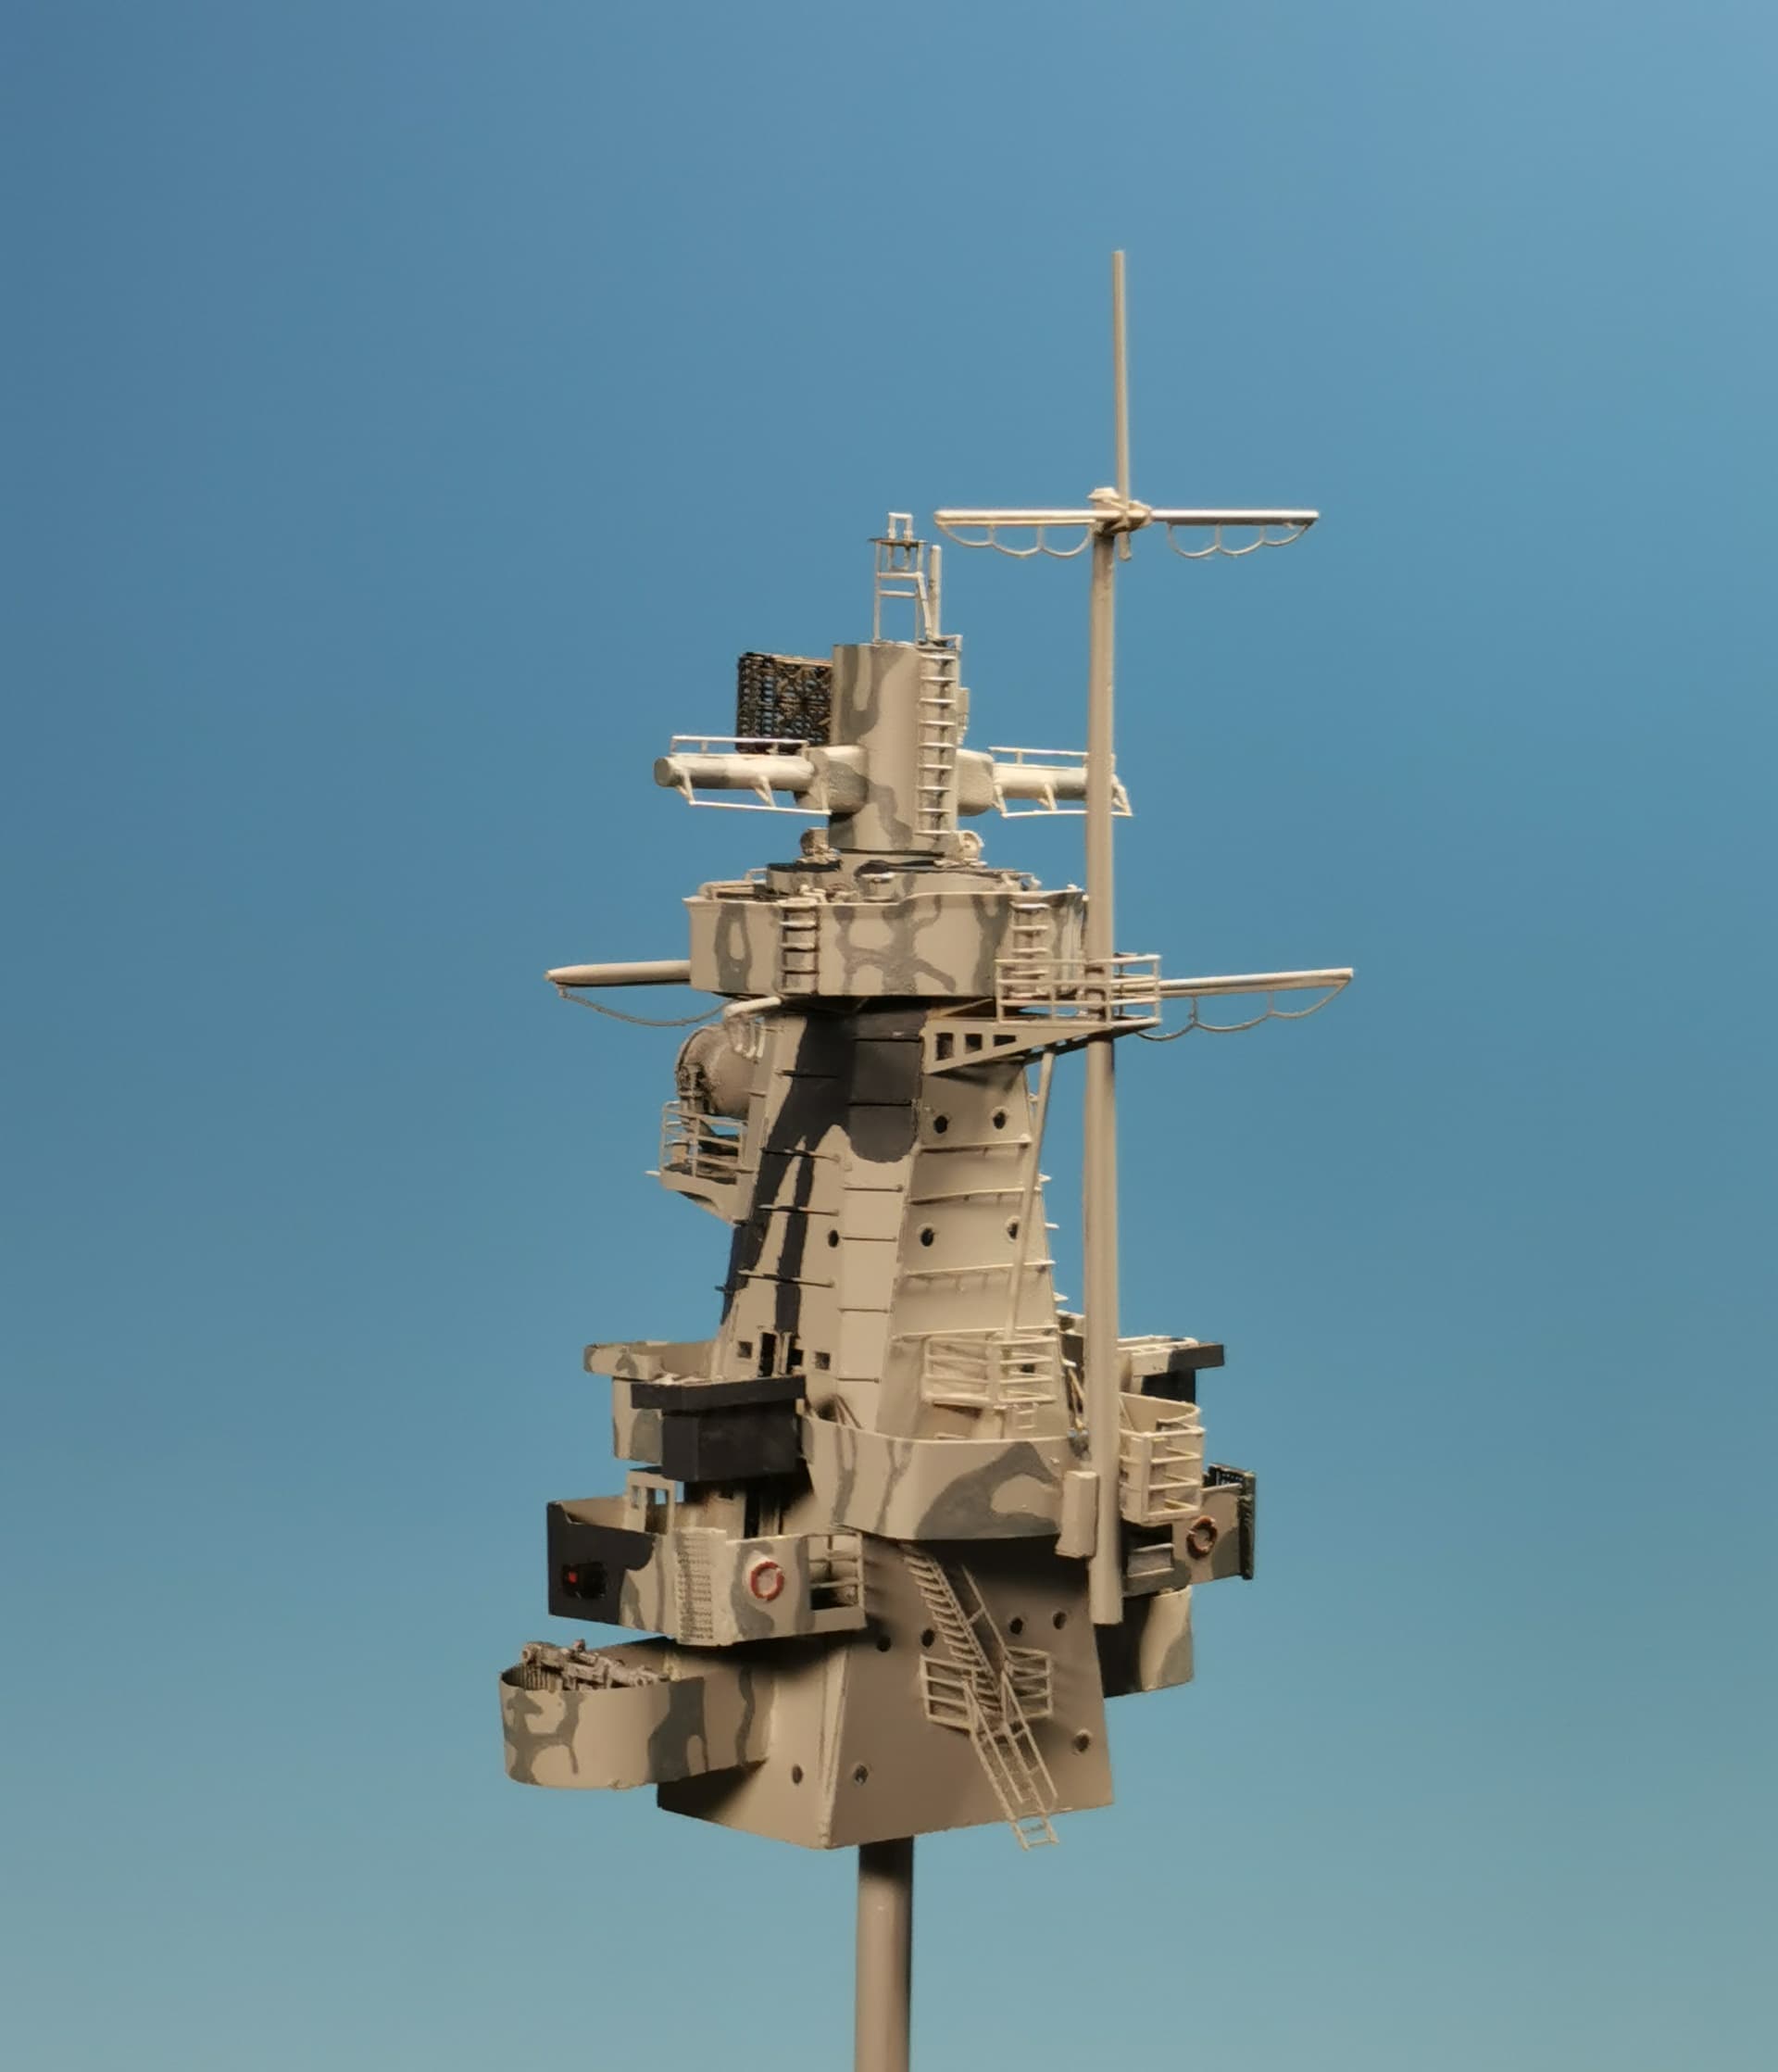
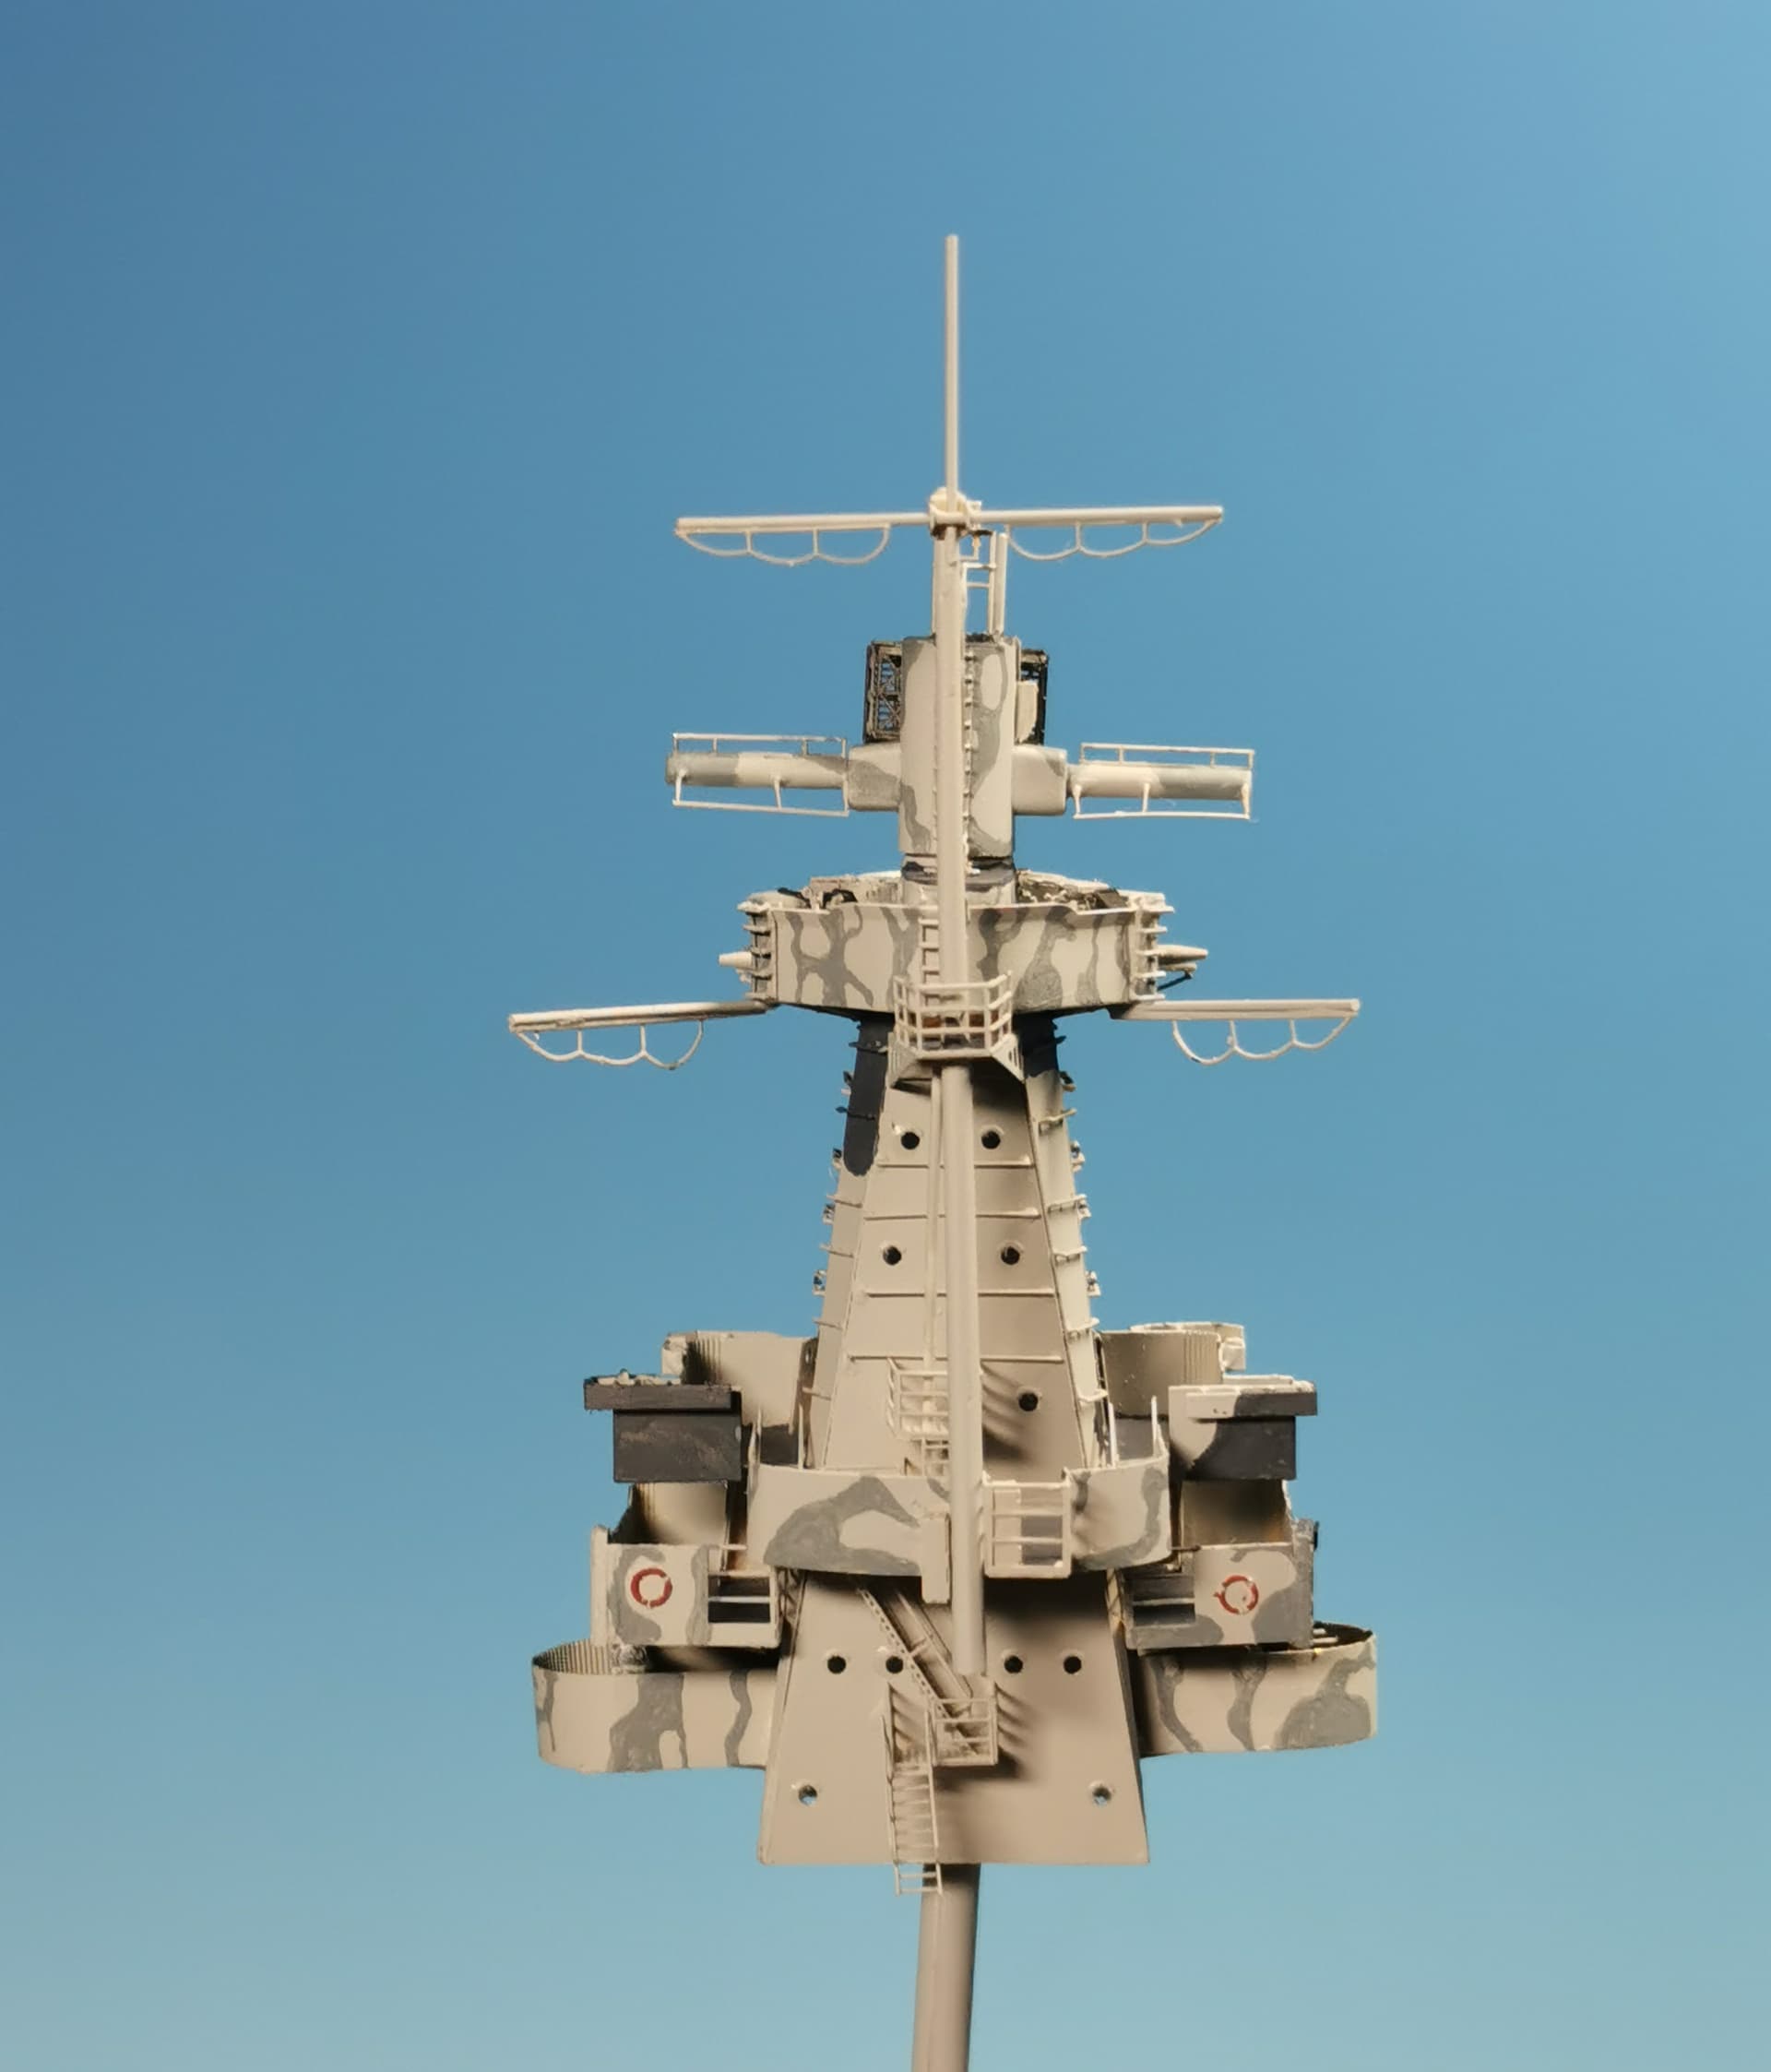
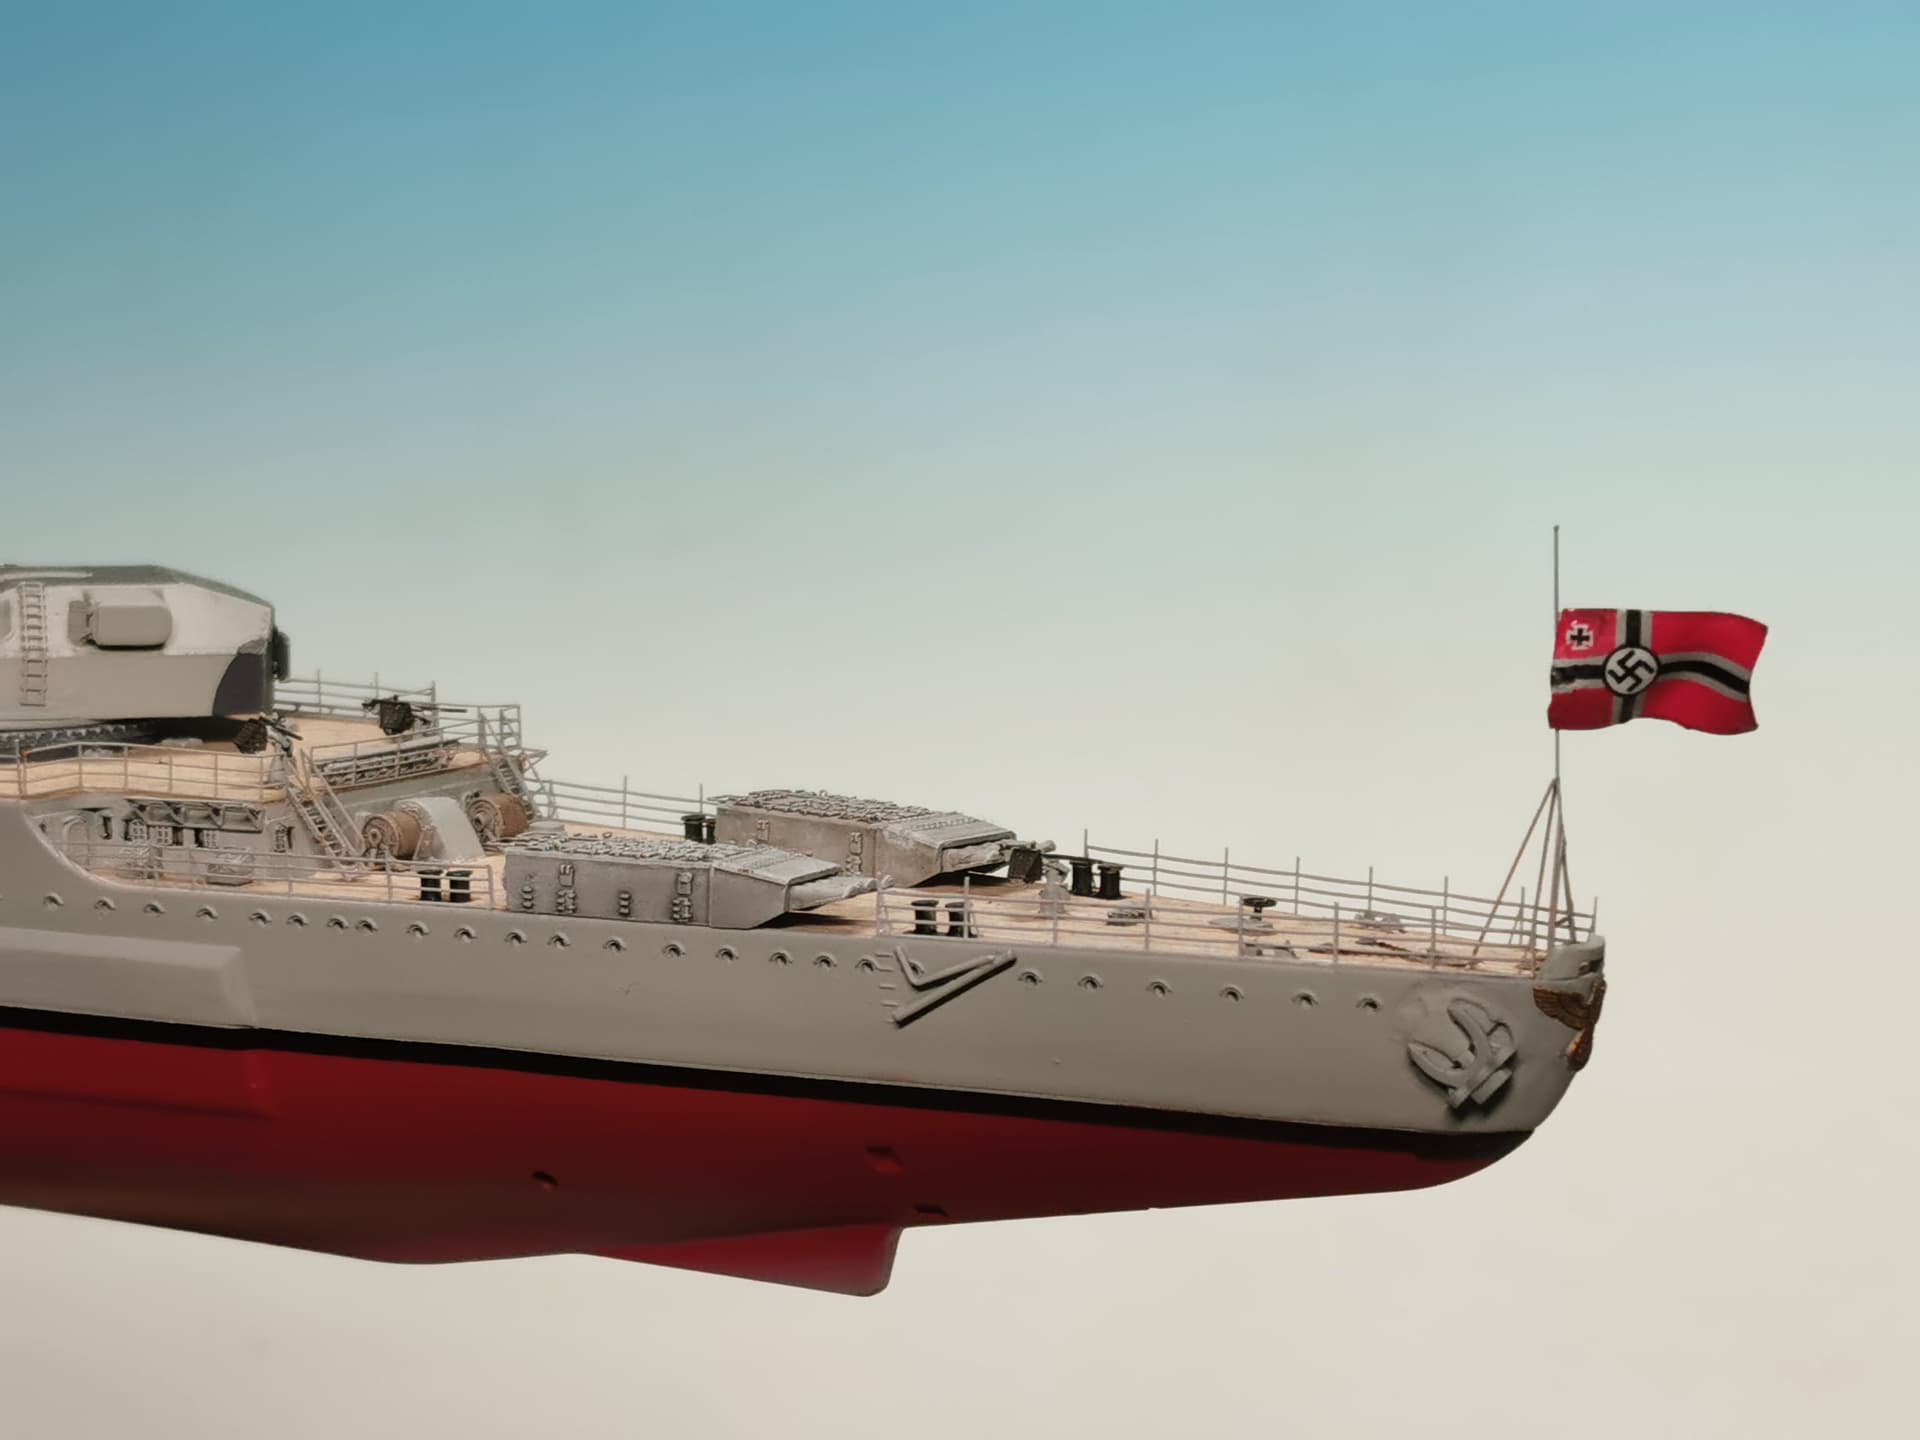
Its done, I´ve glued on the very last missing PE railings and attached the ship´s Kriegsmarine flag 
so there is just the rigging and some weathering at the upper hull left for this ship; well and the crew members and the sea diorama will follow after completion of the ship 
Now where this strange guy again who offered me to do the rigging for me this night…
14 Likes
The Spee looks superb Thomas. Very well done
2 Likes