Layout Design Ideas and Plans

In another thread, we started talking about our current and planned layouts, and the idea was raised to create this subject.

What is the subject? How about the layouts we have and how we design them, and those that were planning. We can discuss elements thereof such as bench work and track plans, electronics including analog or DCC, the height of the bench work and aisle with. Other elements that I’m not thinking of.

To start off, my current layouts are…mainly in my mind and in boxes. I do have two “layouts:”

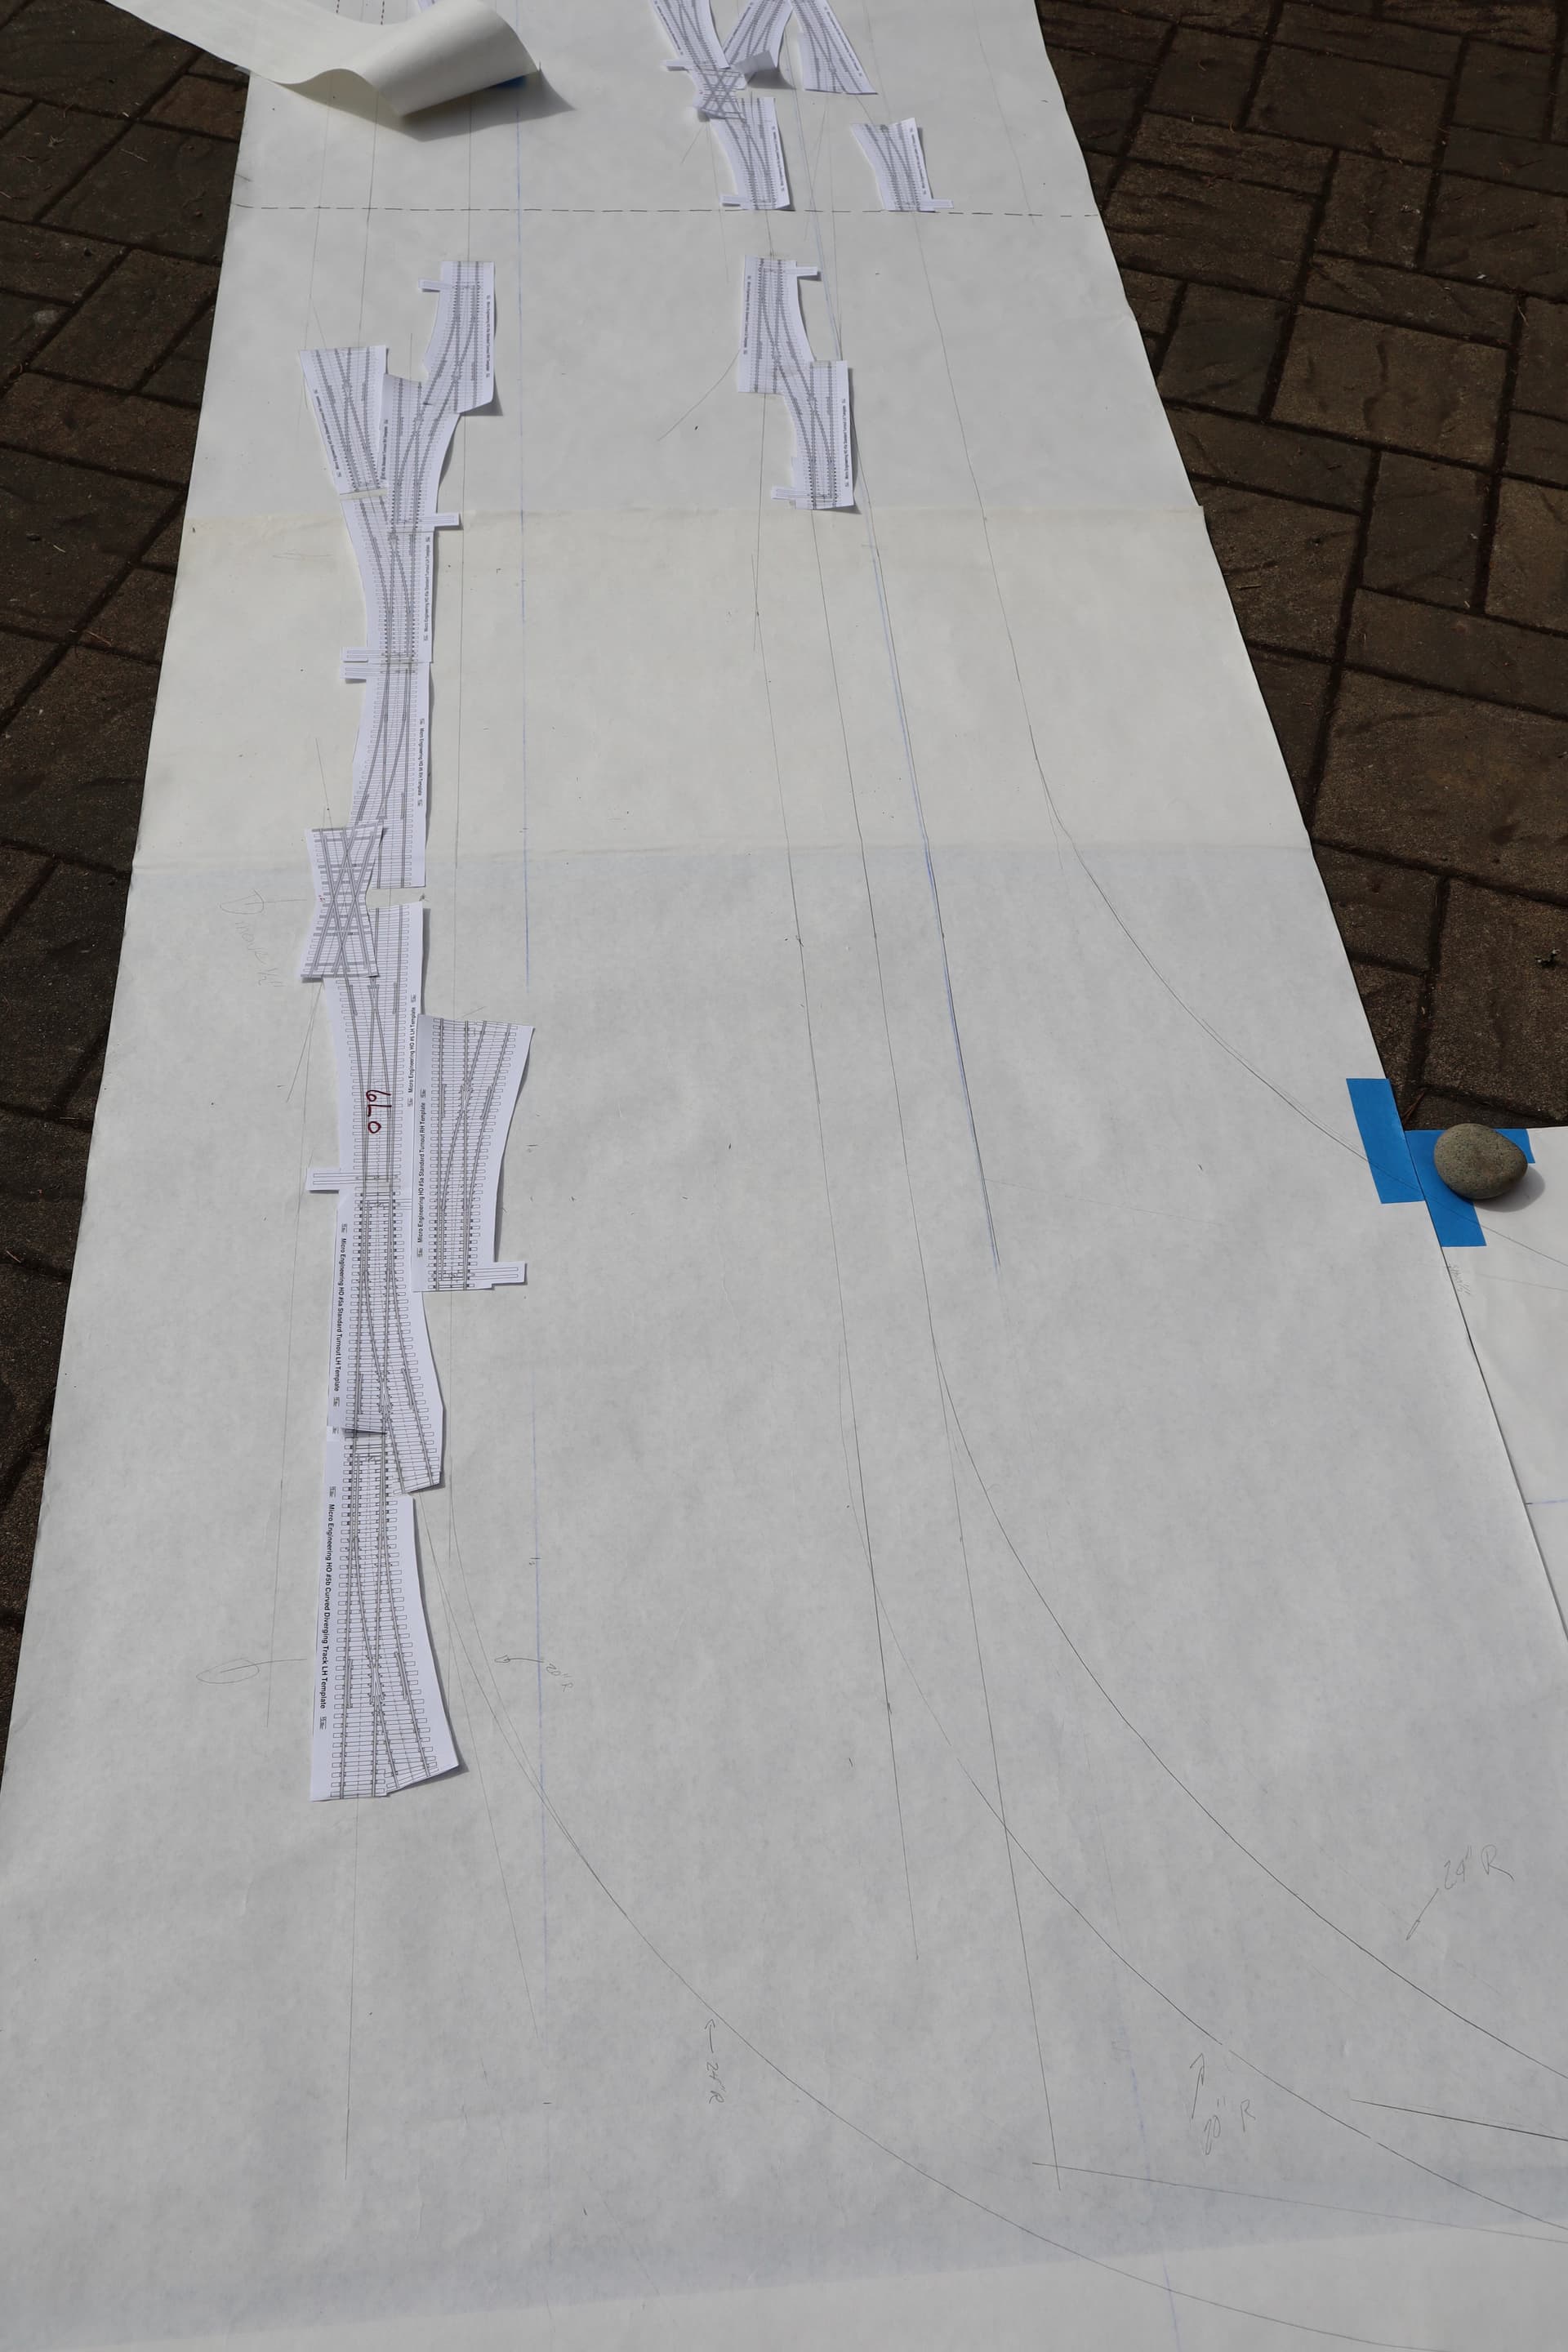
  1. A HO layout on a 4 ft by 2 ft piece of 2 inch extruded foam. It consists of a line with a secondary line that diverges off via a number 6 switch (“turnout”), and that line in turn is intersected by another line with a single slip switch joining them. Scenery consists of static grass and a half inch rise on one corner with a pond on it.

  2. My other layout is of conventional wood frame/plywood construction, and is about one foot by 6 ft. A N scale switching shelf layout. I bought it off of a friend for $20, and it has I think a dozen turnouts (switches) on it. No scenery at all except for the track was painted.

The HO layout I started as a thread on the old site, it was going to be a very basic “how to”. Whether I incorporate either into a full layout someday remains to be seen but for now they give me something to actually power up locomotives and test Rolling stock upon. I also fiddle around with some scenery ideas.

So my future layout, after consideration about what I can handle and possibly build by myself, it will probably look like something like the following: I don’t know yet. My hobby room is about 20 by 24 ft. Unfortunately, it has windows on three sides. And they’re big windows. I plan to put one side of the layout up against the wall so I may make a removable section in front of the window so it’s not being traumatized by the dun when not in use.

I’m thinking of the dimensions of 8 by 20. I want something for continuous running although I like the idea of an operational point to point. Again maybe a bridge will be put in to allow continuous running. Or maybe I’ll put a reverse loop on each end. That’s my plan for HO. I’m going to have to decide between HO and N, or with my eyesight and progressing age,.On30? Kosprueone posted that G scale Roundup earlier this year and making small layouts of large-scale trains is a really cool idea. I just don’t have any such models that have to start all over. But it’s not something I’m going to rule out.

Or maybe I’ll just go nuts and figure out a way to motorize the 1/35 locomotives available and do it all in military scale!?

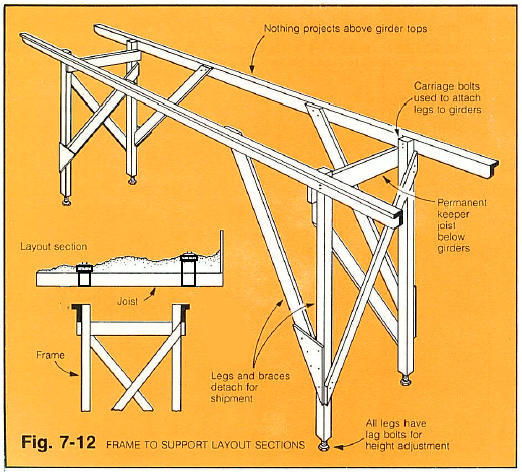
For bench work I’m still planning to use wood for the bench and extruded foam for the surface.

For track plans I want something for continuous running so I can just sit back and watch my trains go by, but I also want to have several small yards and lots of industries around where I can do switching and staging some operations. When I actually managed to get down to some of the layouts in the area that do operations, it’s a lot of fun.

My subject will be my freelance Jackson Purchase and Texas transcontinental, or one of its subsidiaries. That gives me a lot to work with in terms of what part of the country, and what era. The era will be the steam era, most likely the transition era so I can run early “stinkpots”, a.k.a., diesels. I want to have a main line running through with some short lines and industrial railways connecting in here and there.

Mountains, hills, or prairies, I don’t know yet. It’ll probably be elements of everything. I like big bridges so there will be a few Rivers to model, but that means I’ll have to elevate the track work in the bench work, or create a valley in the bench work somewhere. I’m lazy and don’t like building bench work, so I want to keep it simple so I can get the track down on the trains running as soon as possible.

That’s enough to ruminate on for now. 18Bravo mentioned his idea for his layout, and 165thspc has discussed layouts before, too. Buckeye, I know you’re working on one. So what are you ferroequinologists wanting to build or currently working on?

Looking forward to hearing from you.

Fred

Brass hat
Chief of derailments
Master bottle washer
JPTRR

8 Likes

I do not own any trains or have a train layout but look forward to following this discussion and perhaps learning a few things. :slightly_smiling_face:

3 Likes

All my layouts so far have been shelf layouts. Elevation off the floor is always been +/- 60 inches. I prefer to view my models at just below eye level. I feel this is a much more realistic viewing angle than the usual “helicopter view” present in most layouts. Modeling in HO this height makes the model look larger, the detail can be better appreciated and this is a much more realistic viewing angle, comparable to that seen in real life. Also this allows my trains to actually move behind the hills, trees and structures again adding (I think) a greater level of realism.

3 Likes

:thinking: :bulb: I don’t have a layout but all of my layouts in HO, O, On30, and 1/35-1/32 narrow gauge are all in my head. Just need to draw them all out :memo: :pencil2:

4 Likes

Ditto!

1 Like

I don’t have any train items anymore and really don’t plan on buying any or building a layout. In my teenage years…a couple hundred years ago…I had several train related items and had a layout built in the garage, but years ago I ended up giving everything to a friend’s little boy.

So…I will enjoy watching what all of you do. :slight_smile:

Randy

3 Likes

Decades ago I saw a plan for an N scale coffee table layout. The glass top perimeter was significantly less than the outer edges of the table top. There was a single track that ran lengthwise down the center of the track, The train would travel down the track, and moments later reappear traveling in the opposite direction. All of the trackwork necessary to make this happen was hidden underneath the edges of the top. While I can’t remember the track plan, it shouldn’t be hard to come up with, But rather than hide the train underneath the long edges of the top, I think I could have very long warehouse or truck terminal that it could travel through unseen.

3 Likes

Ahhh… I know of one little train set you have. :slight_smile:

1 Like

I’ve figured out a diffferent variation on my above idea. It would have to be N scale to make it reasonably small, I found some nice N scale Russian T-62 and T-62 tanks. I also found an N scale locomotive.

Coffee table layout - one track running through the center lengthwise. Sad little Russian scenes along either side. Train appears from edge of layout, laden with flat cars full of nice freshly painted Russian tanks. It continues straight to the opposite end and disappears. Moments later, train appears on the same track, headed in the opposite directions, with the same tanks, only now they’re burned out hulks, one with turret upside down, one maybe even missing its turret completely.
The cool thing is - this is entirely possible.

1 Like

When I say “shelf layouts” I really mean around the walls or around the room.

I usually go for some sort of “donut arrangement” with the operators standing in the middle.

That is another reason I build my layouts with a high physical elevation; to make it easy to duck under to enter the donut. Also this allows me to always view my equipment from “the inside of the curve” making the longer passenger cars look much better when taking curves that I can then build a bit tighter than I might otherwise.

1 Like

Last couple of years have been a challenge. Radiation for the old man’s cancer, multiple surgeries on both arms to try and relieve nerve pain and fuse my left wrist haven’t allowed much modeling time. Planning for the next layout though has been moving forward. Began with a plan from MR’s Model Railroad Planning 2017:


I then enlarged the plan to 3’ wide and 10’ x 14’ island providing added area for structures and scenery not additional track.

Next step was to blow it up full size and see if things would actually fit, and guess what…
Nope, issue as always is the space required for switches so the plan was modified and trackwork reduced.


Next comes the true dealing w/reality. Since we are going to be leaving this house this design will be further modified to an around the room configuration on 2’ x 4’ segments. I intend to build w/steel framing members w/a thin birch ply skin and pink foam for elevation and topography. In order to start construction though I need to get one more vehicle out of the garage. I have a buyer but his better half said one of his existing vehicles needs to go before this one can come home. So, hopefully construction will start in the spring of 2025.

5 Likes

Do you guys ever use model railroad planning software? There are a bunch of programs for that sort of thing but they all look like they were designed in 1992. Yuck.

Hoping to find something modern with pretty graphics, I also looked for a train game that would allow me to build a virtual layout in sandbox mode and watch it run. I guess no one ever thought to make a game about building a virtual train layout in a virtual house.

1 Like

I used to use atlas’s right track software. It became progressively more sophisticated and started incorporating other manufacturer’s track. There are a few functions I had difficulty with but I created several good track plans. I even started printing them off and one-to-one scale so I could tape it to the plywood and from and mount the tracks directly on it. But I have not used it and probably 10 years. I’m going to ask around to people in my ops group what they use. I’m going to need some software myself, sooner than later I hope.

1 Like

So my mancave/hobby funhouse is 23 ft by 23 ft. (7m x 7m for those of you who can’t handle our archaic and arcane form of measurement). Unfortunately, it has a single support right in the center of the room.

Where the room attaches to the original house (“back wall”) there’s a single interior door in a corner, otherwise the wall has no other doors or windows. A window on each side wall (“left” and “right” wall as seen from standing in the interior door), two windows with a door in the corner on the “yard wall” that faces the yard.

Time to start figuring out how I want to set the thing up. I want my workbench to be between the two windows. I need a place to pile up my stash and parts drawers, a place to put display shelves, and of course, a place to put my model railroad. (Graphics to follow, I just can’t draw on my phone.)

I’m thinking of allocating an 18x18-ft space for the layout set against the black wall and the left wall. A three prong peninsula design like an “E” with the spine running along the left wall. I just realized that that really won’t give me the large sweeping curves that I want.

I’ve read that 36 inches is the best aisle width between the peninsulas.

This is my first serious musing about the design and I’ve already realized that with that criteria, each peninsula can only be four feet across, and that does not allow 24-in curves.

Back to the drawing board. If any of you have any ideas, I’m all ears.

Oh, I can’t decide whether to go with 7 ½” gauge live steam or T Scale. :thinking:

1 Like

Fred, how about F scale? You can order the same locomotives in either electric or live steam. But live steam indoors???

1 Like

That might depend upon the width of potential guests. :rofl:

2 Likes

Something that I would like to speak out against regarding layout design would be the “flat table” mentality that we all seem to start out with when planning a layout. Yes, a solid sheet of wood or foam may be right for yards and terminals but when we get out into the “country side” flat table thinking has our tracks having to climb to create elevation differences. However in real life the railroad TRIES to stay as level as possible while it is the terrain that ungulates up and down AROUND the railroad route. Flat table design has us carving out depressions to create our valleys, rivers and streams.

Years ago Model Railroader Magazine put forth the "L girder open frame style of layout support construction where only the trackage itself had a solid support. Everything else (the ground) was hard shell; meaning screen wire covered with paper towels soaked in either plaster or glue, making for a very lite weight but durable scene support for our hillsides and structures…


construction.

This sort of design is cheaper, faster to construct and allows for the easy addition of scenery both above AND BELOW the track level.

ADDITIONAL BENEFIT:* You may note that in this type of construction; gone is any need for a table saw or cut-off wheel required in the building of traditional table work. This method uses the natural planned surfaces of the wood itself to create lap joints. There are NO butt joints that require the use of a table saw to achieve the perfect 90 degree unions.

*All my layout support structure was built using a hand saw and a drill!

3 Likes

I wish I had photos of my framing when under construction. In one area I intended to have a LARGE valley with several bridges, so I set the level of the L girders low (28 inches from the floor. In another area I wanted just undulating farm land so the L girder height was more like 50 inches.

In several places homemade narrow book cases became the L girder support legs. Filled with my collection of many railroad magazines these became rather massive anchors to really solidify my layout structure.

1 Like

For those of us who grew up on Long Island a “flat table” design based on a plywood sheet simply isn’t flat enough! :rofl:

With a length of 130 miles, width of 30 miles, and max elevation of 408 feet there’s not much verticality in HO scale… Sadly I’m still in no position to build my dream layout, nor even one of the “scenes” that would be based on 9ftx2.5ft modules, each of three 3ft sections. My goal (when I was younger and willing to go to the effort) was to build each module as a stand-alone layout to take to shows, and then join them up if/when I got a house with enough space. Still waiting for that to happen, and at 60 I’m not so keen on all the grunt-work of lugging layouts to shows.

1 Like

Addmittedly a 400 foot change in elevation is only about 5 inches in HO scale. However I suspect there are a number of places on Long Island where the ground countours drop more tha 400 feet below rail level. Perhaps not, i certainly could be wrong.
In any case Long Island is not exactly representative of the general topography throughout the US.