Just started work on the Revell Leopard 1 and I’m building the Dutch version. I’m gonna try to keep a build log going.
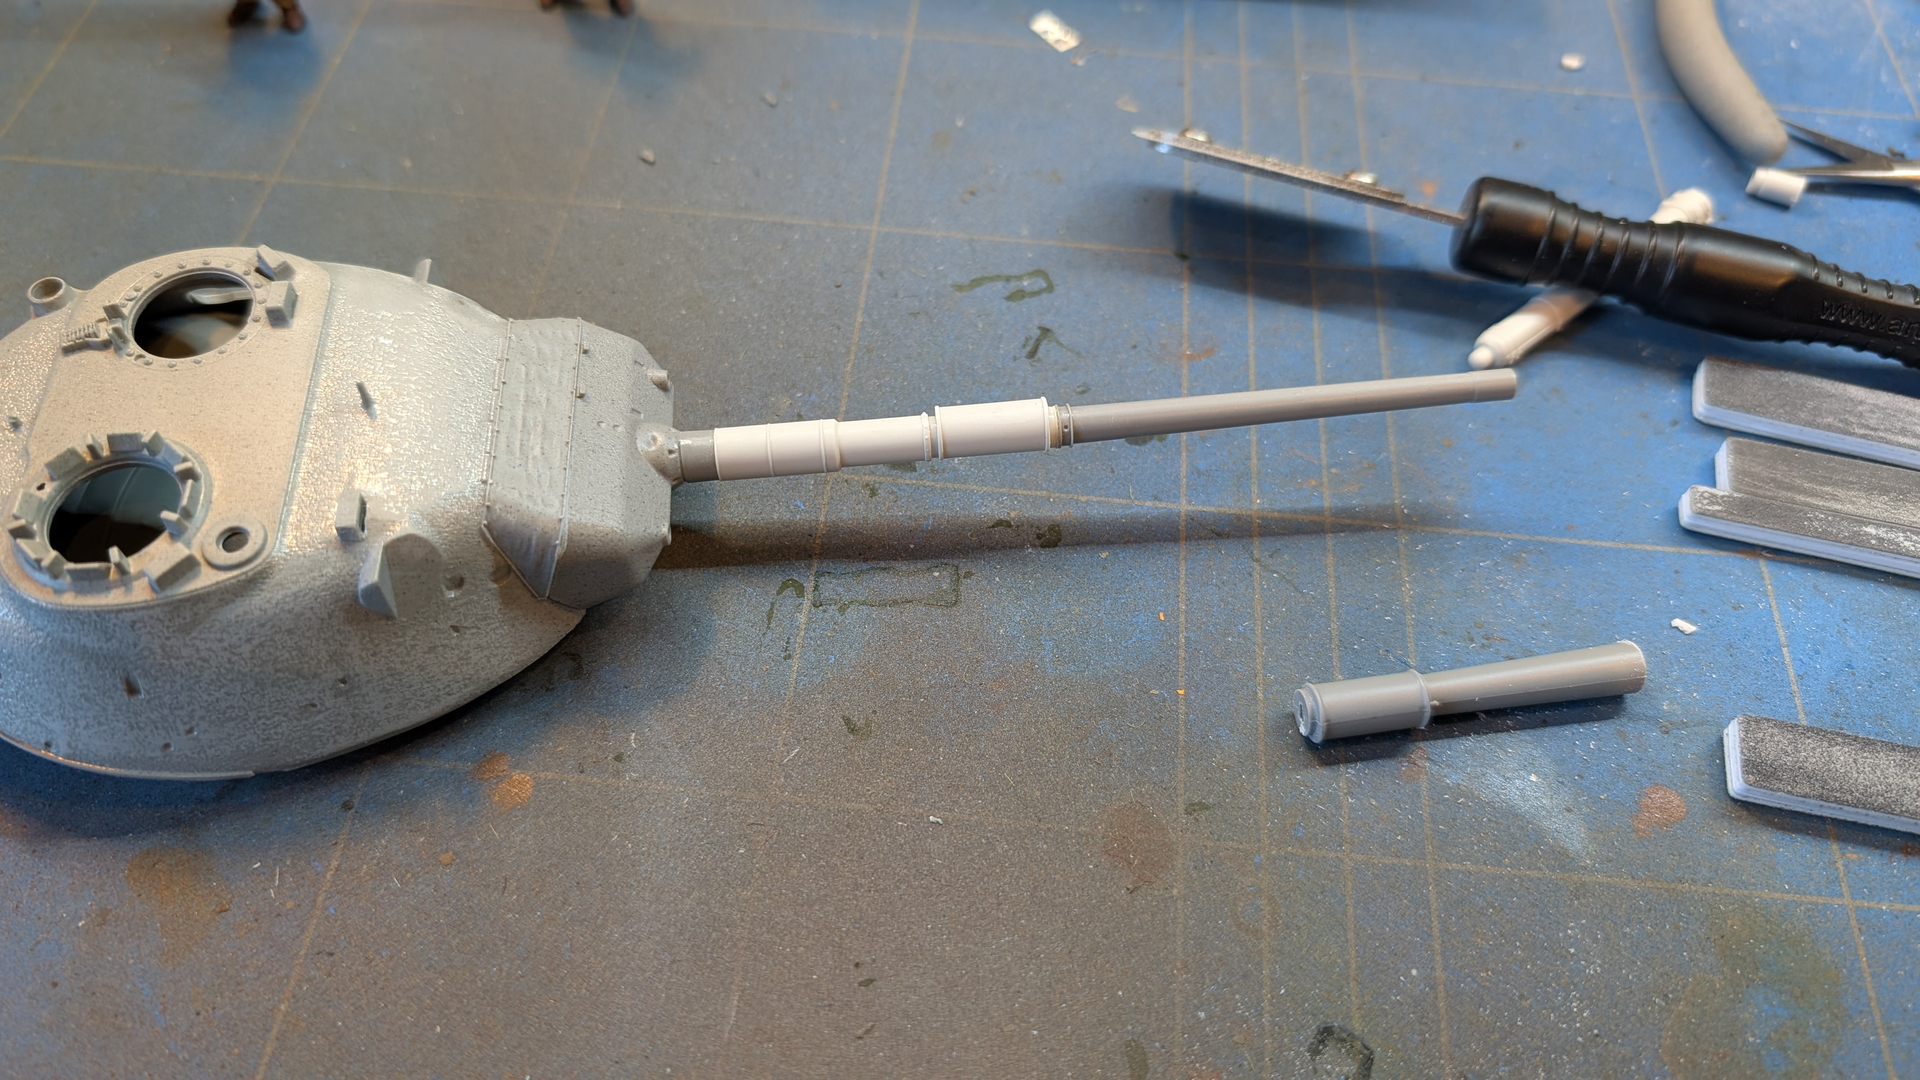
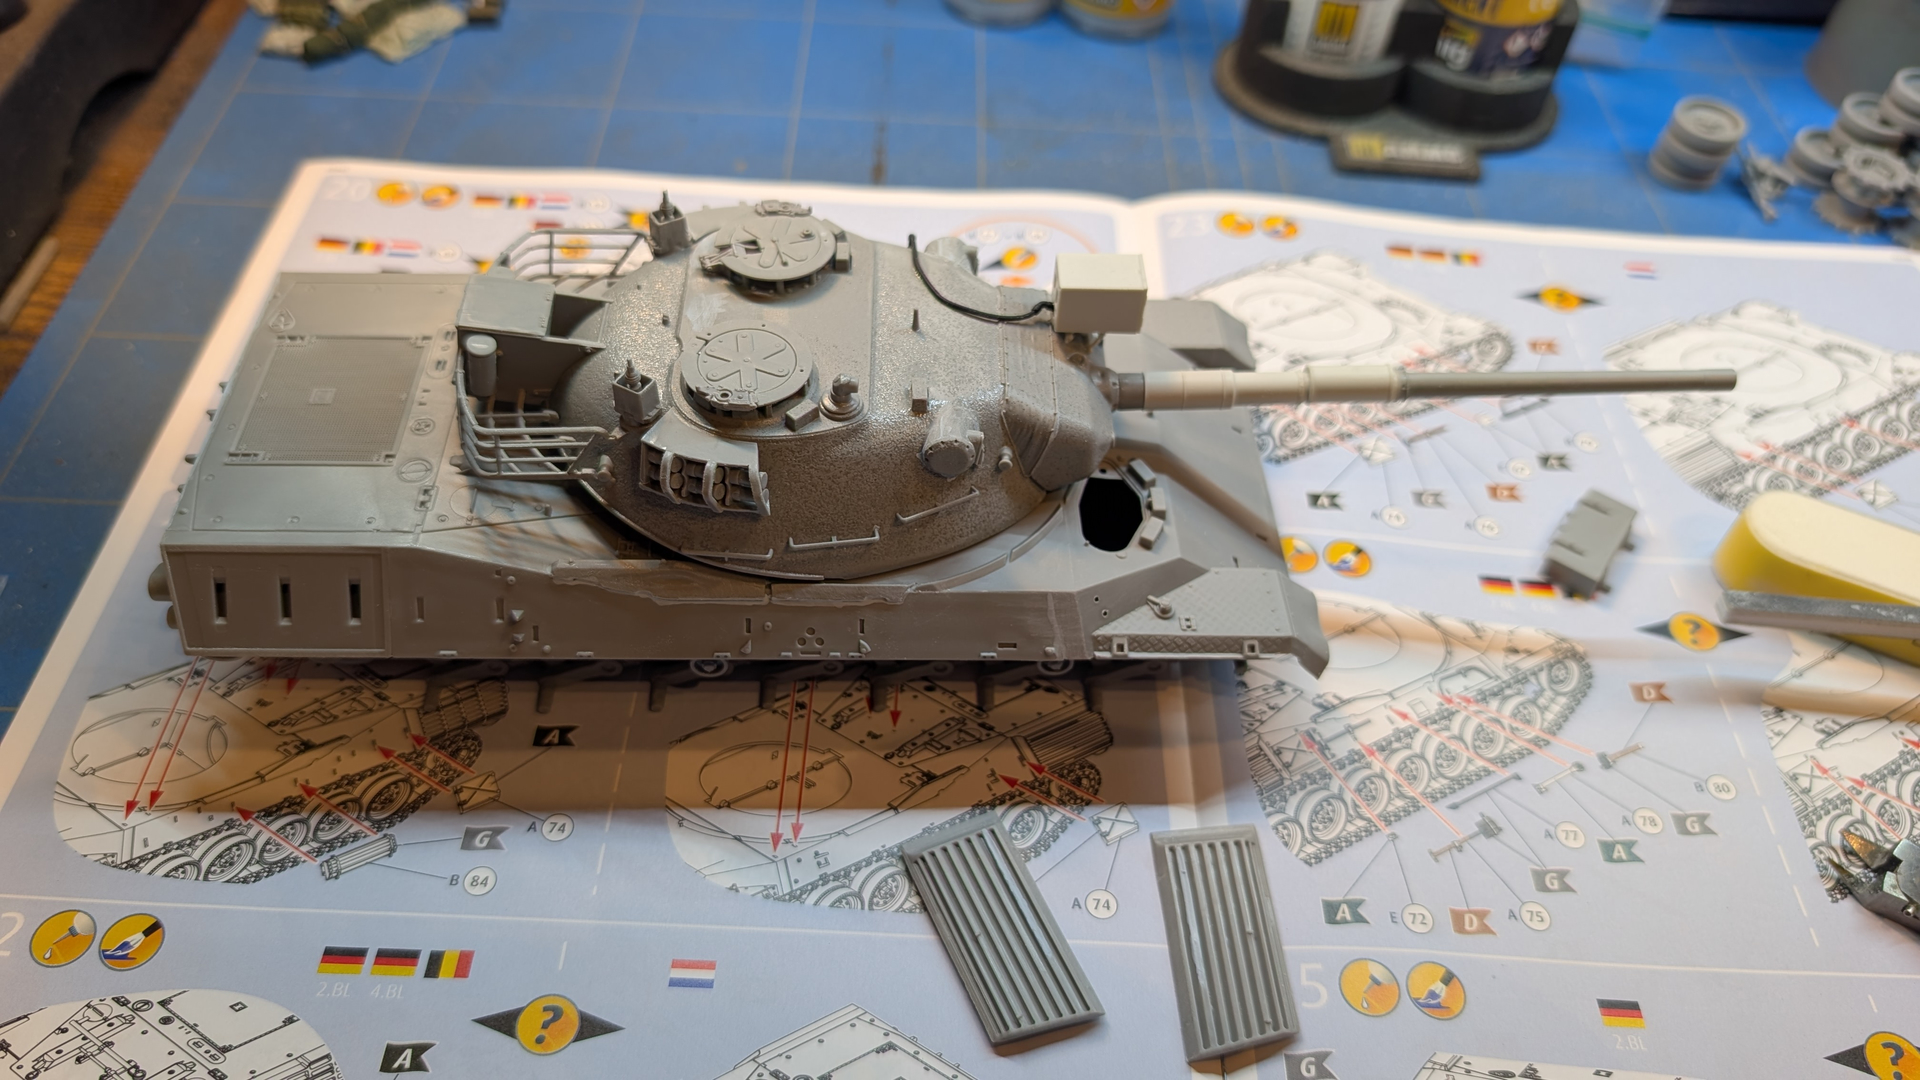
There are a couple of things that need to be fixed on the kit, and the first thing I did was correct the barrel. I don’t know if it’s typical for early Dutch Leopards, or if other countries did the same thing, but most Dutch tanks had a half sleeve around the barrel, on the portion between the mantlet and the fume extractor. A few early Dutch Leopards had full thermal sleeves, but the one I’m building had the half sleeve. So first thing I did is fix the barrel.
I mostly built a Leopard 1 NL from the Italeri kit about twenty years ago (the difficulty of building the smoke launcher brackets put a stop to that model), and I noticed the thermal sleeve as well. I solved it the other way round than you did, though: I cut the front off and made the bare barrel from plastic tube
The Revell kit of the early Leo only comes with the Naked barrel, so doing it that way wasn’t really an option. Instead I inserted part of a barrel of a Meng Leopard 1A5 I have in the stash, that I have an after market barrel for. Easy.
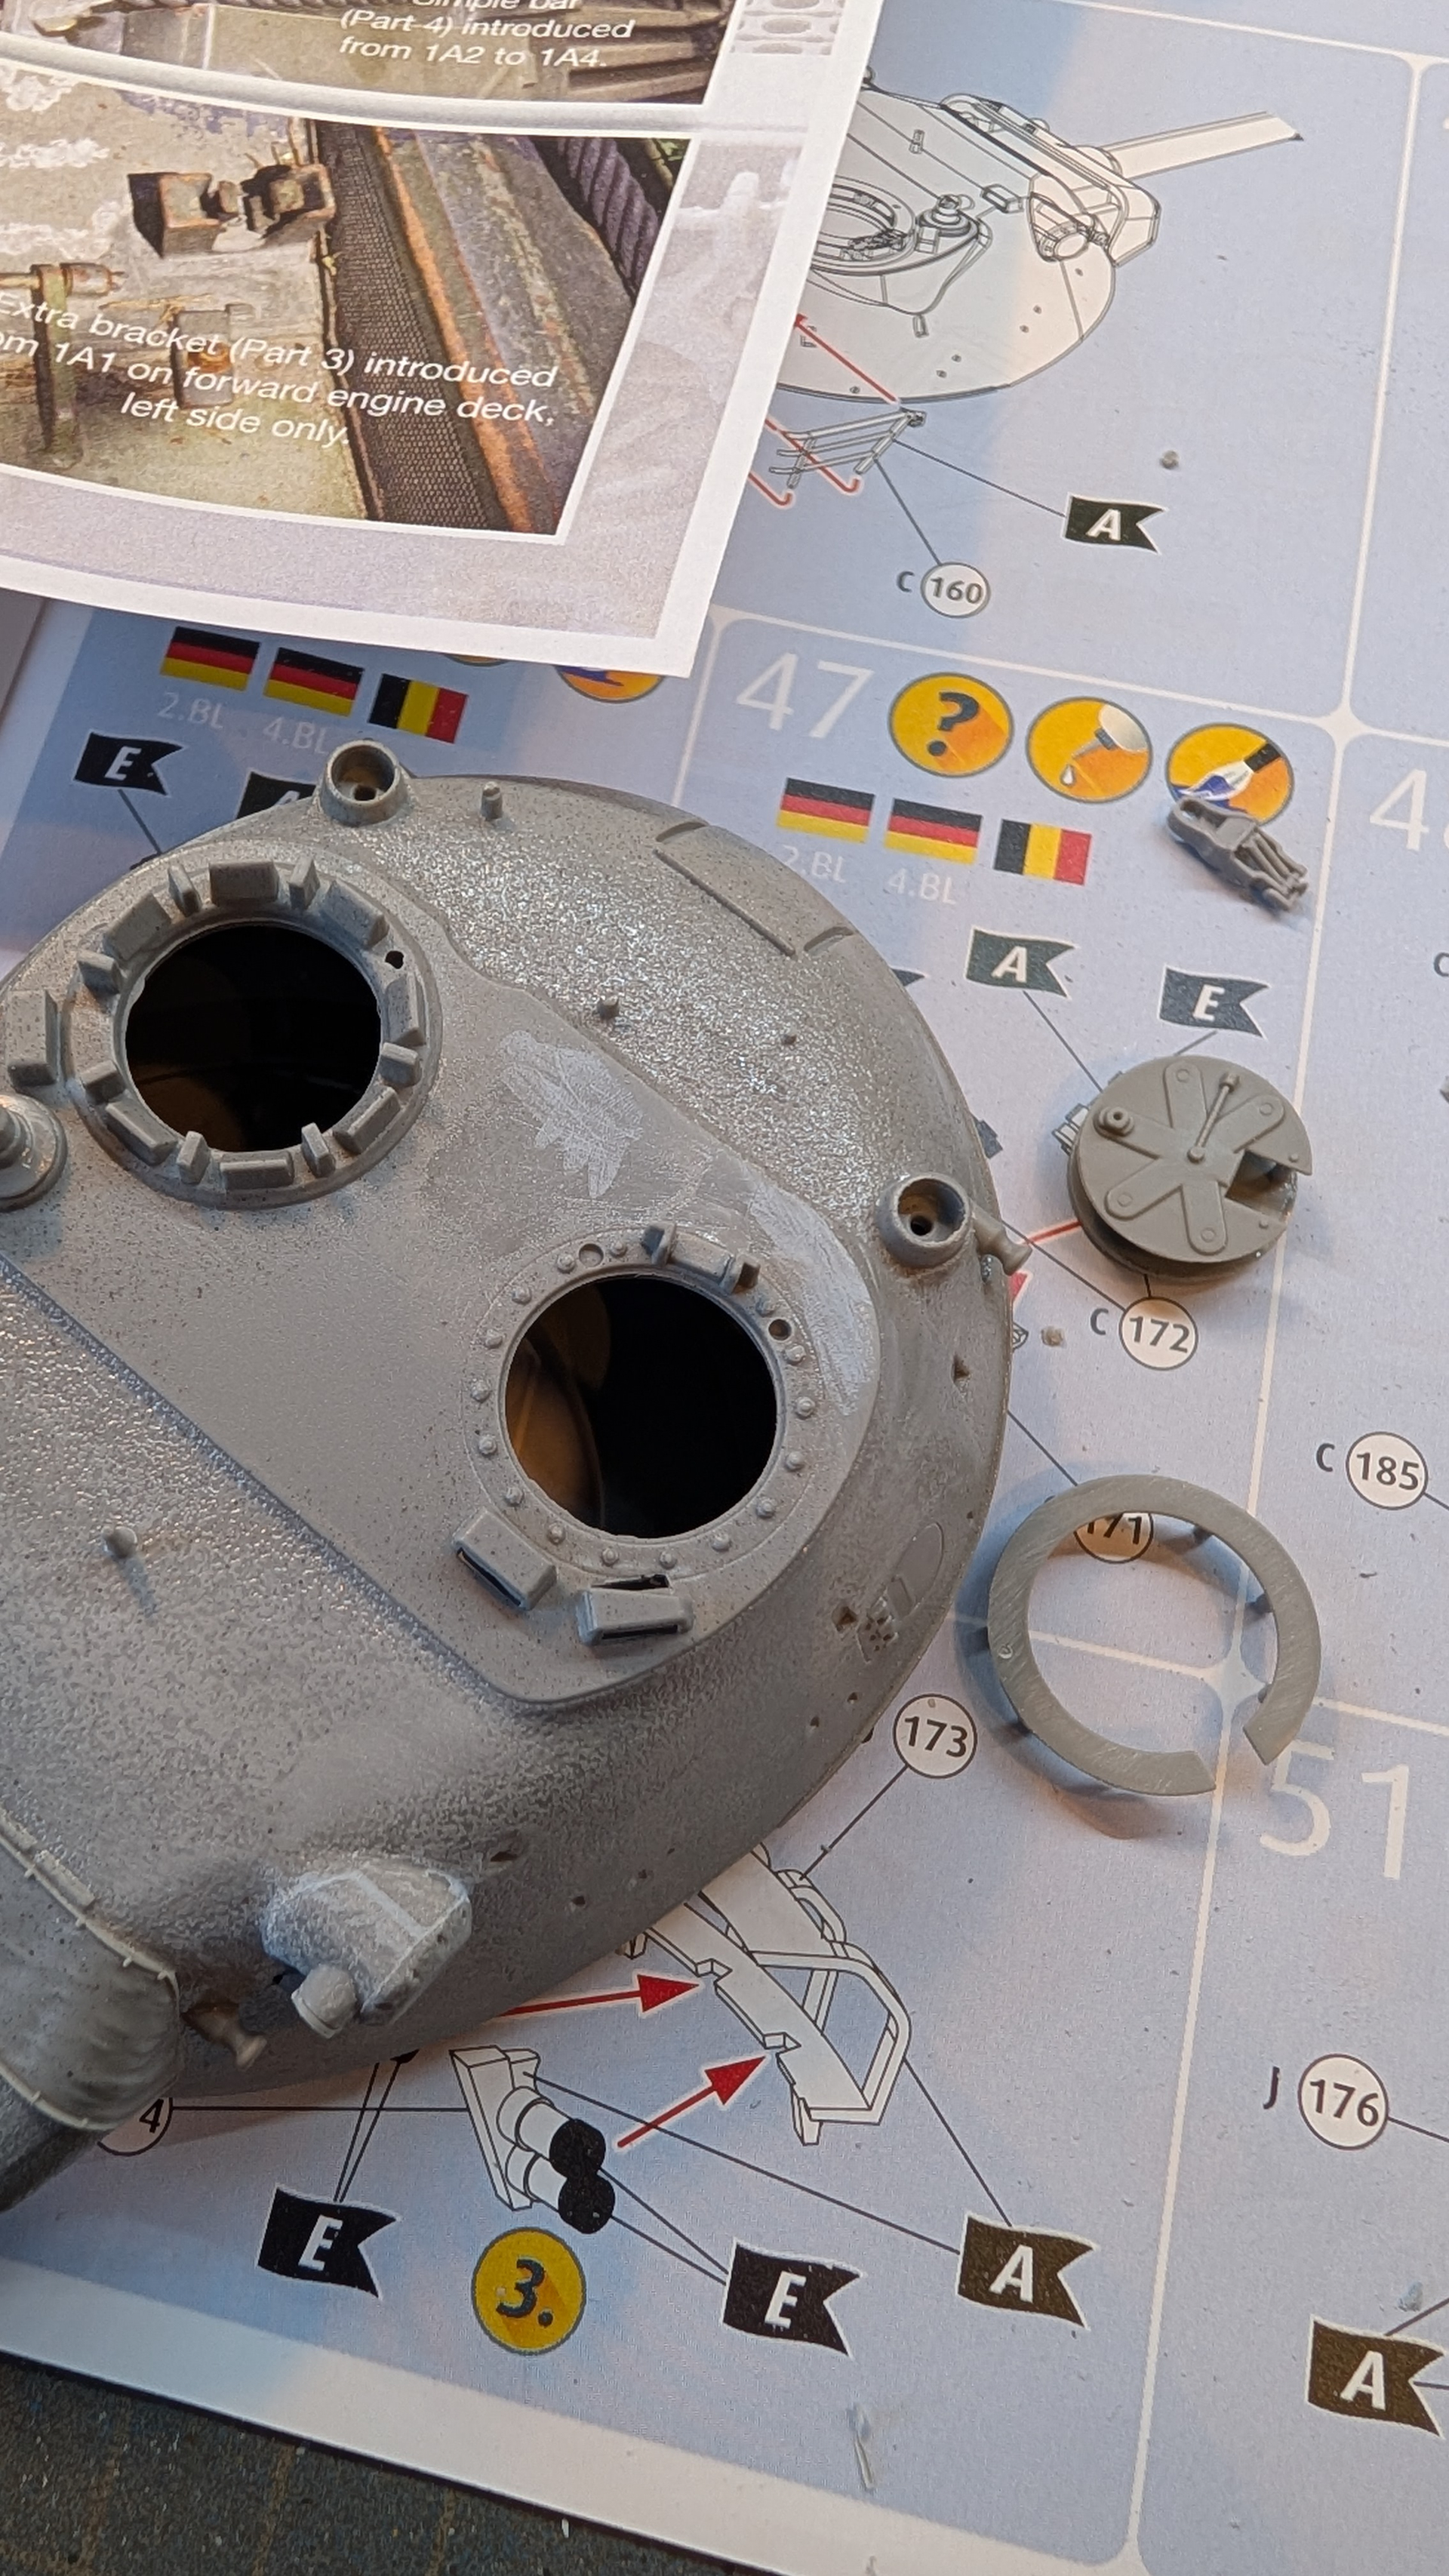
I’m not looking to super detail the model, but some of the detail on the base kit is just too crude. So I removed the loader’s hatch spring and replaced it with a resin item from Leopard Workshop.
The Leopard Workshop set also includes new hatches and skate rings for around the hatches, but while detail on those is nice, casting is really poor. The skate rings and hatches were so warped and the molds had slipped so much, they were pretty much unusable. So I used the kit parts instead and added some missing detail (meaning I drilled some holes). I removed the molded on skate plates for the MG and used the much nicer Leopard Workshop pieces instead.
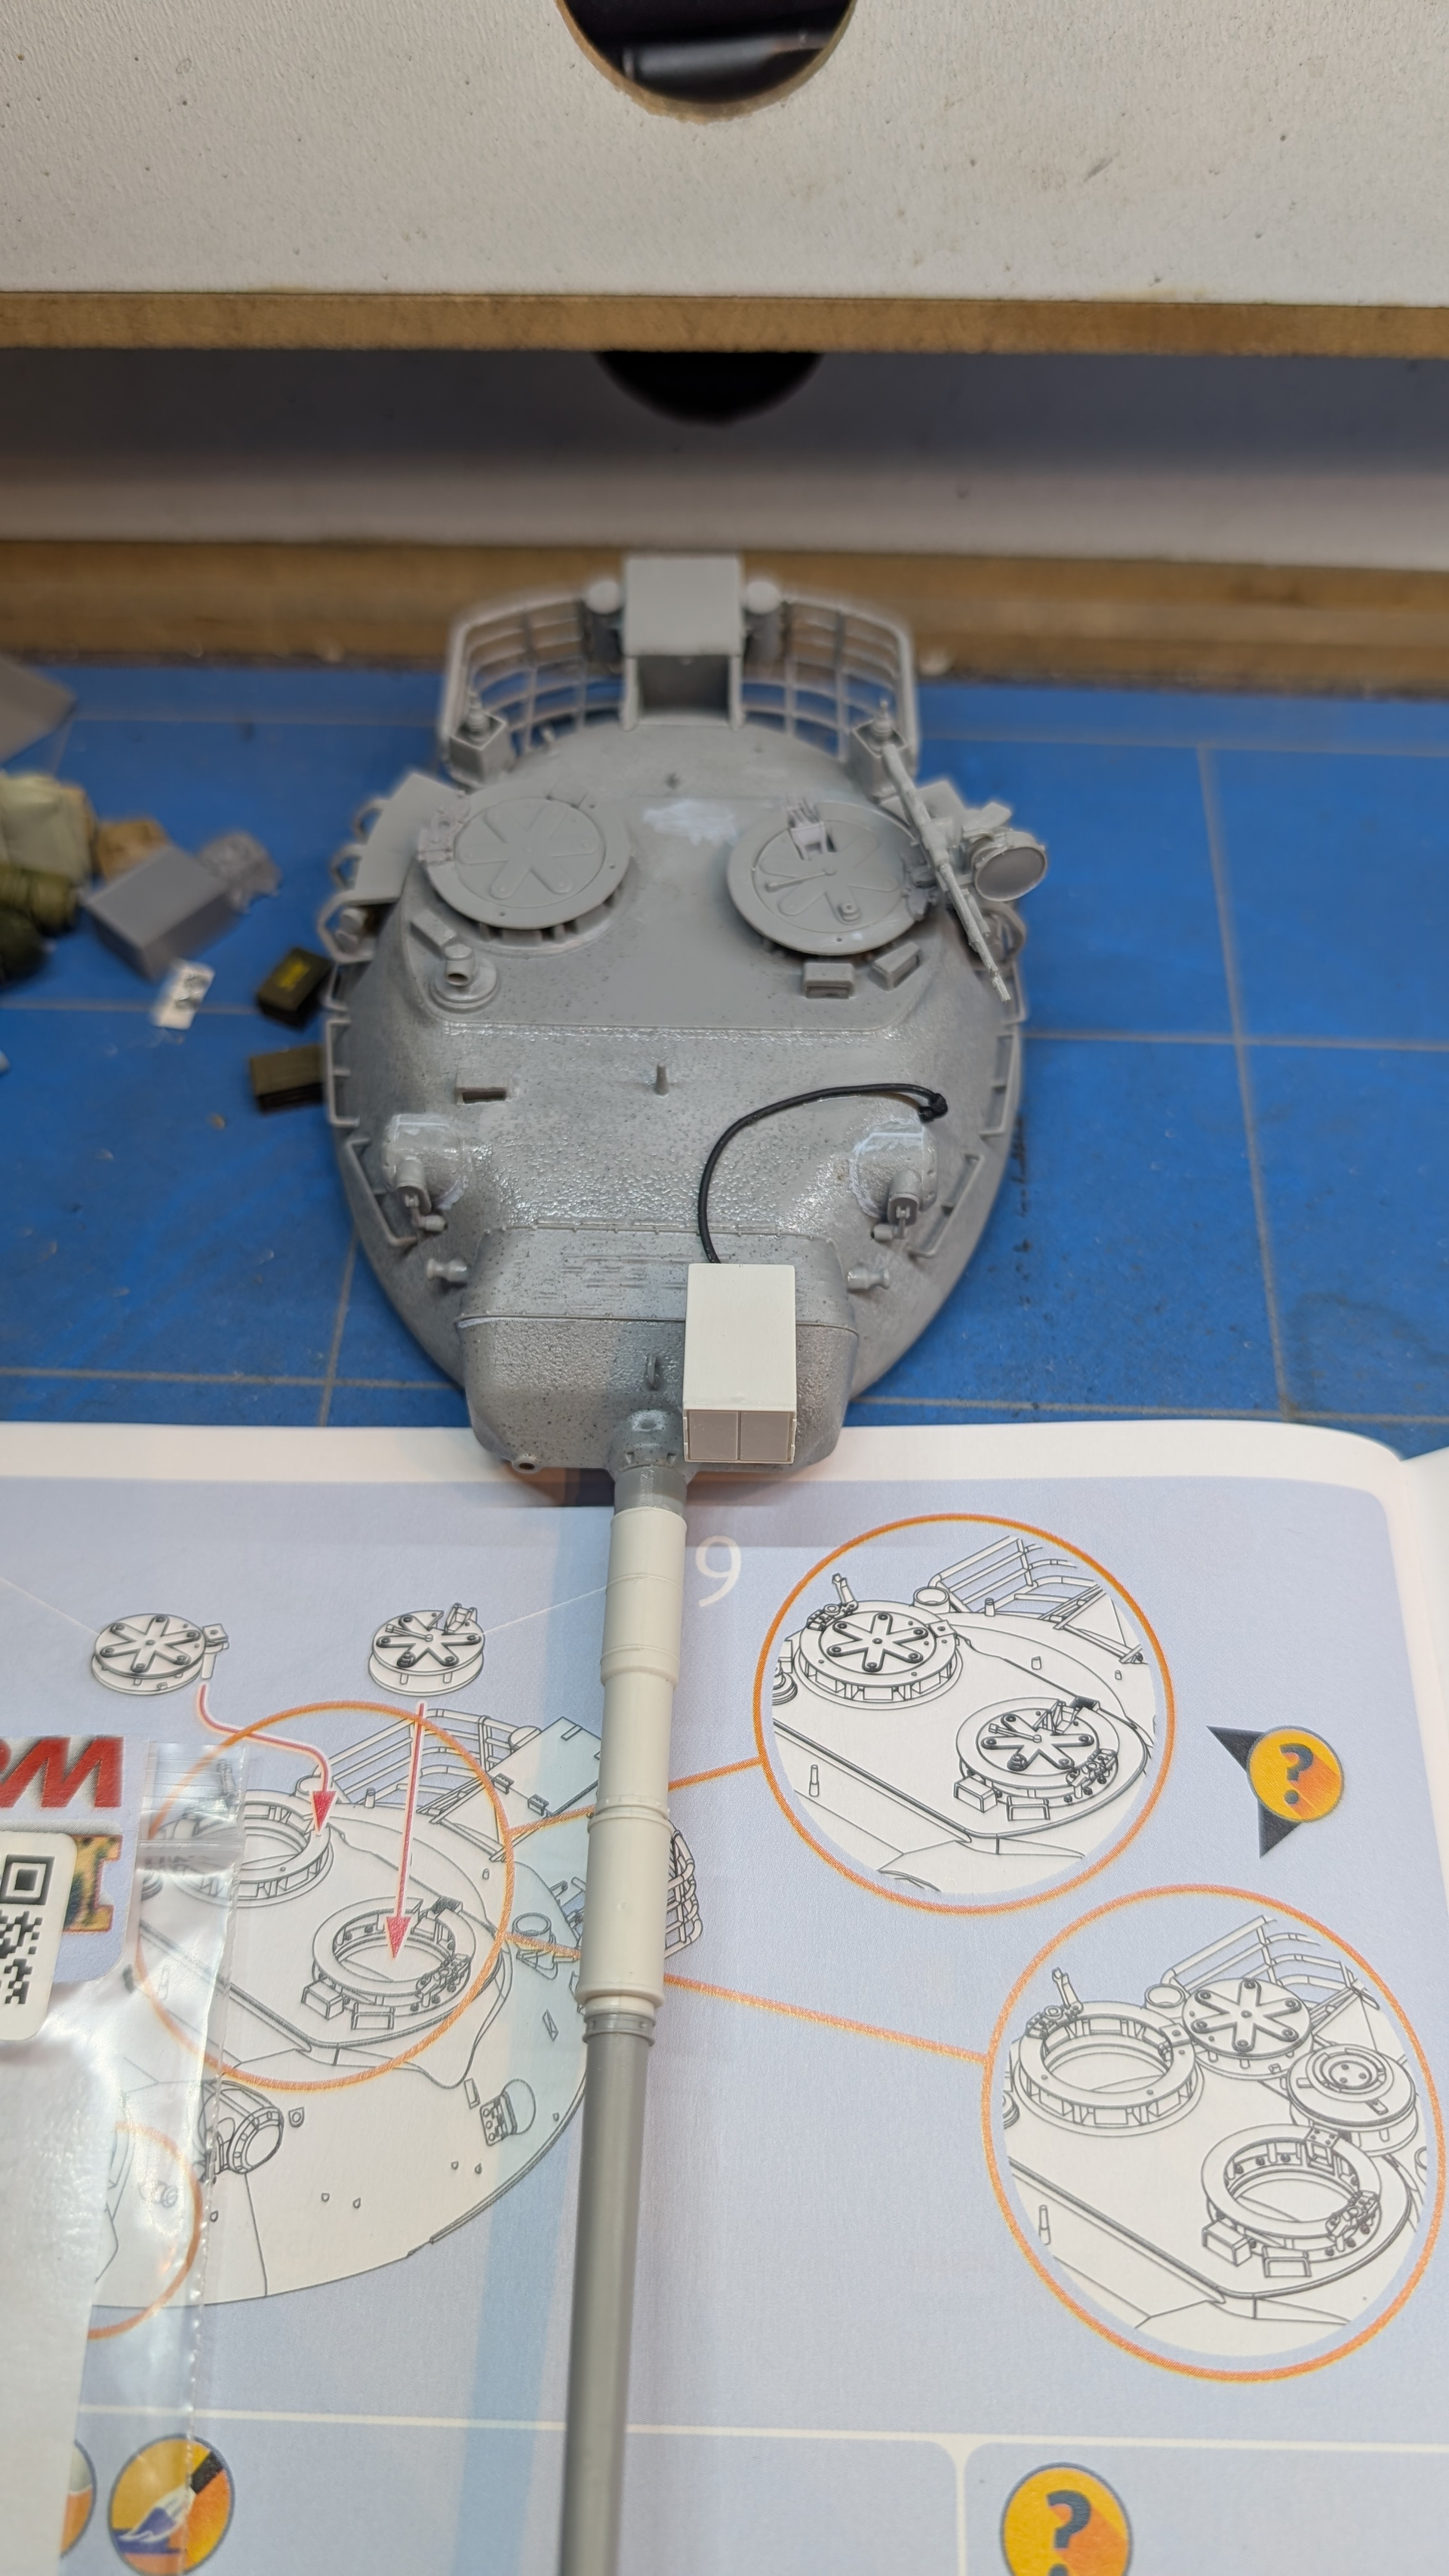
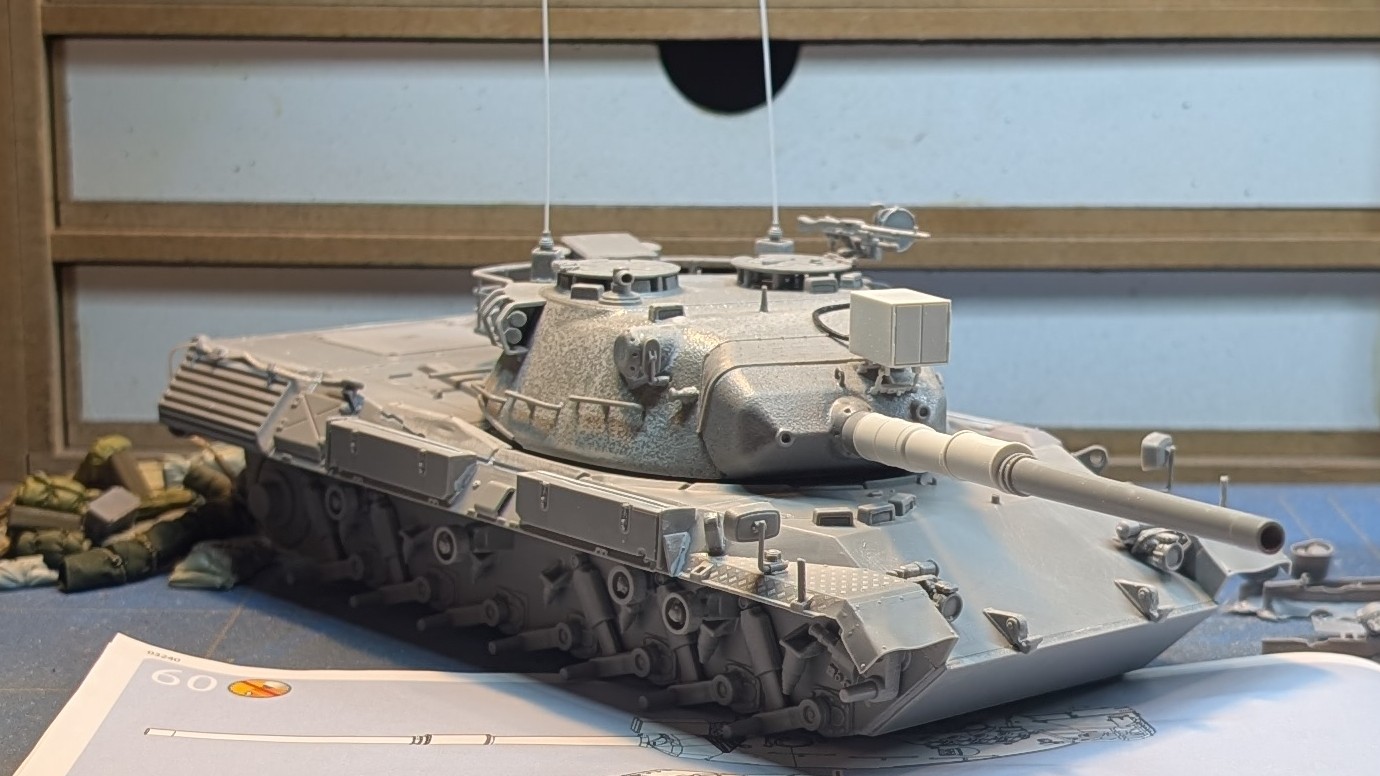
Construction on the turret is done. I used the light from a Meng kit that I had in the spares box, because the details were nicer than the Revell version.
The bustle stowage rack is kinda crude, but I’m not bothered because it’ll be full of stowage anyway.
Didn’t get a lot of bench time today, but managed to get a few things done anyway.
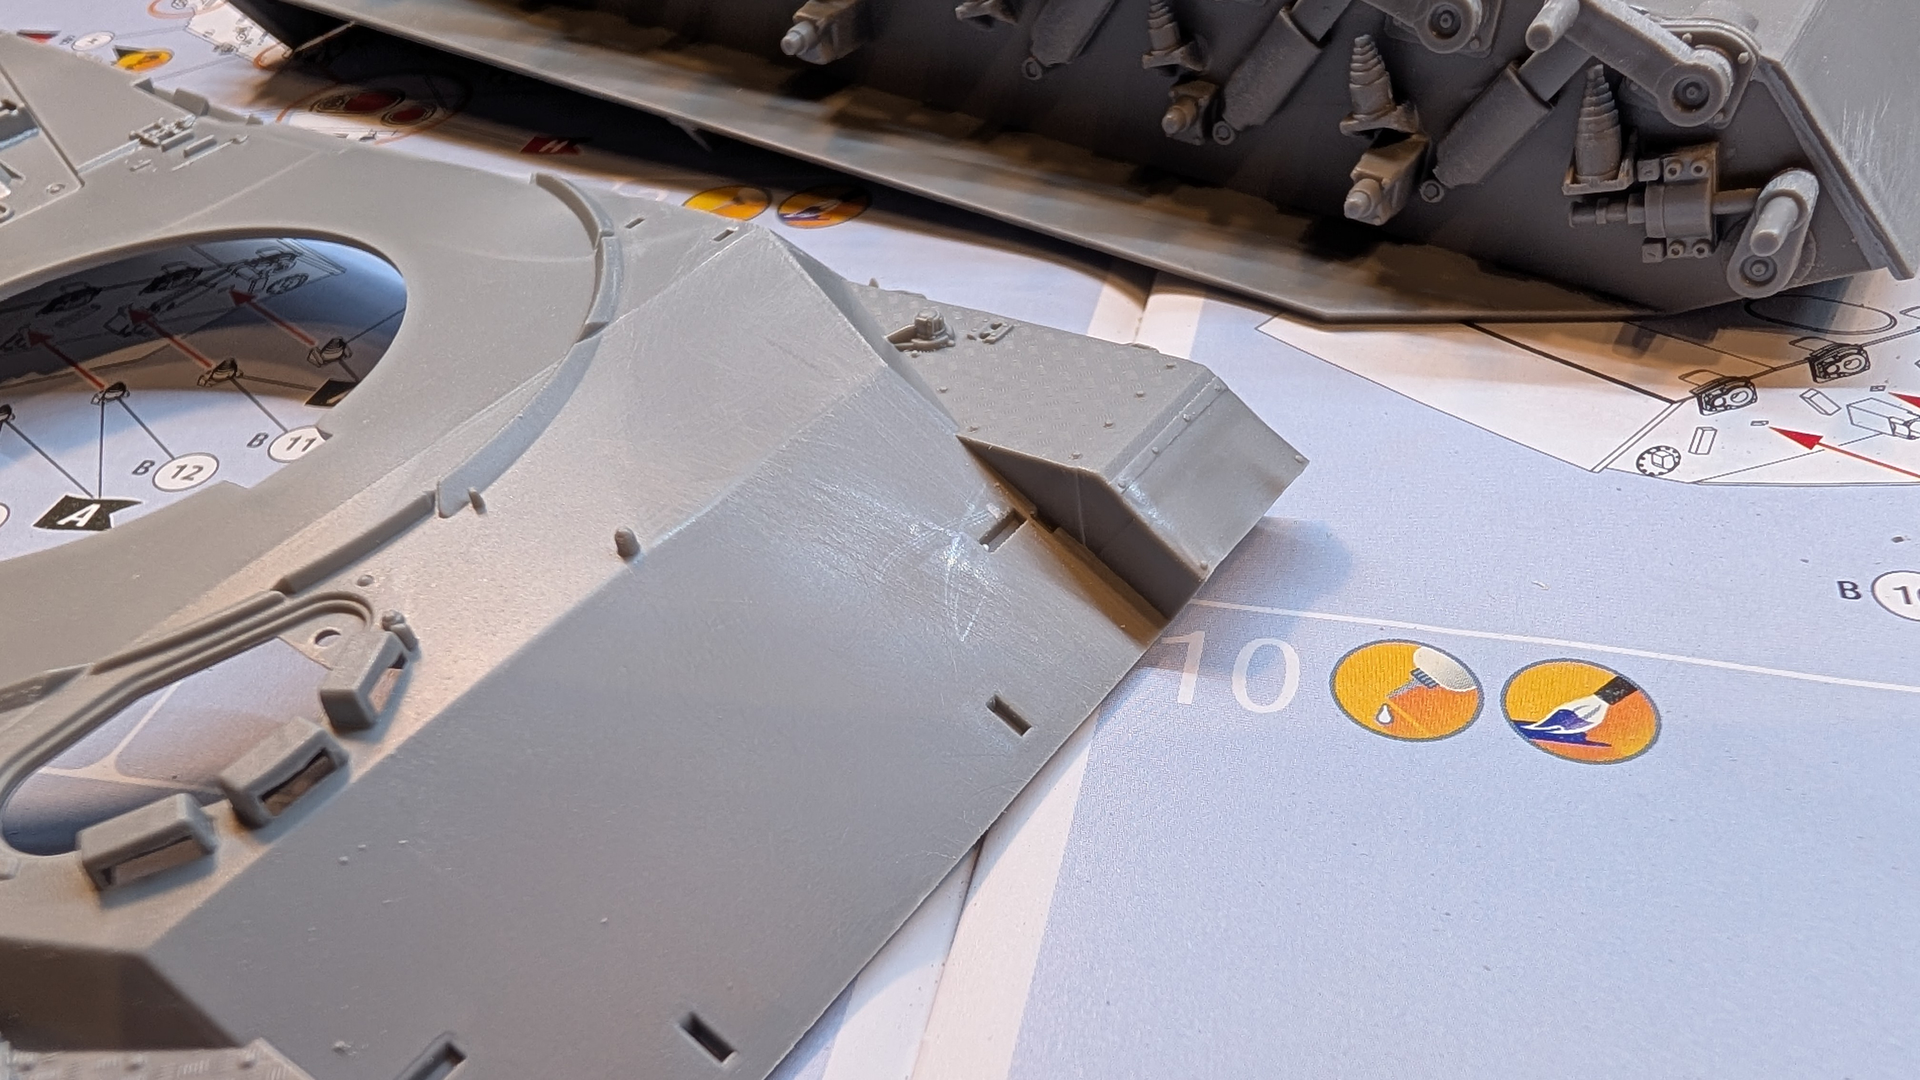
I put the lower hull together and started on the suspension. Since I hate filing down the seems on the wheels, I set up a little reward system; I put together two wheels and sand them, I get to do another step in the build.
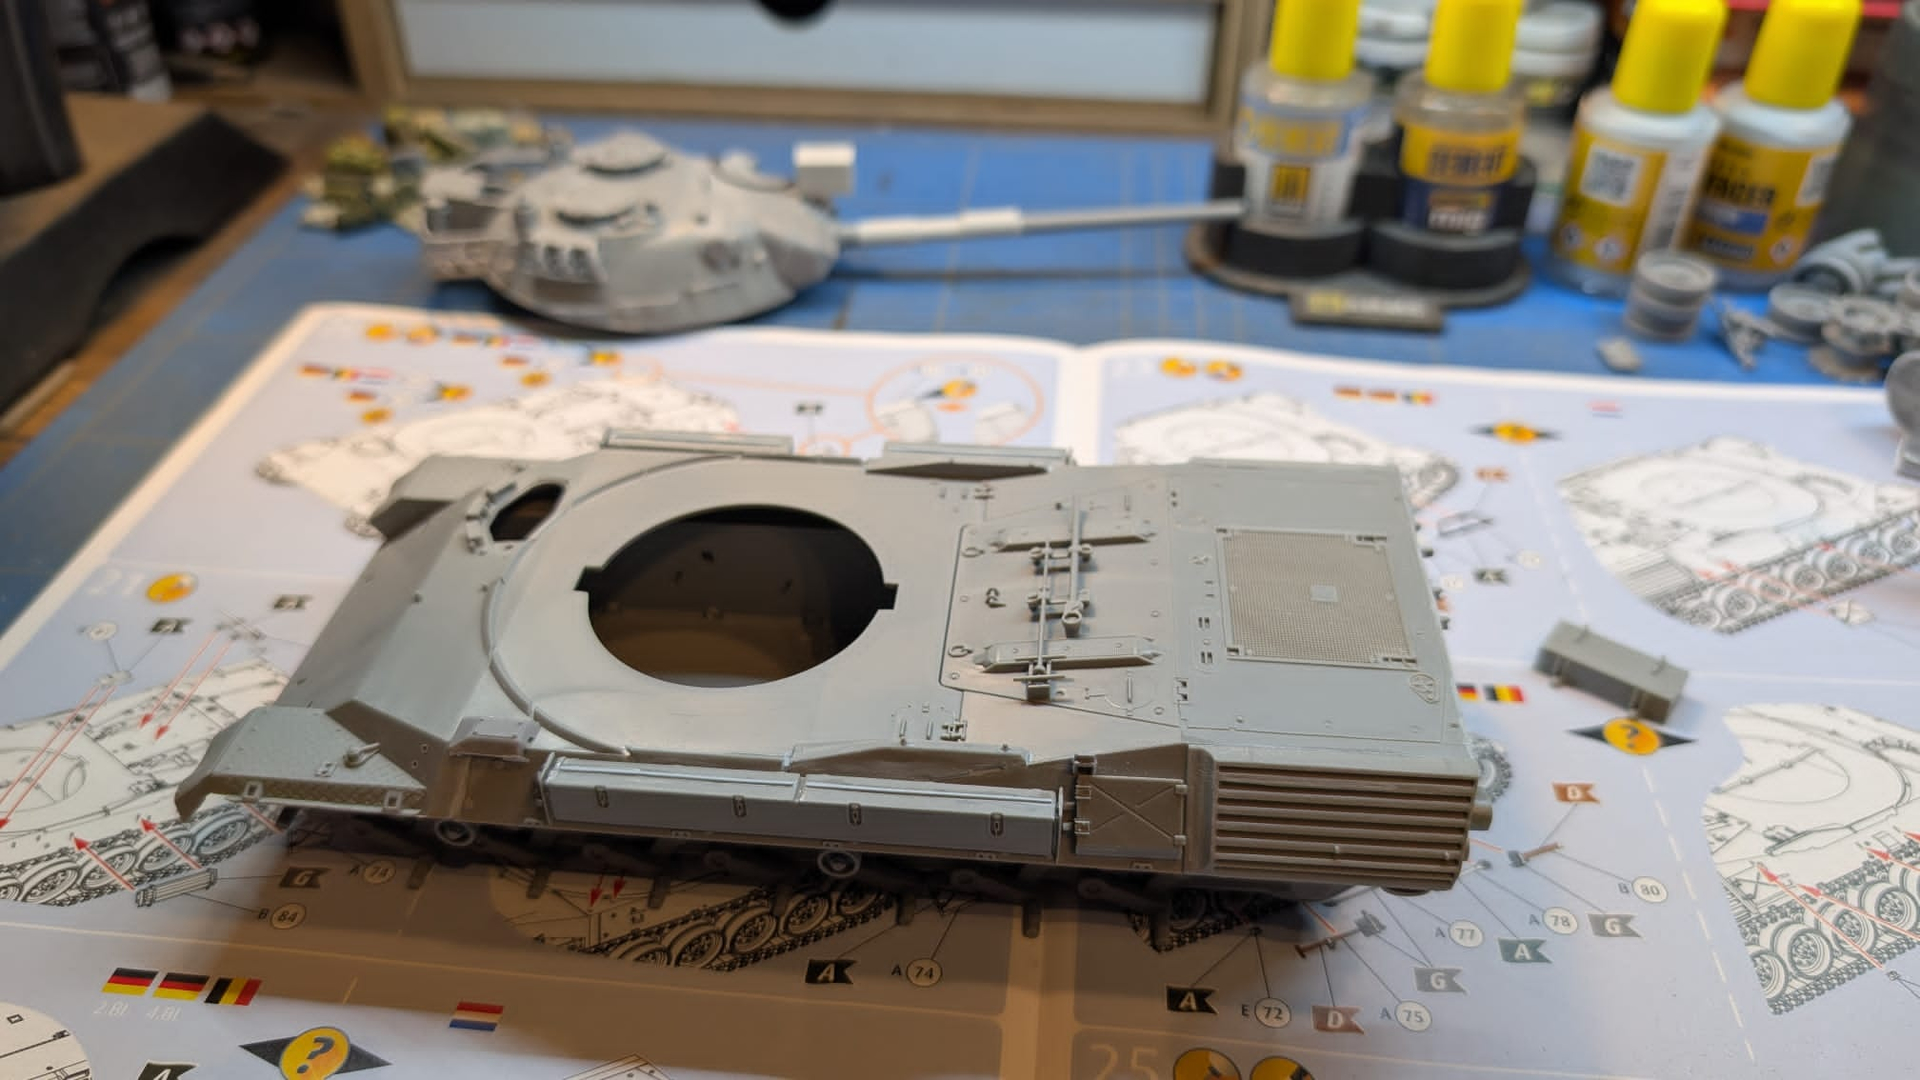
I also removed the molded on plugs from the glacis plate. This kit is one of the very few that has them, but they are done quite poorly. So I removed them and will replace them with aftermarket items. On these early, “naked" Leopards they are quite prominent.
Got some more done today. Basic shape of the hull is coming together, but this is NOT a Tamiya kit. It needs filler. But nothing anyone with some experience and tools can’t handle. And it is a WAY better kit than the ancient Tamiya Leopard 1.
I spent some time fixing some of Revell’s strange design choices. I filled the weird slots that are molded in the exhaust grilles, where Revell would have you glue the tow ropes (at least I think that’s what they are for).
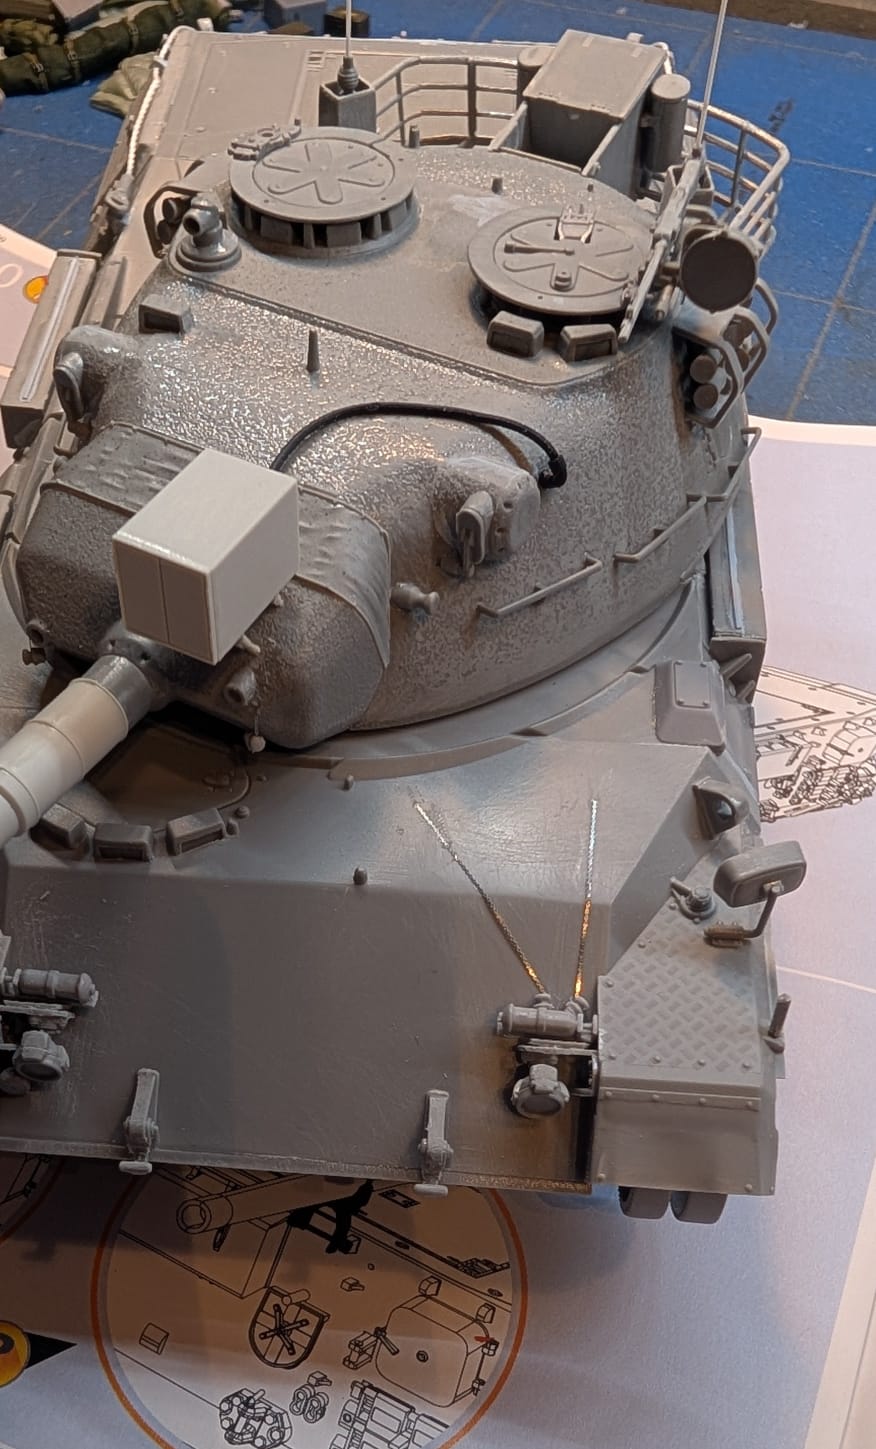
Moving forward with the details on the hull. I replaced the armored cover for the NBC equipment with a more detailed one from Leopard Workshop.
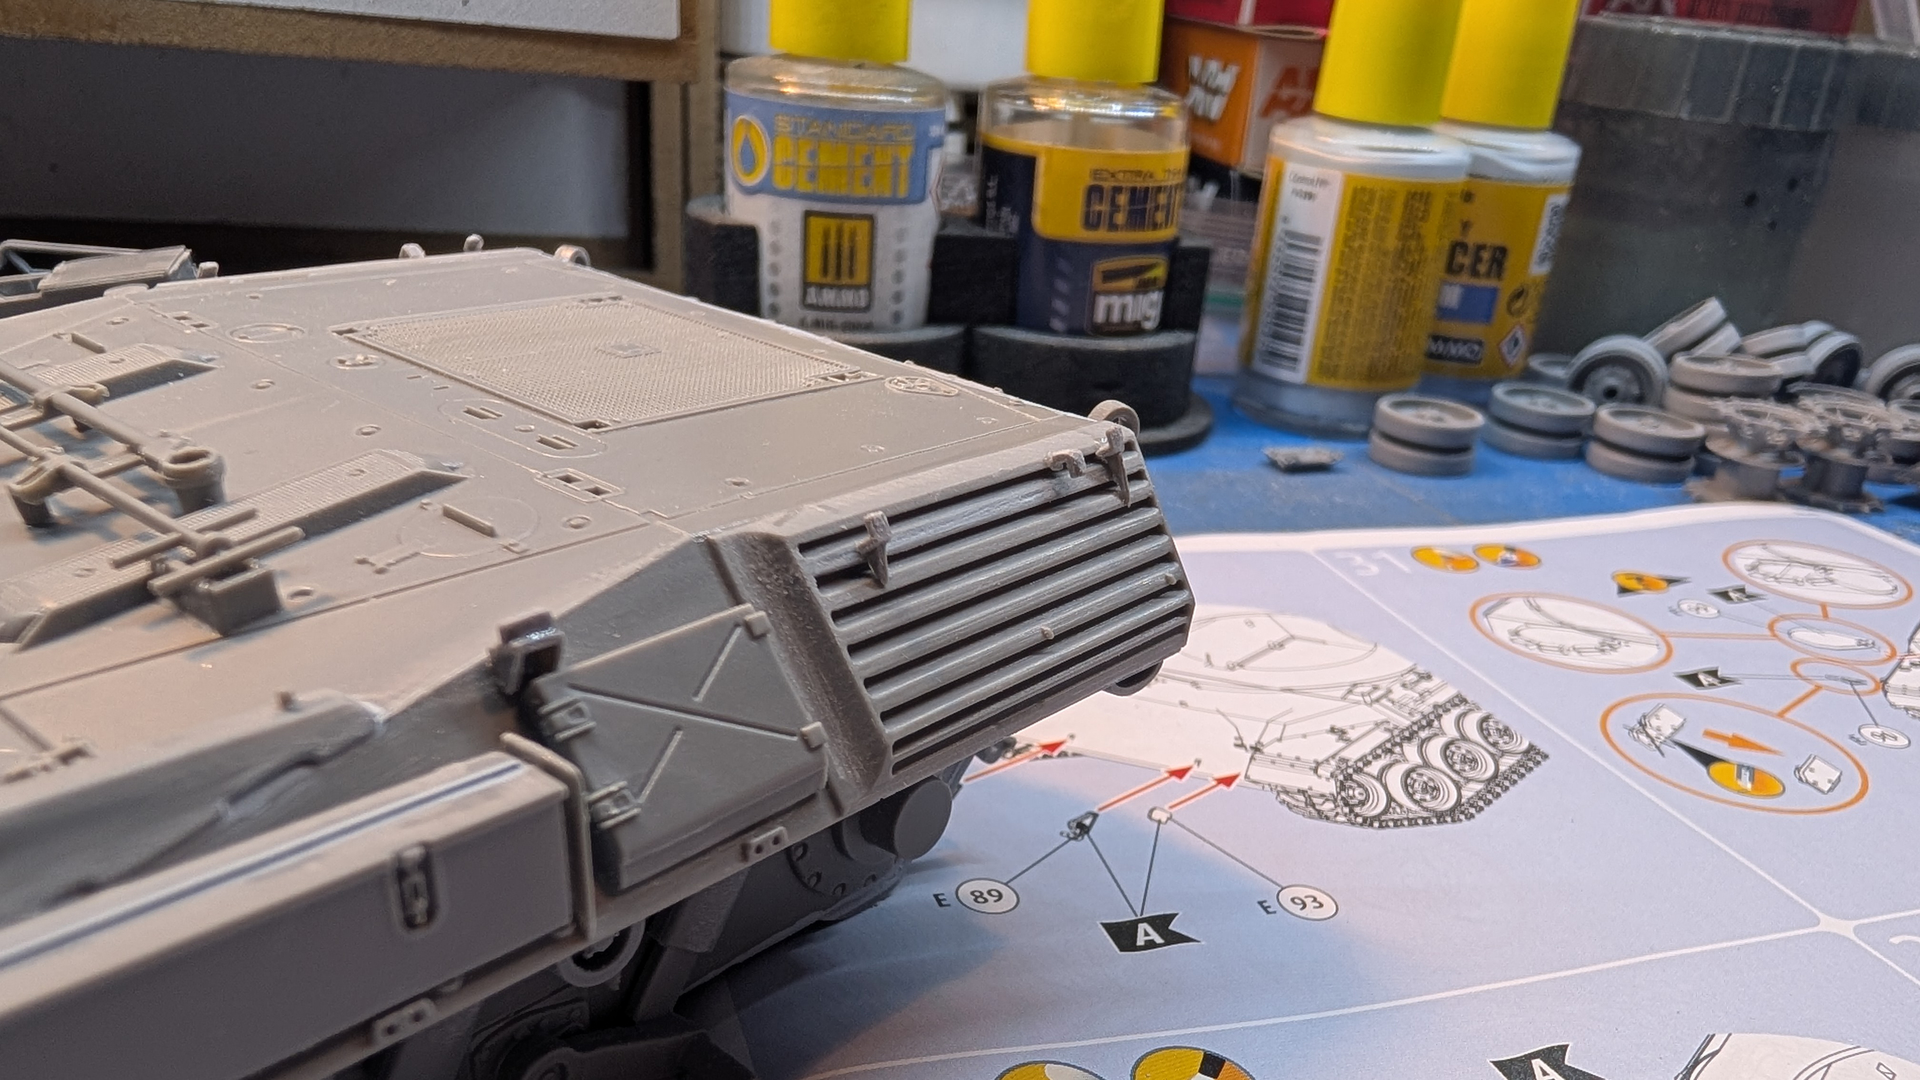
The Dutch Leopards did not have the tools mounted on the sides of the hull. Instead they had long tool boxes along the hull sides, in which they carried tools and other items like first aid kits. Revell has included these Dutch style bins, but they are a mixed bag. Looking at them directly from the side, detail is nice, with little pad locks and everything. However, running along the top of the lid is a VERY crude ridge that looks like a mold line, but might just be the single reinforcing rib that runs along the top of the real thing. These really look like sh*t. So I sanded them off and replaced them with thin plastic strips. These I sanded down a bit, because they aren’t very pronounced in real life. I also ran some thin filler/putty along the edges, to blend them in a little, since the real thing was just a stamped shape, like you would see on a jerrycan, only proud instead of sunken.
Are there separate plates at the ends of the boxes? That’s odd, on the real tank (at least, the one that used to be in Overloon fifteen years ago) the ends looked like this:
Good call, I hadn’t paid attention to that. Revell even added some brackets perpendicular to the boxes, which simply weren’t there on the real thing. Odd… Should be an easy fix though. Thanks for the heads up!
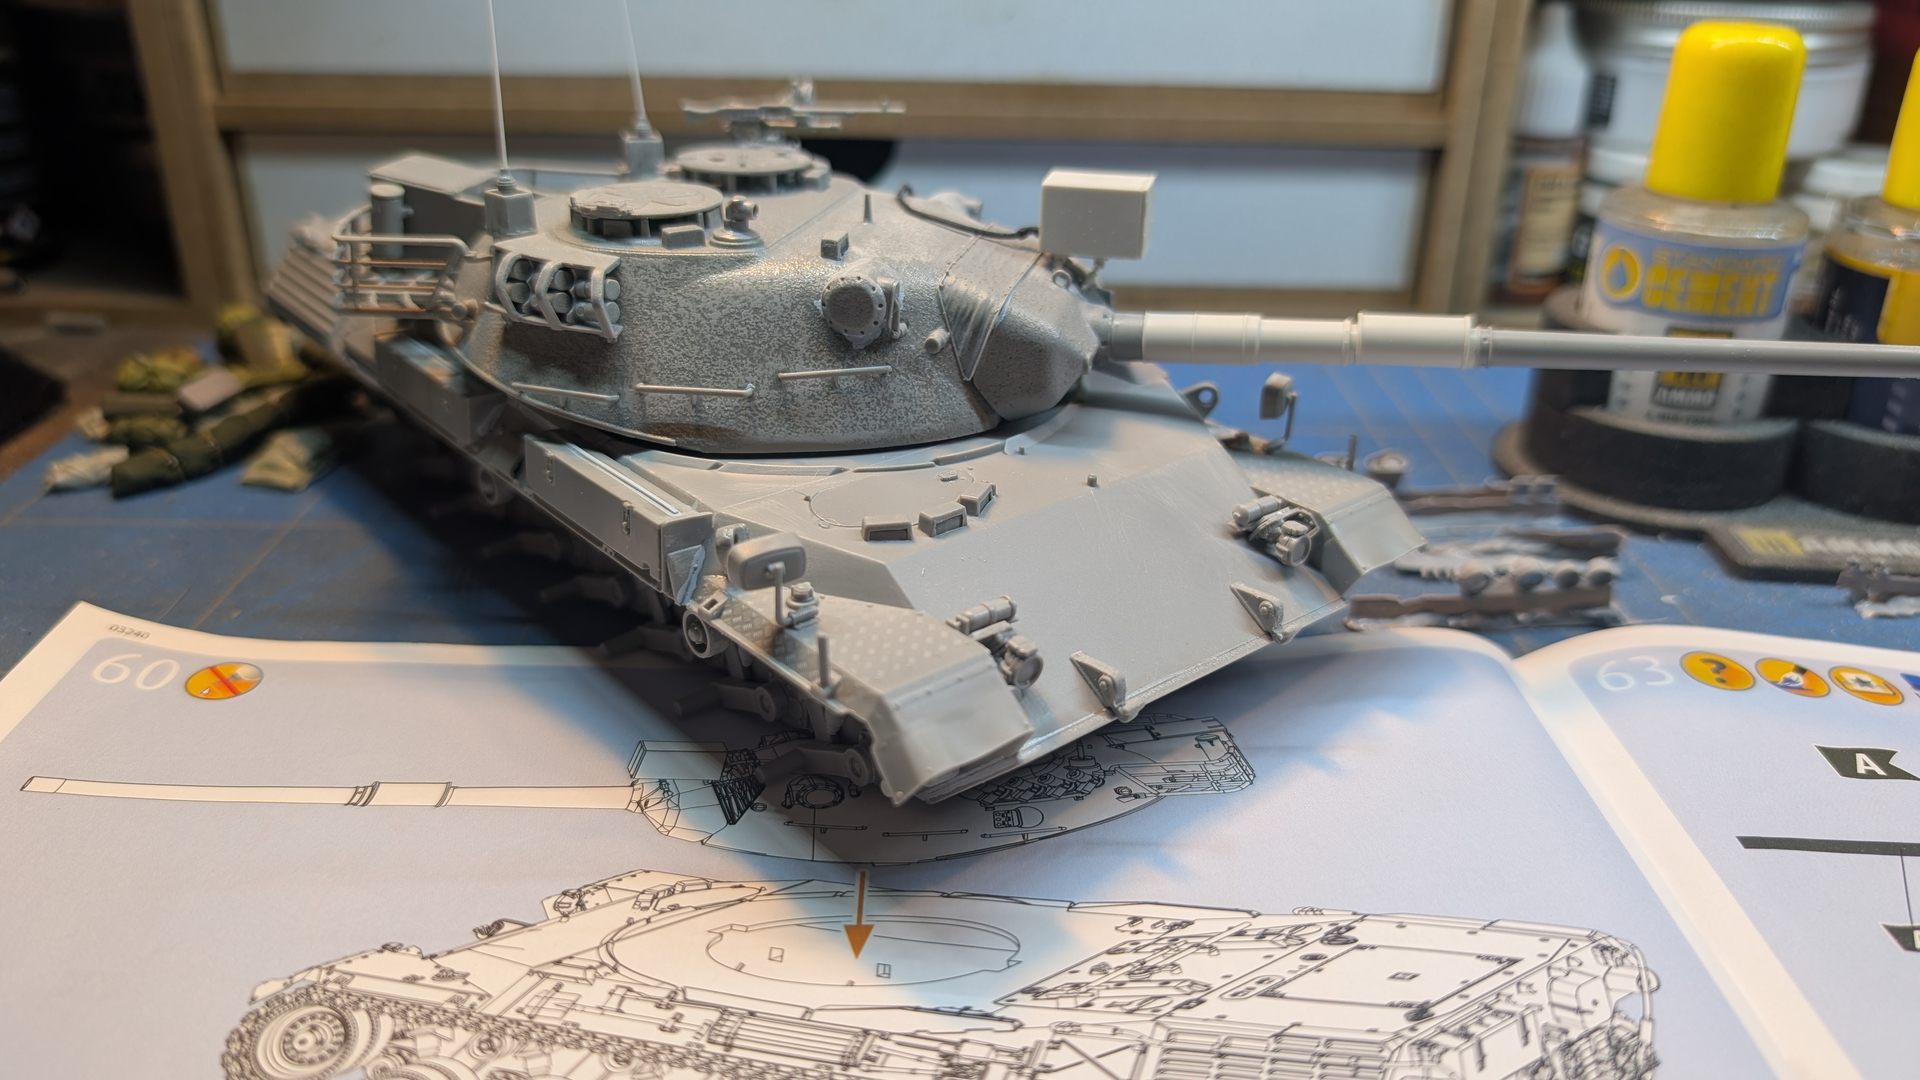
Replaced the kit’s tow cables, because they are a major let down. Some parts of the model are nicely detailed, but these aren’t. They are made of an almost unworkable material and for some reason come with the mounting brackets attached to the cables. So I replaced these.
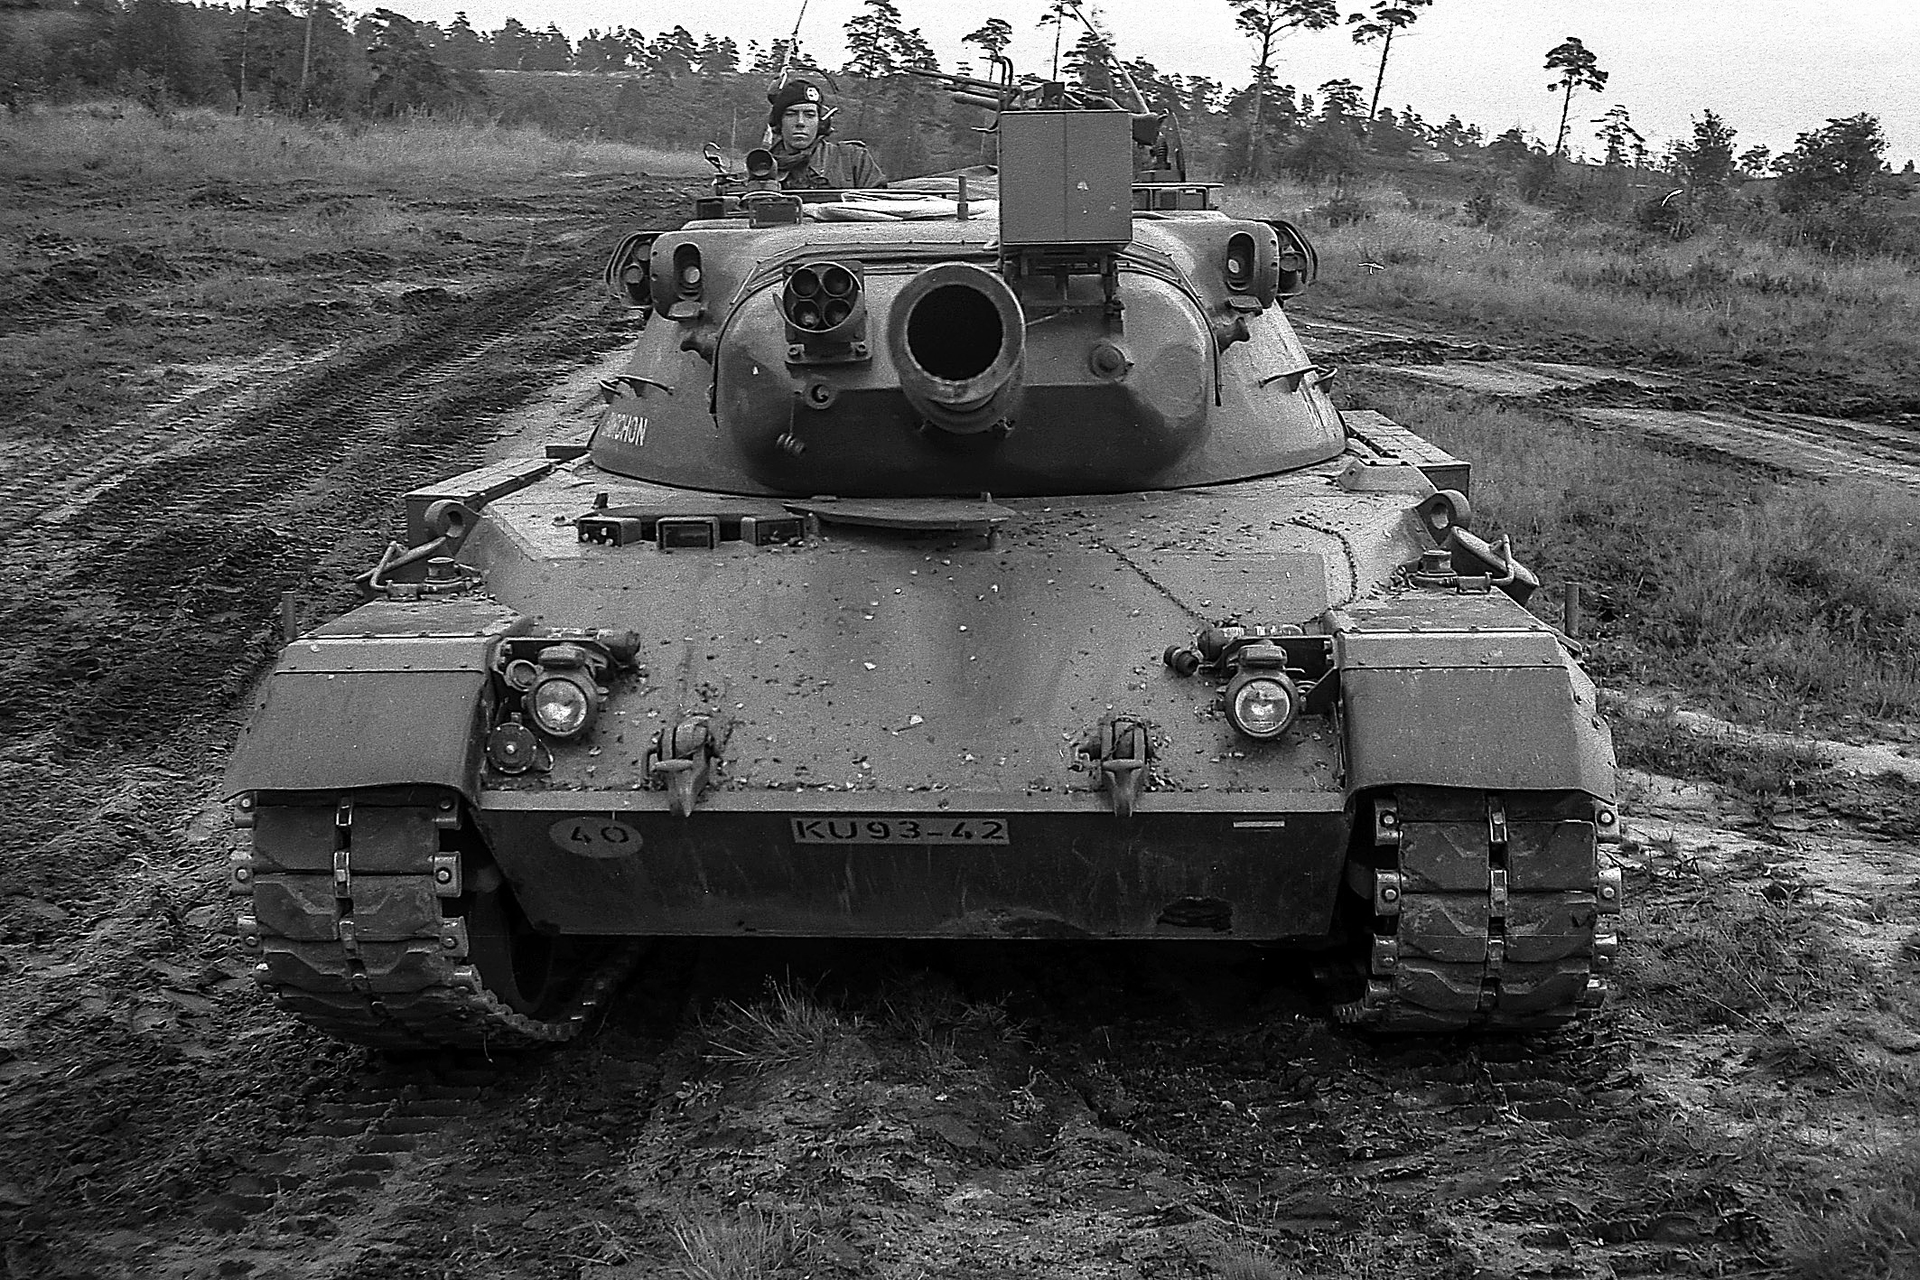
For an early tank, there should be one, AFAIK, on the left, but indeed “bare,” like you have them. Anyone building a 1-V should instead have a zippered PVC bag there, which contained the extinguisher, and behind the right light as well.
What’s the point of the extra plugs on the glacis anyway? You already have them on the mantlet, which makes sense, but why have an extra set on crazy long chains at an impractical location?
Oh, OK I thought I remembered they only had one. Maybe that was initially, then they got two, and then they got the zippered bags?
Hmm … Page 35 of De Leopard 1: Gepantserde vuist van de Koninklijke Landmacht has a photo taken on 2 October 1969 of the first Dutch tank leaving the factory, with no fire extinguisher behind the right headlight. But it might be those were only installed once the army got the tank, of course. On page 33 is a photo of newly delivered tanks in 1971, and they do seem to have two fire extinguishers.
Where did I read they had only one, then? Or is my memory playing tricks on me again?
Aha, Shackleton’s Leopard 1 Trilogy, page 545:
A portable fire extinguisher was attached above the headlight unit on the right-hand side.
And the next page:
A second external portable fire extinguisher was introduced [as part of the upgrade to Leopard 1-V] behind the left-side headlight unit (with both in neat zip-up bags).
So my memory was wrong about the side, and it looks like Shackleton was wrong about the number
They’re for plugging the holes for the gunner’s telescope and the coaxial machine gun in the gun mantlet, for deep wading. This requires long chains, else they can’t reach them, and they’re attached to the hull rather than to the turret because this way, the plugs can be removed by simply traversing the turret until the chains pull them out.
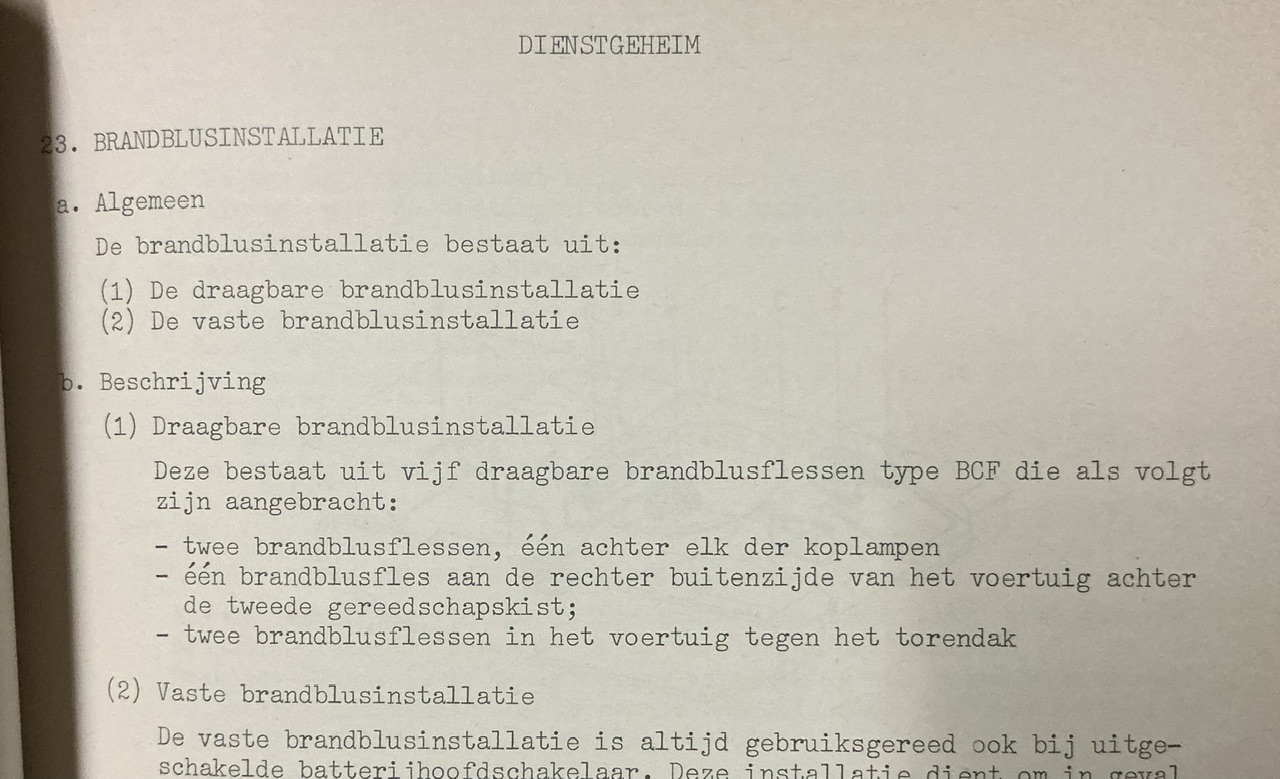
I suspect those are for normal use, not for wading. The second printing of 1TH9-2343 for the Leopard 1 (undated, but from after 1969 as it says it replaces the version of 4 July 1969) has this:
That’s part of the instructions for the deep-wading hydraulics, notice paragraph (12), which refers to item 12 in the drawing. In that drawing you can also see the other plugs. Now to find what, if anything, the manual says about those
Time passes …
Nope, they don’t appear to be mentioned at all. Which isn’t really surprising, as this isn’t an American TM that tends to spell out every little thing