One of the first tank models I built was a Dutch Leopard 2A4 from ESCI-Ertl. About thirty years ago I was very much impressed with the model as well as with the real tank, so I wanted to re-build the model but the ESCI kit was not or hardly available. I did not like the Revell and Hobby Boss kits so I became really excited understanding that Meng was releasing this kit. Meng had a good reputation because of other subjects already. After a bit of research, it turned out that to convert it into a Dutch vehicle, I had to ask the extra sprue with the Dutch parts from Revell customer service (their A4/A4NL kit was no longer available anywhere).
Shortly after the Revell frame arrived (biggest thanks to the Revell customer service, their helpfulness is exemplary), I also bought the ET-Model upgrade etched set and metal-resin gun barrels from RB Models and the Leopard Club (not planned, I overordered them by mistake), the 6+2 smoke grenade launchers assembly and an FN machine gun (also from Leopard Club). When all the necessary parts were collected, the news exploded like a bombshell that the Hungarian Defence Forces had purchased 44 2A7+ tanks and until they arrive, 2A4 tanks will be loaned for training purposes. Wow! A perfect subject to my Leopard 2A4 project!

Since the configuration is always questionable, I waited almost two years to get the necessary reference photos. A friend of mine, Péter “Petibá” Tóth gave me two specific parts that are only found on Hungarian Leos: the antenna mounting and a strange shaped frame behind the loader’s hatch. He CAD modelled them himself using reference photos and 3D resin printed.
After carefully checking the Hungarian tanks it was found out that the smoke grenade sub-assembly resin set is not perfectly matching to the real vehicle, so another friend of mine Csaba Mészáros has re-designed and 3D printed both sides. So I had all parts for a quite realistic configuration to be started.
The project progressed relatively quickly because I managed to spend about 2-3 hours every night on it, and also because I had already built a Polish Leopard 2A5PL tank using a Revell kit, with Voyager detail-up set and resin gun added, back in 2021:

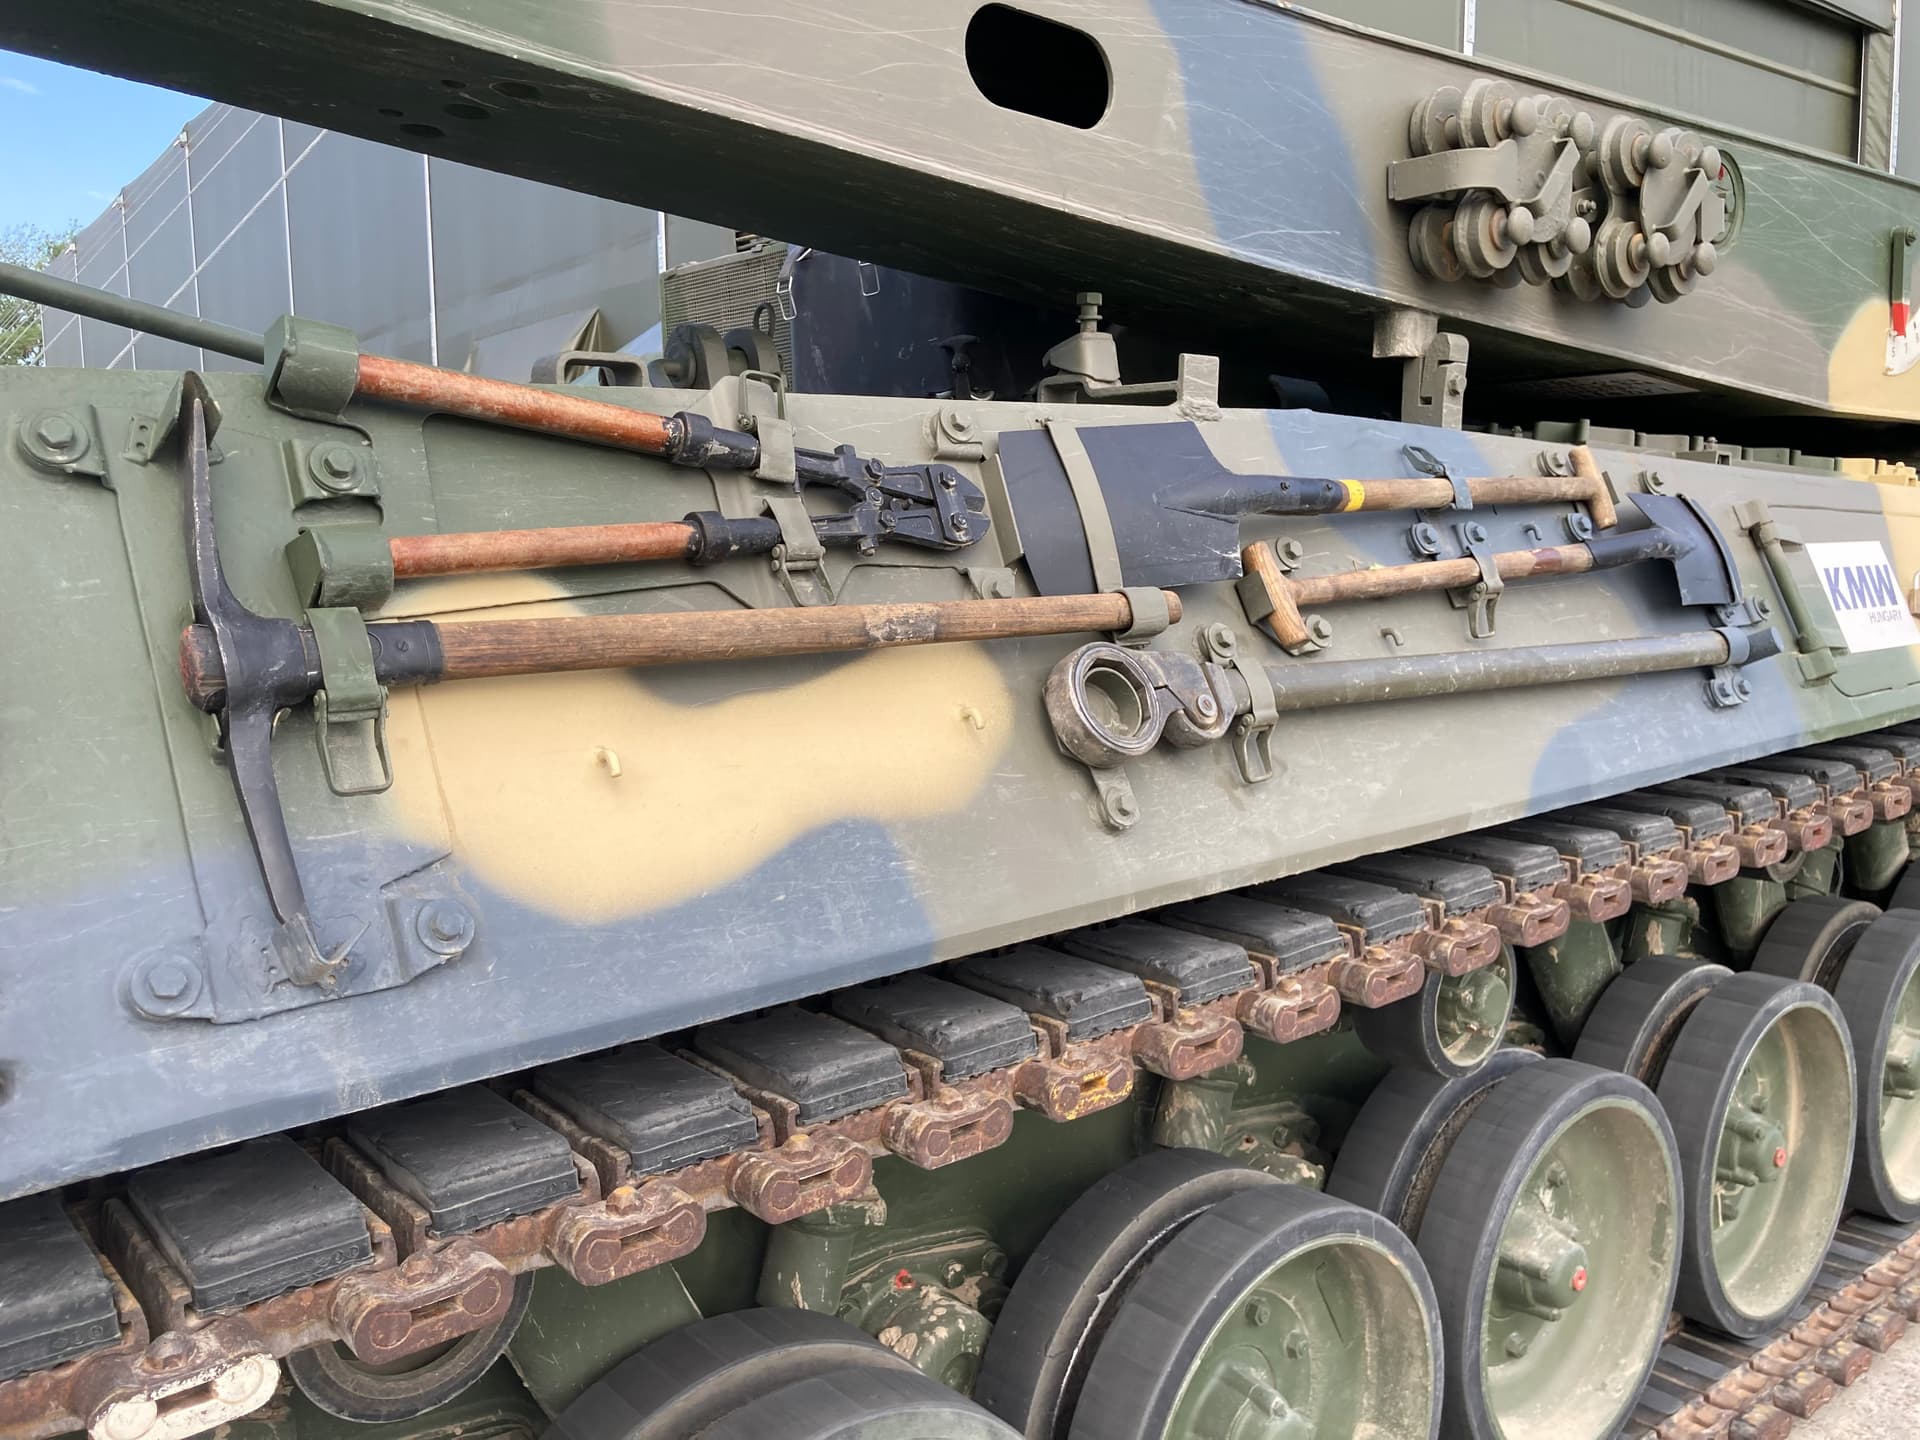
I tried to use as much of the ET Model etch as possible, mostly in the engine cover area. Serious questions and research was required to find out whether the pioneer tools and the field-fuel-filler tube are part of the Hungarian configuration or not. The first vehicles on display had these accessories not fitted to the vehicle, so I had to find out whether these are used in normal use or not. I managed to make photos about a real vehicle and to speak to an tank crew member at a military exhibition who reassured me that these are used on the field and only removed for exhibitions. Similarly, the towing cables are taken off because that is the only way to get the tank on the trailer (at least this is what he said).


I had a serious problem with not being able to solve the gun barrel from one single set because there were some minor damages on each. I ended up combining at least one part from each set, even using the very end of the original Meng plastic barrel. Because the positioning of the barrel elements didn’t want to come together smoothly due to the many different internal dimensions, I drew a black line down the thick (resin) part in the middle of the barrel to give the centre line of the barrel when glued and inserted.

When I finished the body and took the model out to the garden to take photos, I lost one of the main wheels somehow. Luckily “Petibá” has a spare Meng 2A7 kit for such (hyena) purposes, and he was so kind offering me a spare wheel set. He also told me that the frame that hugs the small orange lights on the front of the hull can be installed from the Meng 2A7 kit. This little item was also added to my Leopard.

When I was making the turret, “Petibá” also drew my attention to the fact that, unlike the Meng model, the area under the antennas had been cut out. So I had to remove the antennas and drilled out the two areas on the assembled turret, then made the base under the antennas out of styrene parts. The right hand side was pretty straightforward, but the left hand side hole has an angled bottom that caused me lots of trials to make somethan that does not slide down into the turret. Could tackle it in about an hour.
Not all the upgrades were perfect, but I’m happy with the result.
Unlike my usual practice, I first sprayed the model with Gunze Grey 1000 primer, then went over it and corrected a few spots. The result is pretty clear and looks like a computer rendered CAD drawing to my eyes.


I could also make some good photos about that strange shaped frame on the turret top and have seen that there are two stripes attached, which are missing from the upgrade part design made by “Petibá”. I could add them using plastic nappy cover, the material I always use to imitate canvas or stripes, belts like this. The buckles are added using the Eduard T-72M photo ectch parts, designed as clutches to the T-72 fender boxes. The result after the grey primer is outstanding, I think.

The next day I applied my preferred 1500 black Finishing Surfacer. How cow, it is an Imperial Destroyer! I had some desire to keep the model in black to be honest…


Now I’m going to set the model aside for a few days and first mentally prepare to paint on the Hungarian camouflage.
Happy modeling!
Tamas