While awaiting parts for my Commando build, I’ve decided to start a couple of other projects that have been on my list. And since my Stryker Dragoon kit arrived two months sooner than expected, there’s no time like the present. I’ll be using Ettore Galasso’s excellent DVH-A1 conversion parts, as well as leftover parts from the Magic Factory M-SHORAD Bradley.
Why use the AFV Club Dragoon kit as the base?
It’s simply the best choice from any of the available 1/35 Stryker kits.
In addition to AFV Club kits having more correct detail underneath, the Dragoon version is the only one with the correct hatches on the left side of the hull. They differ slightly from the ones in the other kits. Additionally, the stowage bin above one of the hatches is altered slightly to accomodate the hatch. The Dragoon kit also has the necessary “shelf” stowage at the rear of the hull, and also the correct sloped plate behind the turret. While that plate has two hatches, it’s easy enough to convert it to the single larger hatch configuration.
Lastly, the fact that AFV Club’s applique armor is separate pieces will be a help, as the frontal pieces will require some changes to get them right.
Here are some of those details only the Dragoon kit has that are needed for the M-SHORAD version. (based on several hundred photos I took)
Ettore’s conversion does not have the DVH details underneath - that would have to be a whole different conversion set. Most of it is not visible, and although I also did a separate walkaround of the new underside, I’ll probably only do what’s visible when viewing the vehicle normally, i.e. without the use of a dental mirror.
Yet another walkaround I did includes not just dozens of photos of the interior, but videos as well. I’ll probably confine myself to what’s visible through one or two of the hatches - almost assuredly the rear ramp will not be one of them.
This will be a slow build. As soon as my Commando parts come in I want to continue with it, along with a few others I’ve got going.
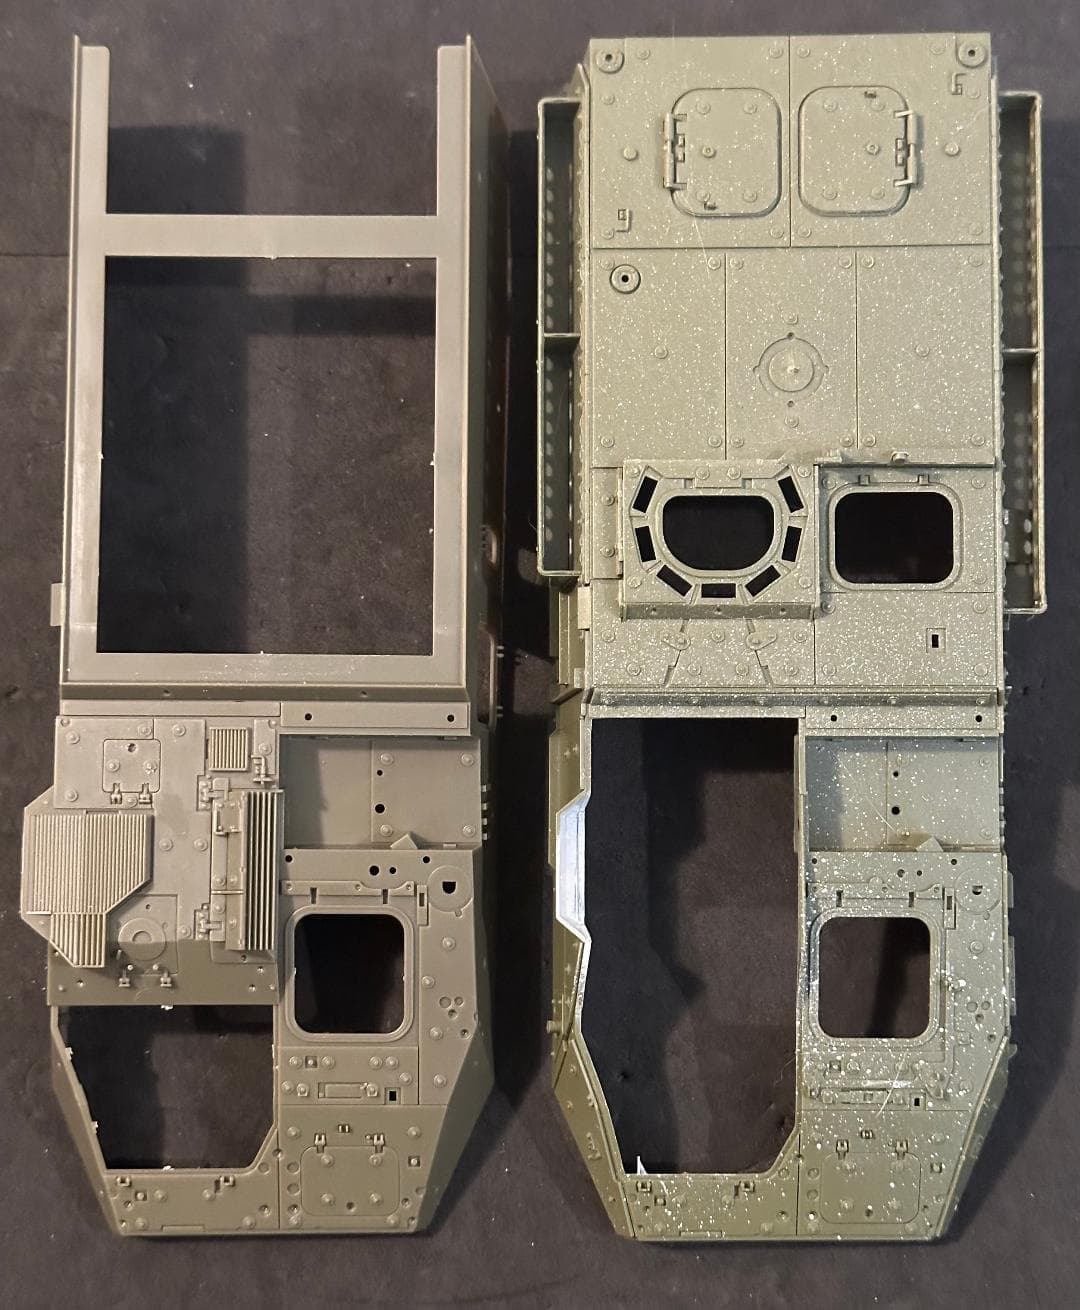
Initial surgery went well. I find when doing a project like this, if there’s any cutting to be done, just rip that band aid off and get it out of the way. That way, if yo just ruined a $70 model kit, you’ll know to stay out of the strip club for a day or two until you can get a replacement,
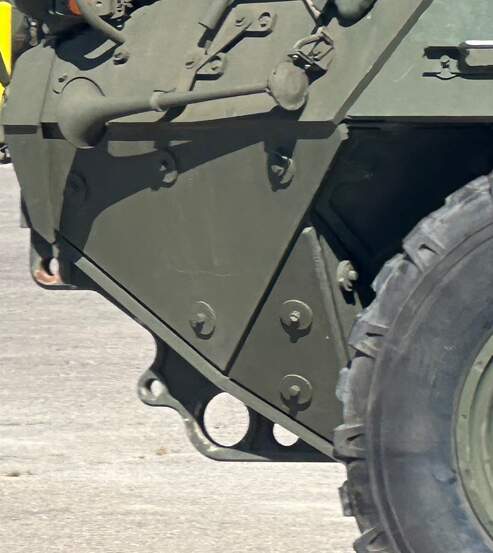
The frontal aspect of the newer Strykers is different. They now look like this:
The top model is an original AFV Club kit. The bottom one is an AFV Club kit after some rotary saw fun. I did this before even working on the suspension, so that nothing could get in thw way, or worse - broken.
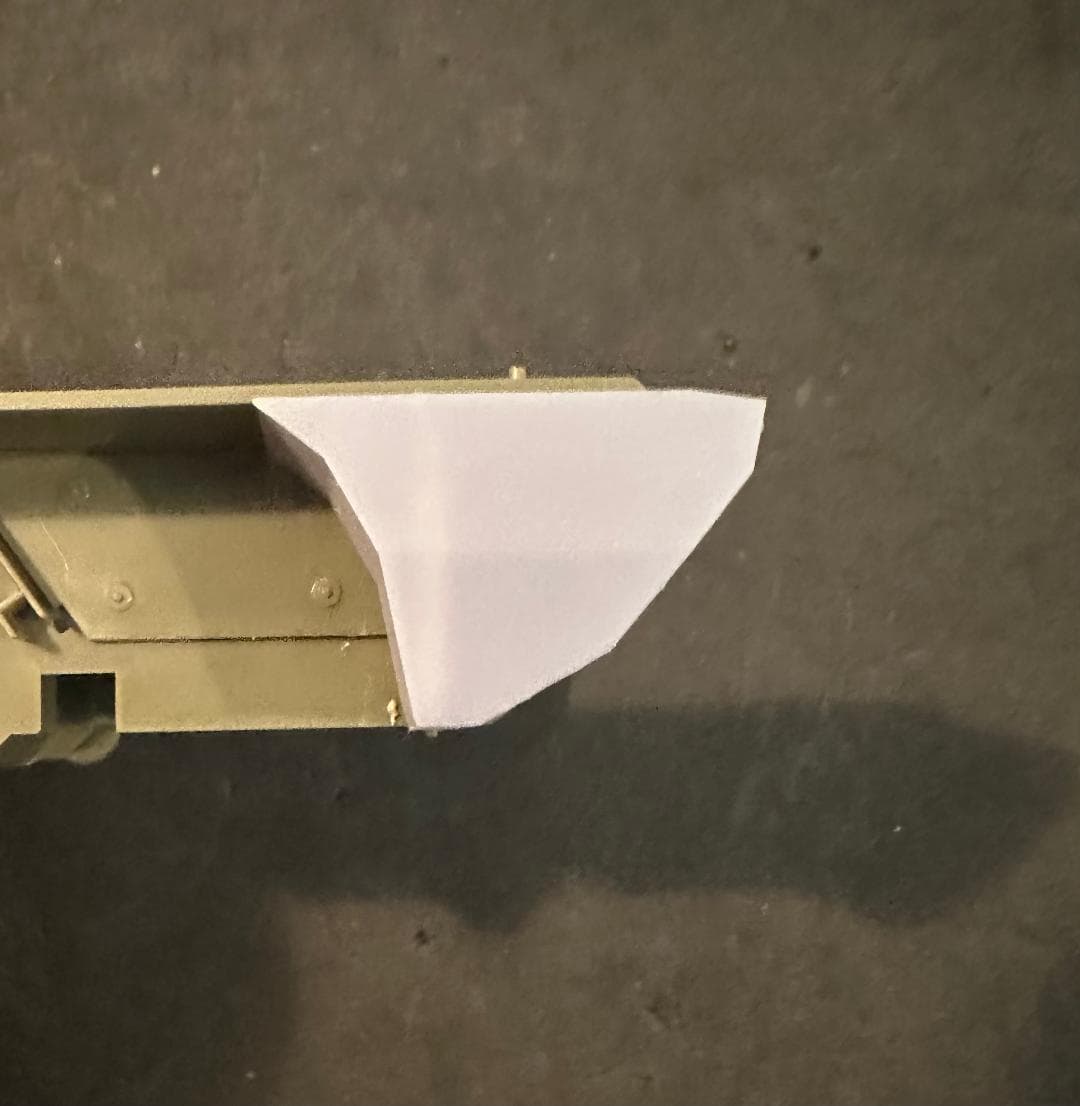
Ettore’s enlarged fuel tanks are first rate - he even allows for the rear plate on the original kit piece to act as a placement guide. The fuel tank is slotted to allow for it. I discovered the only fitment issue was a washer on the lower hull (the topmost rear one) has to be shaved off. Then the new fuel tank fits perfectly. These are just things that arise with pretty much any conversion. Also noteworthy - there’s new armor plating on the Dragoon that I have left off until the fuel tanks are in place. It’s much easier to trim them if necessary.
Thank you. The hard part is replicating it on the other side. It’s like scratch building - make one piece and it looks great. Make a second, and it looks great. But the two together look different…
I picture Hillary. Oh, wait, wrong conversation.
Some of the cuts were easy because I went along joints/seams in the kit. I think planning is the key for multiple cuts. And course sometimes in tight spaces I have to make cuts perpendicular to what I want, getting as close to the line as I can, and then cut across the ends of those cuts with a knife.
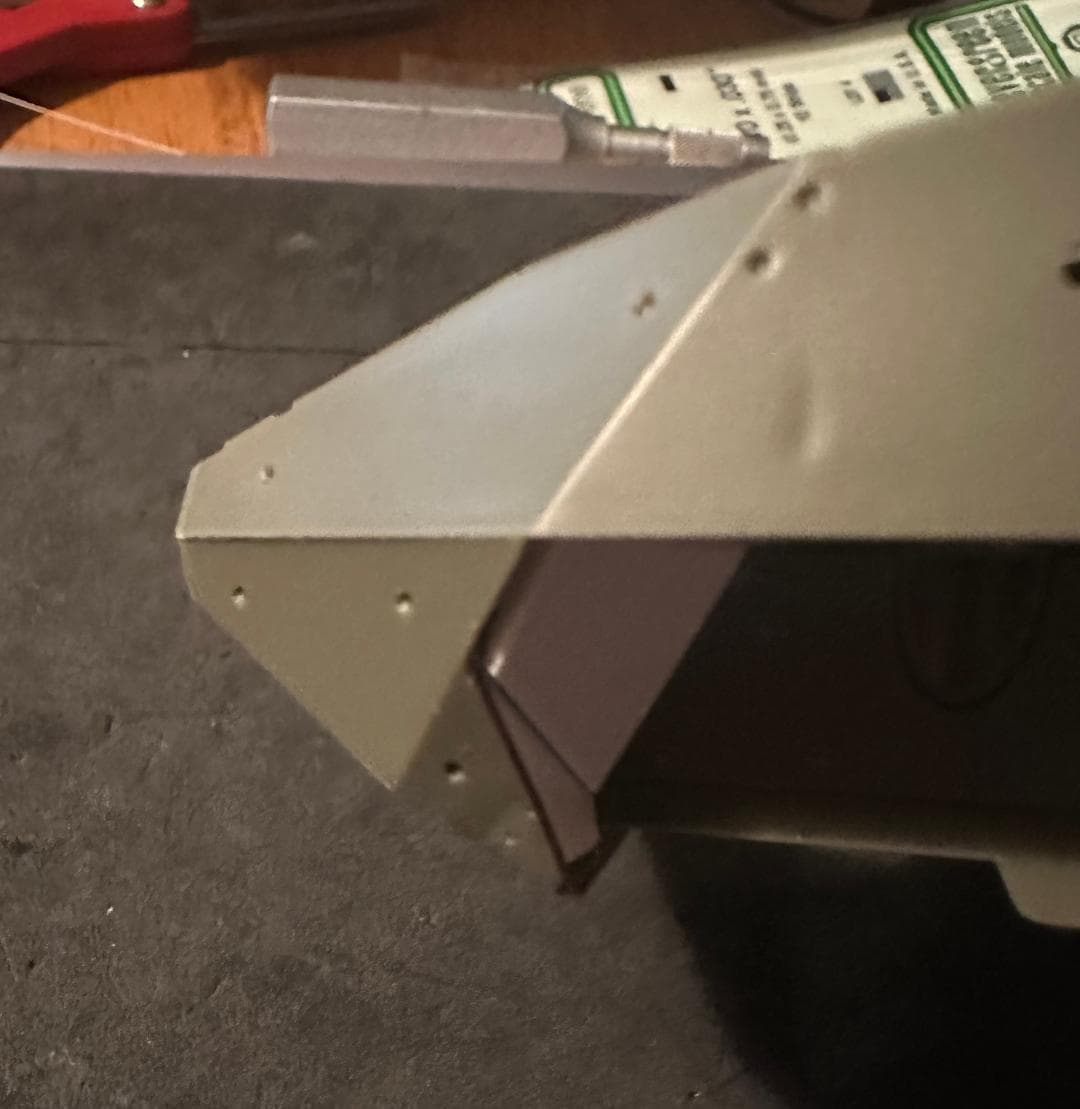
There’s a lot more detail that goes on the plates - braces, large washers, mounting bolts. You can’t see it well in the photo, but there’s a scale one inch border running around the perimeter of the larger plate.
I have trouble wrapping my head around this kind of work. Waaaaay beyond me. I think that sometime I would like to try something like this but I have a very difficult time trying to conceptualize the process or even how to start. That and I am research averse. If I already had plans I can copy, like when magazines used to put them in when they did a conversion article. Will certainly follow and be amazed as the project progress.
Rob,
excellent job so far.
One question about the surgery: which rotary tool are you using?
Is it a Dremel? and which kind of blade? fiberglass wheel or metal teeth wheel?
It’s me the maker of the conversion set that @18bravo is using.
The set includes the front armor plates, the engine hatches, rear fuel tanks, rims, and some other accessories like the tow bar, the BFT antenna and mount and more.
I’ll PM you.