Thanks again! Still deciding on which one to do with the Tamiya kit but will more than likely go with one from Just Cause. I will take a look at the Academy A3 version for one from OIF.
1 Like
Can anyone ID the trailer in the image below? It is available in 1/35? Also, any decals for that specific M113?

3 Likes
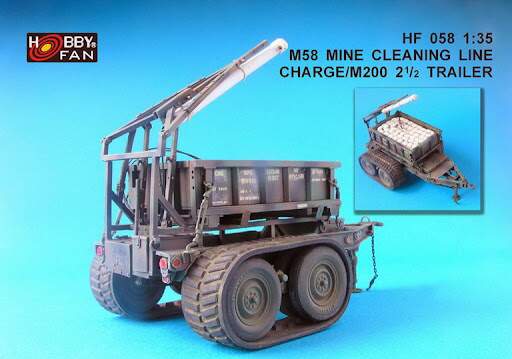
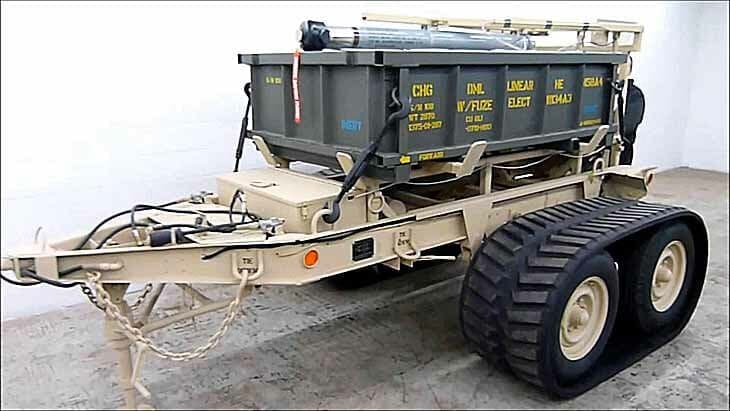
The trailer is an M58 MICLIC trailer. It shoots a line charge over the M113 into a mine field and explodes it to clear a lane.
There was/is an expensive resin one from Hobby Fan, but not sure if it is still available.
5 Likes
Thanks for the quick reply. Yeah, I just looked it up and all out of stock. I wouldn’t be able to afford one anyway from the prices I saw even if they were still in stock.
1 Like
I know you have said you’re not much into scratchbuilding, but that trailer would be an ideal candidate for a first scratch build, especially with the wheel arrangement in your photo. Some square brass tubing, some styrene - I’ll someone on here could even donate some six holed wheels for the project
3 Likes
You know; after building the launchers on the RFM M1150; I saw the launcher system is very similar to the M58. I think that is possible to harvest parts from the M1150 kit and then scratch build the rest.
Don’t know if it’ll be cost-effective though.
here’s what I mean…
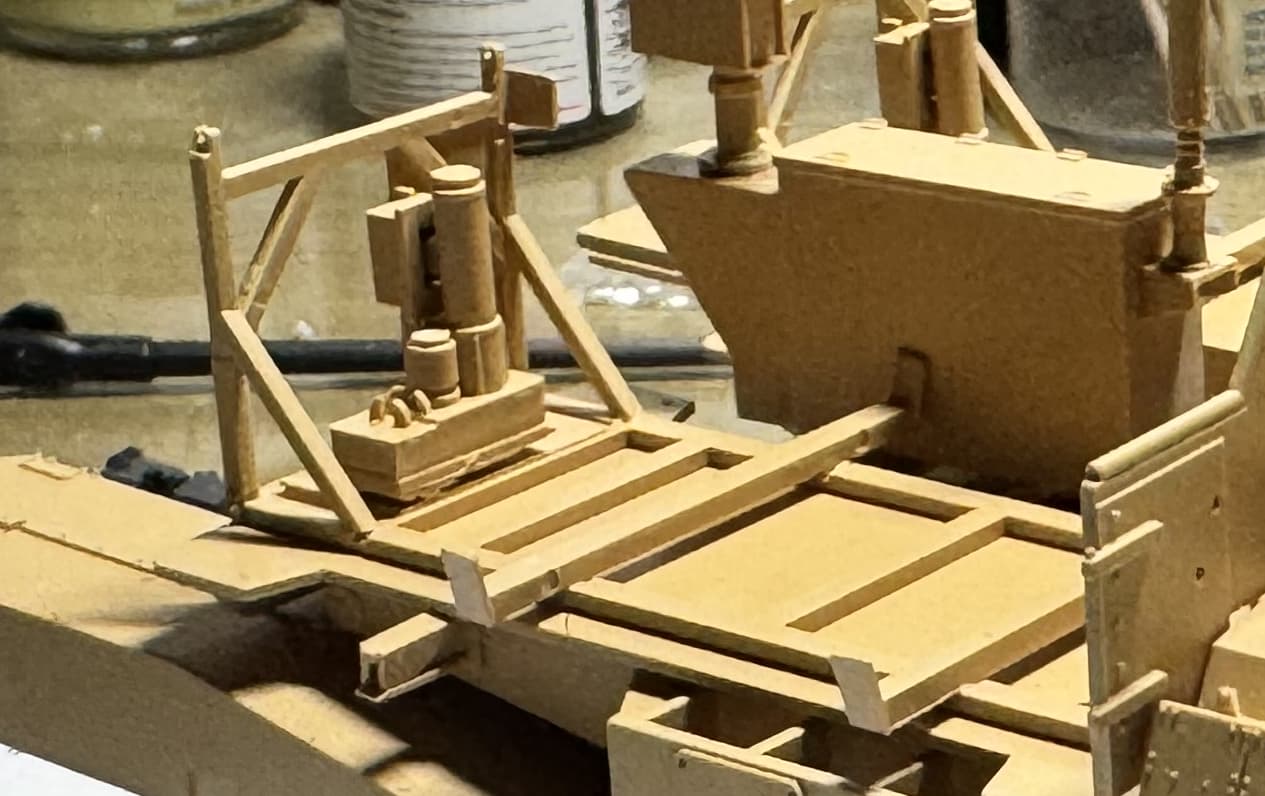
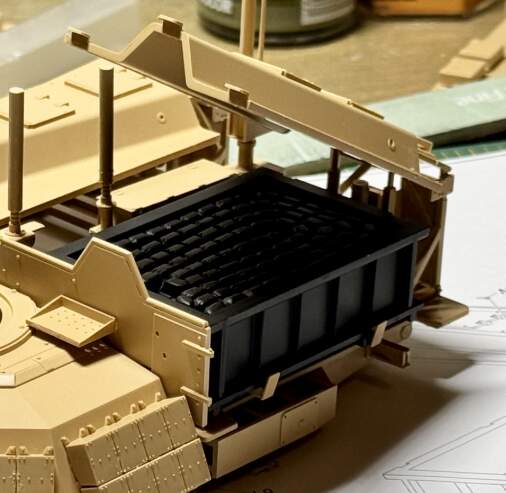
You can harvest the MCLCI launcher parts from the N Parts Tree of the M1 ABV kit.
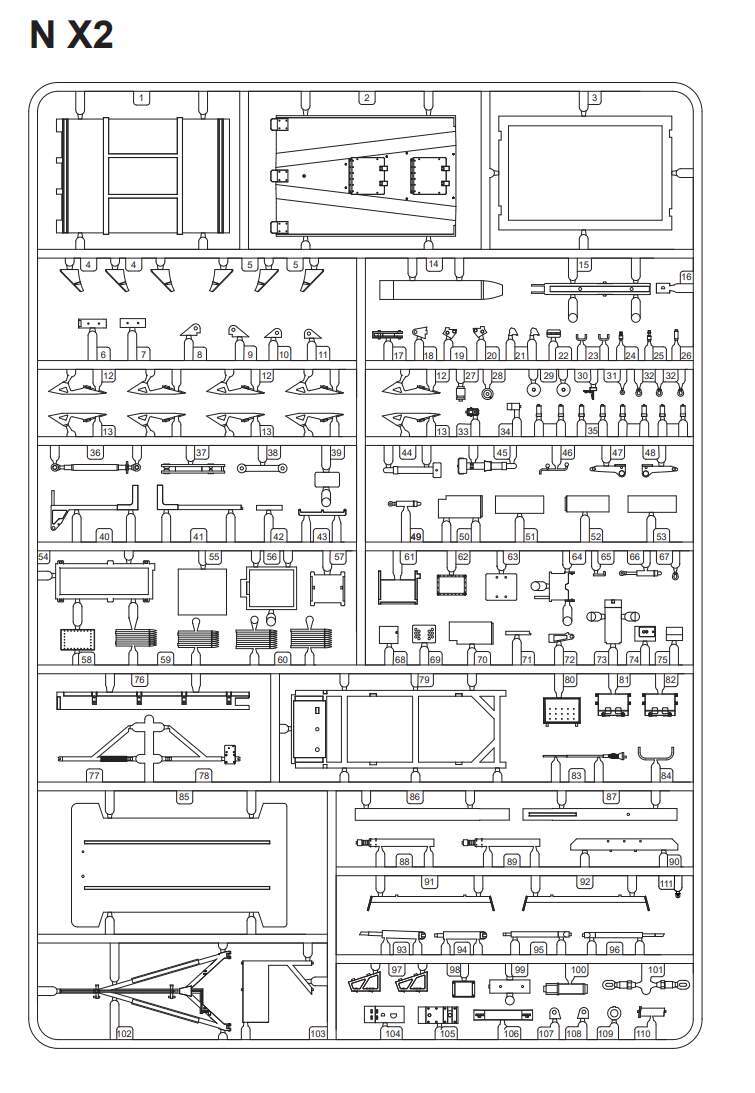
Then scratch build the trailer and put it all together.
7 Likes
I did scratch build a what if Excalibur 8x8. I cut up an old ESCI LAV-25 lower hull and scratch built the upper hull and turret. I used a spare parts tree from the Academy M163 for the gun, radar and a few other parts.


I printed the profile of the M167 VADS to scale and used that as a guide for the turret.

Scratch building the trailer is a bit harder though as the trailer is more complex.
7 Likes
Thanks for the images of the M1 breacher MICLIC parts. Yes, that would work but is a bit pricey for me to part out the RFM kit like that.
If someone had a trashed kit with those parts in good condition I would be willing to make a reasonable offer for the parts or a trade of some sort.
2 Likes
Or maybe someone can measure his kit parts. 
And you can find some very good drawings from the TM online.
2 Likes
Please scratch build this so they make the kit version. You know as soon as u do it, they will as well.
1 Like
There is also a 3d print file (.slt file) for the M58 MICLIC. I may have to buy it and give it a go.
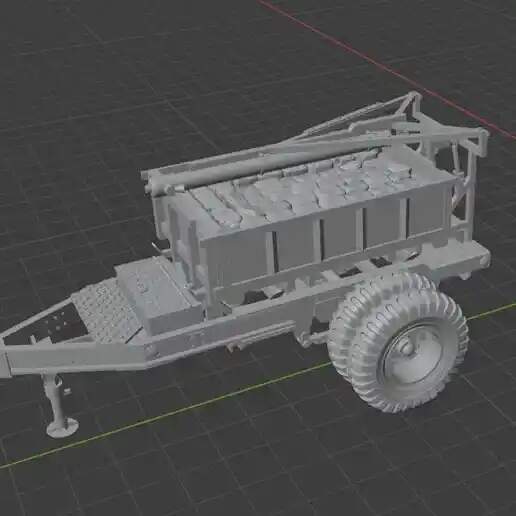
5 Likes
Great find! Thanks for the link. Unfortunately, I don’t have a 3D printer. It looks really nice from a quick glance but looks like they missed the rear stabilizer legs.

3 Likes
The Tamiya M113A2 OIF kit will now become an M113A2 from Panama, Just Cause. I was going to fit the Academy M163 pintle and M47 Dragon parts to the Tamiya cupola but the Academy pintle doesn’t fit properly. The Tamiya vision blocks are bigger than the ones on the Academy cupola so they interfere with the mount on the pintle for the M47. Luckily, the cupola is not used in the M163 kit so will use all the Academy cupola parts from the M163 on the Tamiya kit. The Academy cupola fits the Tamiya kit perfectly.
Here are all the Academy parts that will be used on the Tamiya kit.

I was looking over the Academy M163 indy track links and every link has sink marks. So many sink marks to fill. The Academy M981 also has the same indy track links also with all the sink marks.

For the M113A3 during OIF, I will use the Academy M113A3 kit as suggested. I was able to find one fairly cheap. This one will now be in the NATO camo scheme with the cupola shields.

The Academy M113A3 kit also includes indy track links but the sink marks are not as bad. The kit also includes rubber band tracks and are much nicer than the indy links.


3 Likes
Looks like you are off to a good start (or 3). Looking forward to seeing how they turn out.
3 Likes
Not too many of the independent pads to fill if you are keeping the skirts on.
Keith
3 Likes
Thanks! I am a slow builder but if I am not doing an interior on this one then I should be able to get it together faster. I can only paint outside and with winter here, I have to wait till it warms up.
1 Like
Thanks! Not sure yet which ones will have the side skirts or not. Looking through references to see which specific versions I want to do.
1 Like
The side skirts, aka track shrouds are easily removable. Some units use them all the time and others do not.
2 Likes
Thanks! If I keep the track shrouds on, I won’t bother filling the top tracks or even the bottom tracks. I will only fill the ones visible around the sprockets and idlers.
3 Likes
Also be advised that there are narrow and wide track shrouds. Obviously the wide ones project down further and cover more of the road wheels, compared to the narrow ones, so check your reference photos.
2 Likes