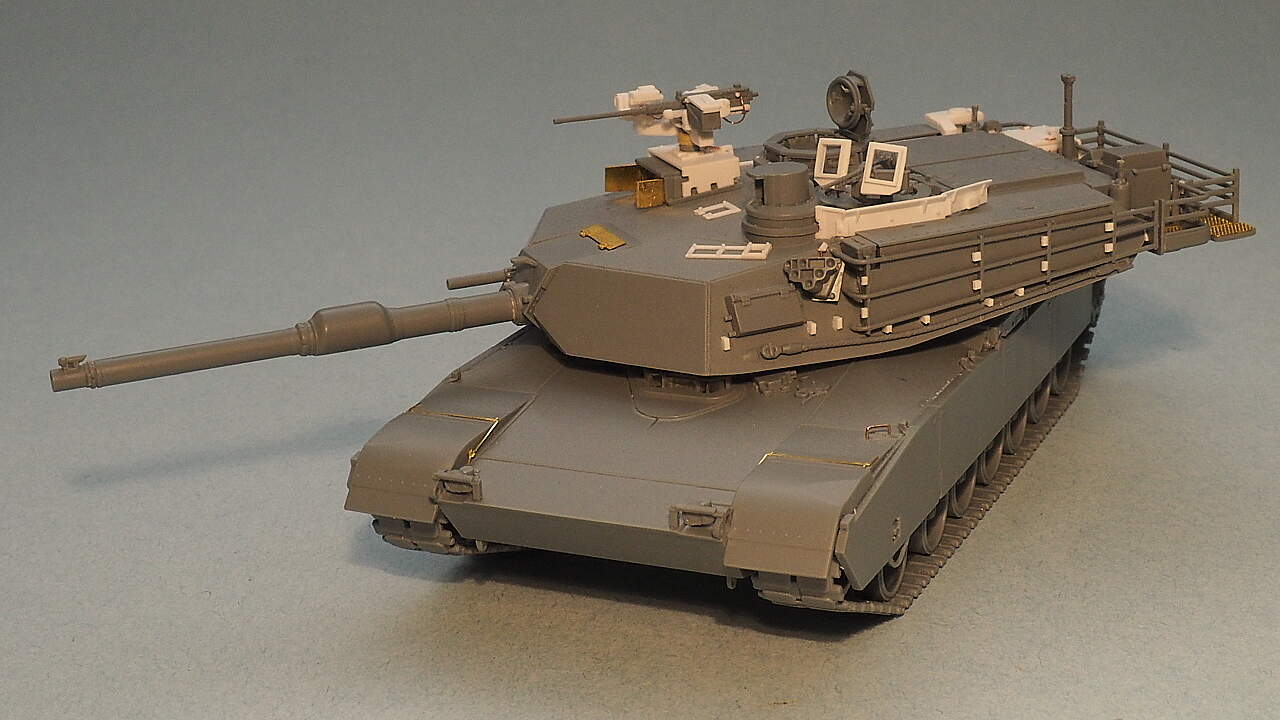
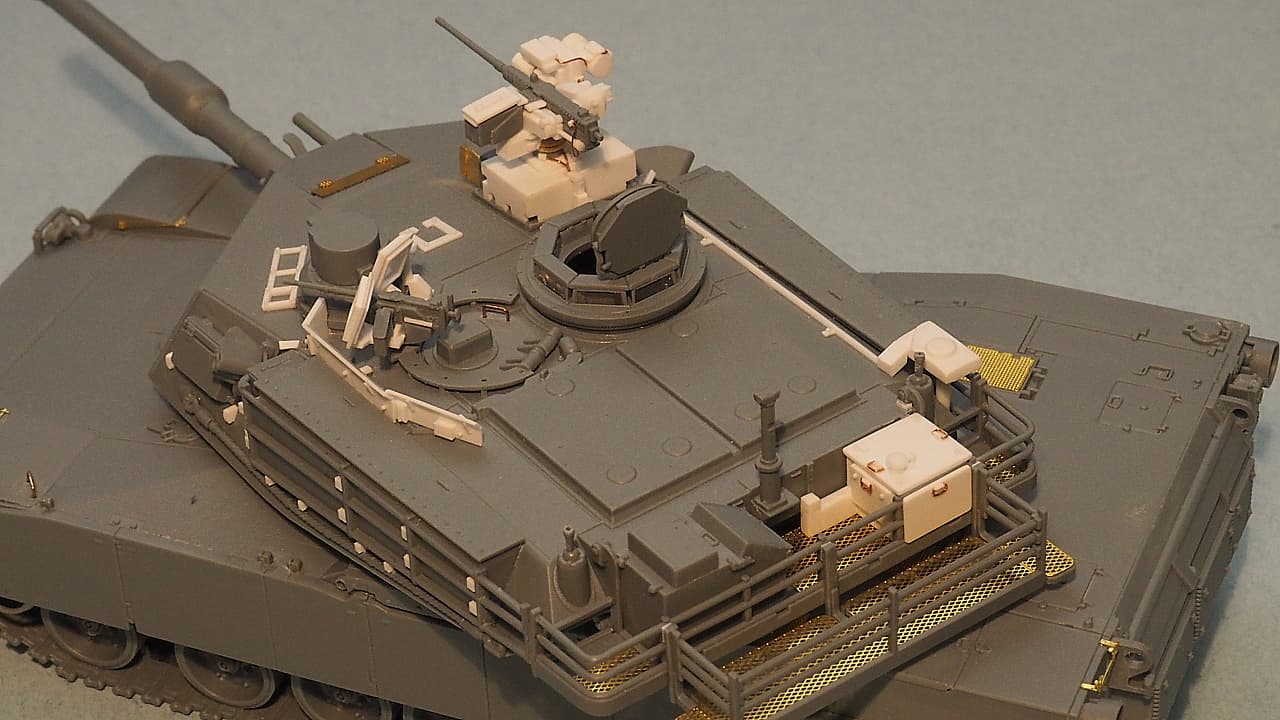
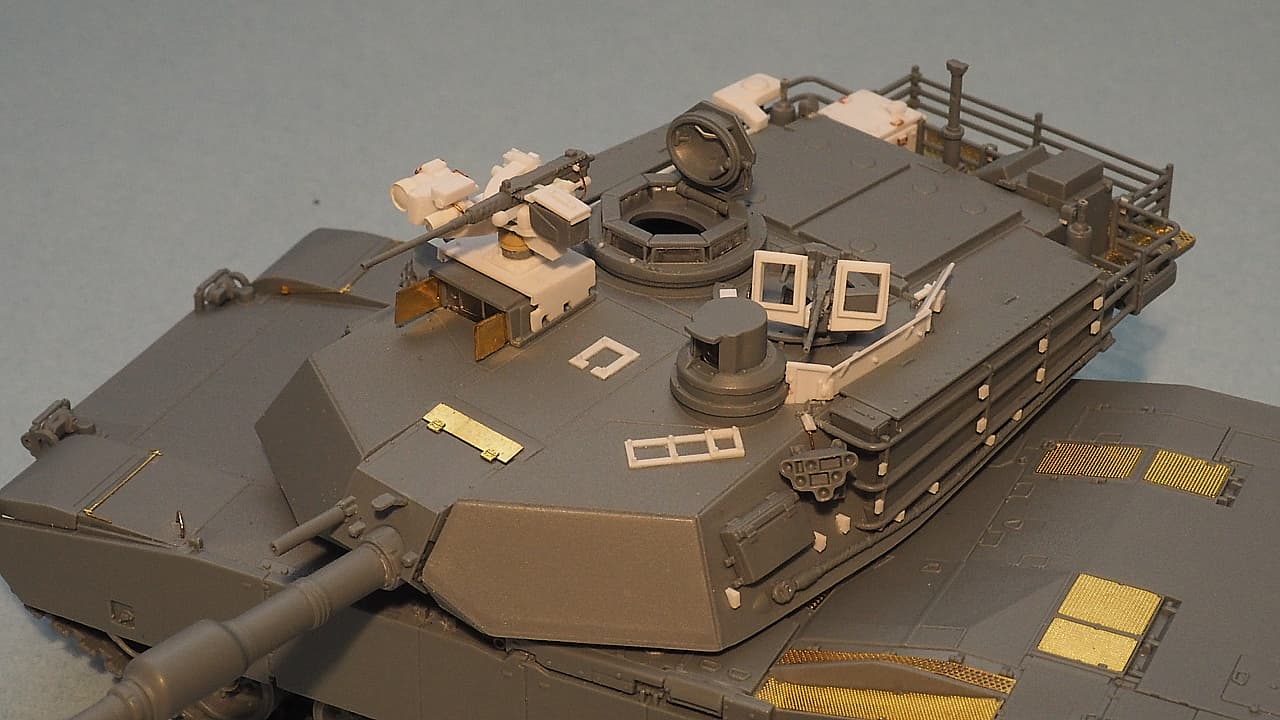
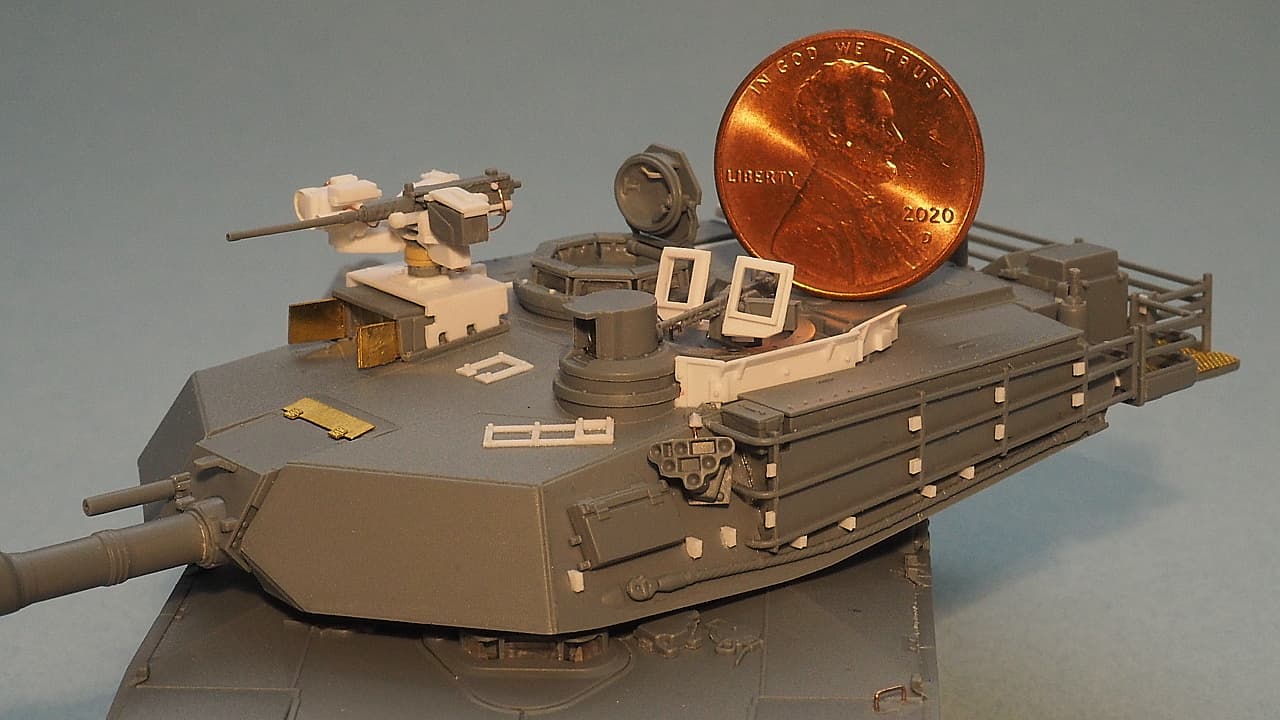
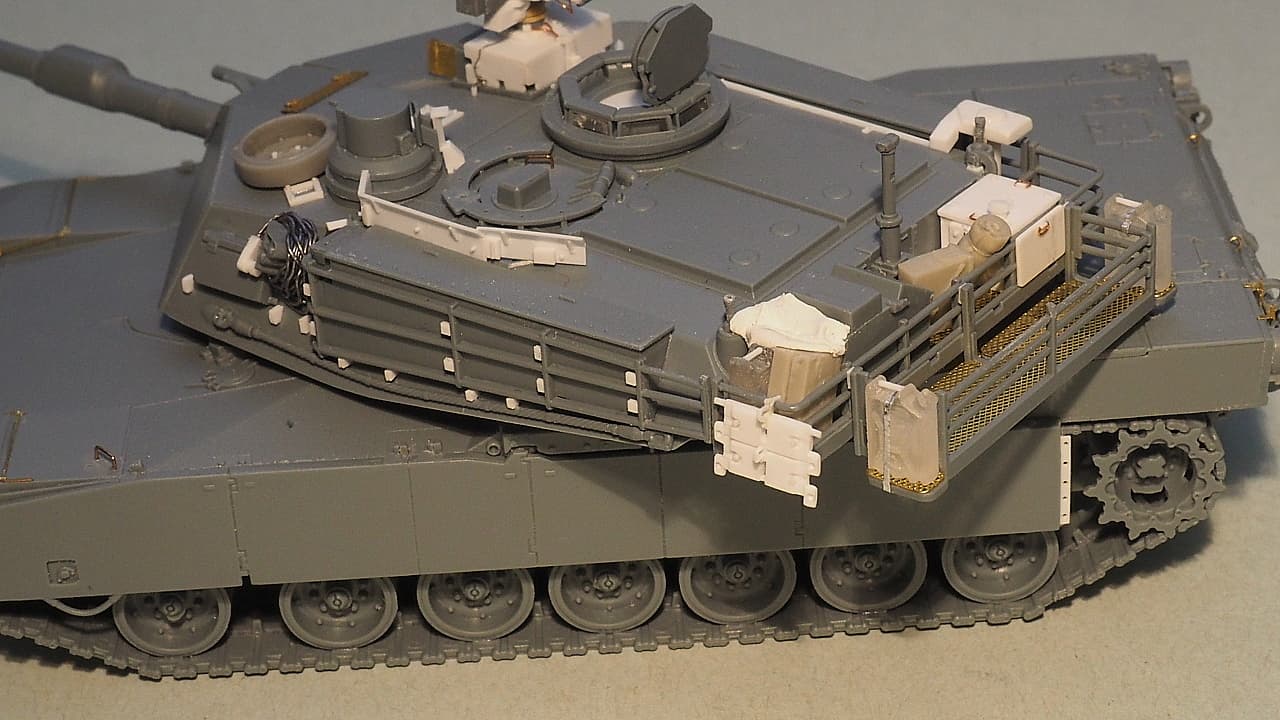
What started out as what I thought would be a quick build has turned into a multi-month project. This is the Flyhawk 1/72 scale M1A2 SEP modified to be a V3 version. One of the best detailed and molded kits I’ve built in any scale. I like the looks of the M1A2 SEPV3 with low profile CROWS II weapons station. I figured I’d kit bash the low profile CROWS station from an aftermarket non-low profile version. That didn’t go according to plan, so I wound up scratch building the whole thing. The funny thing is if I had set out to scratch build the CROWS II LP in 1/72 scale I would have been too intimidated to try it, but by thinking I could kitbash an existing kit, it sort of just happened that way. So I guess you could say I accidentally scratch built it.
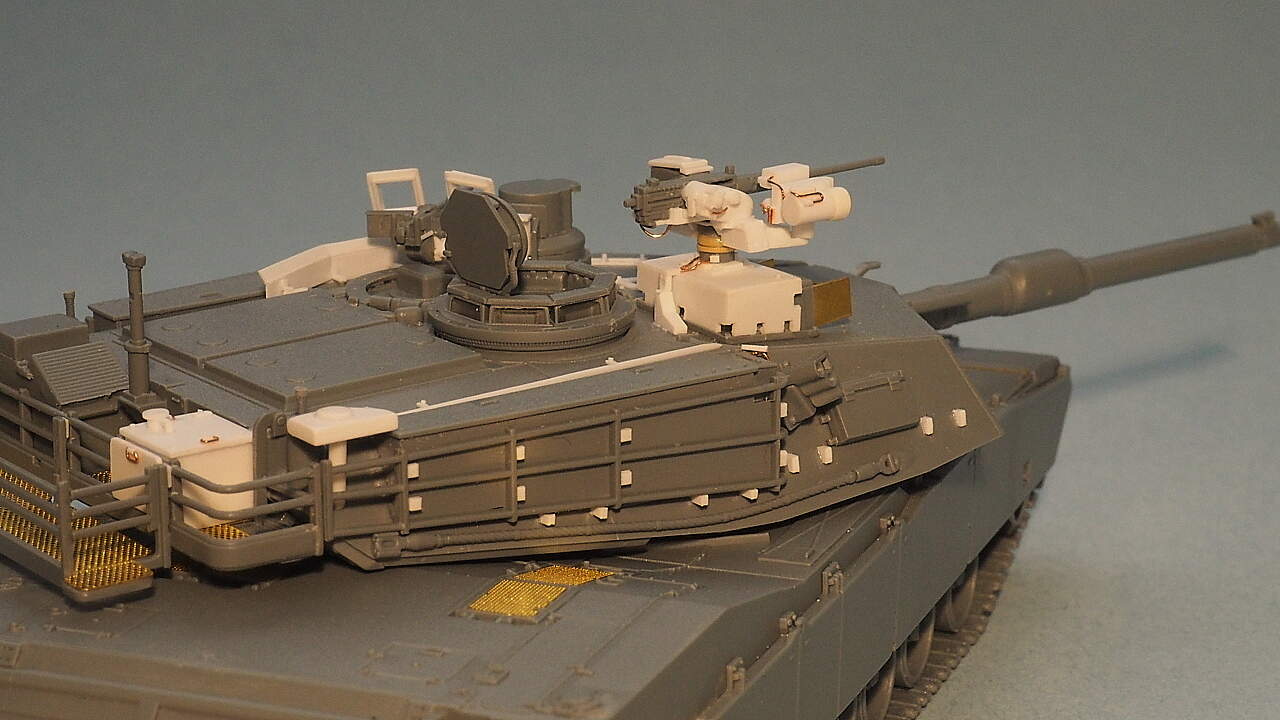
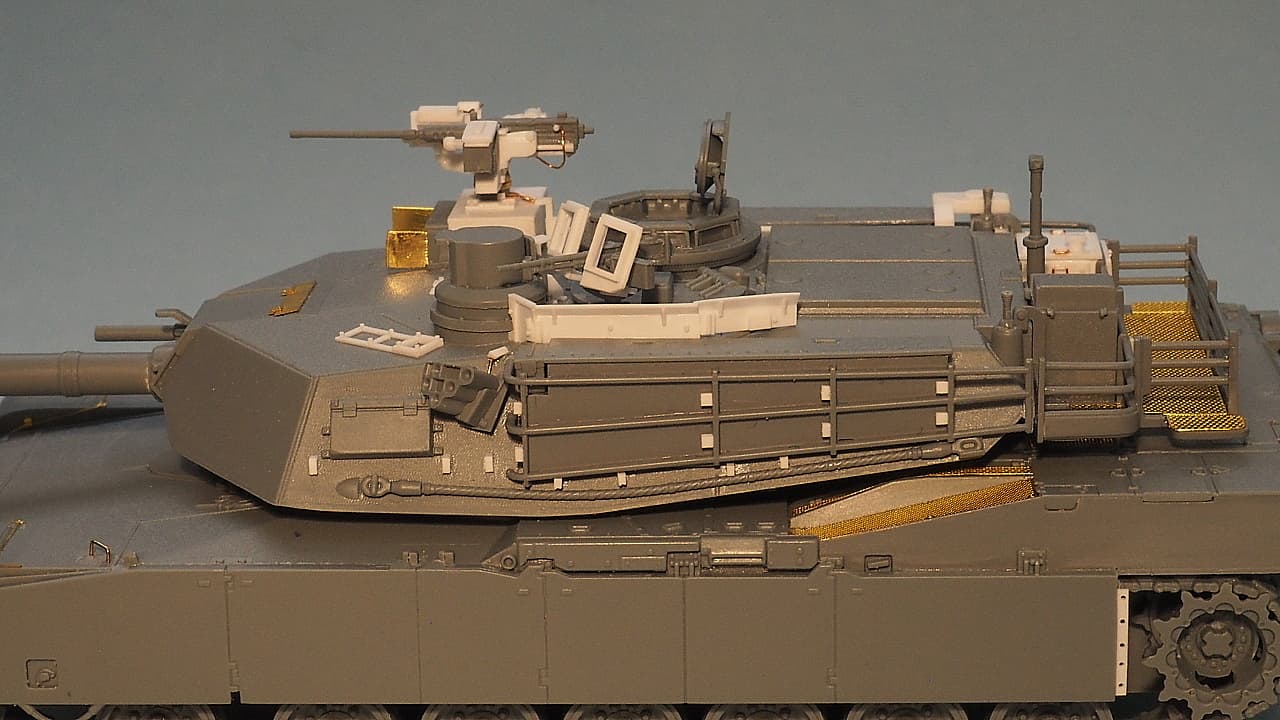
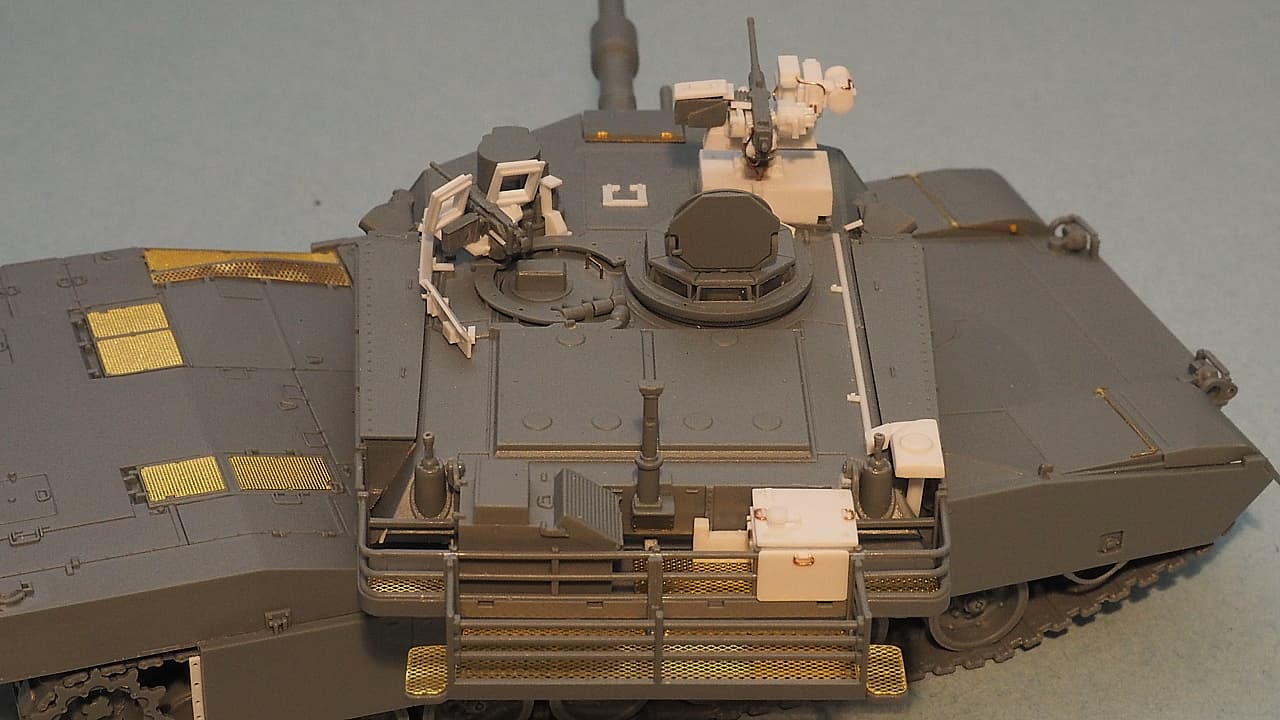
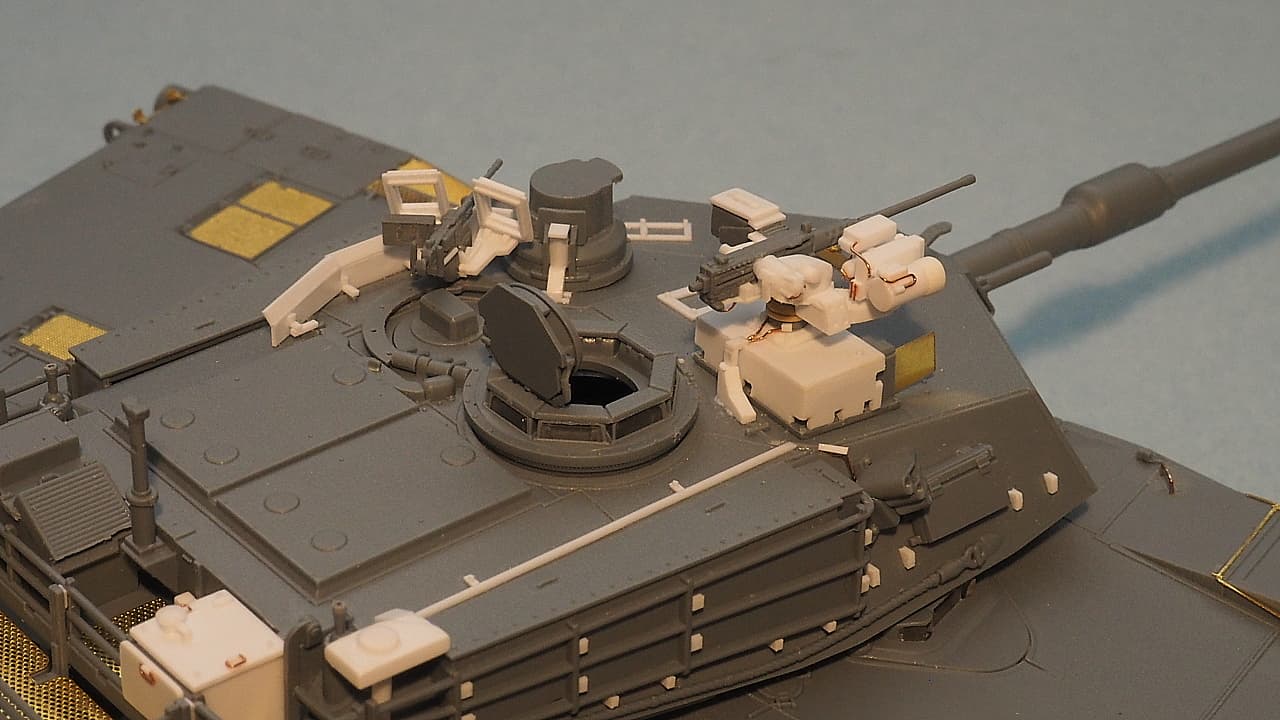
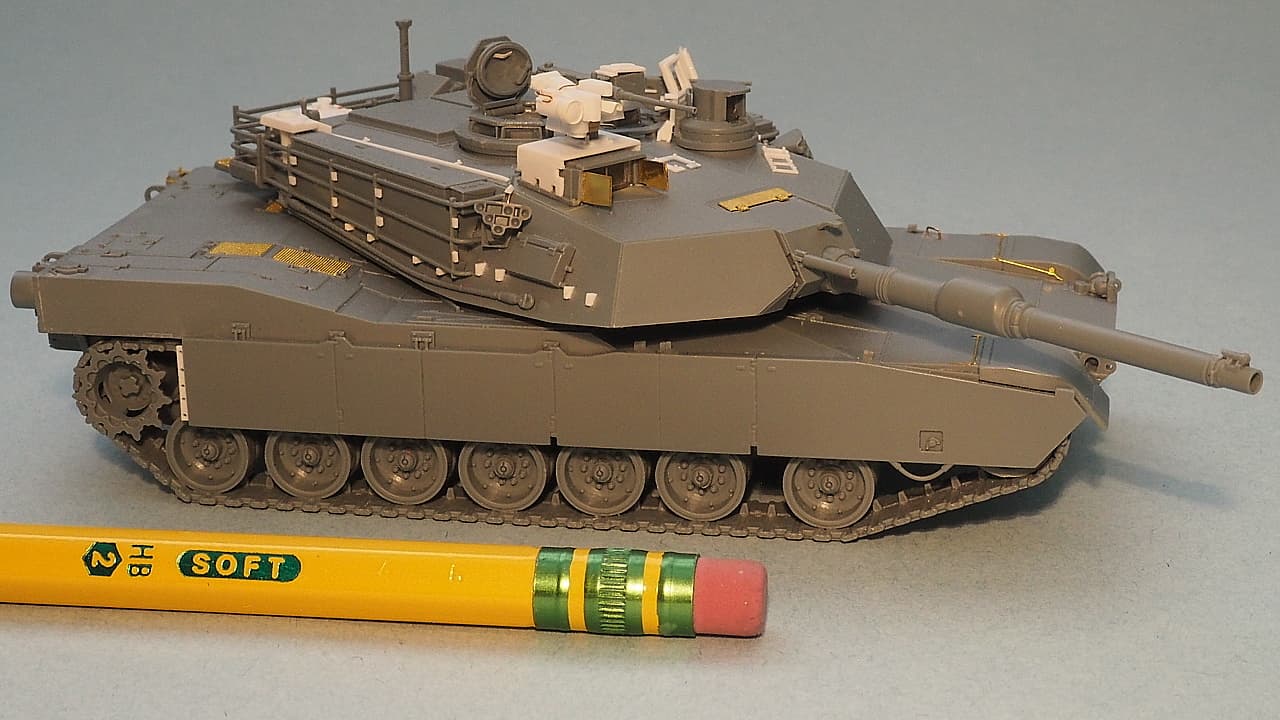
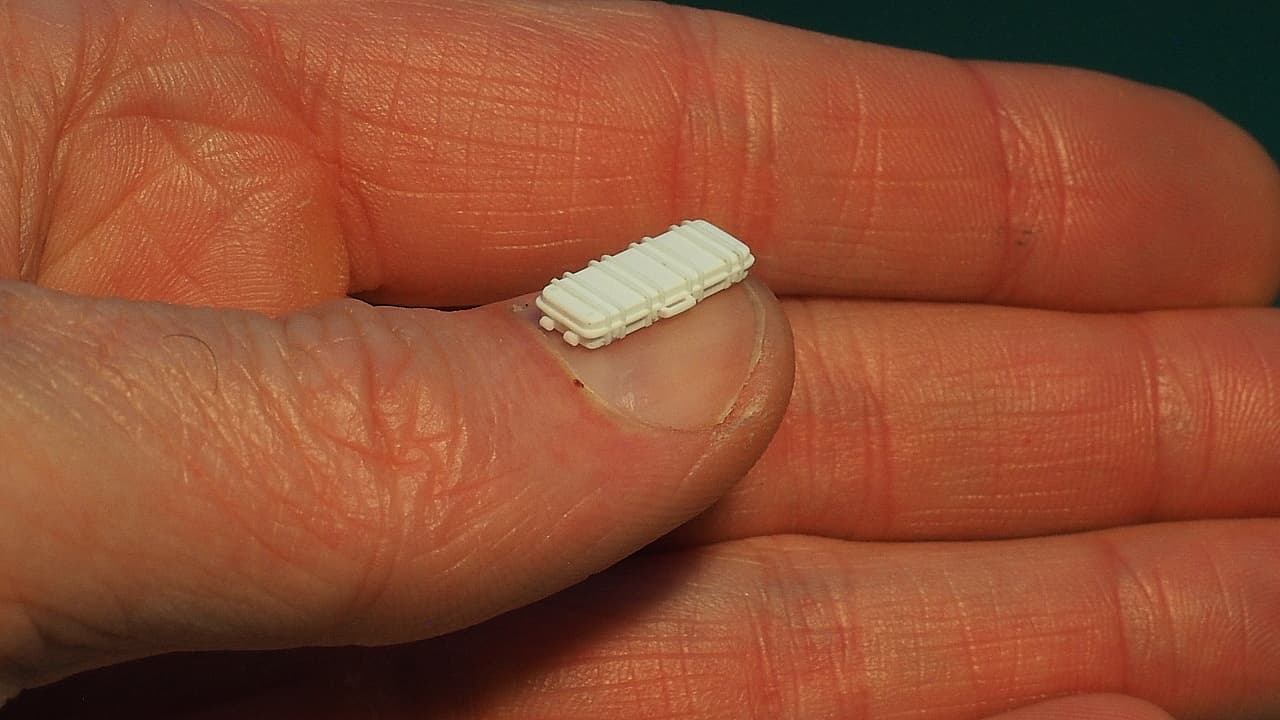
I wound up adding a total of 274 additional pieces to the model, mostly Evergeen styrene, a few pieces of sprue, and .006" diameter copper wire. The shield on the loaders 7.62mm gun is 36 pieces. And the CROWS II weapons station is 104 individual pieces! No wonder this is taking me so long.
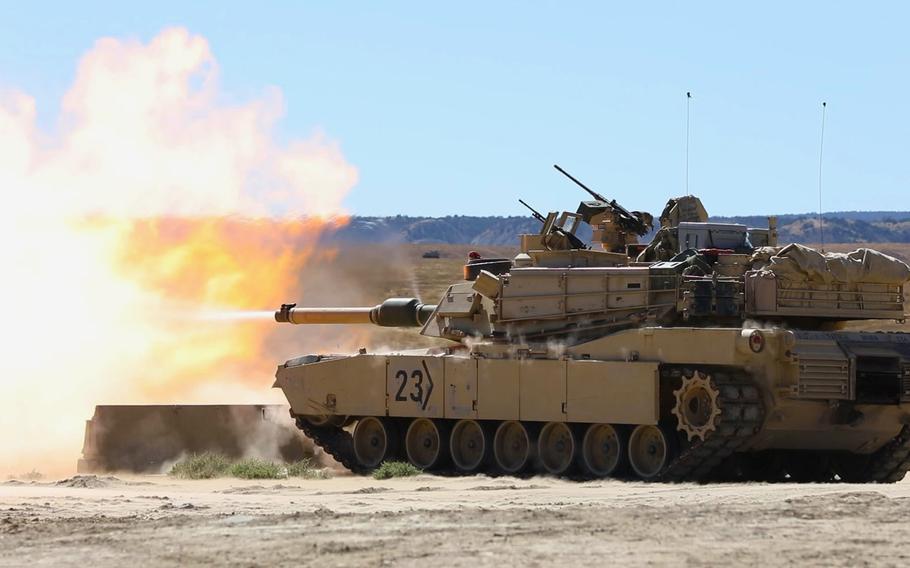
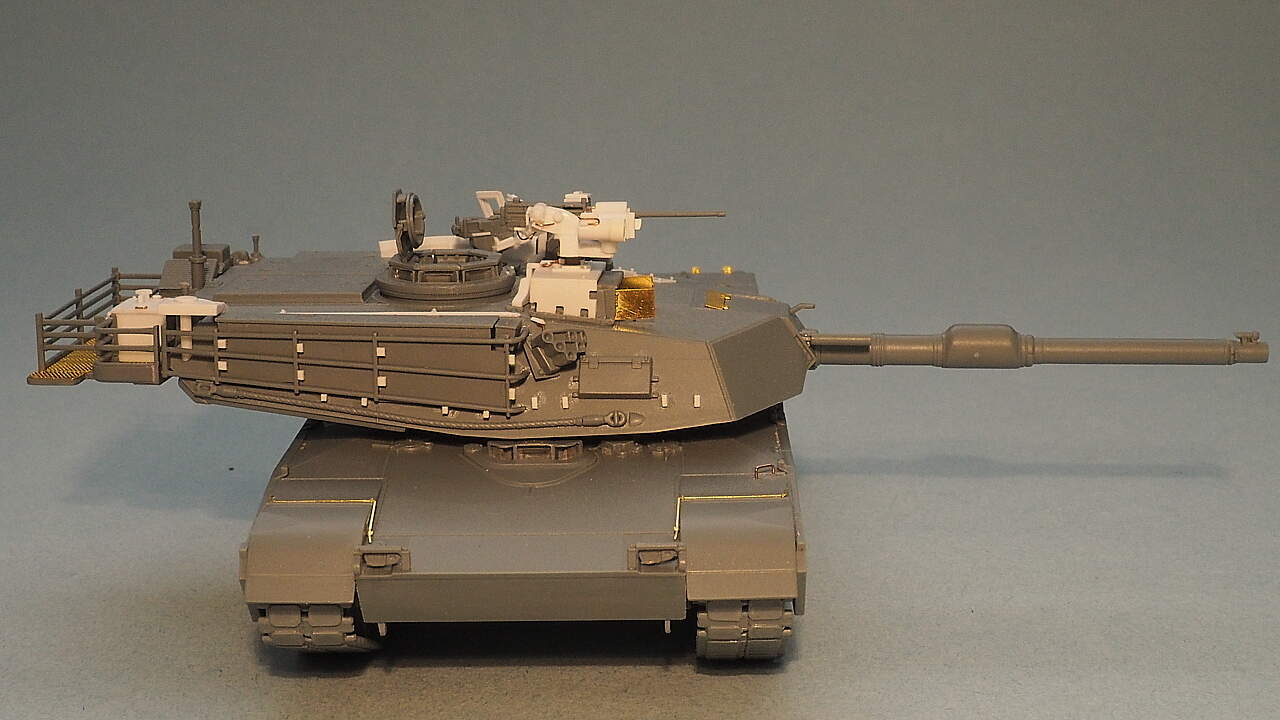
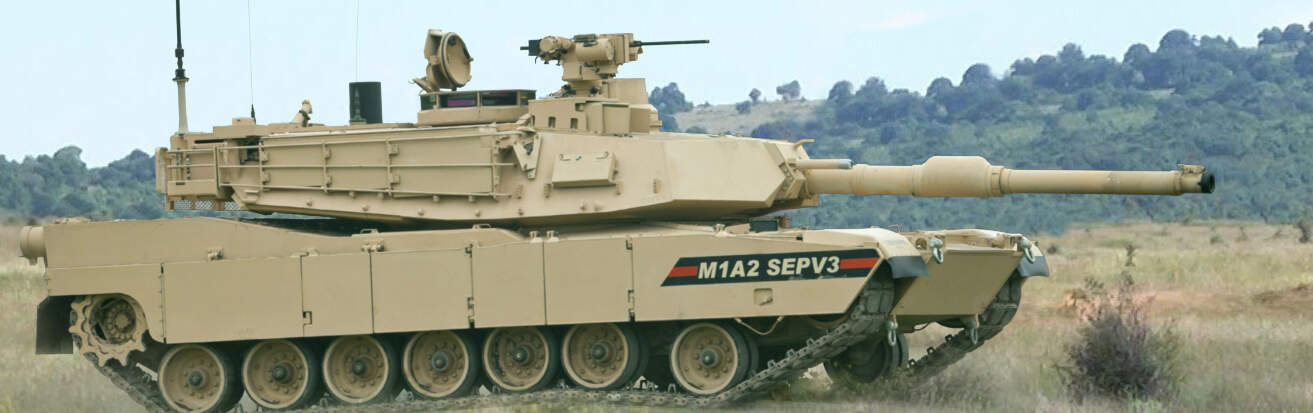
Without further ado, I’m building this M1A2 SEPV3 from the 1st Battalion, 8th Infantry Regiment, 3rd Brigade Combat Team, 4th Infantry Division as seen in this video 3rd Armored Brigade Combat Team (Tanks) - YouTube , and this top photo in September 2021 at For Carson, Colorado (just south of where I live). I like that the sand color is broken up by the green bore evacuator and portion of the barrel, and front left fender.
Nice start on the Abrams. Looks like a Dragon kit. And welcome. Lots of friendly helpful folks here. Any questions, just ask and someone will have the answer or point you in the right direction.
Are you planning to modify the turret’s frontal armor and increase the thickness of the hull’s armor to match the updates introduced in the actual Sep v3?
Regarding turret armor thickness. I put a lot of thought into that. It looks like there have definitely been different batches of SEPV3 introduced. I noticed the 1st Cav and 3rd ID SEPV3s have noticeable differences in shape of the frontal armor. The 3rd BCT of the 4th ID that I’m modeling doesn’t have that same shape to the turret front armor. It looks more like an older version of the M1A2. See some examples here: 3rd Armored Brigade Combat Team Gunnery - US Defense Story
Also, on the Flyhawk kit, the gun mantlet already sits further back then it should for a non-up armored turret. So, in effect, it already has that characteristic of the SEPV3 going for it. The SEPV3 below has the same type of armor the 4th ID has. That’s my long winded answer to say that no, all things considered, I’m leaving the turret armor as is.
Hi Erik,
really nice work there but as others have alluded to , production V3s have increased turret face armor, rear mud flaps, enlarged front & rear towing points, under armor APU and probably quite a few more things I’m unaware of.
Yeah, Understood. I wonder if these 4th ID M1A2s are V2 versions with the CROWS II LP then? Any thoughts? I’m going to display this on a base with a plaque, so want to make sure it’s labeled correctly.
My model is based on the specific tank in the top photo of this thread that doesn’t have additional armor, rear mud flaps, enlarged front and rear towing points, etc. At any rate, I’m building this with the details I see in this video of the 3rd BCT: 3rd Armored Brigade Combat Team (Tanks) - YouTube and from photos like this: 3rd Armored Brigade Combat Team Gunnery - US Defense Story
Here’s an article I found from 2018 explaining the modifications to the current 3rd BCT M1A2s, including the addition of the low profile CROWS II. 3rd ABCT tanks roll in for upgrades – Fort Carson Mountaineer Here’s an earlier article from the year before that shows the original CROWS II (folded for transport) in the top photo of the article. Move to Germany: 3ABCT signals start of presence across Europe – Fort Carson Mountaineer Glad you, and the other poster, pointed it out. I assumed everything with a CROWS II LP was a SEPV3 and that they just had different armor packages. This makes more sense. I’d love to be able to modify the title of this thread and the first post, but it won’t let me. Son-of-a . . .
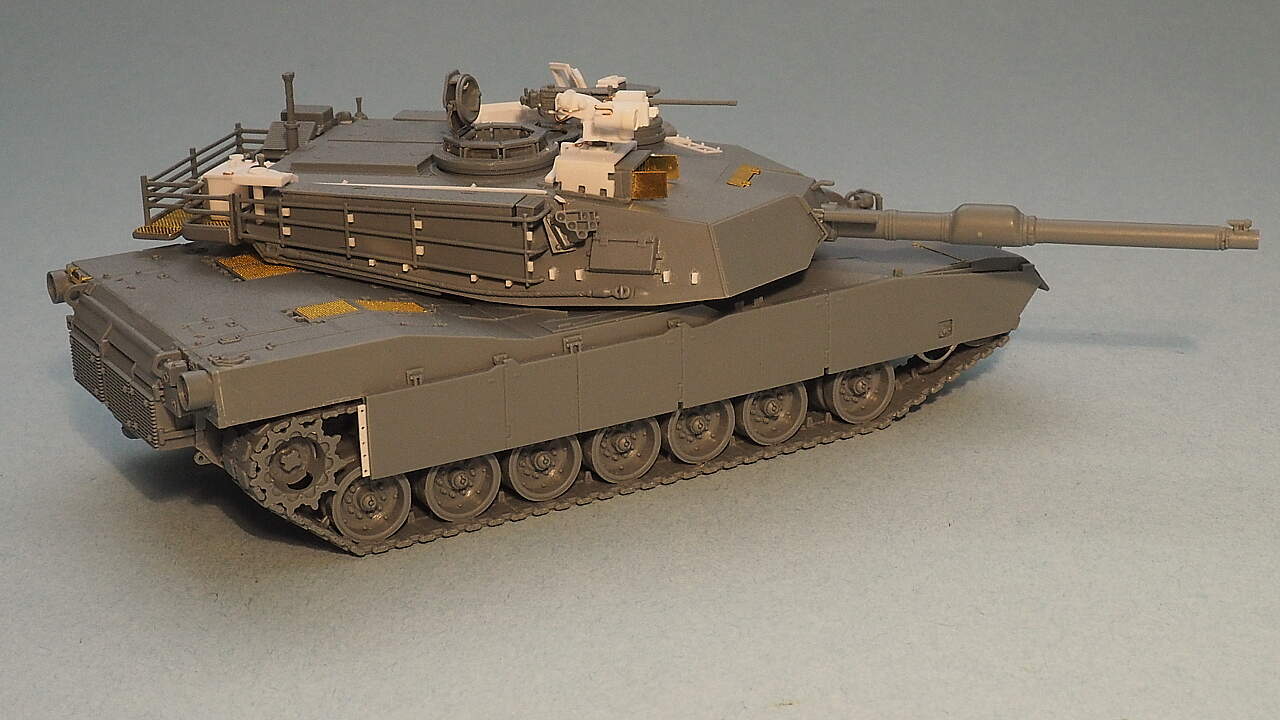
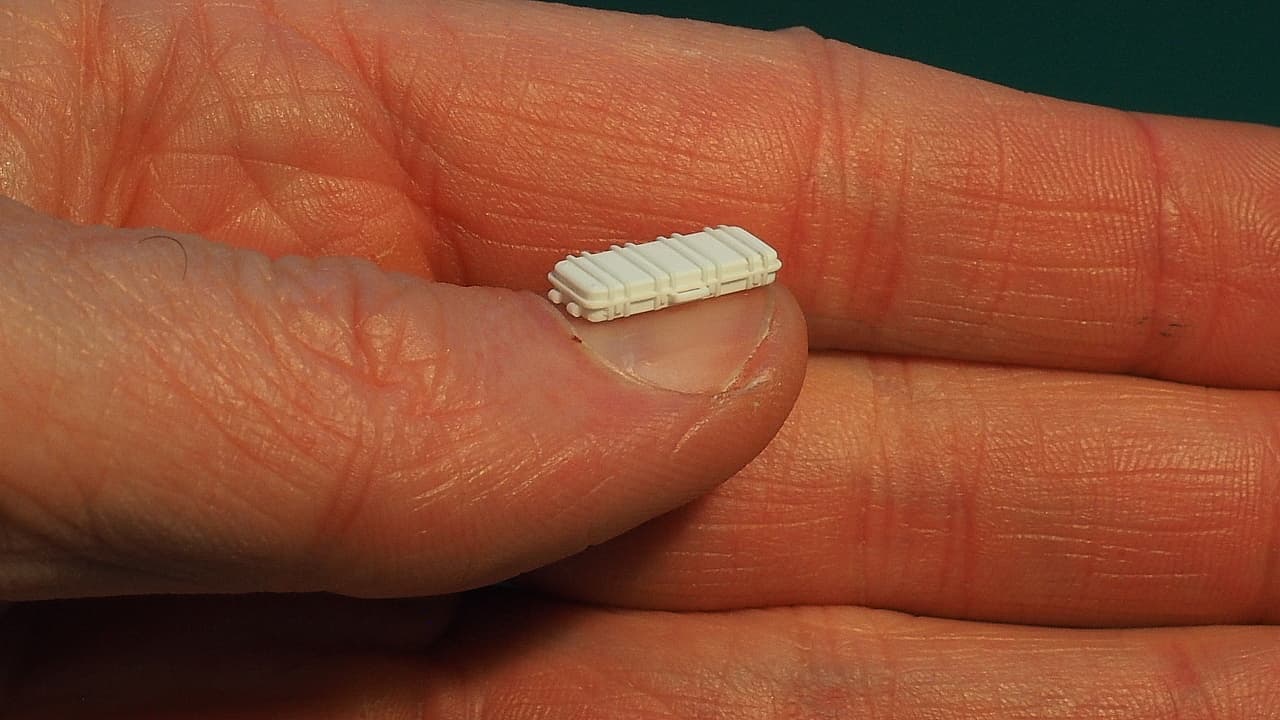
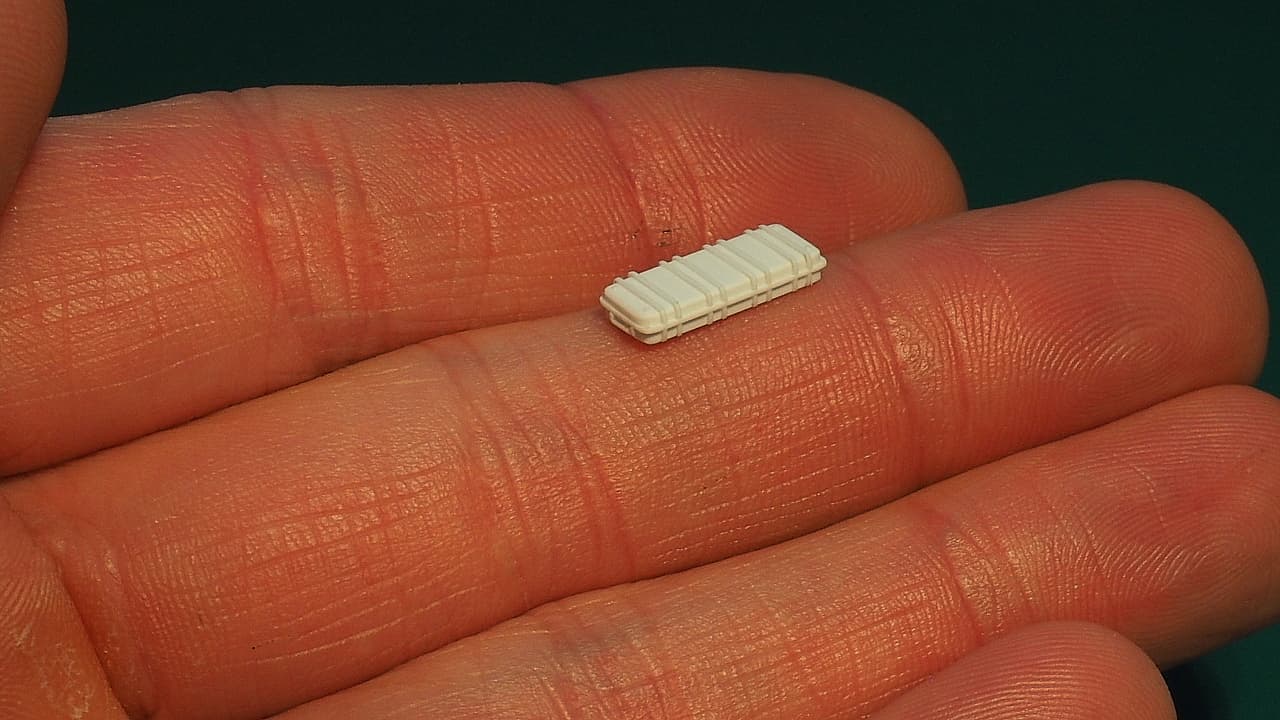
It’s been a real challenge to try to find the right details to add to this tank. Photos I’m seeing have at least a few dry boxes/Pelican style cases as storage. I decided to give scratch building my own cases a try. This is based on a Pelican 1700 case. It’s not perfect, but it’ll do. Believe it or not, it’s 57 pieces of styrene!
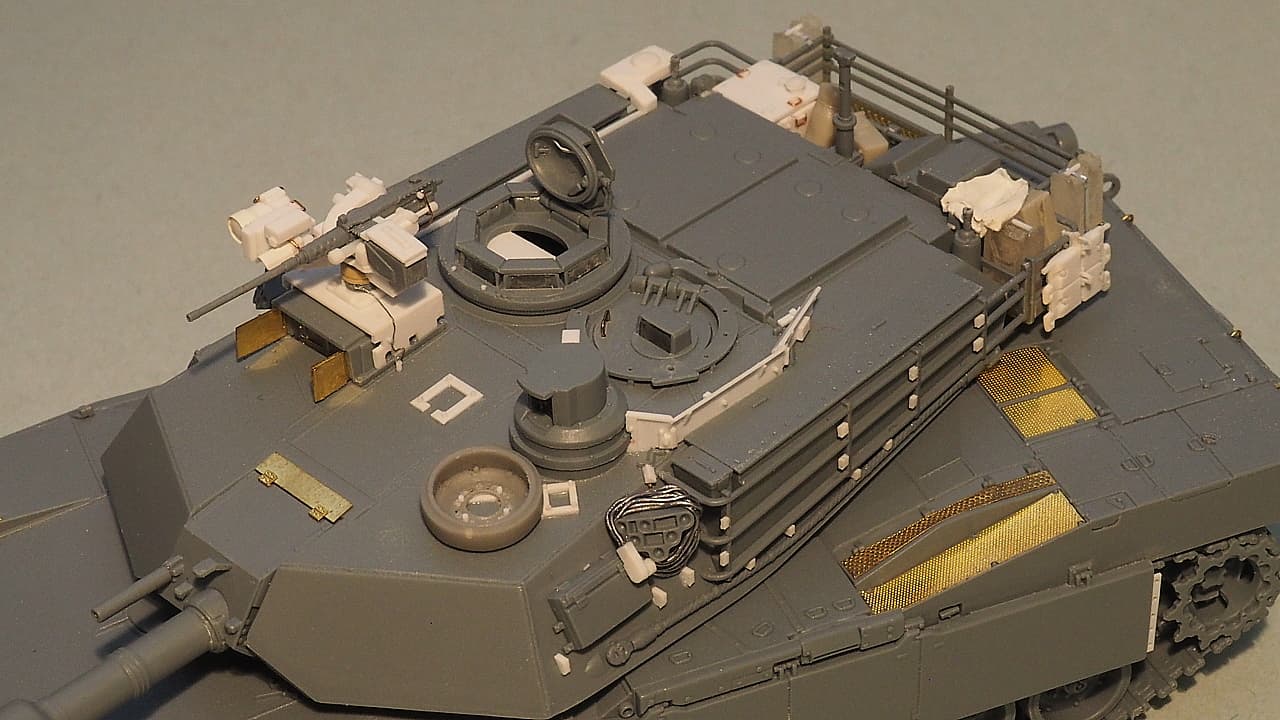
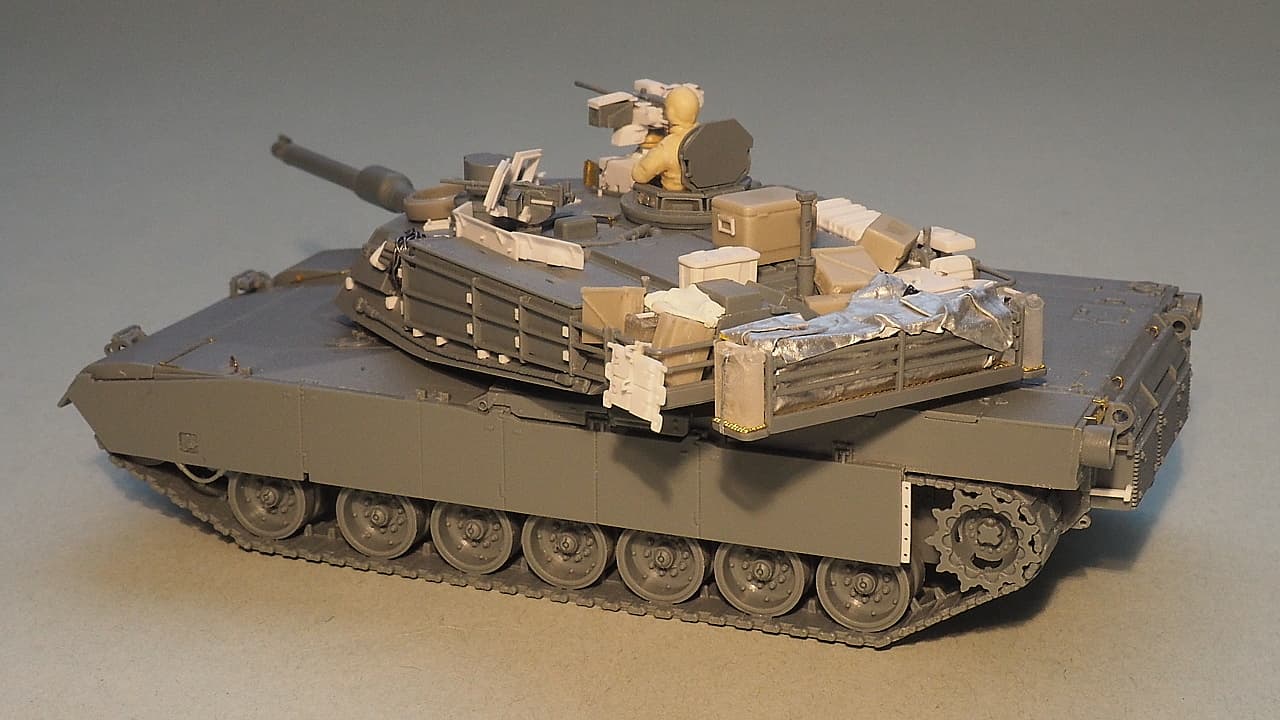
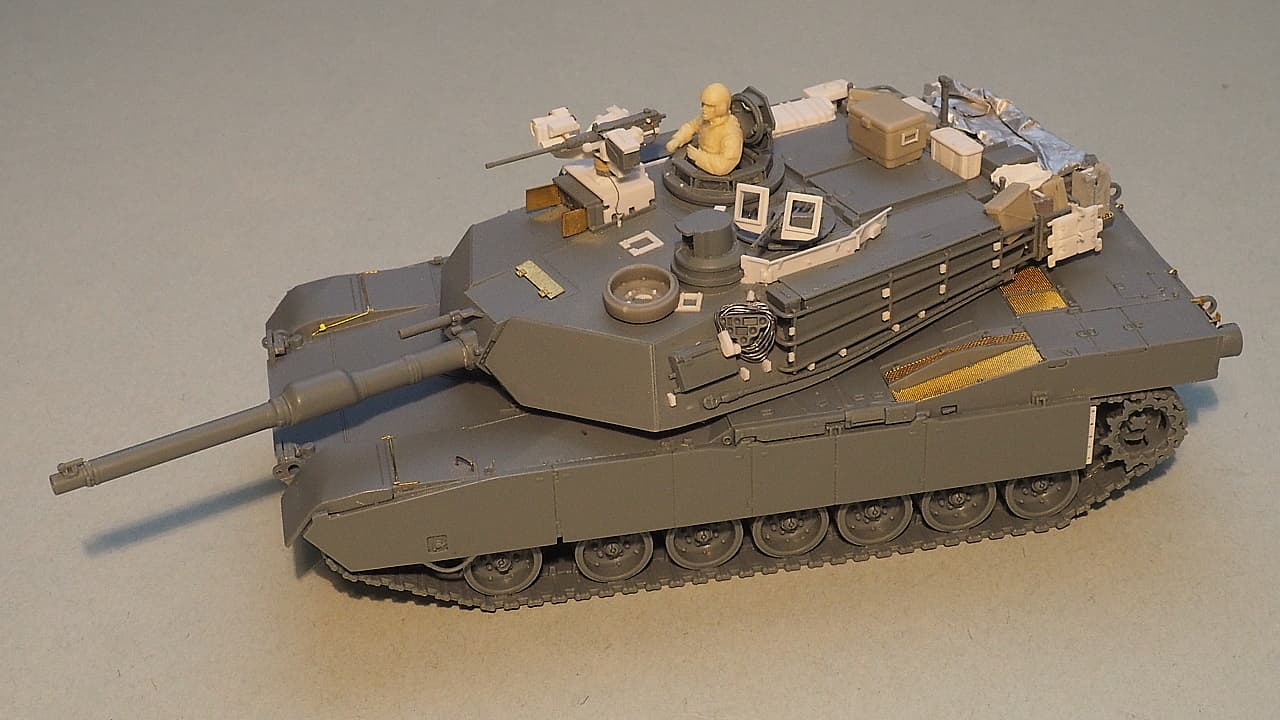
The latest on my M1A2. I’ve glued on all the details that will be attached before priming and painting. The other half of the details will be attached at the end of the project. I’ve experimented with techniques to depict the tarp that will fill the rear bustle rack. I’m still working that out. In the mean time, the details I’ve added are 3D printed modern US water Jerry cans, with new styrene rod handles, and aluminum foil straps securing them to the bustle rack. I also added NATO standard jumper cables, with the plug made out of styrene and .010" lead wire for the cables. The unit I’m modeling frequently hung these around a smoke discharger. The scratch built spare track links are attached to the bustle rack, as is common. I mounted a resin spare road wheel to the roof where these frequently live. The resin part had all the mounting bolts represented, so I had to remove those and drill holes instead and then used styrene rod to depict the 4 bolts used to secure the wheel to the roof bracket. I also draped a small tarp made out of Milliput White over the 3rd Jerry can and MRE box in the side storage. Lastly, I added a .004" wire to the left side of the remote weapons station.
Coming along very nice. I remember when I could do such fine detail with ease but as The Eagle Eye is not as it once was so I am forced to build large size kits.
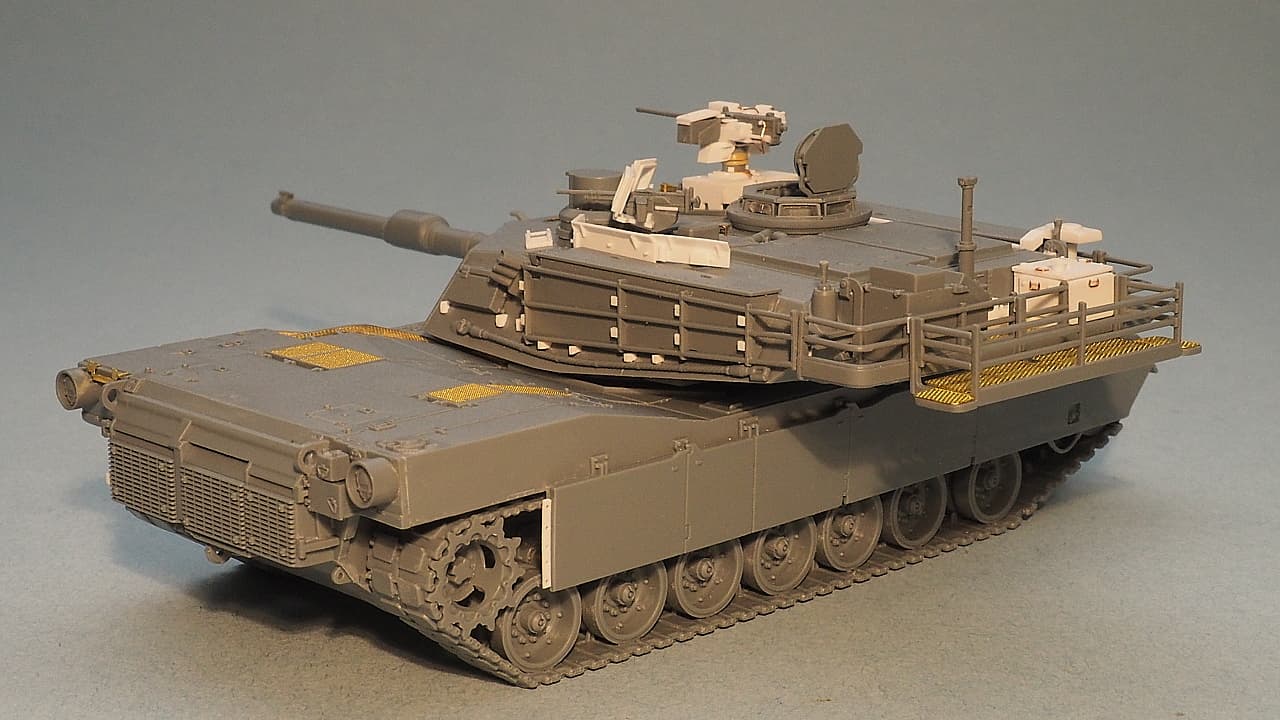
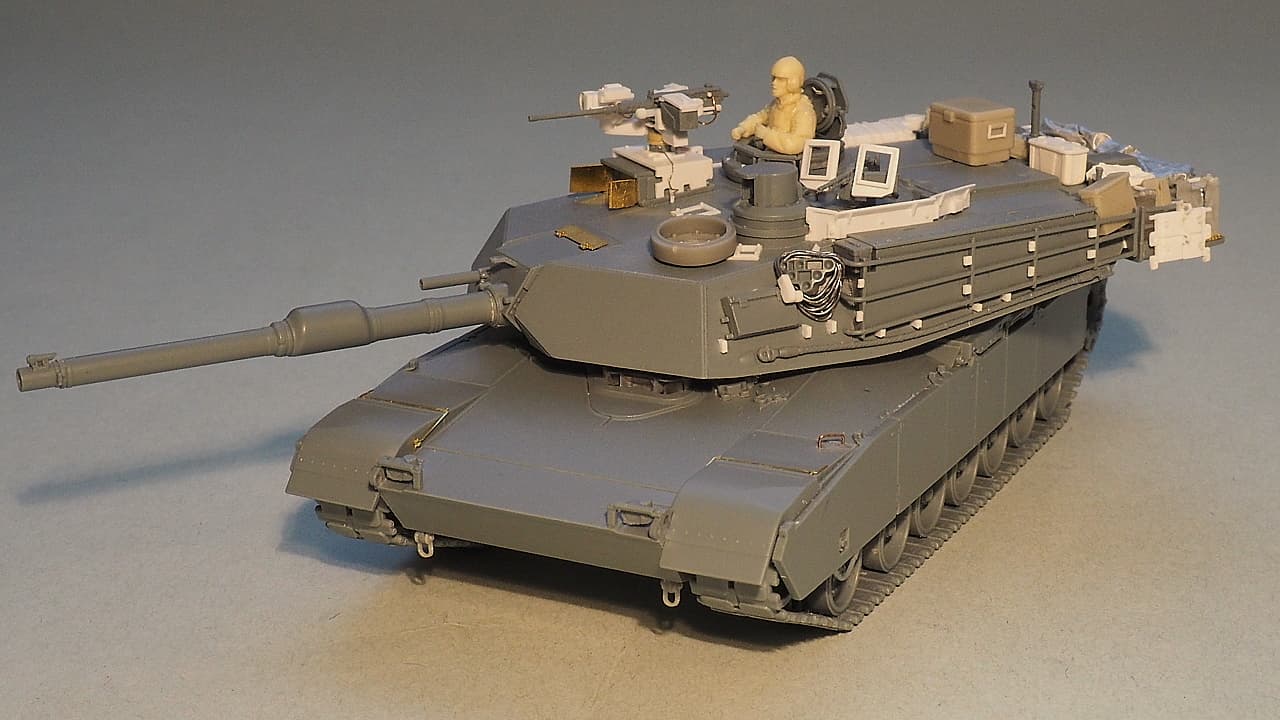
I experimented with different techniques for the tarp in the bustle rack. The Milliput option was a dismal failure. Hard to work with a thin enough piece of the size I needed. Regular aluminum foil is only .001" thick, so too thin. I tried .008" thick lead foil. It looked OK, but I thought that it looked too thick. I had a moment of inspiration while opening a yogurt container at breakfast. The aluminum foil lid measured .003" thick. So that is the tarp material. I’m satisfied with the way it turned out. Ideally it would look a little better, but it’ll do. These photos have the figure and a lot of the stowage temporarily set in place where it will be glued on later. I used photos of the unit the tank I’m modeling belongs to for referencing the type and placement of the stowage. The tank is now ready for priming/painting.
Thanks Ken. It’s always interesting with this kind of thing where I had visions of how I wanted the tarp to turn out, but I couldn’t get it to look the way I pictured. Should be interesting to see all this under a coat of primer.