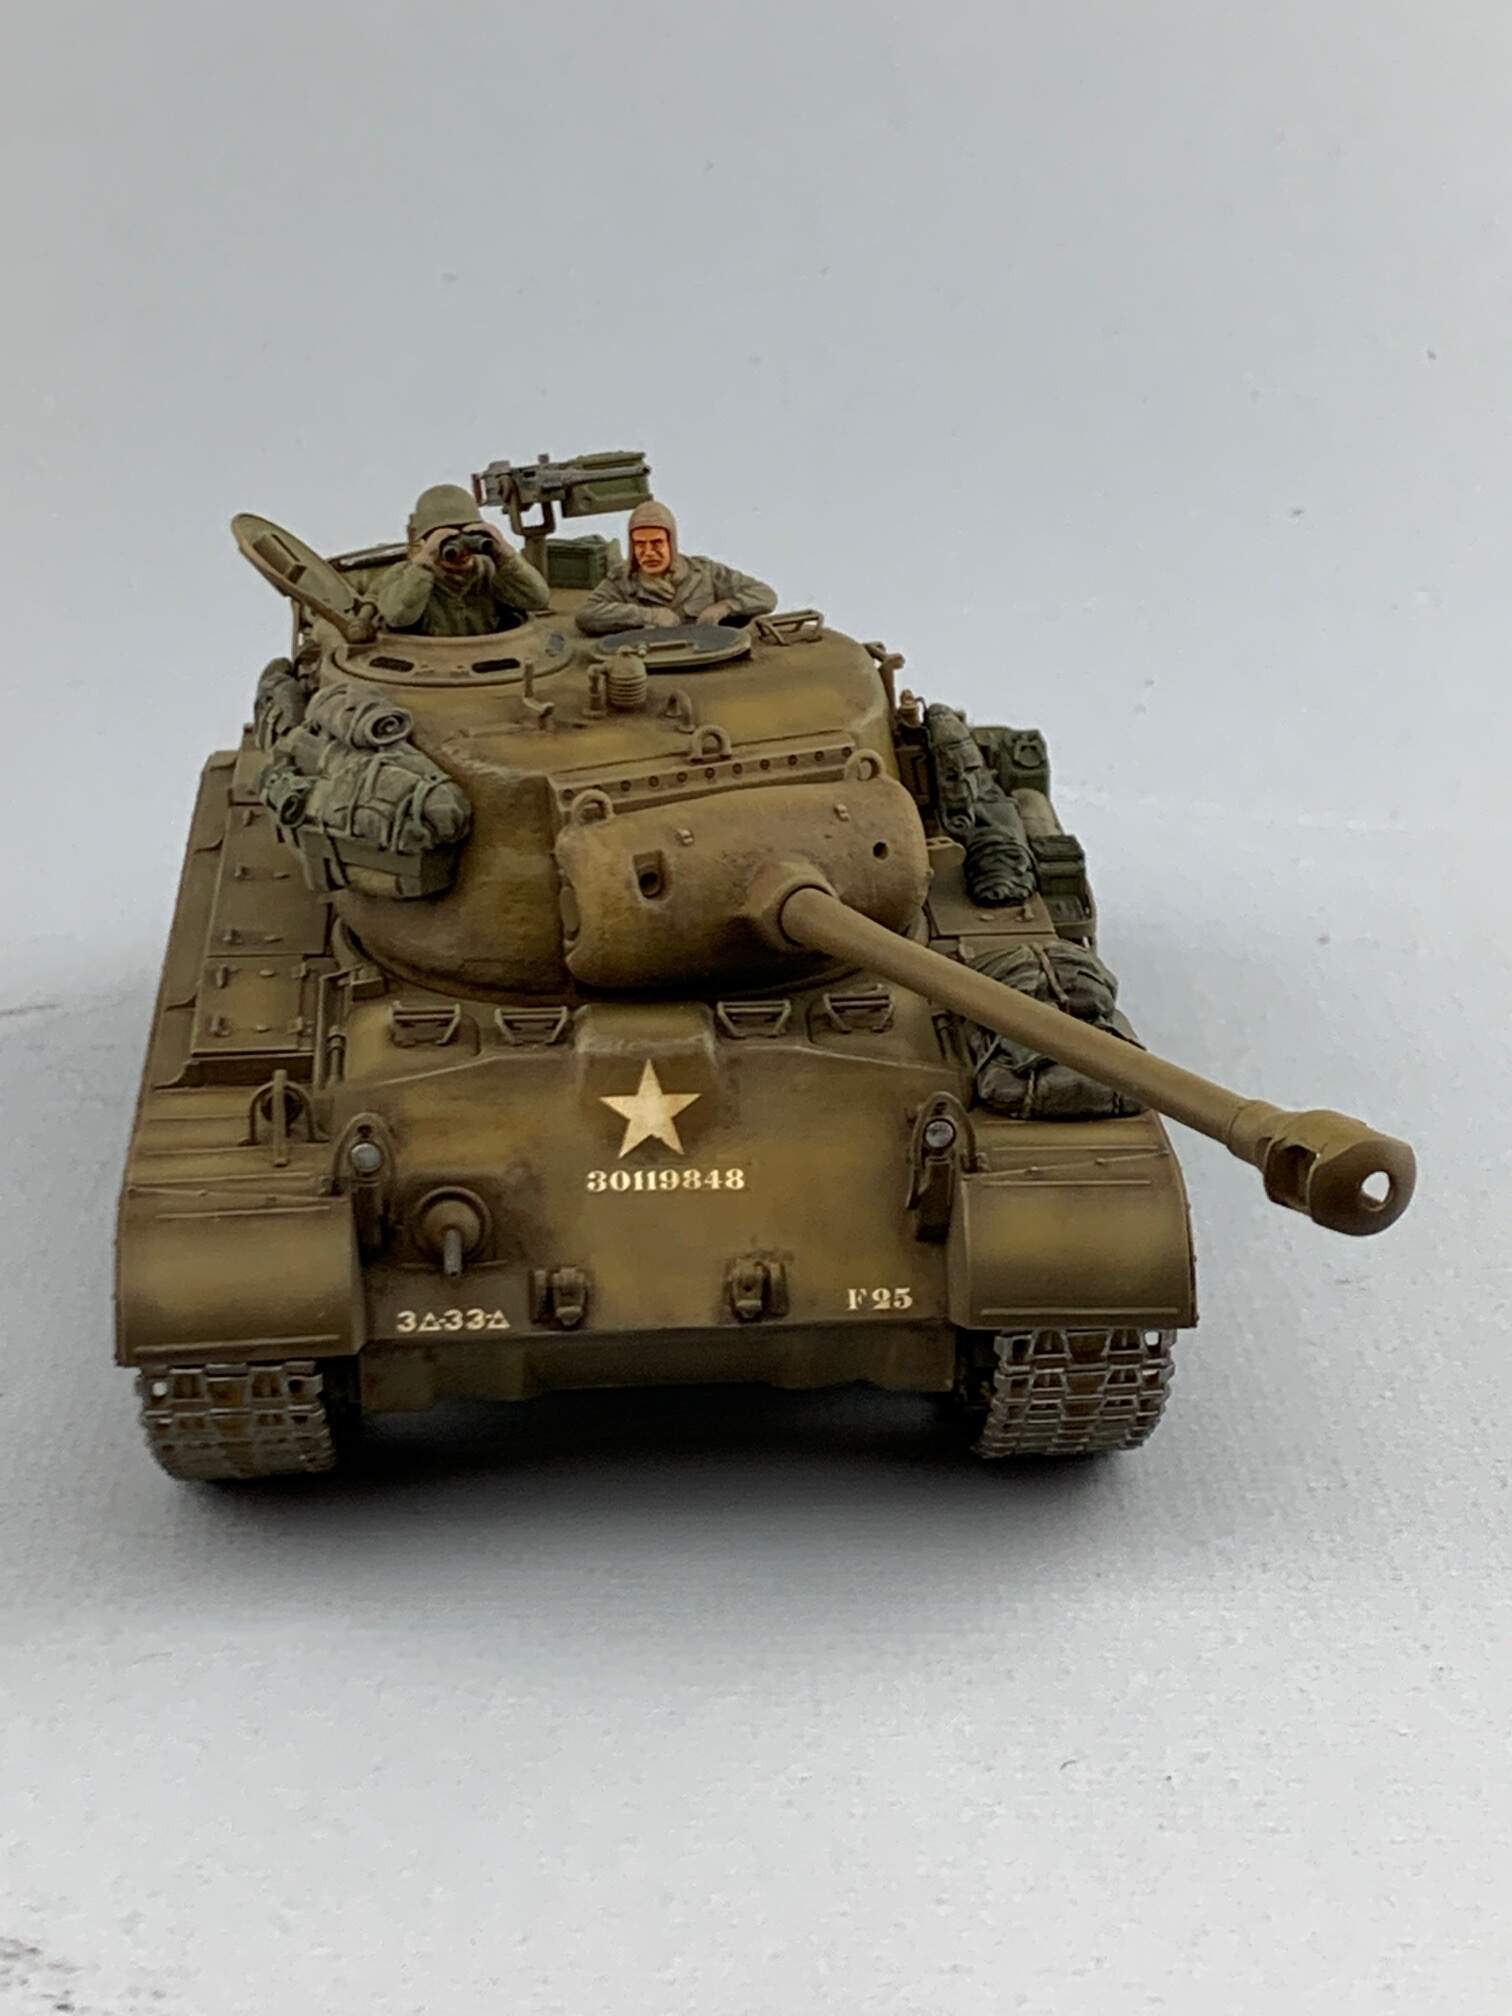
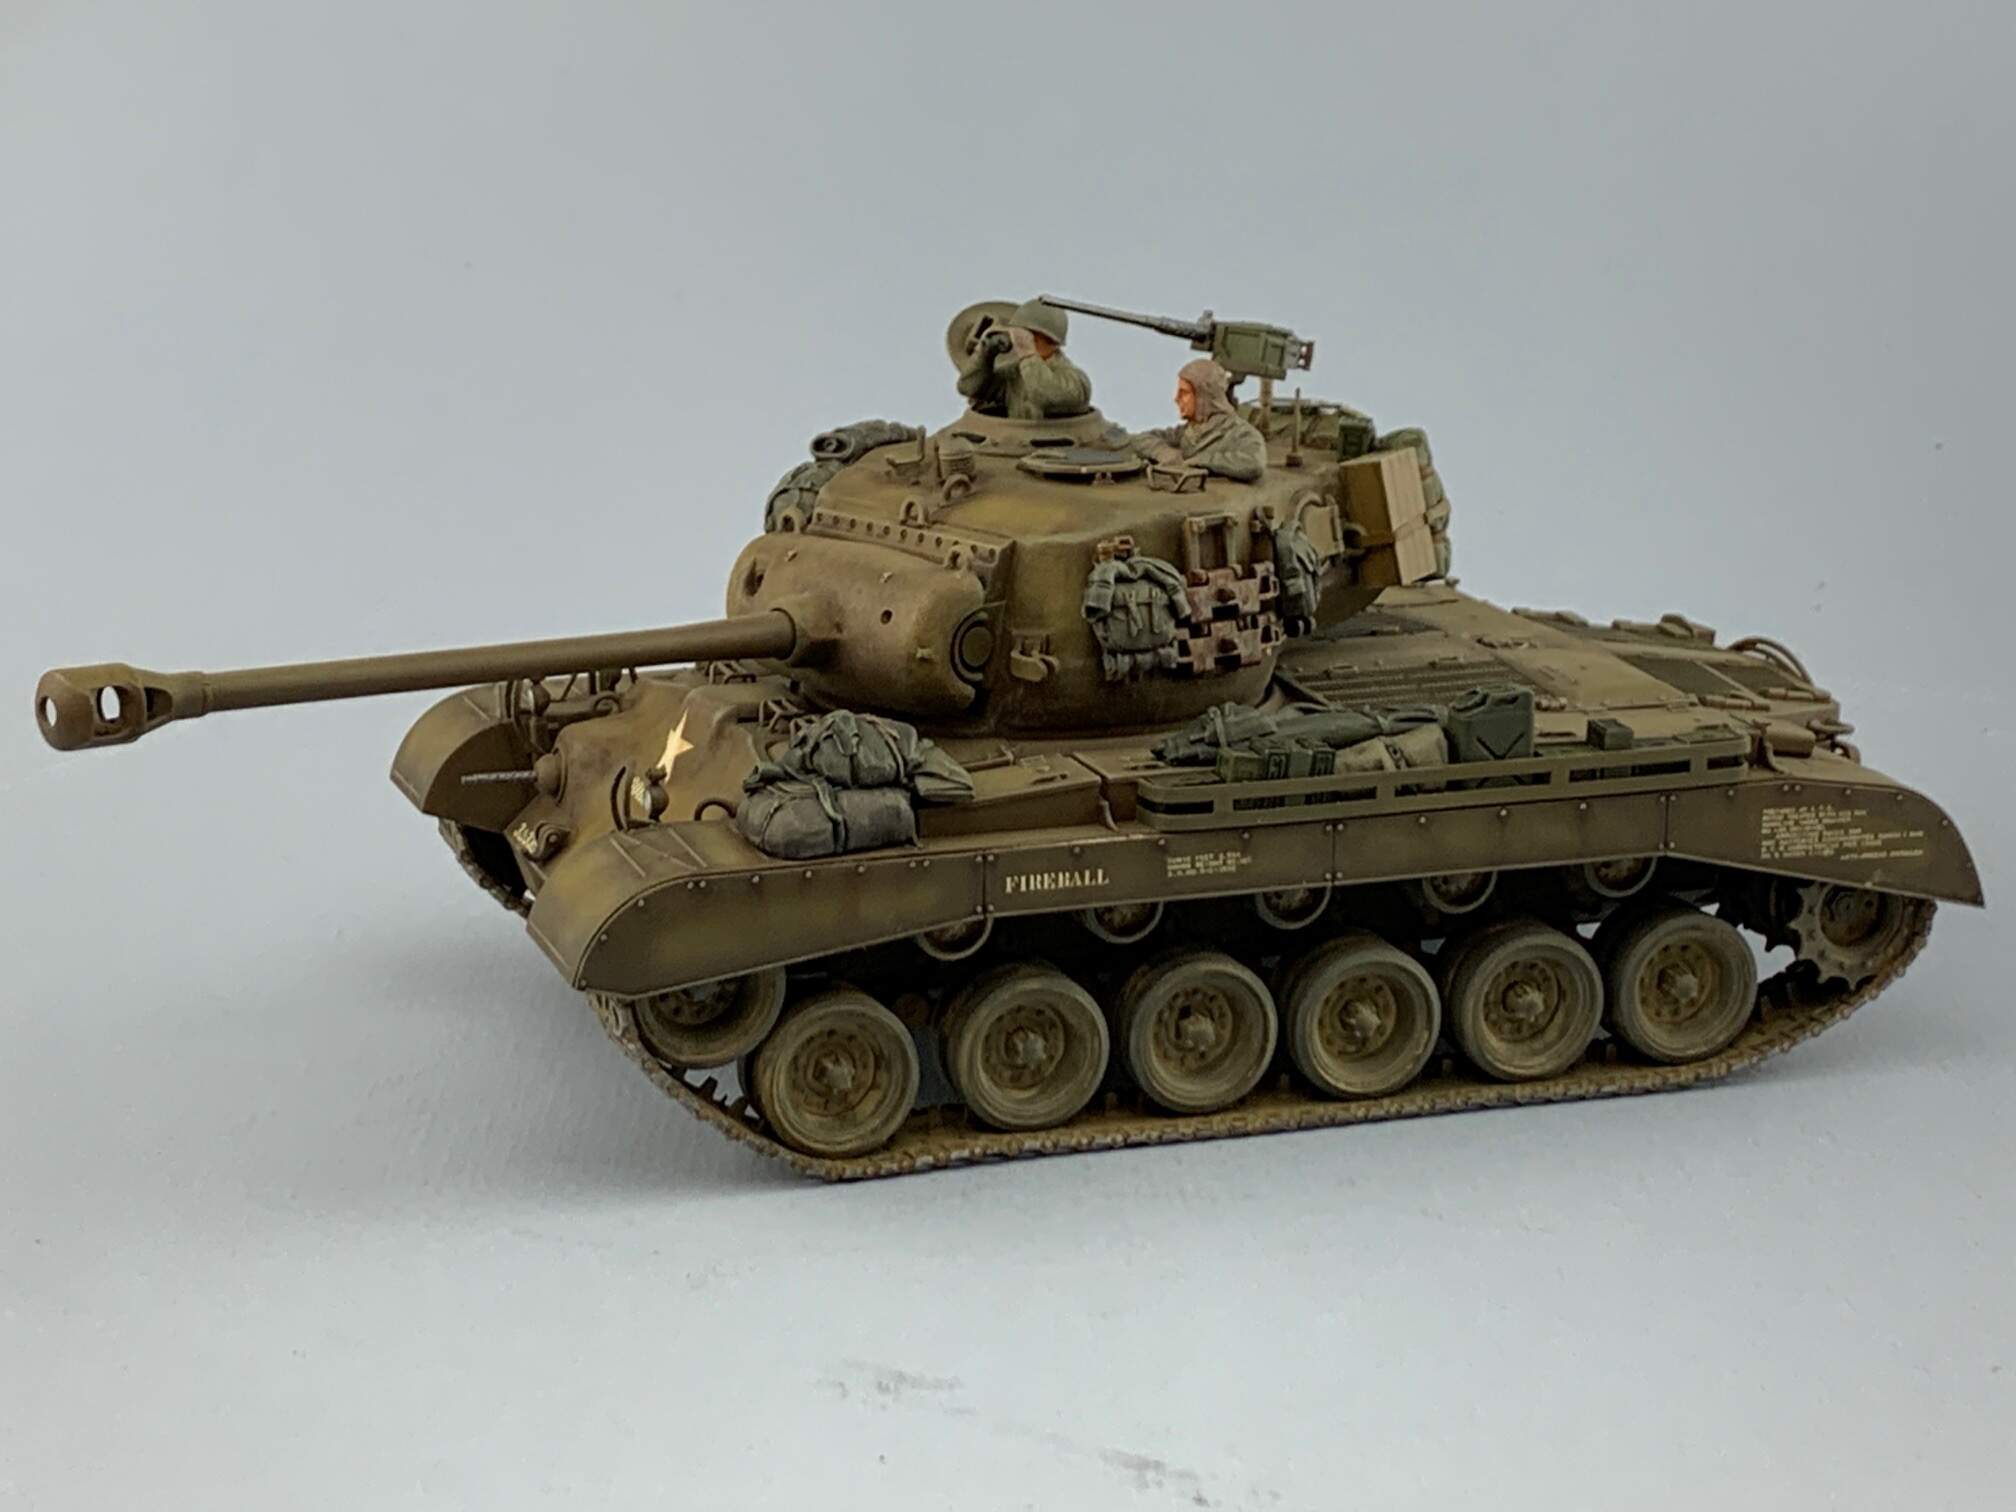
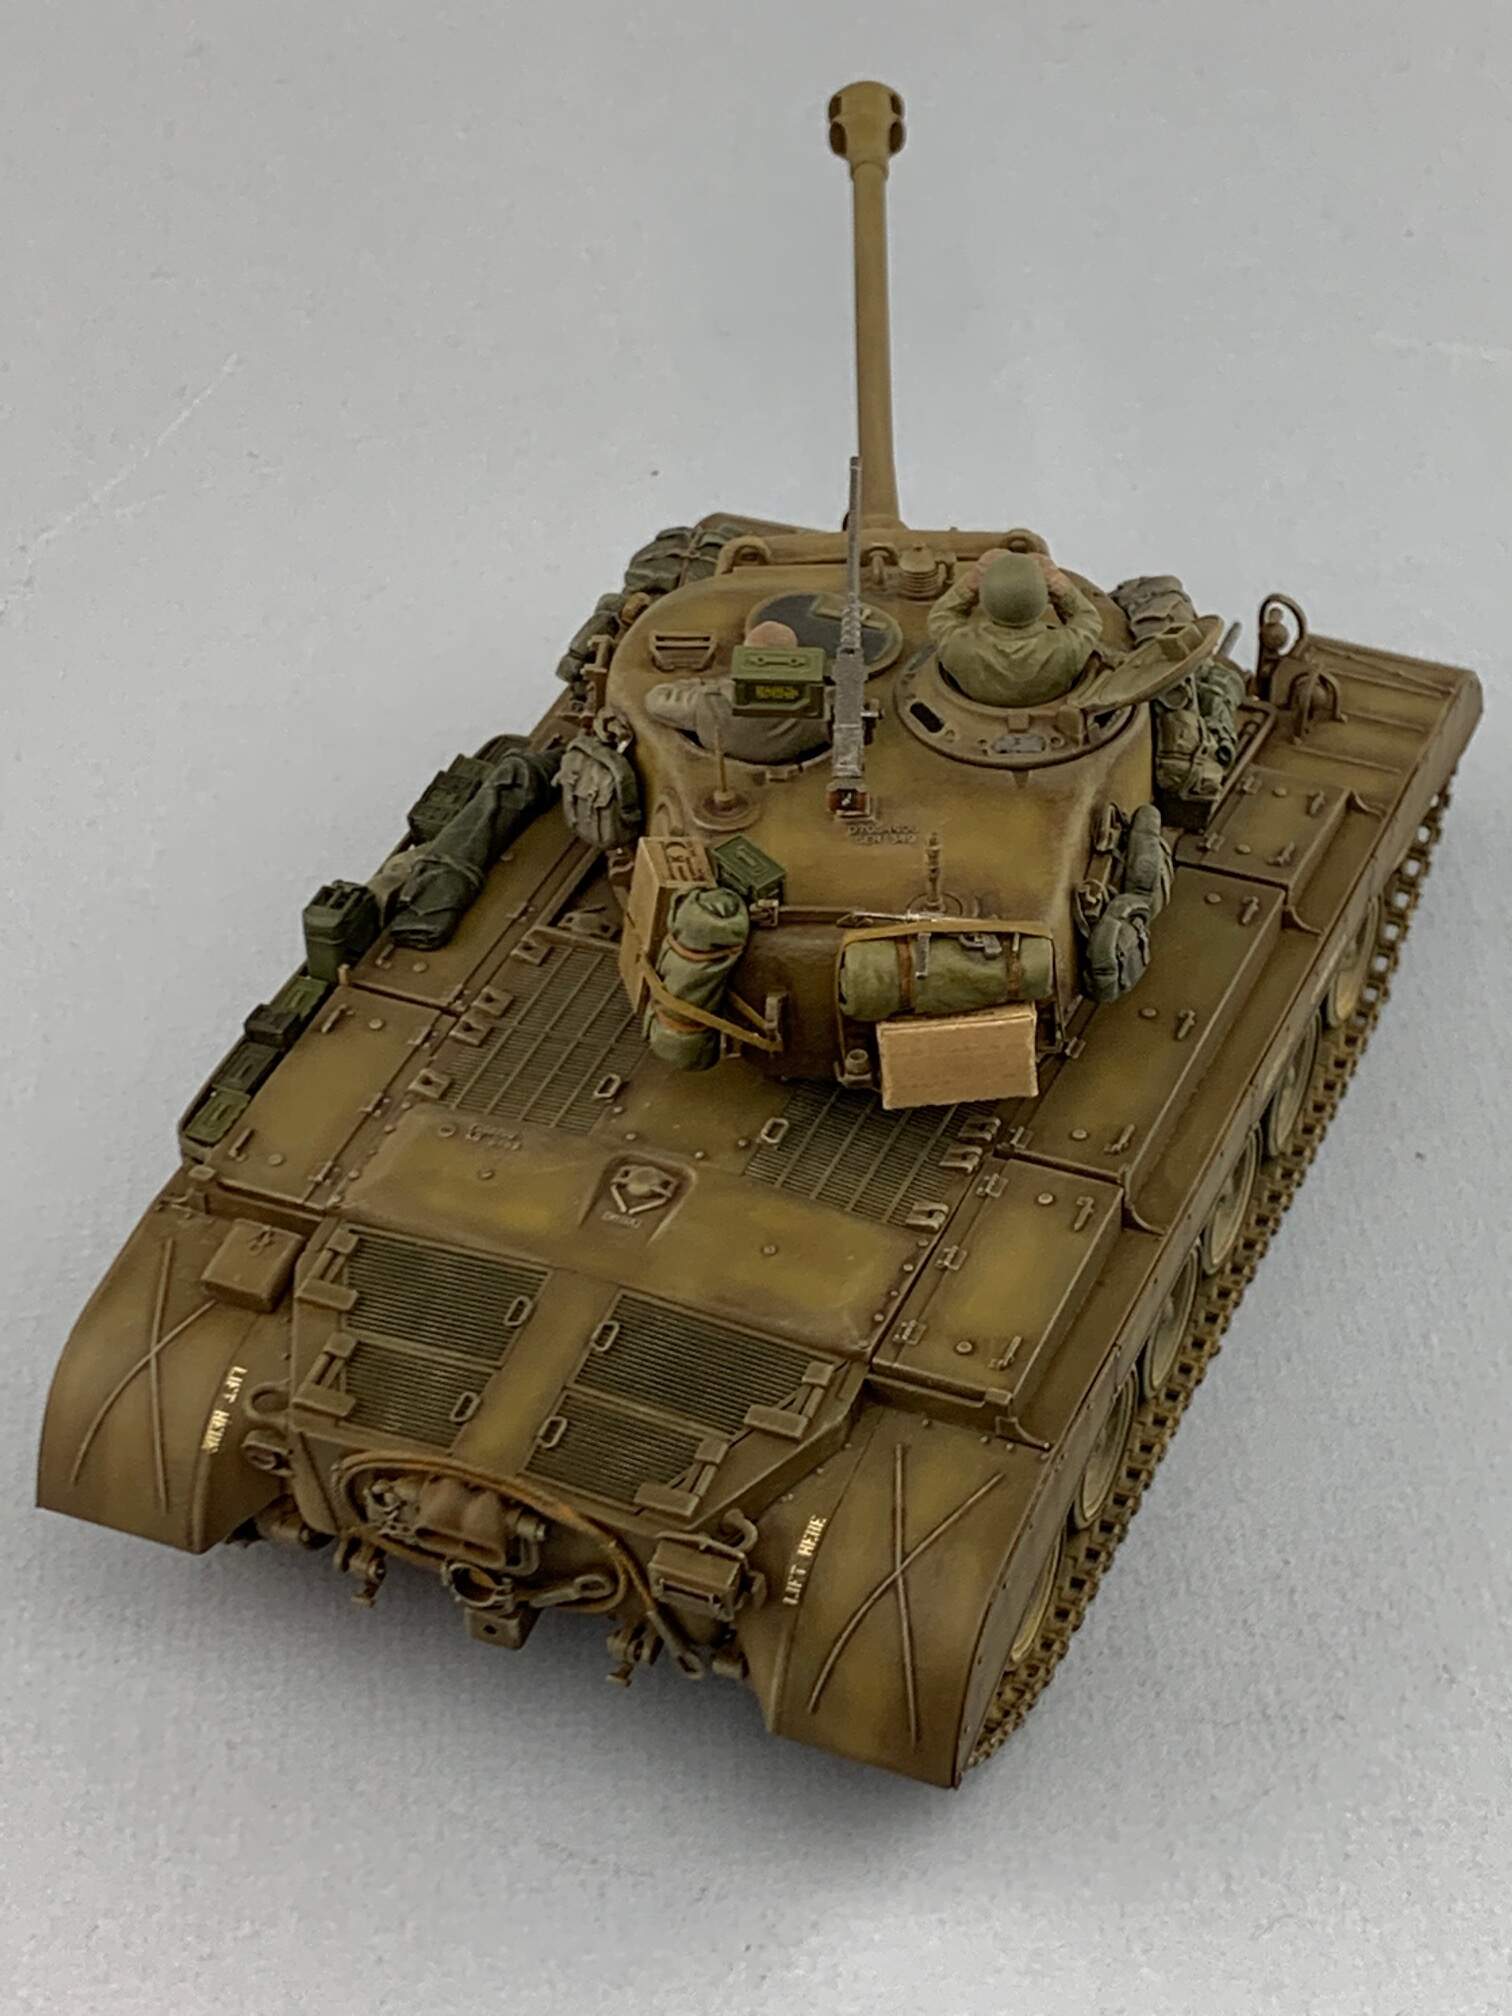
Tamiya kit with scratch built rack and Value Gear stowage.

19 Likes
'Love your stuff; I might have said it before but I do think they’re crying out for antennae.
Yeah I know but low shelves are a problem. I do have some new stuff I might try though. It’s very fine and is made out of some kind of synthetic material I think. Anyway it is very flexible and won’t break and seems to have no memory so it always springs back to being straight.
Well sounds promising! I just think that especially on modern armour, that sort of bristling look just makes them appear a tad menacing and business-like. But as I say, 'love your work, what’s next?
Most of the builds I have posted with the exception of the RFM Sheridan were done 3-4 years back. Currently working on the Hobbyboss AAVP7A but not doing the interior. Got it for cheap. It’s actually almost finished but will take a few days to sort out all the stowage.
Very nice job on bringing Olive Drab to life.
Rick
Thanks. I used an old bottle of Poly Scale OD and did some preshading.
That finished up great! I don’t believe that the WWII T26’s had the first aid/ phone box on the left rear fender, those being added postwar. But other than that, everything else looks dead on. I really like the way your OD paint turned out!
Really came excellent. Nice job all around!
Sweet looking Pershing.
I agree with Brian, this kit looks fabulous and I understand your misgivings about the antennas but hopefully the new medium you mentioned works out.
perhaps you could tell us what it is to are planning to use as I have a similar problem.
@Klaus-Adler, @Taffy3, @metalhead85, thanks for the complements.
David as for the antenna I have no idea what the material is. It was given to me by a fellow modeler at a show who said it was virtually unbreakable because of its flexibility and had no memory so it would always spring back. I’ll see if I can contact the guy and get an answer for you.
Carlos I meant to check on the placement of the phone but simply forgot about it until I was finished at which point I decided to leave it alone.
@Armorsmith I appreciate it if can find out what it is called because it will come in handy on this side of the pond.
Turns out the guy is on the site. I PM him but it might be awhile as it looks like he doesn’t check in often. I’ll keep you posted.
@Armorsmith cool can you tell me who it is, that way I have a better chance at contacting him 

nice ,nice job
can you describe my the paint steps? i love your olive green result!
Thanks.
I started with a black preshade using Tamiya paints. Then using white in selected areas also with Tamiya. The OD is PolyScale lightened with yellow and white. This was highly thinned and applied in multiple thin coats slowly building up the color. I wasn’t too concerned with even coverage as I wanted the preshaded black and white areas to darken or lighten the base coat rather randomly. The key is to apply the paint in very light coats slowly building up the colors. This allows you to control the amount of coverage you want much more so than if you were applying the base coat as you might normally thin your paint. It takes longer to paint the model but I find I get much better results with this method of painting.
1 Like
i test your technjque with the next tank
Could very well be I just can’t remember exactly what the guy told me it was.