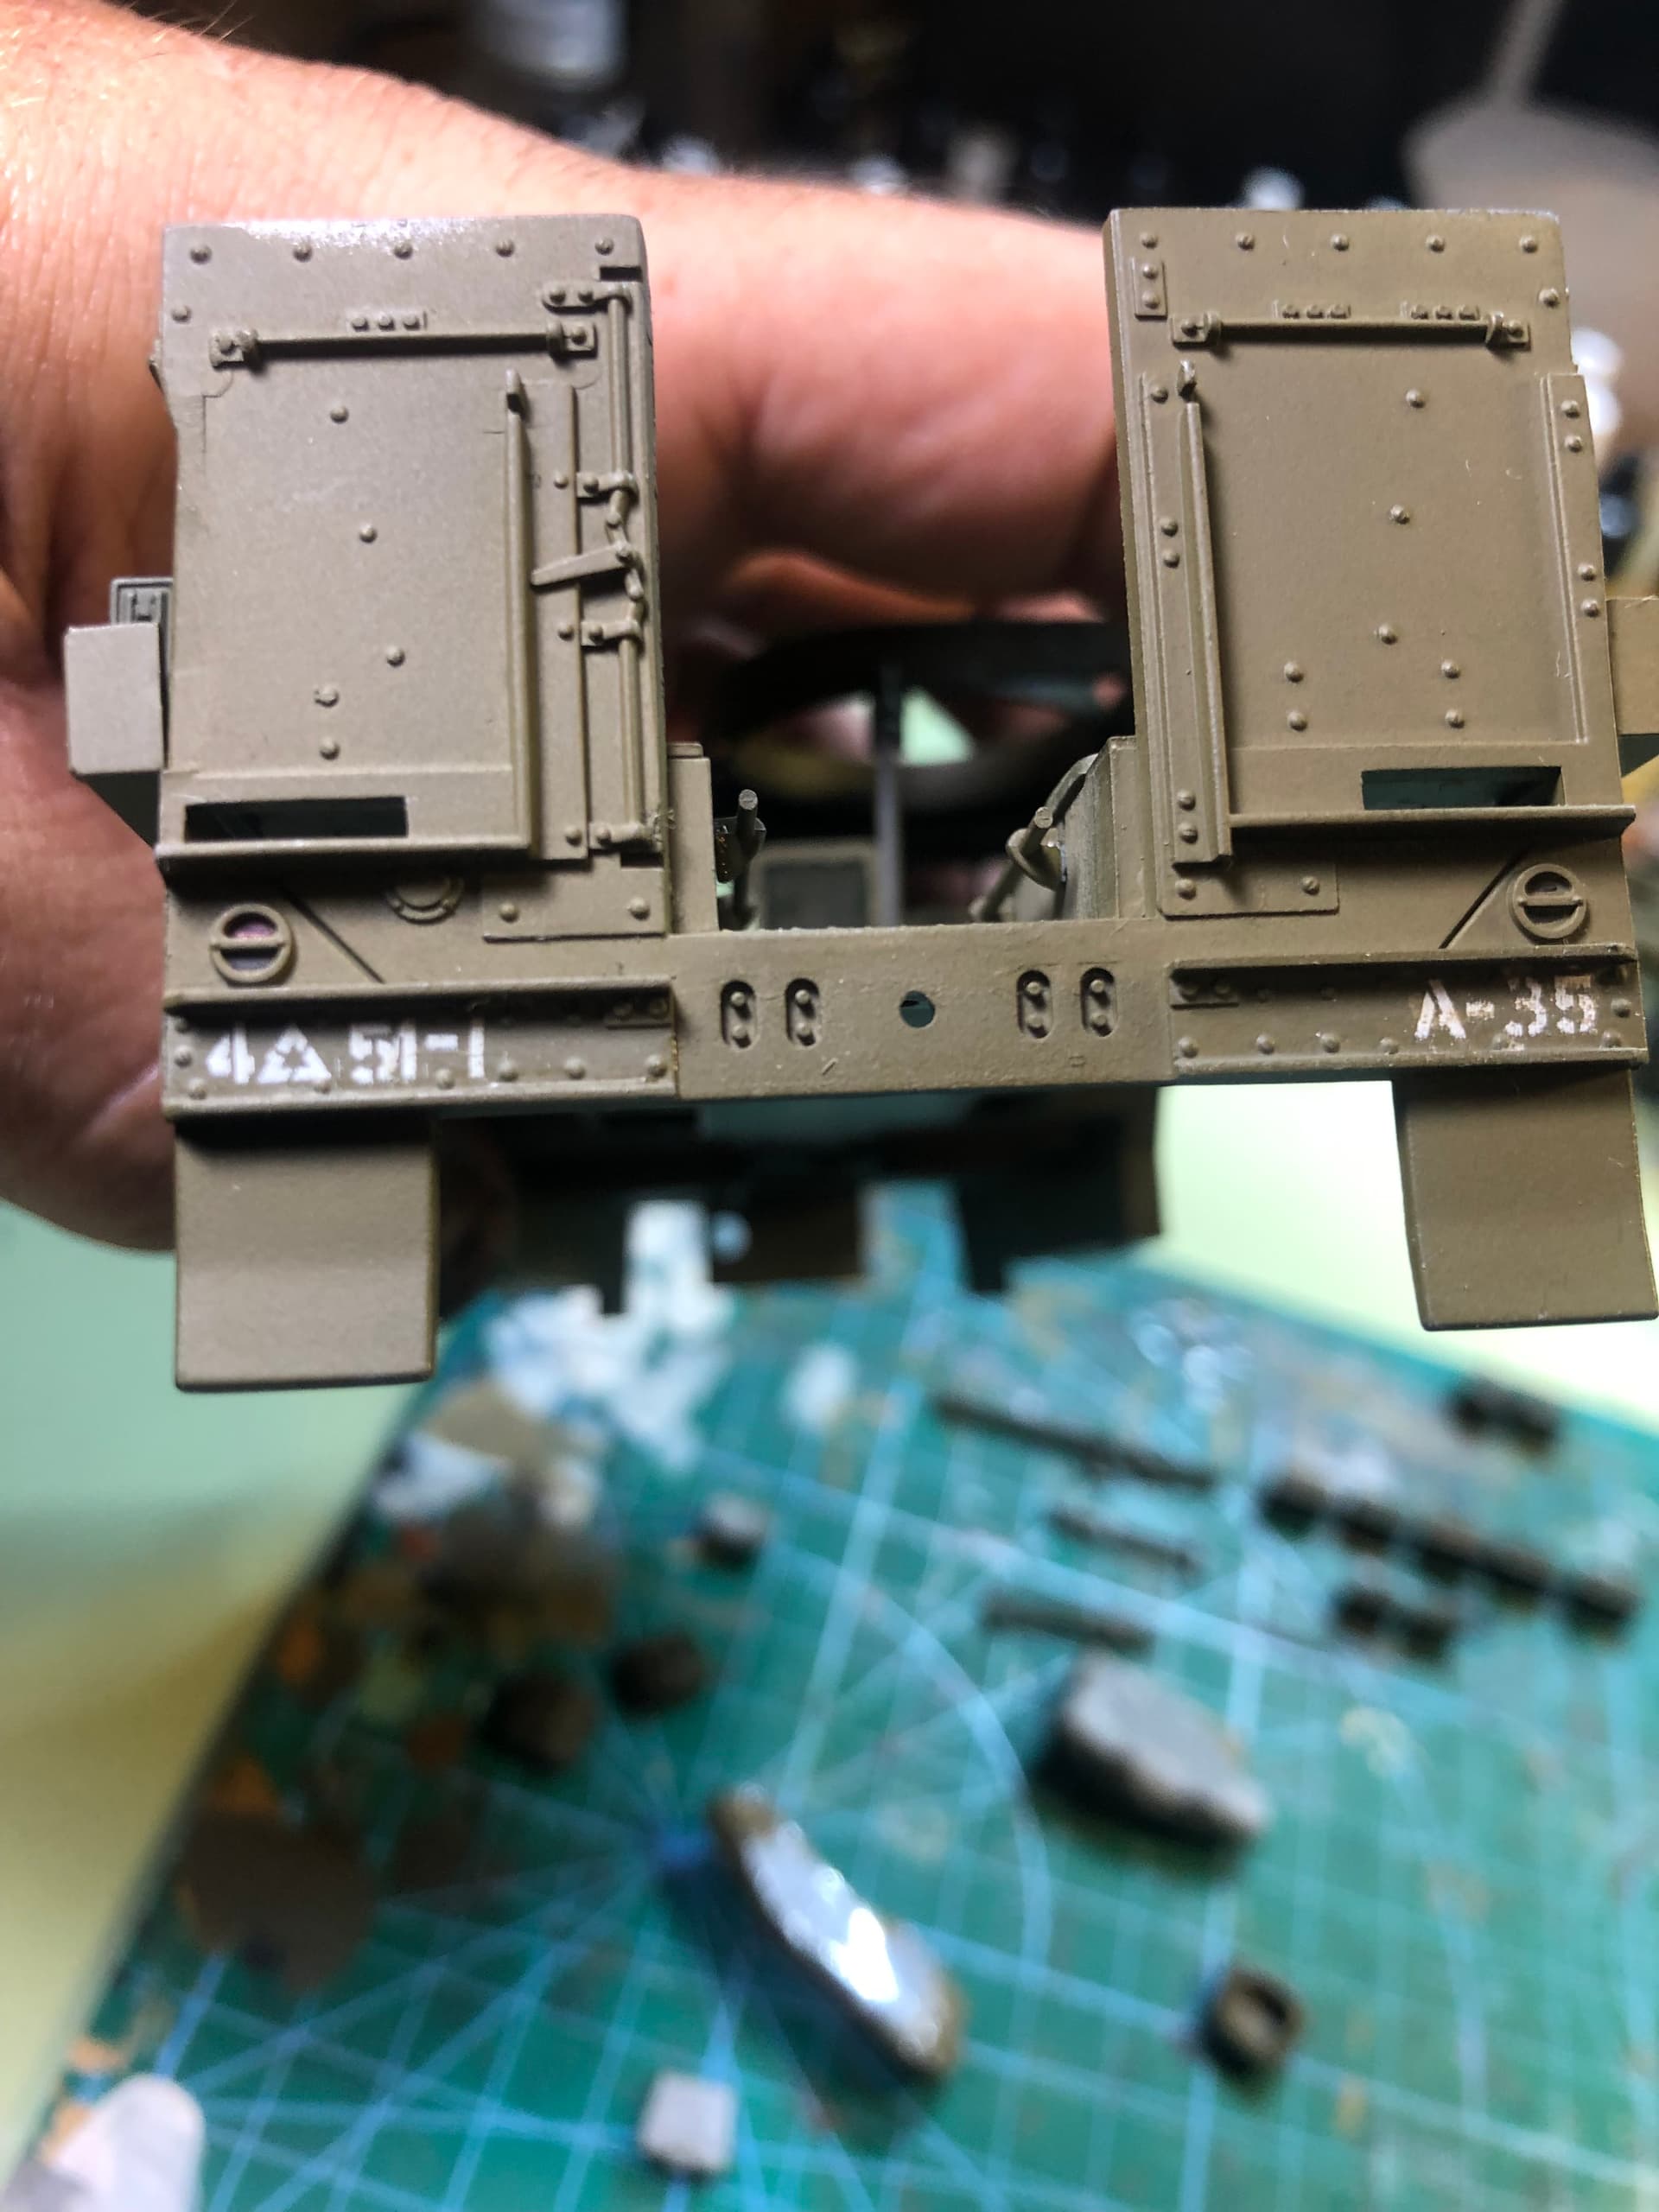
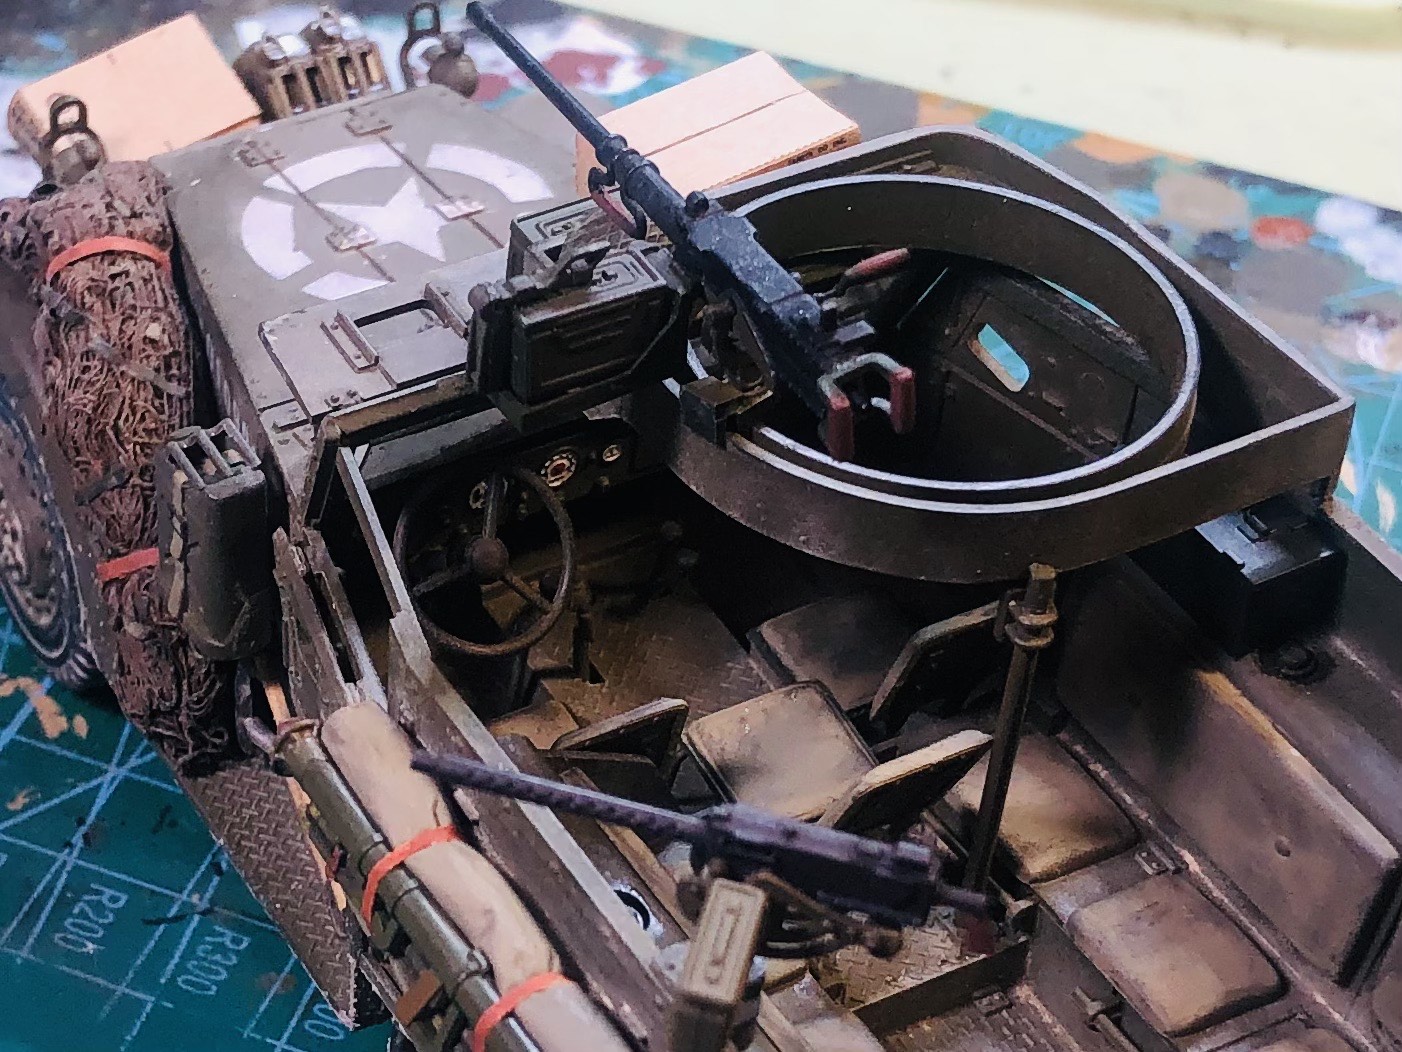
I sort of jumped the gun building this kit, before I realized there were a LOT of modifications to backdate it to a proper M3A1. The sprues were neatly sealed up in a ziplock bag in a tote full of similar ziplock bags that I purchased at an estate sale. Thank goodness for scalemates and their pdf’s of instructions!
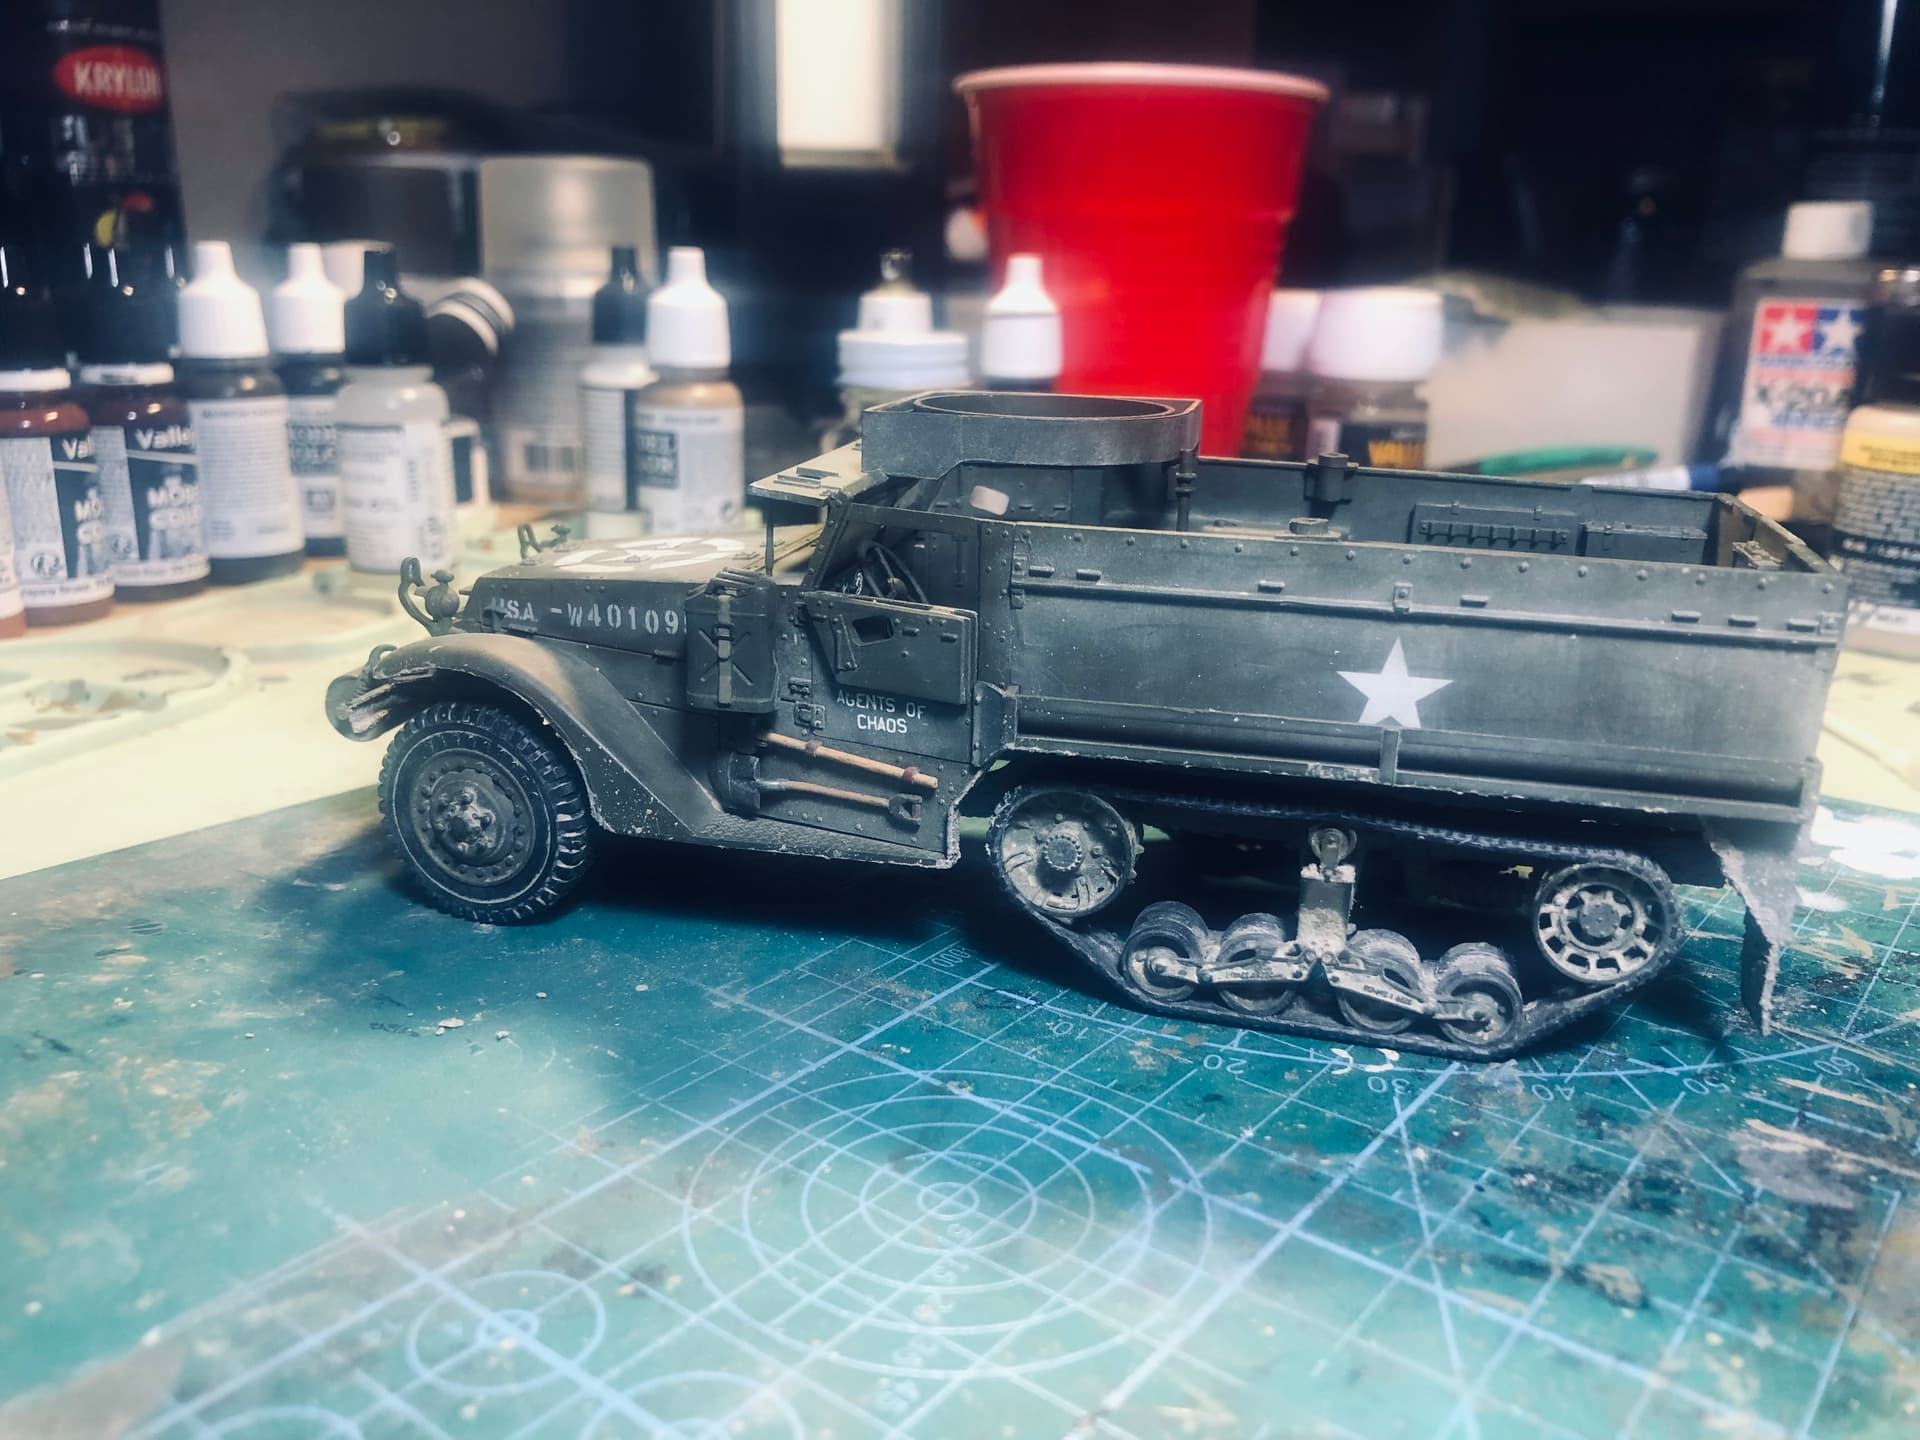
I ended up just using this one to practice stenciling and weathering.
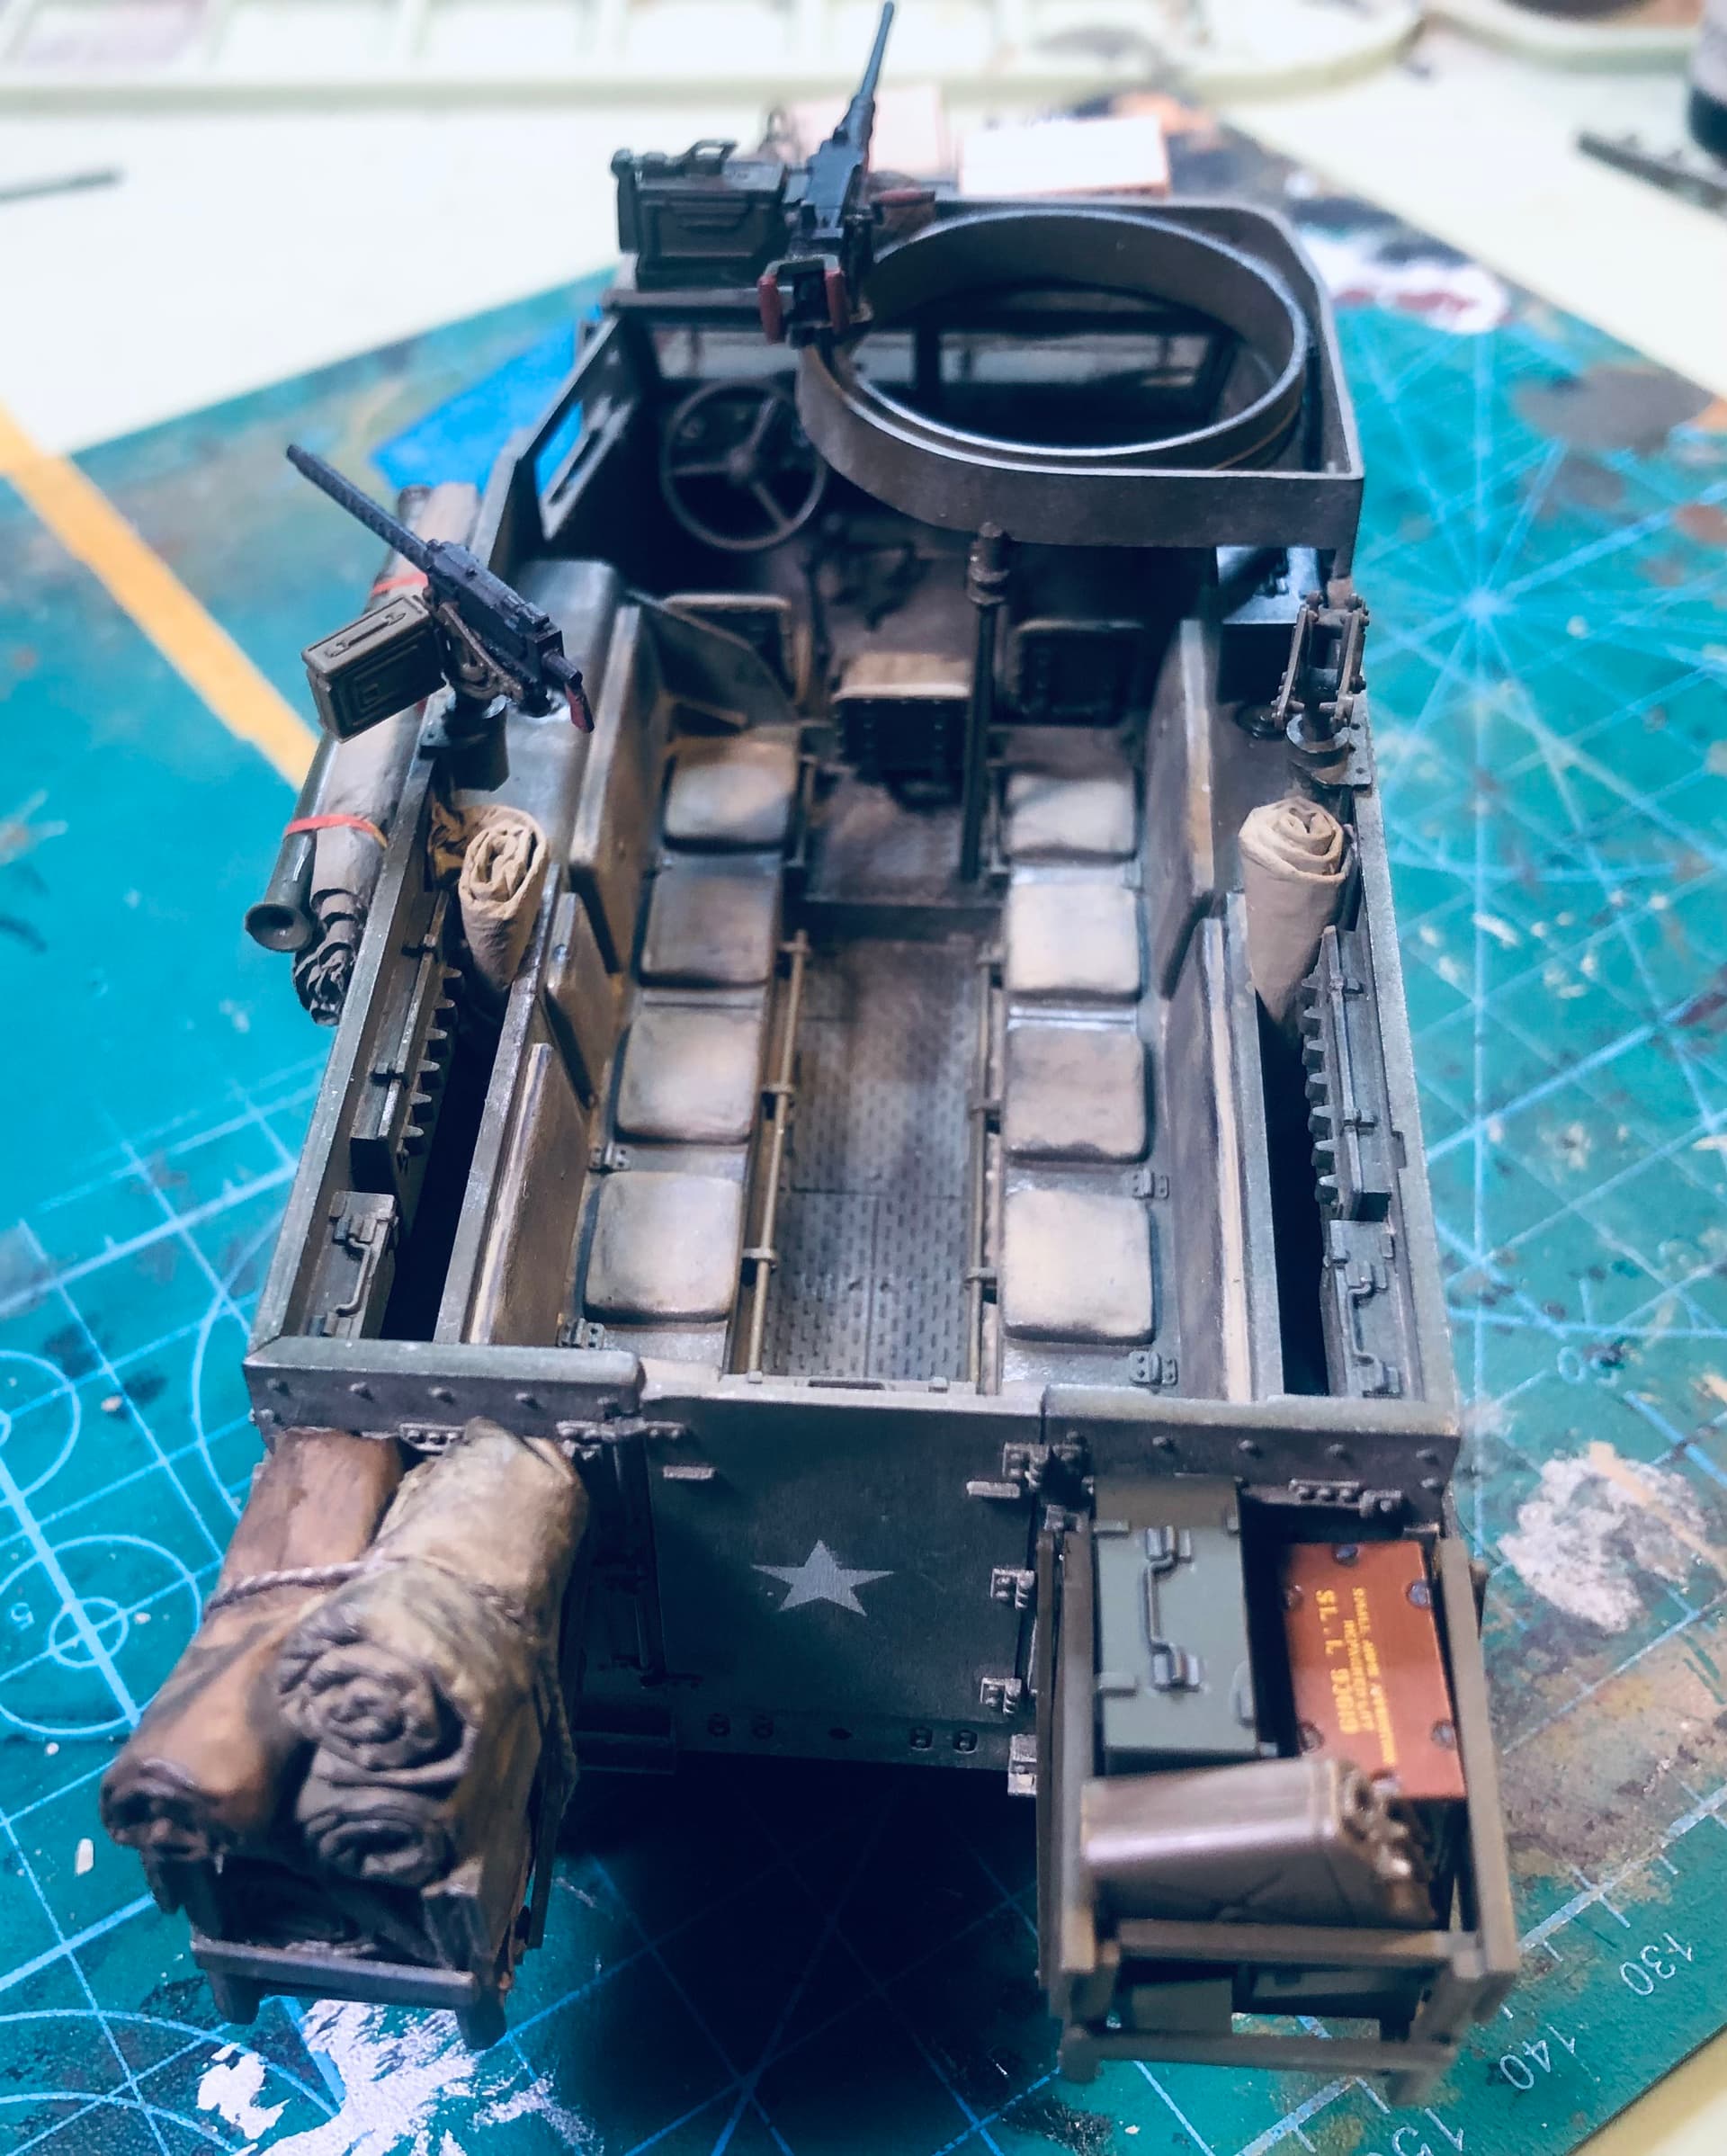
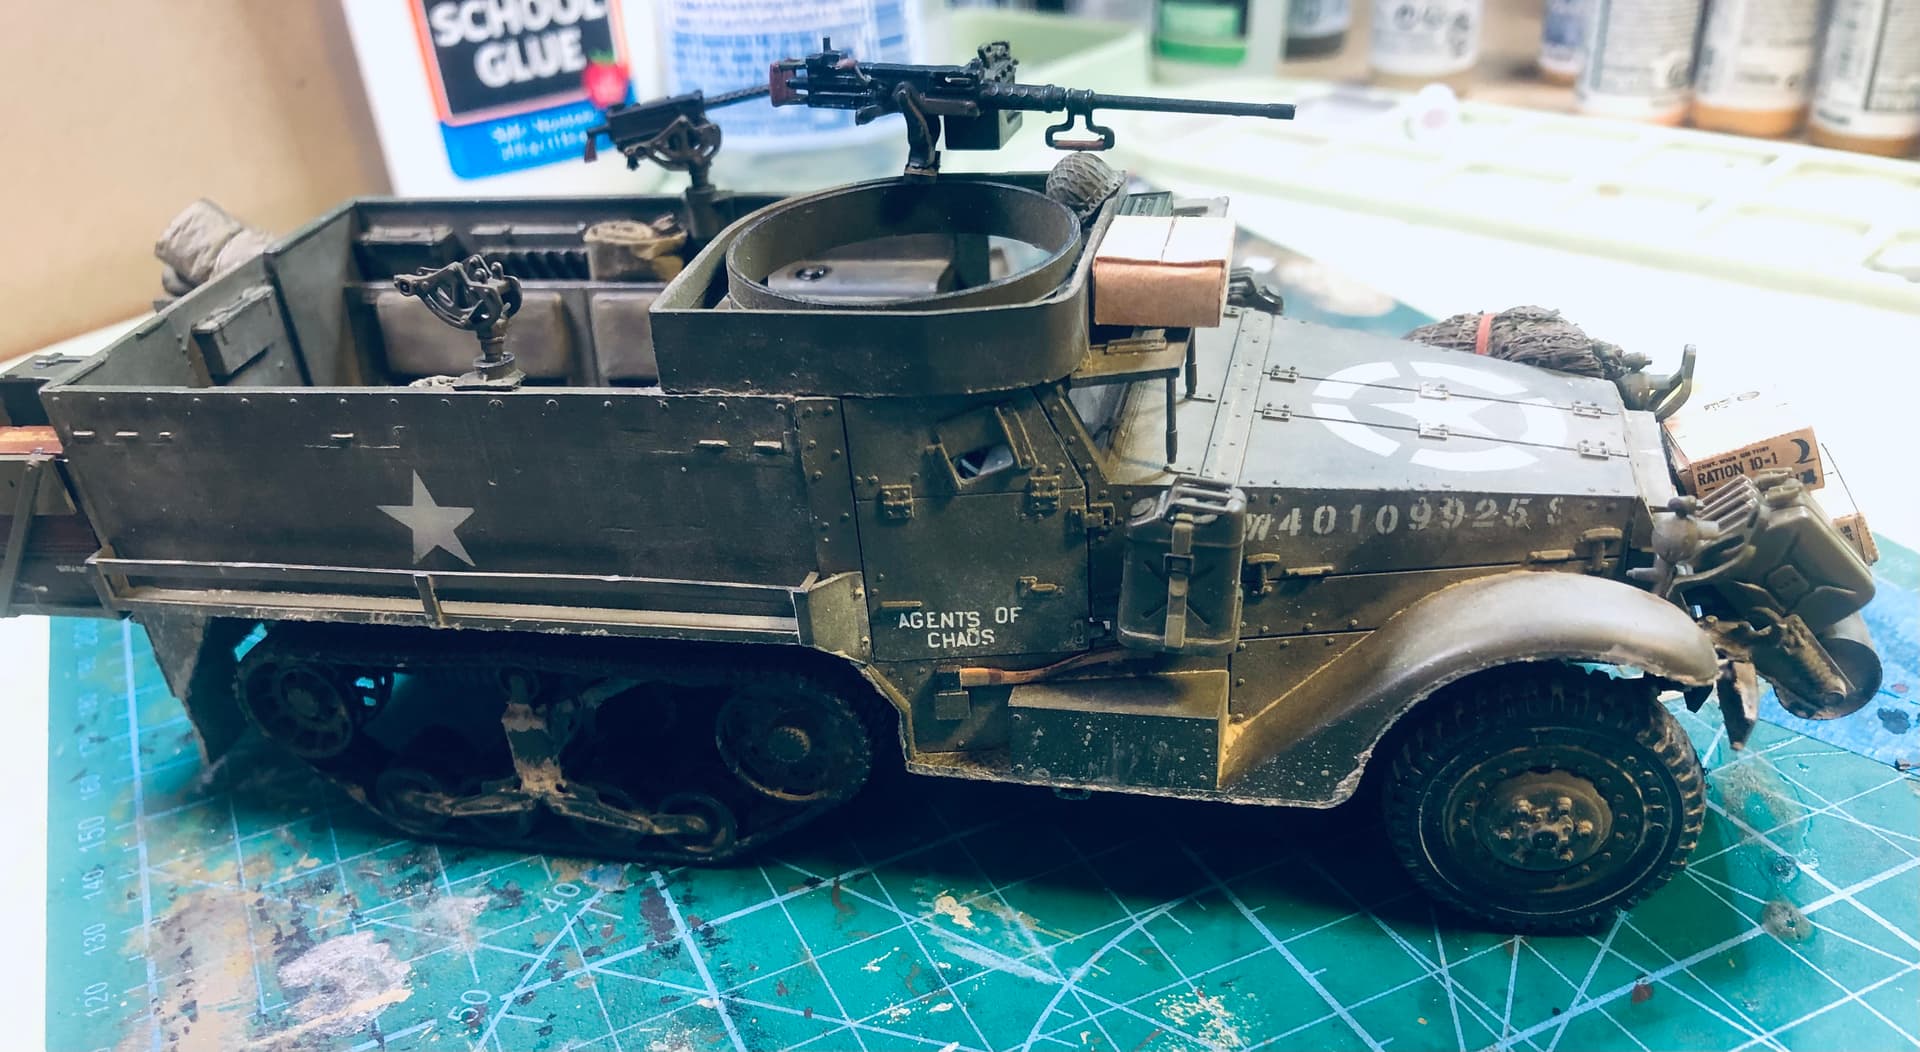
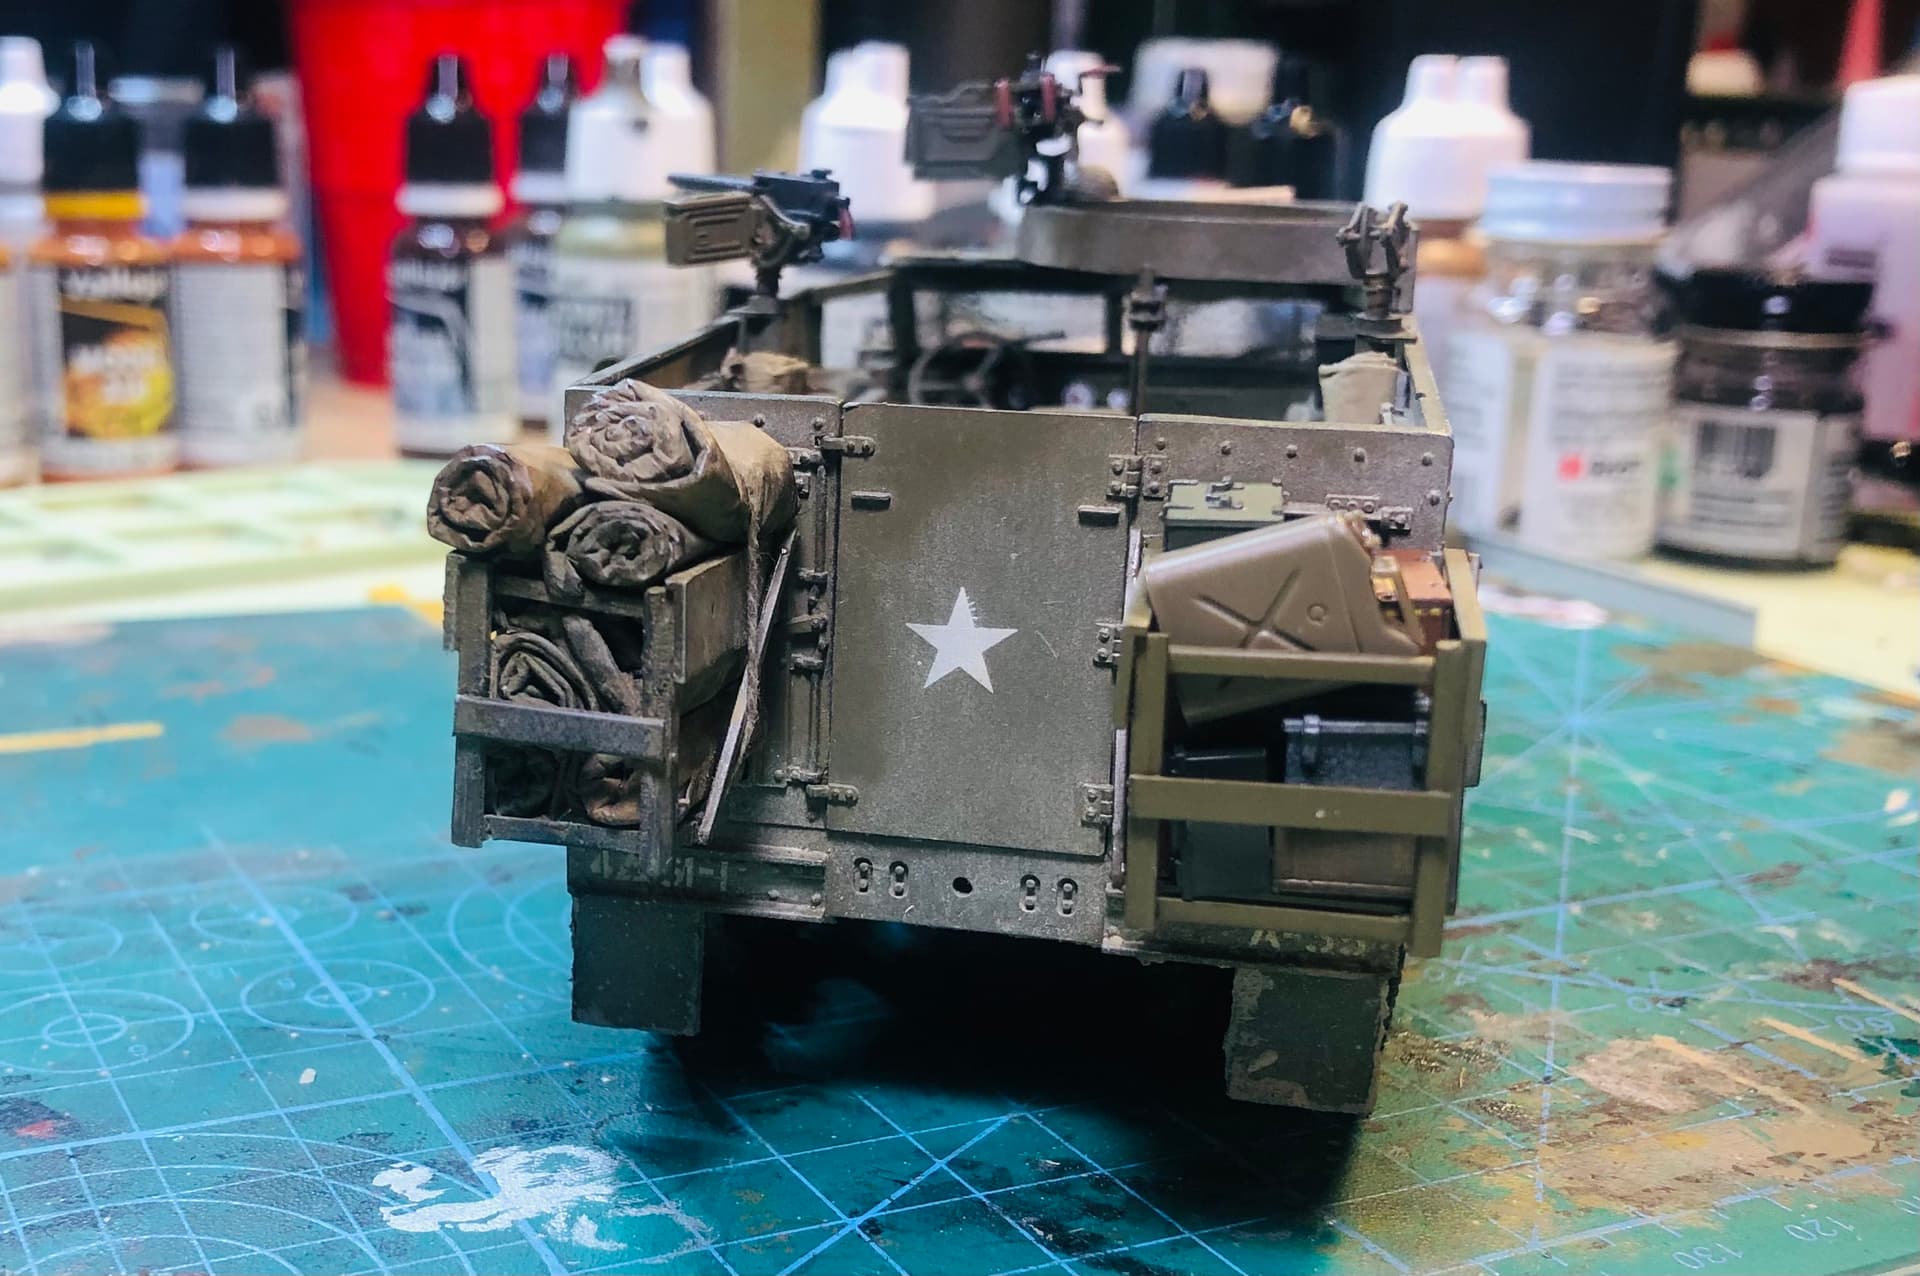
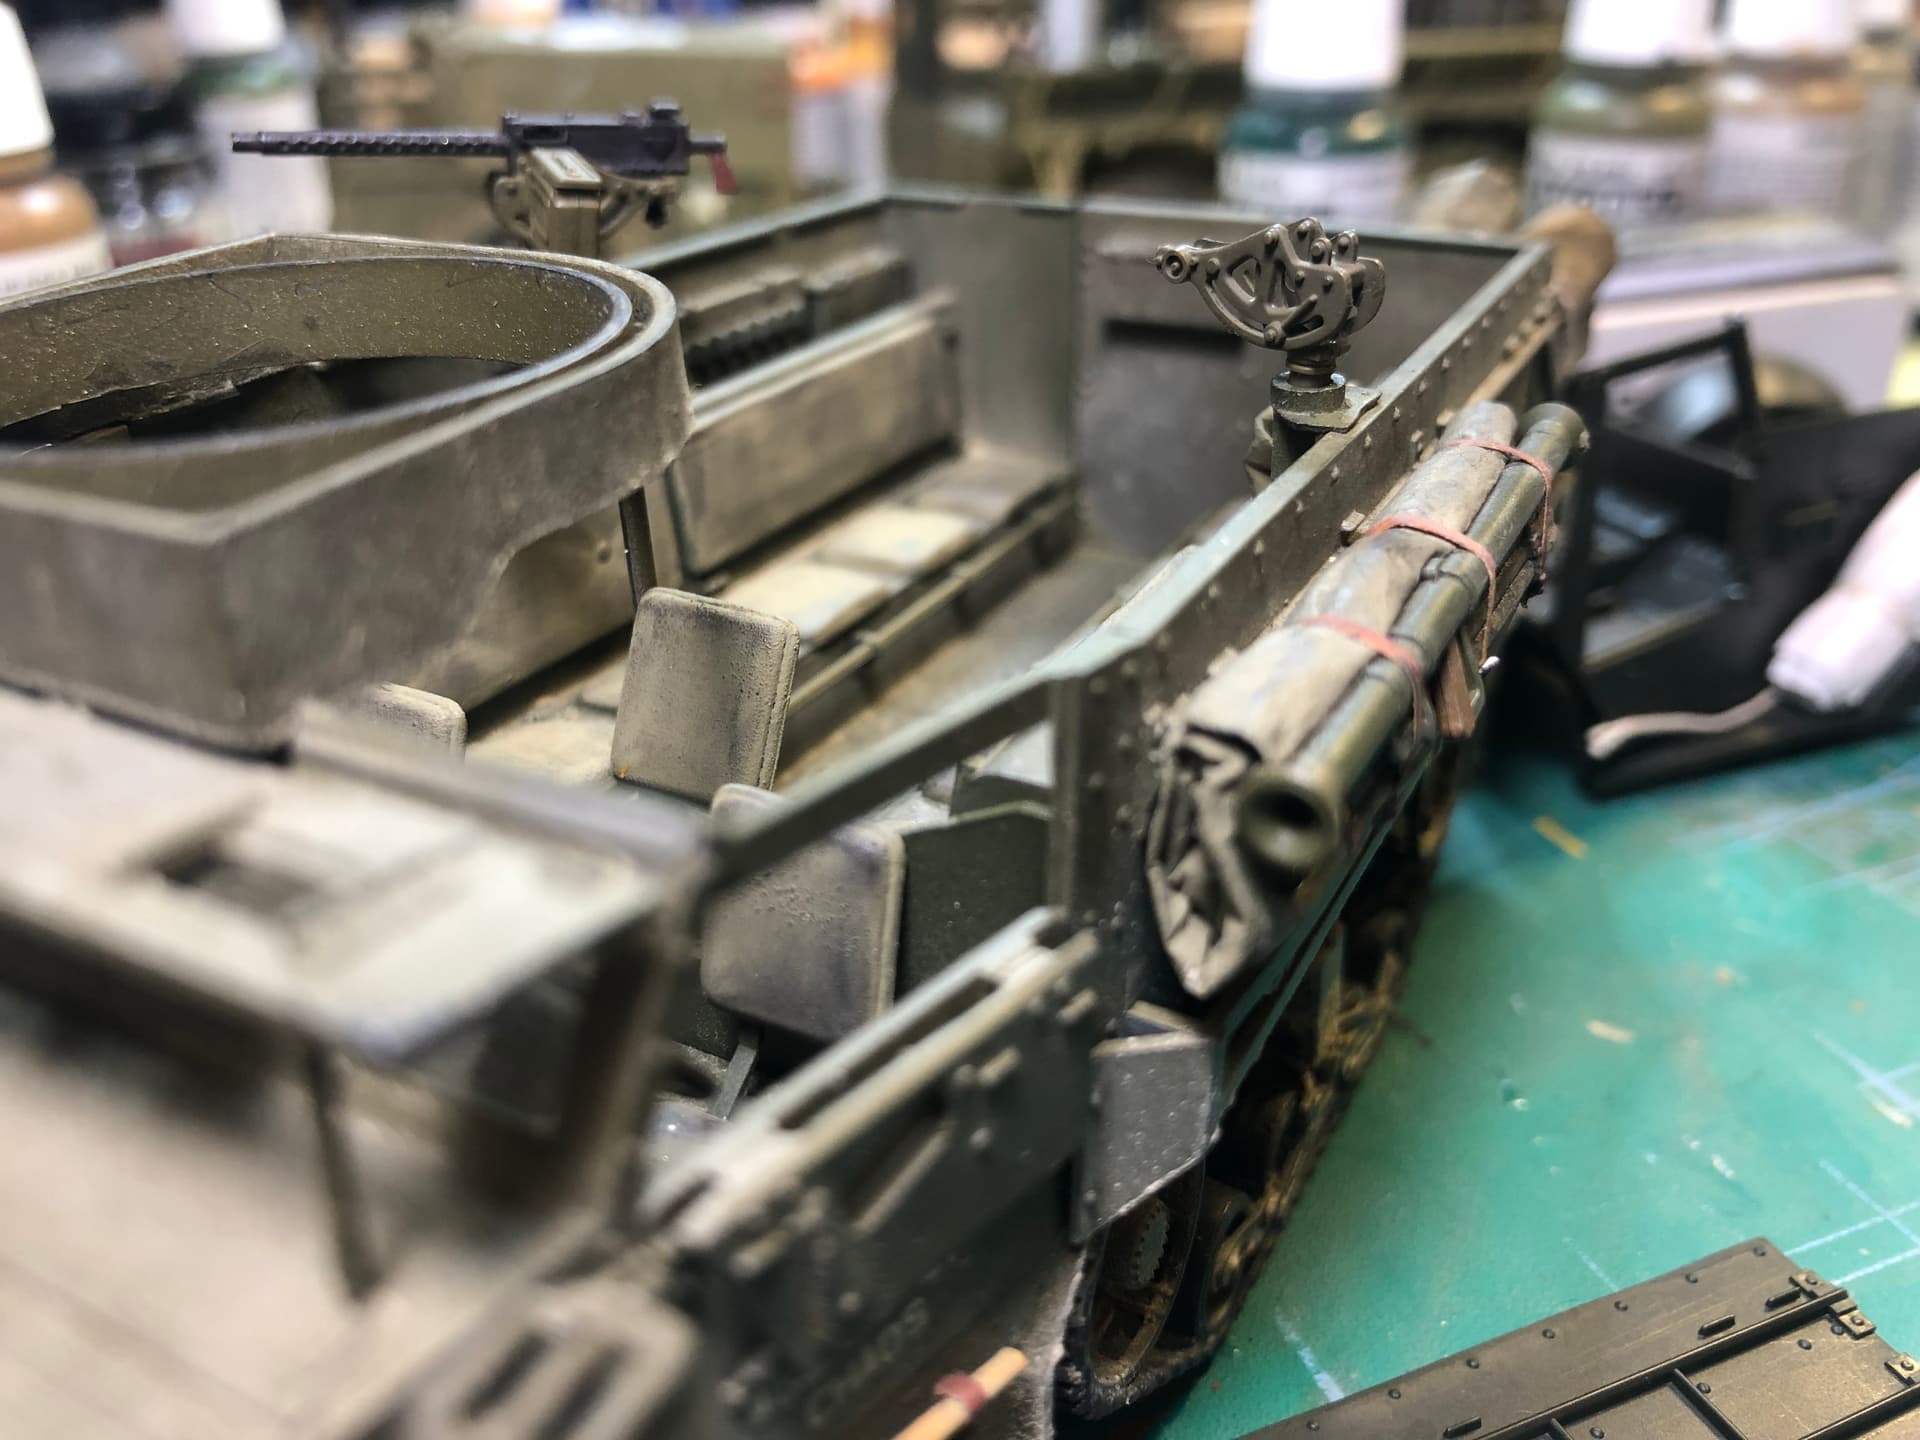
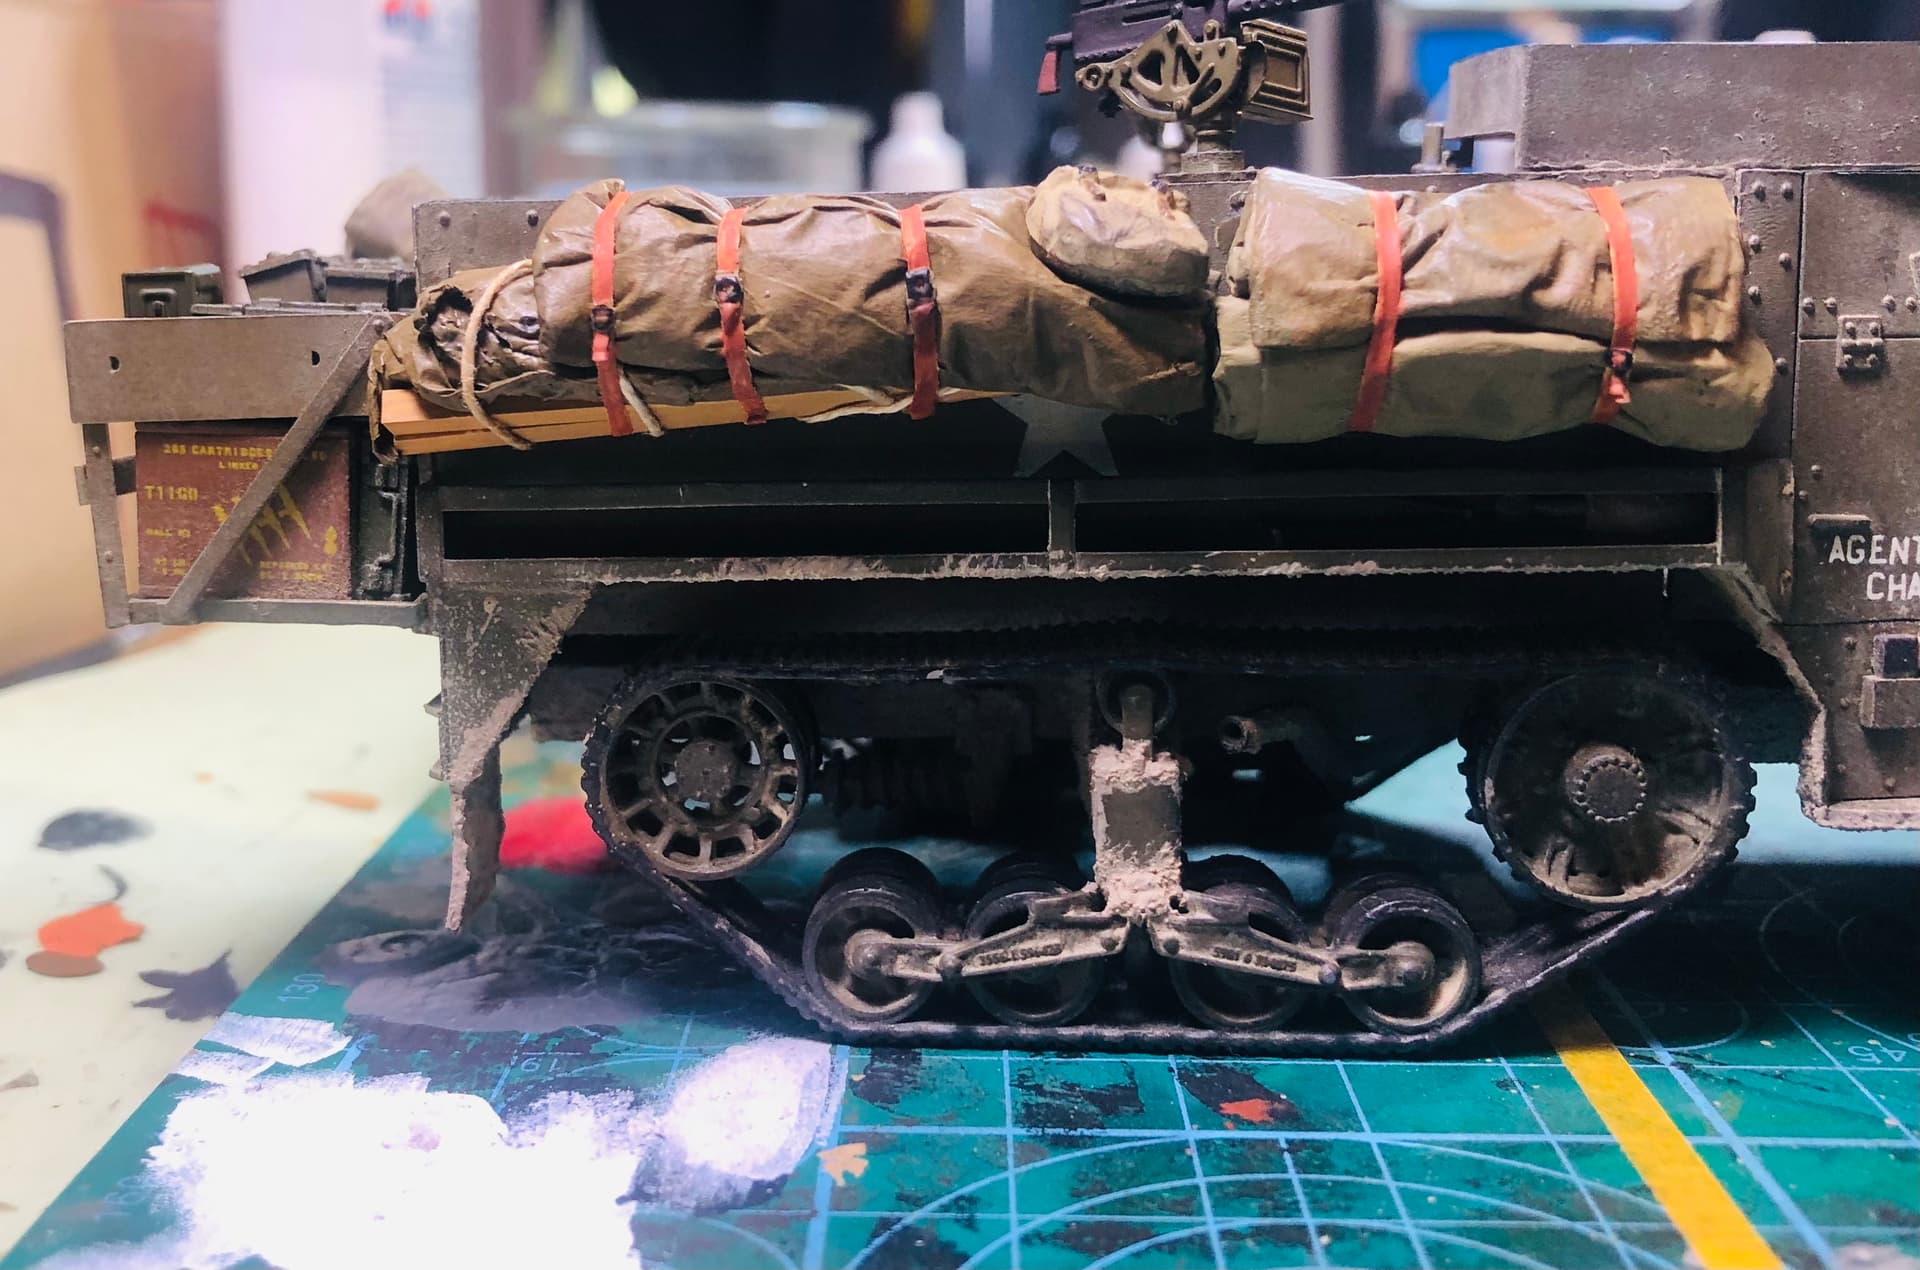
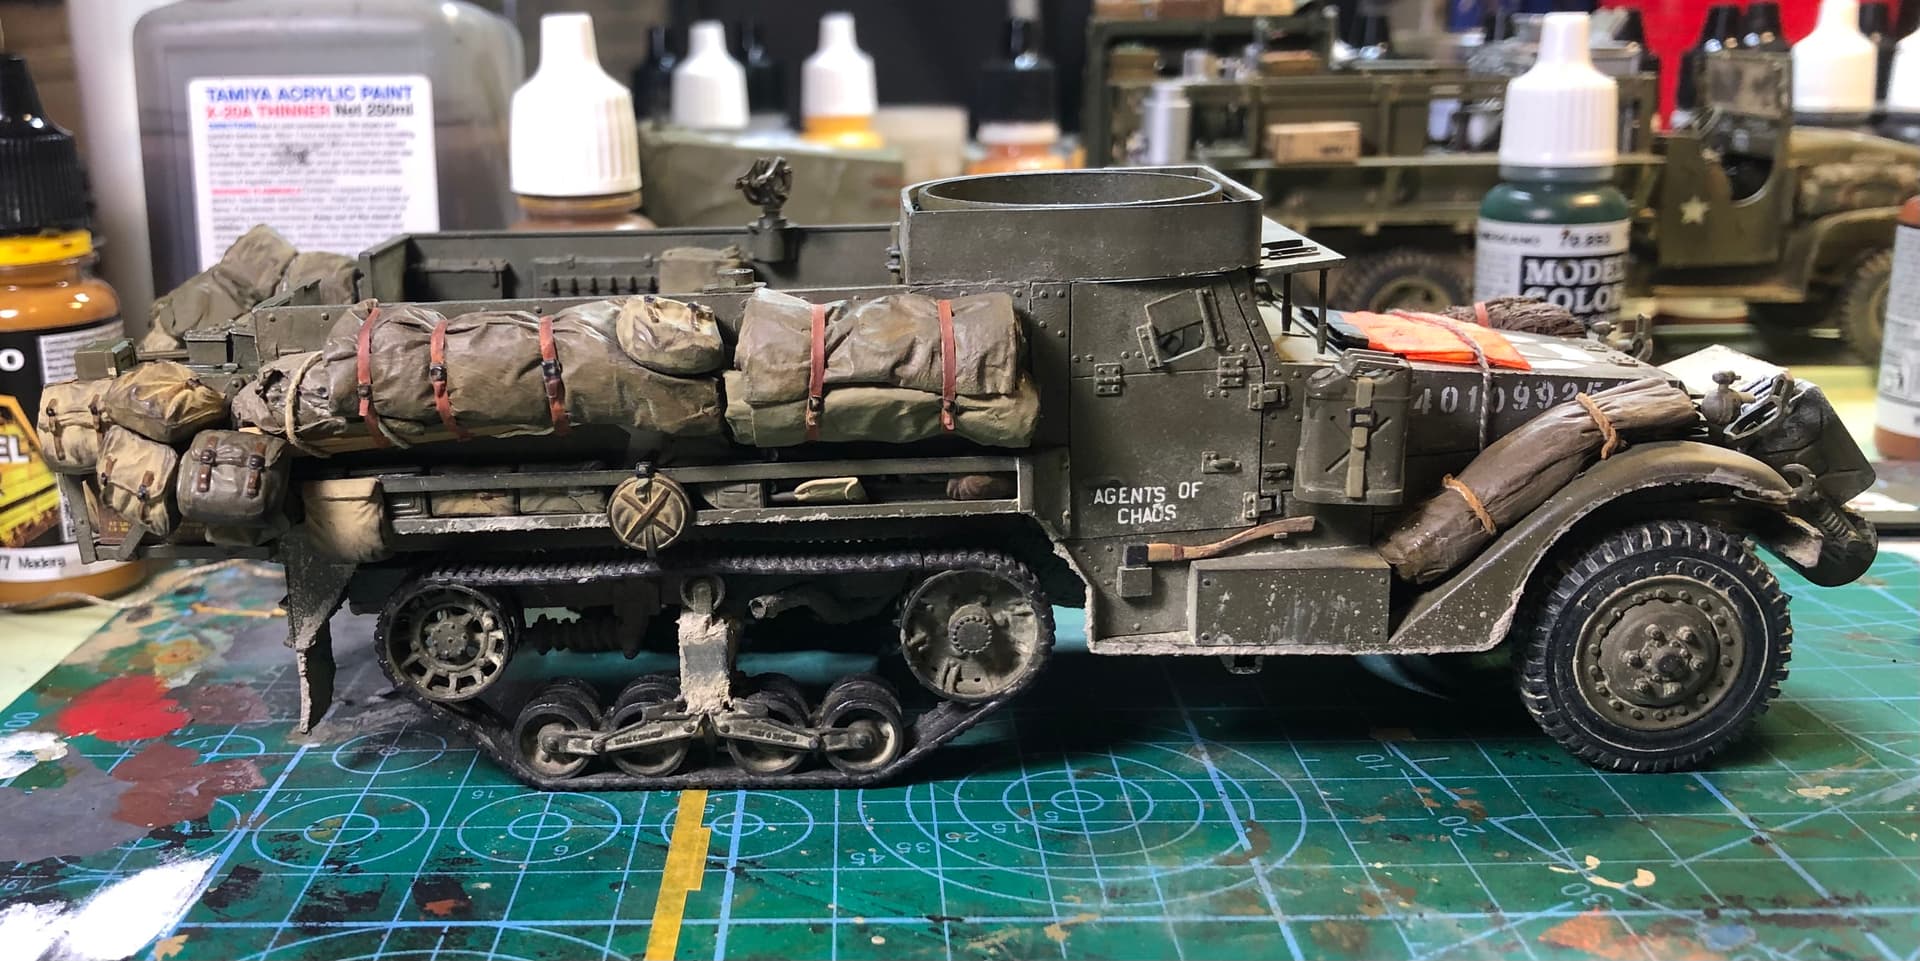
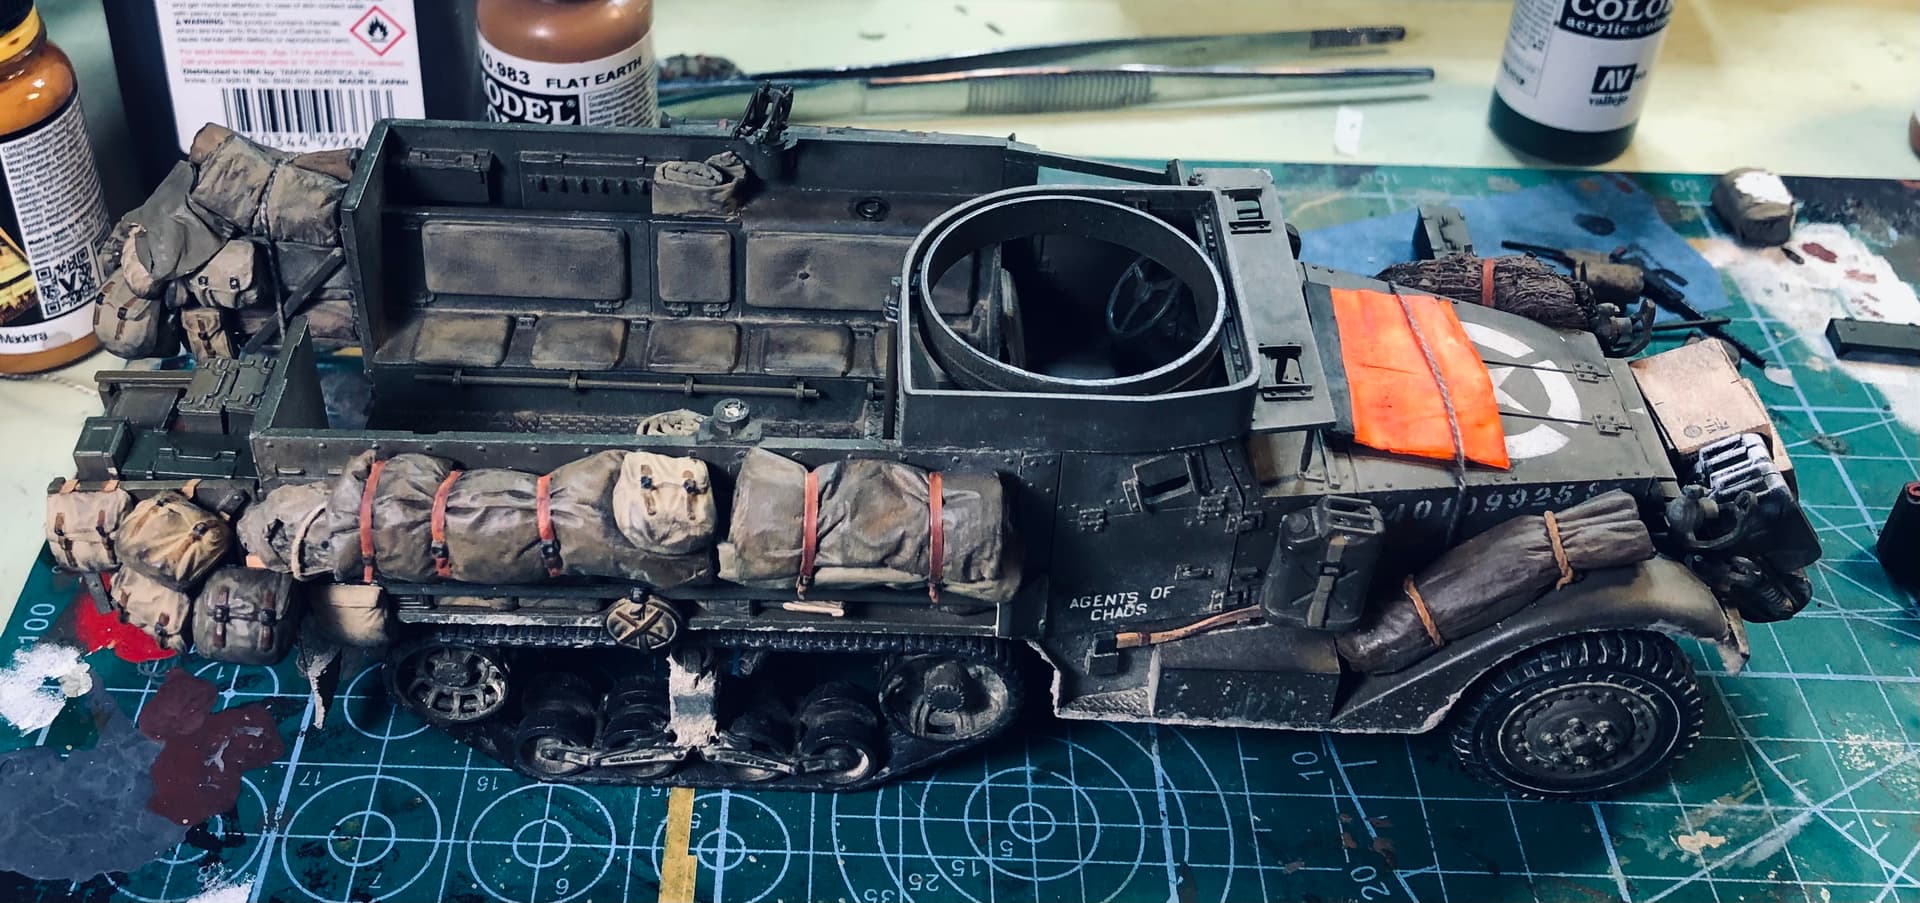
Tamiya M3A2, with a set of 3D printed bogies and tracks(fragile, a LOT of cleanup, it works but I had some trouble with them)
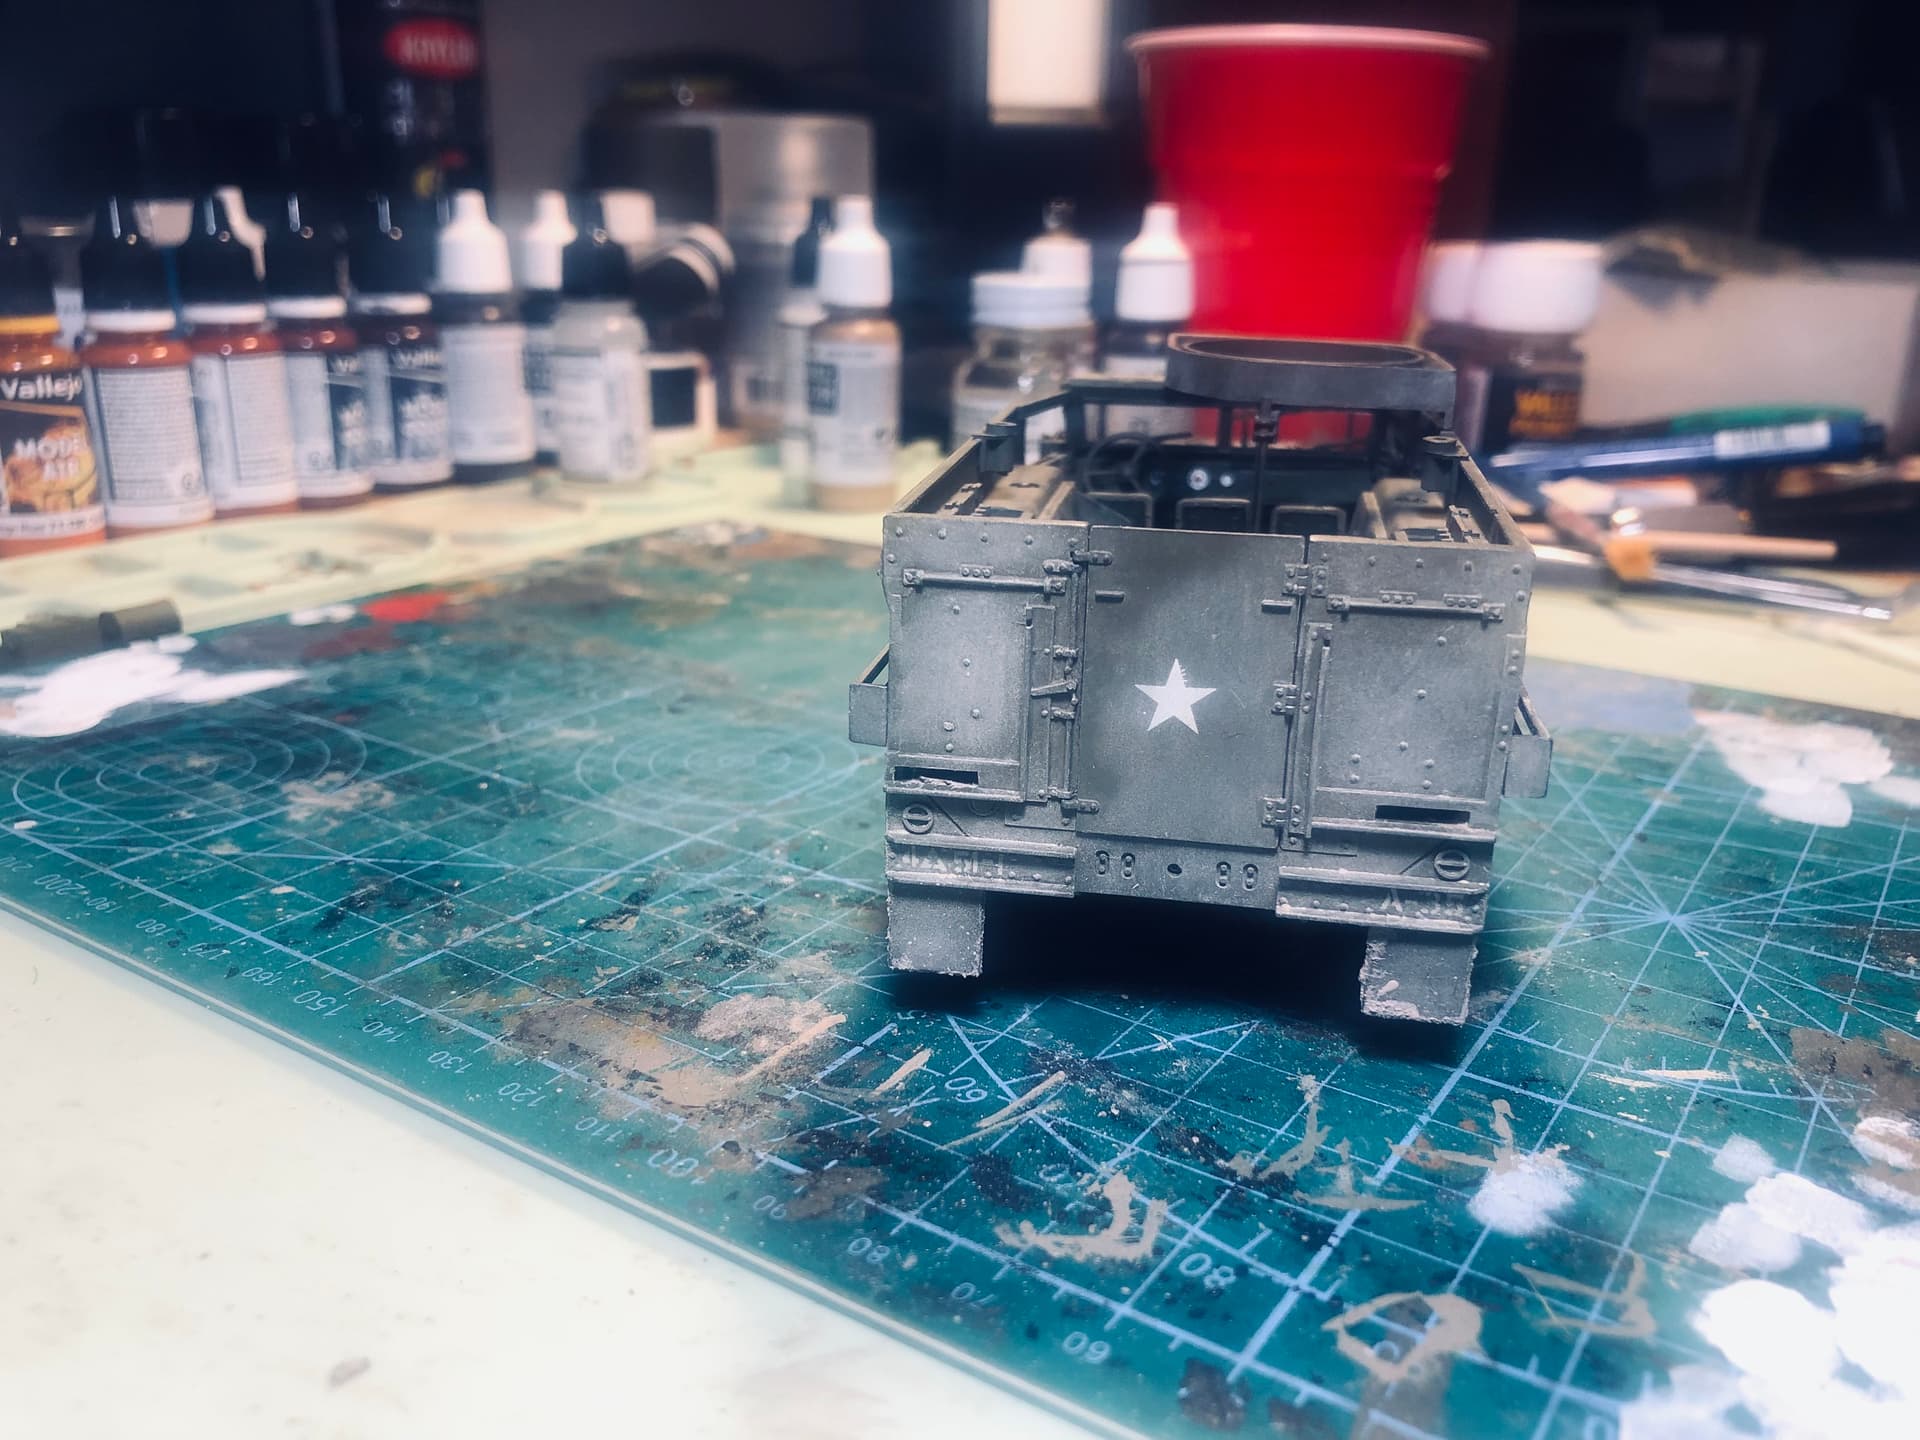
Markings are a combo of airbrushed stencils and some Archer decals.
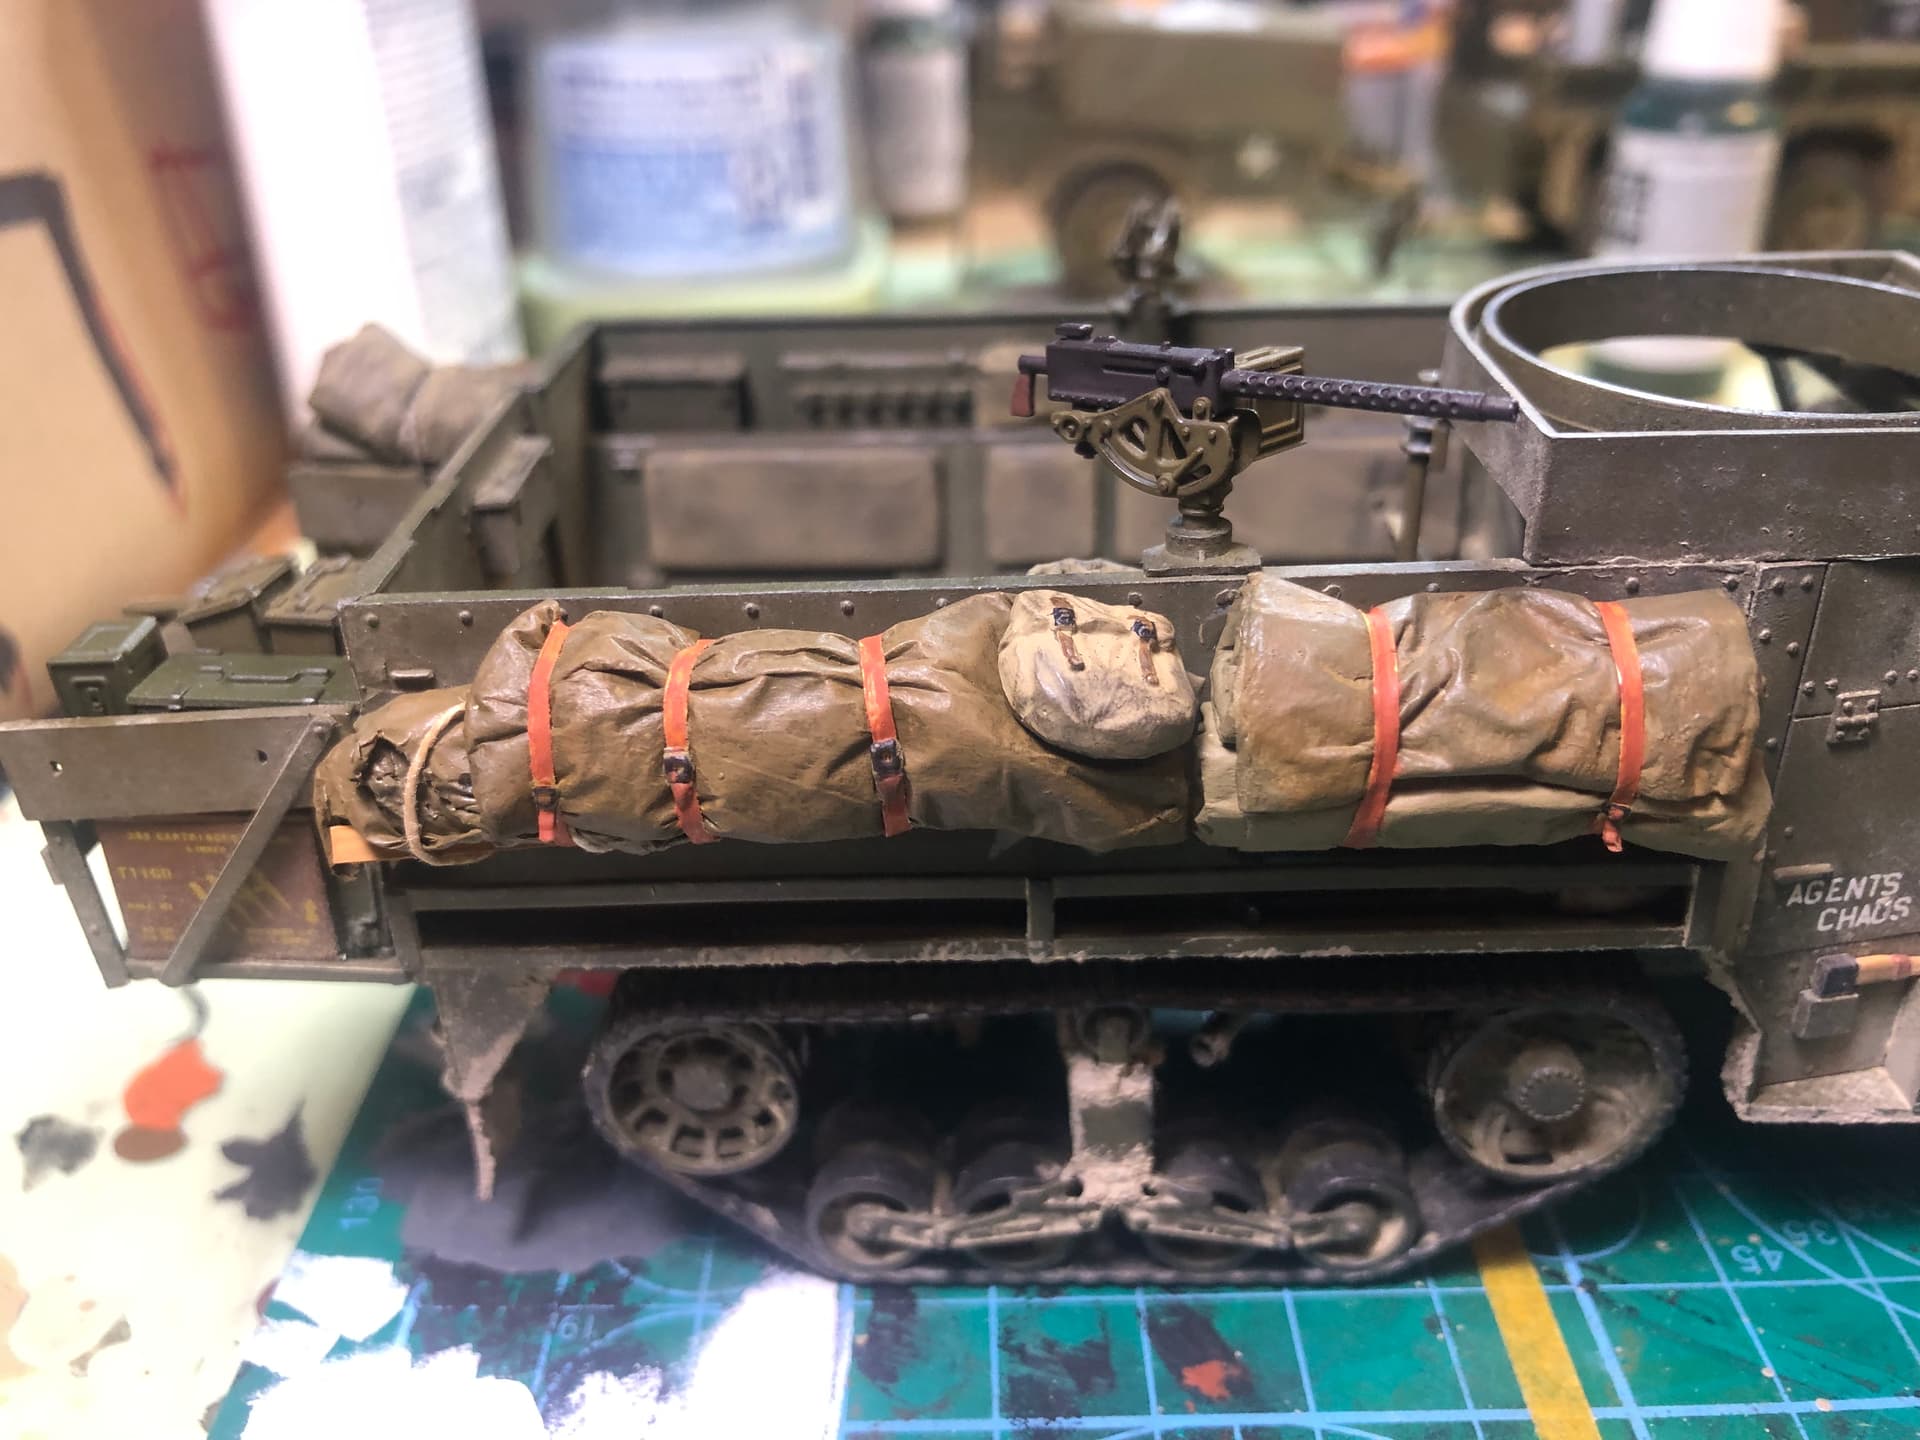
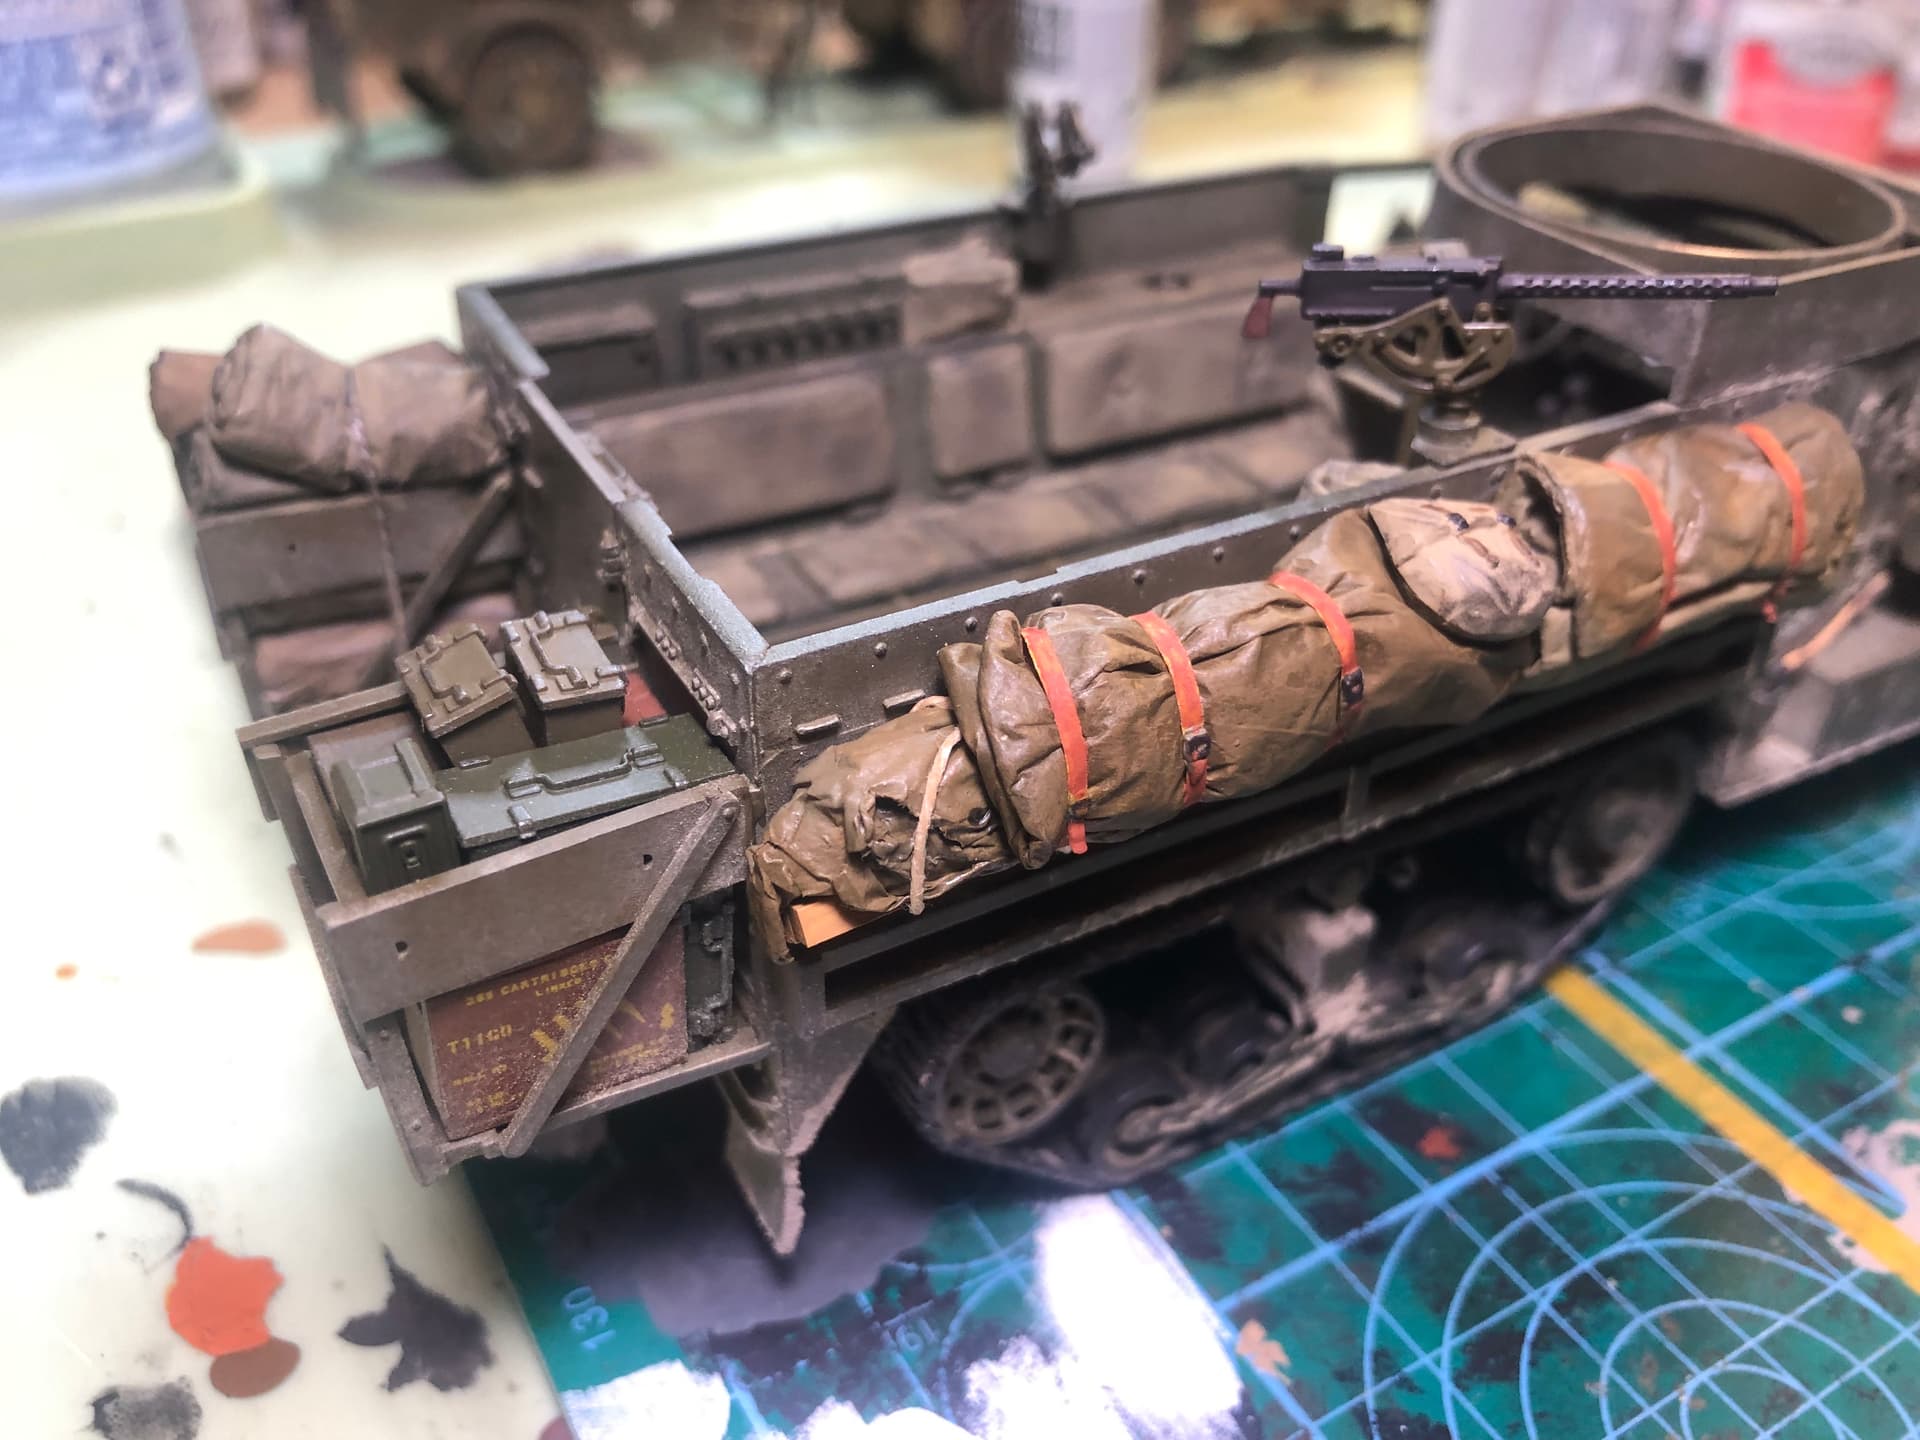
Weathering is Vallejo light mud for thickness, the rest is Tamiya a weathering set applied with different brushes/sponges.
I’ve got like, 80% of another halftrack in the same ziplock bag. Might give this one another go soon!
Just one thing: would you mind editing the subject line to add “halftrack” there? Because “M3A1” by itself could mean anything from this to a light or medium tank to a submachine gun and lots of other stuff besides
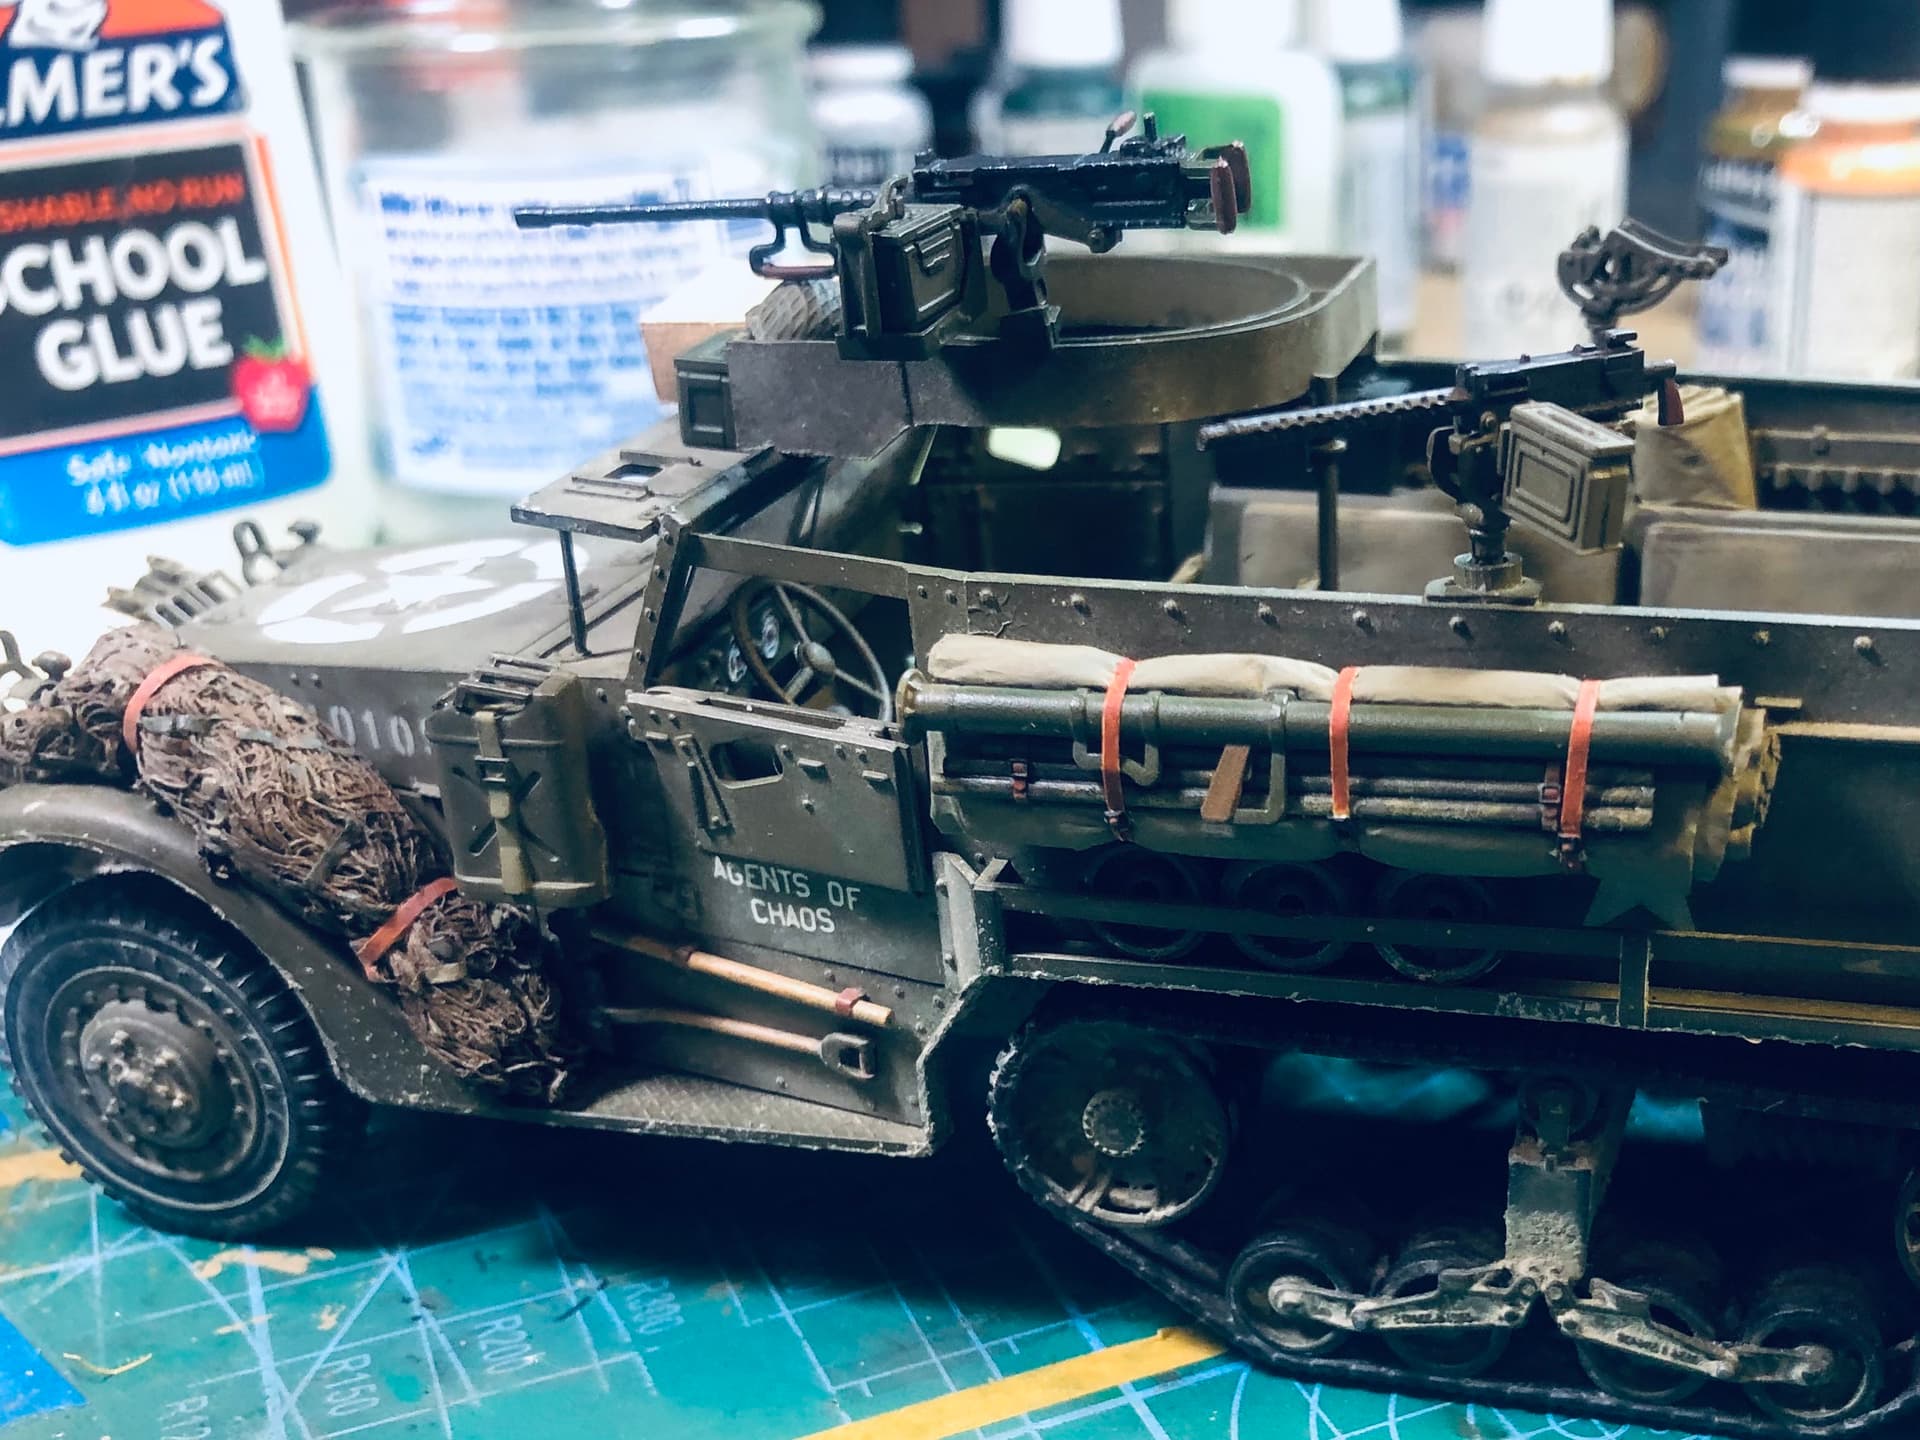
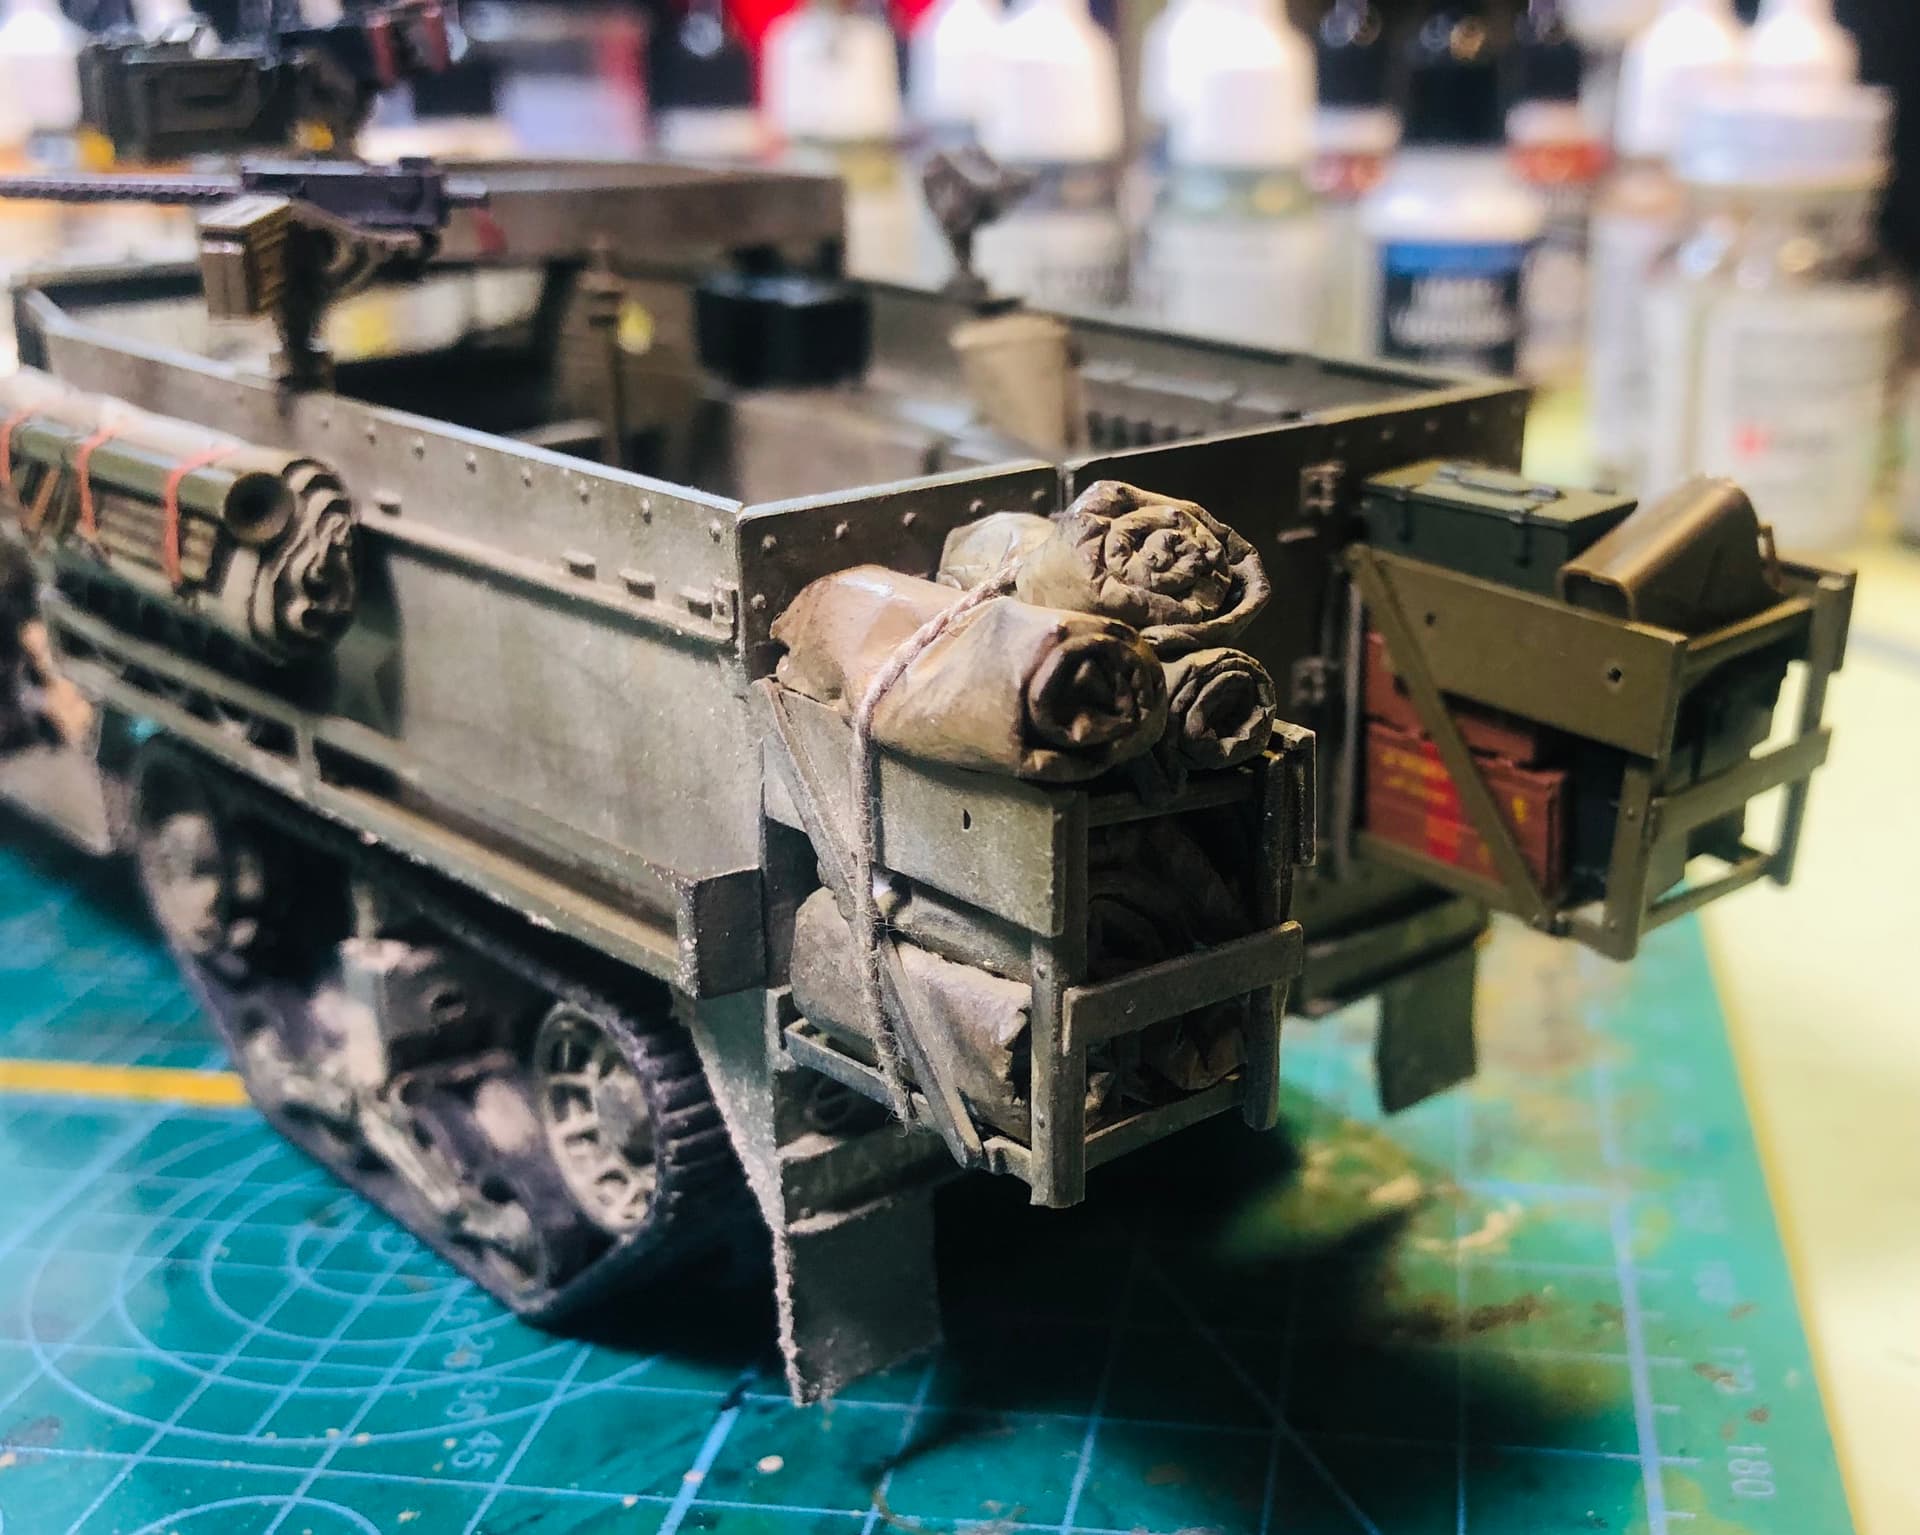
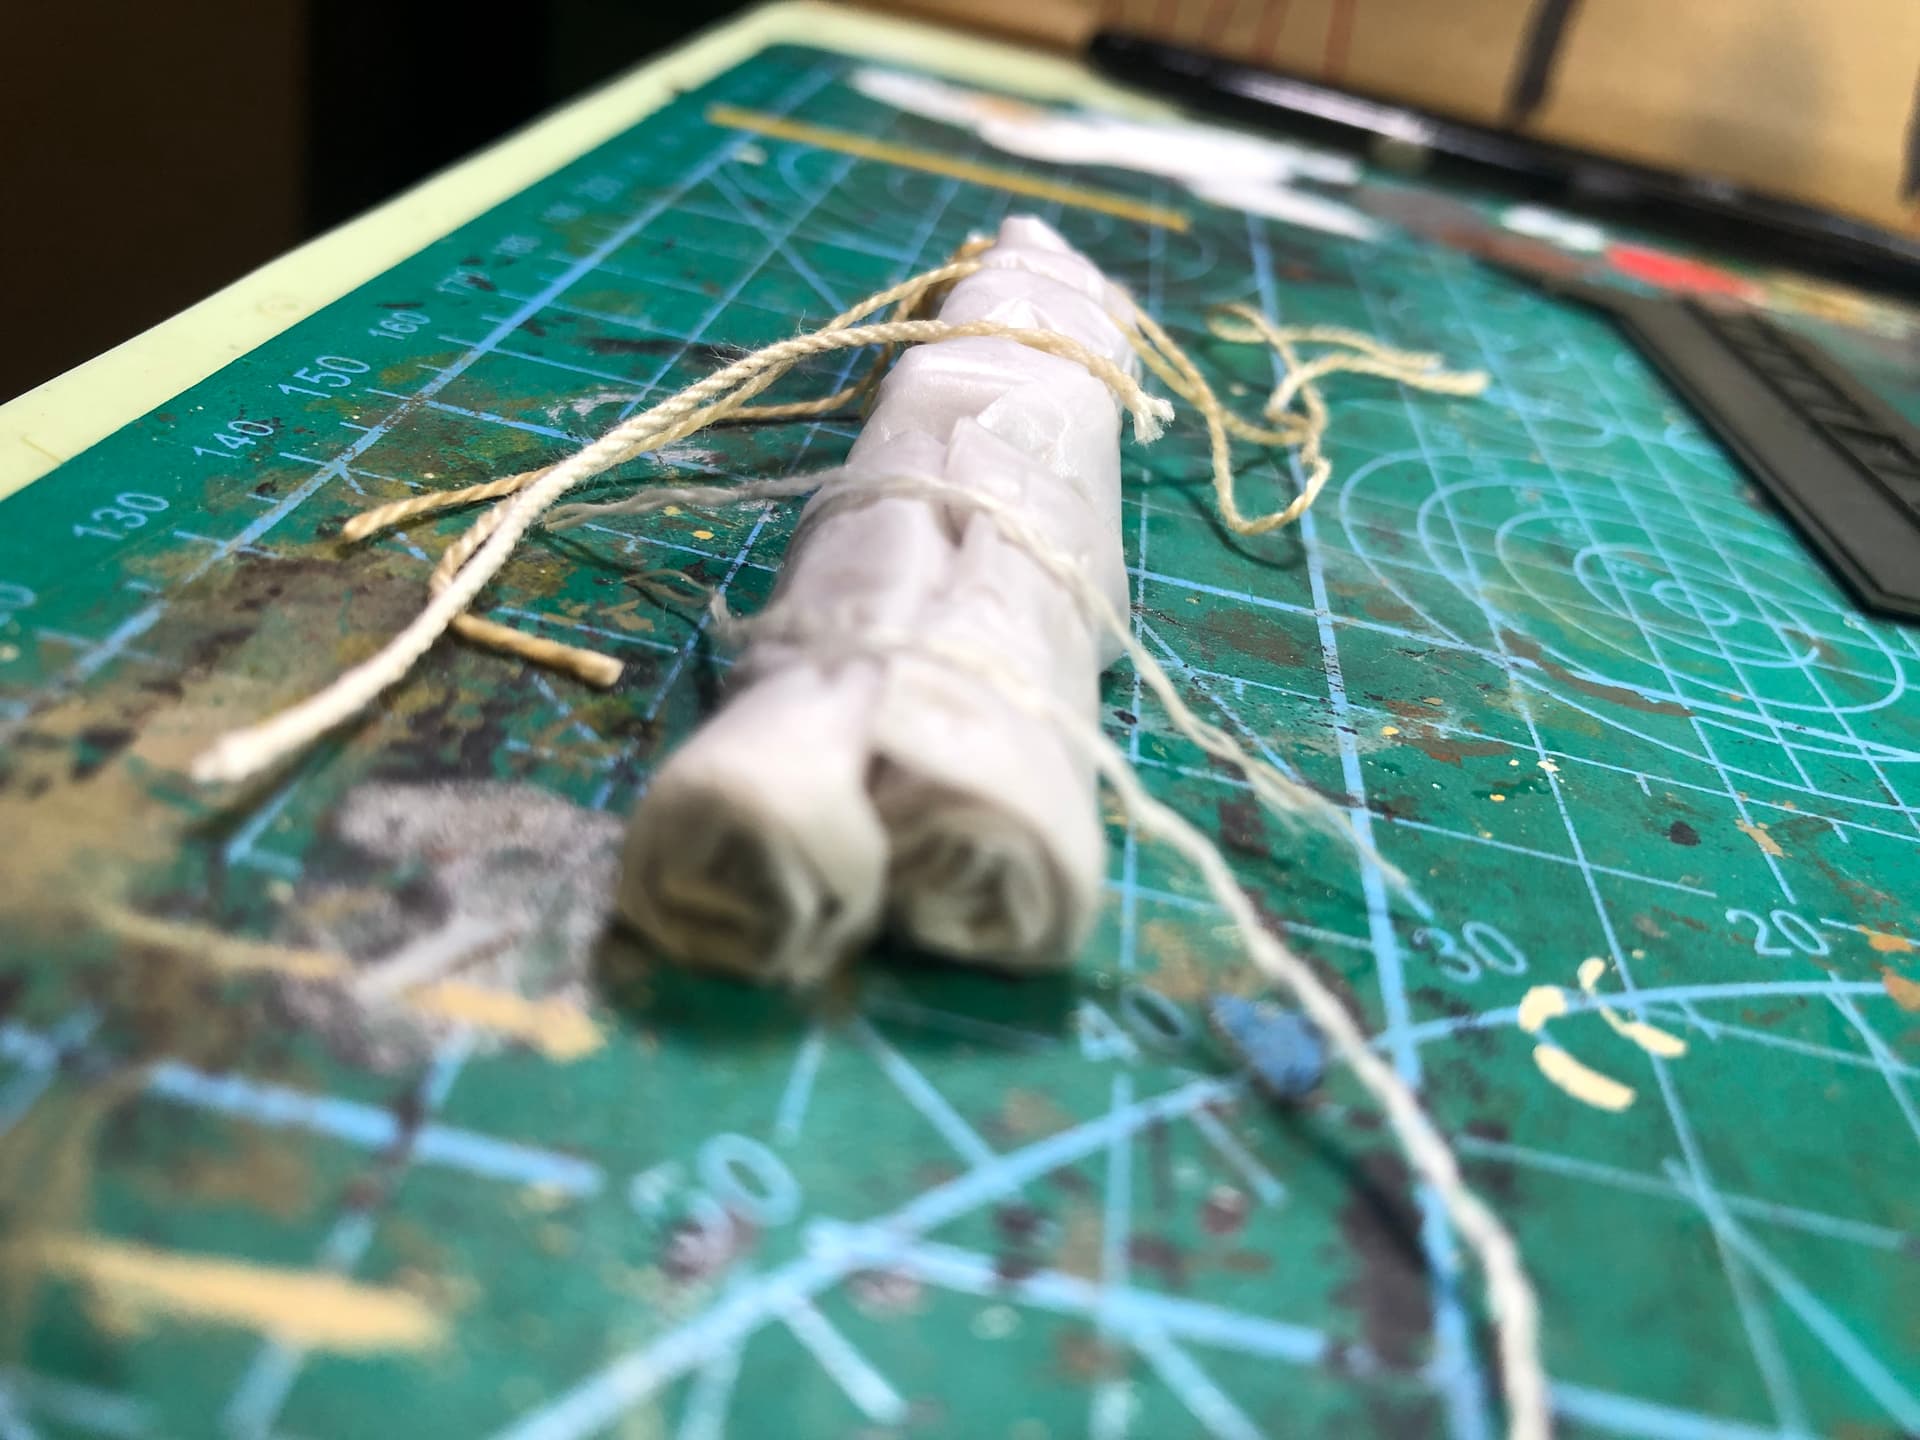
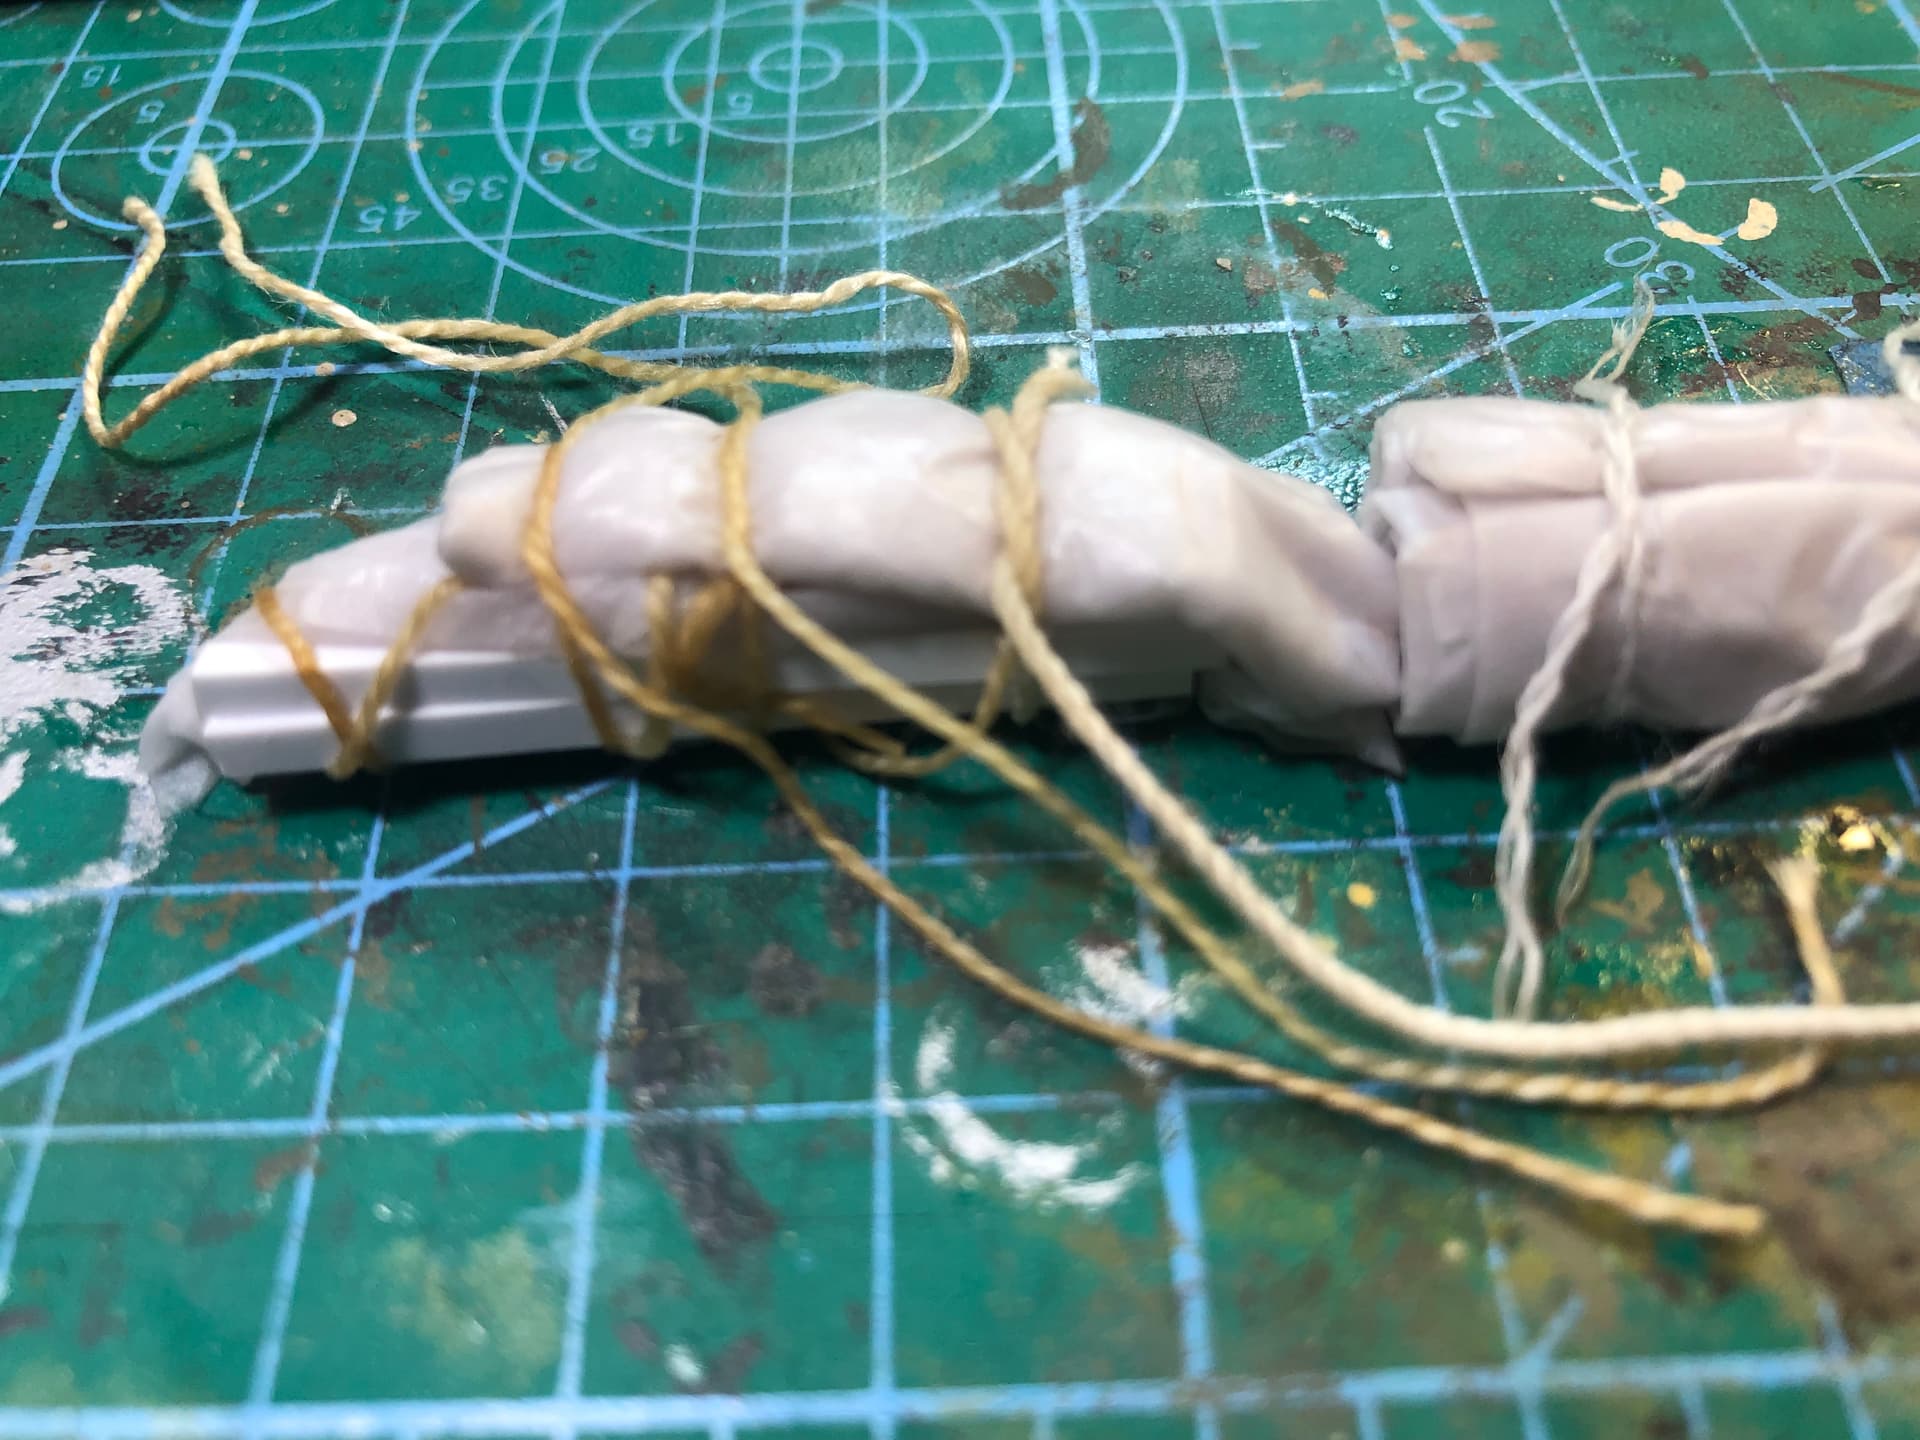
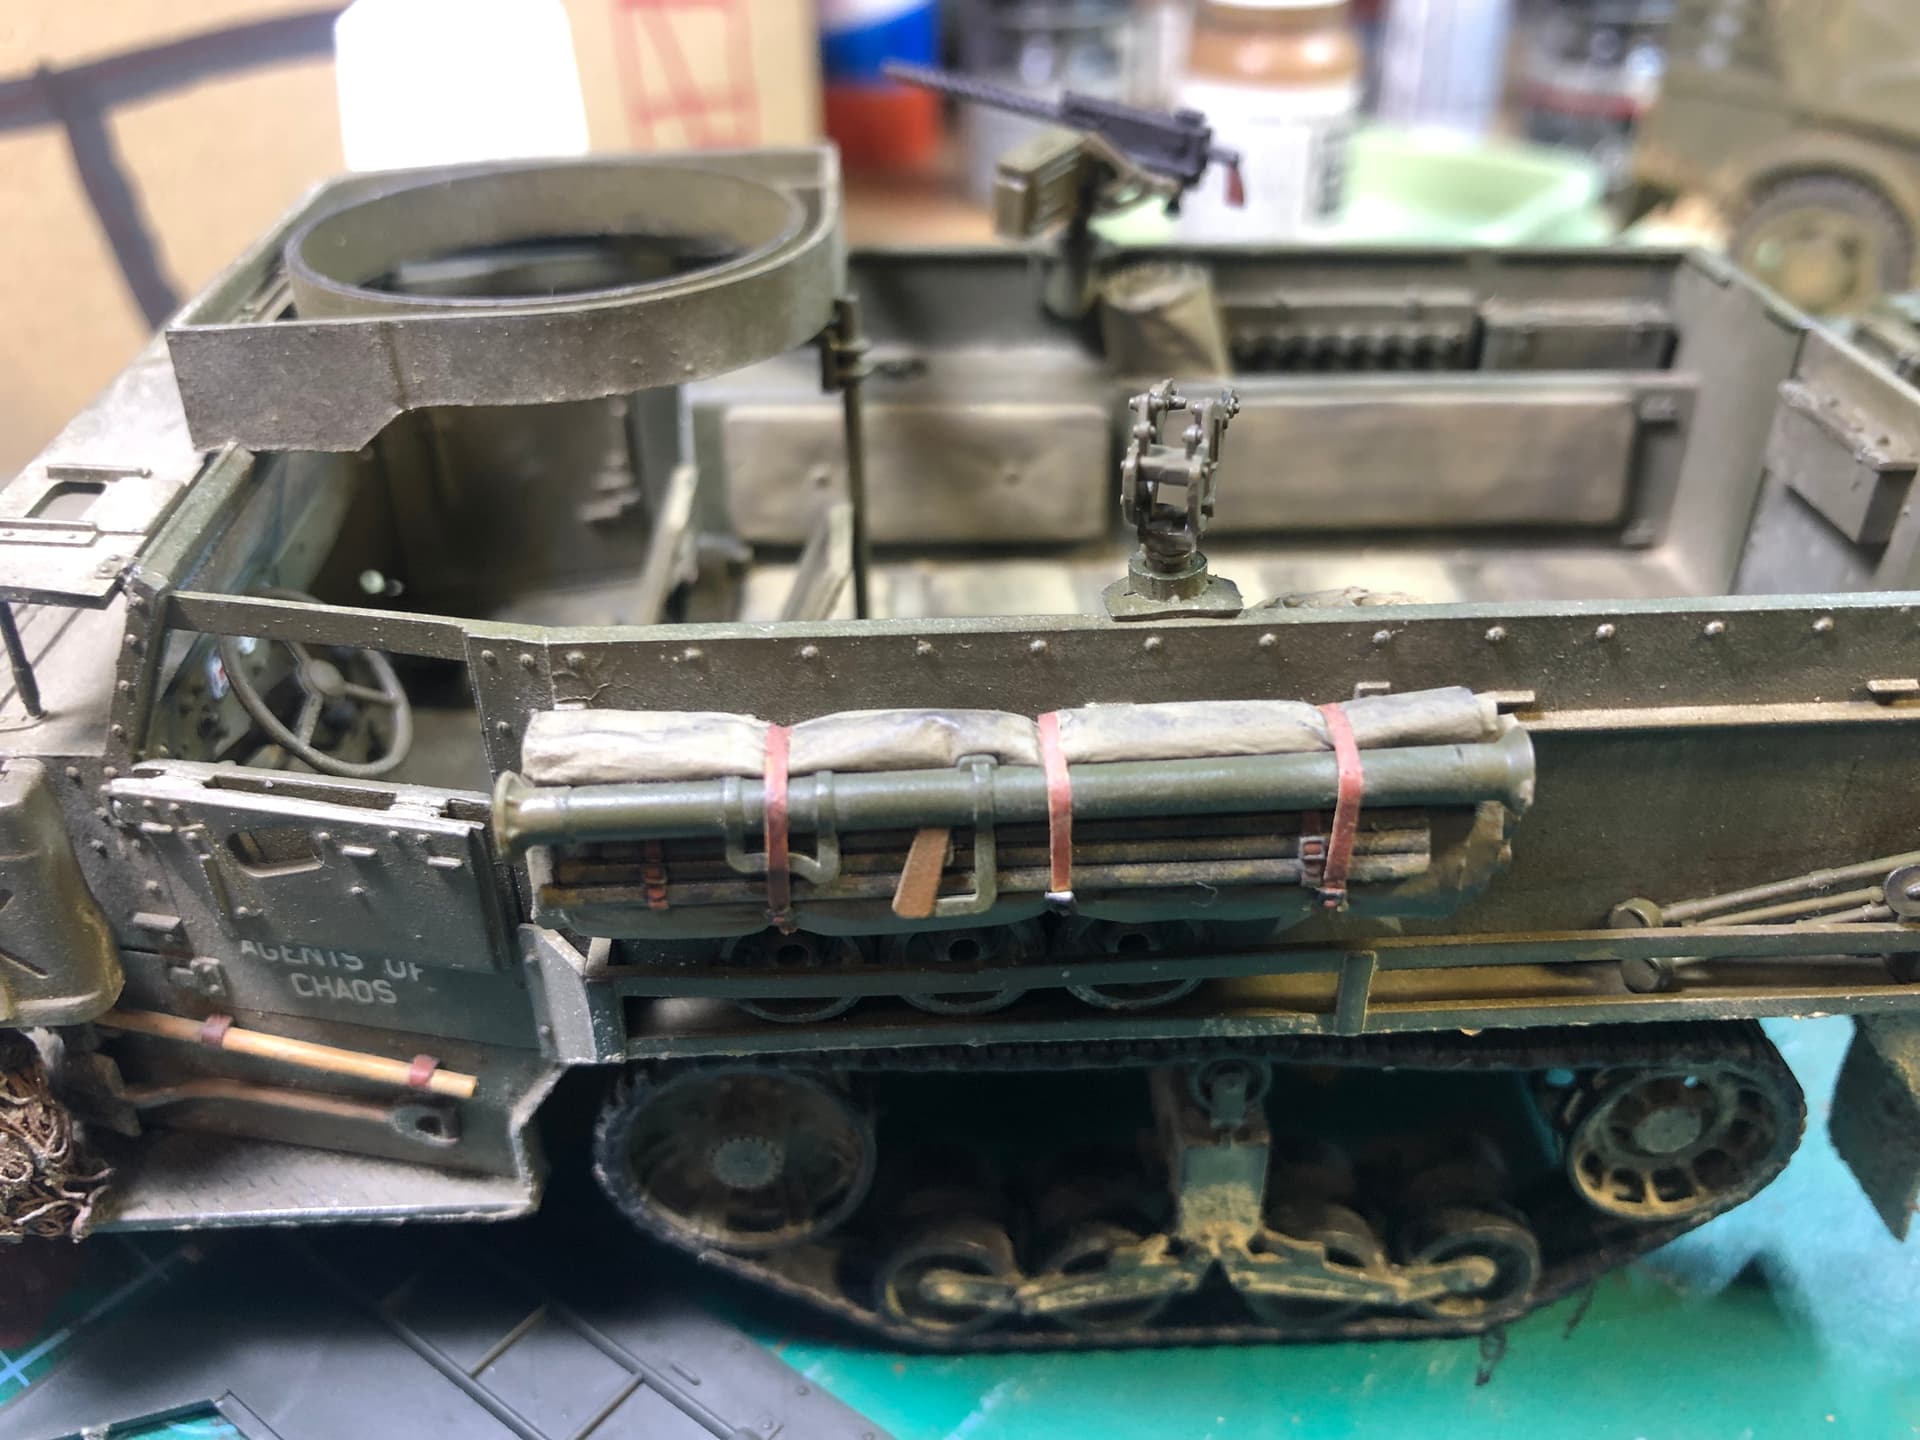
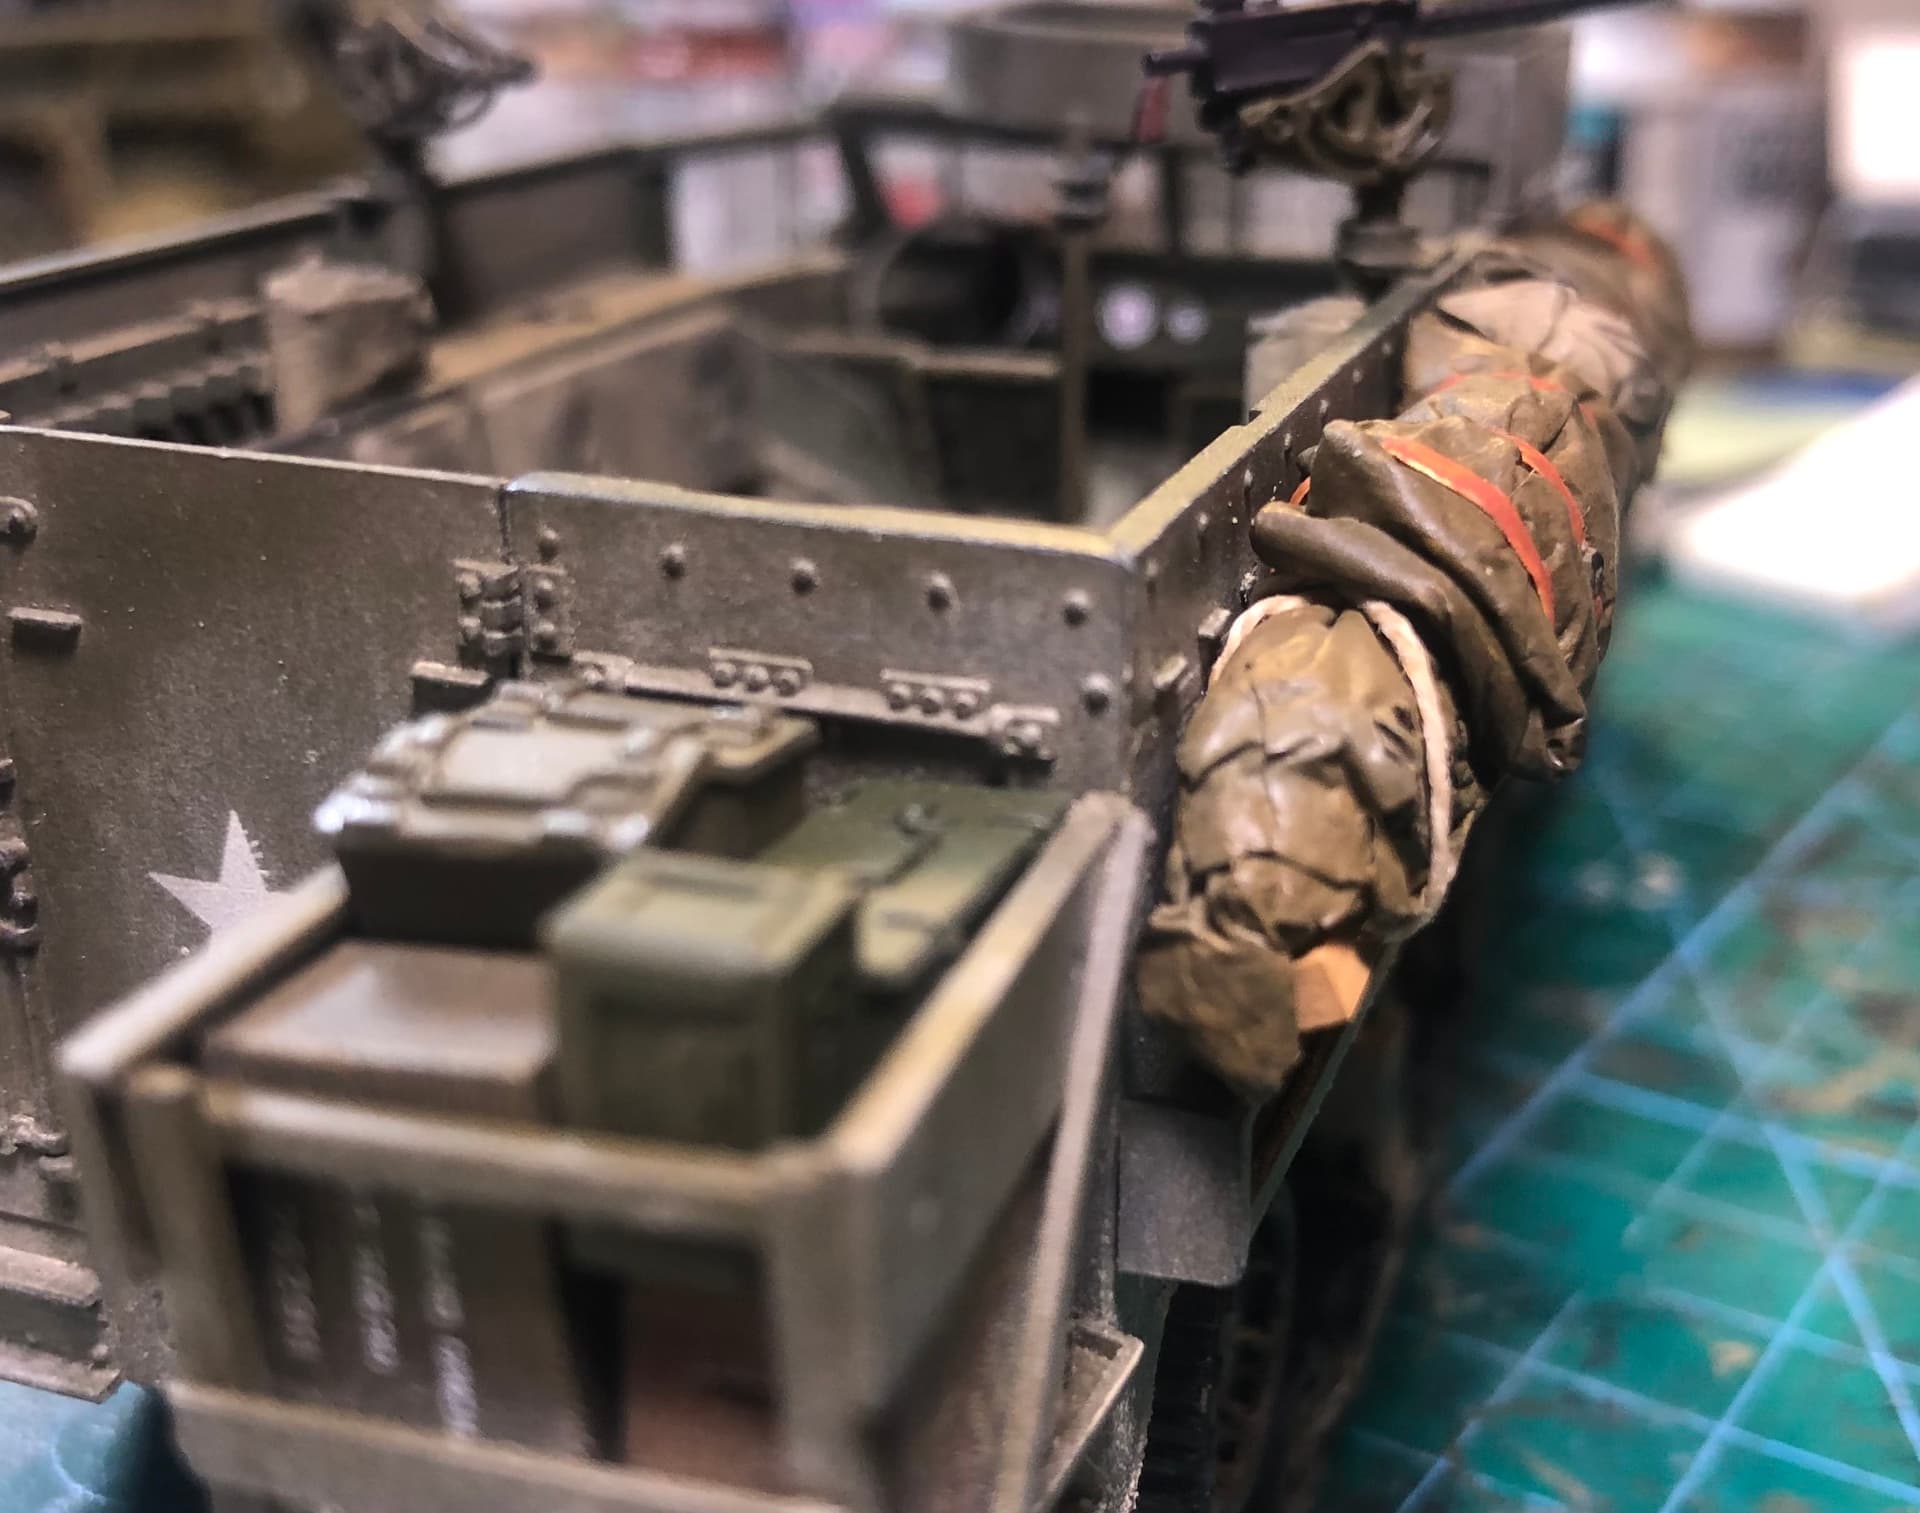
More progress pictures. I should have done more research before I started this thing, but I’m all the way in it now. Doing some scratchbuilding, tarps and luggage racks. Practicing weathering. Trying to hide the M3A2 details without getting caught up in massive modifications. Not finished by any means, just sorting out stowage and bits and bobs. As always, comments/suggestions are welcome!!
Some tarps and whatnot for the right side of the vehicle. The old tissue paper and school glue method. The knotted string will come off and be replaced with foil straps, along the lines of these.