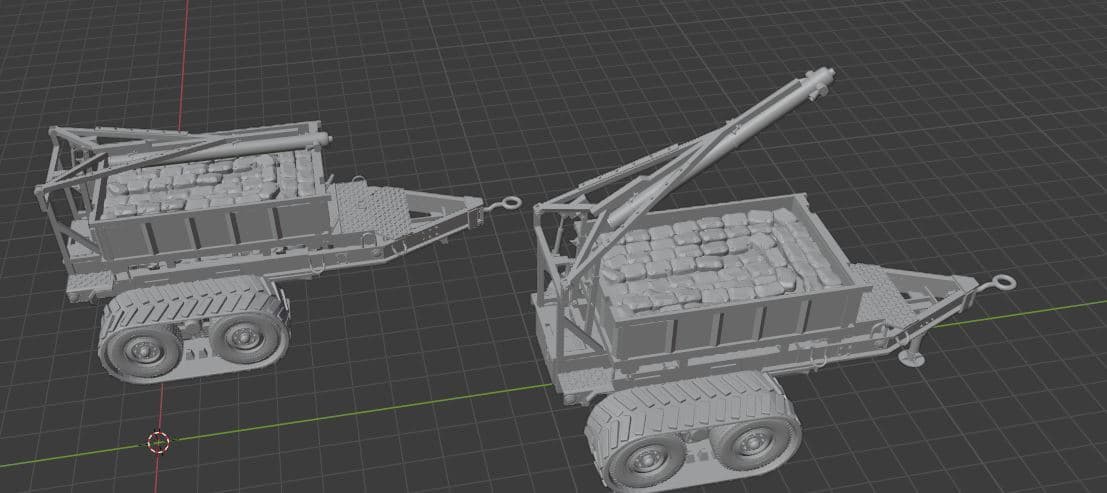
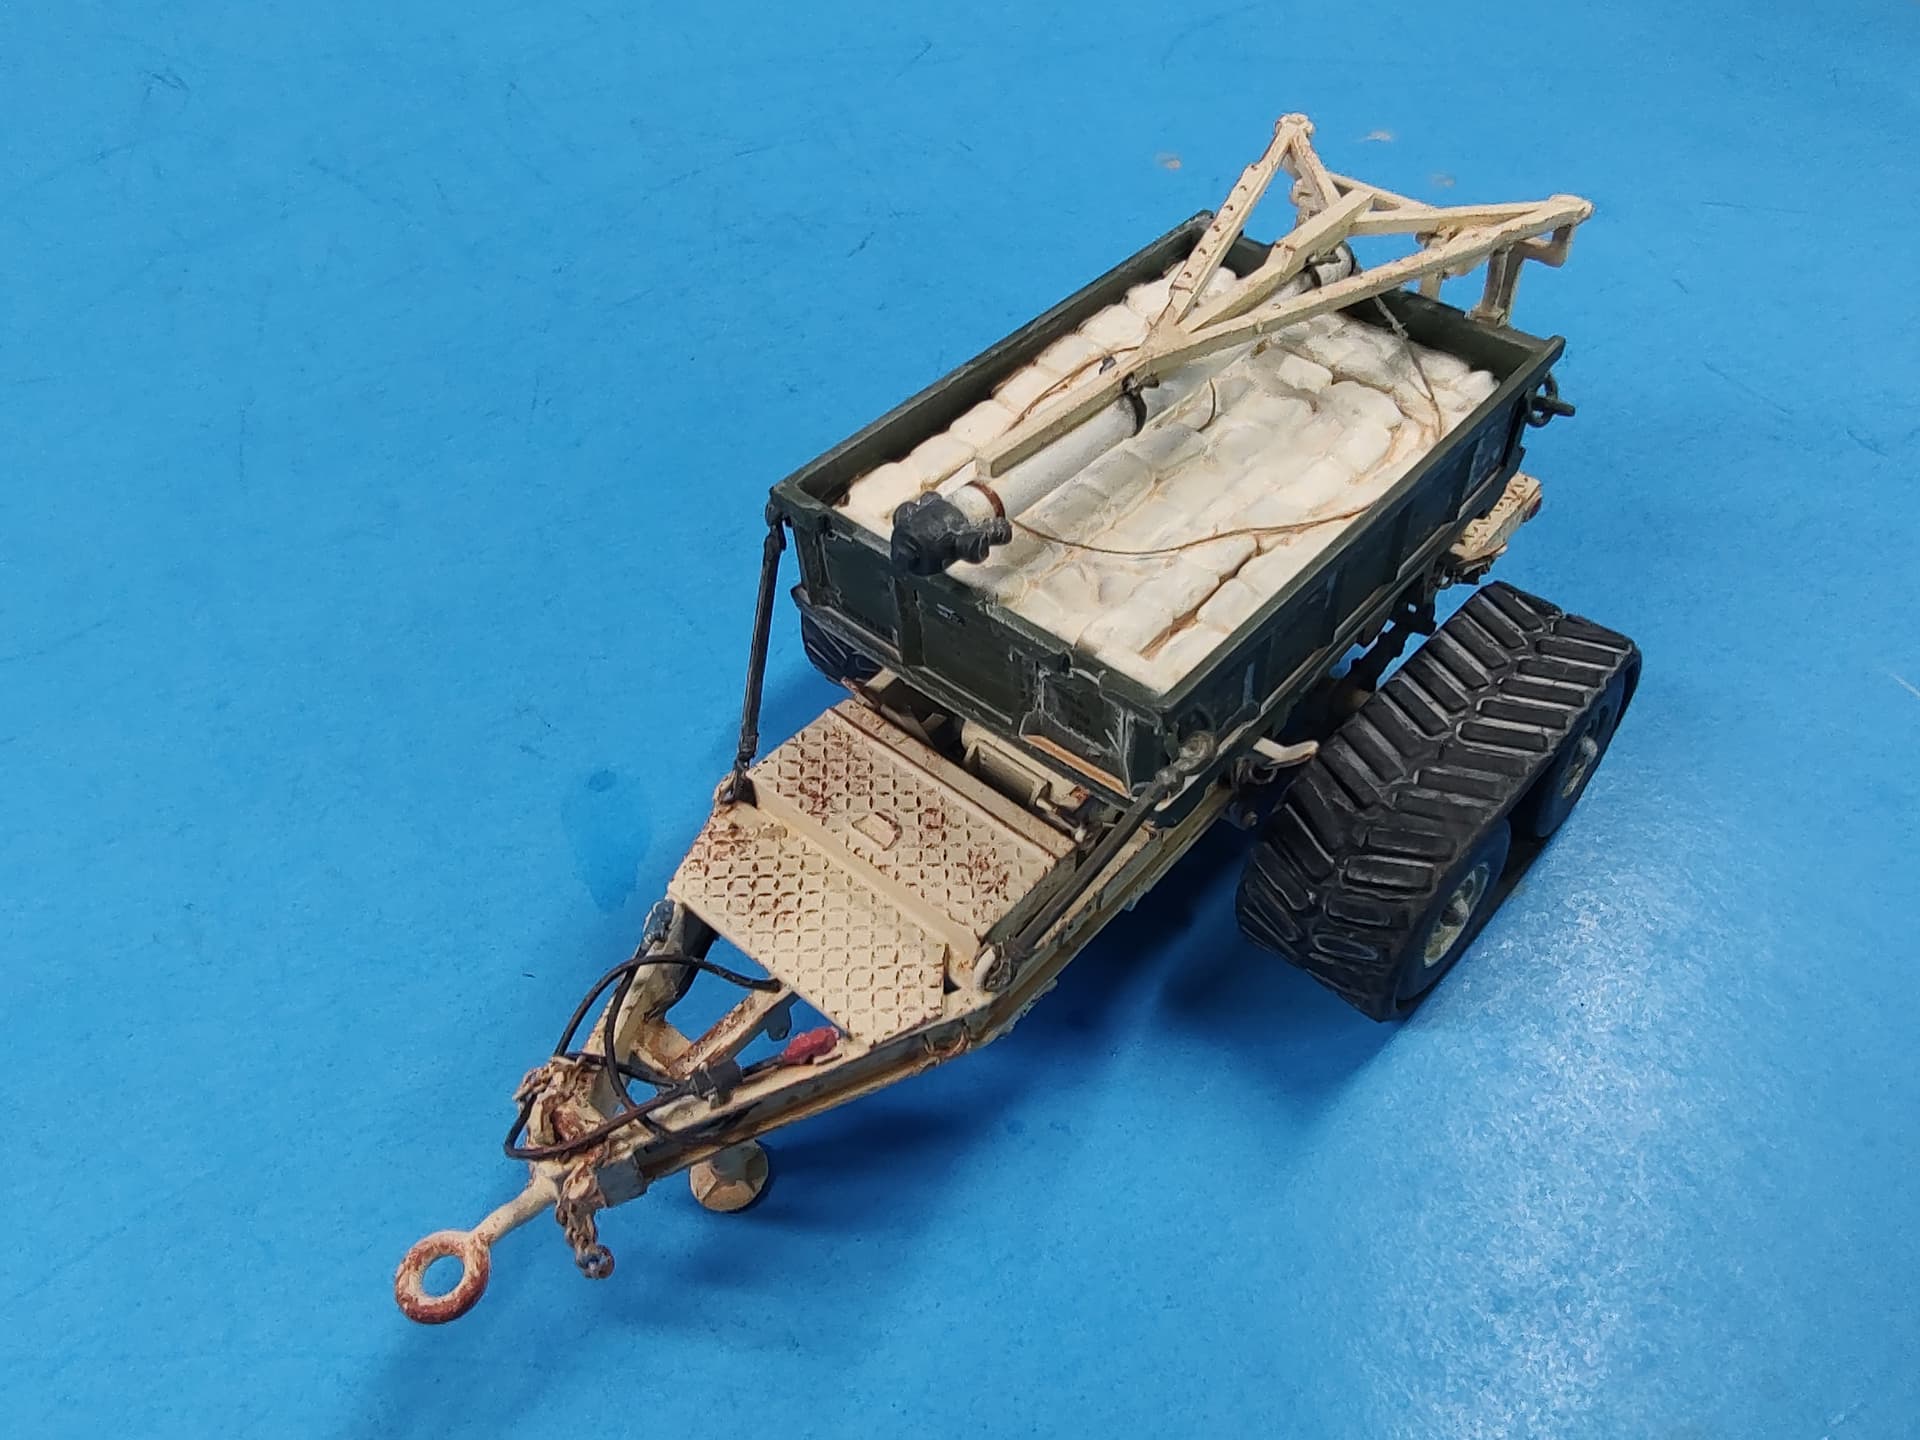
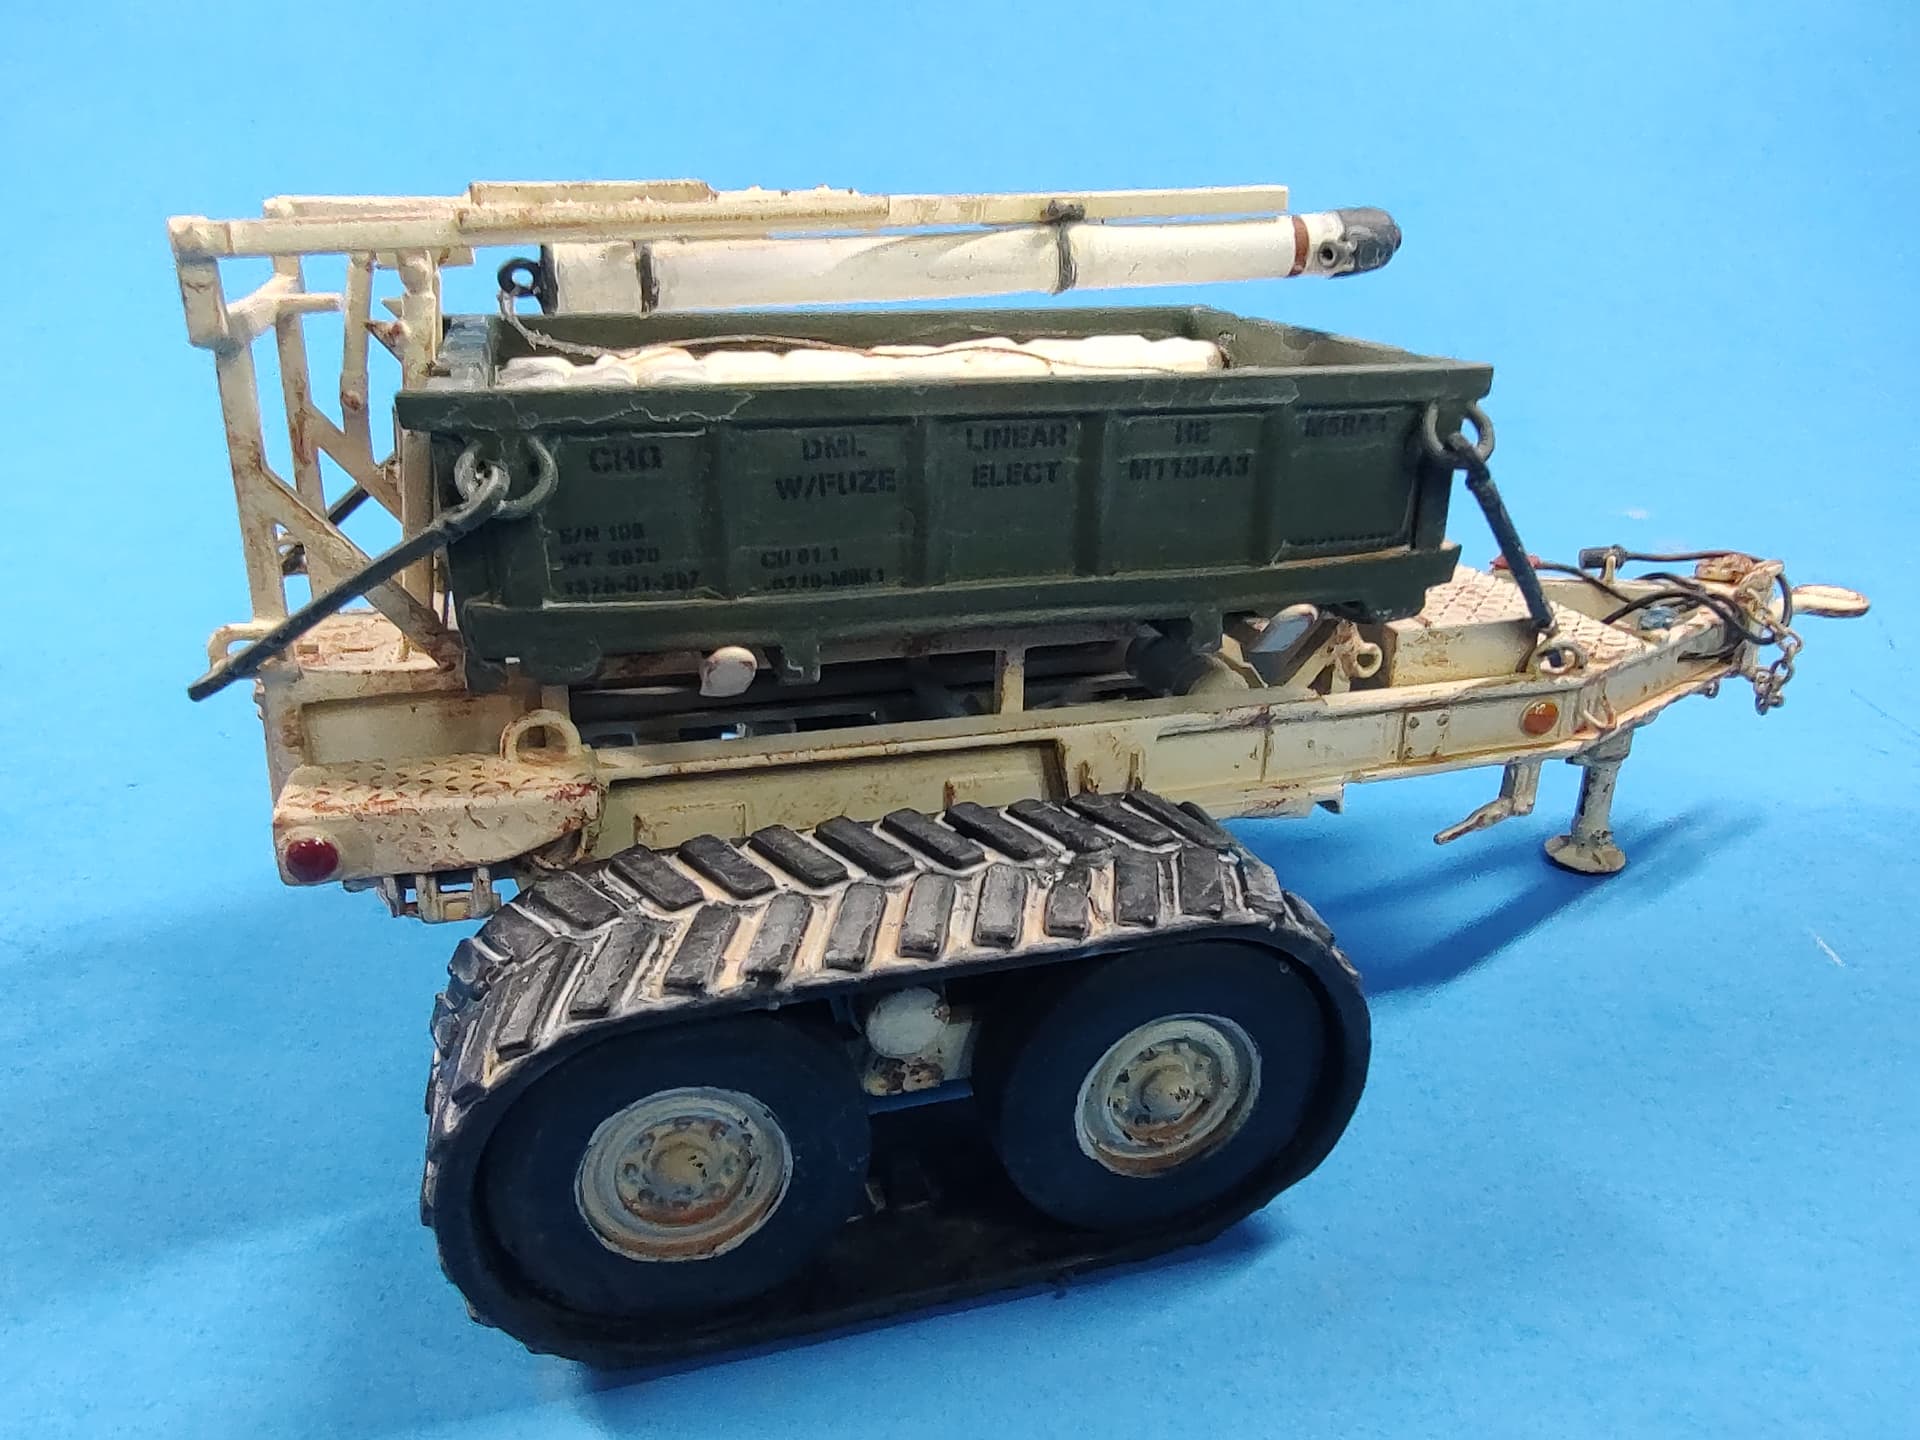
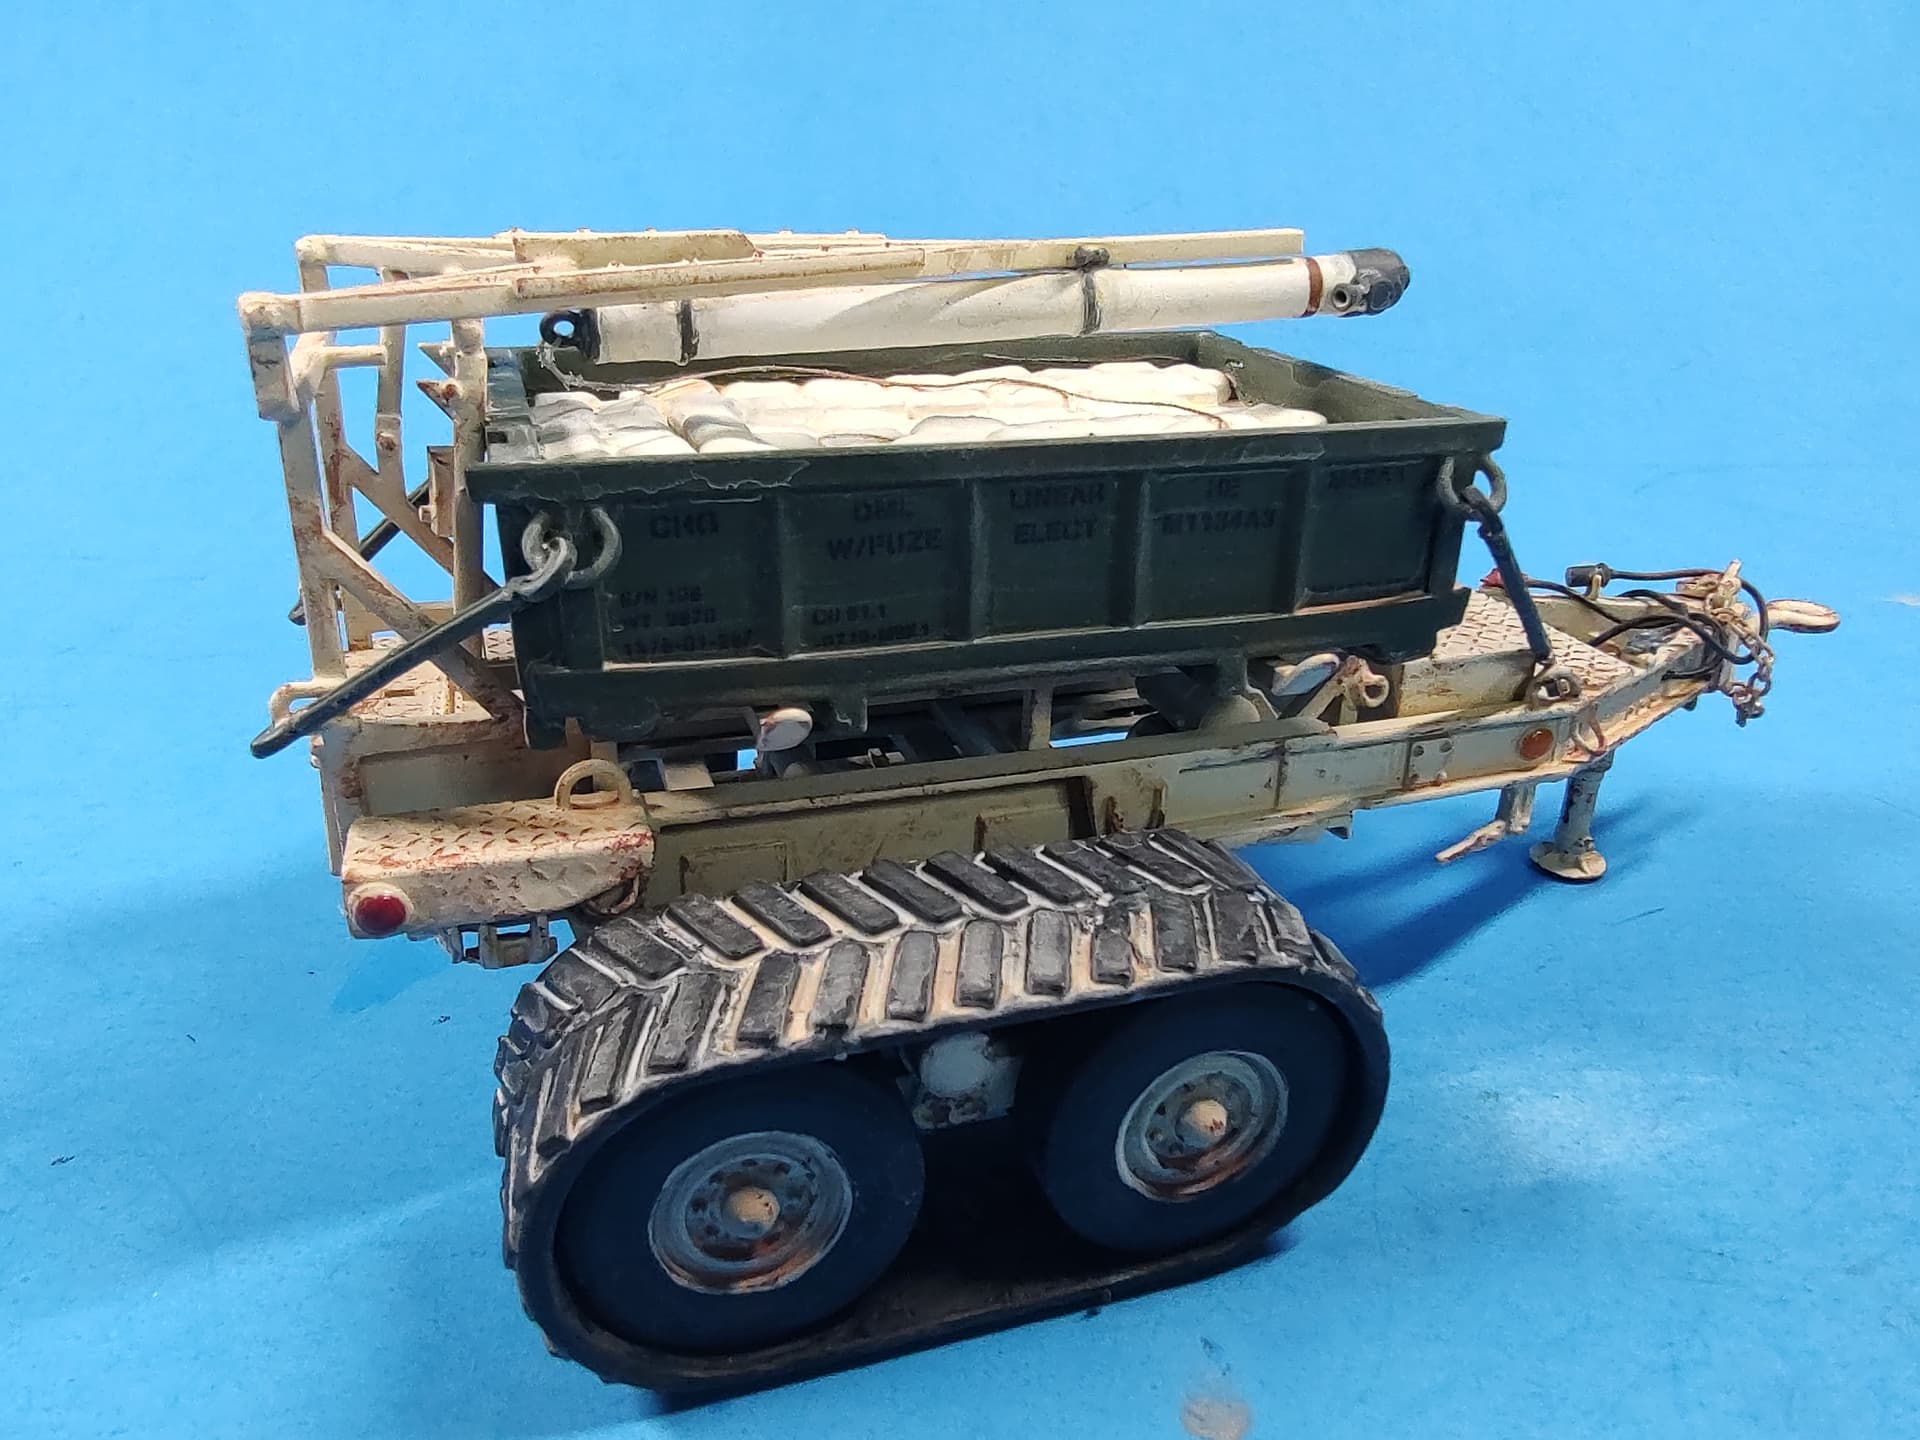
While waiting for paint to dry on my M1083 Prime Mover and M777A2 build, I started a full 3D printed build. I bought a set of files for an M58 MICLIC with tracks on Cults3D from the same designer who did the M149 Water Buffalo I built a while ago. He has a bunch of great files to buy at reasonable prices.
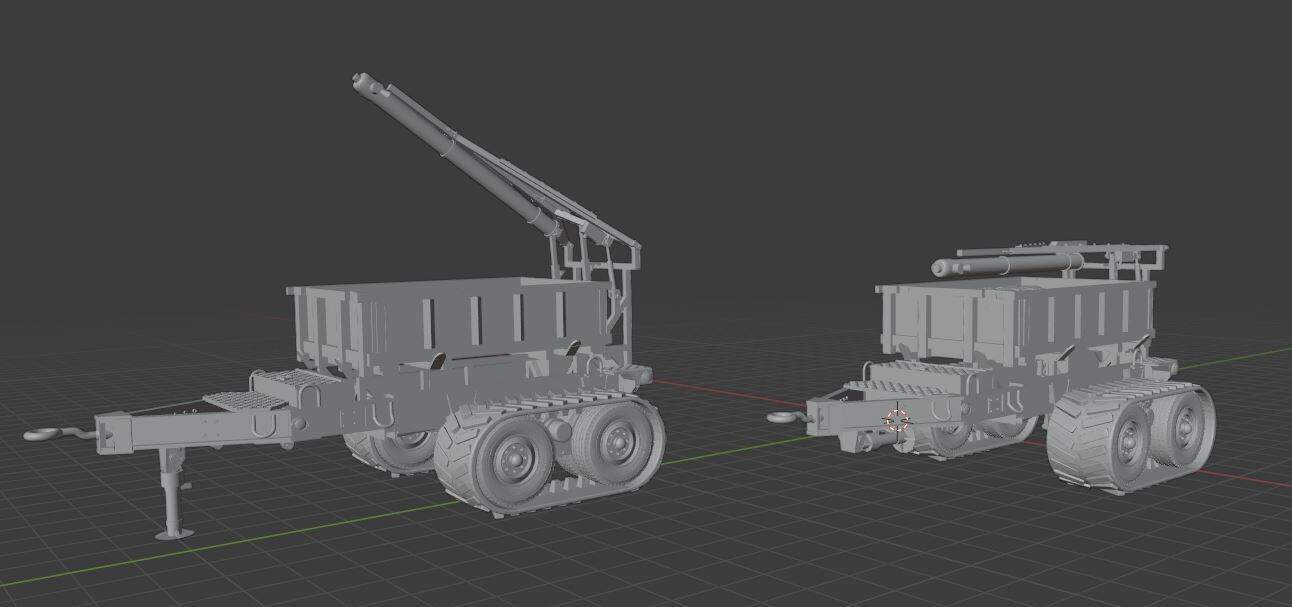
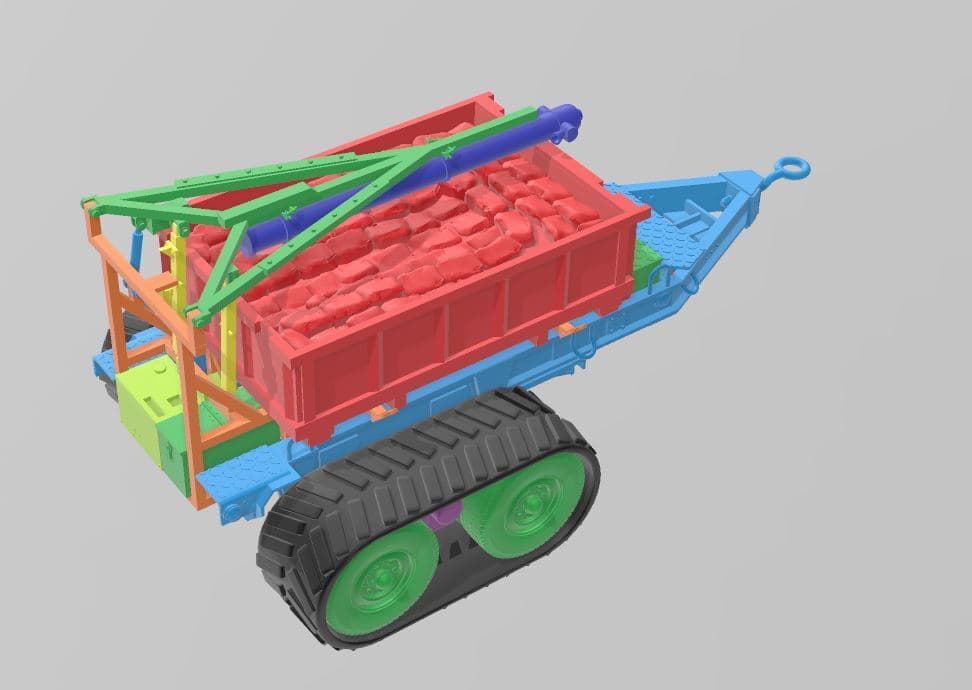
I failed to take any in-progress pics, but here are a couple from the CAD.
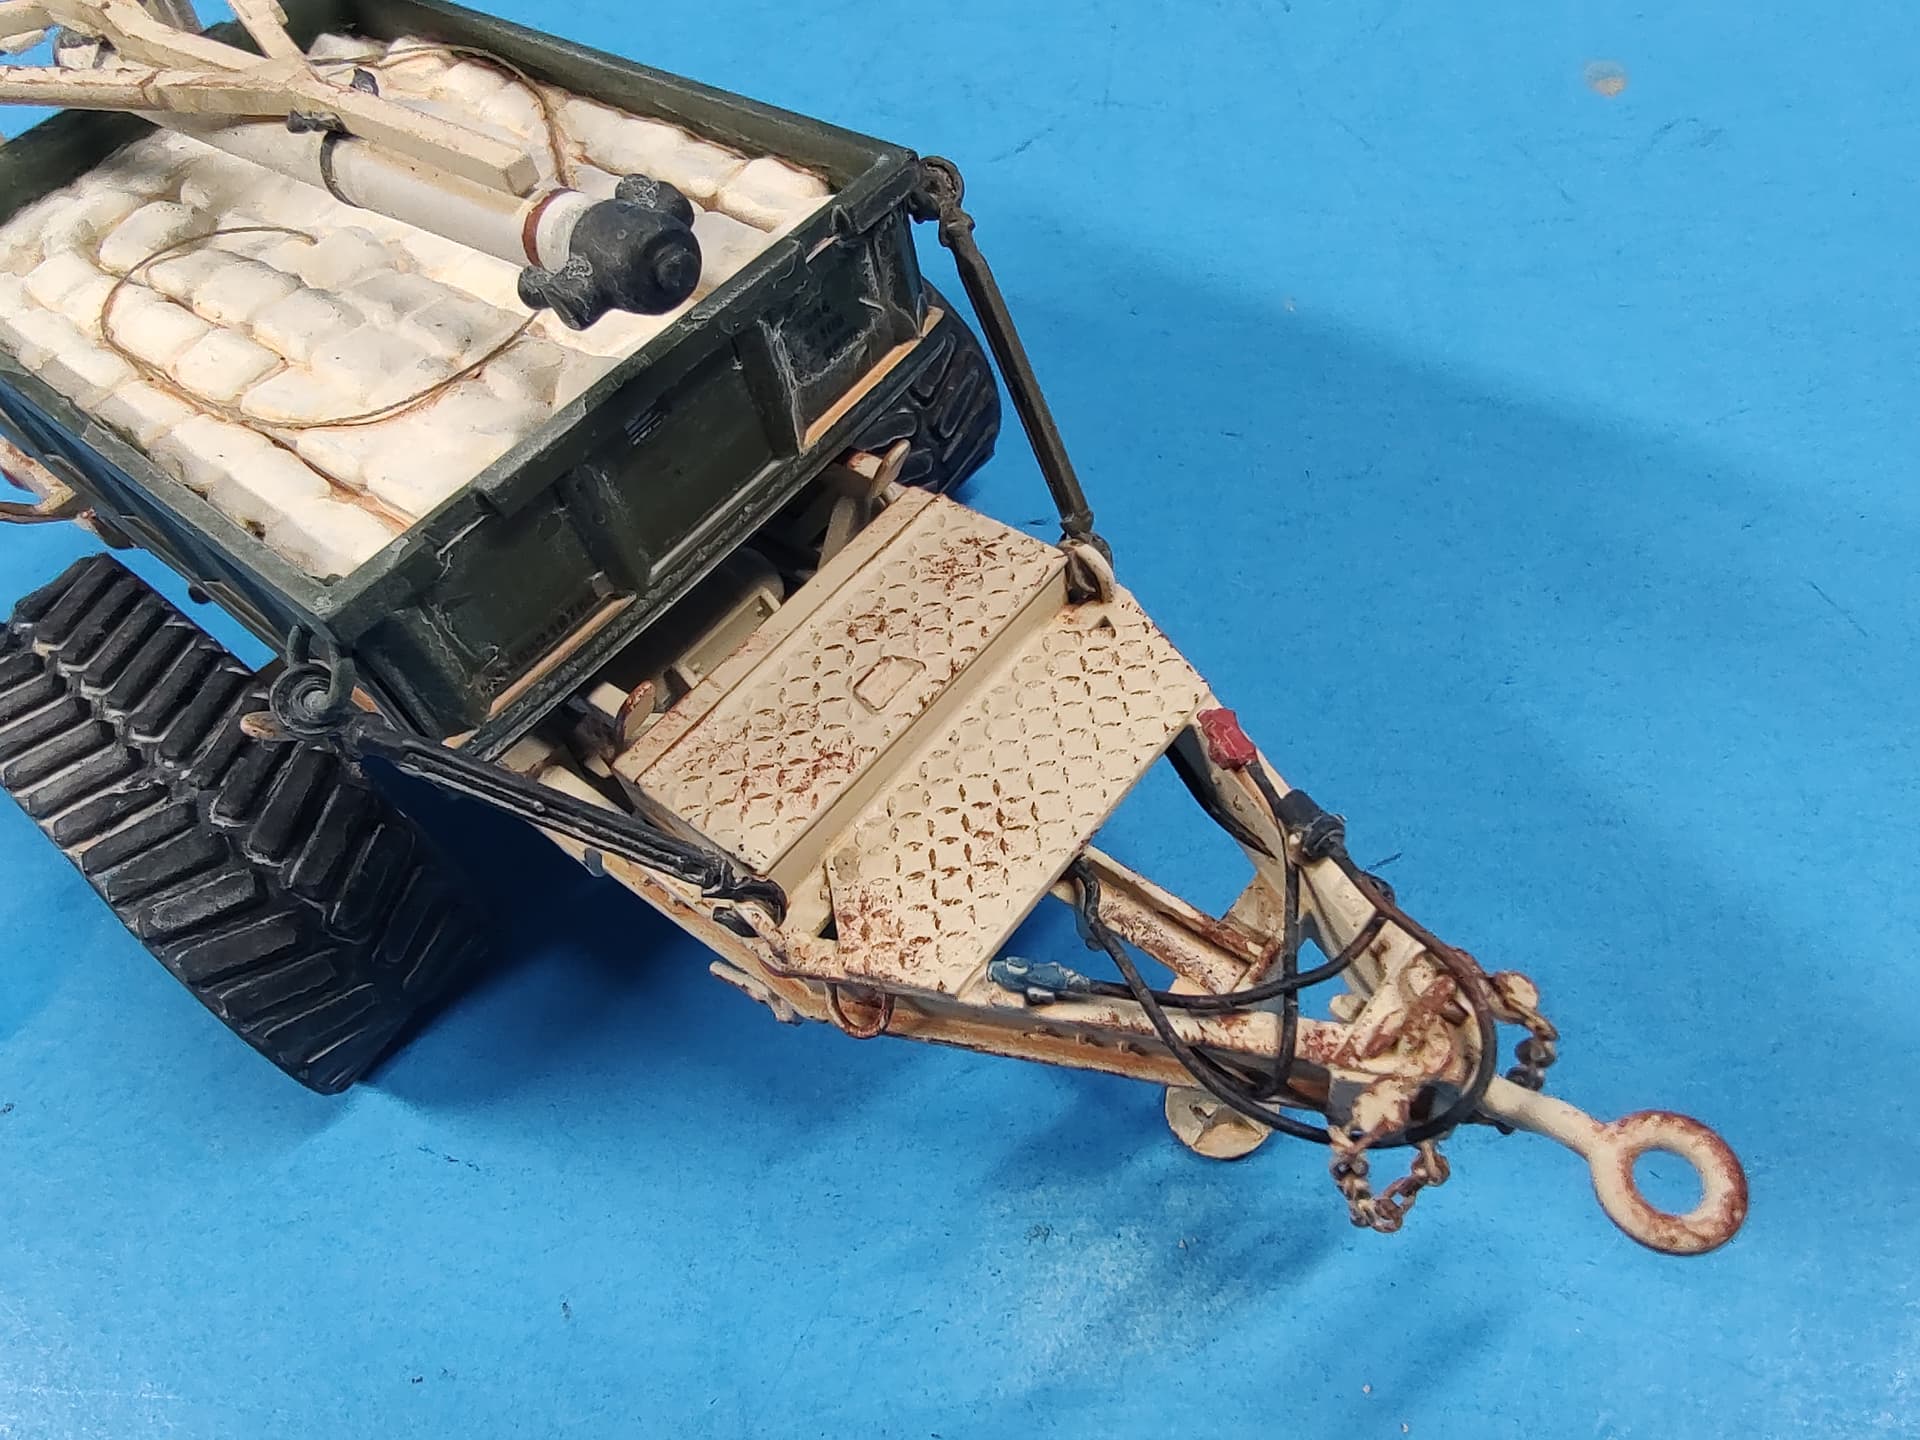
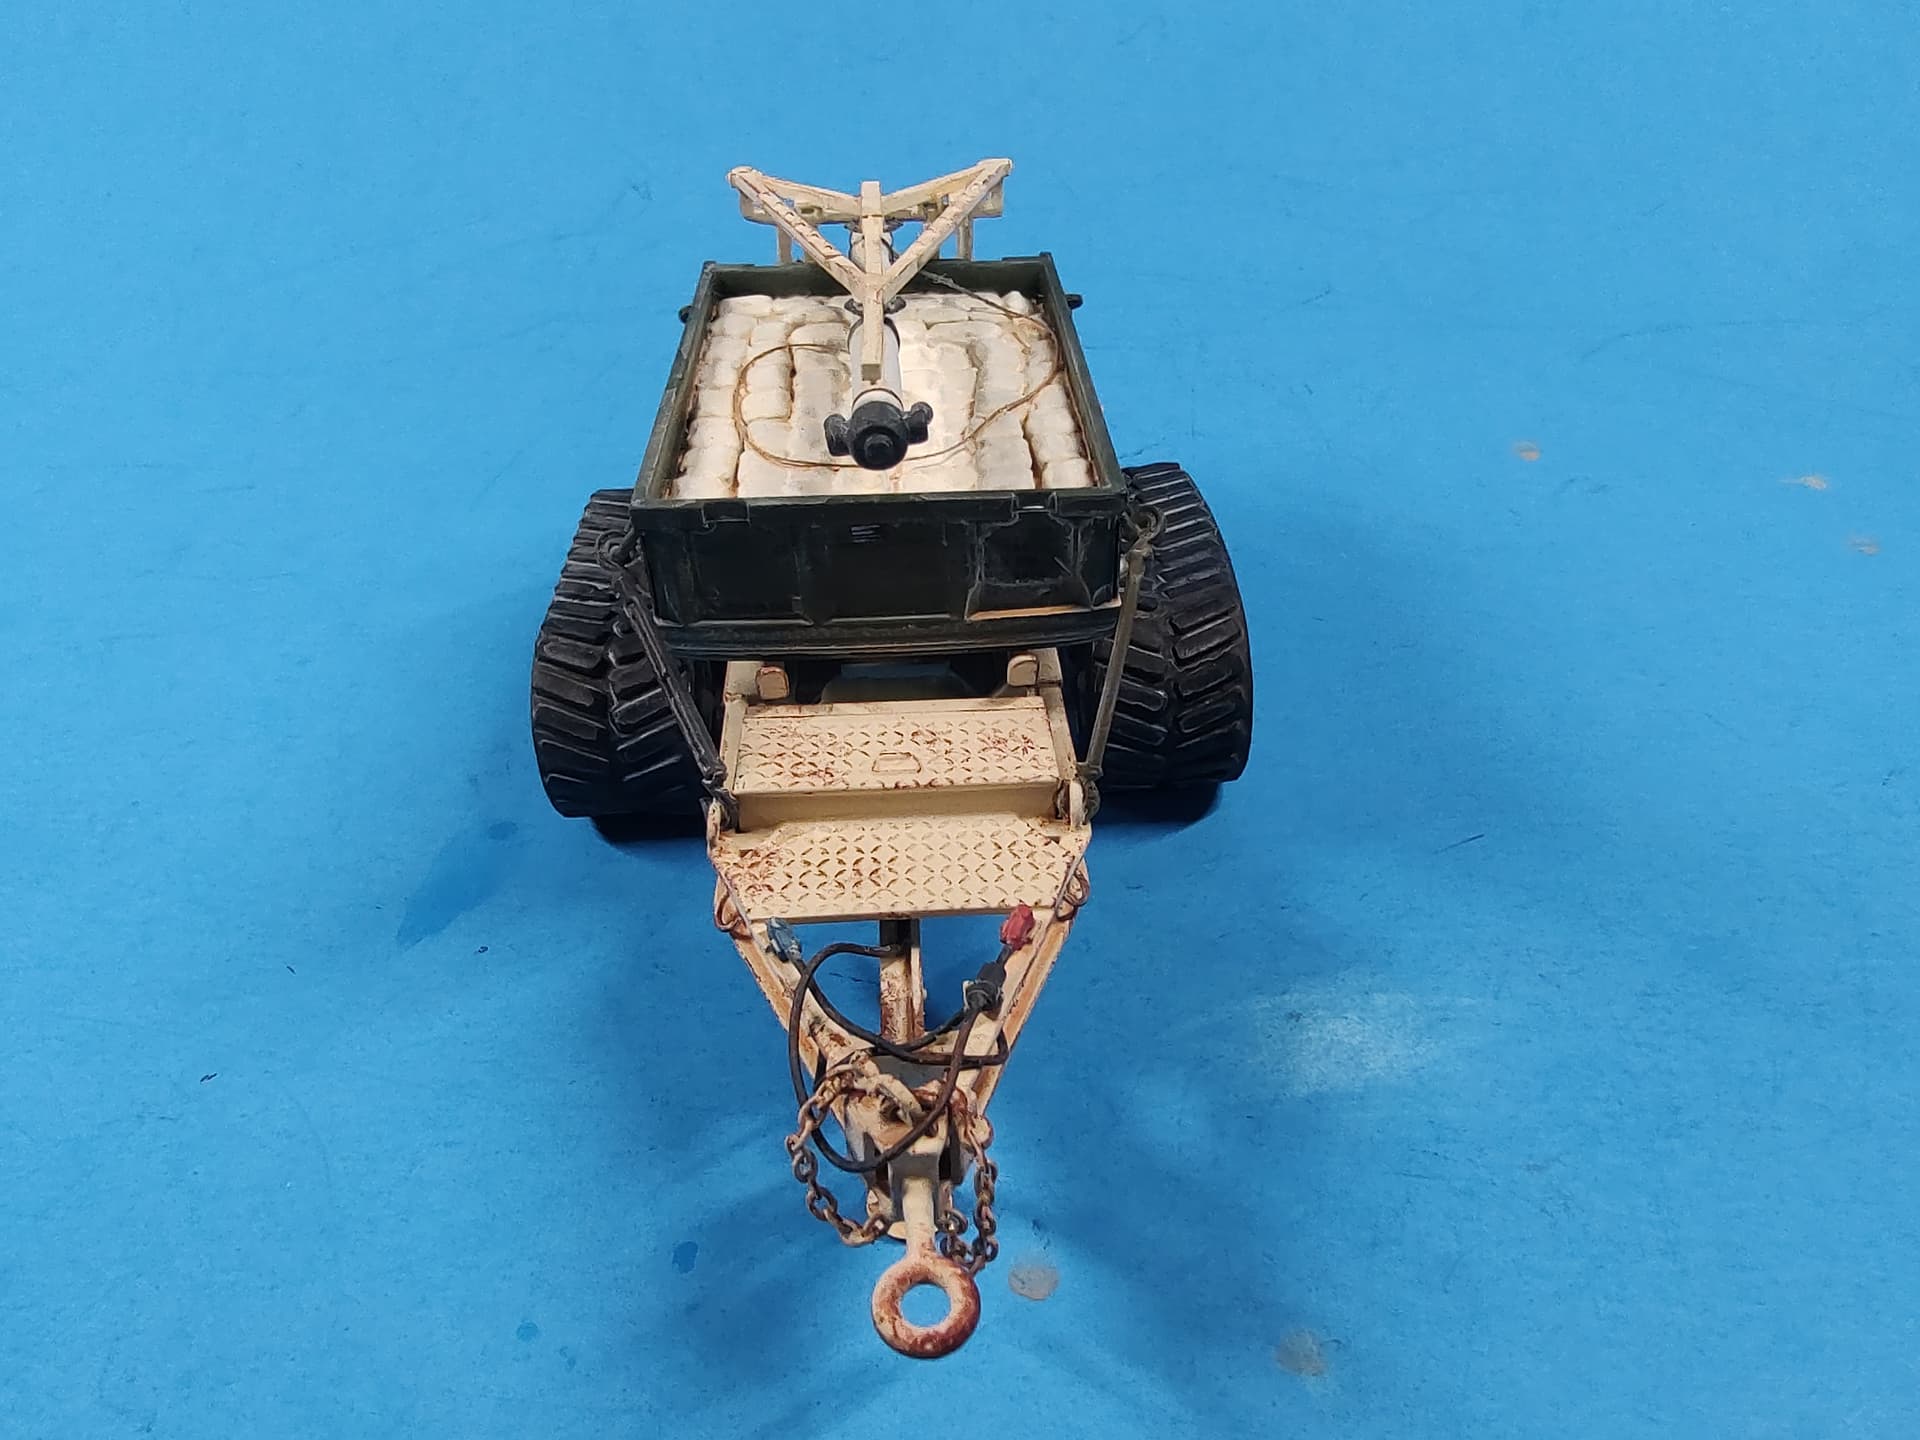
Everything is 3D printed with the exception of the air lines and brake cable which are 1/24 spark plug wire, the chain, and the cable from the rocket to the charges which is gunmetal-colored sewing thread. It comes in about 25 separate parts to print. The parts fit perfectly. I also made all the decals myself in .PPT on my home printer.
@HermannB - Interesting. It is a totally different hitch set-up. I wonder if the guy from Cults3D could design it and add it as an option in the files.
For the decals, they are quite easy to make. Get some computer decal paper and design away. I used Testors clear film paper this time’ but have used others as well. As I said, I design the decals in PowerPoint. Then I print a test page on regular paper to confirm size, font, etc. I then cut a piece of decal paper slightly larger than the area of decals I want to print. I use scotch clear tape to tape the piece of decal paper over the area I want to print on the test paper; seal all edges so the print head doesn’t catch the decal paper edge. I then run the piece of paper through my inkjet printer (make sure the paper is compatible for your printer - they make inkjet and laserjet paper). Once the decal paper is printed, let the ink fully dry for about an hour. Once dry, spray the decal paper with clear topcoat (gloss or flat) to seal them; let this fully dry for an hour or two. Once dry, carfully cut the scotch tape to release the decal paper from the larger sheet. Then cut out each decal and apply like any other water-transfer decal.
This thread has a good discussion on them. If you search for printing your own decals, there are quite a few topics on them as well.
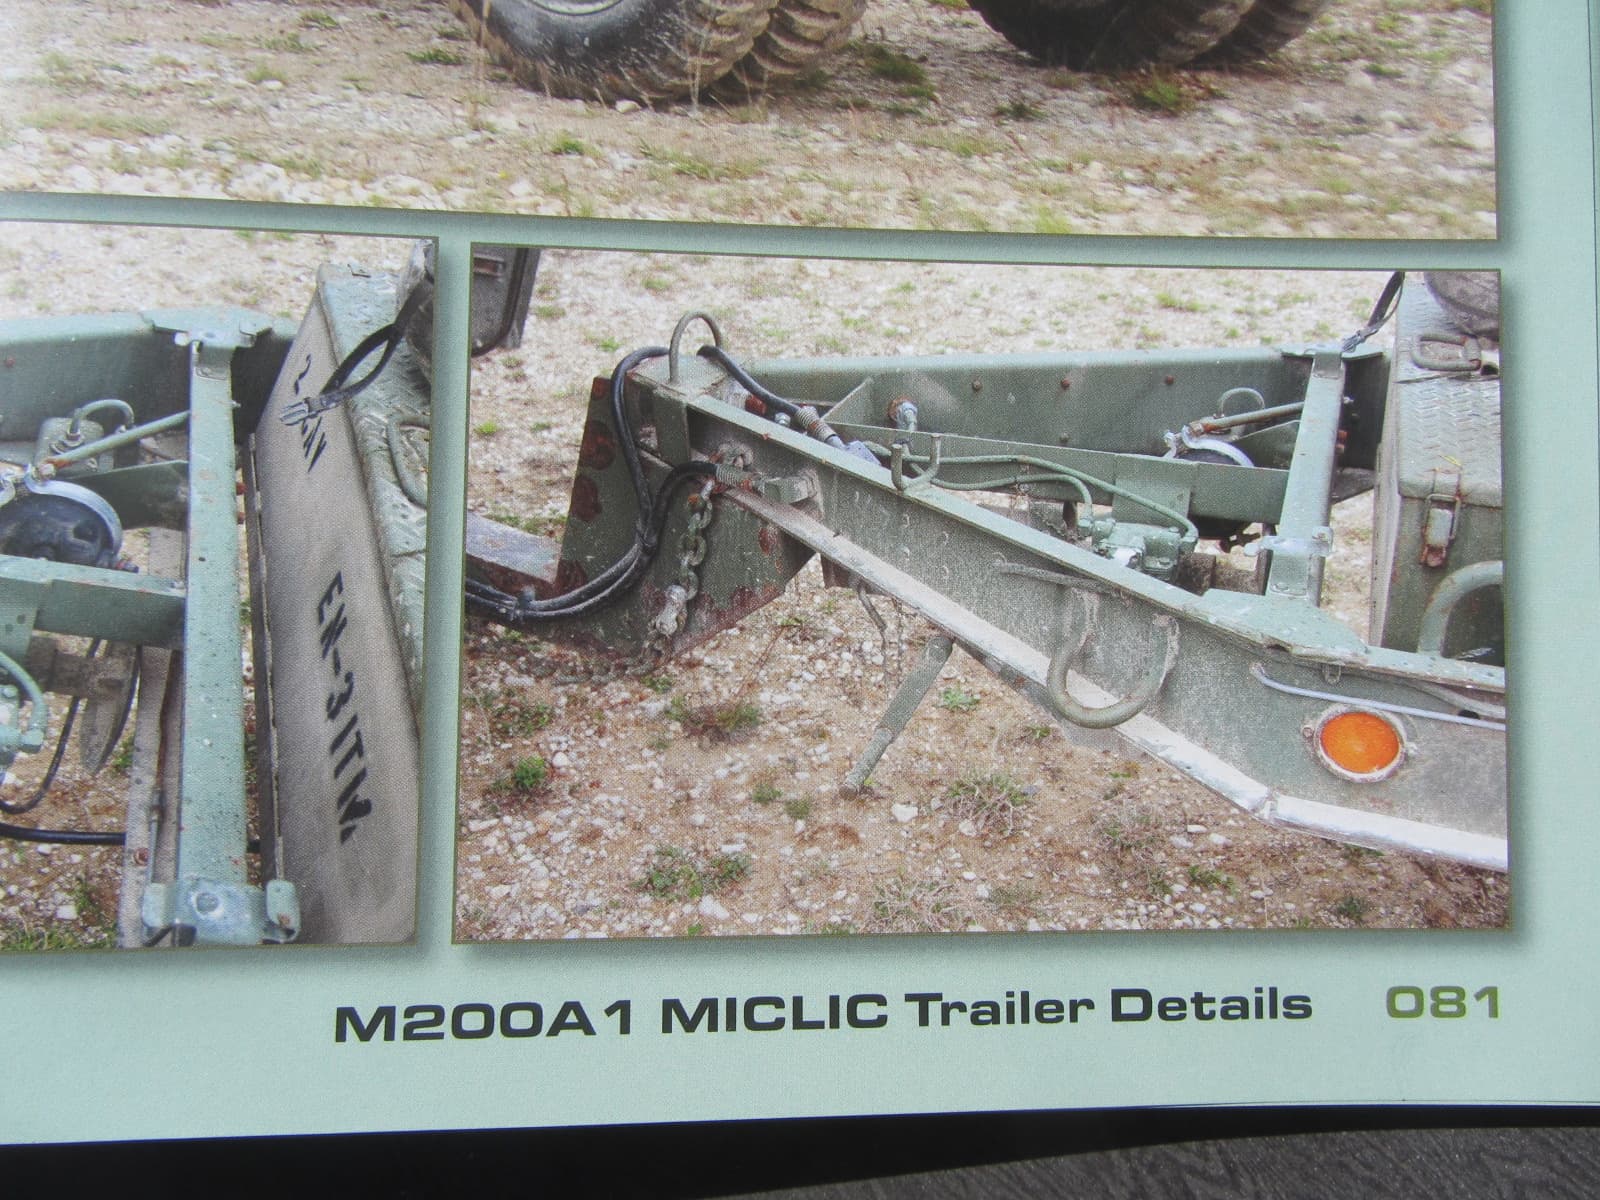
Nothing special to making the air hoses and brake cable. I use black 1/24 scale spark plug wire. Cut to length and glue it coming from under the frame. For the gladhand connectors, I have 3D printed ones from our own James Lee (@Petition2God). I add them on the end of the airlines. The brake light cable is the same with a piece of 0.060 rod added on the end as the connector.
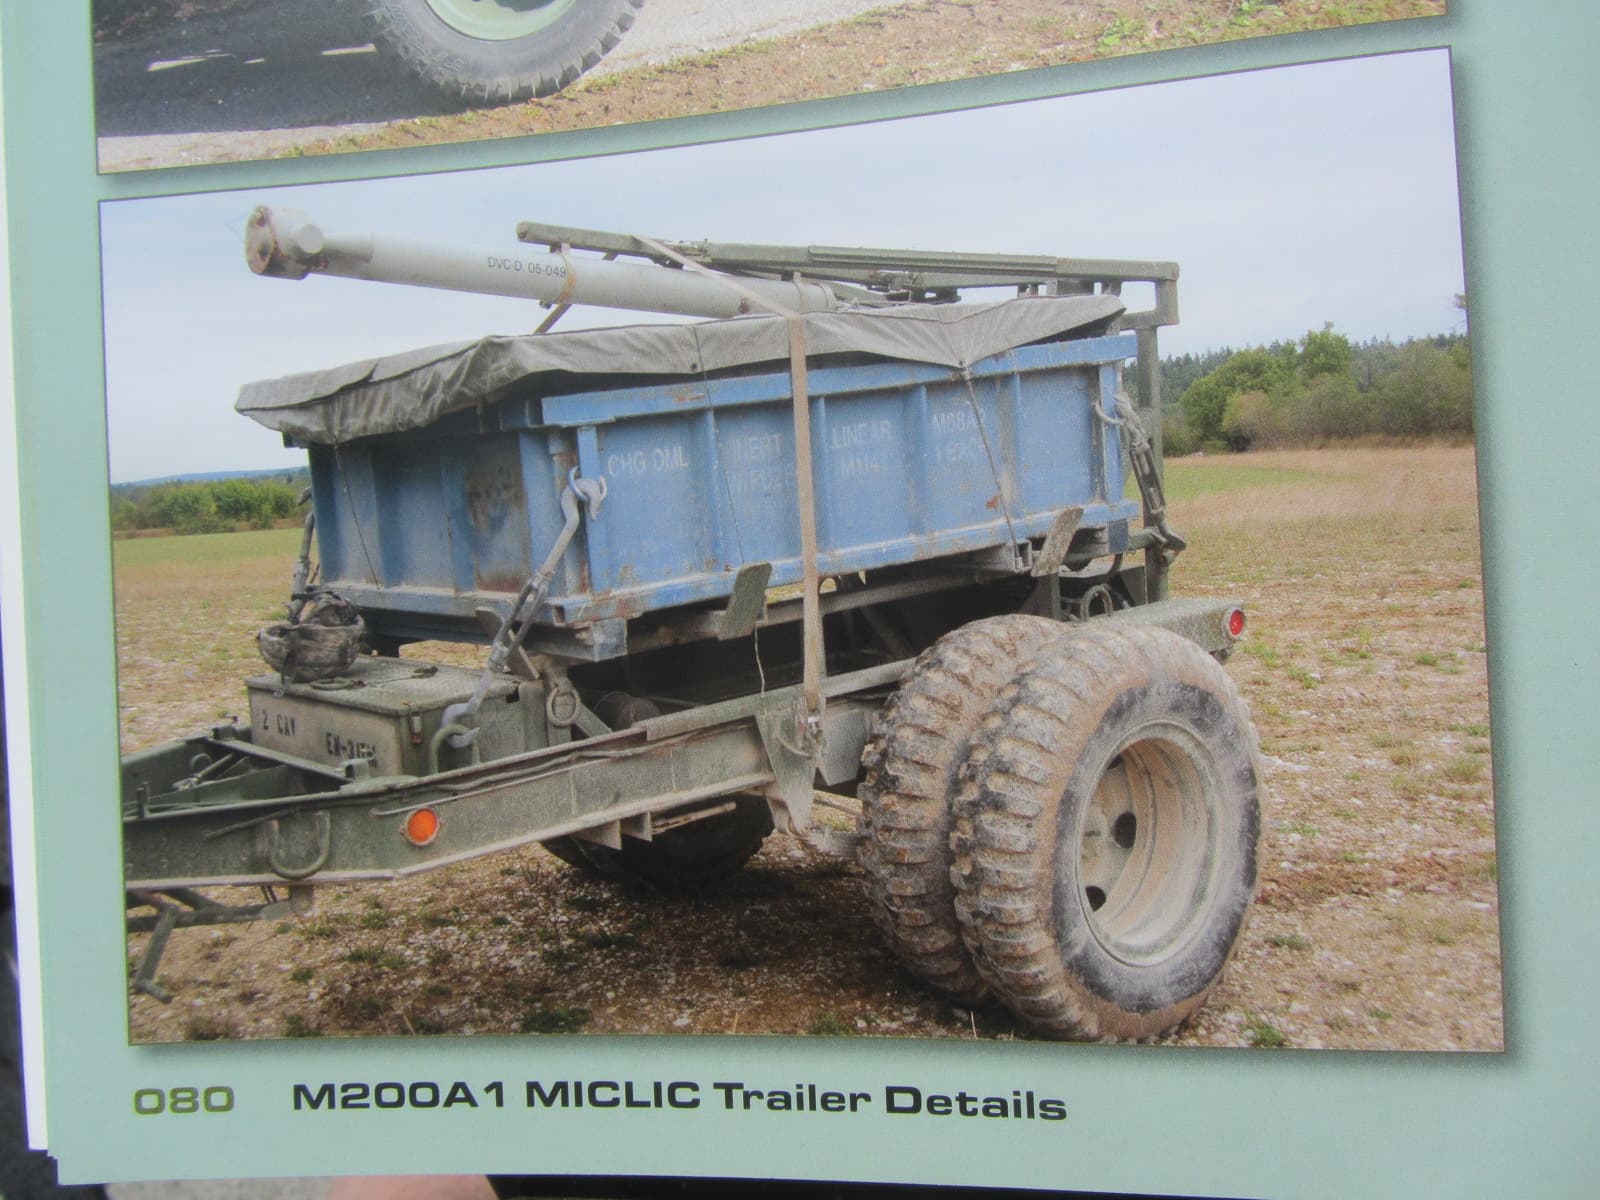
When we (9th Engineers) got MICLICs circa 1988 and later 1st Engineers, the trailers were single axle, 2-tire, and bounced a lot during travel cross-country. If the rocket rail was raised and we had a big bounce, the explosive-laden cable could come partially out of the box, spoiling any launch. 2000 pounds of high explosive on a spilled spaghetti of a cable would ruin your day. The track and twin axles greatly reduced bounce.
Back then, we towed the trailers with M113s and mounted two of them side by side on M60-class AVLB’s (armored vehicle launched bridge) which were then called AVLMs (armored vehicle launched MICLIC). Firing and detonating a MICLIC was a site to behold.
Thanks for the compliments. Great info. I have actually thought about getting another M60 AVLB and making an AVLM, then what to do with the bridge? We’ll see.
The same guy also has files for the wheeled M58 as well.
I custom make all of the decals for a range of Engineer vehicles, including the construction, demolition and pioneer tool boxes, and the camouflage system bags. Details. It’s always about the details.
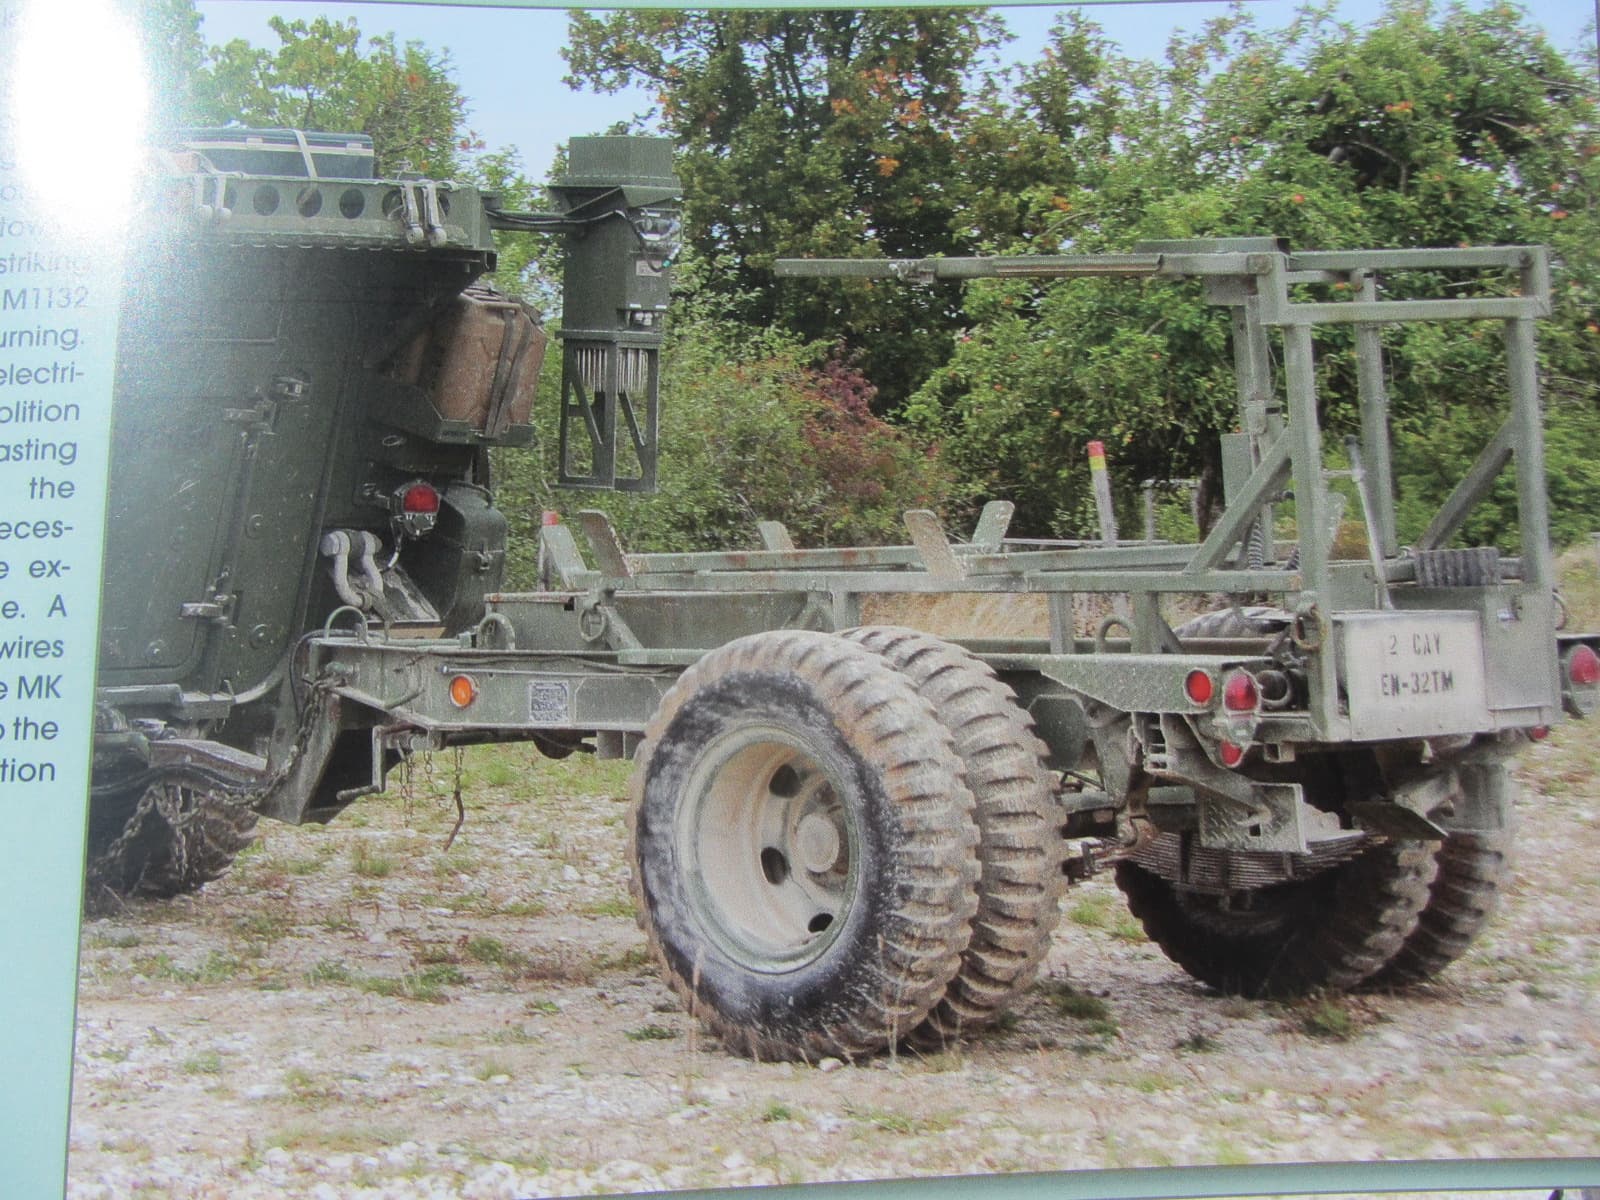
BTW, I also have the M200 MICLIC trailer with loads from the cults website. It printed beautifully. I have 2 - one for a future M113A2 and another for the Stryker M1132 ESV. I’ll have to scratch the lower trailer tongue for the ESV. Cheers …
Awesome build. Well Done! the rubber band track with the greying rubber tread and the sand between them is especially well done. The rust peaking through the diamond plating is quite realistic too. I hope to see this at a future show.