That came out really well.
Paul, that looks fantastic! Odd looking thing but very interesting. 3D printing is really opening up all sorts of possibilities for subjects like this.
John, looking good. Really nice paint scheme. I might just have to add one of these to my collection.
Its exciting to see something come along that is completely out in left field. If this kit is representative of the 3D printed models out there, we are in for a lot more interesting things. This kit had raster lines that were largely eradicated with careful sanding. I imagine future kit will be even better with finer detail & less rastering.
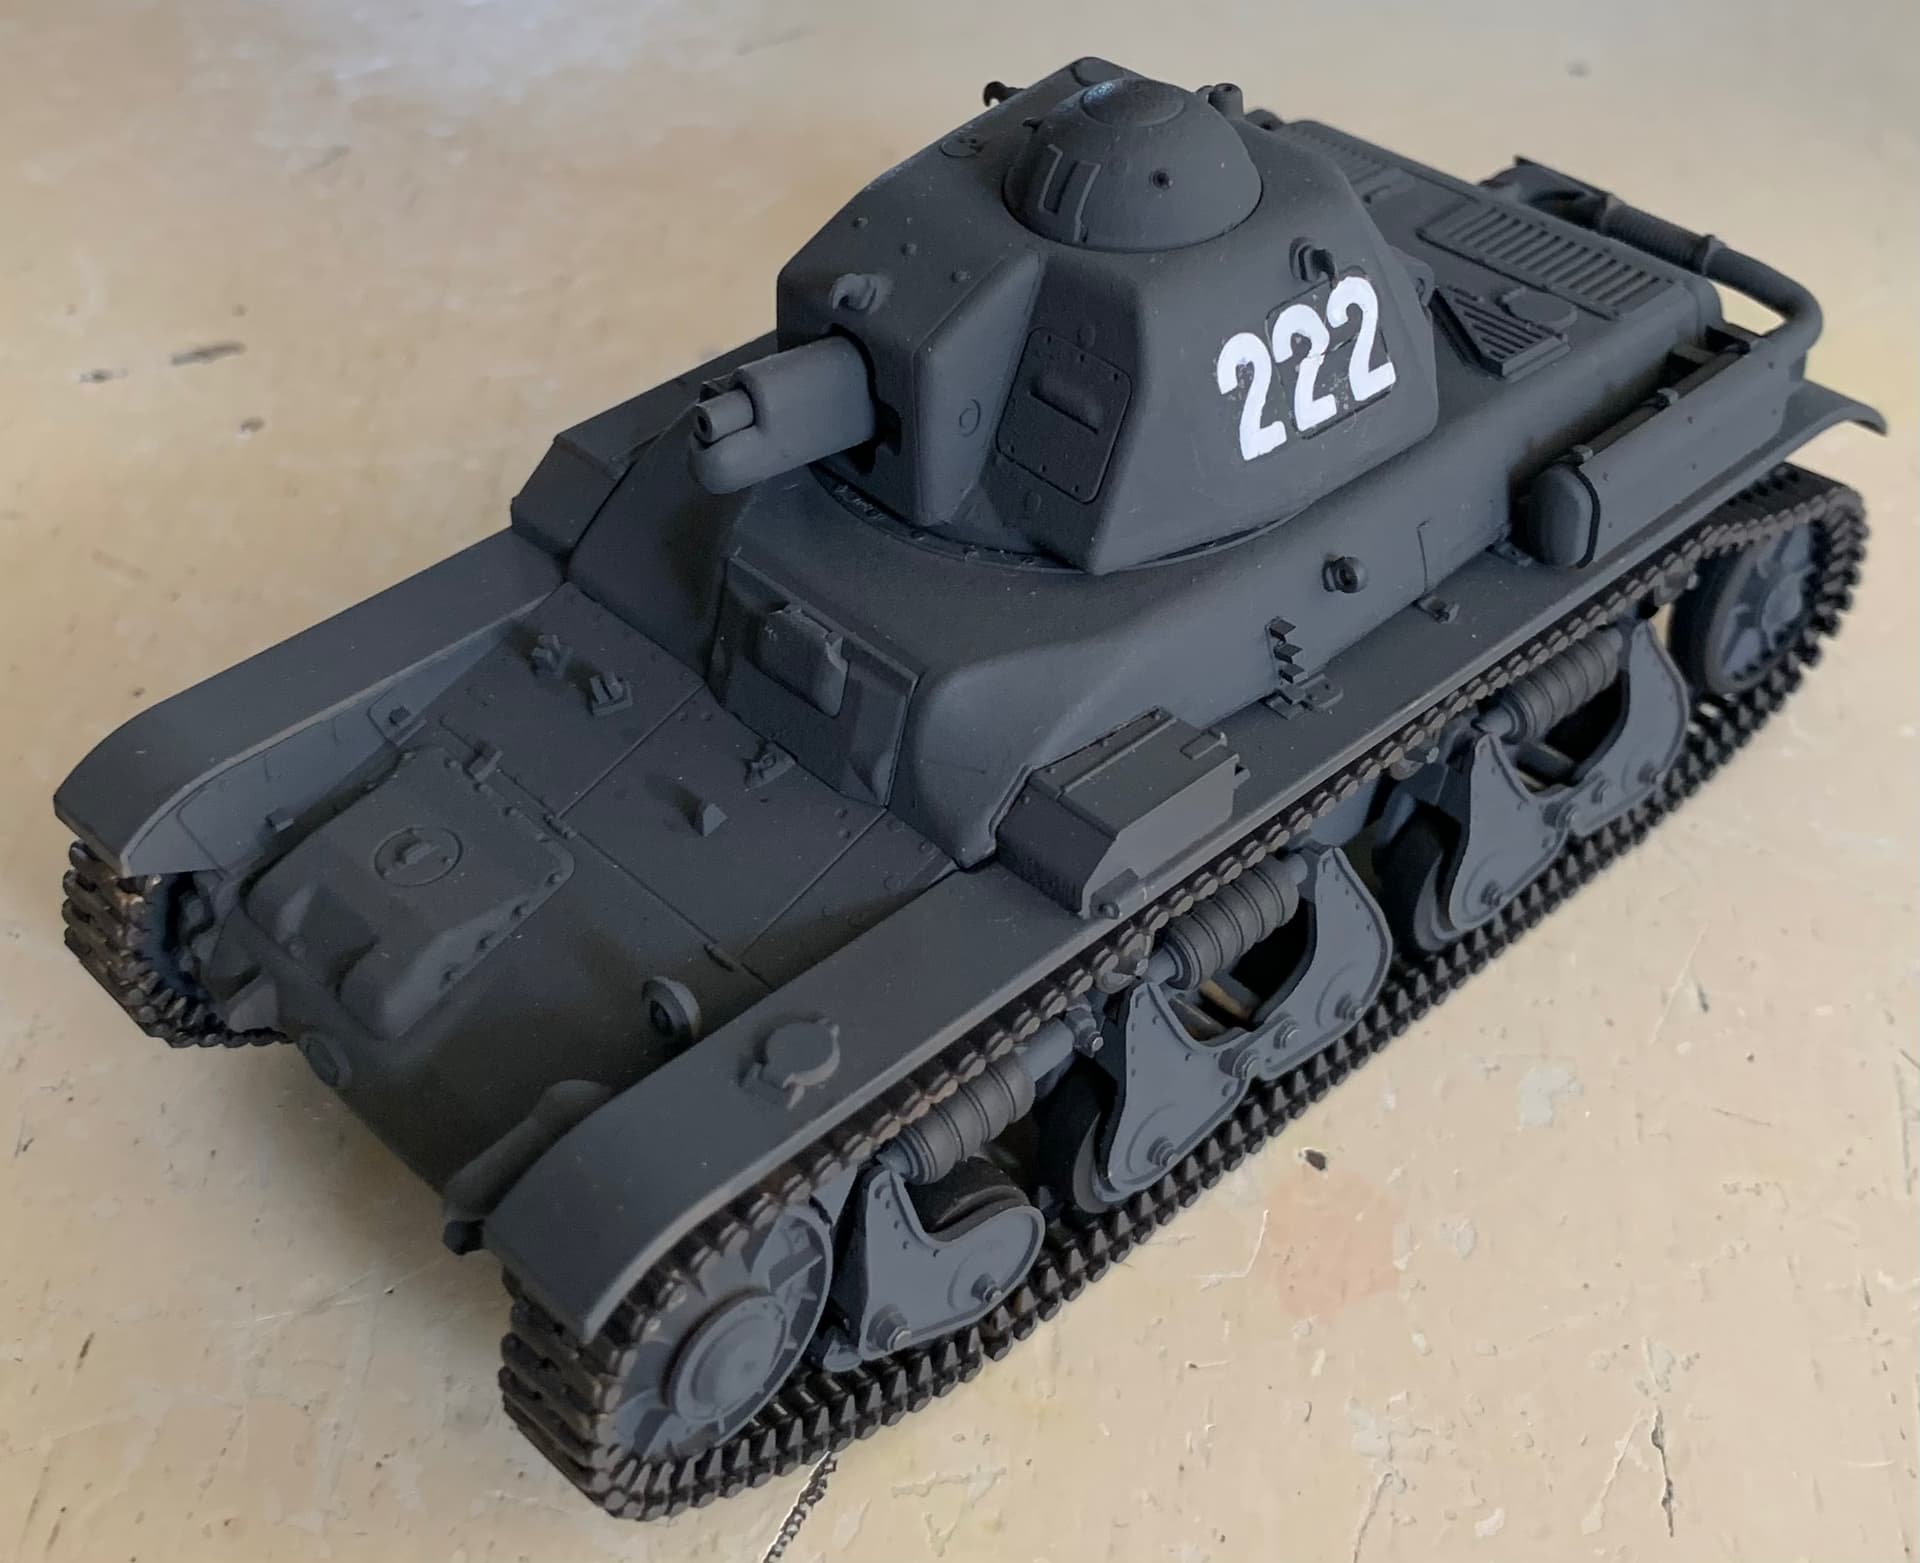
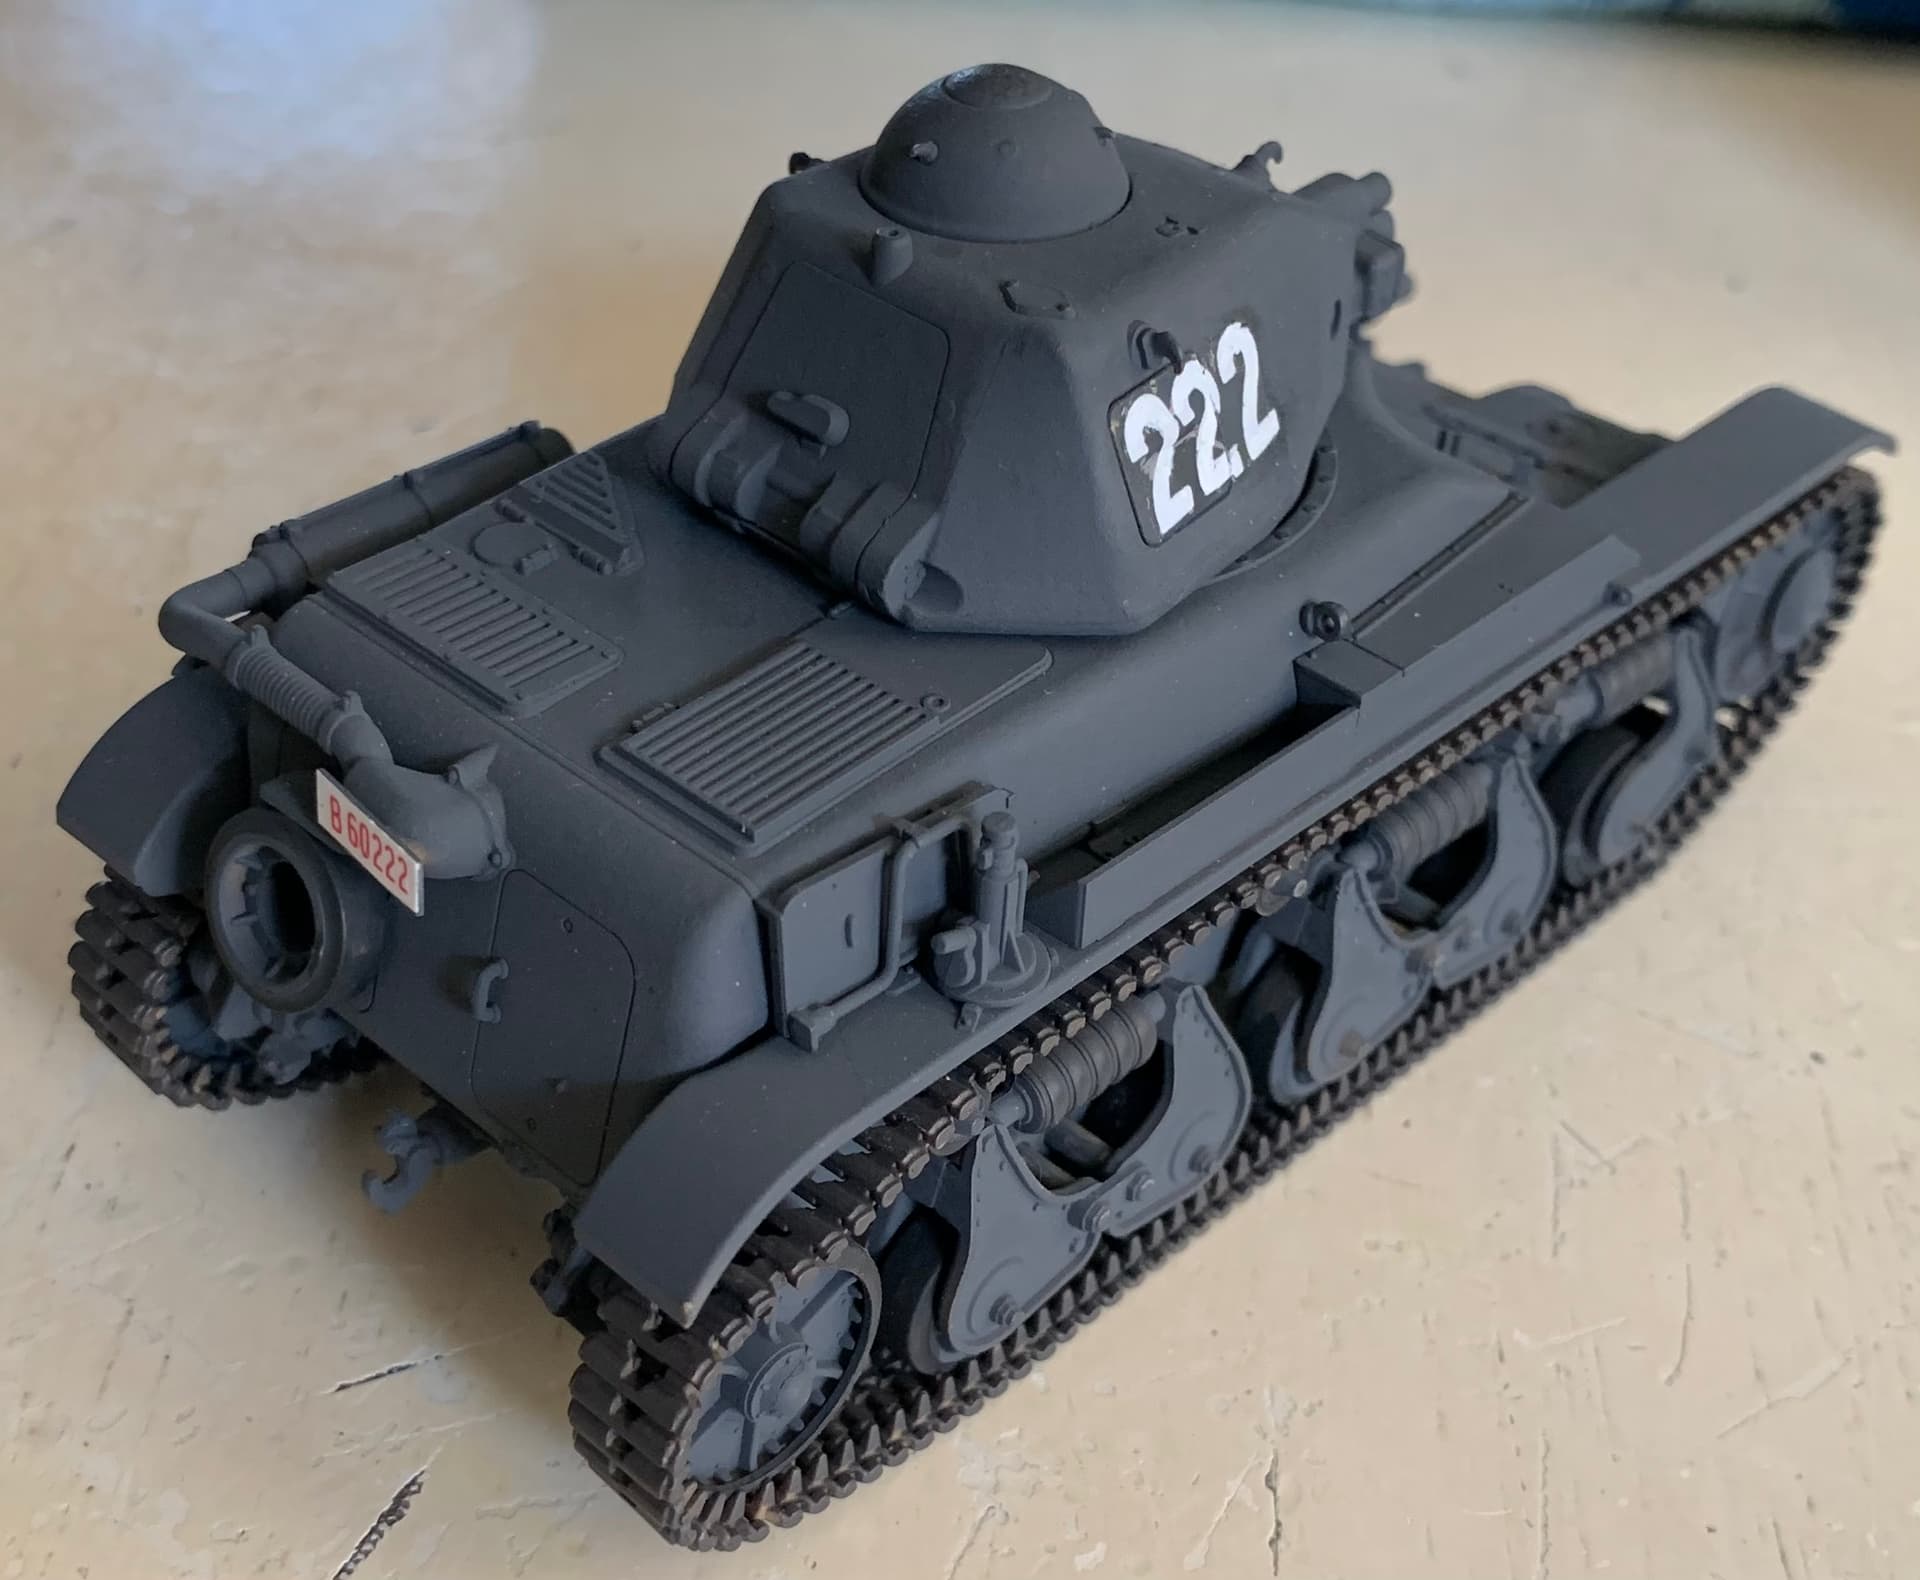
This Char 2 will go into the display cases along with the other models and look good enough to fit right in the the more conventionally produced kits.
Paul
1 Like
A fantastic looking tank there Paul- a unique looking piece with a great finish.
Looks fantastic Paul. It came out very well considering the couple of tribulations you had along the way.
Thanks guys, this is my first build in several years due to the long distance move and so its a bit of a learning experience. I find I can’t see very well and even a visor only goes so far. I actually have to shoot pictures and throw them up on the 27" montor to really see things. I guess I’ll have to go to the eye doc for better glasses . . .
Same here. I shoot with an iPhone but I never trust reviewing images on it. The big display is where my mistakes always smack me in the face. ![]()
—mike
Paul, A very nice job on a very unusual tank. I also have more difficulty seeing as I age and the best thing that I did was improve the lighting in my hobby room. I chucked the 2 x 60 watt lights in the overhead fixture and the desk lamp and replaced it with a U shaped track light above my work area with 6 LED spots in it. That made a big difference.
Yes, lighting is very important. I have a LED work lamp over the work area and find it helps. Getting old is not for the faint of heart.
Paul
Hi Paul, MLT is my acronym for Mr. Leveler Thinner. The best I can find is it is lacquer thinner with a lacquer paint retarder to slow the drying process down, and it also contains some sort of leveling agent. Chemistry aside, the technique is pretty old, where one would wet the painted area with thinner to level the paint. For me, this works pretty well as I tend to black base my models to break up monochromatic schemes and also to bring out panel lines etc. In doing this I find that some areas have more paint built up than others, and once done I’ll broad spray the area with MLT enough to wet it, though not enough to have the thinner flooded which will ruin the effect. This will even out or level the surface of the painted area after everything dries. I’ve not mastered this, and still get areas where I’ve built up the paint not getting totally even, since this is basically thinning the paint that’s on the model.
As with all techniques, a little practice helps! I typically do a test shot on the underside of a rear stabilizer in case it goes south. Also, this really doesn’t work with metallic paints as they are a completely different animal! Hope this helps.
John
1 Like
My solution to the damaged afterburner petals, make a cover based on this image I found here.
Used the old method of PVA soaked tissue draped over the part and left to dry.
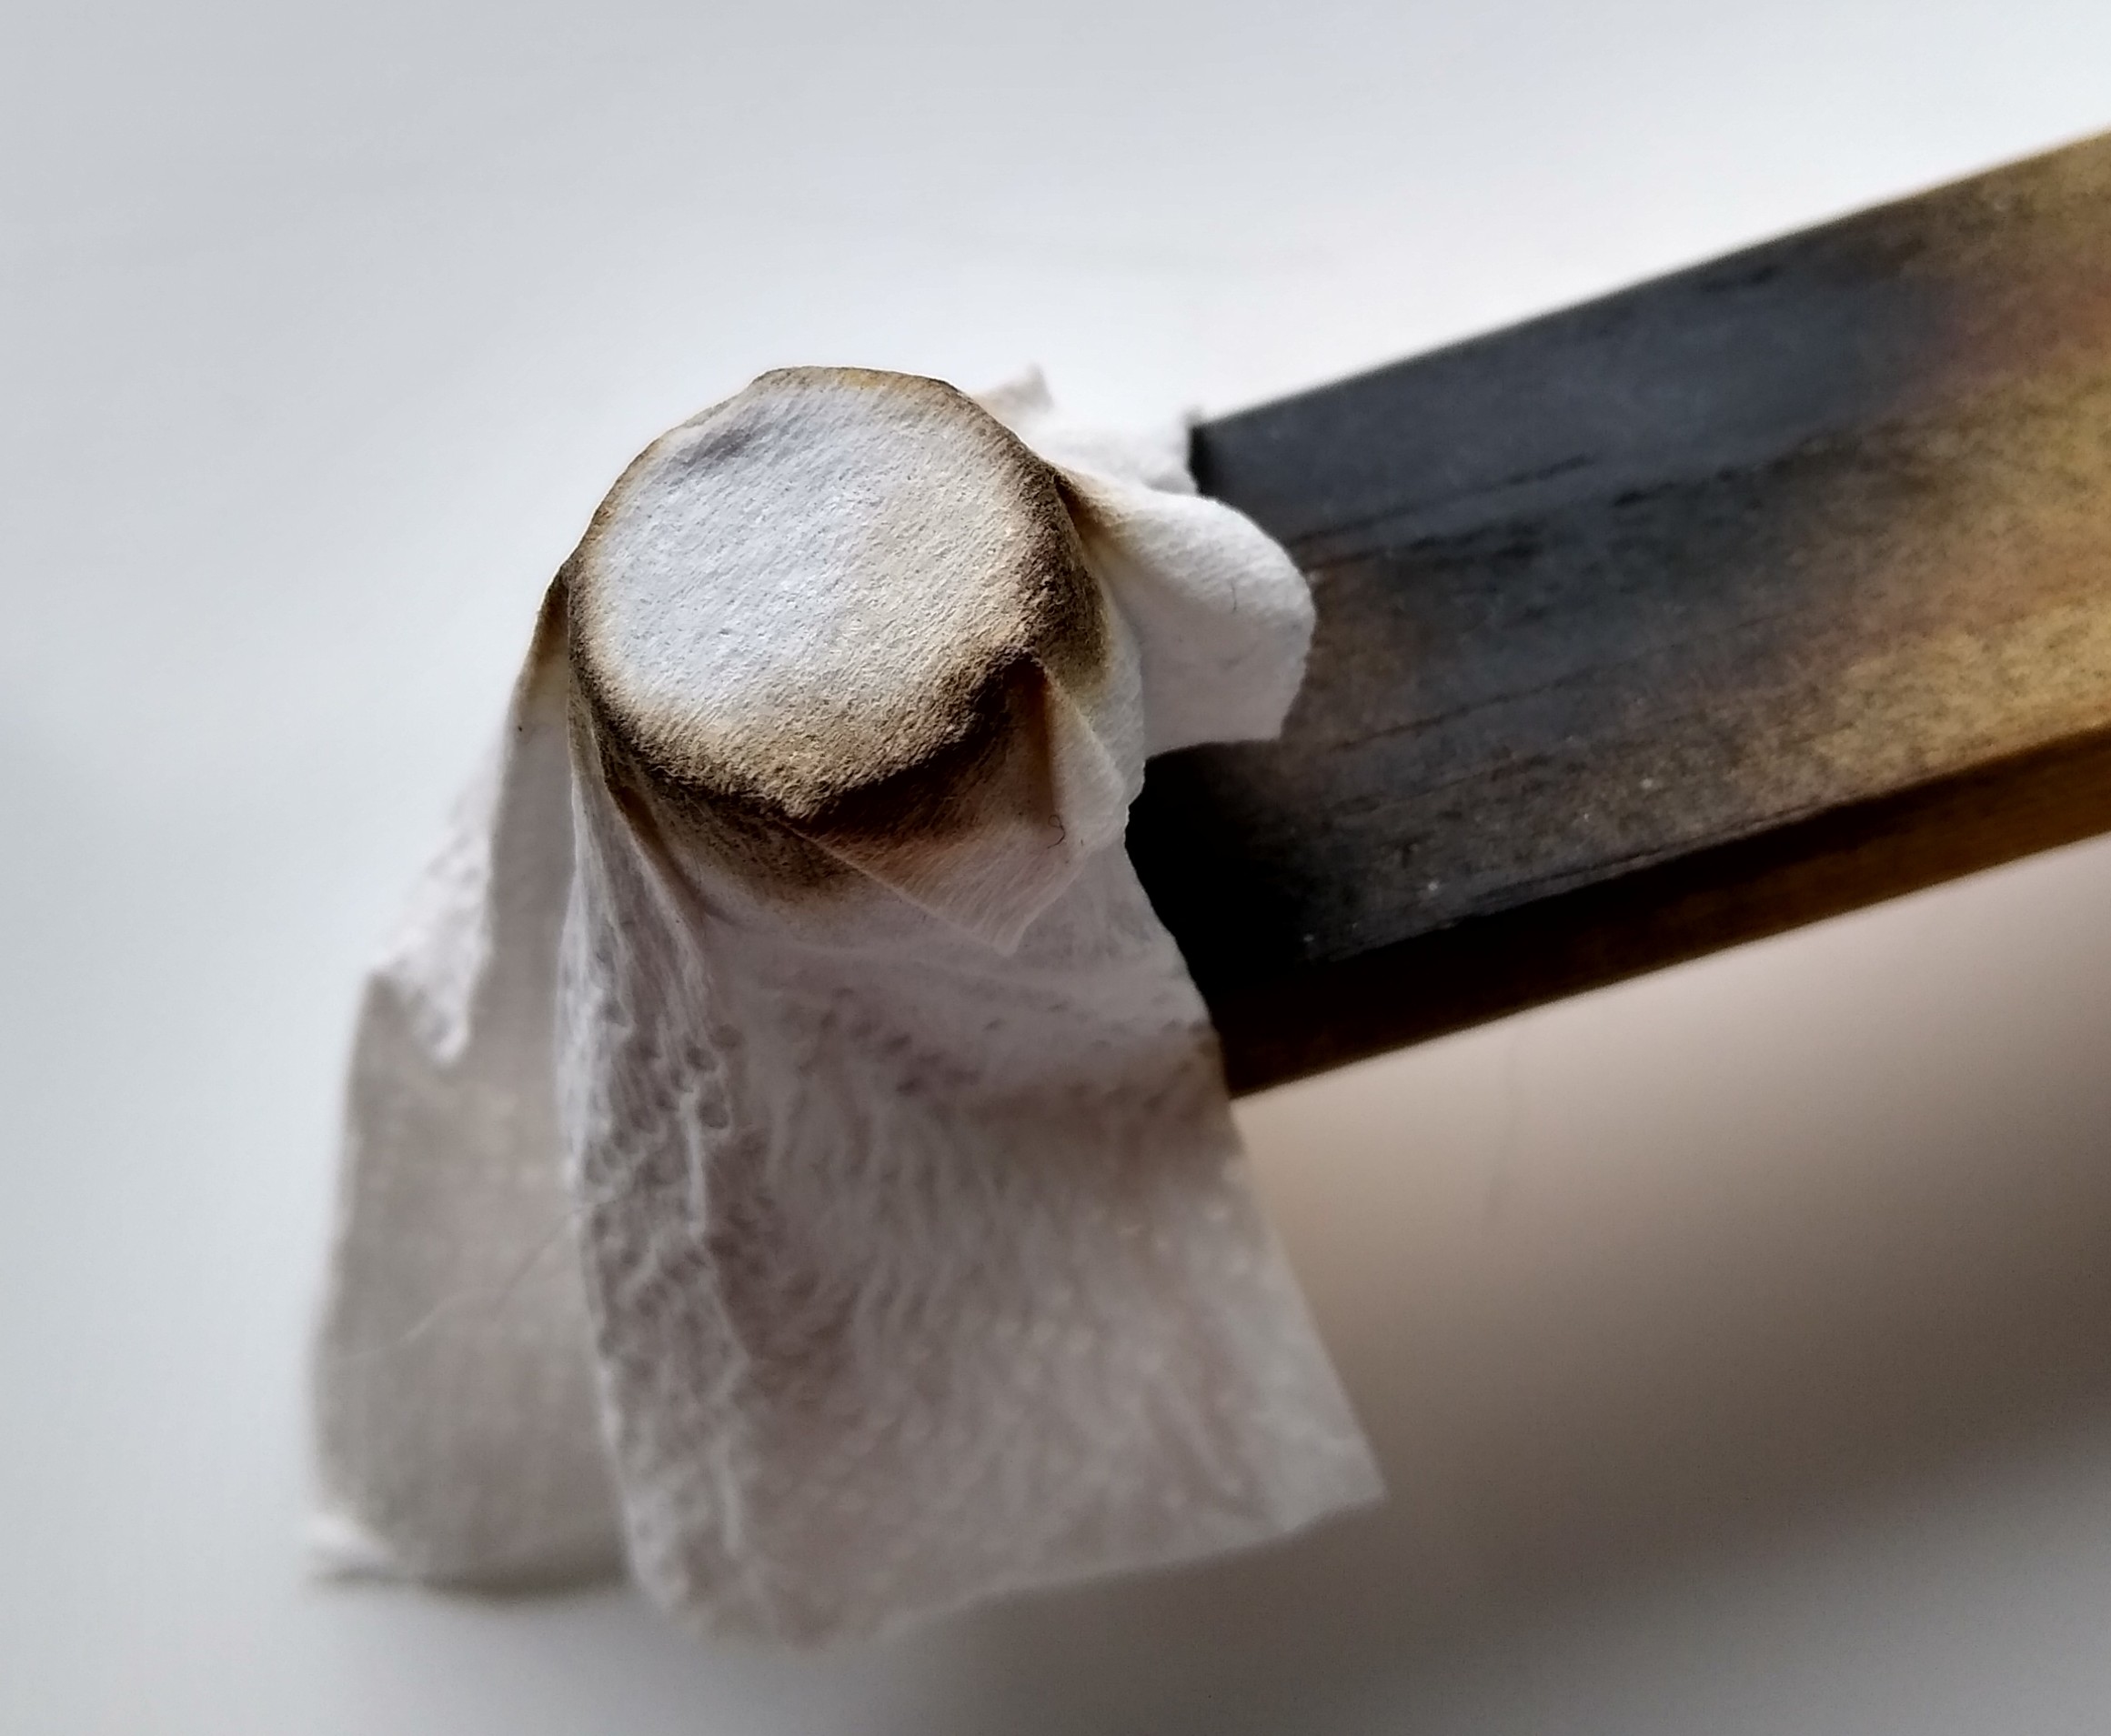
Just needs trimming and painting red.
Unexpectedly, the tissue did soak up some of the wash I applied to the exhaust.
1 Like
Last little touch ups and painted the anti-glare panel and radome. Think she’s about ready for some gloss and decals.

5 Likes
First lot on today.

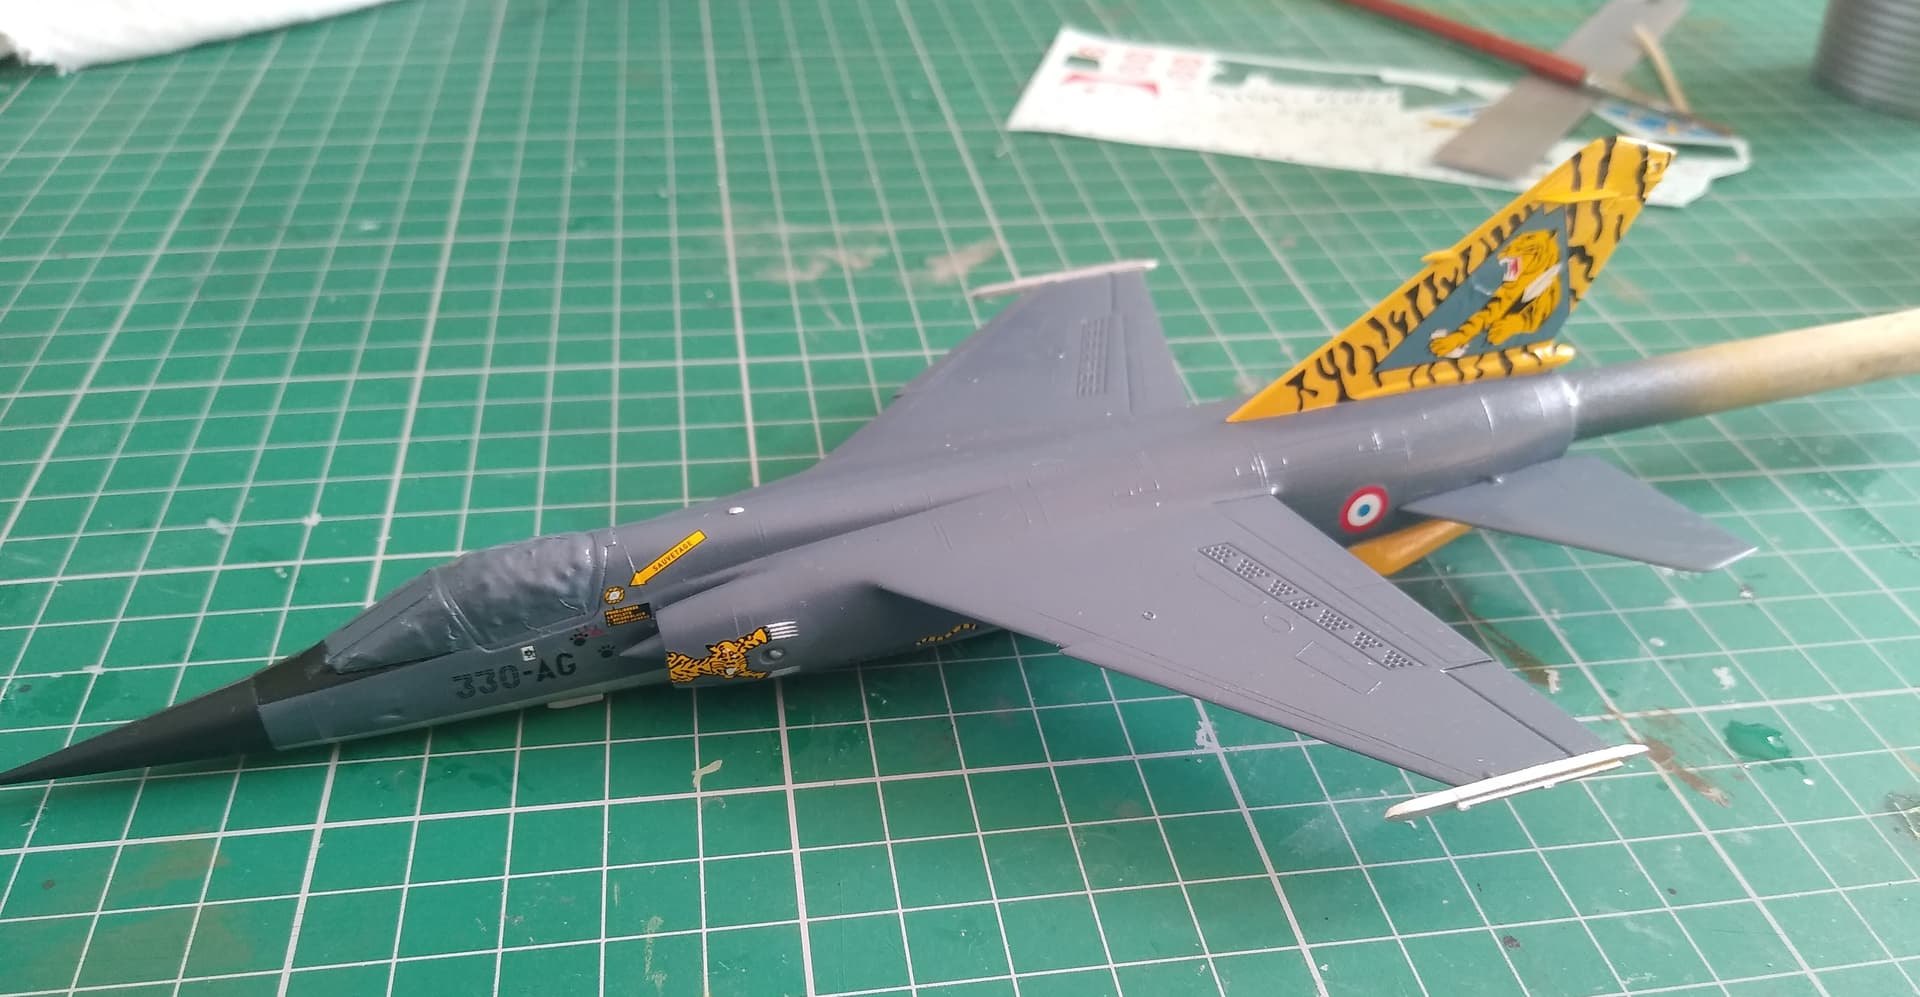
As the set are from the Revell kit, the stripes on the rudder didn’t quite match up with the leading edge. We’ll see how the other side goes on tomorrow, but might have to get out the fine brush and black paint.
10 Likes
Decals are fantastic looking- should make this sleek craft even more interesting.
1 Like
Thanks Karl. It is a good looking jet and I do like this scheme. Unfortunately I haven’t been able to find any photos of this aircraft. A few of the all over striped version painted for another Tigermeet, but not this.
I had planned to do more today, but ended up doing a lot more in the garden that expected. Might put in an hour when I get in from work tomorrow.
1 Like
The decals are starting to bring this beauty to life.
Paul
1 Like
Thanks Paul. Definitely going to be a very eye catching addition to the collection.
I called this complete for our club meeting yesterday’s OOB build but I still plan to add more light weathering and a small base.
/arc-anglerfish-arc2-prod-dmn.s3.amazonaws.com/public/CNCGN4AABMB66IGITC6TXLLK2U.jpg)
10 Likes
Lovely color Ryan- I’m sure it will look even better with a little weathering.
1 Like