So, I thought this discussion could interest many other people and decided to split it from my model thread.
Currently my ISU-152 has just one lamp on the front, it has been painted green and varnished like the rest of the tank as I had no clue on how to make it right and no intention of doing it back then.
I already googled some stuff around and found some ideas/solutions, however I wanted to know how do you guys approach the problem and if there’s any (hopefully cheap) trick to get some decent result.
I already read about aftermarket plastic covers, but the only ones I found have outrageous prices.
I use one of two options:
a. Purchase the correct sized MV Lens, (or similar) found in your local model railroad shop, or
b. Drill out the plastic lens, burnish foil into the opening, add a filament if you like, and then with the headlight lying on its rear (you may have to use modeling clay to keep it from moving) add drops of clear resin until it’s full. Surface tension will give it a slightly convex surface.
2 Likes
You can drill out the lens, paint the hole chrome silver, and fill the opening with 5 minute epoxy. Place an oversized drop into the hole and it will naturally round over and be slightly domed to represent the lens well.
I’ve gotten good results with a 1mm Molotow chrome pen.
You can also try something like this:
- Paint it. Silver with a couple of coats of clear gloss. With care and practice, this actually works quite well. Getting a sharp, clean demarcation line around the “glass” and the housing is the key to a convincing result.
Larger lenses can be painted with blues and bright white “catch lights,” which can be attractive (if somewhat stylized).
- Drill it out and add an aftermarket lens. MV lenses are the standard but hard to find now. They already have the silver parabolic reflector surface on the rear.
There are clear styrene “generic” headlight lenses available for model railroad applications (treat as per 3, below). These usually come in sets with several different diameters. Sometimes you have to convert the model RR size, often given in “inches of prototype diameter” for the scale - usually HO, they’re sold for in order to know what you’re actually buying.
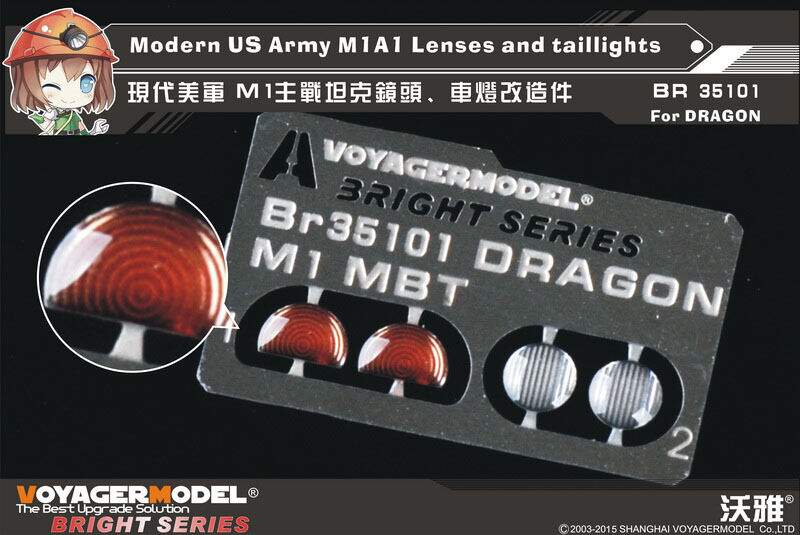
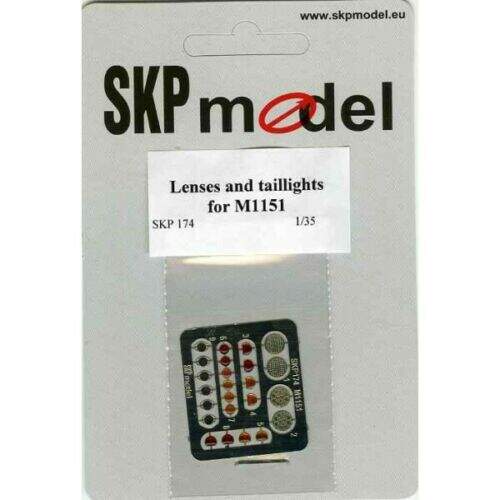
Several PE companies sell lenses and lights that are made from steel covered with colored or clear resins. Most of these are “kit specific,” but there are a few generic sets, and if you collect up enough leftover bits, you can sometimes get lucky and find a size-match in your PE stash. SKIP is one such PE lens maker. I think Eduard also has a few.
- Drill it out and add a scratch-built lens (punched disk from clear styrene coated with a drop of gloss clear). Paint the inside of the housing silver. An alternative is to cover the back side of the disk with foil vice painting the inside of the housing.
(This is my go-to if the lens diameter is a close match to one of my punch and die sets.)
An alternative is to make the lens out of a piece of clear sprue. Heat one end to make it melt and round over. Saw this domed bit off the rest of the sprue. This will look best if the backside is smoothed with fine grit sandpaper and the whole thing give and coat of clear gloss. Finishing the backside / inside the housing as above. The difficult is fining a piece of sprue that’s at least as large in diameter as the desired finished lens. (Smaller diameters can be simply be cut as slices of the face of the larger dome.)
-
Drill it out. Paint the inside silver and fill with a clear material (epoxy glue, acrylic gloss gel medium, clear gloss acrylic). The downside here is dealing with shrinkage. The epoxy will shrink the least, but it’s hard to mix without any small bubbles, and you need to shop around to find an actual CLEAR epoxy.
-
Most newer releases come with the headlight lenses as separate clear parts. Treat these as per 3), above.
2 Likes
Drilling out plastic lens and a drop of quality chrome silver can give this result with ease.
3 Likes
The Molotow Chrome pen with clear epoxy glue method is the easiest, cheapest, and fastest way! Also looks great!

There was a post on this forum a while back that showed some amazing painted headlights. They looked as realistic as MV lenses. Wish I had bookmarked it.
If you need the vertical lines in the lens, use the clear sprue method but press it (not too hard) into something like a row of staples to get the lines.
Also,if the rest of the tank is in the field and dirty make sure you dust up or dirty up the lens like the rest of the vehicle
I am quite clumsy, trying anything involving drilling and epoxy glue I fear is going to be a recipe for irreparable disaster.
I’d rather try some ‘safe’ methods.
I was thinking of using clear plastic from bottles, punching a hole in them and extracting something approaching a fitting circle, then gluing it on top of some aluminum foil and then slapping the whole thing with glue on top of the lamp.
I suppose the hardest part would be getting a fitting circle of plastic out of the bottle…
@Nightgaunt , I think this looks very promising. I want to order this UV tool and make my own headlight lenses at some point. See video for details.
Small Soldier Adventures in Miniature- Headlights
The site also has many excellent tips in various videos. The videos on working with photo-etch are excellent.
I was thinking of something easier like specific decals, but looks like that’s something very hard to find, especially the specific size I need.
I think I’ll start punching holes in bottles and see what happens.
Ok I fiddled very briefly with a hole puncher I got and I realized I can get almost perfectly sized circles made of plastic.
I think that with a firm hand and a good pair of scissors I can resize it to perfection.
I wish I could show it to you but while inspecting it it fell on the floor and I wasn’t able to recover it! 
Now, since I’d like to avoid drilling how could I paint something to put behind the lens to make it look like “hollow” so I can just slap the whole thing on the headlight?
I’d drill it out and use chrome silver paint as mentioned above on several occasions. The hollow body of the headlight provides the depth with the chrome silver paint. Adding a drop of epoxy as mentioned can make a nice lens.
That perfectly sized circle of clear plastic disc will look flat and somewhat unnatural even with the backside painted chrome silver. Even other painting techniques like a horizon etc in my experience, it will still look like it lacks depth.
Just my .02 of opinion
Best wishes with the clear plastic disc.
I was thinking that a “proper” paint-job behind the lens could create some sort of depth, but that’s really not my field
Drilling and glue really put me on edge, I’d rather avoid, at least for now.
I saw they sell very realistic decals for licensed car models (at outrageous prices) I thought I might make something approaching that. But that’s just an attempt.
I’ve tried the “drill and fill with 5 Minute Epoxy” method, only to have bright yellow lamps after a few months.
So I now work like this:
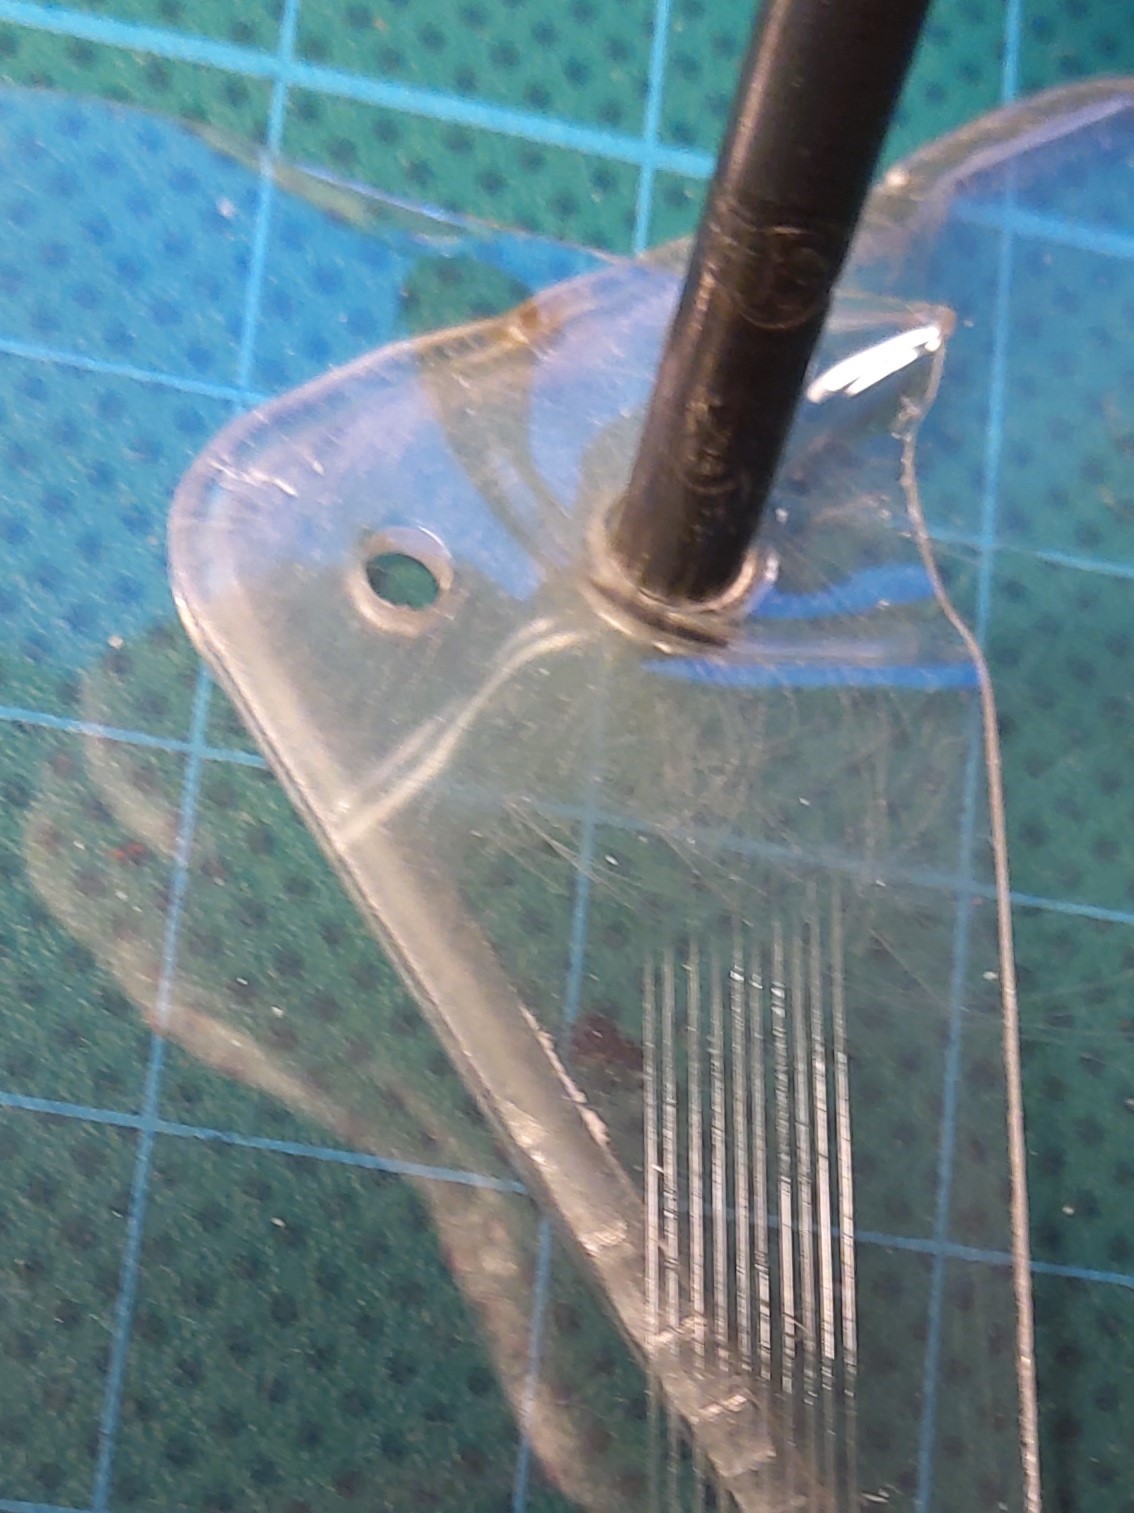
A lamp with a reflector diameter of, for example, 3mm has that drilled out, then I widen the opening of its lens ring to 3.5mm, best done with a cylindrical router, so there’s a step in the hole. Thinnest aluminum foil (think candy wrap) is molded around the back end of the 3mm drill and a “reflector” cut off with a razor blade and glued in with white glue. Into a piece of styrene or other material of ca. 2mm thickness, a 3.5mm hole is drilled and a piece of acetate (e.g. bubble pack) receives parallel scratches from a #11 blade. The acetate is then held over a candle flame until it becomes floppy, then gets laid upon the styrene plate and pushed into the hole with the back end of the 3mm drill.
The lens is cut out and sanded until it press fits into the lens ring, and ideally, the result will look like this:
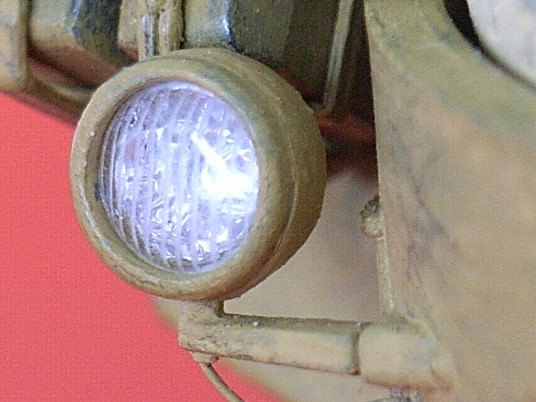
“Ideally”, because it may take more than one attempt at forming it: Anyone who has ever tried to stretch sprue has found out that one styrene isn’t like all others, and that goes for acetate, too. Some sorts become rigid as soon as they leave the heat, others take a considerably longer while to cool again, so you have to experiment until you find the material that works best.
Happy modeling, Peter
5 Likes
One of the tricks I use is to cut a small piece of clear sprue and heat the end to it softens and gently do a rolling press onto a flat metal file . That gives the look of early glass lens lights and the rolling action creates a gentle rounded look to the lens.
The other thing is to drill out a solid light as previously stated and foil or paint the inside and add clear finger nail polish with a tooth pick .
1 Like
That’s very beautiful, indistinguishable from a real headlight.
1 Like