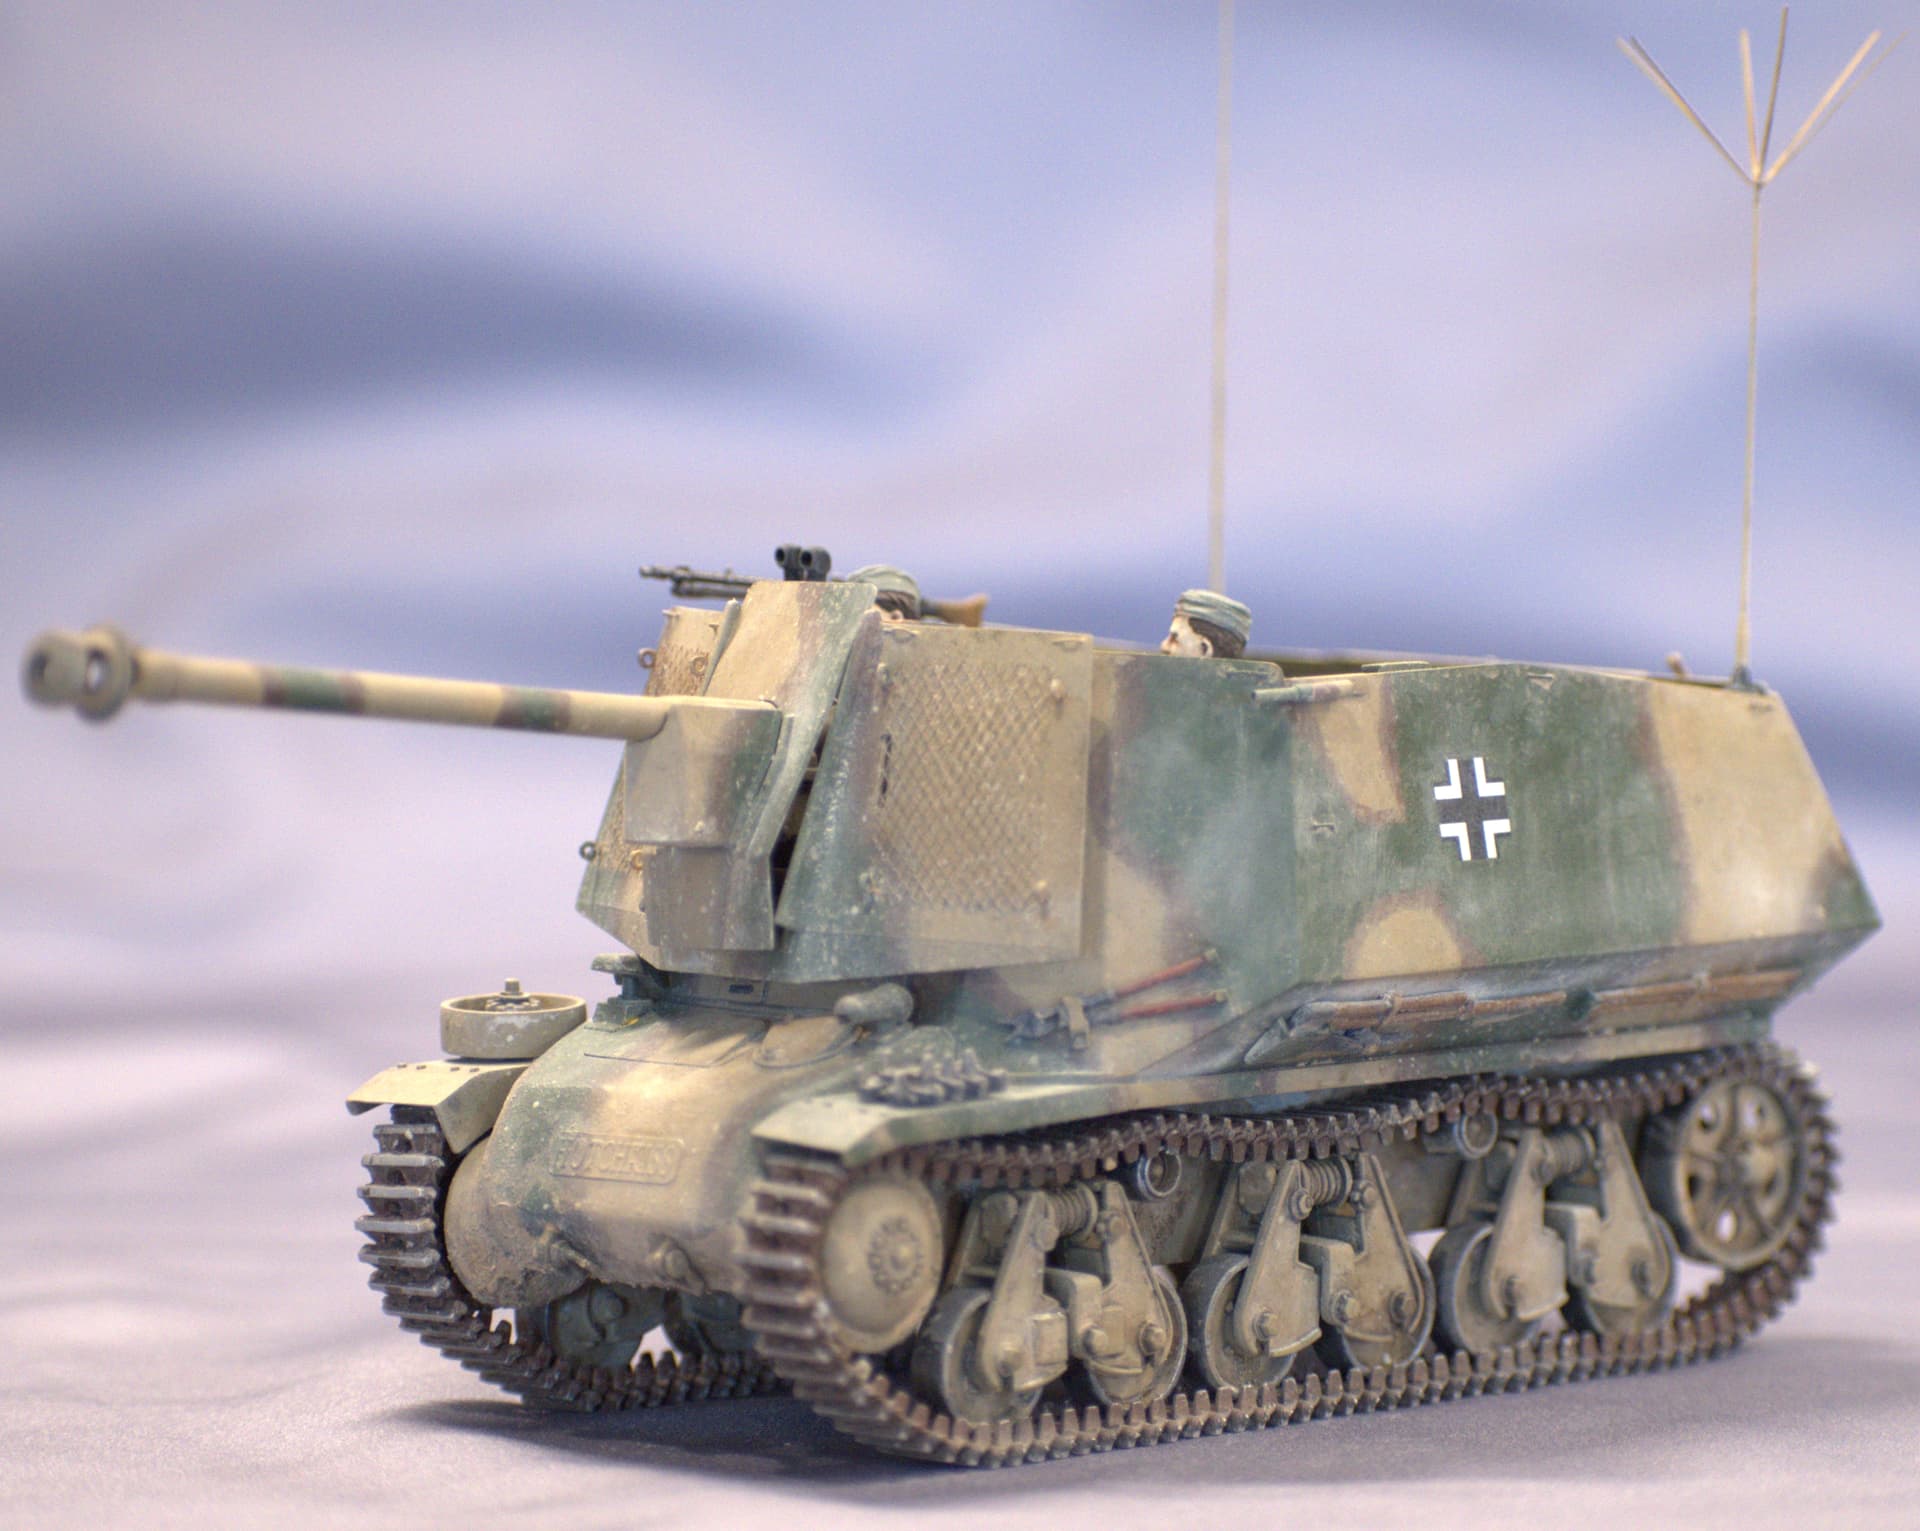
The Marder I was built on the hull of French Hotchkiss 39 tanks that were captured during the fall of France. Built in France, fought for France, captured in France by Germany, modified into a Panzerjager in Germany and destroyed or captured by the allies in France.
I will be building the 20 year old Trumpeter kit of the Marder I with the addition of the Blast Models upgrade kit, Friulmodel tracks, parts from a Lion Roar photoetch set and most likely a metal barrel.
On first glance the kit looks like a challenge, thick parts rife with ejector pin holes to be filled and soft detail. My first time doing a separate conversation like this so it should be fun.
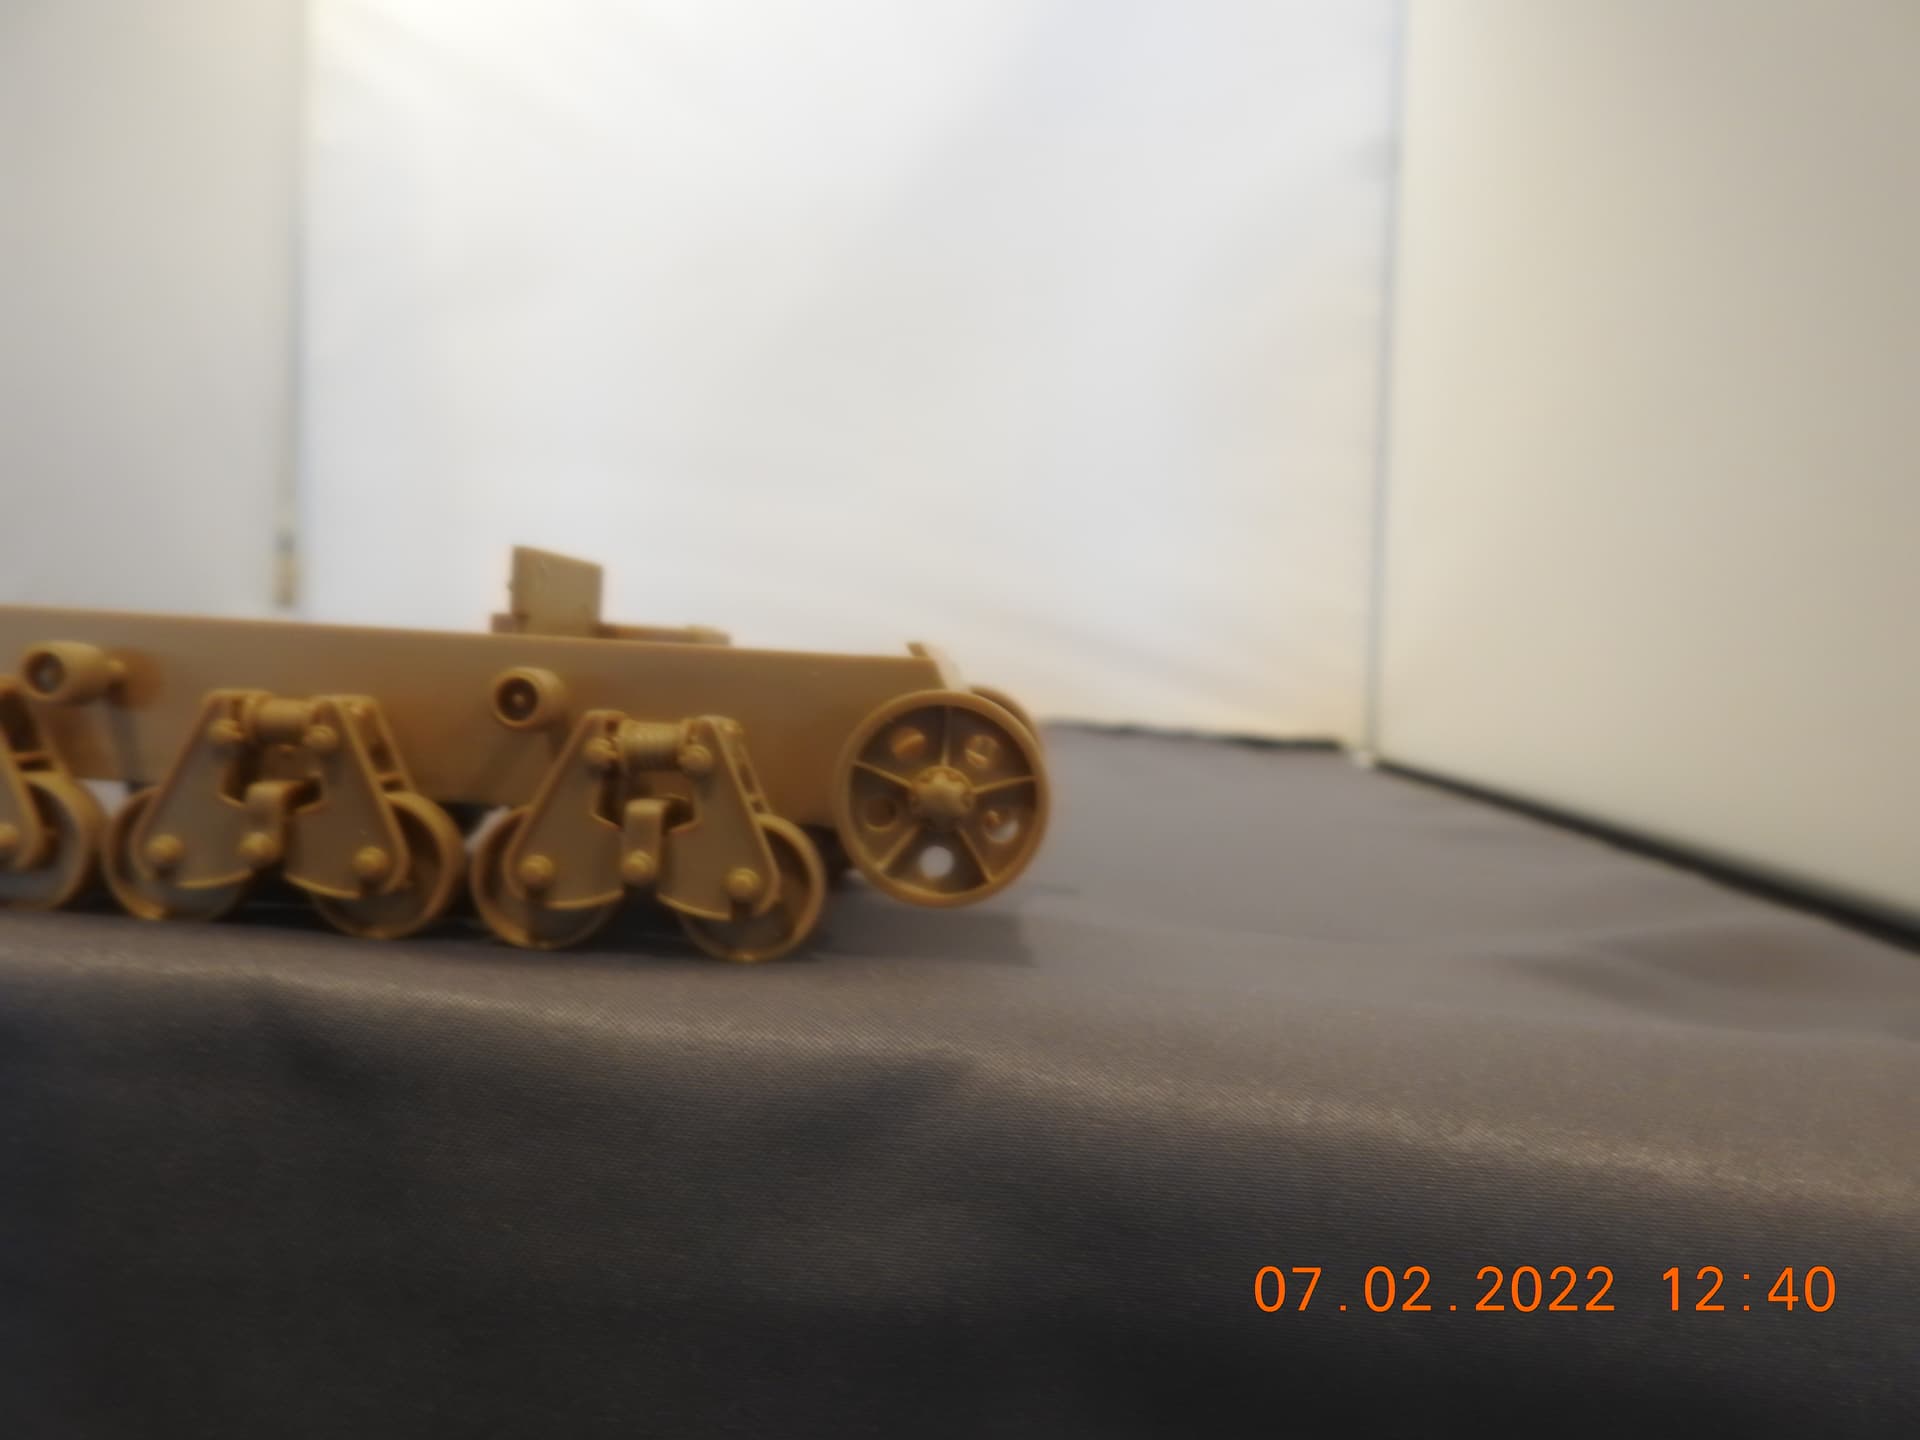
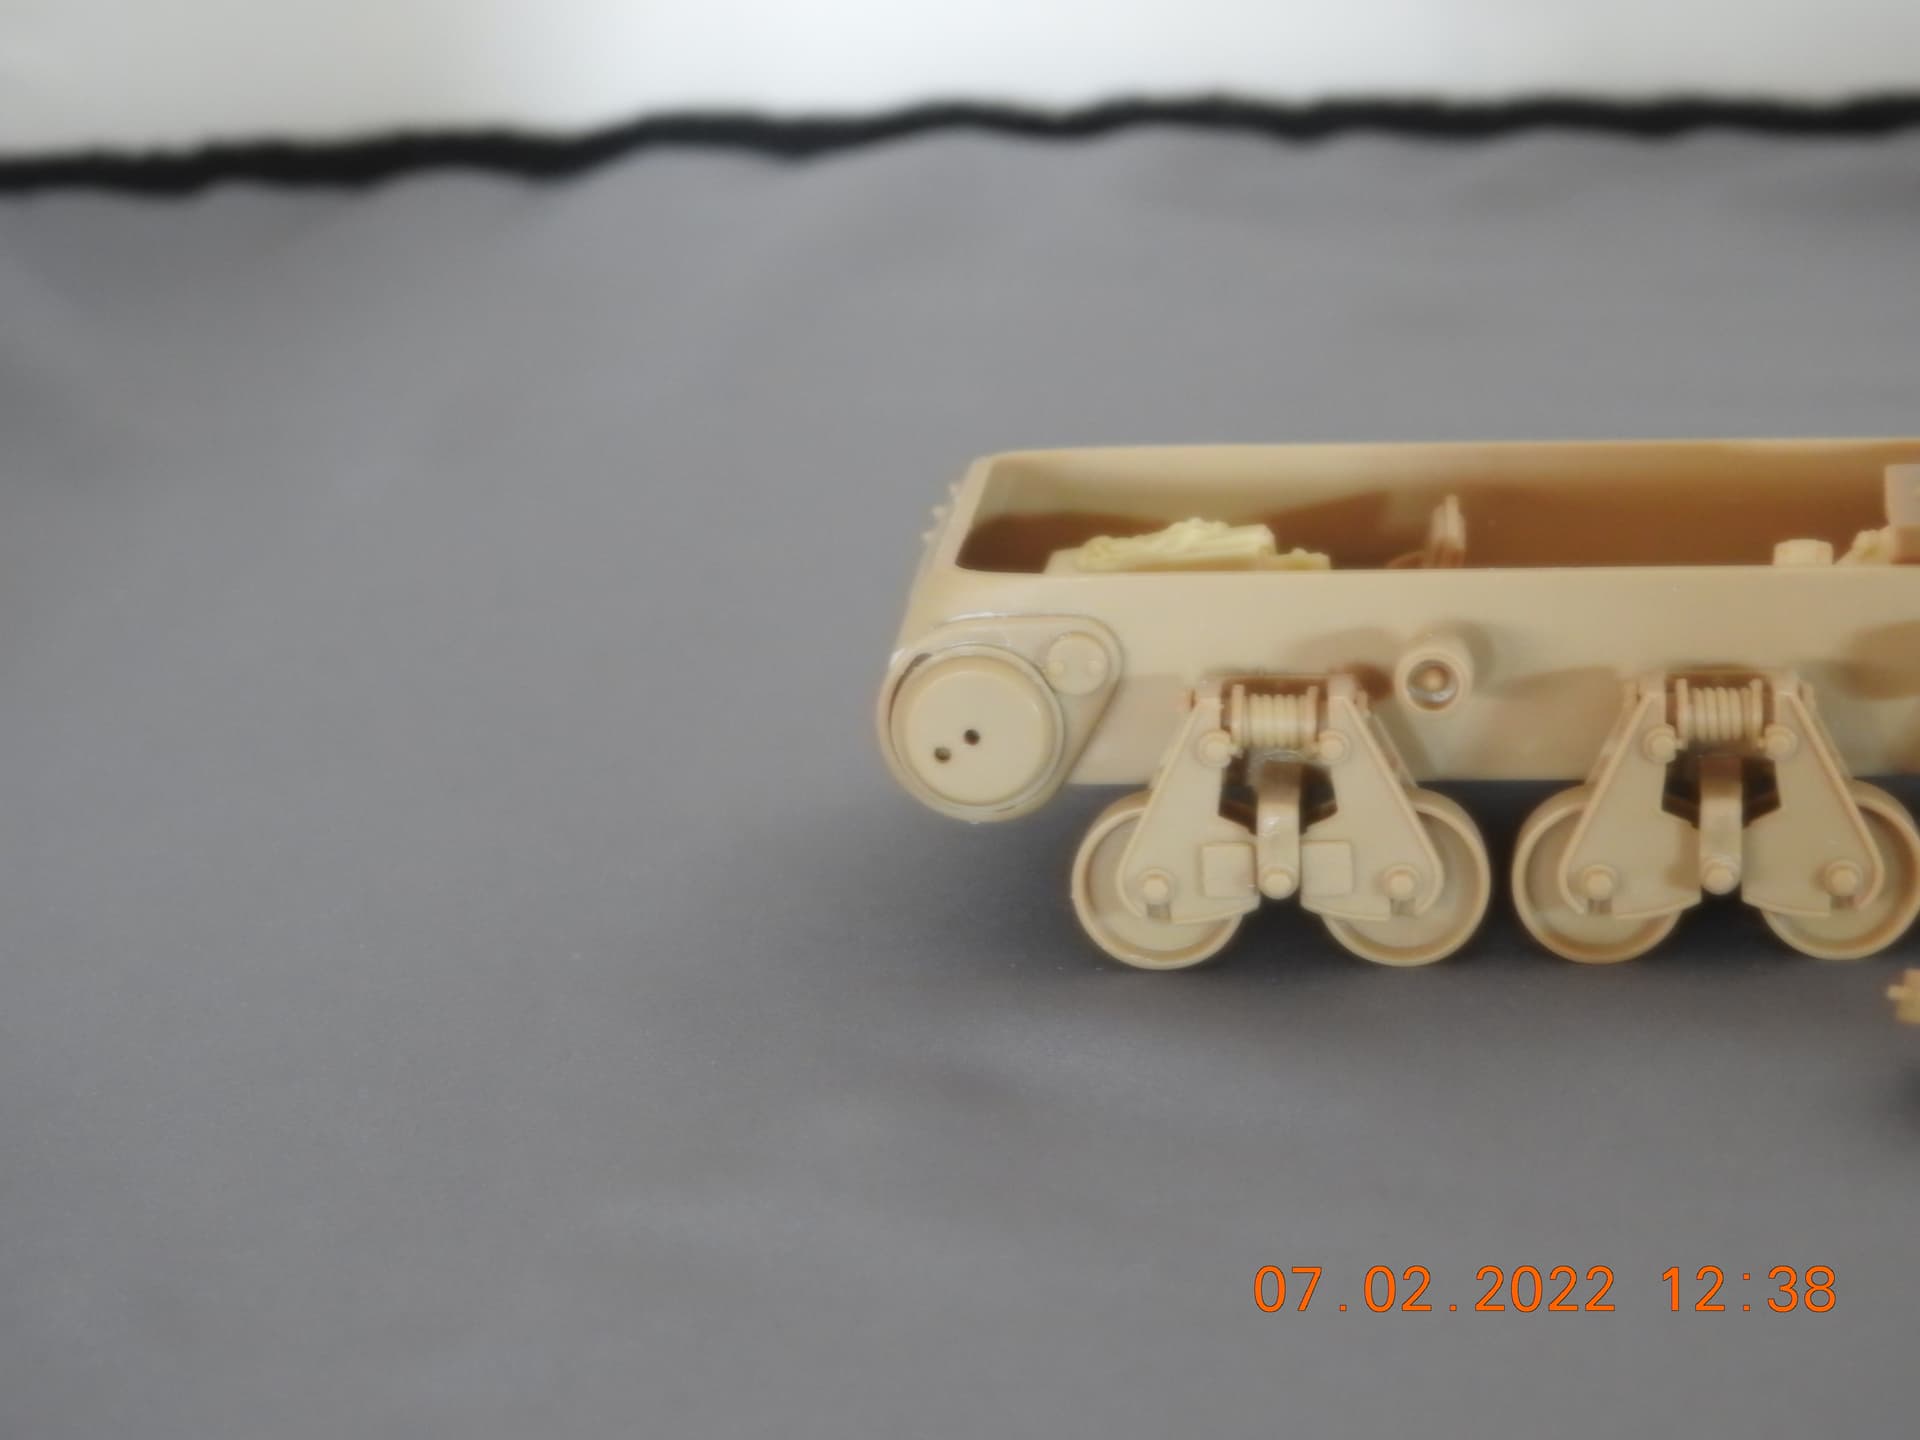
The rear idler wheels need to have the five holes drilled out as they are solid. The position of the holes are marked on the back of the wheels so I drilled them out and used a reamer to enlarge them to the proper size.
The Blast Model set recommends moving the mounting point of the front sprockets back as they are too far forward in the kit. The measurements in the Trojca book Panzerjager Vol 2 back this up. The mounting point Trumpeter gives you is the forward hole in the following picture and the recommended location is in the center.
The suspension units are quite fragile and are glued in place. Normally I leave the sprocket or Idler loose to allow painting and weathering of the tracks seperatly but both need to be glued solid on this kit.
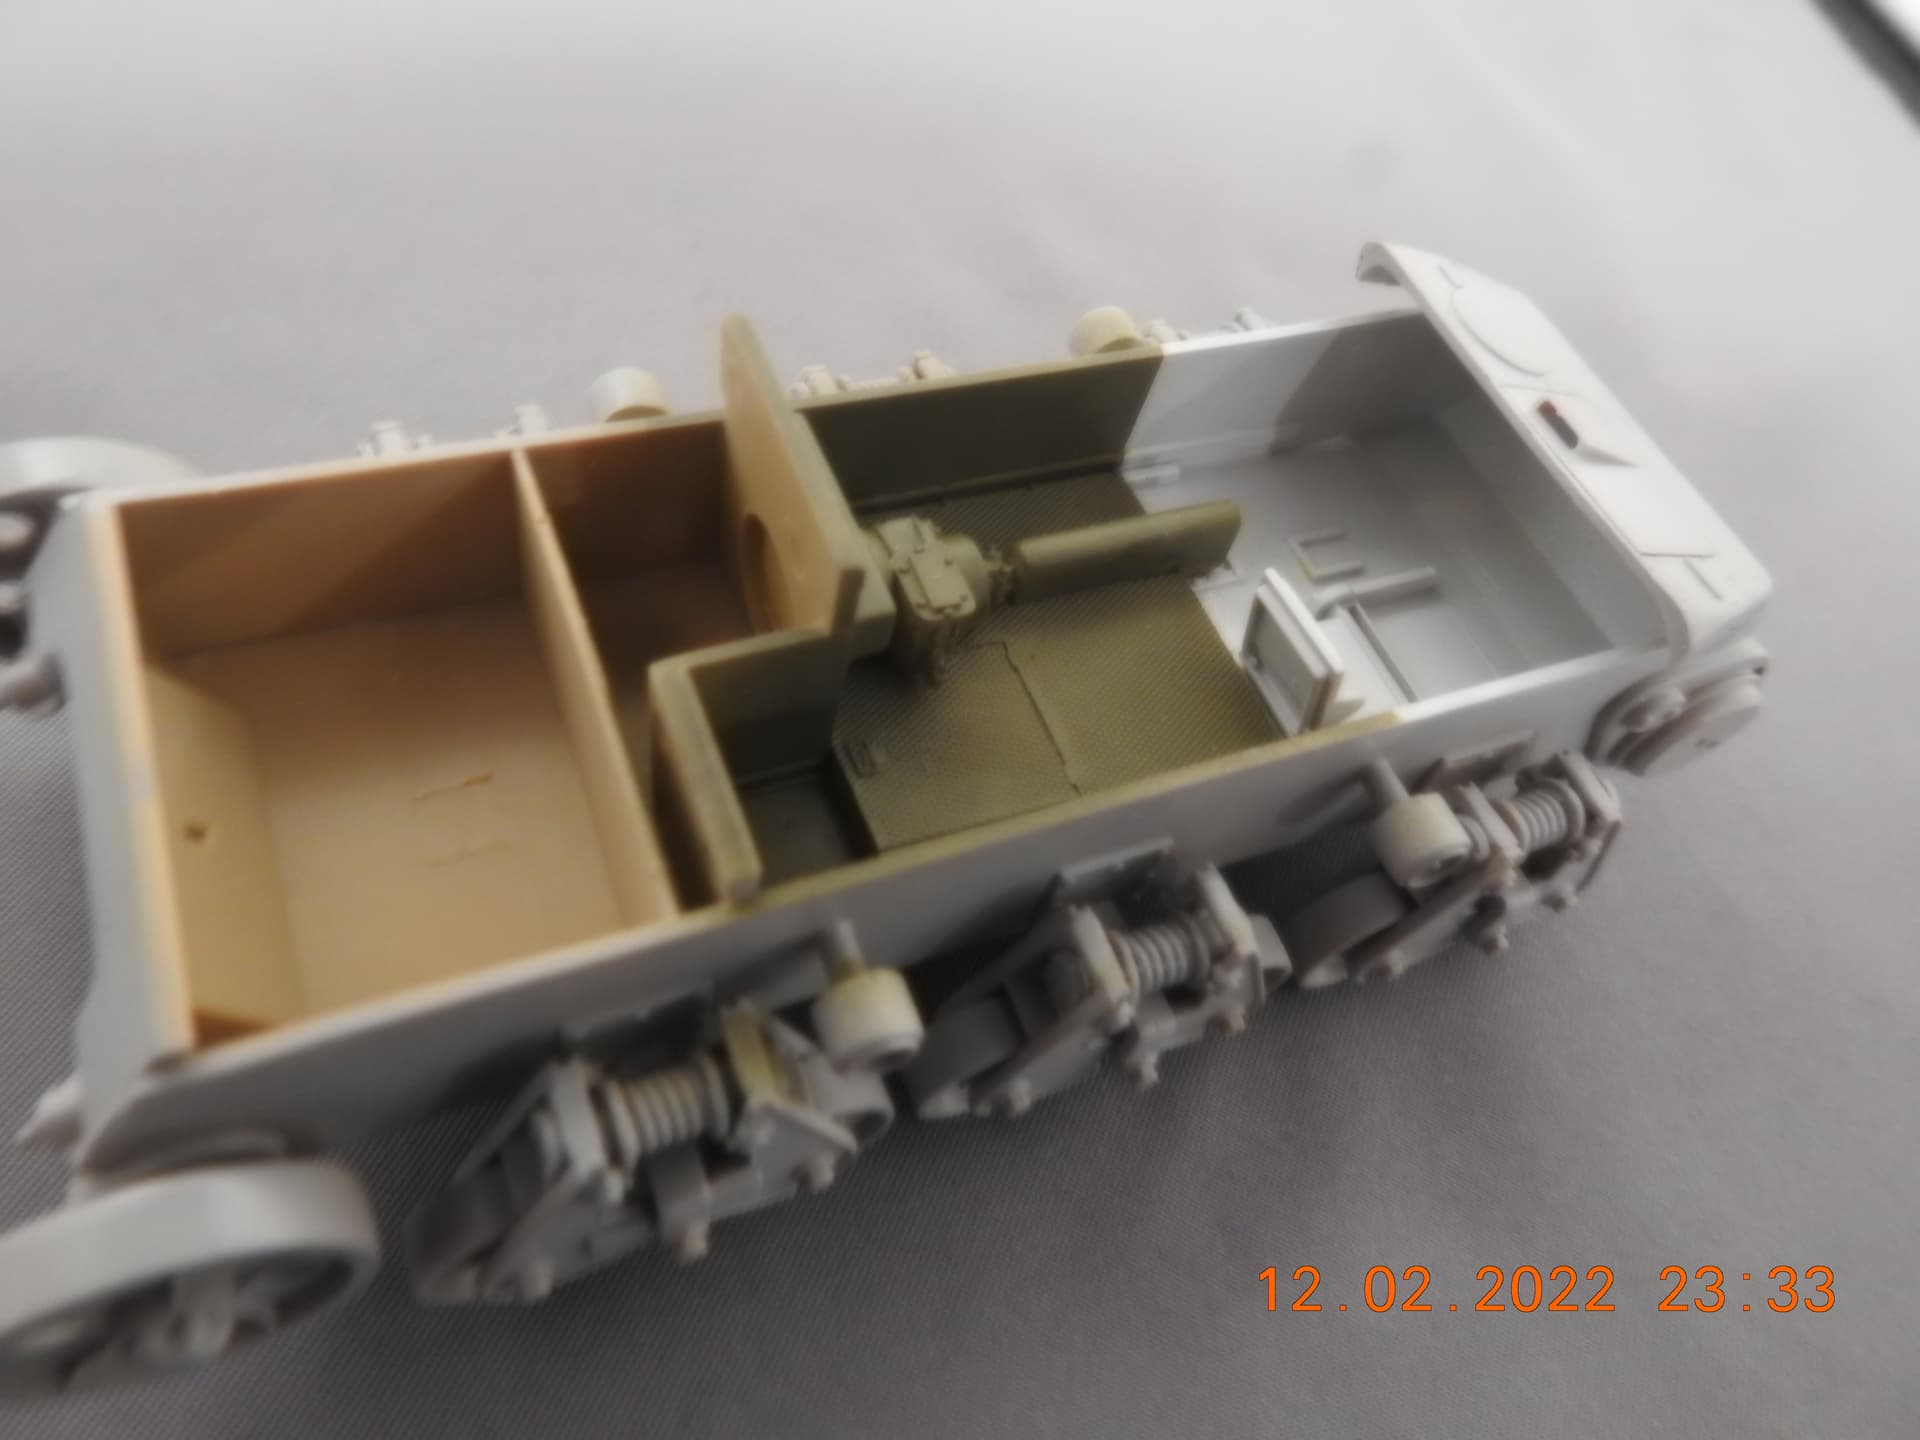
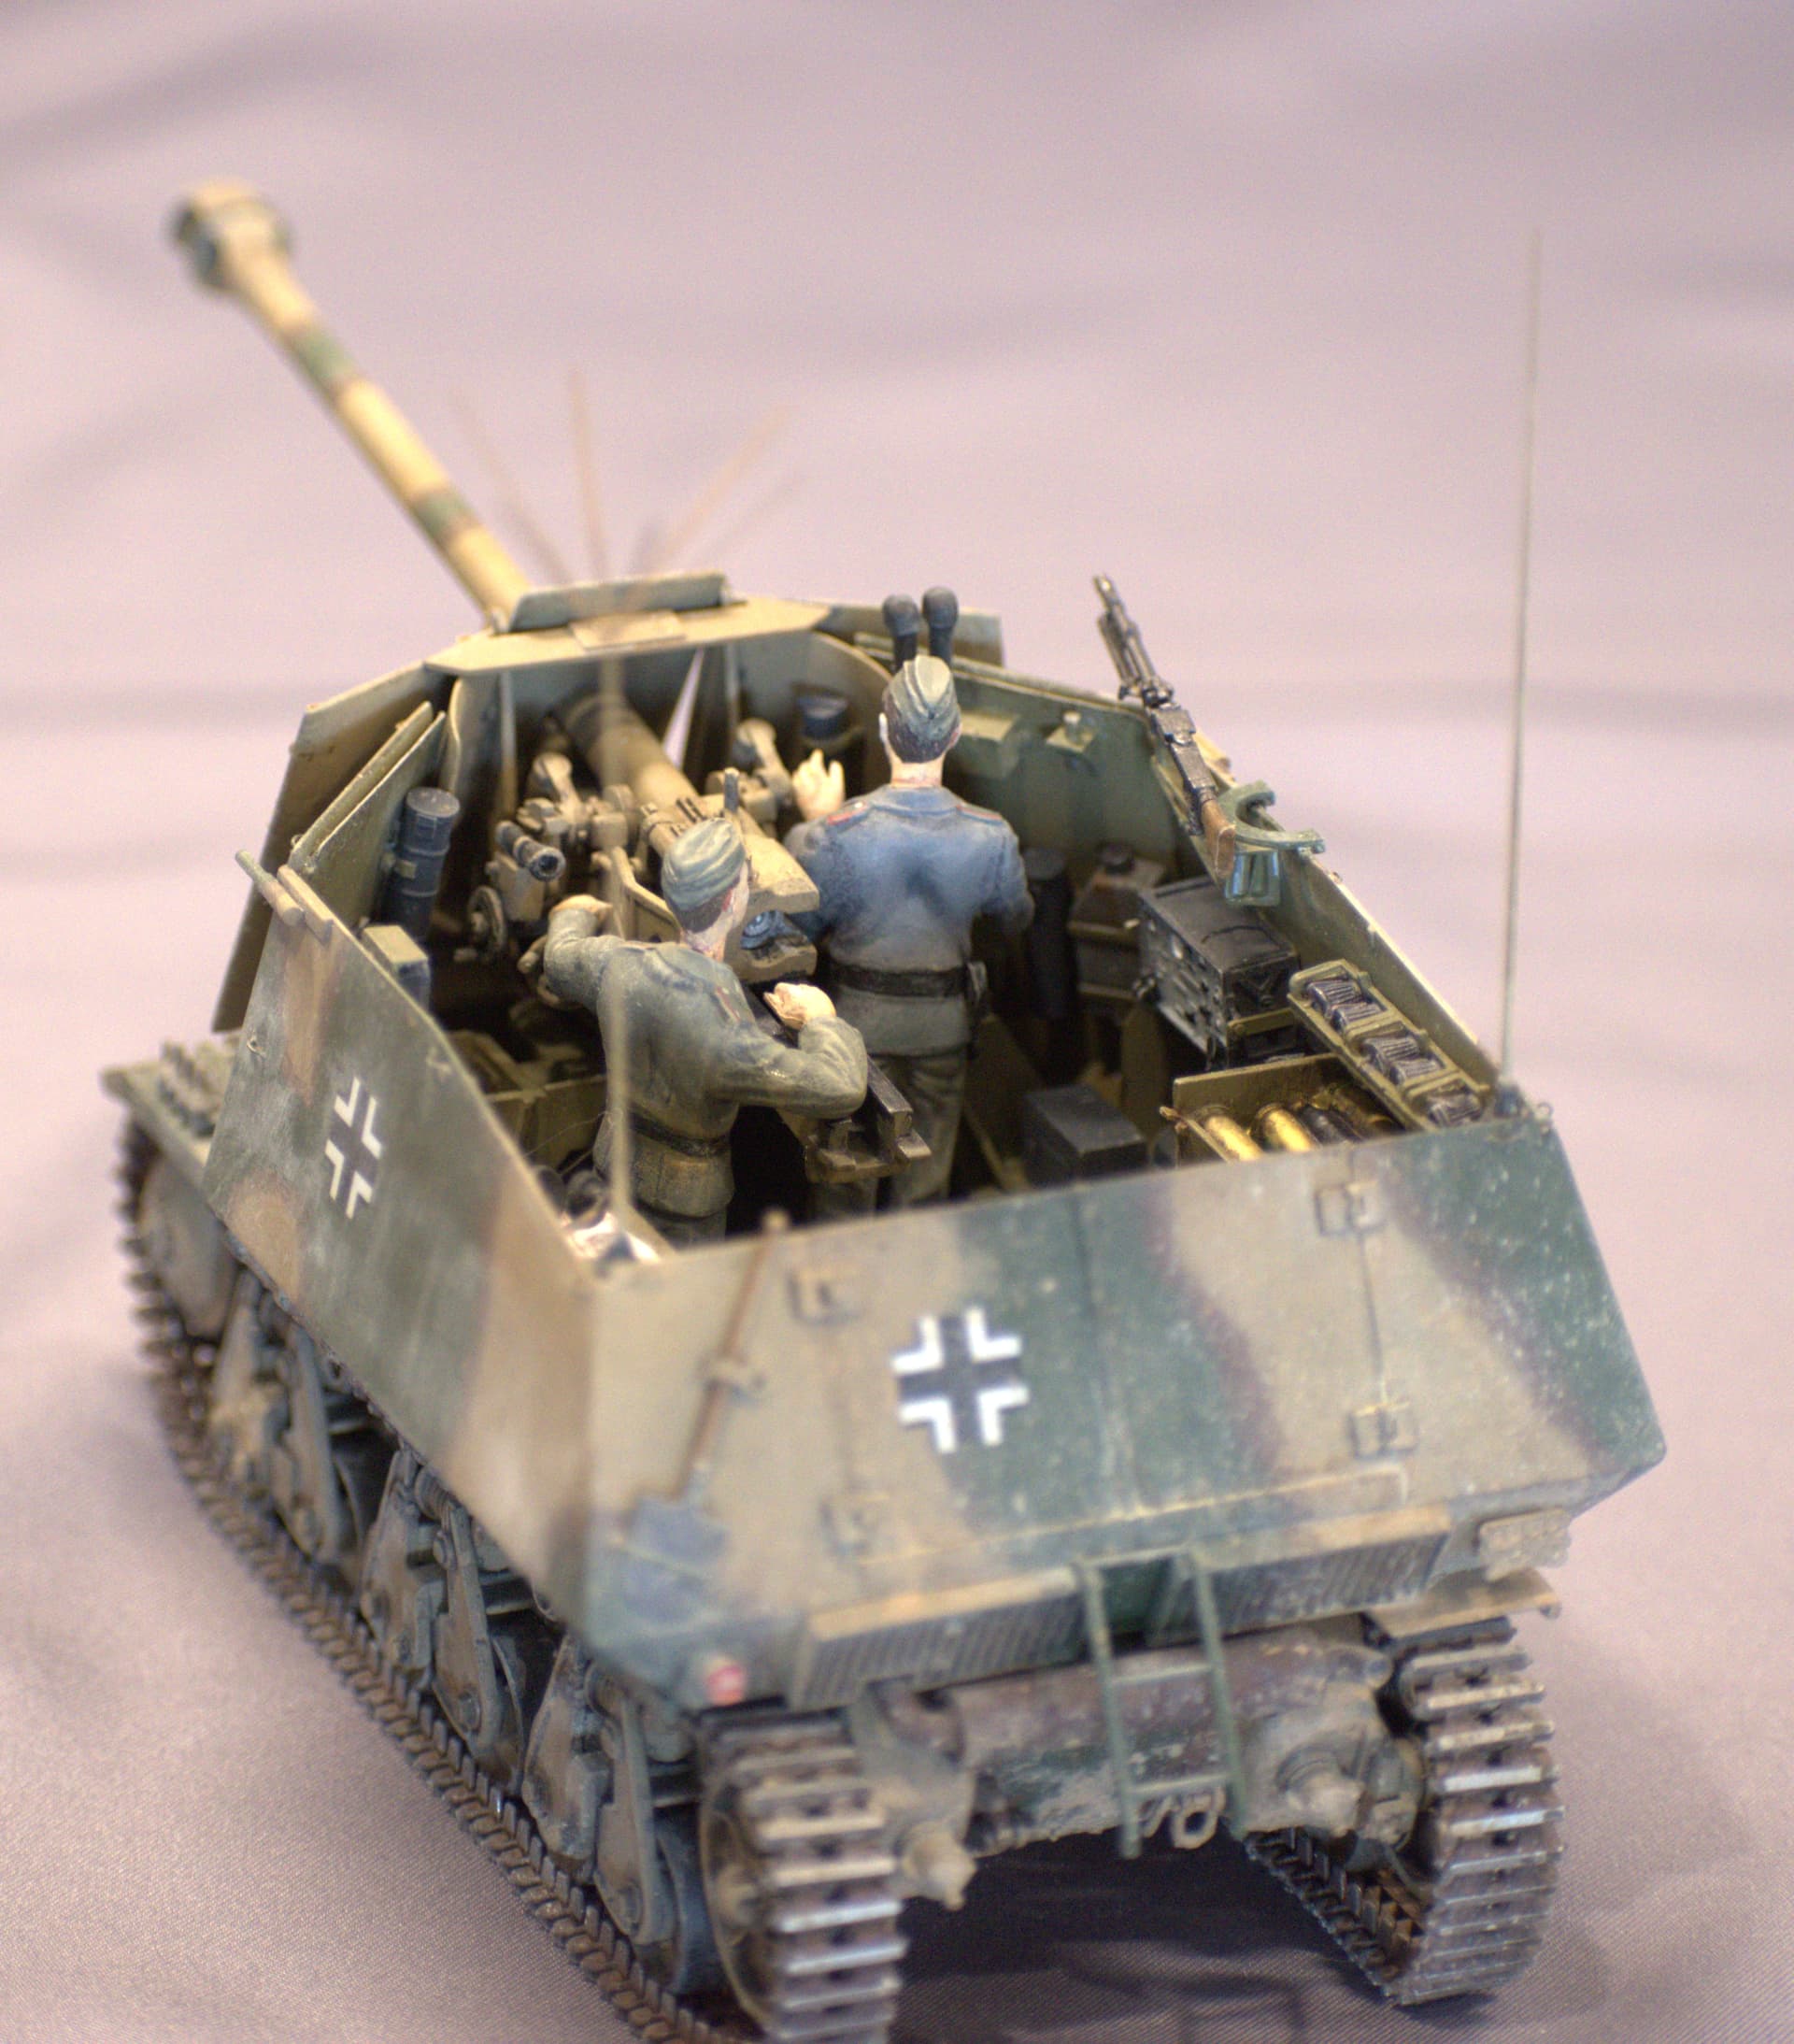
I have no idea what colour the interior of French tanks were painted and the interior of the fighting compartment with the exemption of the Pak 40 is painted a dark colour in the two pictures I could find.
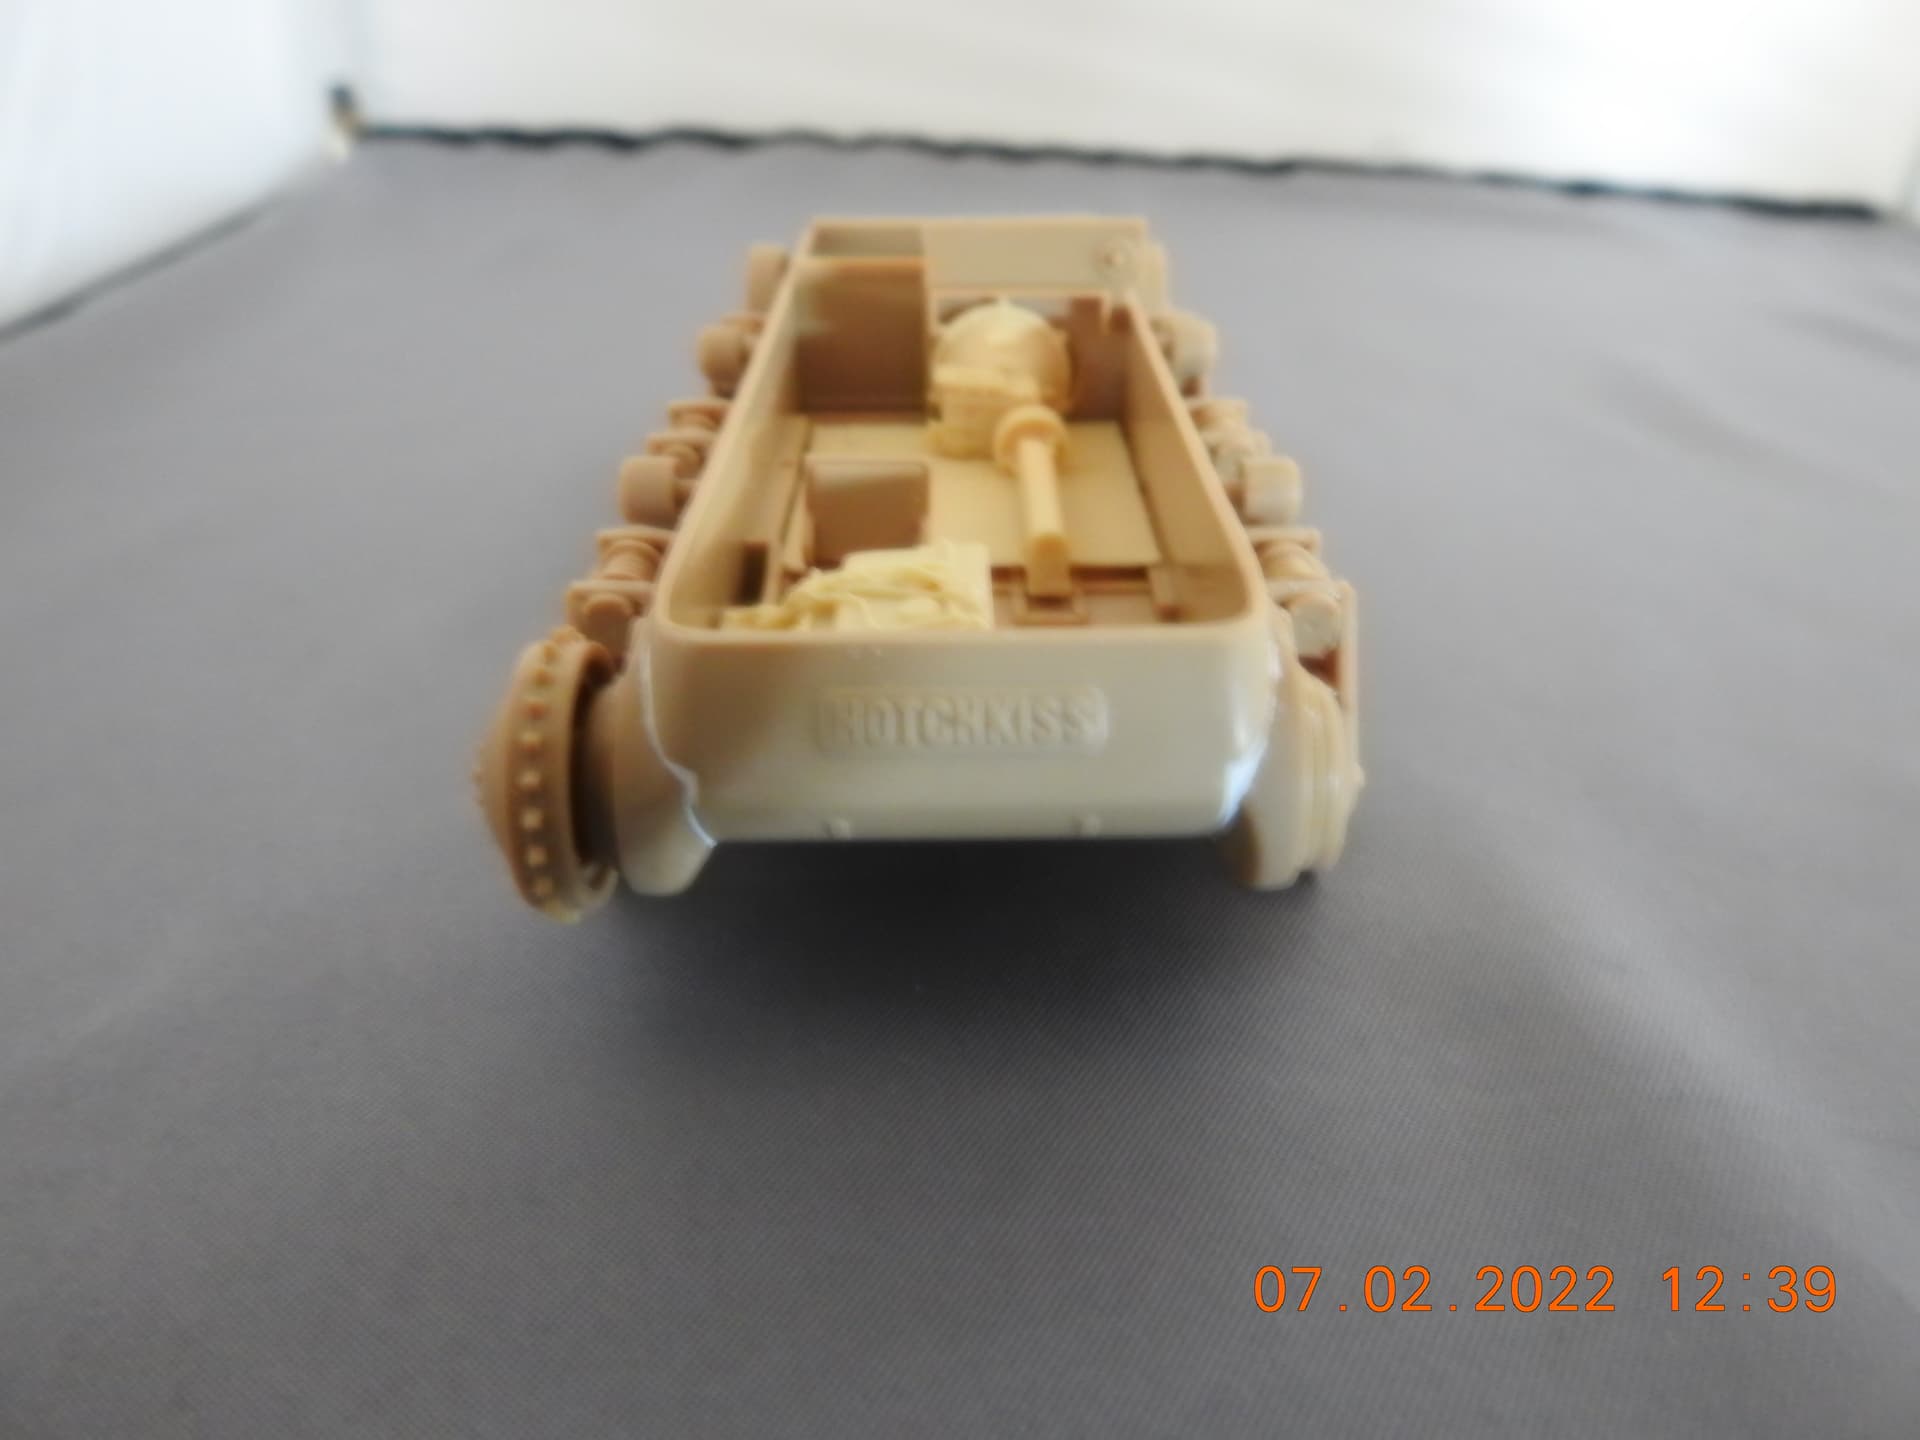
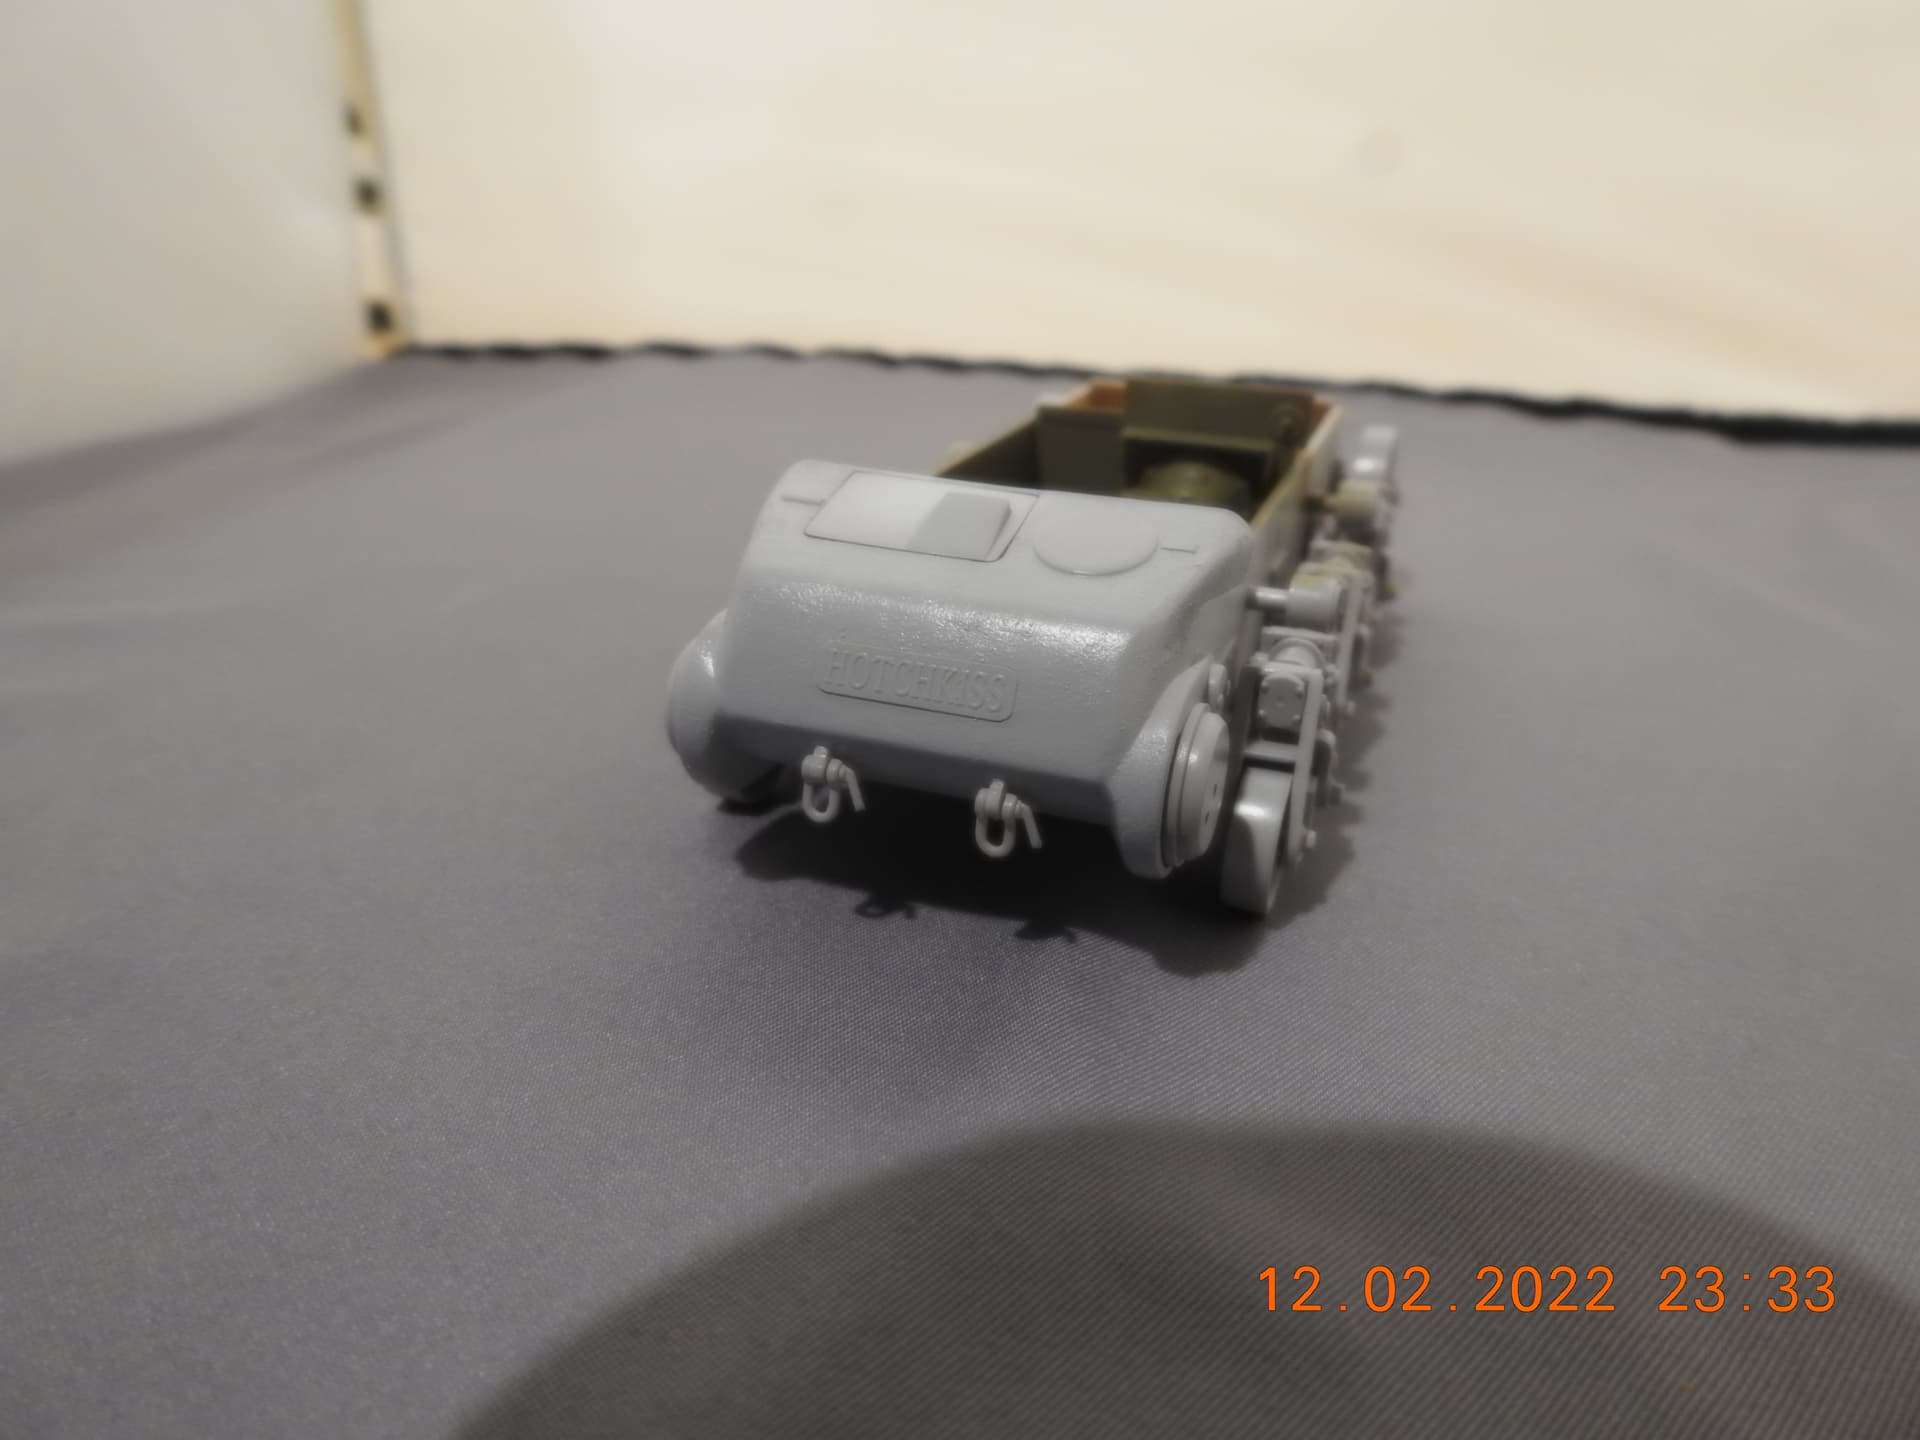
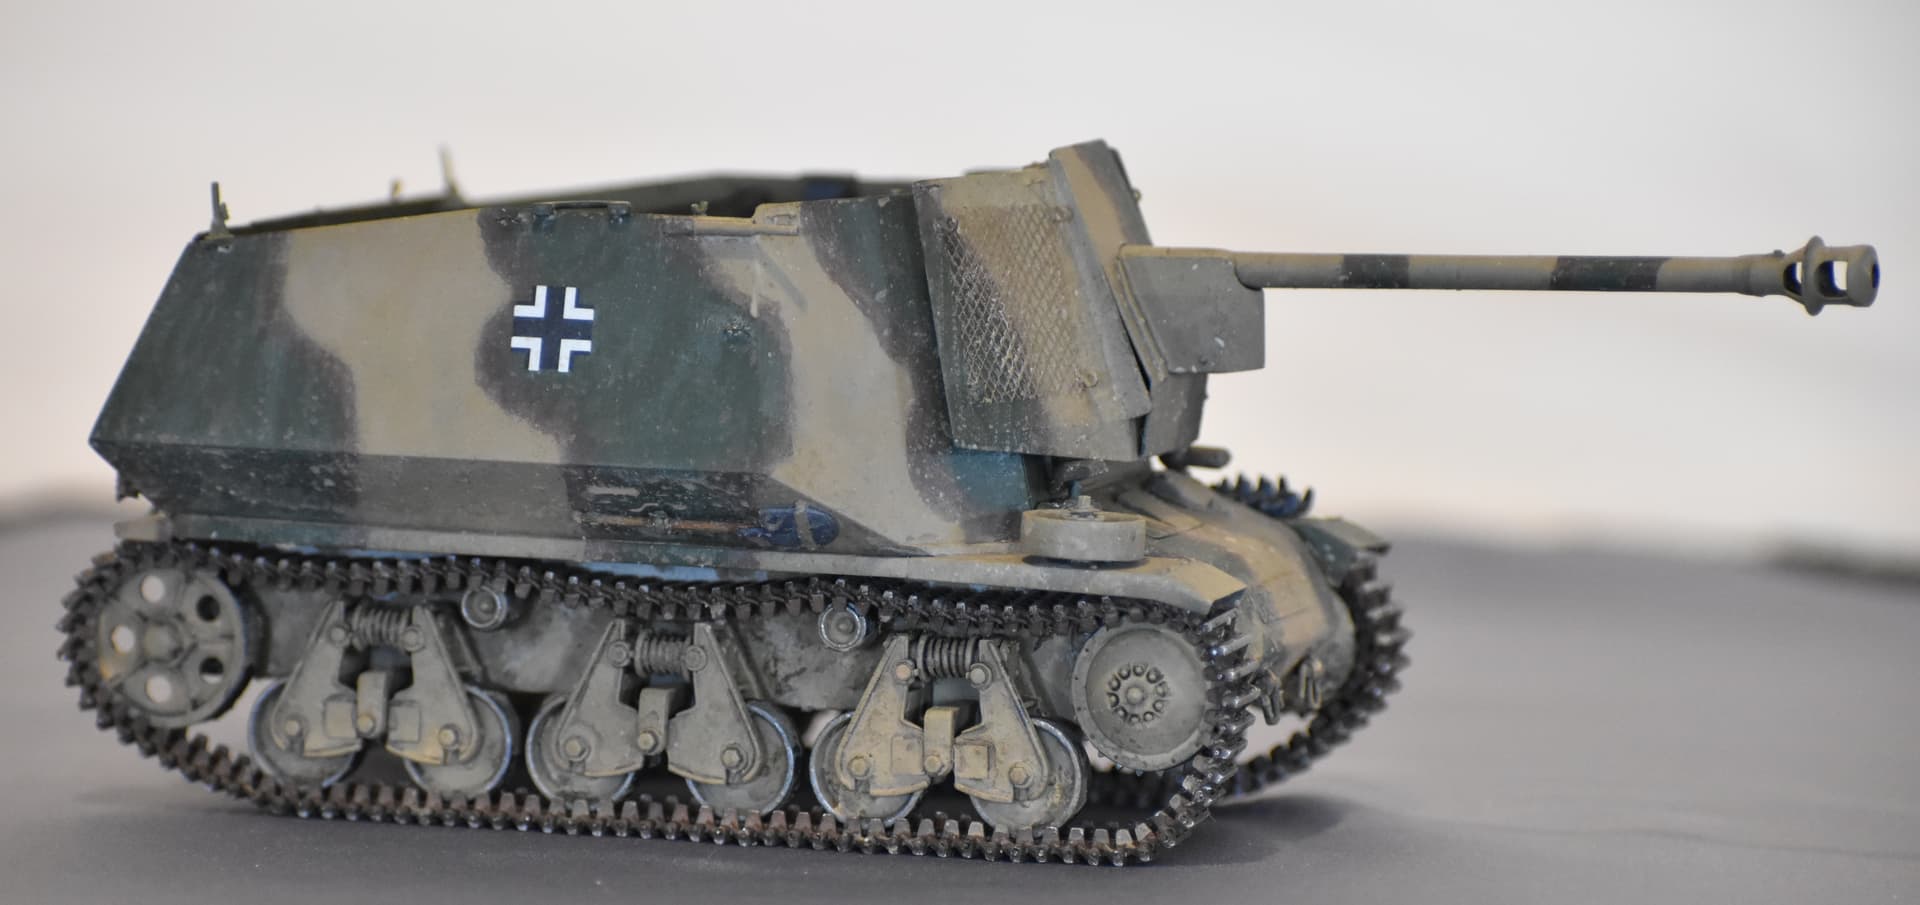
That Hotchkiss marking on the front hull must be a scale2 inches thick and will have to go.
I’d paint the interior of the fighting compartment the same as the outside. If the illustrations I have seen are correct, French vehicles were white inside originally.
Thanks for the info Peter. I am thinking of painting the interior of the hull white and just weathering it quite heavily. The fighting compartment is dark and since it was upgraded in France could be green but would more likely to be grey in my opinion but the green would be different! The Lion Roar set provides a photo etch Hotchkiss that to my eyes looks more to scale.
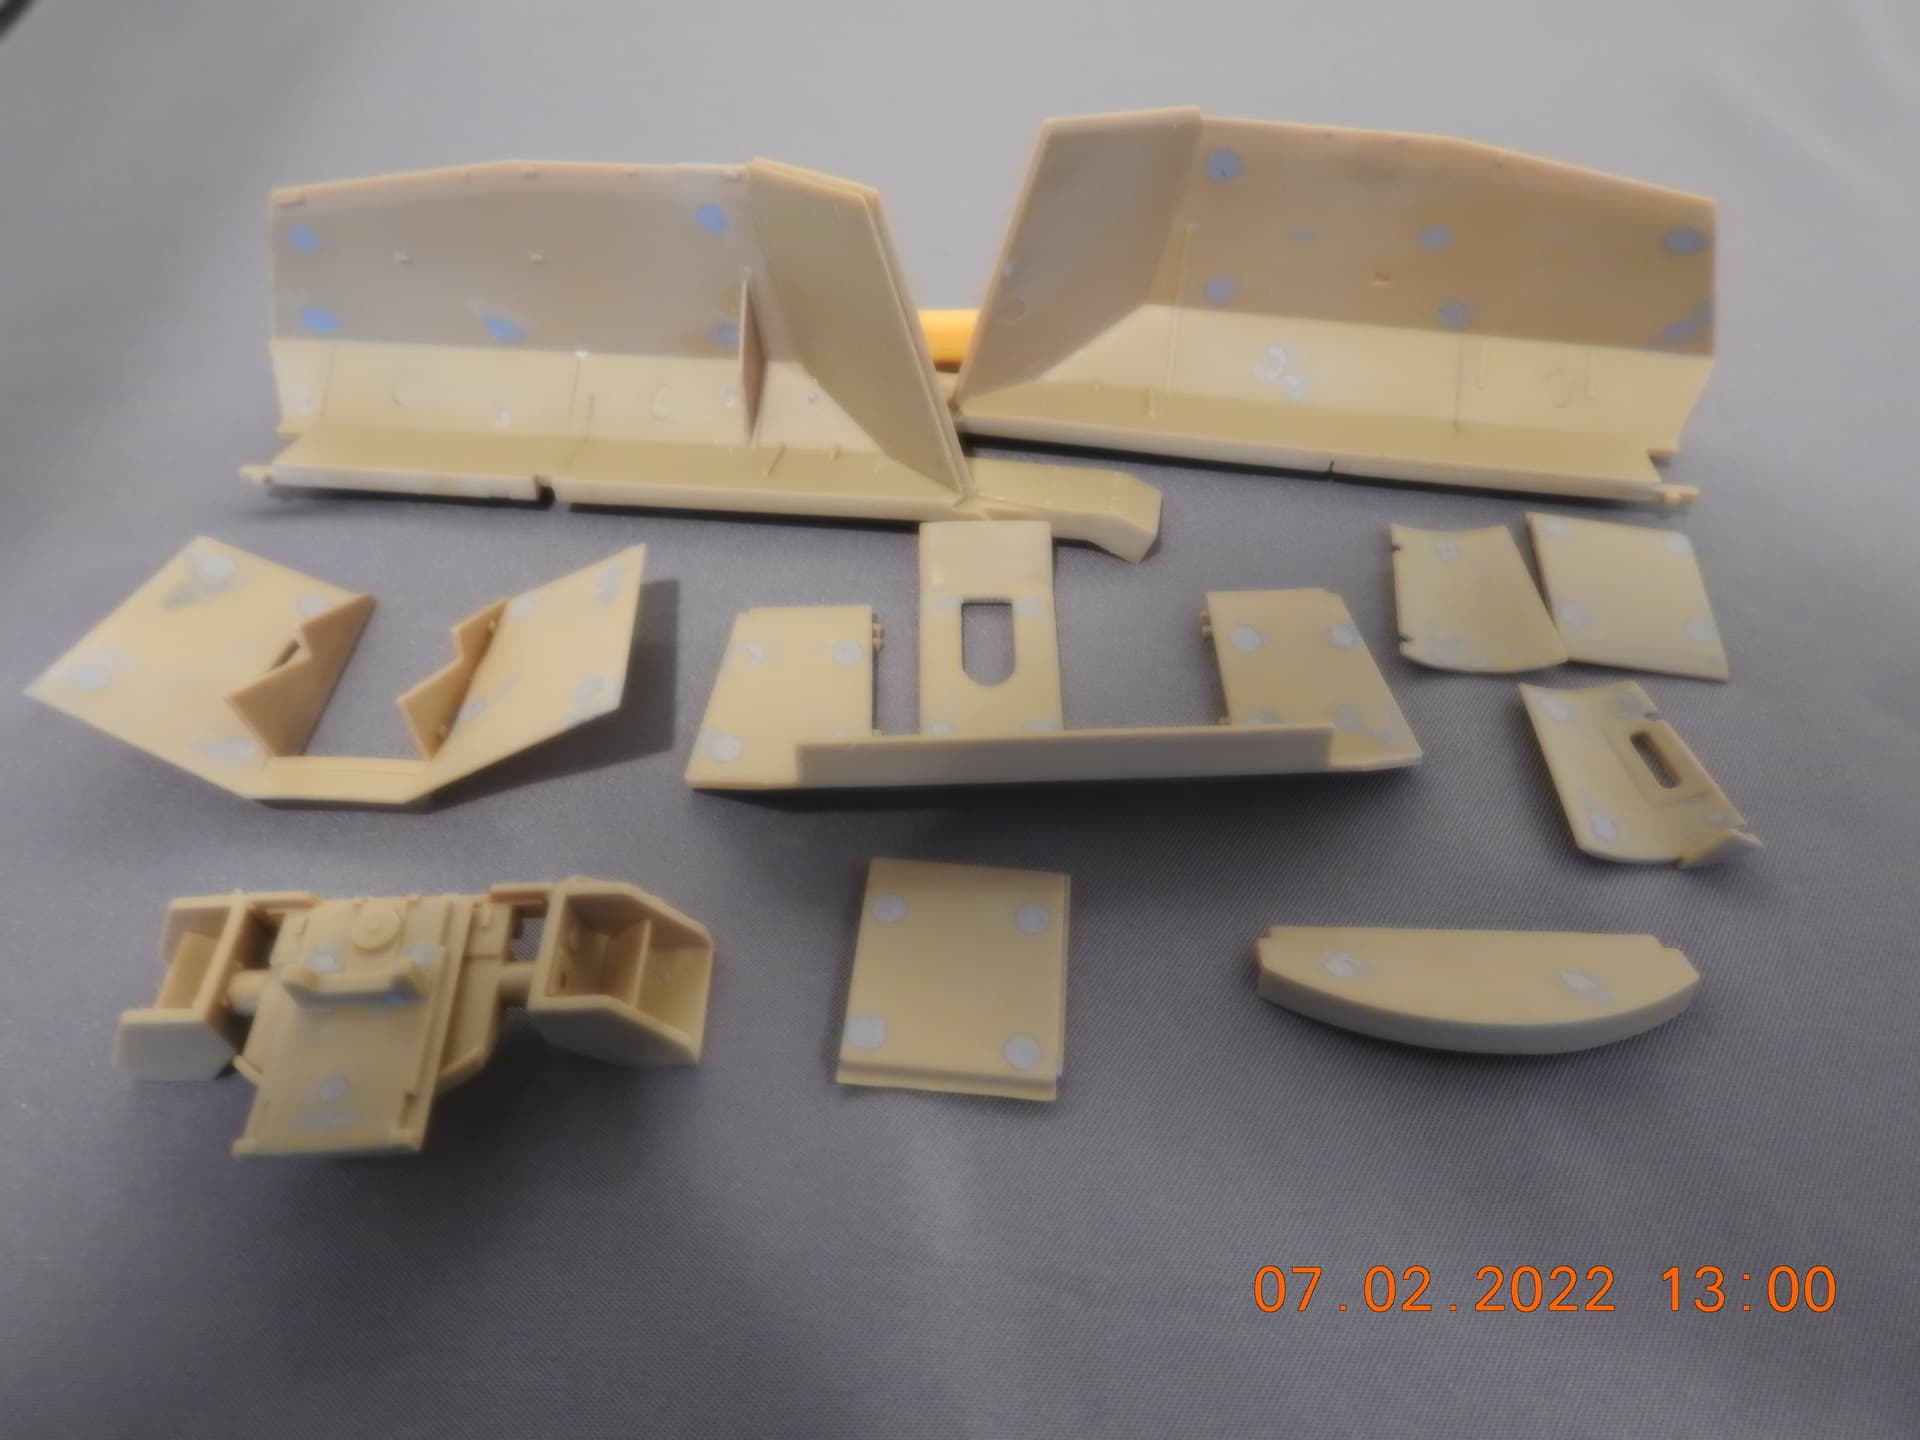
I may have filled some that will be hidden but with the Blast storage instead of the kits I am not sure which ones will be hidden and which ones will come out and bite me latter. I got the track links all cleaned but not assembled.
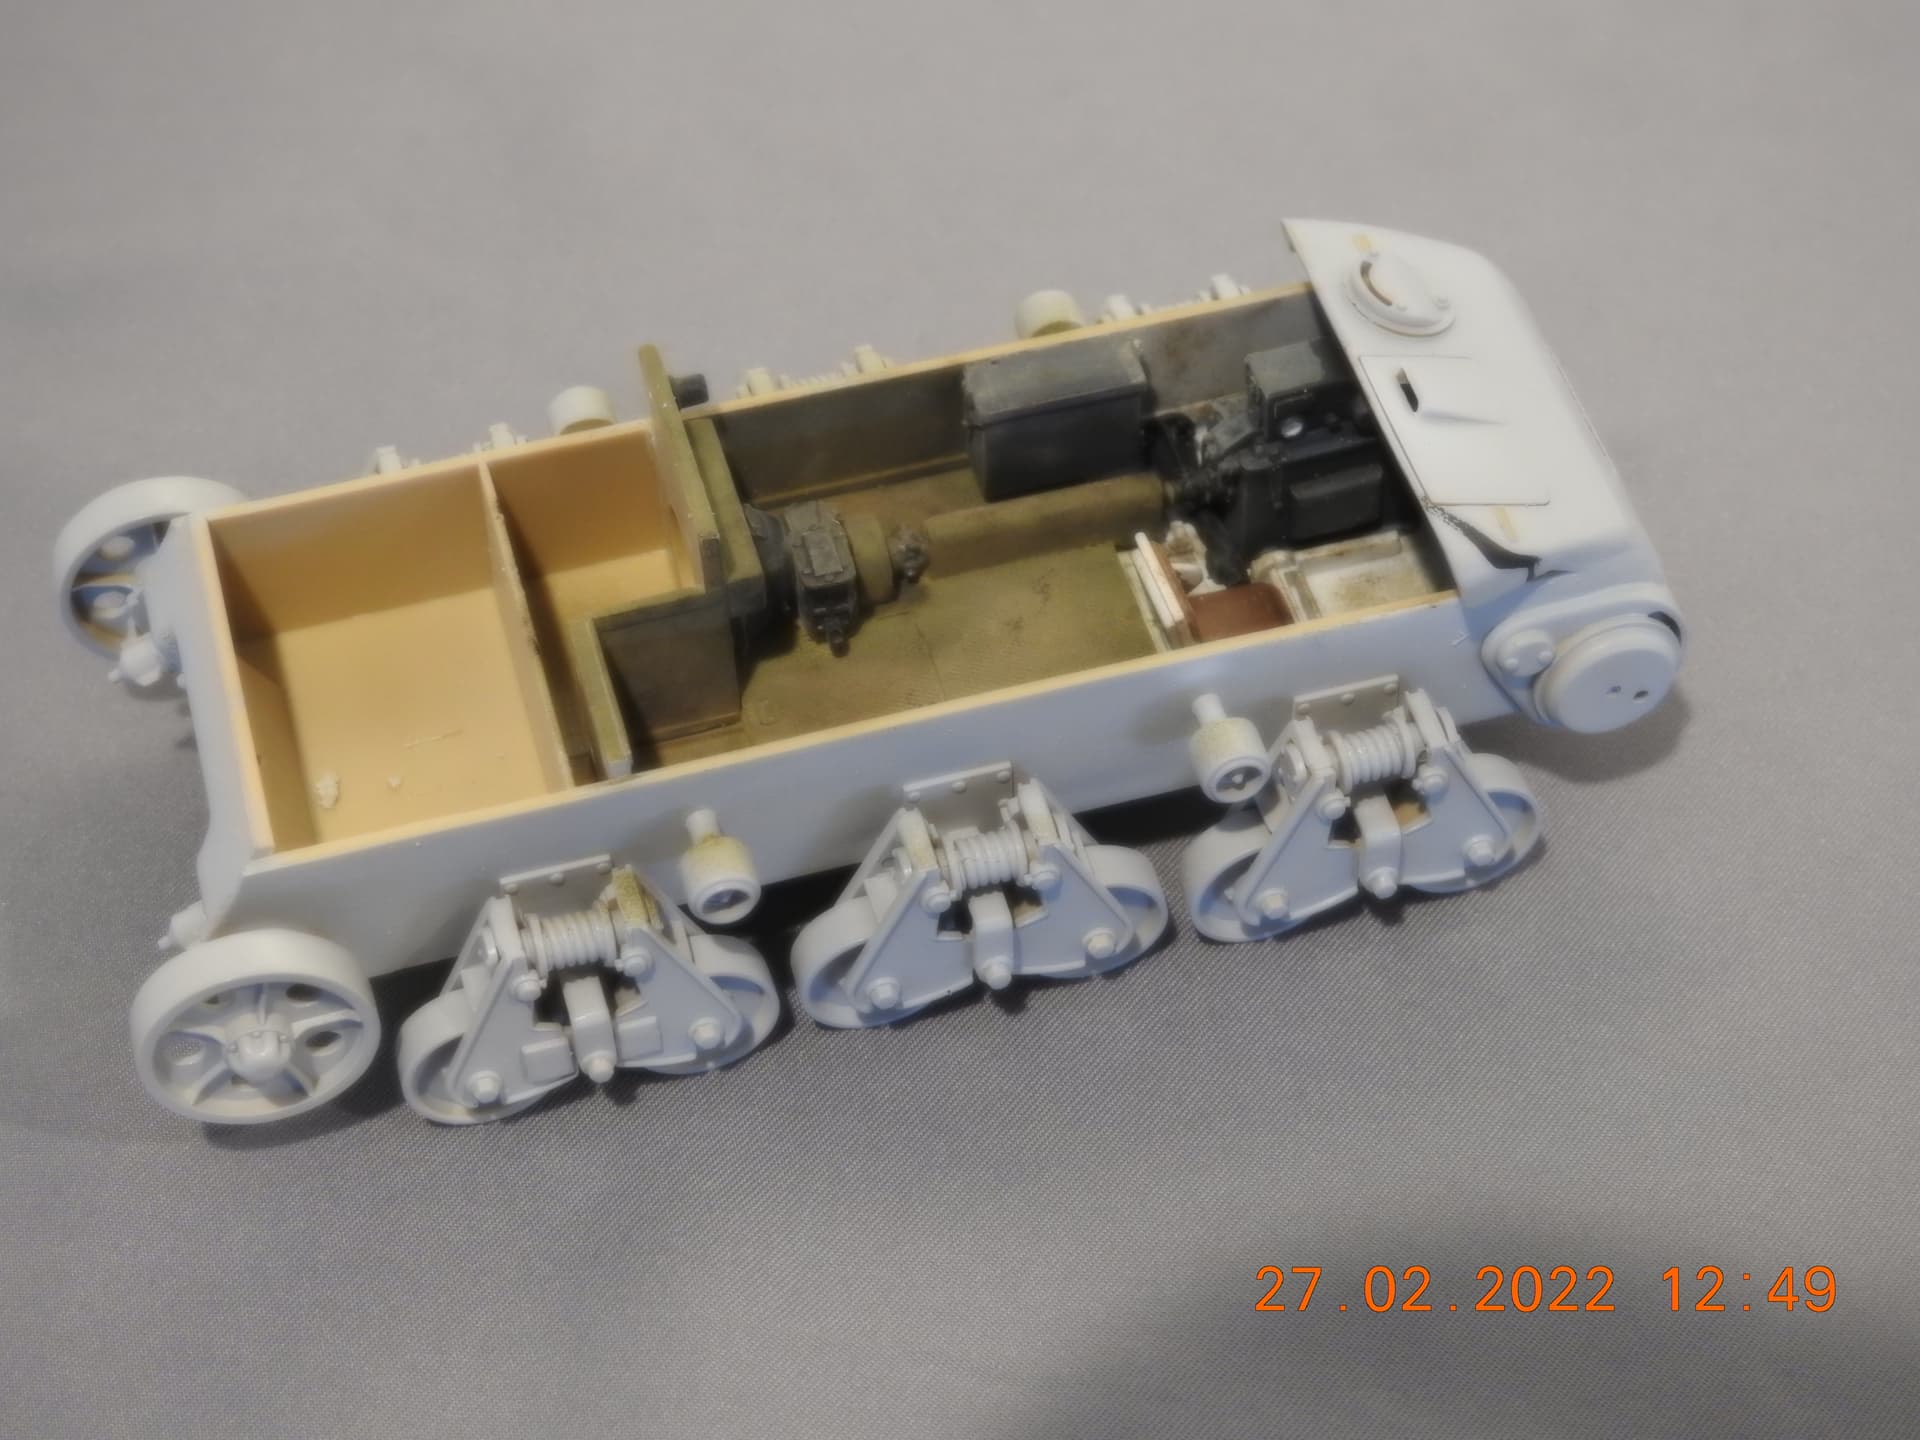
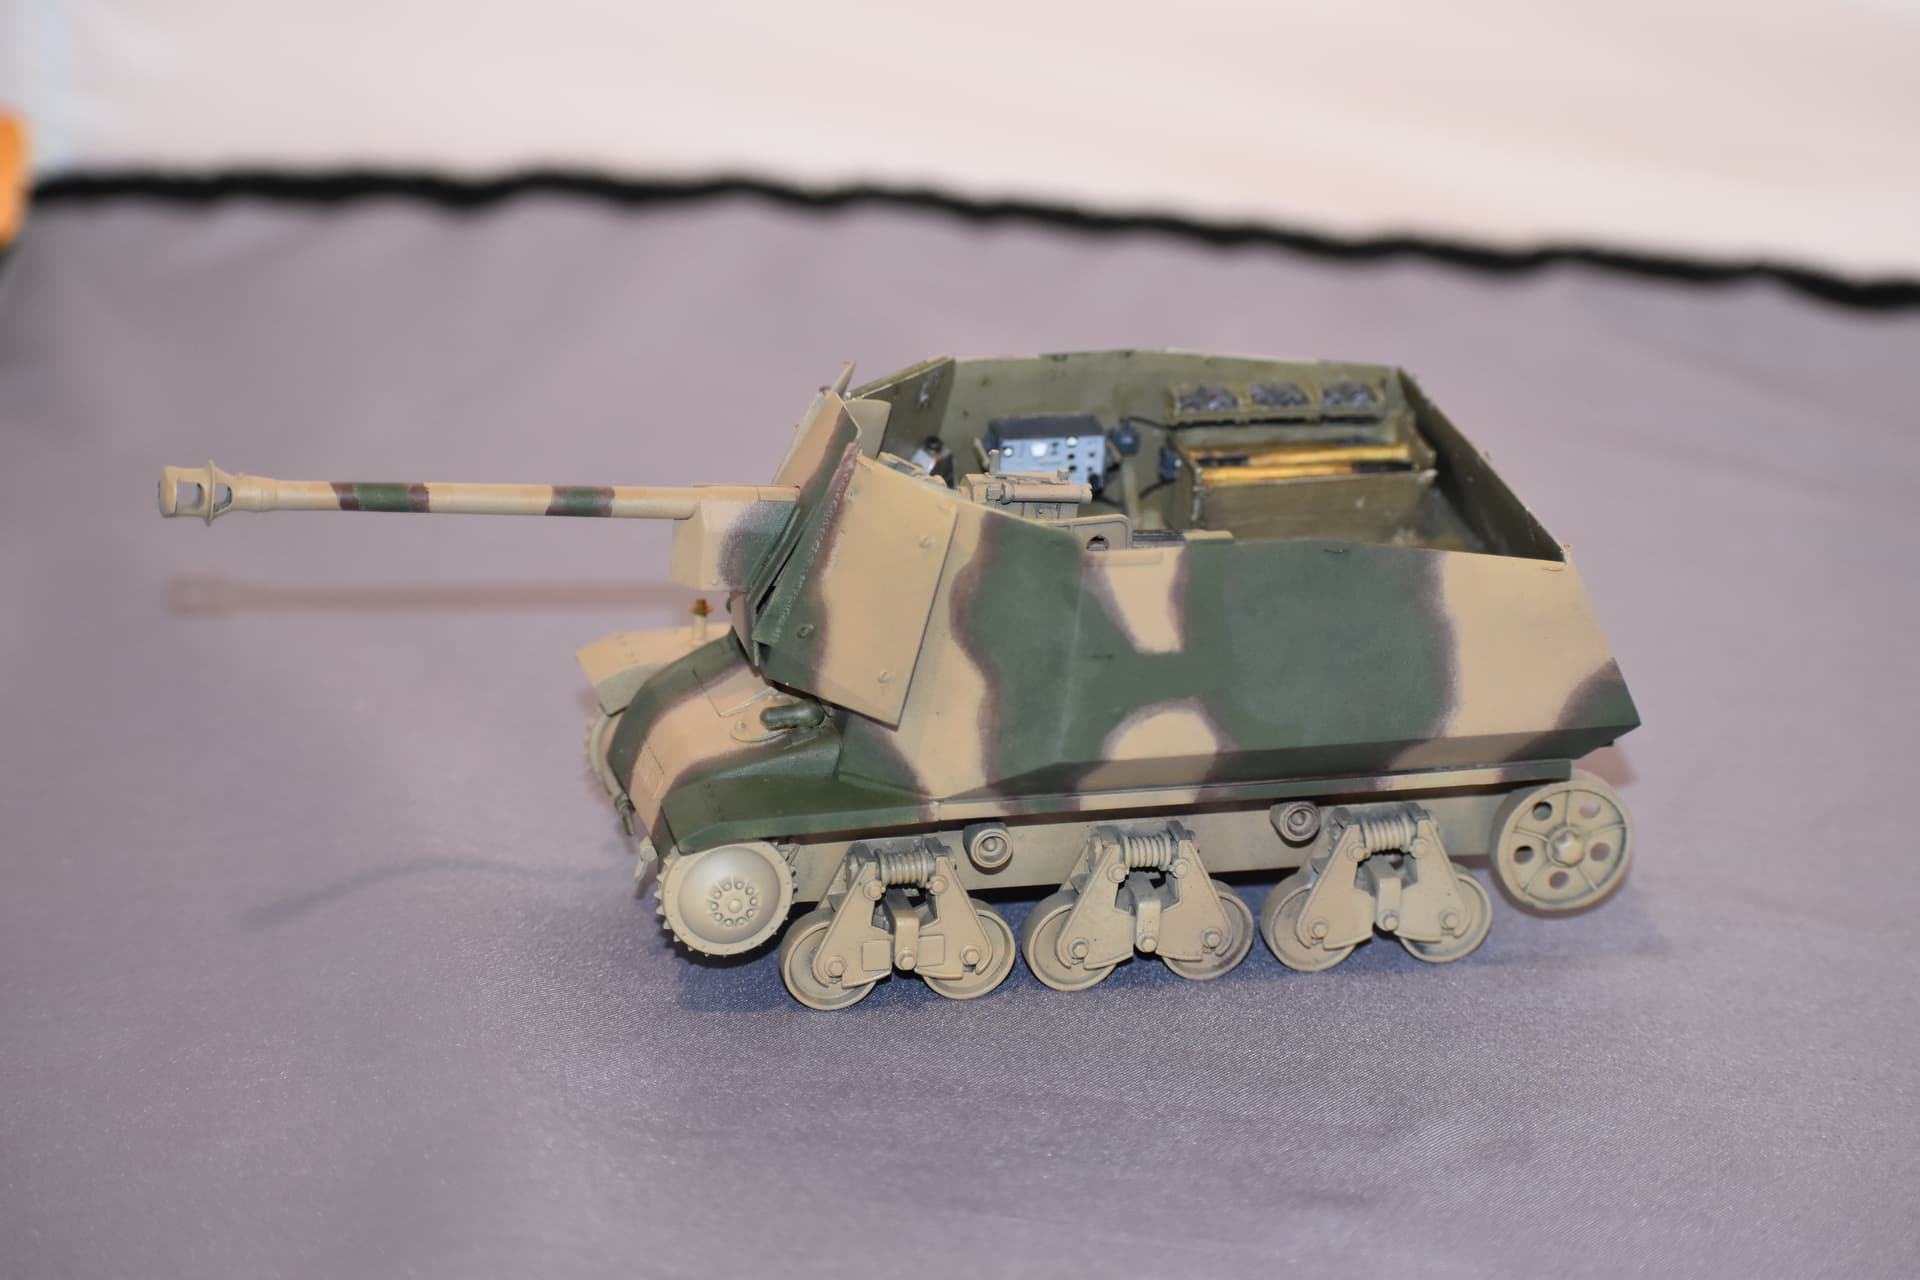
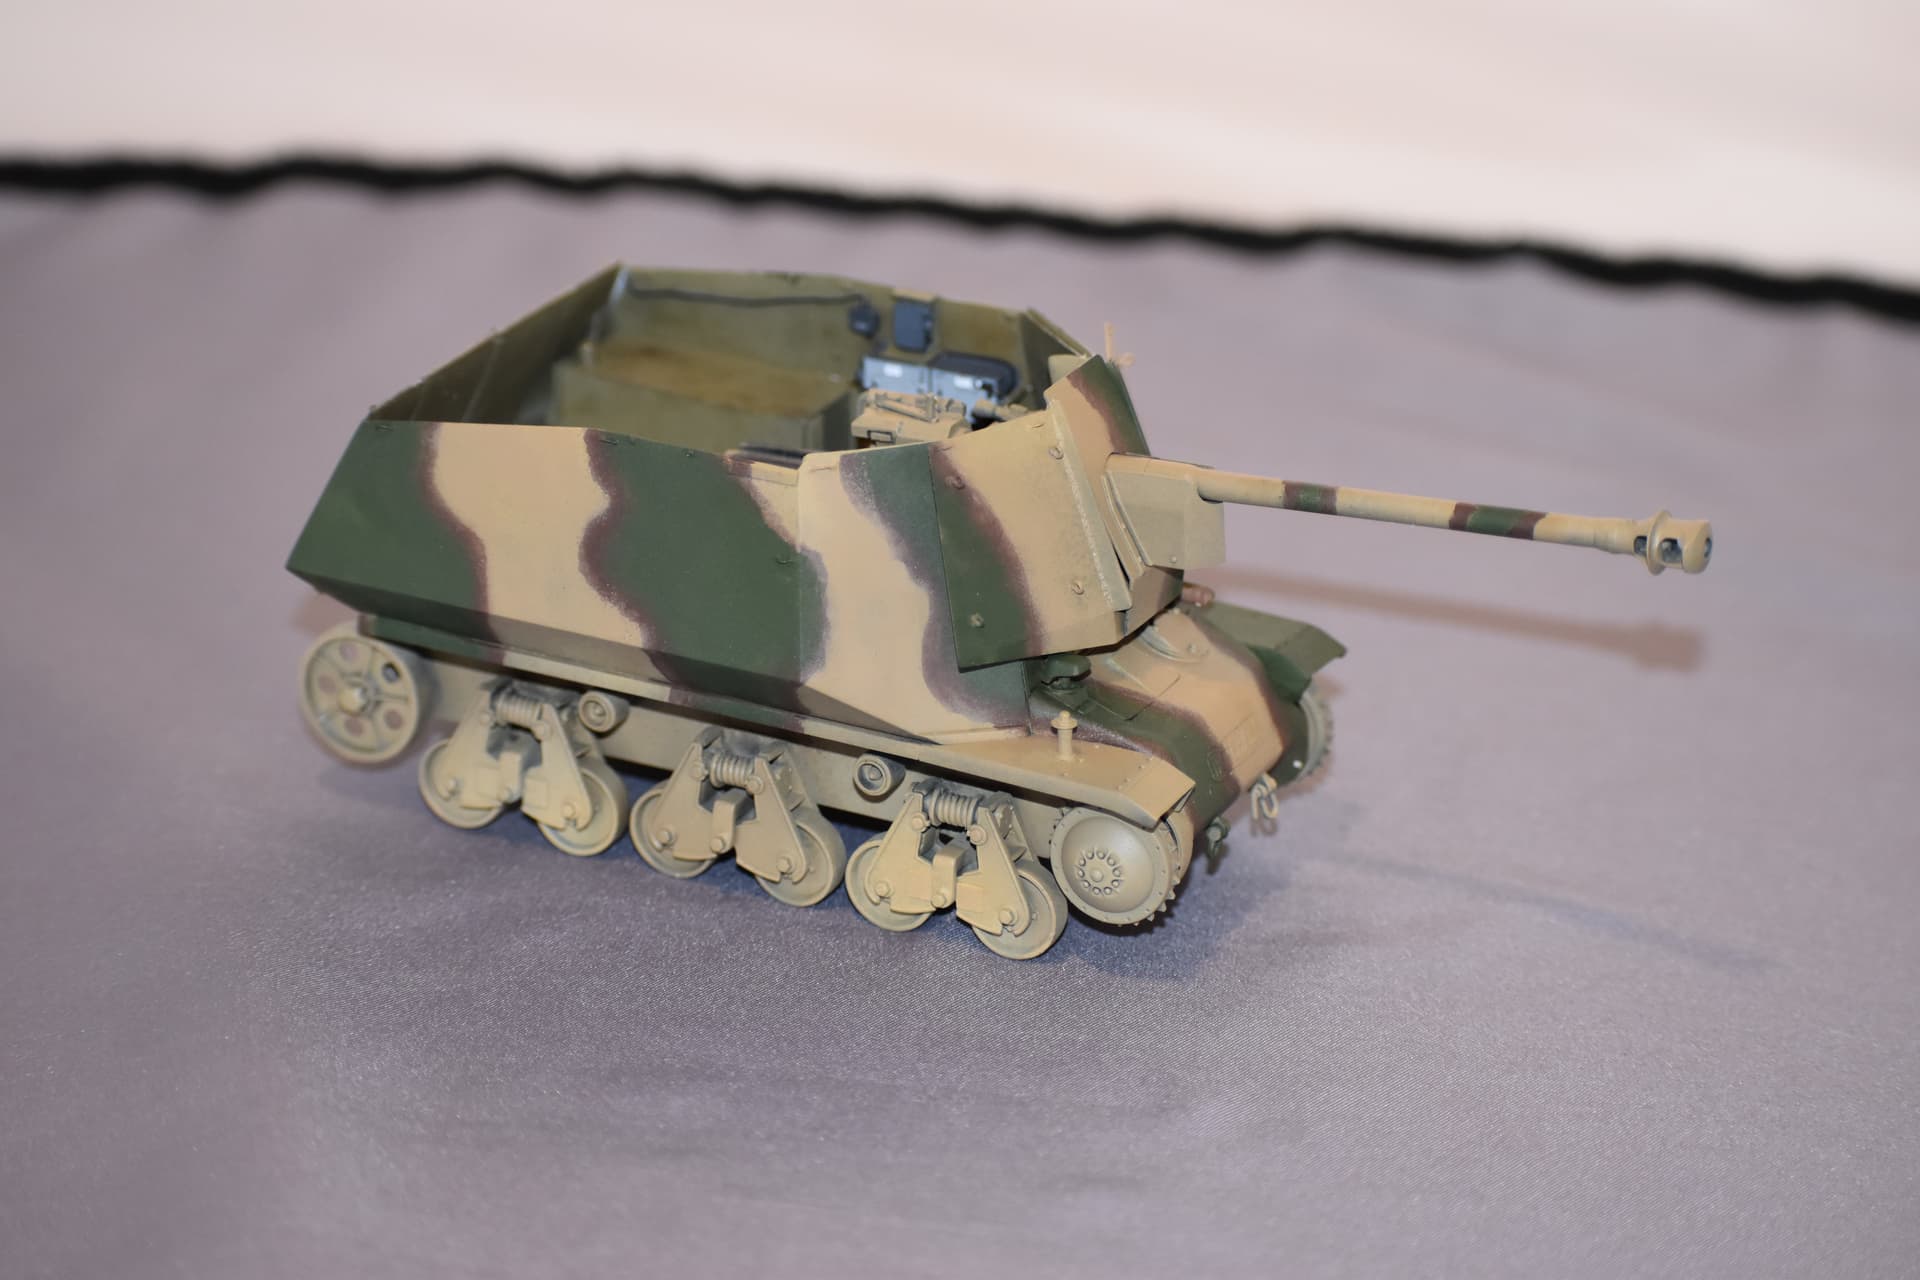
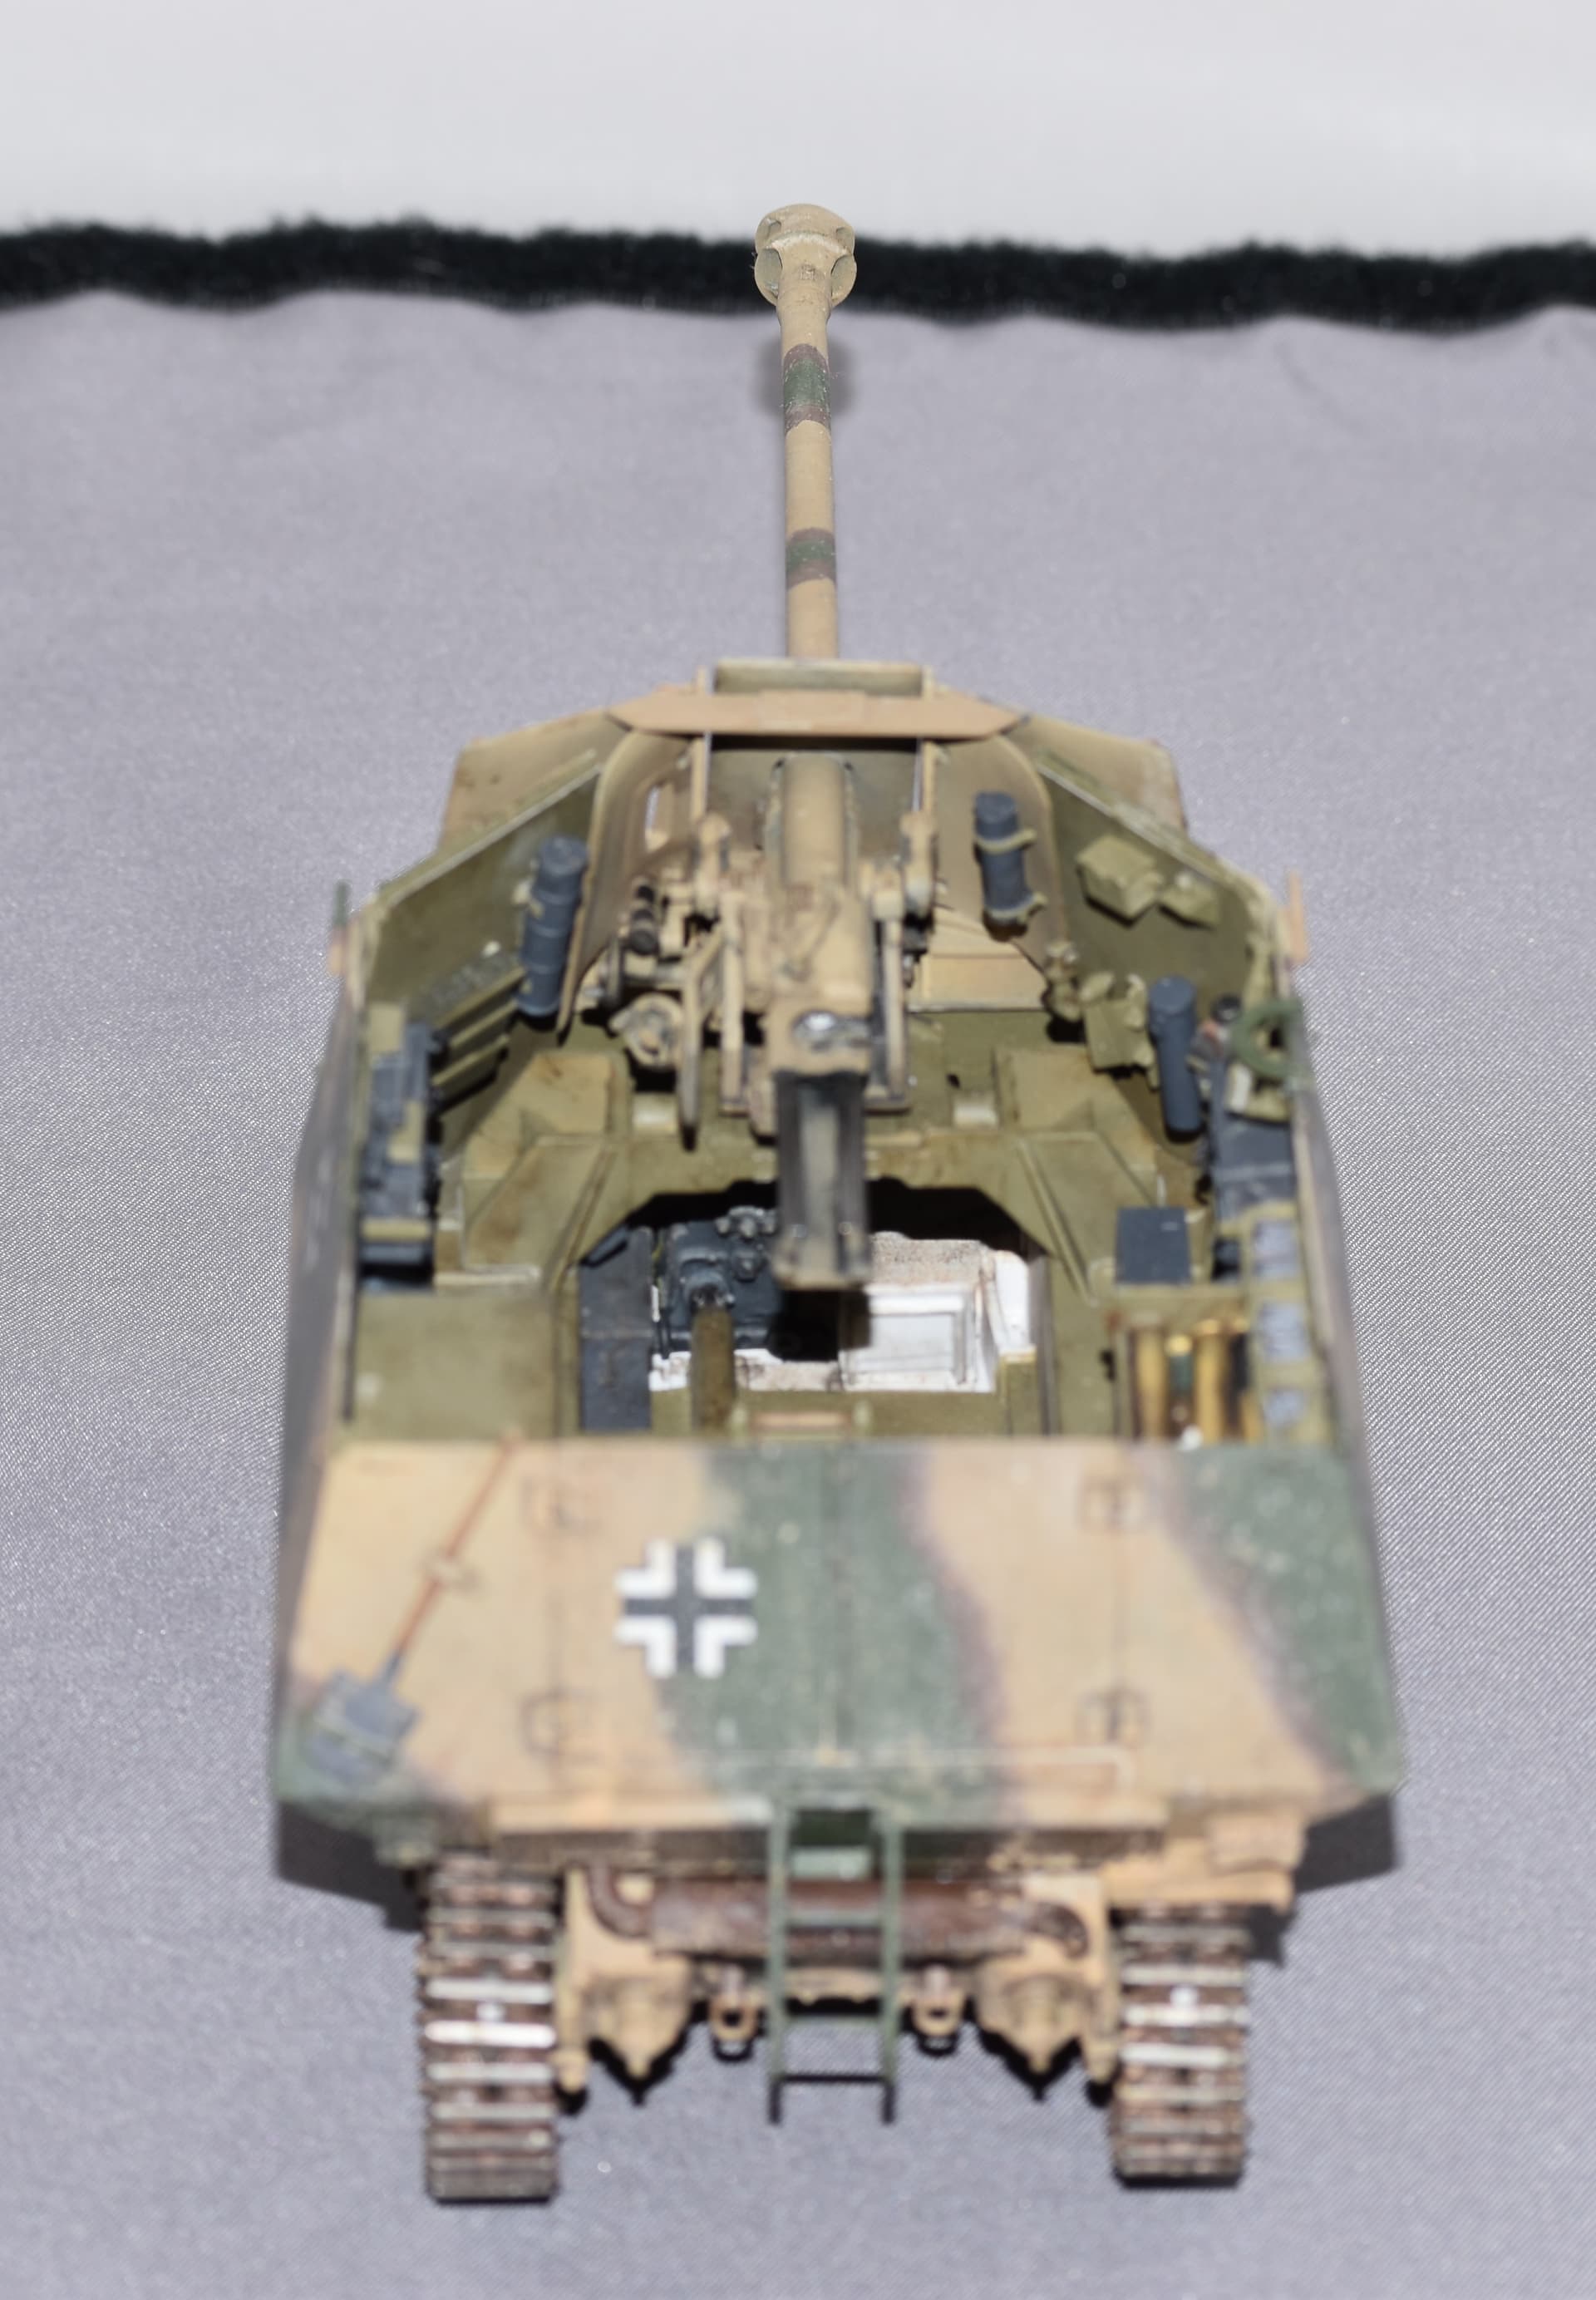
I have decided on the interior colour scheme. The drivers compartment will be white and the interior of the fighting compartment will be French green. The vehicles were modified in France so why not use up the excess French paint stocks on the interior. Pics show that the gun was dunkel gelb so the green, yellow and some gray attachments should give some colour interest.
Sorry for the lack of updates but I hope that I can keep them more regular. The first picture is of the superstructure and the hull taped together. I think that I will have to assemble and paint the interior before it is attached to the hull.
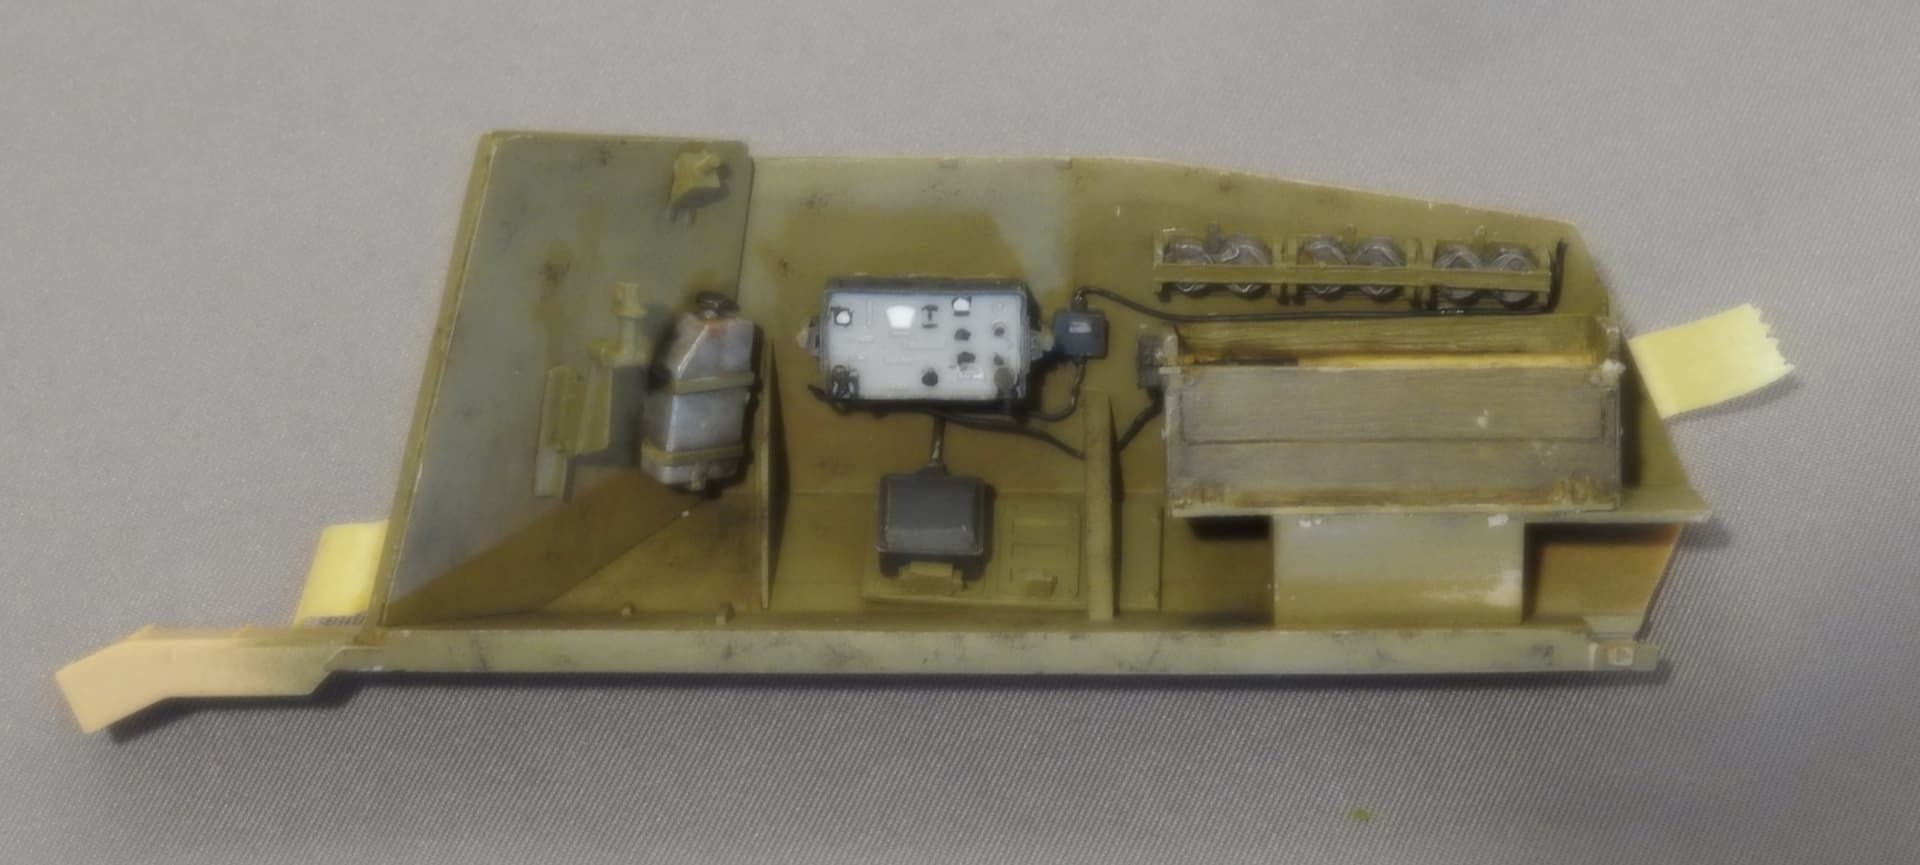
The reinforcing plate marked is supposed to go at the rear of Trumpeters marking lug on the hull side but when I then tried to fit the Blast radio set in it would just barely not fit so rip the reinforcing plate out, clean the area up, reprime and repaint.
I finished the painting of the lower hull while playing around with the hull sides. The next step is the cleanup and painting of the interior components.
I think that it is going to build into a nice representation of one of the German conversions of a French chassis and I do not have a Marder I in my collection. On the other hand it gives you a great appreciation of how far molding procedures have come in the last 20 years.
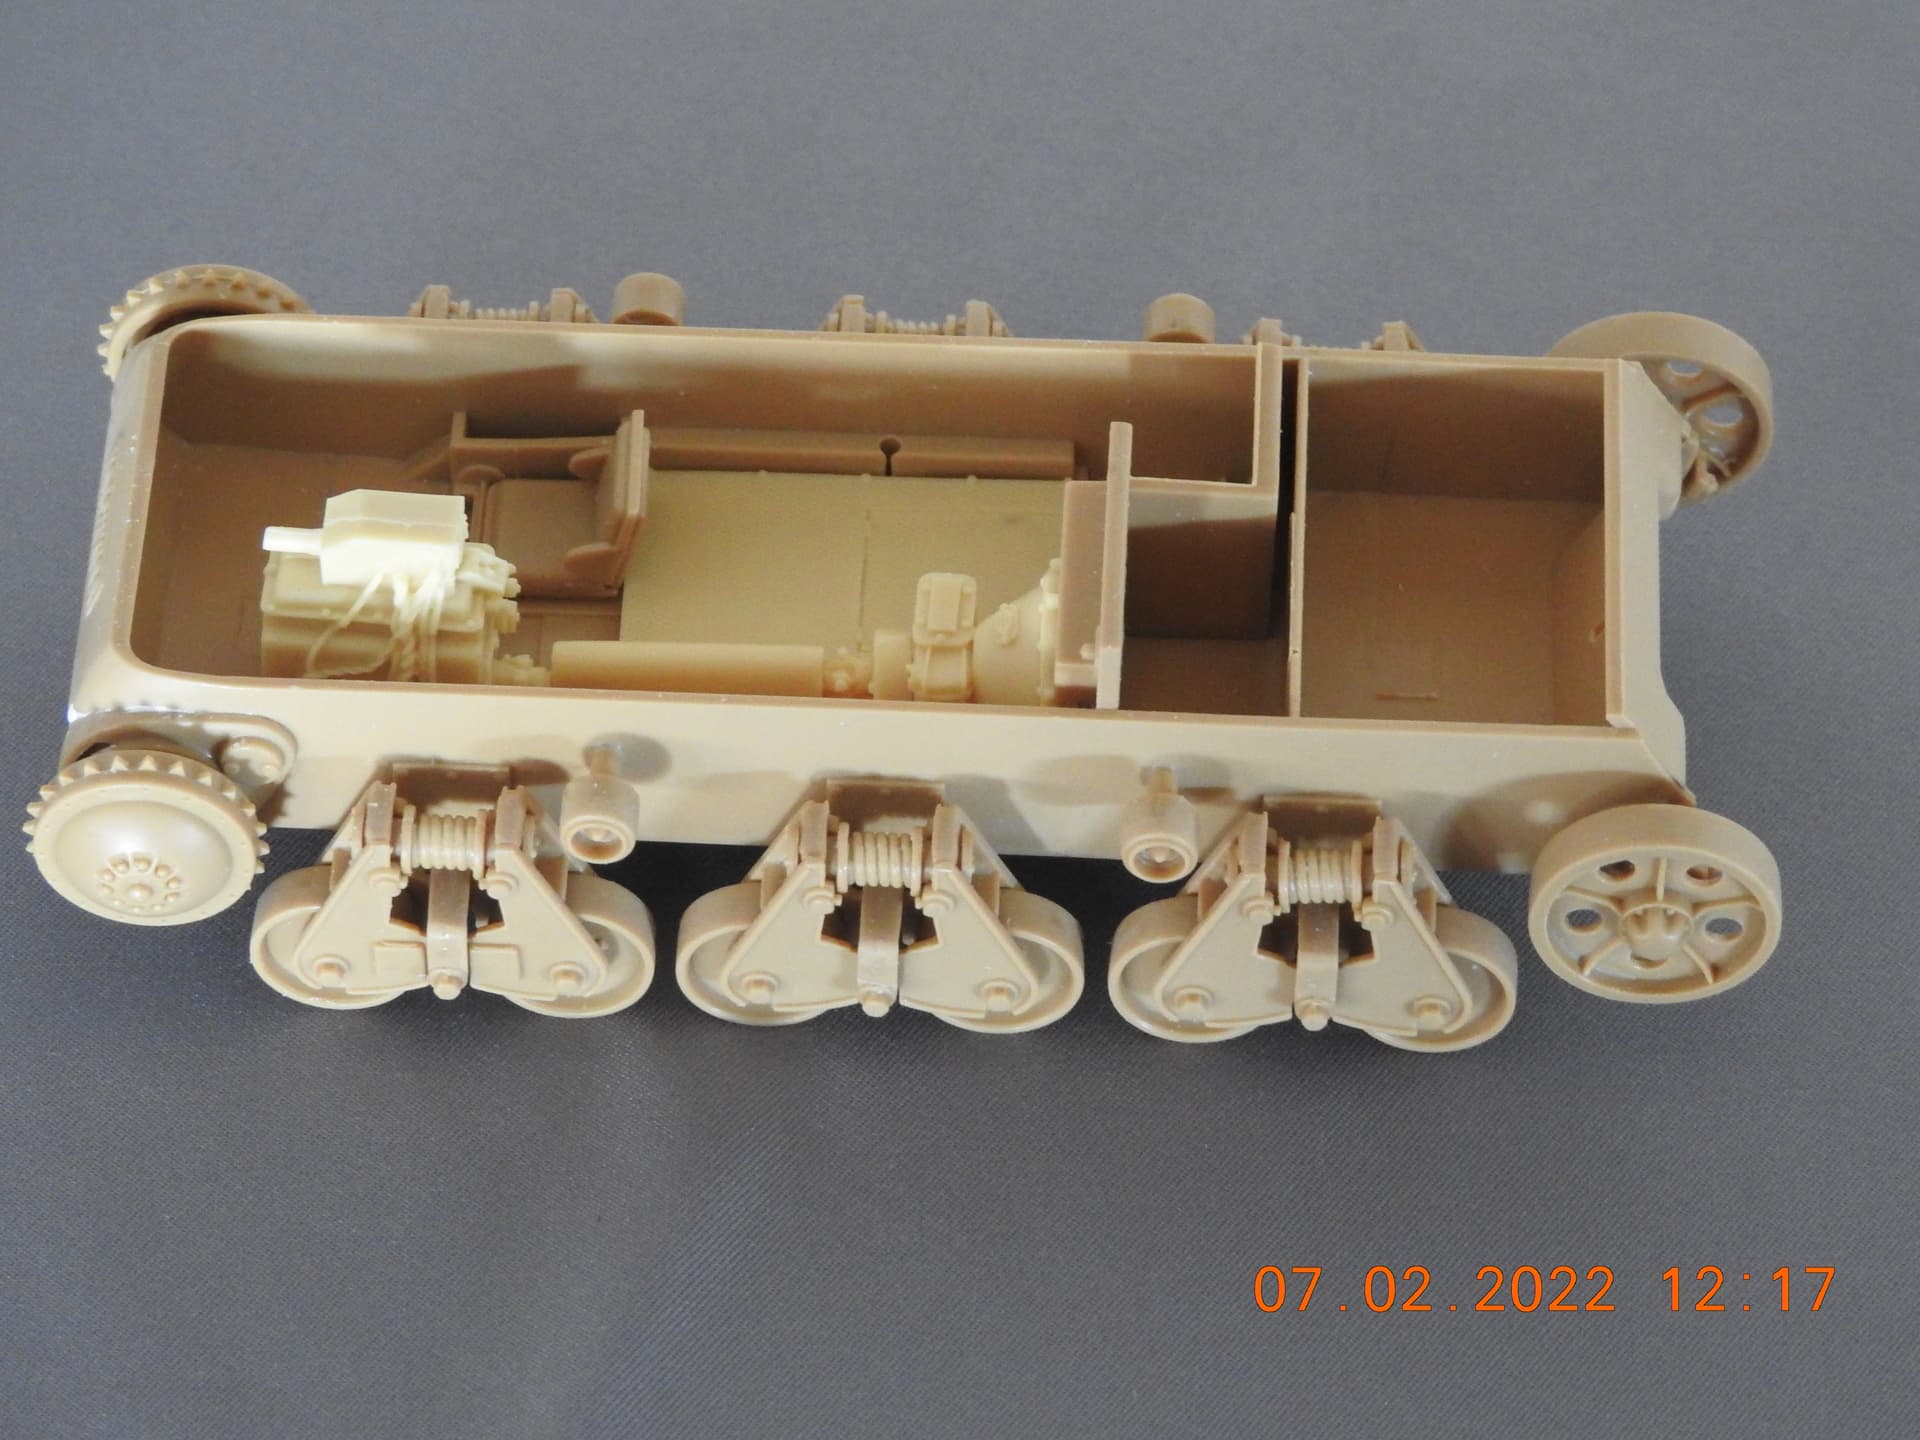
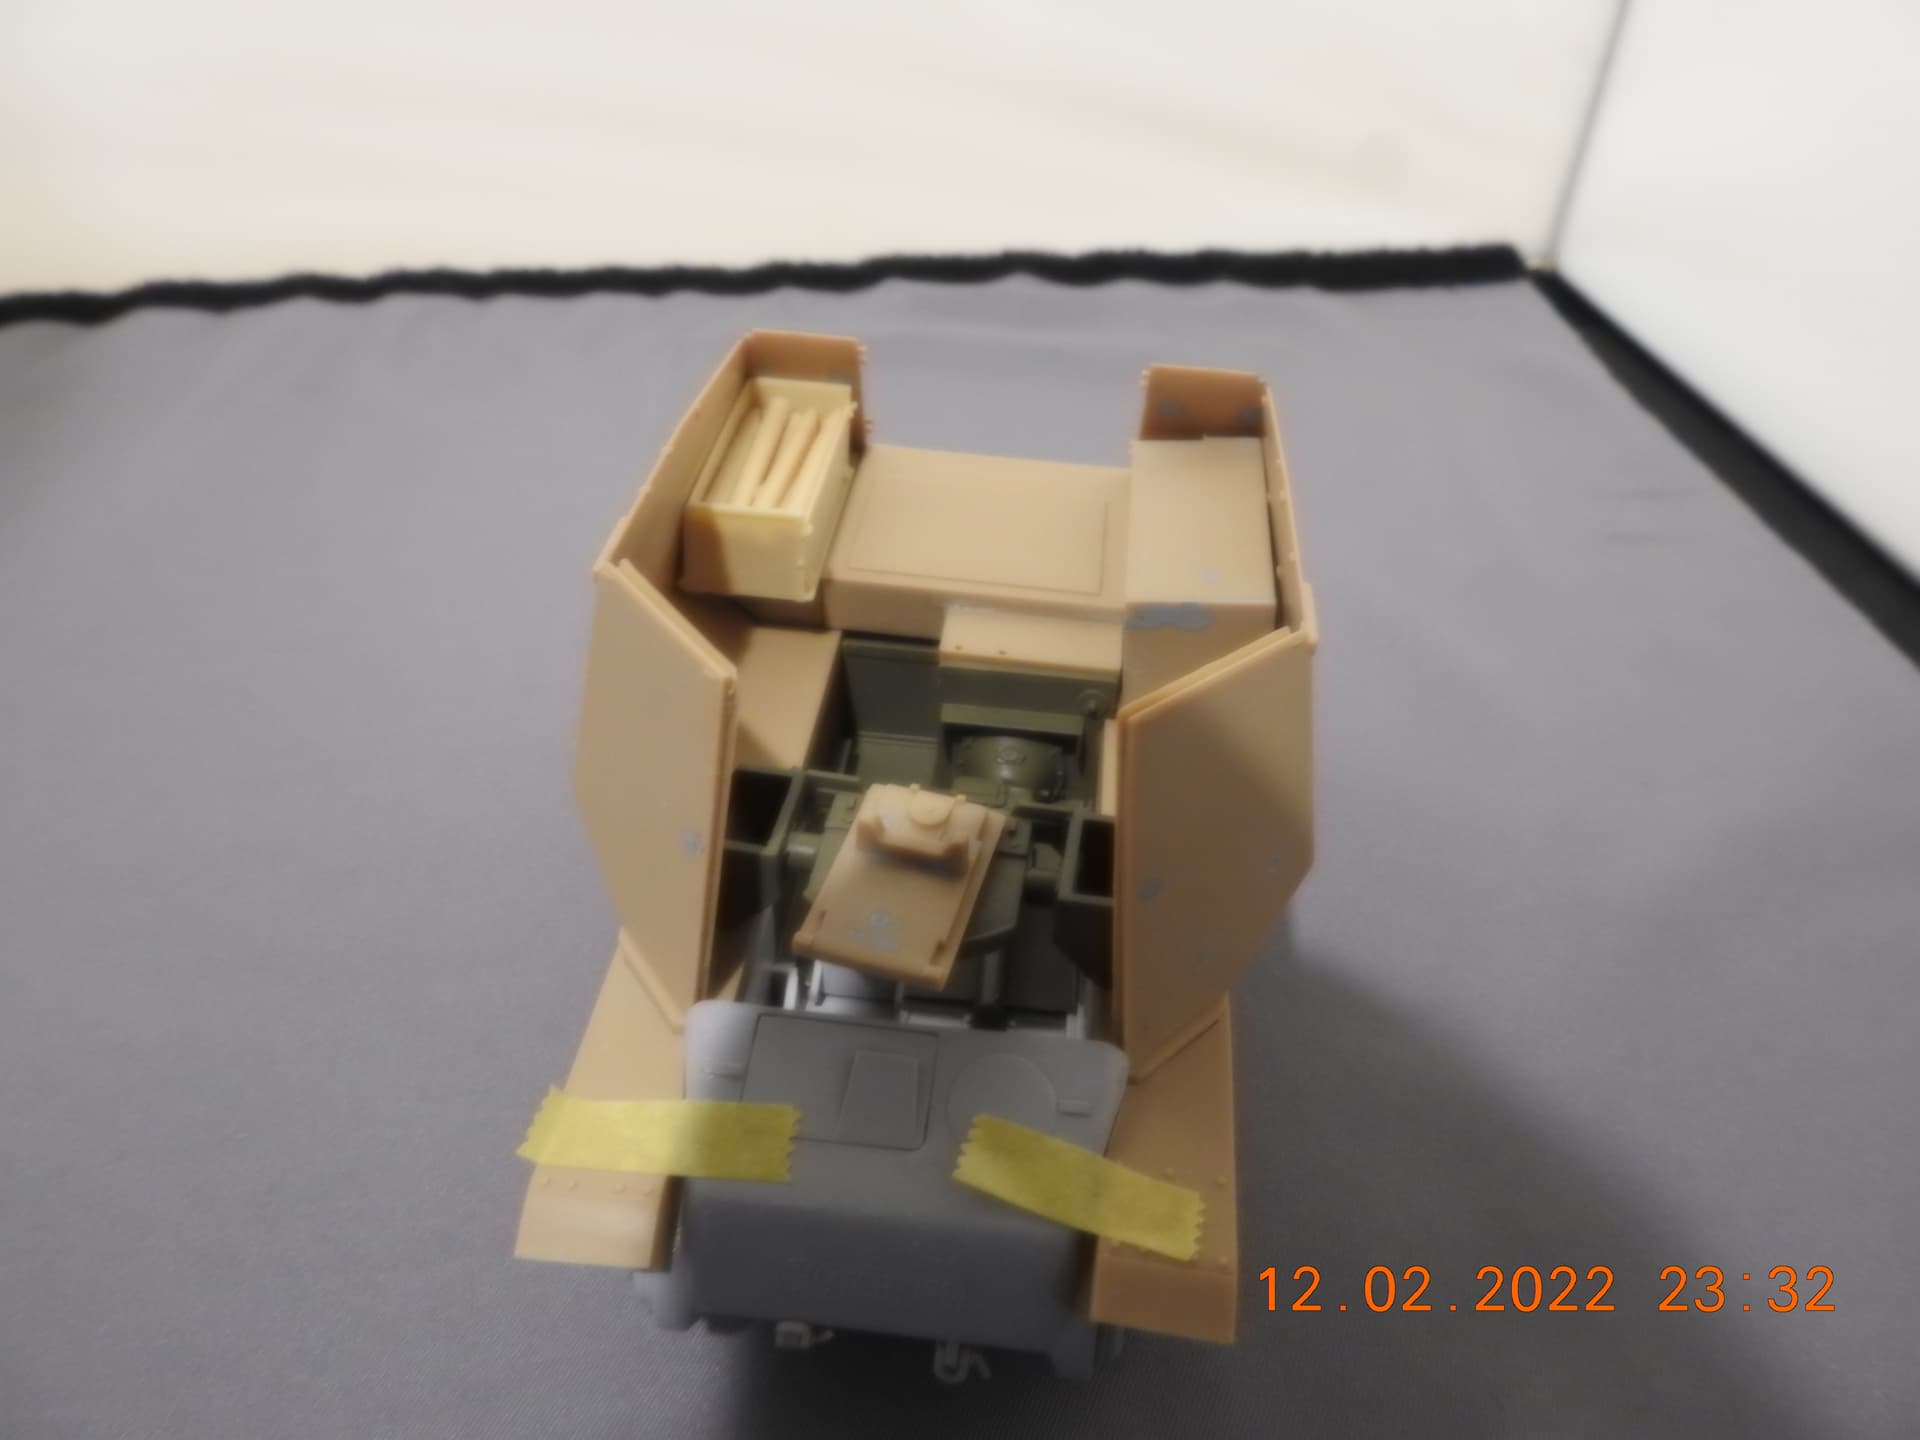
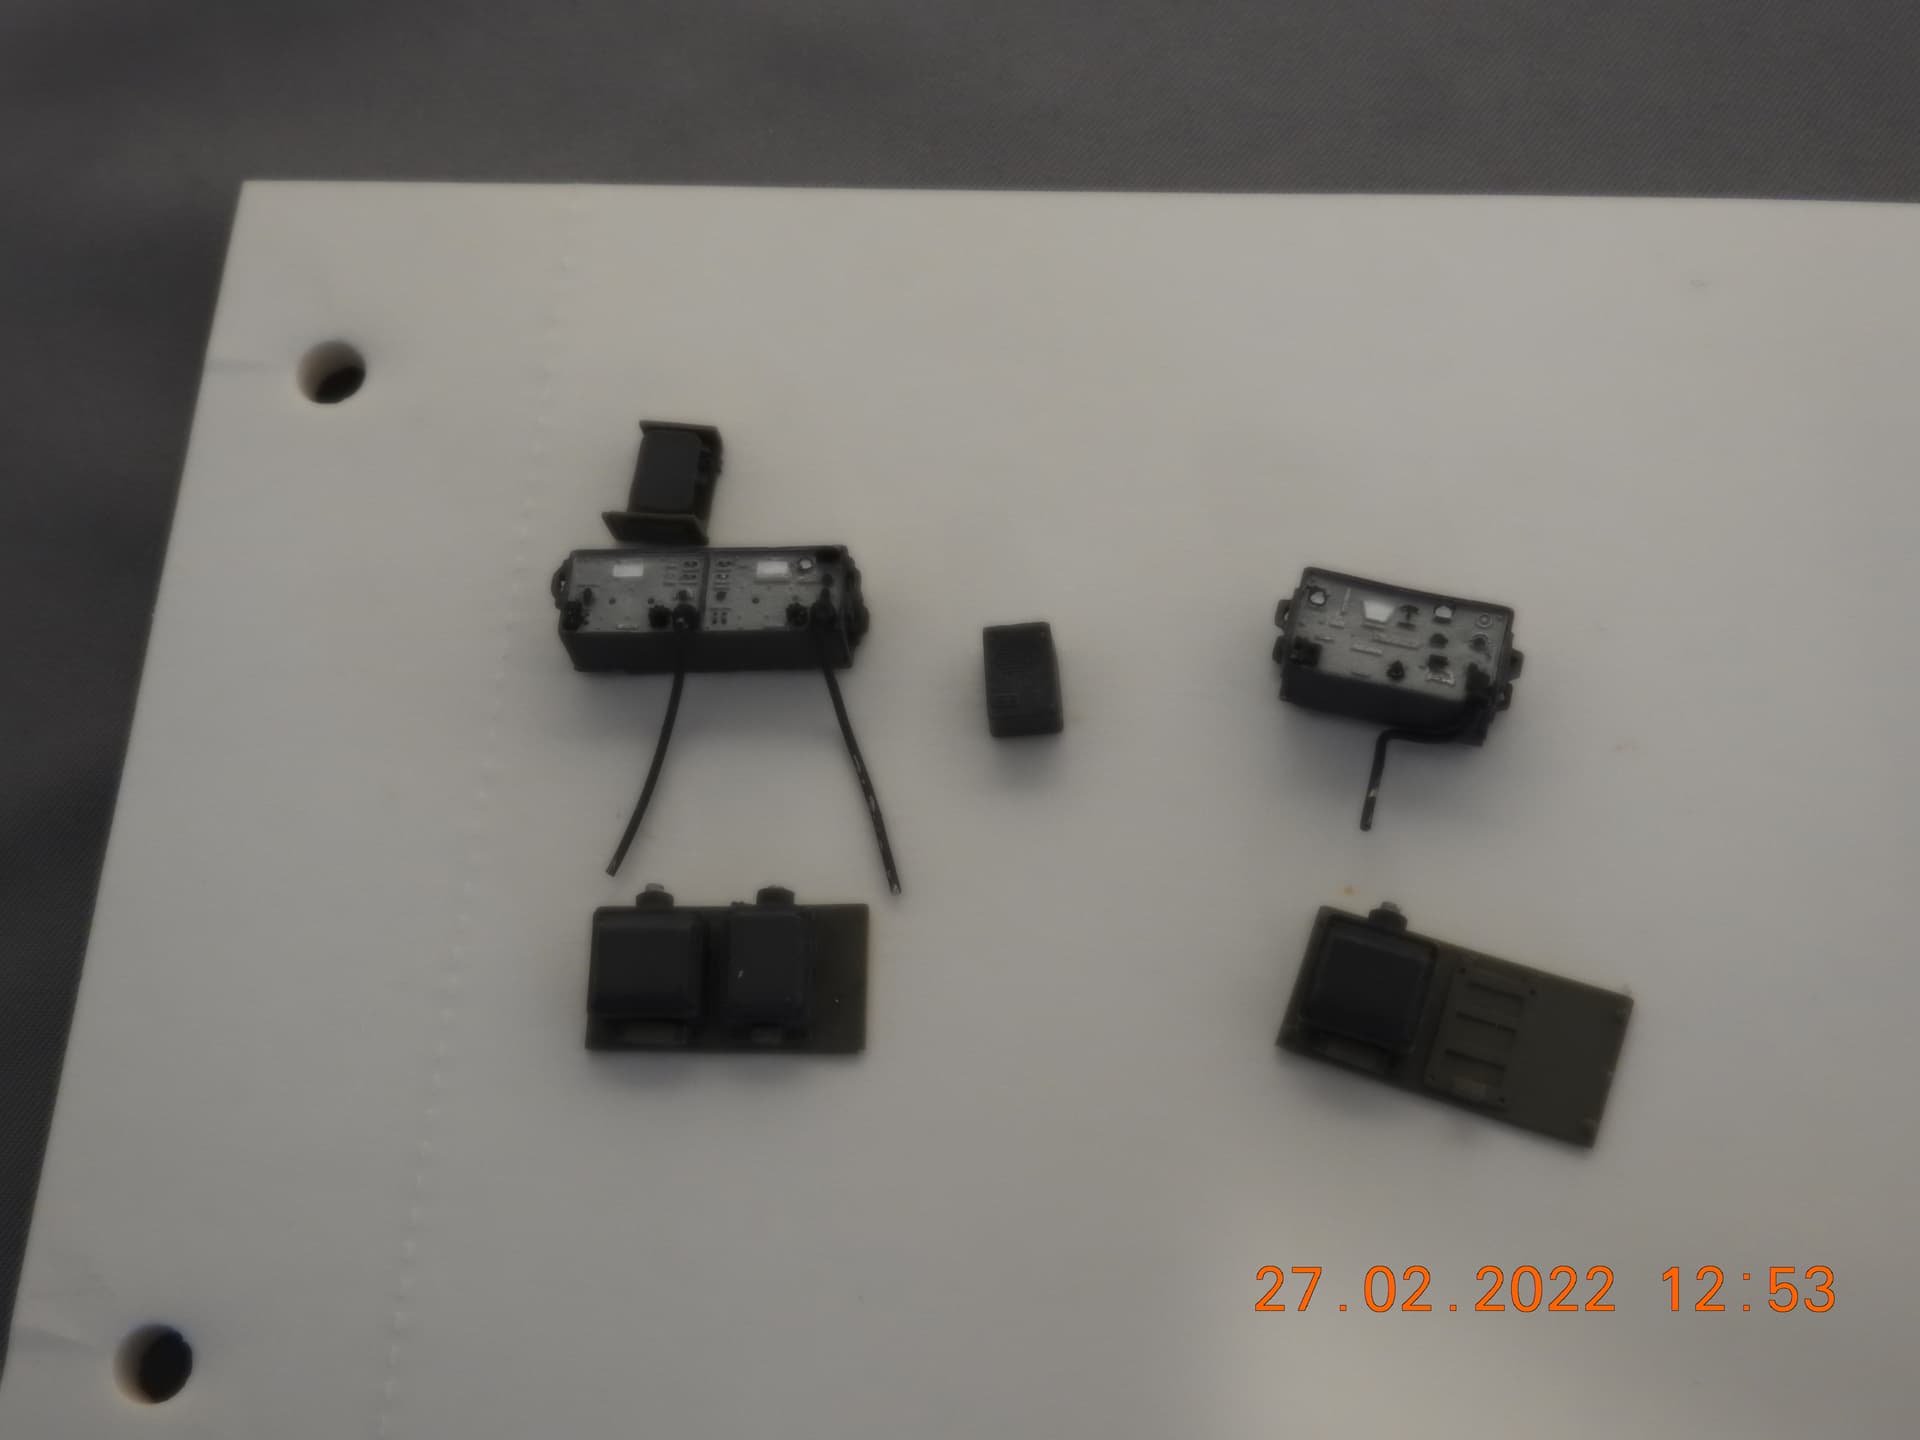
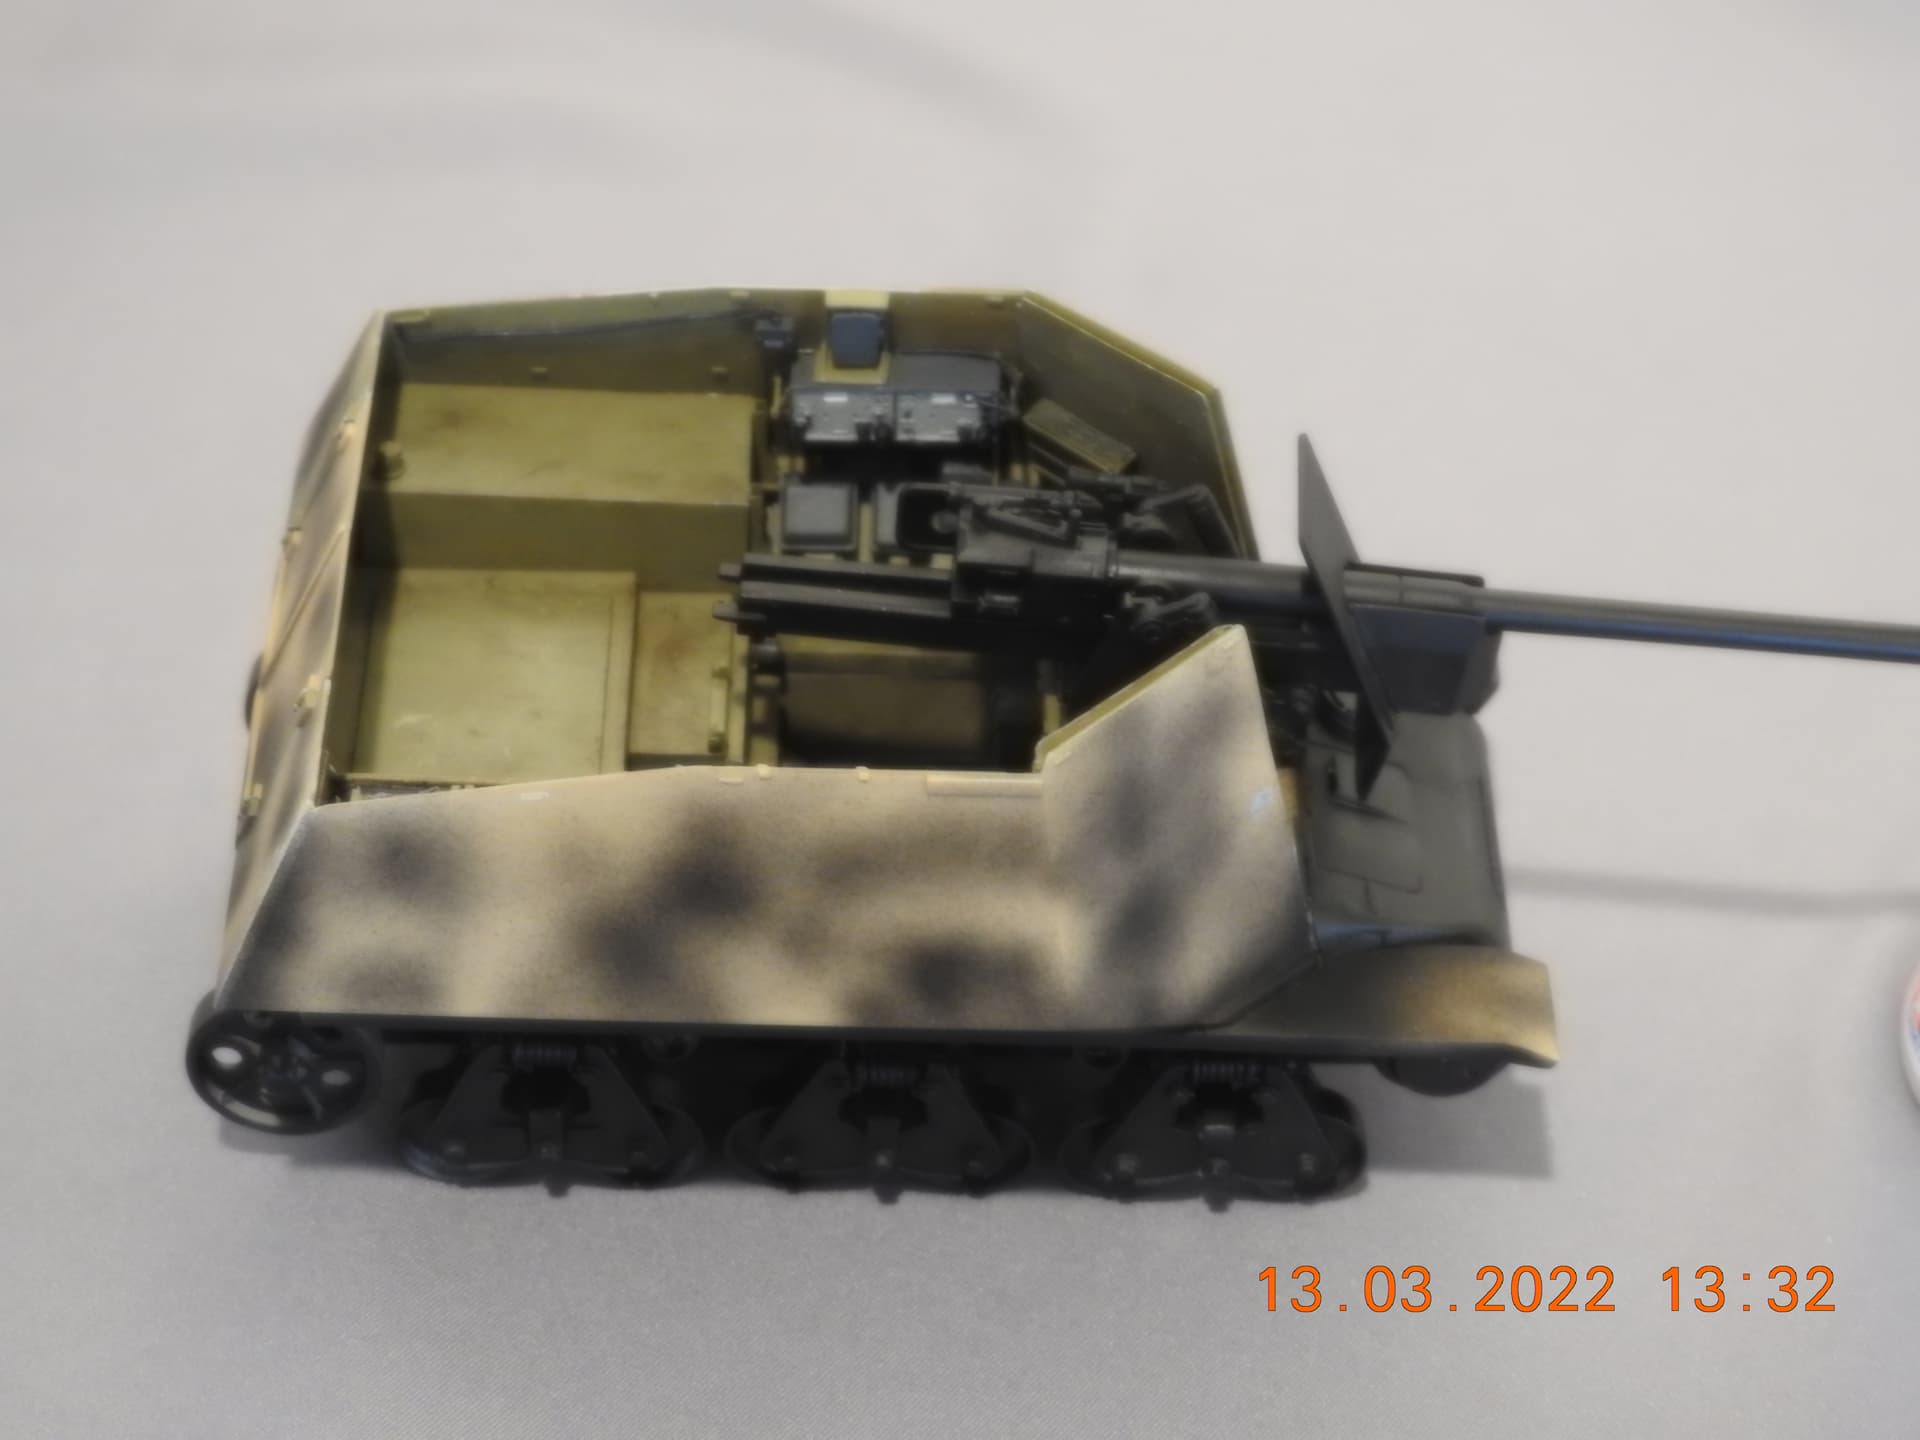
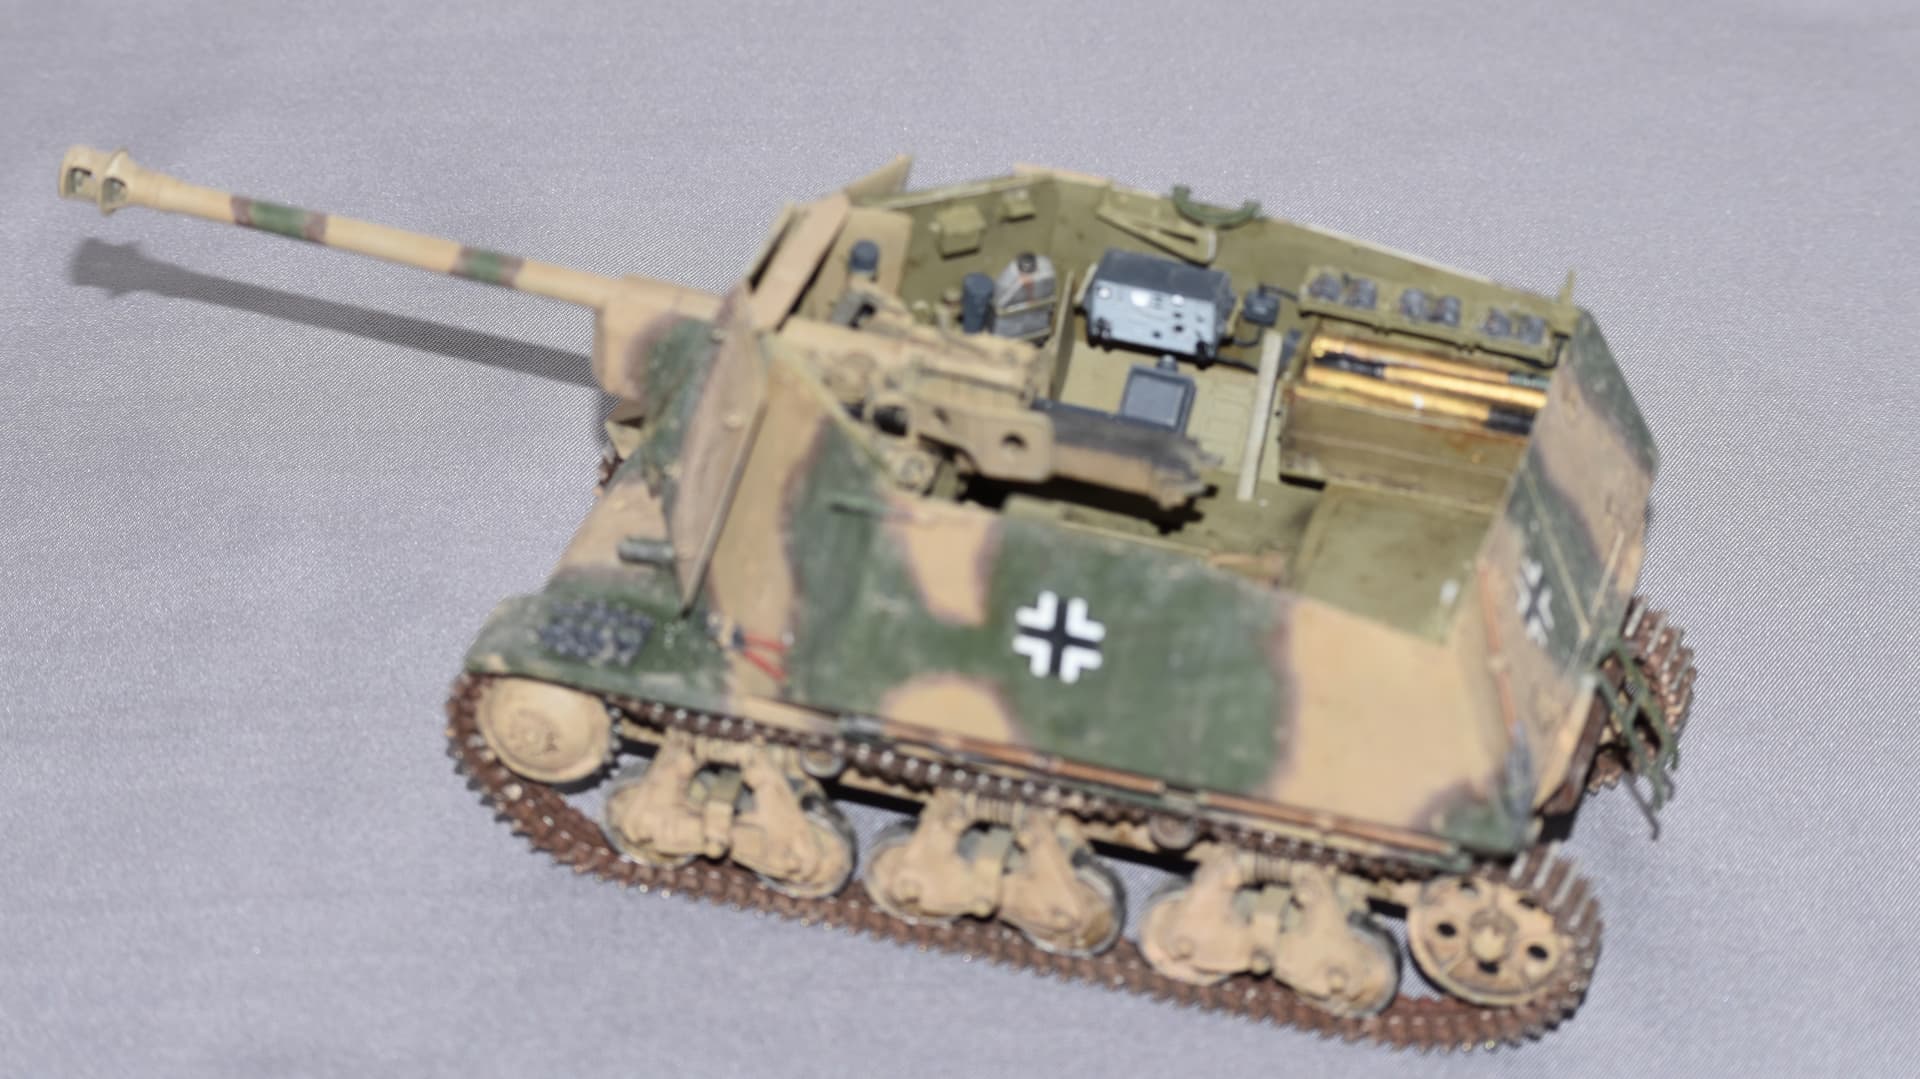
Most of the interior is pre painted and the major parts installed. I left off the smaller parts because I don’t want to knock them off during assembly. While the sides were open I wired up most of the radio system.
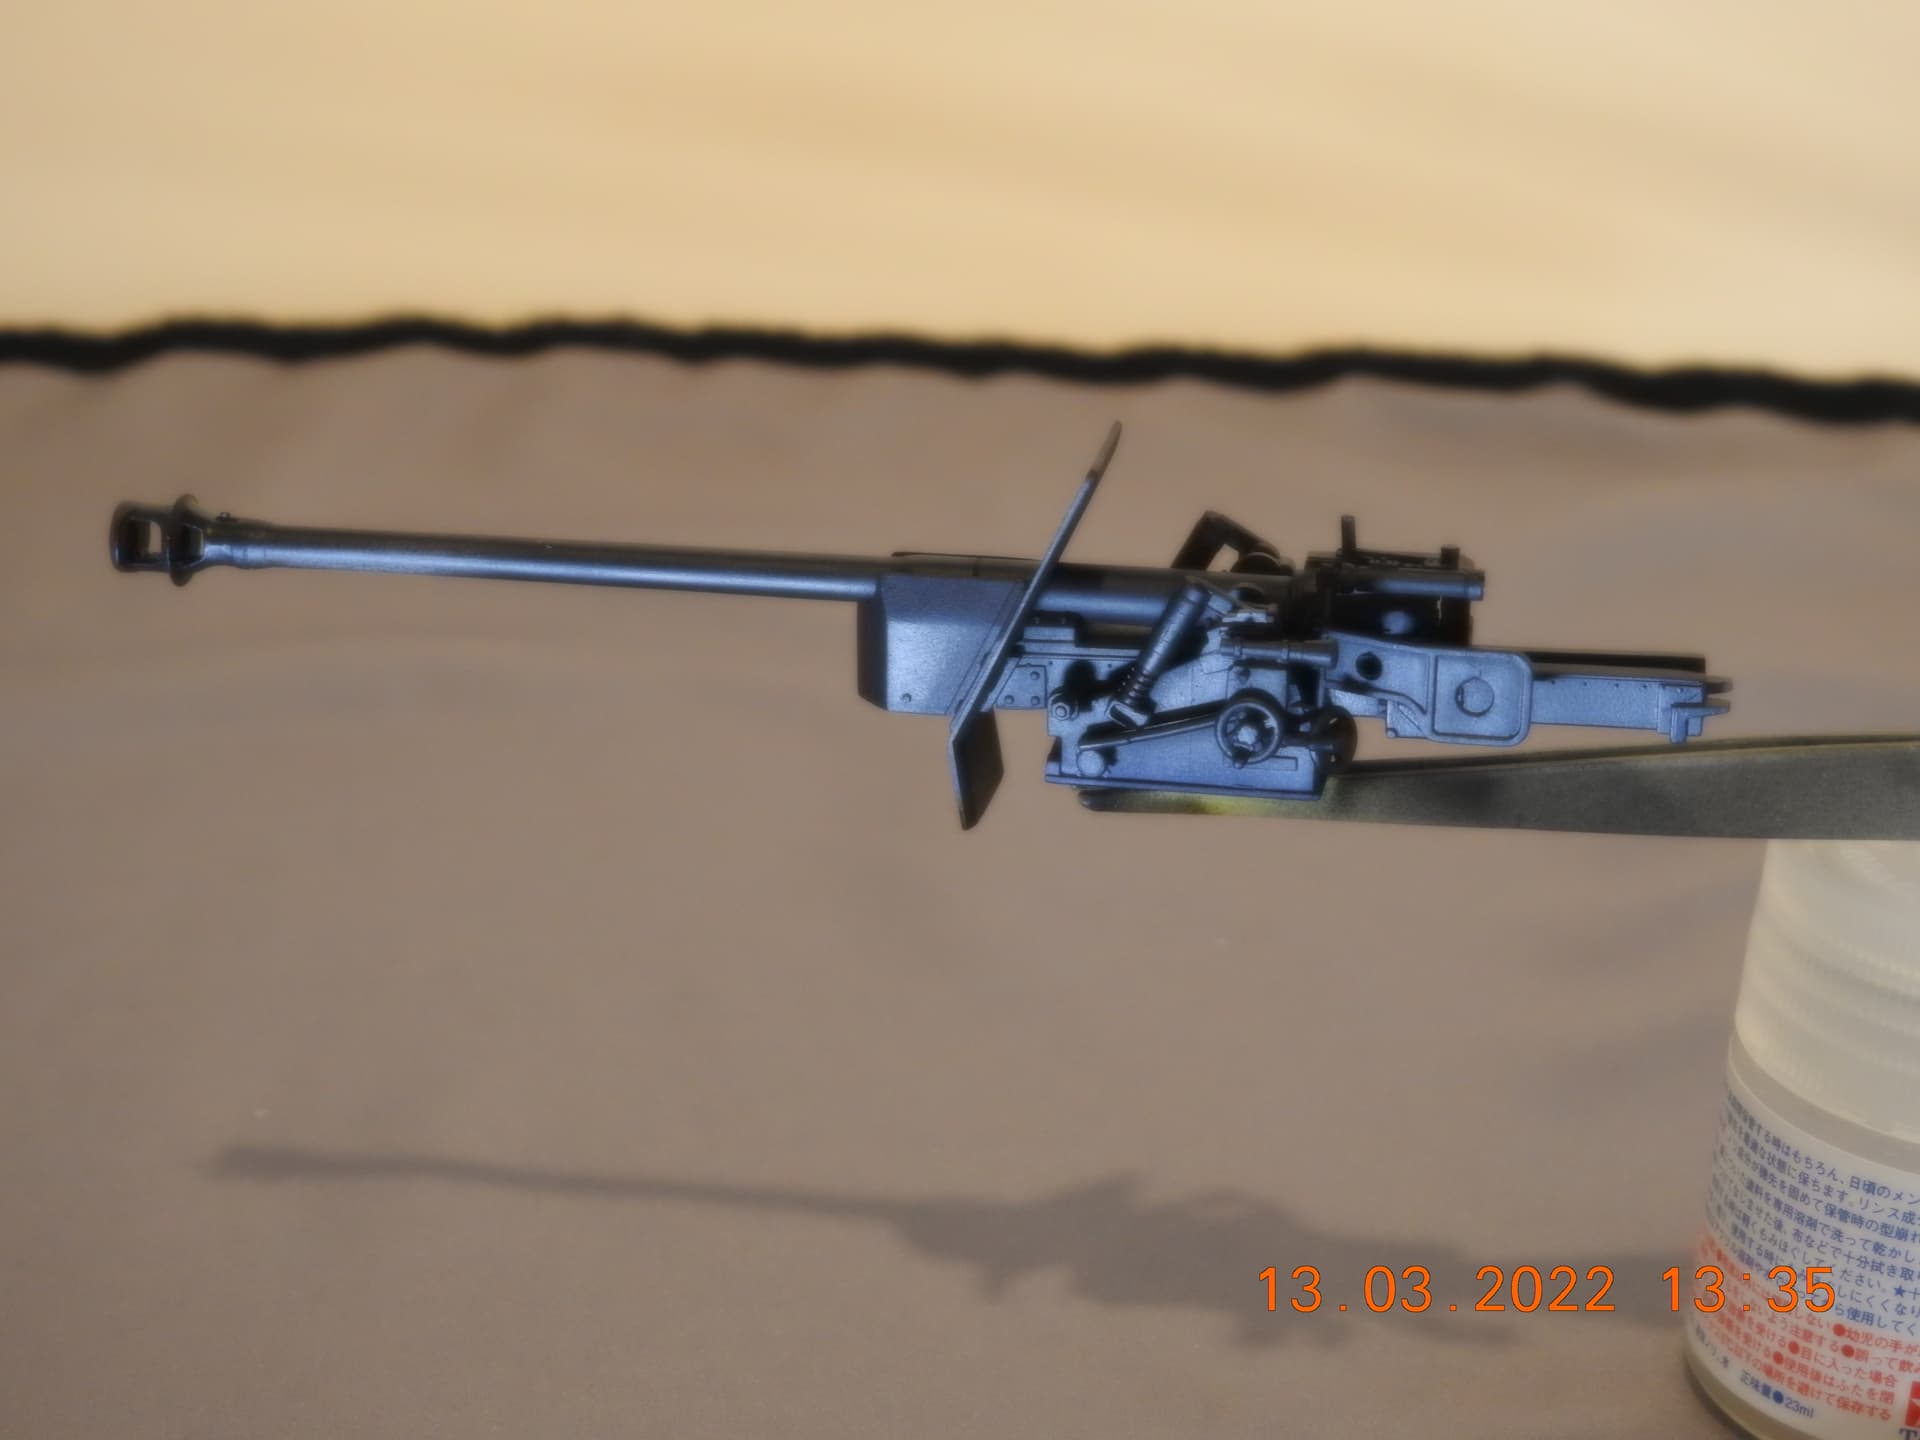
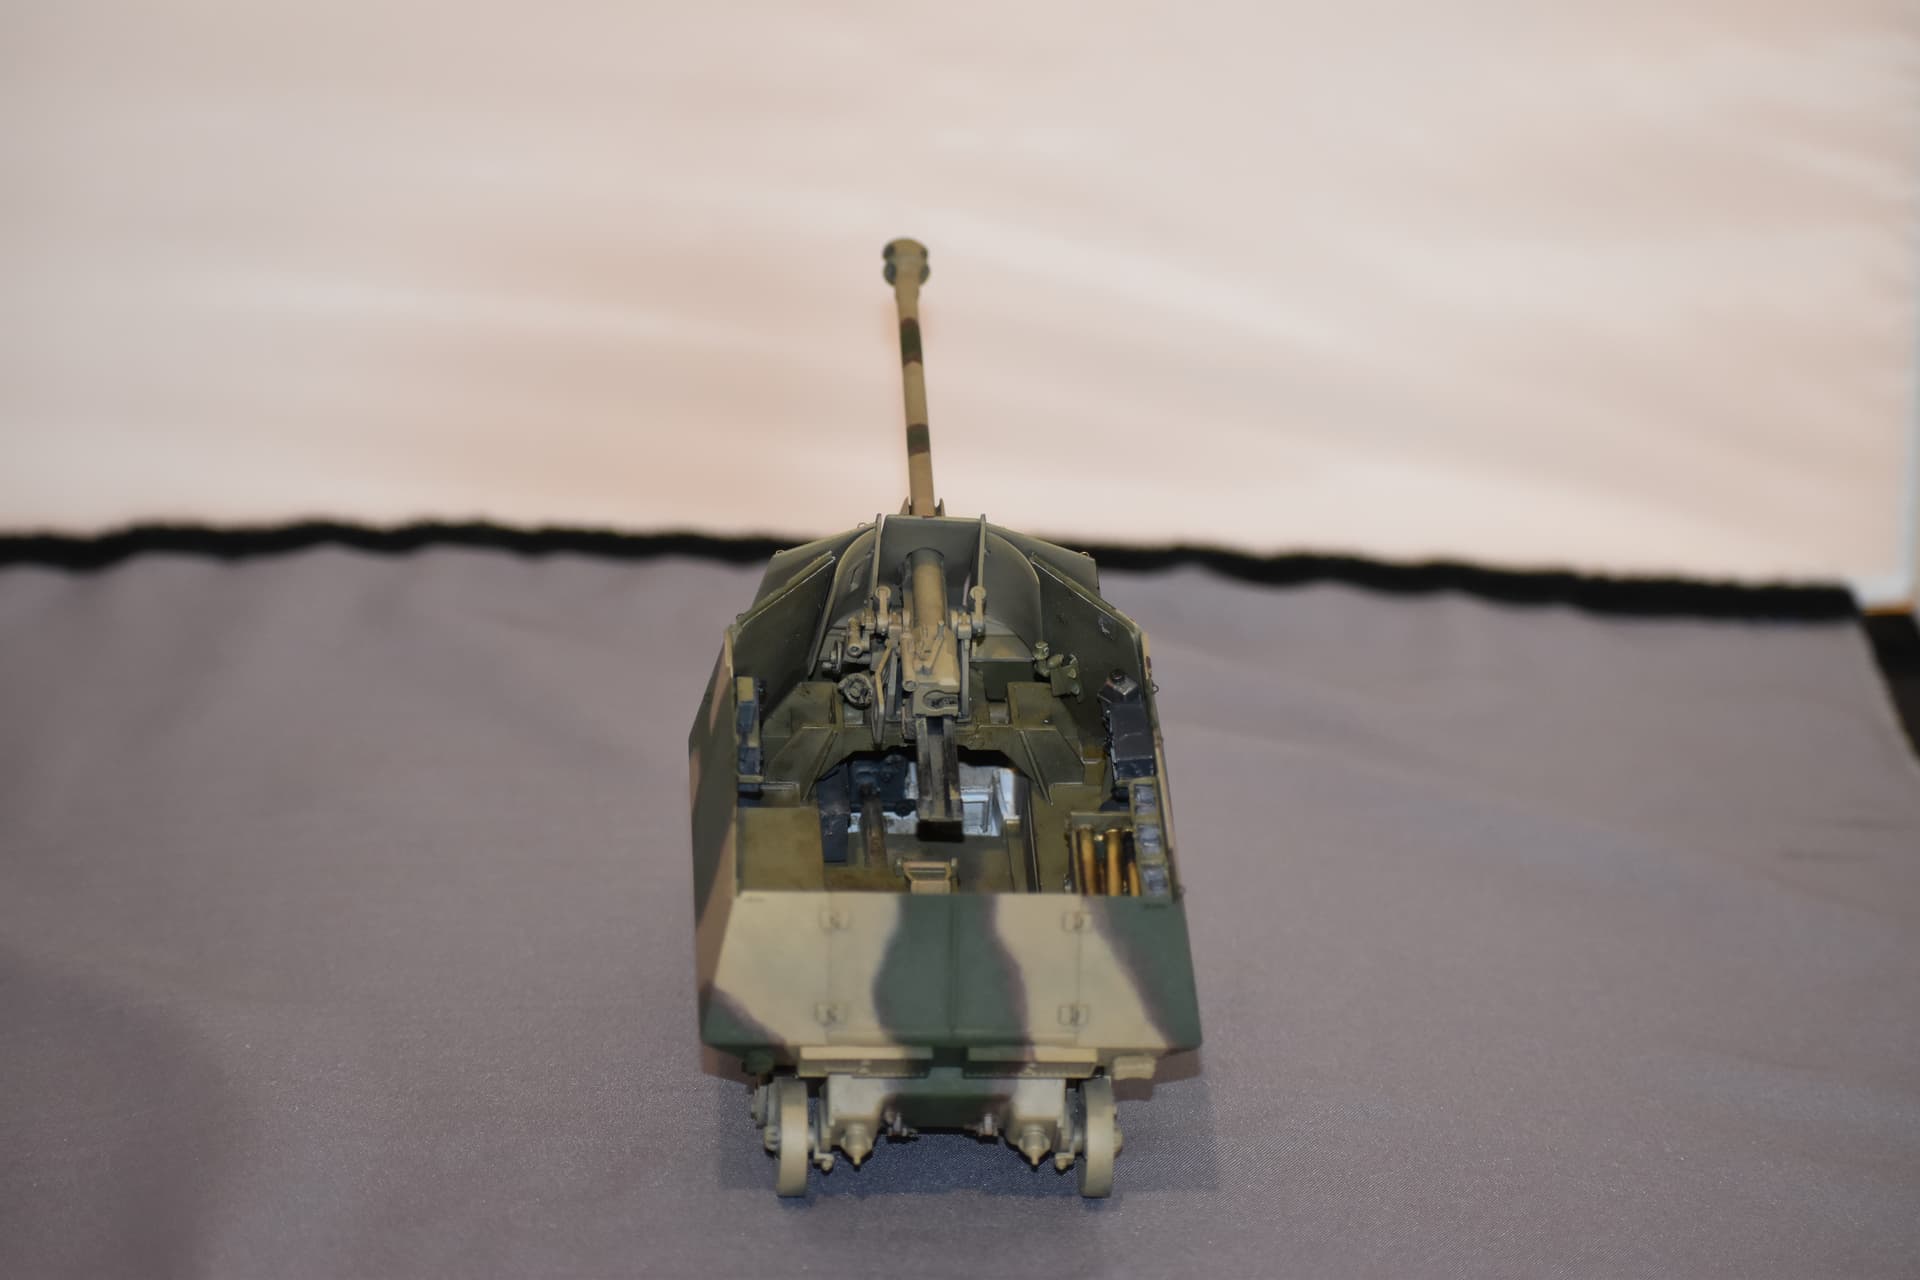
I managed to get a little more done but it is hard to pull away from all the armour pictures showing up on the news feeds. I assembled the Pak 40 and gave it a coat of black primer. I am hoping that the gun will turn out a little darker than the exterior of the vehicle.
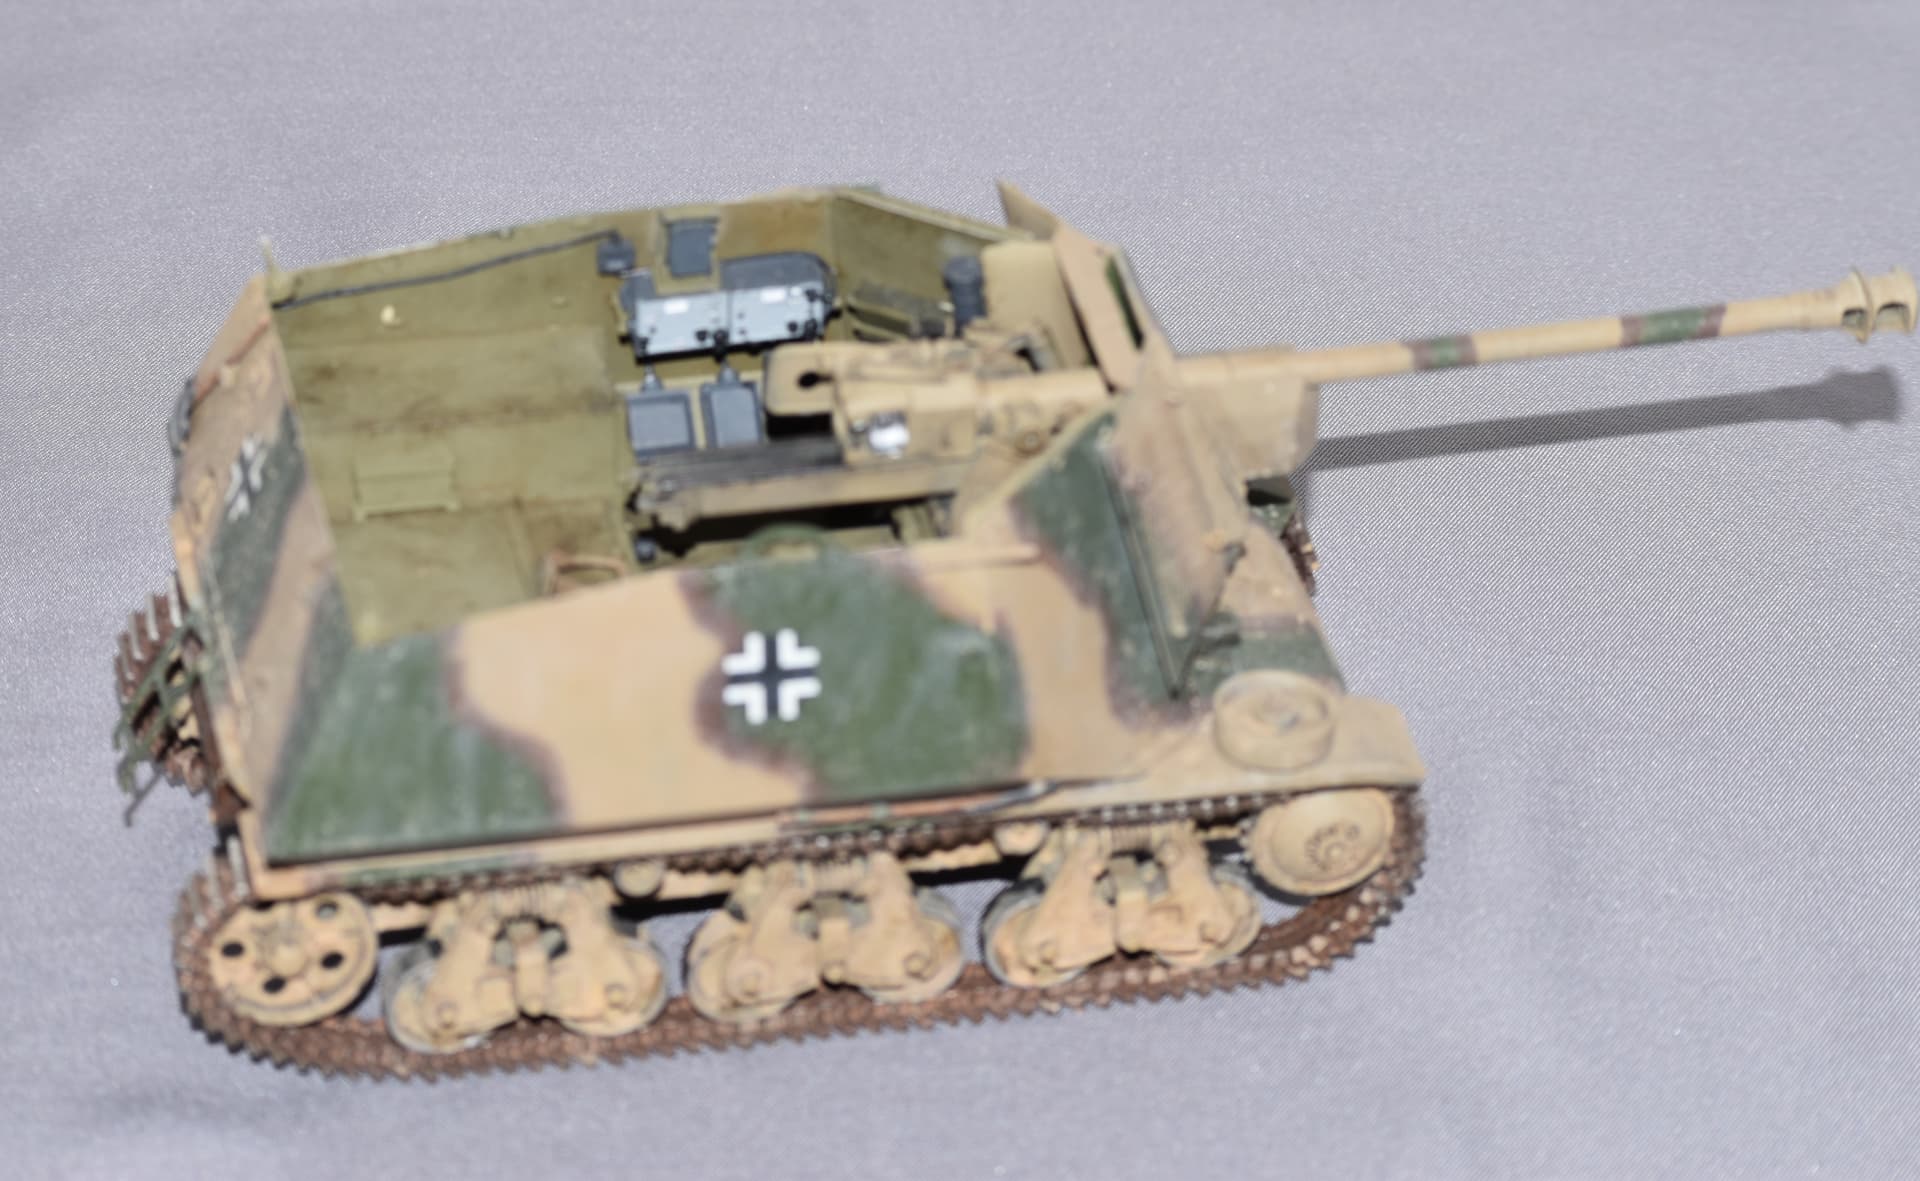
The next big job was to glue the superstructure to the hull, lots of claps and tape to hold it together while the glue dried. The gun is just set in place to see how it sits and try to figure out how the gun shield attaches to the gun.
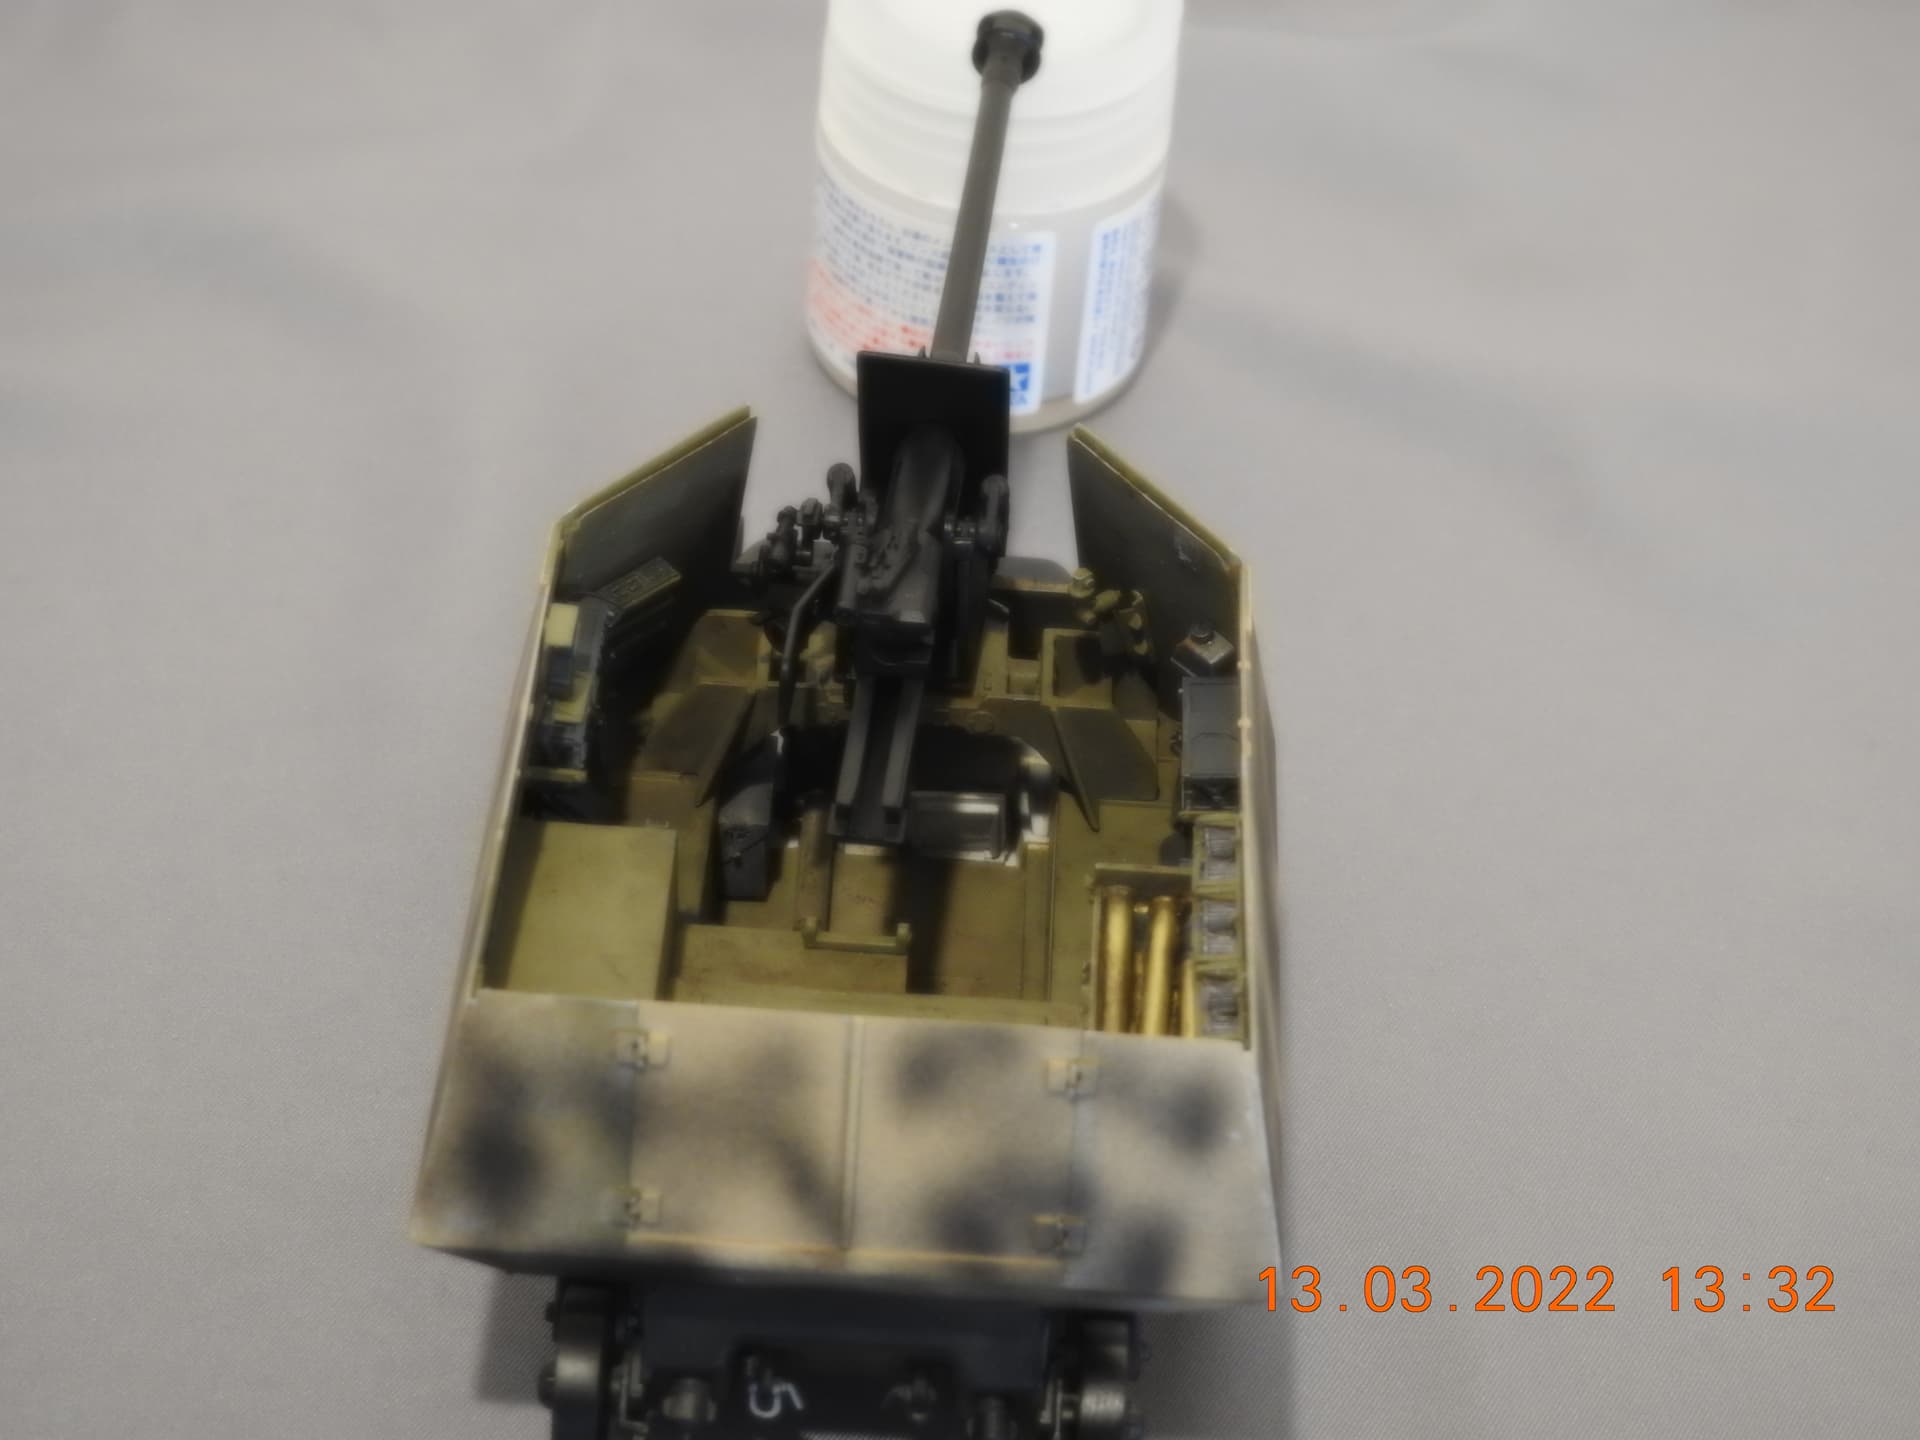
The Tamiya paint jar gives a reference to how small this vehicle is. While attaching the superstructure I only managed to knock off 2 of the interior parts. One of them flew into space and even cleaning the model bench did not help in finding it. Its not that small of a part so hopefully it will show up during the build. Now to assemble and paint the tracks so they will be ready once the camo scheme is on.
Cam, do you still have the second instruction sheet from the Blast Models kit? If you do would you mind scanning it and sending it to me?
Thanks.
Mack paperquest5@gmail.com


