Hi All,
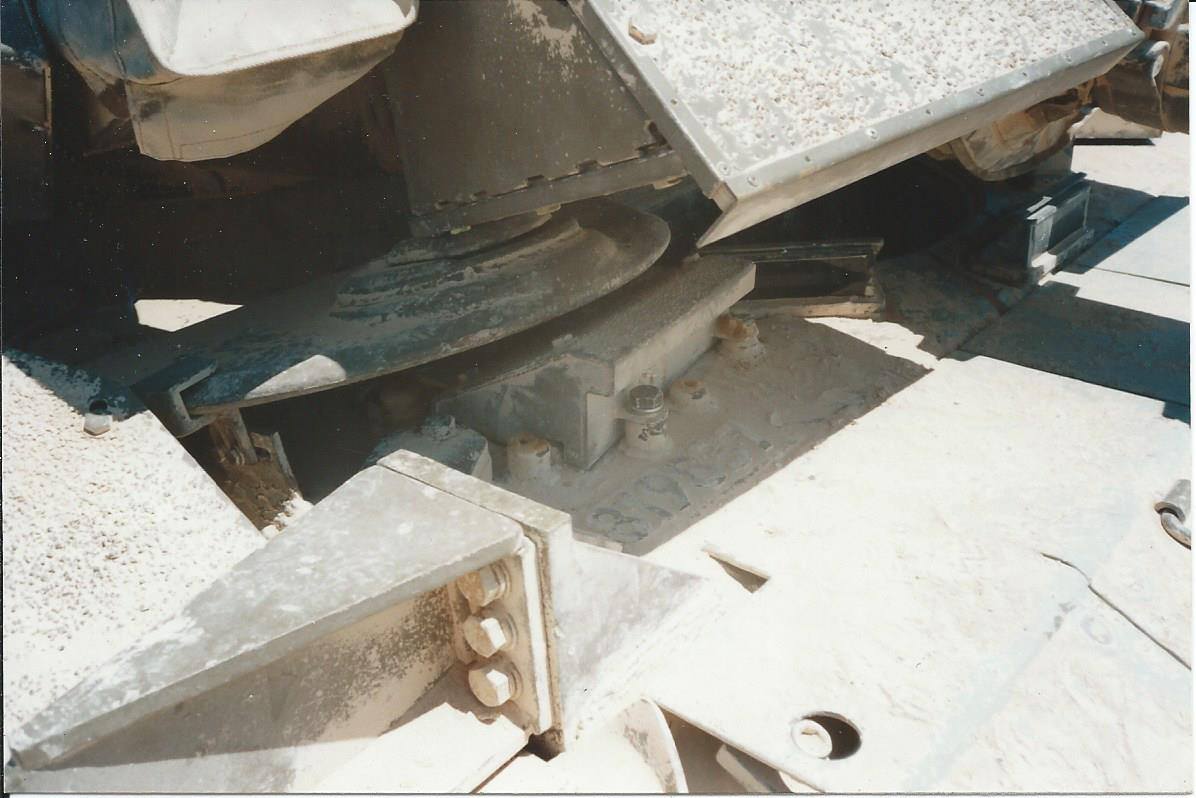
Sorry to be bothering everyone with so many questions about the Meng Gal Batash, but this one has me genuinely stumped. At step 2, the instructions have you remove, from the left rear part of the hull, some raised raised ridges of plastic; there are similar raised ridges on the right rear which you are to leave in place. In step 4, the instructions have you choose either photo etch part W4 or W5 from the photo etch parts to mount in the remaining left side ridges; this is the tank serial number, apparently. The real question is that the photo etch (W parts) include 3 of each (W4 and W5) of the serial number panels. I’ve scoured the instructions on every page, and I cannot find a spot where the remaining 2 serial number panels are used. This isn’t particularly concerning, as I’ve seen many kits that include some extra duplicate parts, but this seems really odd, given that Meng provides 3 of these parts, and apparently has you use only 1. I just want to make sure that I’m not missing some obvious location where these remaining 2 serial number panels should go, or possibly that the instructions just fail to identify the locations for these 2 serial number panels.
Thanks for any help!
If I am understanding this correctly, you want to know where the number plates go on the vehicle?
Ideally, yes. I’d like to know if there is only one location for the vehicle number (as identified in the instructions) or, if there are 2 more locations, which I didn’t find in the instructions, I’d like to know where those locations are. Thanks for responding, and if you can help me, fantastic!
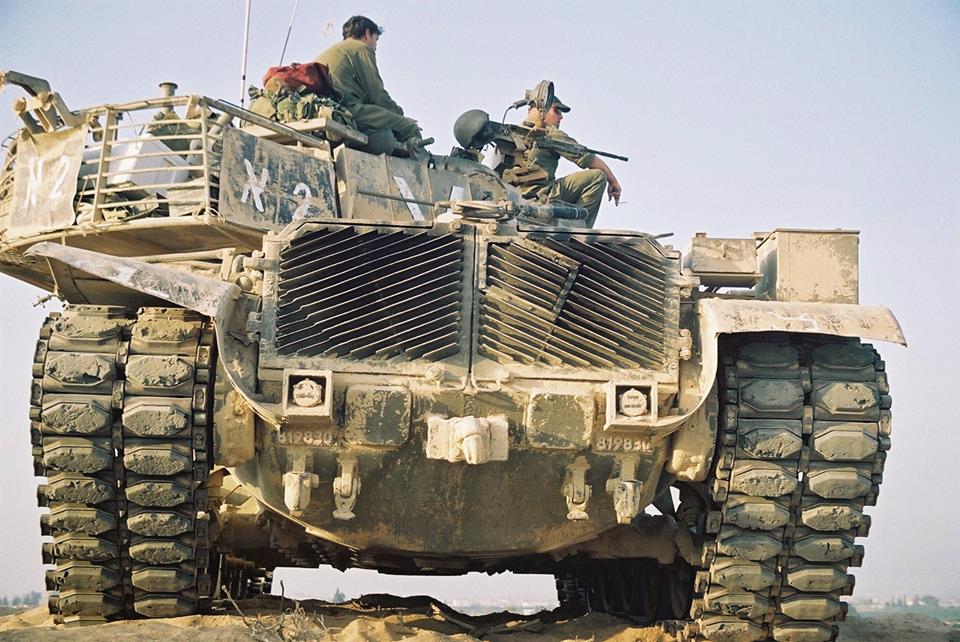
On the 6B Gal Batash there is one more number plate, on the front of the hull, on the top right corner.
The 6B Gal vehicles (not Batash usually had a double number plate at the rear and one at the front. What is strange is that the 6B Gal kit from Meng includes only two plates, compared to the three on the Gal Batash kit, which is strange.
Nikos,
Thank you SO much for this info!!! This is EXACTLY what I was looking for!!! So, now, it’s clear that the Meng instructions are wrong. The instructions have you remove the right hand rear ‘mount’, if you will, for the second vehicle number. Unfortunately, I have already removed that plastic, but the good news is that there was not a lot of plastic present, and it will be easy to just place the photo etched number plates on both right and left hand rear of the tank, as per the photos you sent.
And now, with the other photo you sent, I see I missed that the instructions do, in fact, show that a second number plate is supposed to go on the forward upper hull, though I think the instructions may have the location a bit off. It just goes to show that we can look right at something, and not see it!! Thank you again for taking the time to answer my question. My tank will now be more accurate than it otherwise would have been. 
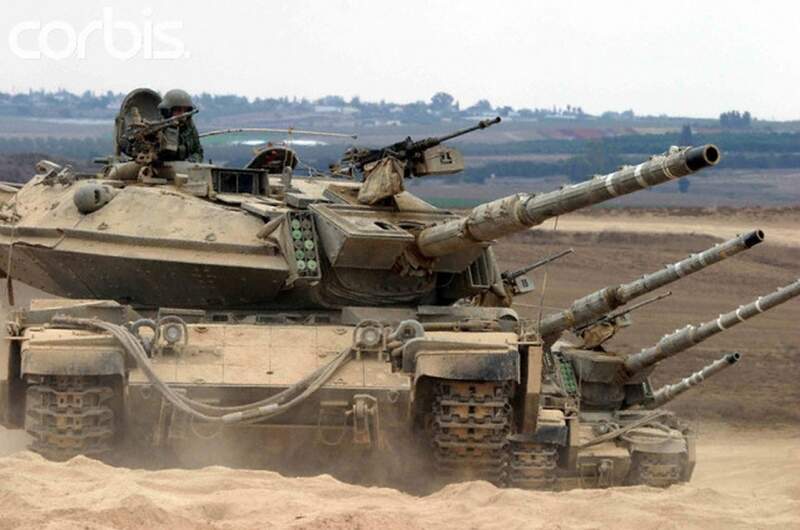
One other interesting point. In the photo of the rear of a Gal Batash that you sent, it shows the tracks very clearly. I have the Desert Eagle Publishing Part 2 for the Gal and Gal Batash, and none of the tanks in that book show that type of track. The tracks in the book appear to be Merkava Siman II all metal tracks, which I plan to put on my tank, using the Fruil set. The tracks in your photo almost look like the initial tracks on an M1 Abrams tank, though on the Abrams tracks, the rubber parts form a more chevron type shape. I wonder what tracks are on the tank in your photo; do you know?
There were two types of tracks used on the Gal Batash.
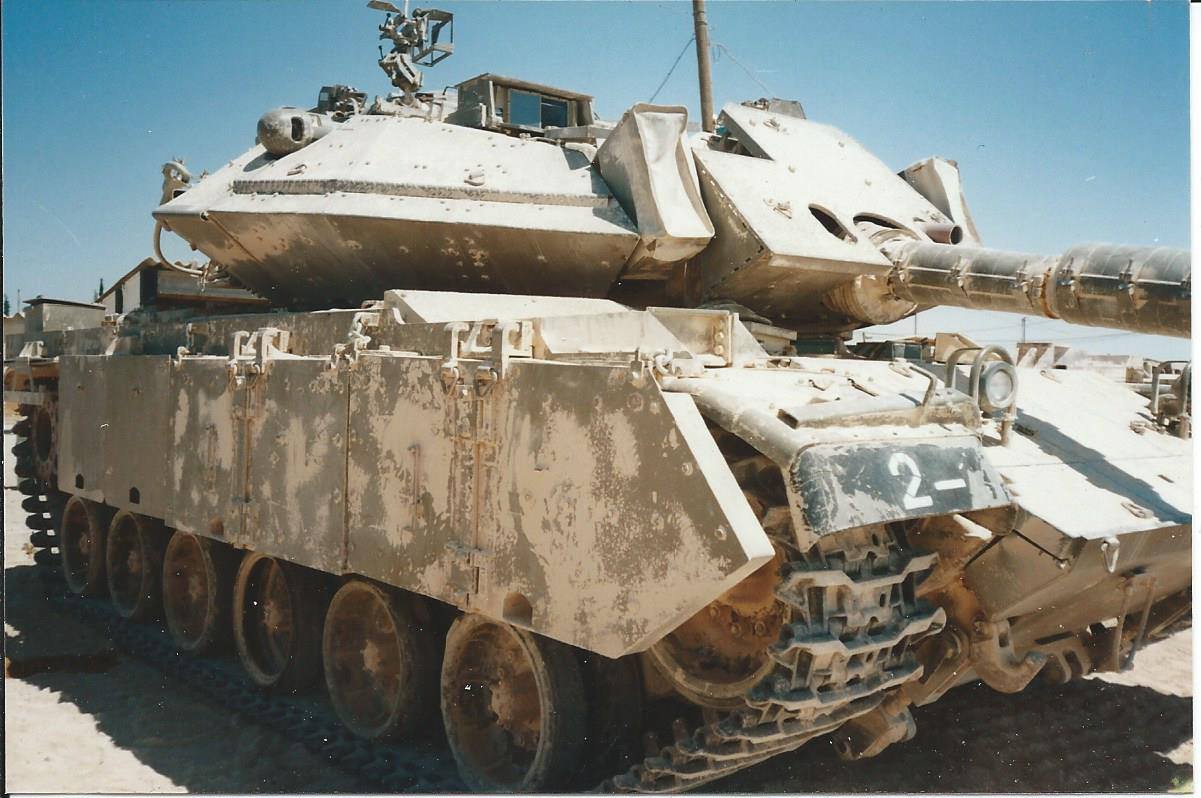
Merkava track (more common):
or Batash (reinforced) tracks, similar to the Merkava 2D:
or, if the crew was partying the night before, both:
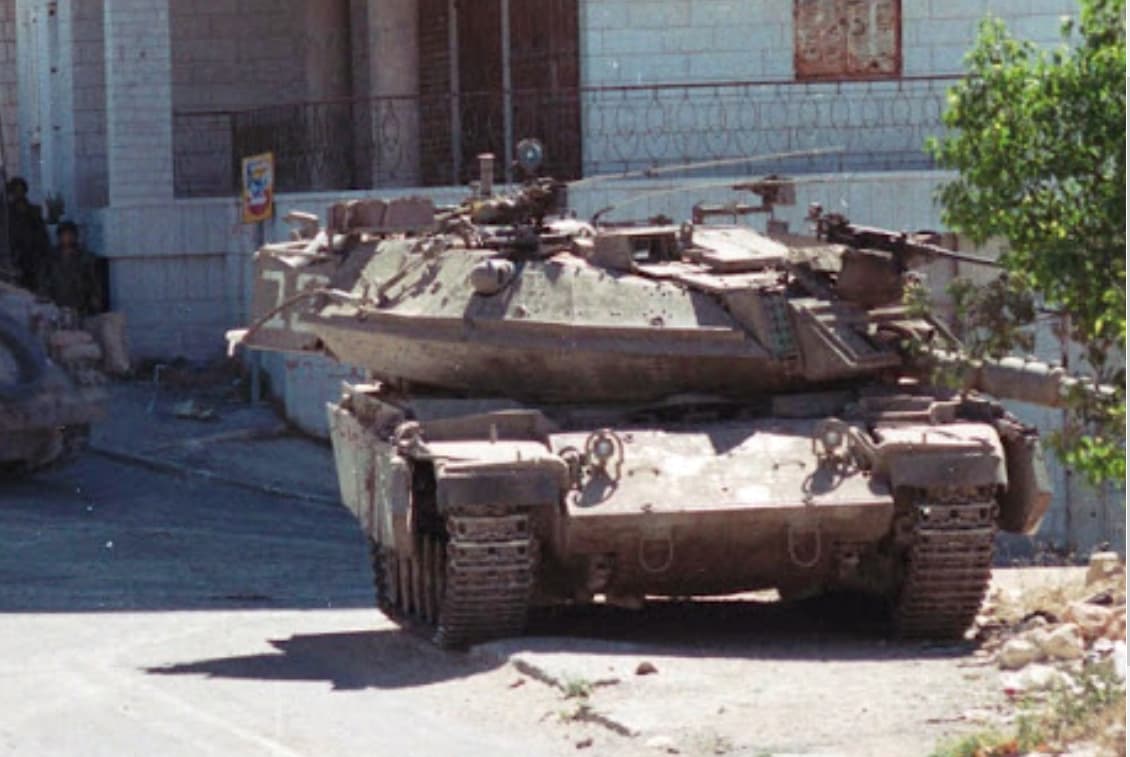
 the photo showing the rear of the vehicle is a Gal (earlier variant), not a Gal Batash, and the track is the T142 track used on M60 tanks.
2 Likes
I wonder what the reason could be for such a setup. One might assume assymetric tracks cause uneven strain and vibrations thus shortening suspension life.
1 Like
Would be good for a competition to wind the judges up … Then you produce the photo … 
It is odd though, maybe a supply error ? and one Merkava track got put in the wrong pile and due to urgency, they just went with it and fitted them knowing they will be ok ? If you look at at least 2 out of the 3 GBs to the rear, the first 2 have the Batash tracks fitted. So if you did have 2 different types fitted, as long as the track actually fits that type of running gear, it wont have a massive effect on wear or vibrations etc, especially on that type of rough terrain - perhaps if running continuously on a tarmac road, there would be a noticeable difference but other than that, you’d be ok
Could those raised plastic lines simply be alignment marks?
Some Italeri kits had them to make positioning of tools easier …
The Magach 6B Batash and the Merkava Mk.2D (which was basically the Batash version of the Mk.2B) were initially used exclusively within the security zone in Southern Lebanon. Their job was taking (usually exposed) scouting positions just outside their bases overlooking the area in their immediate vicinity. They needed the extra armor to offset the higher-than-usual risk of getting hit by guided AT missiles.
Following Israel’s withdrawal from Lebanon in May 2000, many of these tanks were redeployed around the Gaza Strip in similar role.
The Batash versions of the Magach and Merkava were never meant to move around a lot, and certainly weren’t fit to fight other tanks, for their power-to-weight ratio suffered significantly from the additional armor.
From my personal experience, the Mk.2D was a quiet lazy, but well protected moving pillbox. Since that was pretty much their intended role, it wasn’t really a disadvantage.
I’d say the problems associated with assymetric tracks were probably accepted as calculated risk due to the limited milage these tanks were supposed to cover.
1 Like
Having said all that c#&p, I still don’t know what the reason was for this assymetric setup…
1 Like
I’m going with supply error… And they needed it to be used … necessity ?
@Uncle-Heavy: Robin, yes, I think those slight raised plastic ‘edges’ were there primarily as locators for the vehicle numbers. Since I retained the one on the left side, all I need to do is put the other photo etch part symmetrically on the right.
Thanks to everyone on the track discussion! In addition to the Meng Magach Gal Batash kit, I also have the Meng Magach Gal kit. These thoughts on tracks might be an interesting side note for the Gal build, and maybe I’ll do a mixed set of tracks (one one none side, a different type on the other) just to be different.
Also, just because I was curious, I checked the Gal kit instructions to see if they showed 2 vehicle numbers on the rear of that tank. It does not…it shows just the one, just like the Gal Batash kit instructions.
Another interesting personal note. I knew I had a number of IDF vehicles in my collection, but it looks like I’ll end up with more IDF vehicles than any other nation’s AFVs. I already have 4 built, an AFV Club 1967 Shot Centurion, a Takom Merkava I, an Academy Merkava IV, and a Meng Merkava 4M. In my as yet unbuilt models, I have the Meng Merkava 3D Early, the Meng Merkava 3D Baz, the Meng Gal, the Meng Gal Batash, the Meng Namer, another Meng Merkava 4M, a Takom Merkava I Hybrid, 2 AFV Club 1973 Shot Kals, and an Amusing Hobby Shot Kal. I’ve also got an Academy Gal Batash that probably won’t get built since I have the Meng, and a Hobby Boss Merkava Mk. 4, which I bought many years ago, before I realized the running gear misalignment problem with that kit. And, an old Tamiya Merkava Mk. I. And then there all the other IDF AFVs that I haven’t yet purchased!
2 Likes