Thank you! I didn’t know that about the etch, I thought it was a recent very recent development since you don’t see it often. I didn’t know Mig (of AMMO fame?) had claimed it. I didn’t think they even sold PE.
cheers
Michael
Thank you! I didn’t know that about the etch, I thought it was a recent very recent development since you don’t see it often. I didn’t know Mig (of AMMO fame?) had claimed it. I didn’t think they even sold PE.
cheers
Michael
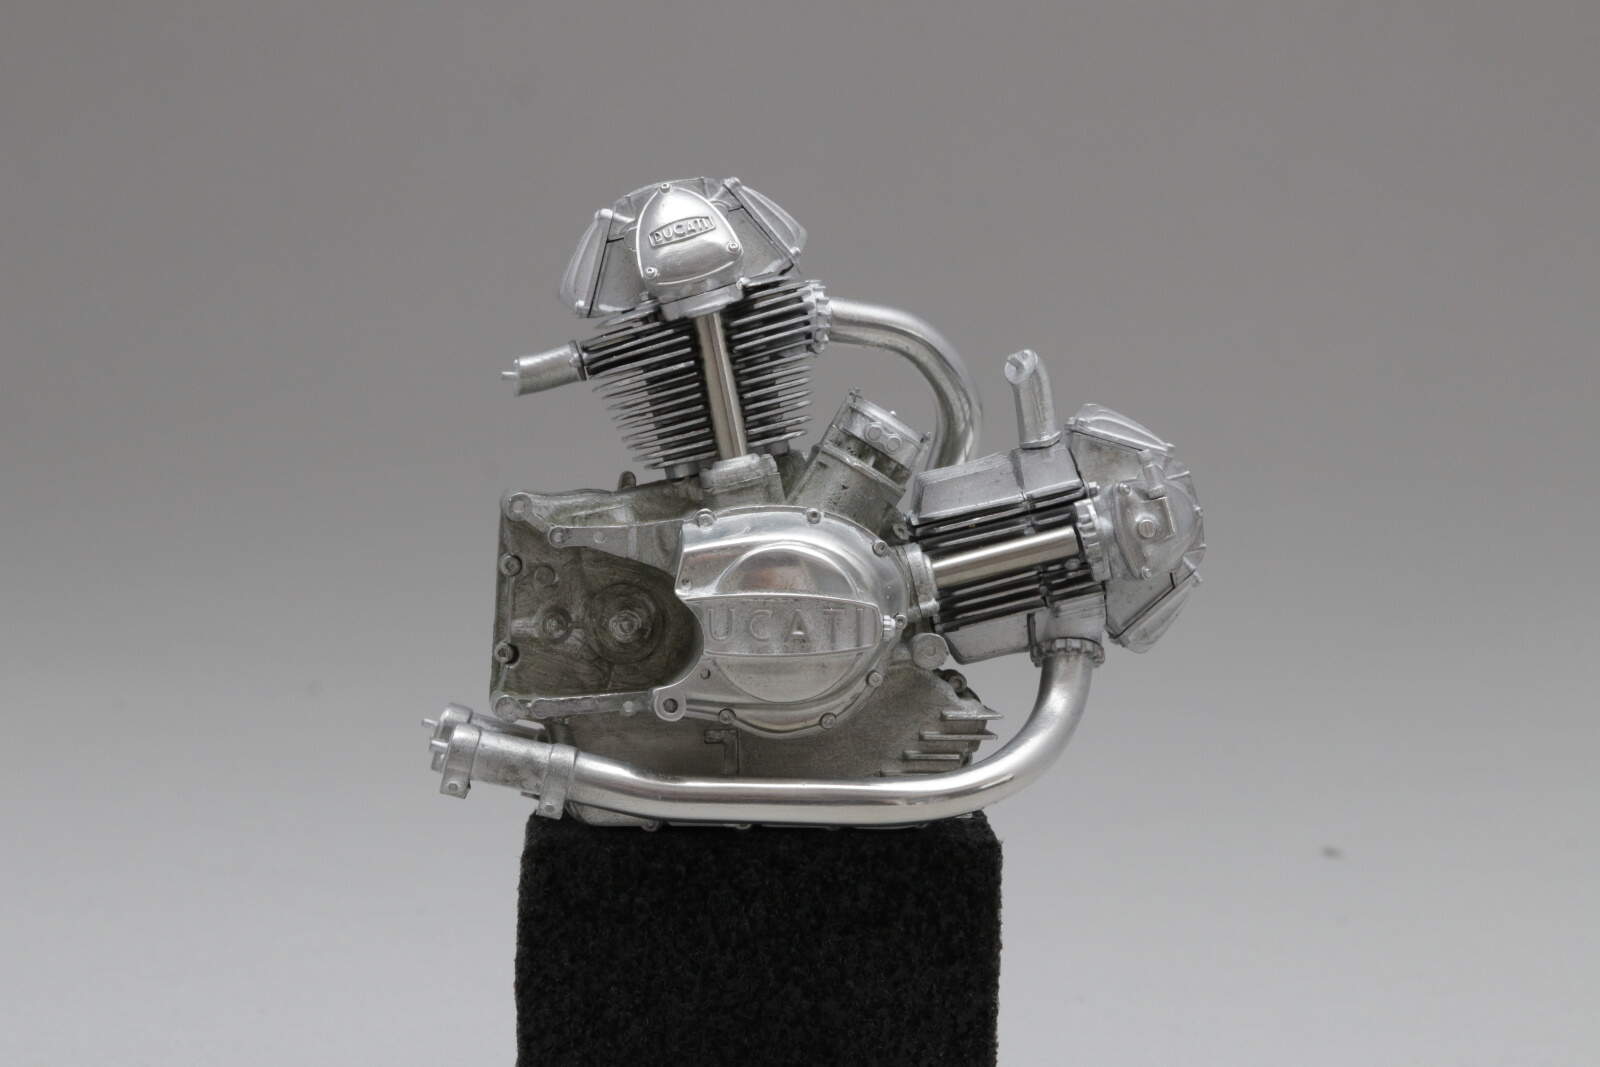
Turning attention to the engine now. I have decided not to paint but try for a cast metal effect for the main block and polished elements where required. It’s a work in progress at the moment but here’s we are at the moment
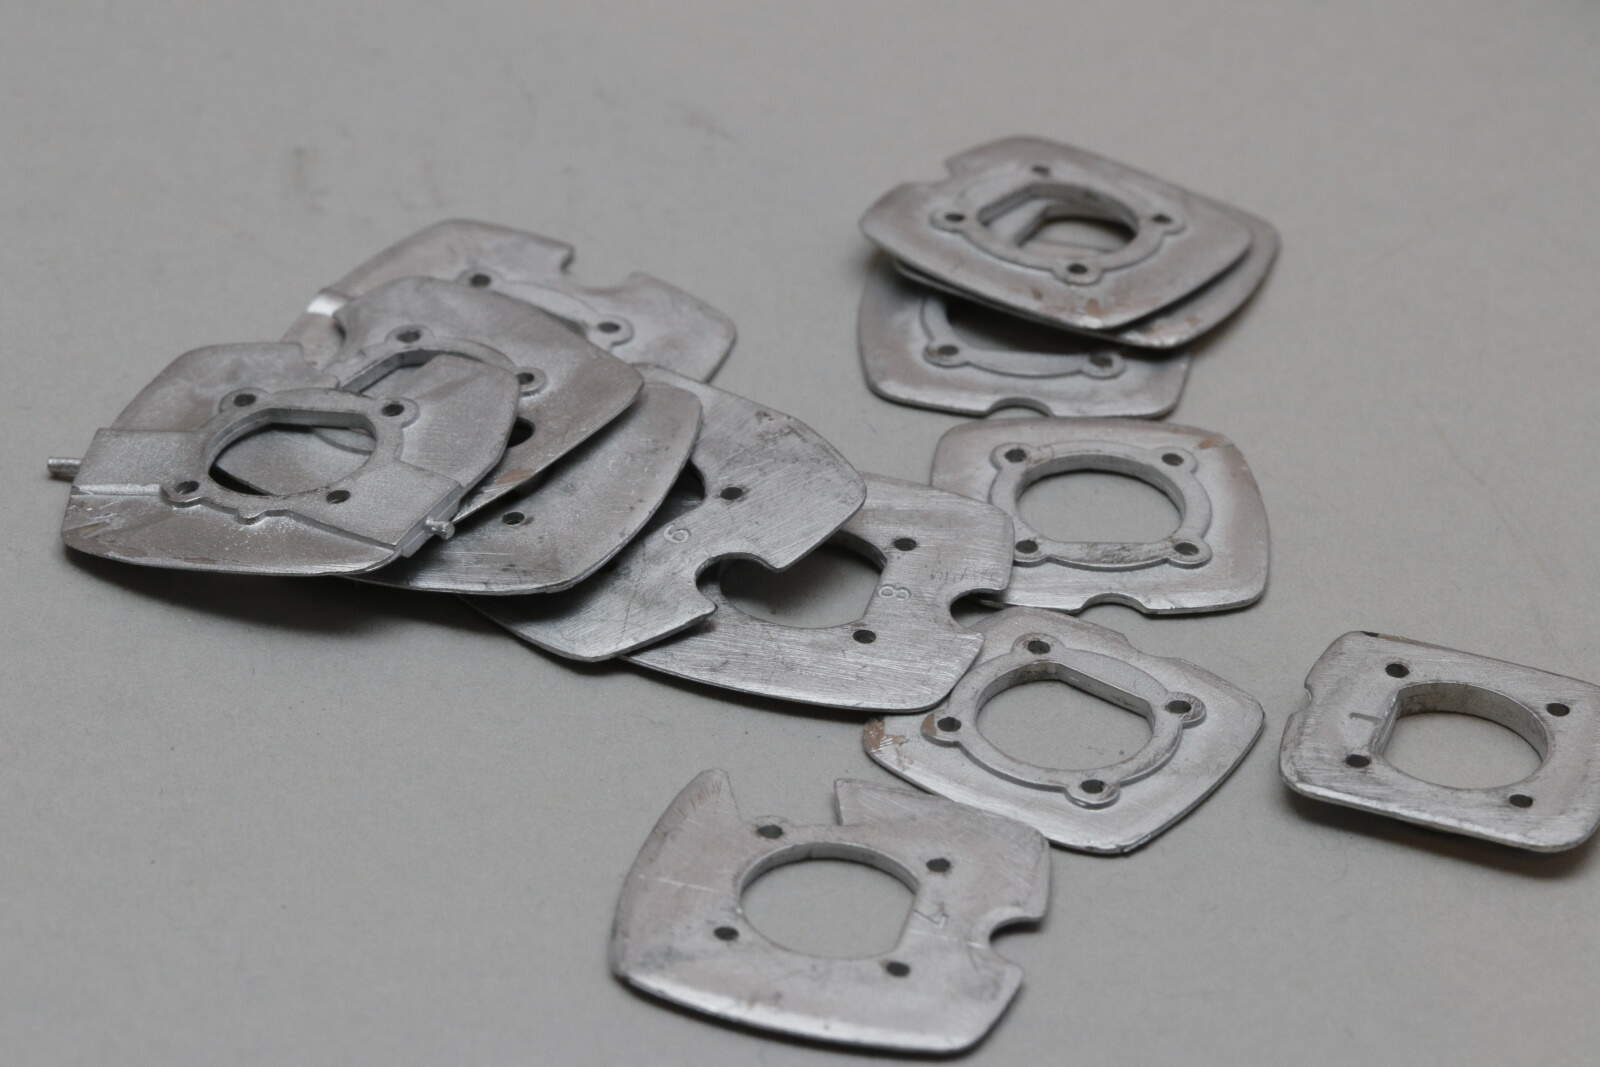
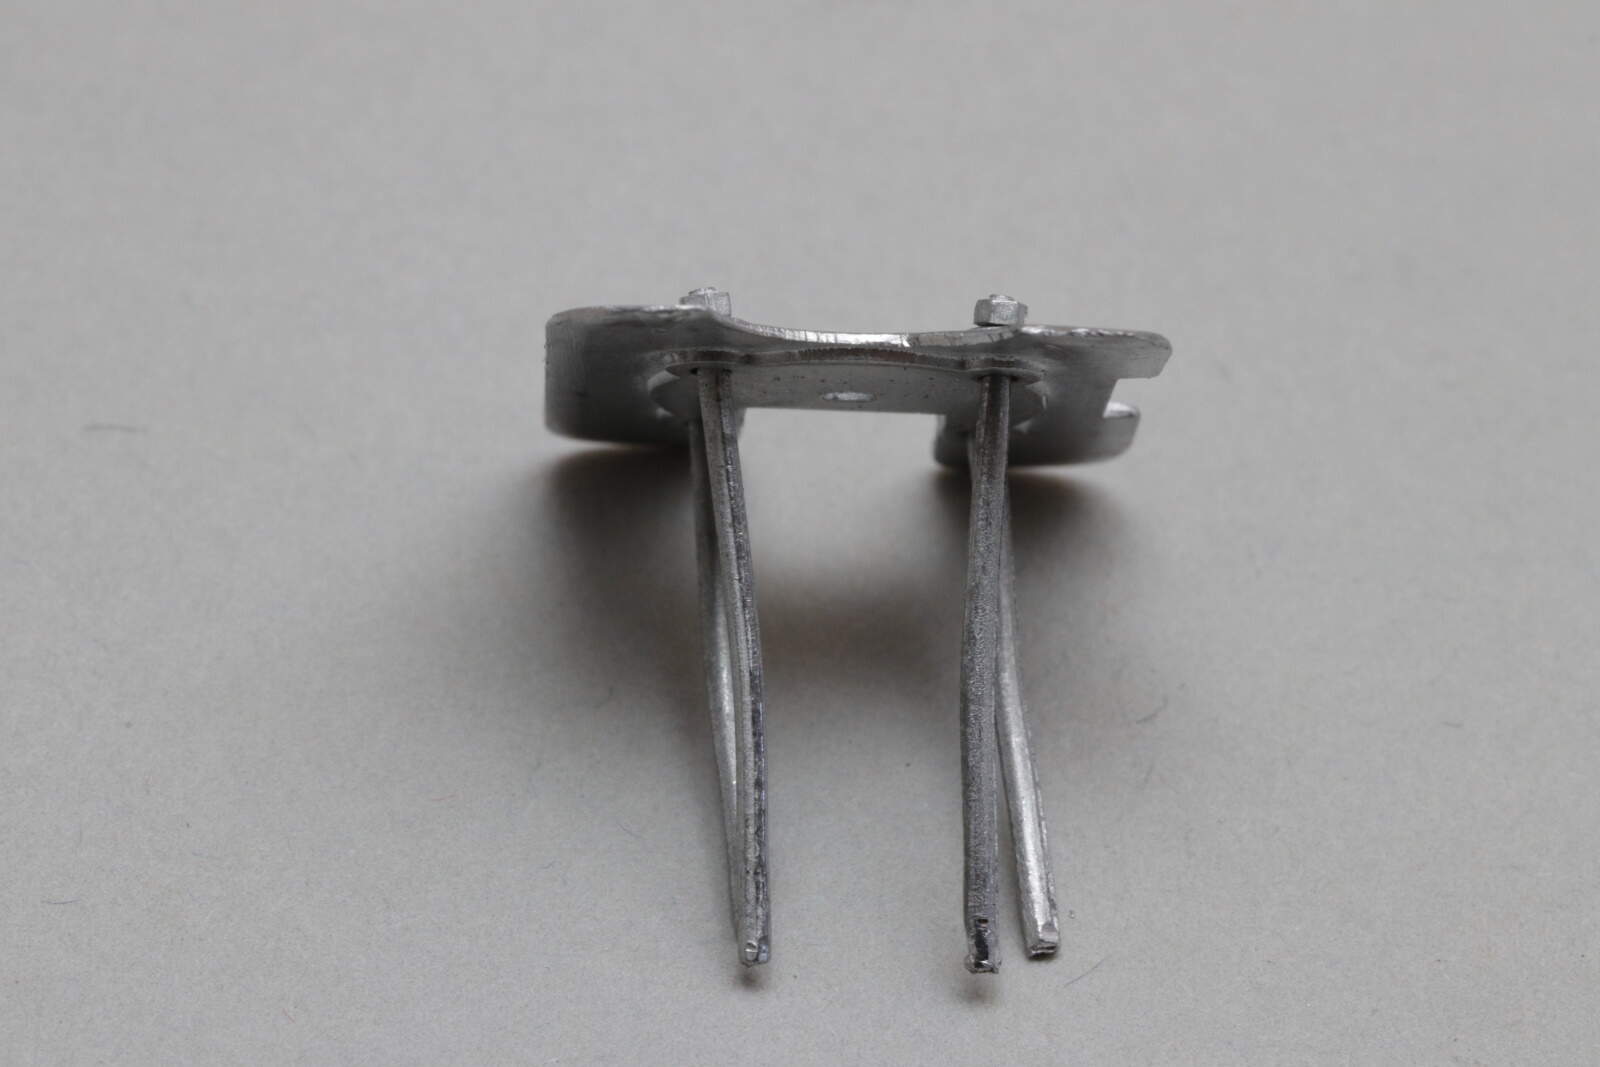
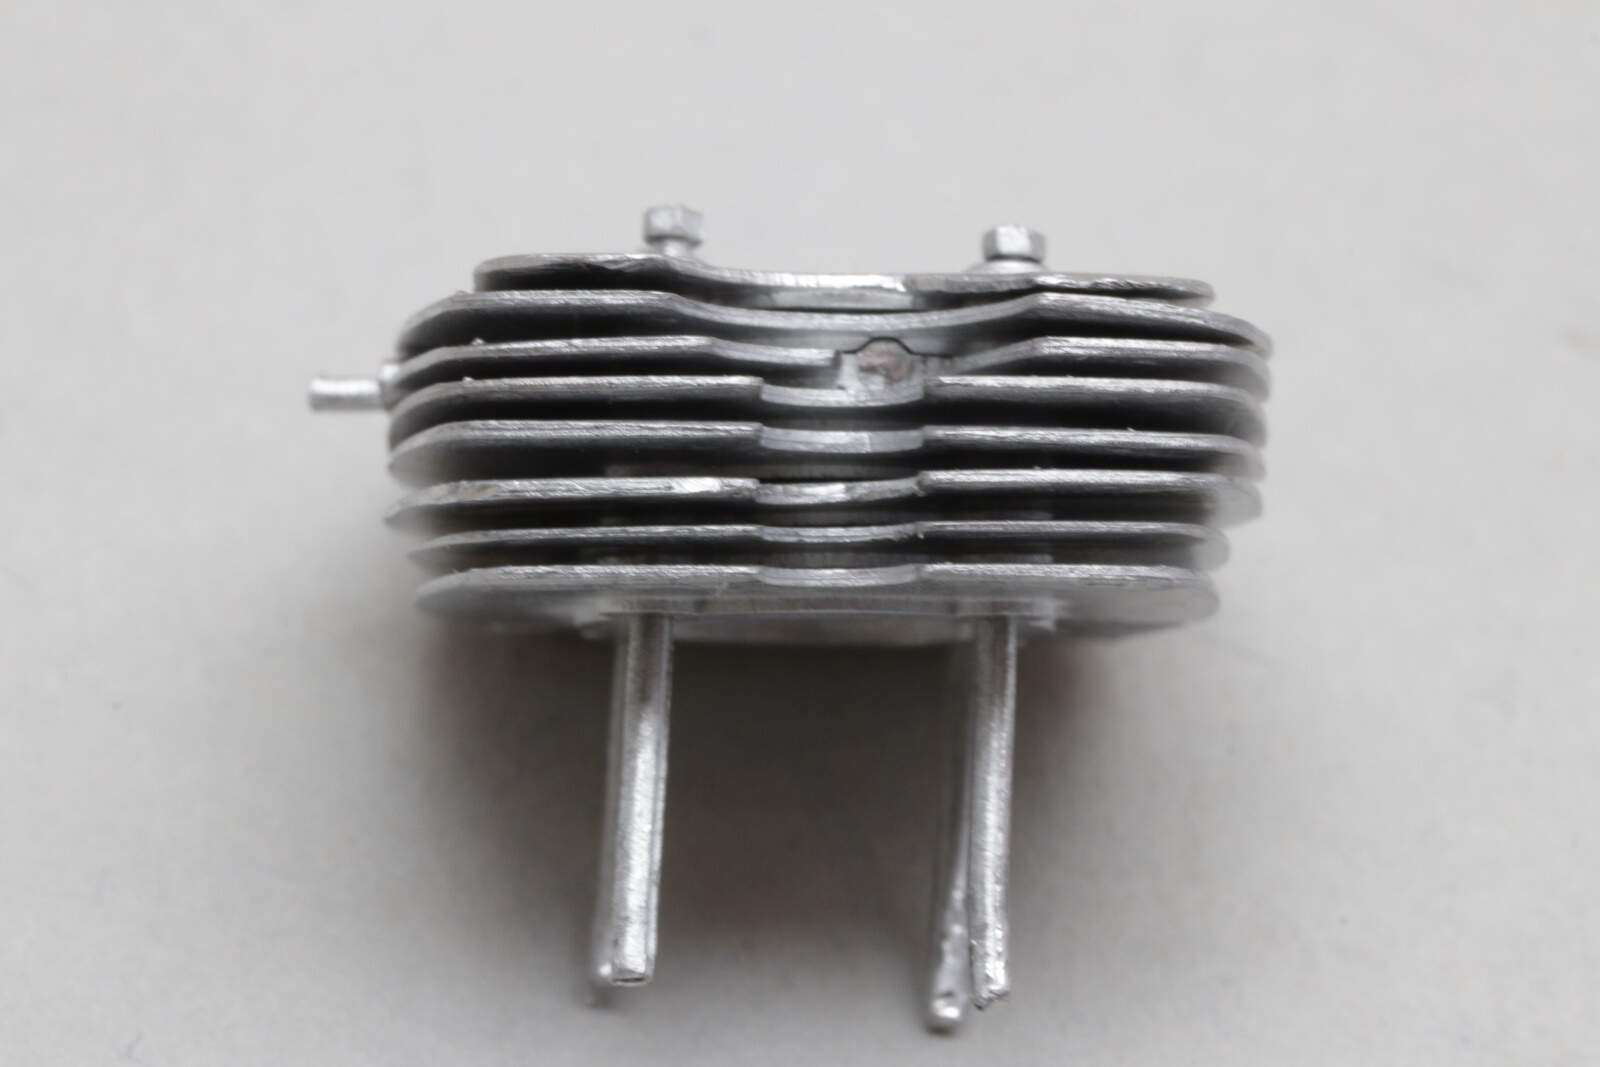
and then a dry run of building out the cylinder fins, which starts with a pile of fins
and then add layers
and you get a cylinder block that doesn’t quite fit yet
Still a fair bit to do here but I have a rough idea now of how this works and what needs to be sorted.
cheers
Michael
That looks sooooo good Michael, lovely work!
Cheers, D
Michael,
Your decision to not paint but rub out and polish the engine casting I guess using steel wool really paid off is Spades. No way could I tell the difference between a full size block and the kit block as yours looks about as real as one could ever get a kit one to look.
As for that cylinder head. Damn, does that look good once built up. This is turning into another one of your epic builds for sure.
joel
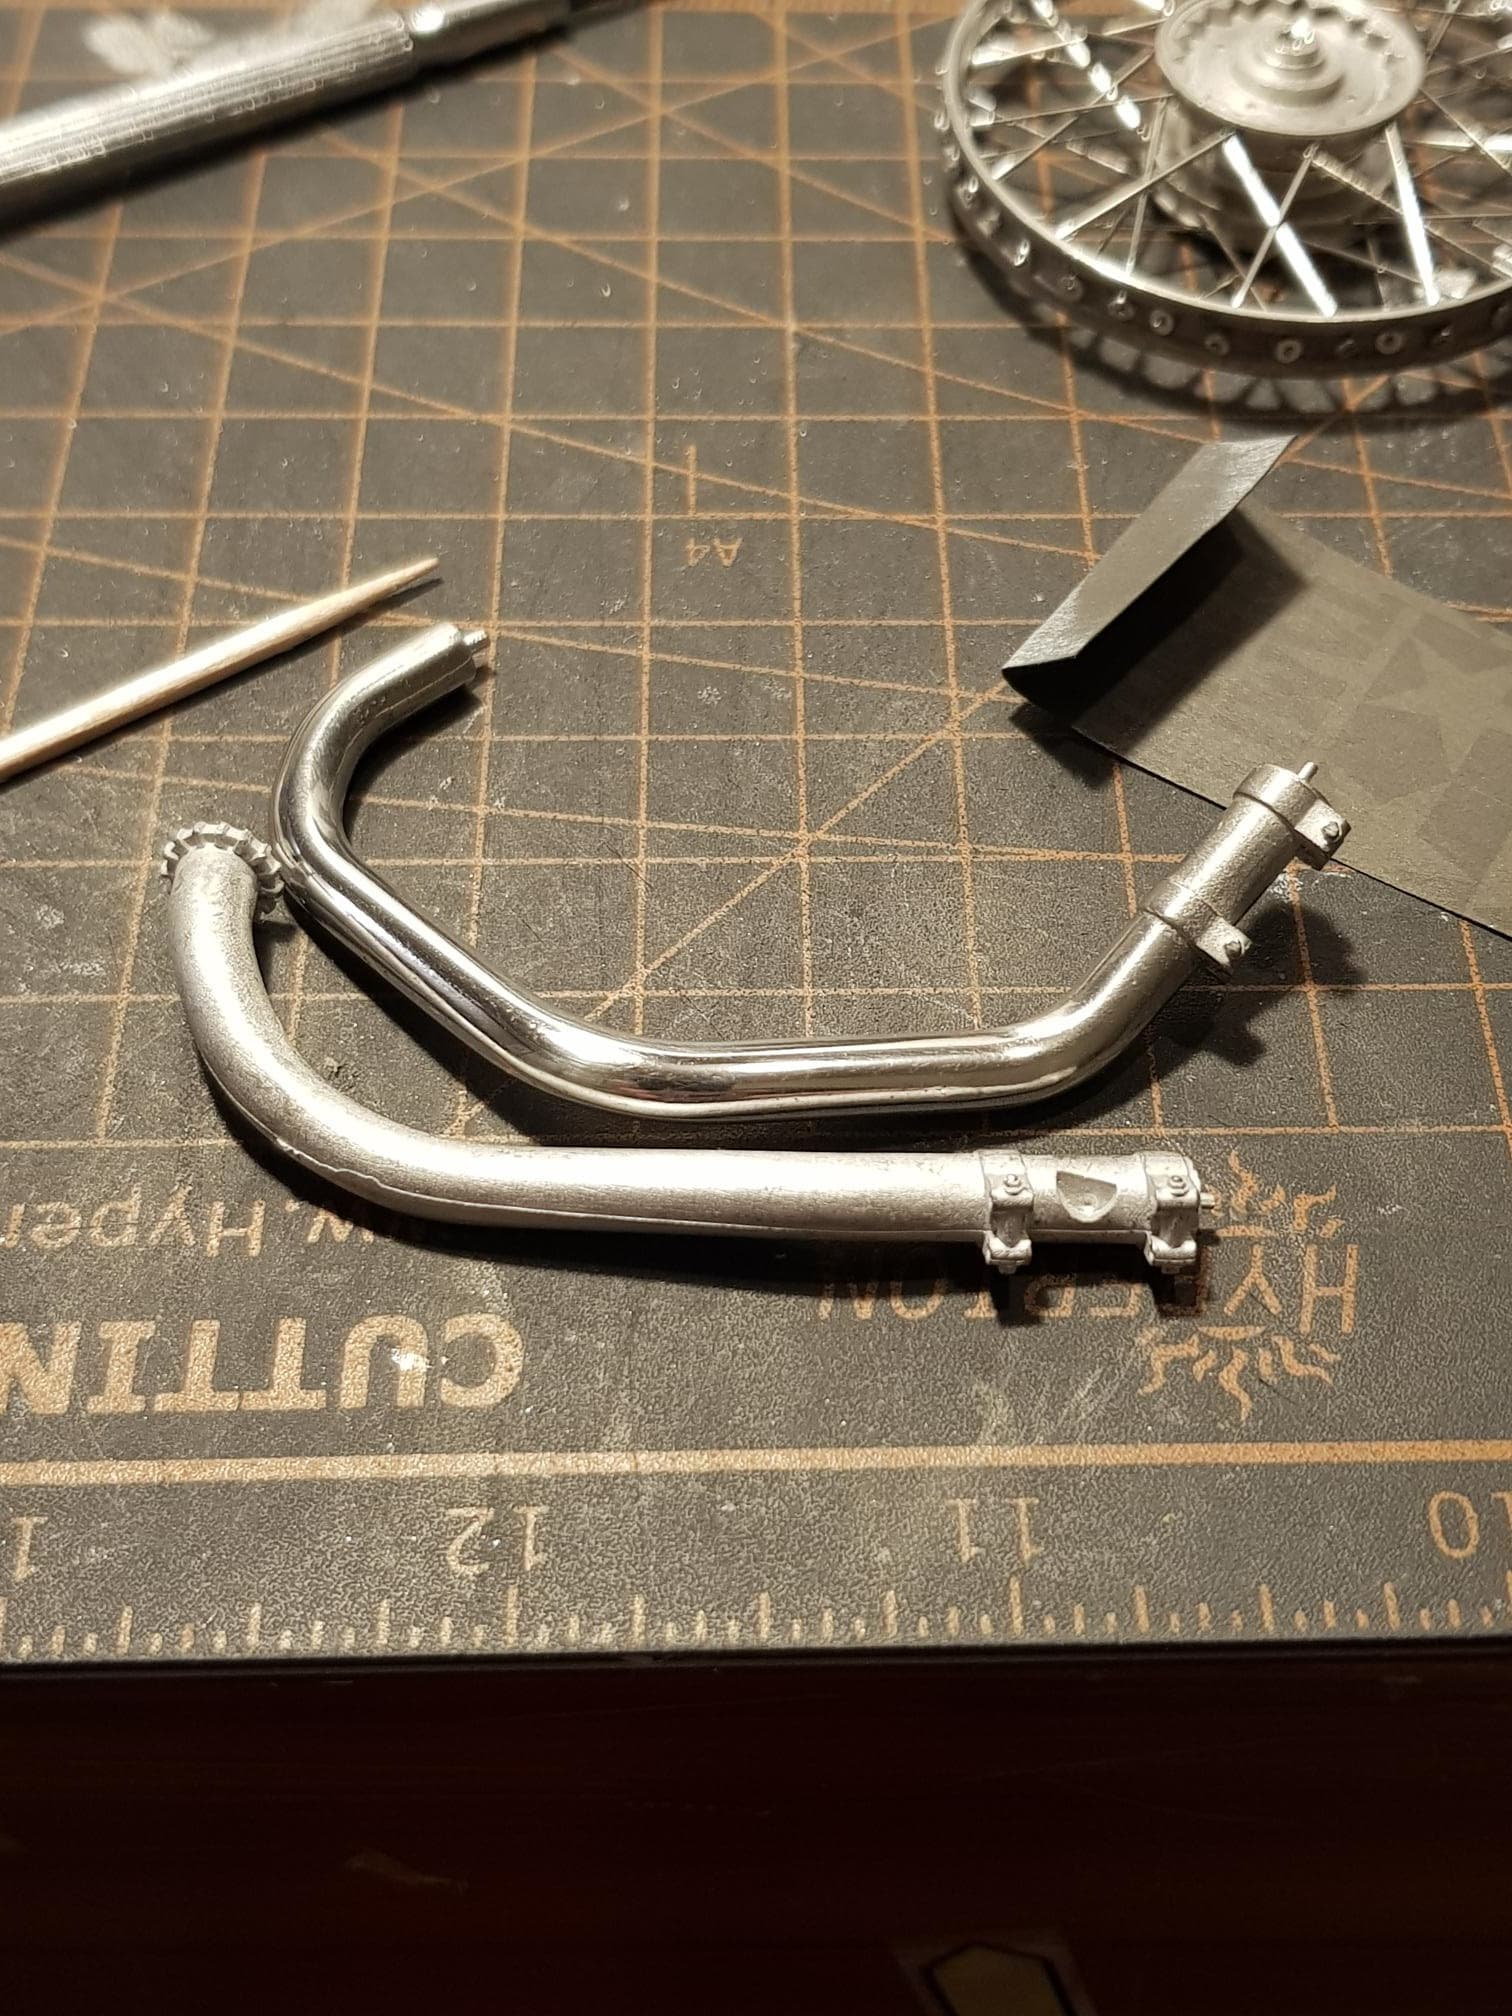
Continuing to work on engine though I have lost the use of my favourite tool for the moment - a fibreglass brush. It is essential for cleaning the white metal and is invaluable for getting into the nooks and crannies. Unfortunately the metal is pretty tough on the fibreglass and I have worn the brush away. We are in lockdown at the moment so I have ordered some replacements. Hopefully here soon. But continuing to polish away, an example here are the exhaust header pipes - one partially done, the other untouched
cheers
Michael
Looking very nice Michael. Great tip on the fiberglass brush . I’ll have to order a few for my upcoming build.
Cheers - Richard
Michael,
What a huge difference in the two exhaust pipes: Before and After. Not sure if anyone could get that finish with Metallizers, but for sure I can’t. Not even coming close.
I’m also very interested in those fiberglass brushes as i have a very poor record of cleaning out recessed panel lines after sanding. Can you post a few pictures of what they look like, so I have a better idea of where to look to order a few of them.
joel
Joel, the one I use is from AK, but you can get them from electronics stores as well as they are used to clean PCBs.
Cheers, D
Hi Joel,
You can also buy them at art supply stores as well. The pen is about $15 and the refills about $3.
The idea comes from Damian who sometime ago recommended them for some other task that I cant remember. The great thing is you can alter the length of the bristles. Only drawback when cleaning metal is you get lots of fine fibreglass pieces so gloves are pretty key. They’re a it like a 1500 grit sandpaper.
cheers
Michael
I use them for precise point sanding, like ejector pin marks, in areas where you can’t really use a traditional sanding stick. The 90 degree angle of attack is very handy.
Cheers, D
D & Michael,
Thanks for the pic and the info. I’ll be heading to my local big box Arts and crafts store: Michaels this week to pick one up.
I originally thought that they were perfect for cleaning out recessed panel lines and areas, but now I’m finding out that close tolerance sanding is also it’s specialty.
joel
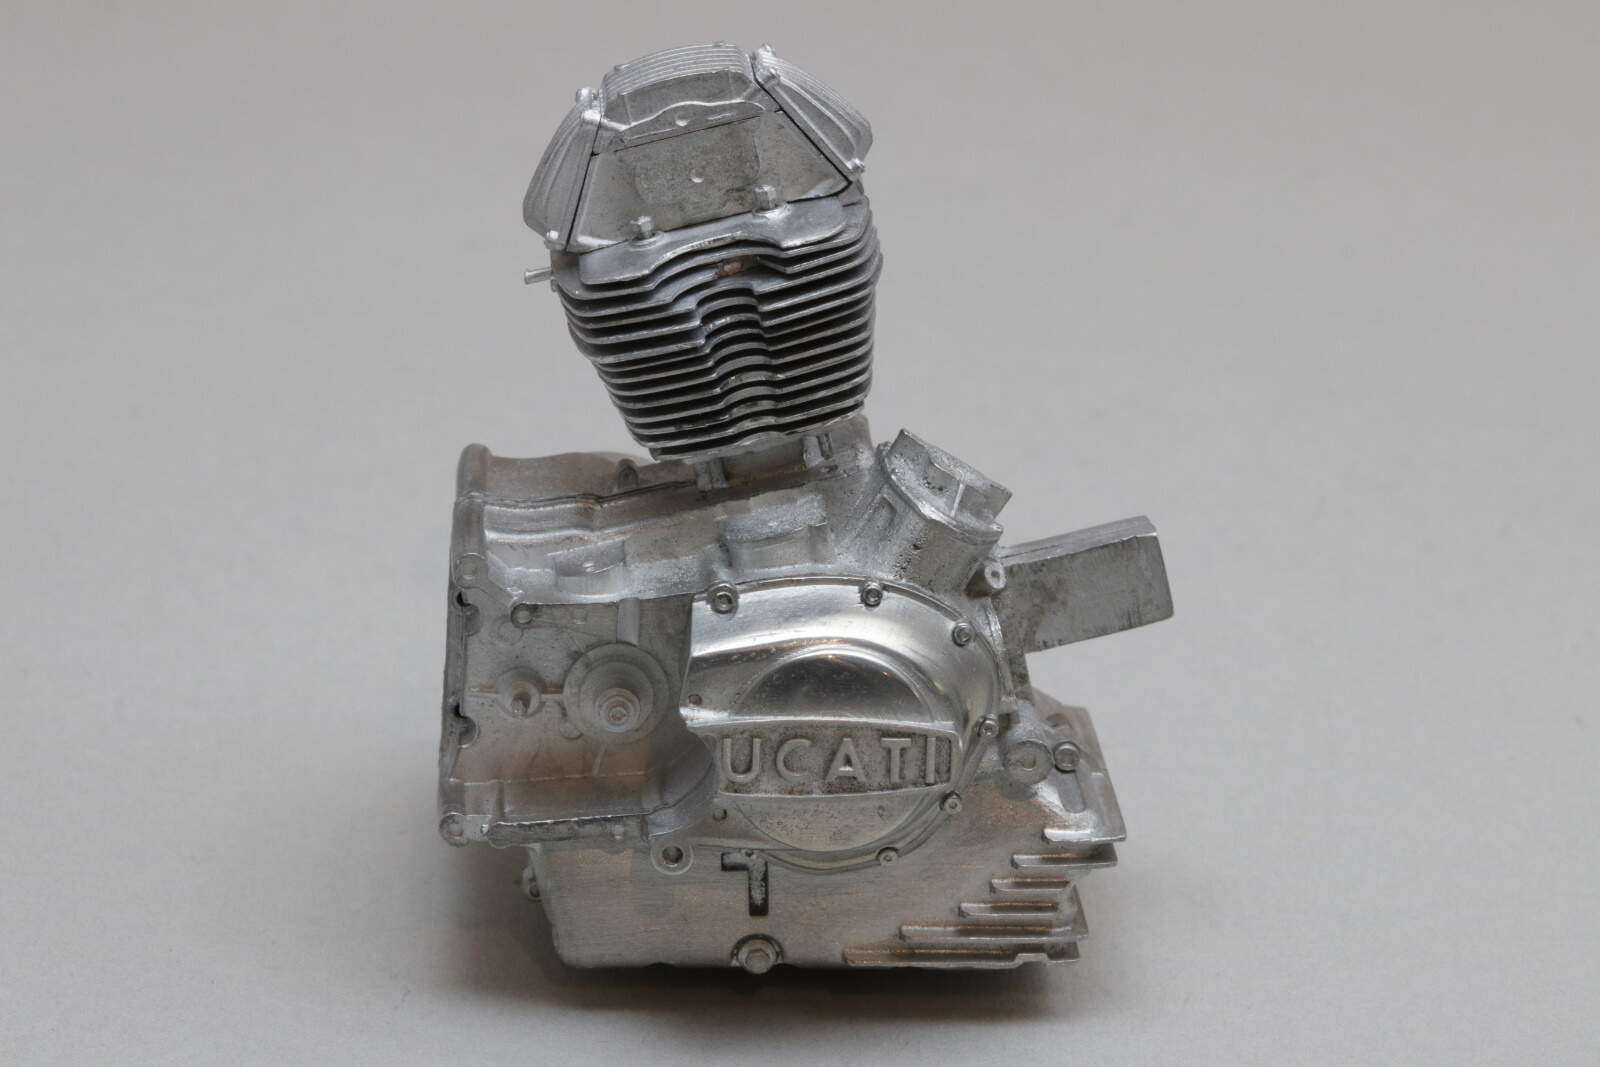
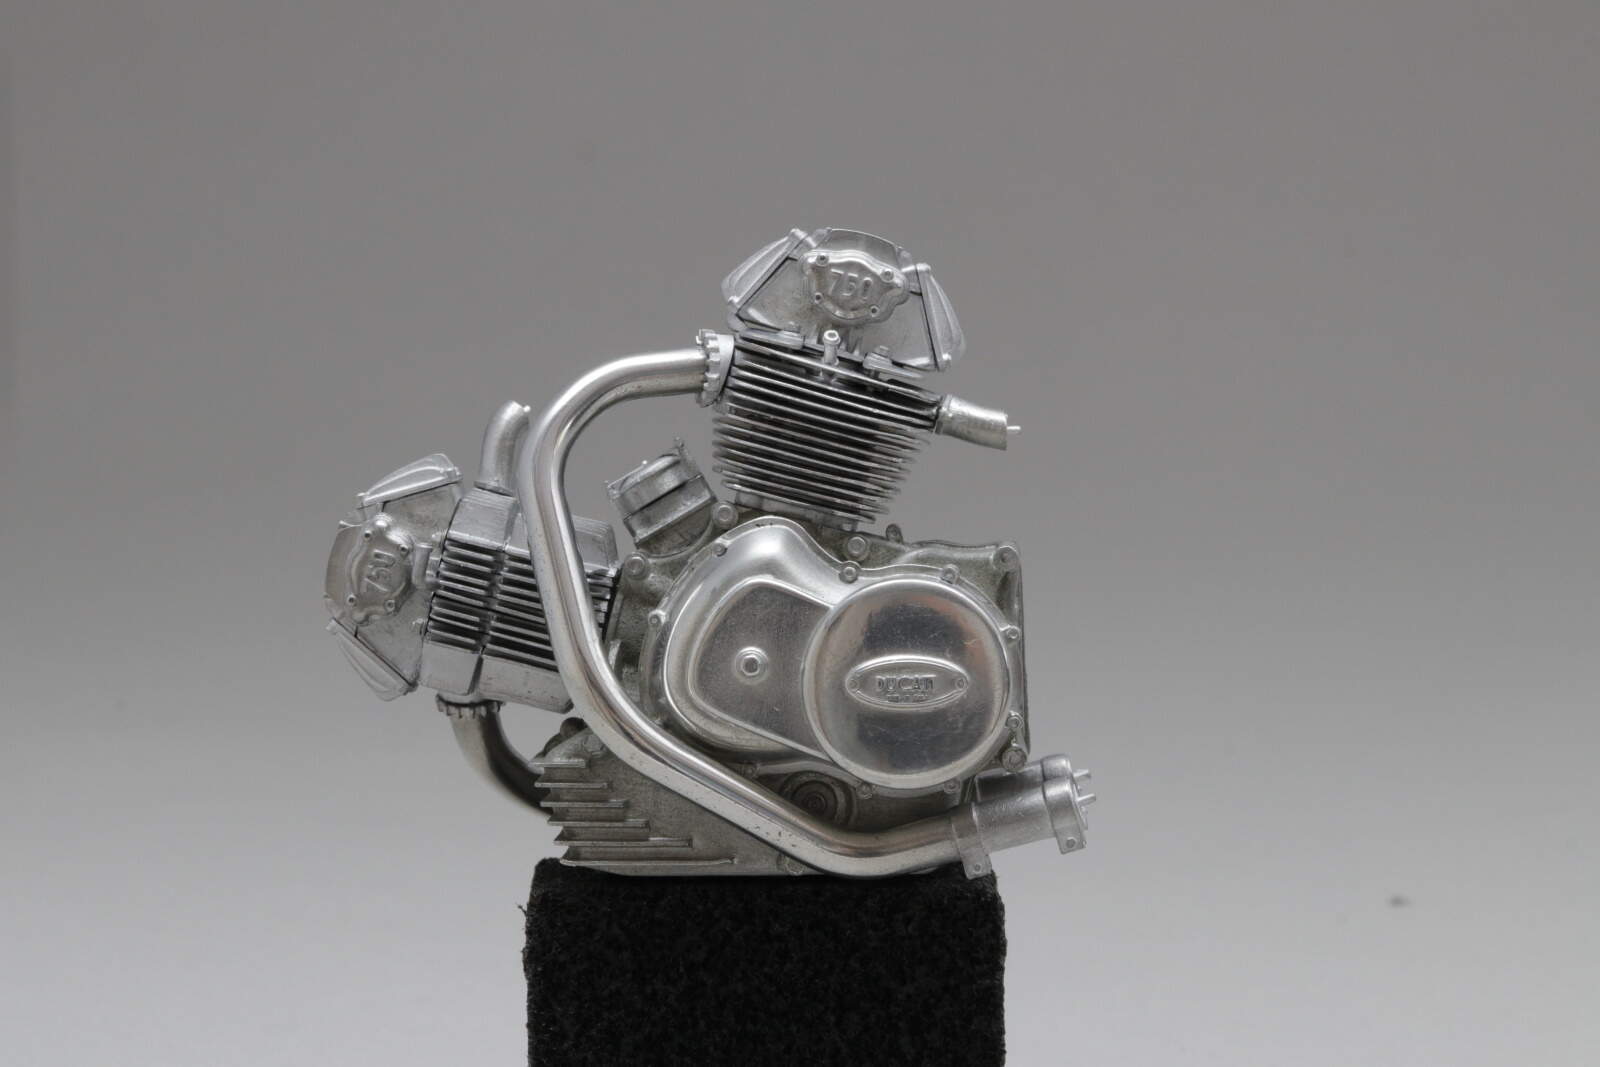
Well the fibreglass finally arrived on Friday and I was able to finished the motor on the weekend.
Ducati’s iconic desmodromic 90 degree 750cc V-twin.
cheers
Michael
MIchael,
your Ducati 750cc looks as real as a model can get. If I didn’t know it was a model, I’d be hard pressed not to think that it’s a picture of the real engine.
joel
Very nice Micheal . Dr. Taglioni made desmodromic valve operation work well . An earlier effort was experimented with by James Landsdowne “Pa” Norton but was abandoned.
Richard,
I googled desmodromic valve operation as I had no idea what it is. One vid had a plexi cover of the valve so you could see it operate. Looks like how a regular valve, spring and tappet work with a ton of oil being pumped over it. Is there an exhaust and intake valve or just one valve to do both functions?
joel
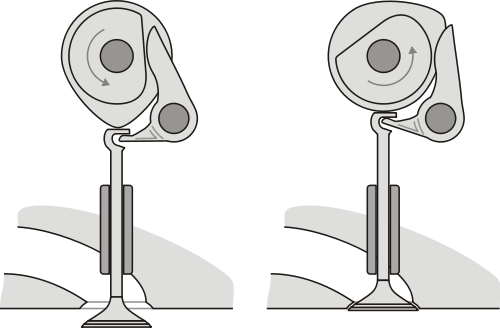
Desmodromic valve systems have the valves opened AND closed by the camshaft or other mechanical means. The purpose is to minimize valve float at high rpm .There are generally no springs involved - if there are springs their function is for some purpose other than returning the valve to it’s seat . Dr. Fabio Taglioni of Ducati renown is one engineer who’s name is often associated with desmodromic systems. I don’t know if it still holds true but at one point extremely high rpm F1 engines had their valves operated by pneumatics .
HTH .
Cheers - Richard
Richard,
Thanks for the information. So the rocker on the top of the valve serves as a positive stop for the return of the valve? And yes, F1 and many of the more advanced classes of race cars use a very similar system. the current F1 engines rev to 15.000 but they use to rev to 19.000 or so back in 2008. too bad they regularly blew those engines. Gee, I wonder why.
joel
@Joel_W
The stop for the valve upon closing is the seat and the grind of the cam . In a conventional system the valve stem is held in contact with the lobe of the cam by the valve springs.
In a desmodromic system the valve stem is mechanically connected to the cam so that the cam both pushes the valve open and pulls it closed.
There are no rockers as desmo systems are by necessity overhead cam - the cam acts directly on the valve .
Thanks for the tech lesson Richard. I knew vaguely that the valves were mechanically driven but your explanation and picture are great info.
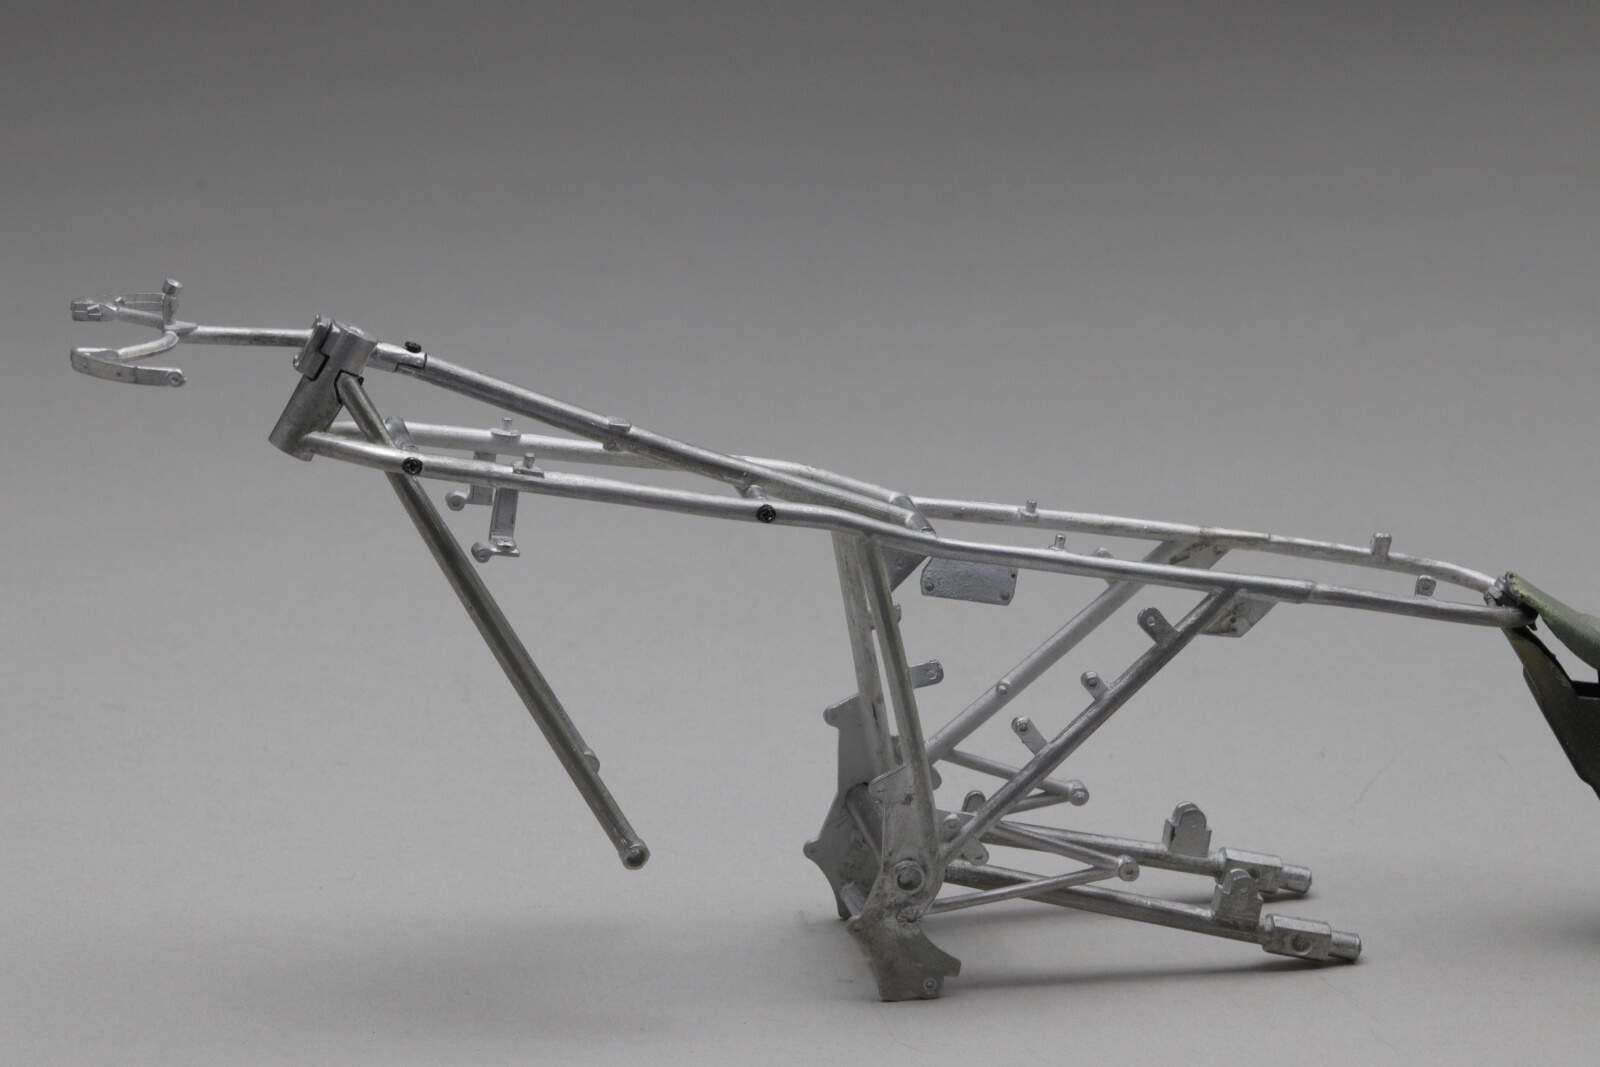
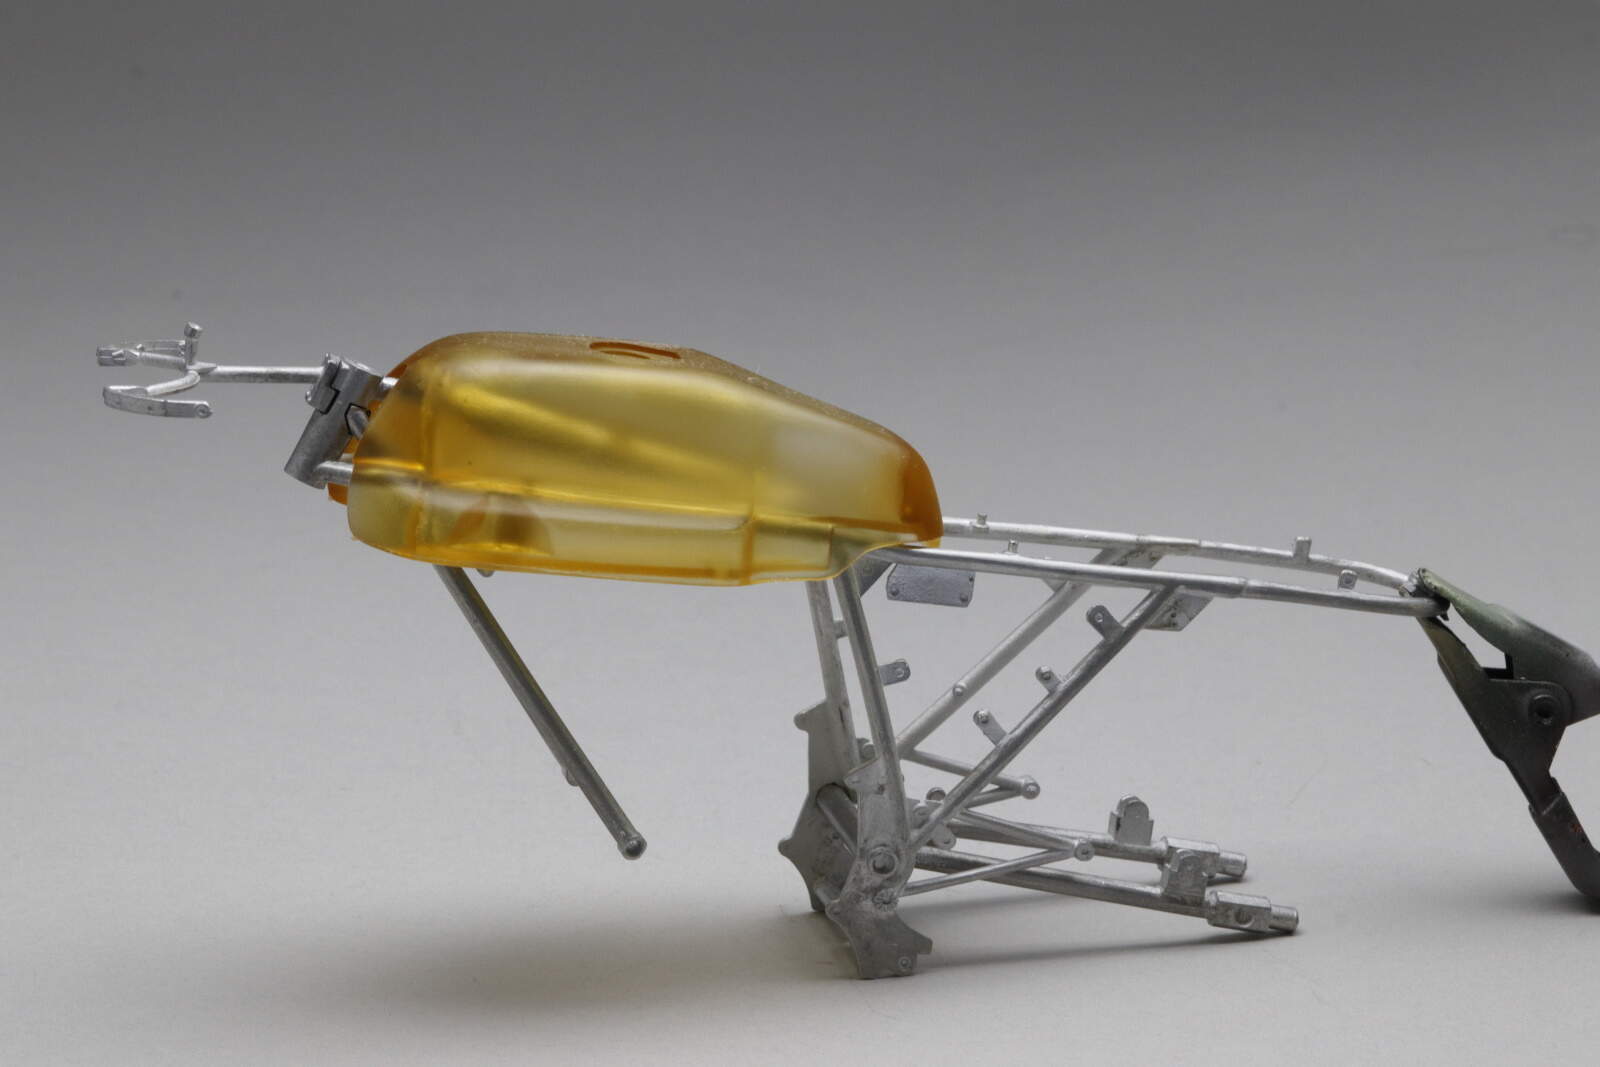
Moved to the frame and assembled the basics.
and added the tank to given some semblance to the shape
Now I am at a bit of a standstill. Still waiting here if Gravity will do the frame and tank colours. I will give it a couple of weeks because I can’t add any of the ancillaries until the frame is painted its particular green. If no luck I have looked for similar colours and see if I can do some blending.
cheers
Michael
Richard,
As Michael said, thanks so much for the information. I’ve never seen anything like that before.
joel