That bike windscreen looks like a real challenge ~ will you be using the kit supplied “rivets” that go in the holes in the windshield frame ? ( not my model )
1 Like
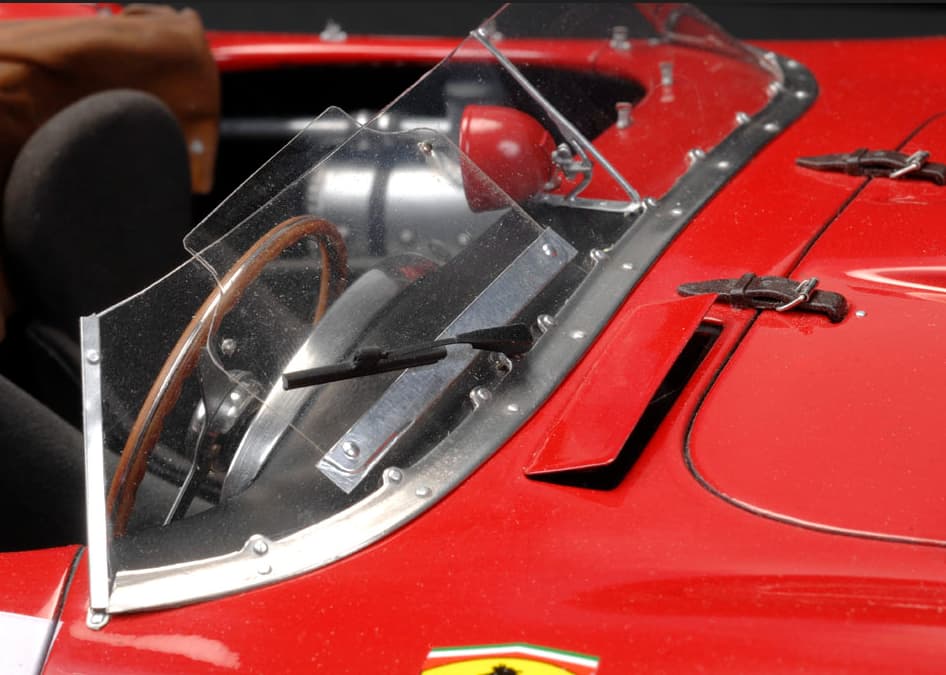
The screen on mine is a different version to that one in the picture. I am building the Collins/Klemantski car. This is one of Klemantski’s photos, a rare colour one during the Mille Miglia.

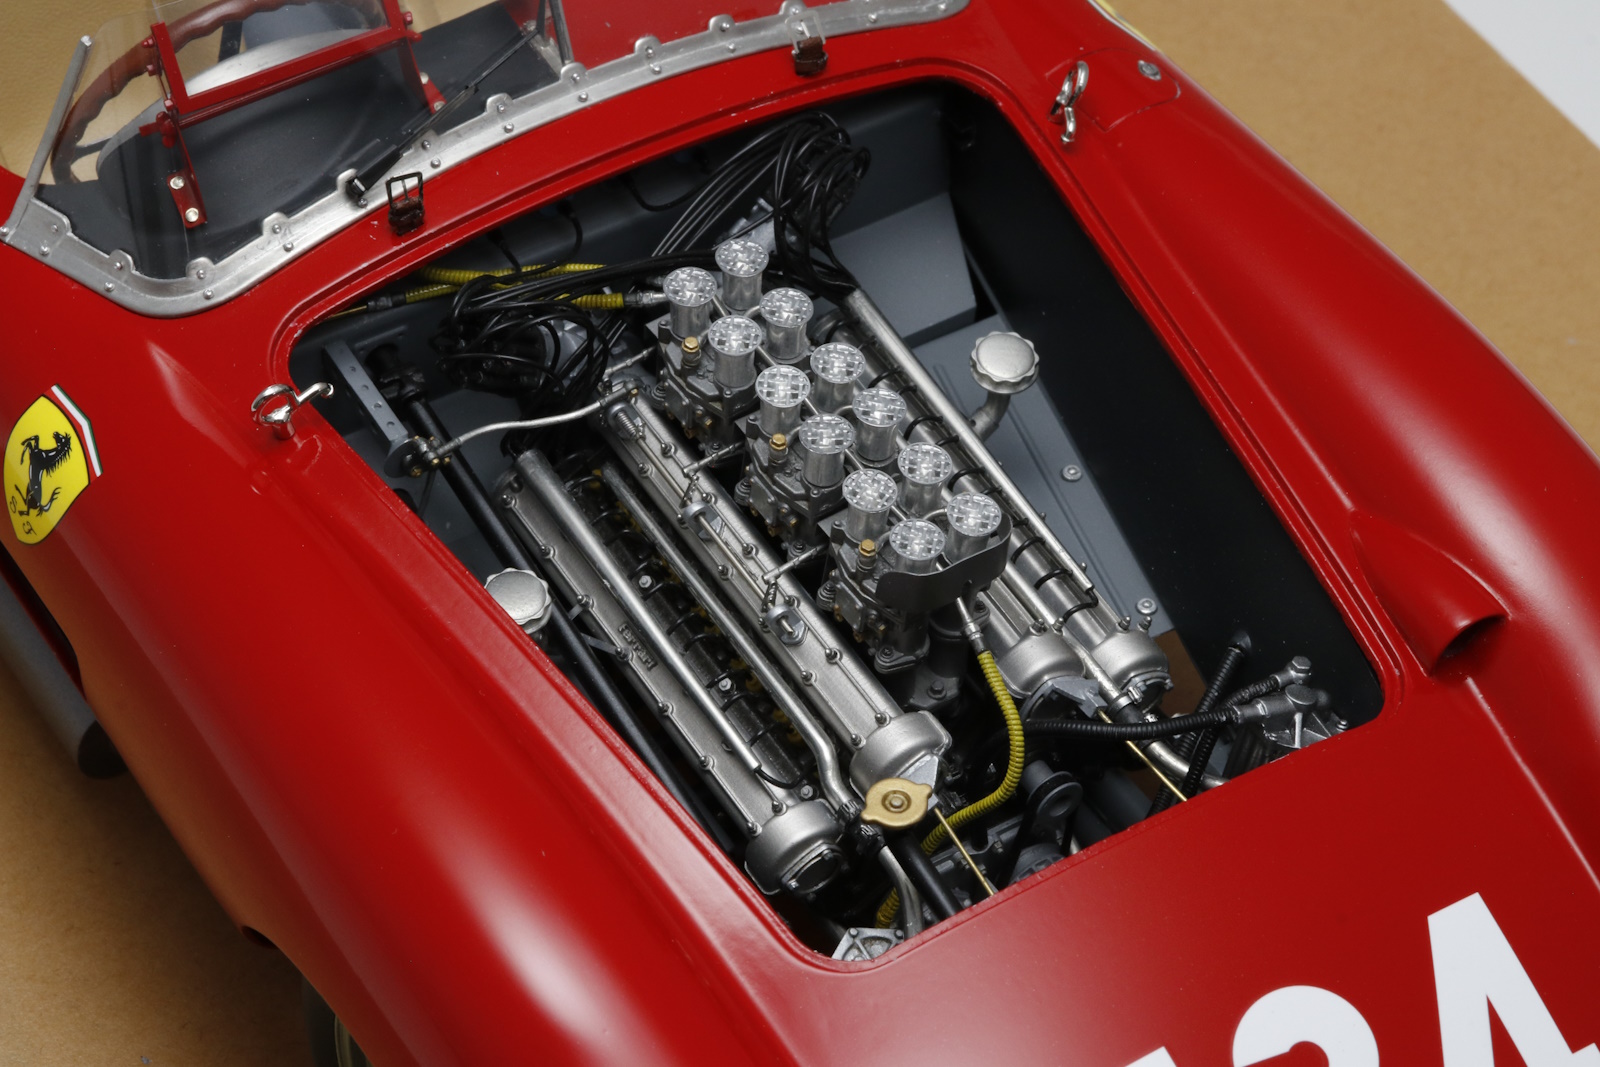
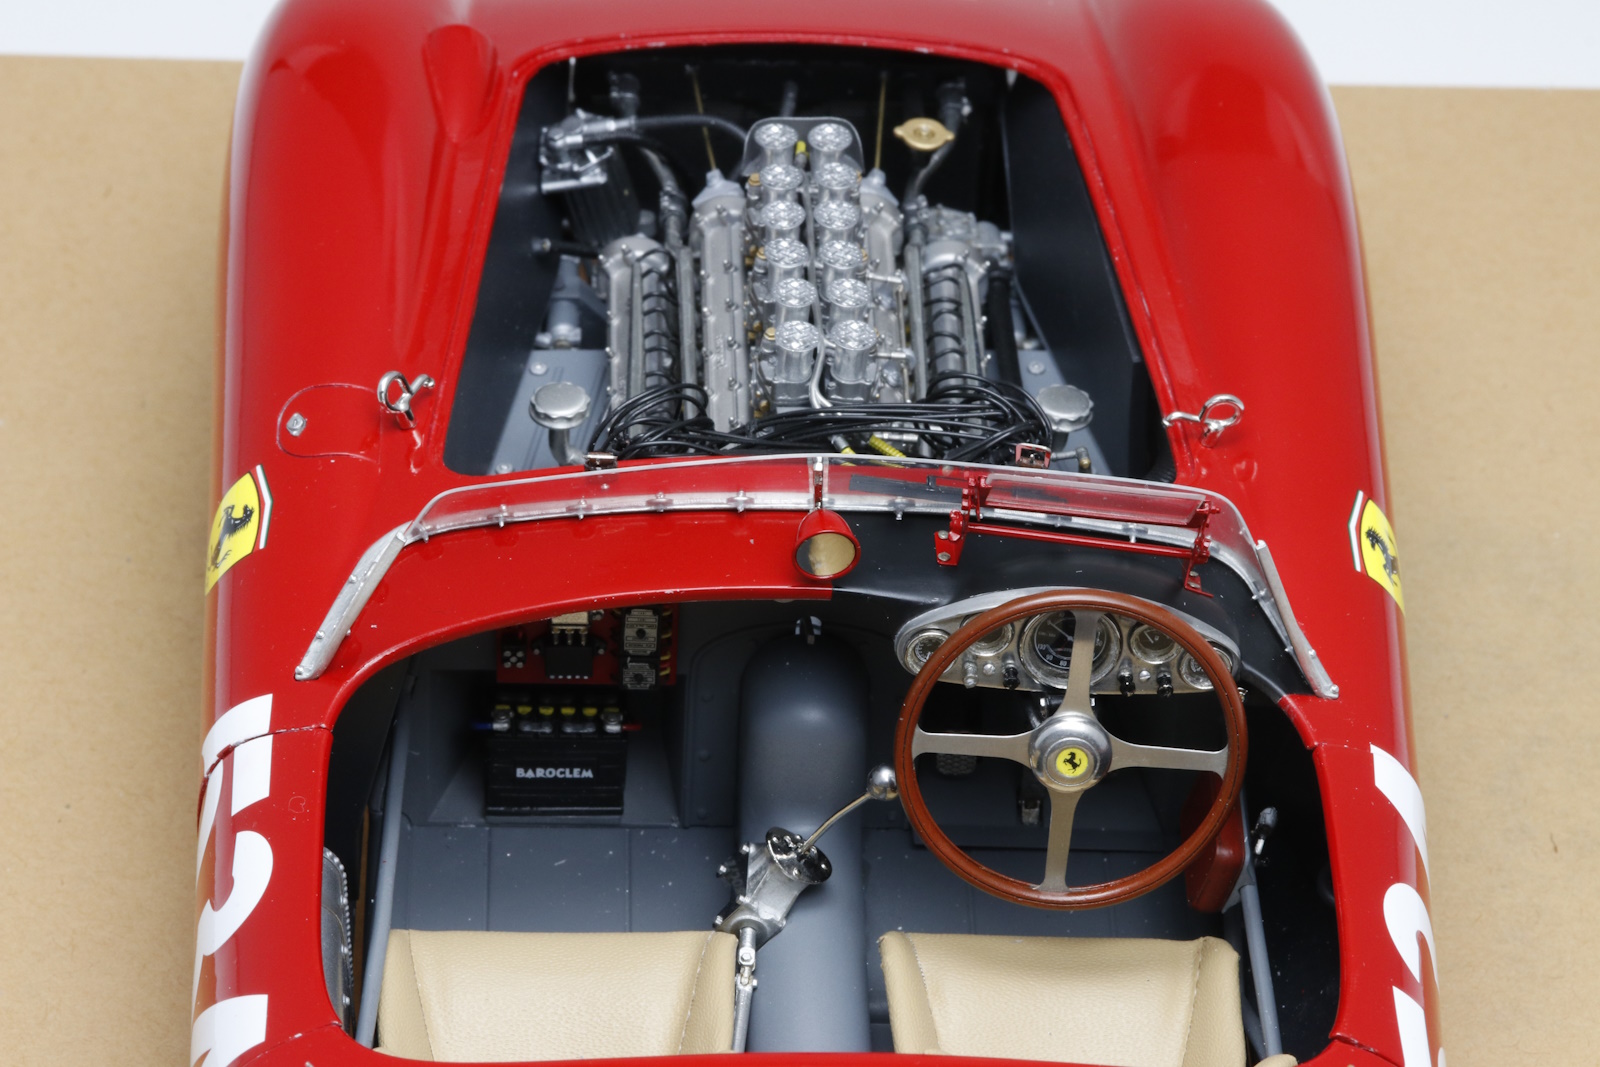
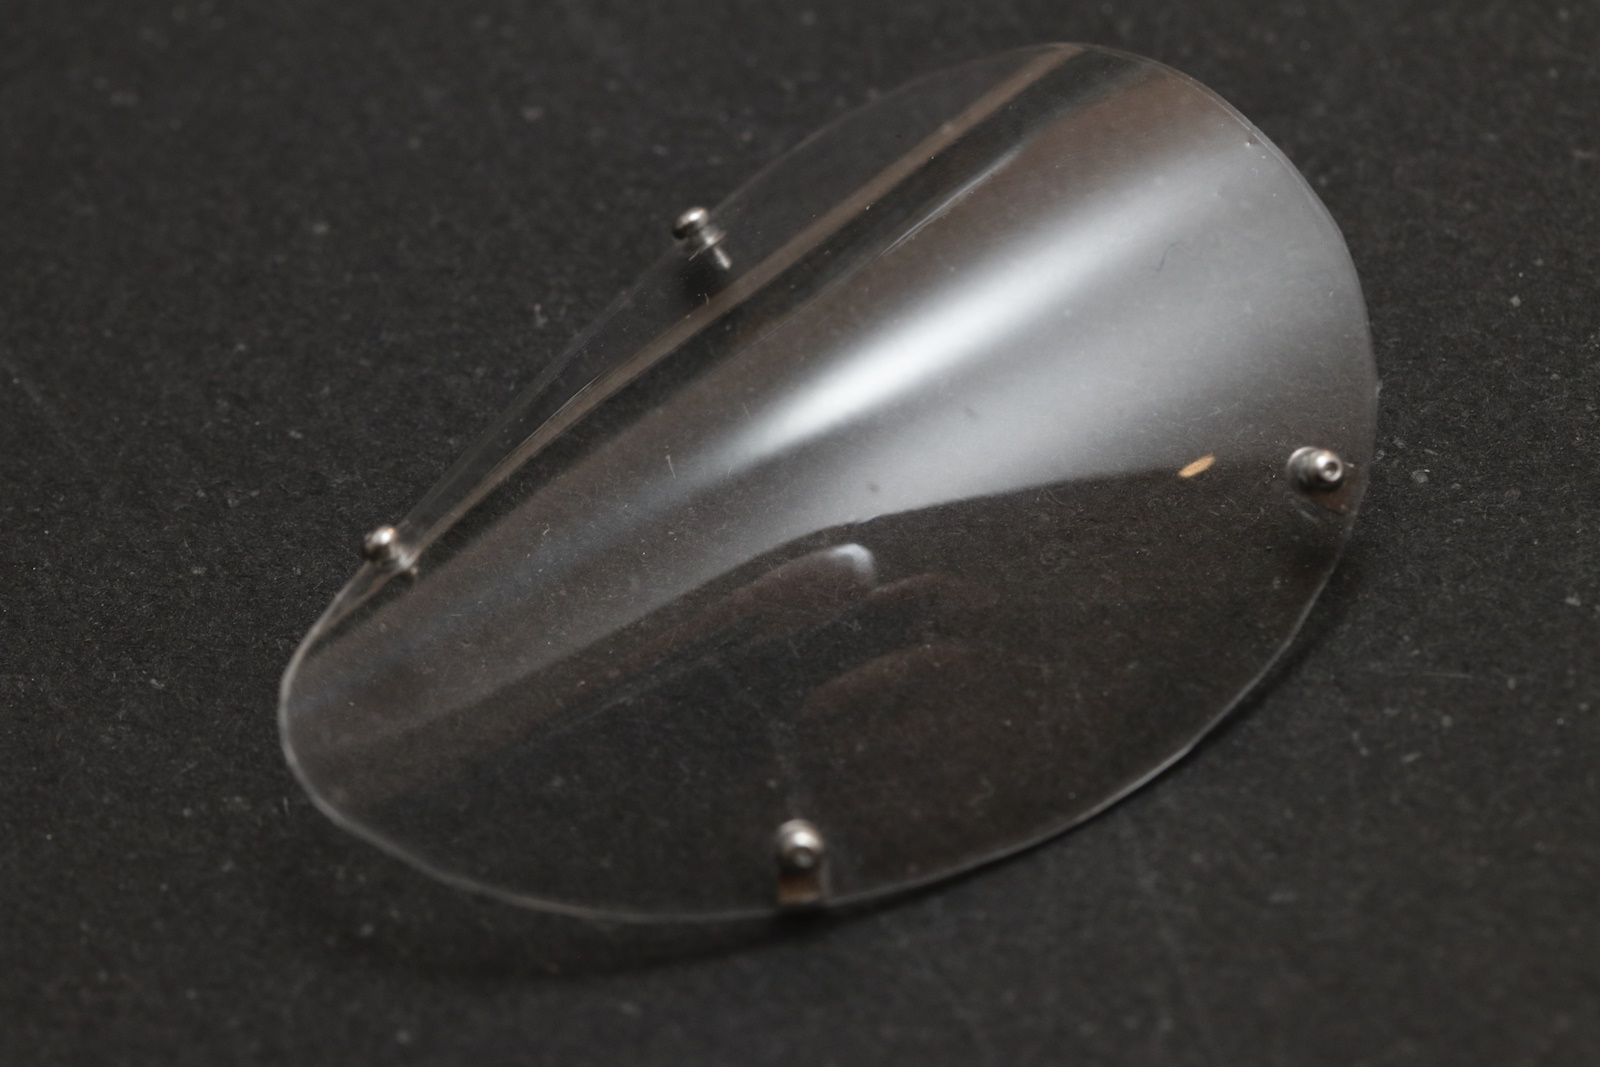
I have just built the screen and given it an undercoat today as part of my procrastination towards fixing the doors i.e. am doing everything else. It was quite fiddly of course being MFH, about 20+ parts. I assembled it in situ to help then removed and primed.
As for the wind screen itself, yes I will be using the rivets, I have drilled the holes. The screen will be the last thing I fit.
Hope that helps,
cheers
Michael
7 Likes
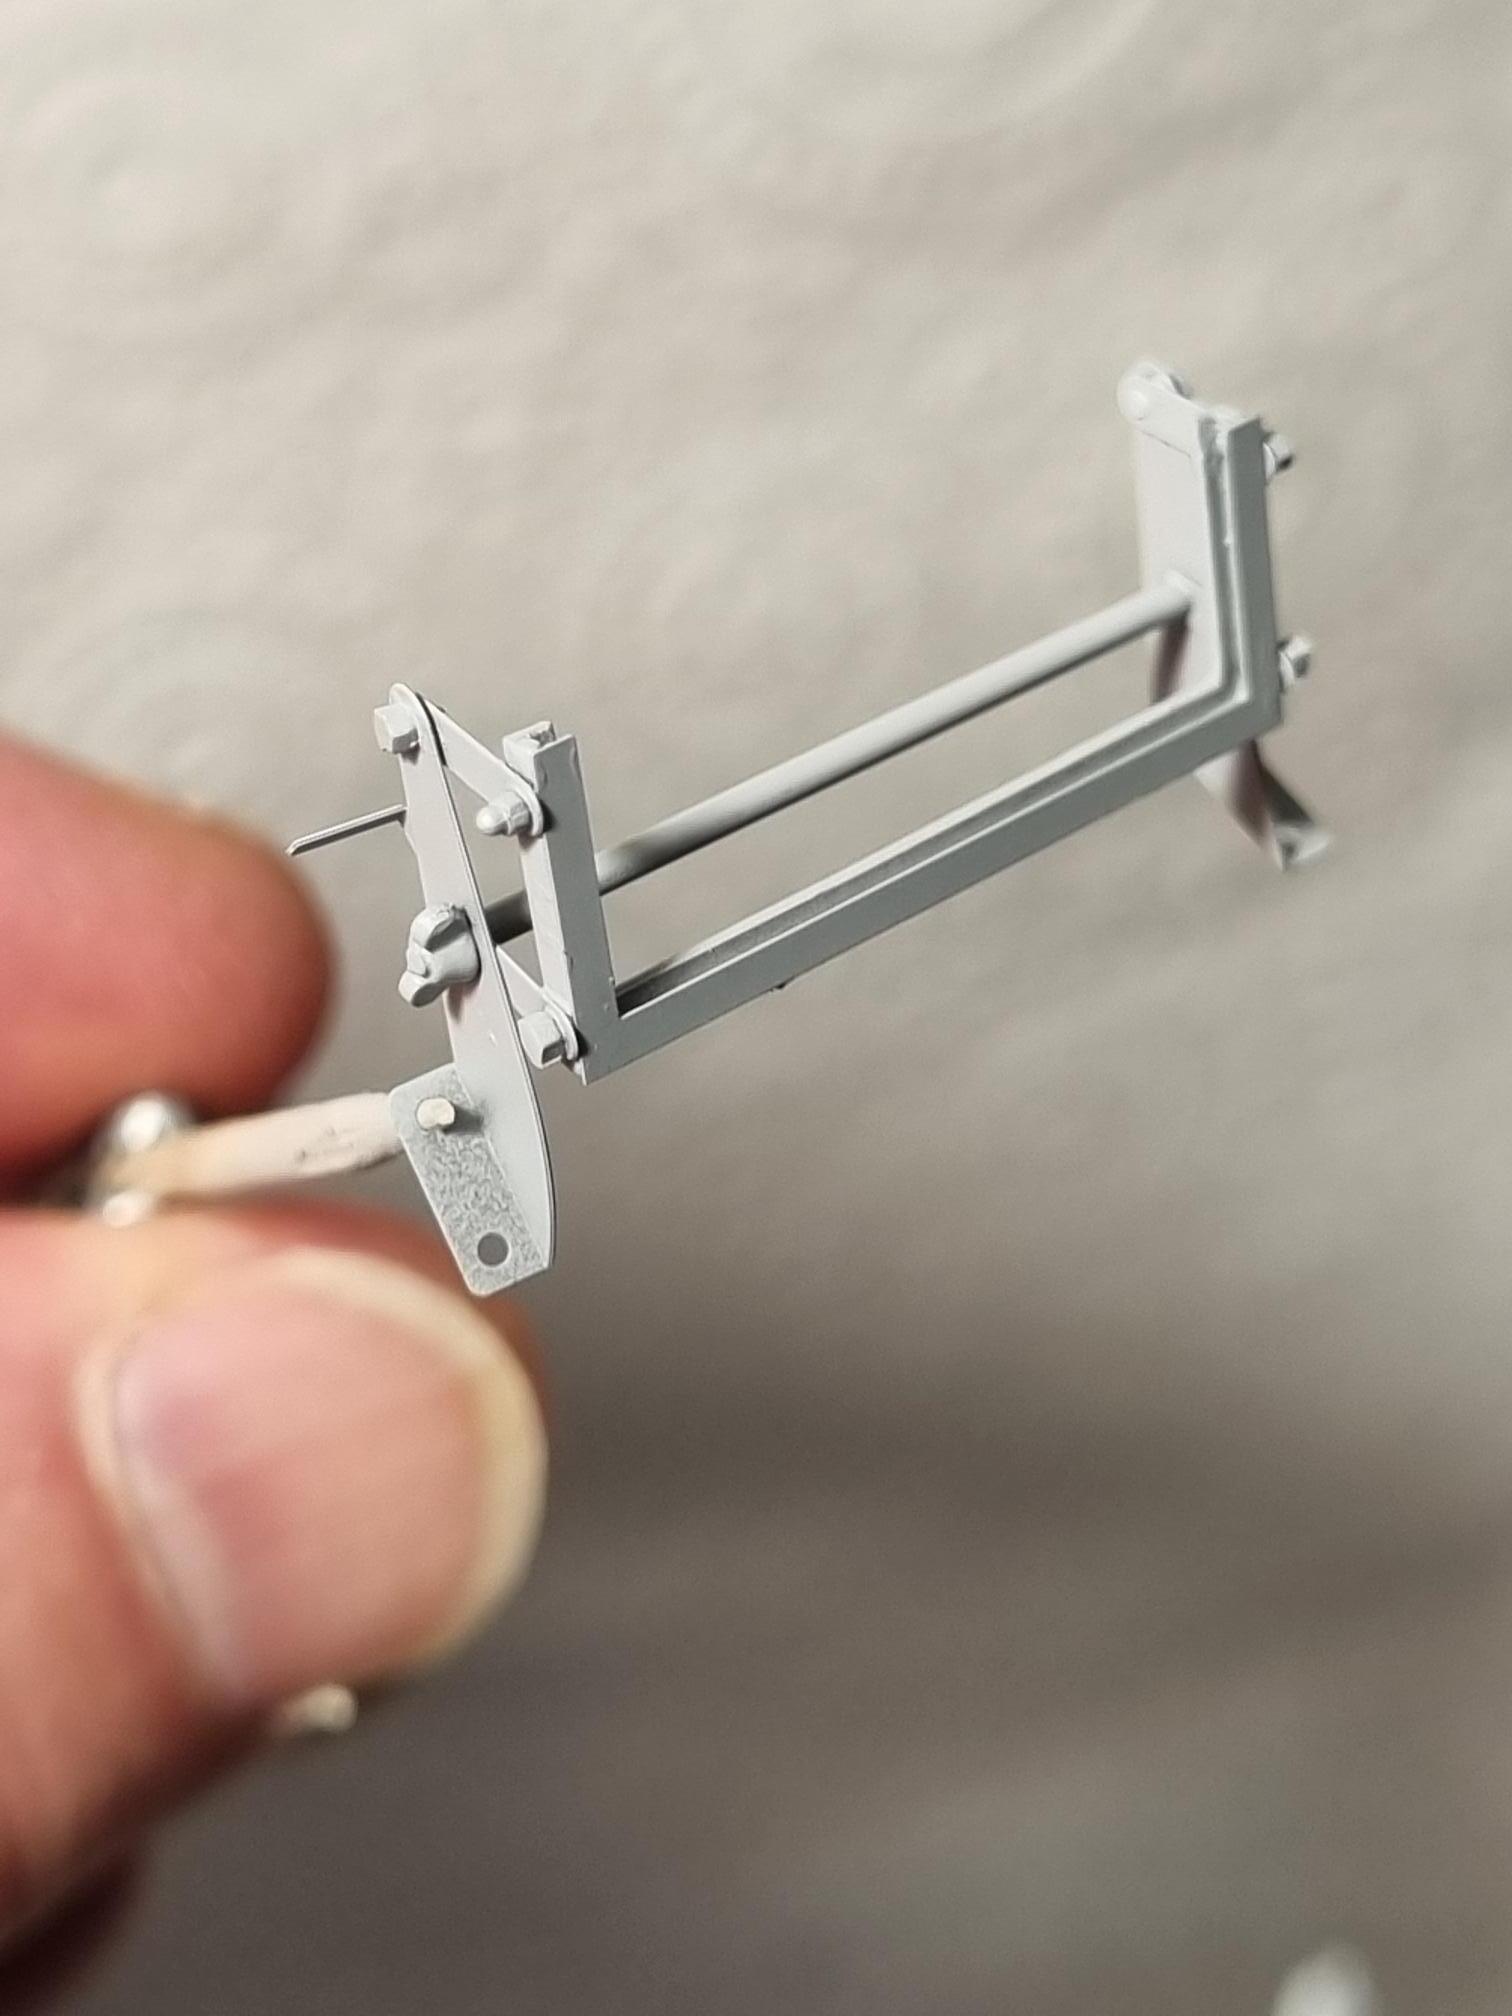
Excellent work on that mini windscreen frame, not sure why they kept using it after the rules changed for 1957: "Cars now had to have at least two doors and both seats had to be the same size, in a cockpit a minimum 1.2m wide. The minimum windscreen height was reduced from 20 to 15 cm. 1957 24 Hours of Le Mans - Wikipedia
I think they used the mini screen because the main screen was too low. While it reduced the overall frontage of the vehicle, I guess the drivers need a little more protection. You can see in the photo I provided above it sticks out above the main screen.
I haven’t seen the Ferrari movie yet, actually I forgotten all about it. I will see if I can it somewhere.
cheers
Michael
That is insanely beautiful detail.
I had never heard of Model Factory Hiro before. I’ve been researching F1 cars and this is what I would eventually like to take on 1/12scale Fulldetail Kit : McLaren MP4/5
If you want one buy it fast . MFH kits sell out fast .
They do occasional re issues but you never know which and when .
Hi Steve, I think that one is out of stock, like most of the MFH kits. As Richard said MFH occasionally do re-issues, or you may find a retailer who has stock, or the likes of ebay often have MFH cars listed.
Spot Model of Spain currently have some in stock Model Factory Hiro K832: Car scale model kit 1/12 scale - McLaren Honda MP4/5 Honda Marlboro McLaren Team #1, 2 - Ayrton Senna da Silva (BR), Alain Prost (FR) - Spanish Formula 1 Grand Prix 1989 (ref. MFH-K832) | SpotModel
cheers
Michael
Thanks for the replies. I don’t quite think I have the skill level quite yet to take on a MFH kit (just re-started after a 40 yr hiatus). They are so exquisite, I assume they are at the top for cars, as their price demands?
If it isn’t too much to ask, what is the history of MFH to ask for such high demand and pricing?
I hope they do a re-issue in the next couple of years. Alain Prost is whom drew me into watching F1.
1 Like
Never owned one myself but from what I have seen the part count, part accuracy/engineering, part material and limited production run all combine for the high price.
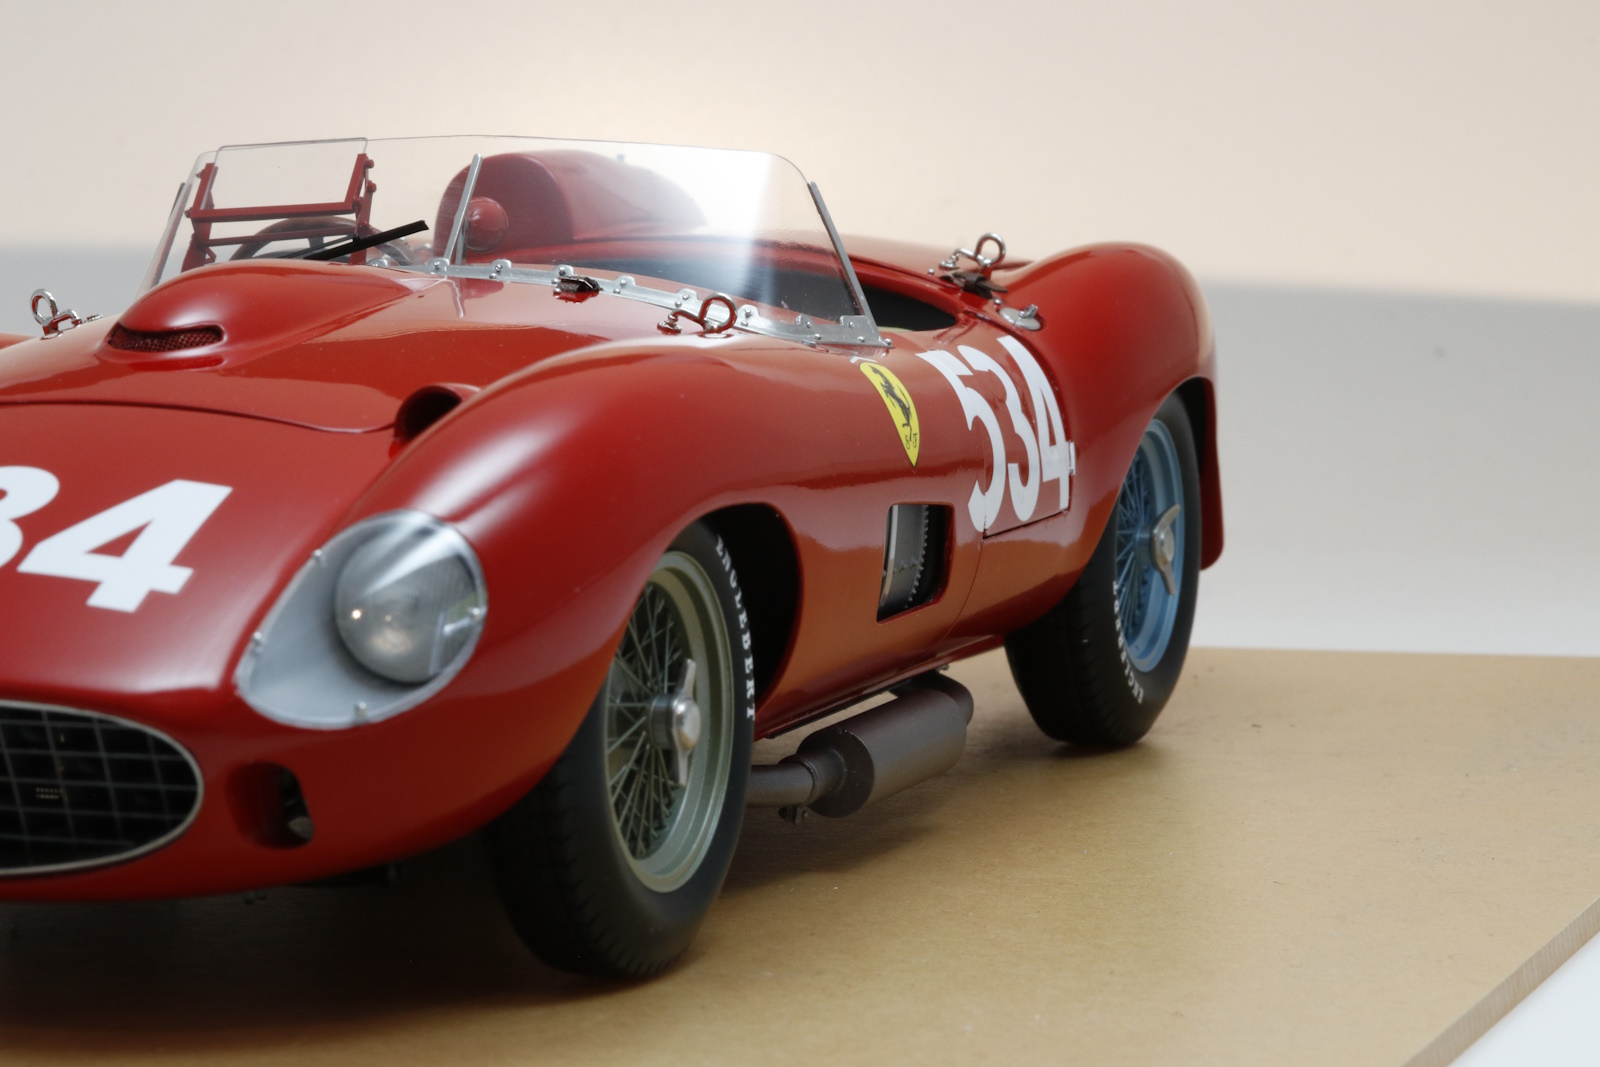
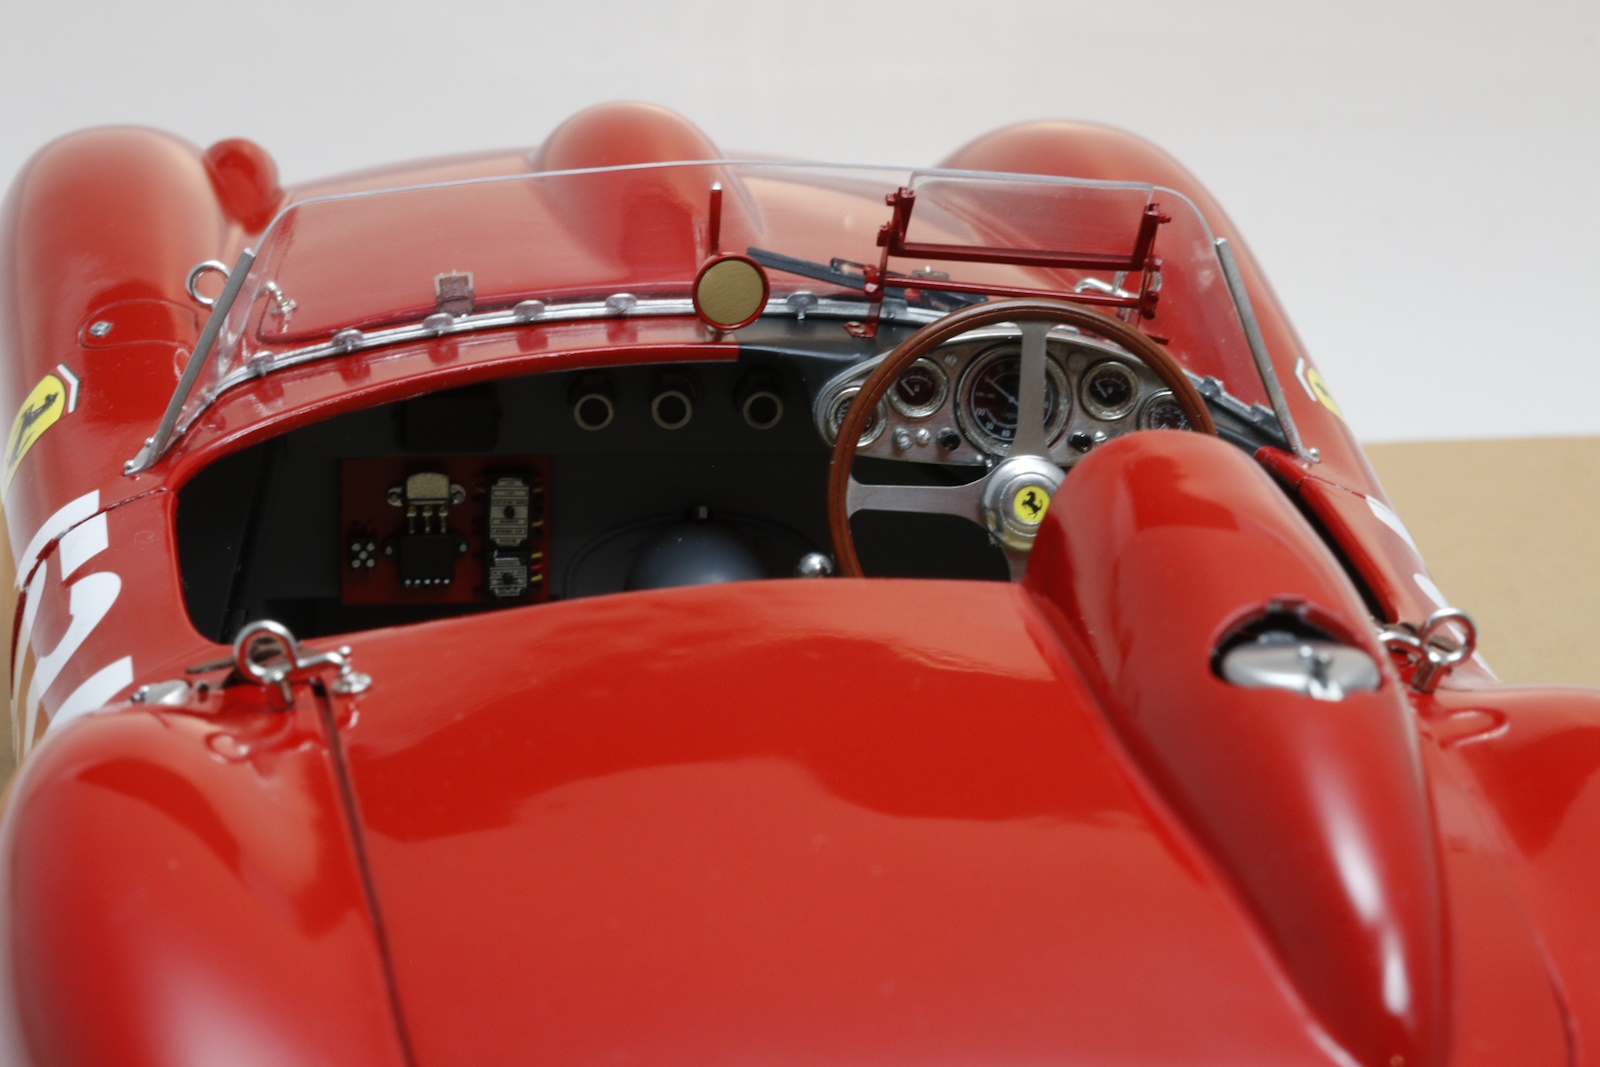
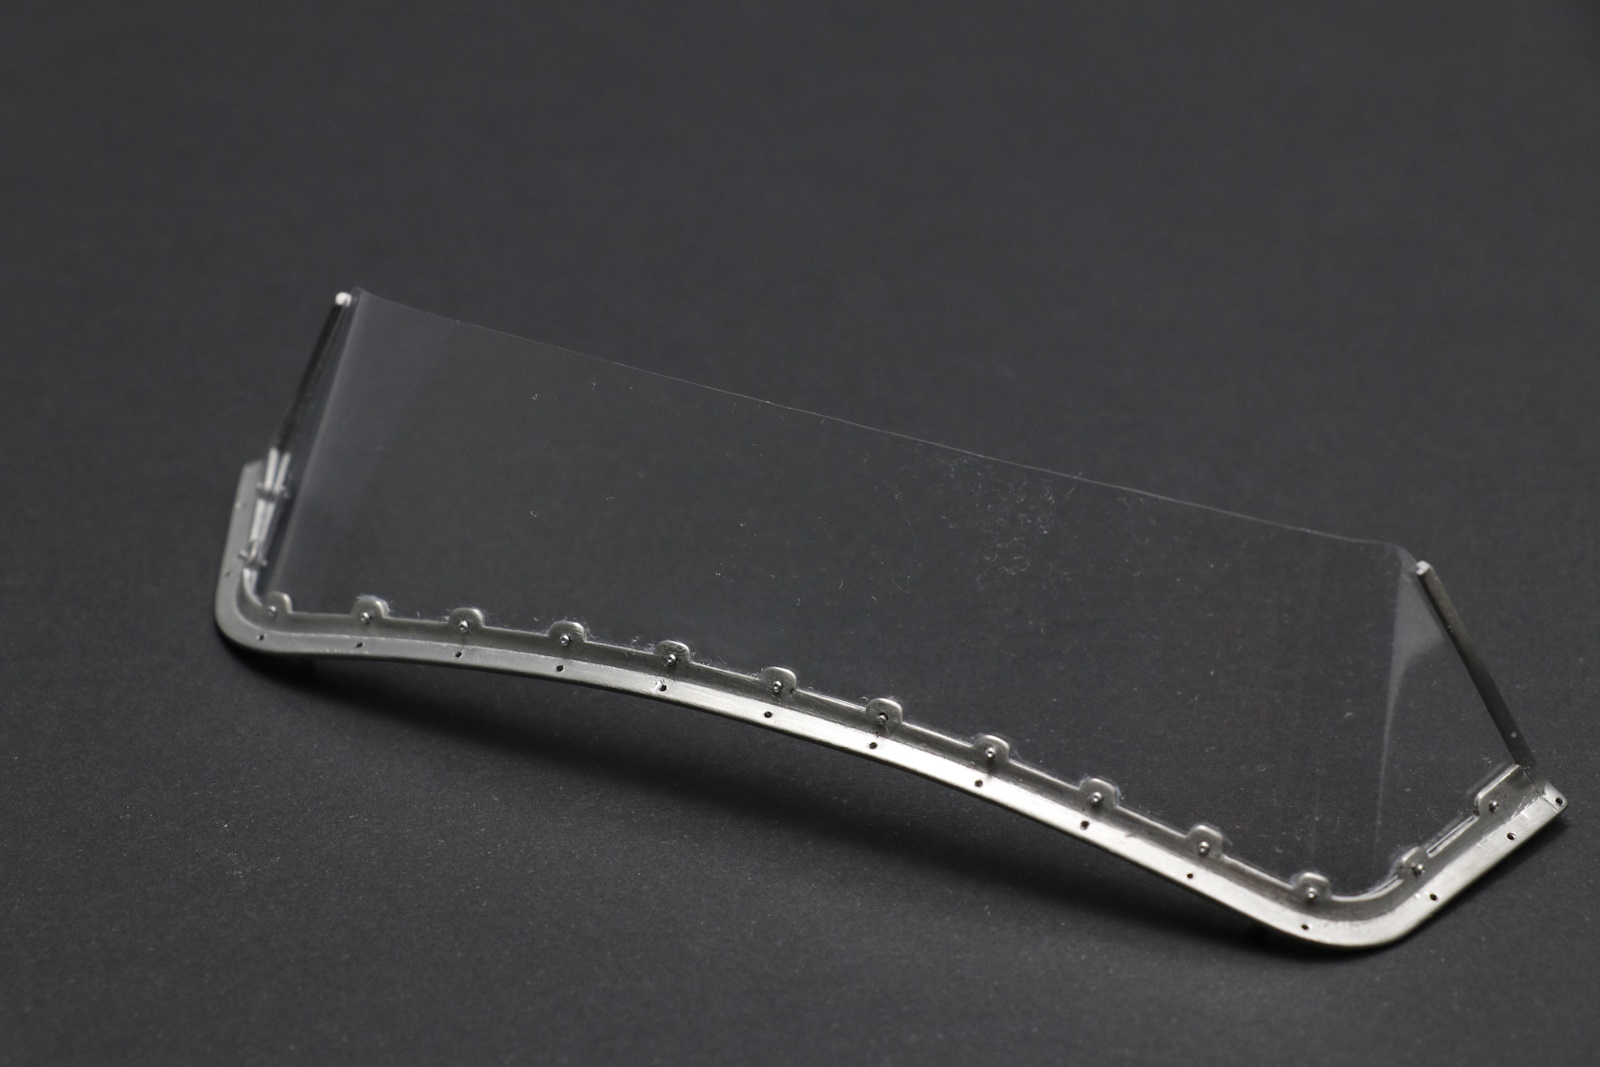
@Ferrari166 Tim, this one is for you. Finished the windscreen. Did originally think of doing it with the frame in place but actually that was never going to work. The main problem with building on the frame is the softness of that frame and the continual handling of the screen which means so many small scratches. And trying to put rivets through plastic is not that much fun either. But anyway, this is it.
I am finished with the procrastination now and am working on the doors and frames so I can finish the body. I need to get that on the chassis so I can get the floor and exhausts on.
cheers
Michael
6 Likes
That looks great - I admire your ability to cut the MFH vacu-formed glass out - I find that to be harder to do than much of the build!
Cheers
Nick
This is the best I have seen ~ very wise to assemble it prior to mounting, as you say any handling can cause scratches. Did you pre-drill the rivet holes in the plastic, or drill them after the clear part was attached to the metal frame ? it doesn’t look like you used any adhesive to hold the clear part to the frame ~
Thanks Nick. It is the most nerve-wracking part of the build, mistakes being very obvious and not really recoverable.
cheers
Michael
Thanks Tim, I drilled the frame first, then taped the screen in place and then drilled the holes for the screen, hopefully tight enough to hold the rivets in place. The rivets are too long as is, so I snip the excess off and add a touch of CA to the end of the rivet just to make sure it doesn’t slide out.
cheers
MIchael
Makes sense that you taped it in, I cant imagine getting the holes drilled without doing so. Good you mentioned the rivets, they sure look to long to me. I need to get a good pair of flush cutters ~
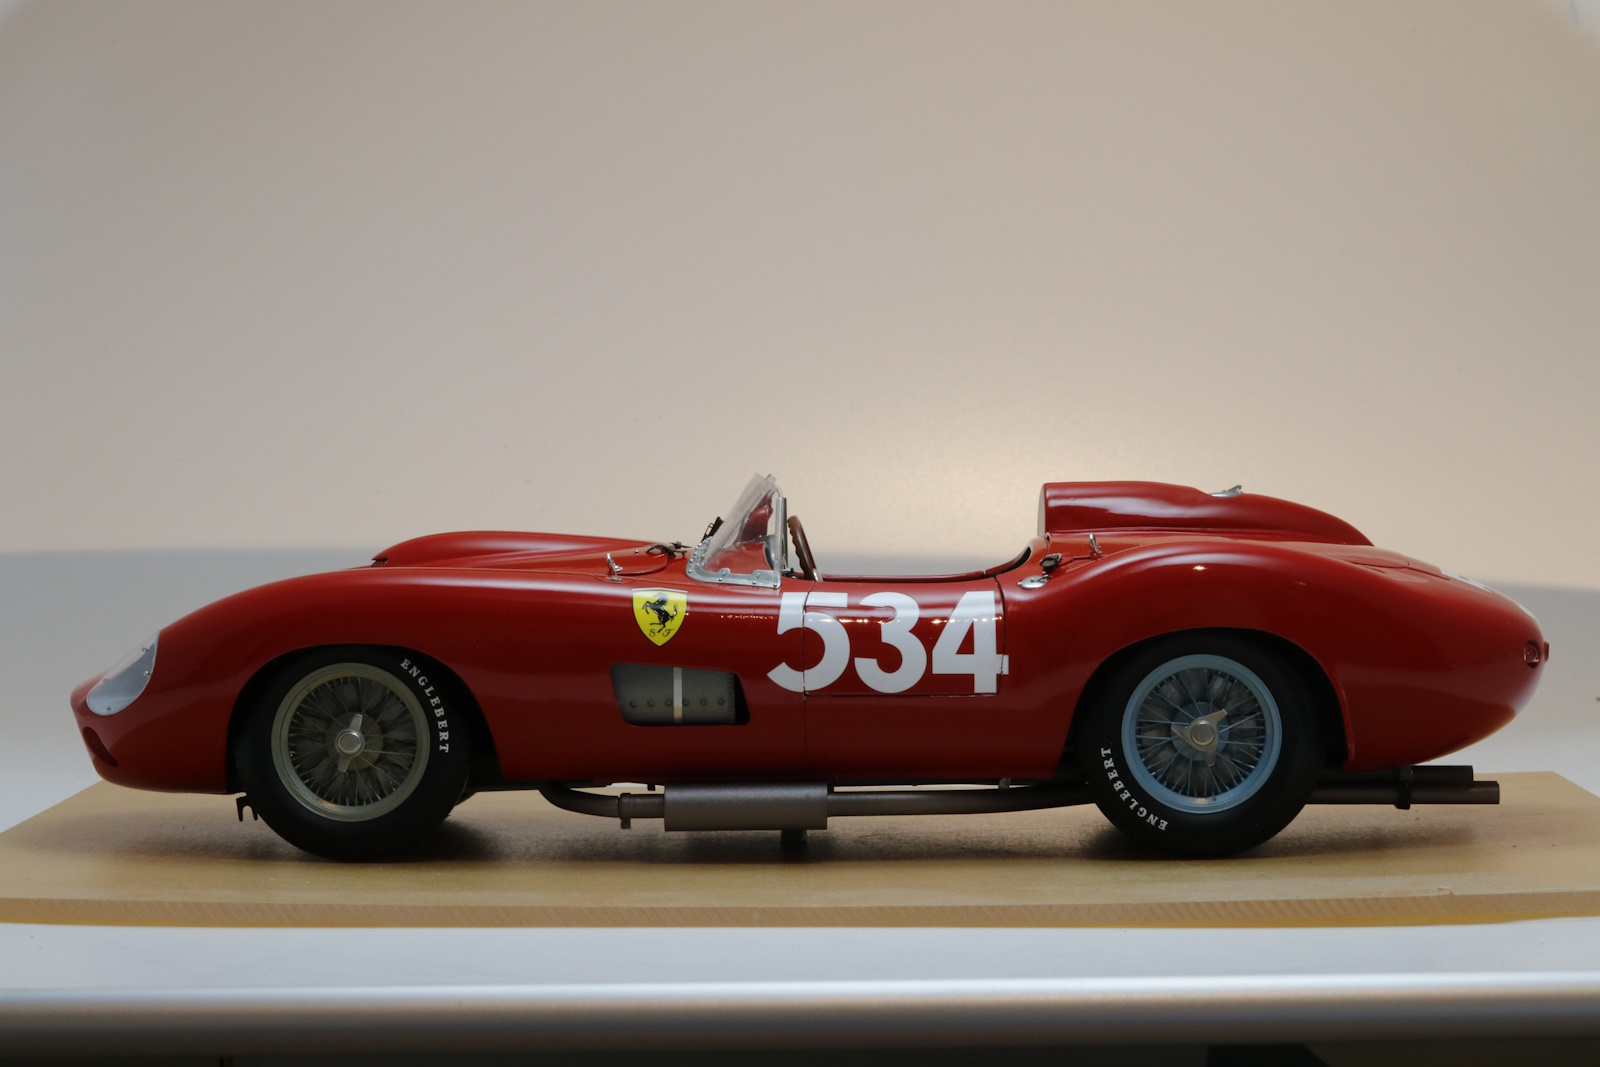
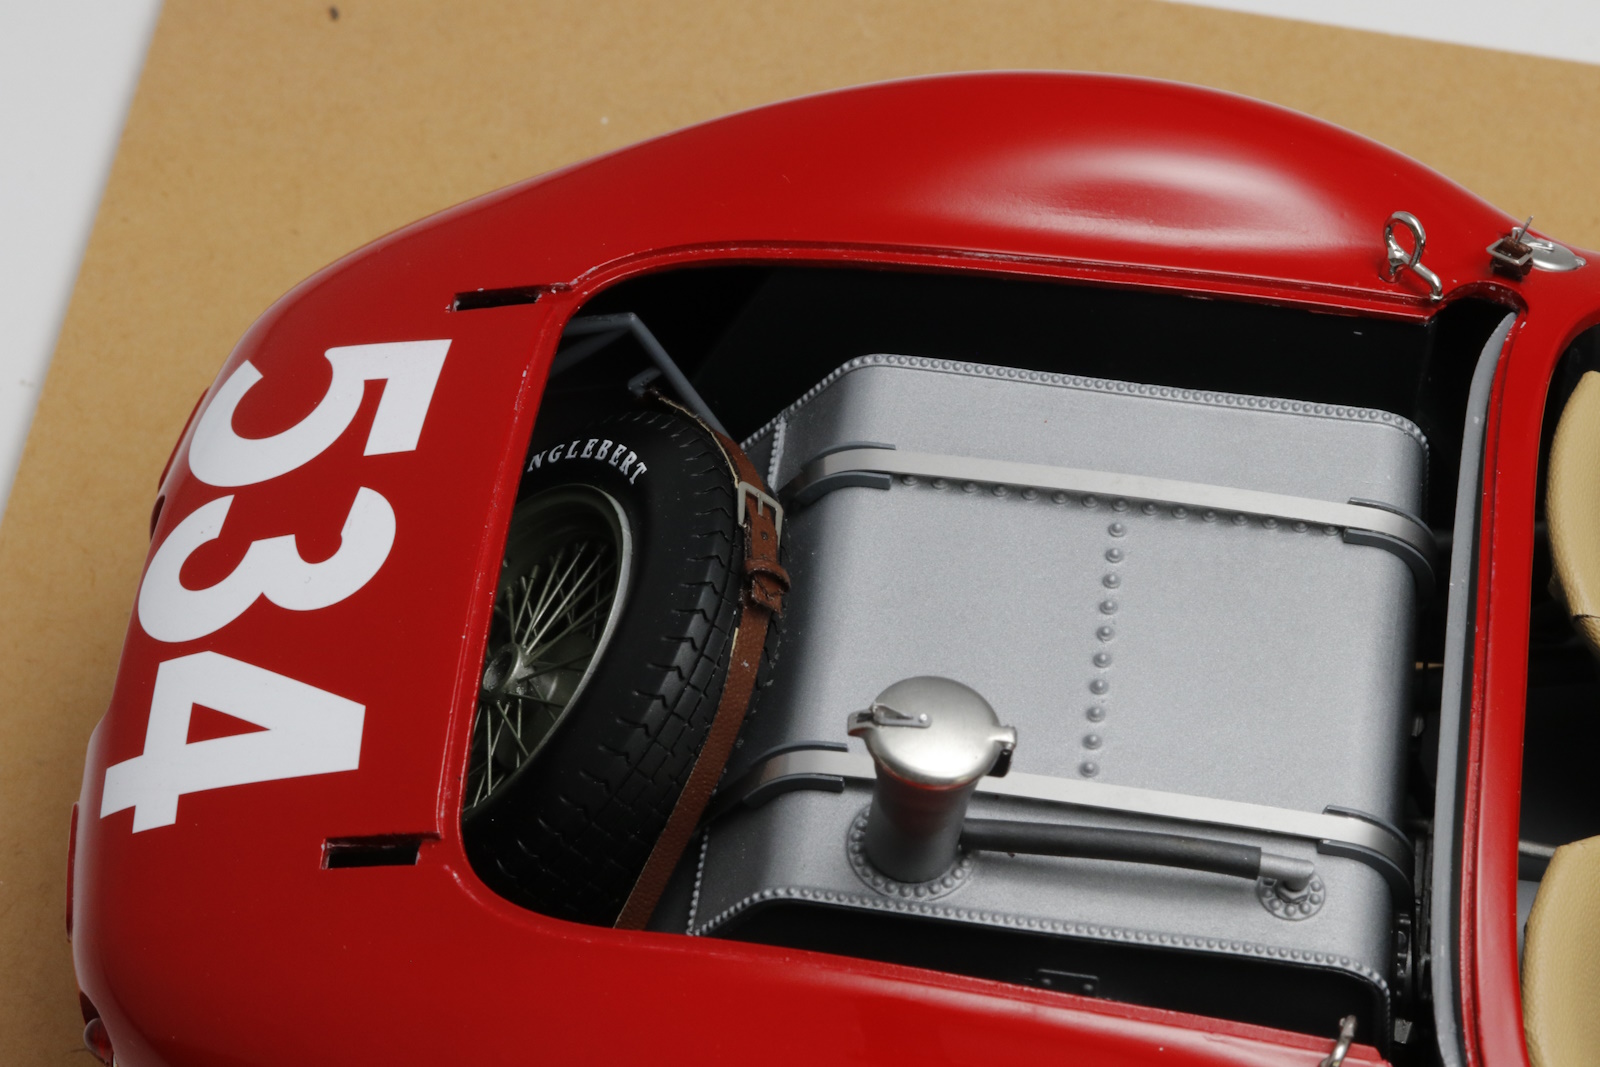
Well I painted the rims, then assembled the wheels. I did that because I thought it was just the rims that were silver/green and silver/blue. During the comments I think you posted a photo that showed it was clear that that whole wheel was painted. So once I finished assembled, instead of touching up the scratched rims, I resprayed the whole wheel. I will keep the spinners polished metal though. You get lots of spare spokes but be careful, out of the 72 spokes 1 or 2 will definitely fall out.
cheers
MIchael
Thanks for the info, the wheels you built are some of the best I have seen, a prominent feature of the model.
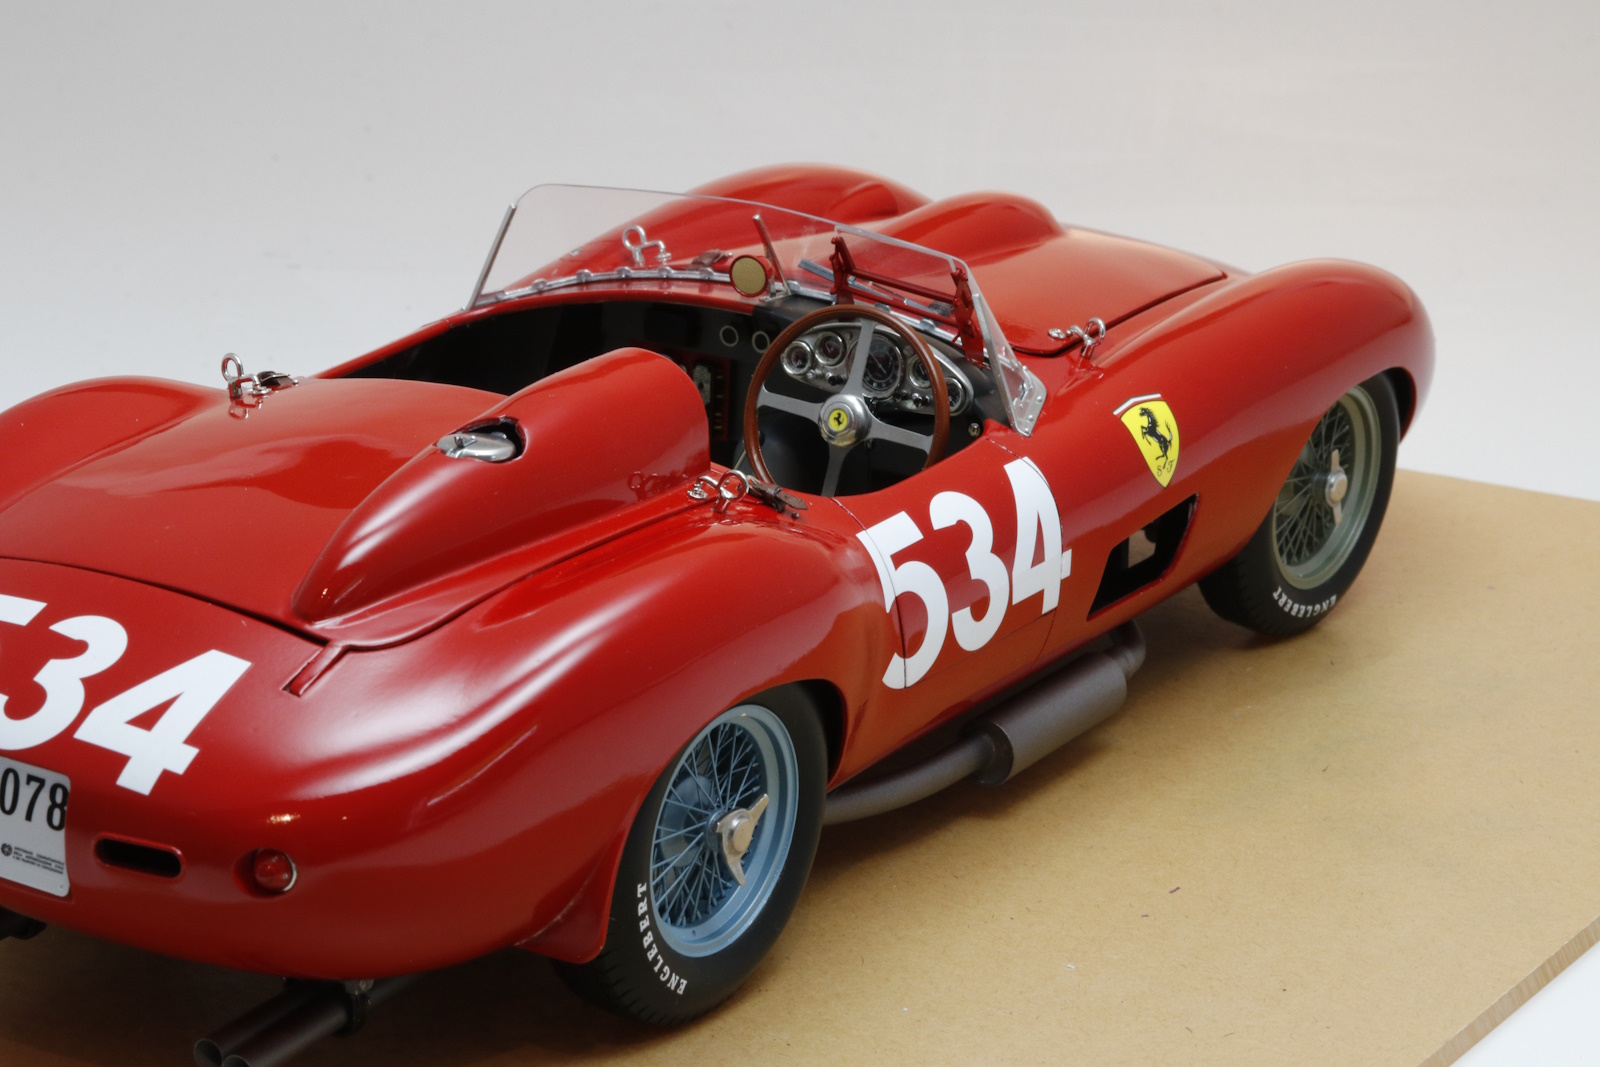
An update of sorts with some forward progress and backward steps.
From a viewing distance it’s not looking too bad
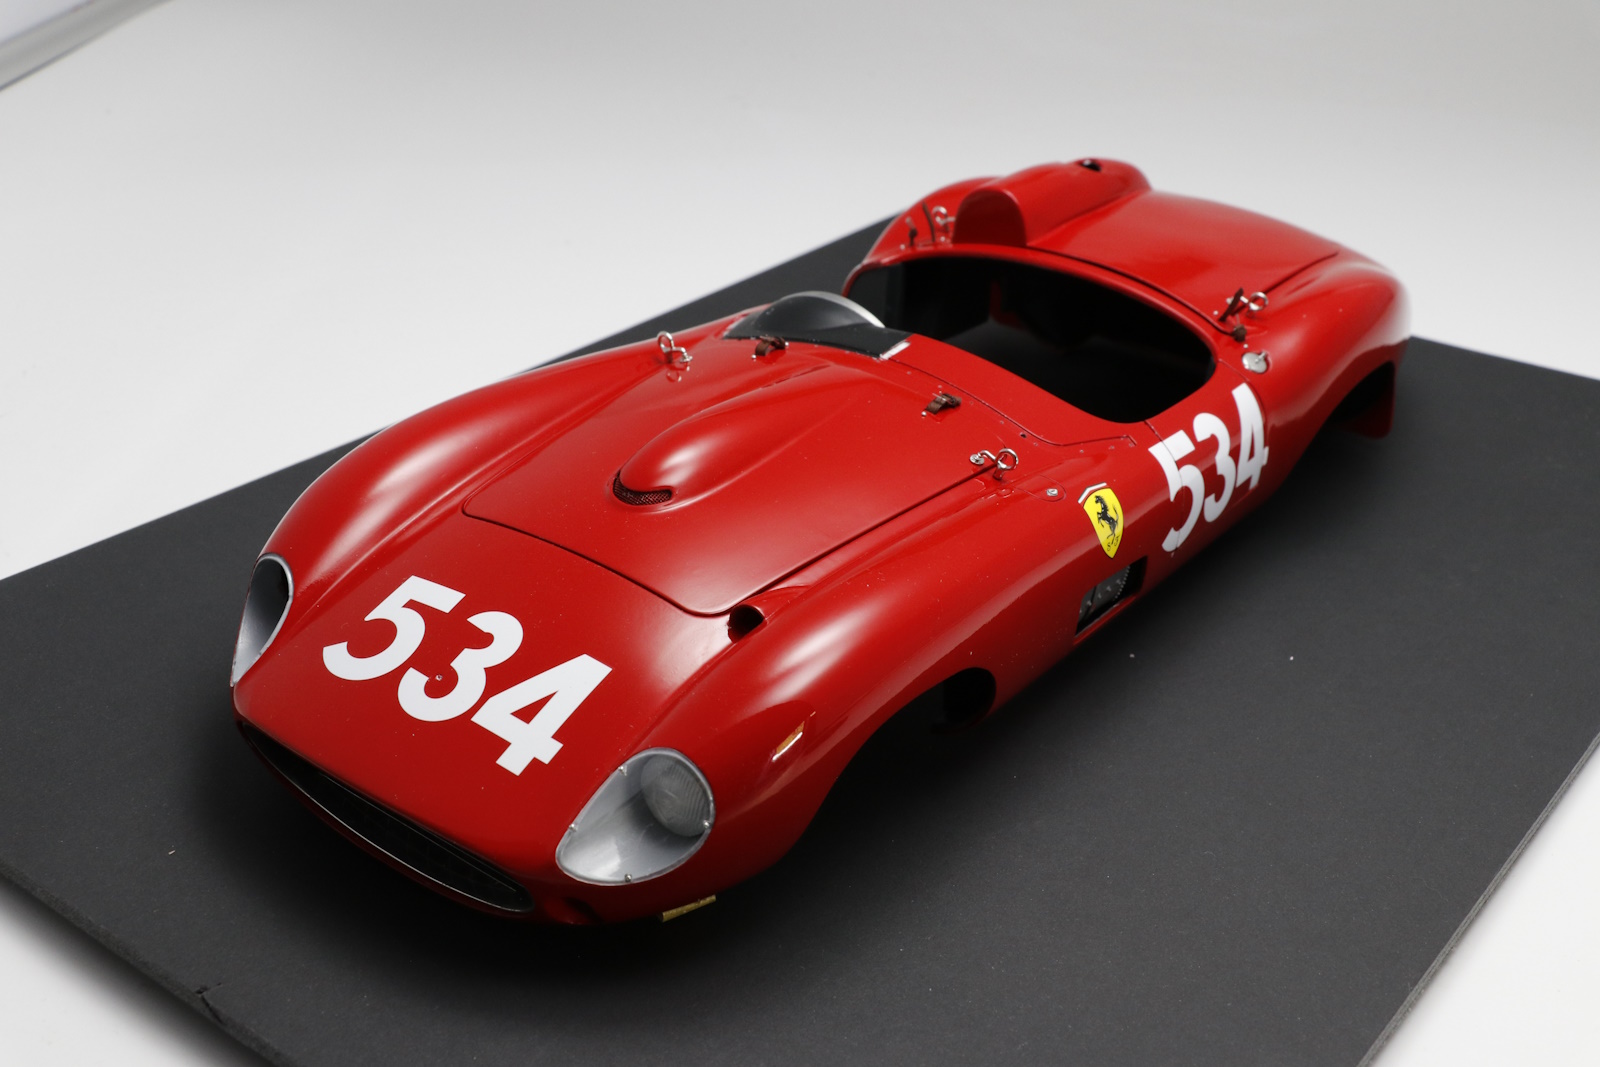
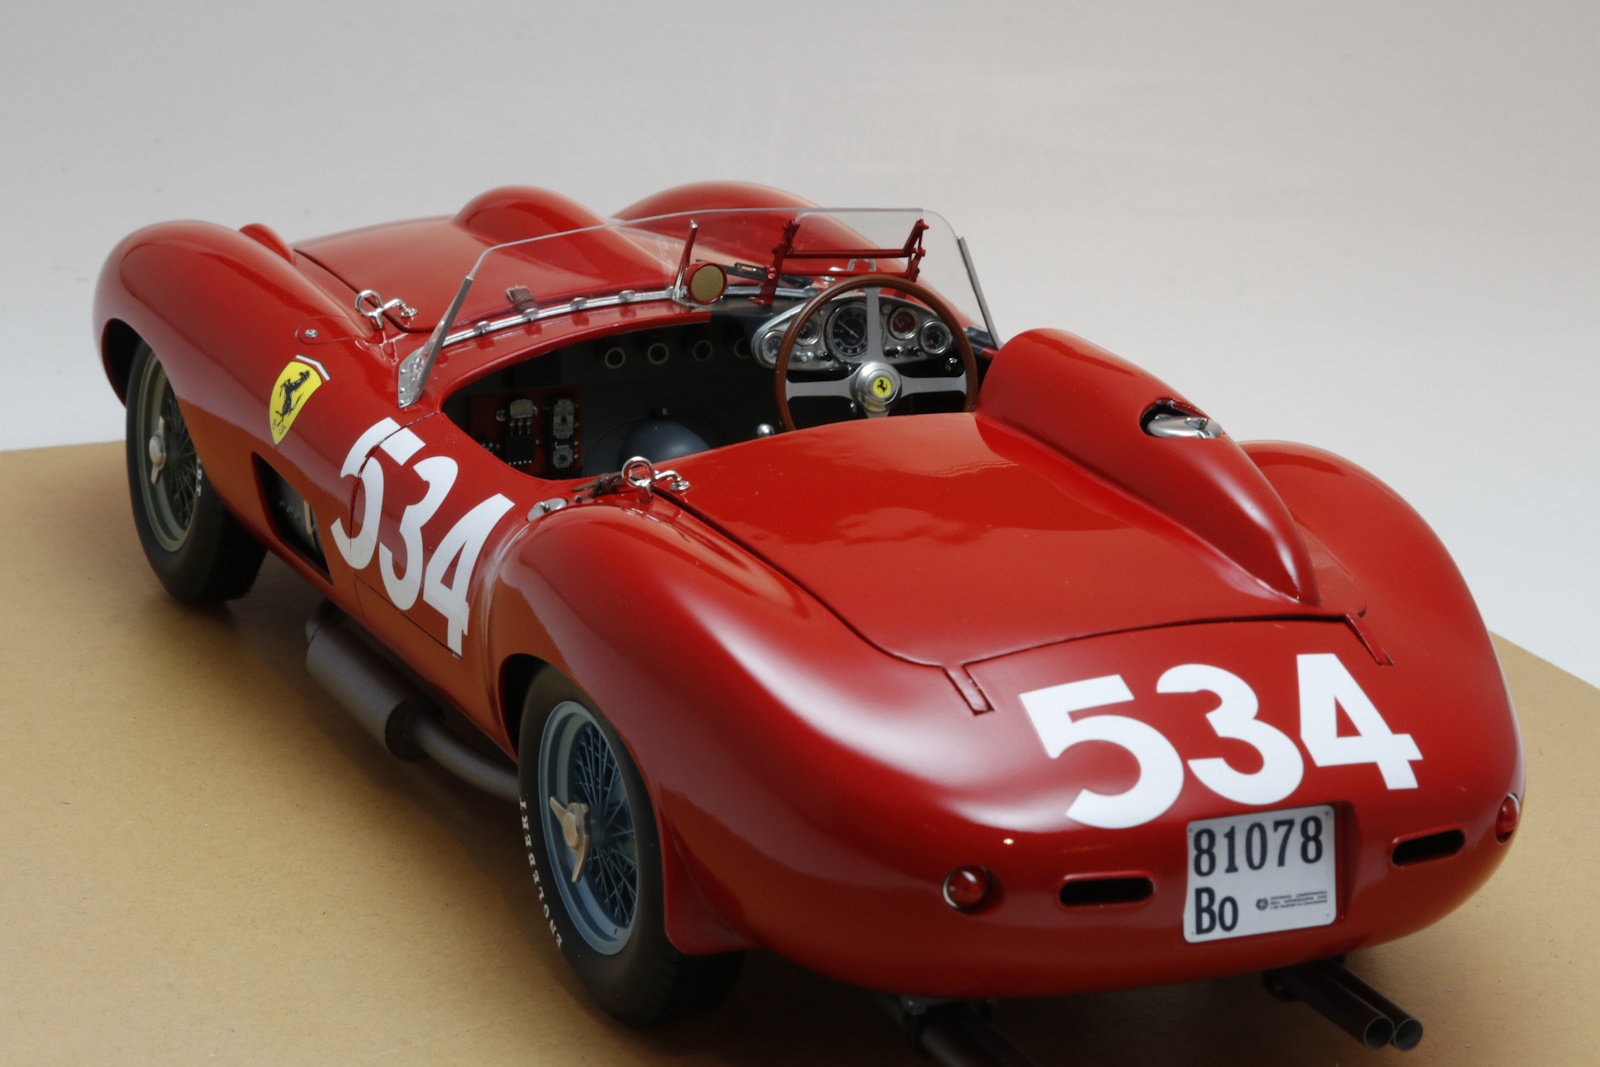
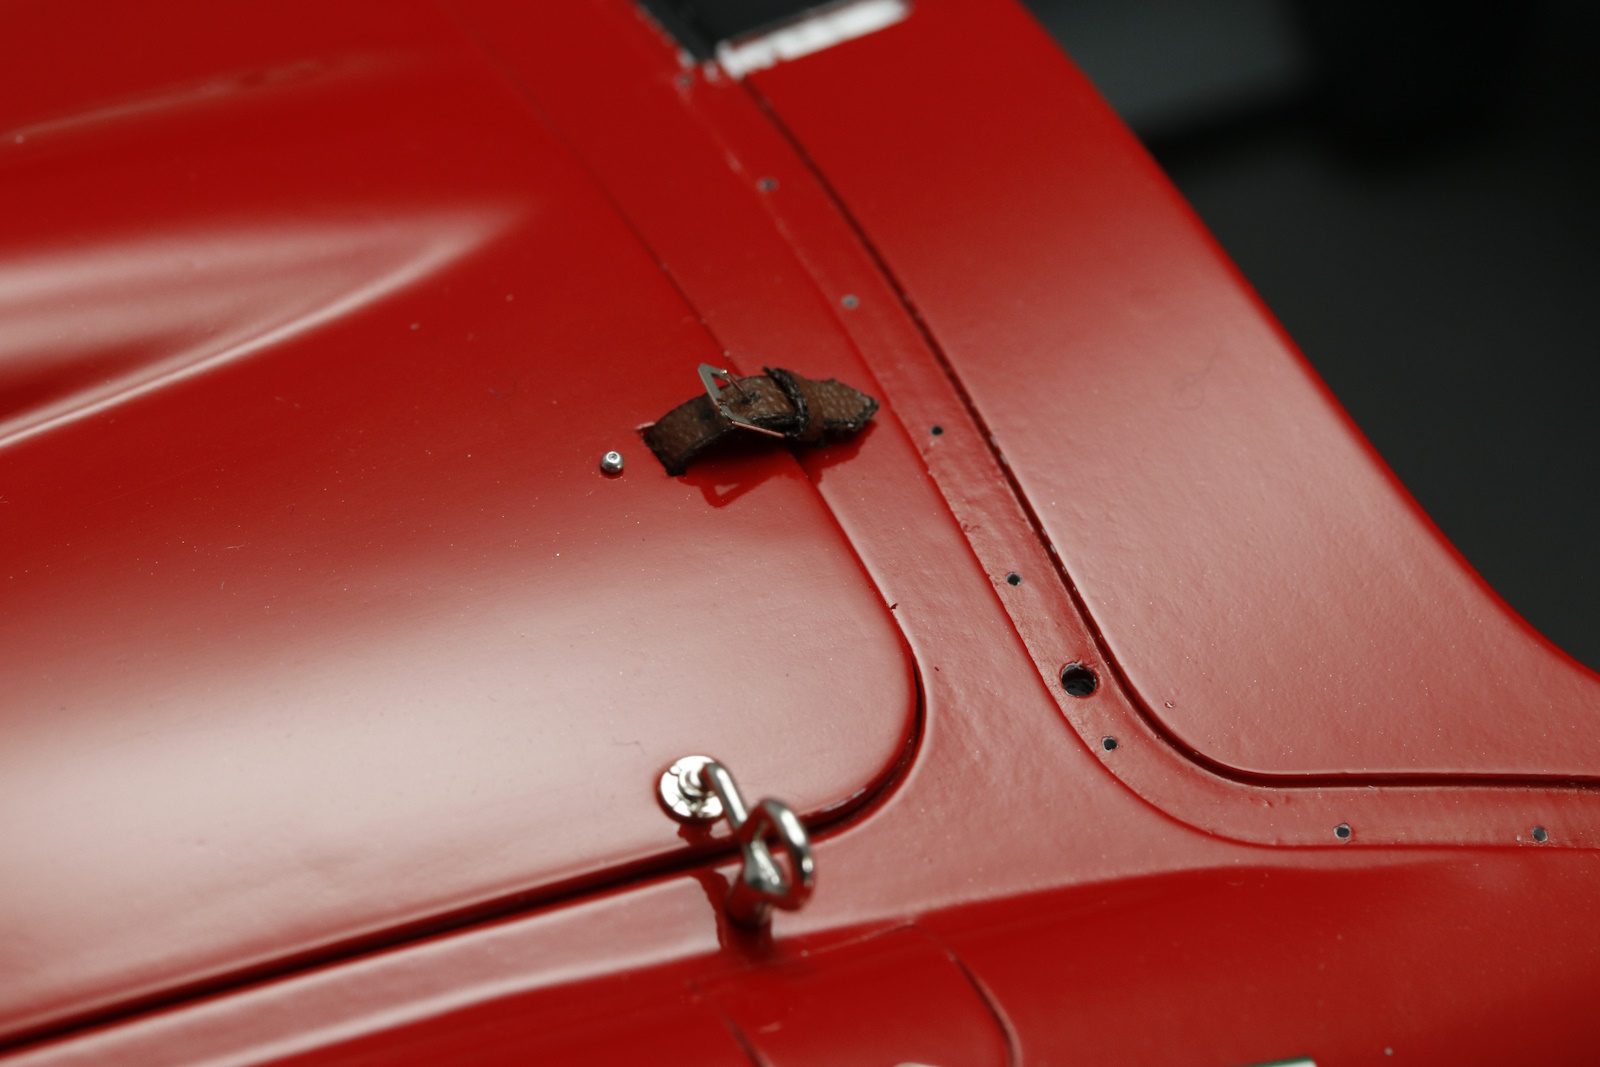
Lots of detail work going on. The hood and trunk latches are spring operated so you lift and turn them if you want to take the hood off or open the trunk
With spring attached

it then links to a metal circle with a pin fixed under the body shell

In place
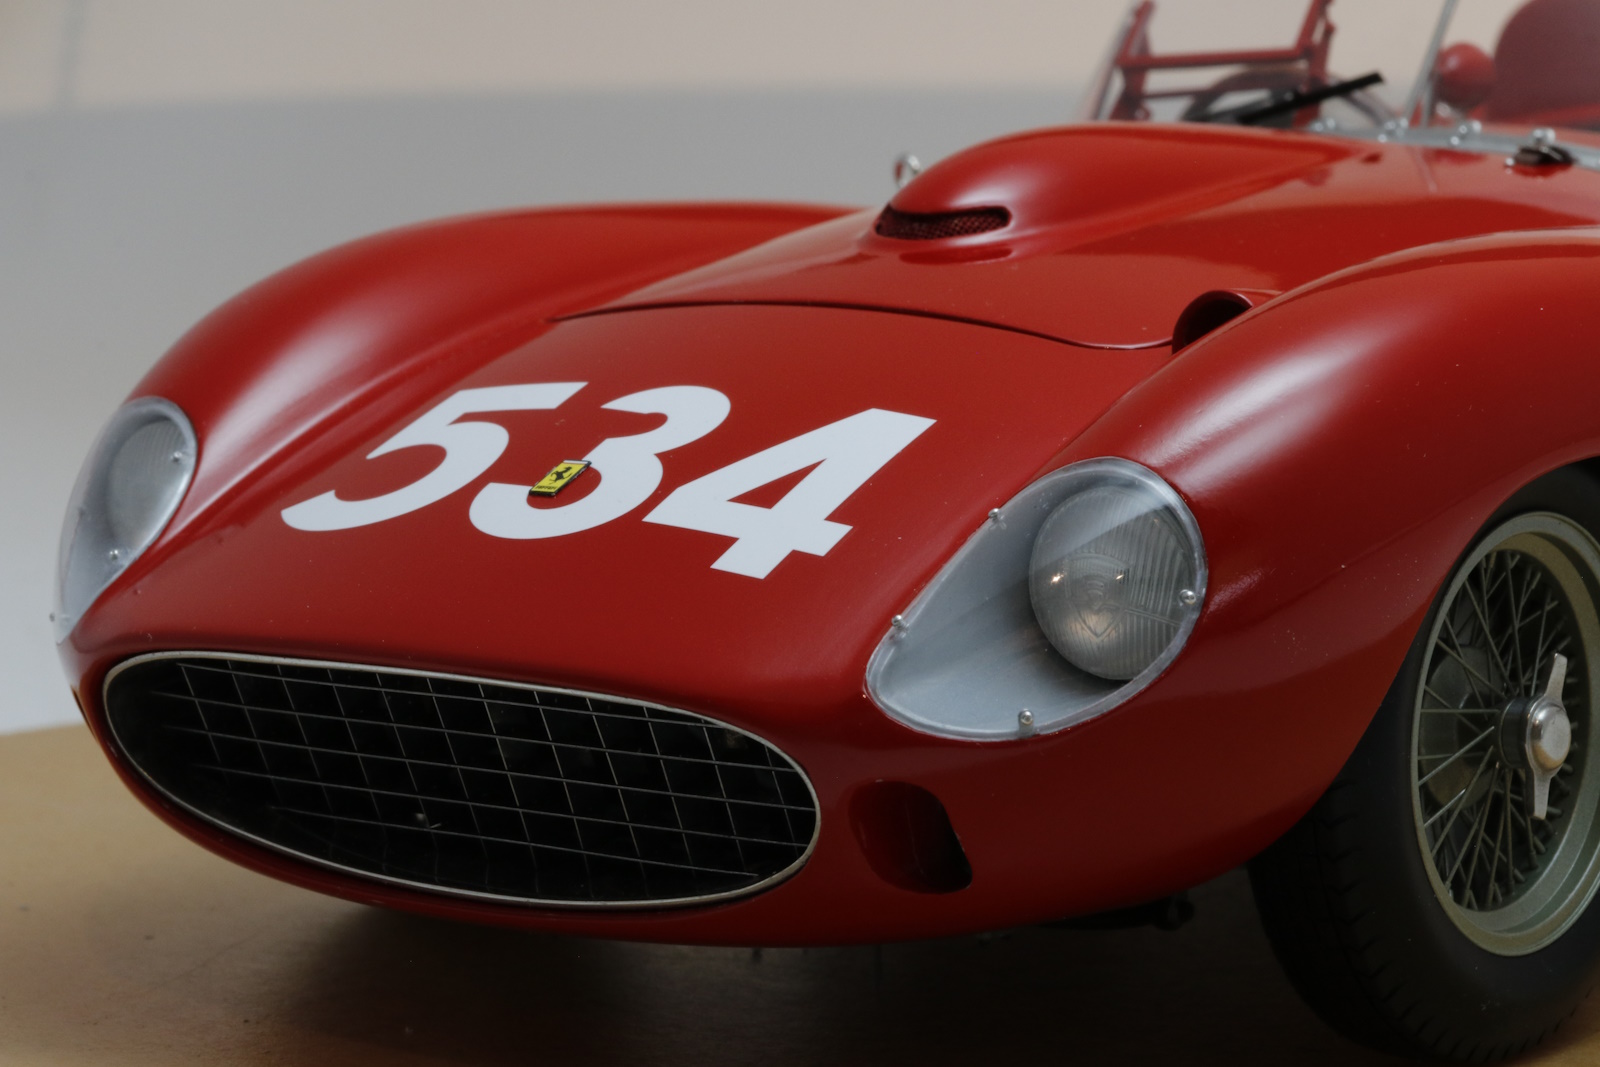
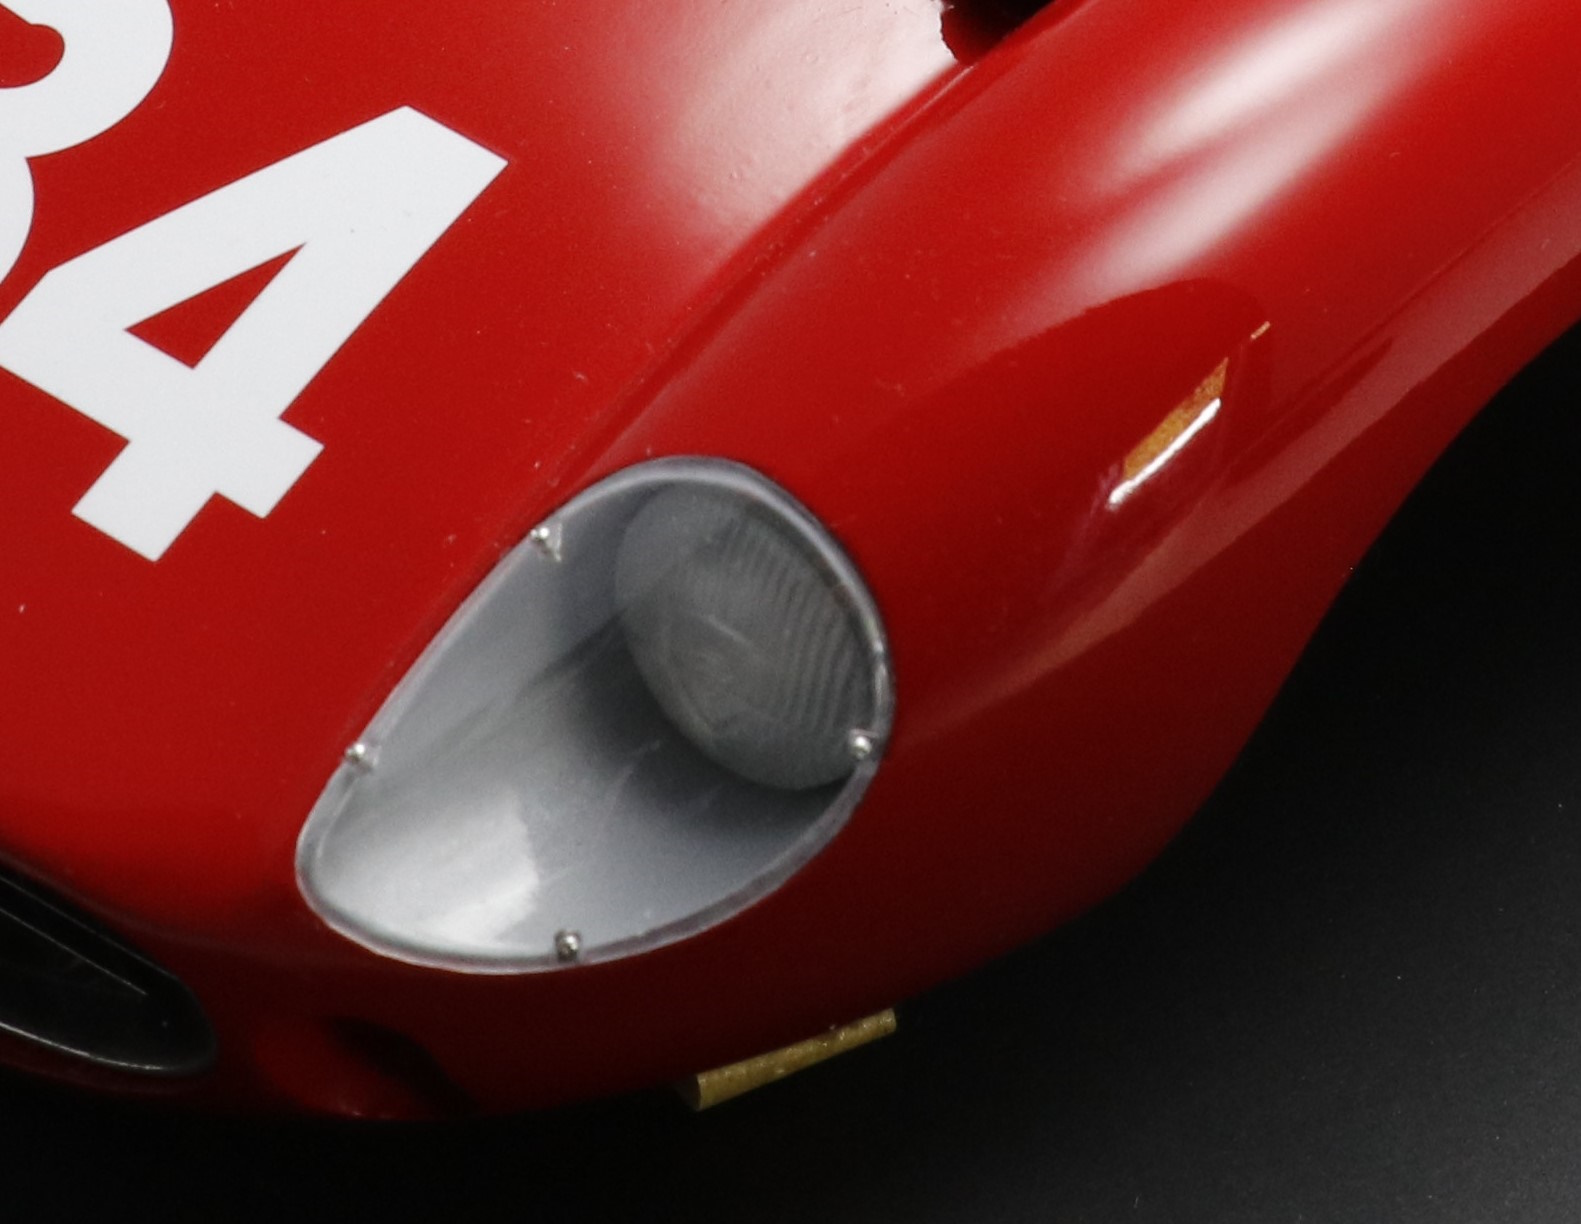
The headlight covers are different in that the rivets are put through small metal clips which are then fixed to the body. Lot of measuring and dry fitting here
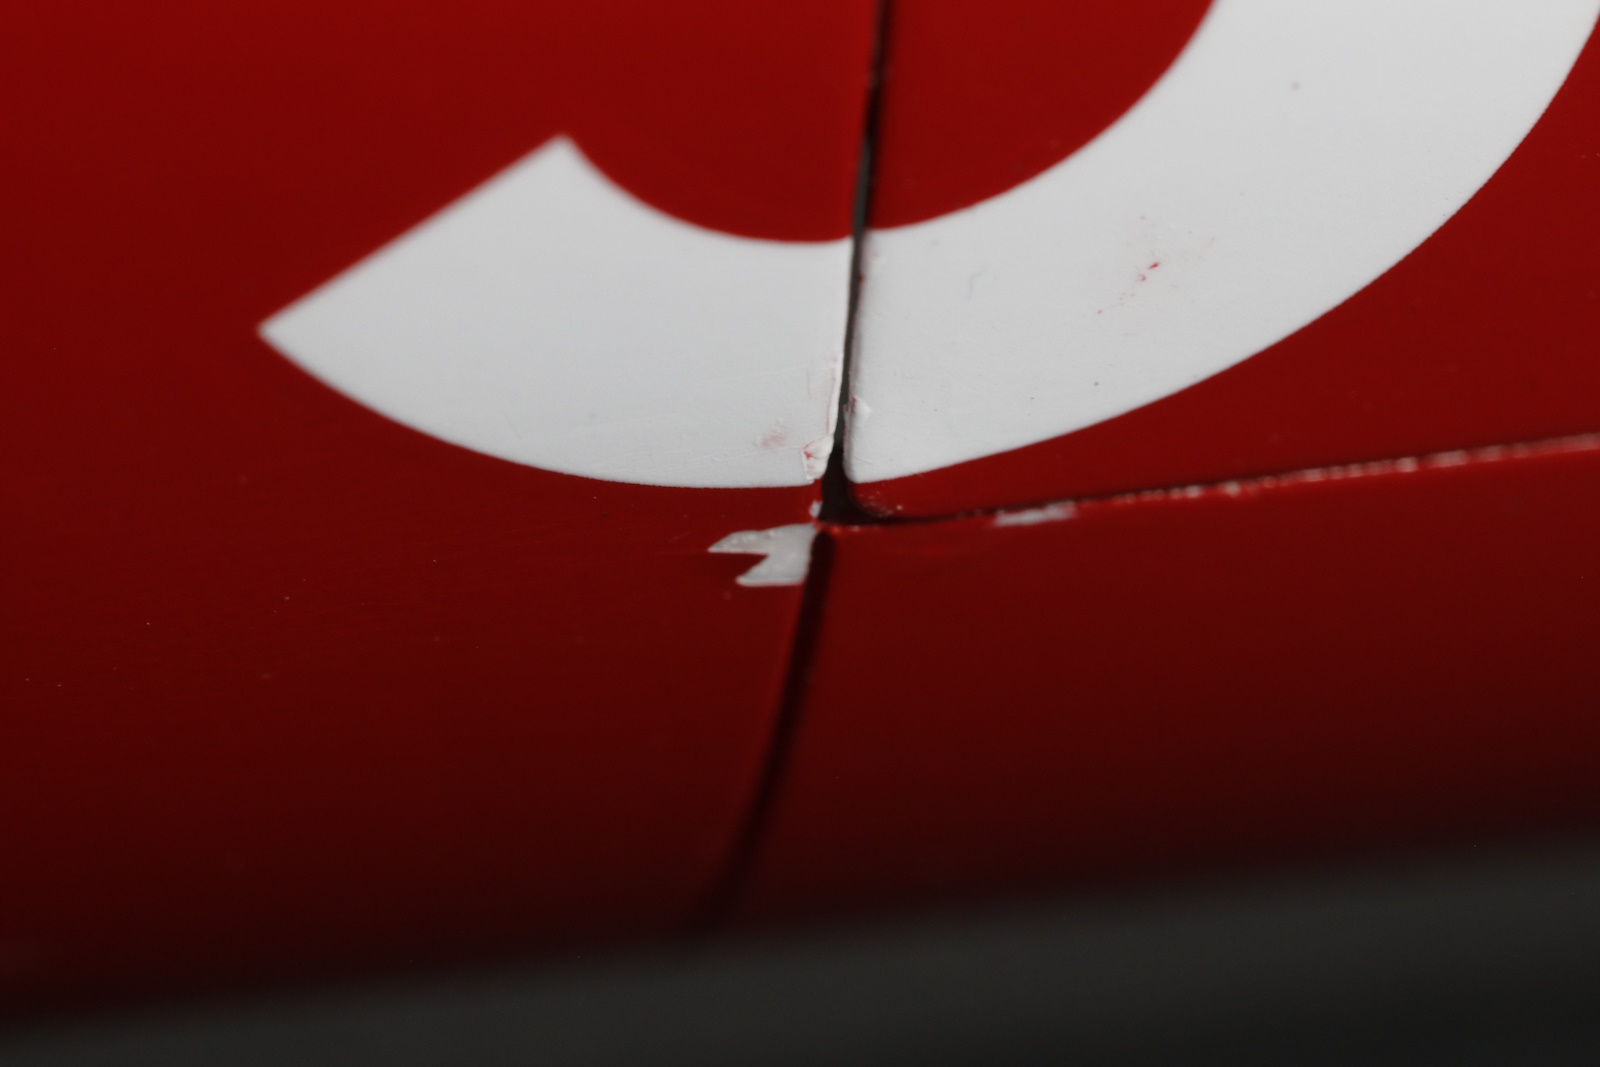
The drawbacks are with the body painted and glossed there is so much handling required to test fit and then attach all these items the inevitable happens, for me anyway, a scratch
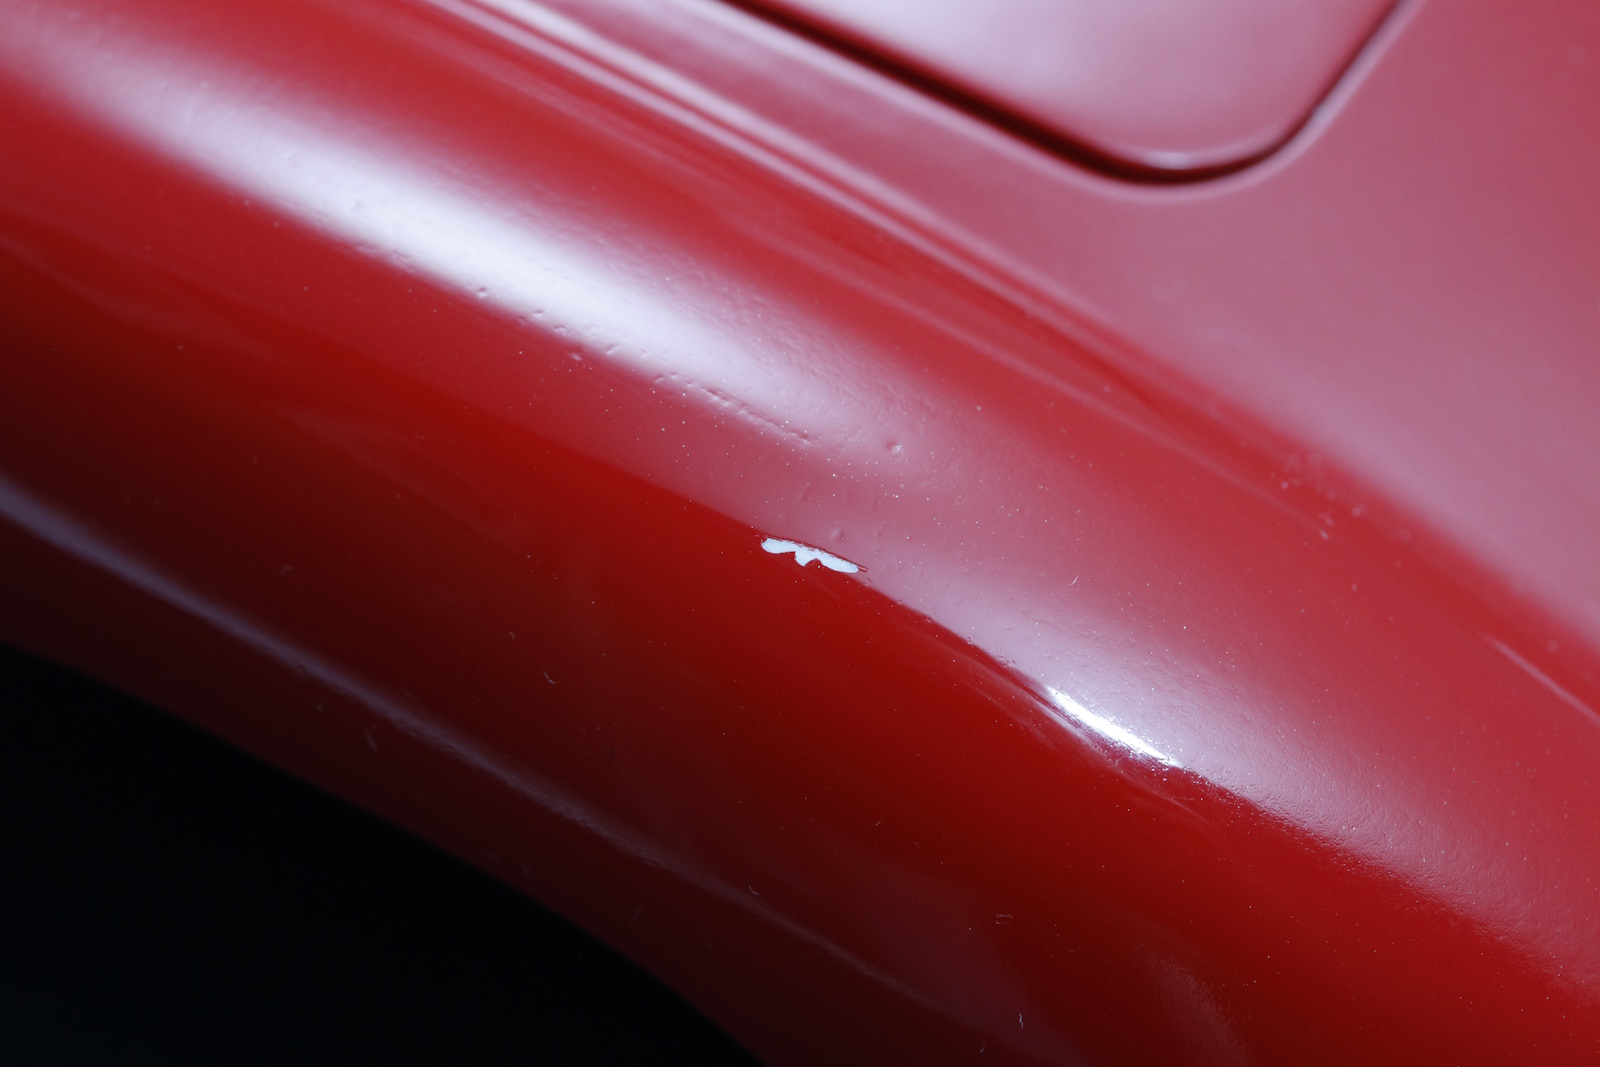
This photo did highlight a couple of body flaws I hadn’t noticed before so a chance to address them all along with the new paint chip while fitting the first of the recovered doors caused by masking tape I had put on to protect the paint
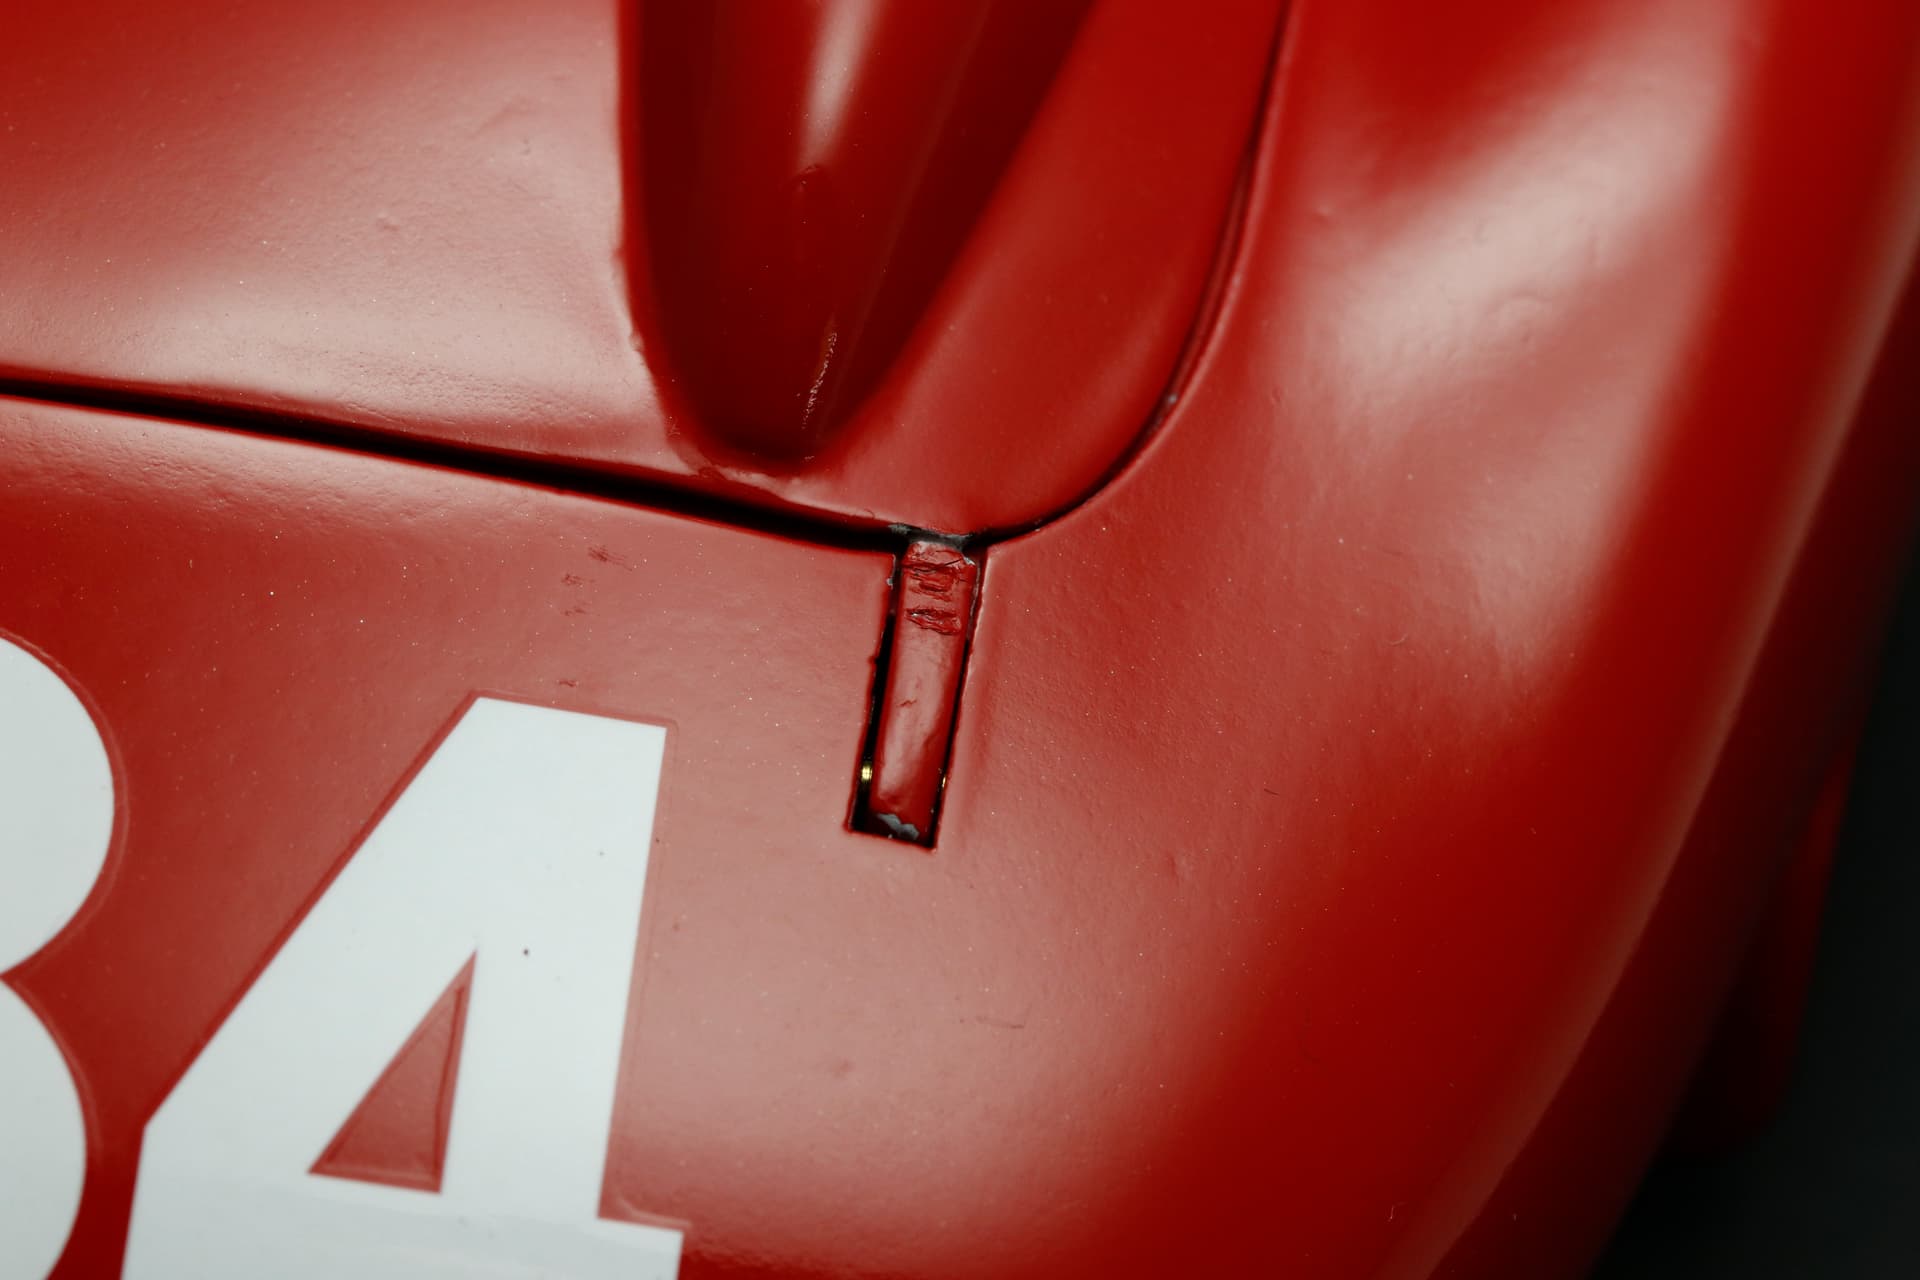
and the hinge broke off the trunk, this was the umpteenth time. It happened very early on in the build as I tried straighten the trunk. Here as I was test fitting the very awkward trunk hinge mechanism inside the shell and trying to align everything. Metal is so unforgiving if not fully lined up. It does work now but a fill and repaint required here
And I still haven’t tried to fit the body to the chassis - anything is possible with that event.
cheers
MIchael
7 Likes
This model is very fussy as is any MFH build, you are rising to the occasion Very well, as each step is finished the model becomes more and more damageable. You achieved a Great fit on the hood, I have tried mine and its never going to be perfect so I will live with that. I plan to fix the doors and trunk lid permanently to try to help reduce chipping through handling. Amazing job on those headlight covers by the way ~
3 Likes