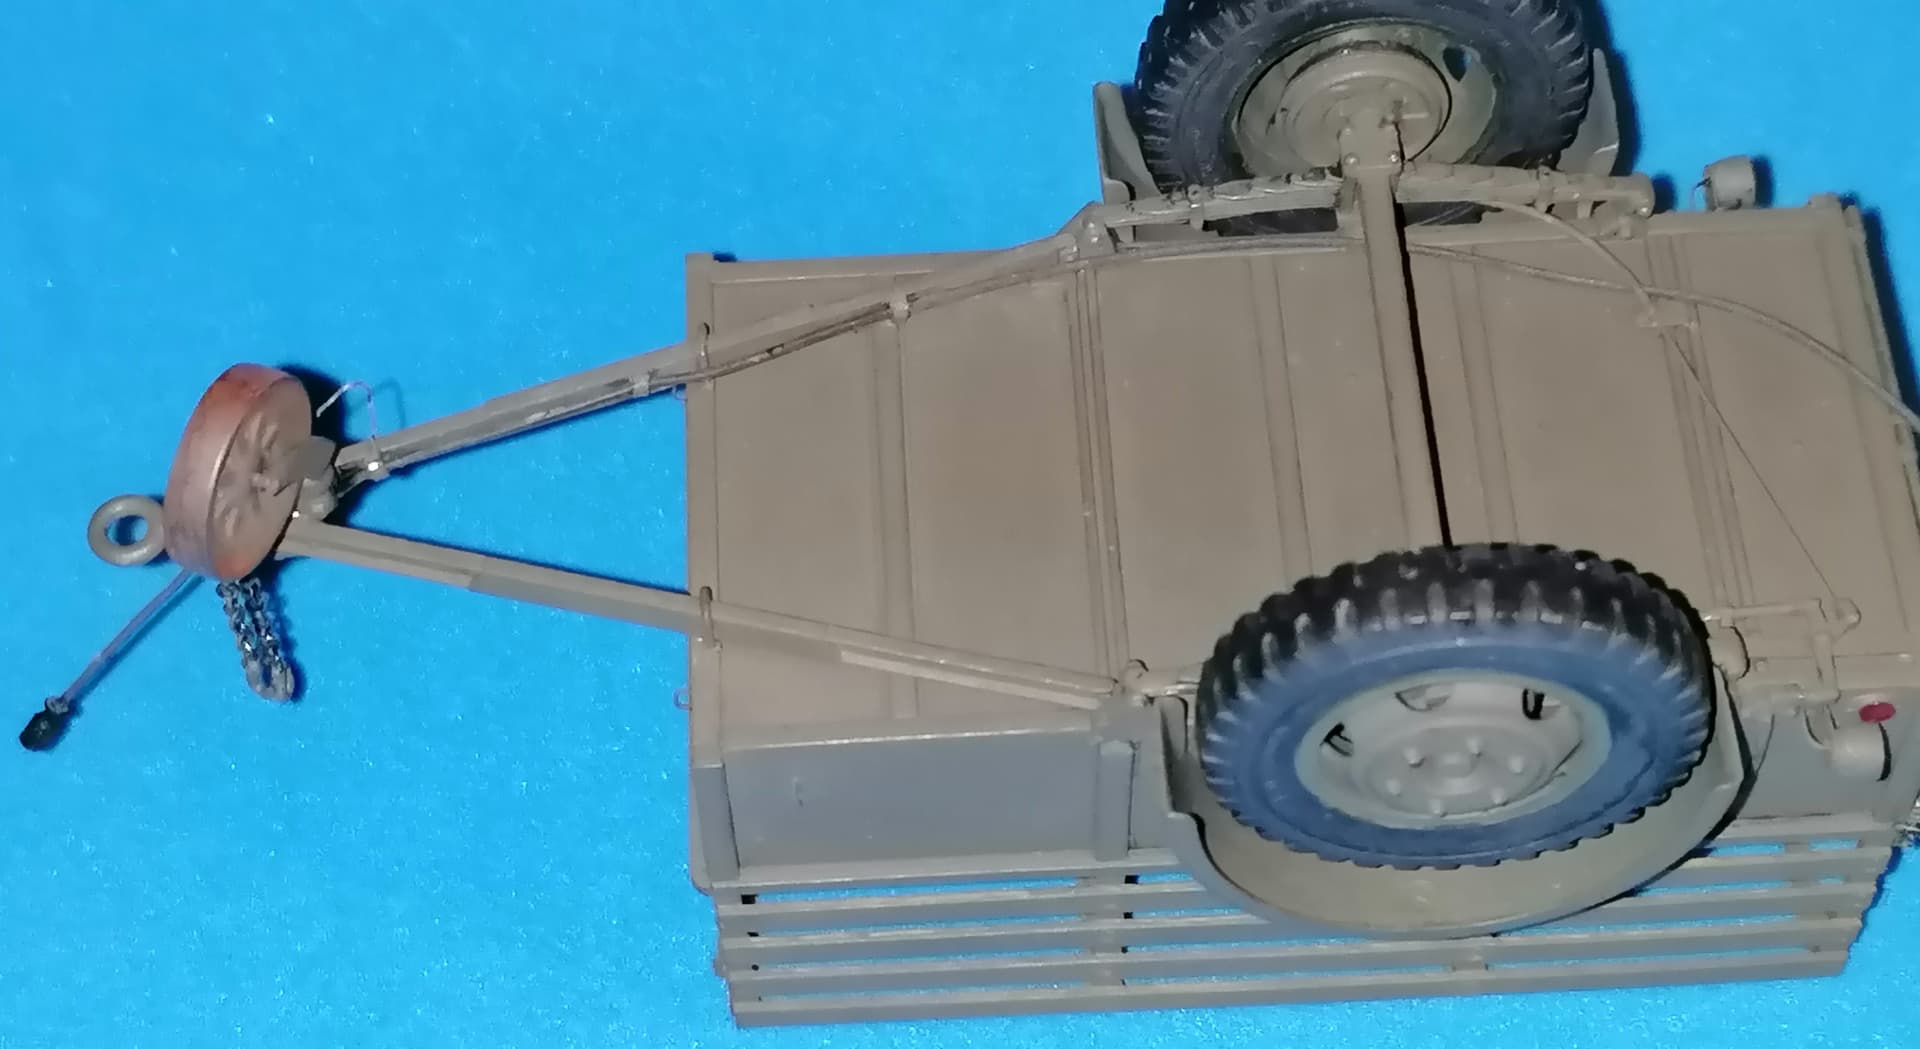
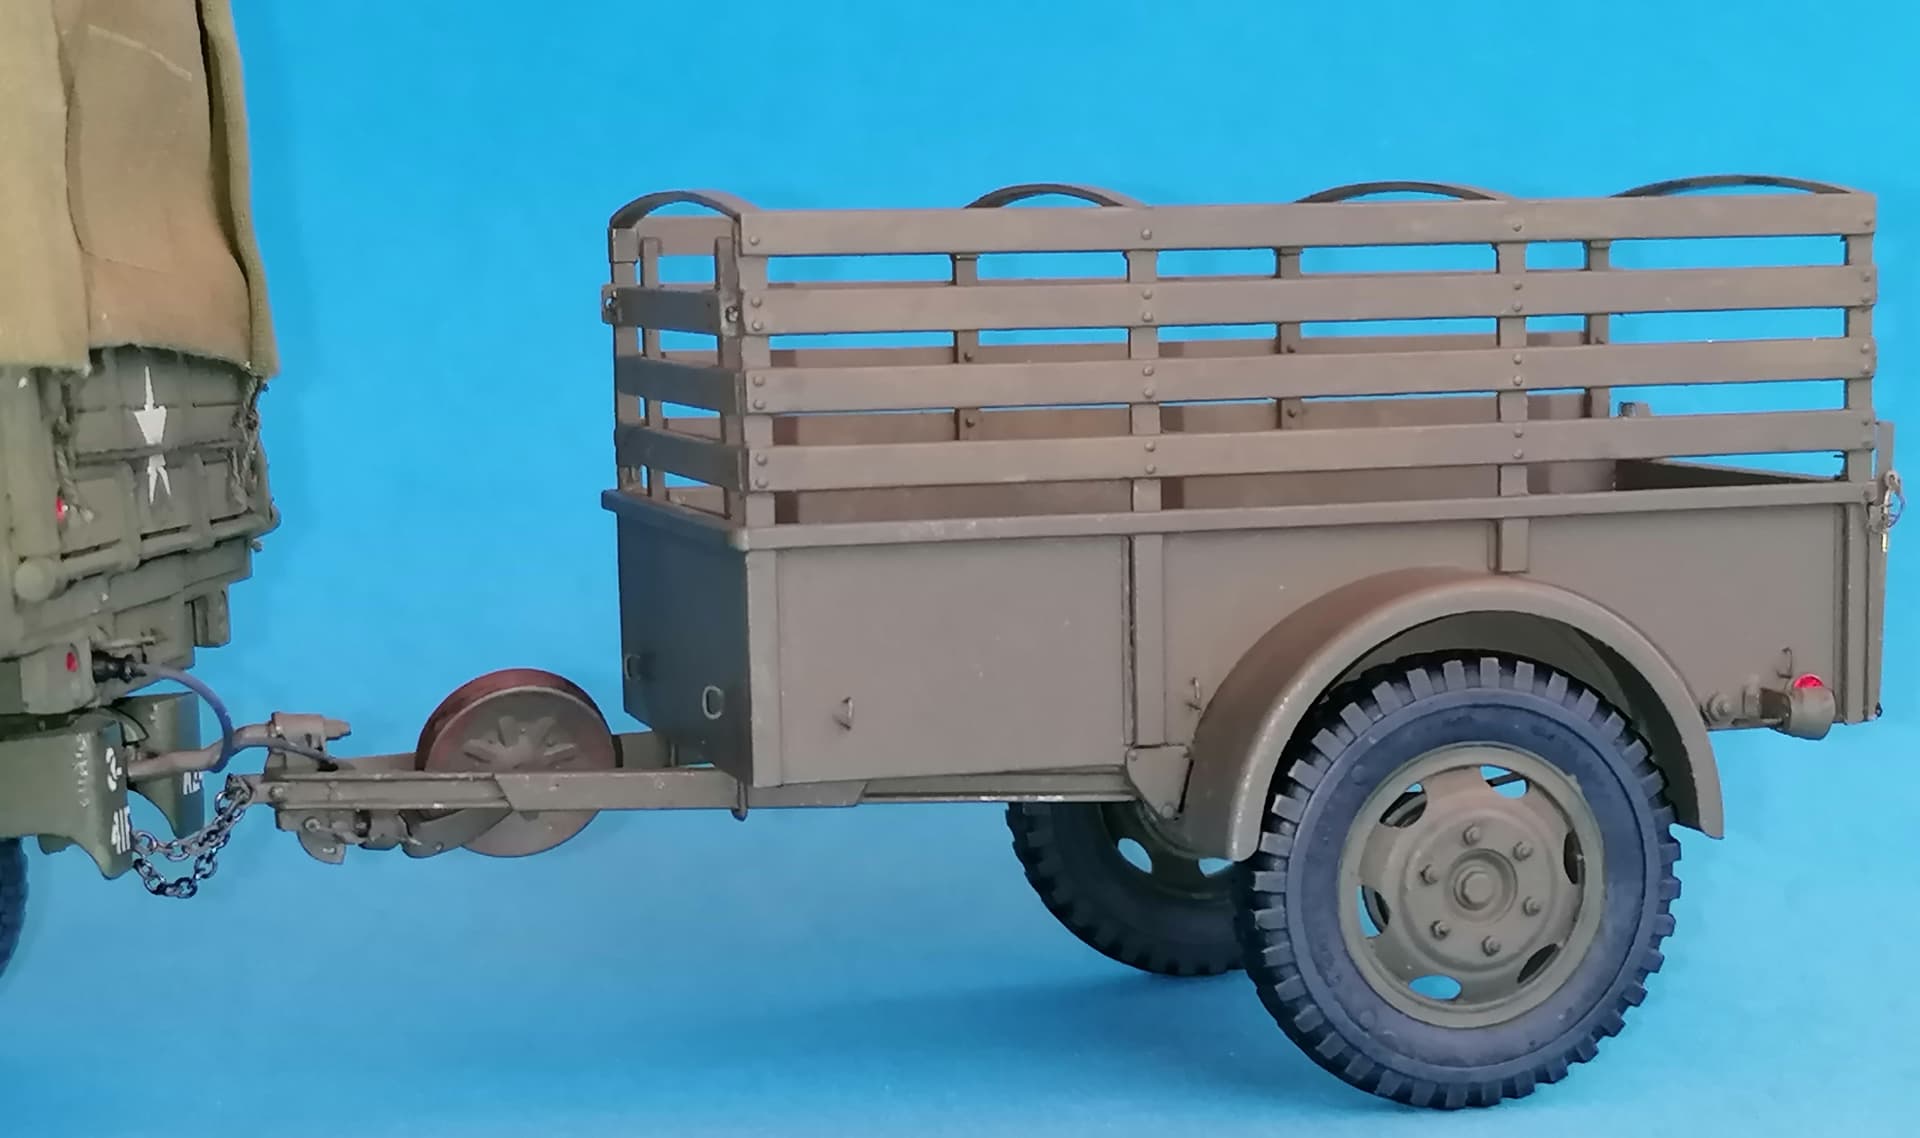
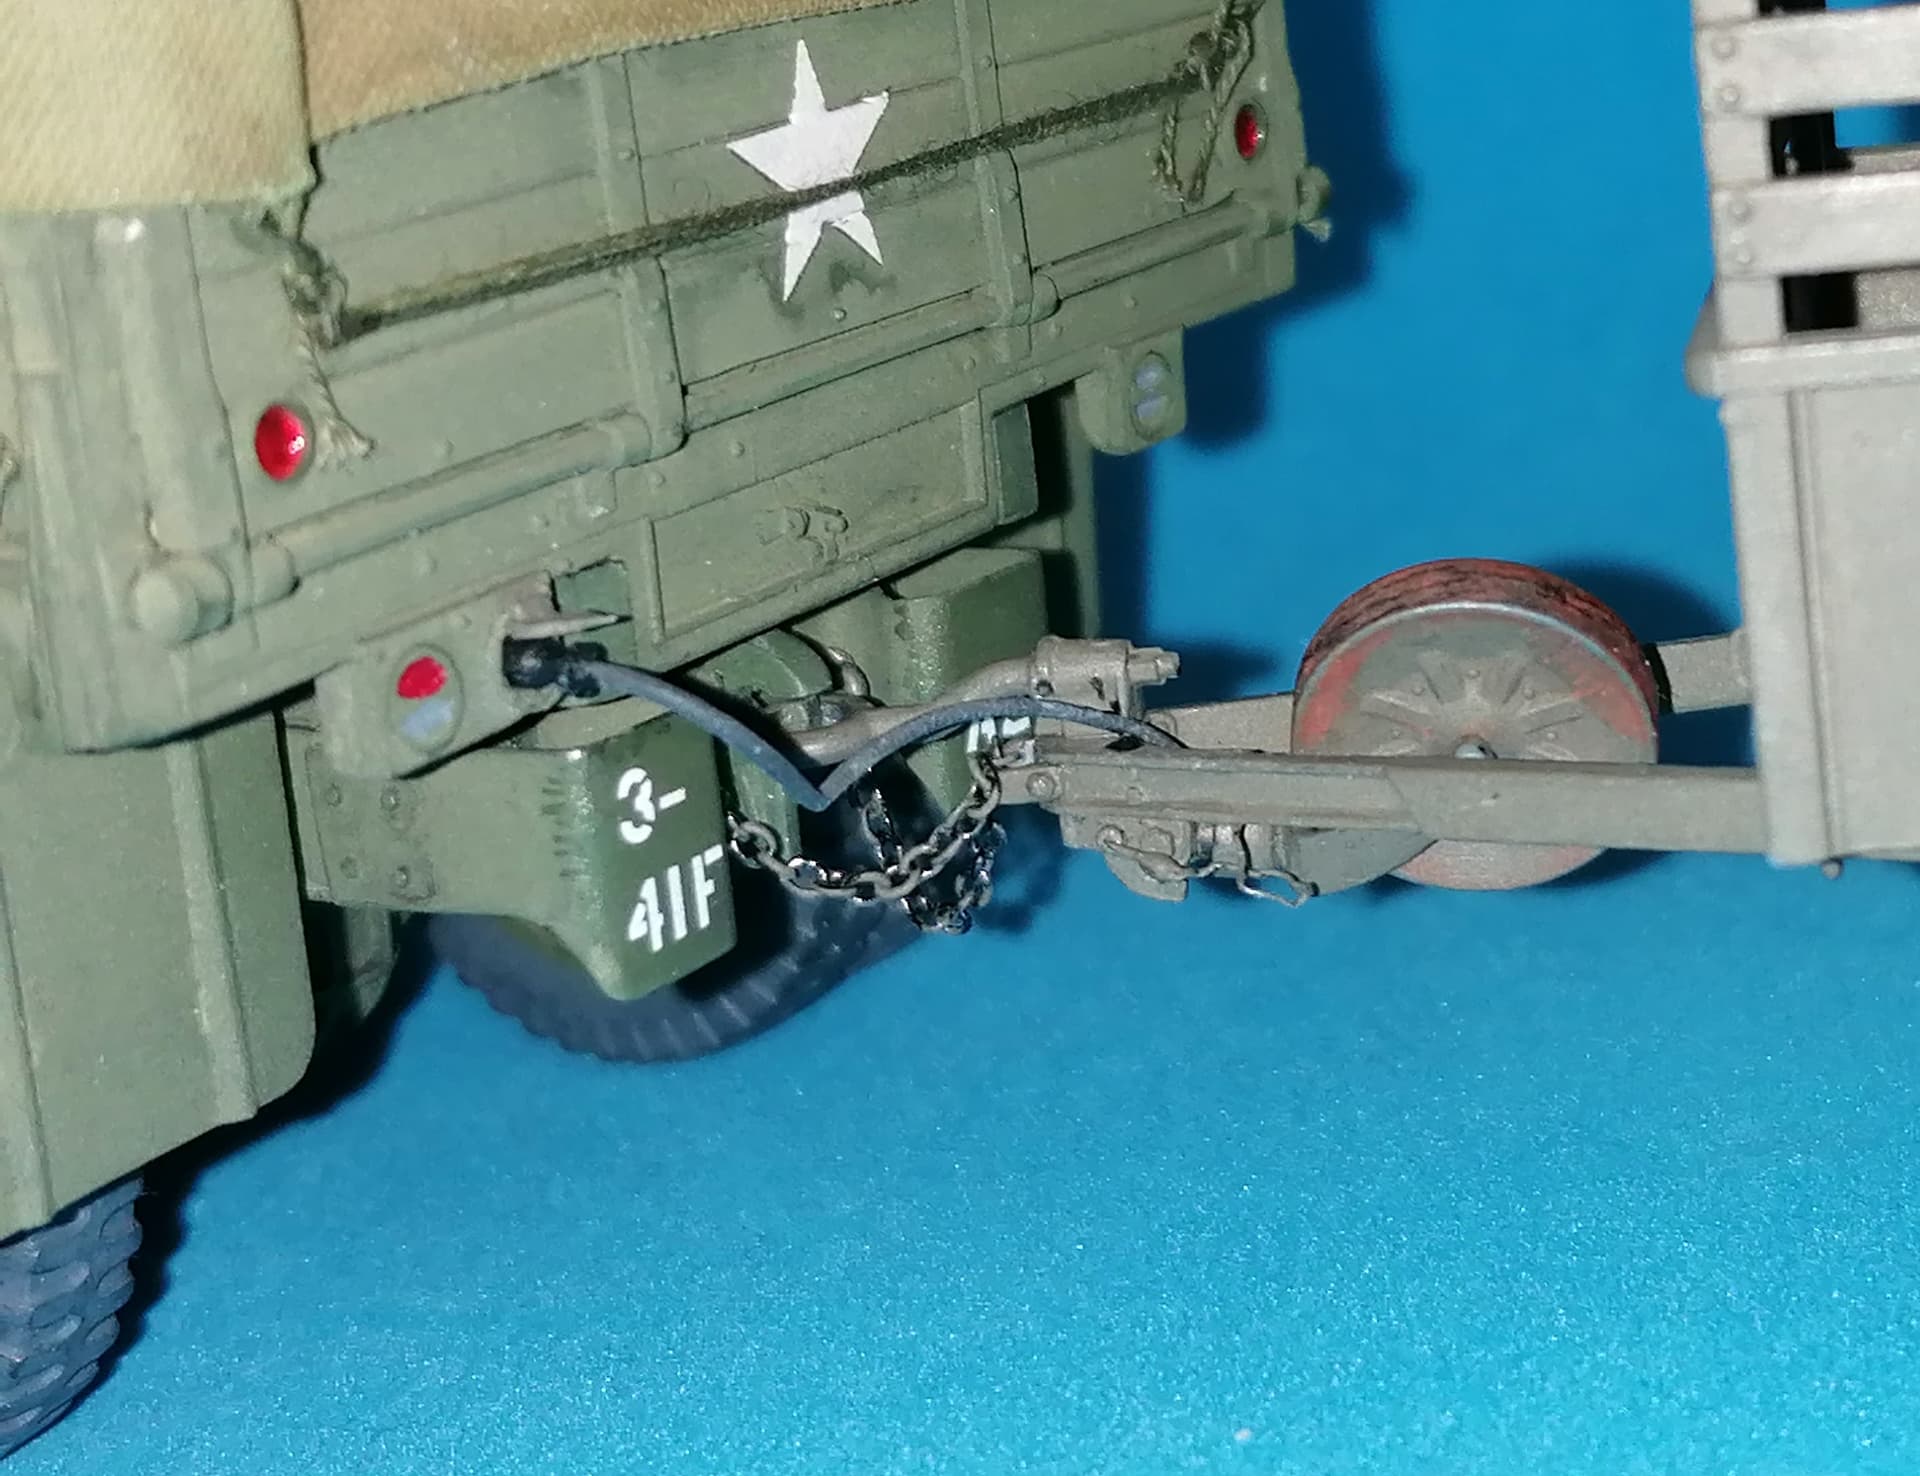
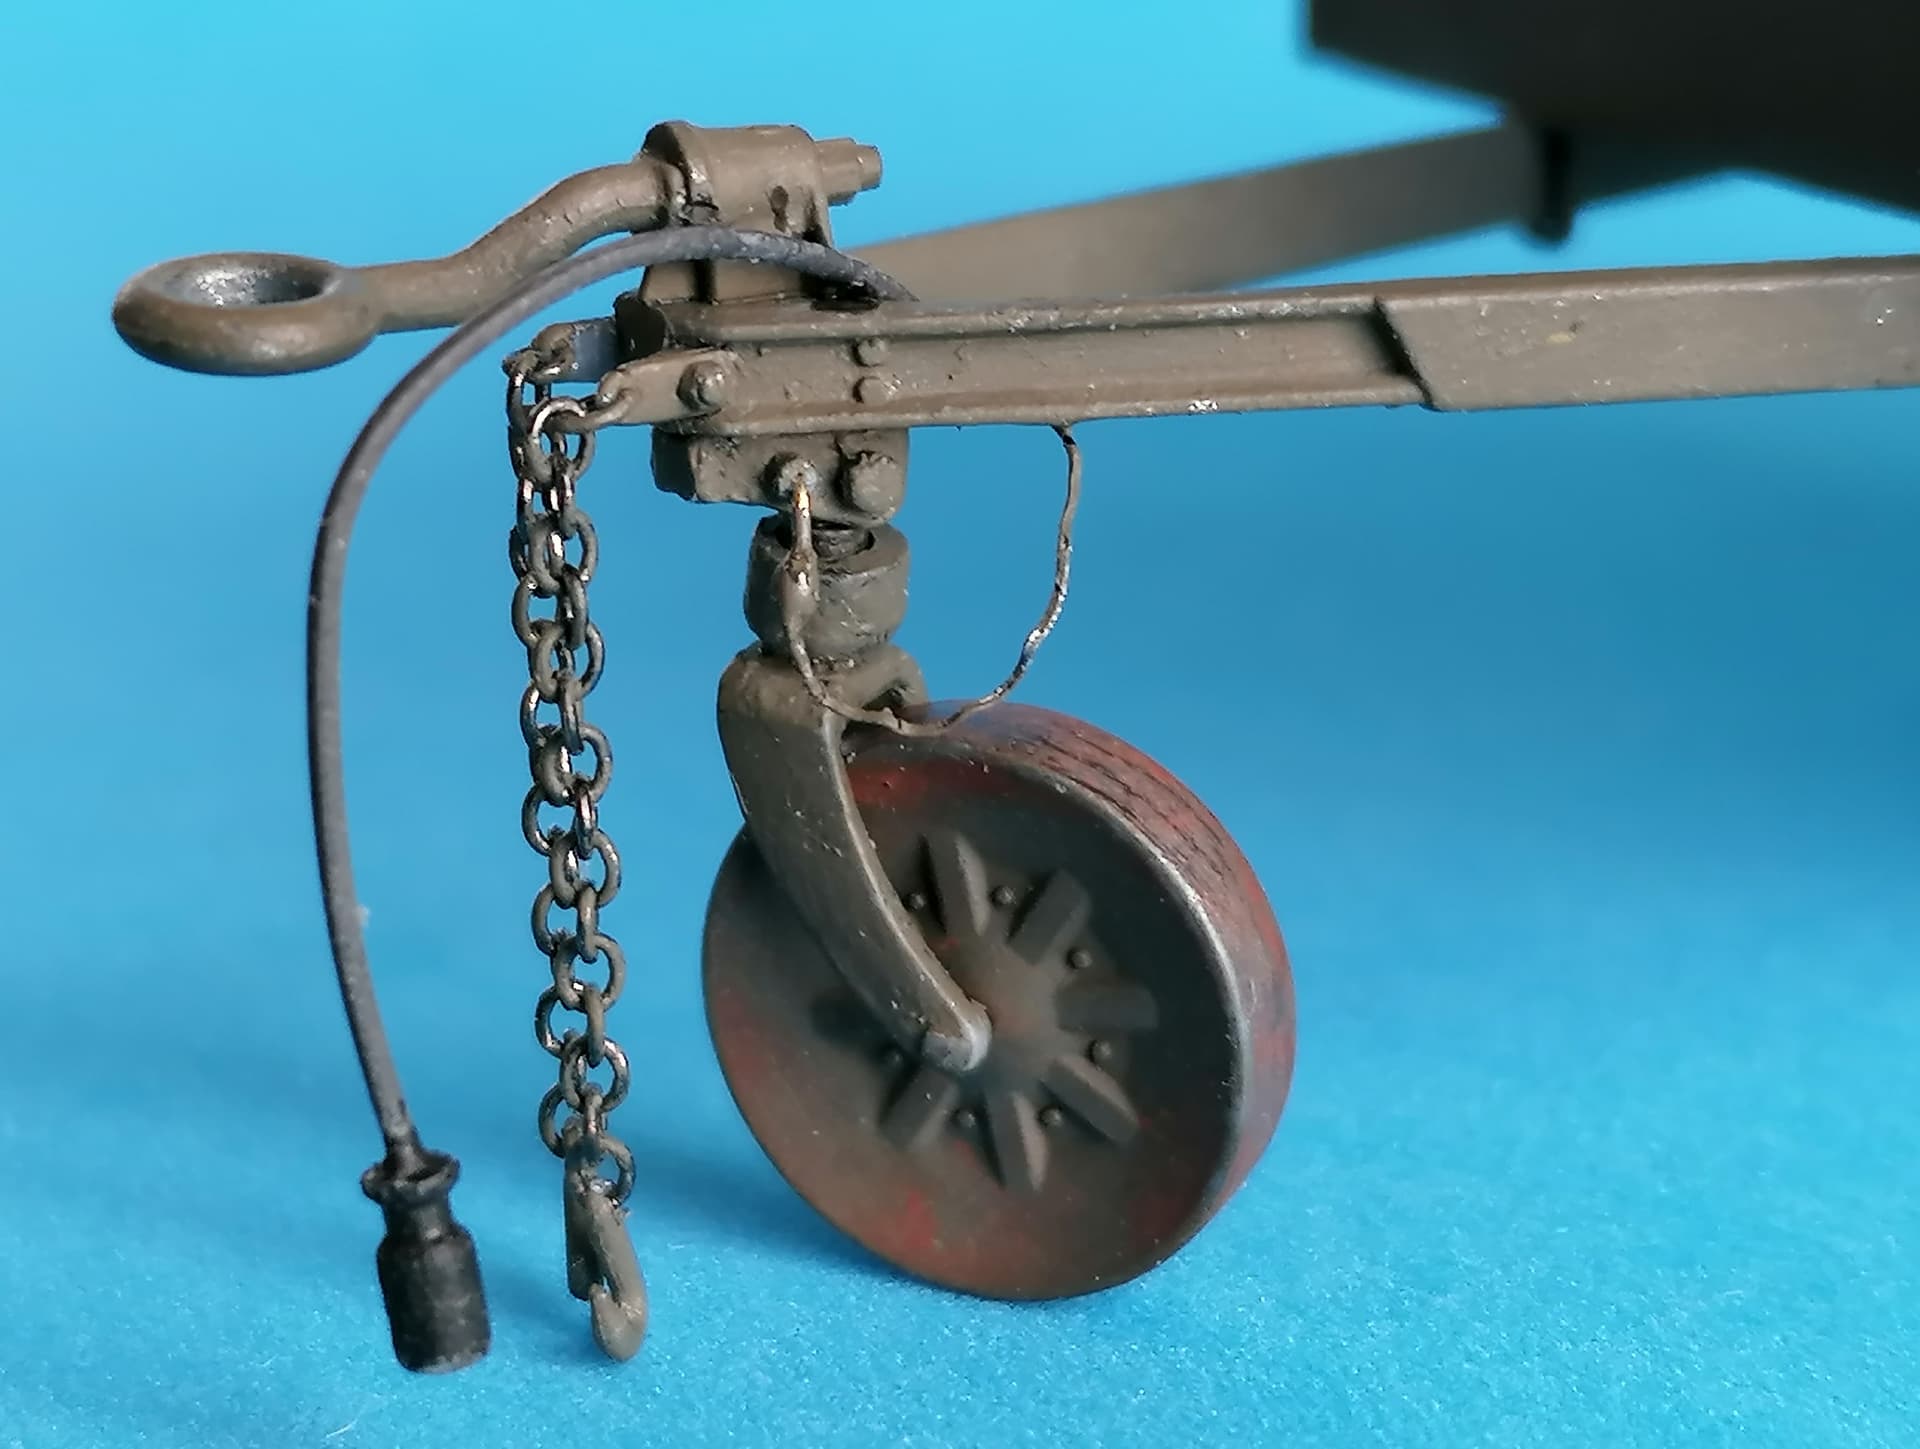
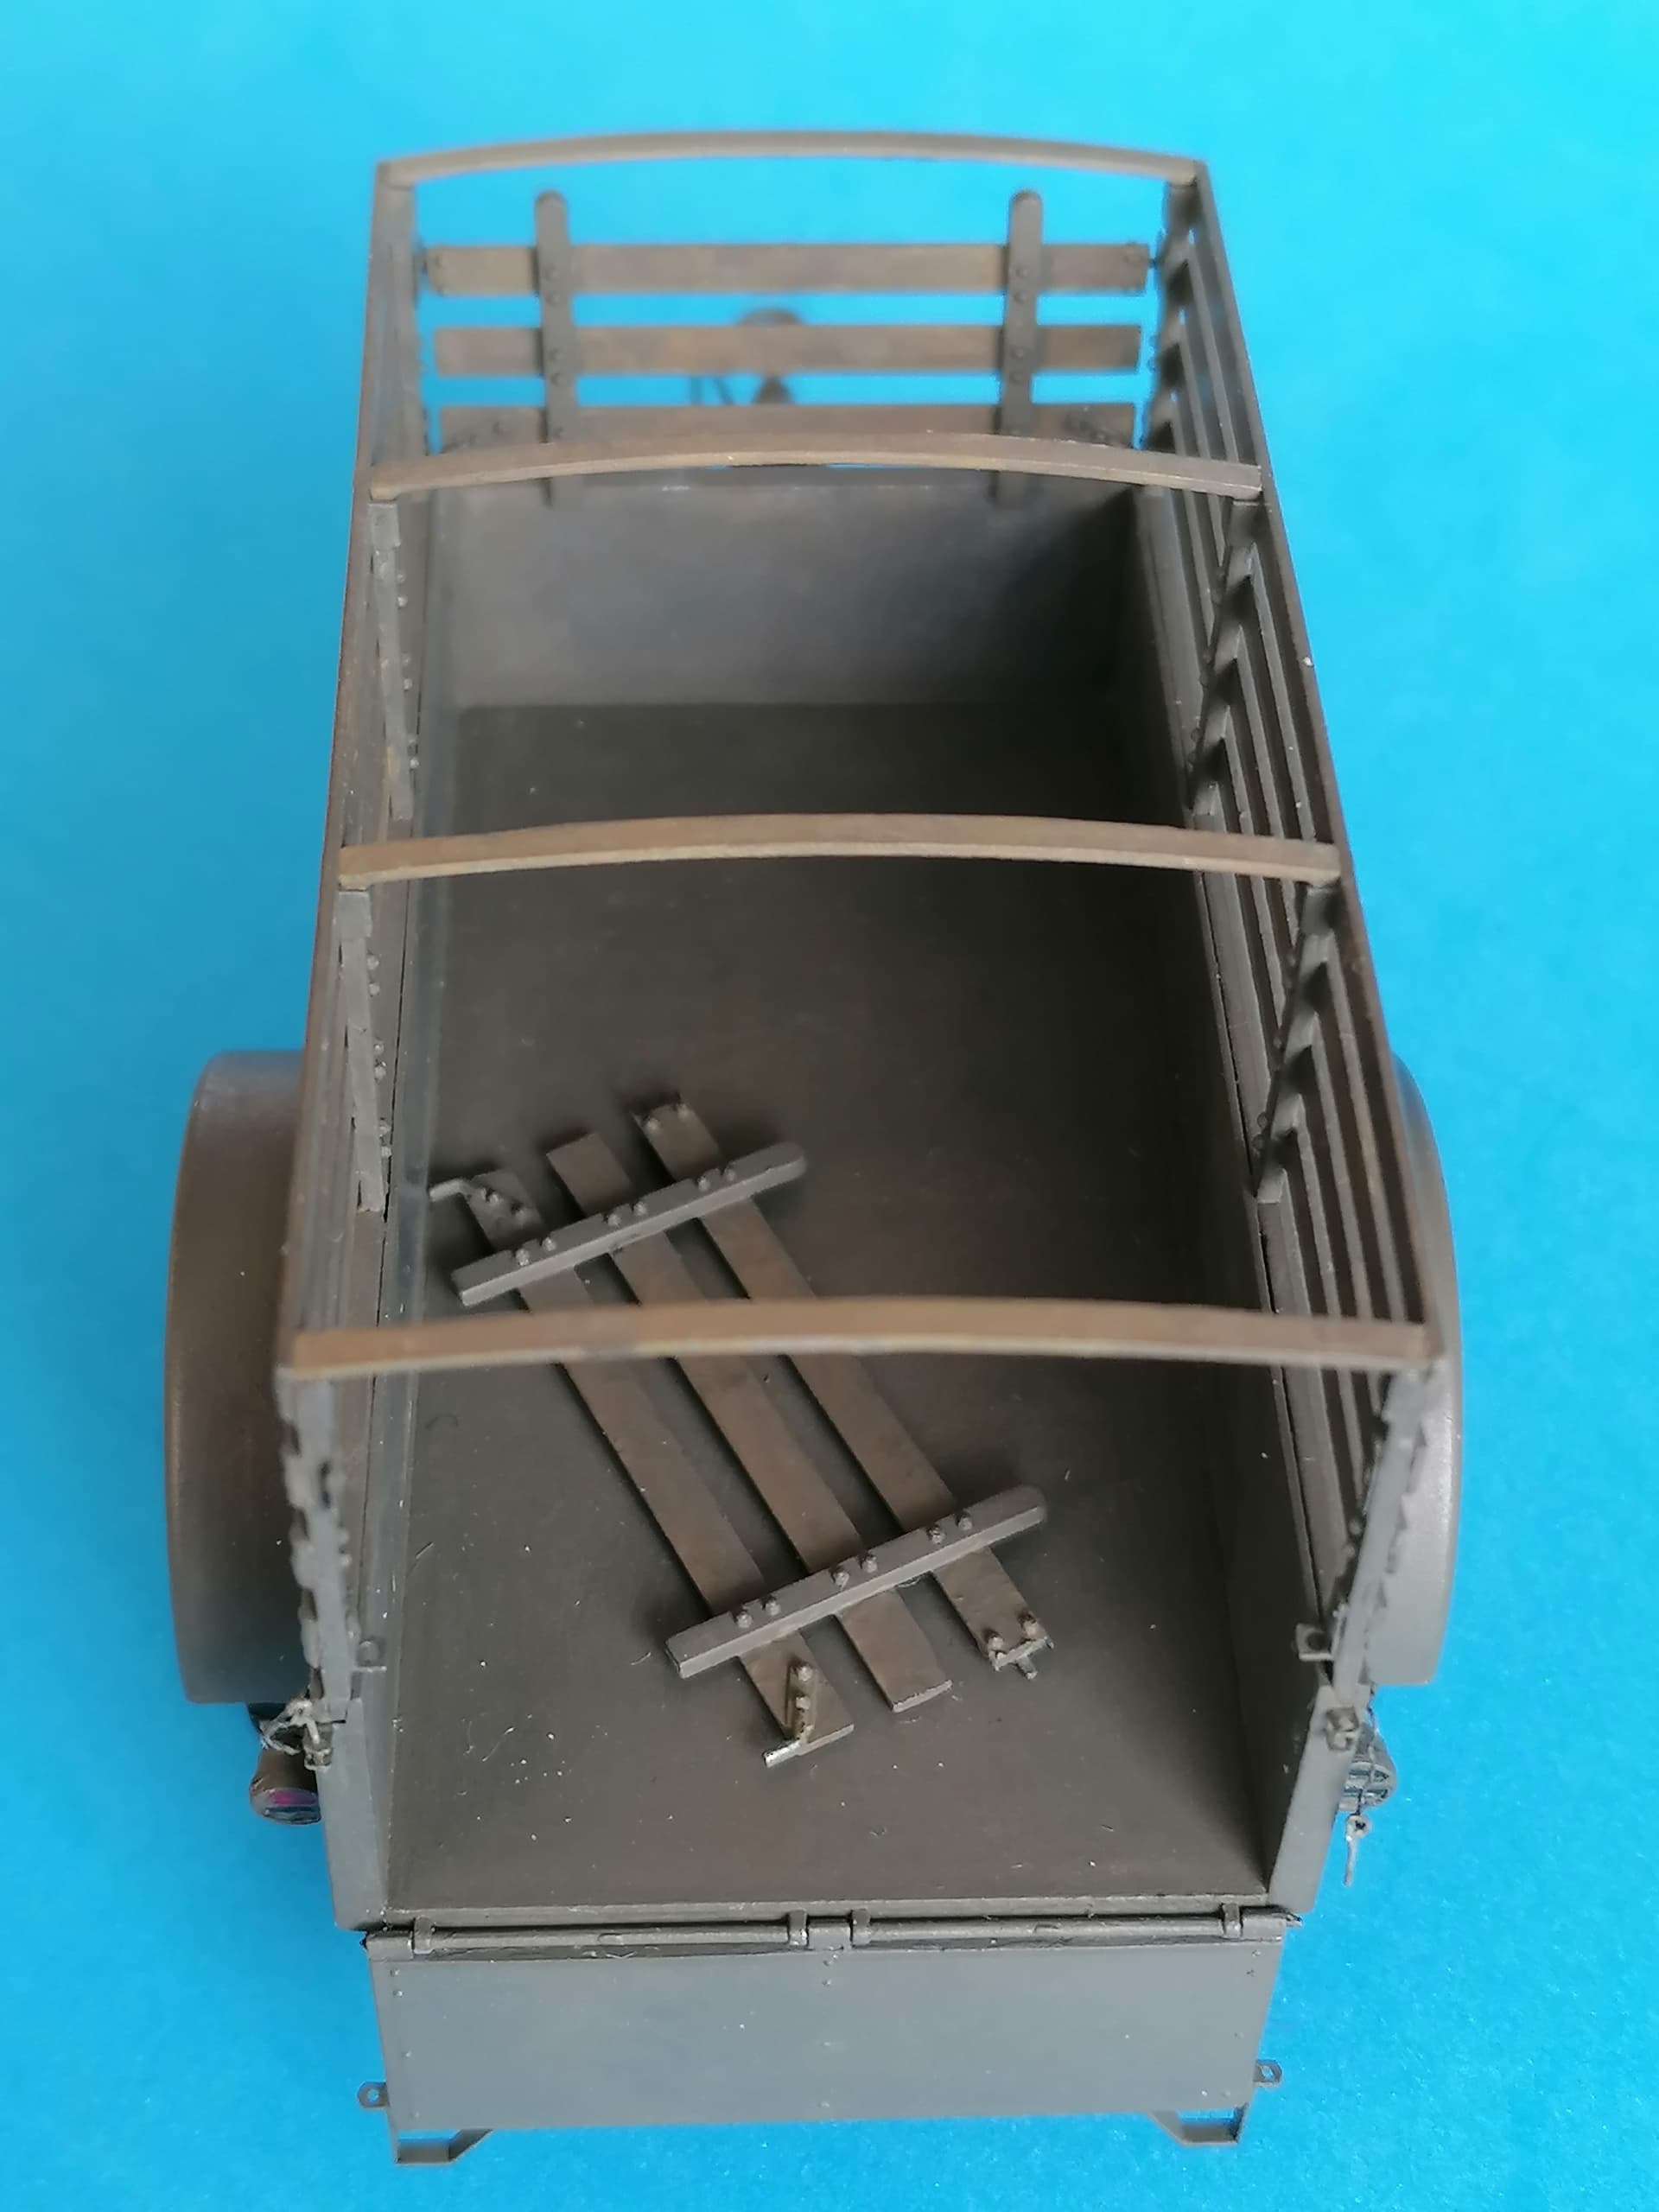
Now here’s Ben Hur’s bottom - my model’s, I mean. For the trailer light cable, the instructions request a piece of 0.4 mm diameter wire; instead, I took rubber filament of the same size. Trouble is, MiniArt’s instructions show that cable representation only from the plug thru the end of the draw bar beneath the load bed - no information about how it would be fixed to the draw bar and, worse, no information on how it would continue to the taillights.
As the picture shows, I’ve got plenty “cable” left and “wires” from the lights, too, but I have no idea where they all would meet, and how.
Can anybody help, please?
Peter
1 Like
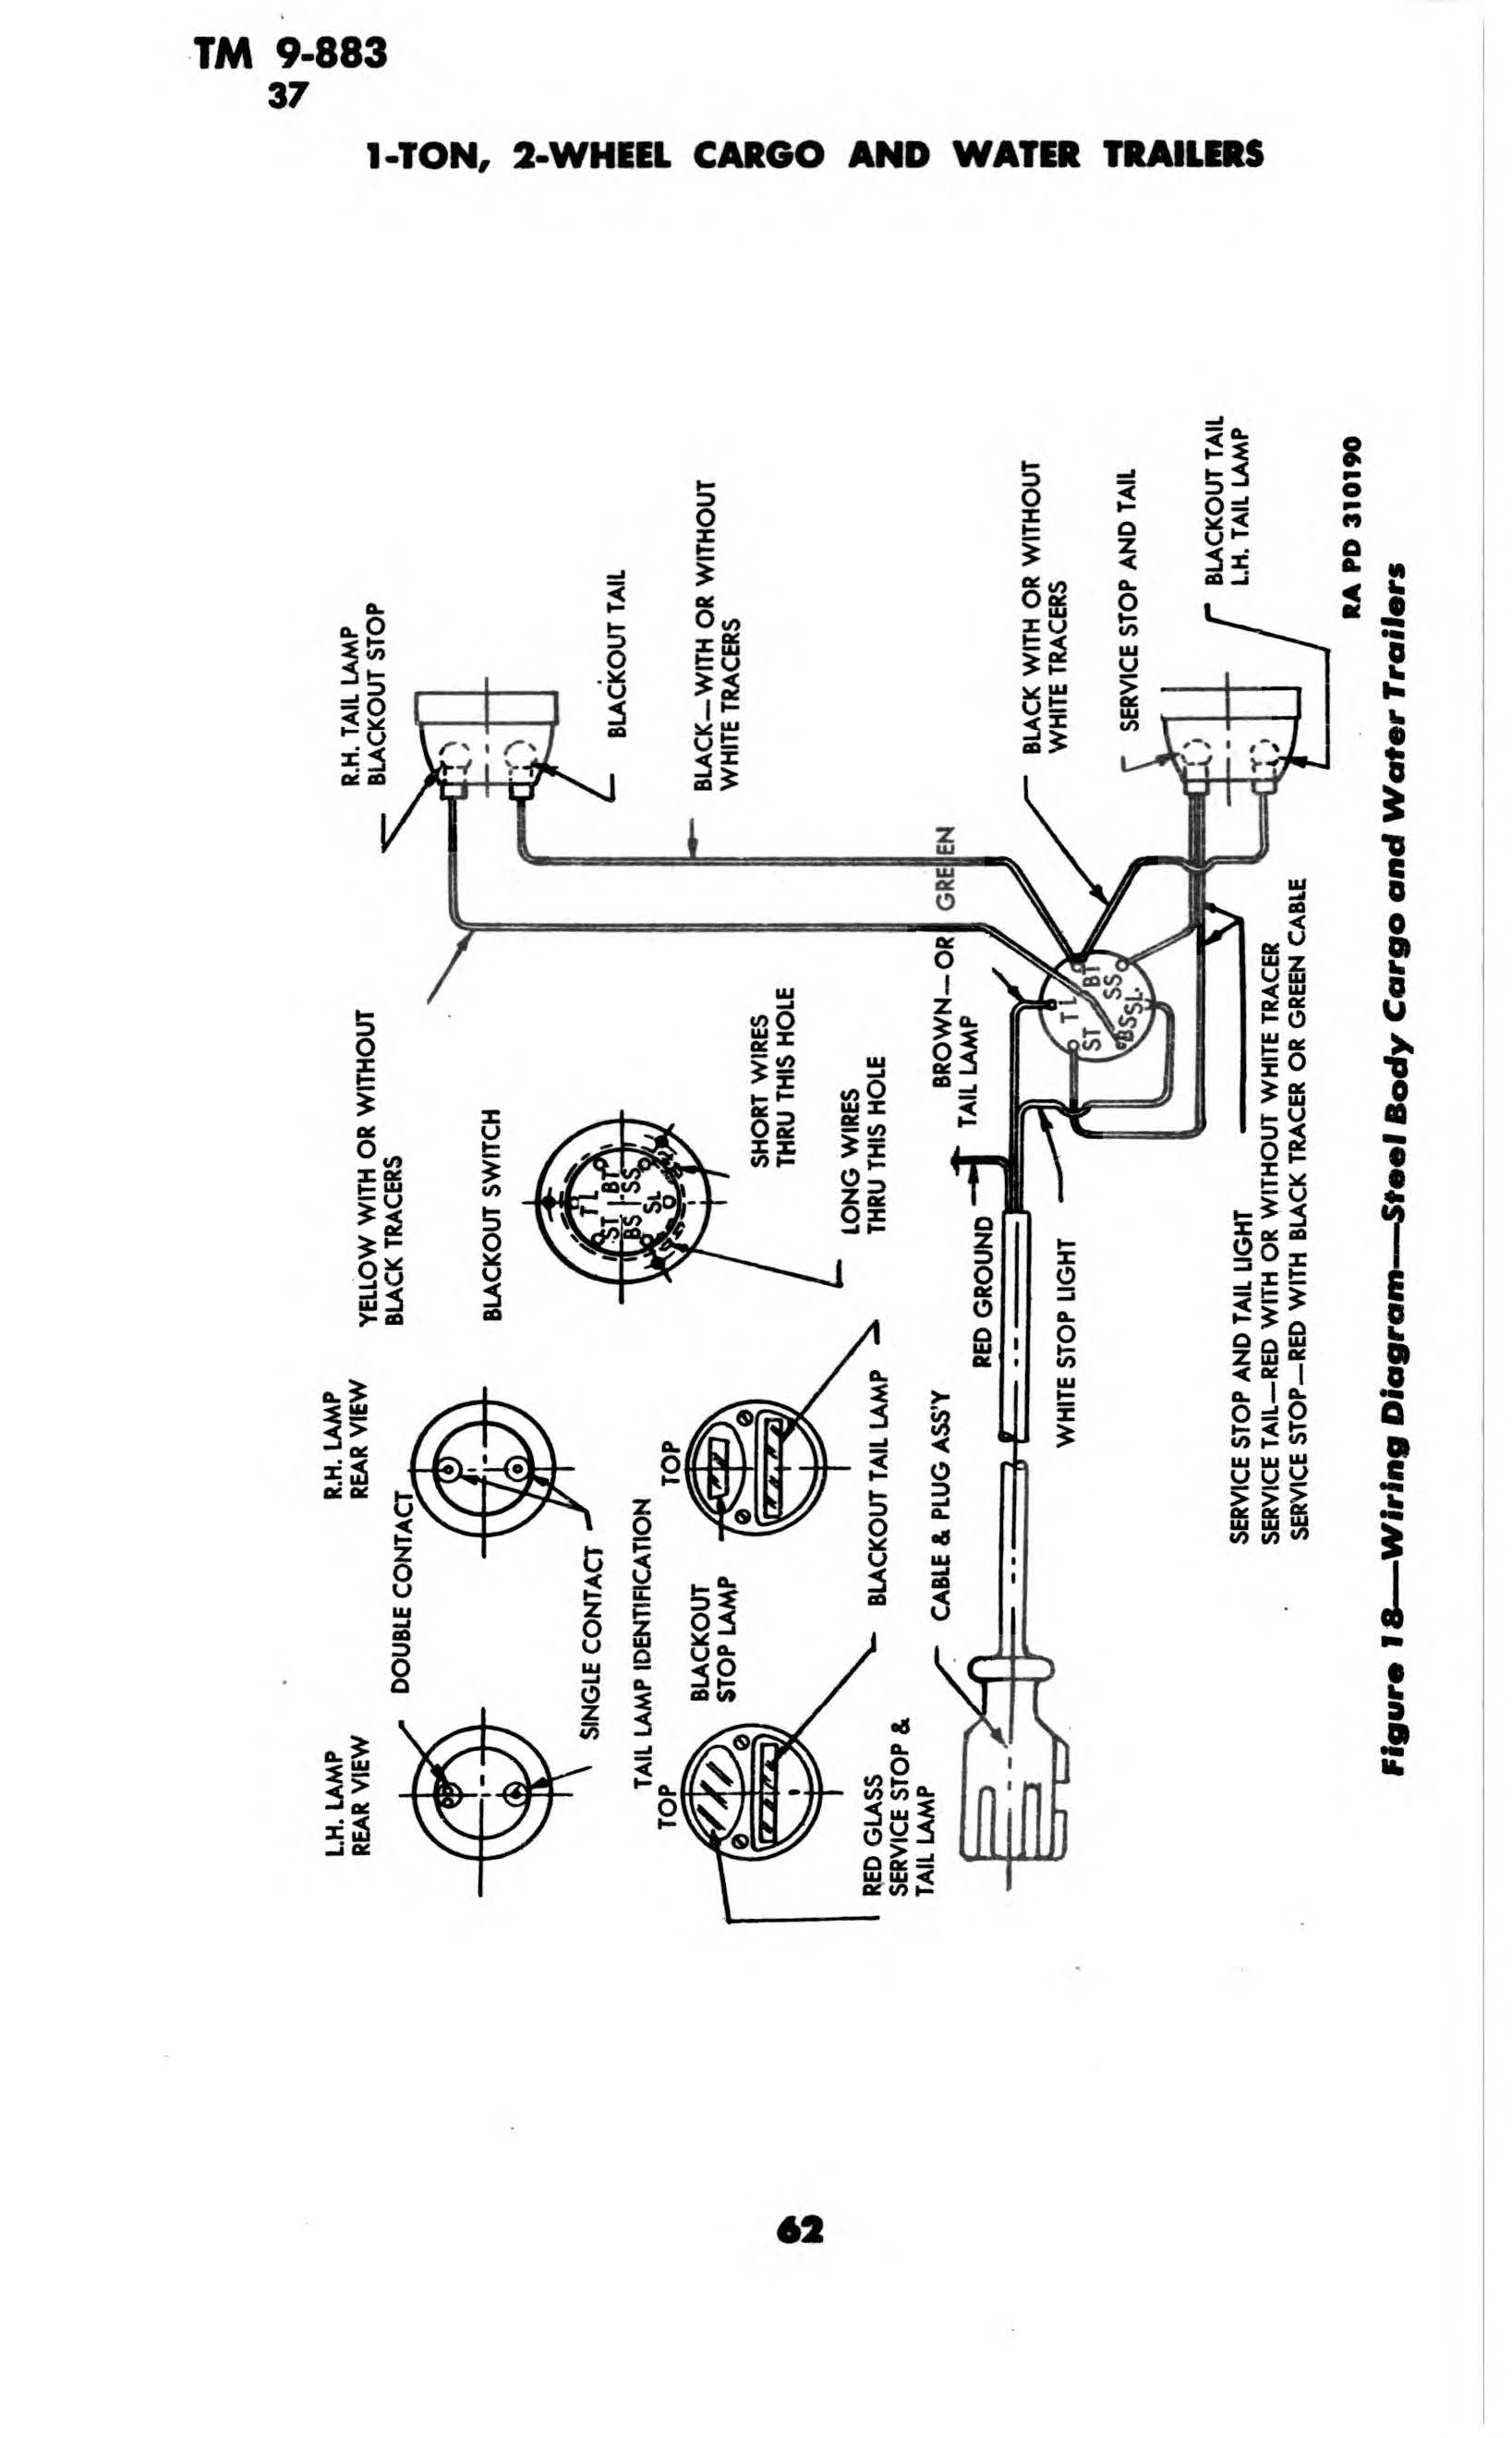
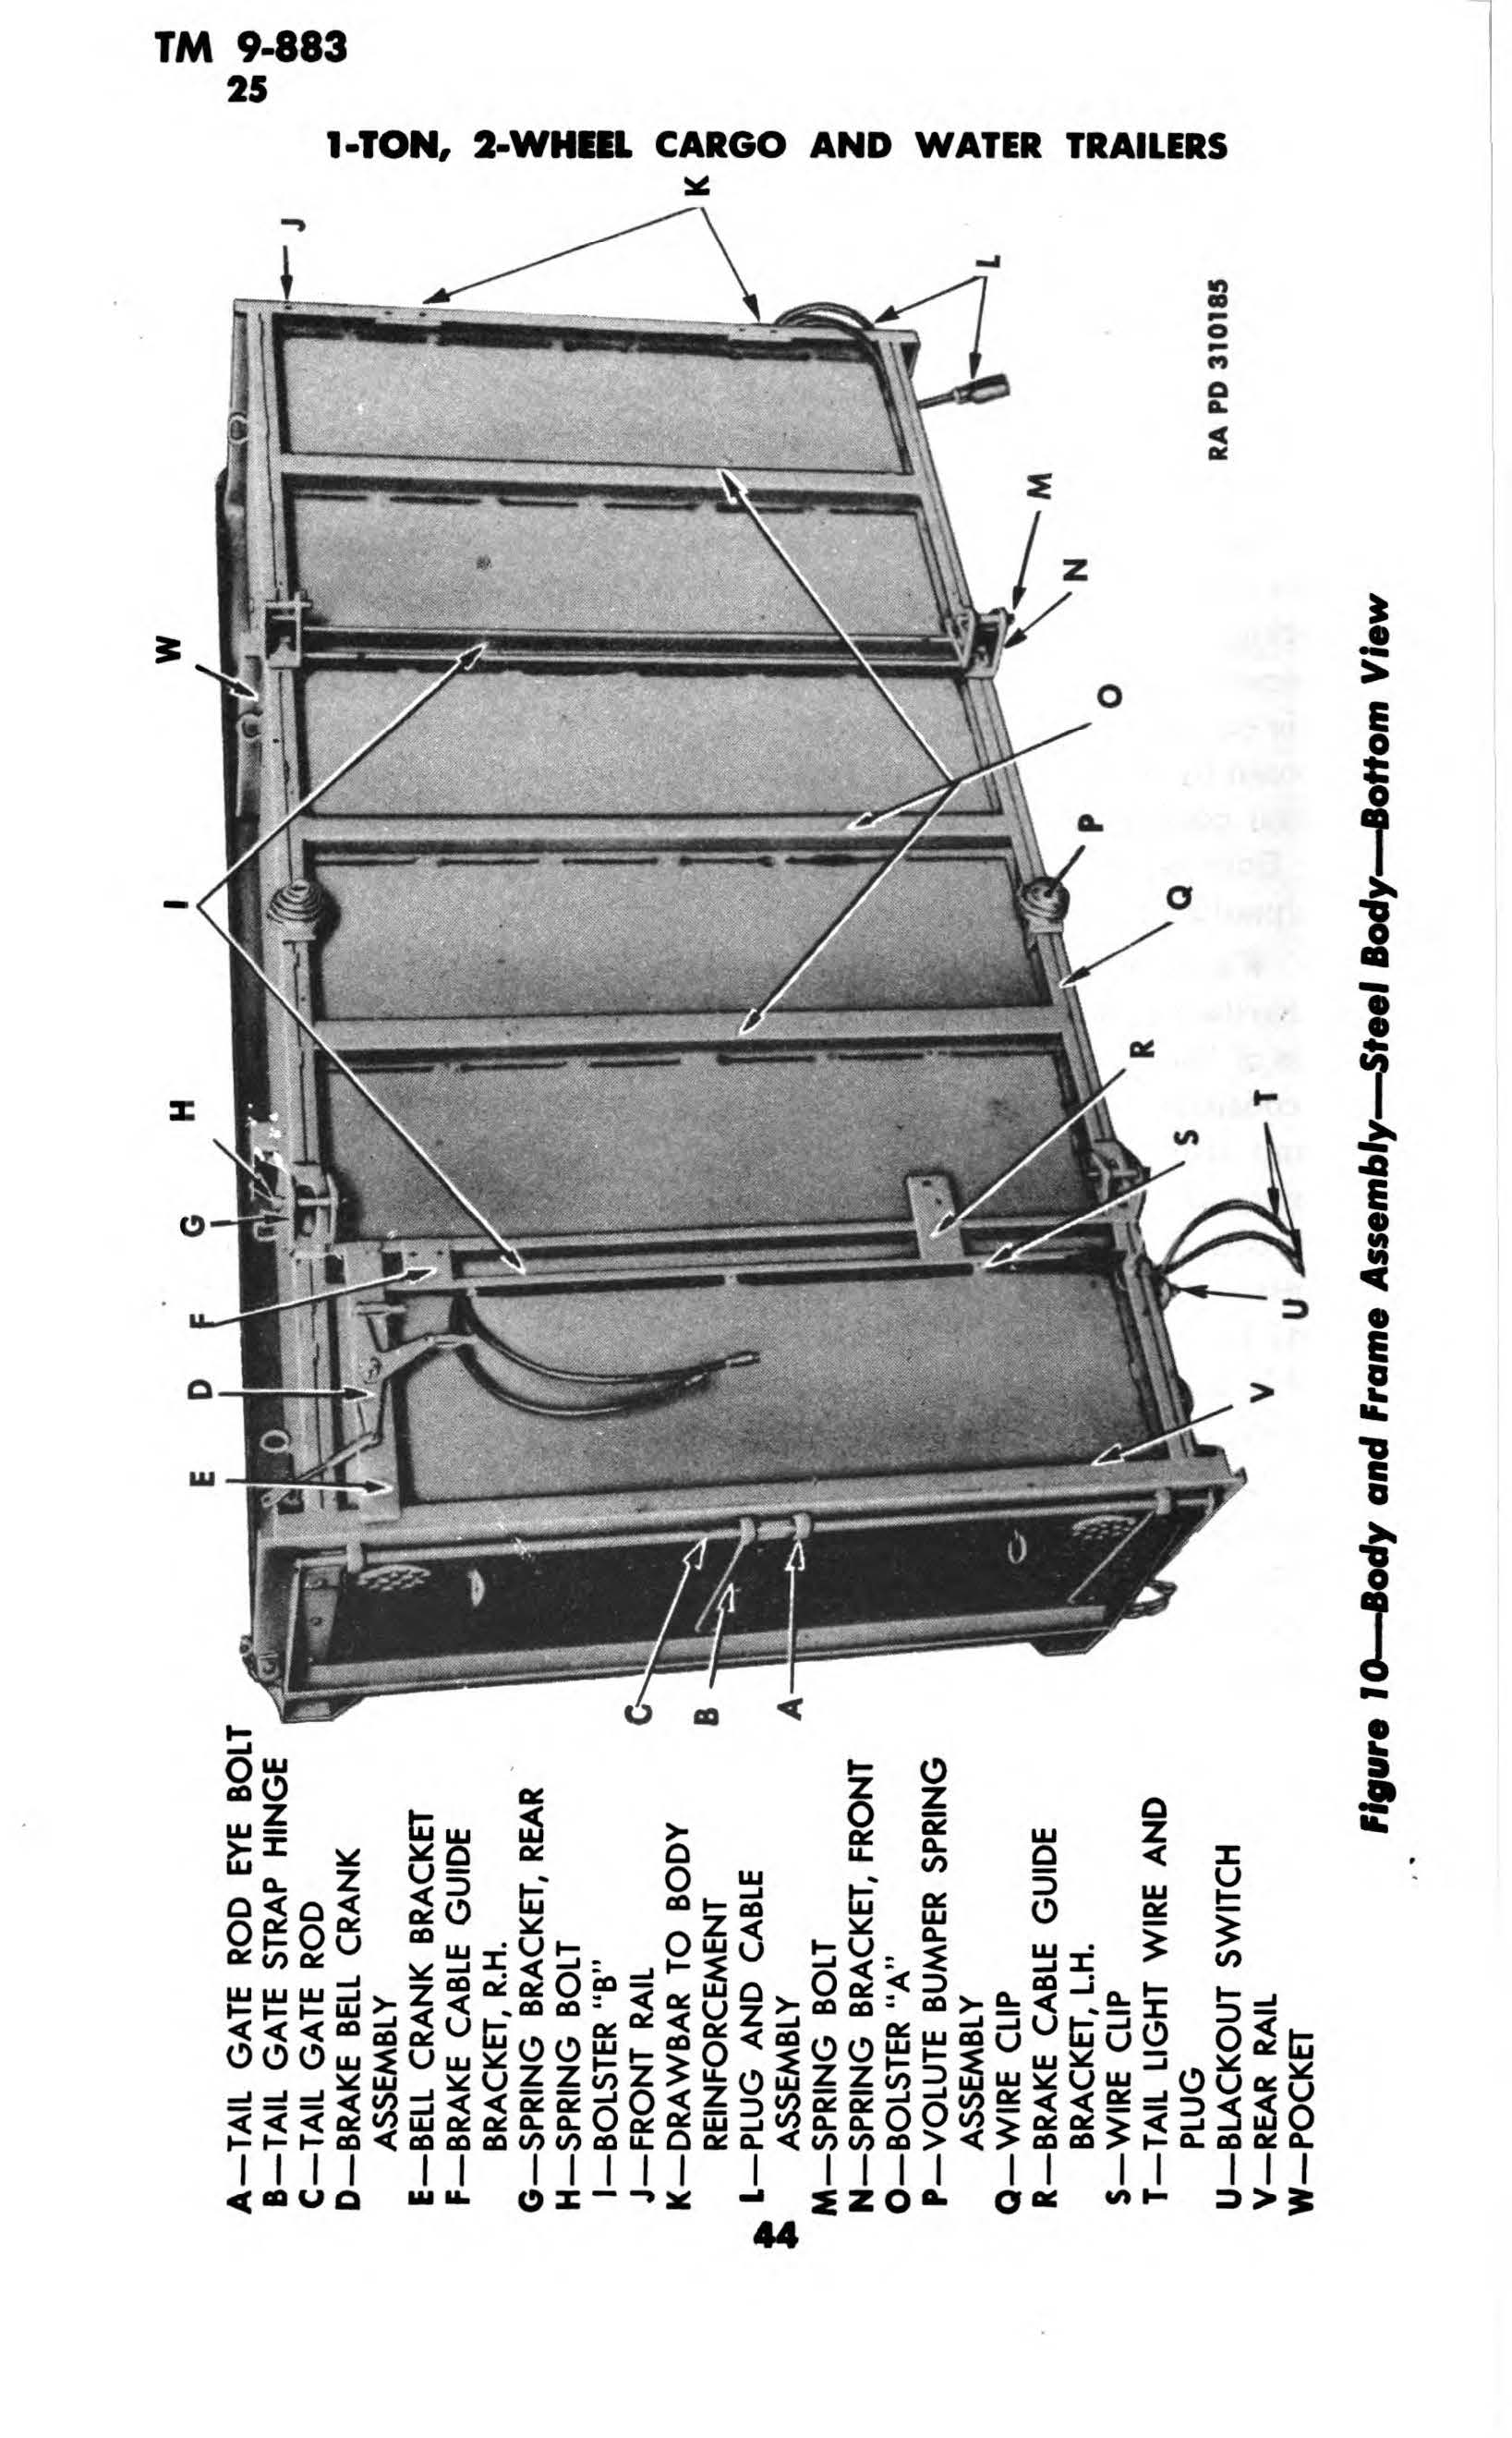
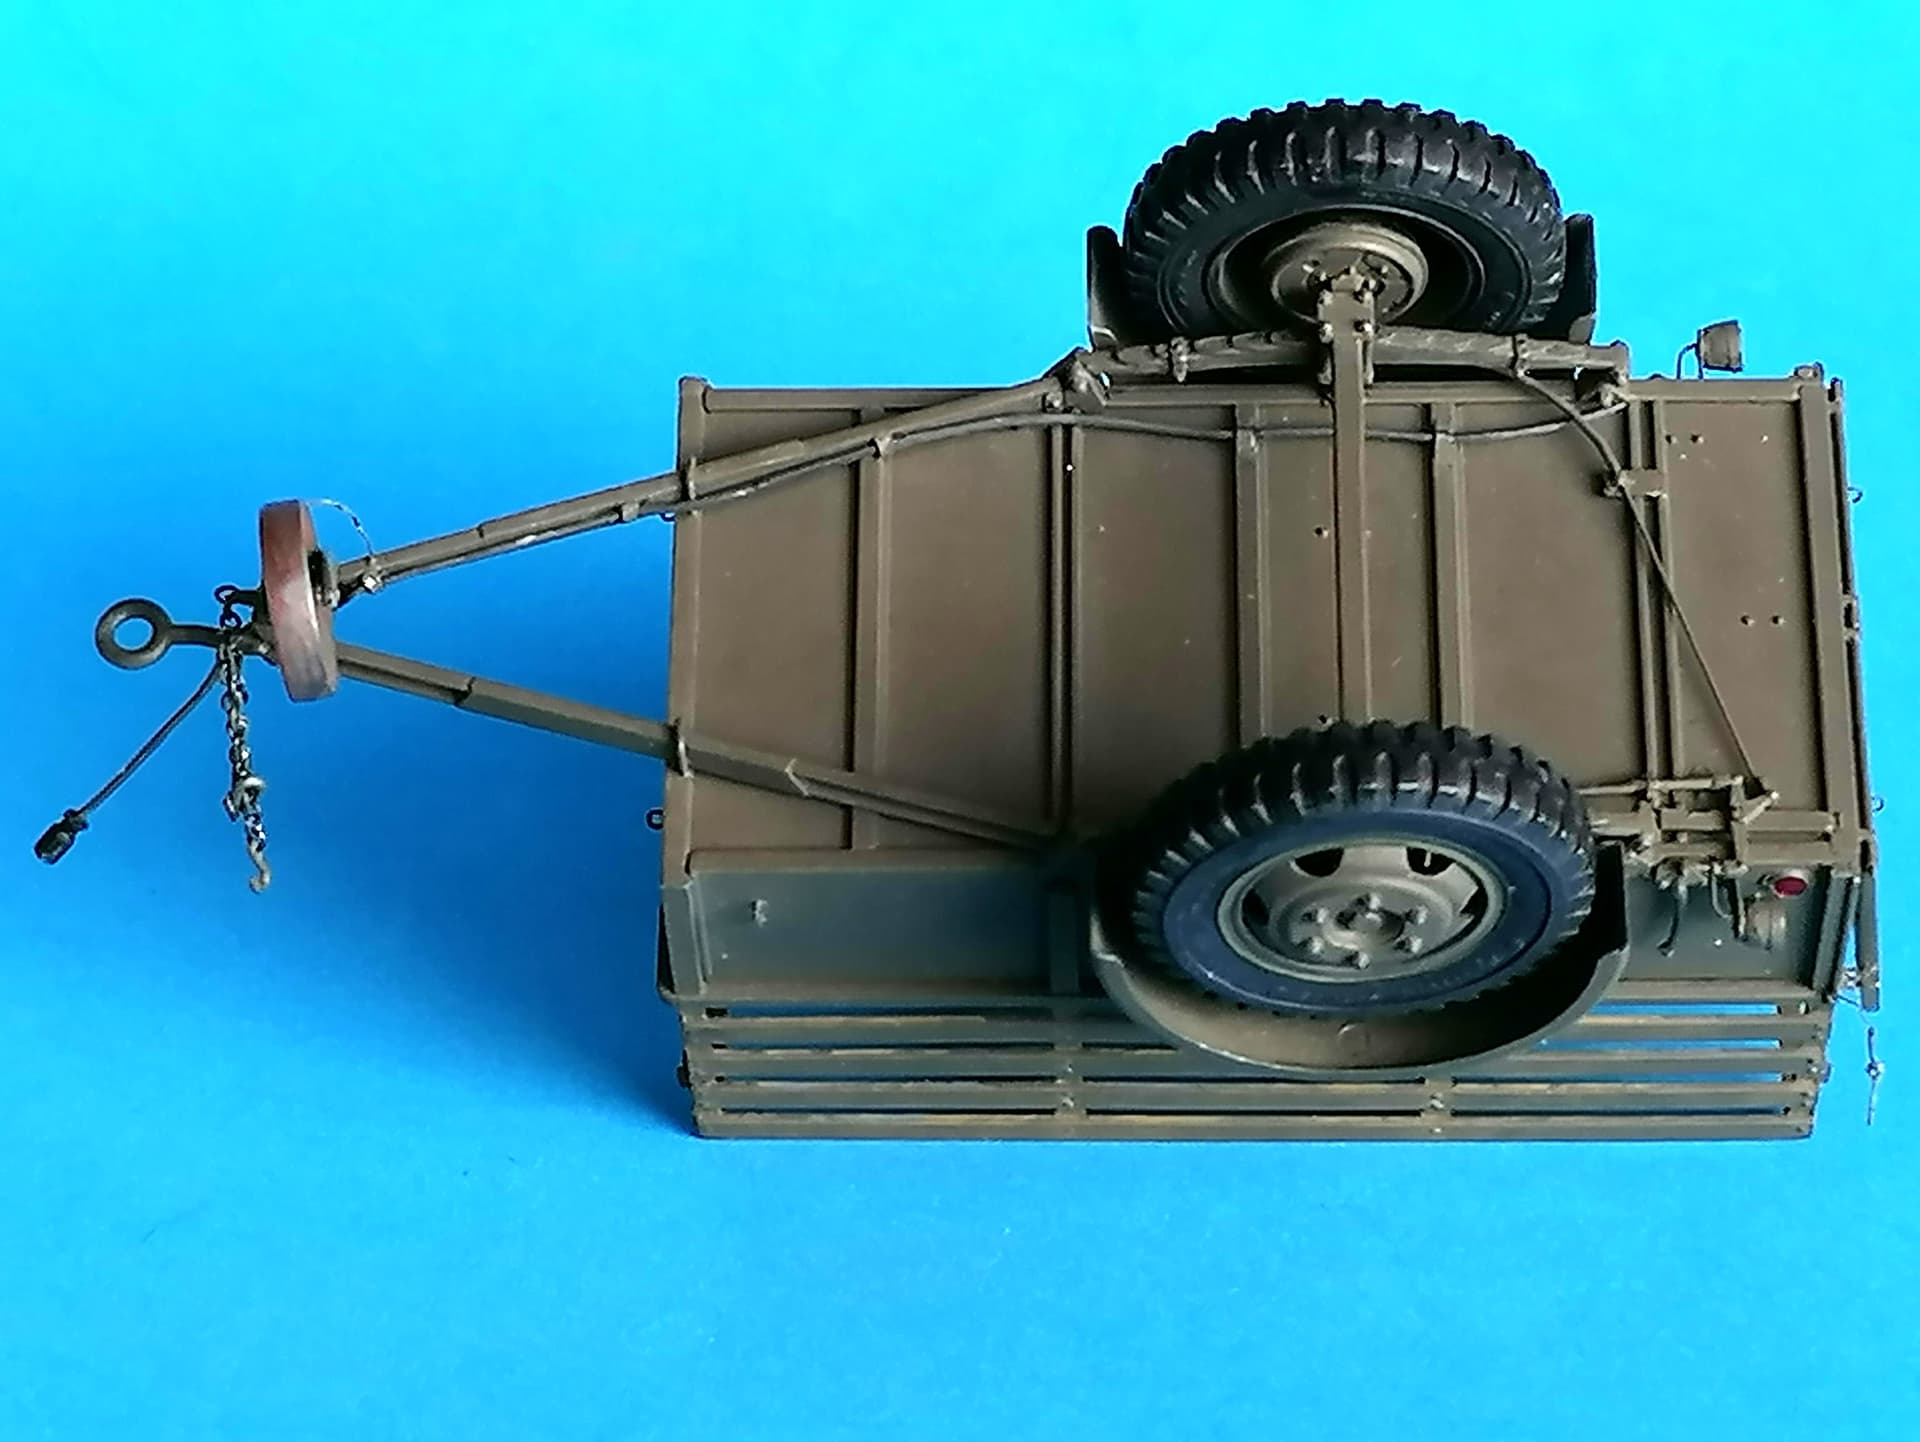
The cable goes all the way back to the blackout light switch on the left side of the trailer at the rear (item U in the bottom view). From there wires went to the lights either side.
You want to find and download TM 9-883 1 Ton Trailers.
[EDIT: wood-bodied trailers had a junction box on the front cross-frame, but were otherwise the same…]
2 Likes
Bingo! Thanks a lot, Tom!
(Another fine example to help define AMS …)
1 Like
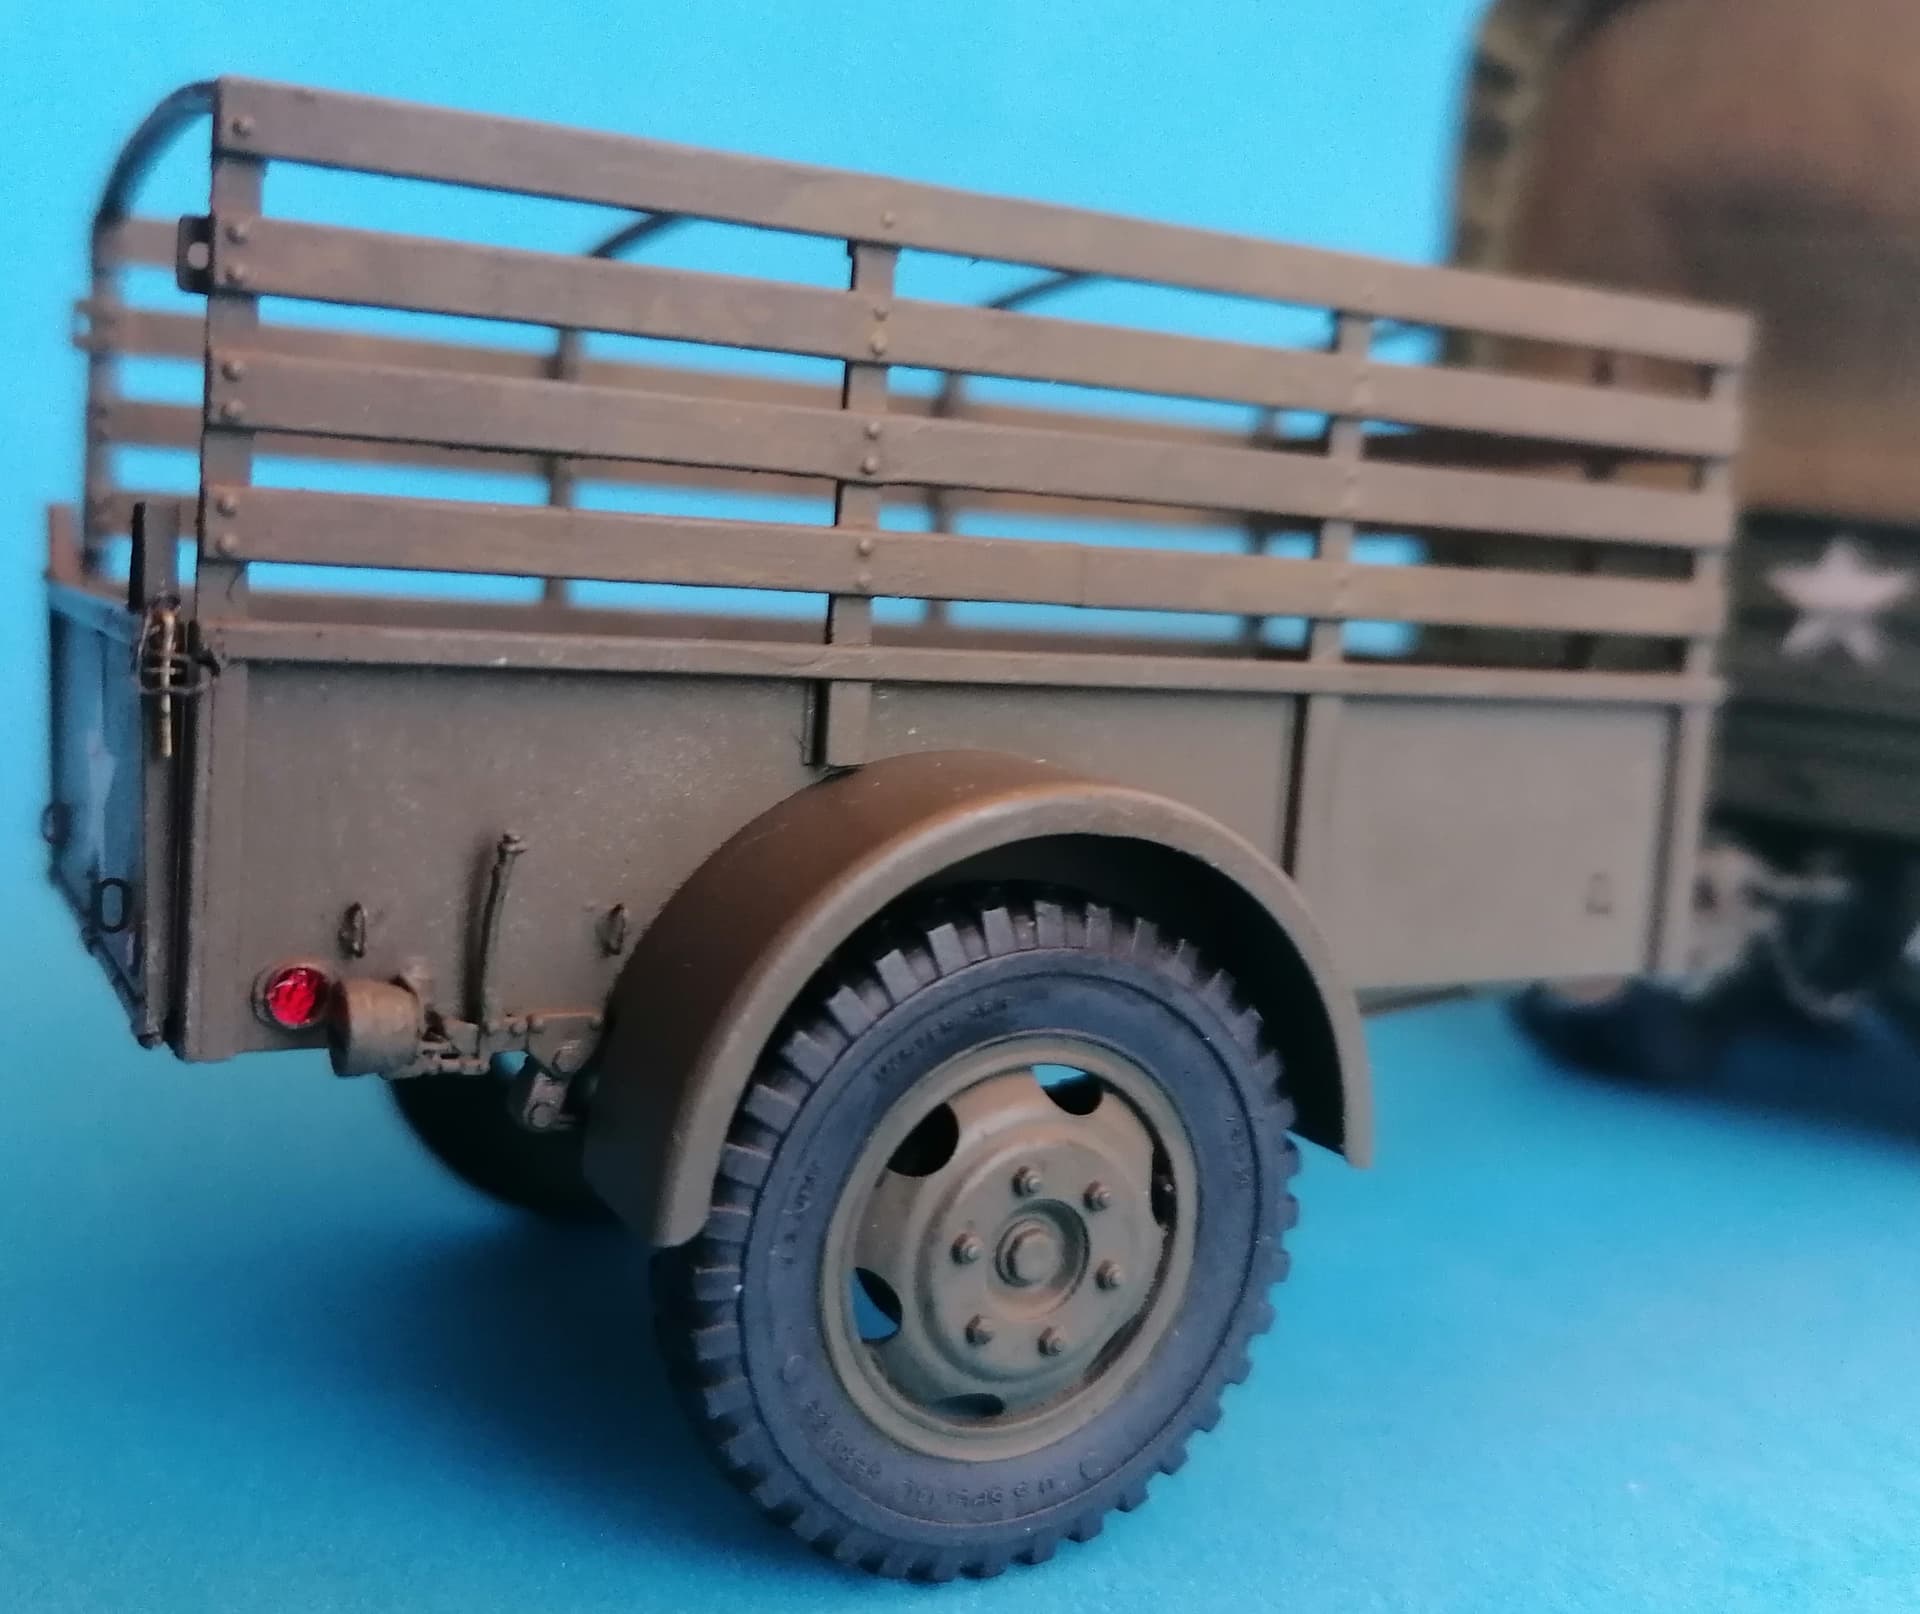
It’s done! Or at least I am - fed up with those tiny parts.
Here’s what it all looks like:
Do you think it was worth the trouble? I have my doubts.
Peter
6 Likes
It looks beautiful. Nice solid build, great paint job, fantastic color, and mild weathering. What’s not to like? The chains are in scale and that brake light line connector is spot on. Great build.
3 Likes
Thank you very much for your friendly words. And meanwhile, the build report has been published:
https://panzer-modell.de/berichte/benhur/benhur_e.php
Happy modeling,
Peter
2 Likes
That’s a fine trailer! I’ve built a few now, and my answer to the tie-down question is to make replacements from brass wire wrapped around the tip of my tweezers to form a D-shape with a wire “tail” I drill a hole in the trailer, insert the “tail”, add CA glue, and trim the tail flush with the inside wall. They might not cut the mustard when viewed with a microscope, but to the Mk I Eyeball they are more than adequate. Life’s too short to waste on microscopic bits of PE…
1 Like