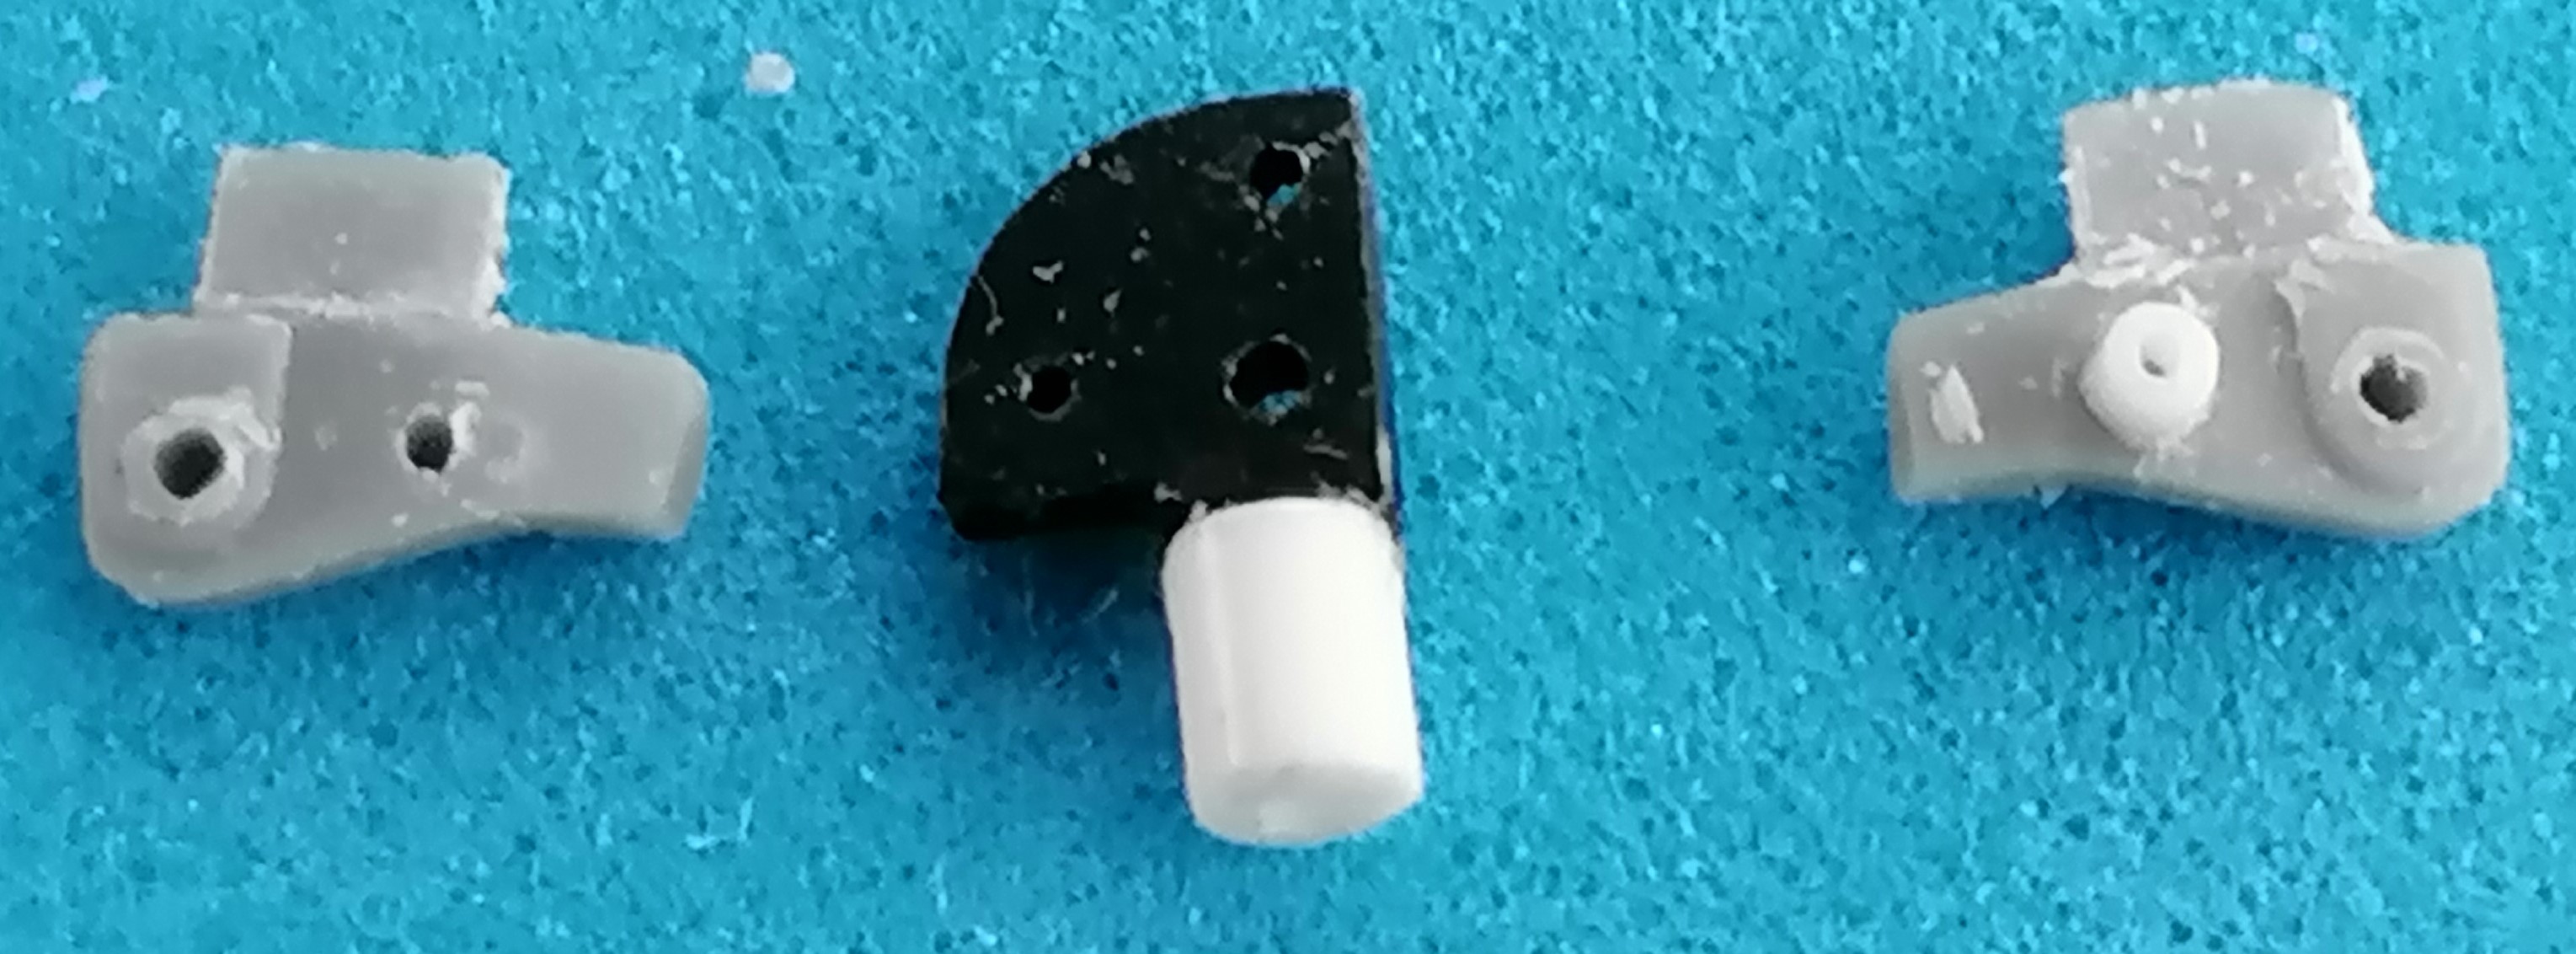
While building my trailer, I wonder if anyone has succeded in building the support wheel mount the way the instructions tell you to: The hole for inserting part PE9 doesn’t exist in my part Bk7. On the other hand, it would be easy to make the support wheel mount operating by placing BK5 between Bk6/7 without cement and fixing it in up or down position with a new part PE9 of wire that would pass through all three.
Any ideas or objections out there?
1 Like
No objections, but workable features (other than track, which for my is designed to conform to terrain, not go VROOM VROOM on the carpet) will cause people to want to work them, eventually leading to breakage, disappointment, frustration, and eventual road rage, which could then lead to incarcertion, gang rape, retaliatory shanking, murder conviction, death sentence, and Presidential Commutation.
That said, it would cool to see you do it.
4 Likes
I guess it would’ve been easier for everybody if I had added the pictures as intended - like the girl said, don’t drink and post…
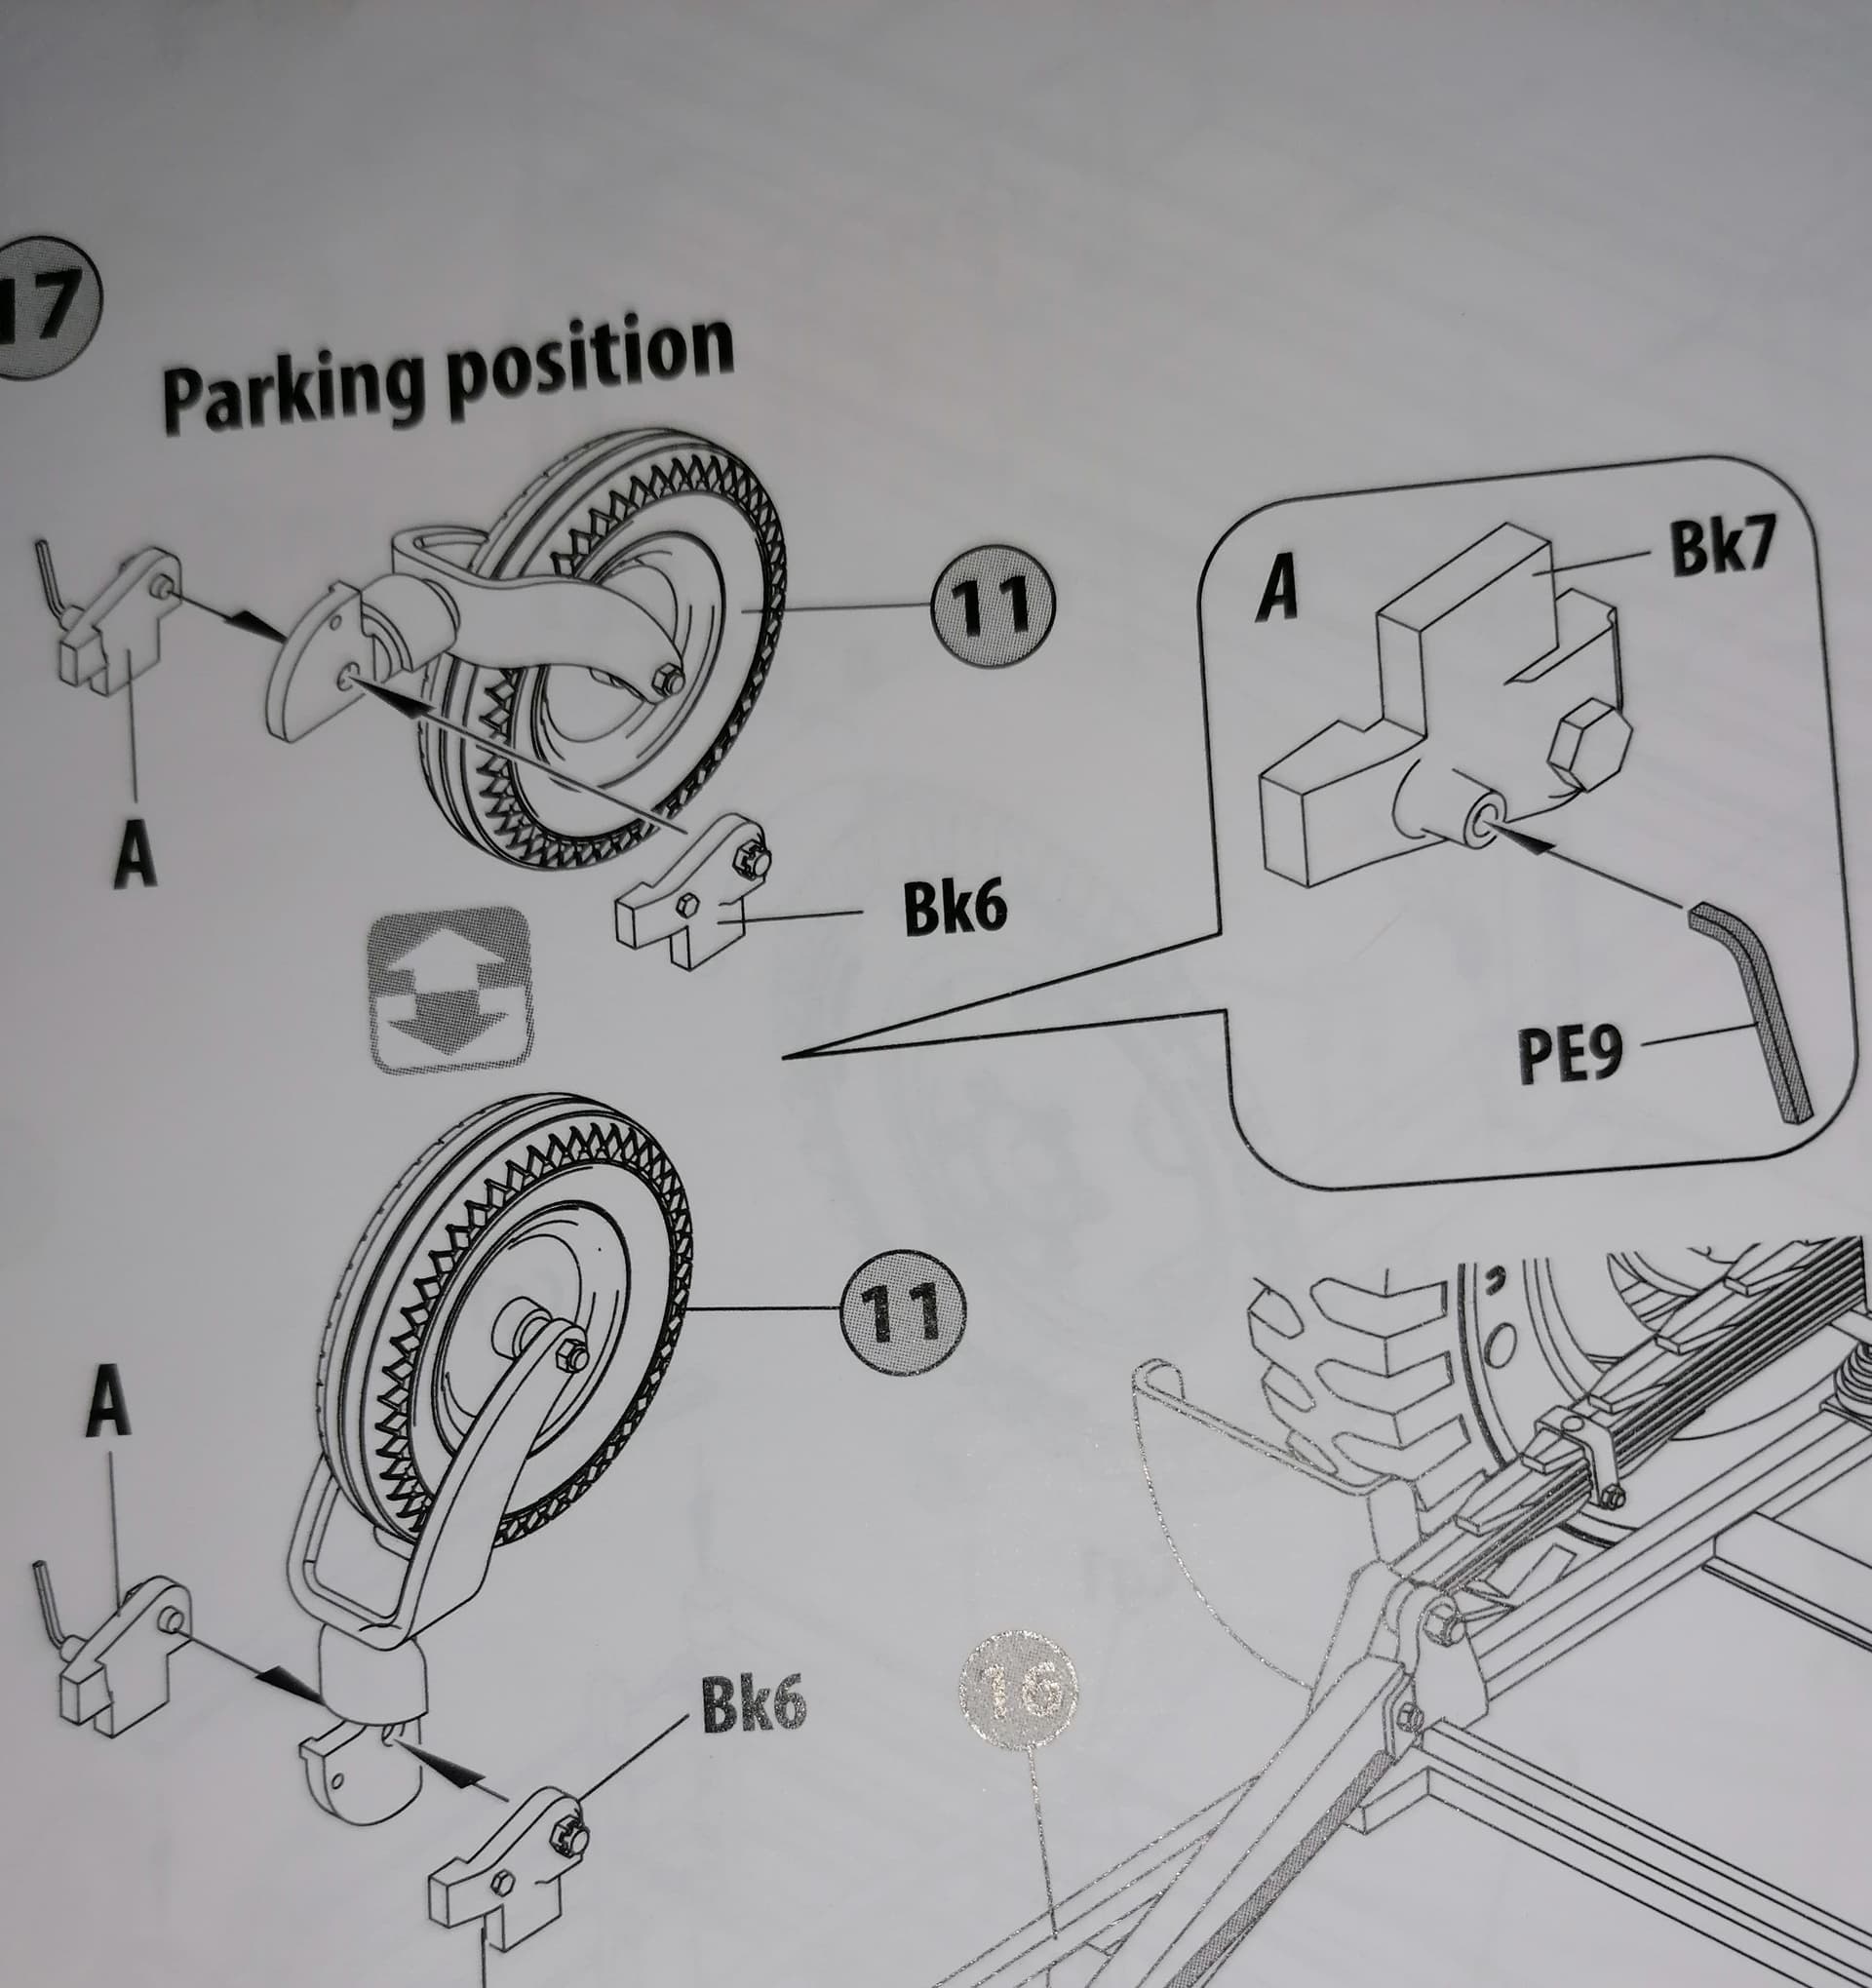
So, once again, any ideas? I’m mad enough to try and realize them! Meanwhile, I’ve already found that Bk5 needs another little hole at the other end of its curve.
Now please read the initial post again…
2 Likes
I was looking at the instructions myself after reading your initial post and I don’t see a problem with drilling a hole through 6/7 with 5 in between , then inserting a wire through them without glue to possibly make it workable, if I’m looking at this correctly. I could be wrong of course. But would it come loose after being manipulated so many times?
2 Likes
Good point- the consequences could be life altering!
2 Likes
I did read it. It seems the hole is easiest to drill out. My response was in regard to your asking if there were any objections. If by “operating” you mean allowing it to be posed in either position I certainly don’t object, but at the same time don’t see the advantage of being able to move it. Unless of course you don’t know how you want to pose it. In that case I leave it until the time comes. Workable features work until they don’t.
2 Likes
Wow you must be in a really tough model club! ![]()
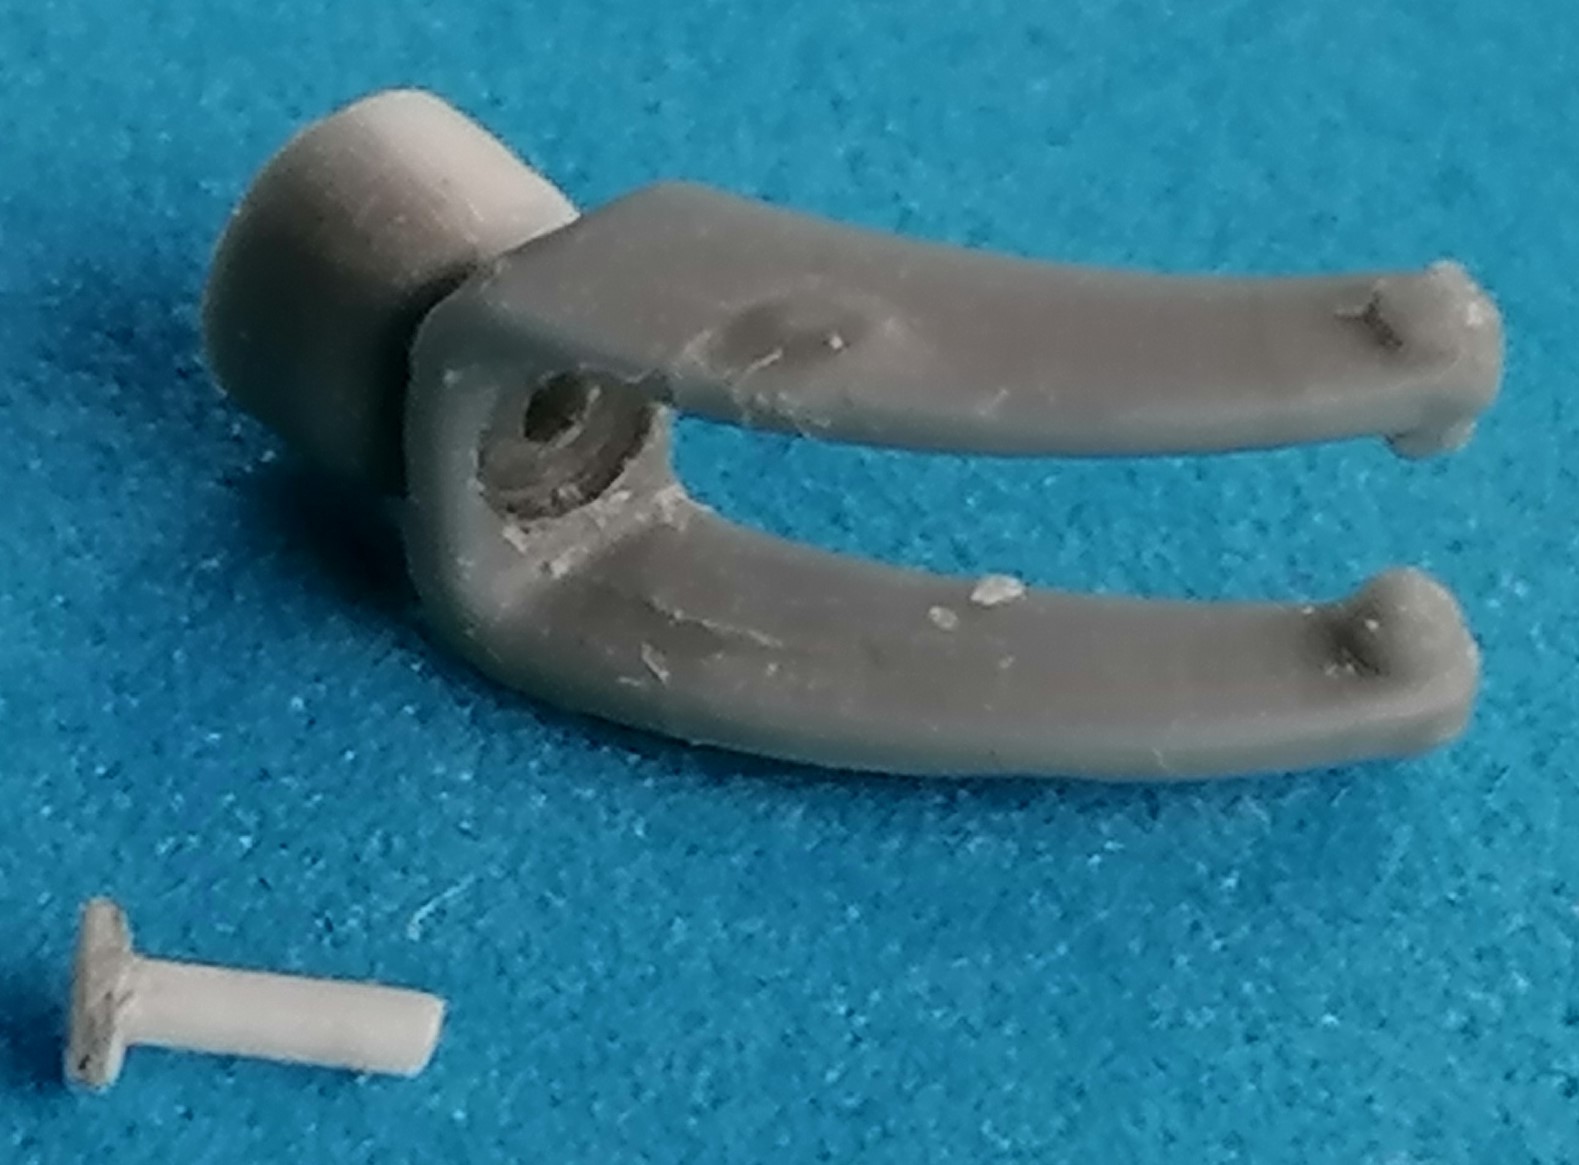
As for making it work, why? I replace the PE part with wire because it looks better than flat PE. But to be safe with a working pin you’d want to add a tiny chain to avoid losing it…
2 Likes
I have this model and will drill out the hole when the time comes, then replace the flat brass part with a small piece of round stock.
On my model, I will not make the front wheel workable. If I did so, it would be really cool. Then I would put the model in a box or display case where it will not be handled for the next 10 years. Having forgotten about the working wheel, my future self will pull the model out of the box, the pin will fall out, and the wheel will fall off. Since my future self will not see the pin fall out, I will grumble about the stupid, overly fragile model in my hand, glue the wheel back on, and put it back into storage for another 10 years. As a result, the model will ultimately become less accurate because I took the time to make it more accurate. ![]()
The other possibility is that while attempting to make the wheel workable, I will drill the holes off center, bork the whole operation, requiring me to scratch build new parts. This will waste a bunch of time and make me all grumbly pants for a day or two.
I am kidding. But not really.
2 Likes
Well, the original reason for my post was to find out whether there was a mistake in the illustration showing a hole for the PE pin or in my part Bk7 that has no hole. Seems like I should drill that hole - no problem. And against that pin getting lost, Doug, my standard solution is “rubber chain” from the upper part of black pantyhose:

Besides, if you regularly build things like this you’ll remember them even years later.
My next question will be how to make that wheel steerable.
As for the advantage of all this madness - it’s just what I love about building models: Proving to myself that I CAN do that; I get a kick out of it, opposed to painting: time and again, that proves to me what I can NOT. (And before anyone tells me it’s just a question of practice - the way I build, I have a production rate of less than one model per year - how should I get painting practice?)
3 Likes
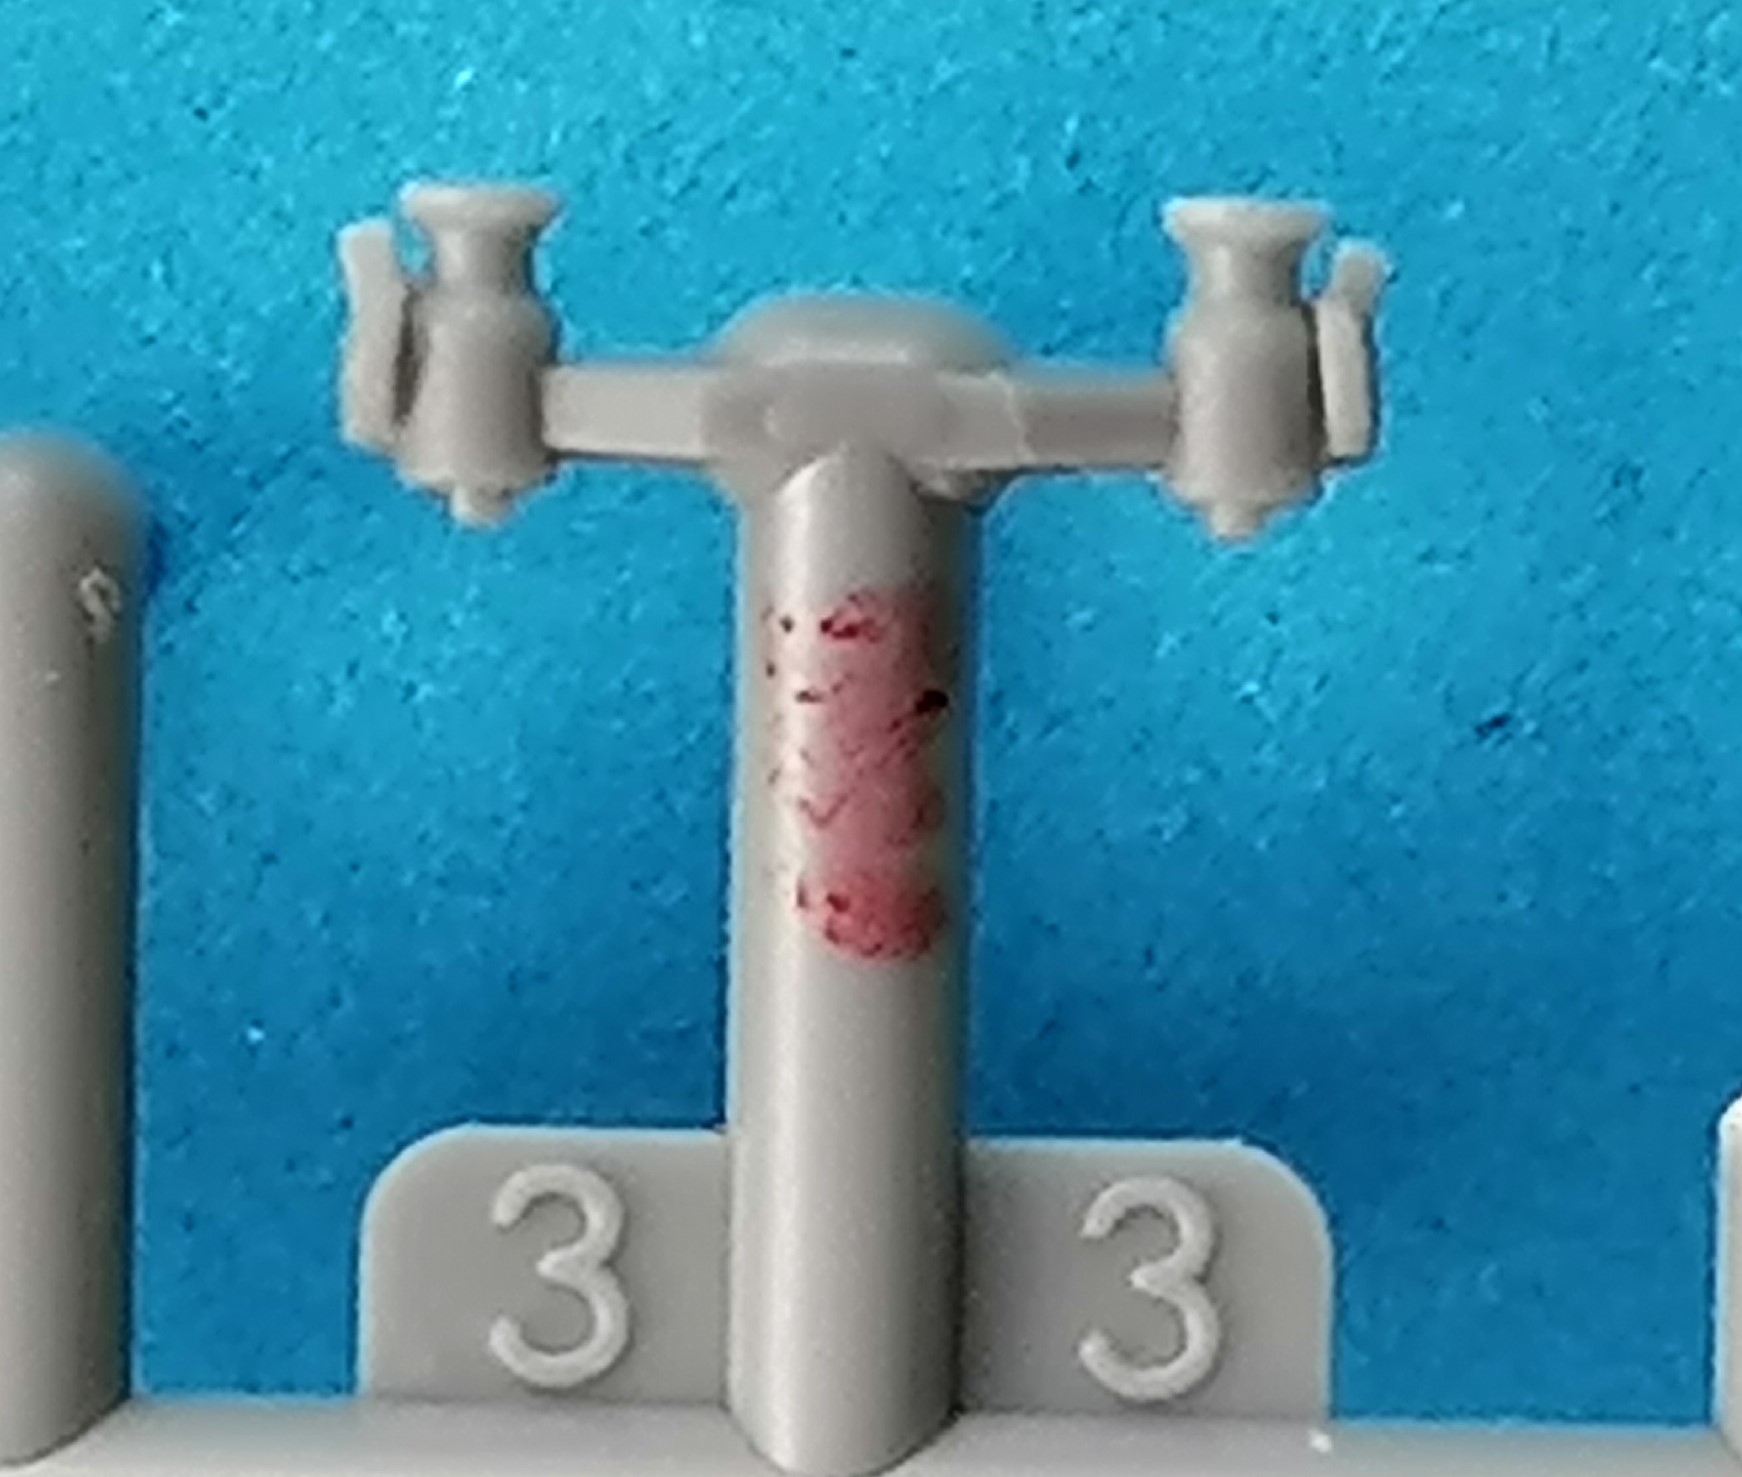
Next question: Does anyone have a foolproof way to install these tiedowns on the trailer sides?
They’re supposed to stand between the two tiny lines that give them no support at all. I’ve tried two part epoxy glue but found it impossible to hold them in the correct position until the stuff hardened. Normal superglue would demand success at first try of placing the part, which I don’t believe I could achieve 12 times around the model, and I’m not sure how superglue gel would work. HELP !!!
2 Likes
Ammo Ultra Glue. Absolutely perfect for this application.
1 Like
The Ultra Glue or one of its competitors should work. The other option is black “tire” CA. This is a medium viscosity CA with powdered rubber. It is sticky to hold the piece in place and slower to set giving you time to place it correctly. It has better shear strength than normal CA. I use BSI (Bob Smith Industries) IC-2000. I’m not sure that one brand is any better than the others. The BSI stuff is widely available. Like all CA’s it has a one-year shelf life, so buy in the smallest battle available, date it, and replace at the one-year mark.
Good Luck!
1 Like
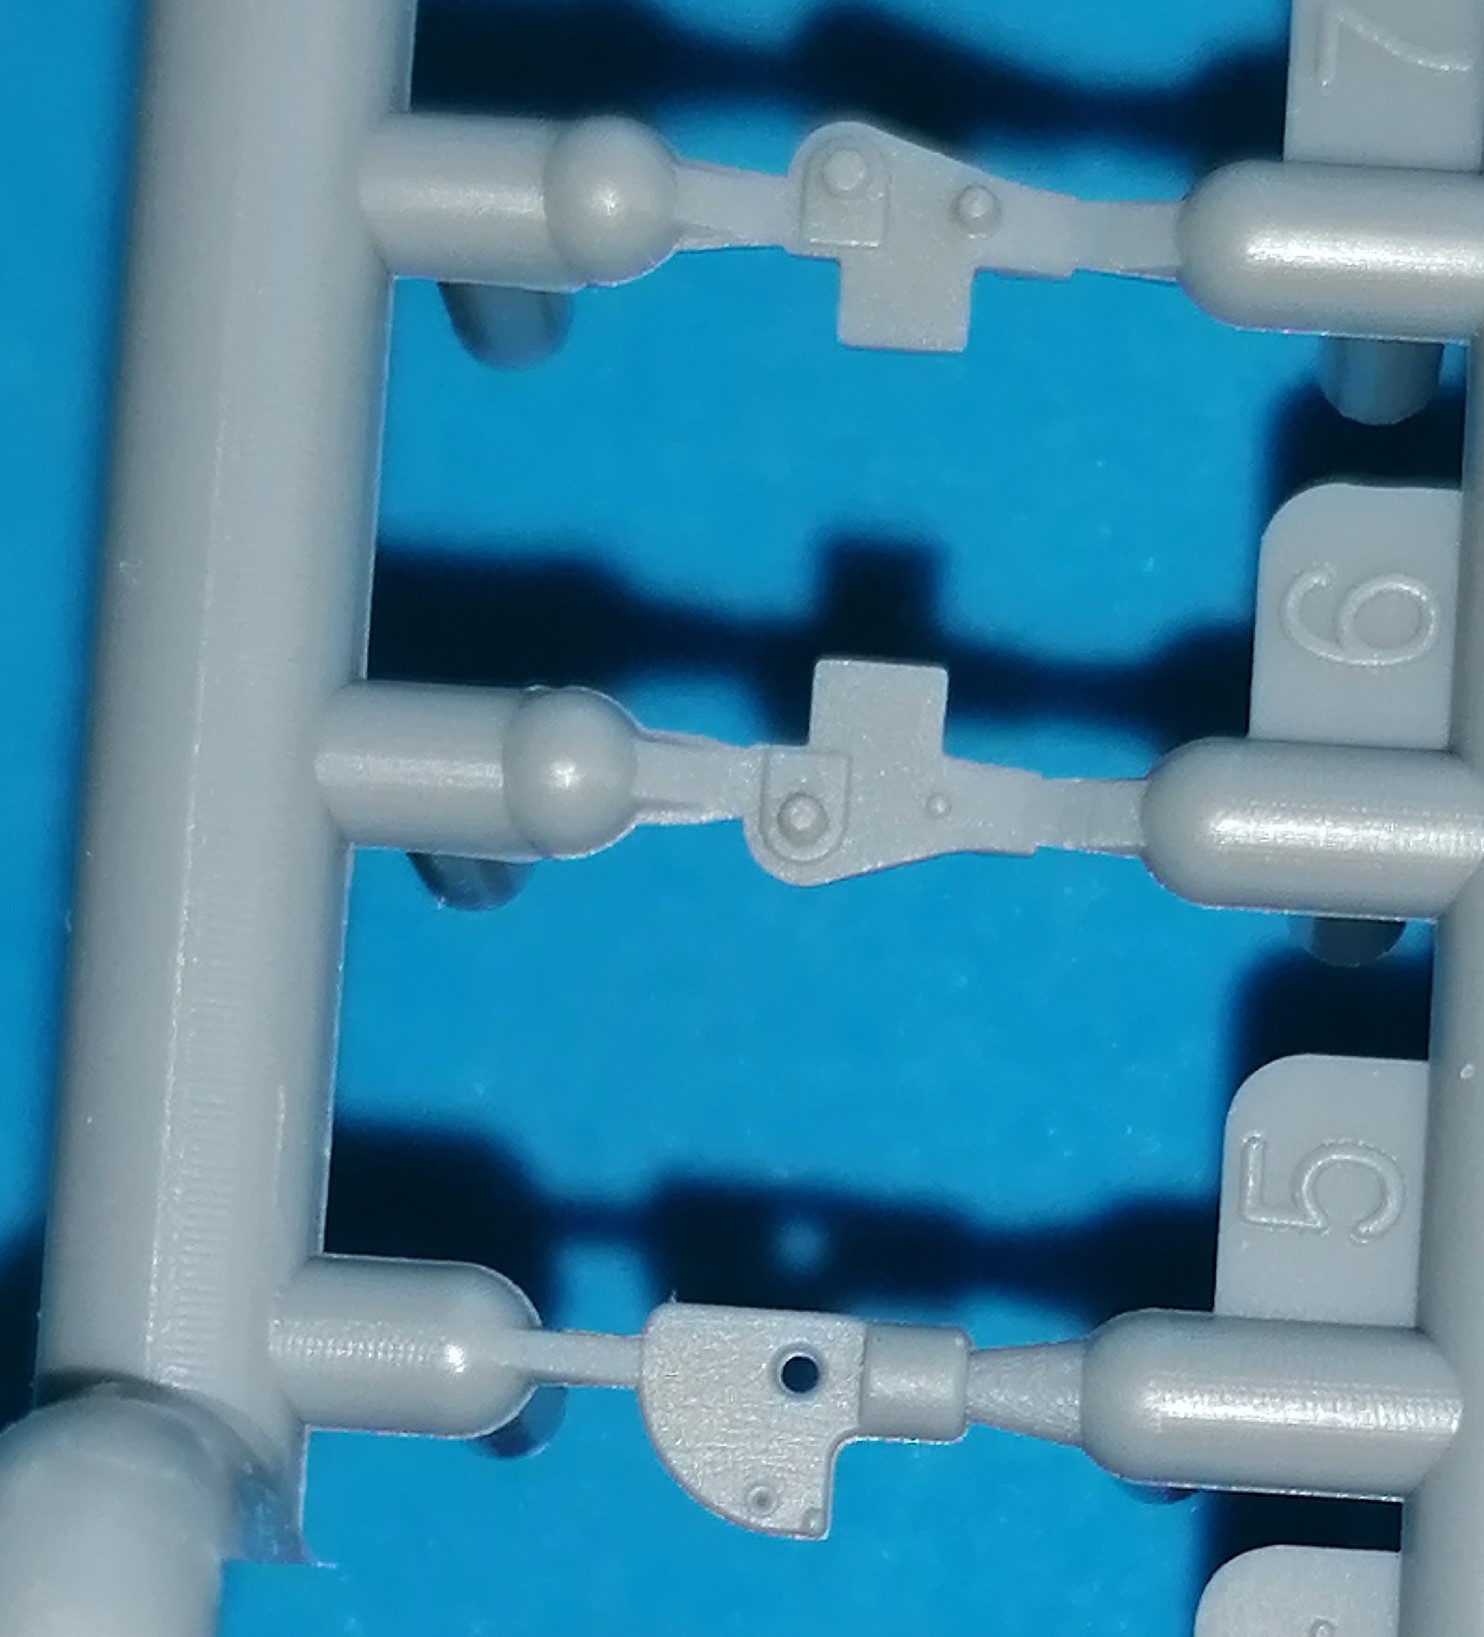
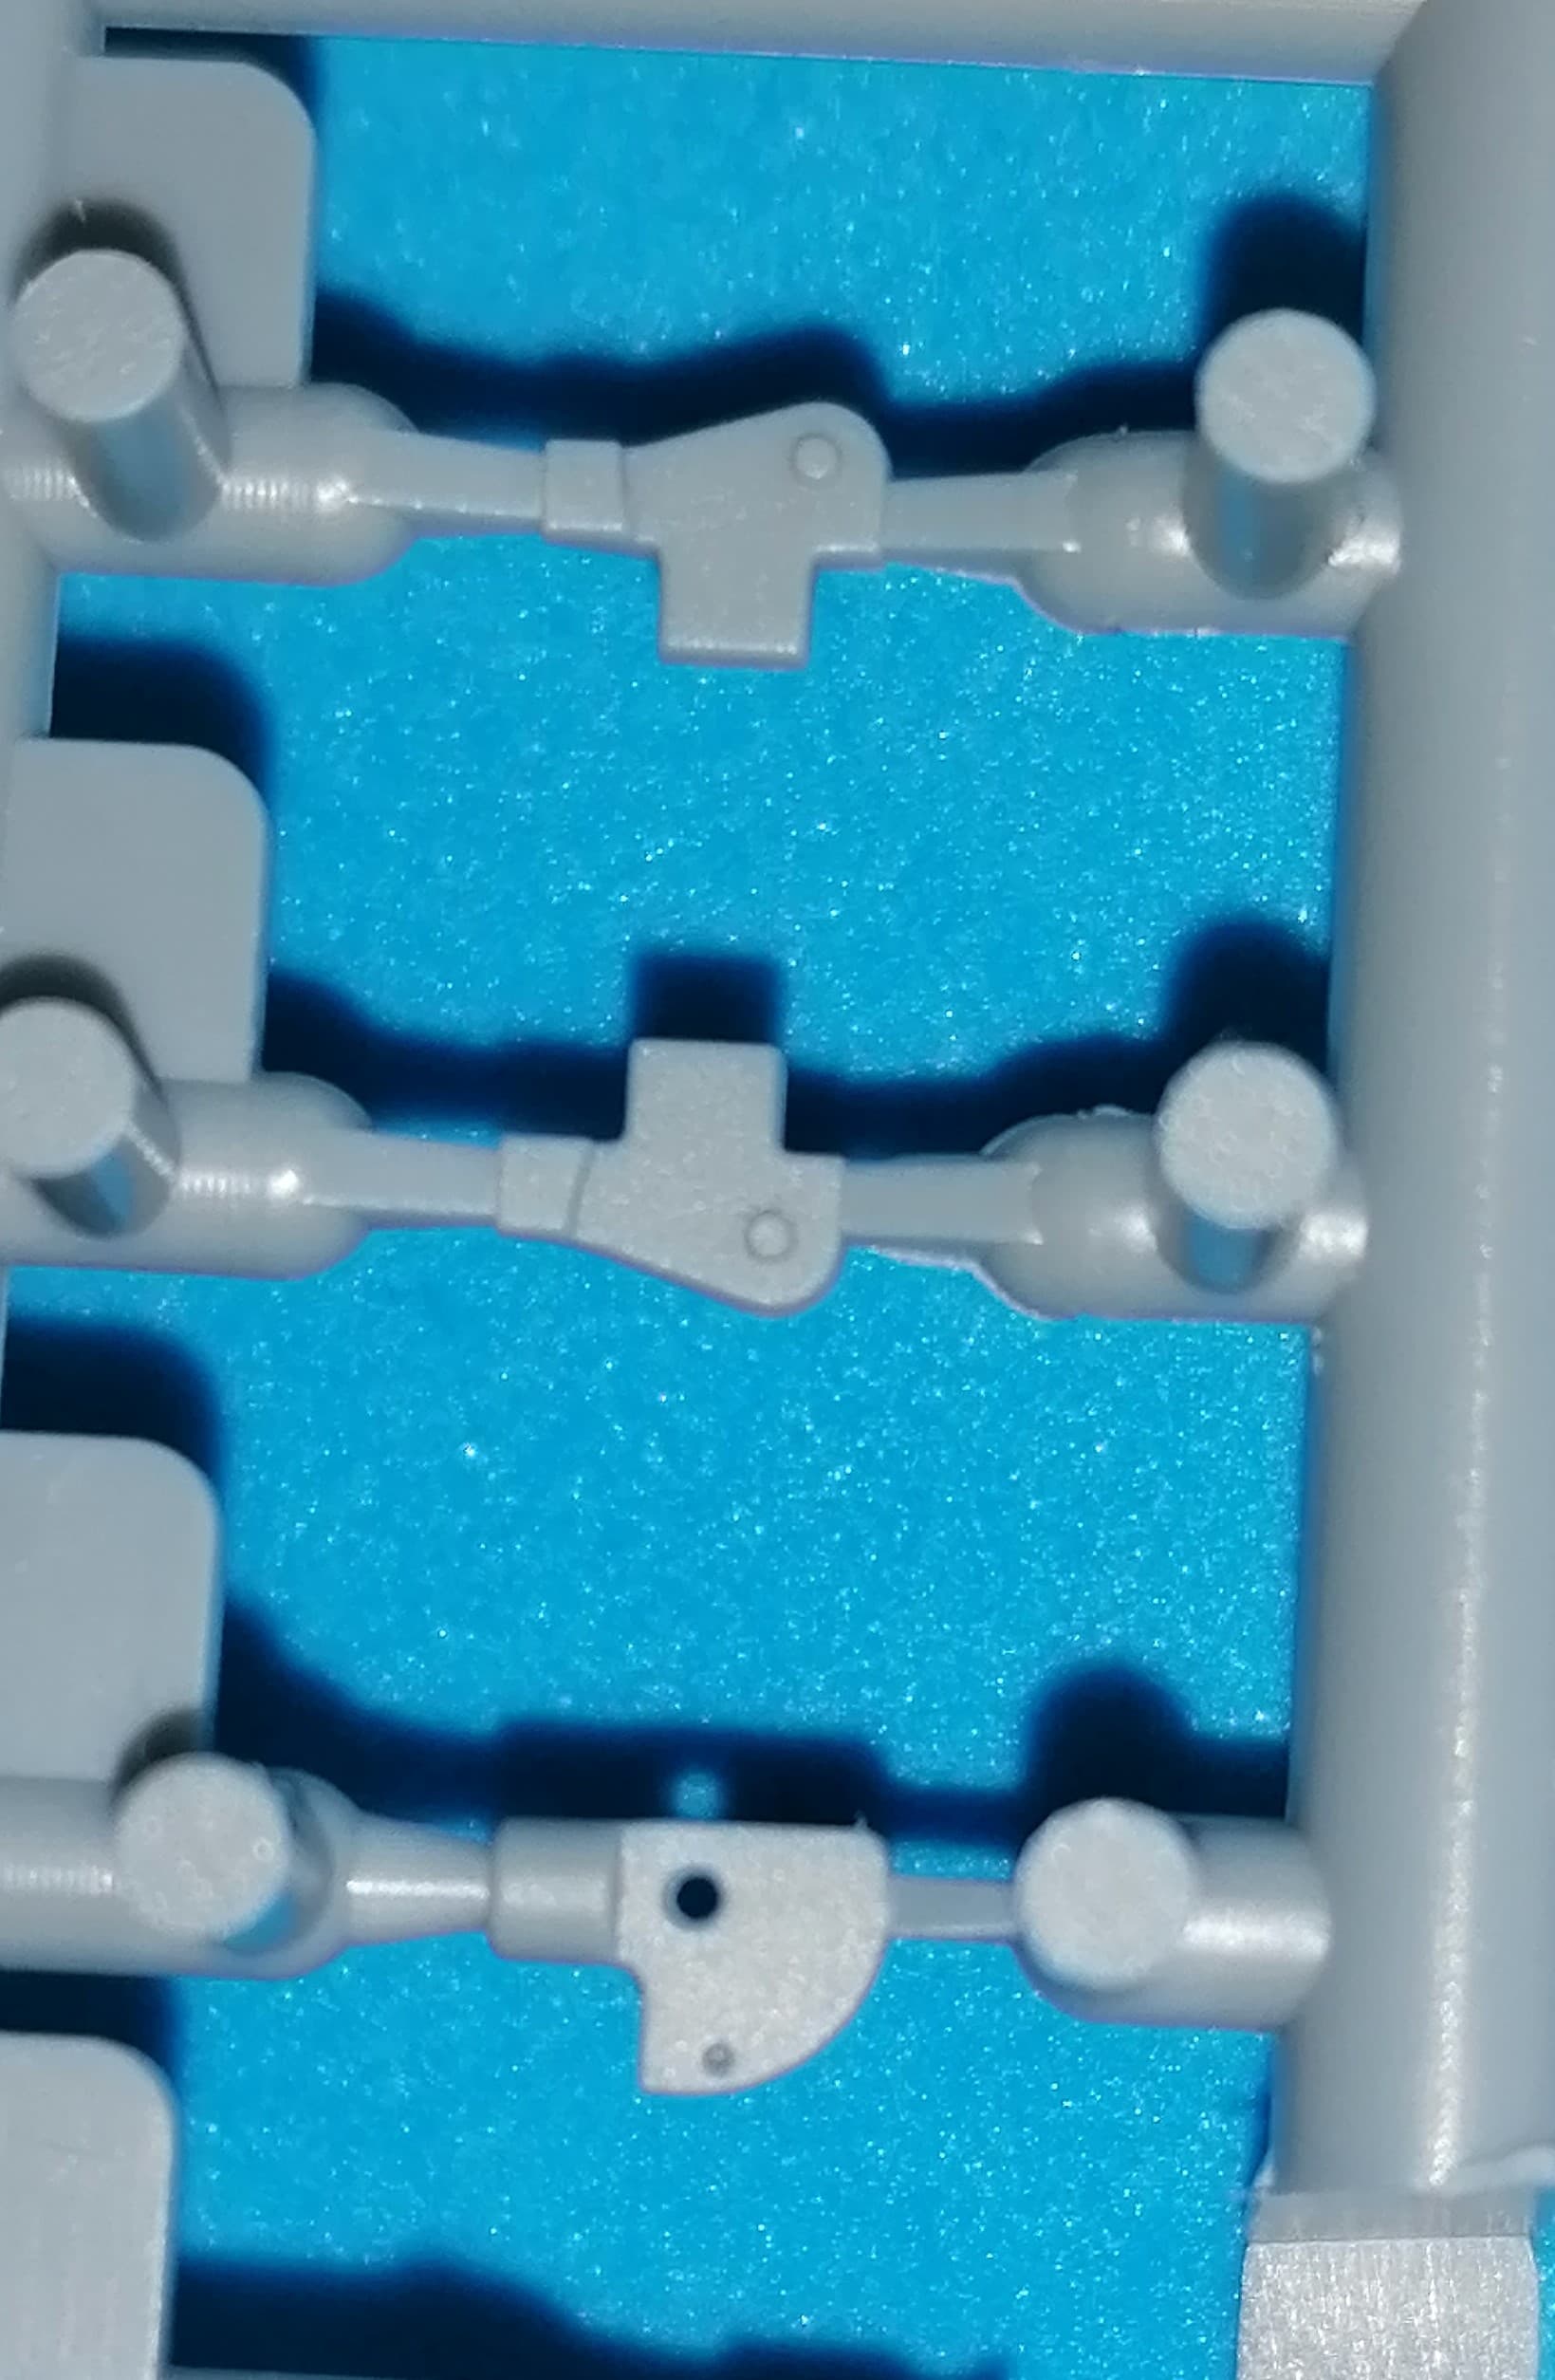
Coming close to the end of construction - it’s taken even longer than I had expected because I lost part Bk5 to tweezer launch and had to scratch build the replacement, which took several attempts.

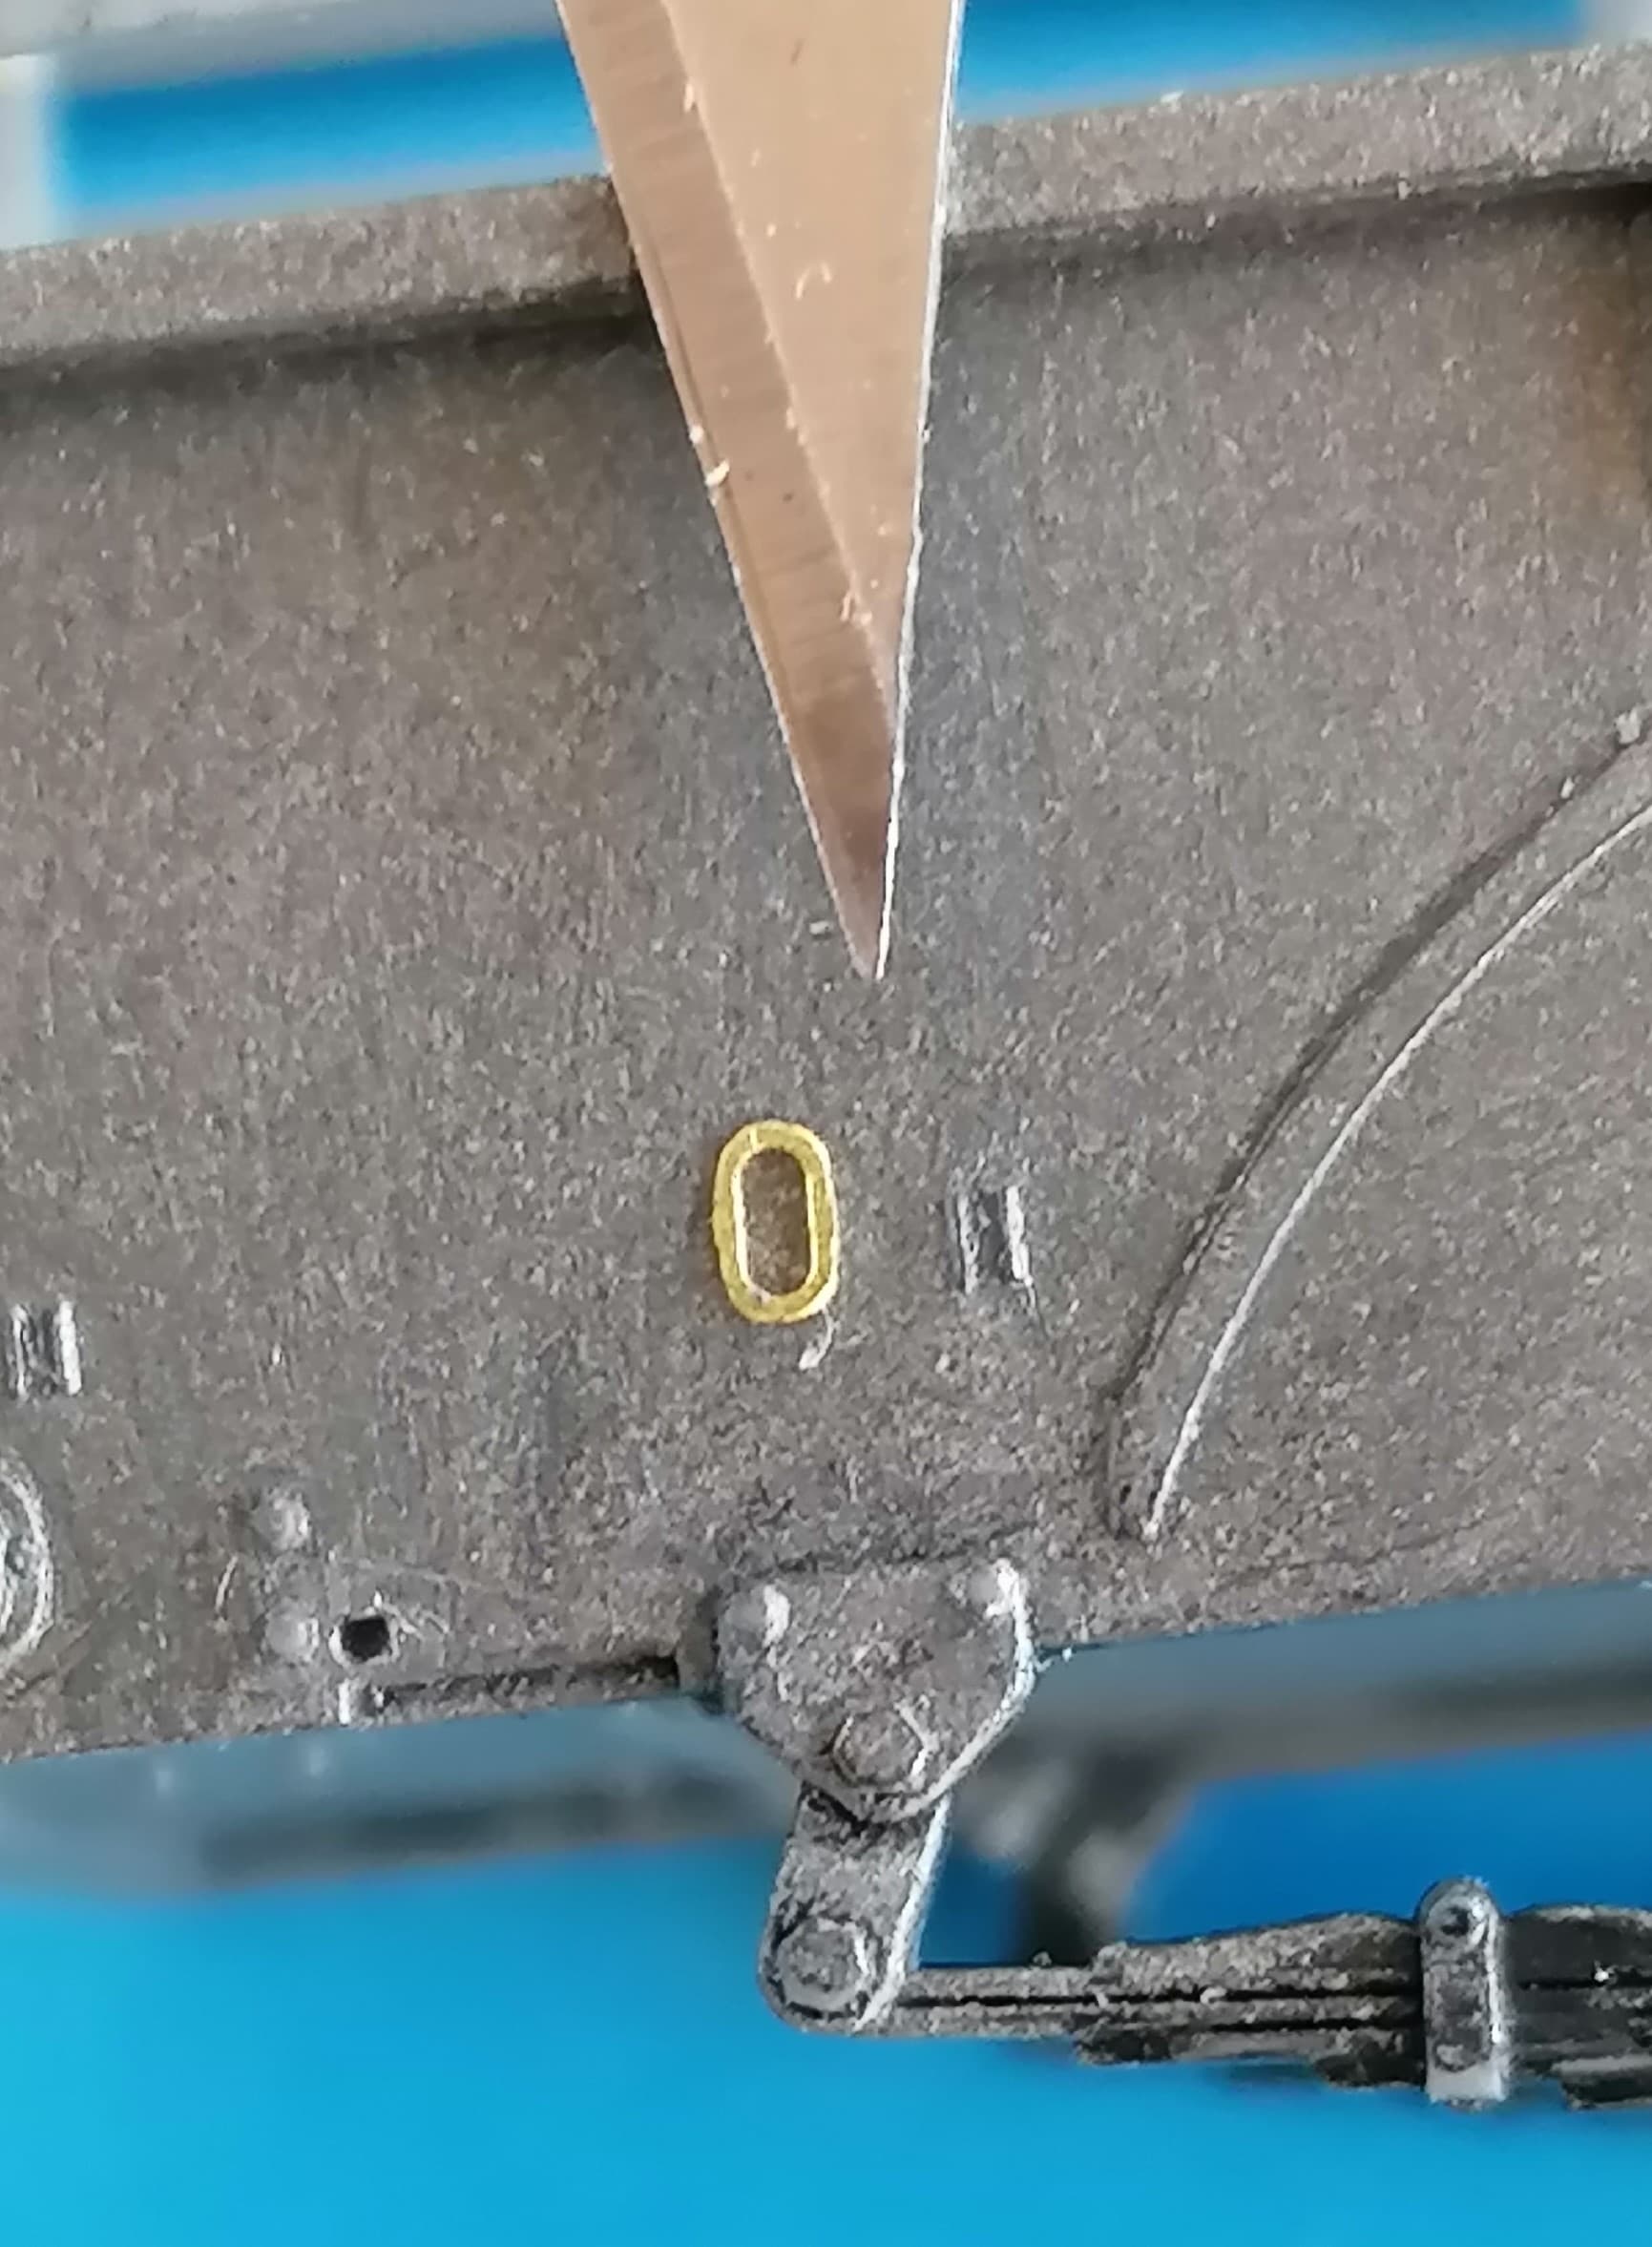
And I succeded in making the wheel assembly steerable, although I’m not sure if building up the top of the fork into a full cylinder is correct:
I even found a way to install the tiedowns: A tiny bit of CA glue gel held them in place while I added high viscosity CA, and a day later I strengthened it all with 2-part epoxy glue.
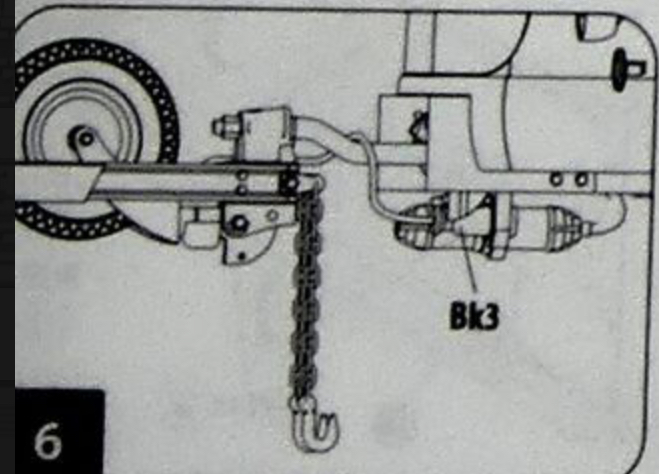
And here’s a (hopefully) last question: What are parts Bk3? I simply can’t find them in the instructions - neither in mine nor in the ones for the Water Trailer as shown at Scalemates.
Any ideas out there?
2 Likes
Using Super Hobby instructions the K-52 trailer looks like when being towed you switch out bk-4 for bk-3.
That is the only kit which has that drawing.
2 Likes
Yes, Bk3 is the trailer light cable connector when connected to the towing vehicle.
1 Like
Thank you, Ryan and Gino,
But I still don’t get it: You can’t plug that light cable in with Bk4, like you would with your electric shaver, but you have to exchange Bk4 for Bk3 to do that? And then why are there two Bk3?
Confused, Peter
2 Likes
I can just tell you what they show not why. Maybe a common sprue for future use.
2 Likes
That would make sense, as there are also two truck bed (?) end plates on that sprue that definitely are too wide for Ben Hurs, w/o any remarks regarding their destination. So I’ll just ignore the Bk3’s.
Thank you!
2 Likes
I think Bk4 is the “plug” and Bk3 is the “plug” connected into its “socket”, with its retainer clip. You can’t make them functional in 1/35 plastic.
The second Bk3 may be for the power cable coming from the generator on the radio truck.
KL
3 Likes
And that makes sense, too - thank you, Kurt!
1 Like