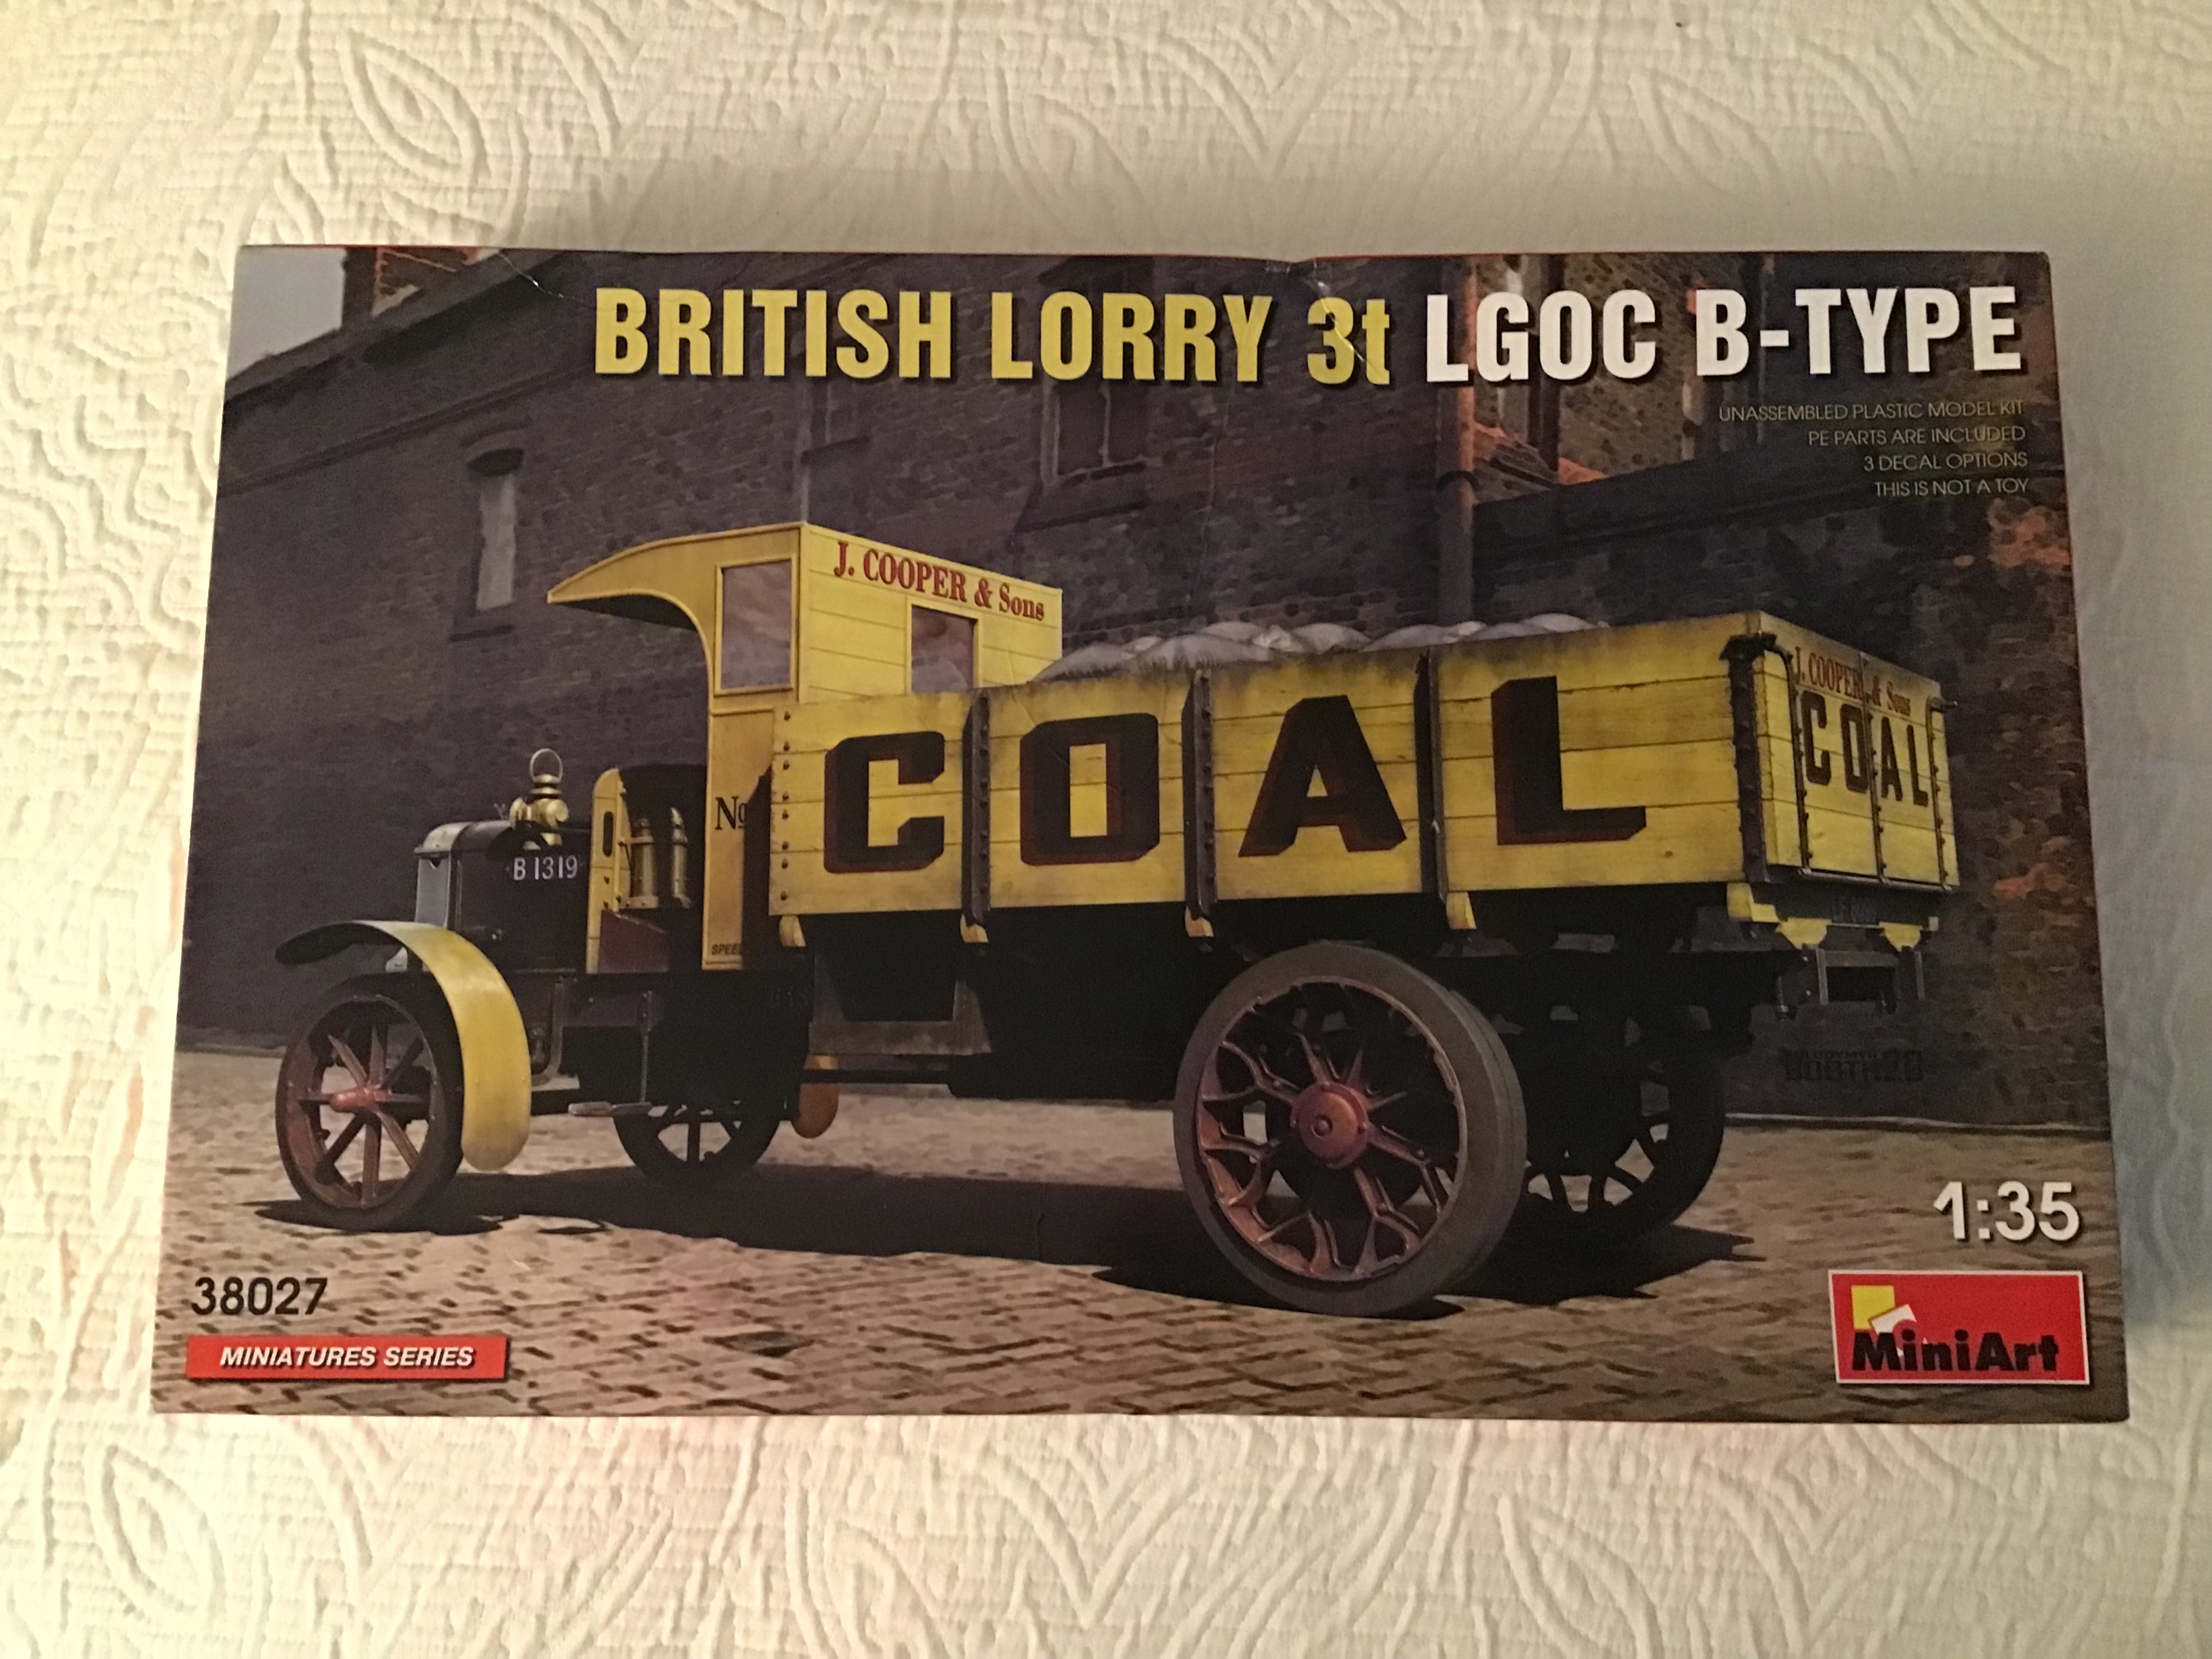
This will be a OOB build . My last two efforts involved considerable scratch building so taking a break from that aspect- I may attempt some coal bags out of epoxy putty as a load .
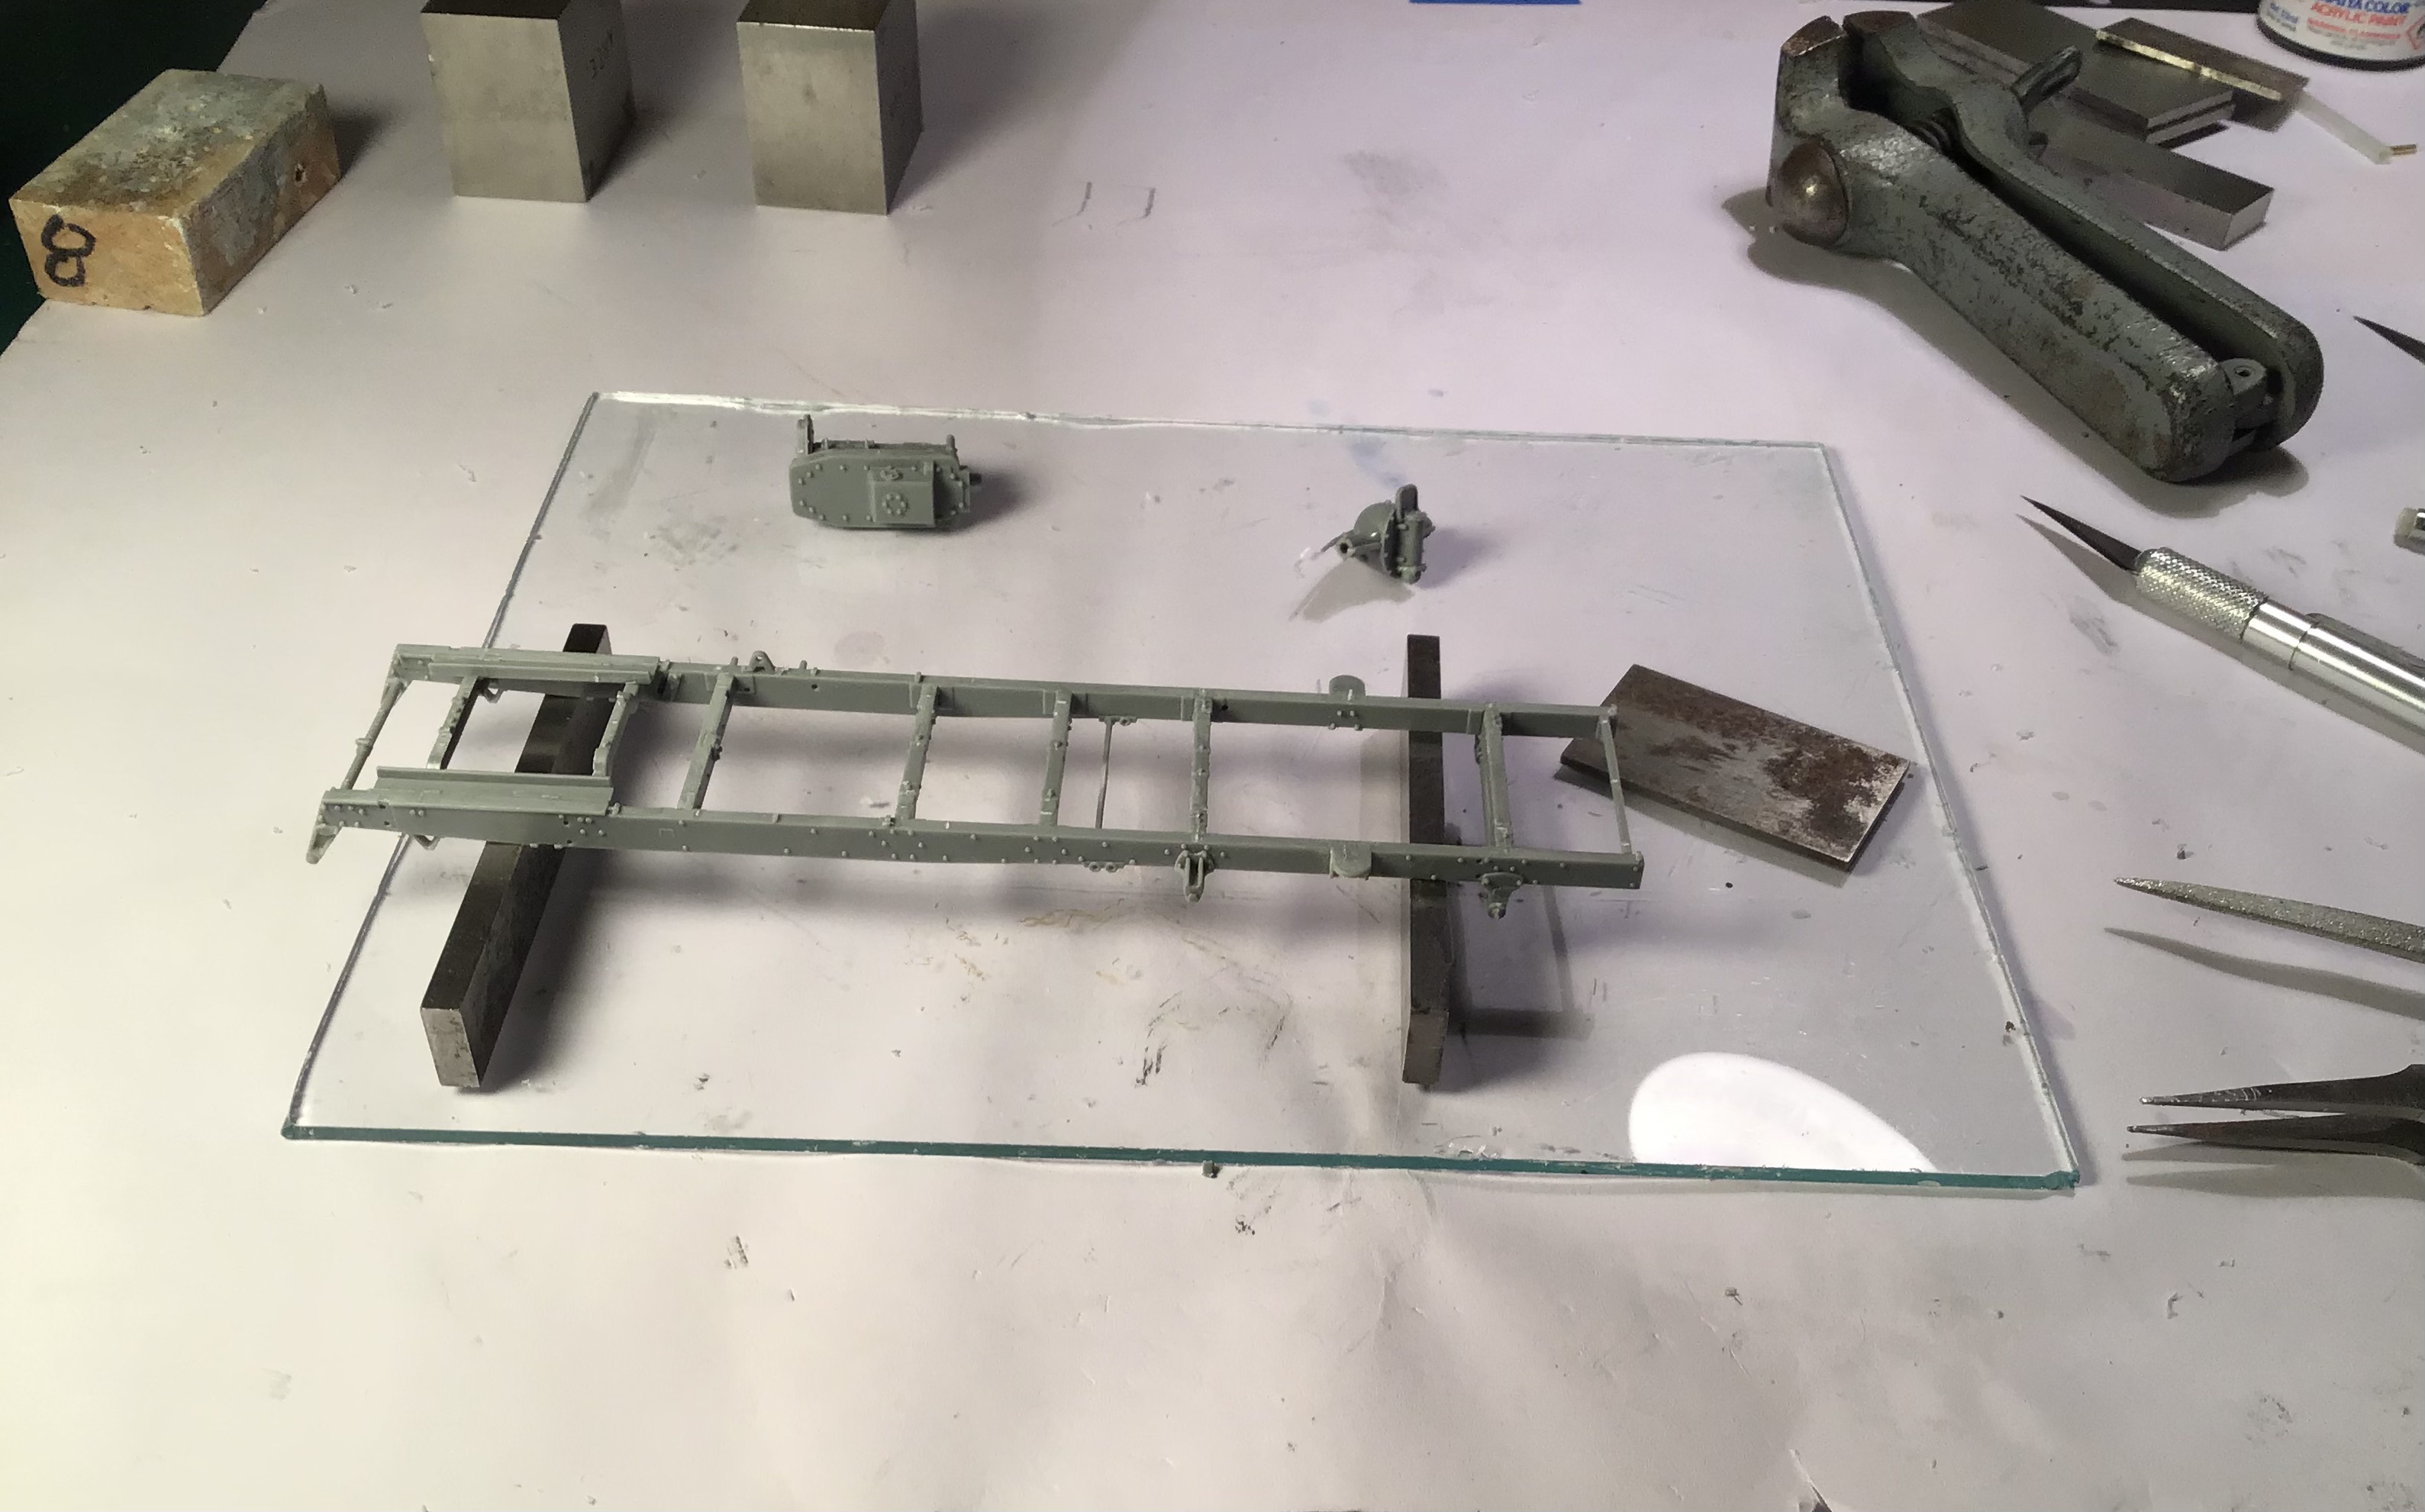
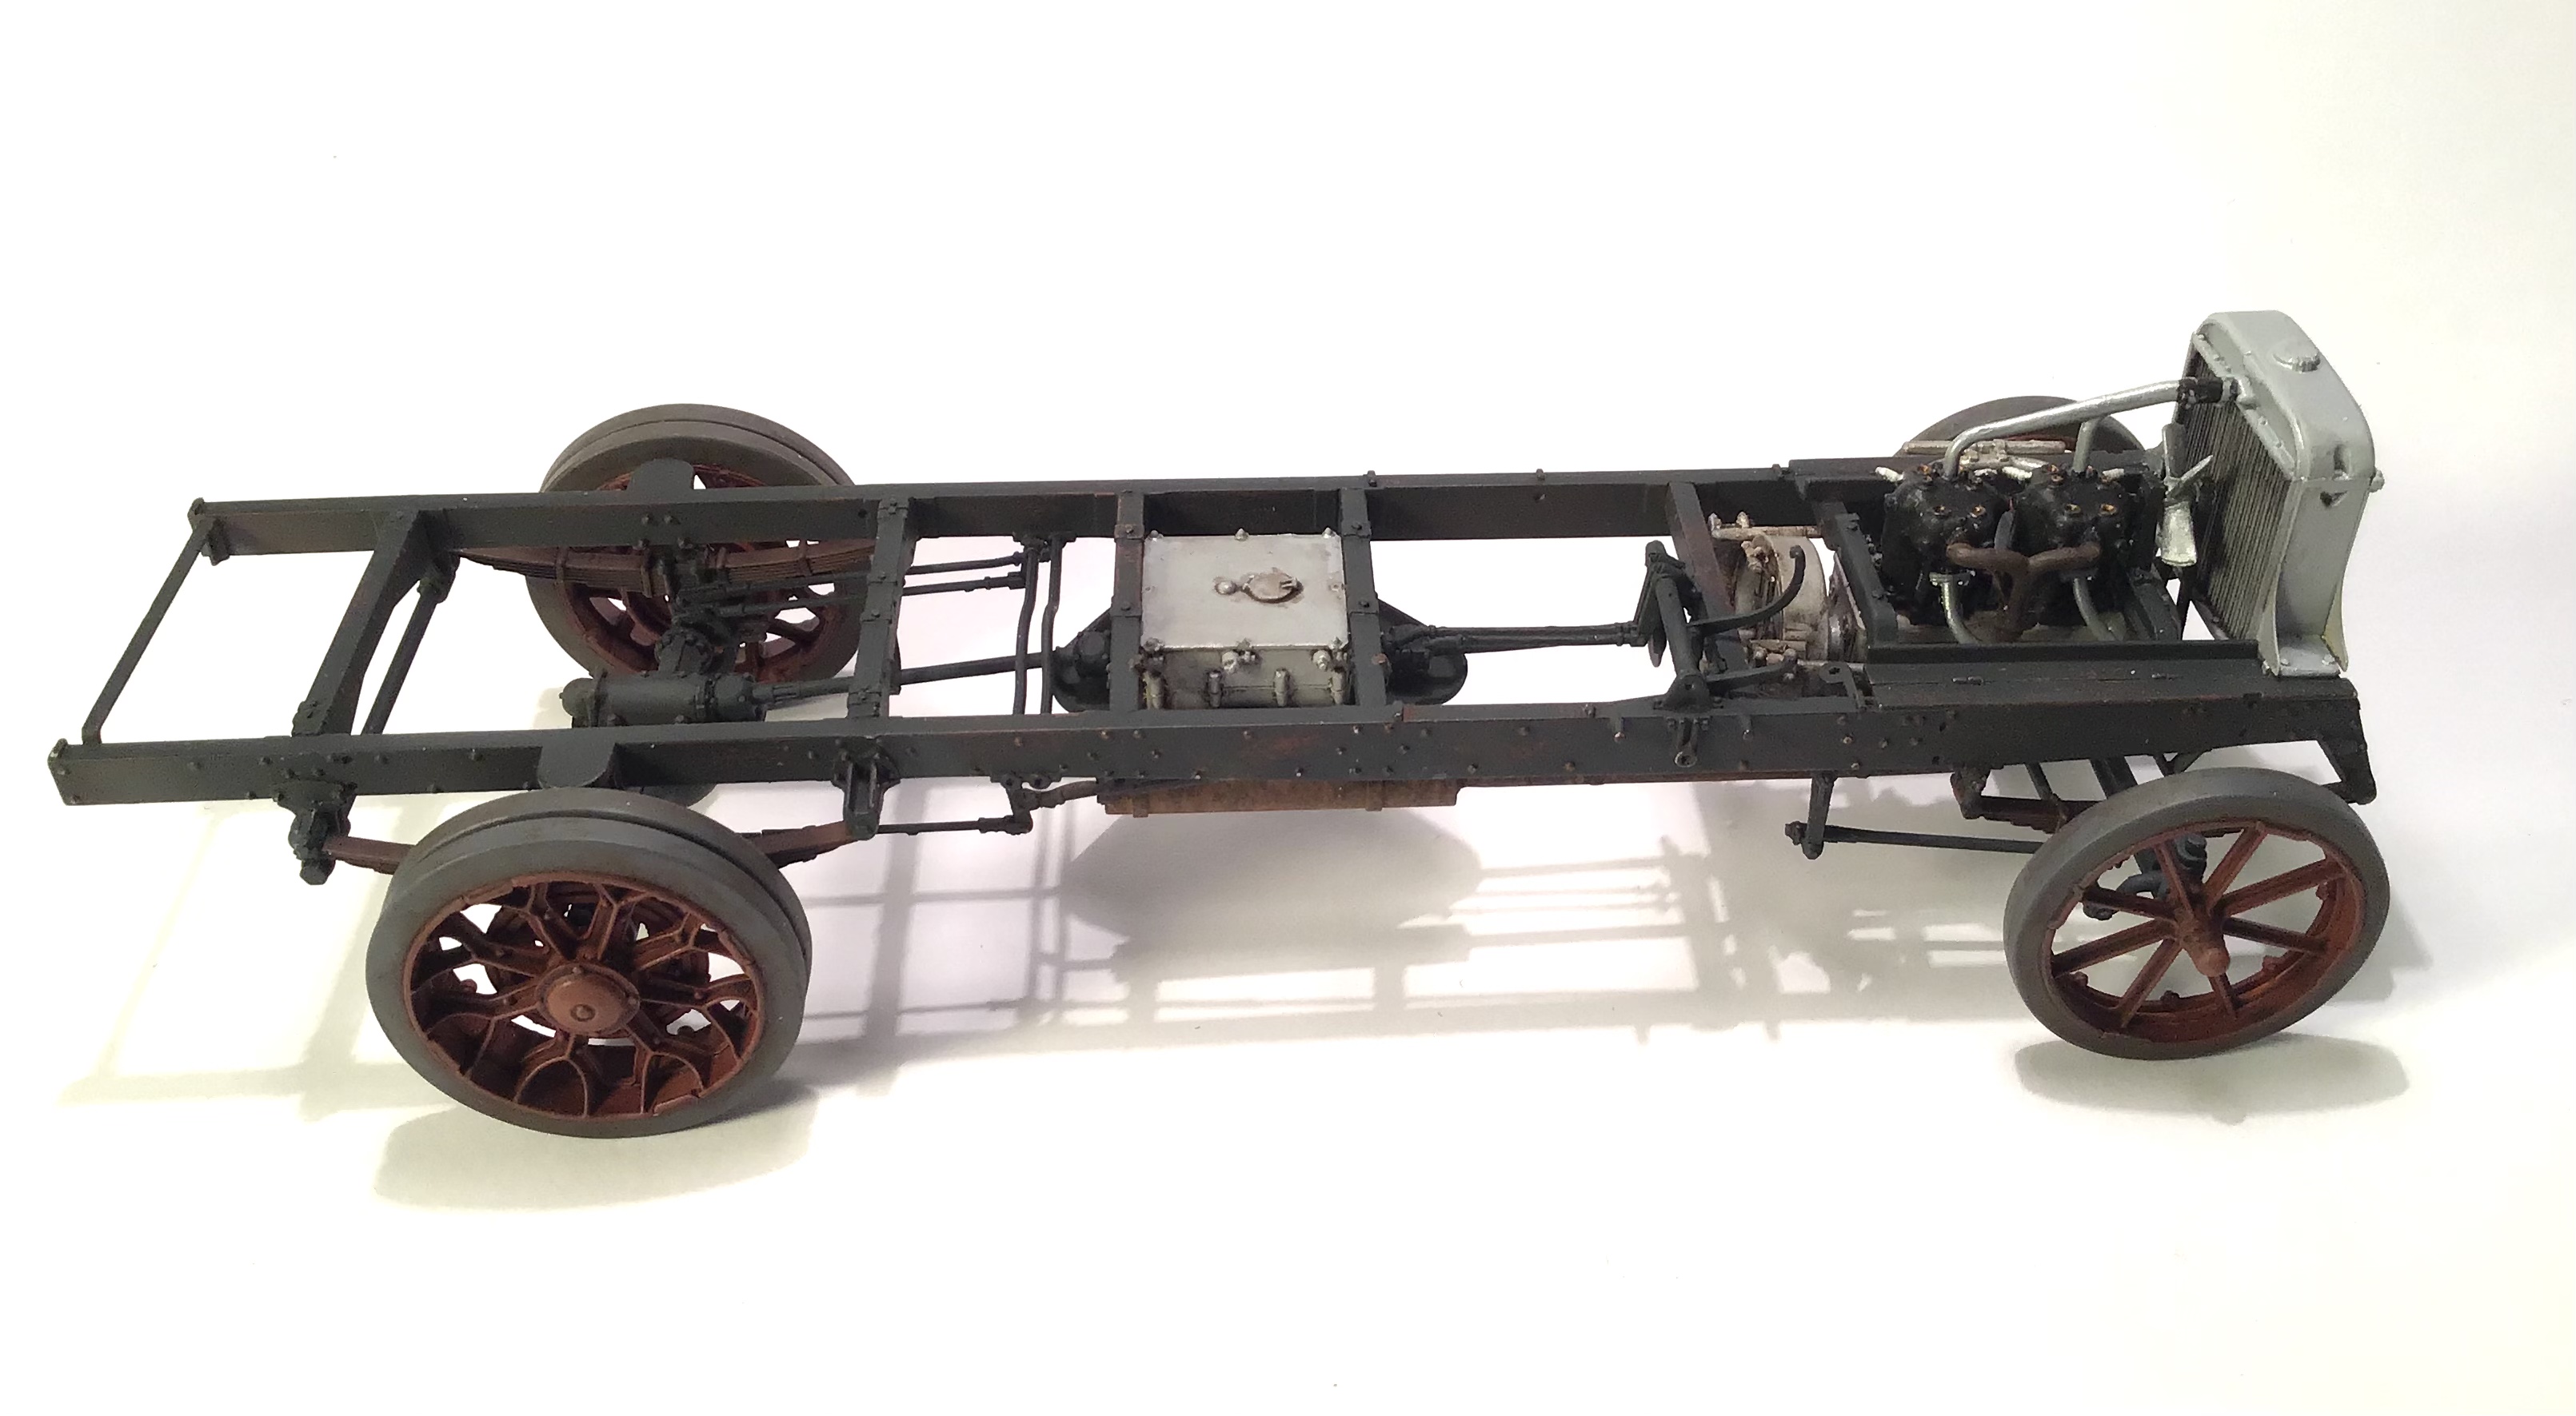
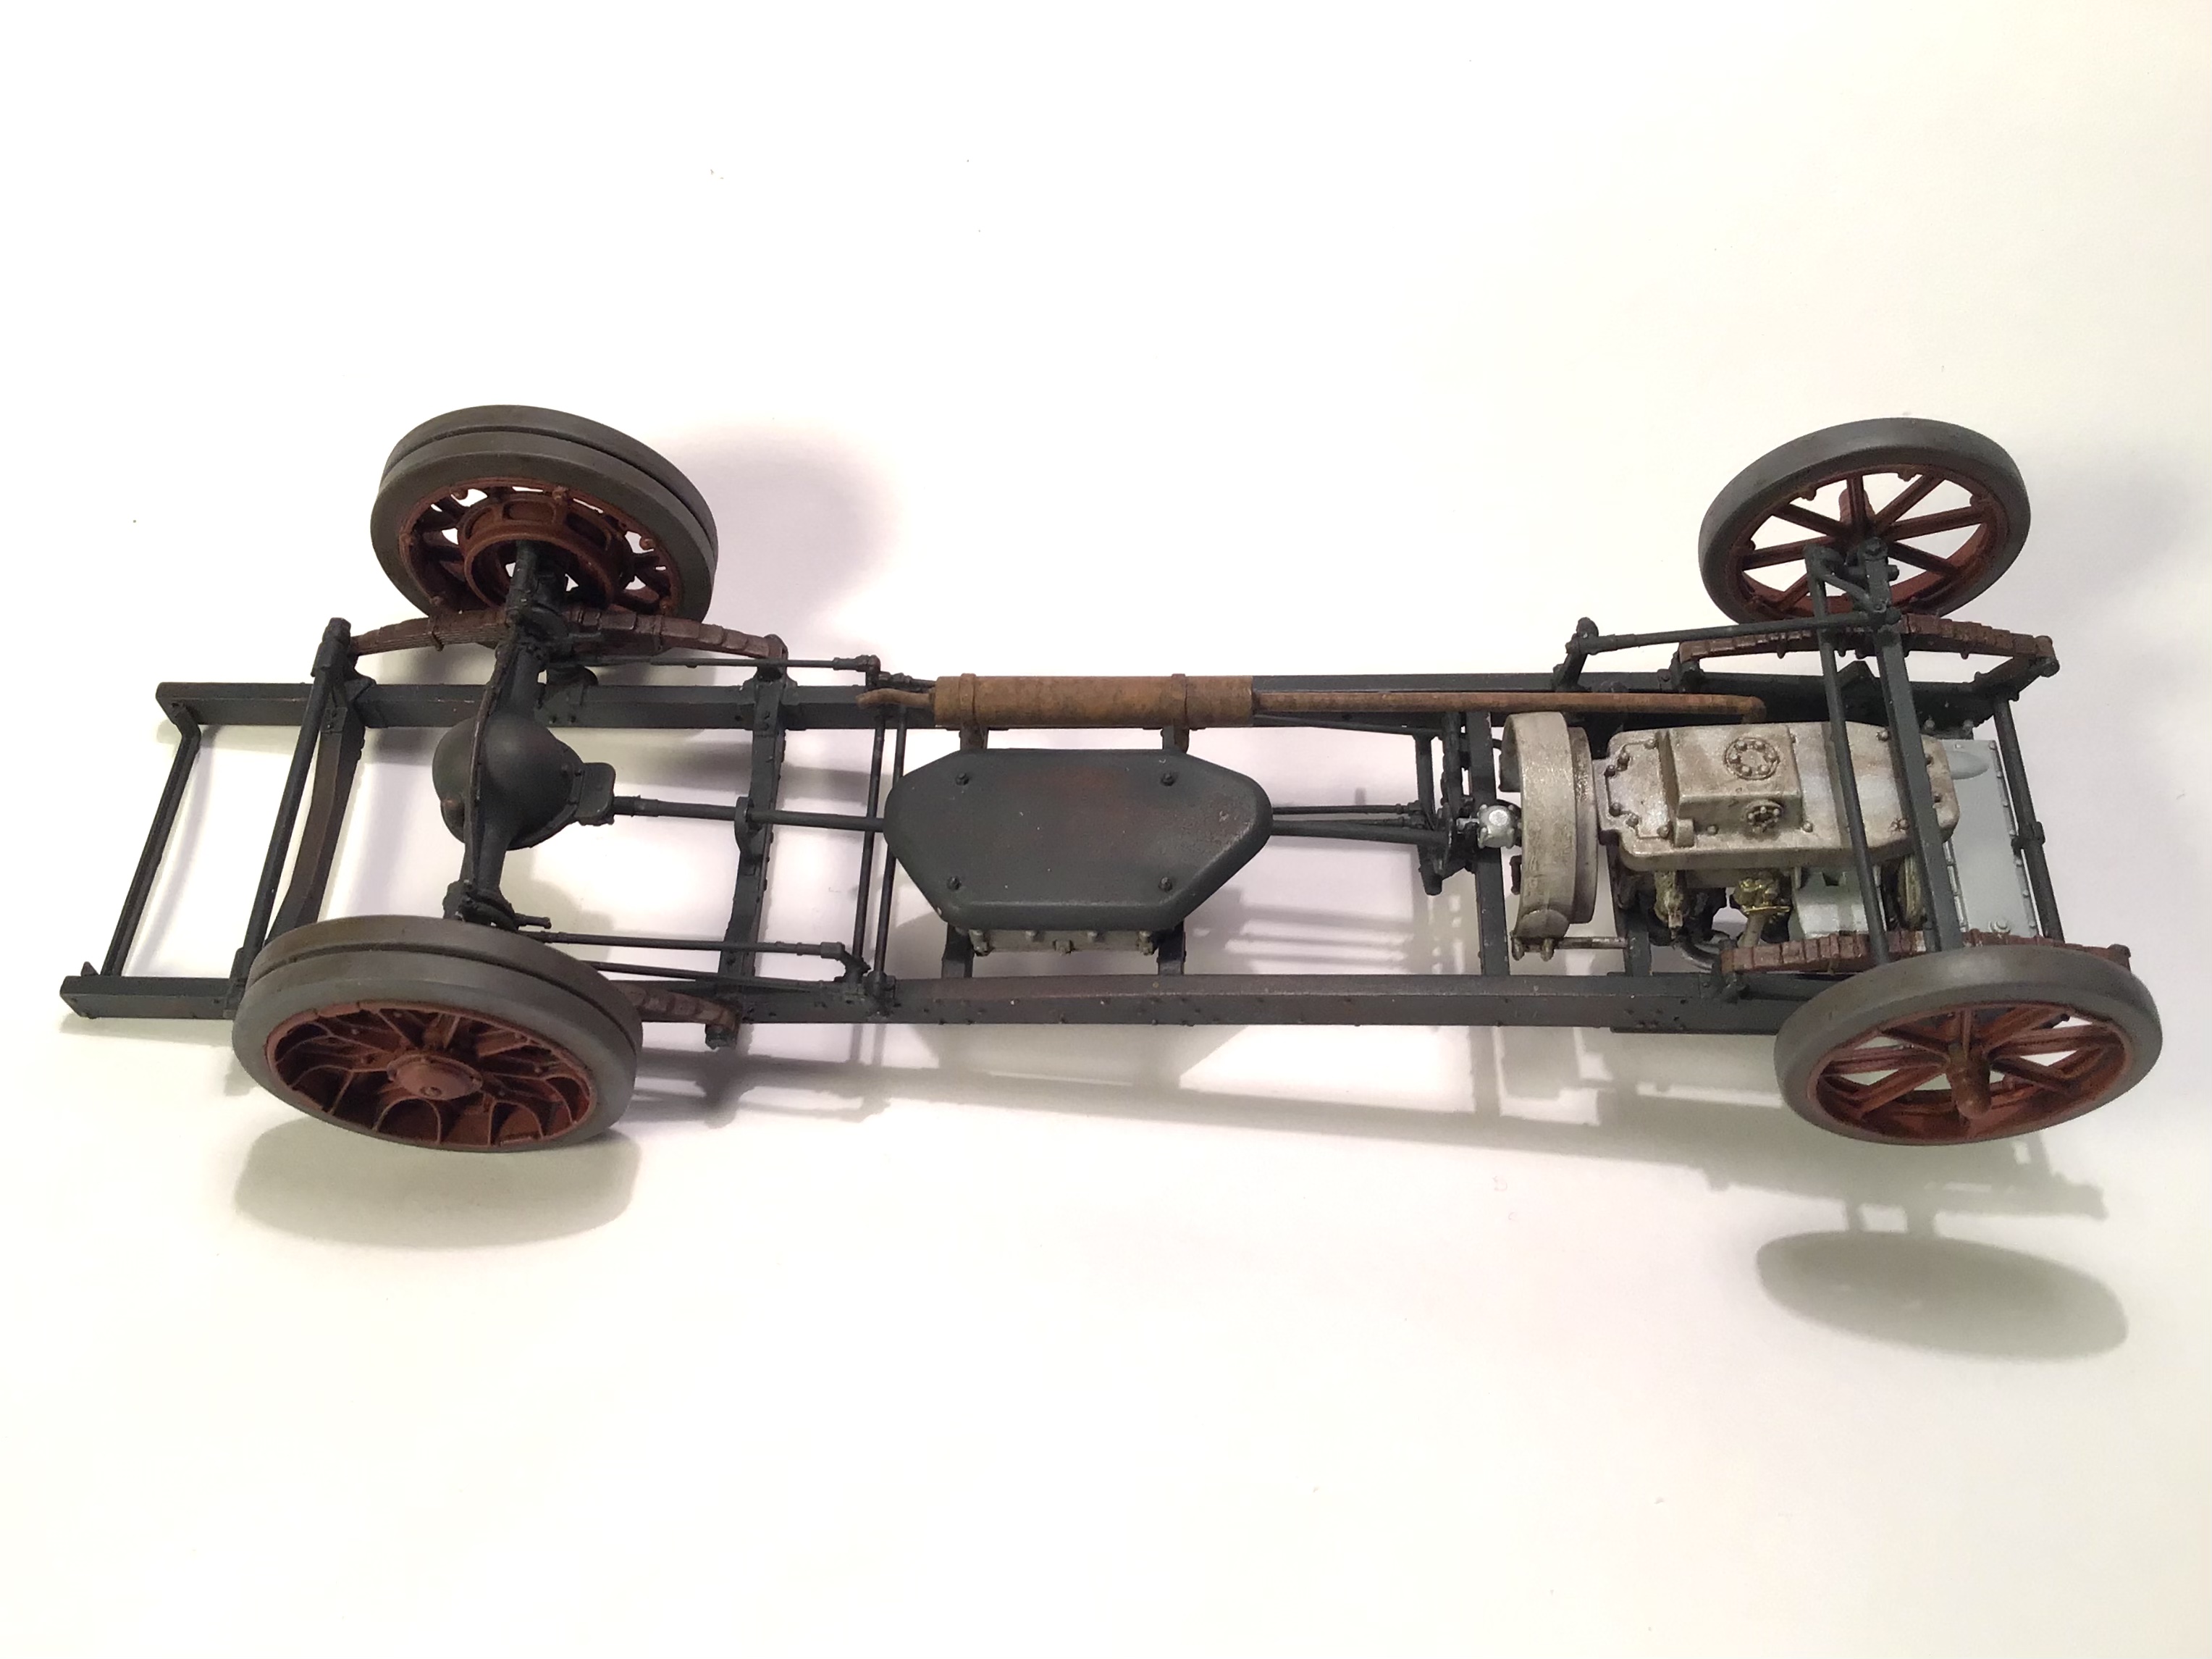
Built up the chassis on the glass plate . Fit is very good and the plastic is much better than the D7 from years ago .
Built the London bus version of this about 3 years ago. It was a very enjoyable build. Lots of small parts but it went together well. Will be watching with interest.
So the love/hate relationship with Miniart goes
on …
I’m not bashing them - on the contrary they are incredibly detailed and go together well considering the high number of delicate parts.
But I have come to the conclusion that you need to be in the right mood - at least for certain phases.
If the mojo is low come back to it another time , which is what I am doing.
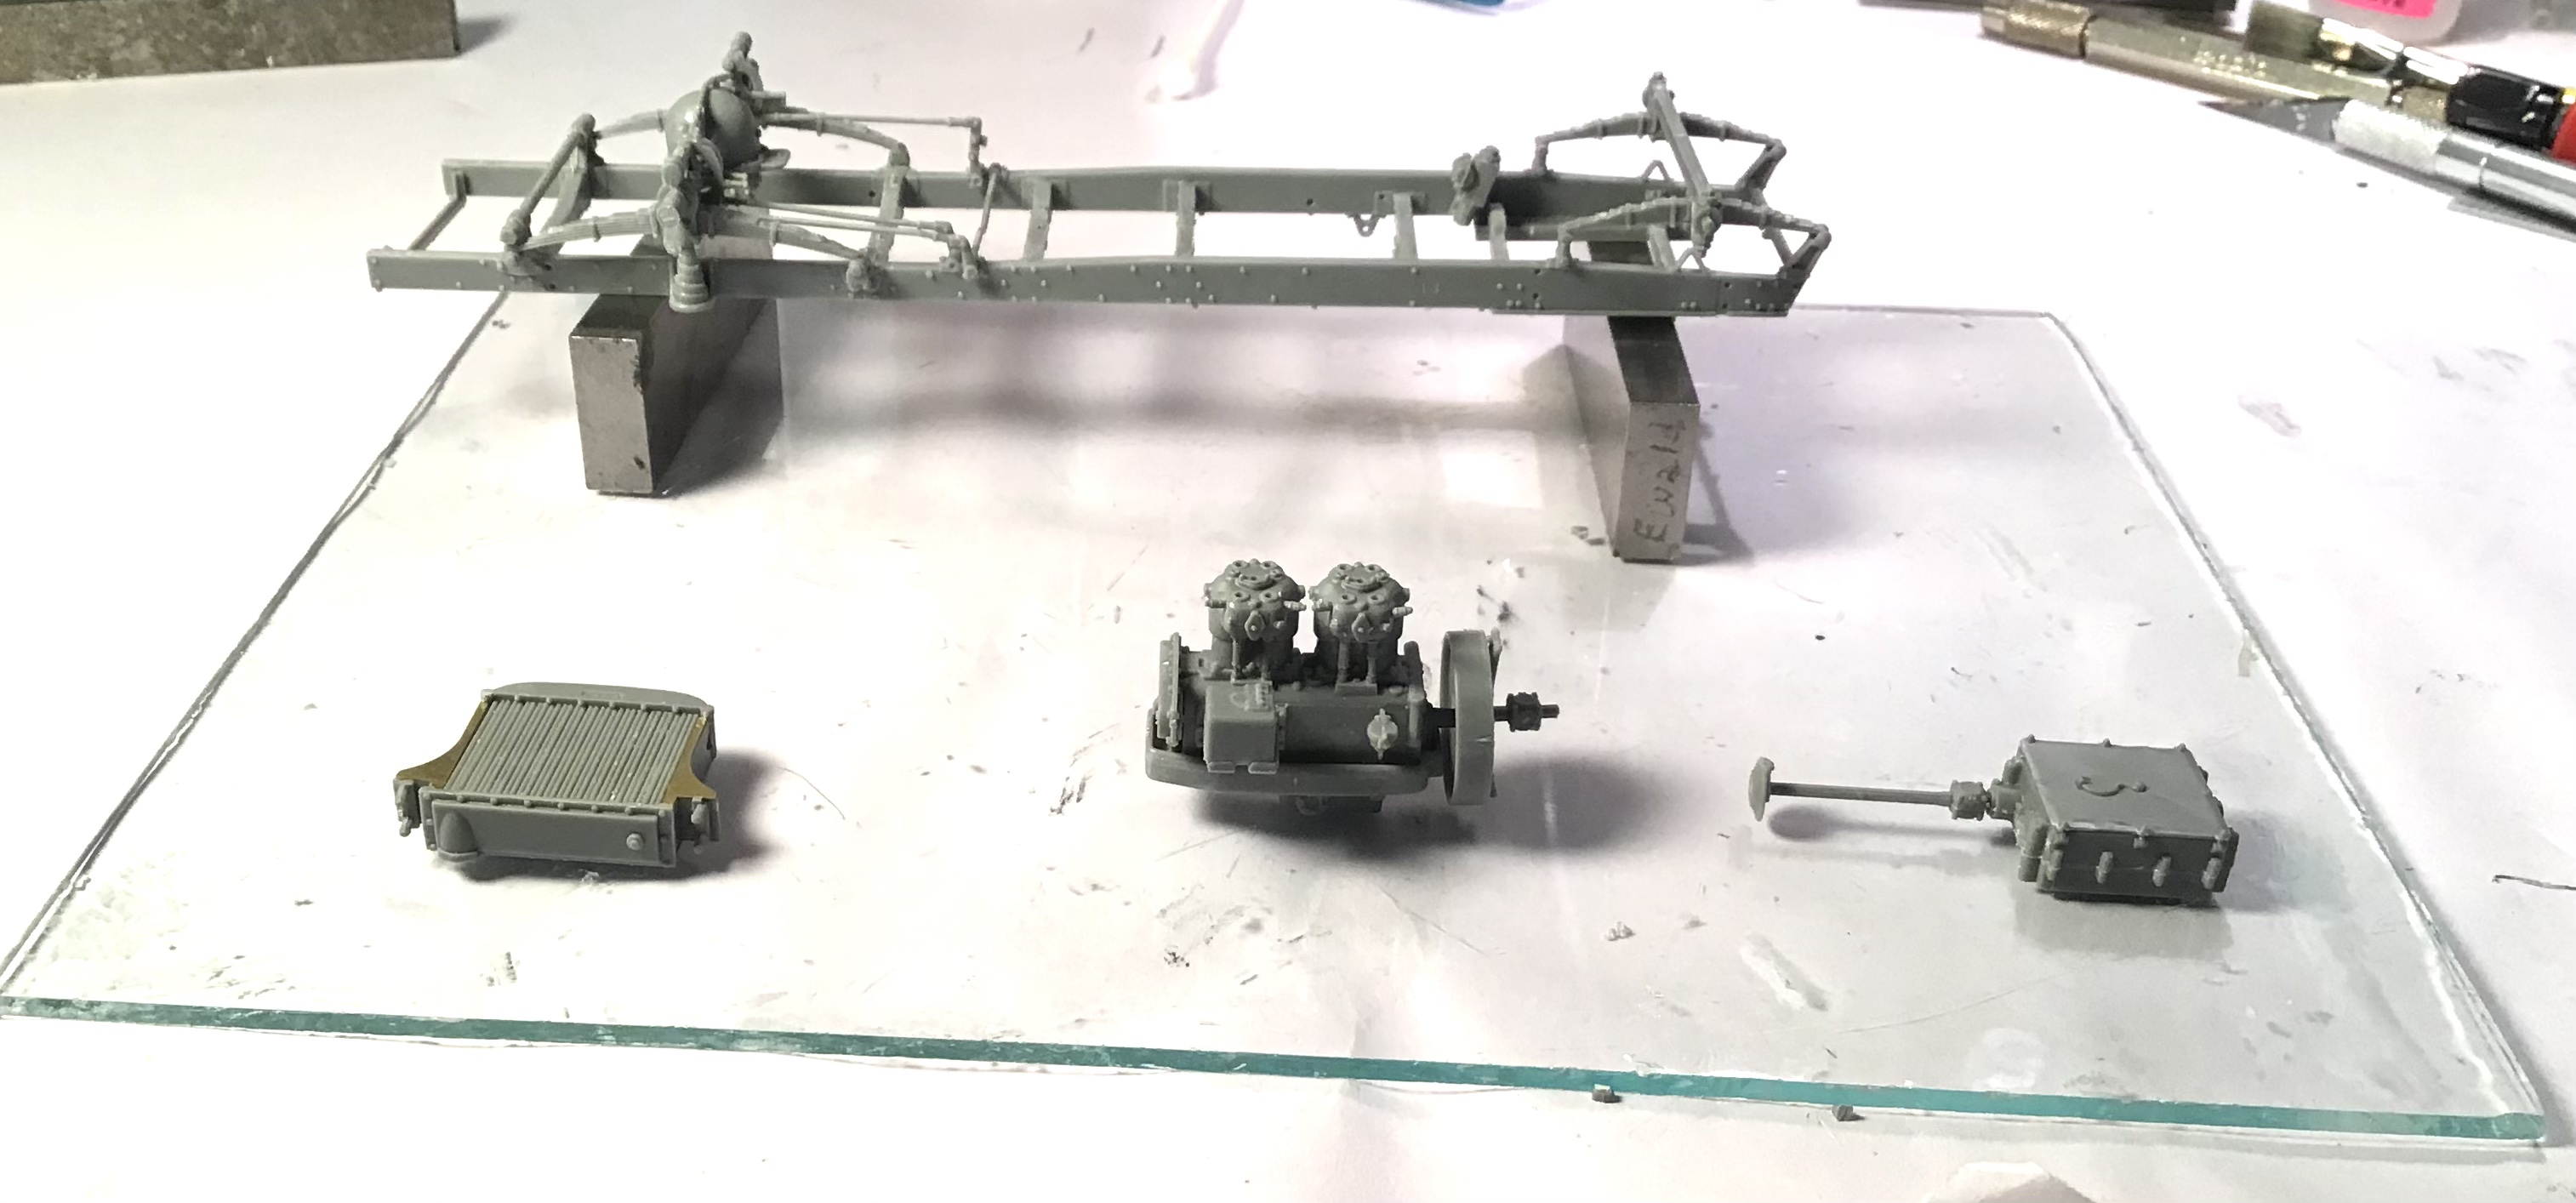
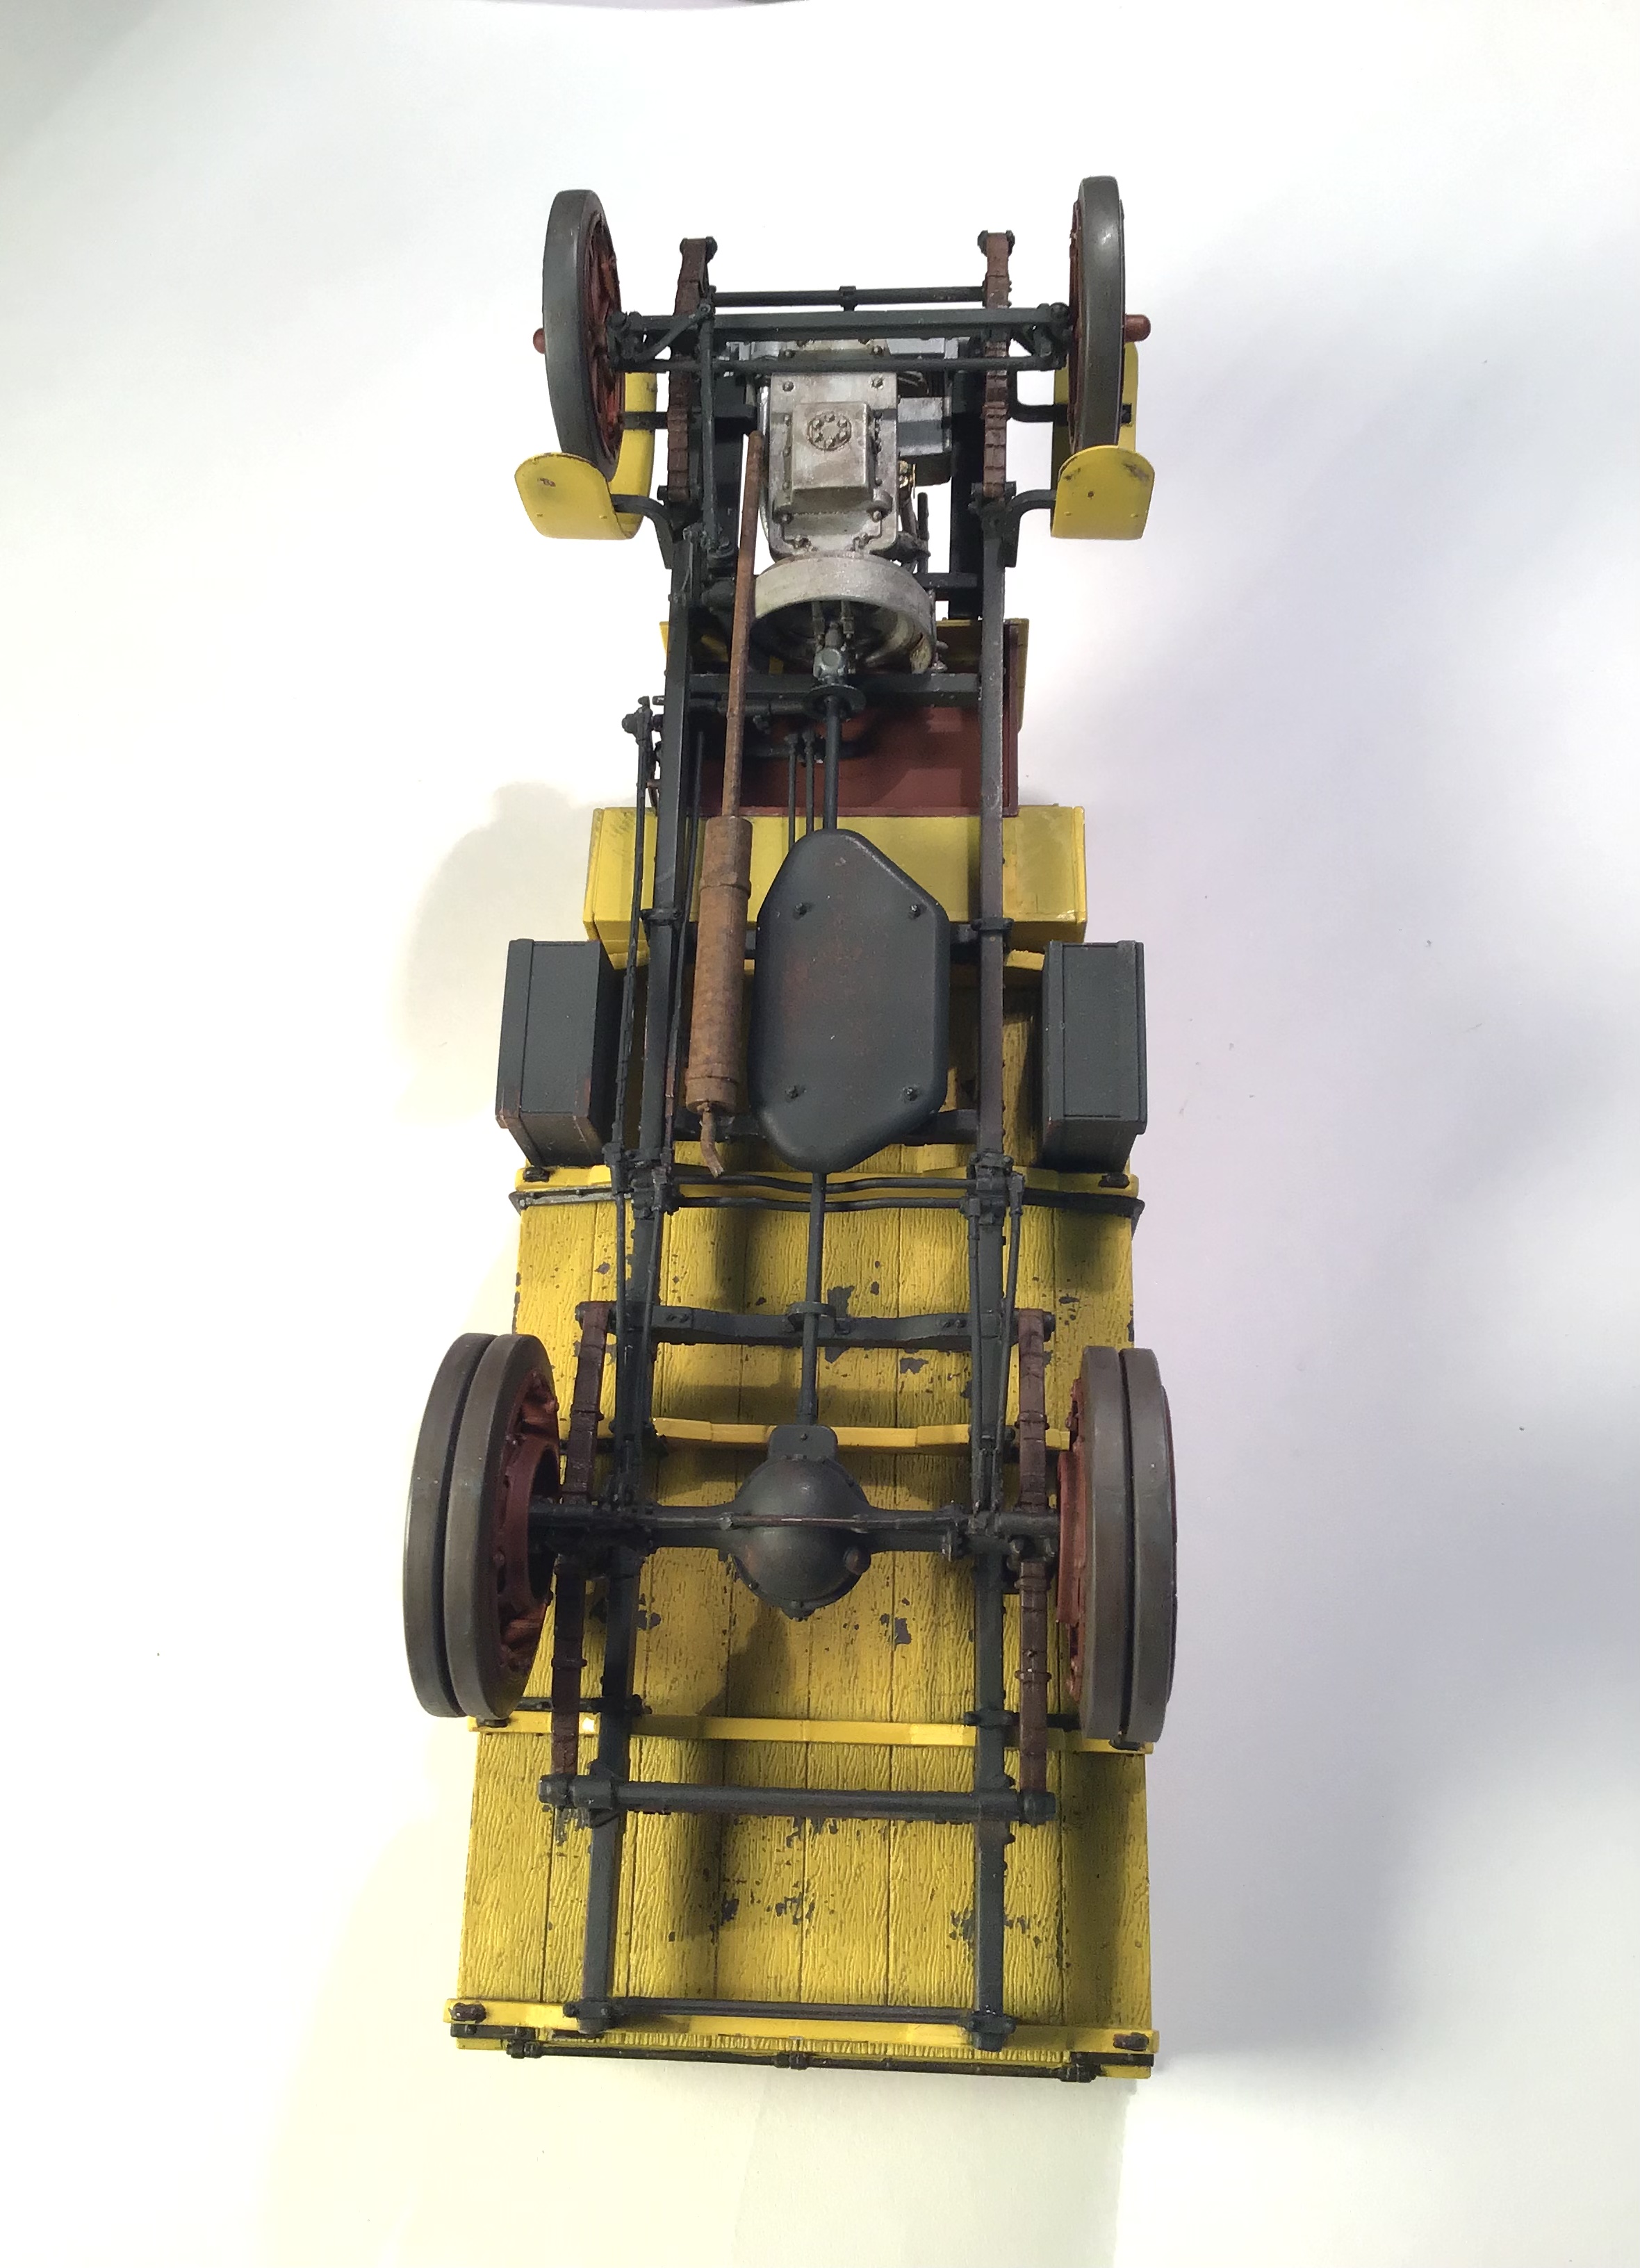
Chassis, engine, gearbox and radiator mostly
done . What you see here is just shy of one hundred pieces. The radiator alone is twelve pieces in plastic and four in photo etch.
Still trying to map out the painting sequence.
More to come …
RT
@RDT1953 Yes! the challenge of Miniart kits - I recently built one of their 1.5 ton 4x4 trucks. I’m glad to report that it all went together as intended, but, man, no coffee for me anywhere near the assembly! Yours is looking great!
Cheers
Nick
Thanks for the kind words gents !
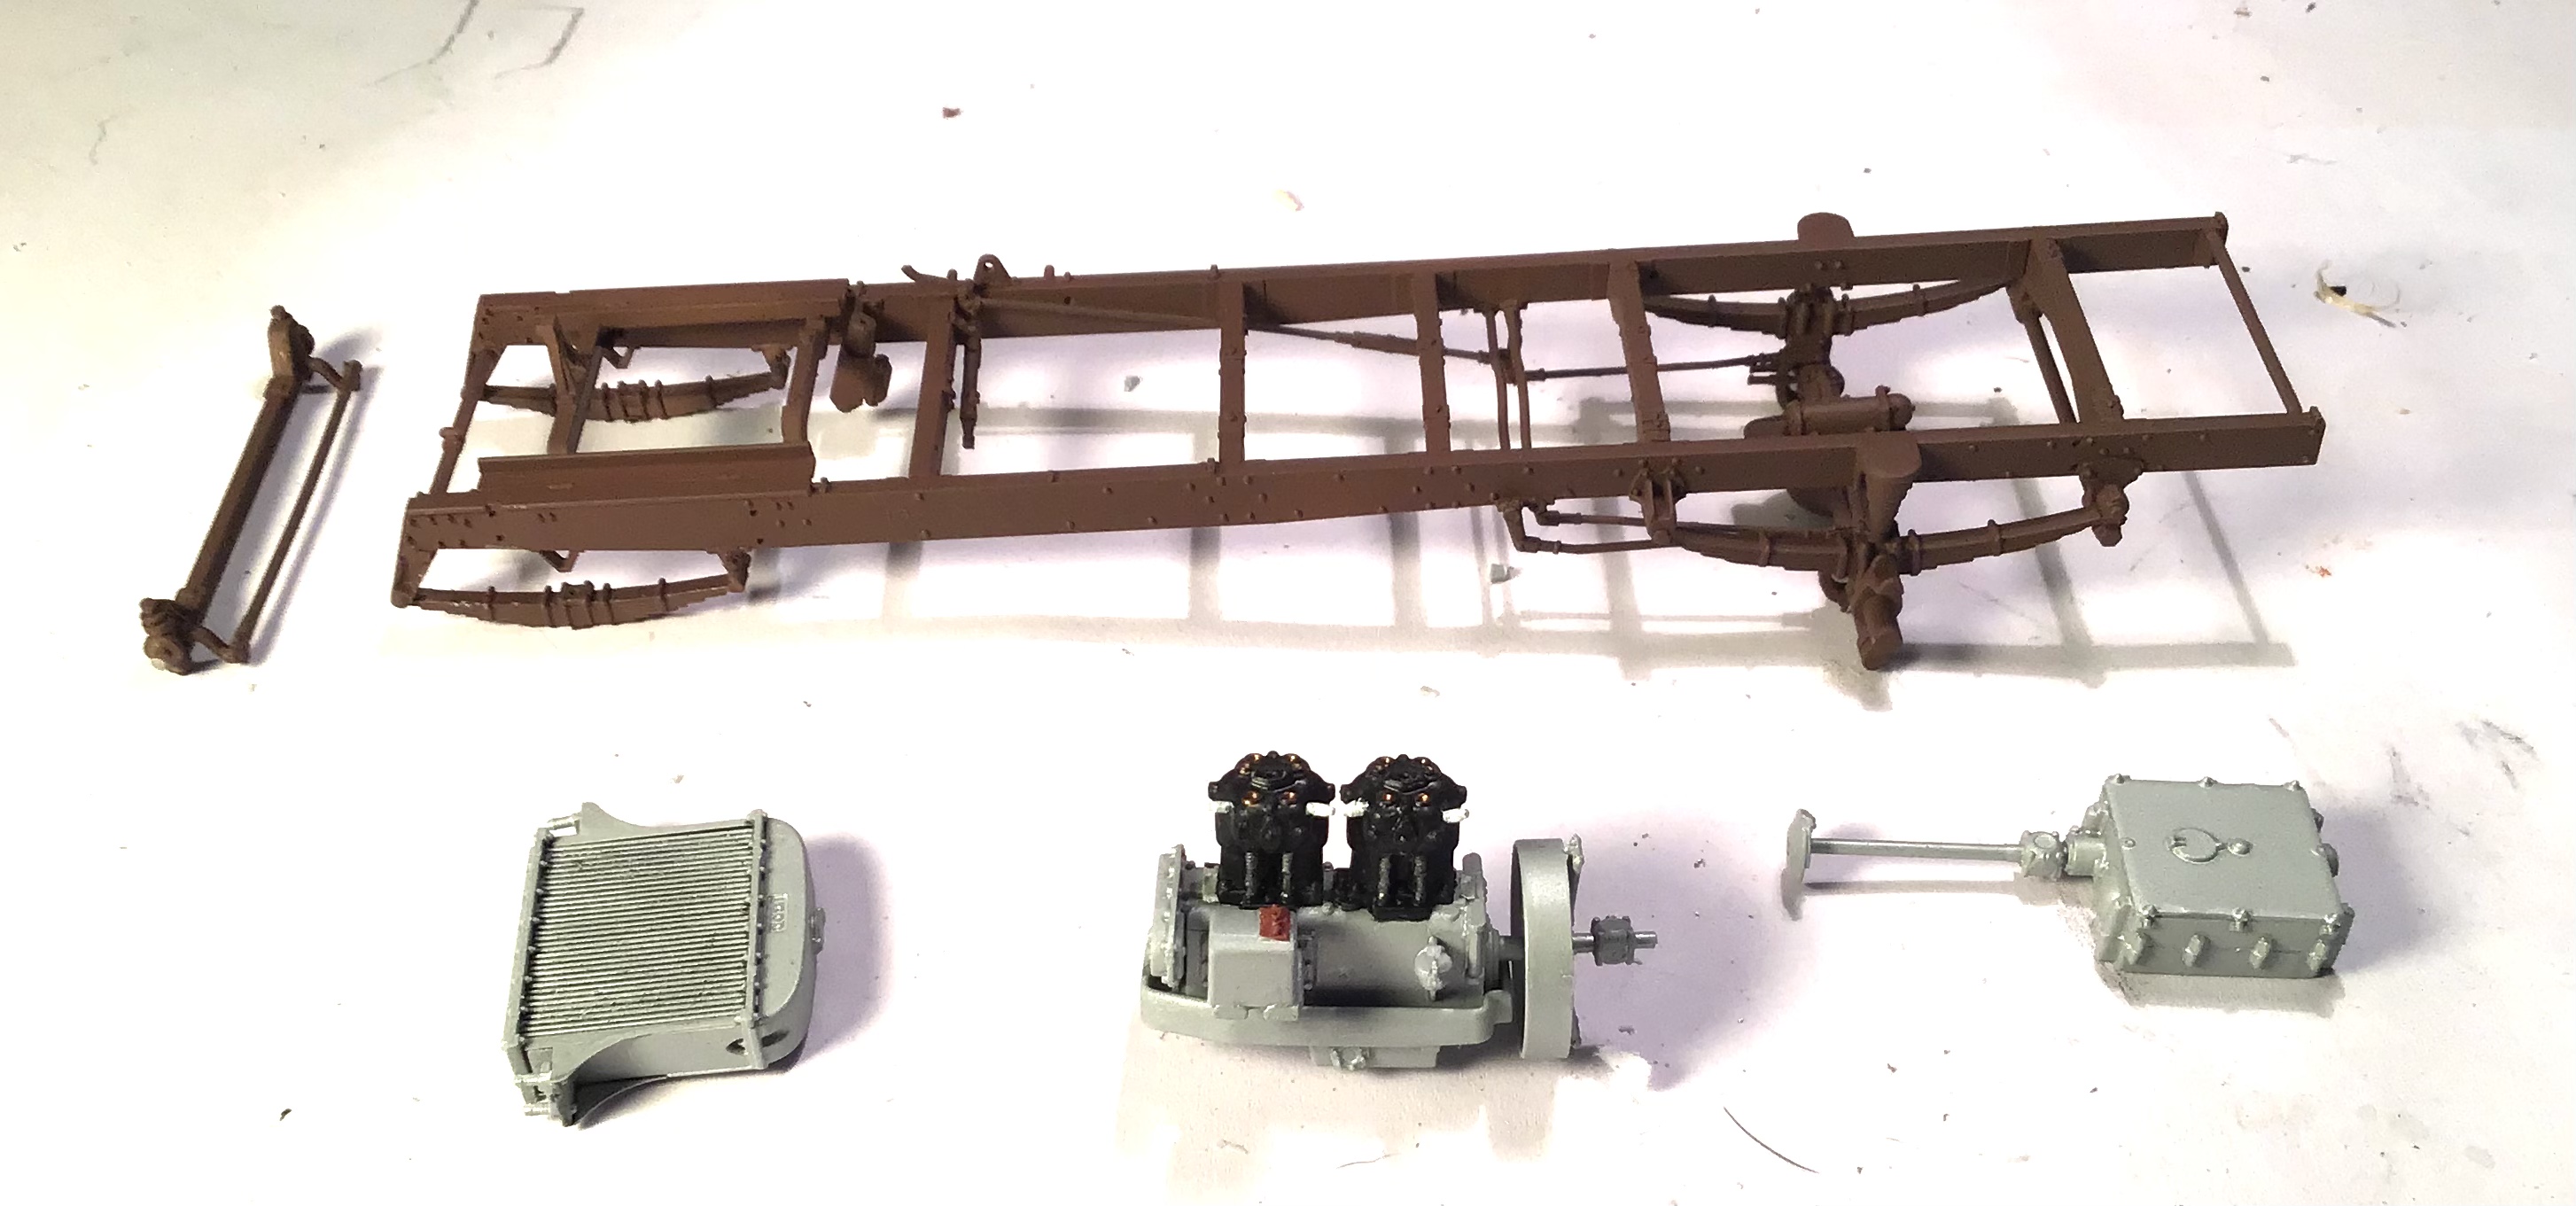
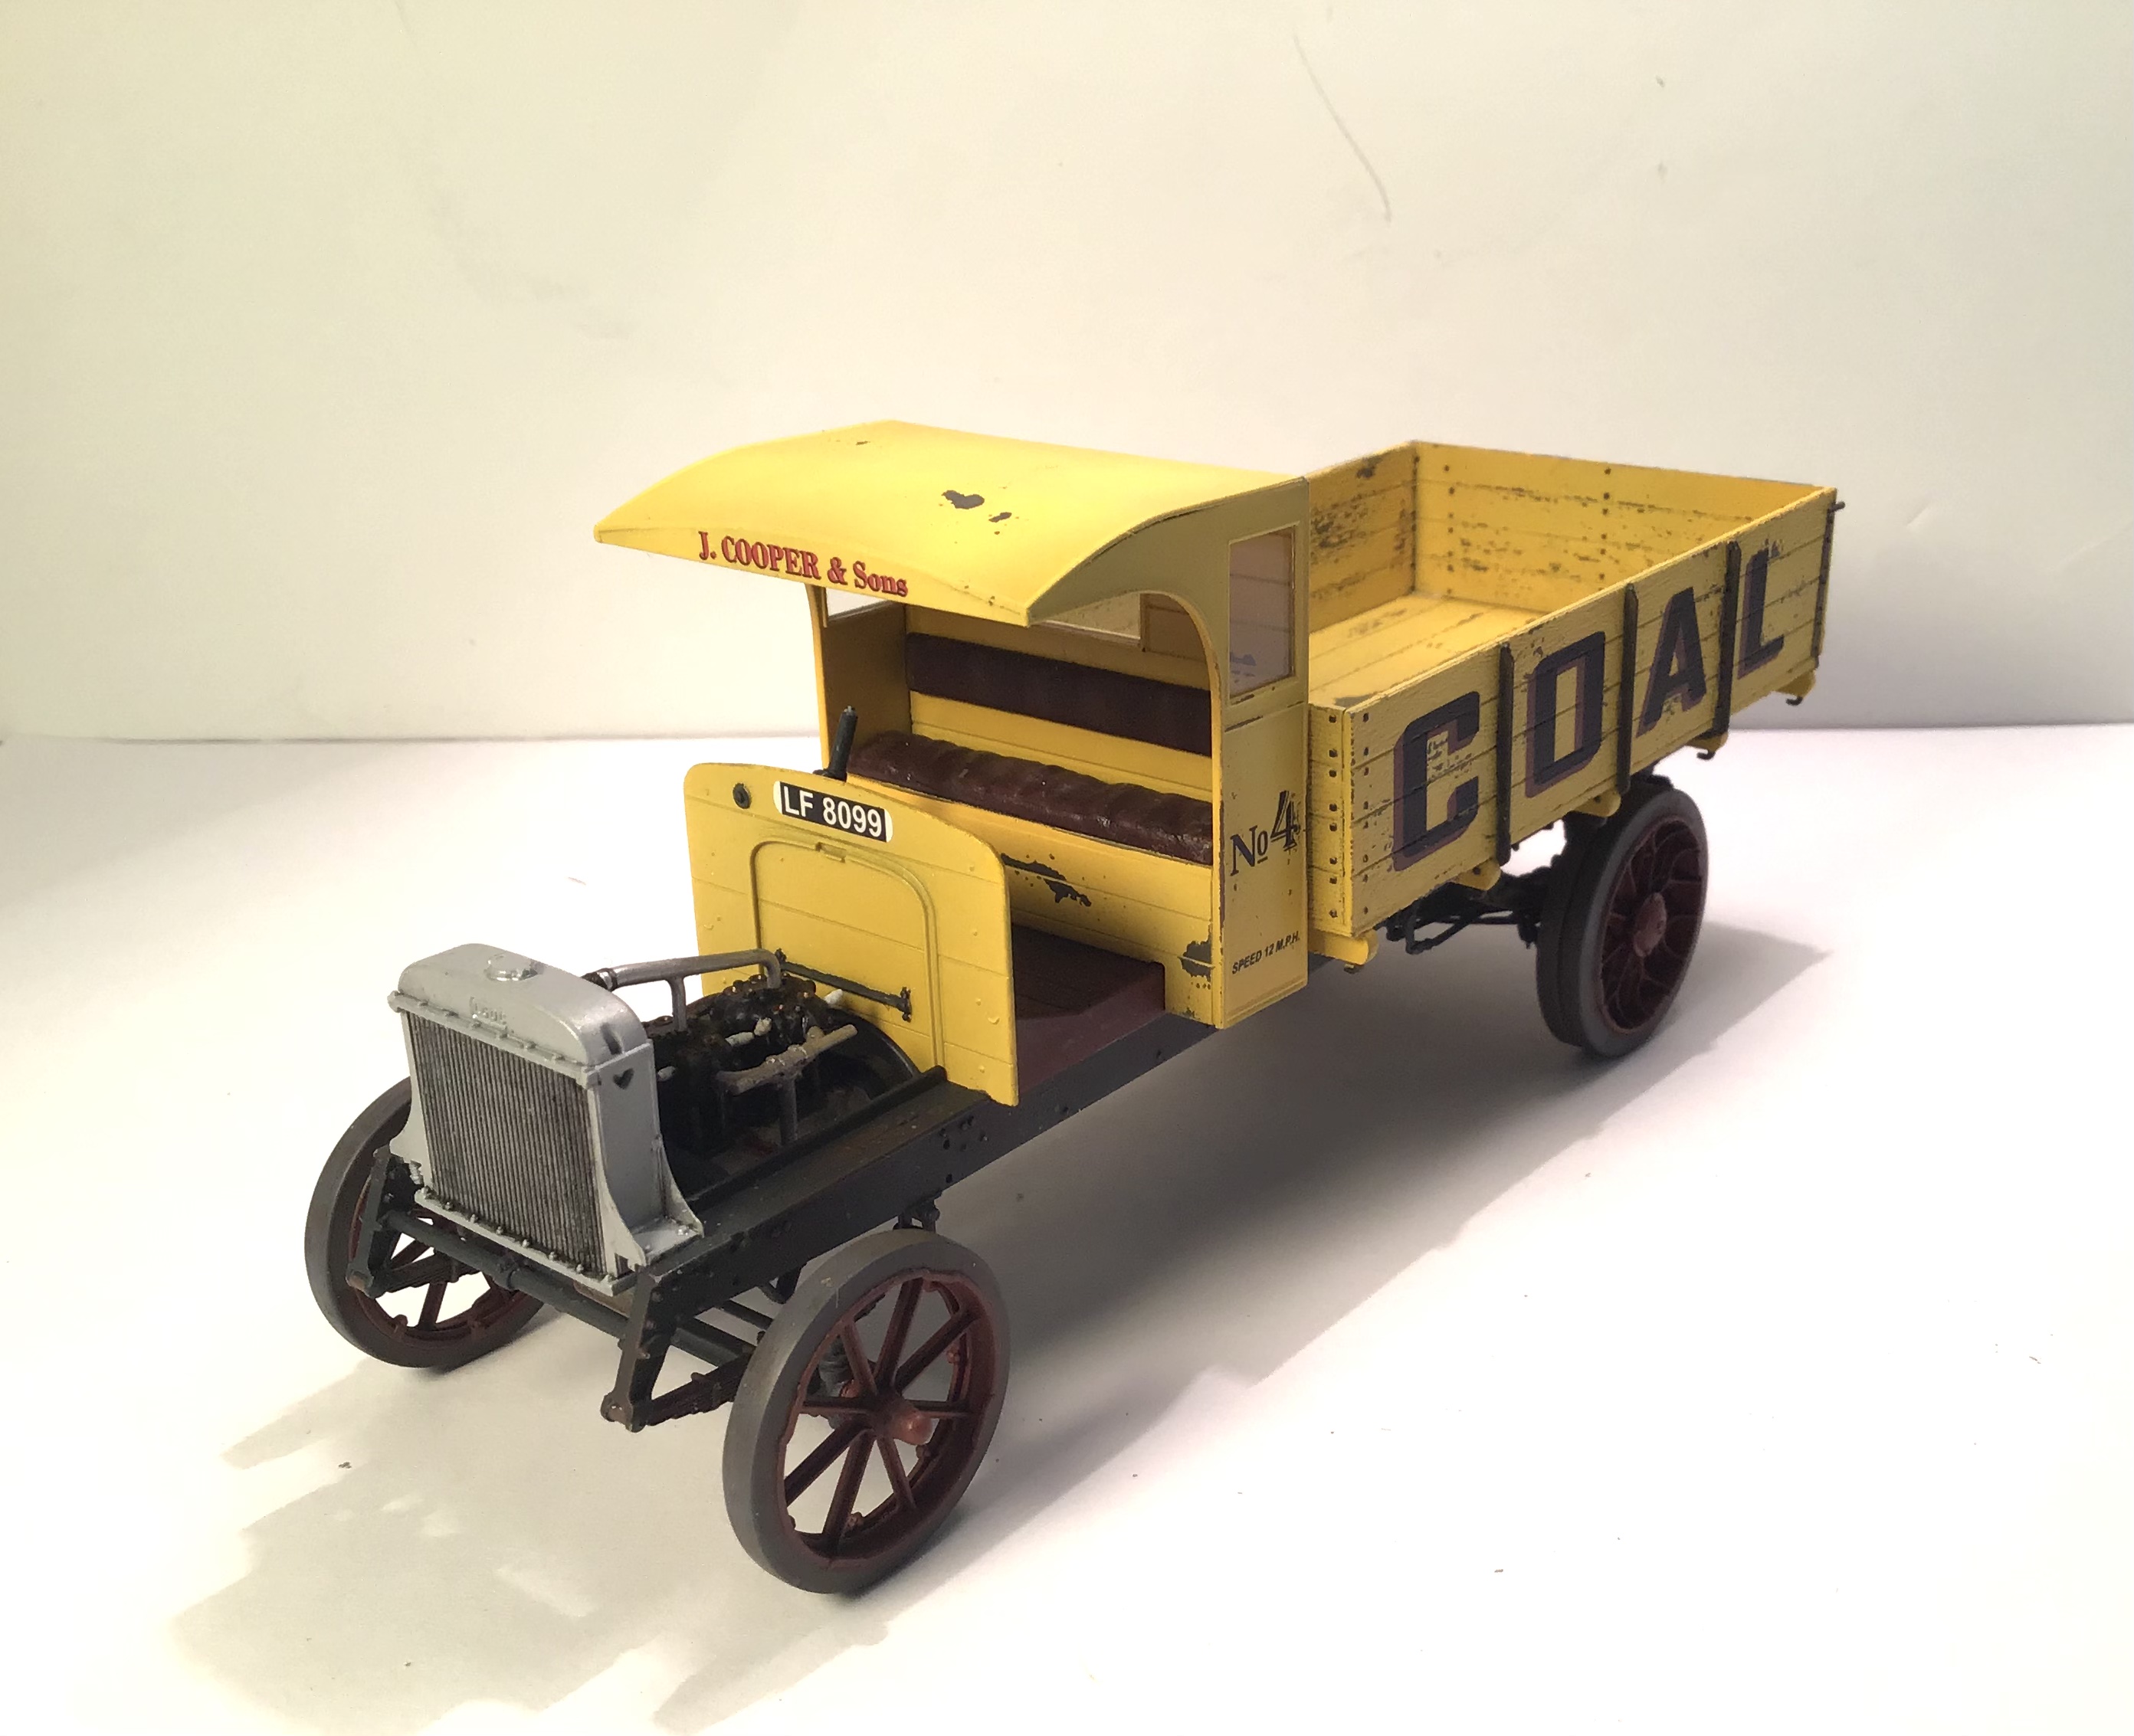
Chassis largely done - hand crank yet to install and engine wiring if I’m up to it. The kit includes tiny photo etch spark plug caps that need to be rolled into shape - we’ll see.
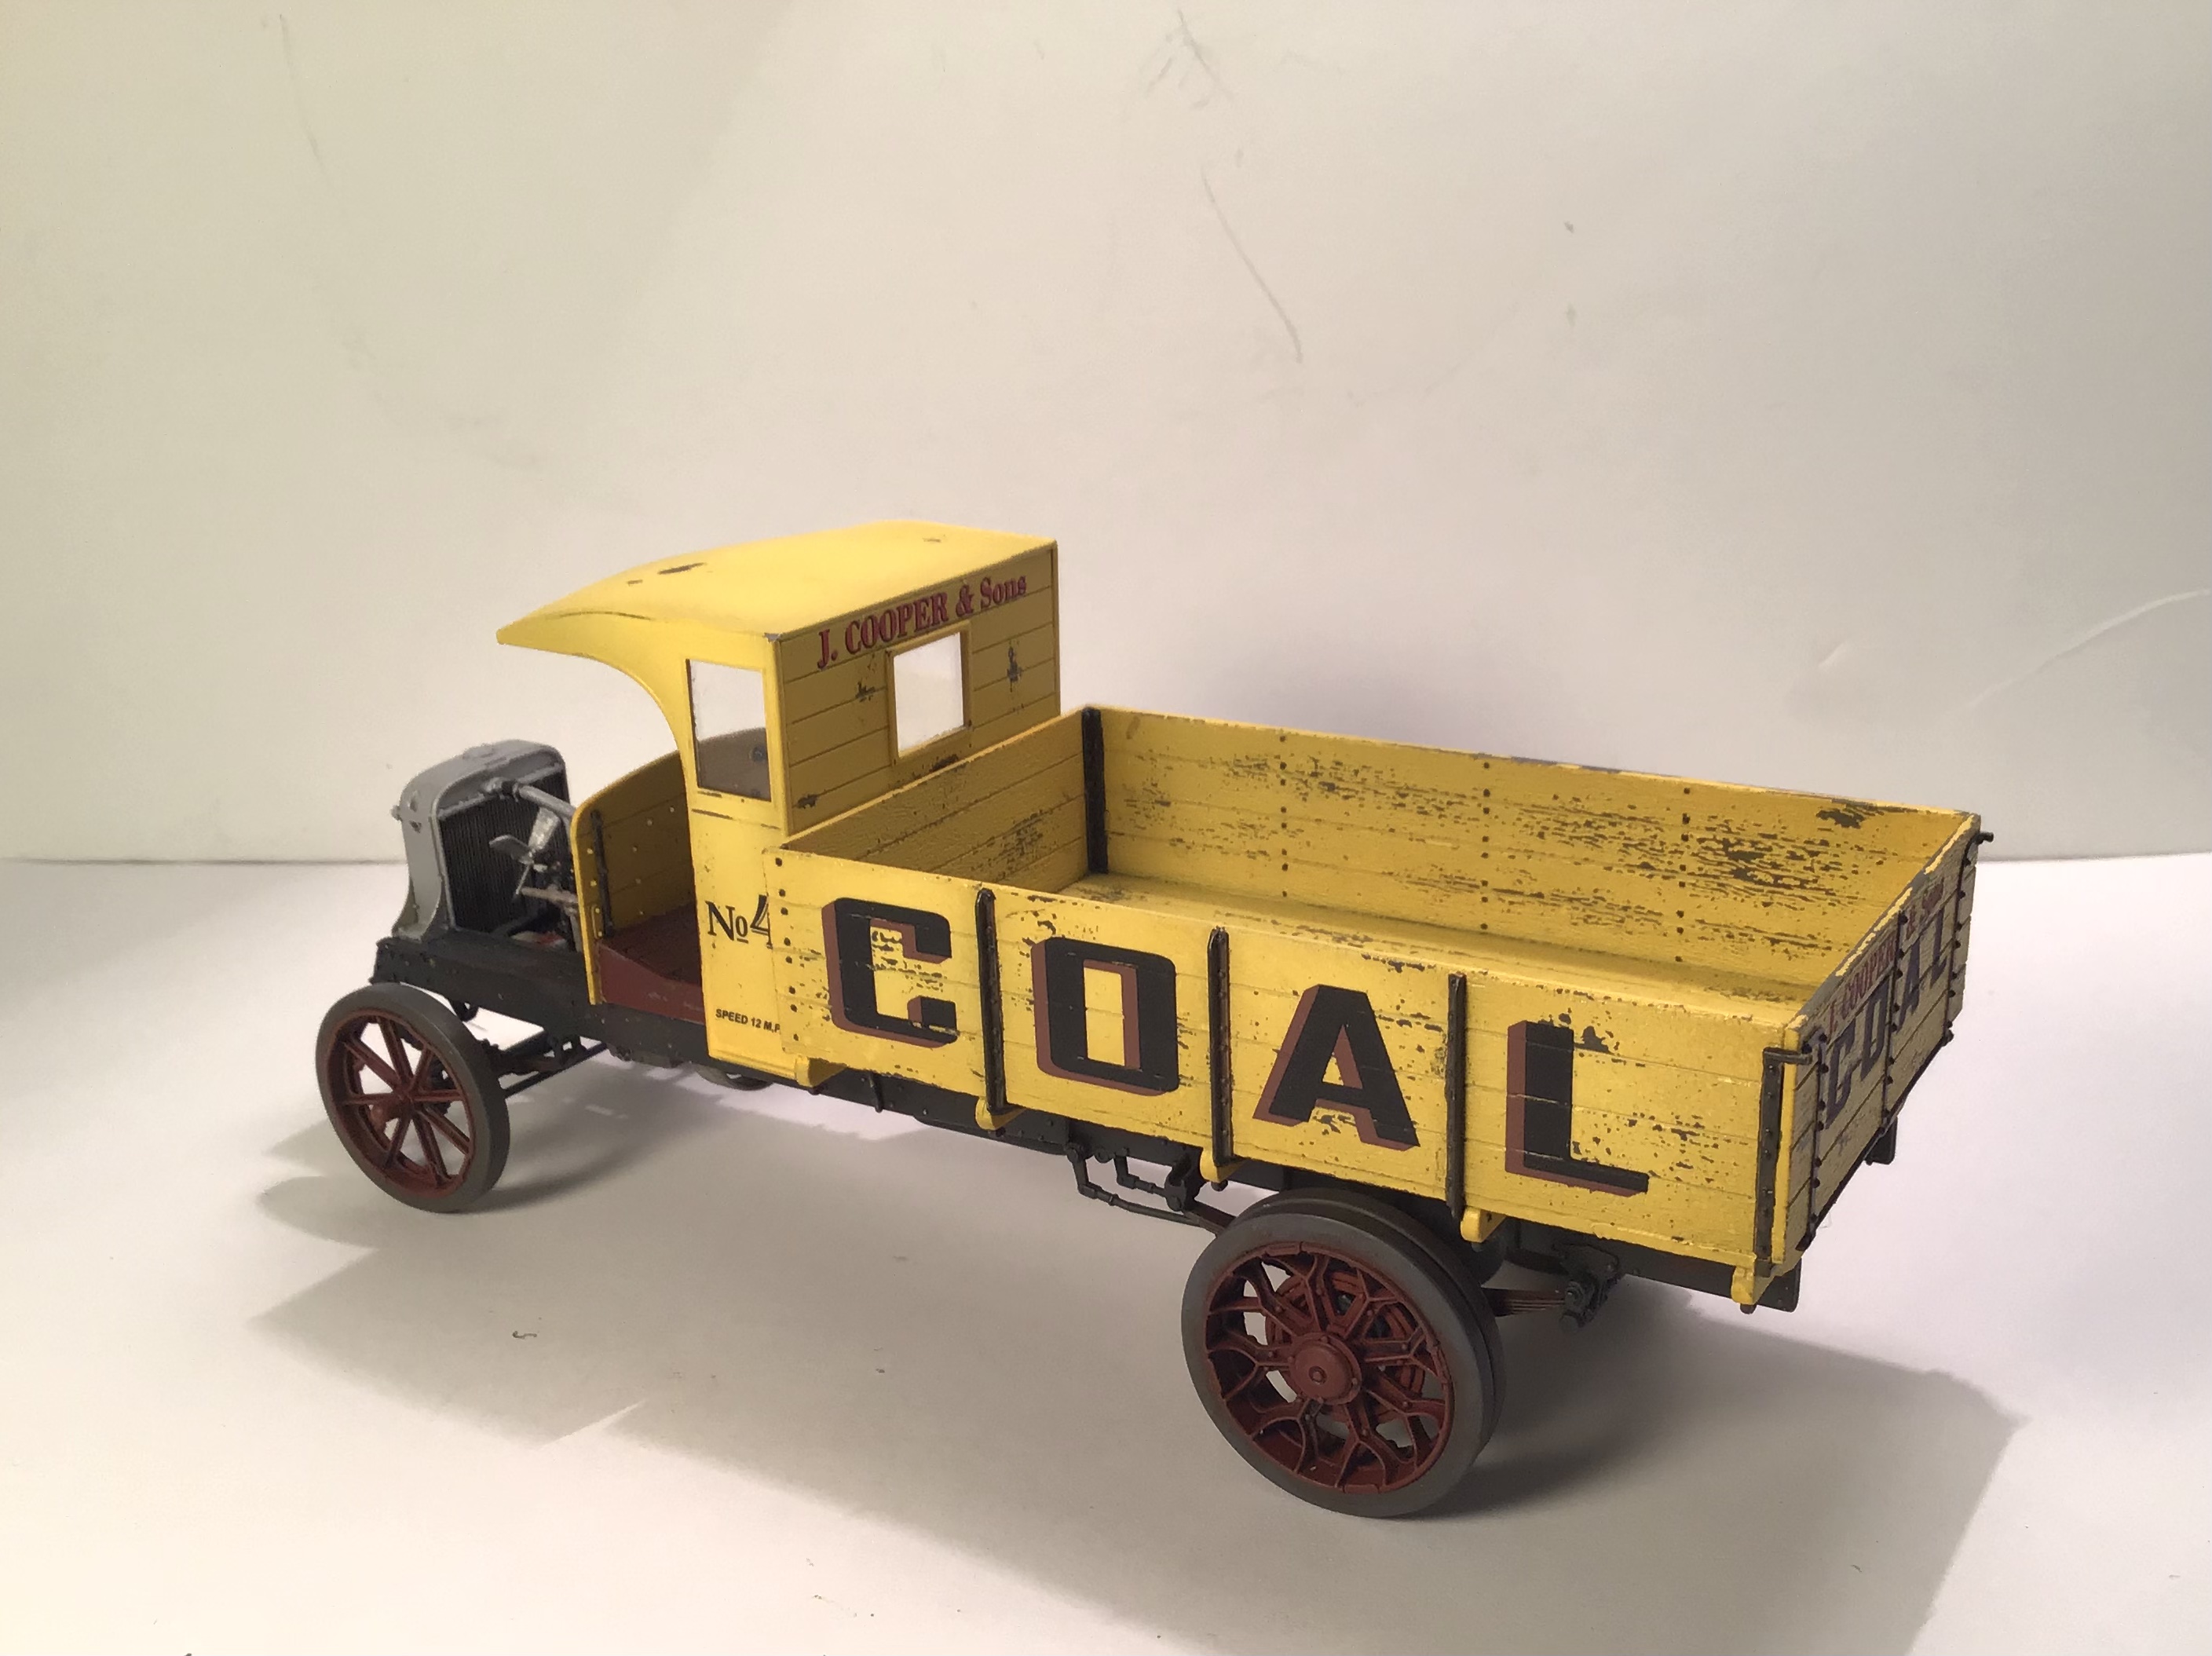
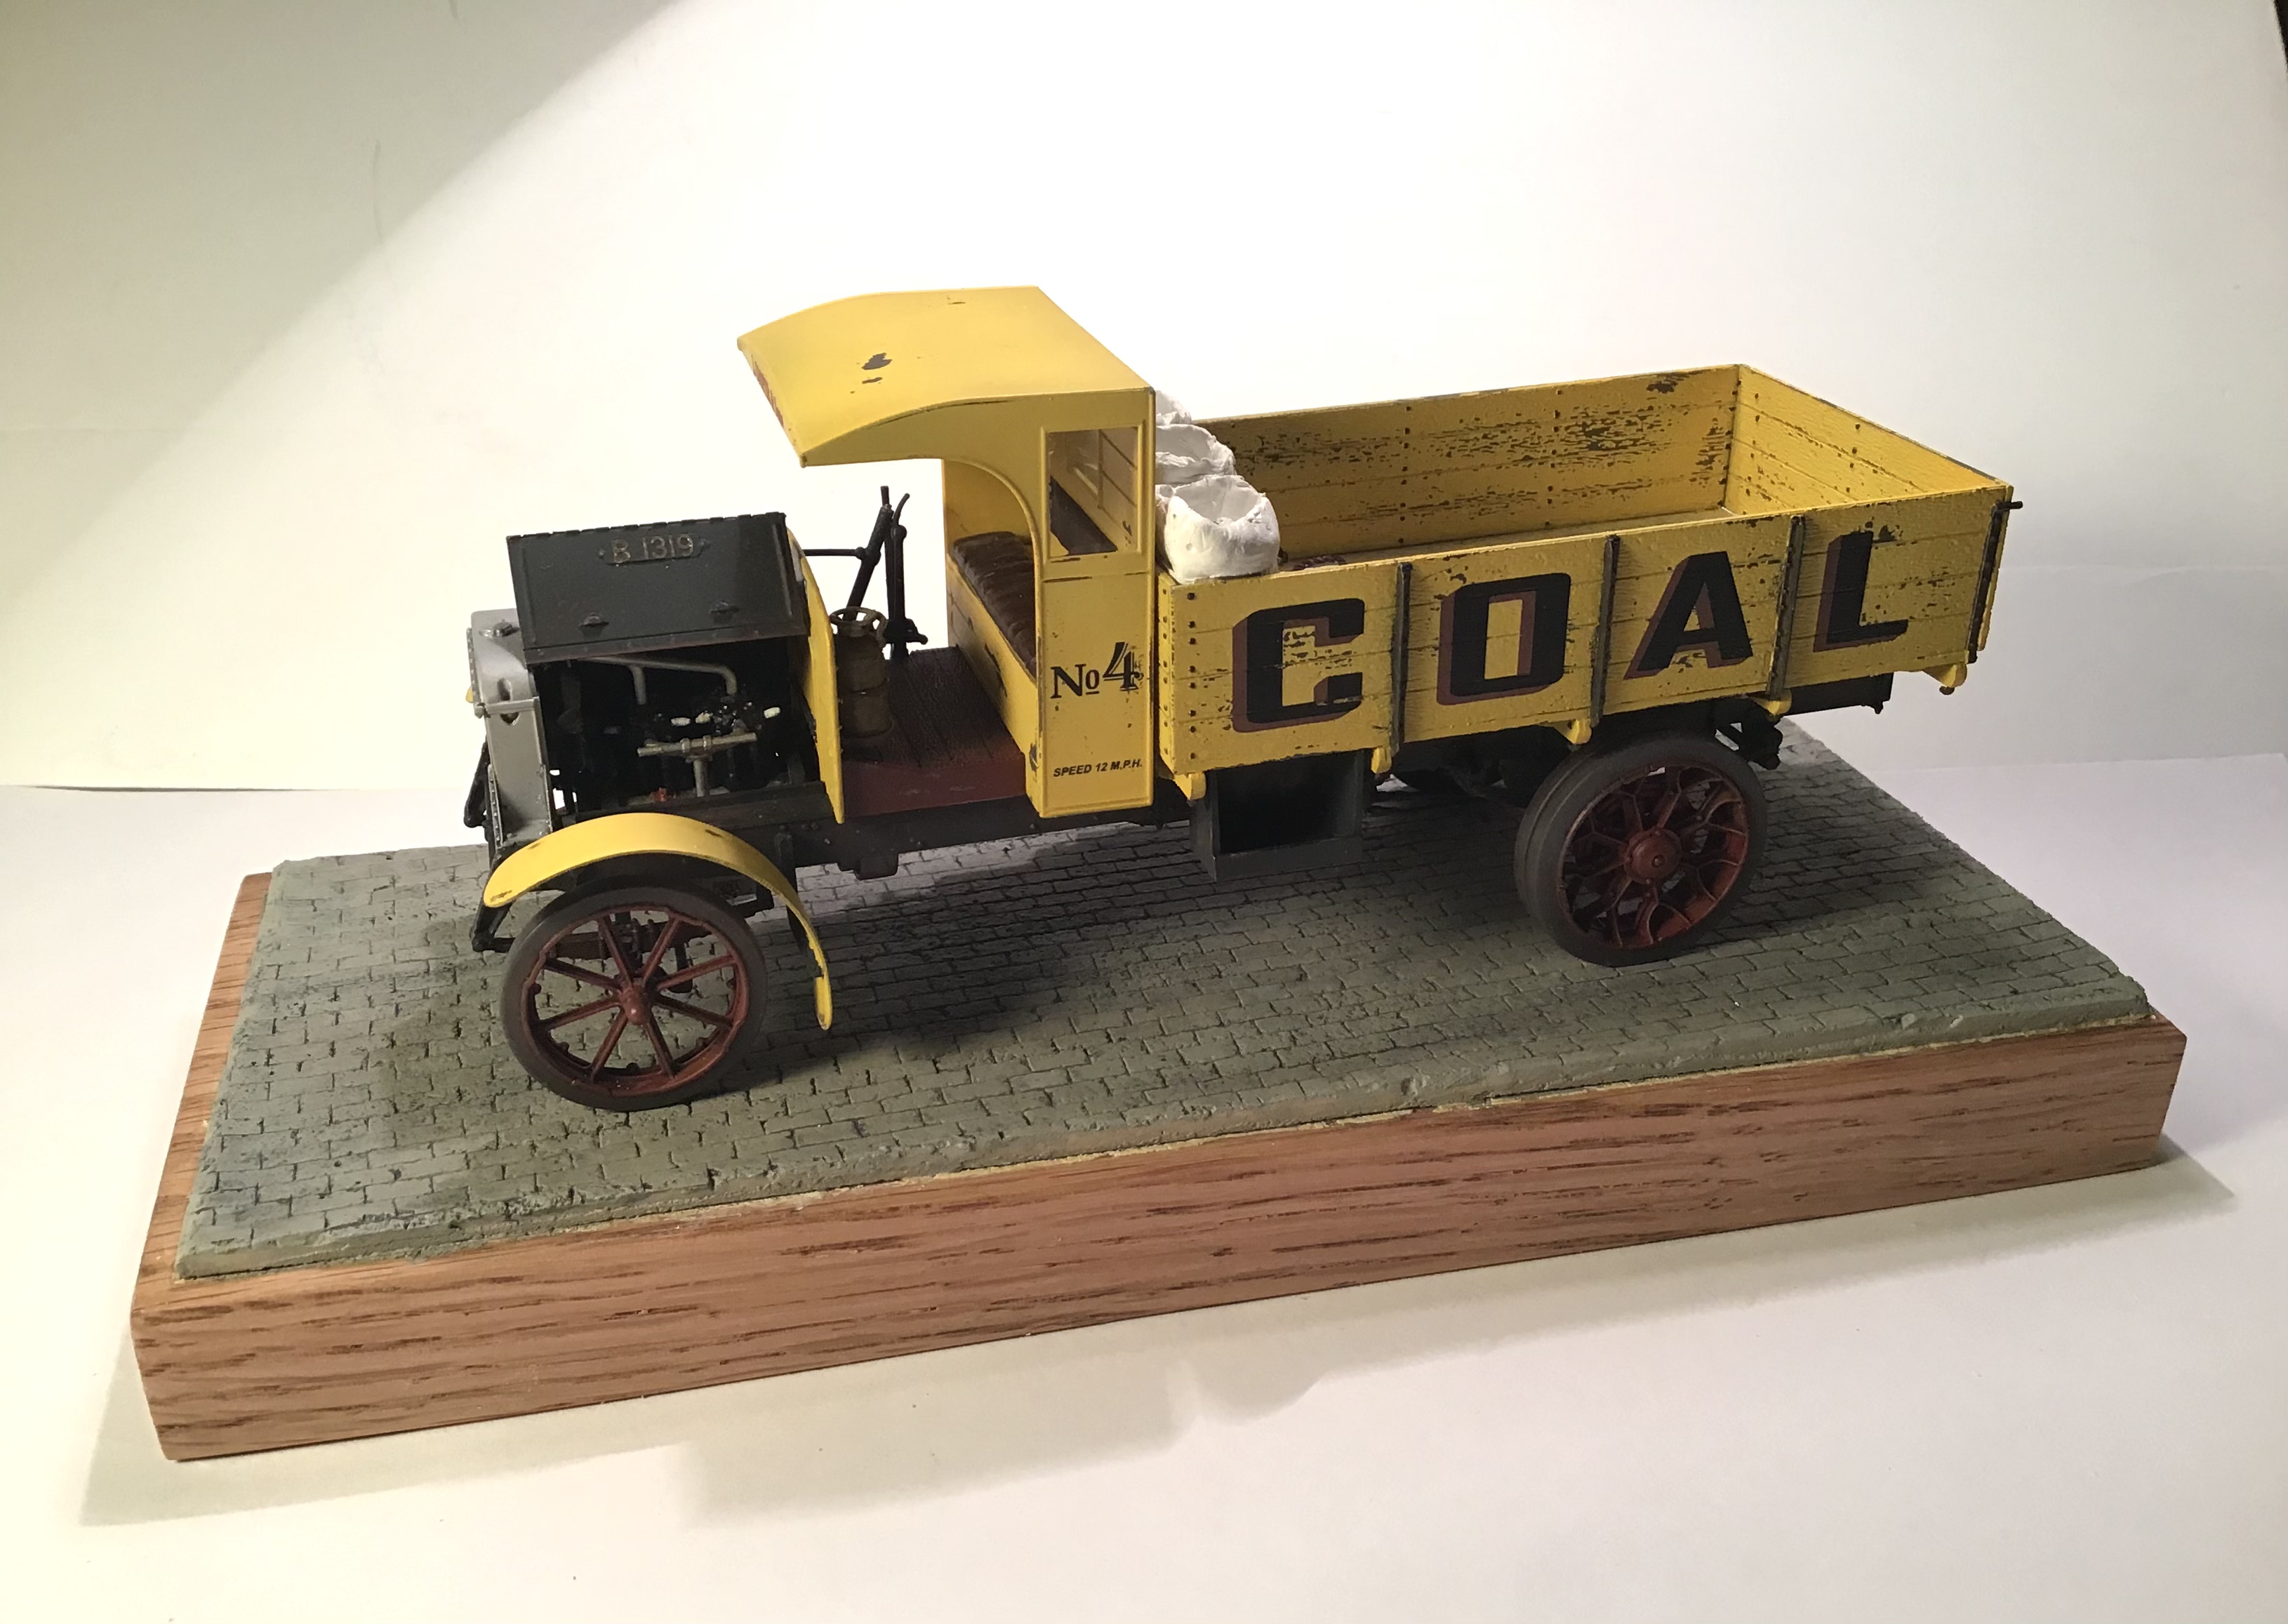
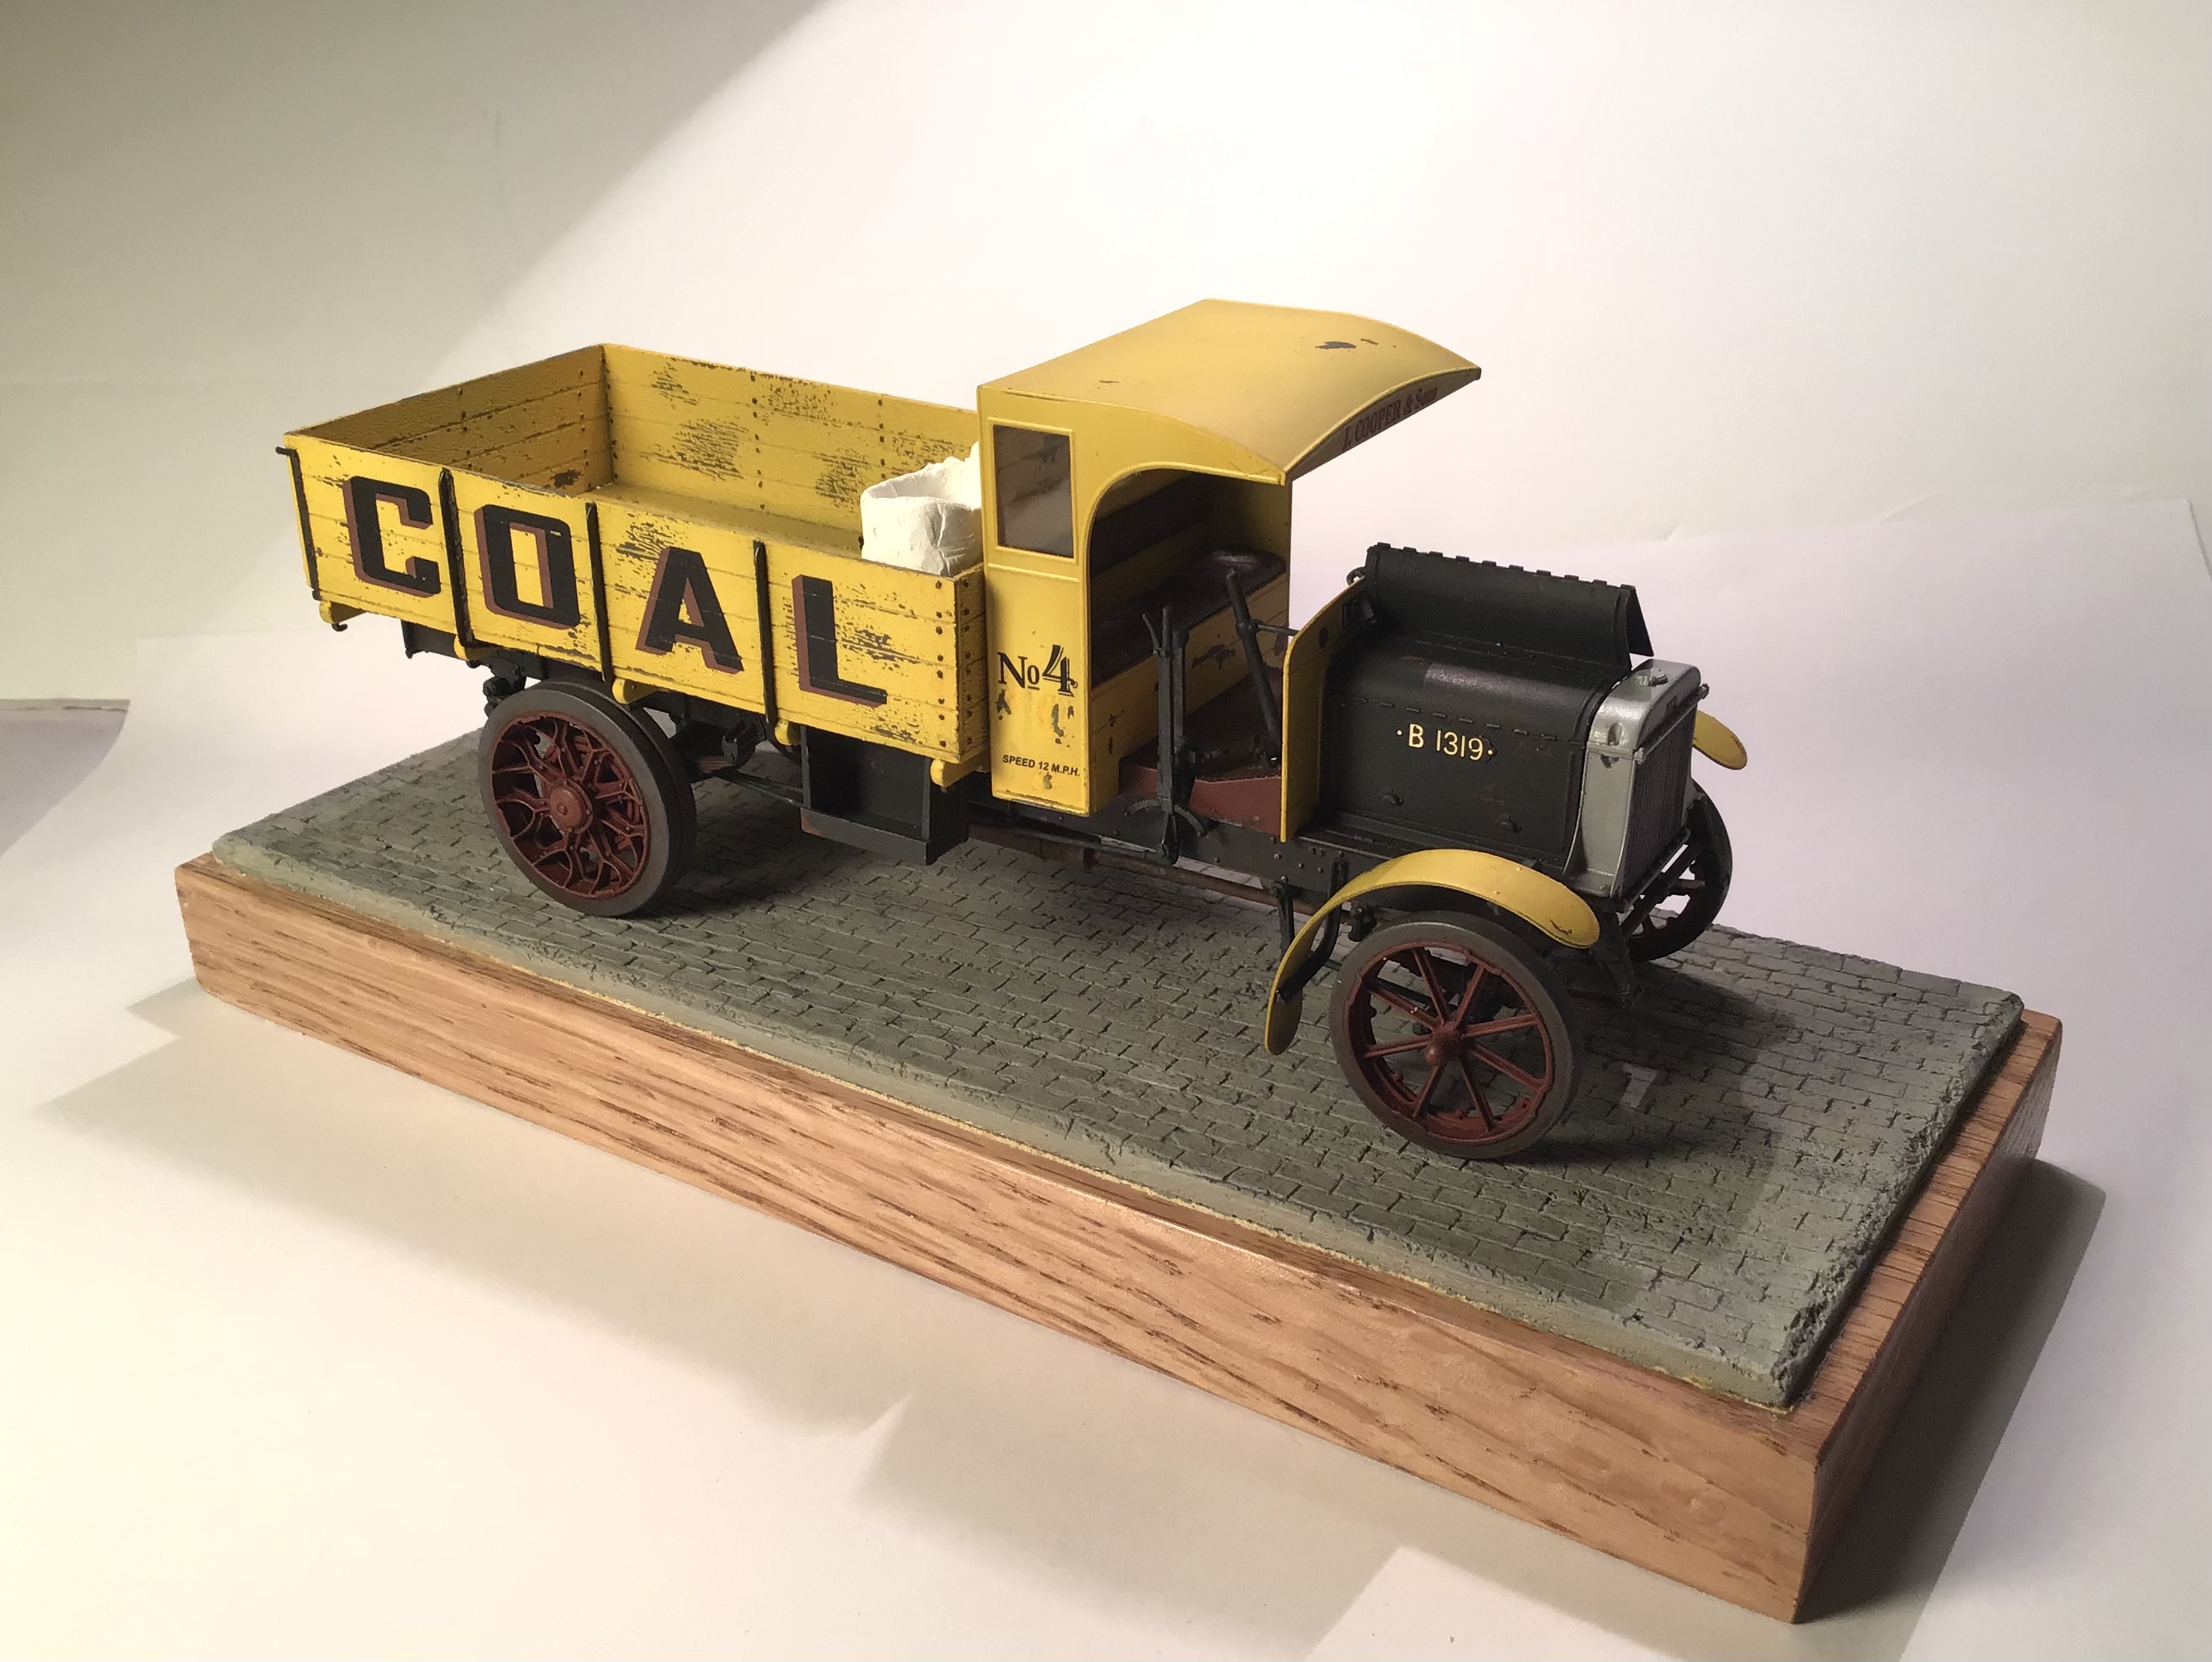
Big body parts installed - Miniart decals are superb
( in this kit at least) - Thin , strong , opaque. Absolute minimum of clear carrier film. Responded well to Microset/Microsol. They settled in beautifully.
Truly looks painted on. Well done Miniart.
Now on to hood , fenders . Haven’t made up my mind yet on attempting ignition wires .
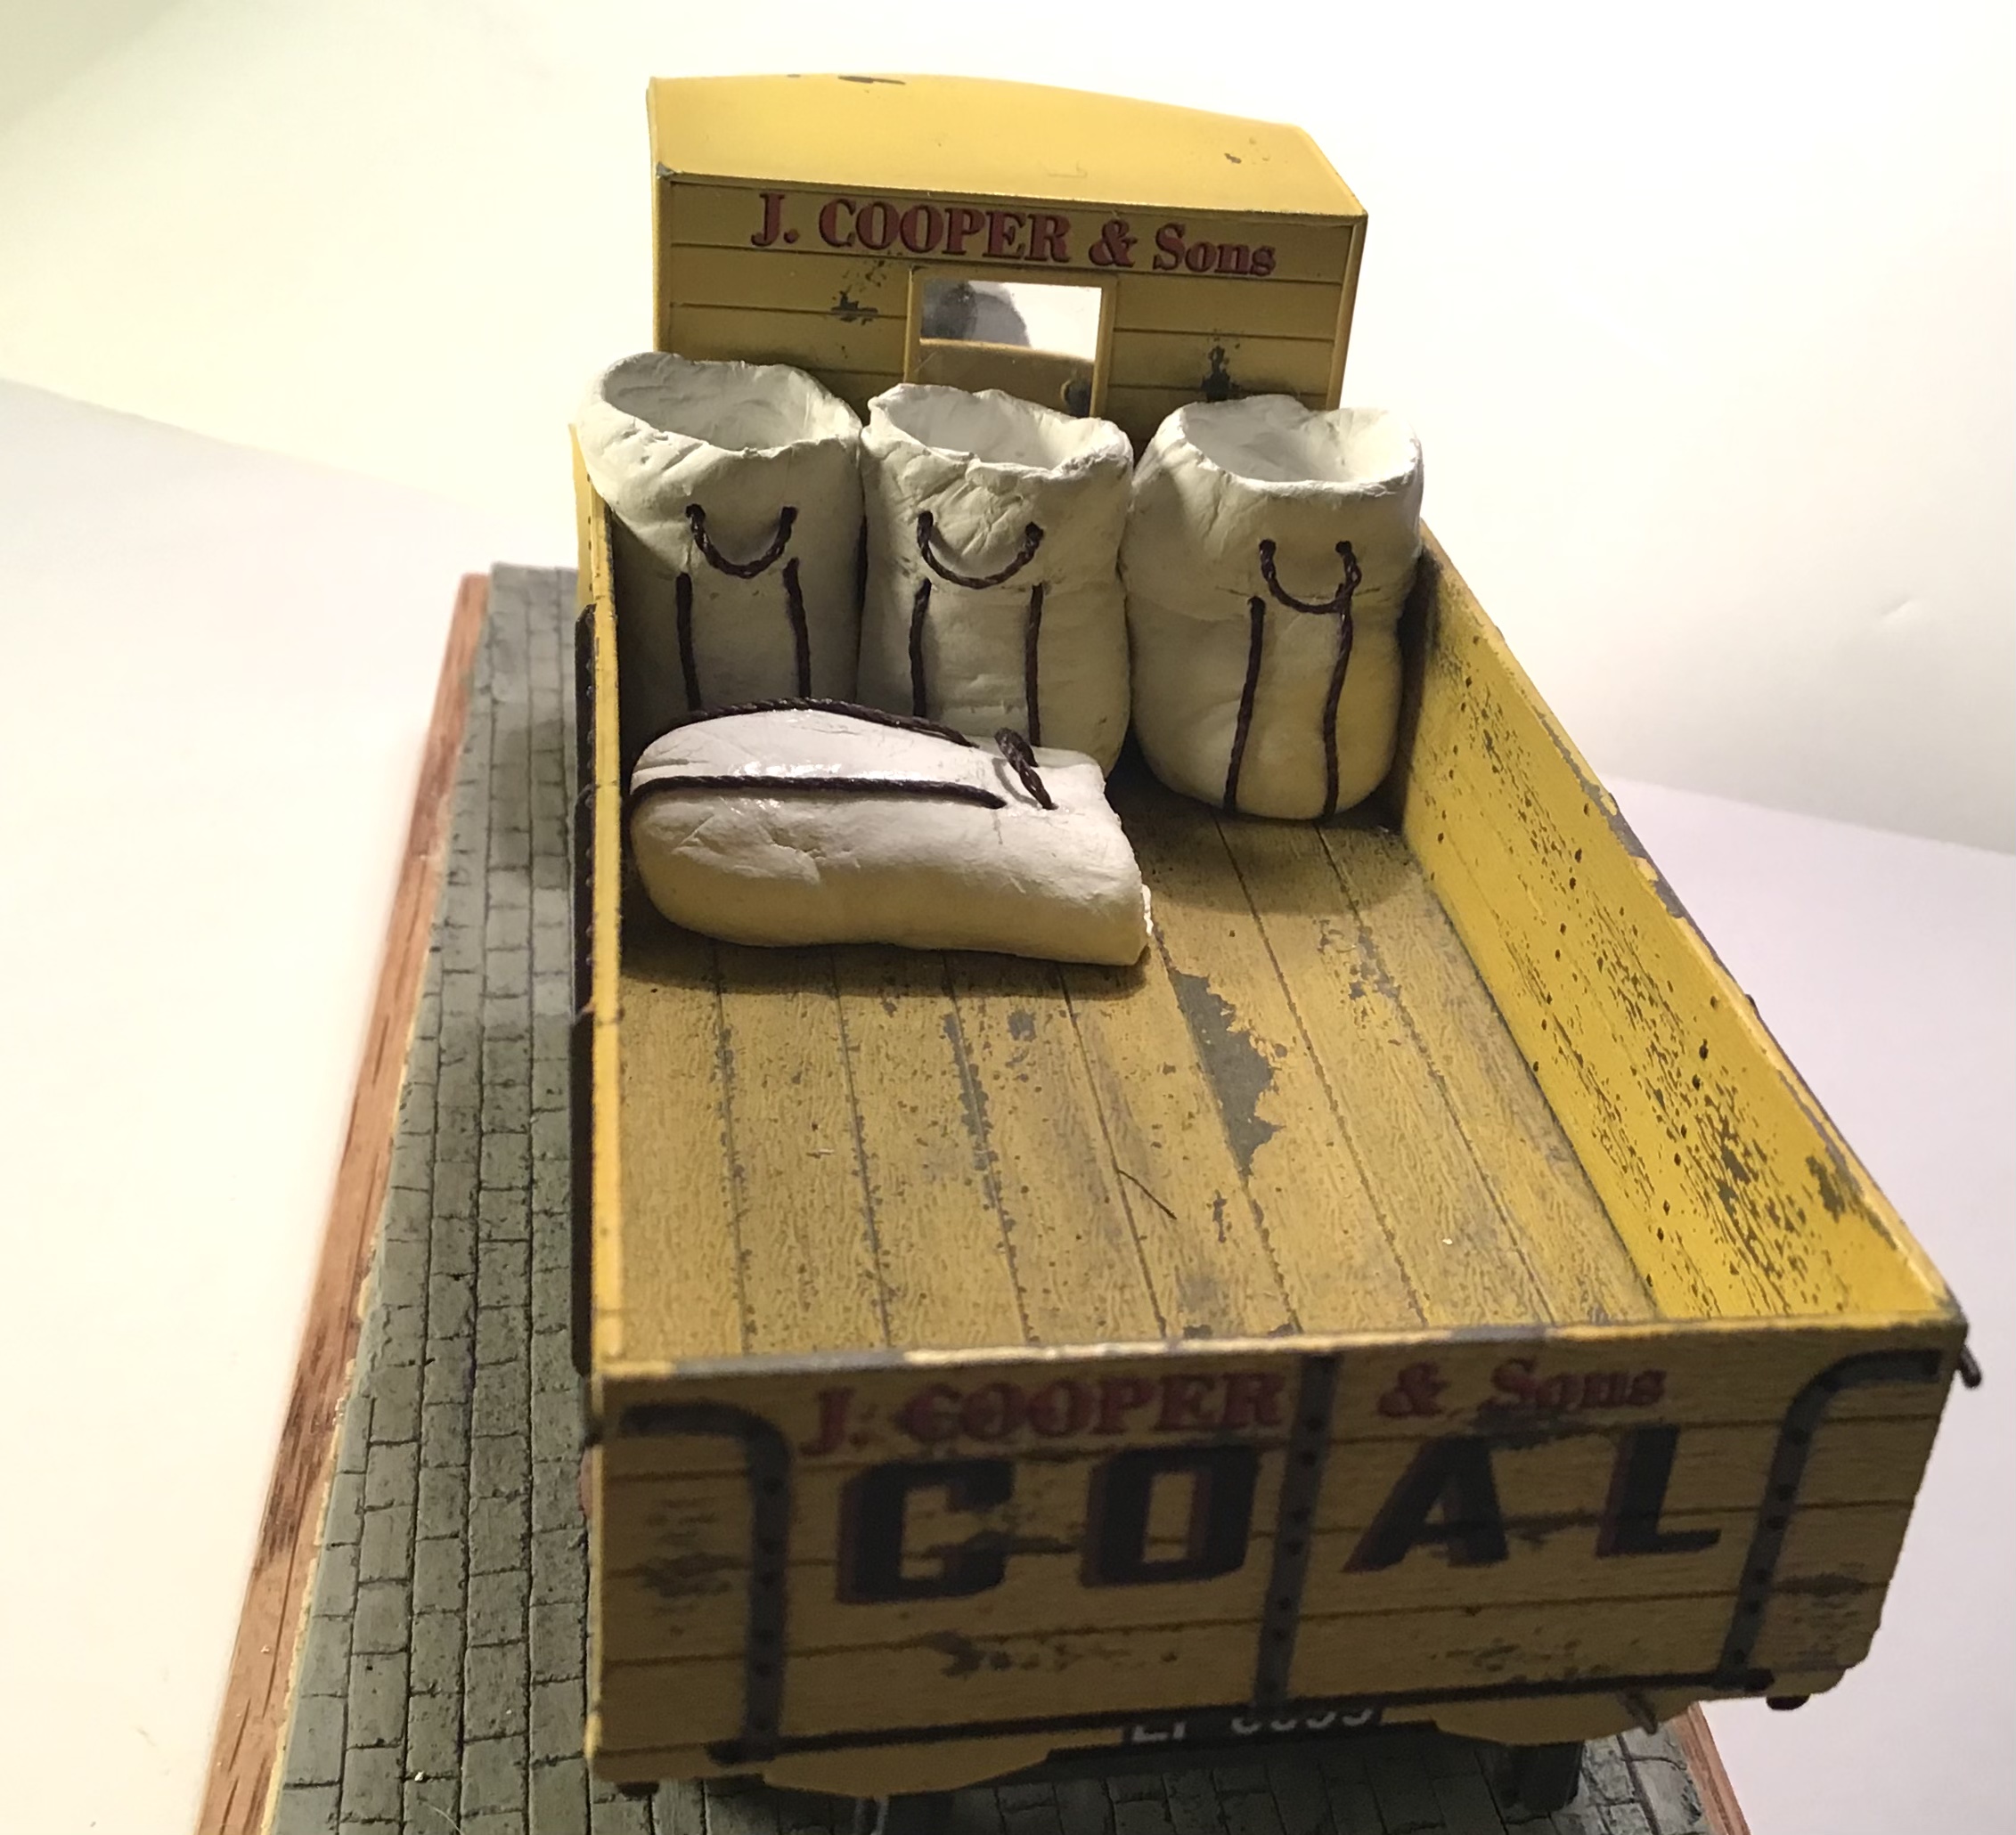
Exploring ways to make coal sacks .
Thanks for looking !
Cheers-RT
Great progress Richard, I’m enjoying your build & I totally agree with your earlier love/hate comments about MiniArt. I like everything about them & their (often unusual) range…except, it would seem (typically with the kits I buy) that they don’t test-build their products before release. I cite the quad-mg assembly on their Gaz truck as a particularly egregious example, I’m still in therapy 7 years on…
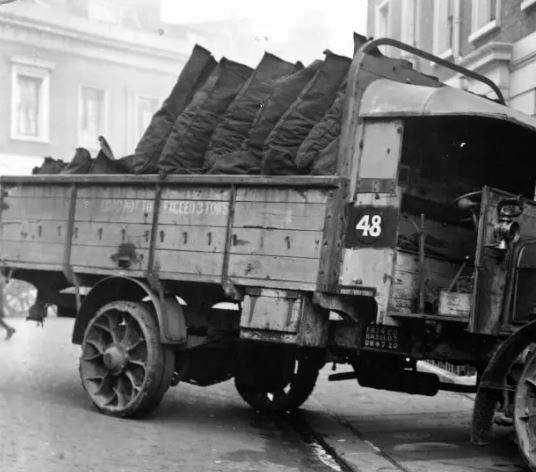
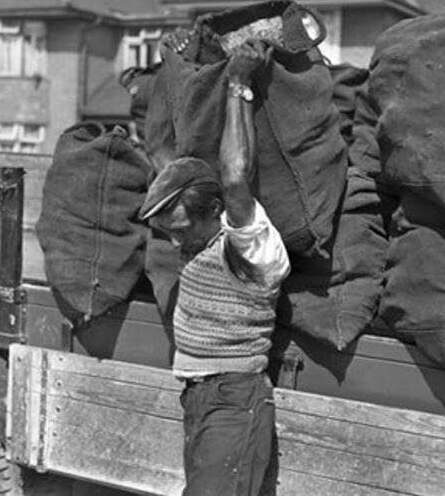
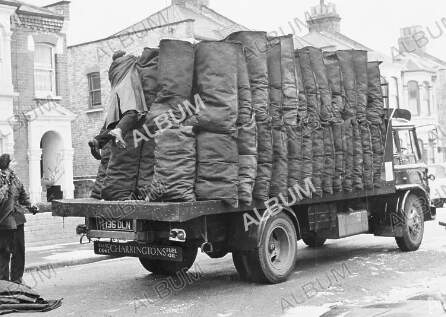
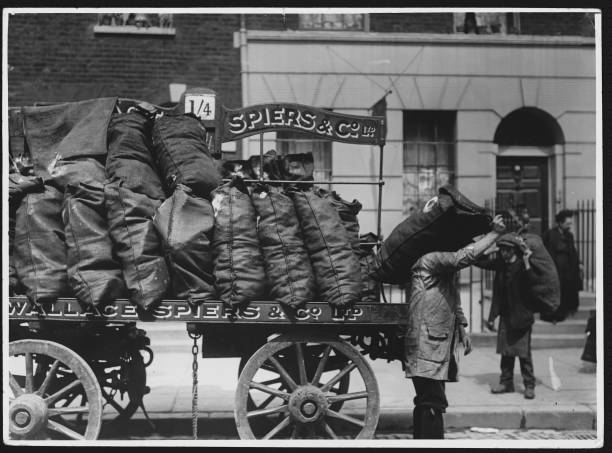
I’m surprised they didn’t supply relevant cargo for the Type B (?) – if so, doubtless they’ll release a set just after you’ve scratched your own. Maybe you’ve already looked, but this partial image (for discussion purposes only) might help…
The sacks look way large/heavy for carrying, maybe they used trolleys. Looks like a bunch of empties at the back. To replicate them resin’s one solution, another might be paper-towel grade sheets soaked in PVA (to prevent tearing) then cut to a sack template, folded/glued & filled with sand or whatever? With some pre-scrunching the creases could look OK.
Those sacks were big. It’s the reason you didn’t pick a fight with the guys that delivered coal or indeed blocks of ice (for old-time ice-boxes) - they had biceps that even Popeye would envy!
Coal sacks underway. I wound up sculpting them in epoxy putty. I tried gift wrap tissue but they just crumbled . I next tried making actual sacks with epoxy putty but again no success.
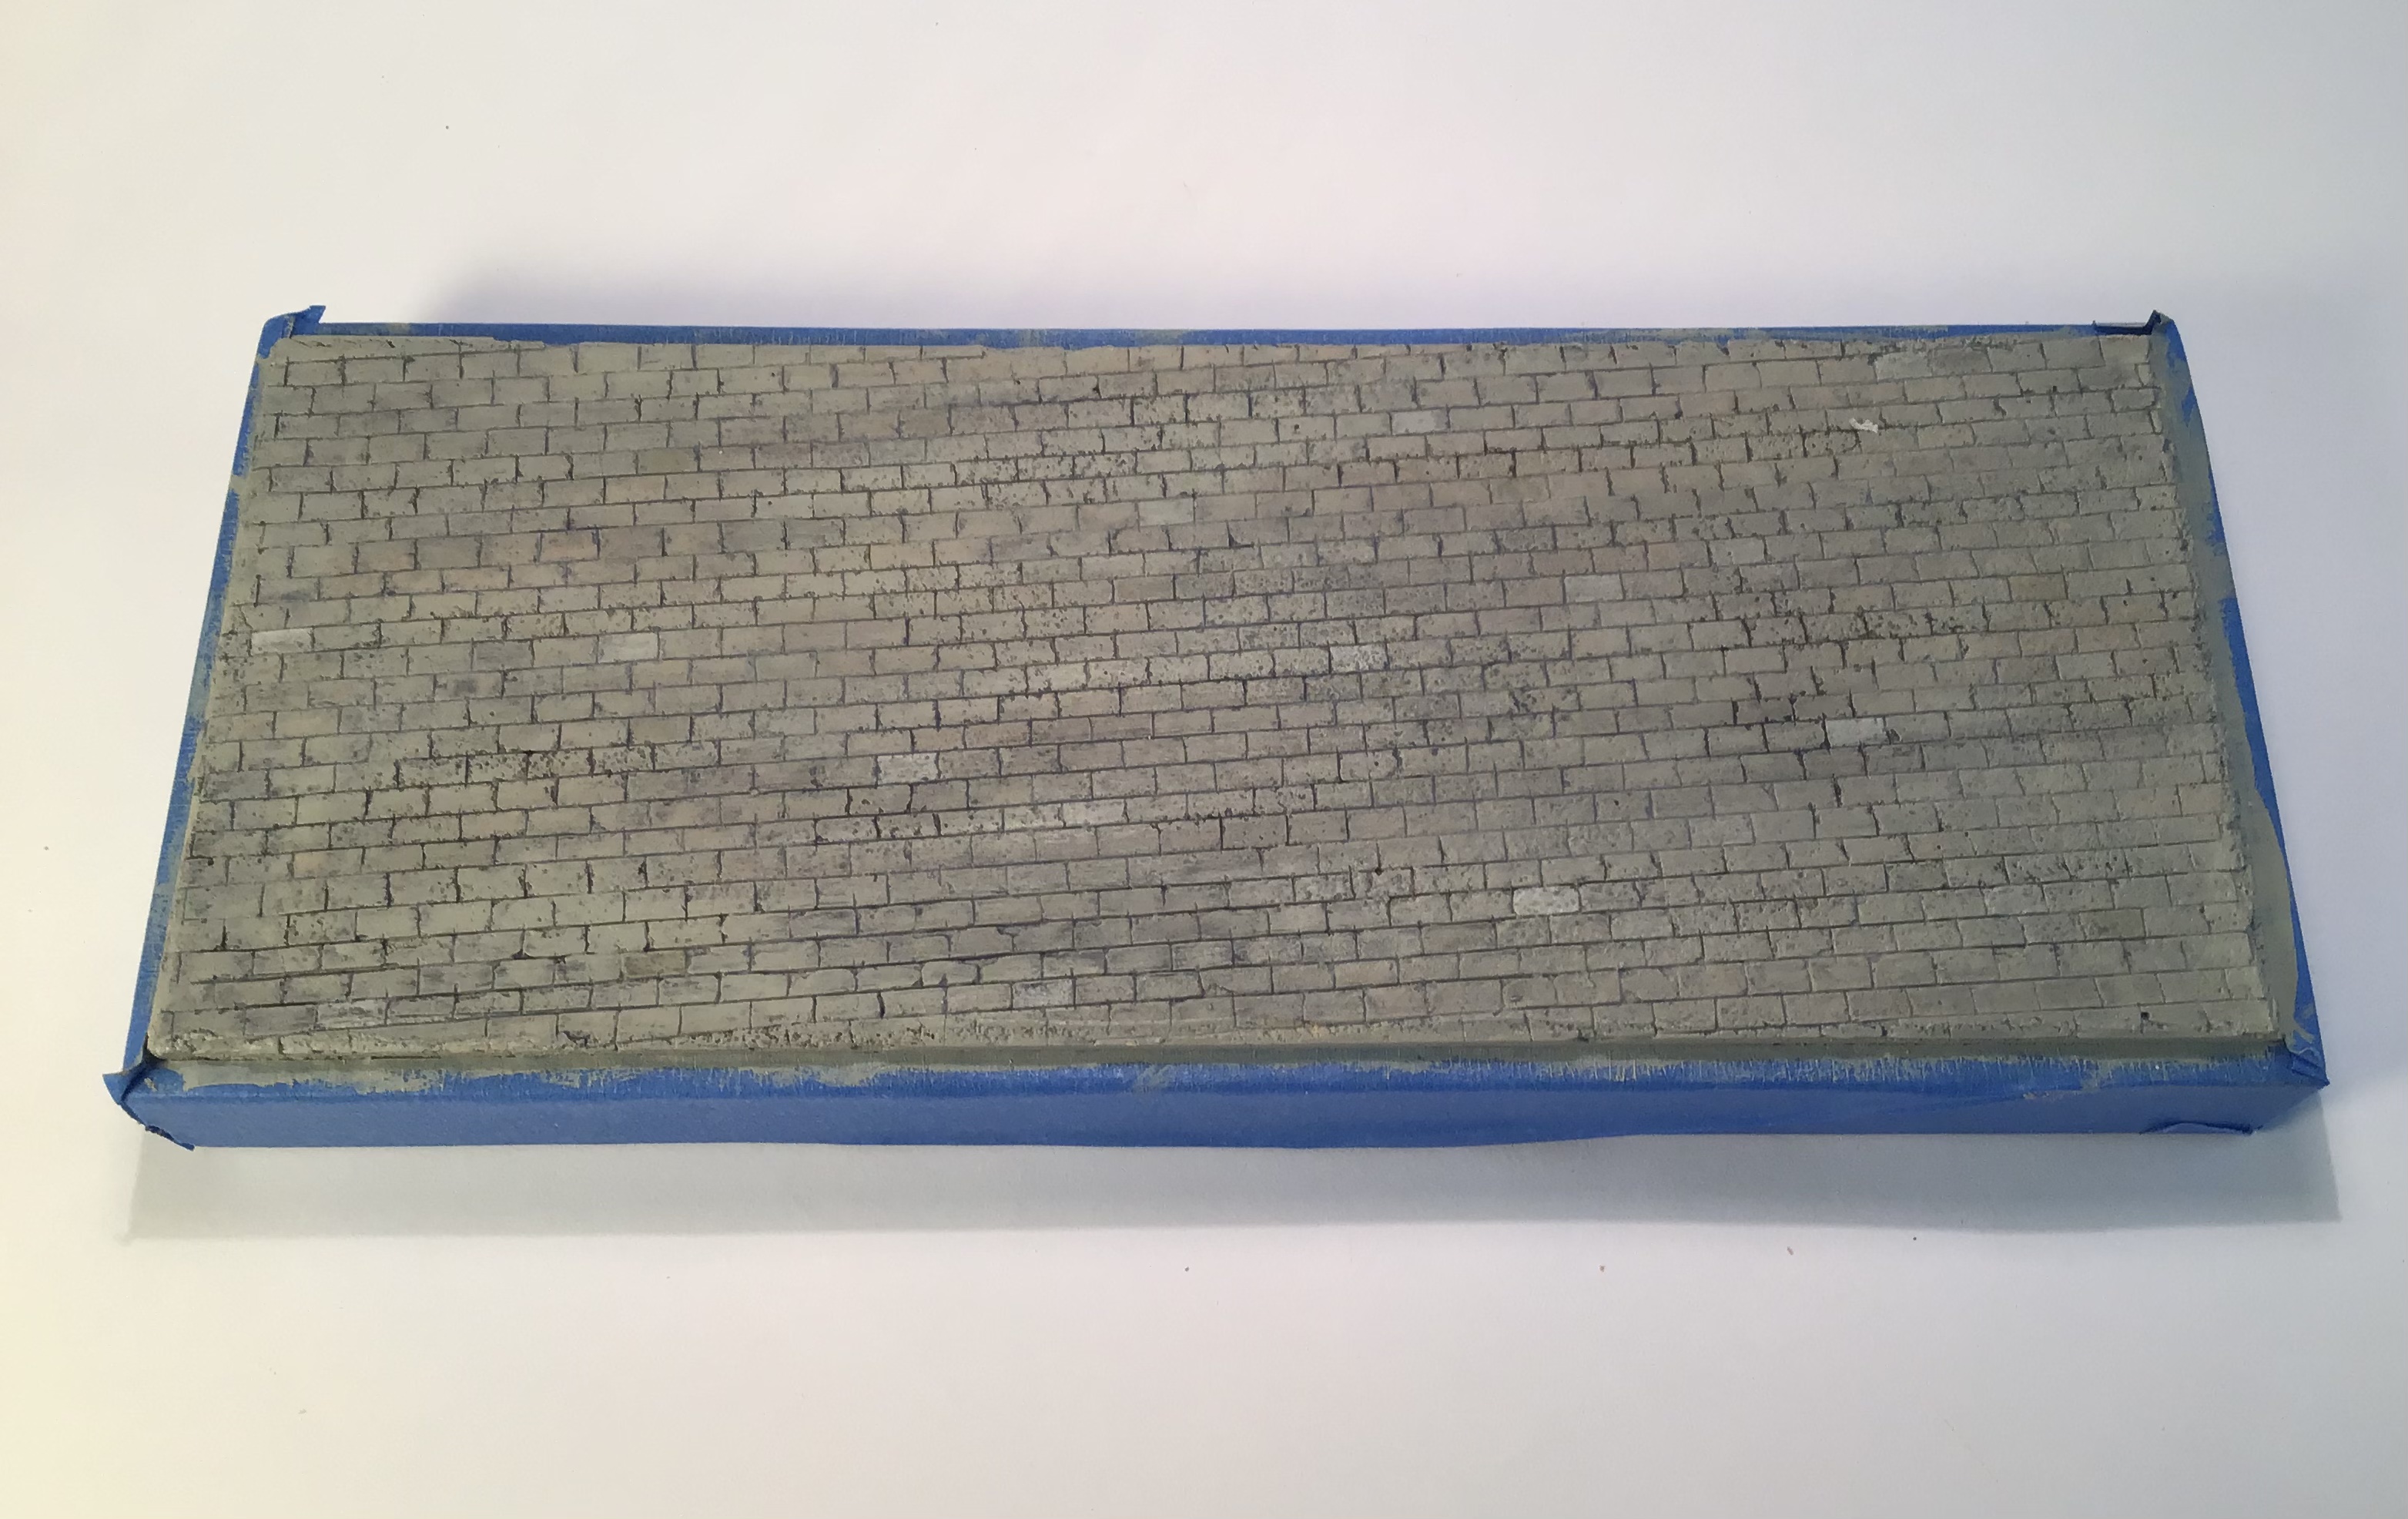
Each sack was formed from a solid lump with the top hollowed out . In hindsight I should have worked all this out before painting the bed . For fear of damage to the paint work I made a wood fixture to the inside dimensions of the bed to fit the sculpted bags to . The fixture was lined with tape and given a coat of paste wax as a release agent .


