I will say, having a proper jig to hold the engine, would make difference. I tried a couple things, but ended holding it by hand for the last few lines.
2 Likes
So, i got a jig in the mail yesterday. I slapped the motor in and got the engine lines complete. I’m happy that part is done. I’m dreading knocking them off.

Now i can put on the parts i knocked off and plan for the lines in the engine compartment.
Whew. Honestly, that’s how i feel.![]()
9 Likes
After a break from my last steps, it was time to plan the plumbing lines in the engine compartment. It went a lot smoother dueto the thicker copper wires i used. But still fiddly. I couldn’t use th clamp i bought. But i got it.
I finally sprayed a flat clear in the lower hull. I could have had it done, work has been crazy. If i’m tired i try to at least mount one piece at night. Working with the copper, that actually helps out.
I CA glued 1 end, and let it cure before trying to manipulate it.
Now for the pics.
Here i have a test fitting of the engine with the plumbing lines, checking the lengths.


Not bad.
Now i have to paint it up, weather and get it mounted.
14 Likes


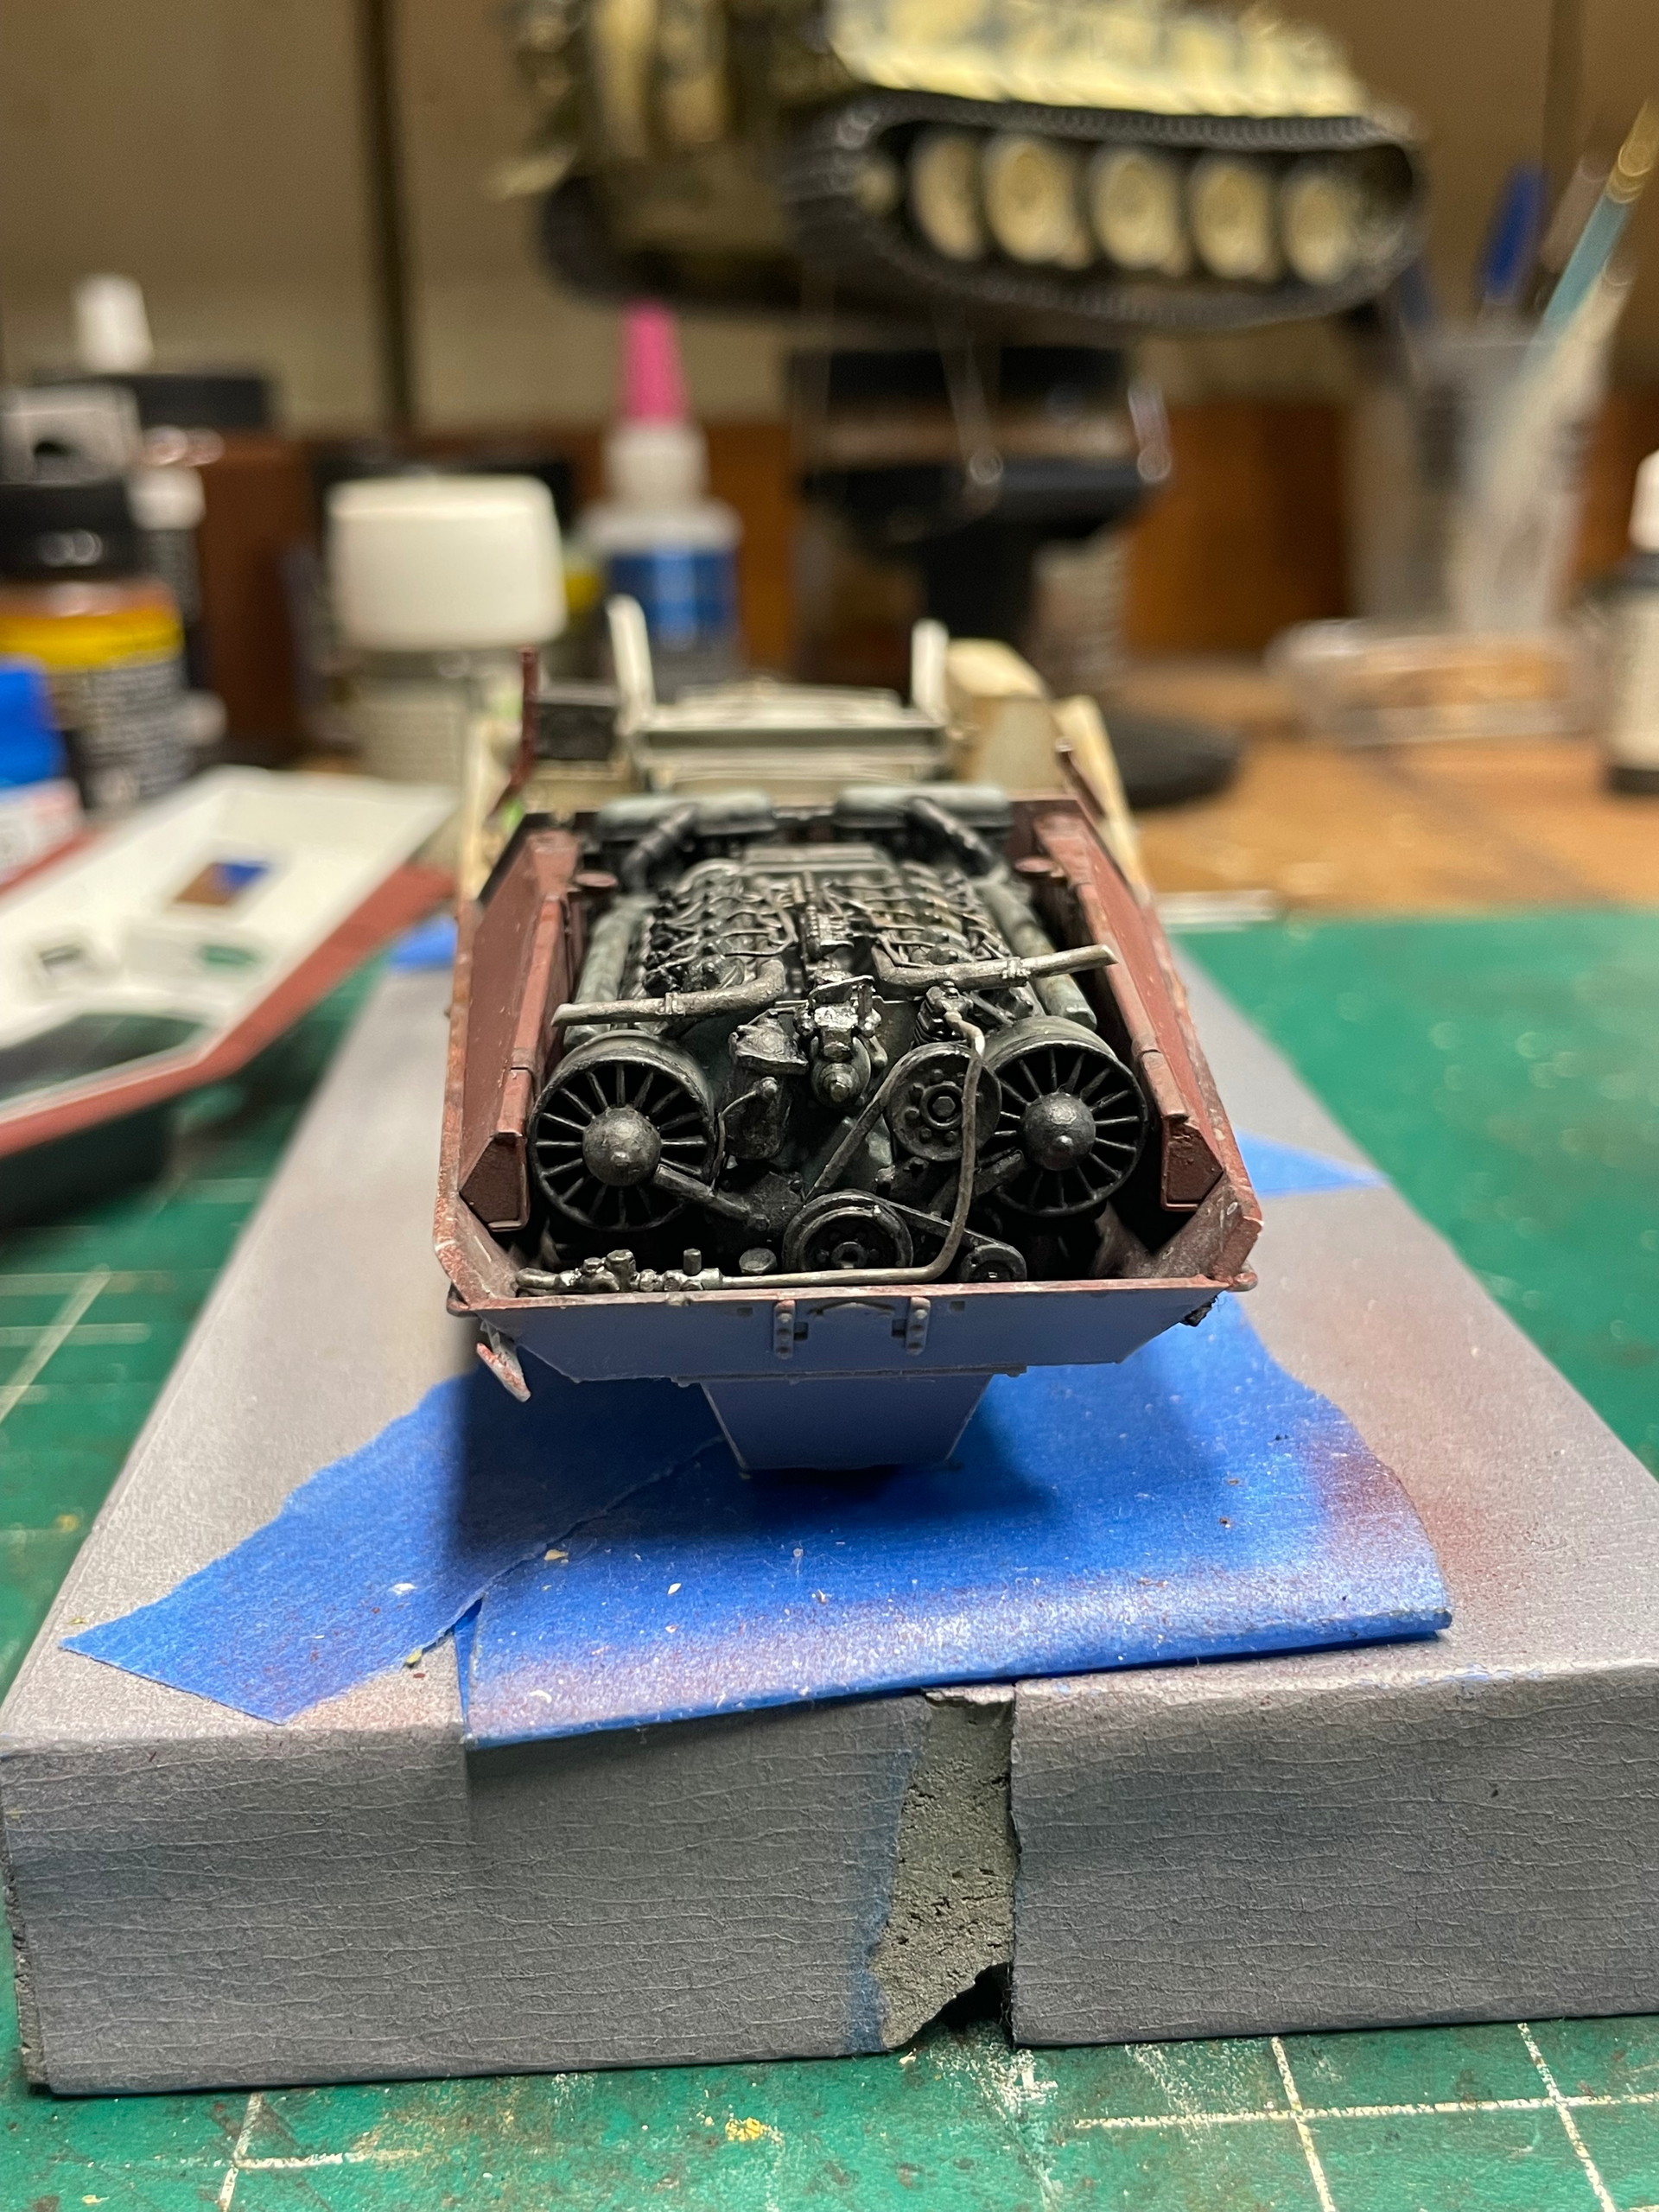
Over the past few days, i installed the final parts on the engine and touched up the paint. Those 2 black pipes that connect with the parts hanging, they were a PITA for me.i’m not sure if i cut off a pice when removing from the sprues, but there was no positive engagement points for the glue. I fought them for a while, trying them each way.
I sprayed a flat coat earlier tonight.
Almost ready to mount into the hull.


6 Likes
Alright.
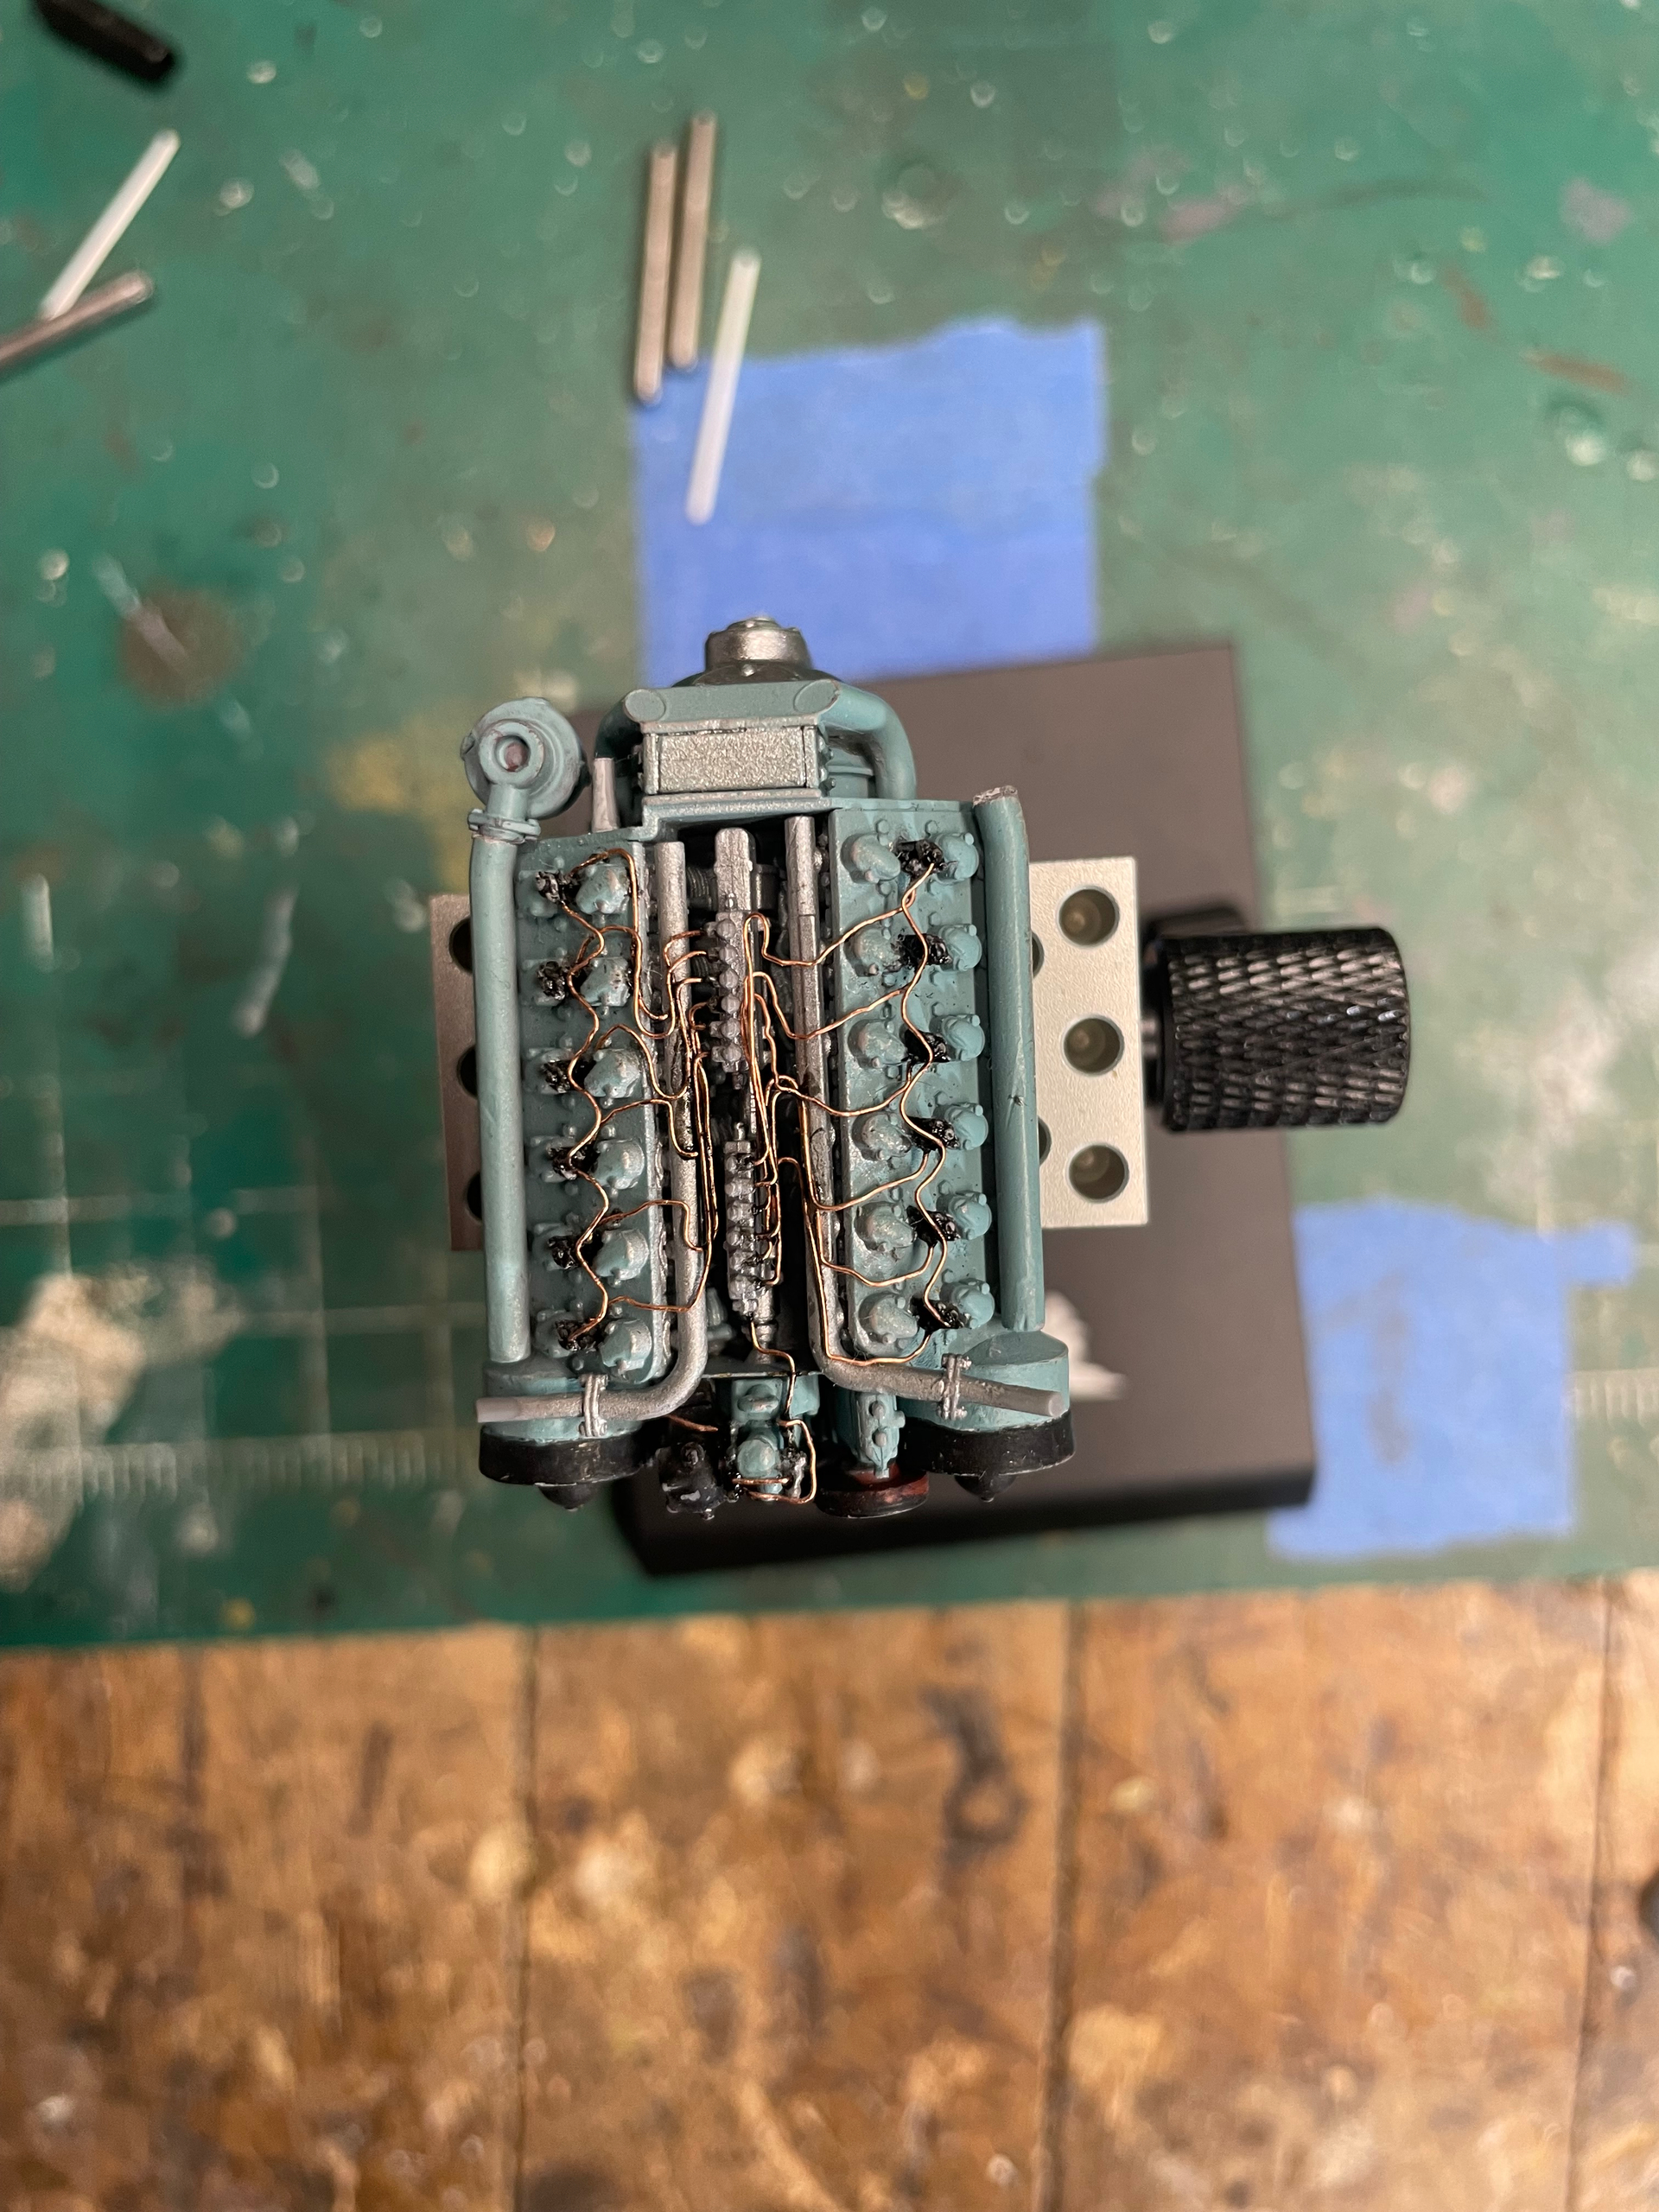
Did a black wash with Tamiya panel liner on then Engine. It’s a little dirtier than i wanted, but i will be adding more effects. I’m letting it cure before I continue. ( applied yesterday).


I also did a Vallejo Engine grime wash in the engine compartment. It’s supposed to simulate that dusty crap that coats engine bays and builds up. I also added some Vallejo streaking grime in there. I tried to build it up on the edges where dust collects.


I hope to get some more done today if possible.
Marc
9 Likes
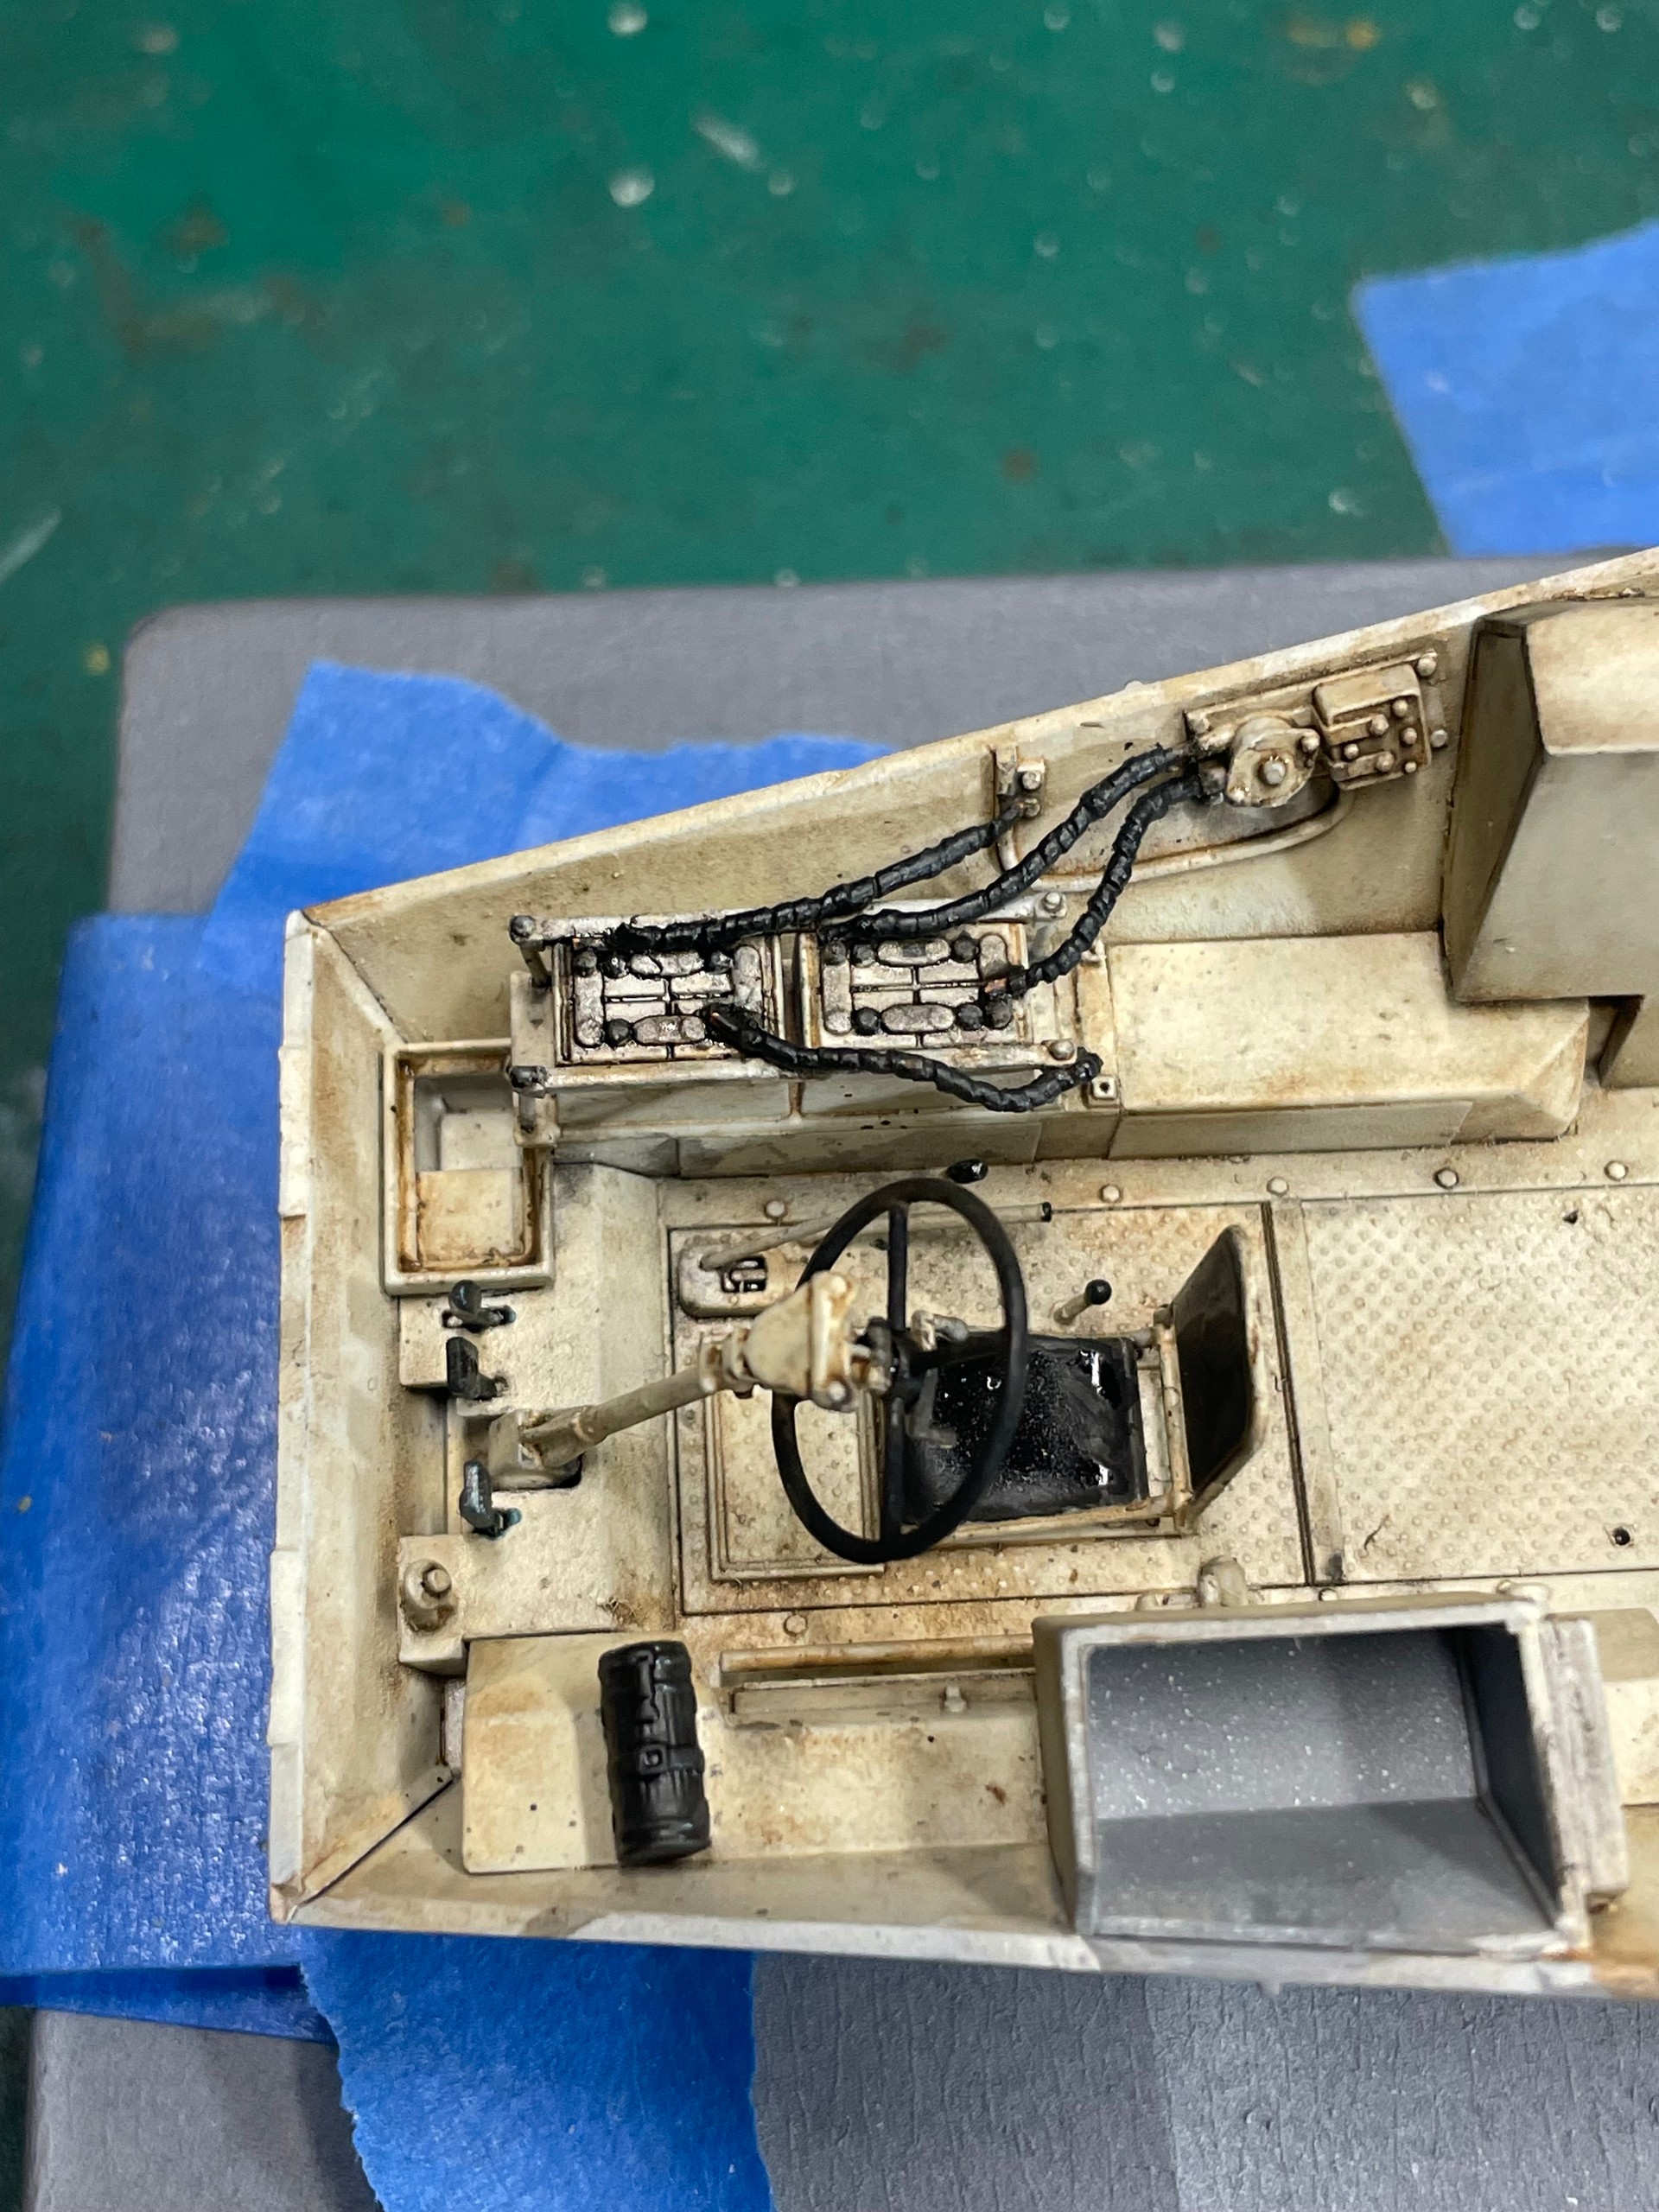
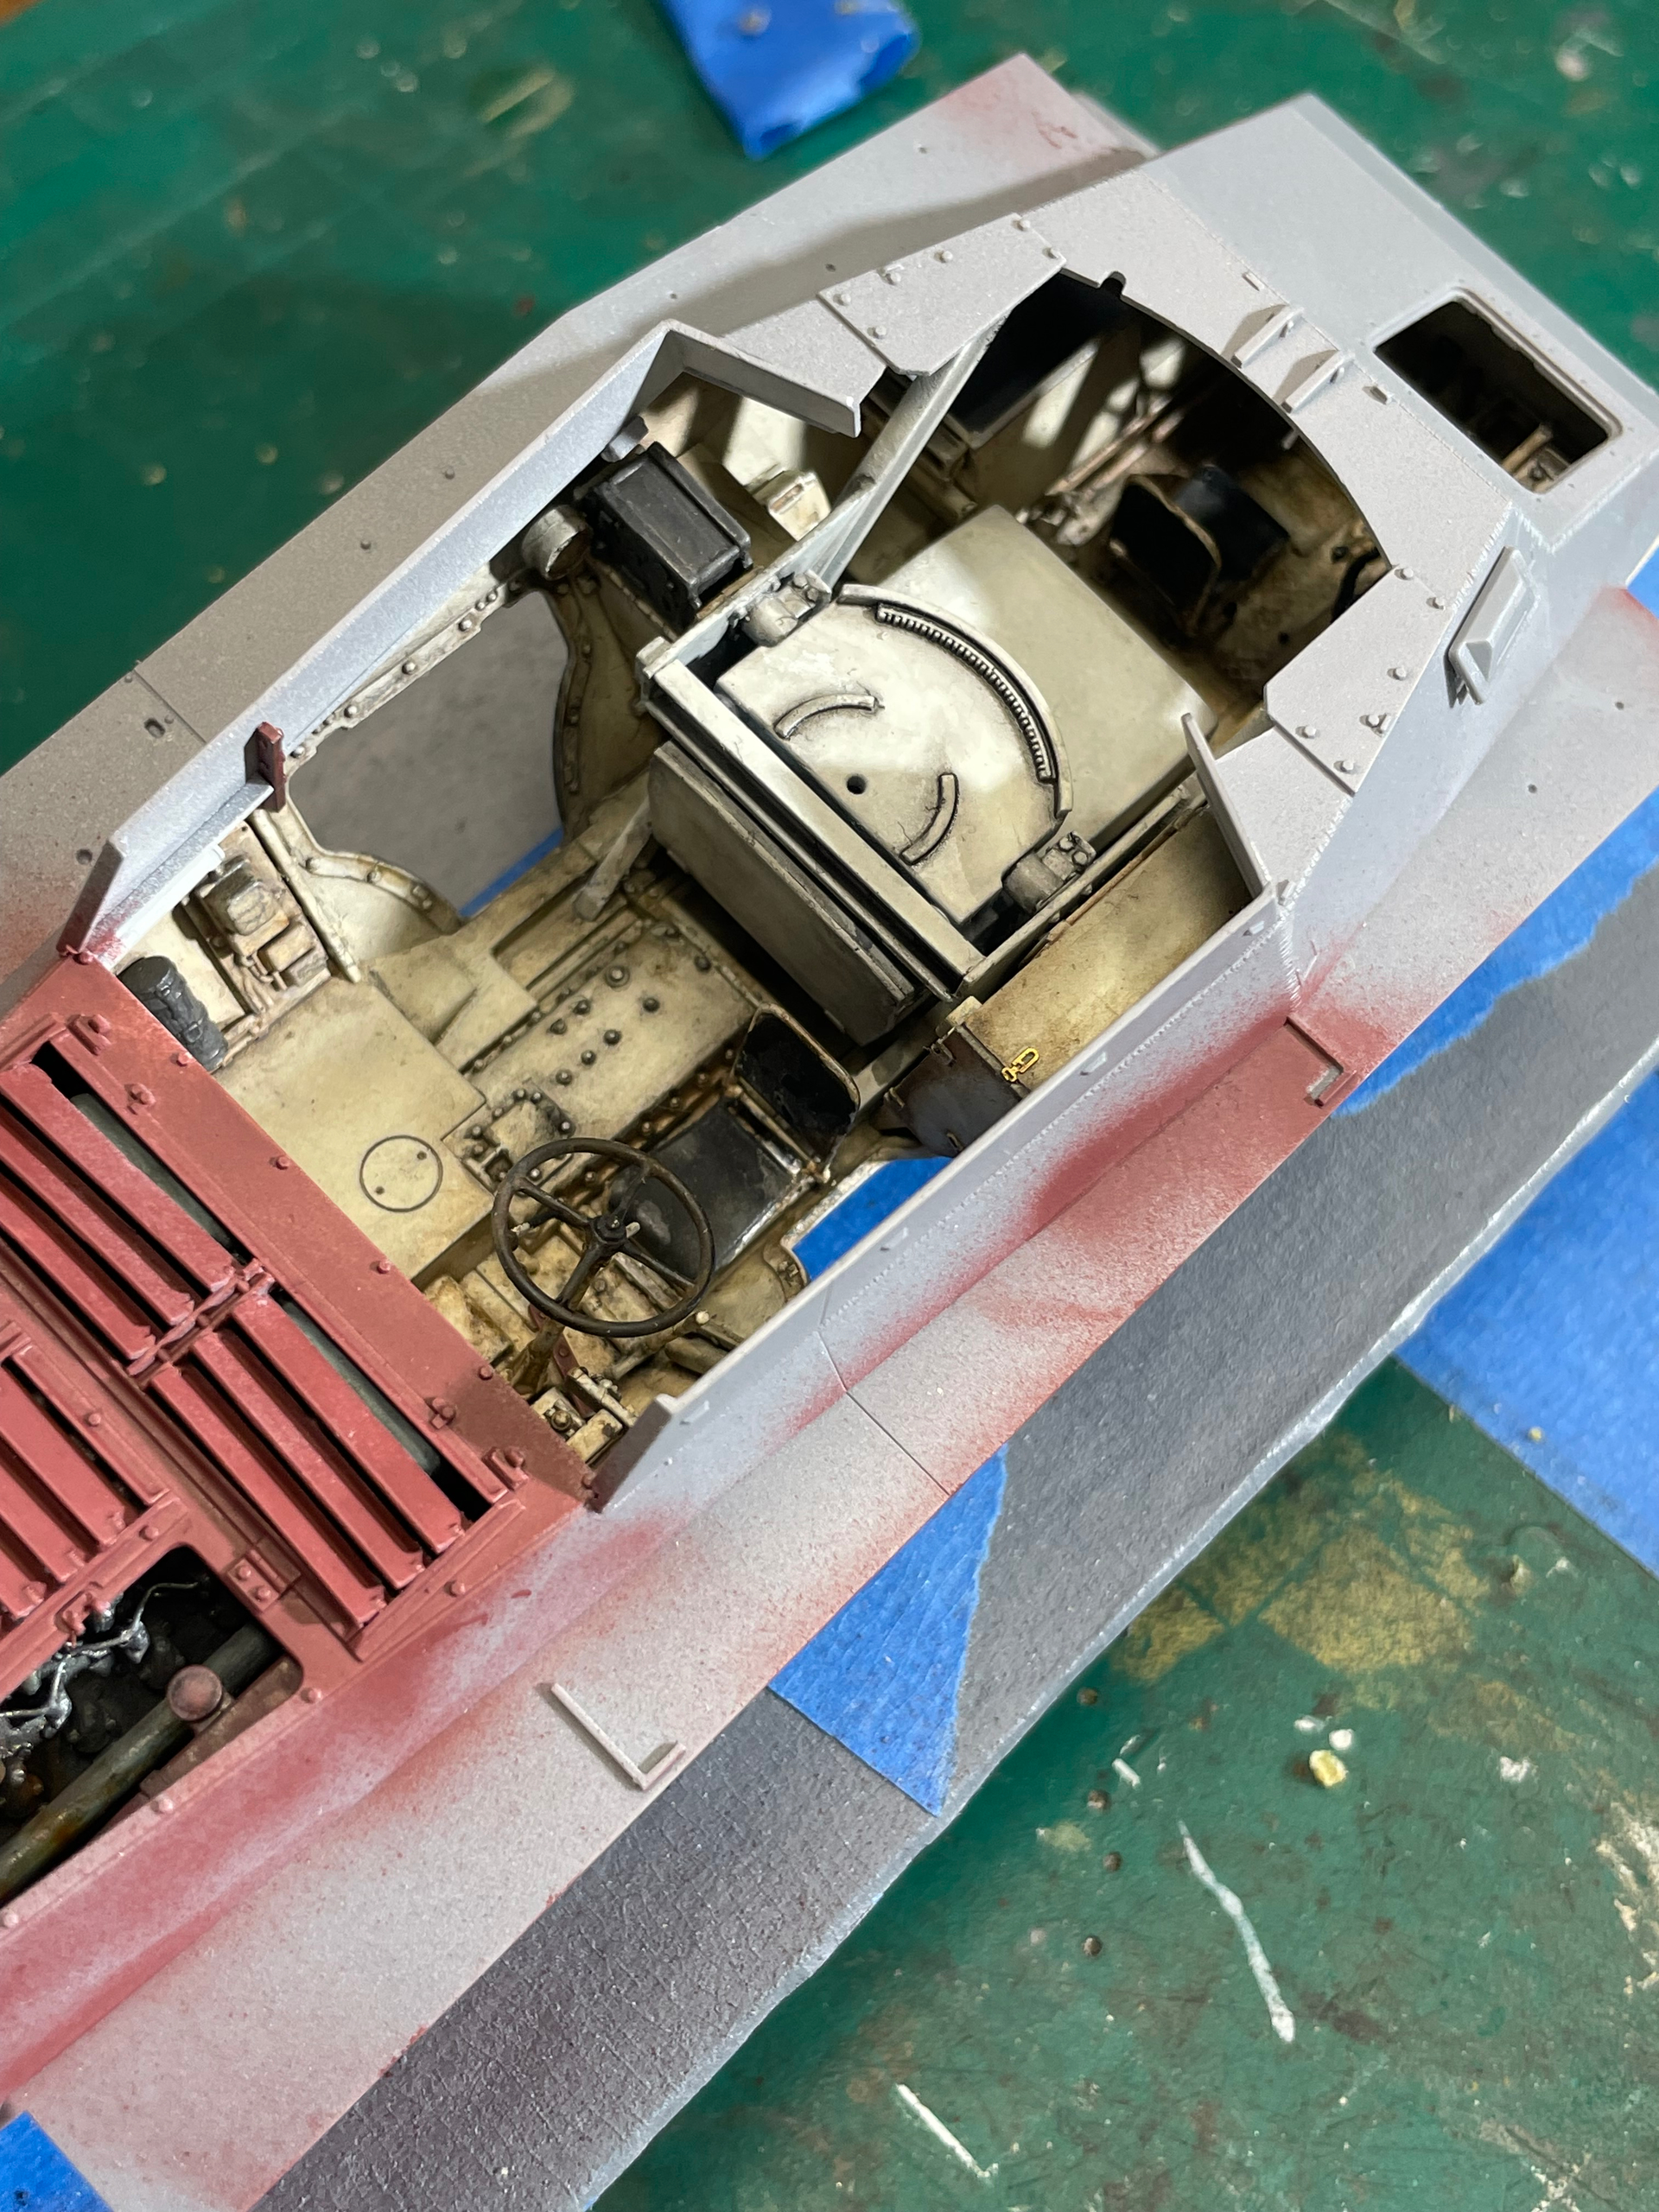
I did some more weathering last night. i added some mud to into the main hull, where the crew would walk and sit. And i went around some areas with a pencil to simulate wear.

After a quick fix, i finally mounted the engine in the engine bay. I just need to hook up 2 more lines and that should be complete for the engine.
The rear, lower engine mounts did not line up totally. Granted, dry fitting the completed engine into the bay area, is not so cut and dry. There is a small “ key” on the bell housing that fits into the fire wall. I’m not sure if i cleaned it enough for the proper seated depth. Then again, it looks like the lower engine mounts line up correctly, so it could be a kit issue.

Marc
9 Likes
Nice job!
3 Likes
Great detailling.
3 Likes
Thank you.
With the engine mounted,
I’m having trouble gluing one of the thicker hydraulic lines to the small blue thing to the left of the engine, mounted in the hull. The line is attached to the motor and runs underneath to the small gadget .
Hope to solve today/ tonight .
1 Like
I hate it when I have a loose gadget.
1 Like
Wow, 22 days since my last update.
I’ve been wanting to post an update since Monday.
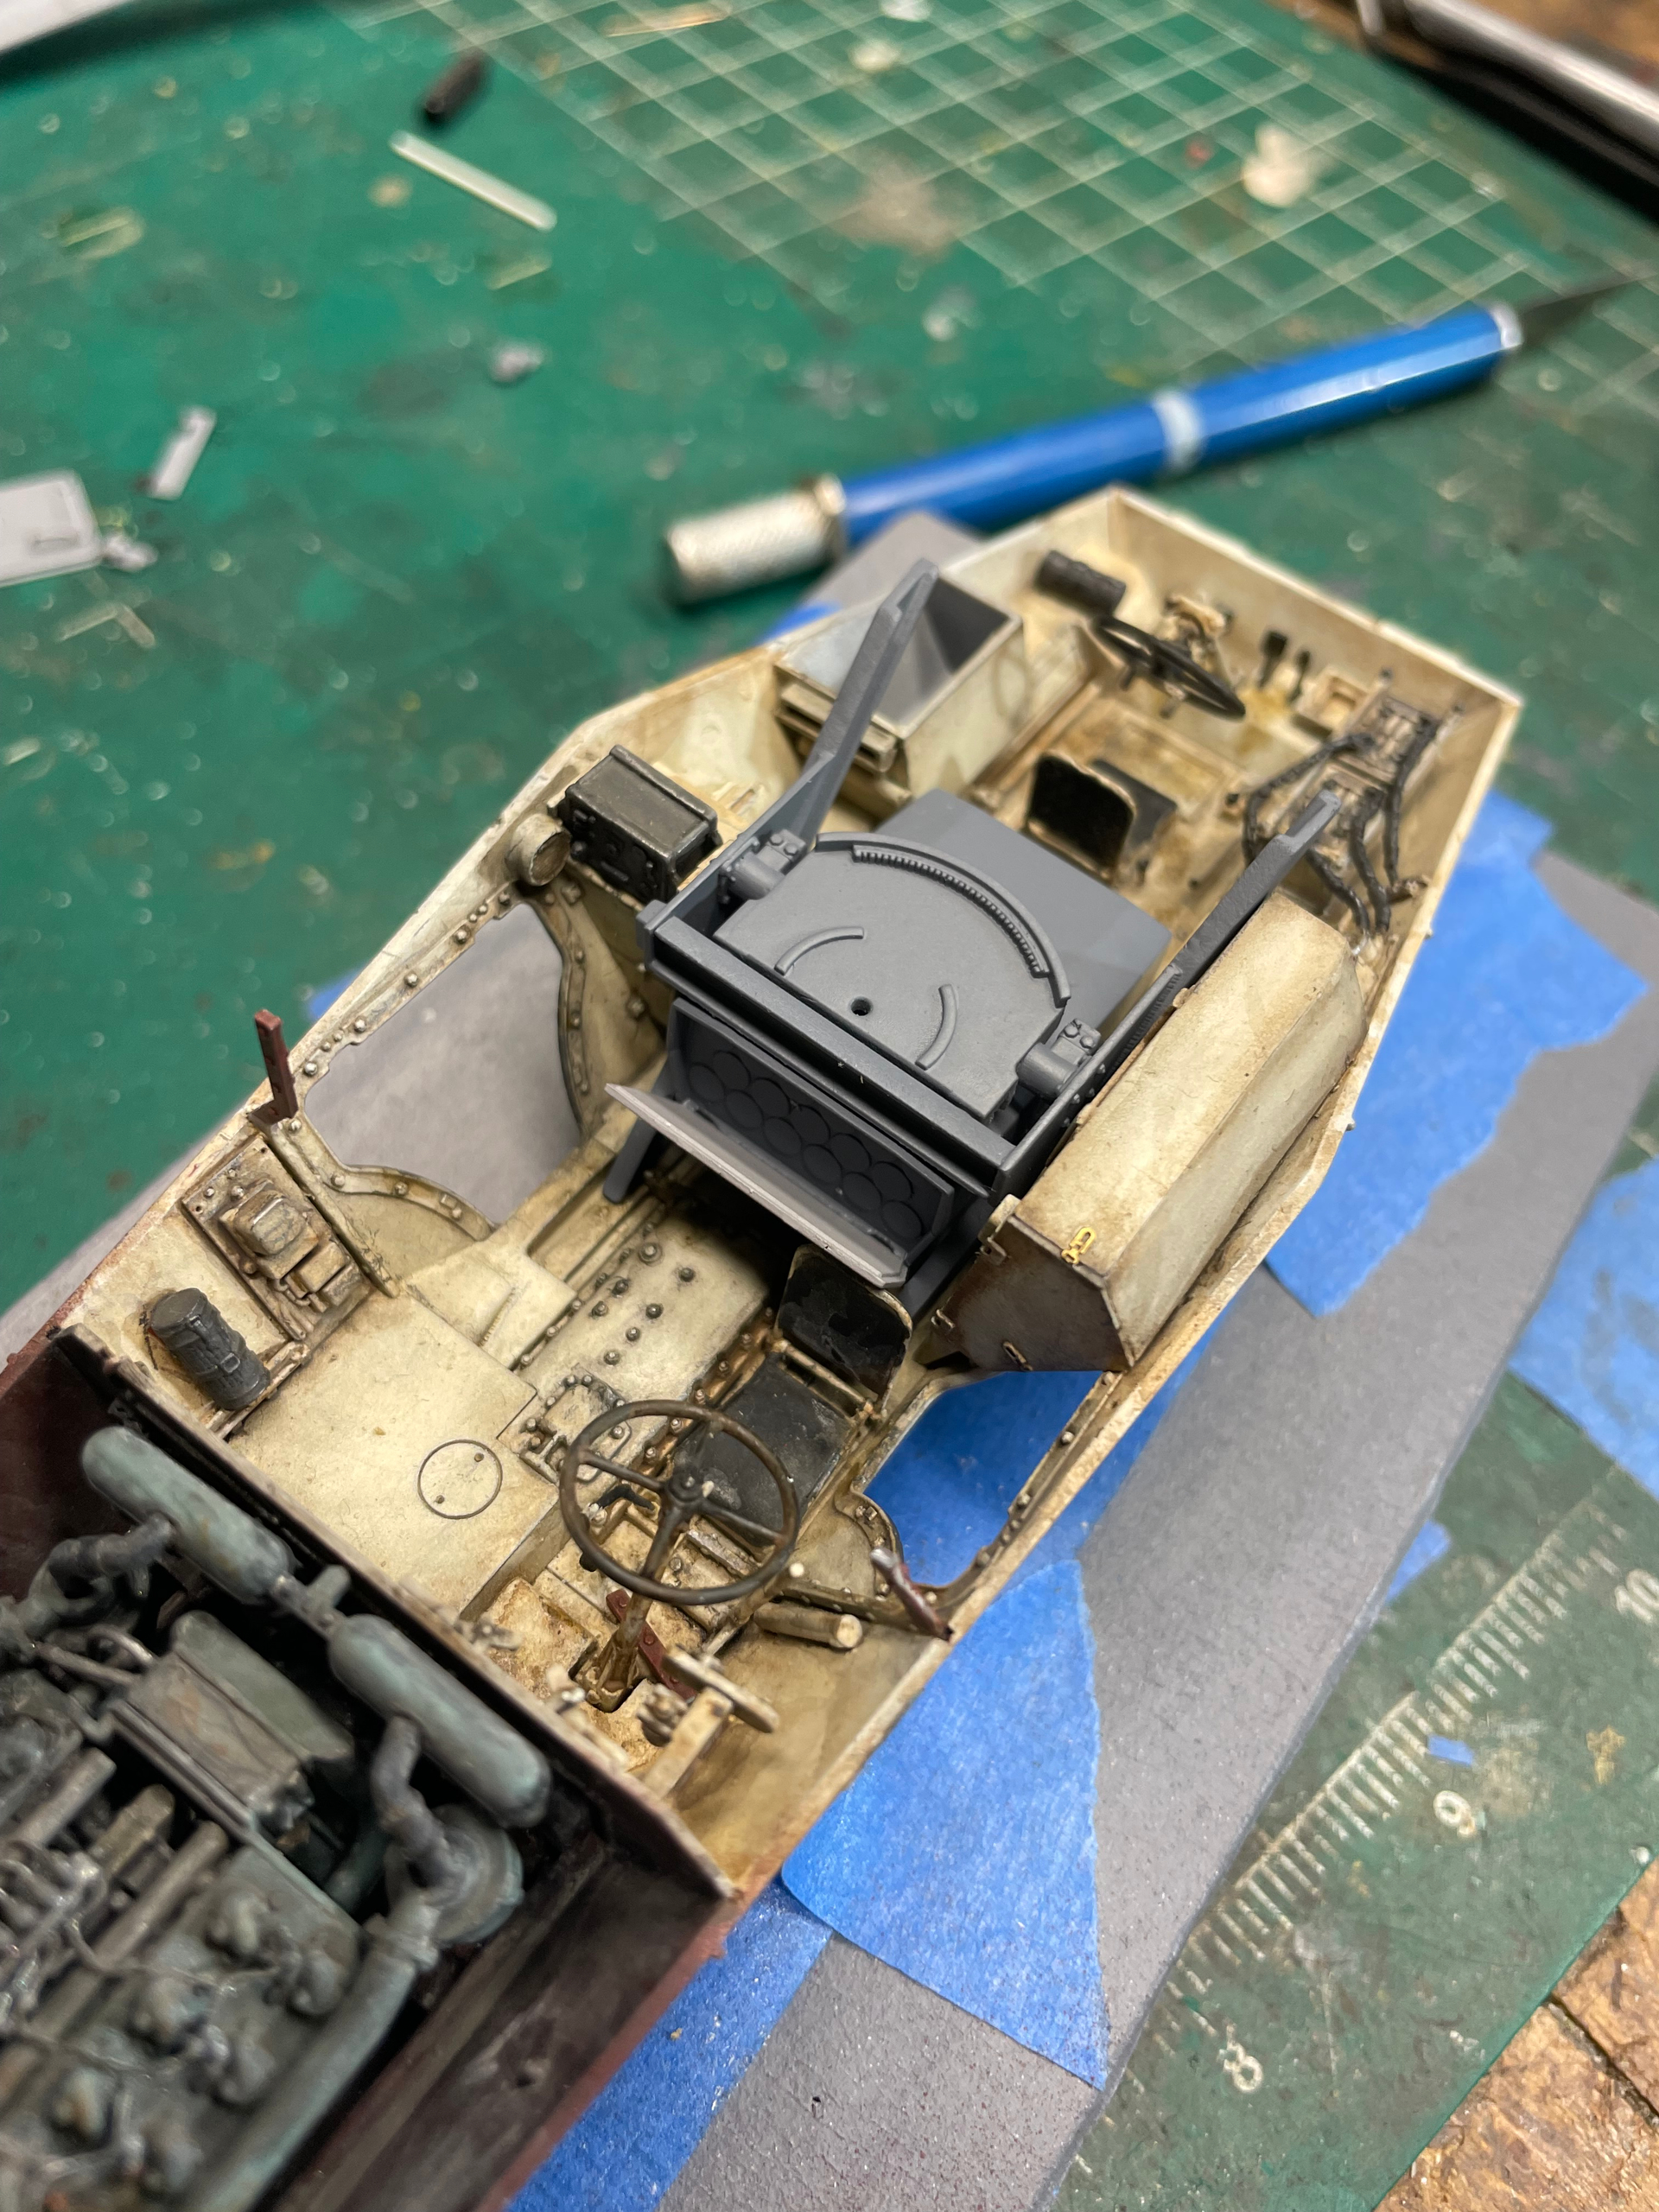
I’ve got the engine mounted totally. Did a little touchups.
Test fitting the base of the gun. It fits.
I Started building the upper hull.
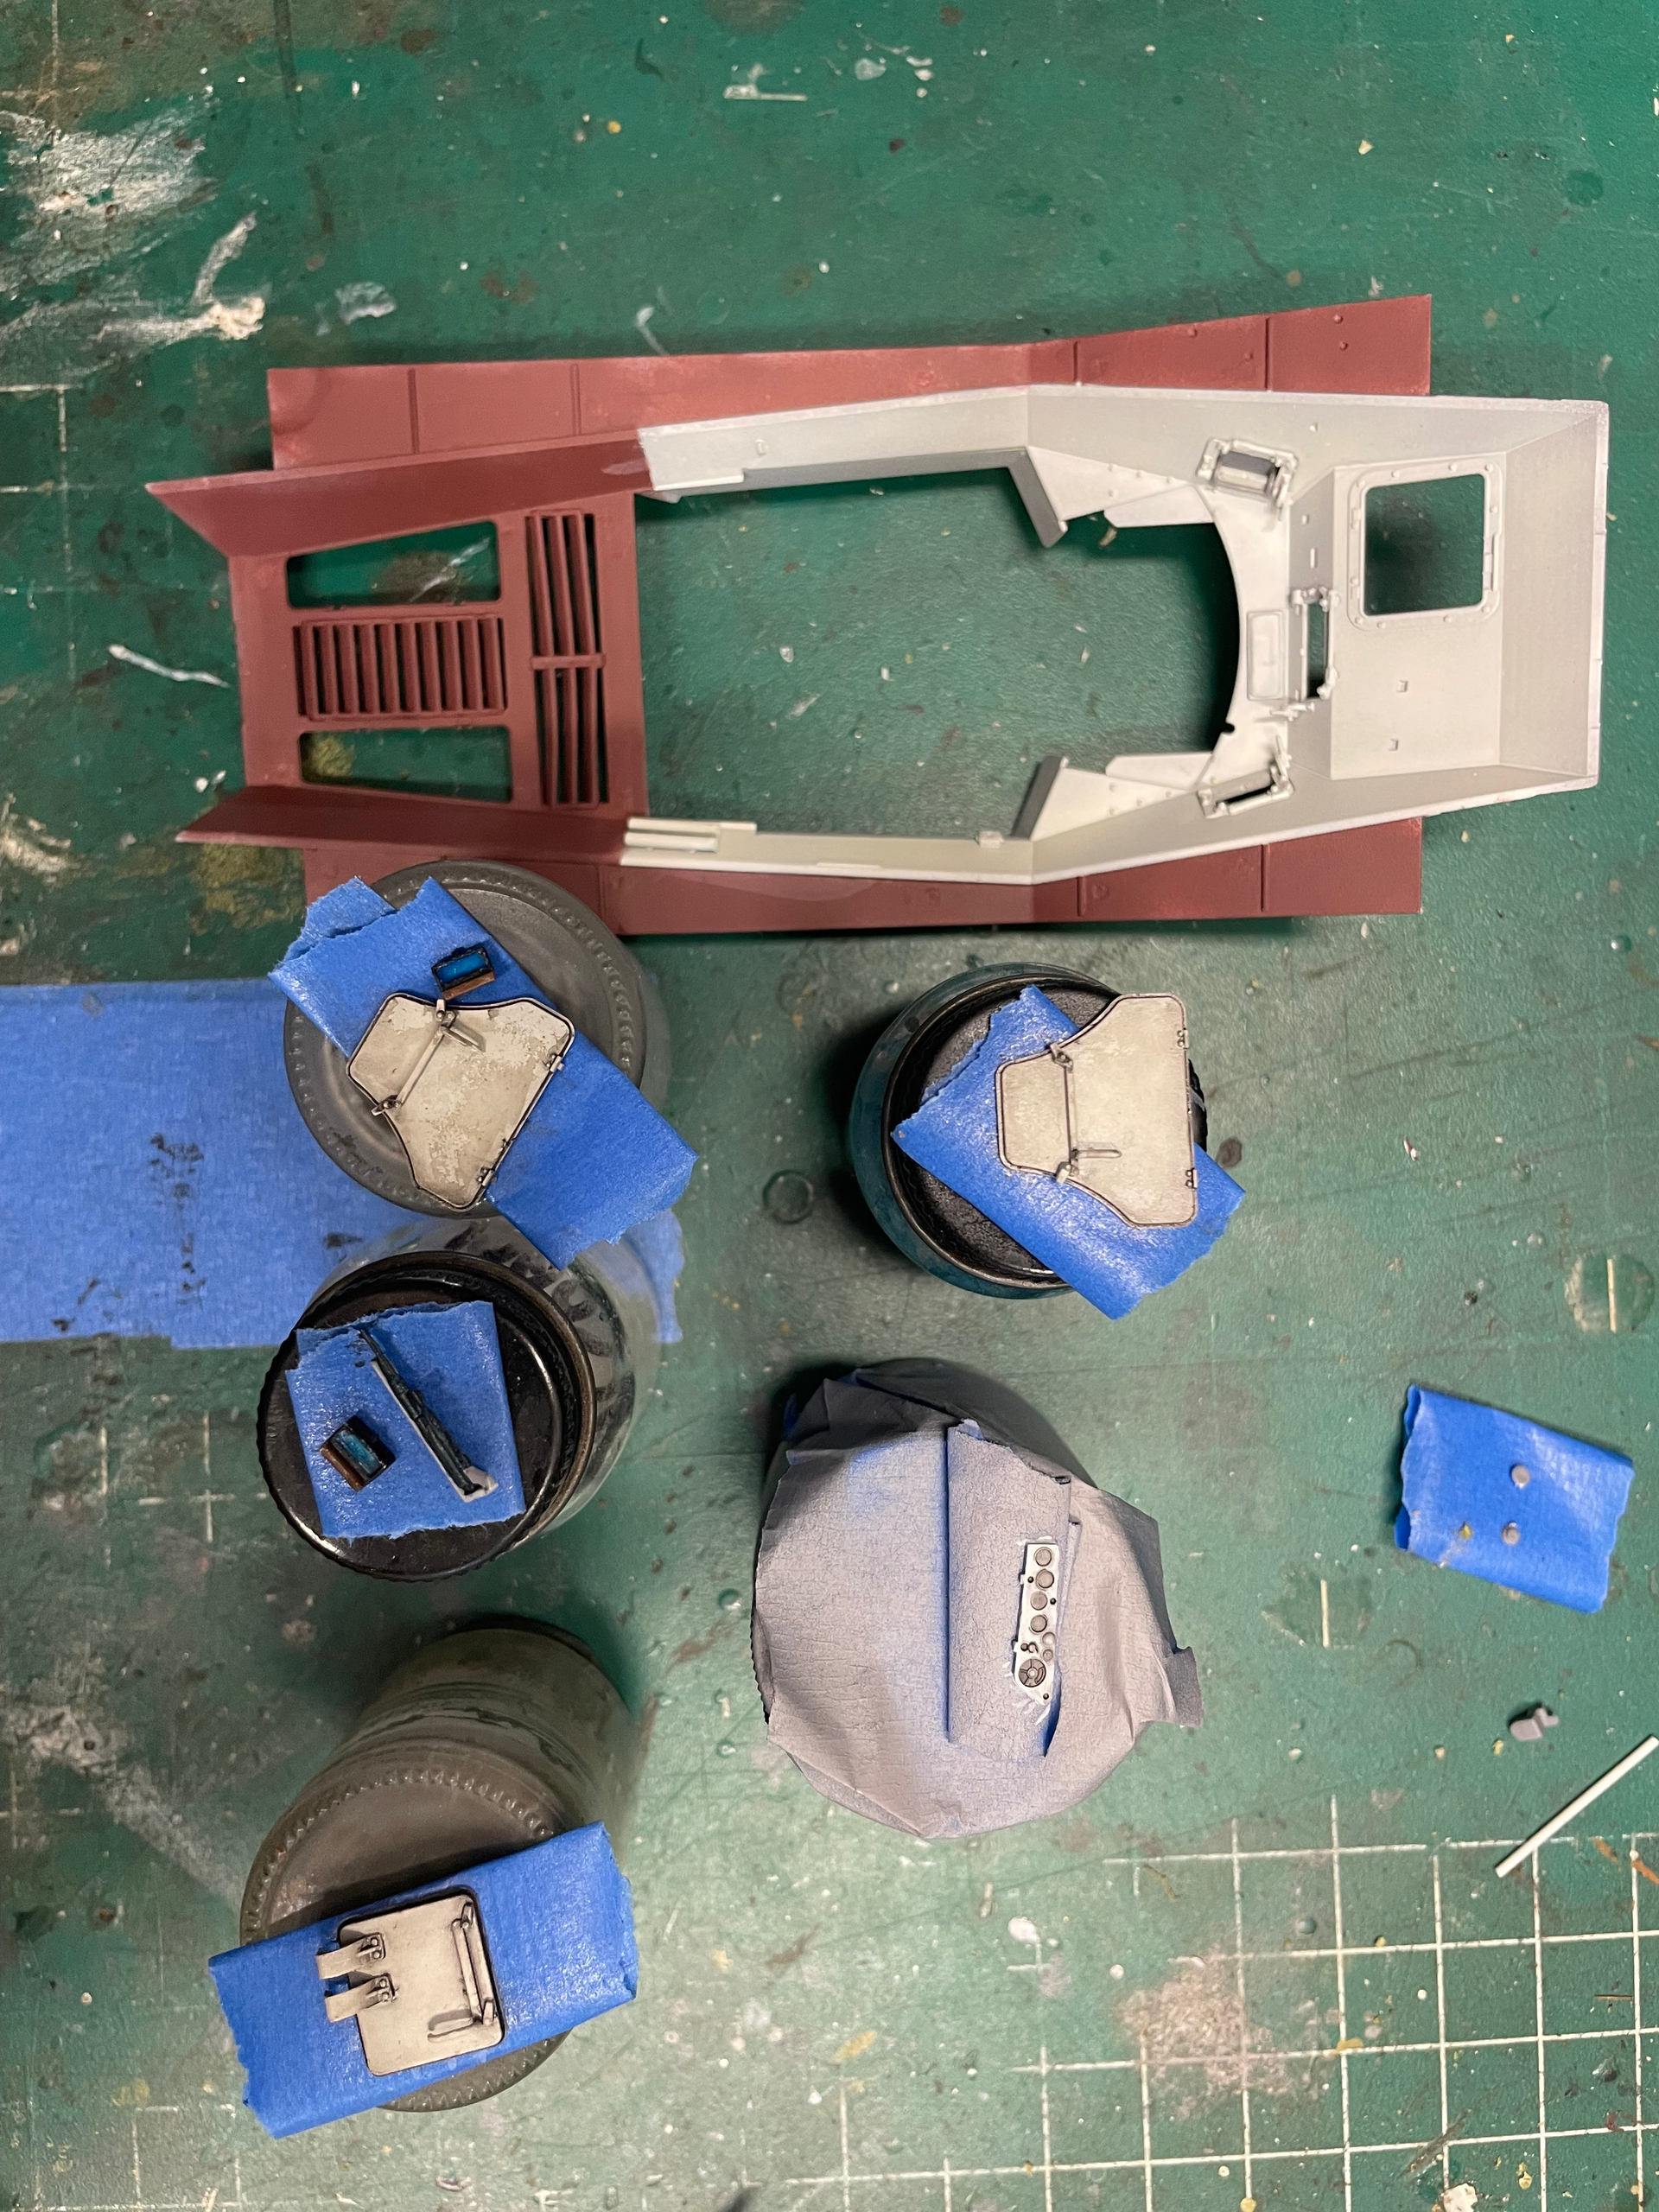
I had to add the to upper armor plates and some interior bits. I built up some doors and got everything primed and a base coat added.
I’m planing on having a bunch of doors/ hatches open. I’m not sure how much will be seen, but i’m not worried about. This build is about me.
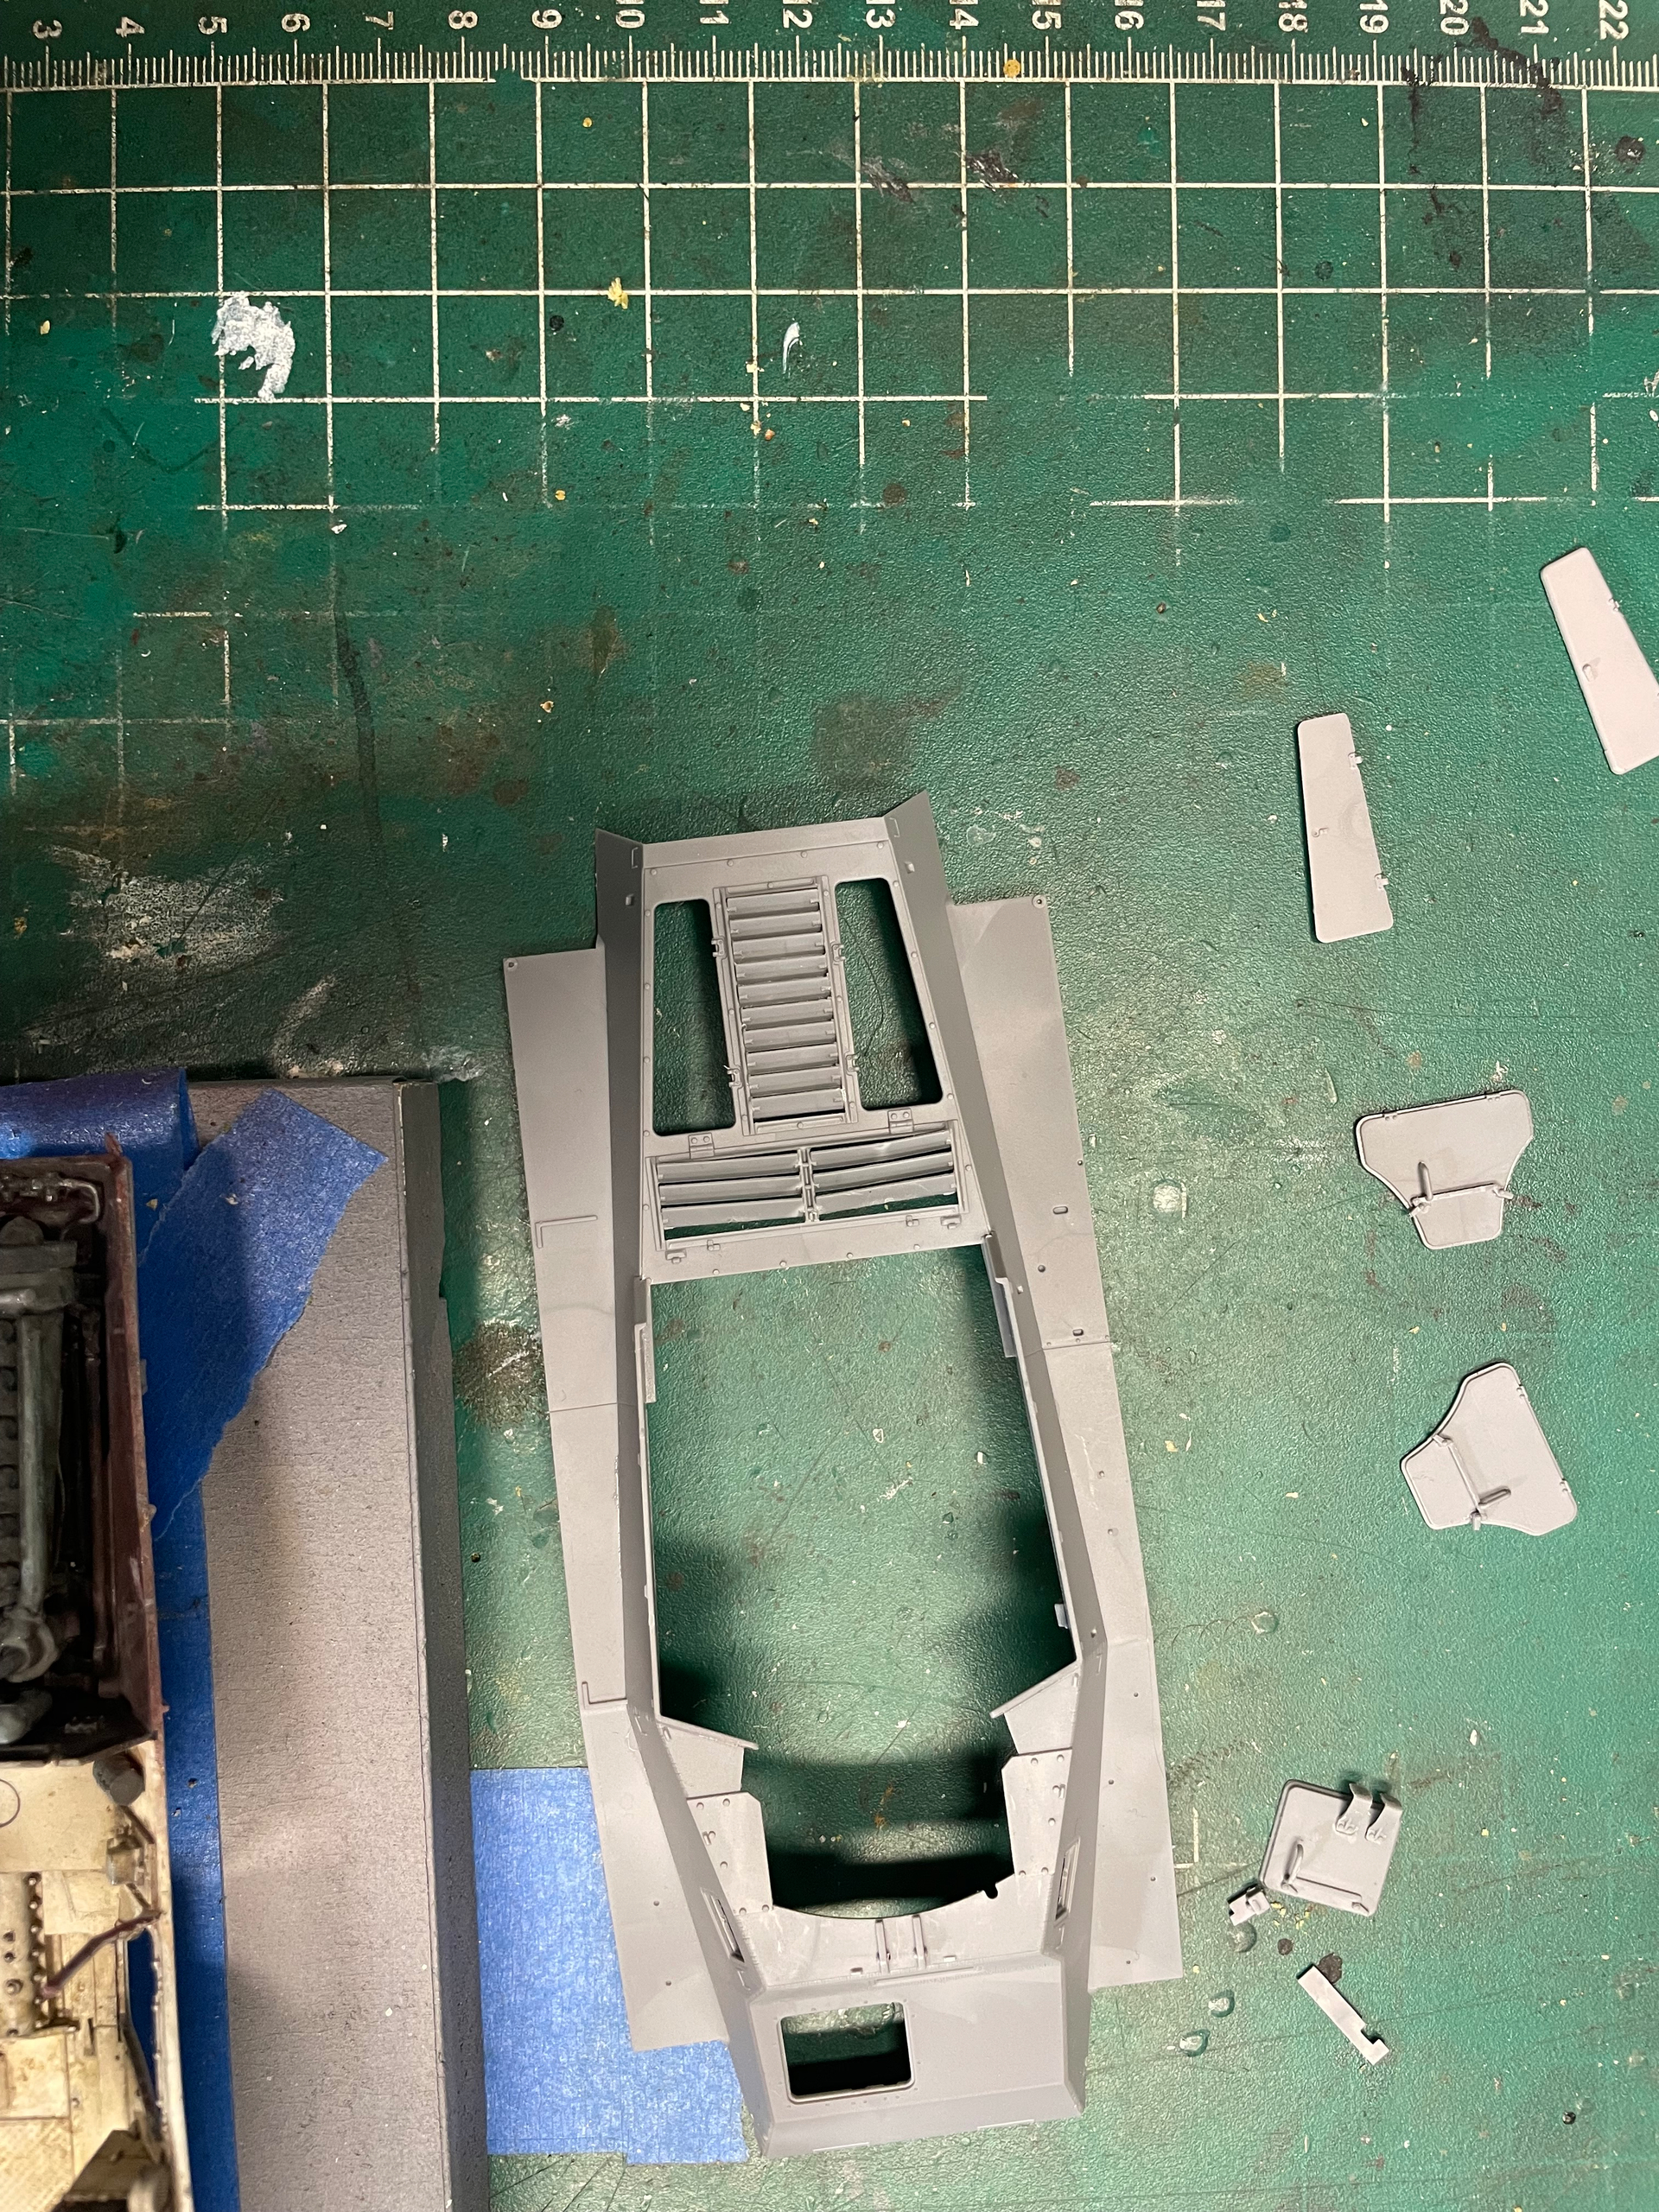

I’m pretty sure i have the center vent flaps backwards.
Removing the piece from the sprue in one piece is not easy. It did break on me, but with how it mounts it’s an easy fix. I tried to remove it, but it’s not worth it. I glued in good.
Part A 14 for reference.
Marc

5 Likes
I’m back! I’ve been wanting to post an update since Sunday, I just couldn’t find the energy.
I’ve been working here and there, but i’m really at a snail’s pace at the moment .
I’ve primed and did a base coat inside the upper hull.
I’ve been getting smaller parts prepared also that mount inside the upper area.
Unfortunately i messed up my ivory white base for the interior. I forgot what i did for a ratio for white and the ivory base. Whoops ![]()
A little more wash and once closed up, it will not be noticeable, to me anyways.
I weathered the fuel tanks and installed them.
I am so close to adding the upper hull to the lower, but i need to make the time to do.
Here i have the upper dry fit to the lower. With the hatches open, the engine will be visible to a point.

I have to get off my butt and speed the process.
I’m still enjoying the kit. It has it’s little challenges, but as stated earlier, i knew what i was getting into
And accept all .
![]()
Marc
4 Likes
Looking good!
2 Likes
Thanks!
1 Like