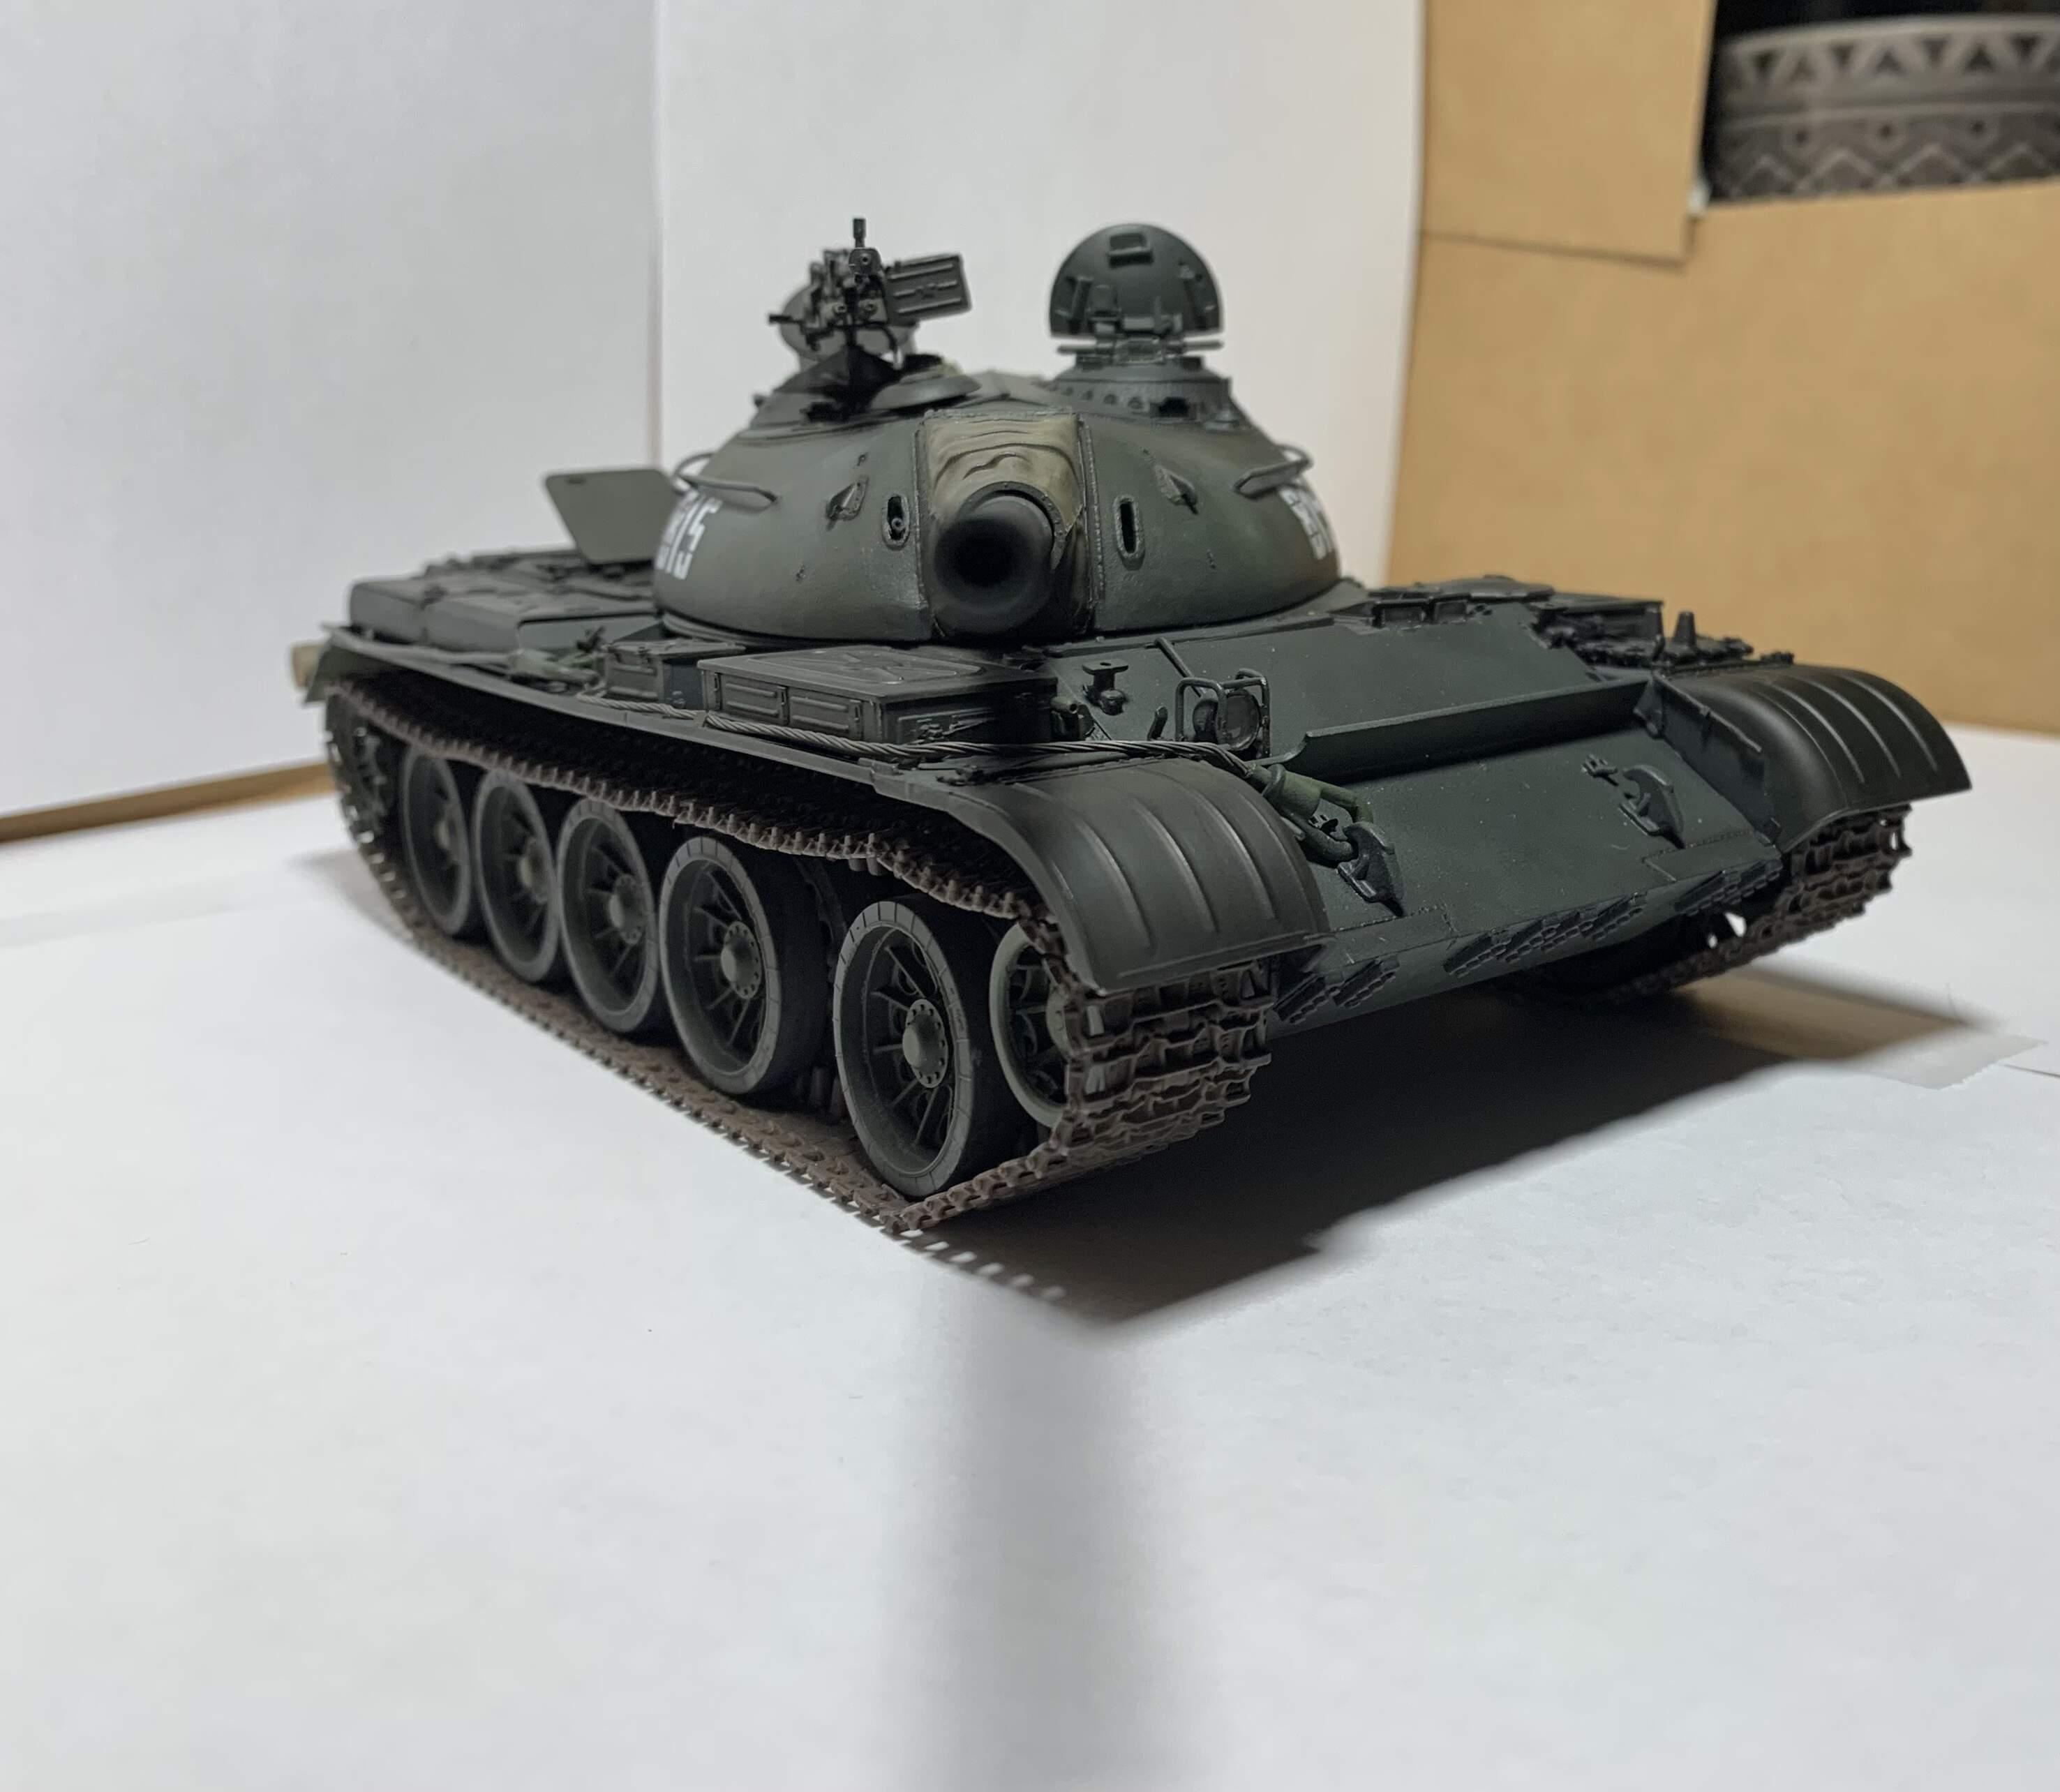
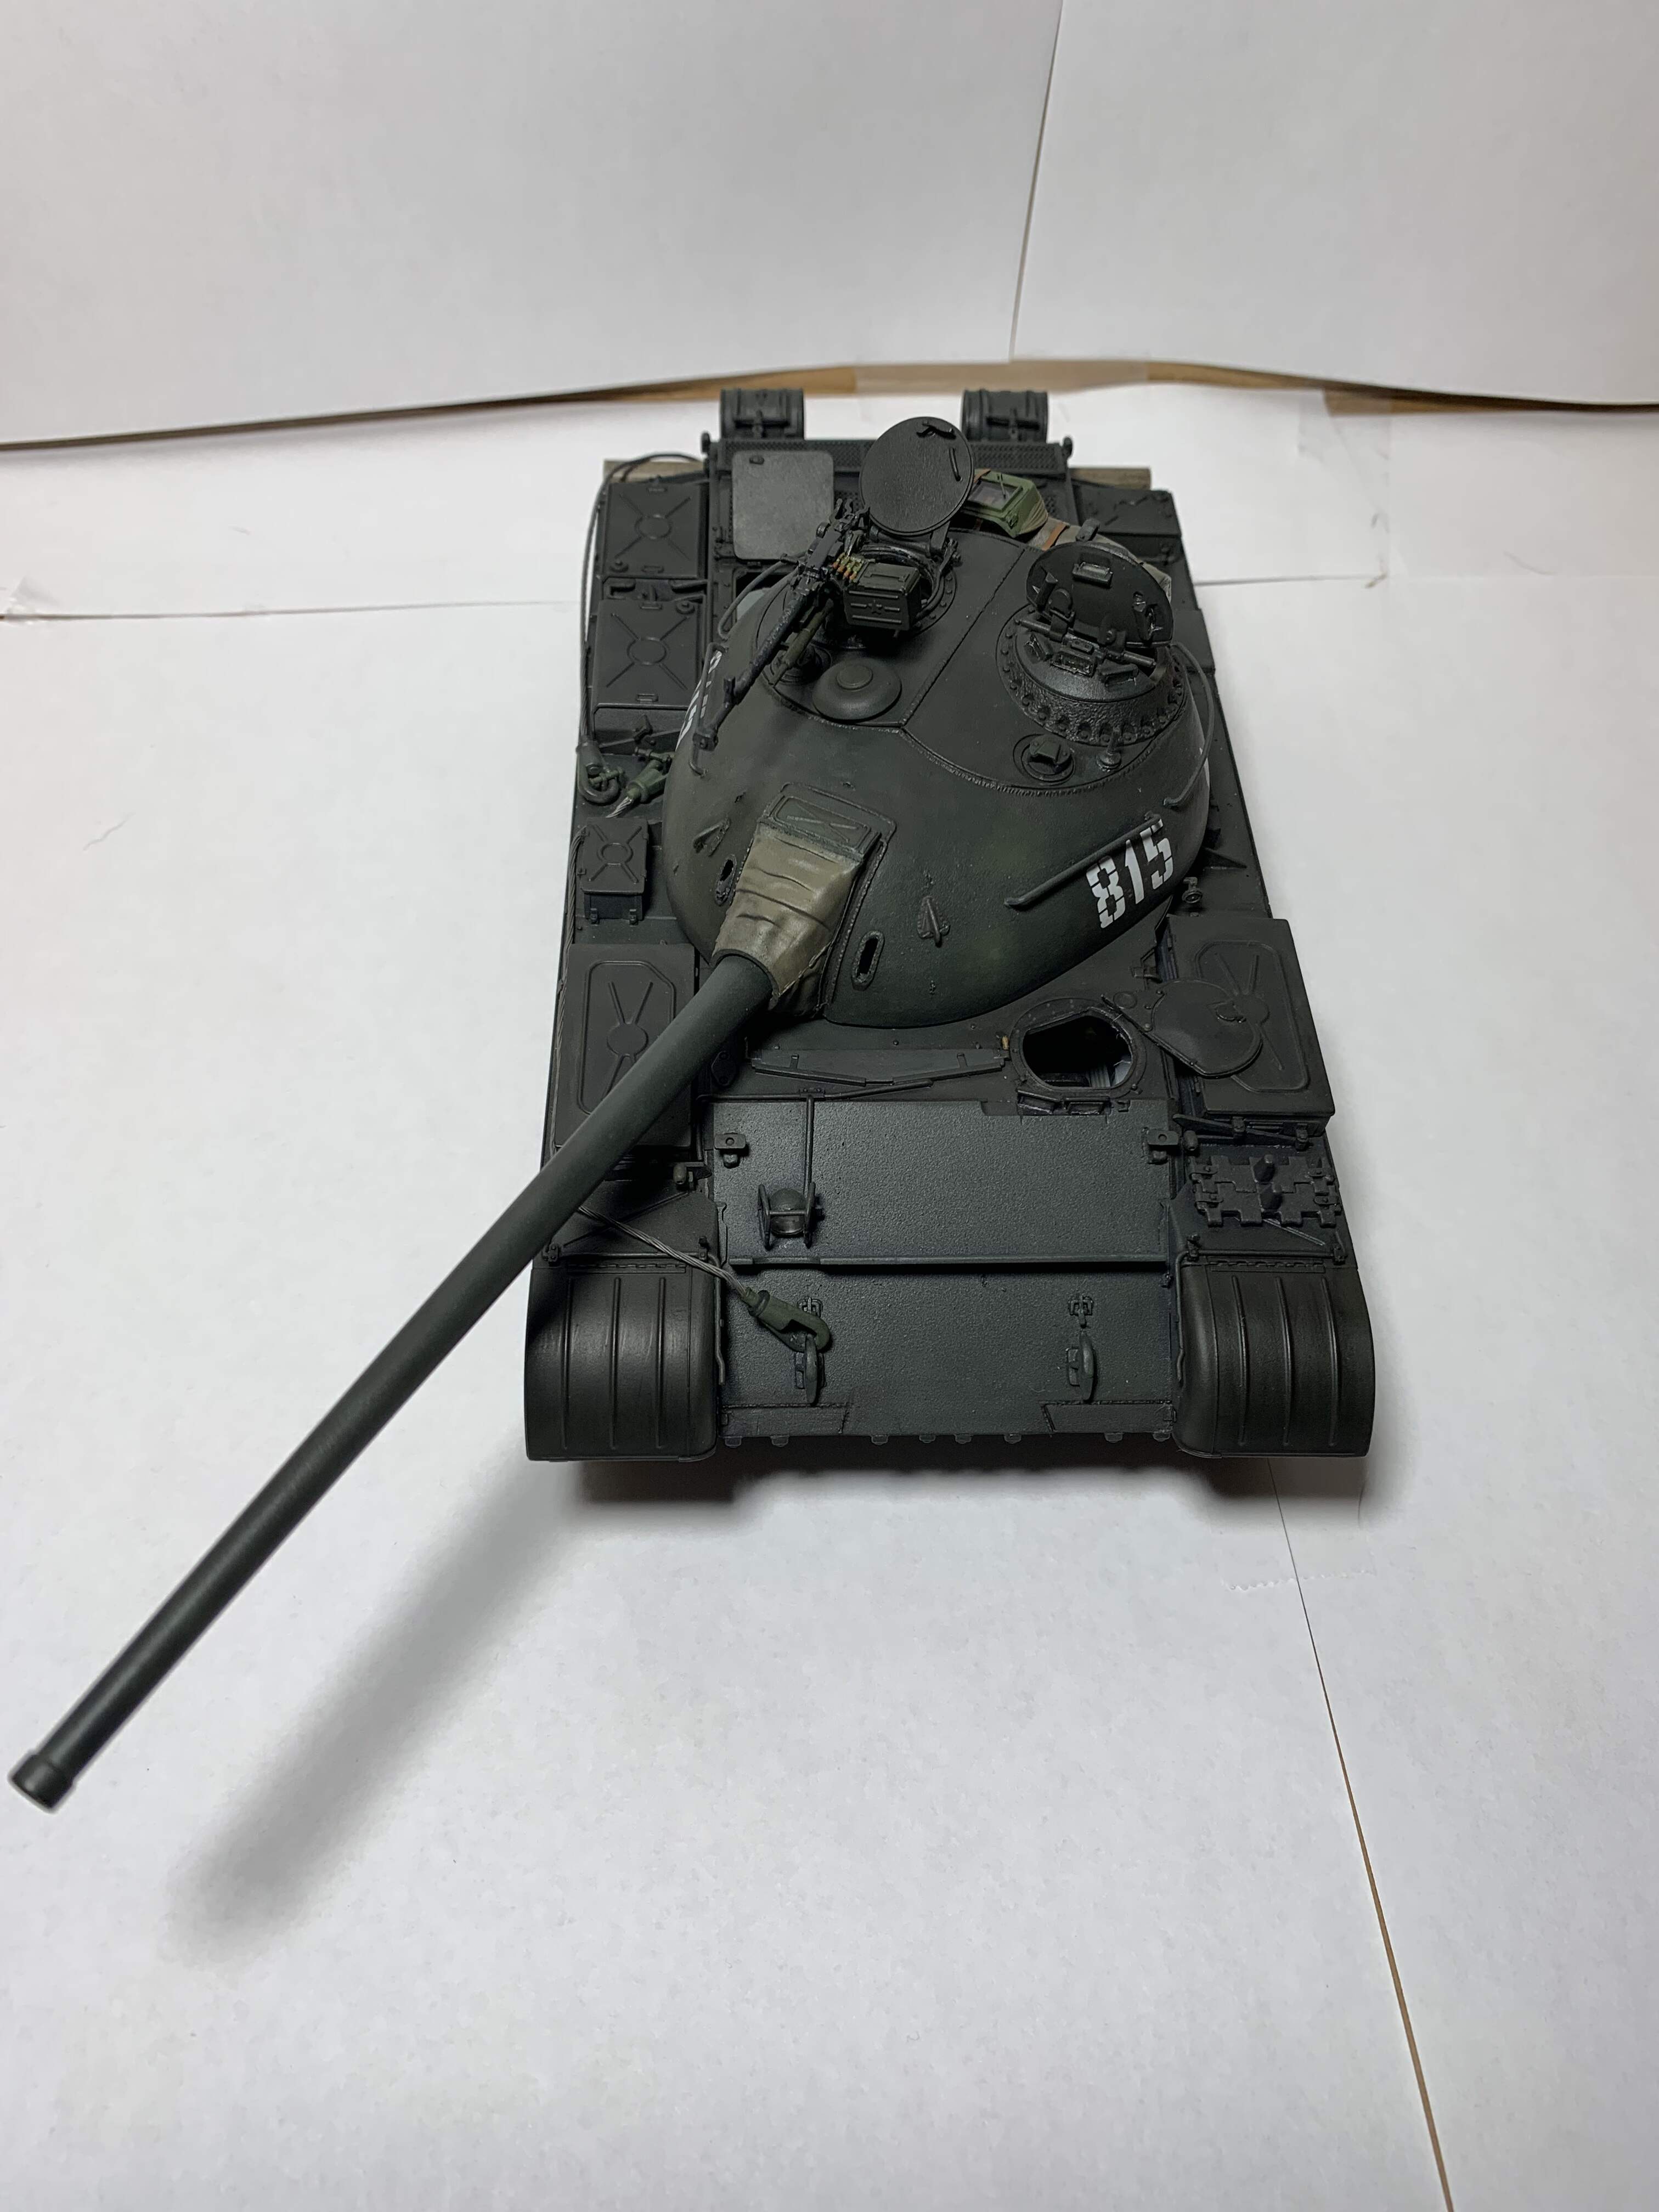
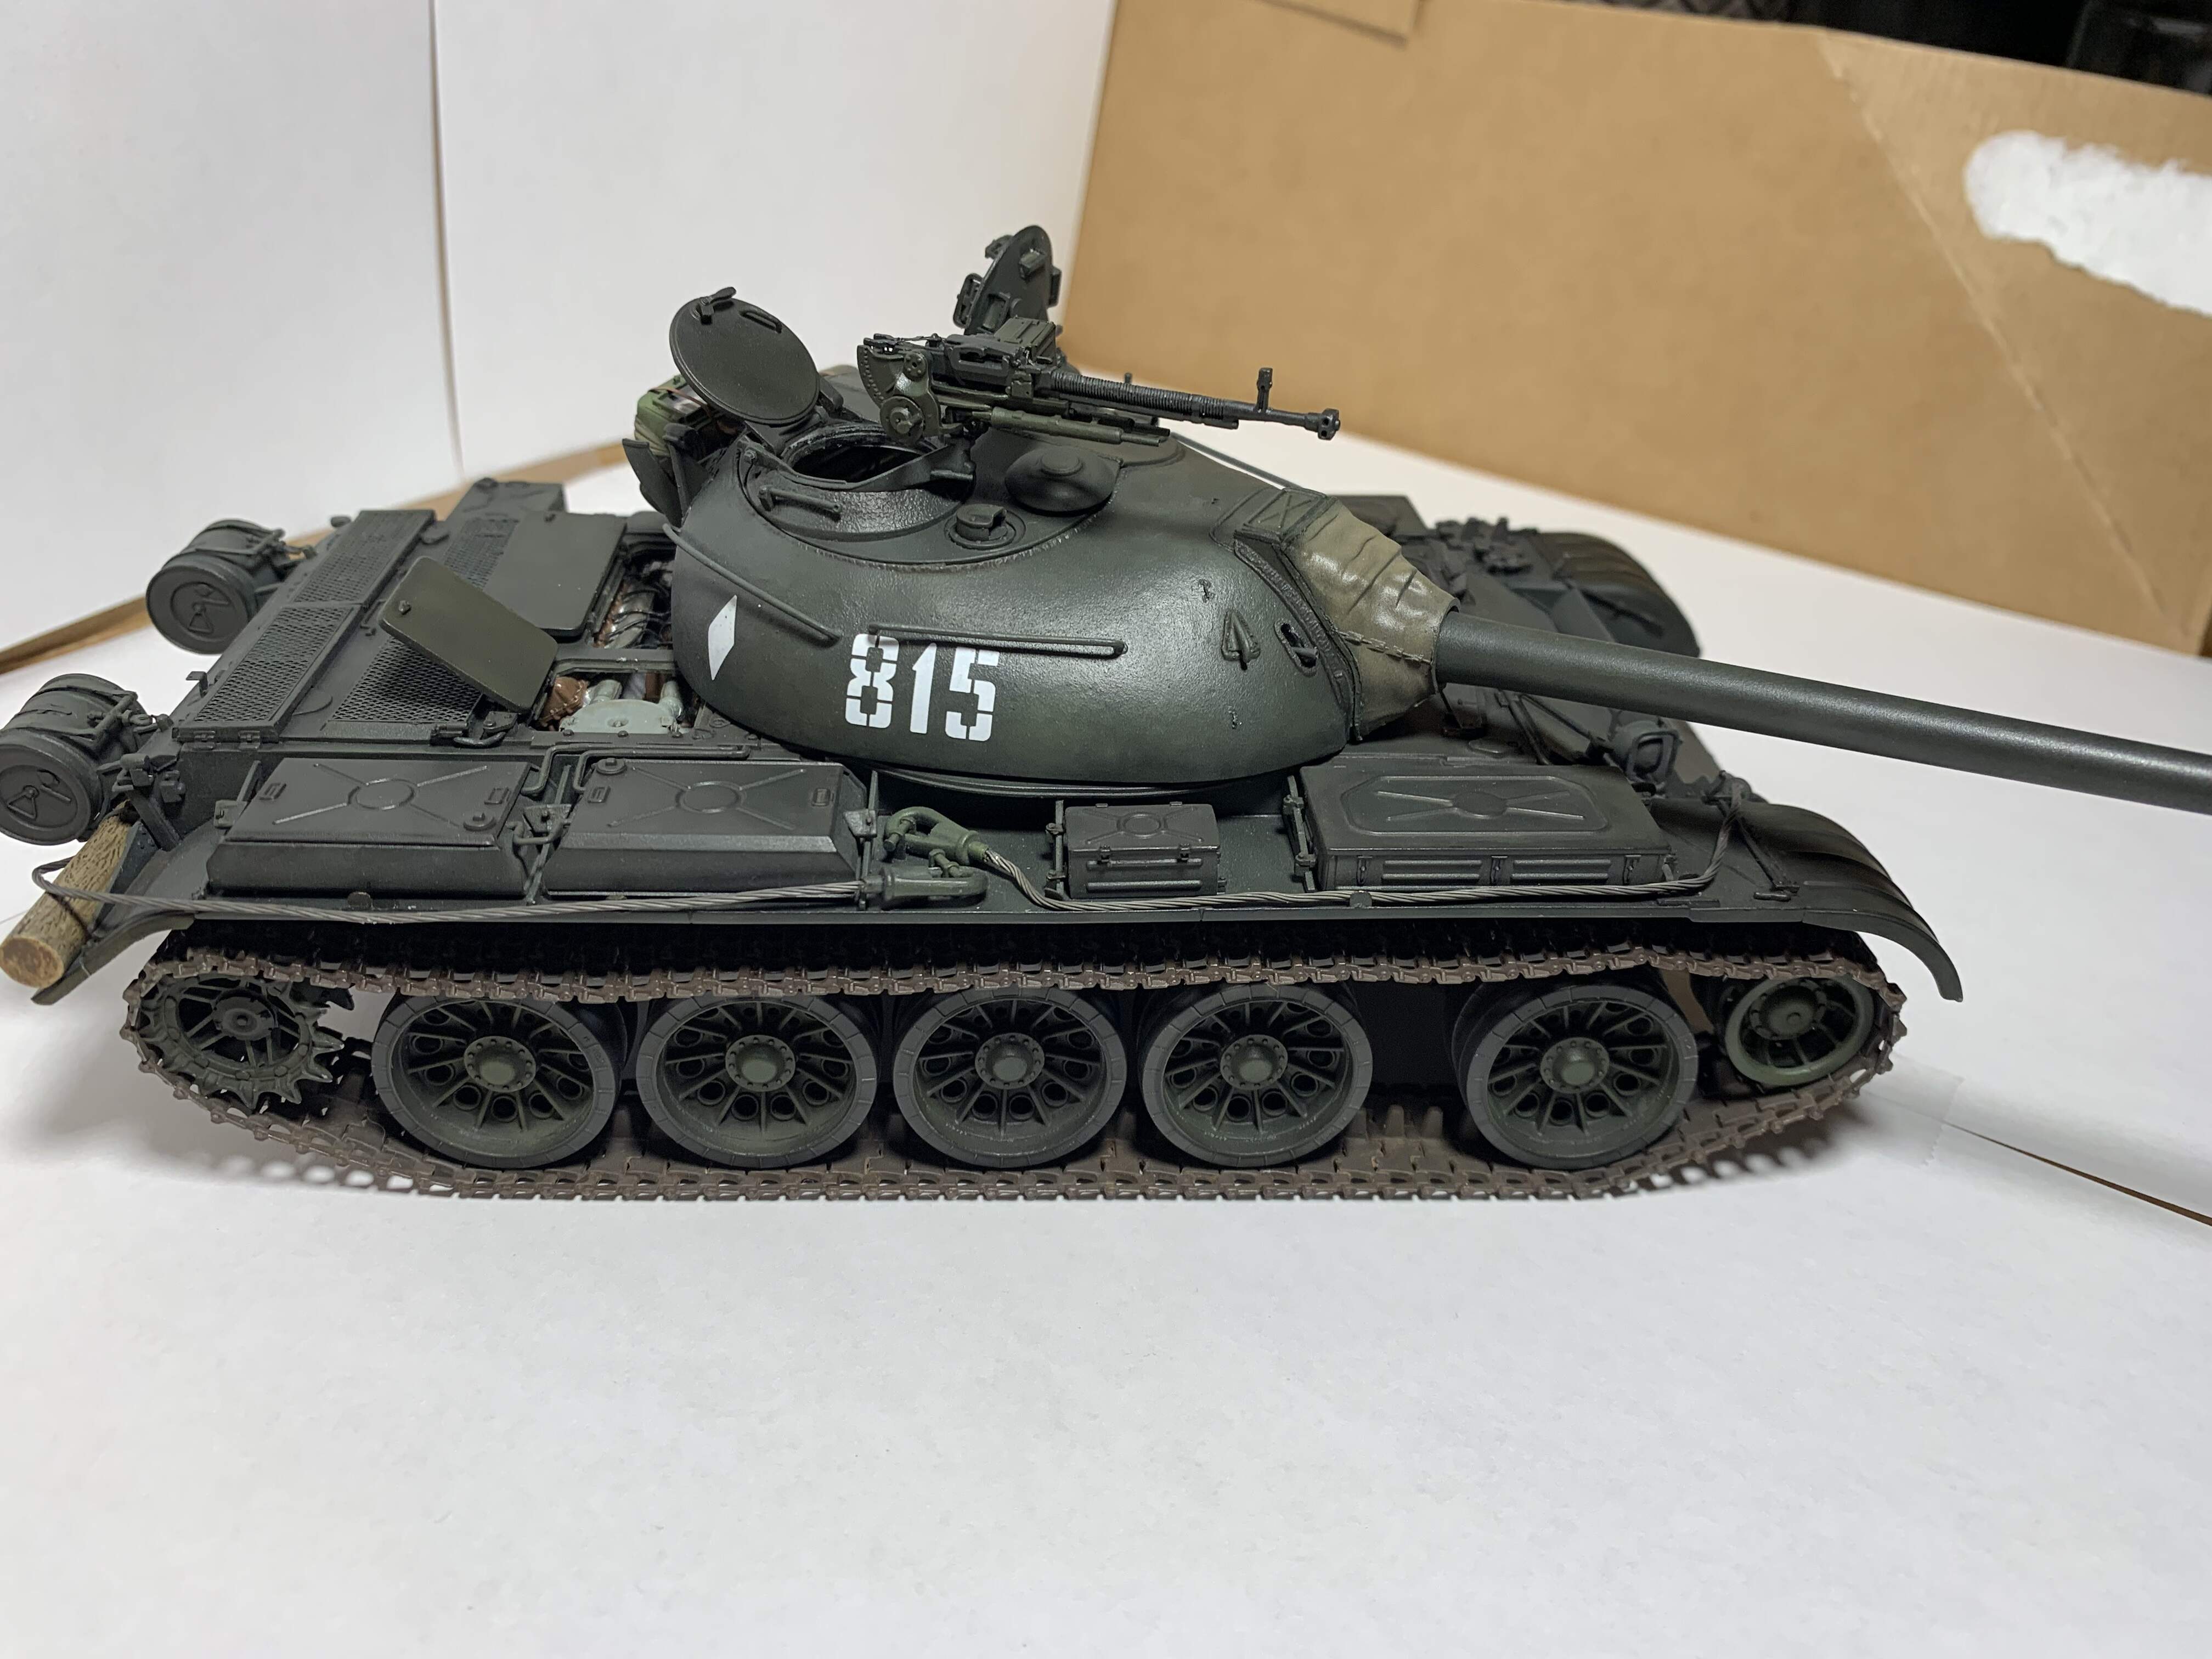
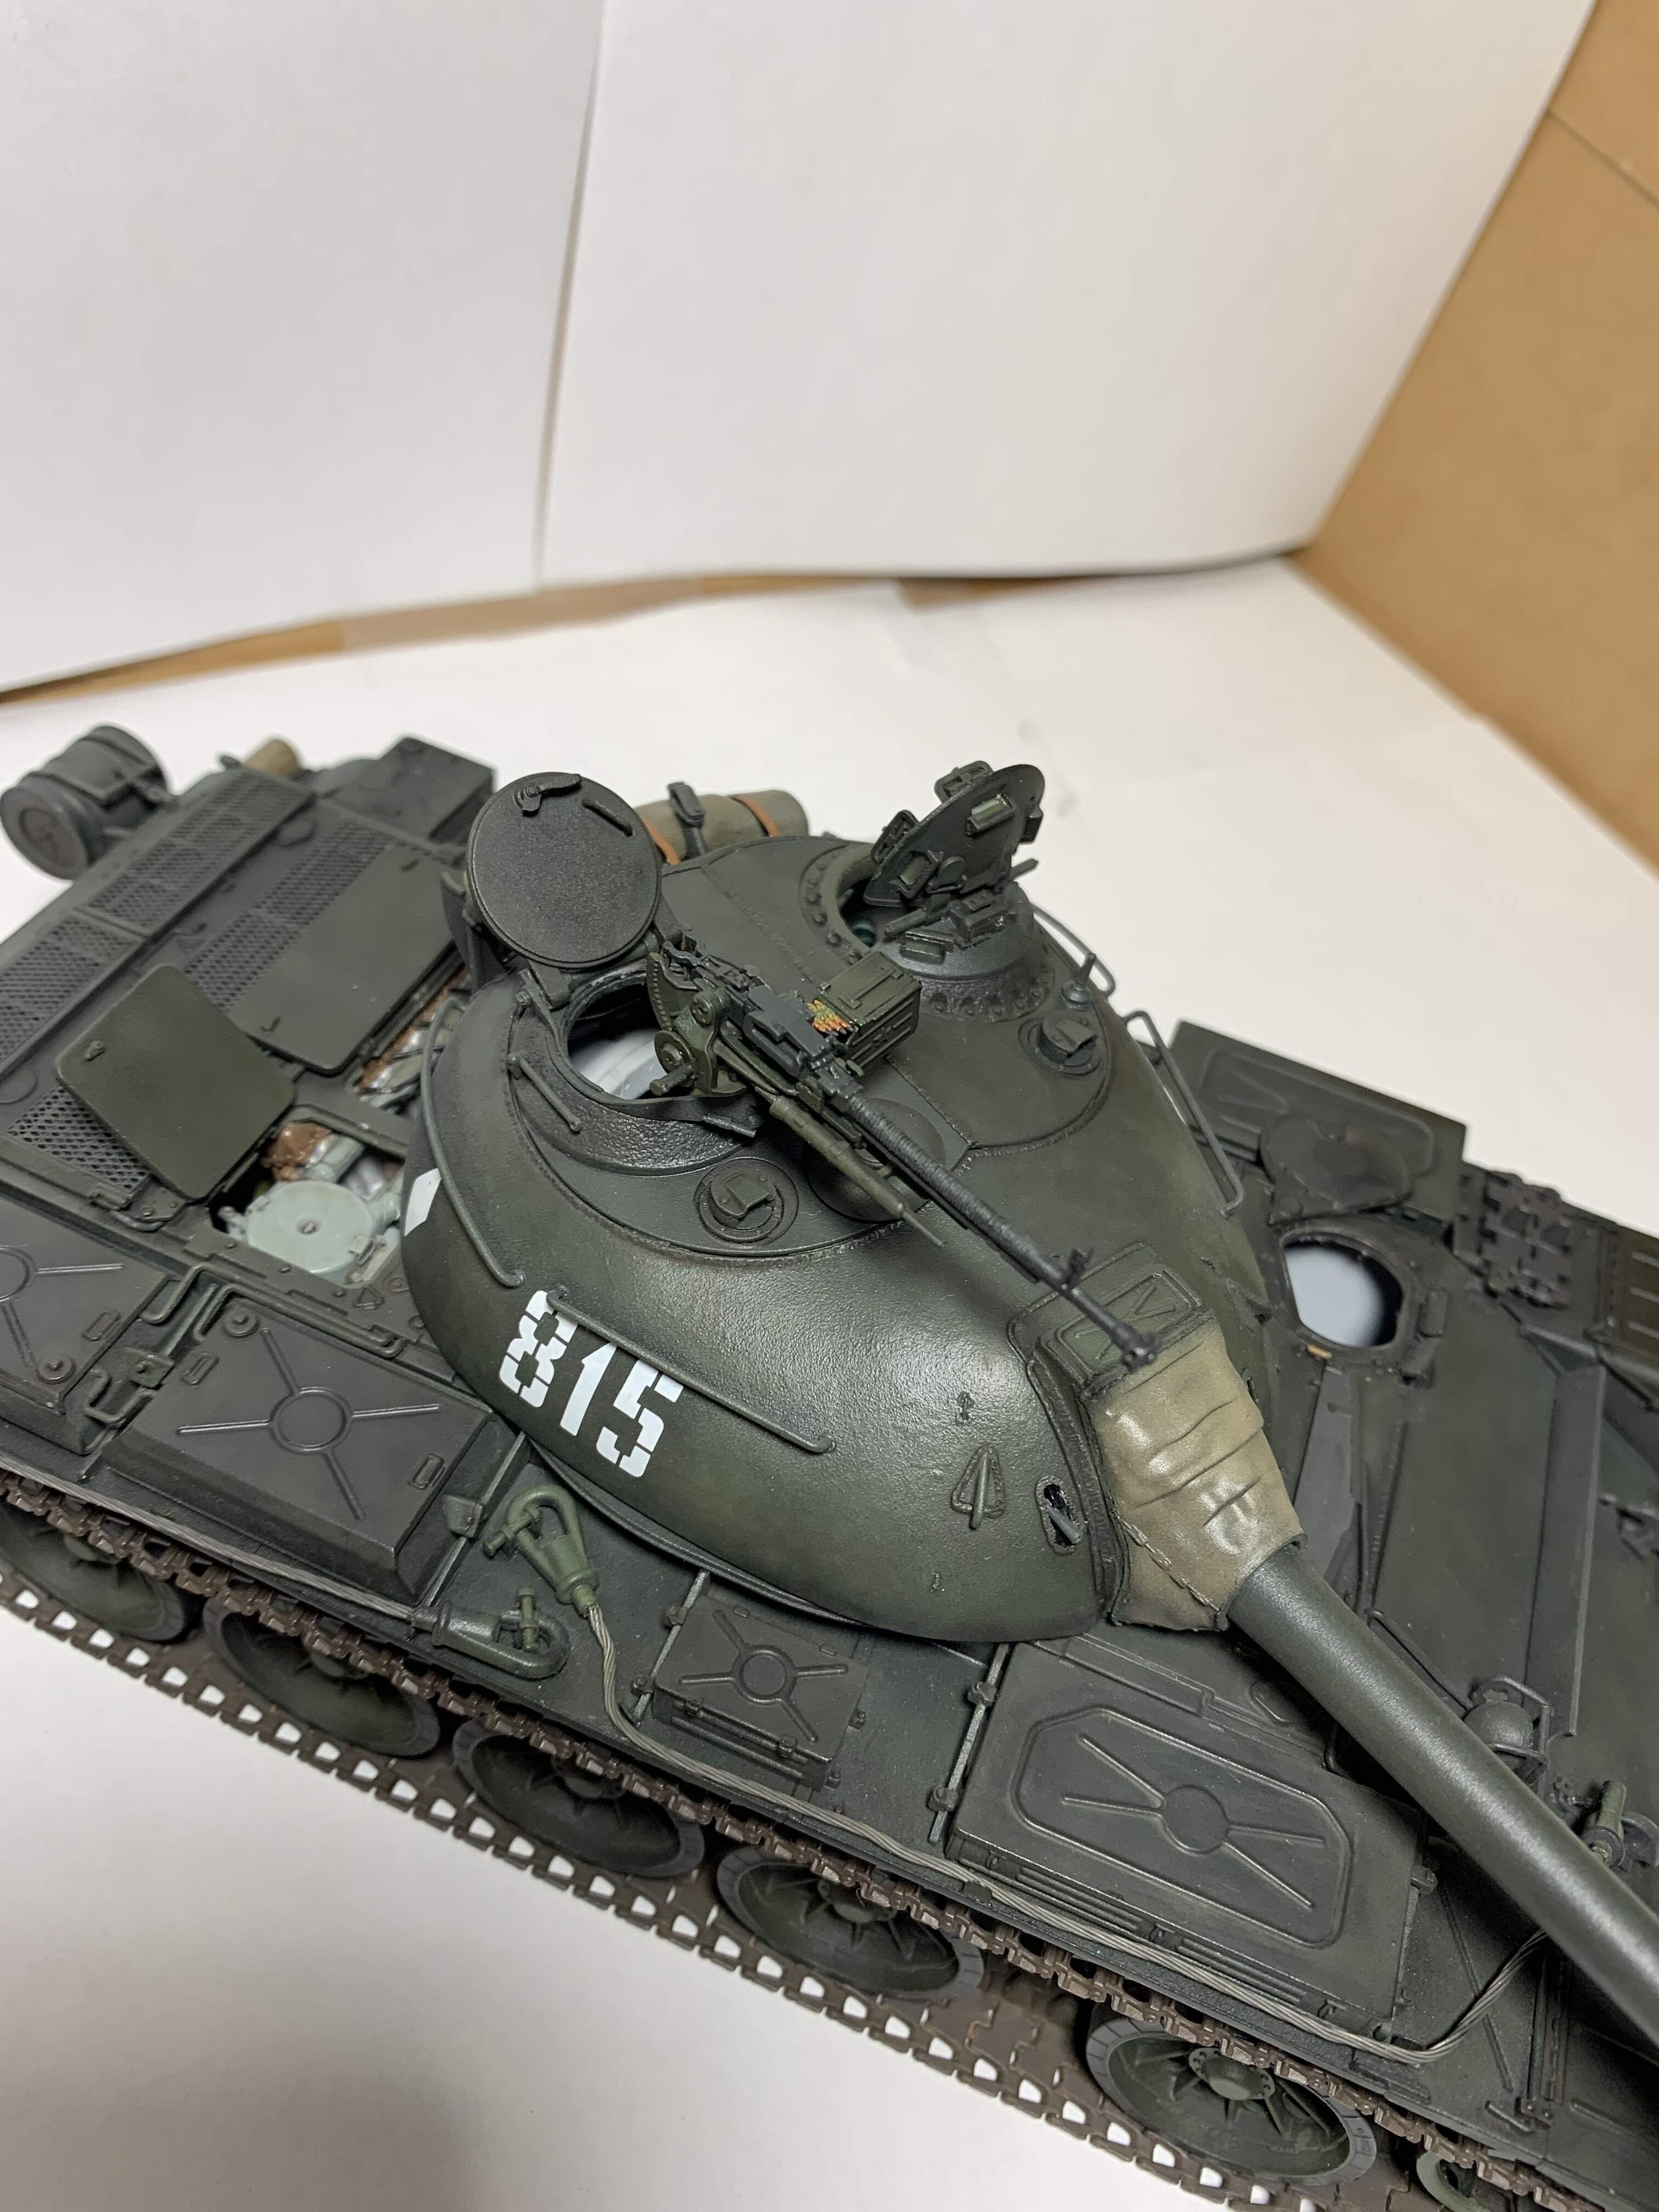
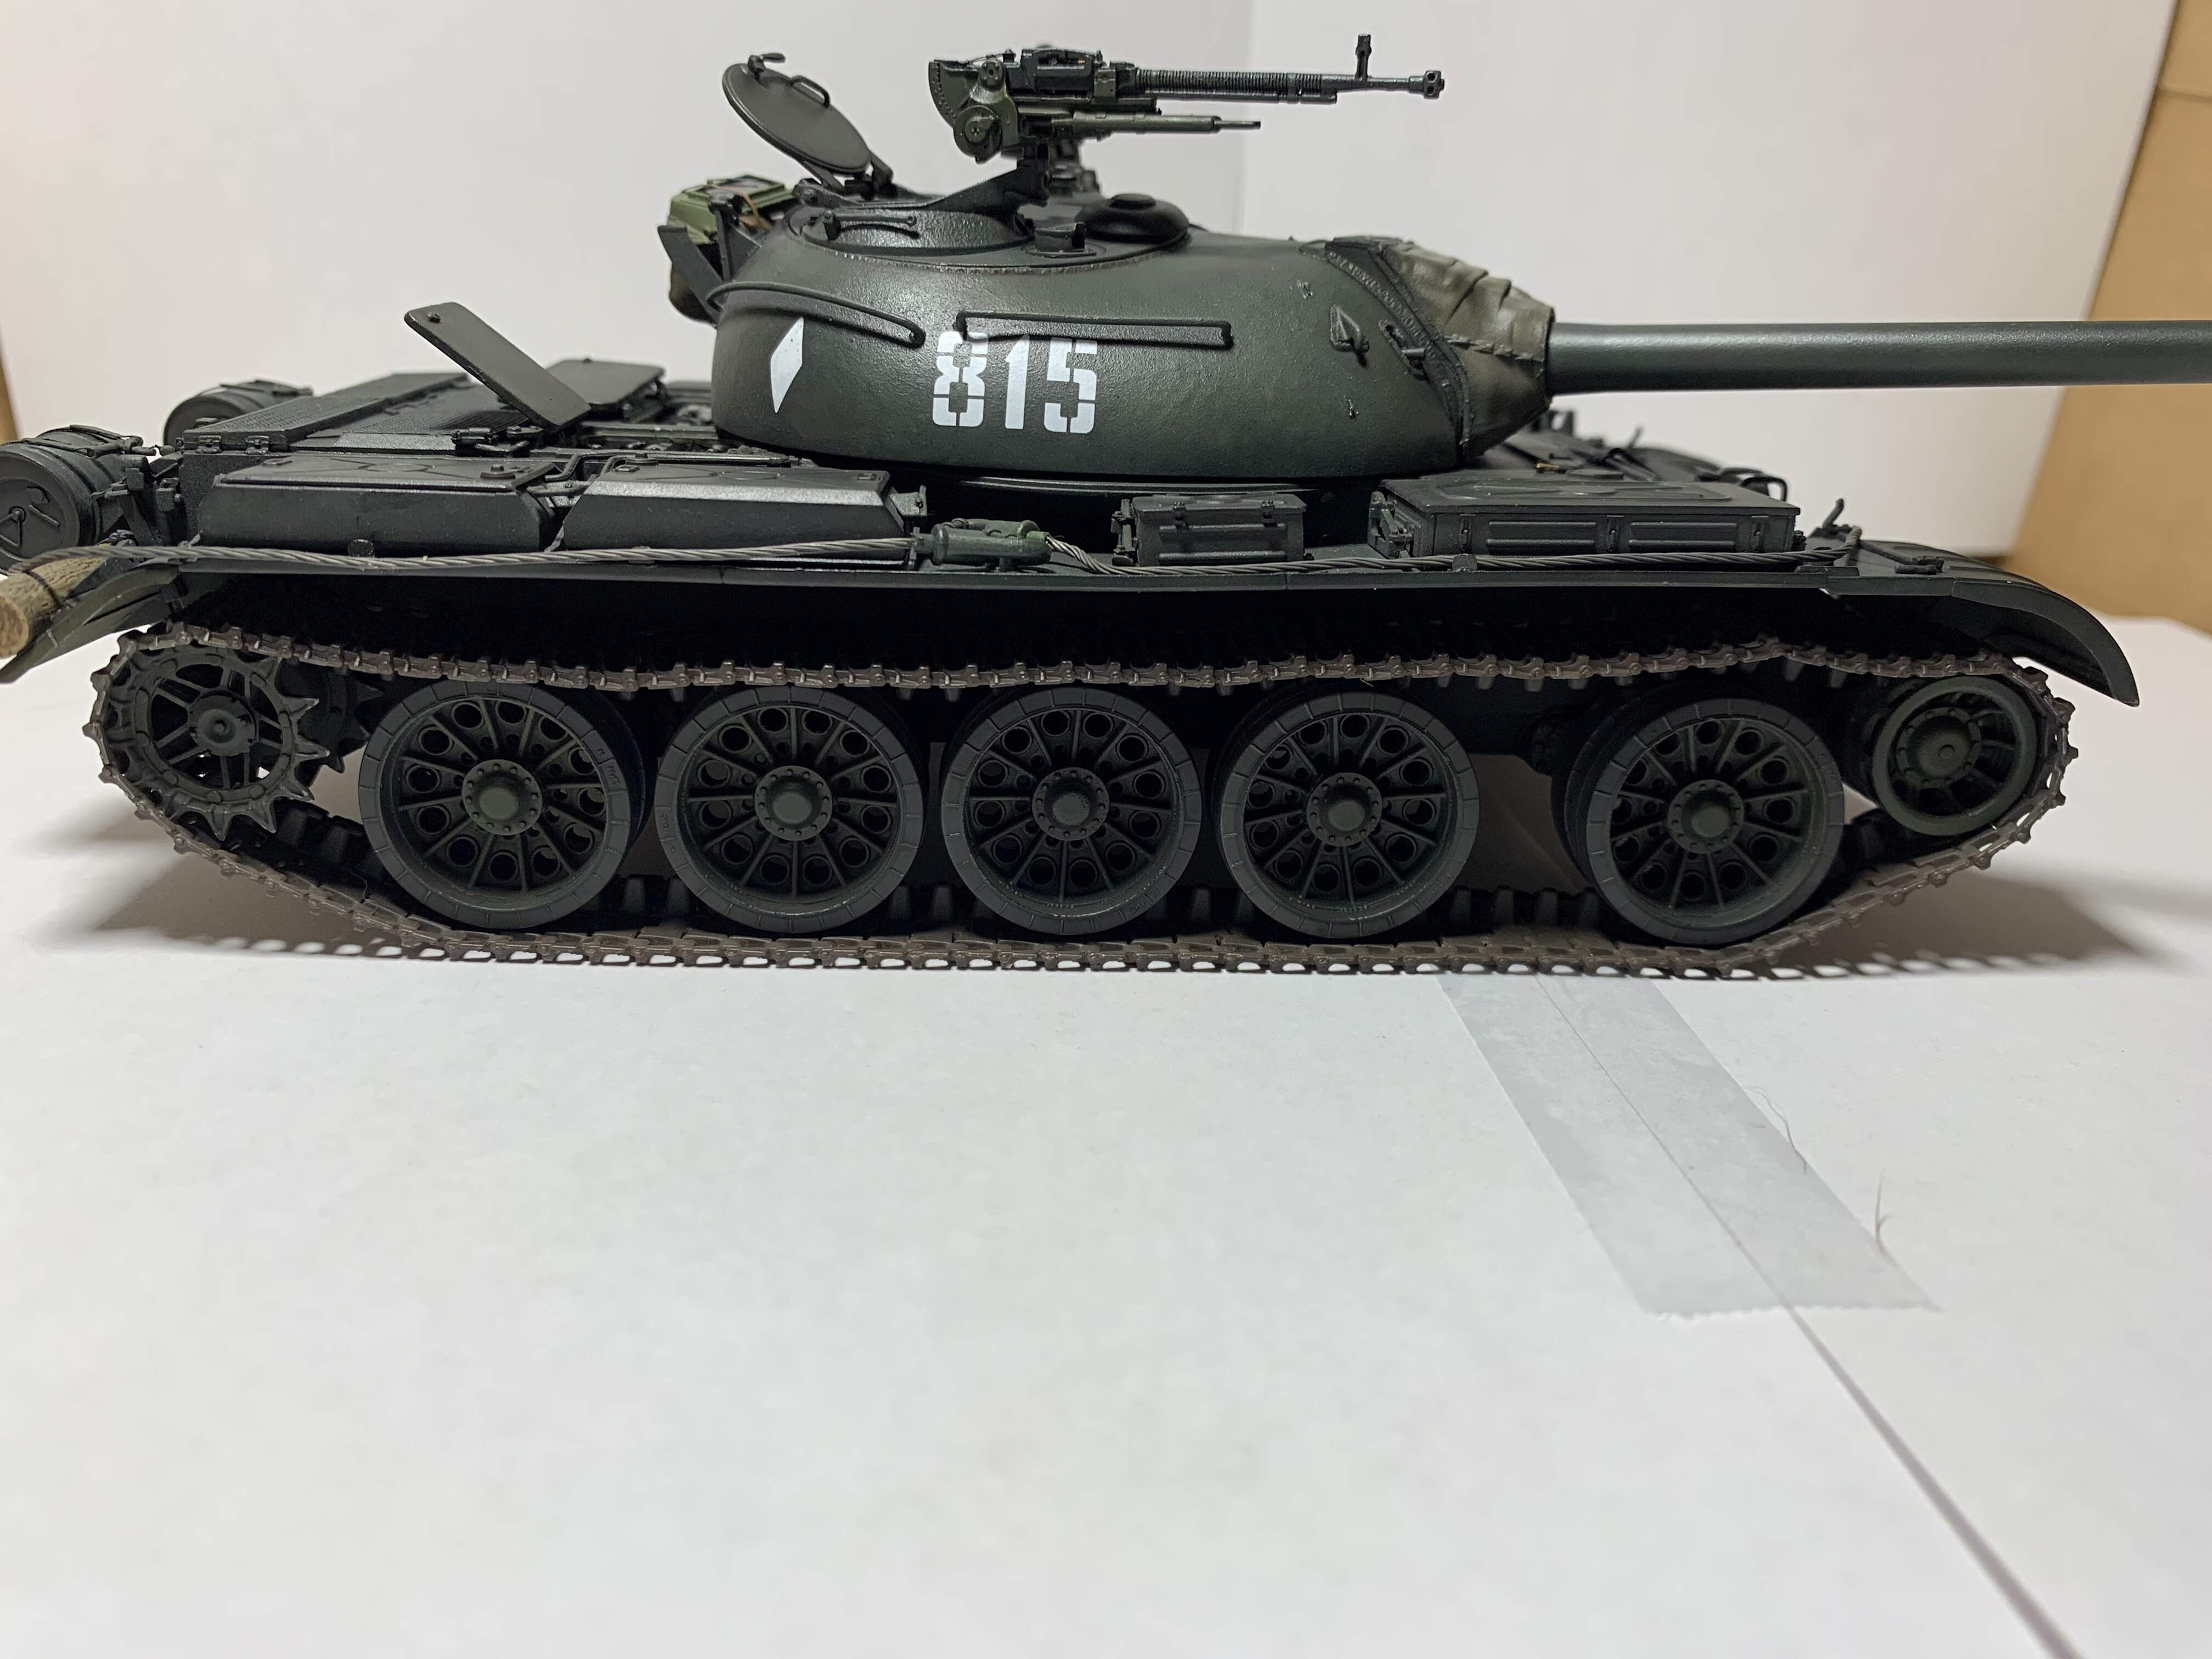
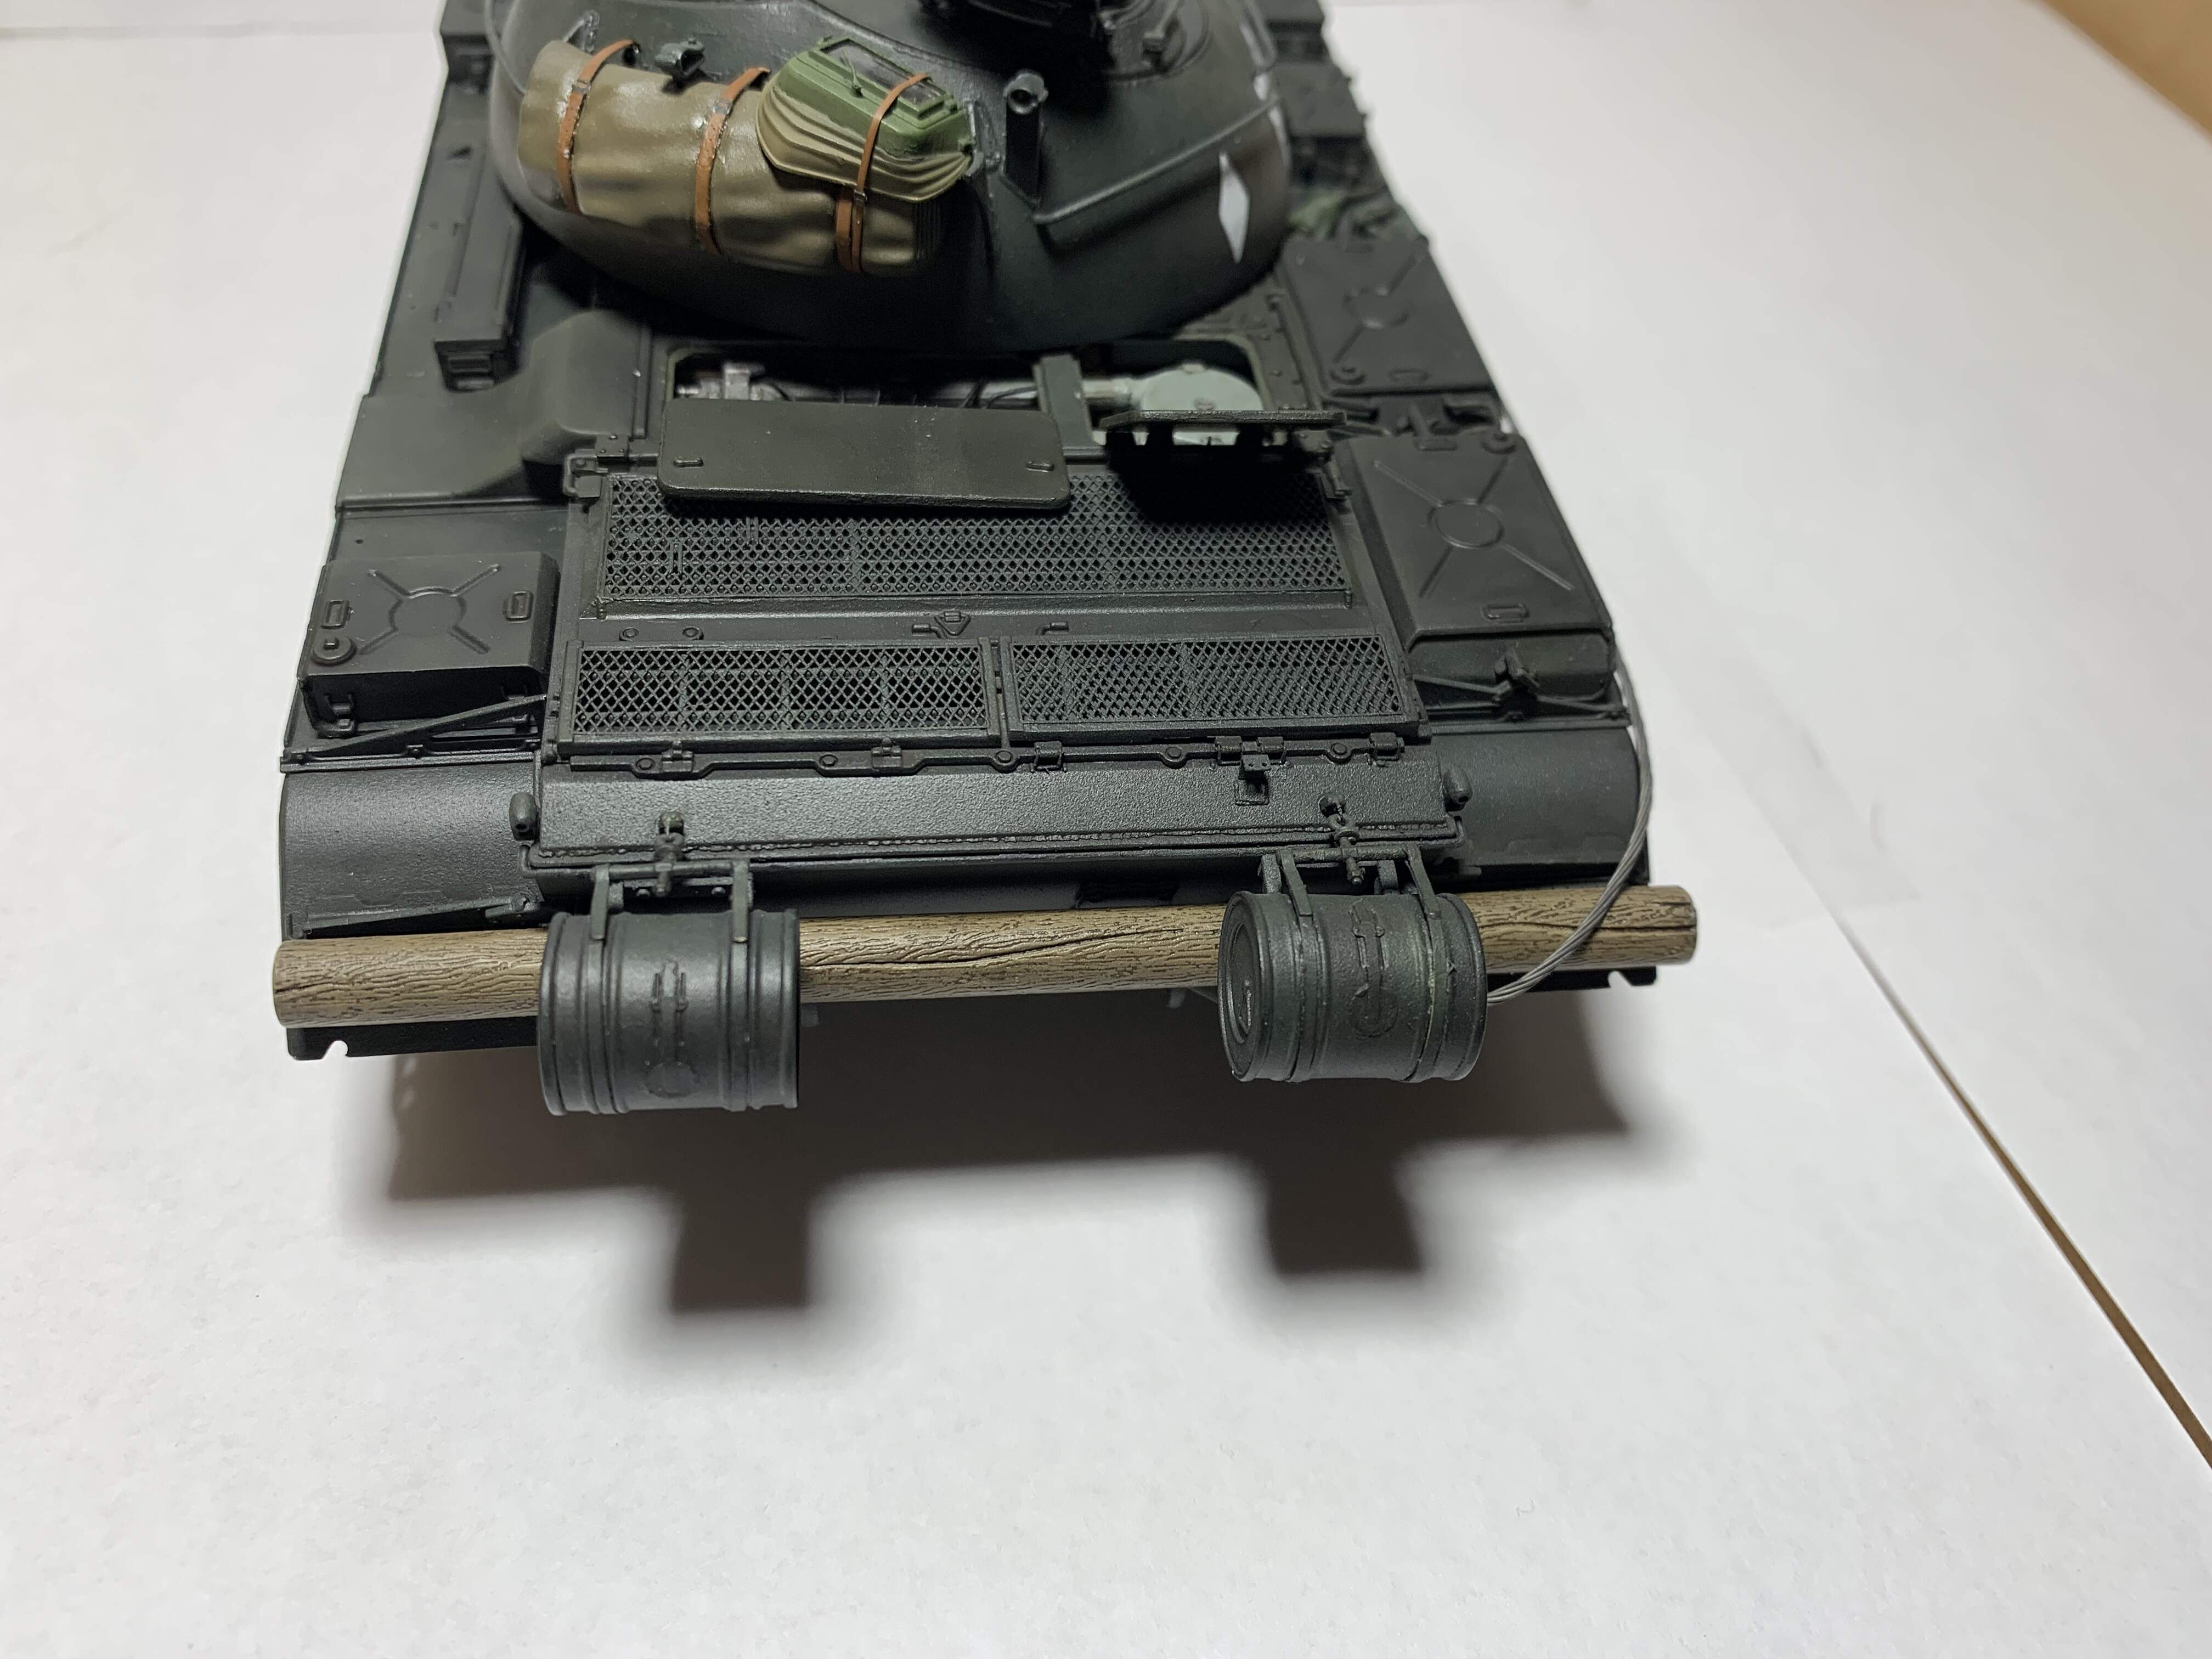
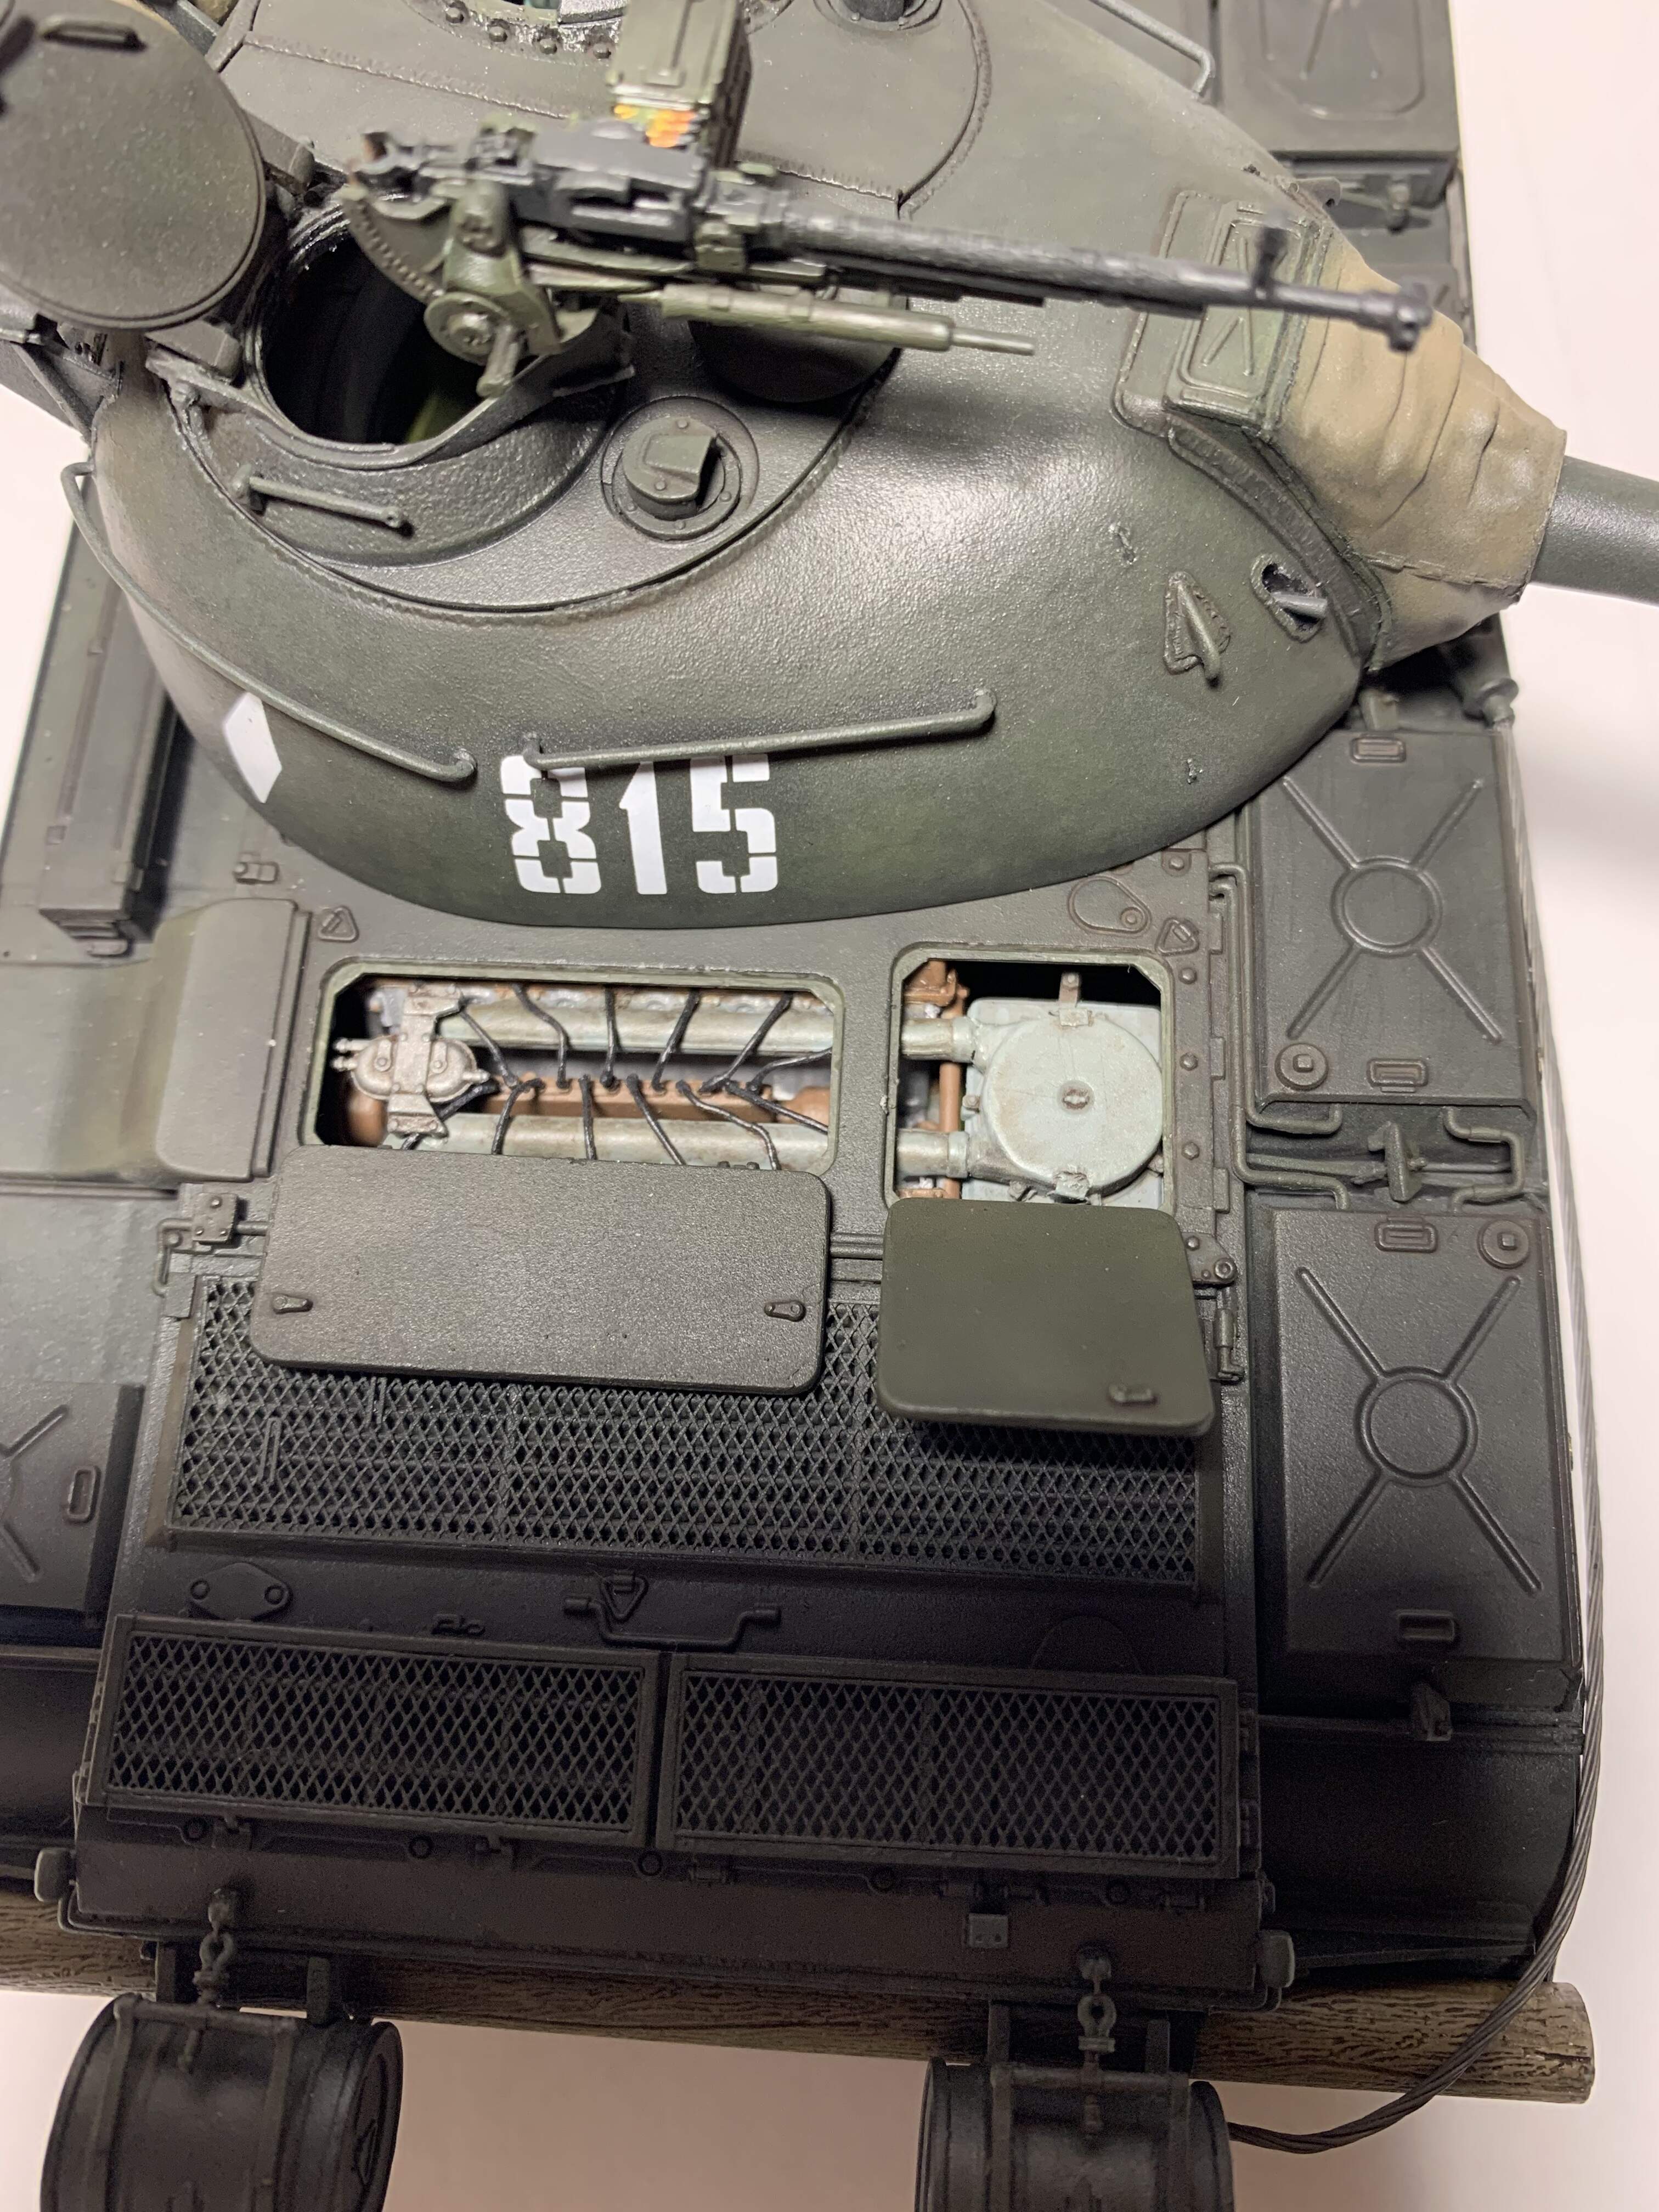
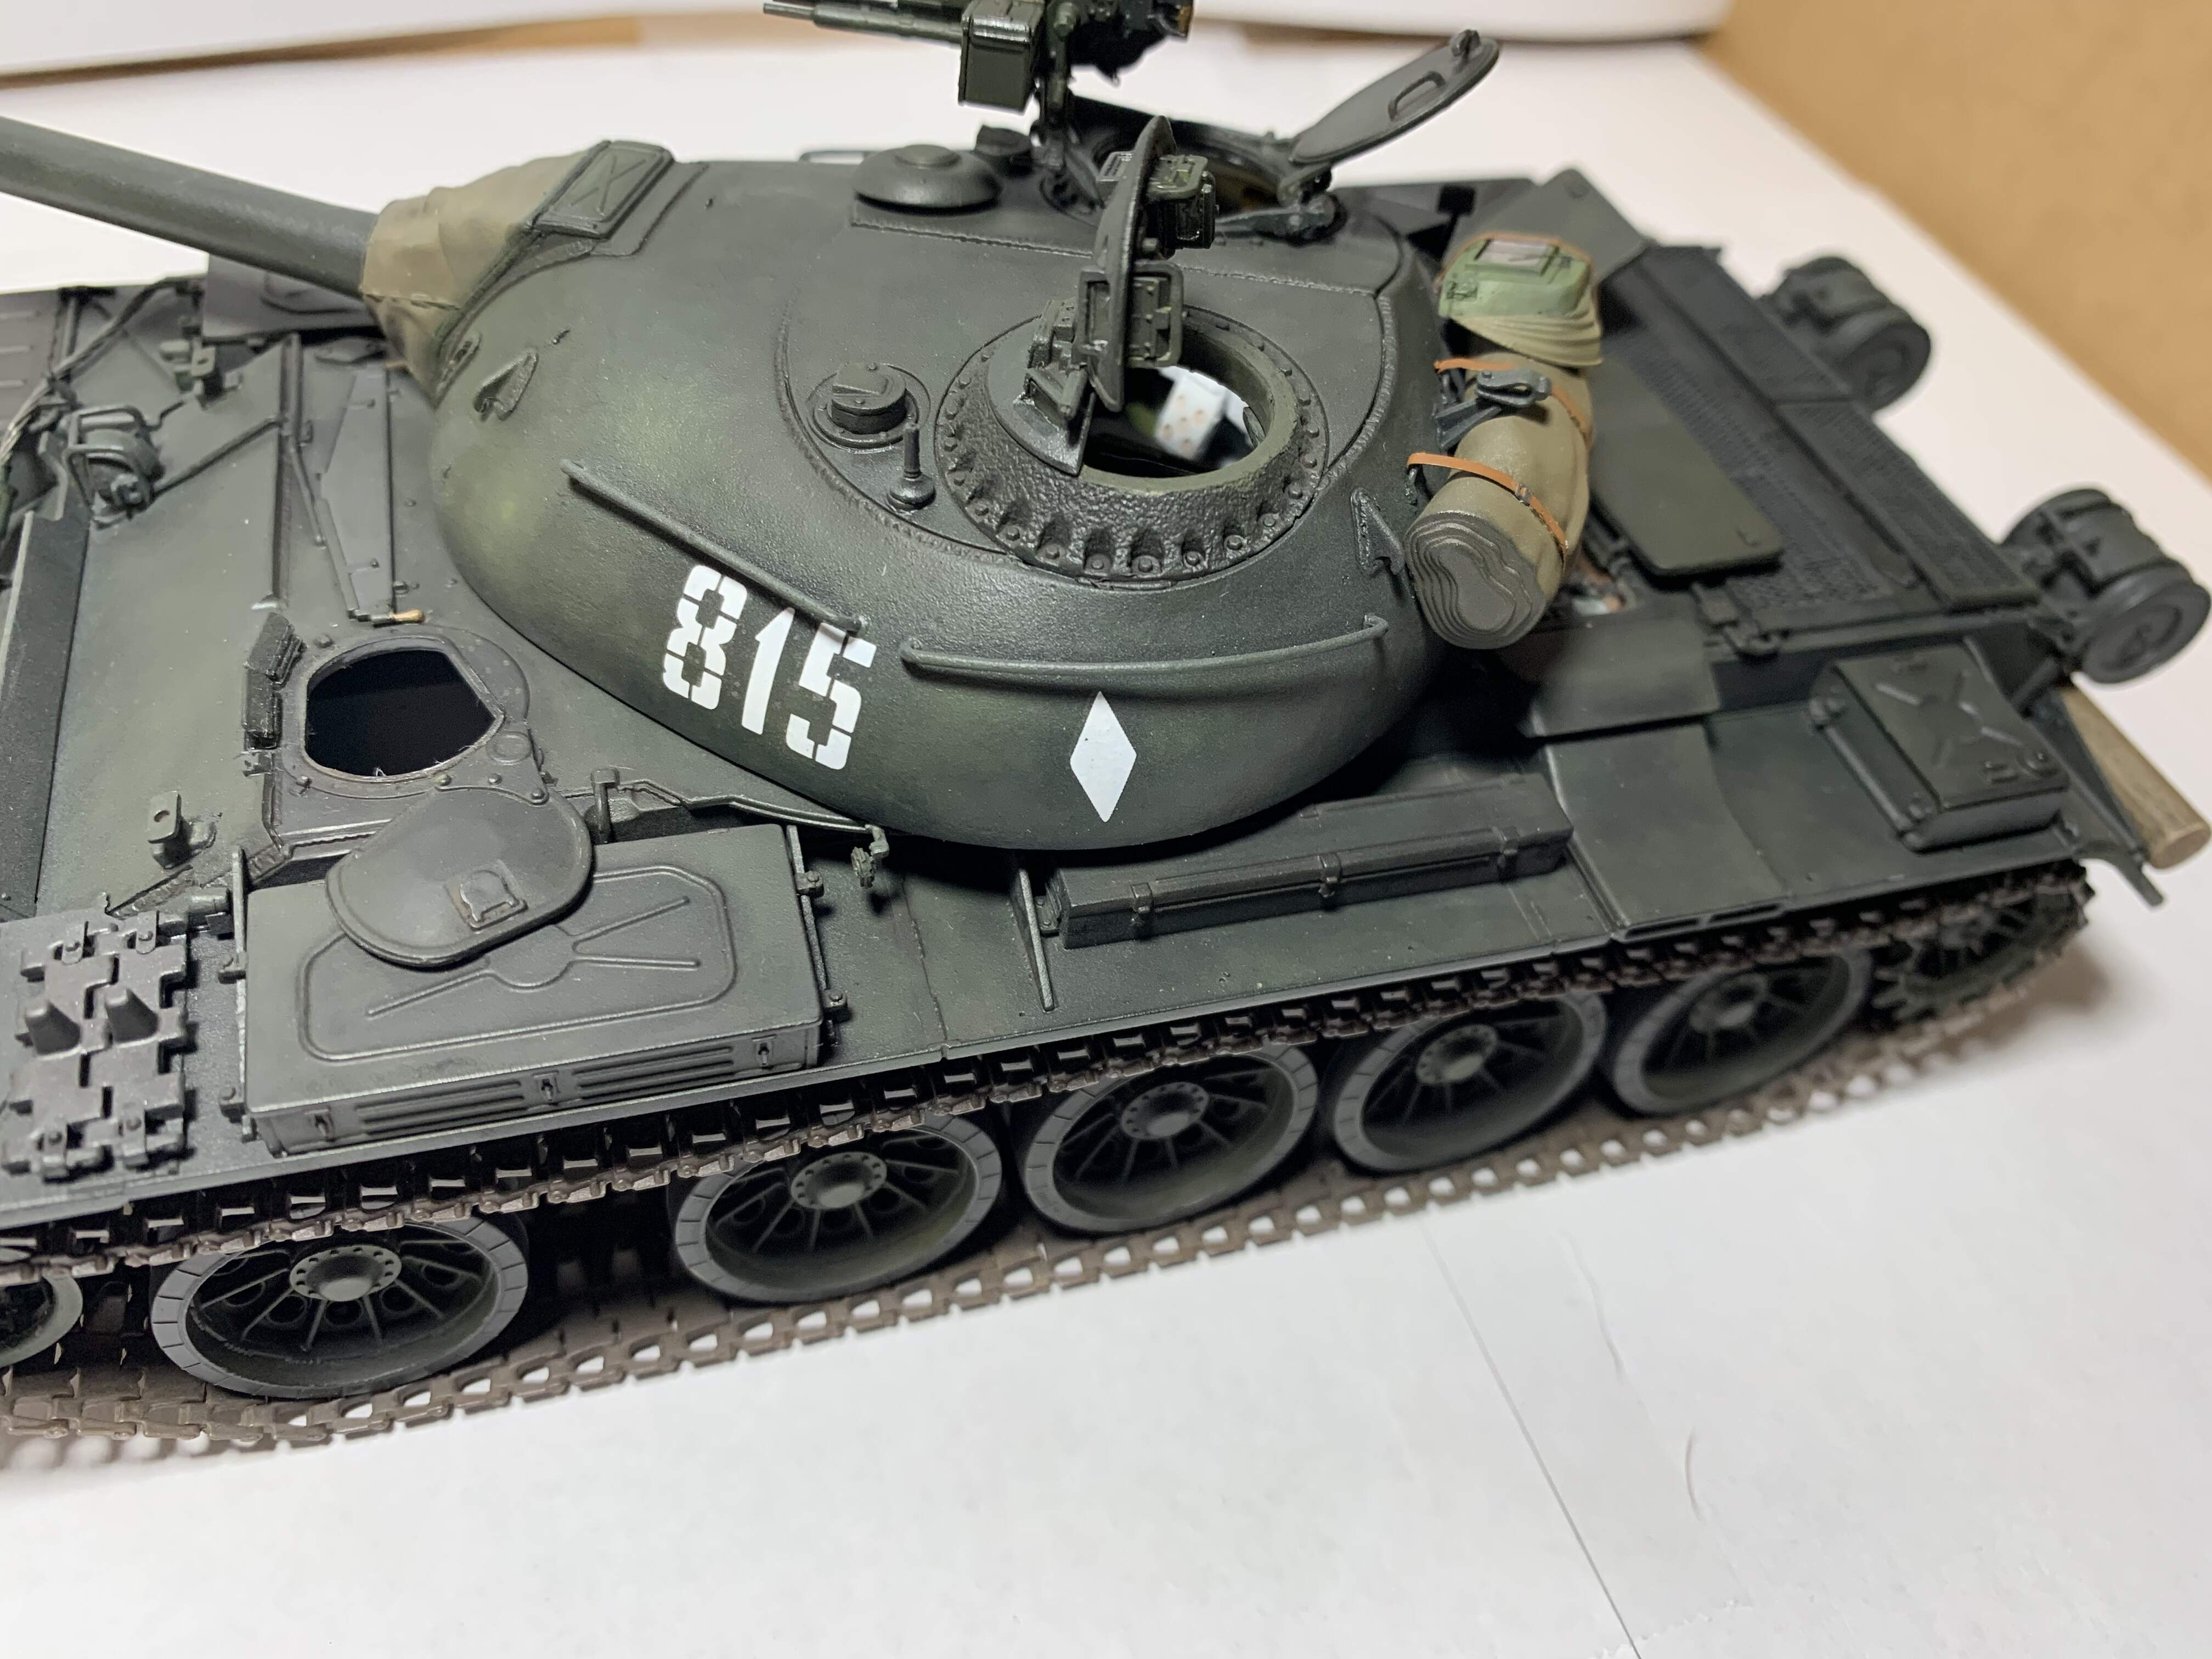
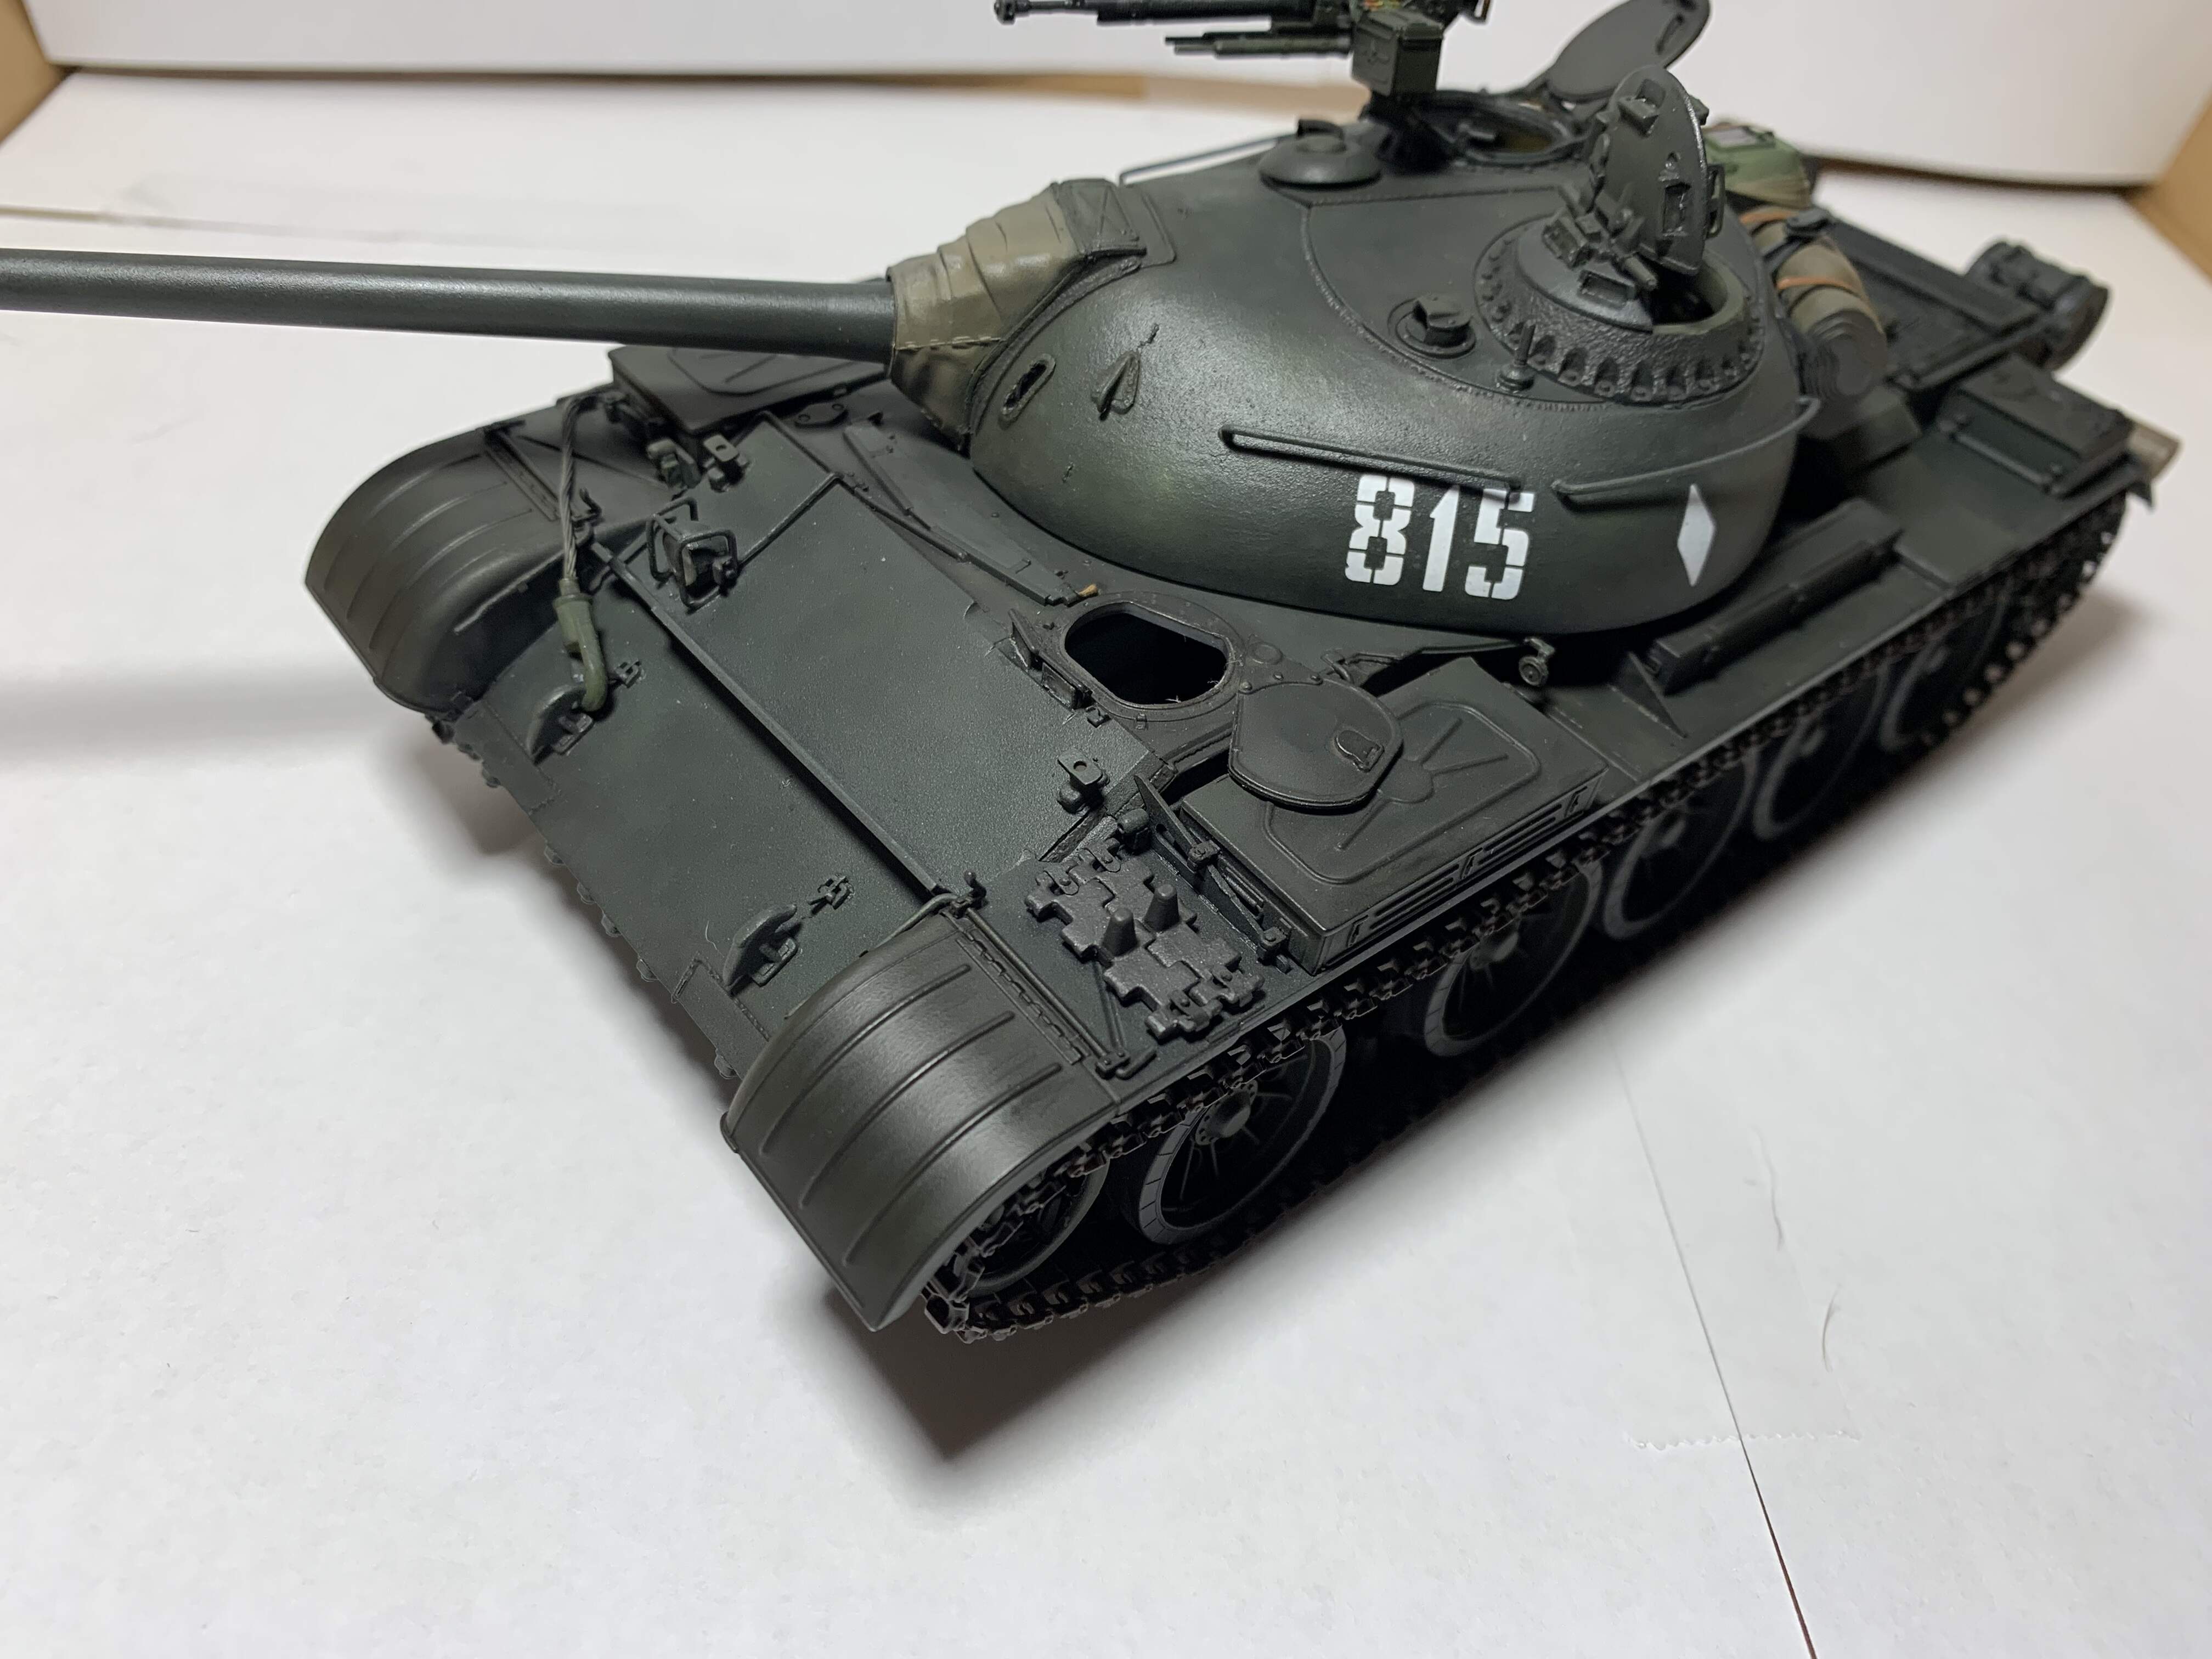
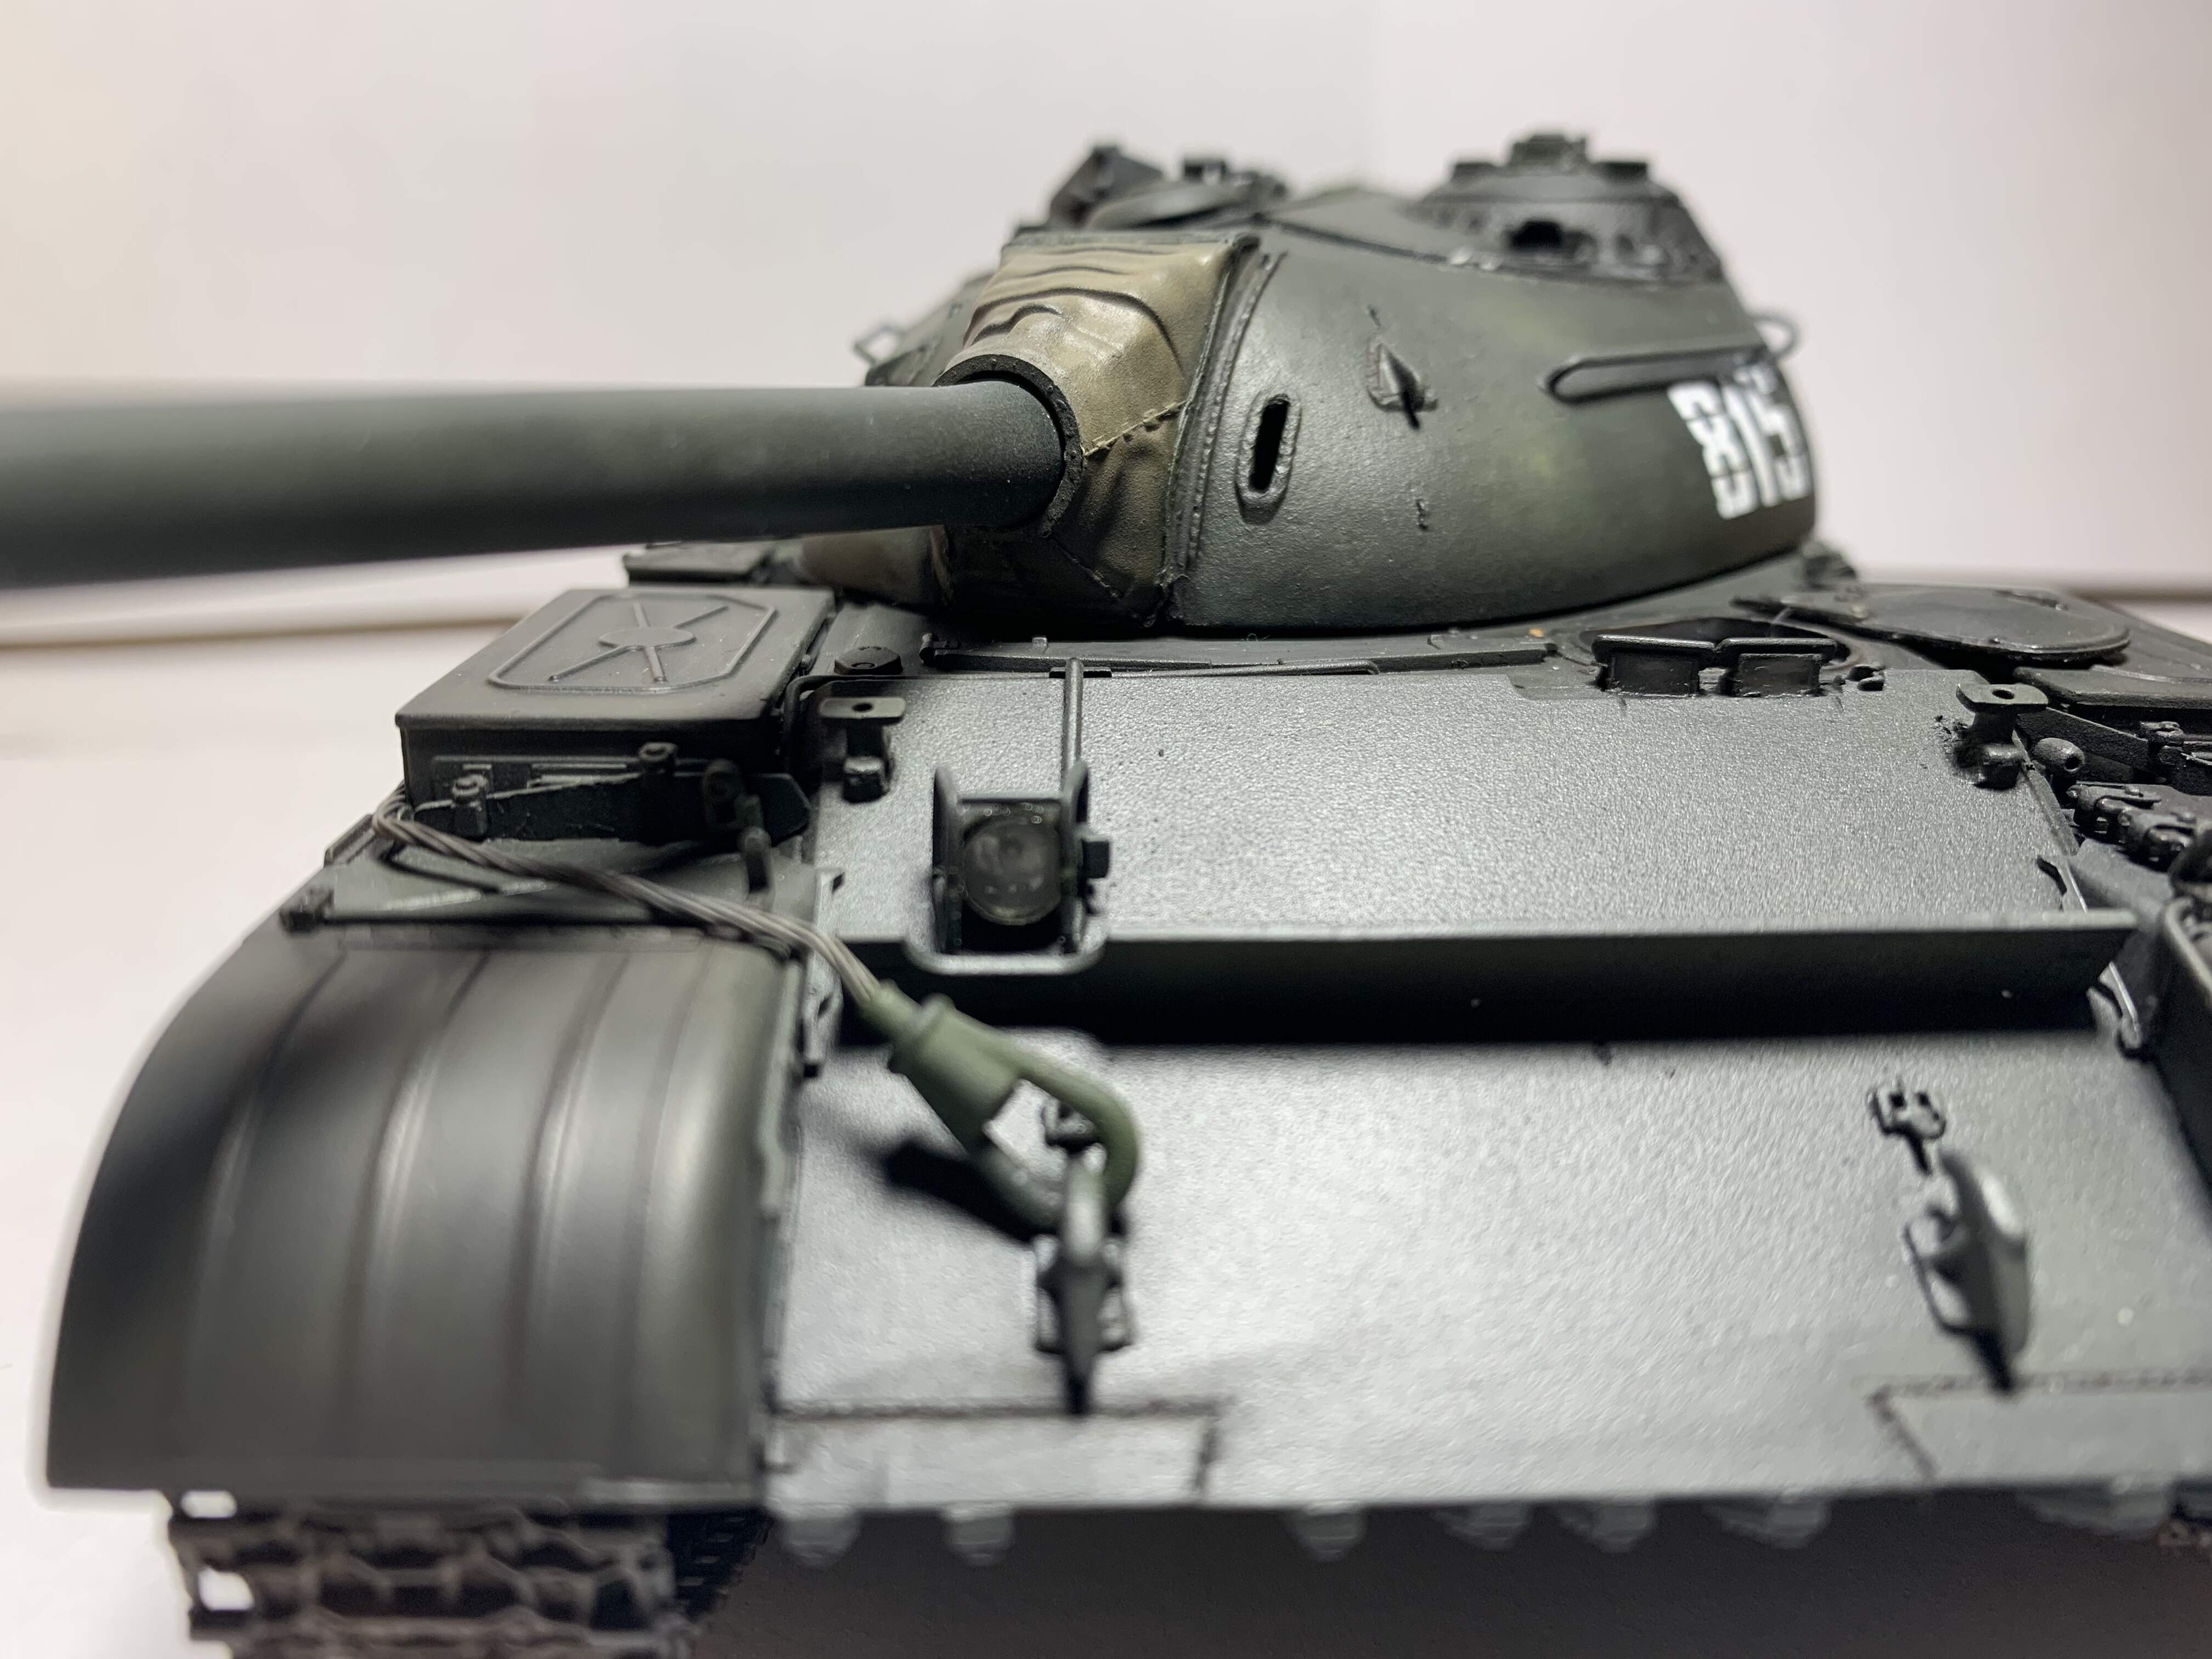
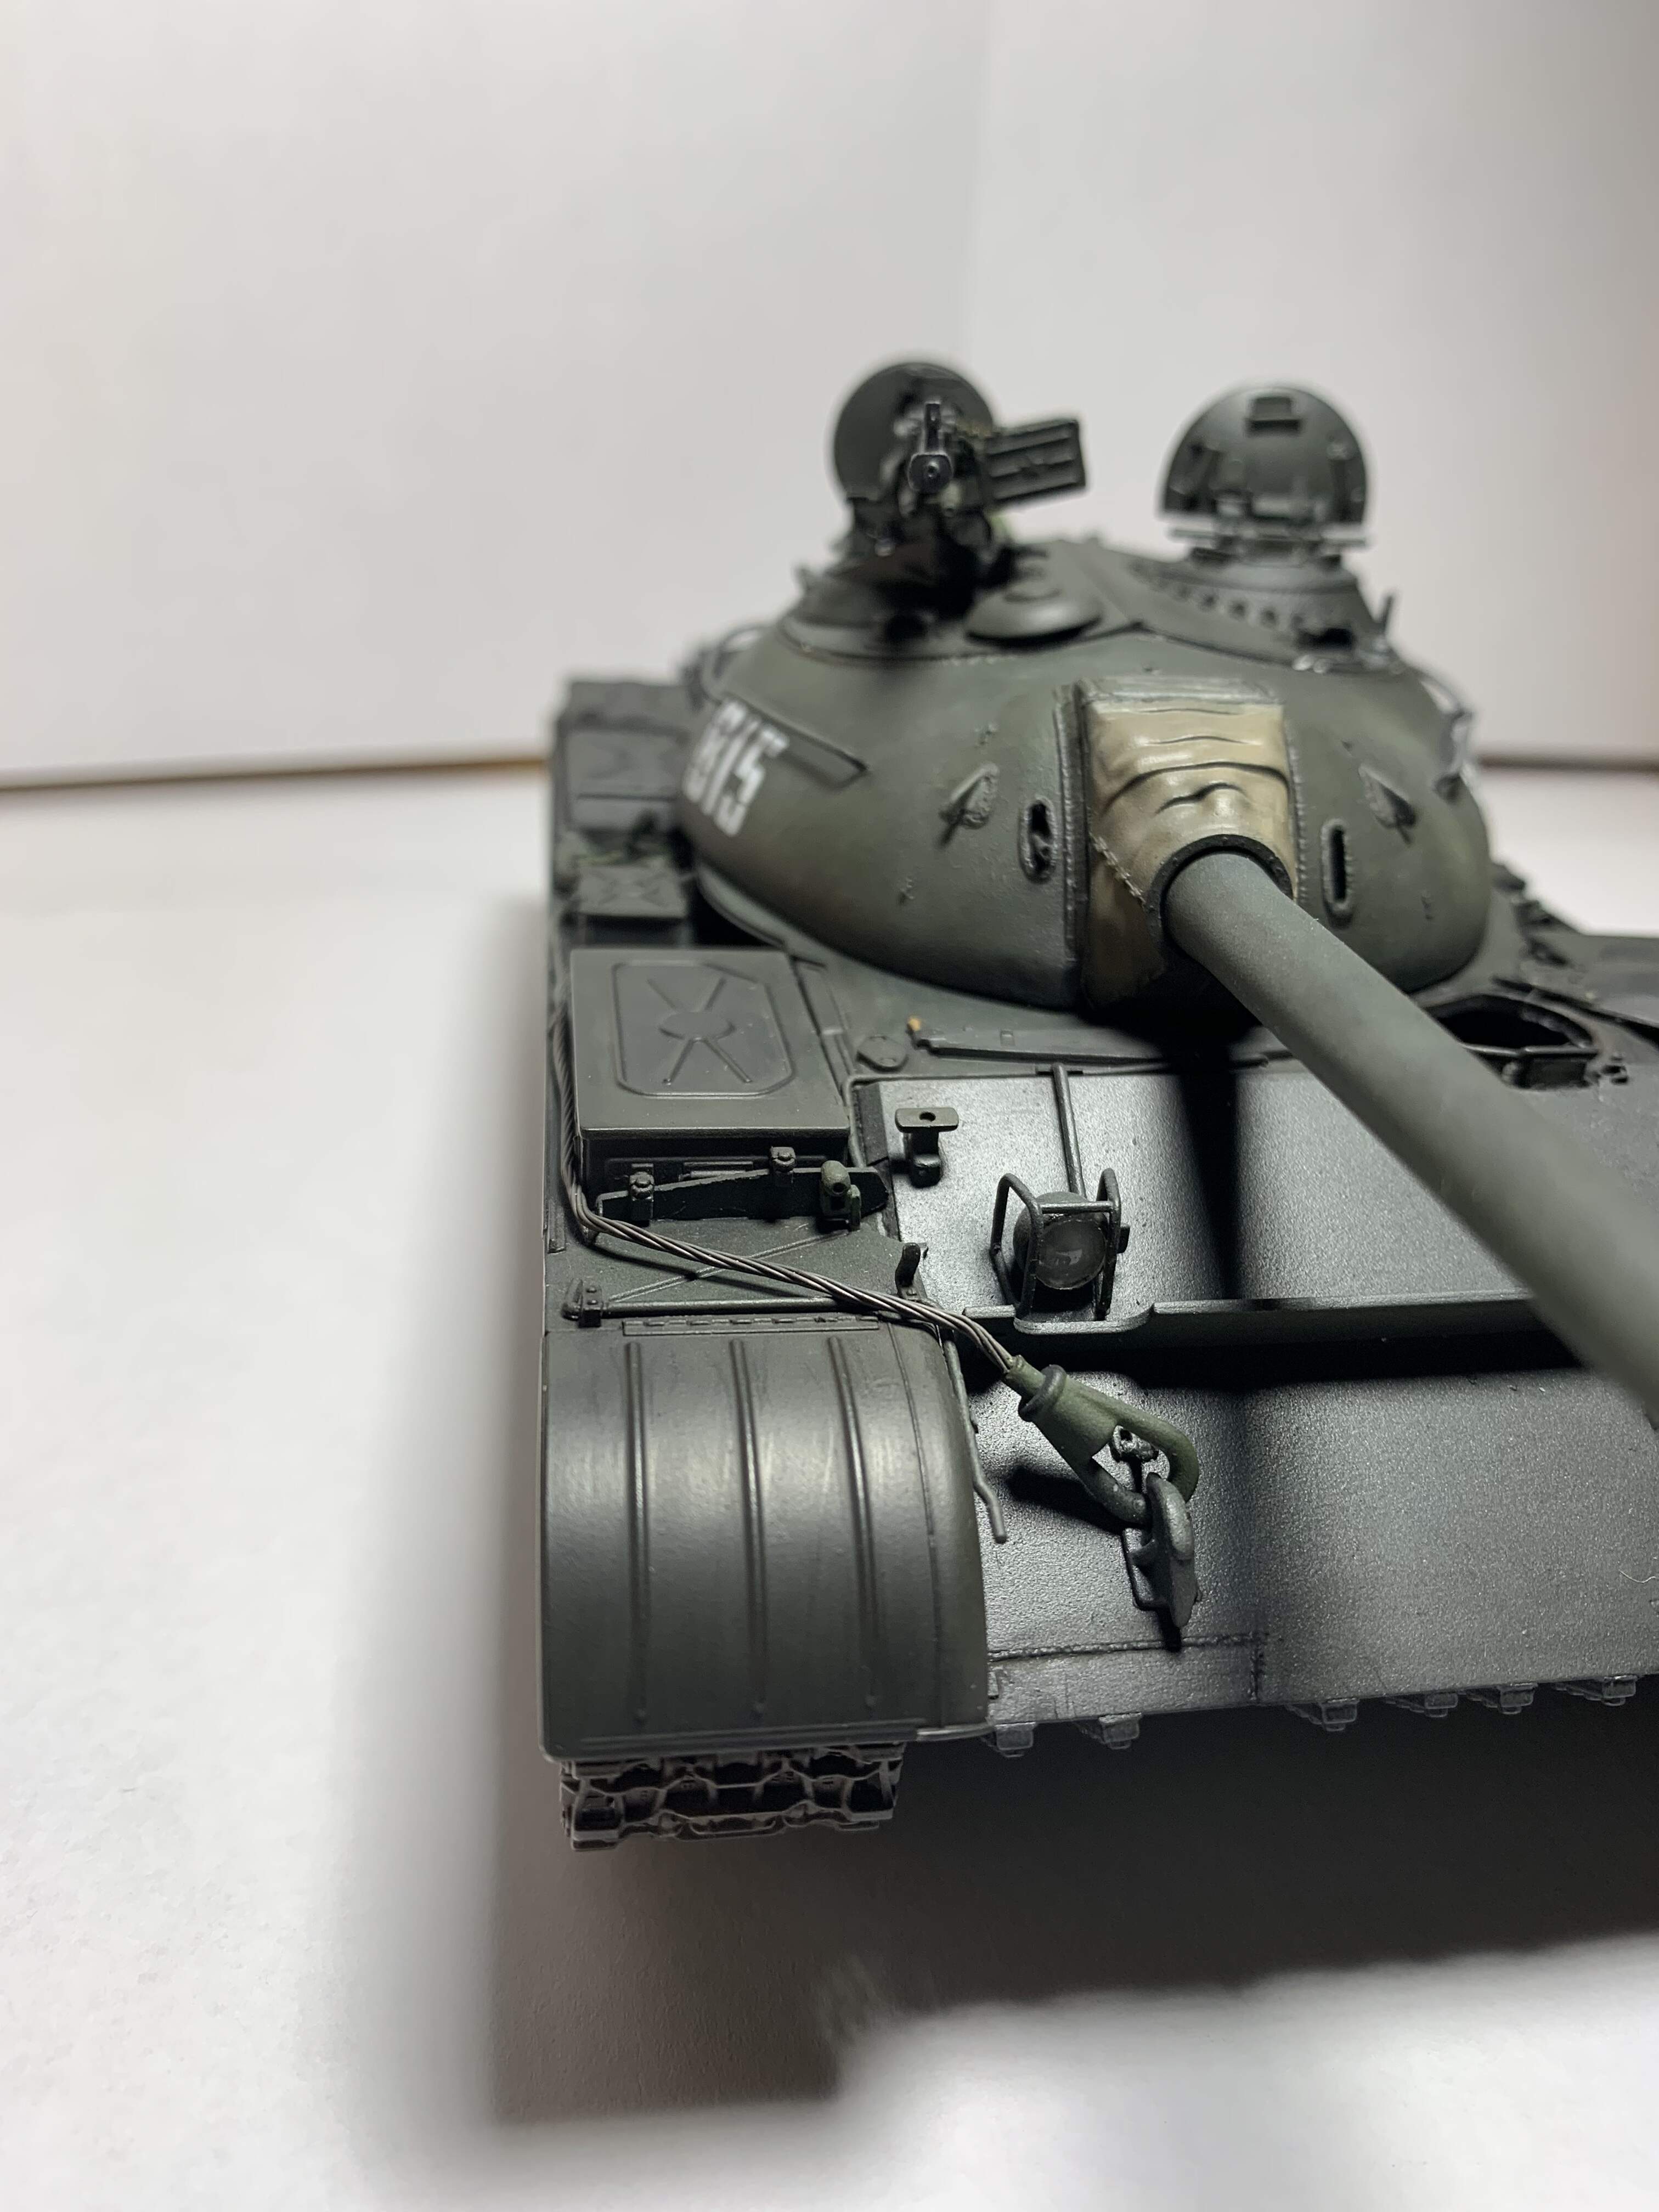
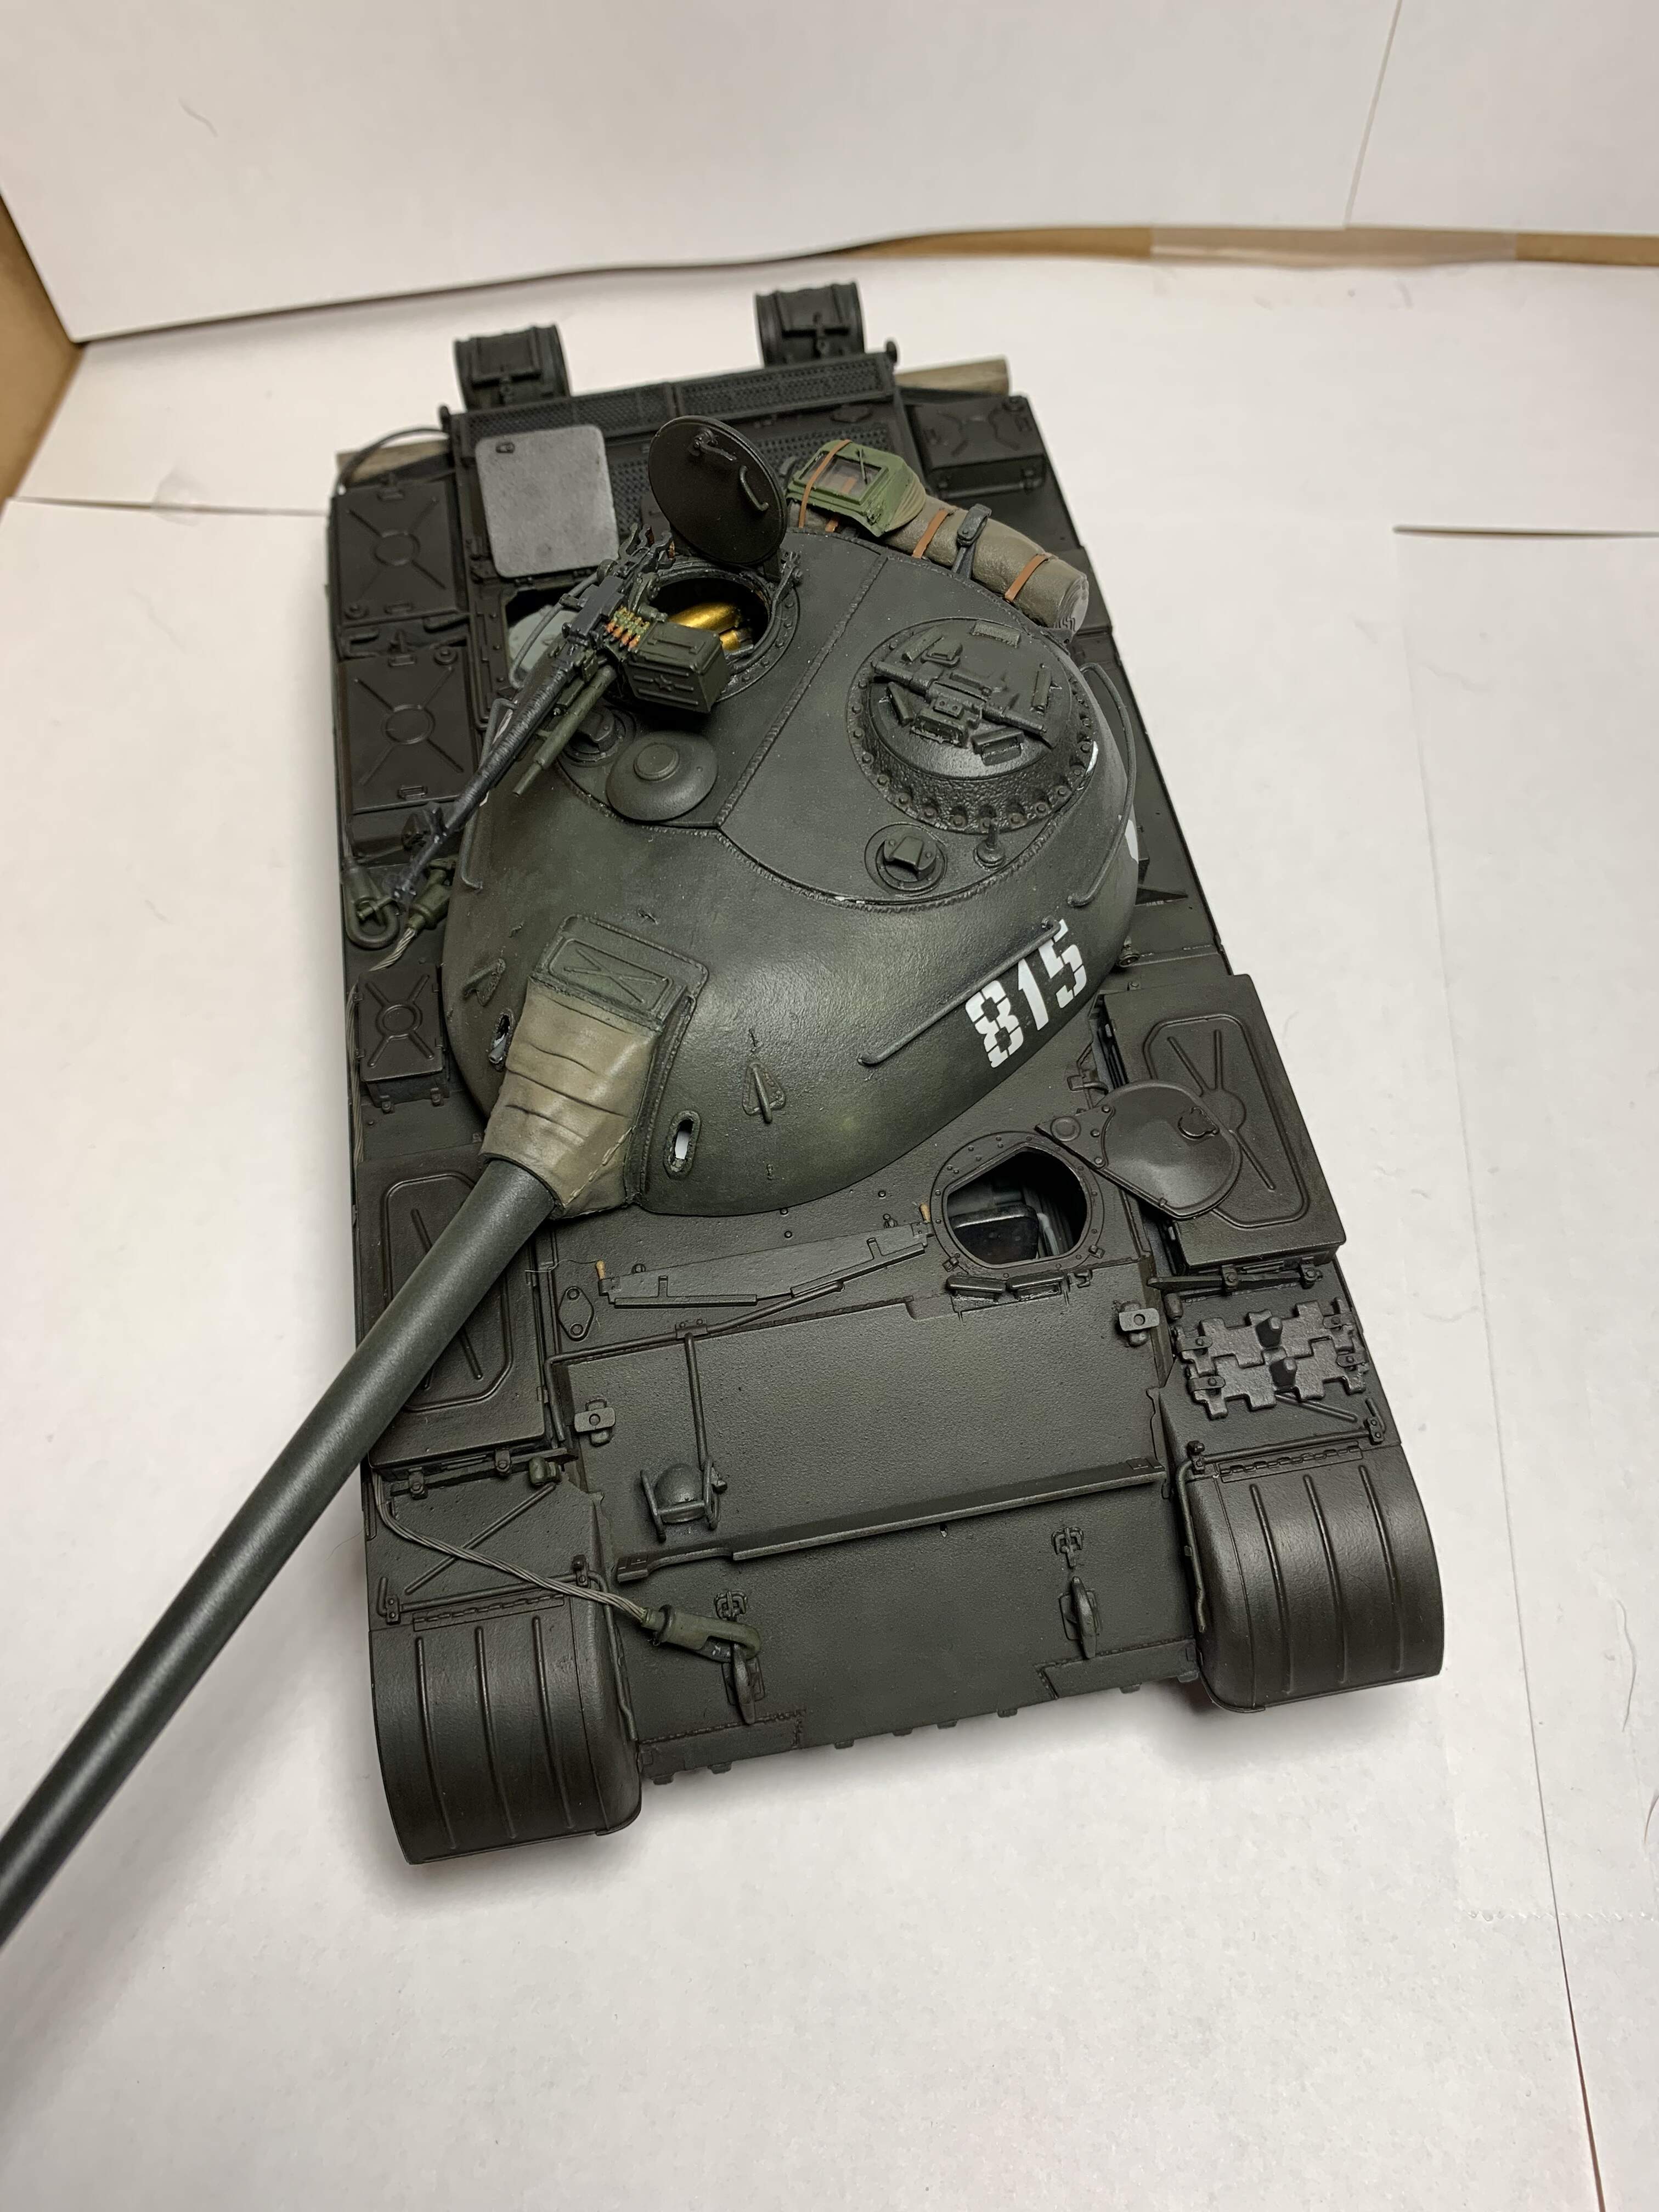
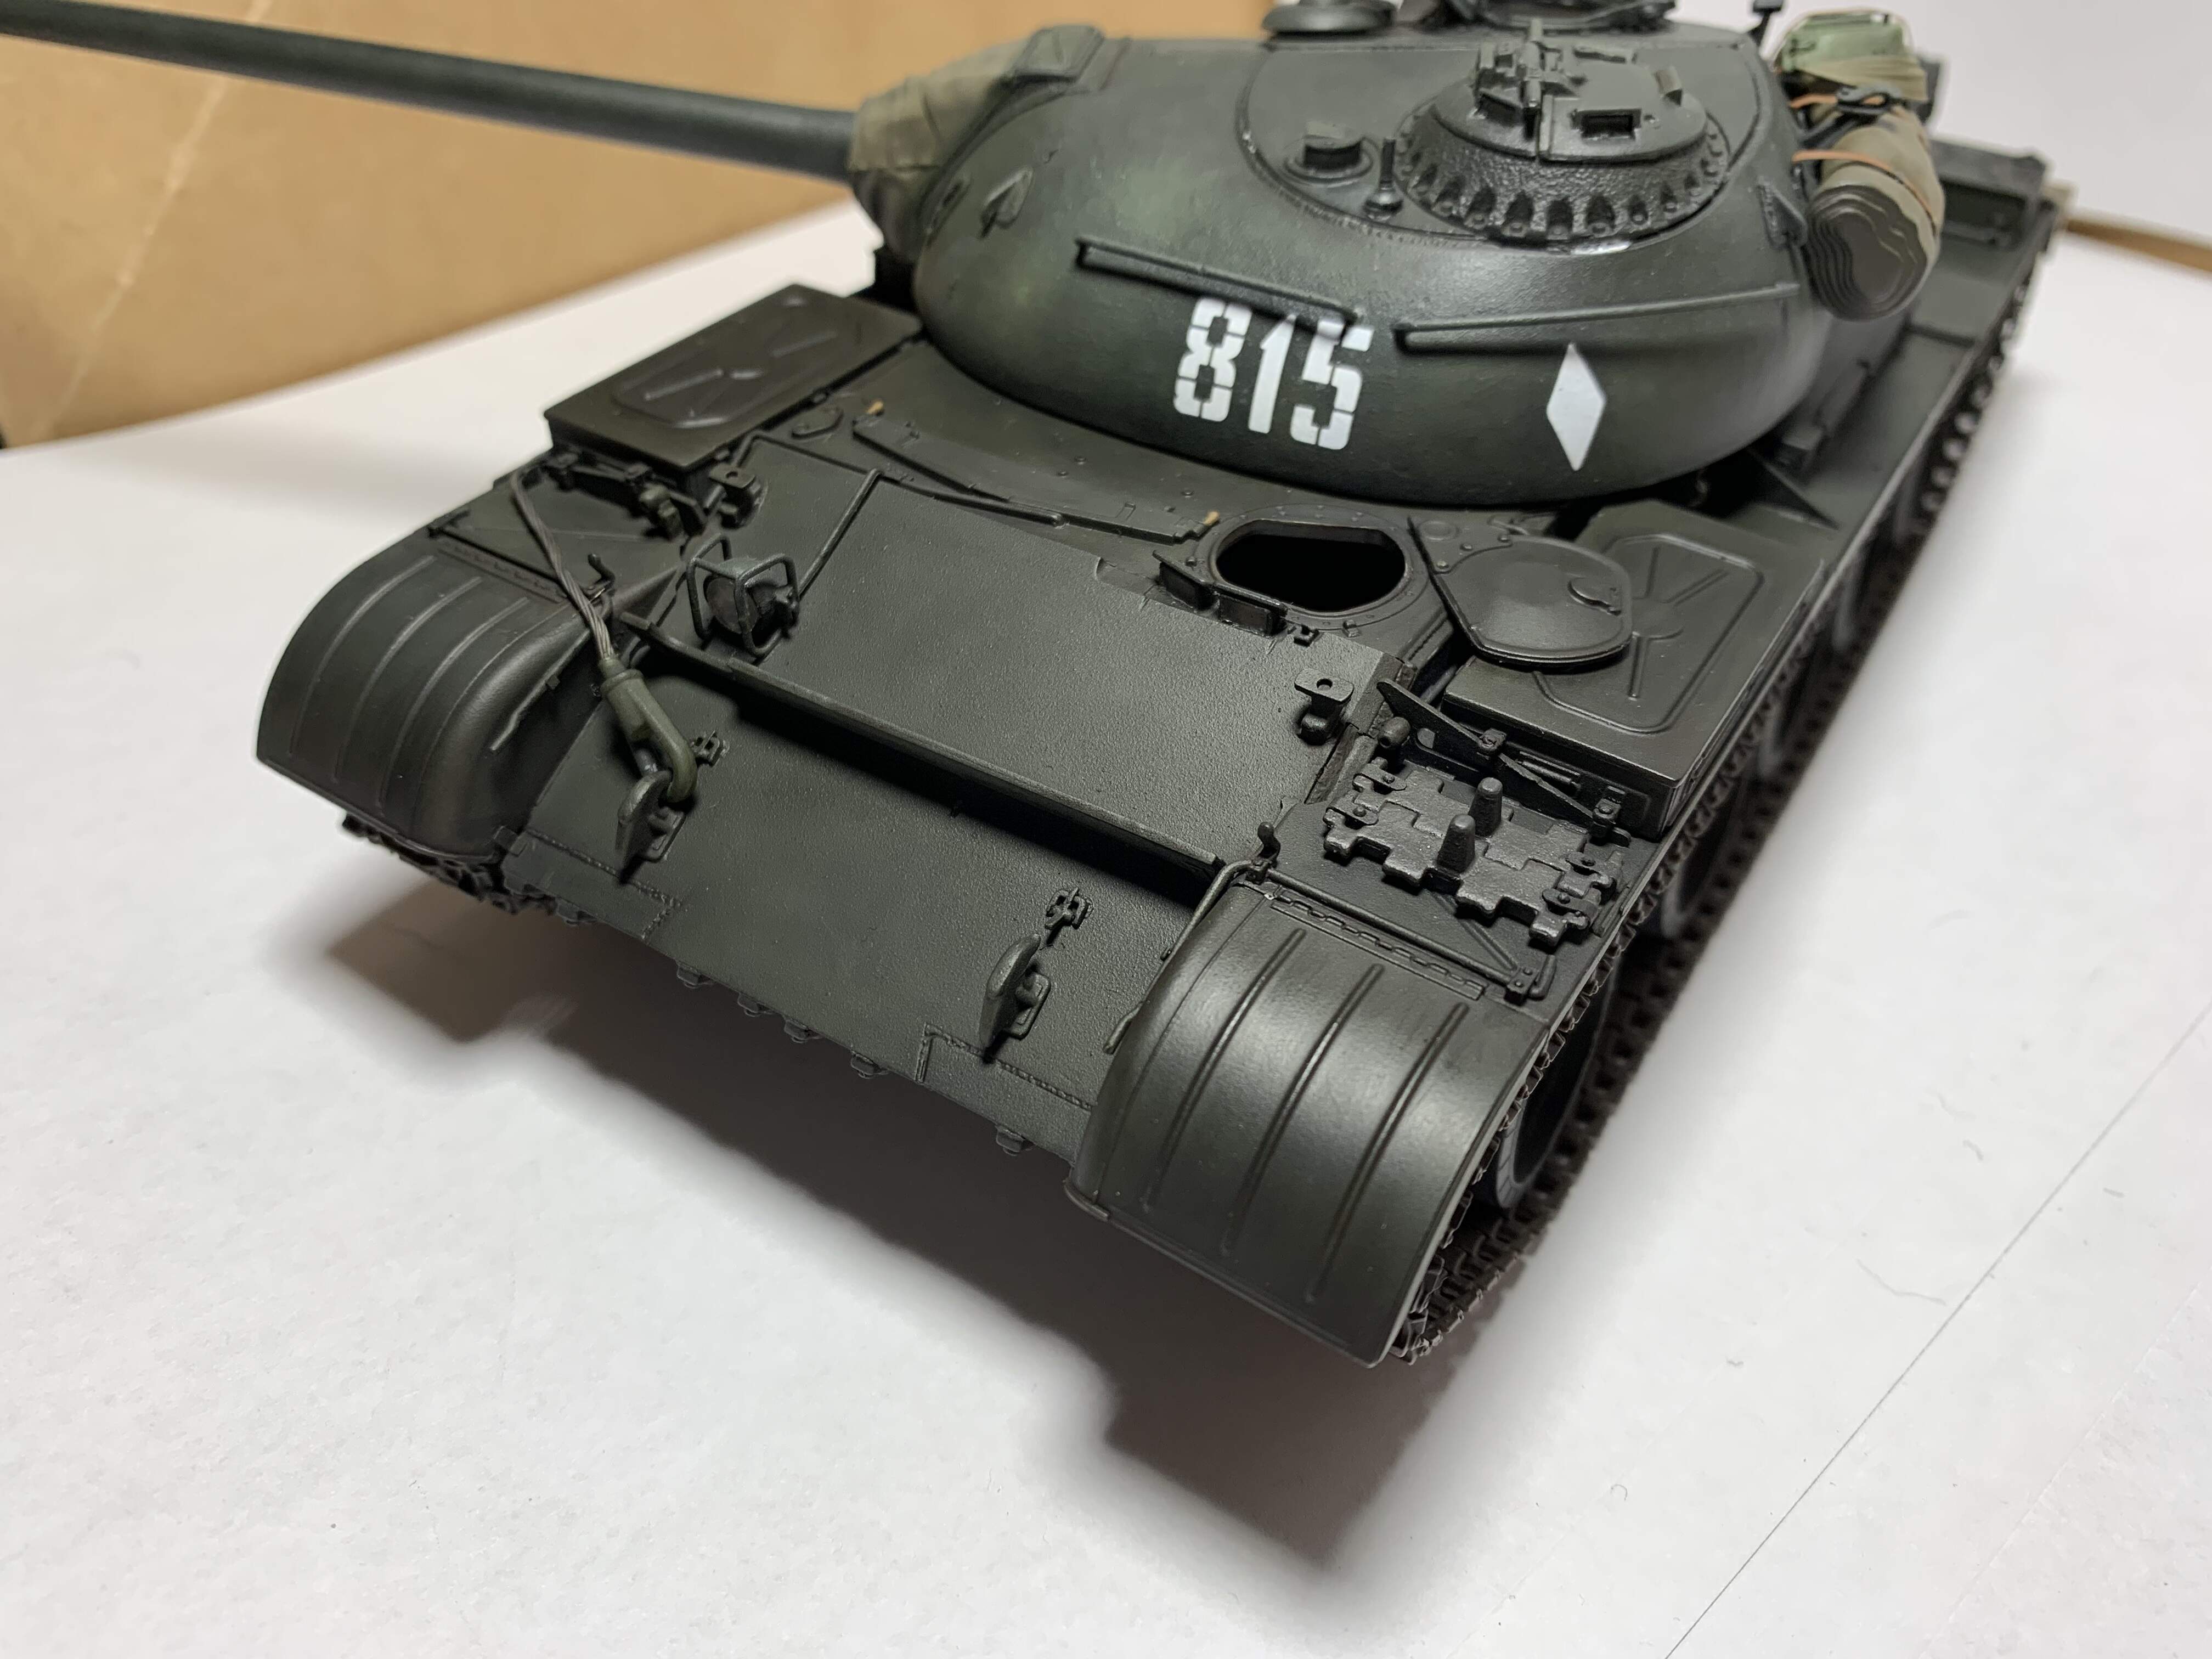
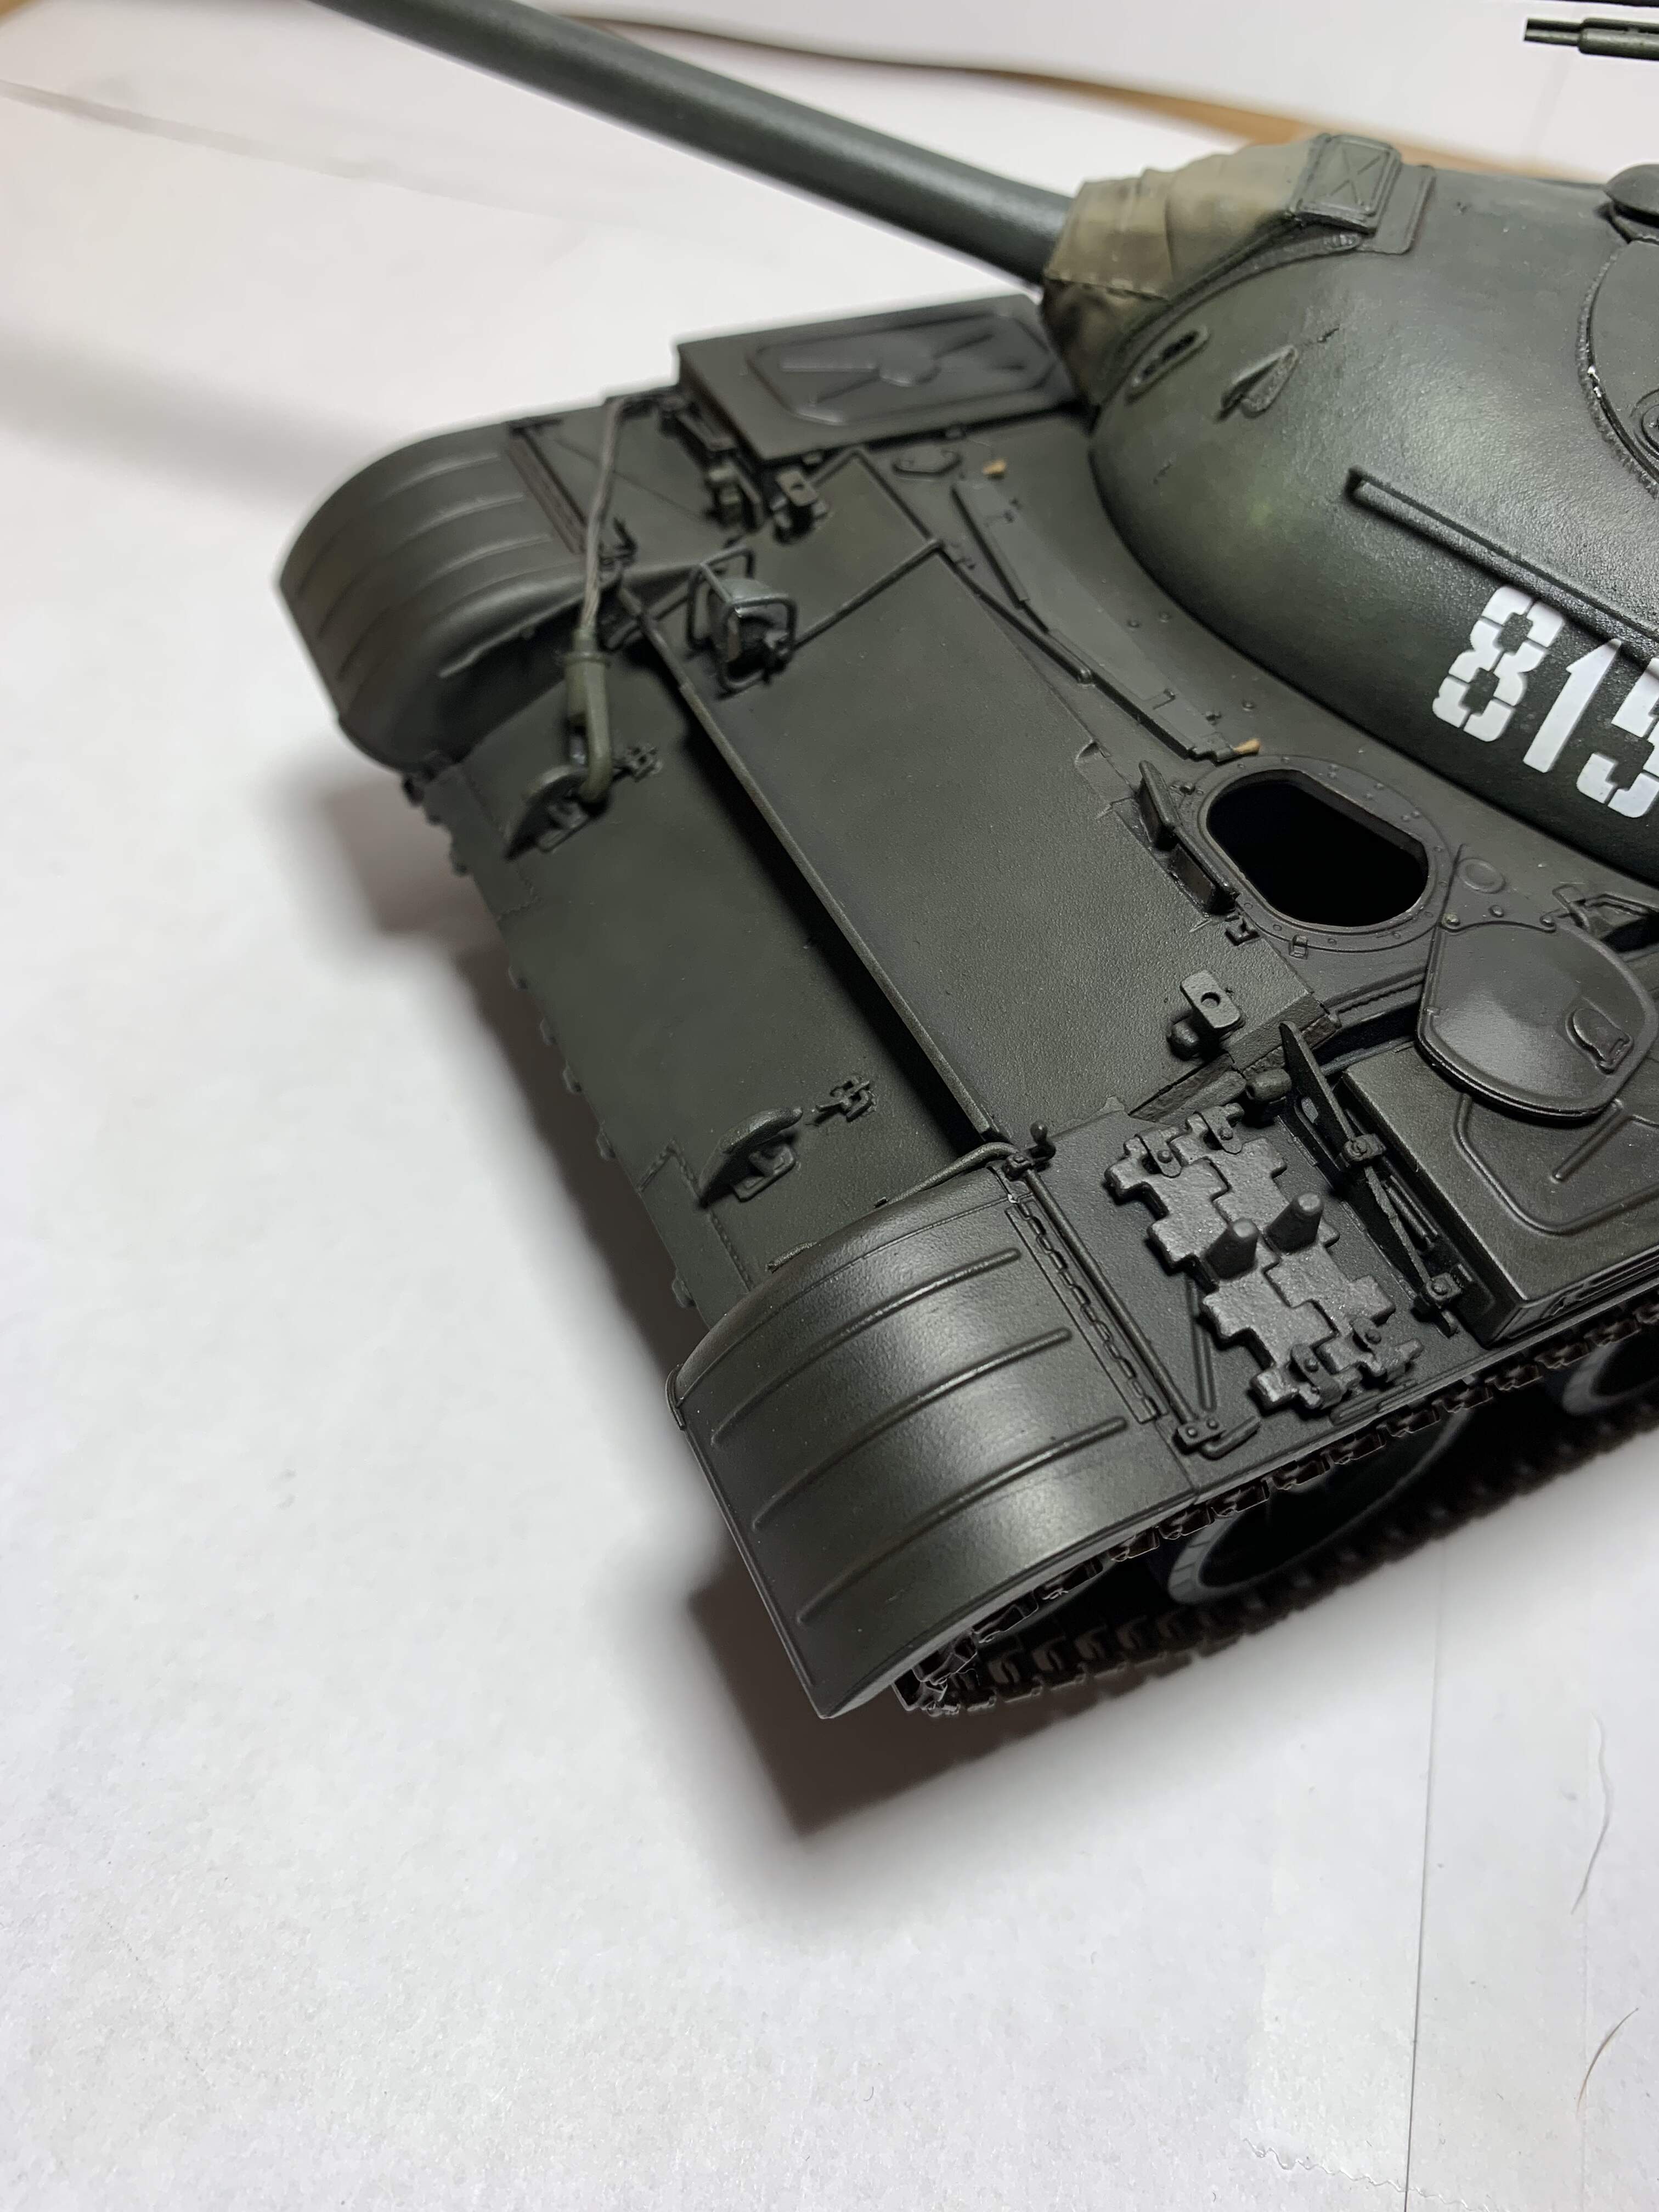
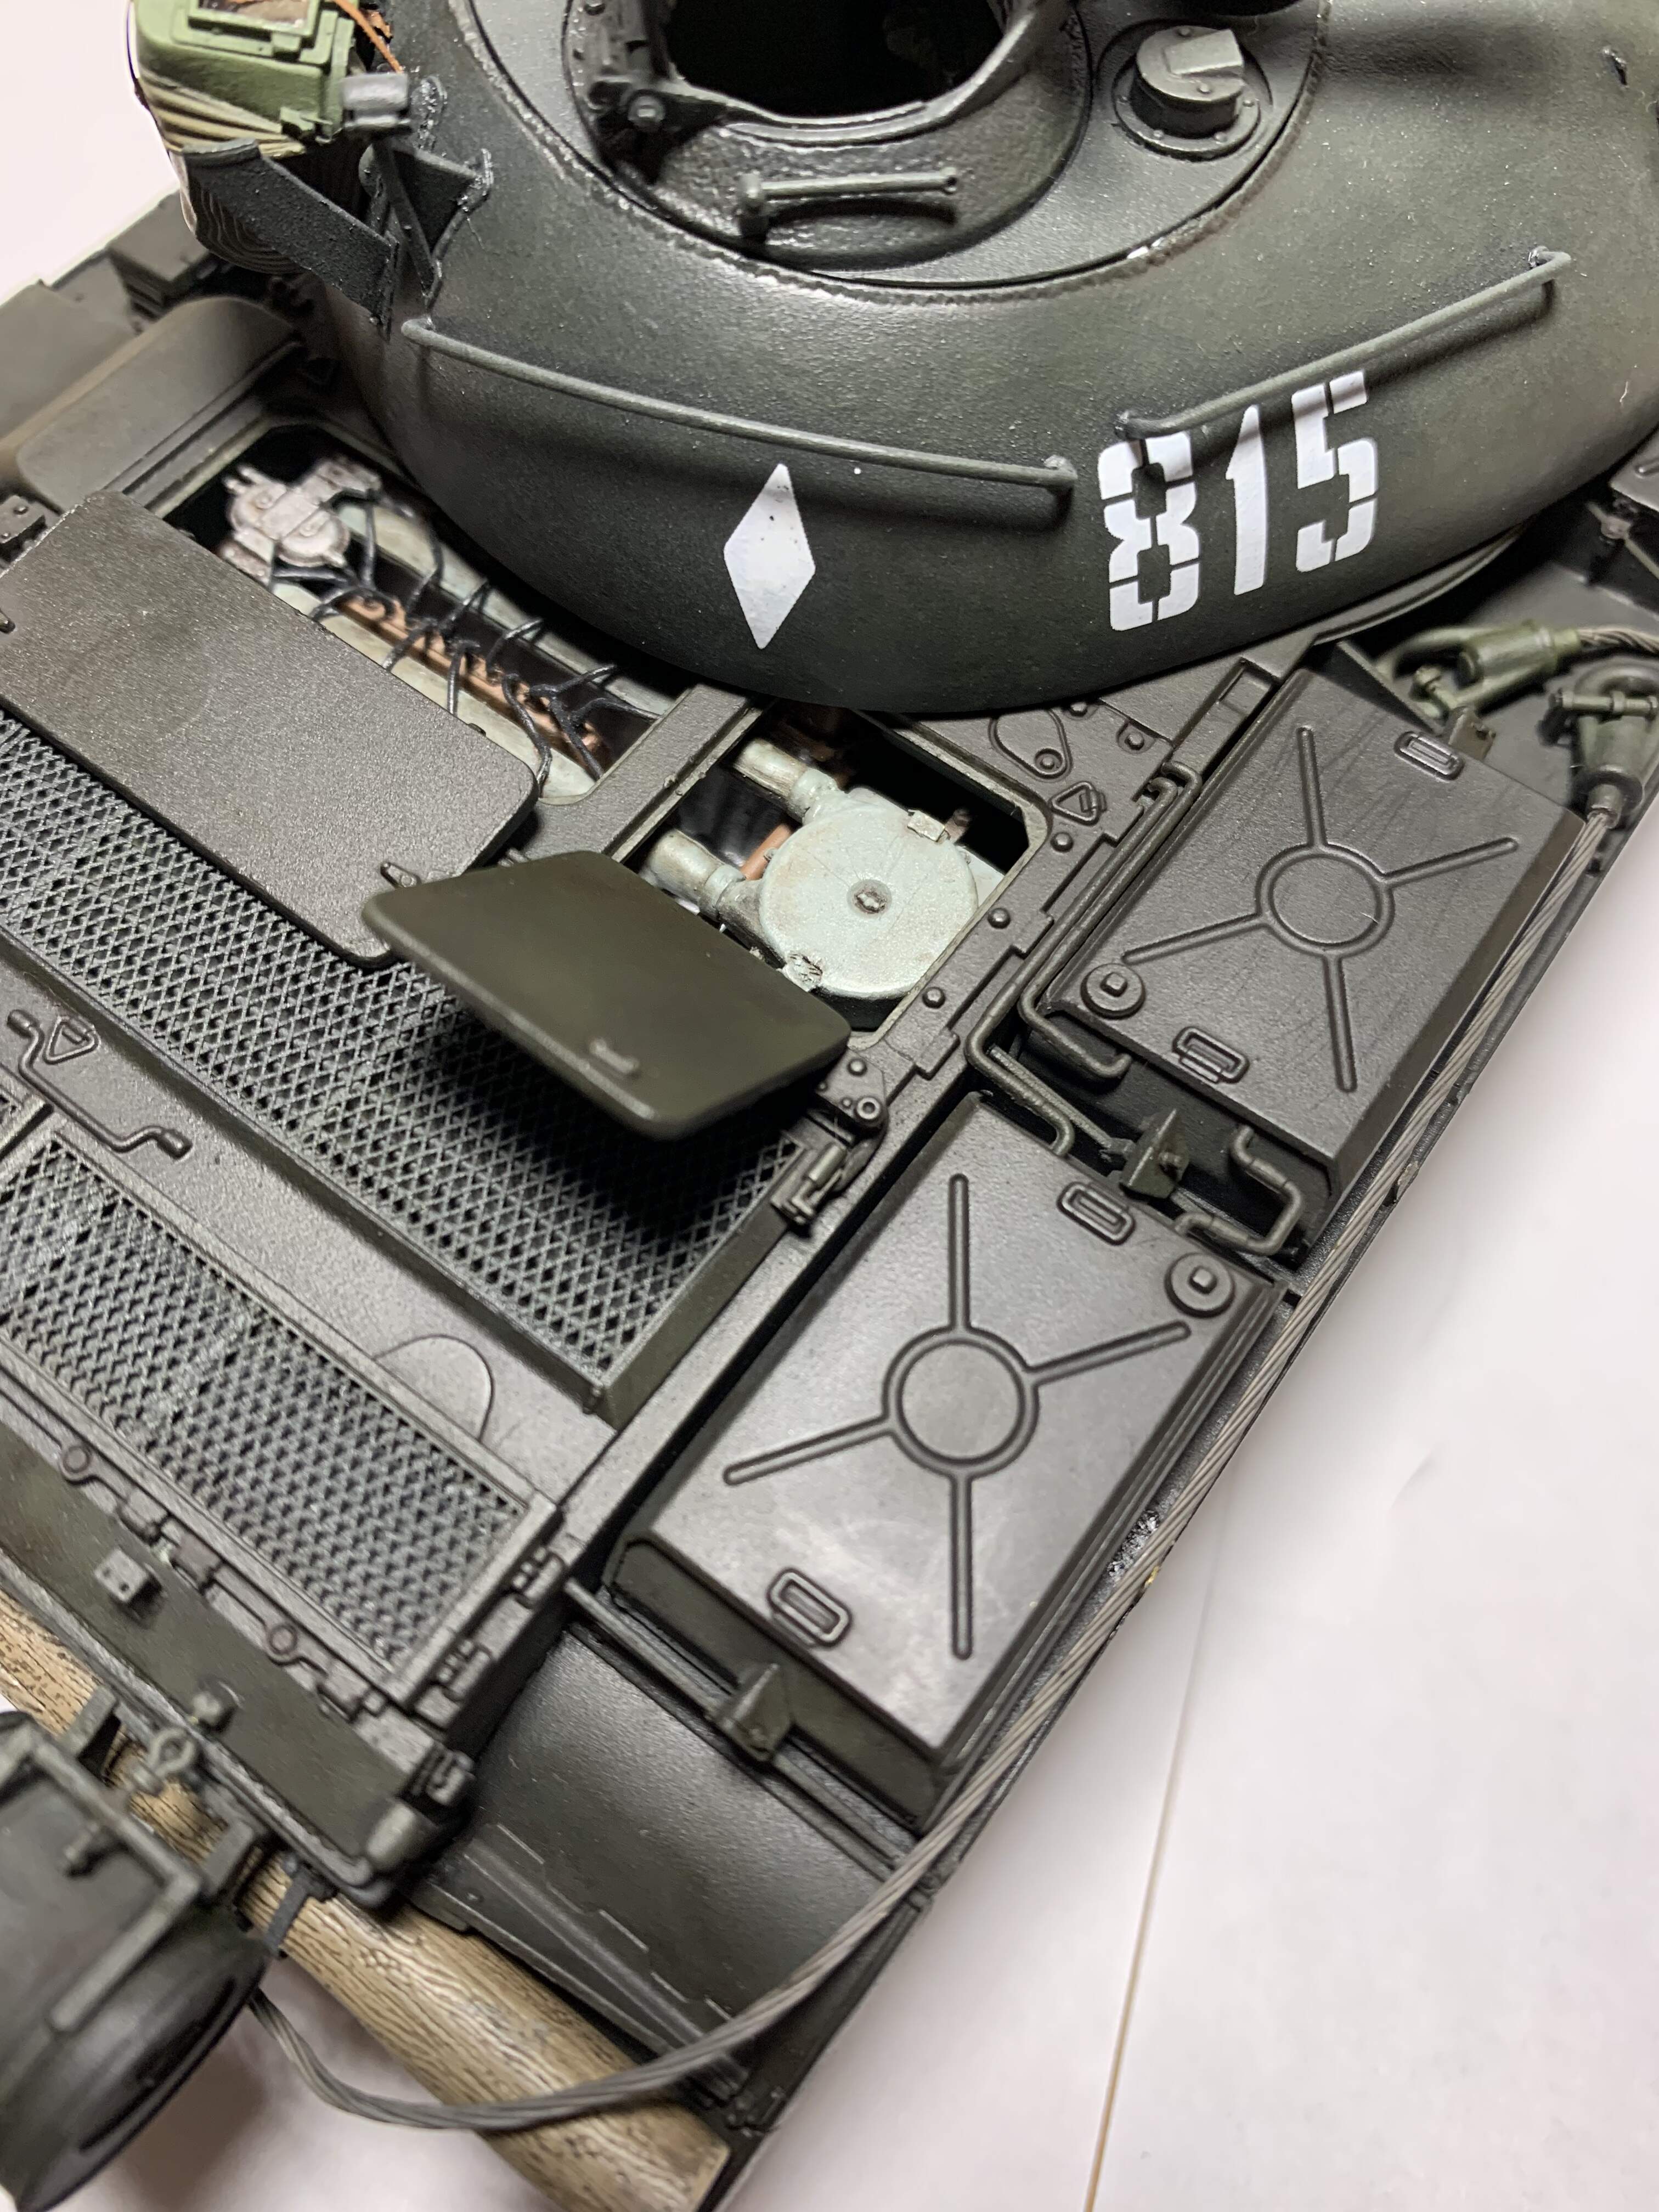
This kit was a slog! I started back in February and worked on it pretty much every other day for the past 5 months. I had a blast, it’s not perfect, but it’s 100% my best effort to date. Kit was built OOB except for the tow cables (Miniart has way too much confidence the plastic ones won’t break during the bending required to bend them).
I say almost done as I need to reattach two prices, and I think I’ll weather it more when my skills improve. I’m too happy with it right now to tinker with the finish.
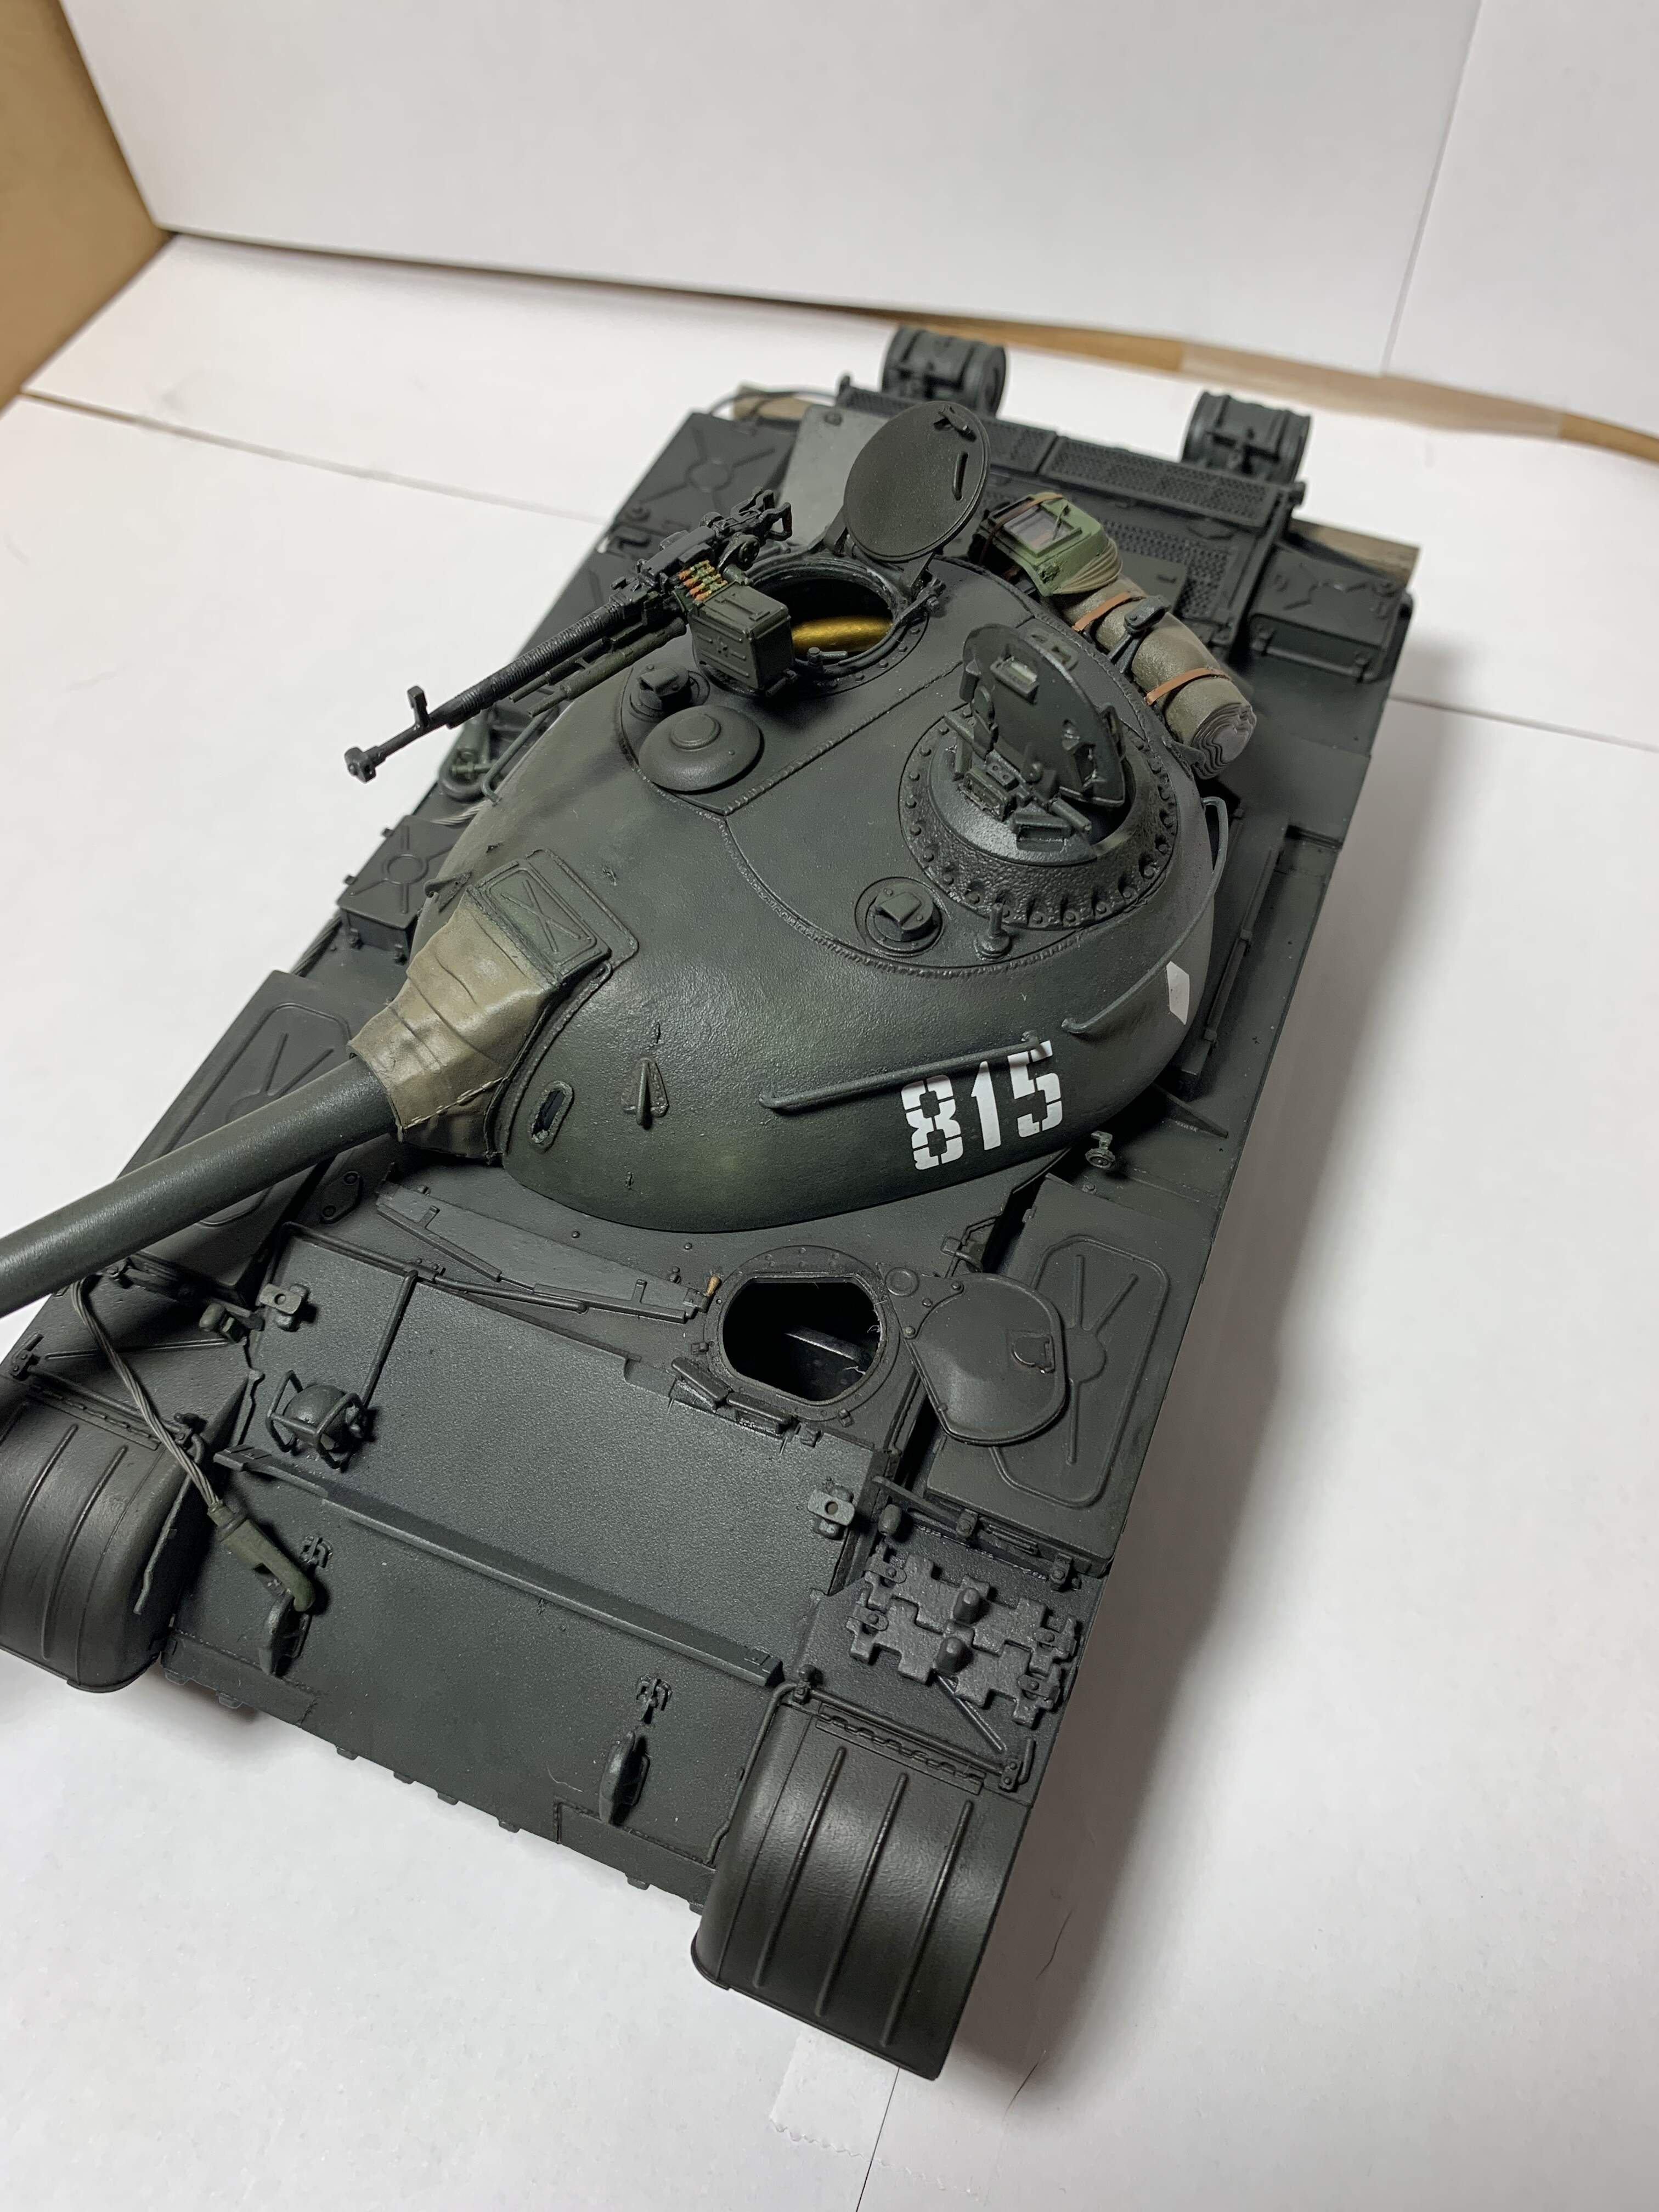
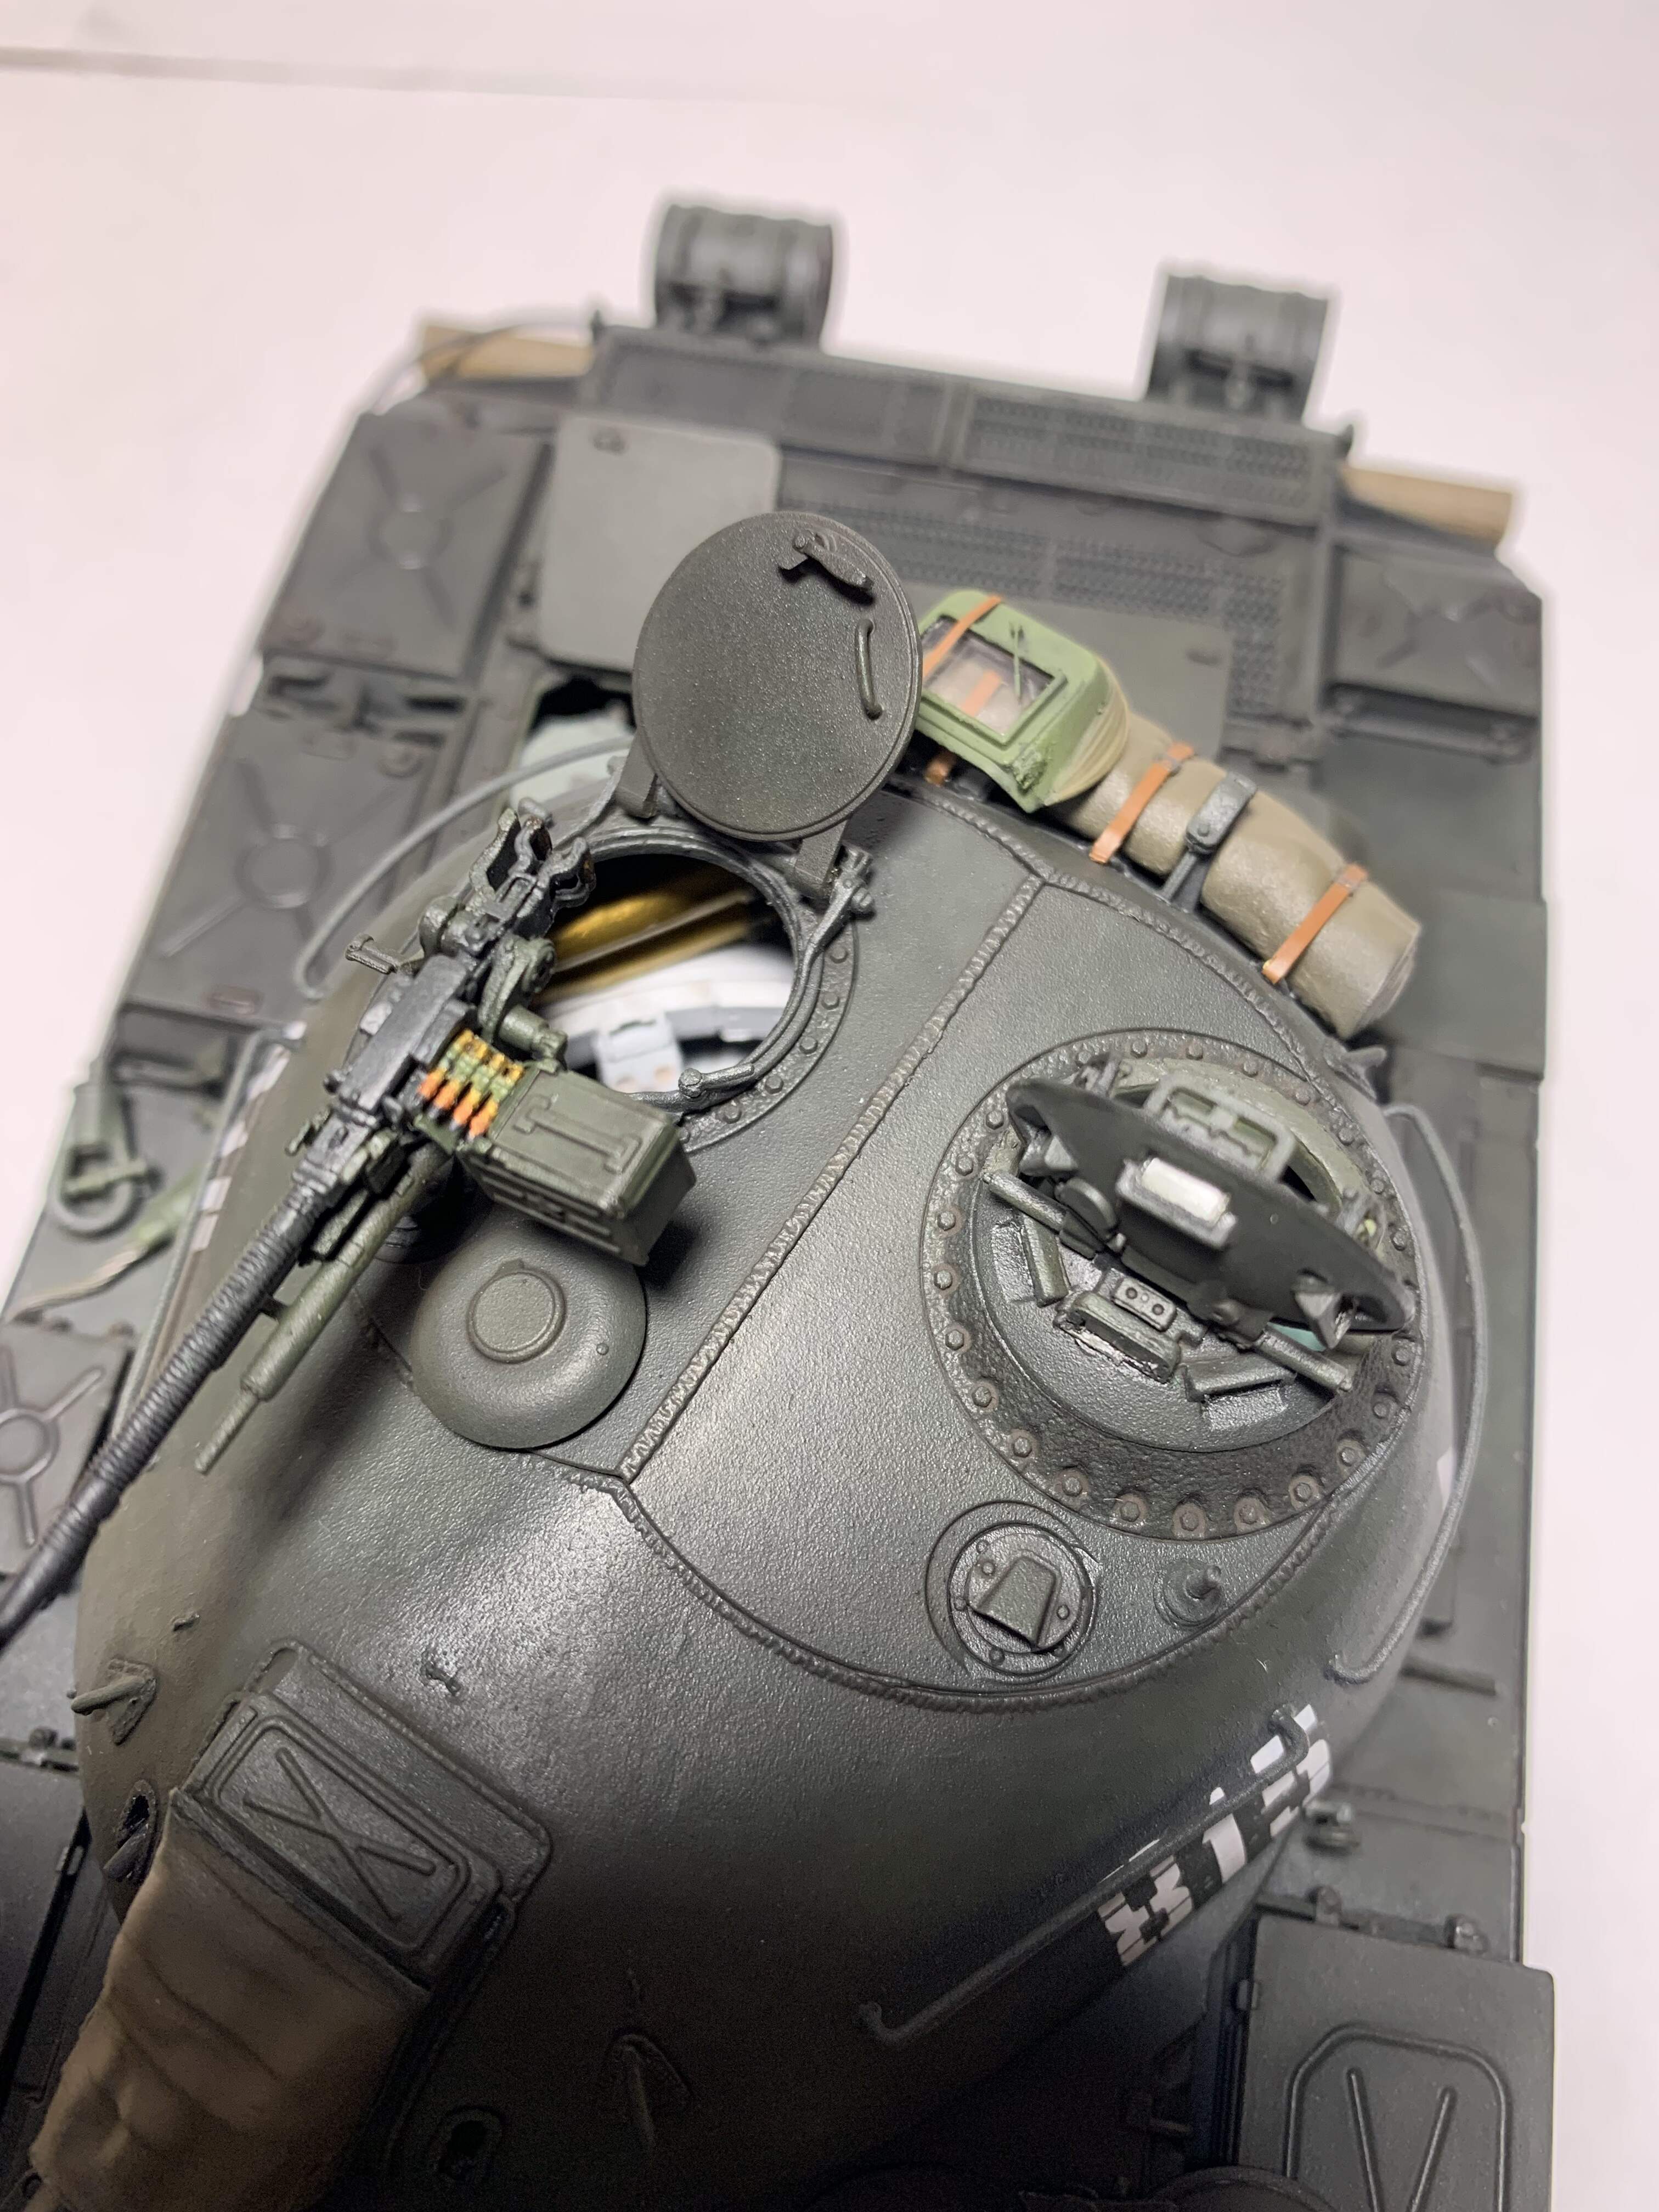
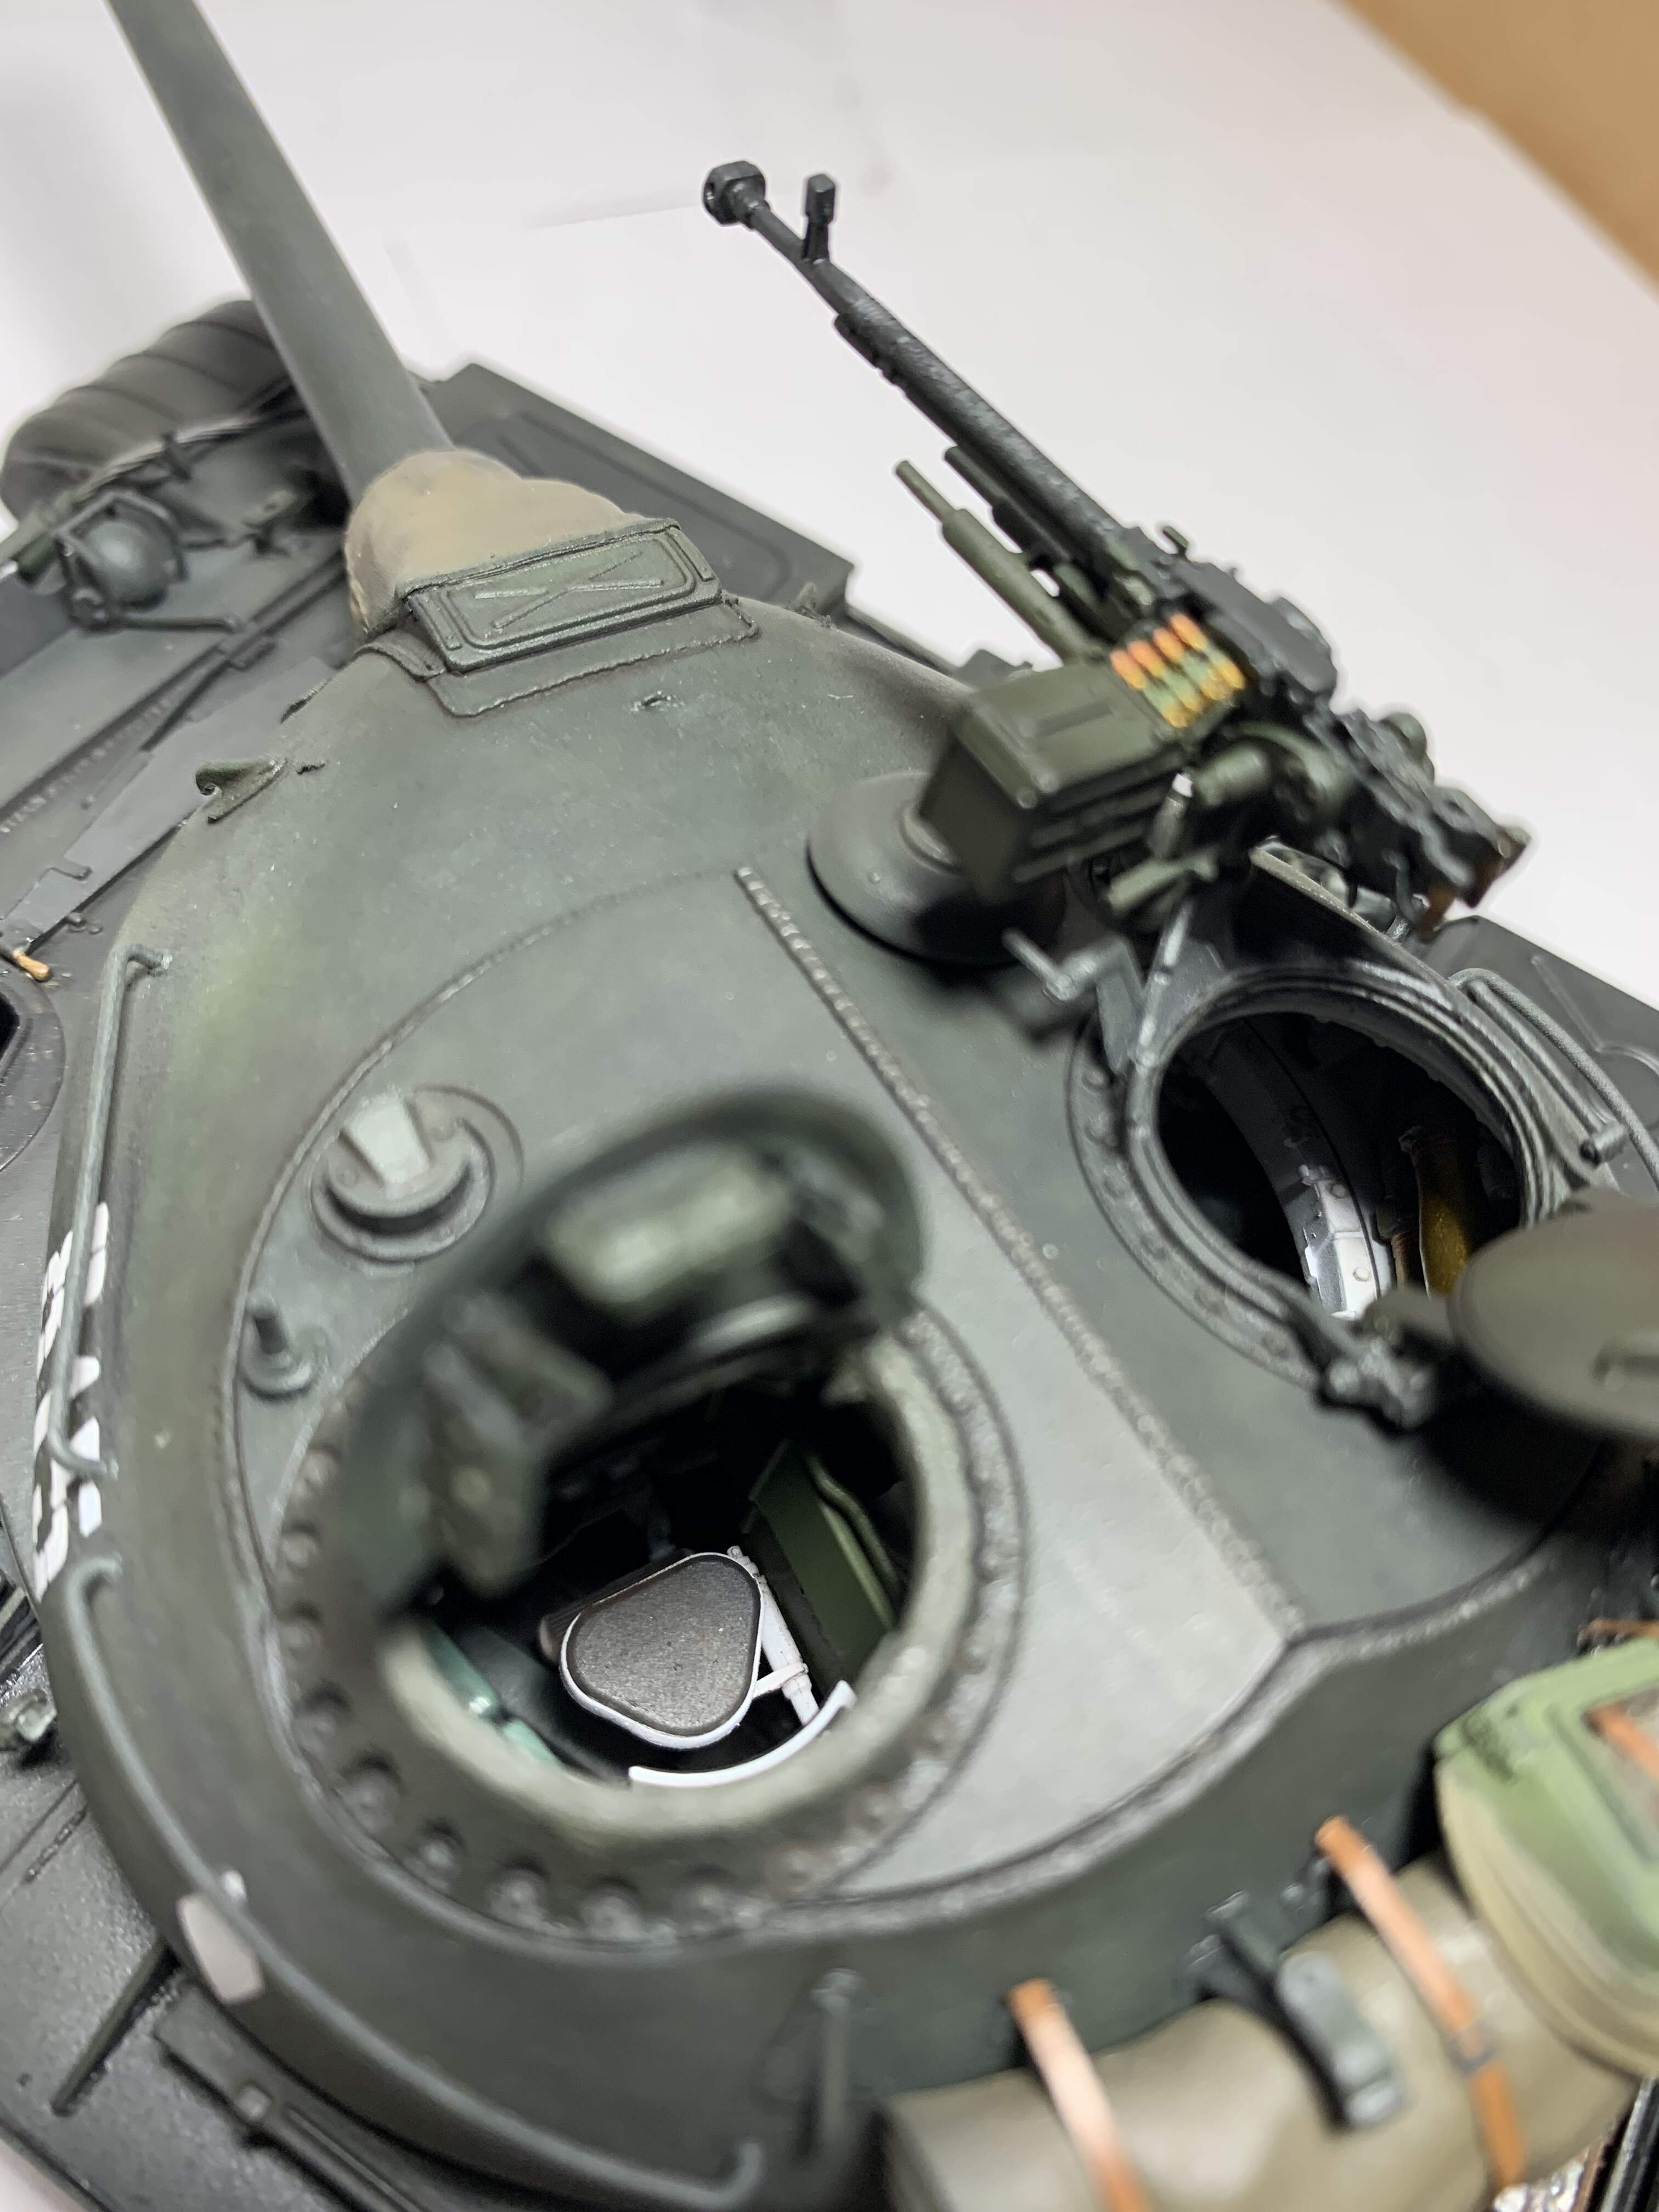
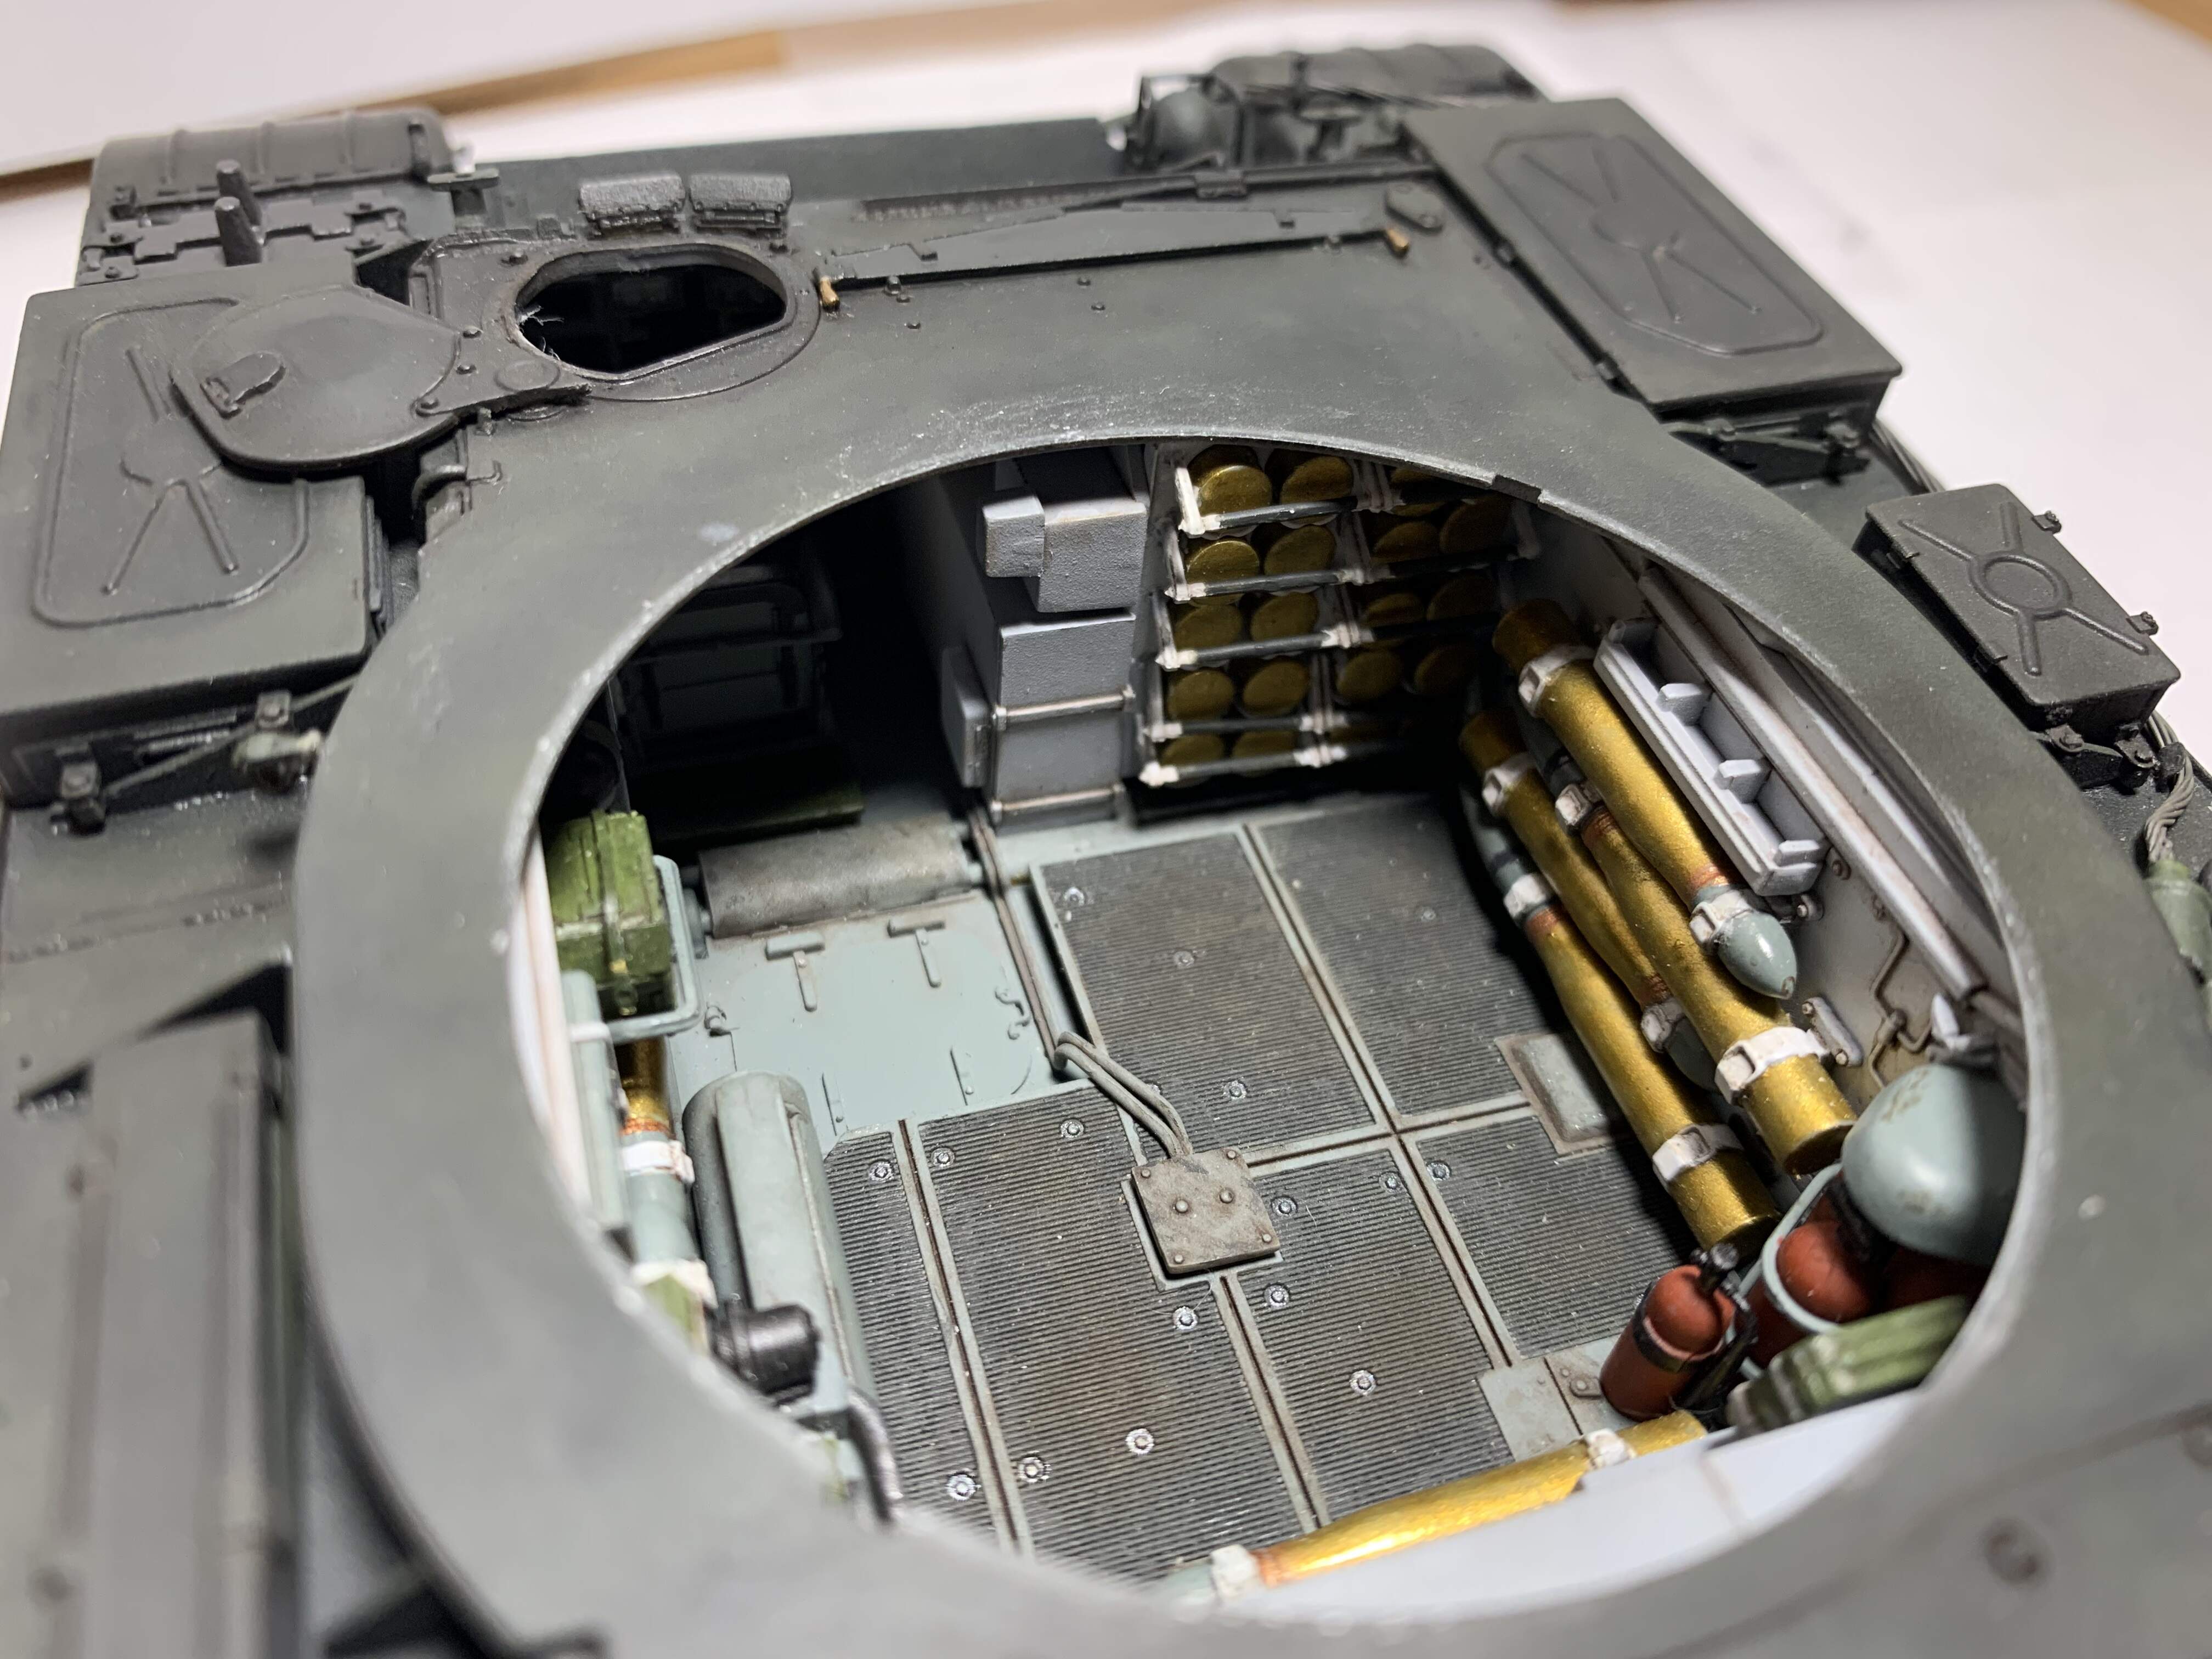
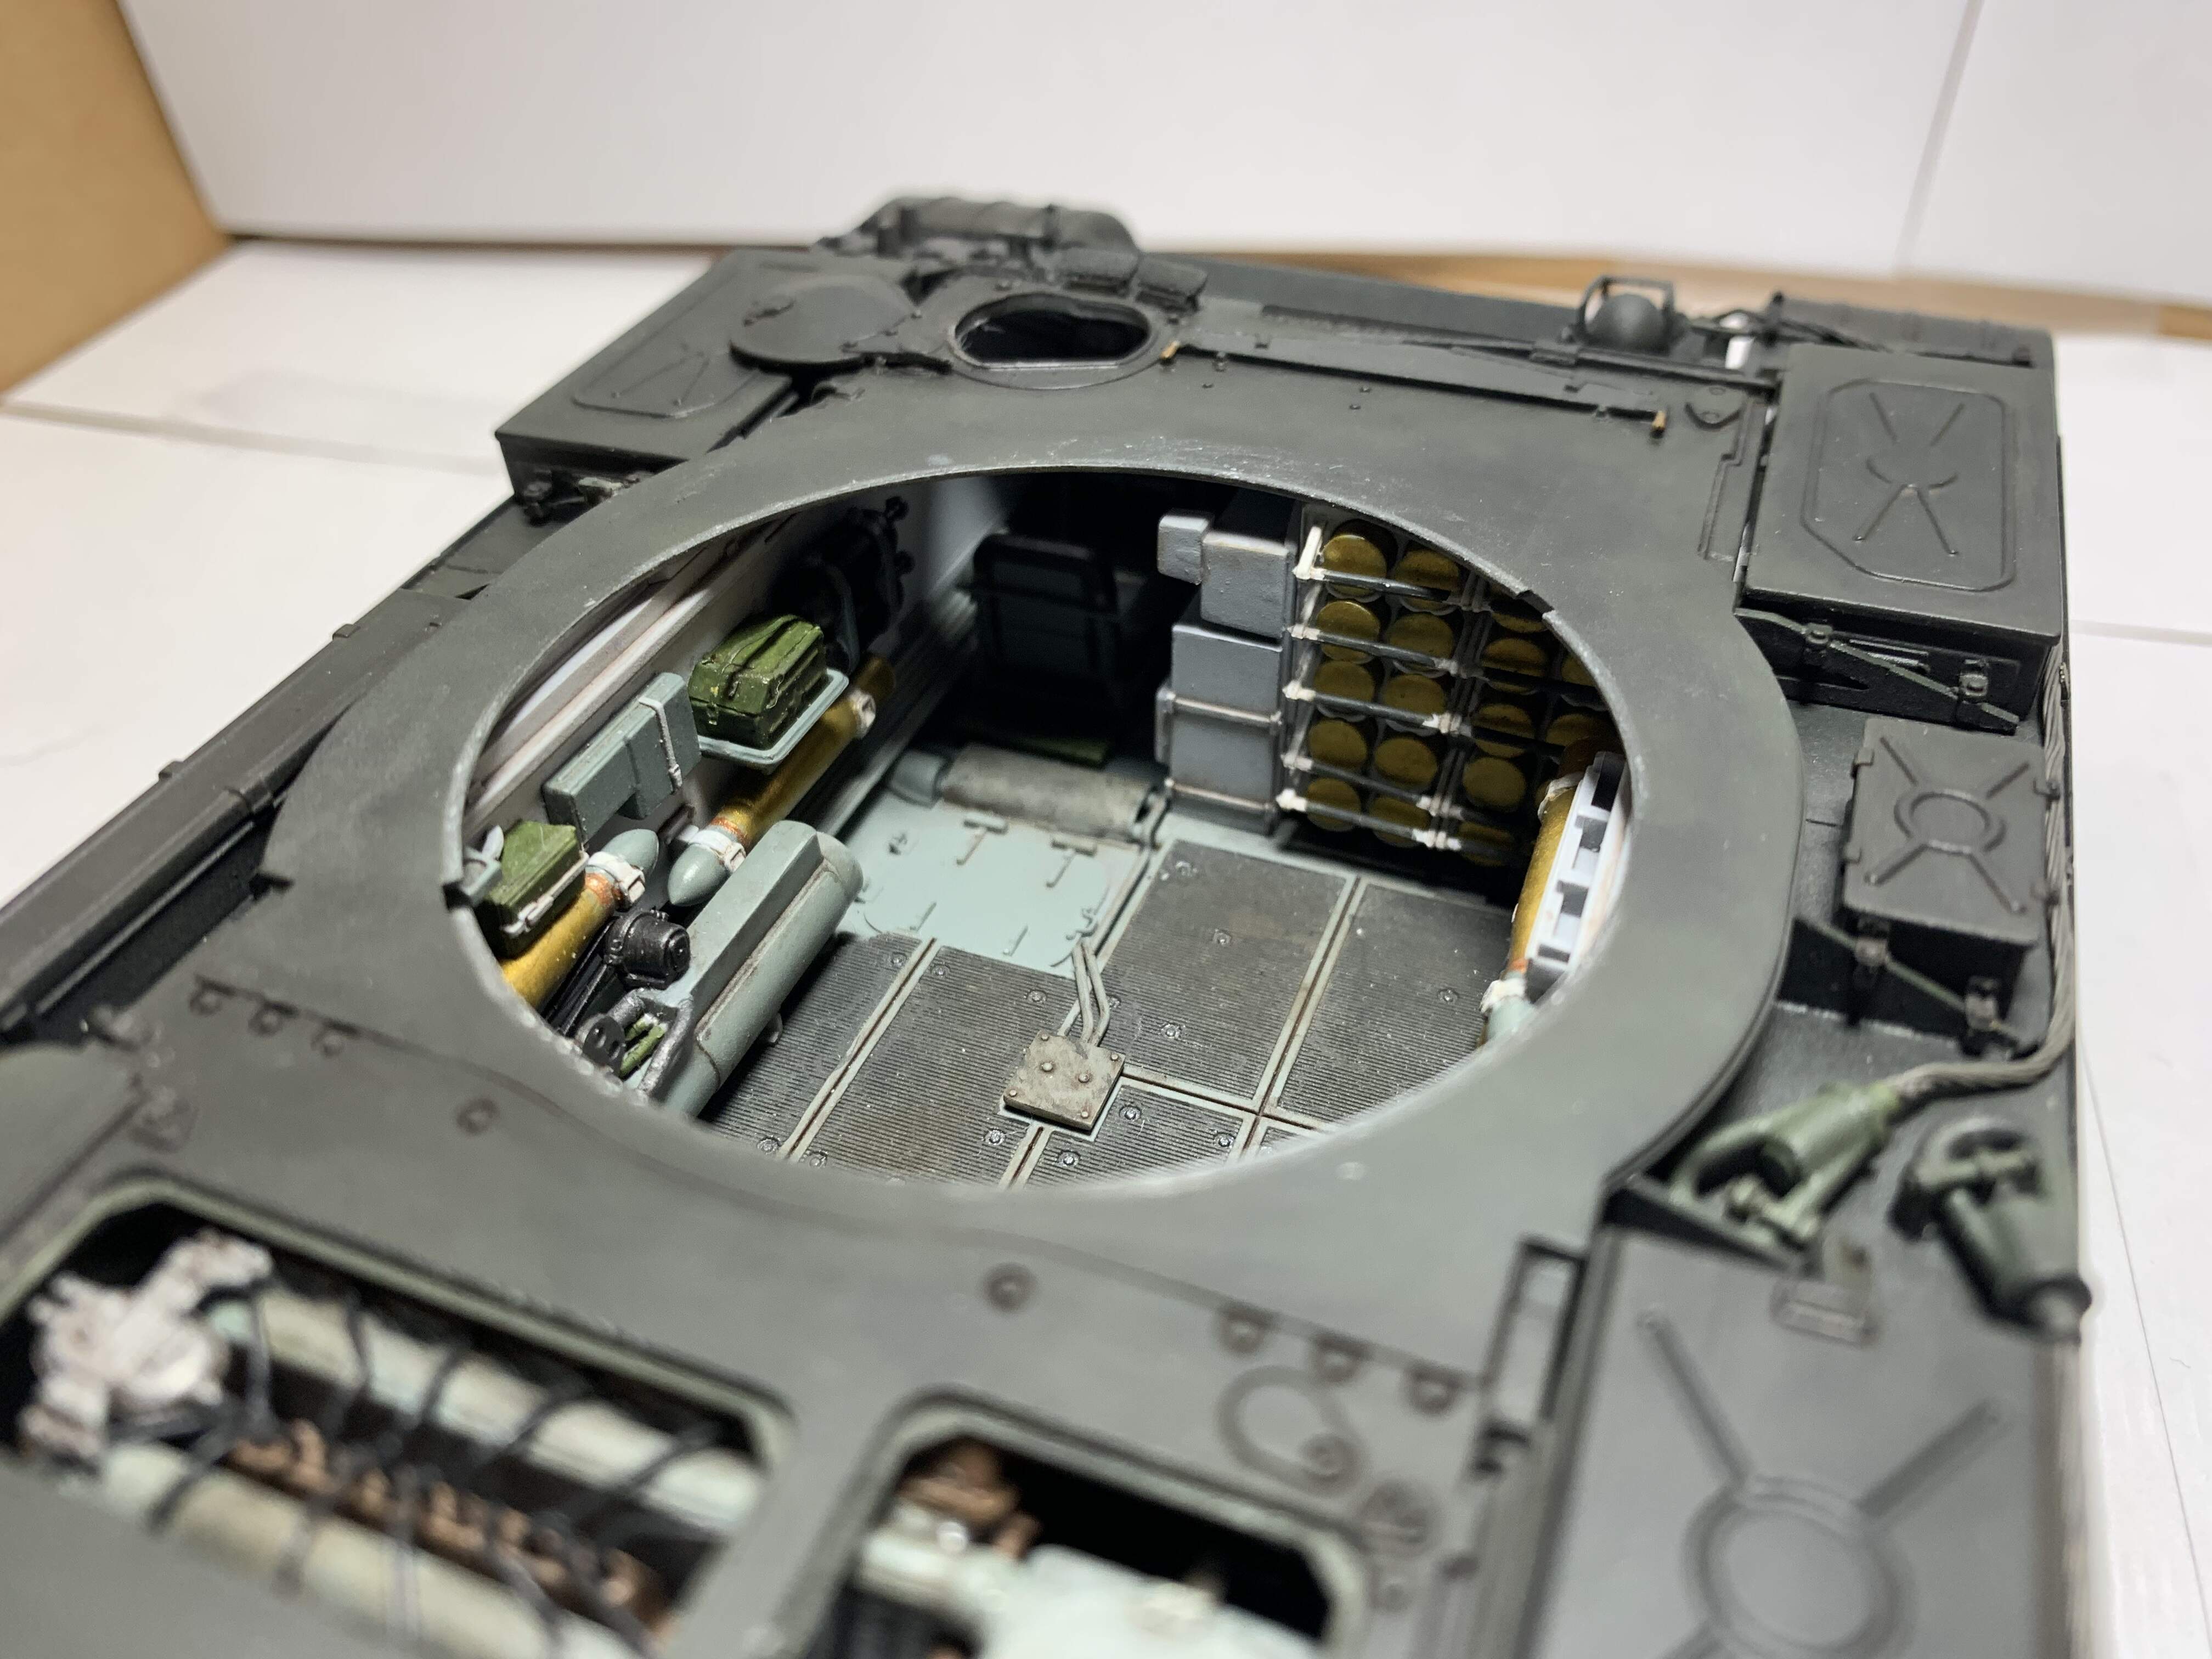
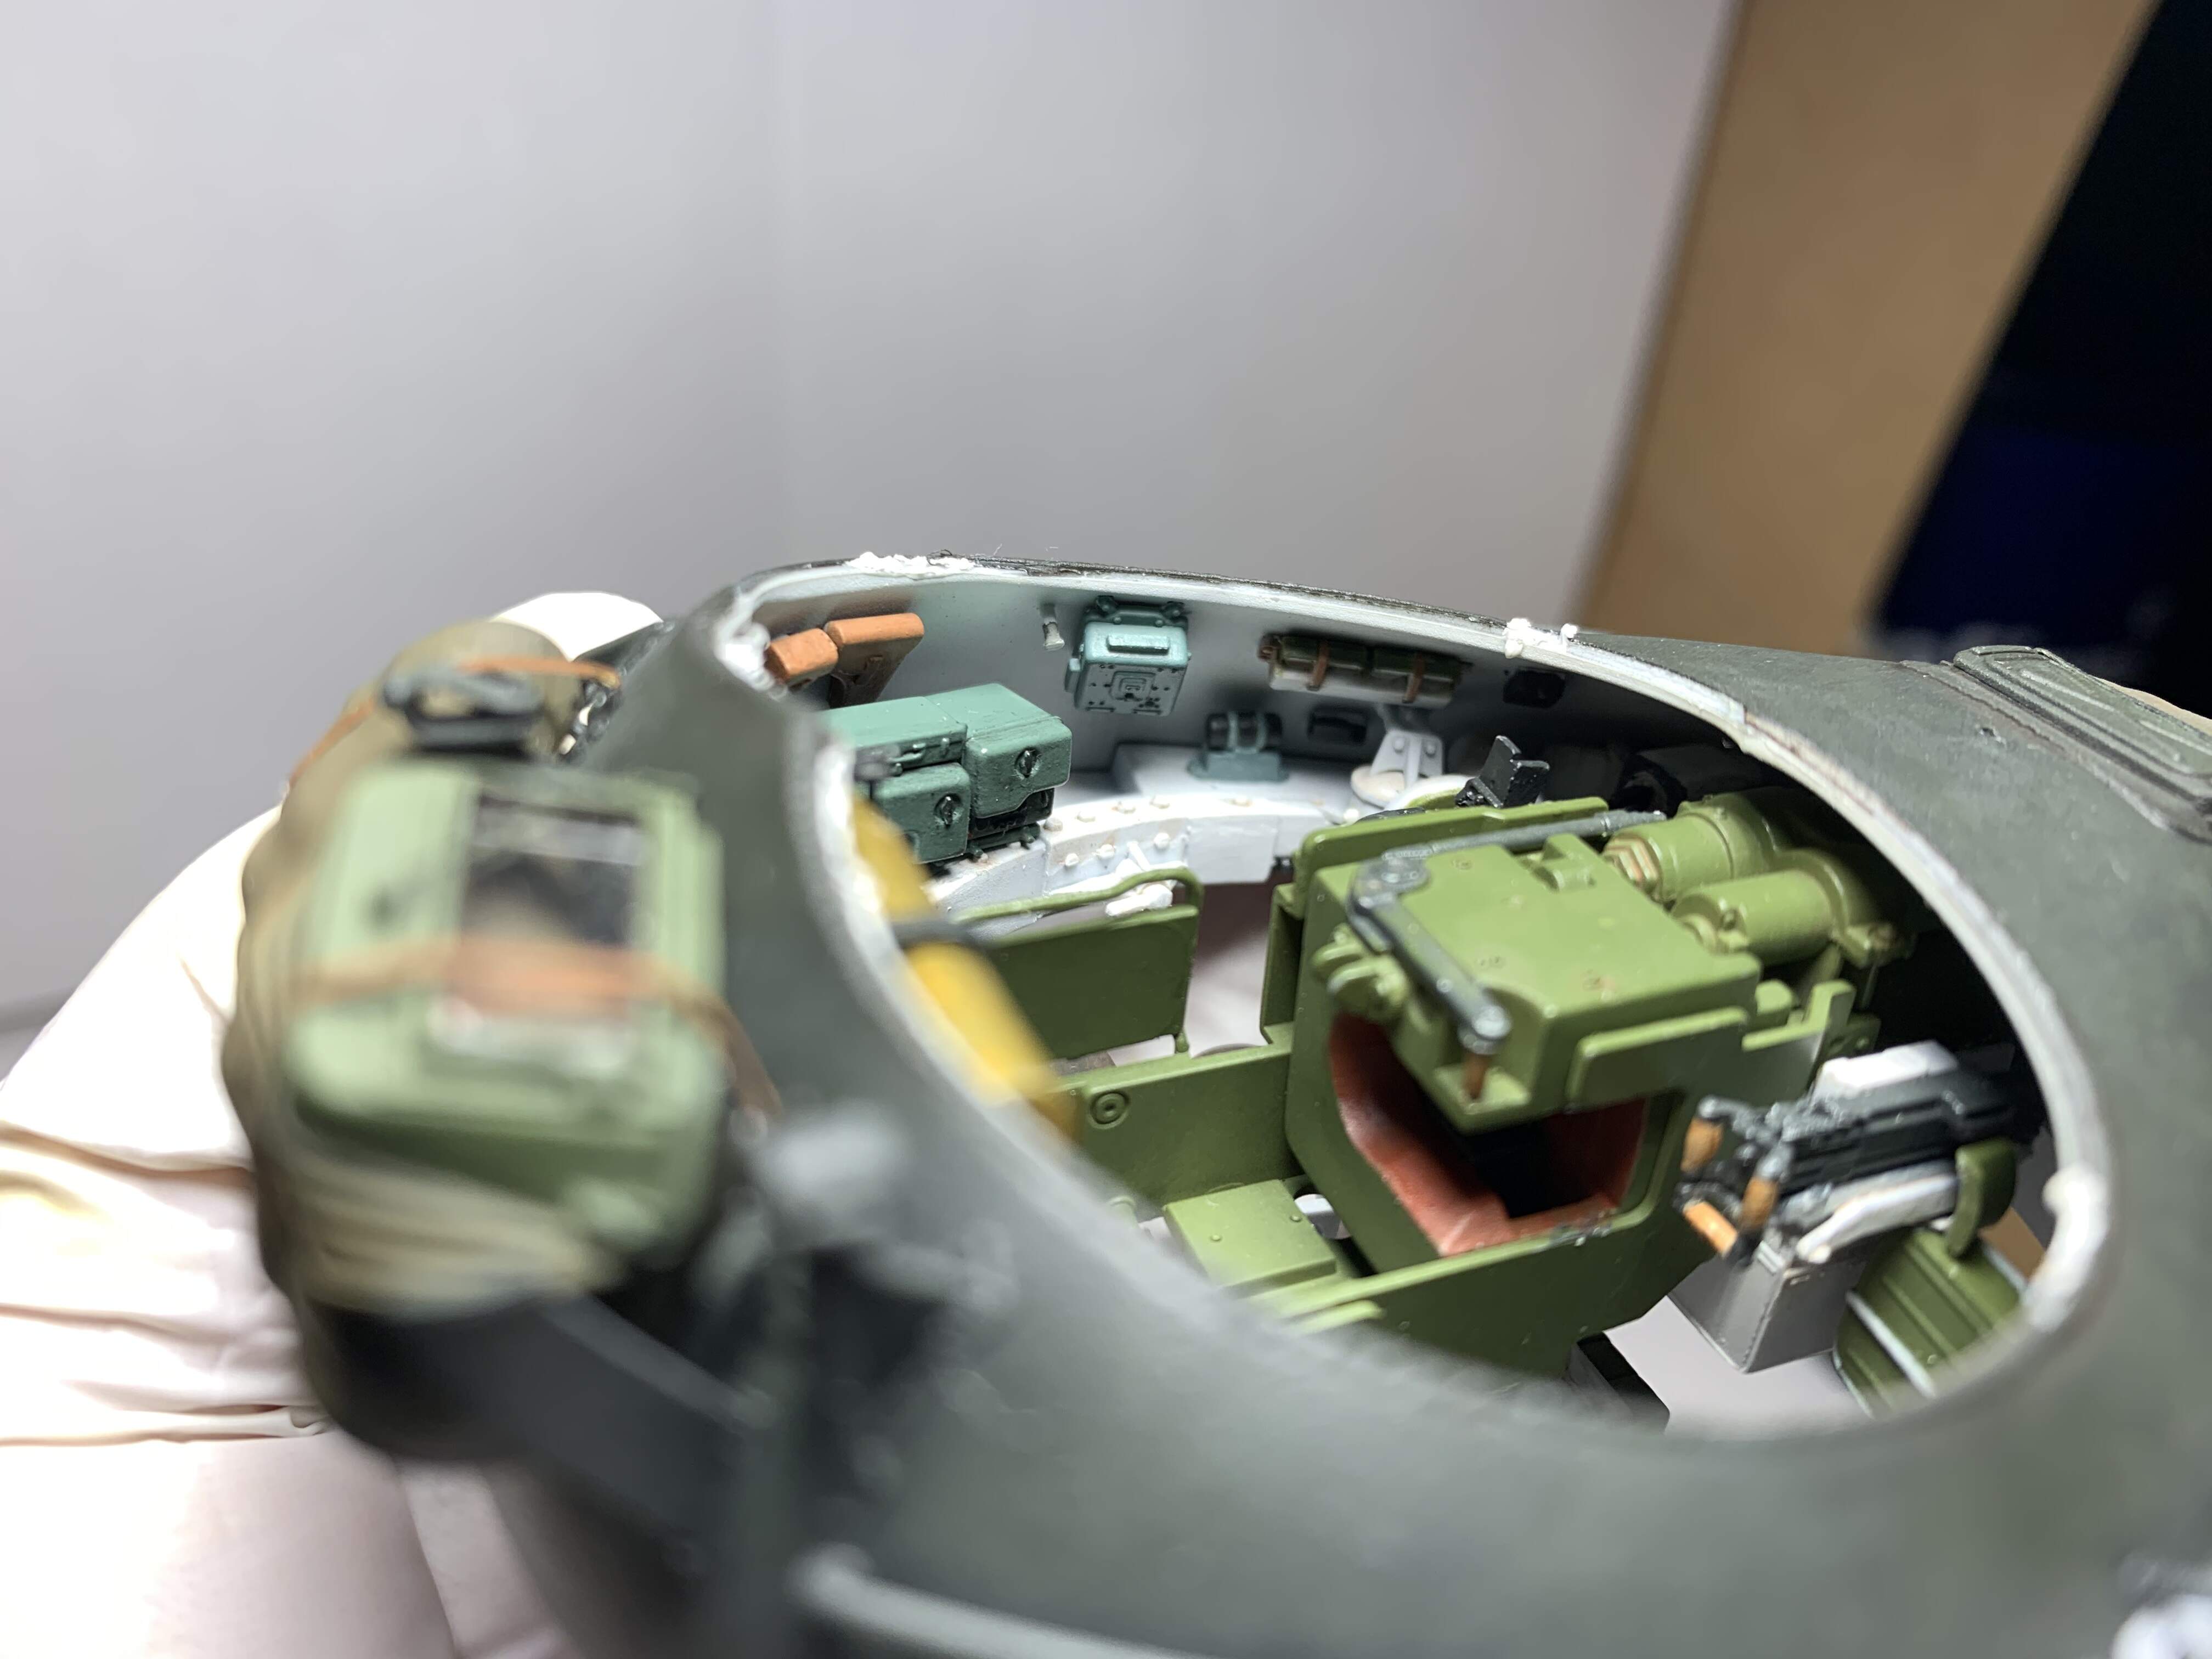
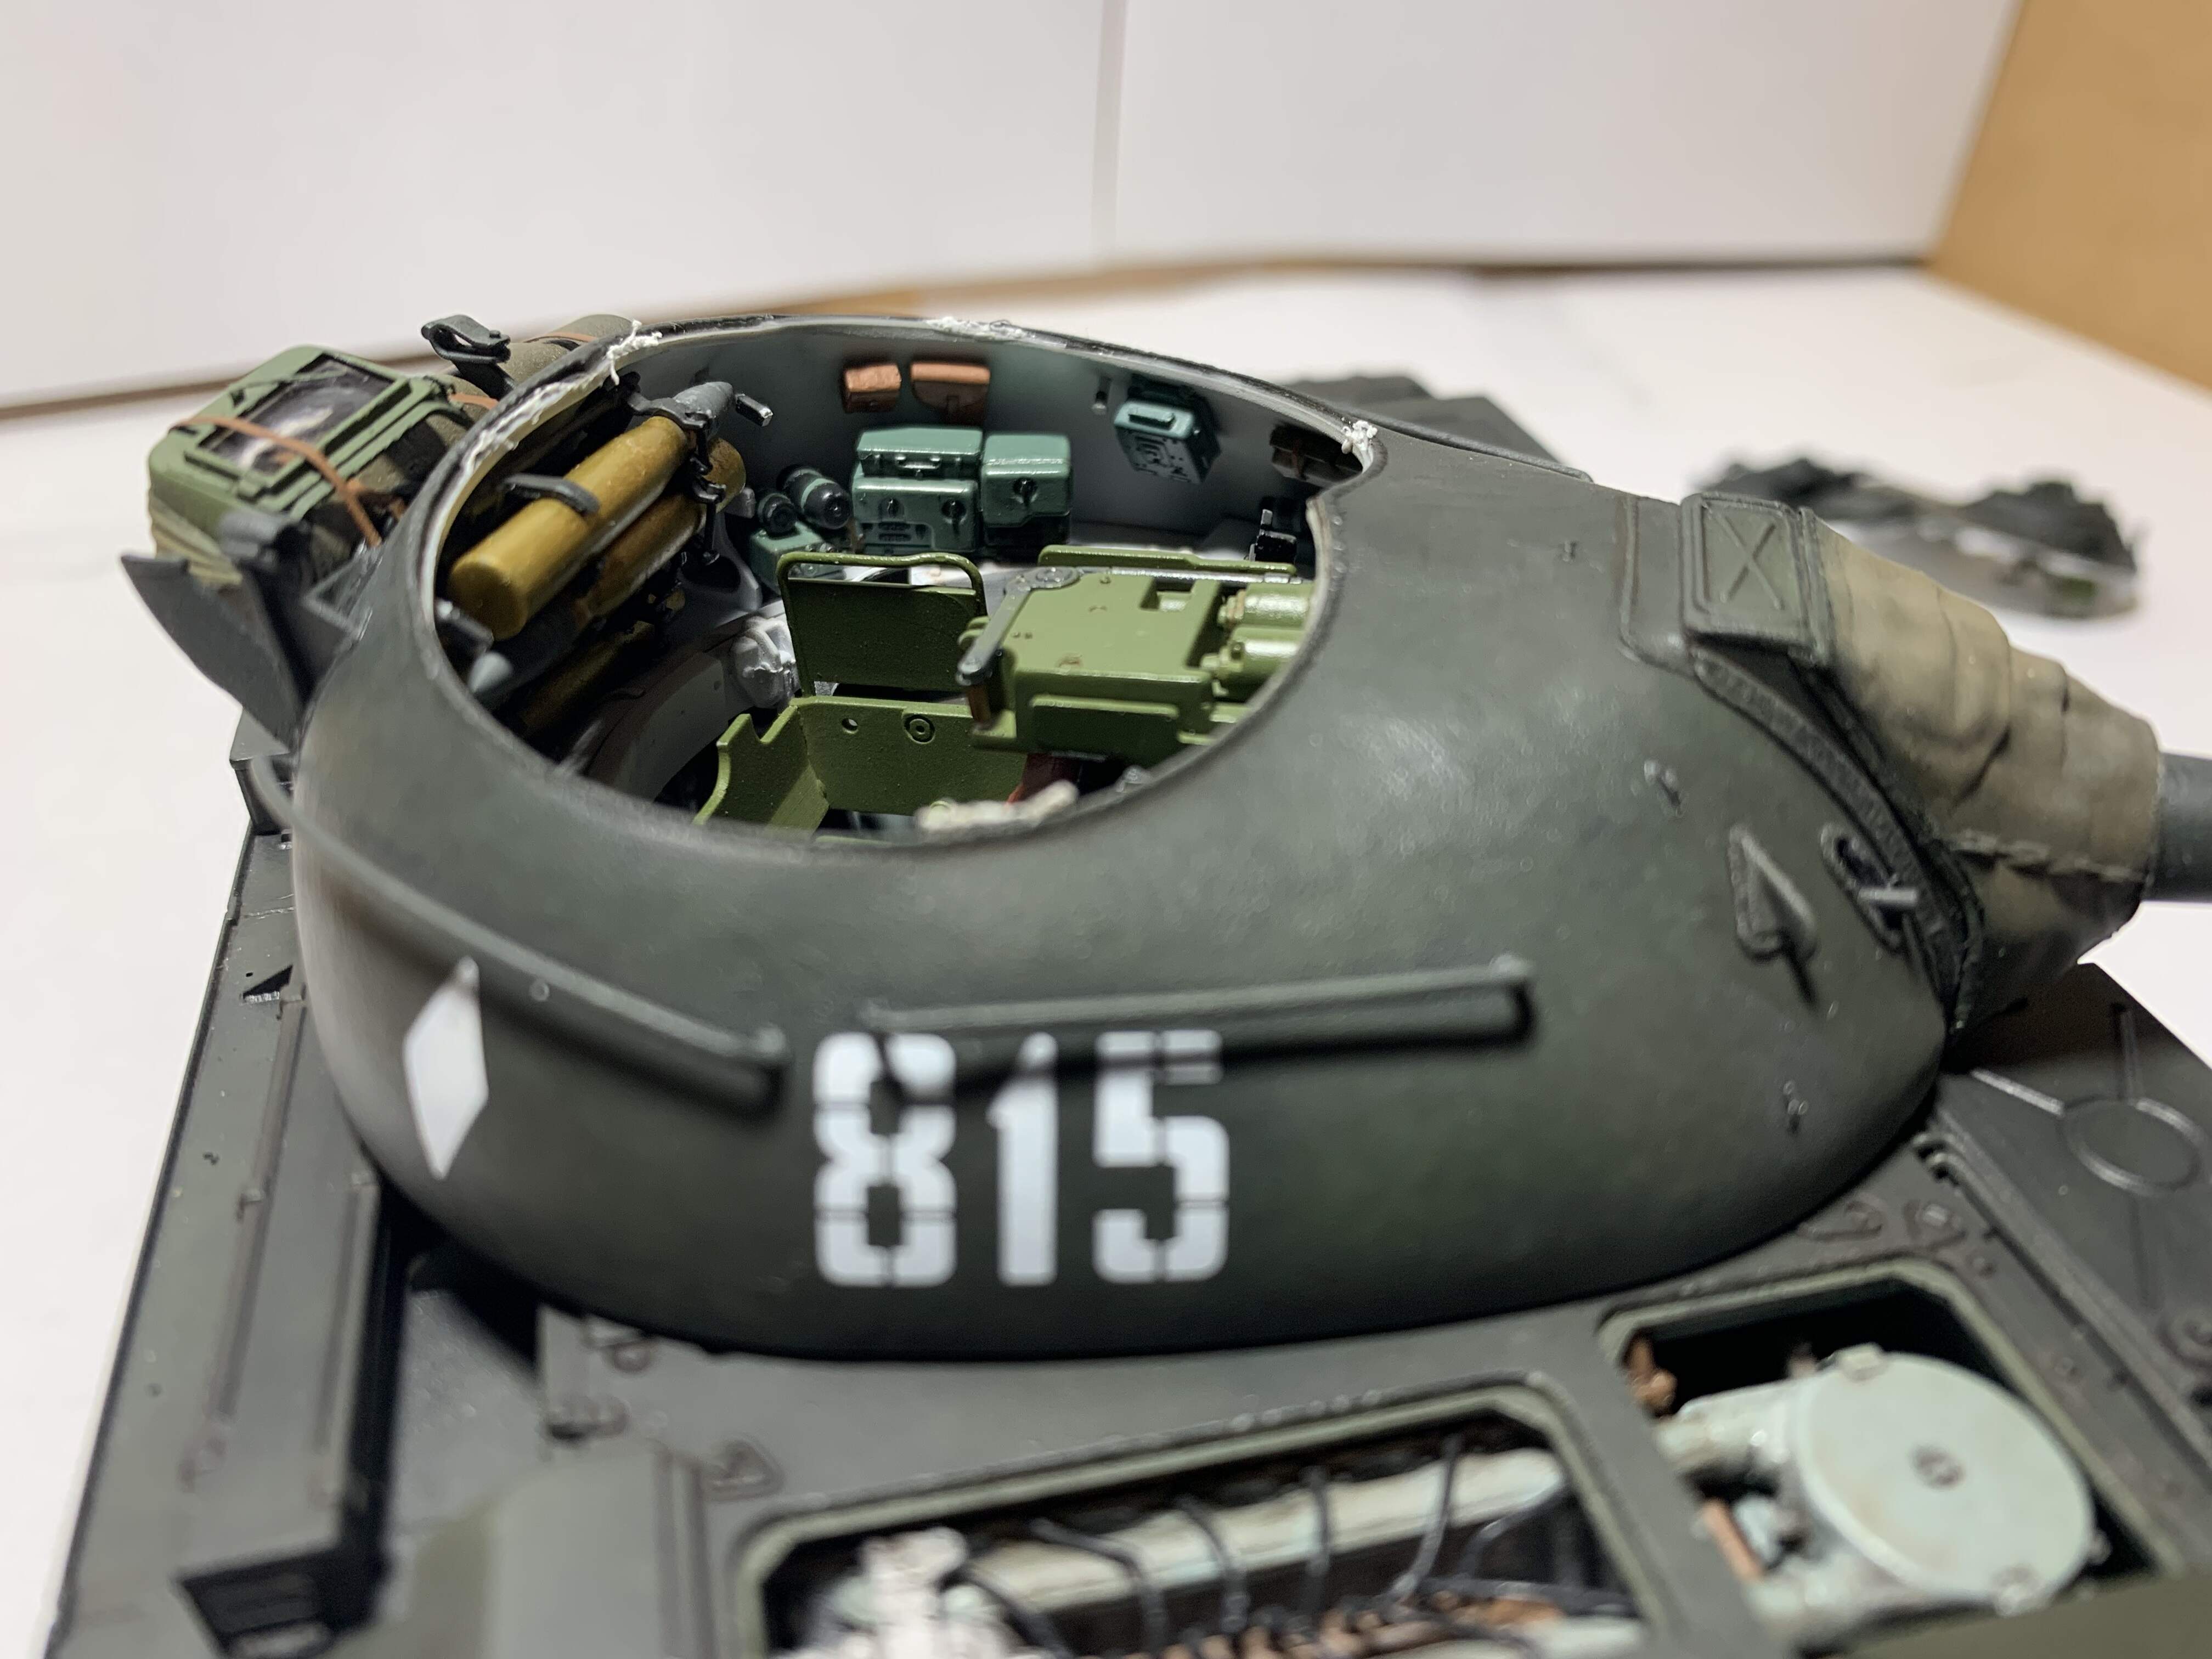
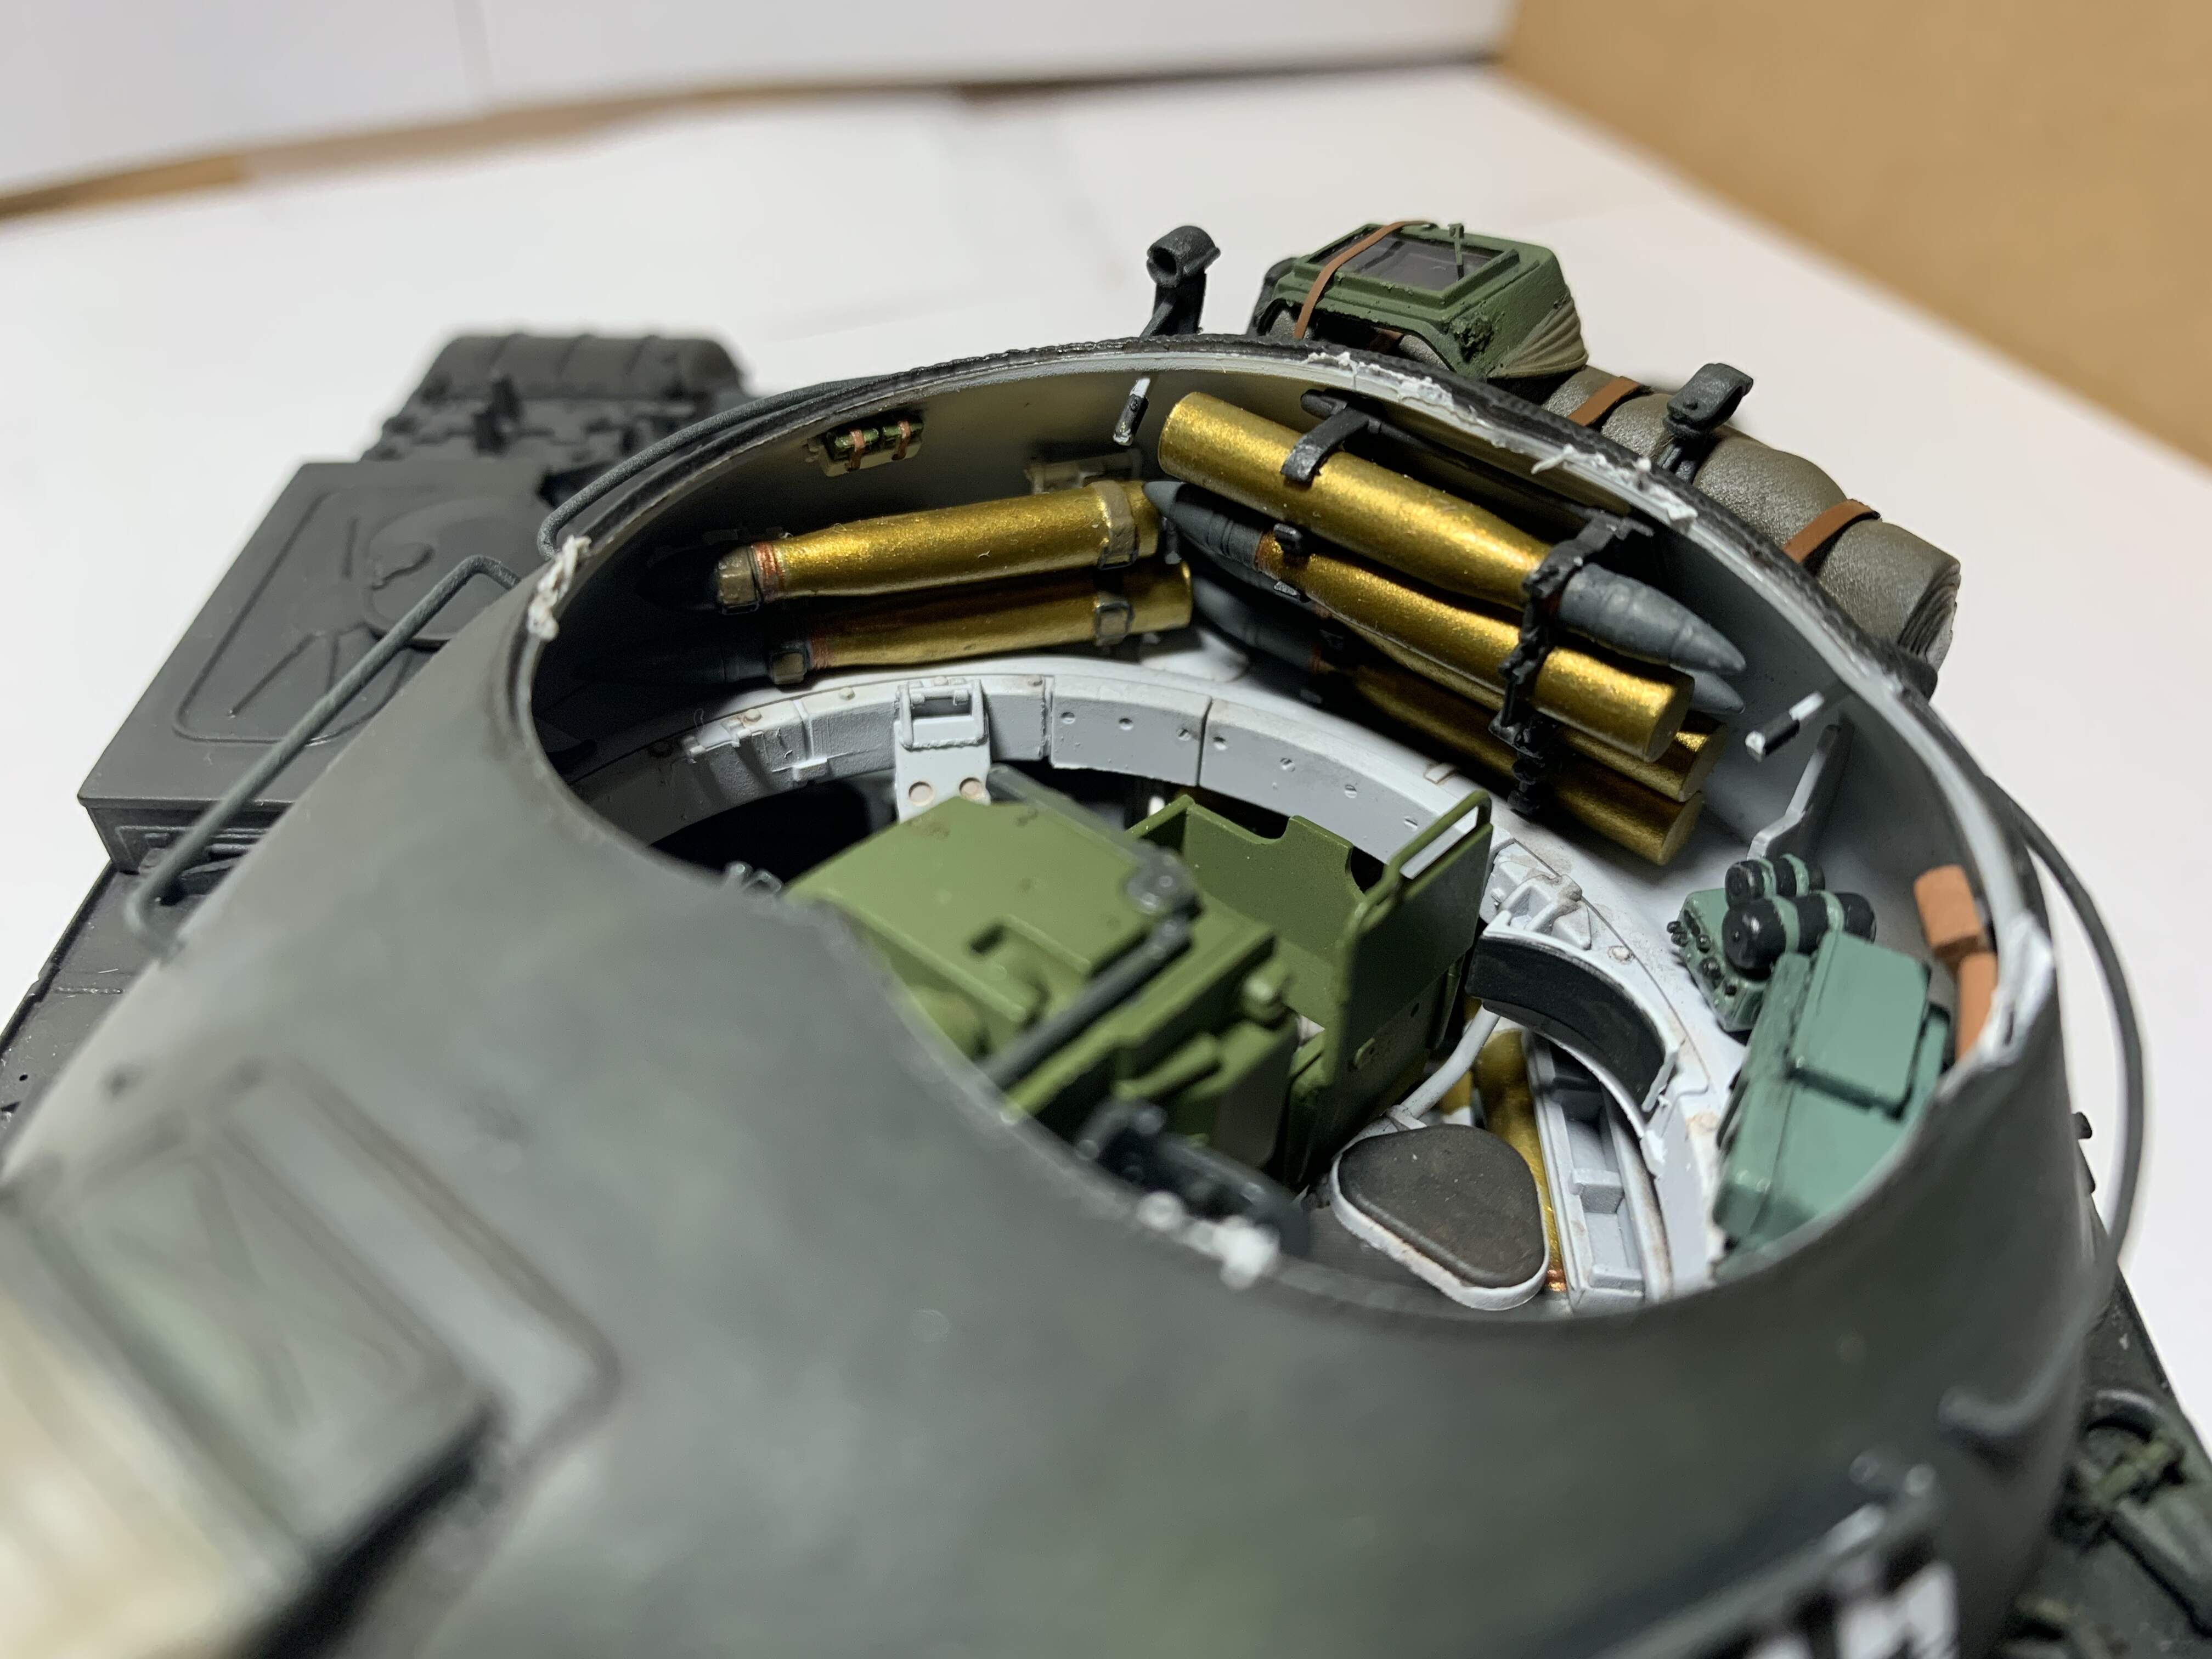
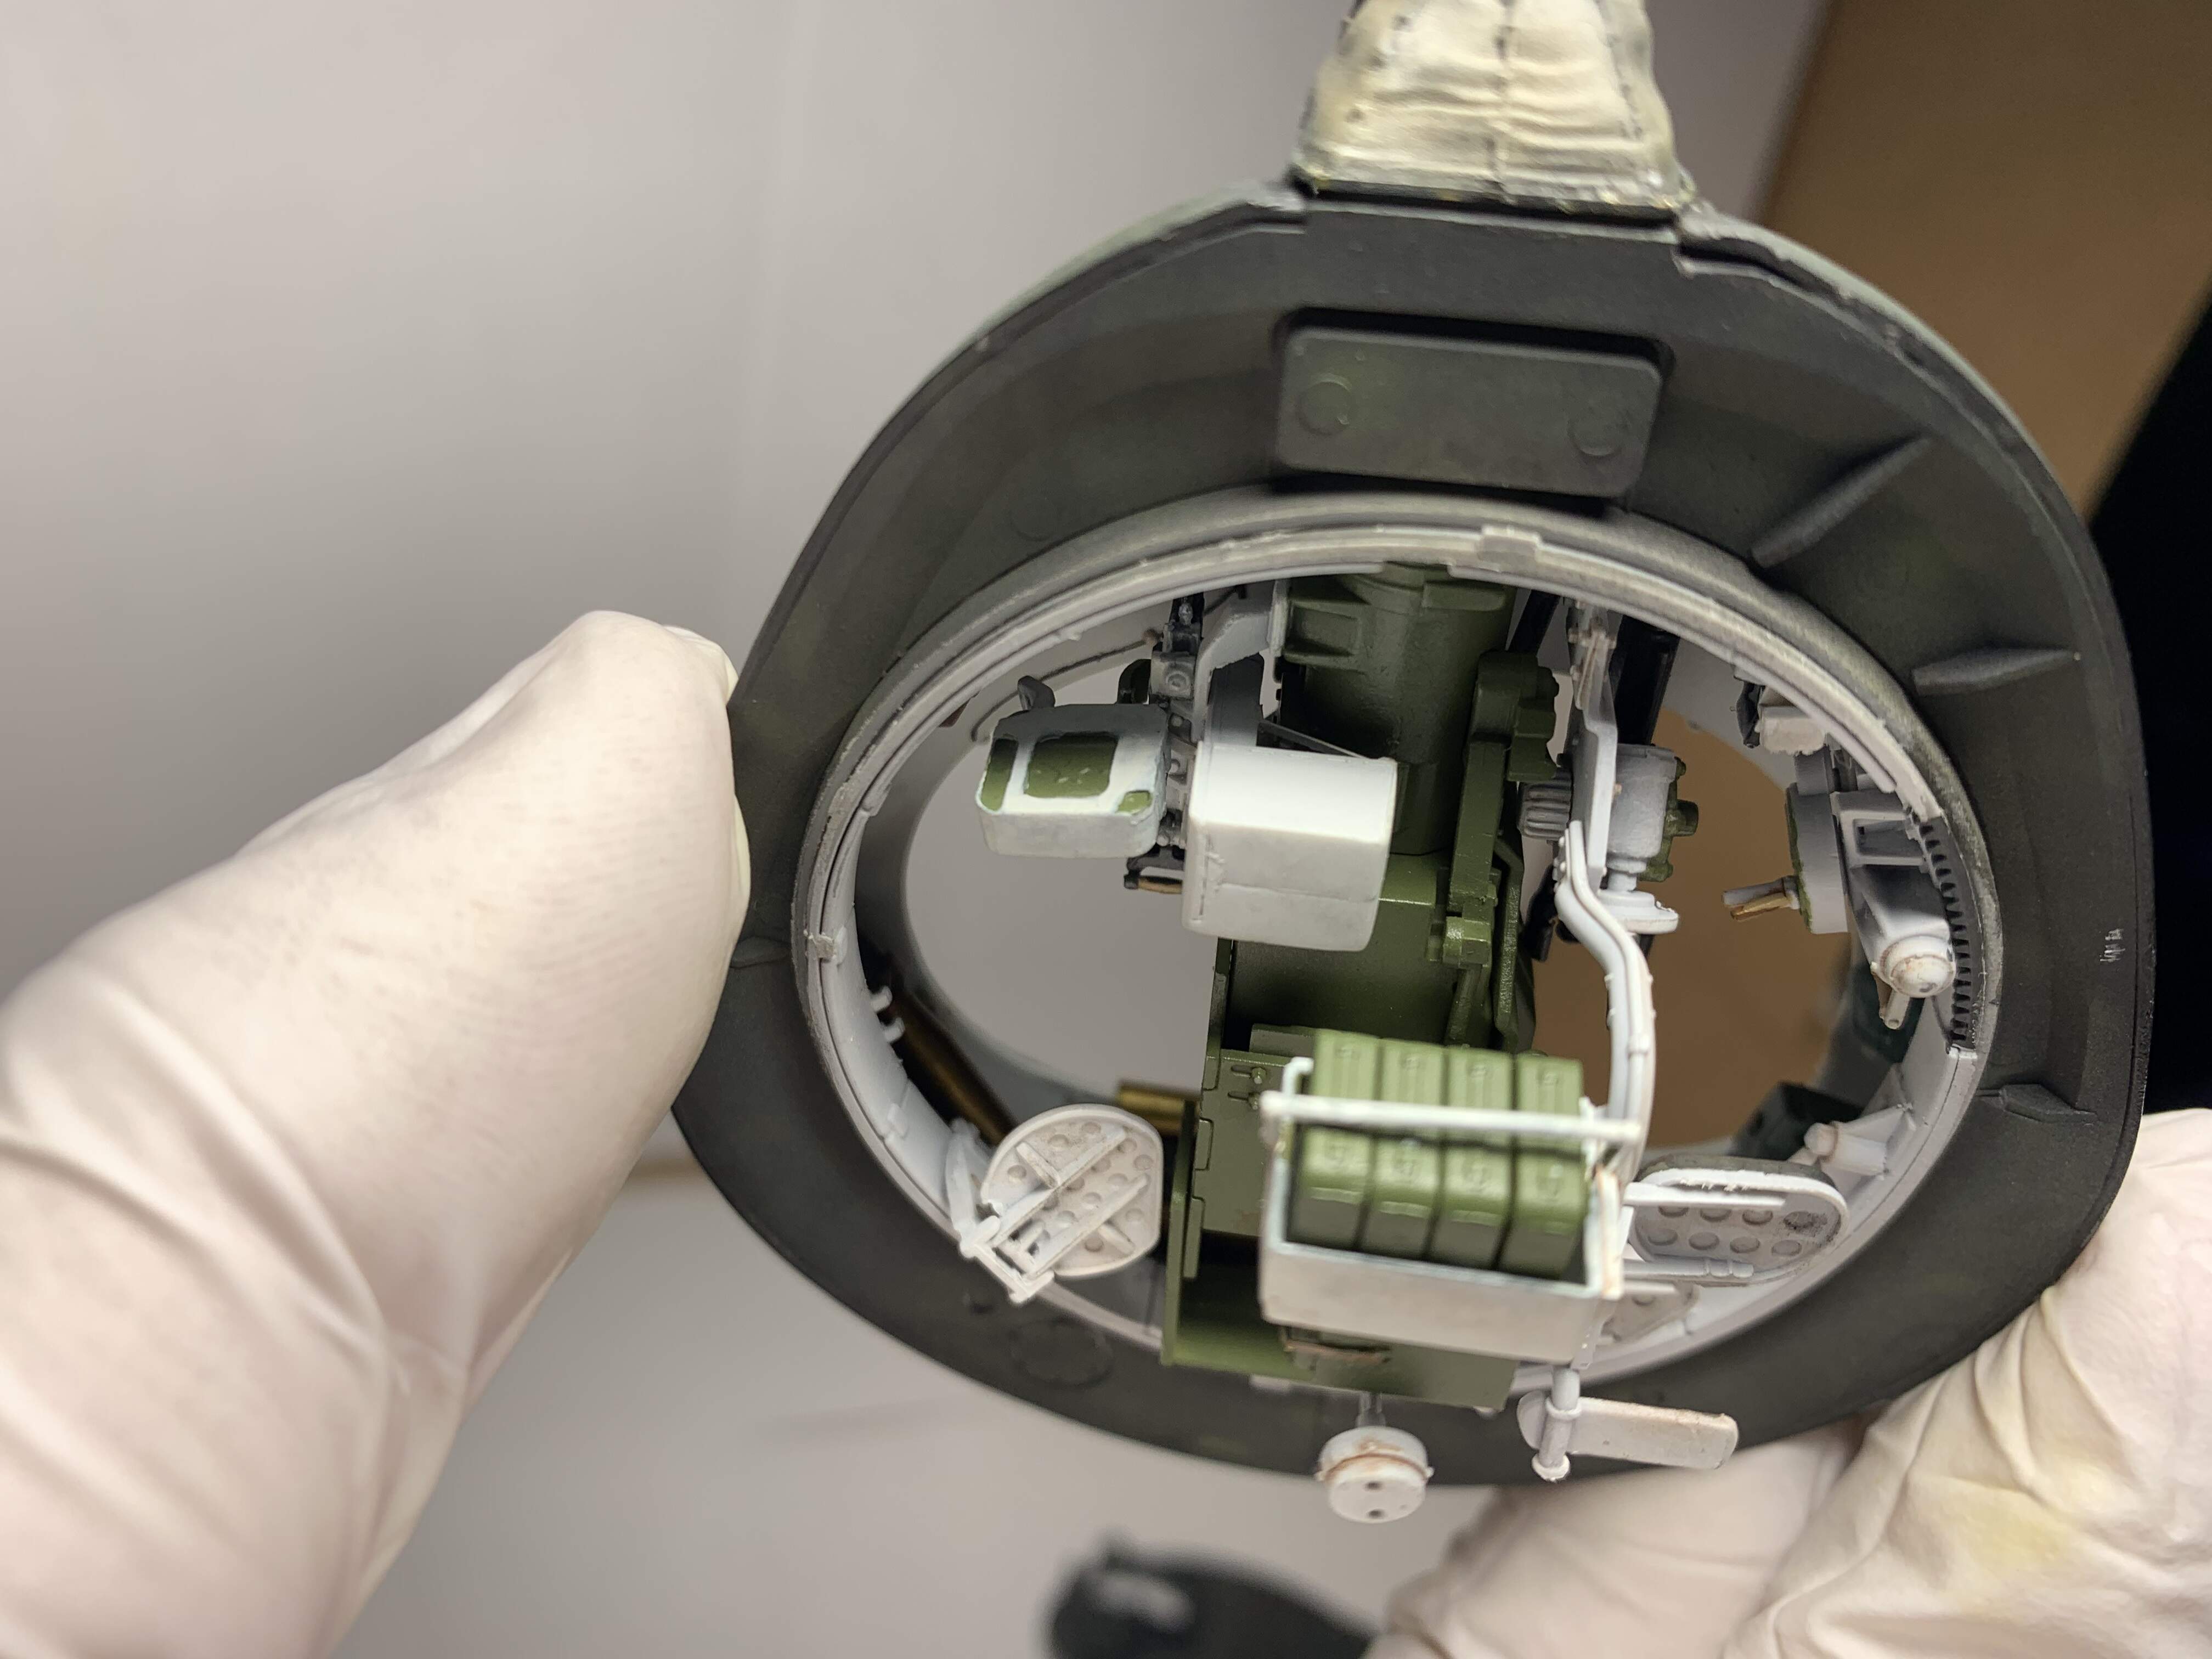
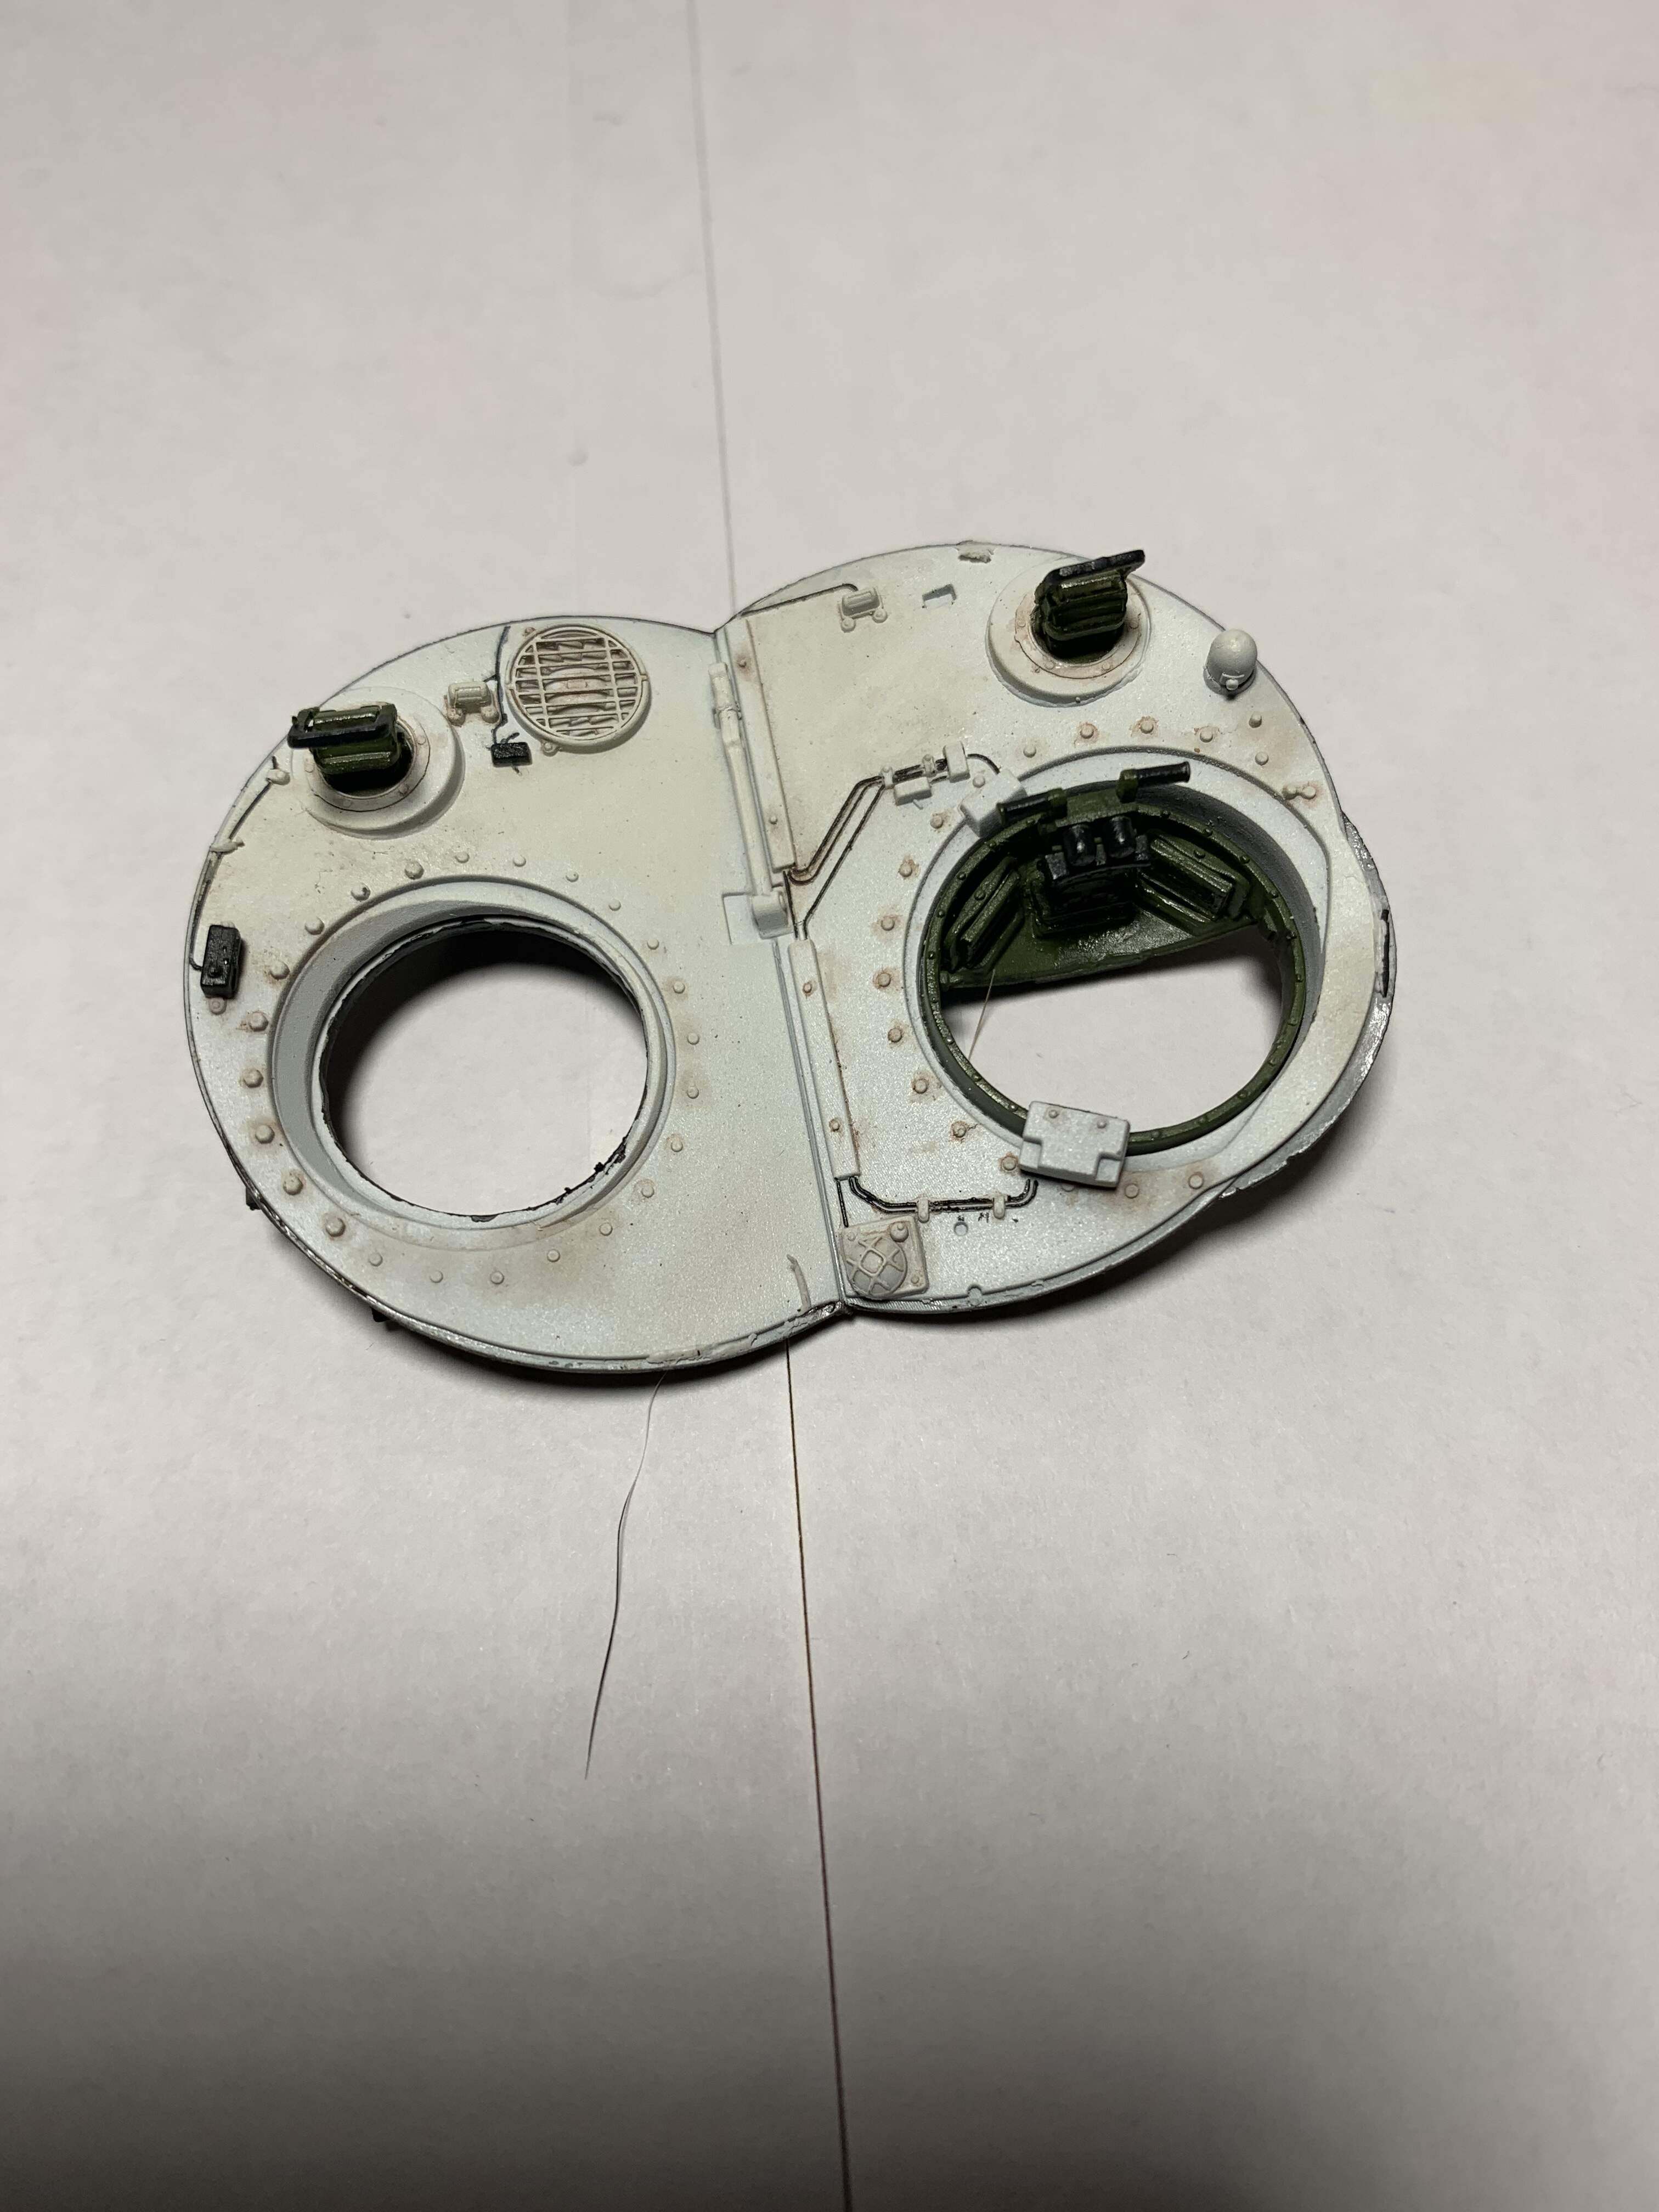
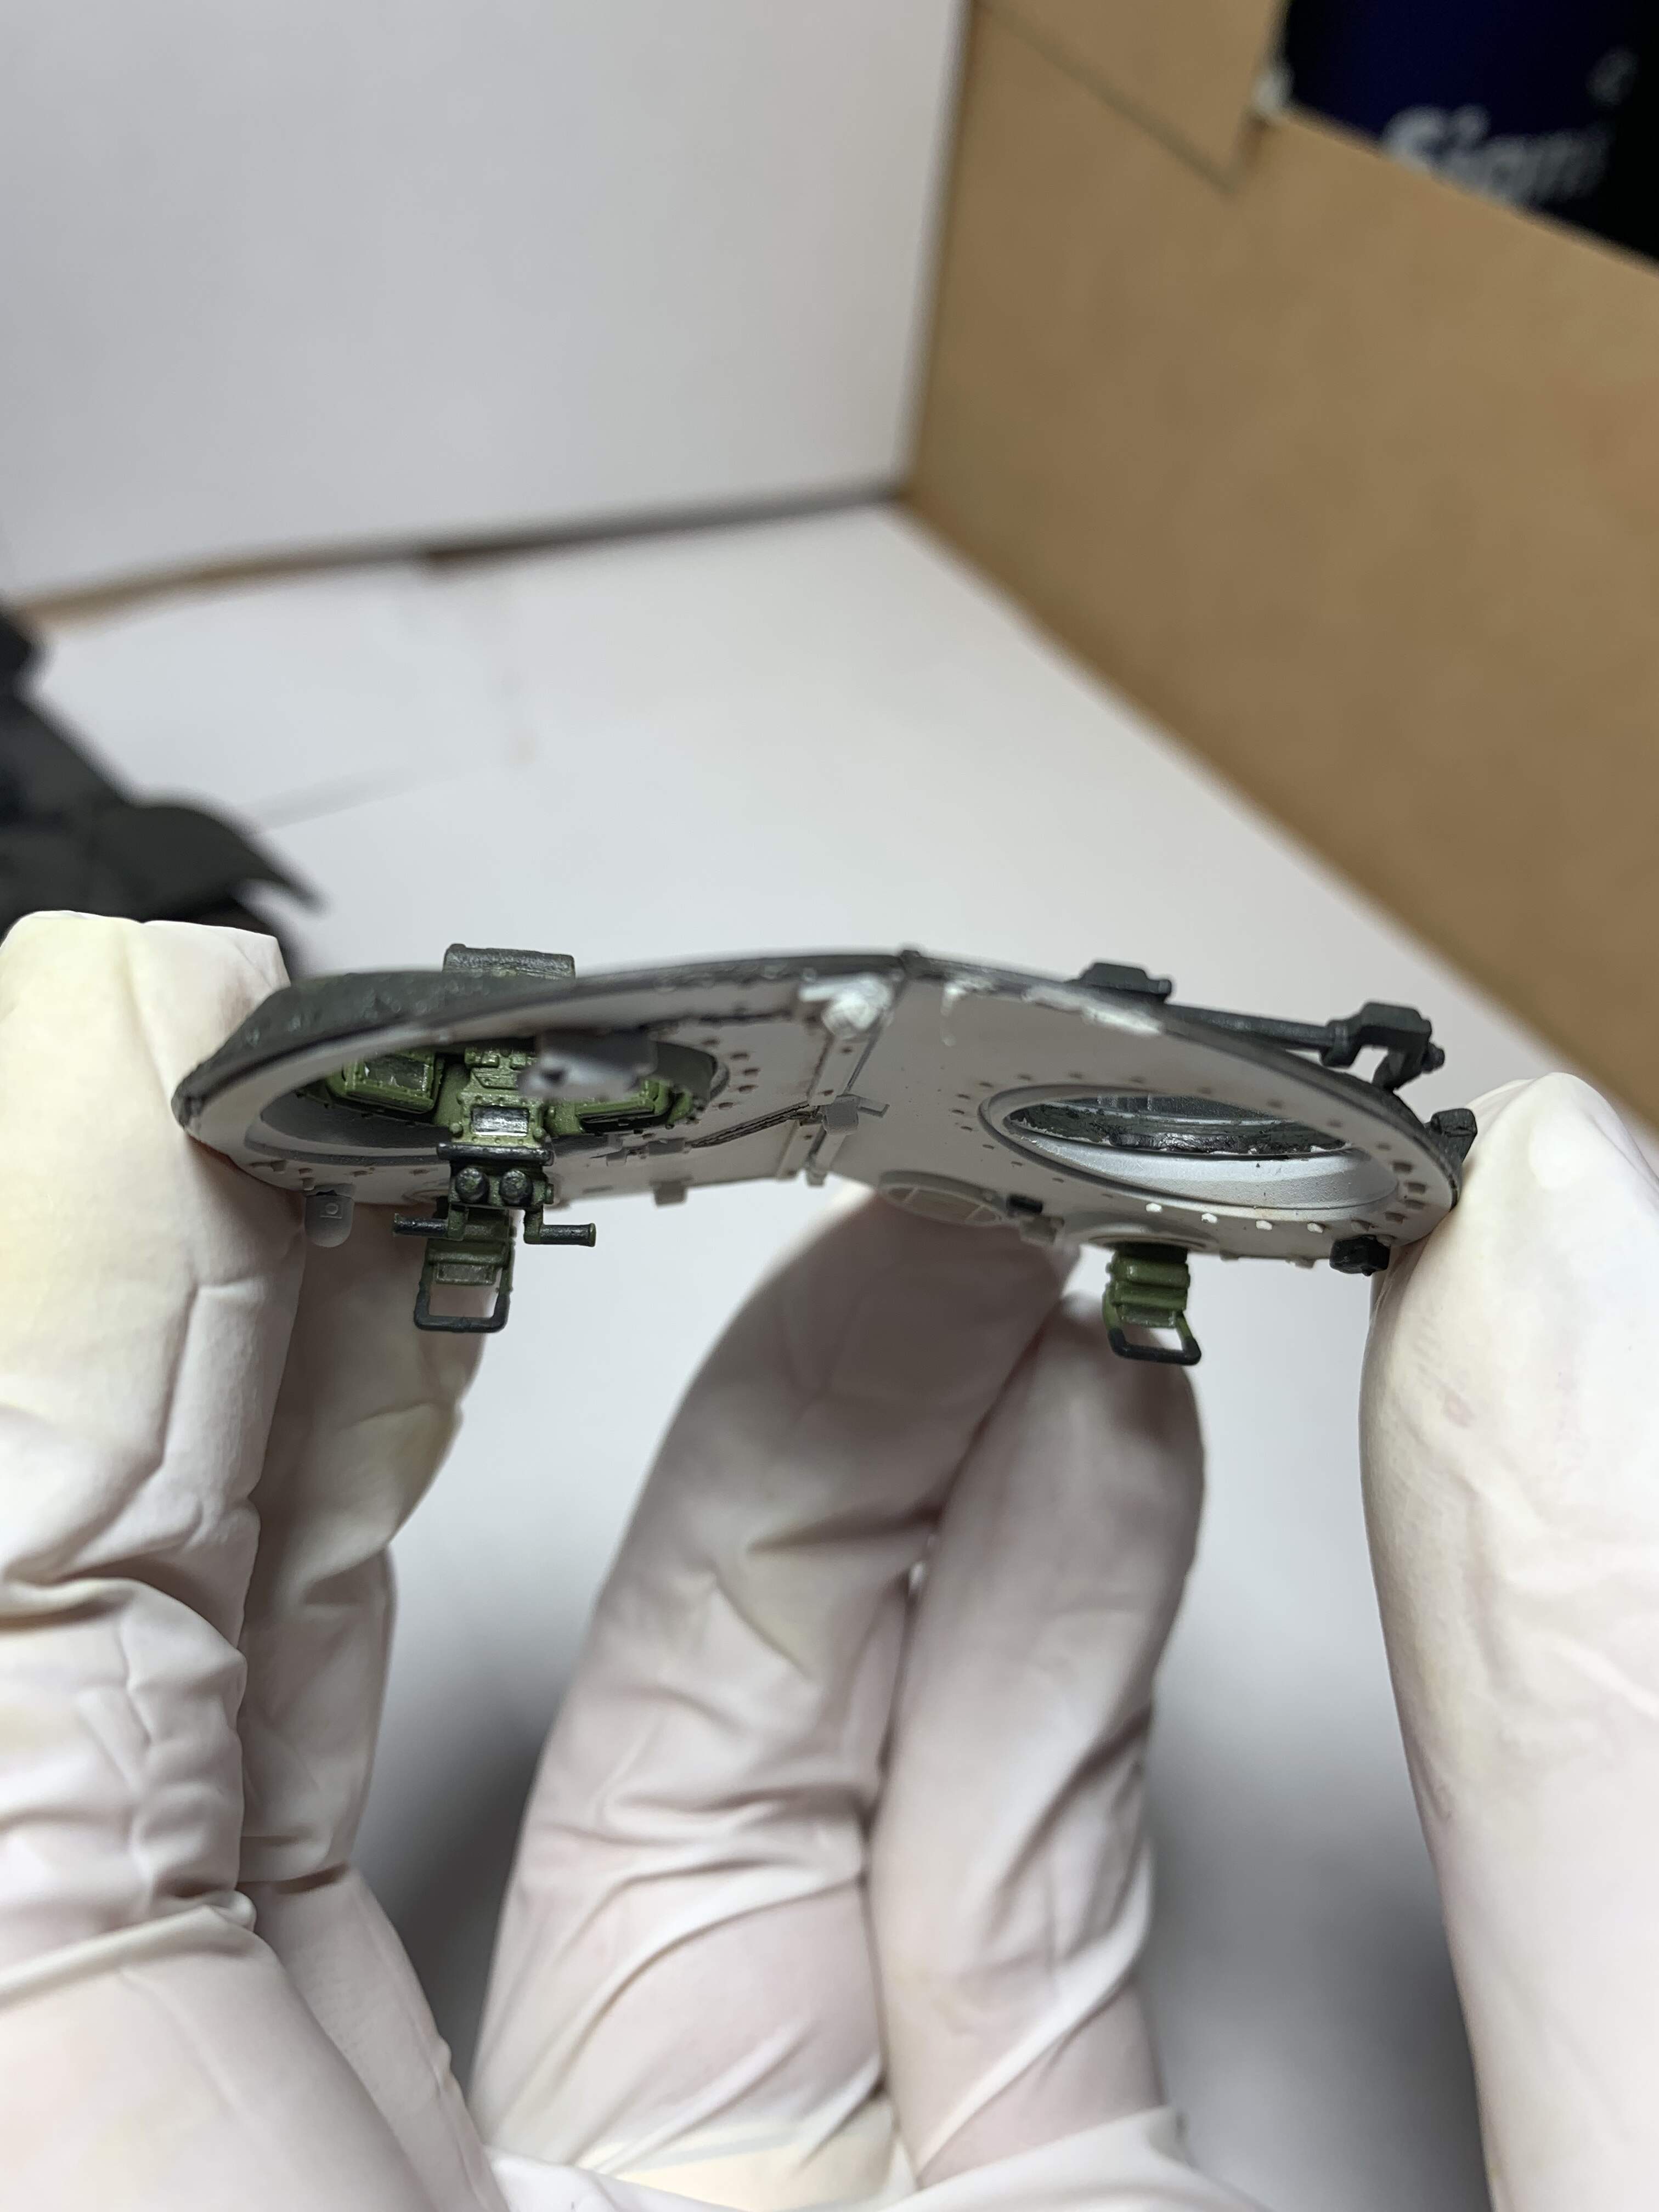
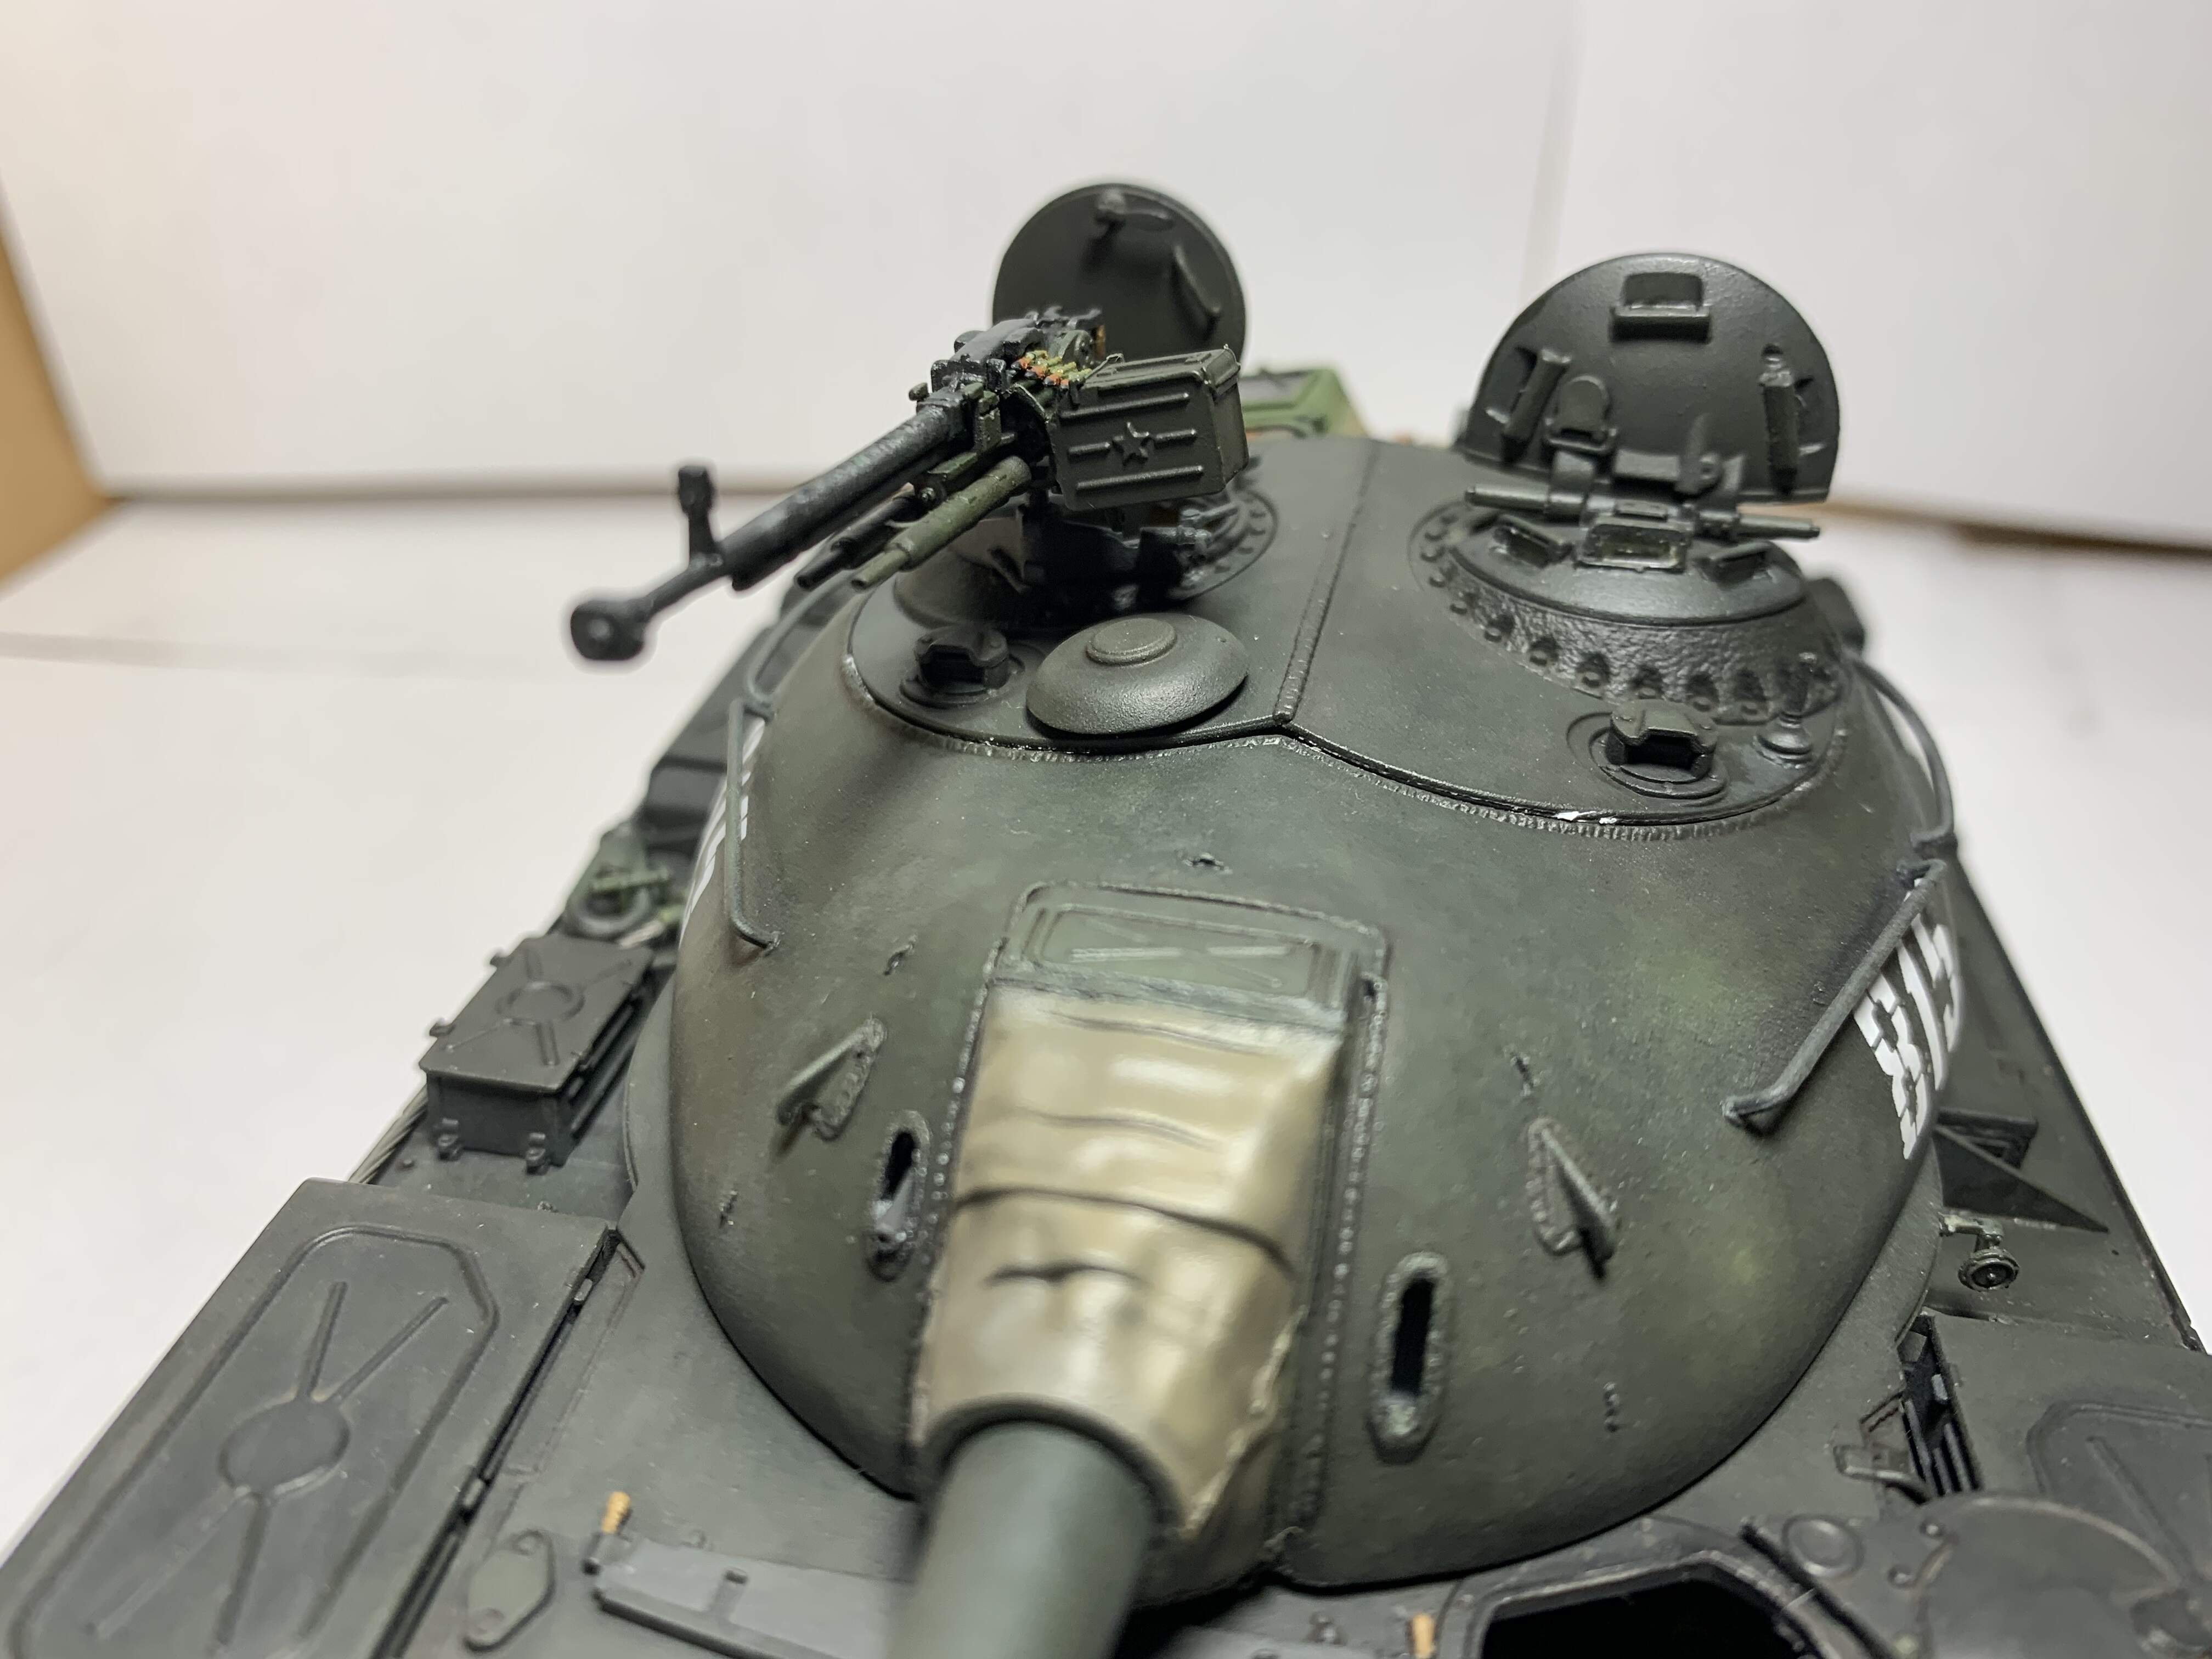
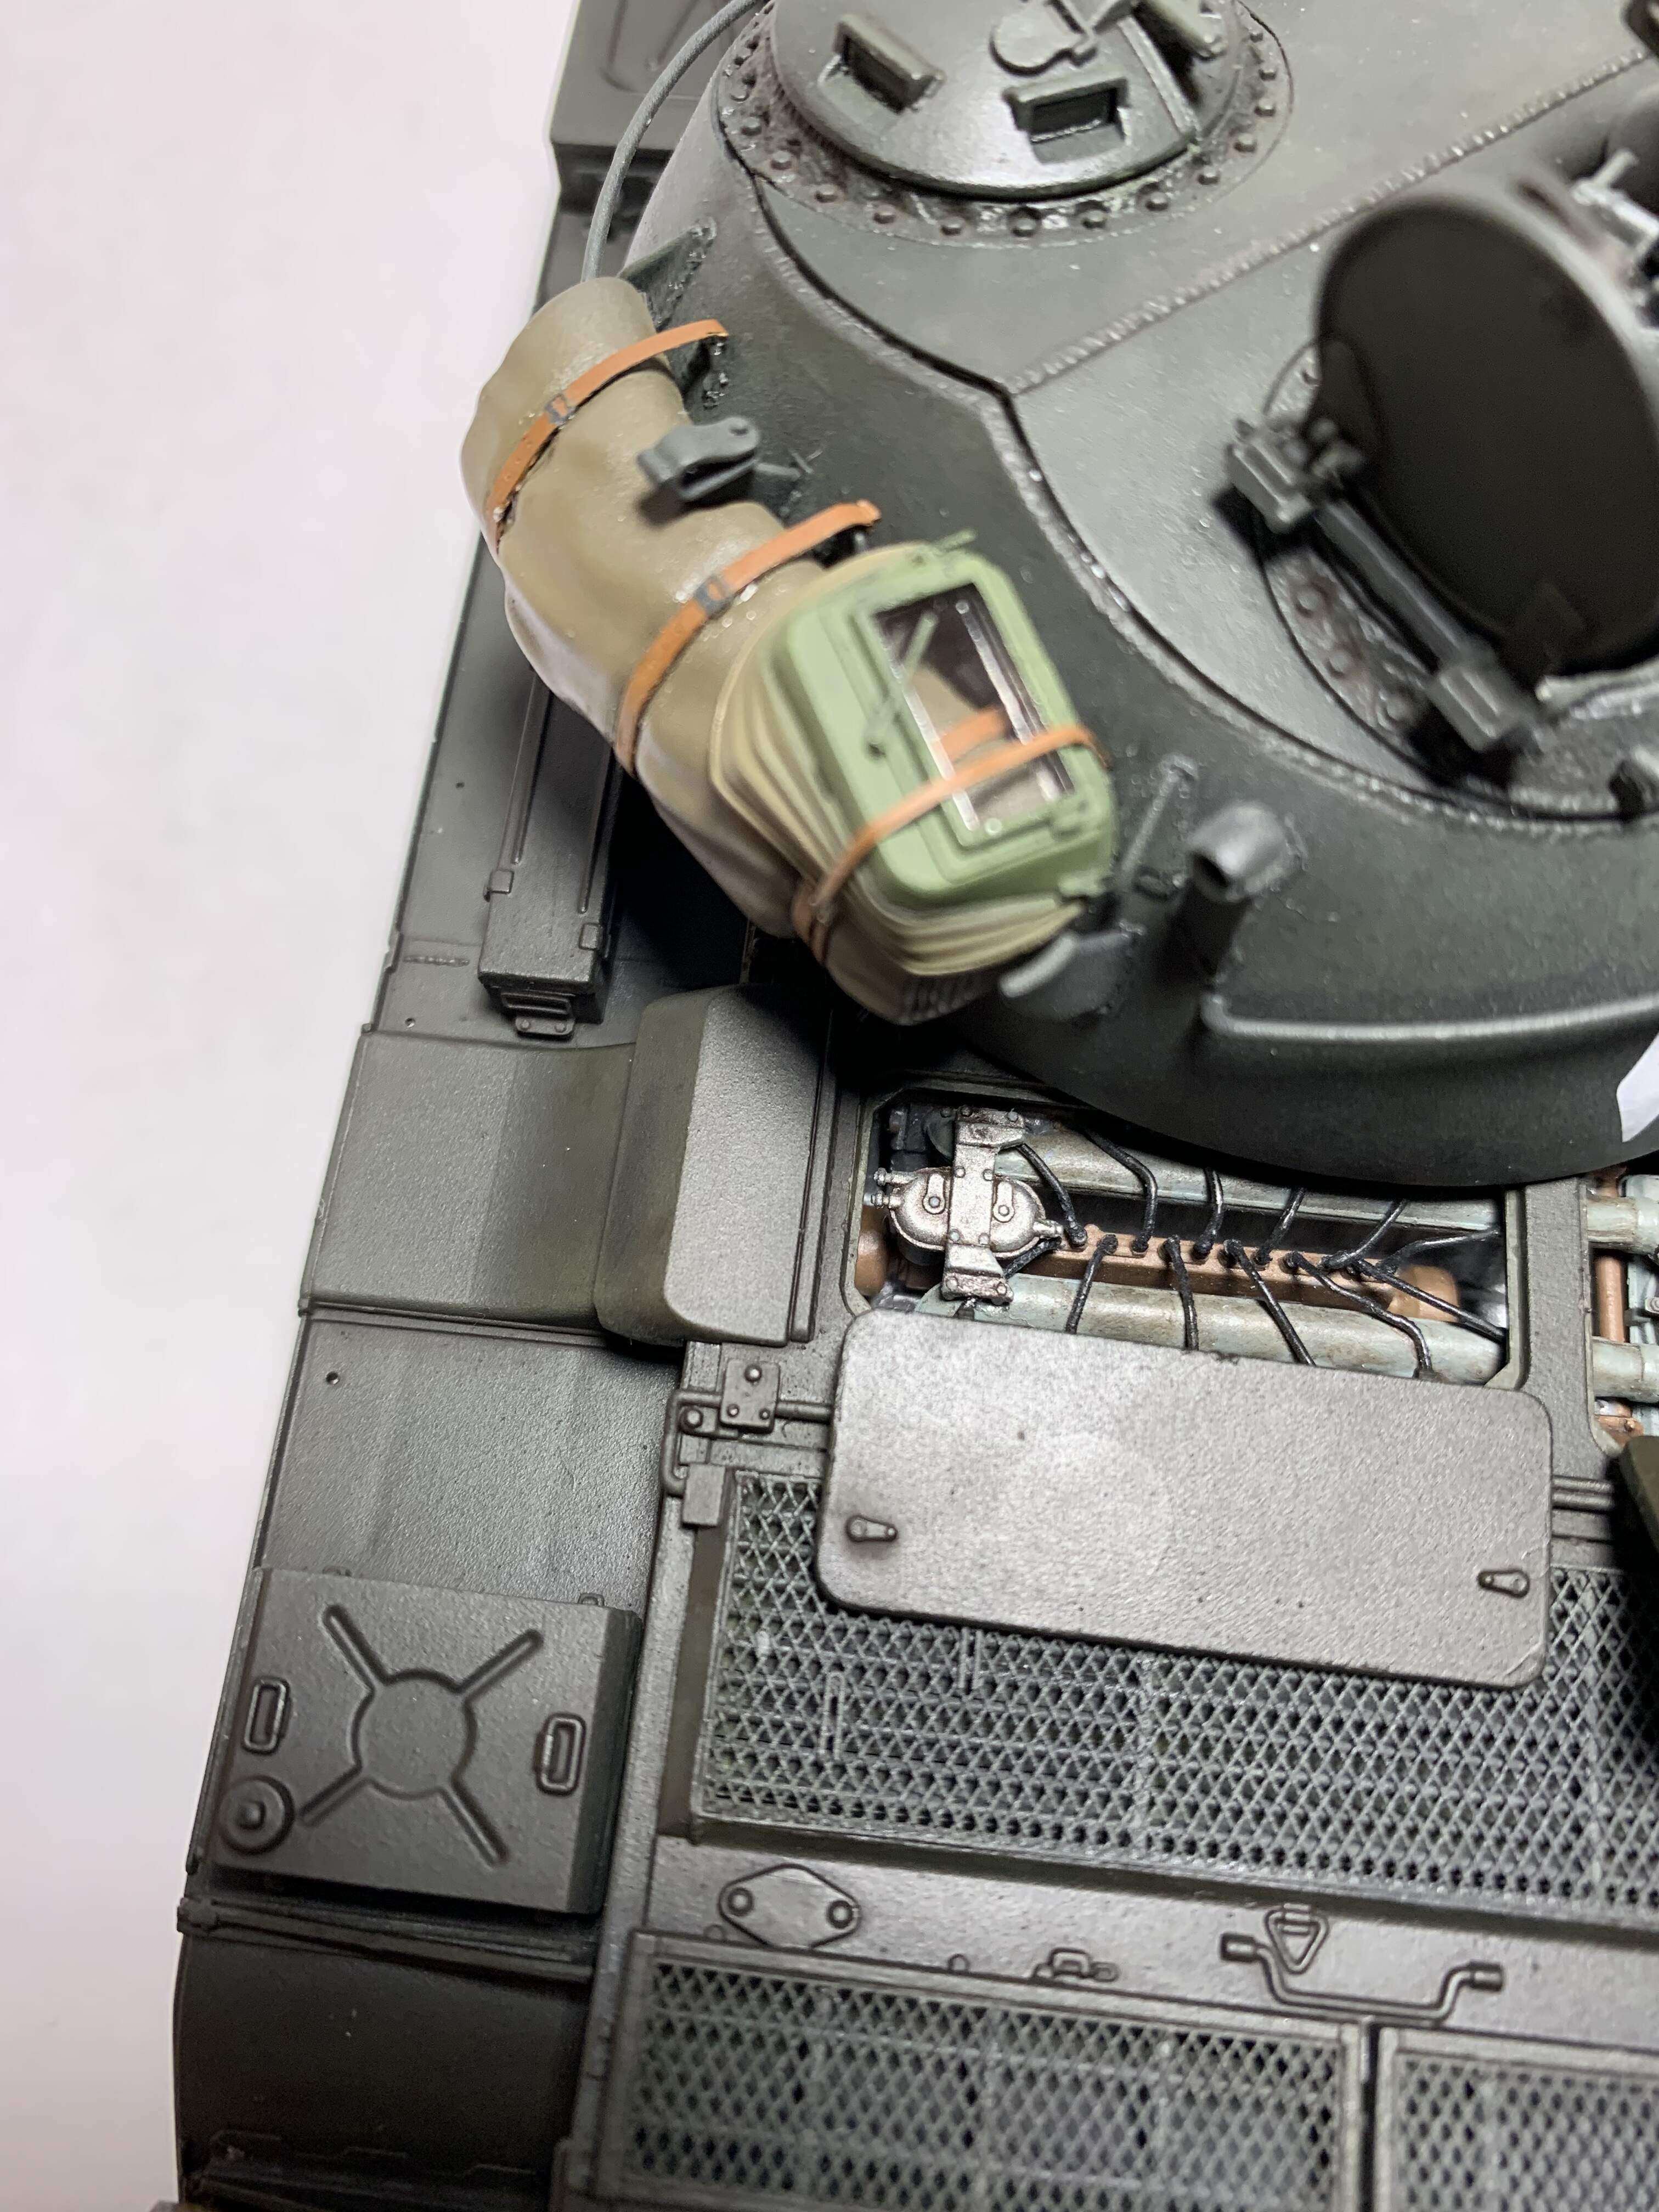
I’ve left the turret roof removable (secured with white tack), and all the hatches movable. I’ll post more interior shots of the turret tomorrow when I remove the roof. As well as more overall pictures. Comments welcome!
Thanks man! I used Vallejo brass on them, by far the best brass paint I’ve used. I was pretty happy with how it turned out. Has good metallic flake size and goes on smooth.
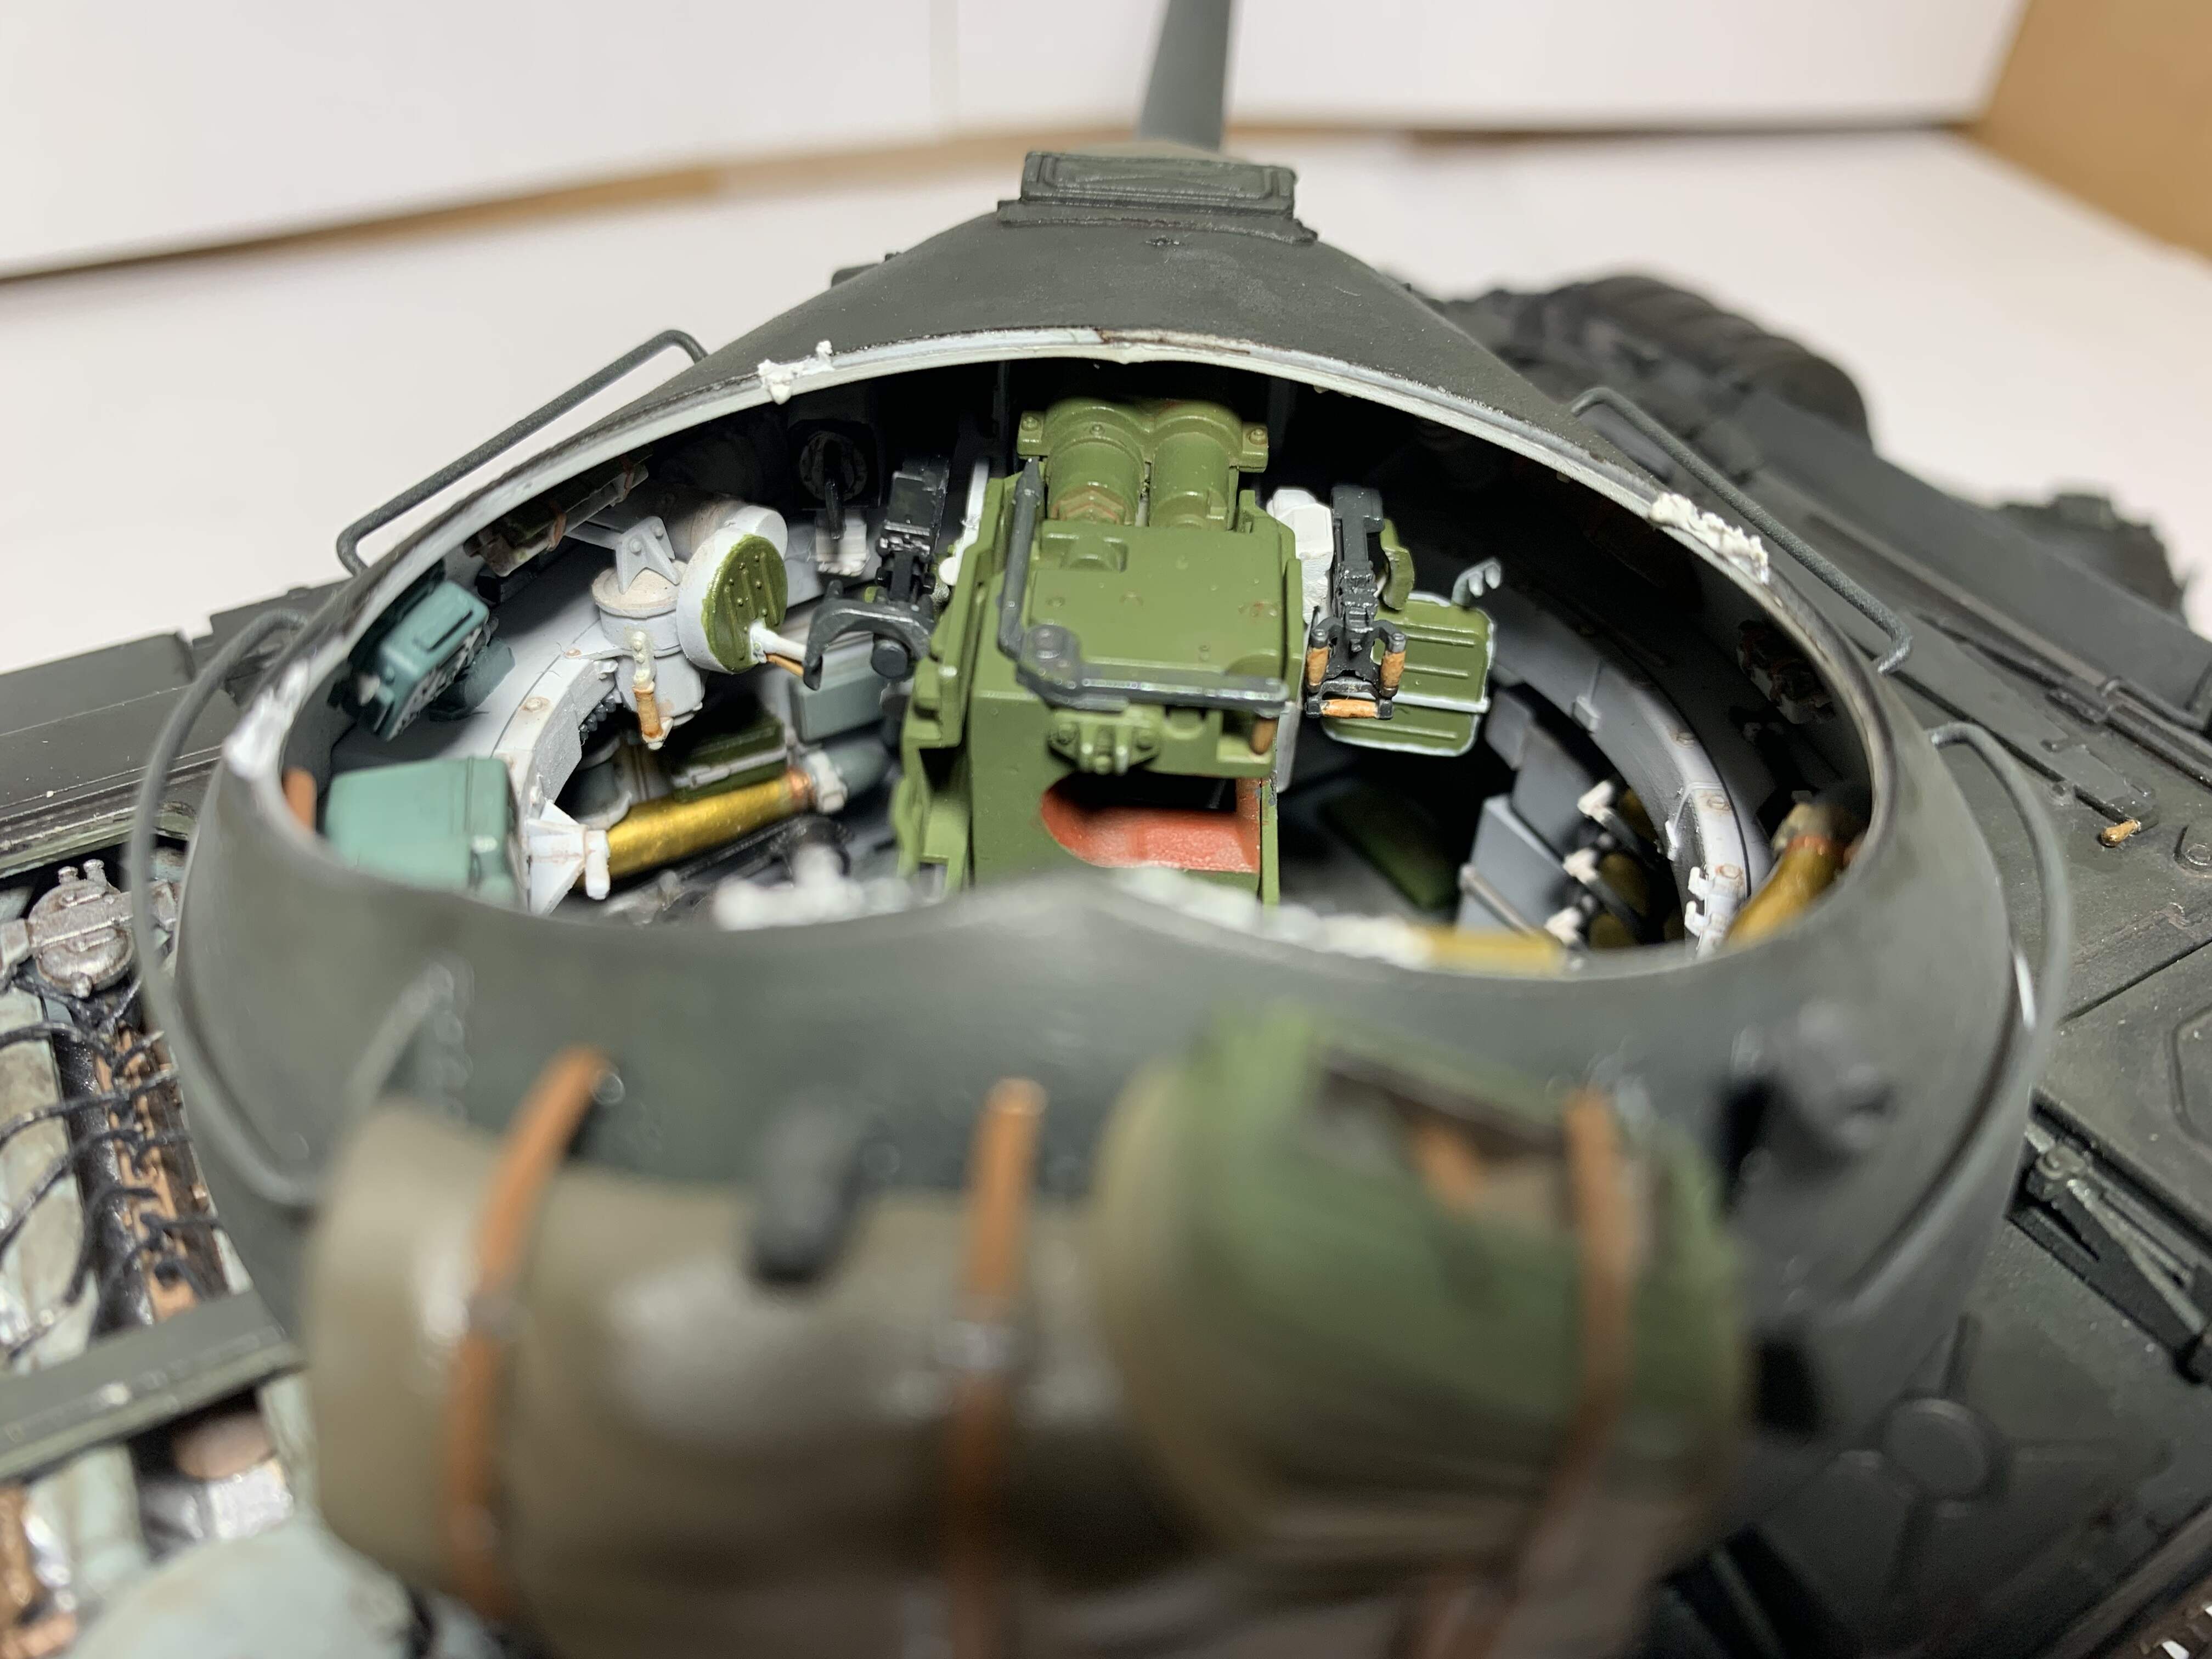
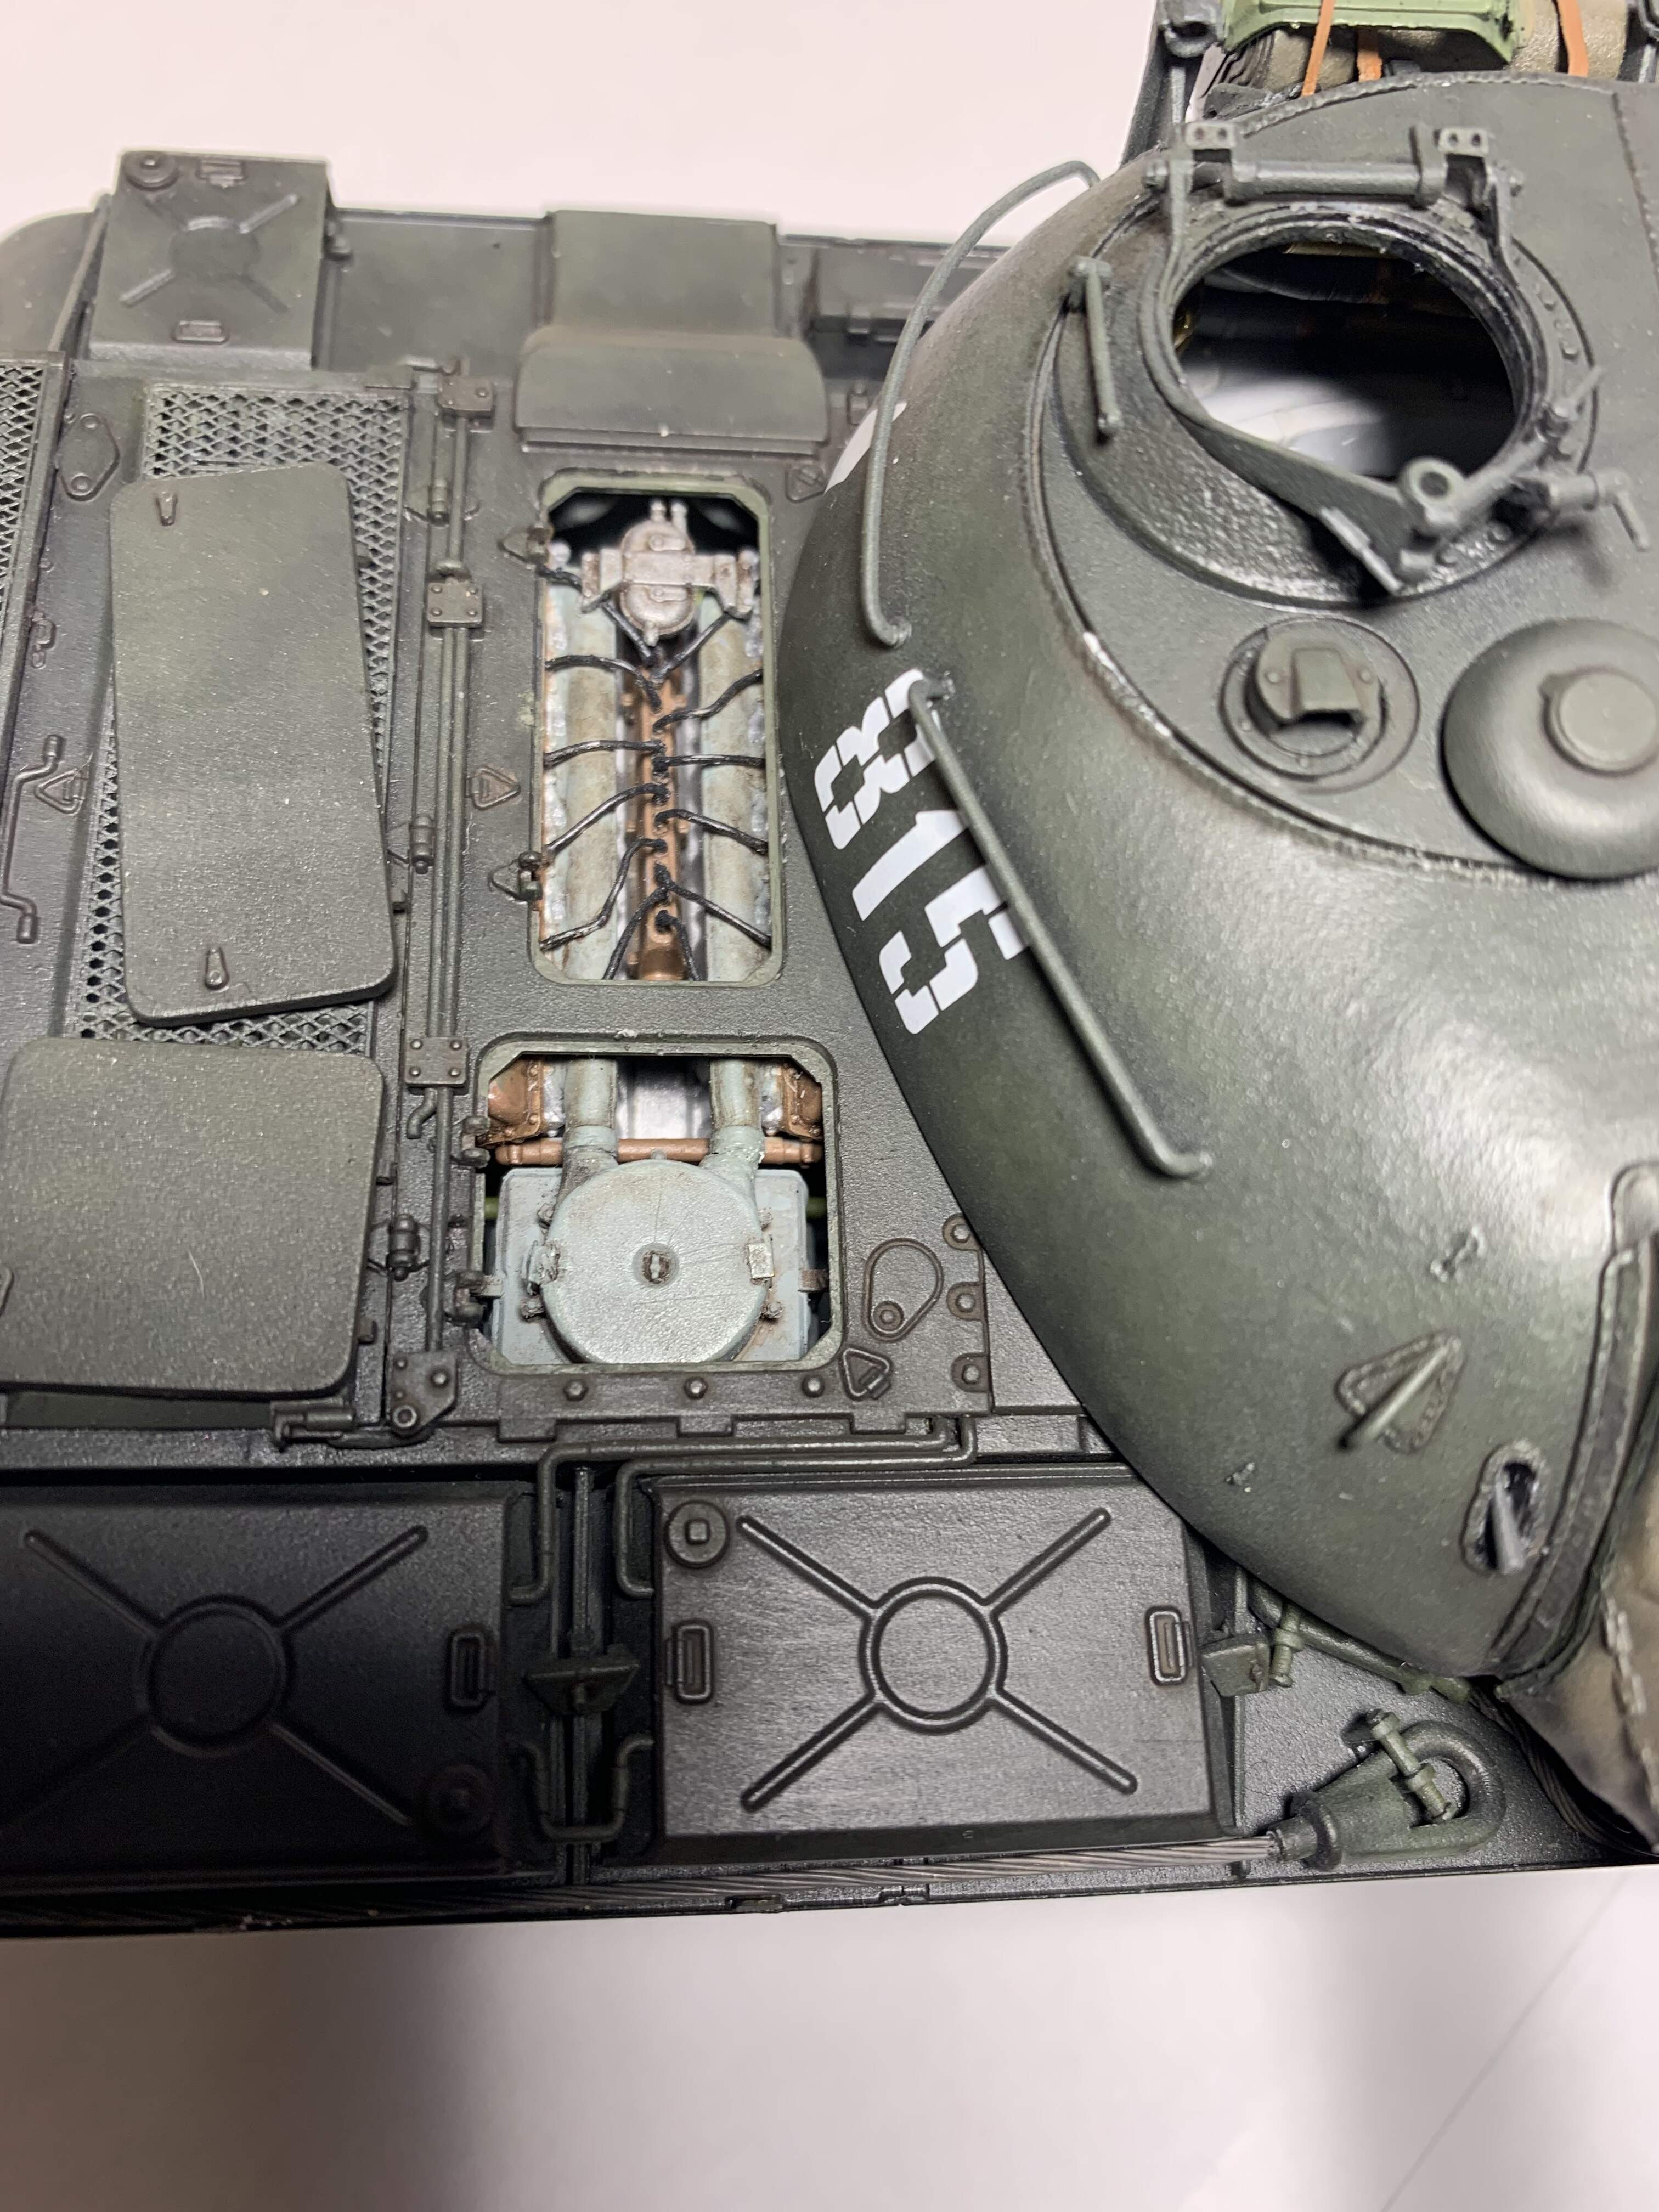
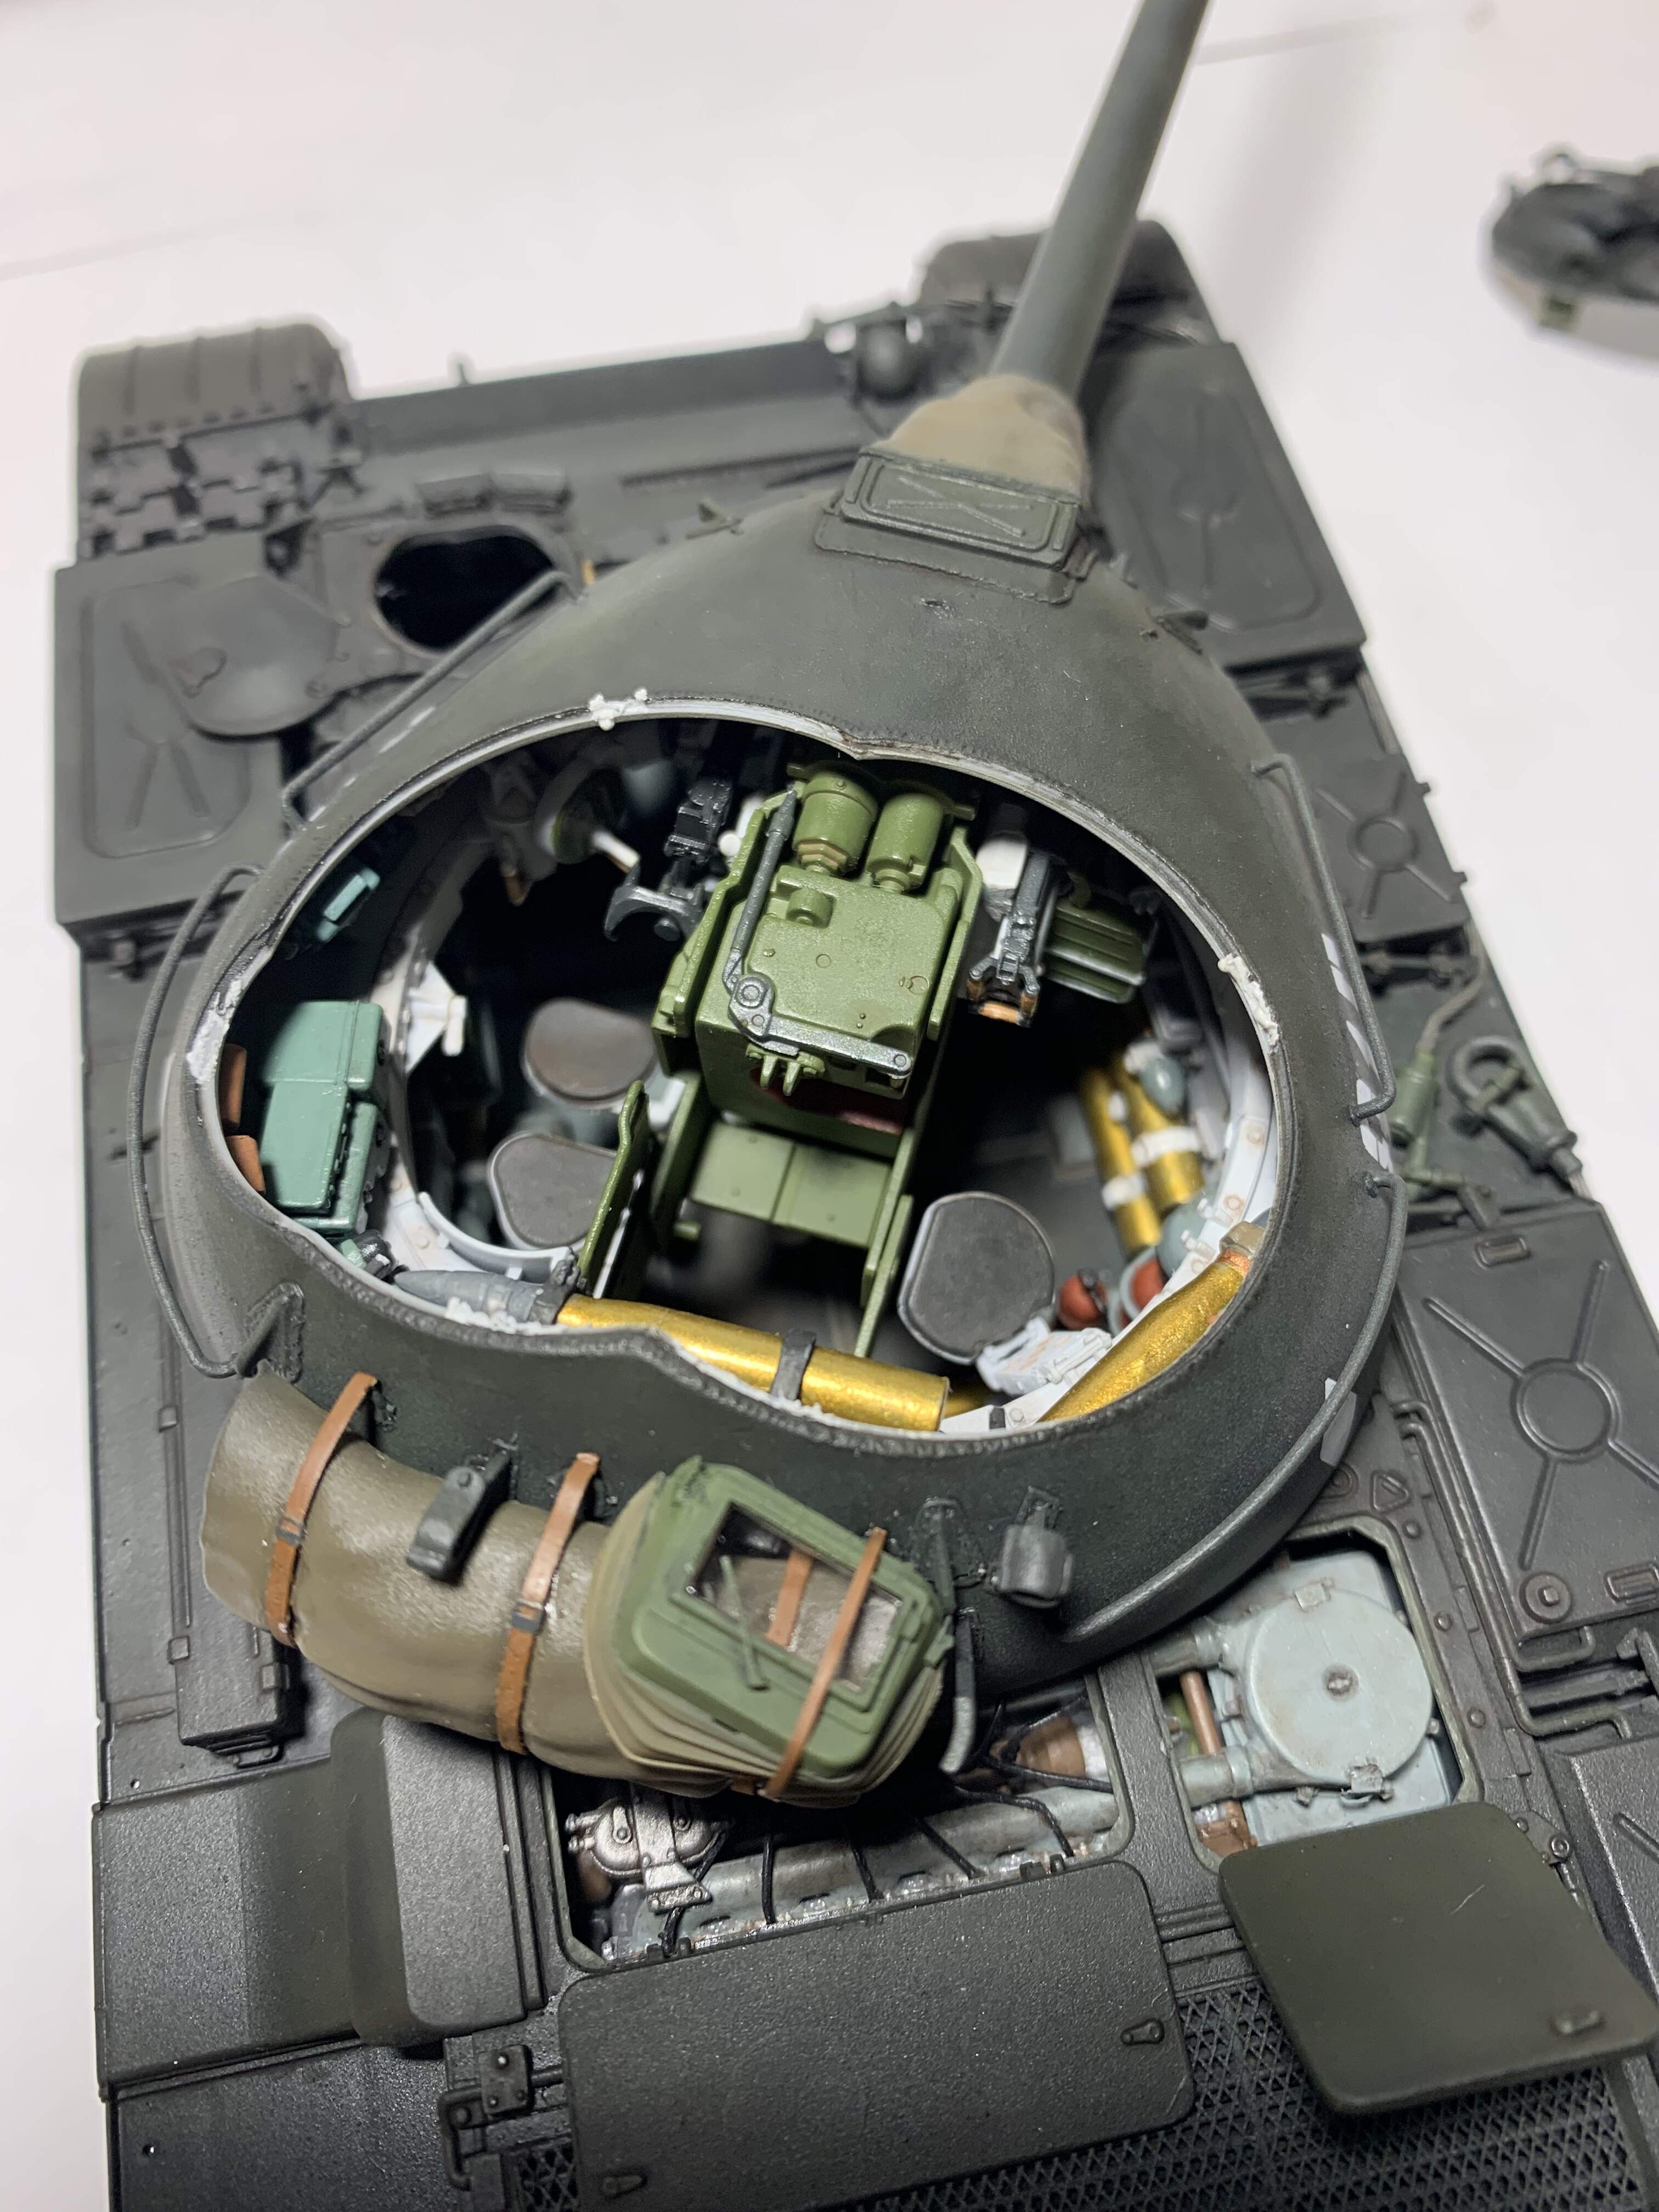
Thanks! It really is an interesting shot. Often, at least for me it’s easy to forget the technology that goes into tanks, and how complex they are inside when you only see exterior shots.
I really liked building an interior kit. For someone who has never been inside an AFV it gave me an appreciation for the complexity of these vehicles, and the challenge of operating them. I can’t imagine trying to swing one of those 100mm rounds into the breach in that cramped turret
I’ve decided I will weather this one, testing each new technique on scrap. First up, I applied a filter made from a mix of Winsor Newton raw umber and ivory black. This applied fairly wet, allowed to dry to the point where there was a slight sheen from the thinner, and then it was brushed lightly to blend. I worked on very small areas, so it took a while but it felt more controlled this way. In my opinion it
unified the paint a bit,
made it flatter and took away the residual sheen from my satin coat
warmed the color up and made it lighter green which I was shooting for
made details pop a bit.
made some of pre shading effort pop back out
The turret in the following hasn’t had the filter/overall wash yet. In my opinion it looks cooler in tone, less blended, and has less detail pop out
Absolutely beautiful!!
And if you don’t want to do to much weathering, you could always put these figures with it, then the tank would have been kept clean…