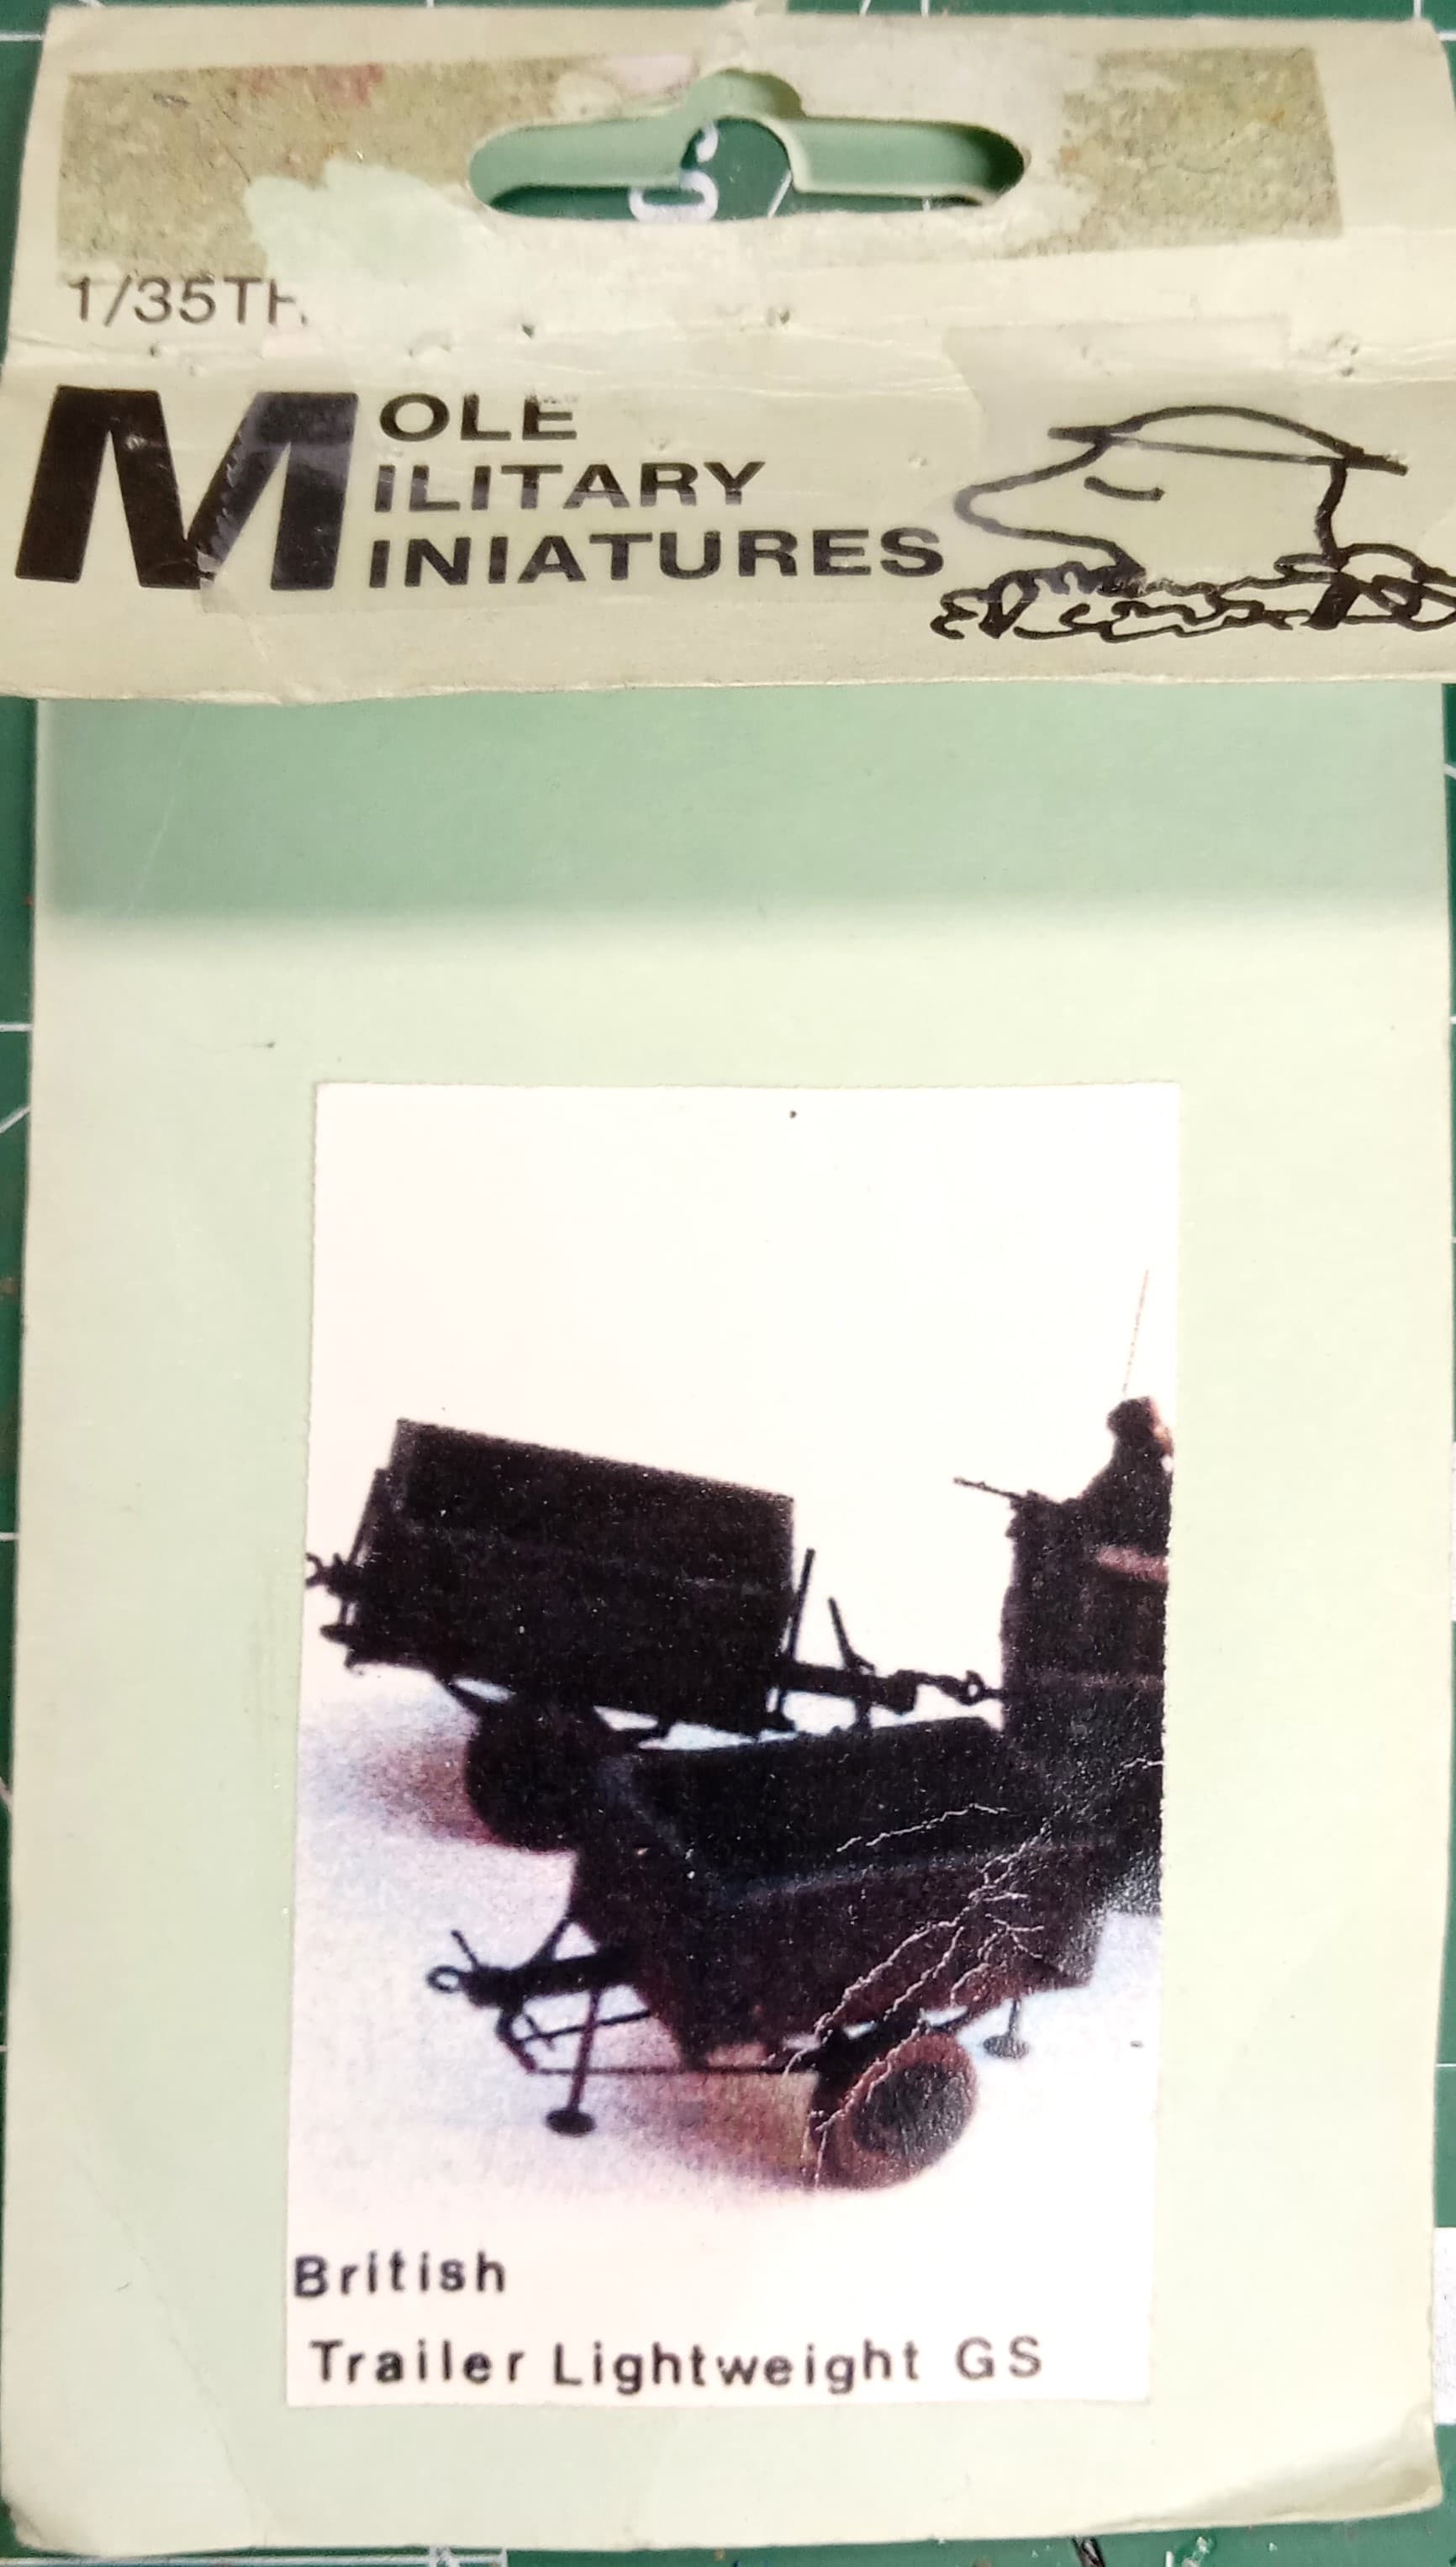
I just started this kit this morning. MMM is new to me and it’s a trailer so I couldn’t pass up the opportunity to pick it up.
There’s a fair amount of cleanup to do as it’s a white metal kit. Par for the course. Some of the parts are bent out of shape, but that’ll be an easy fix.
More to follow.
Mike
2 Likes
Gave it a start this morning. Fair progress with one notable error.
The side panels have one or two “protrusions” and the body’s bottom has the same. I, uh, failed to pay attention to that and put the one on the wrong side. When I add the second panel, if that makes things “off,” then I’ll take it apart. If not, it stays as the “floor” will cover that. Ooops.
Mike
1 Like
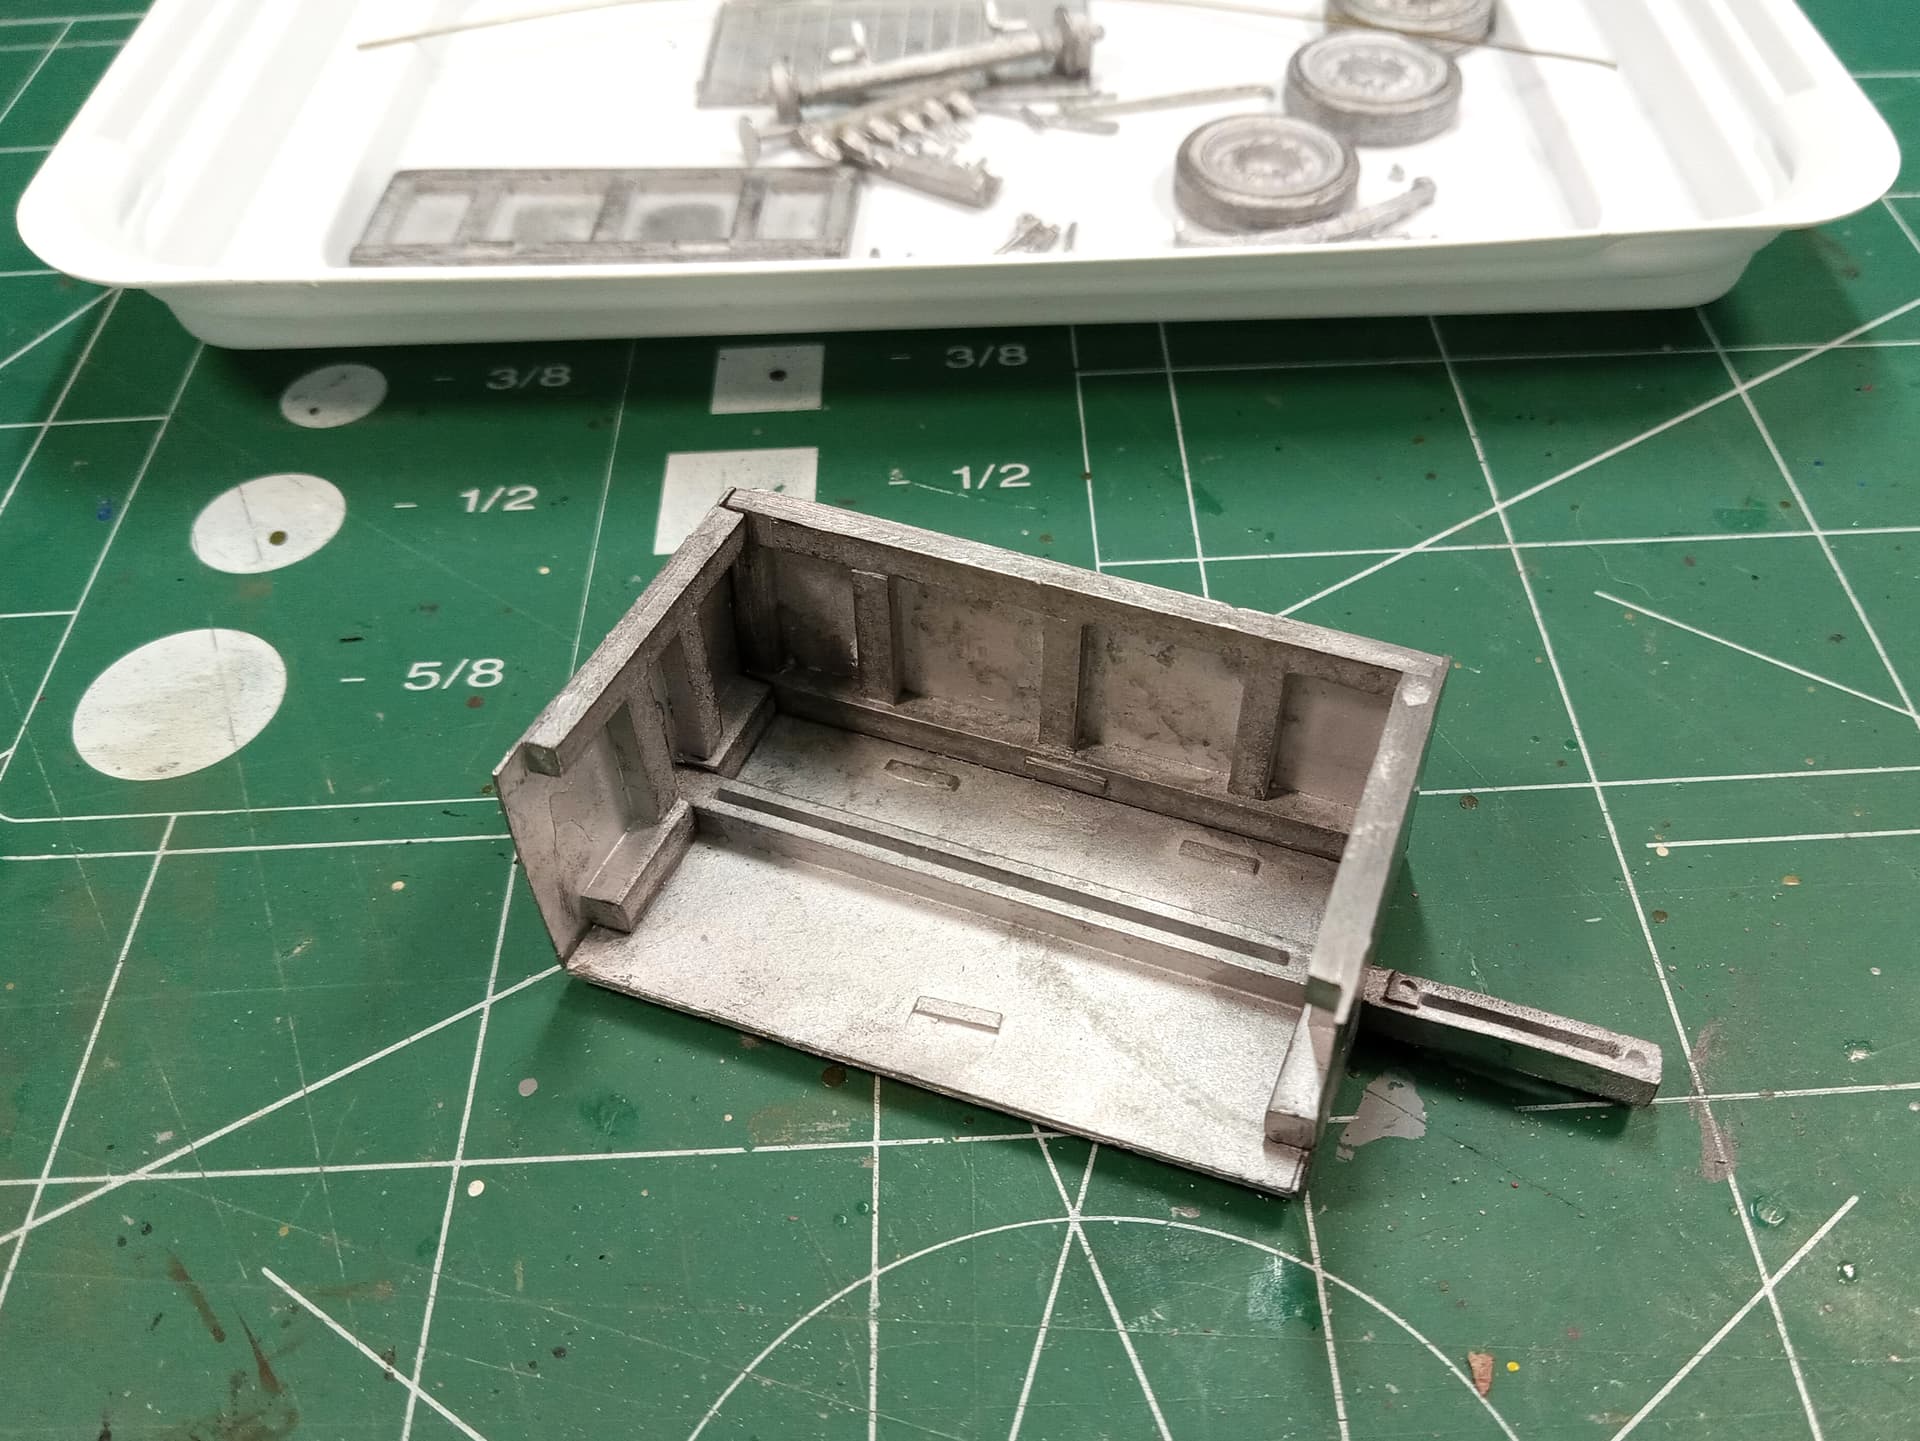
Some more work this evening. Thankfully I had a 6" 120-grit disk for my belt/disk sander. That made evening out the sides much easier (you can see the sanding lines - which will blend away with primer). I’ll most likely “ding” up the sides and ends for a little wear and tear.
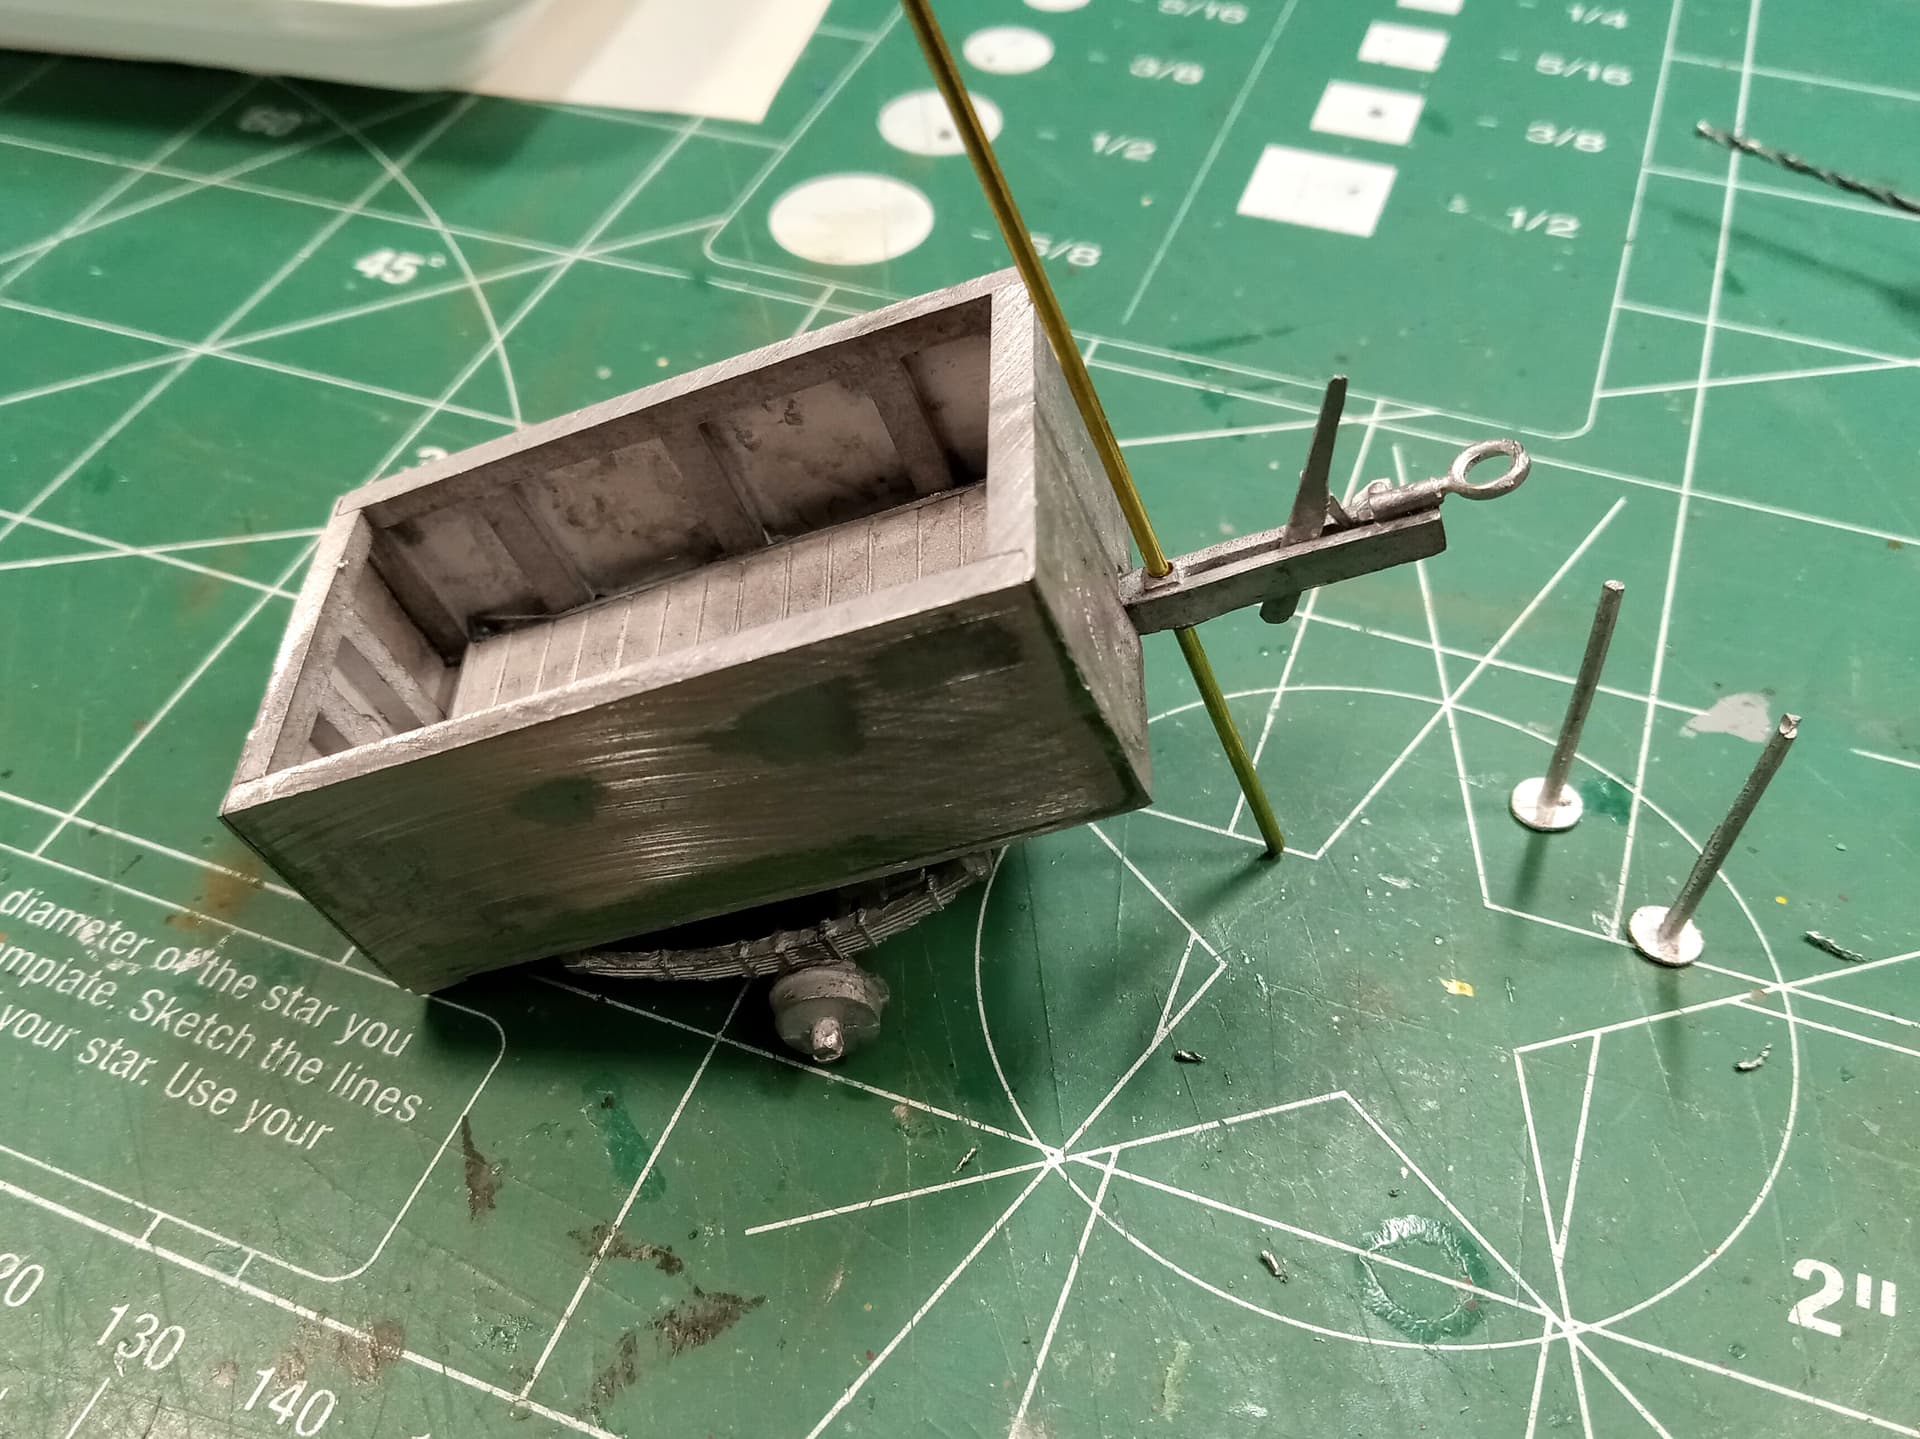
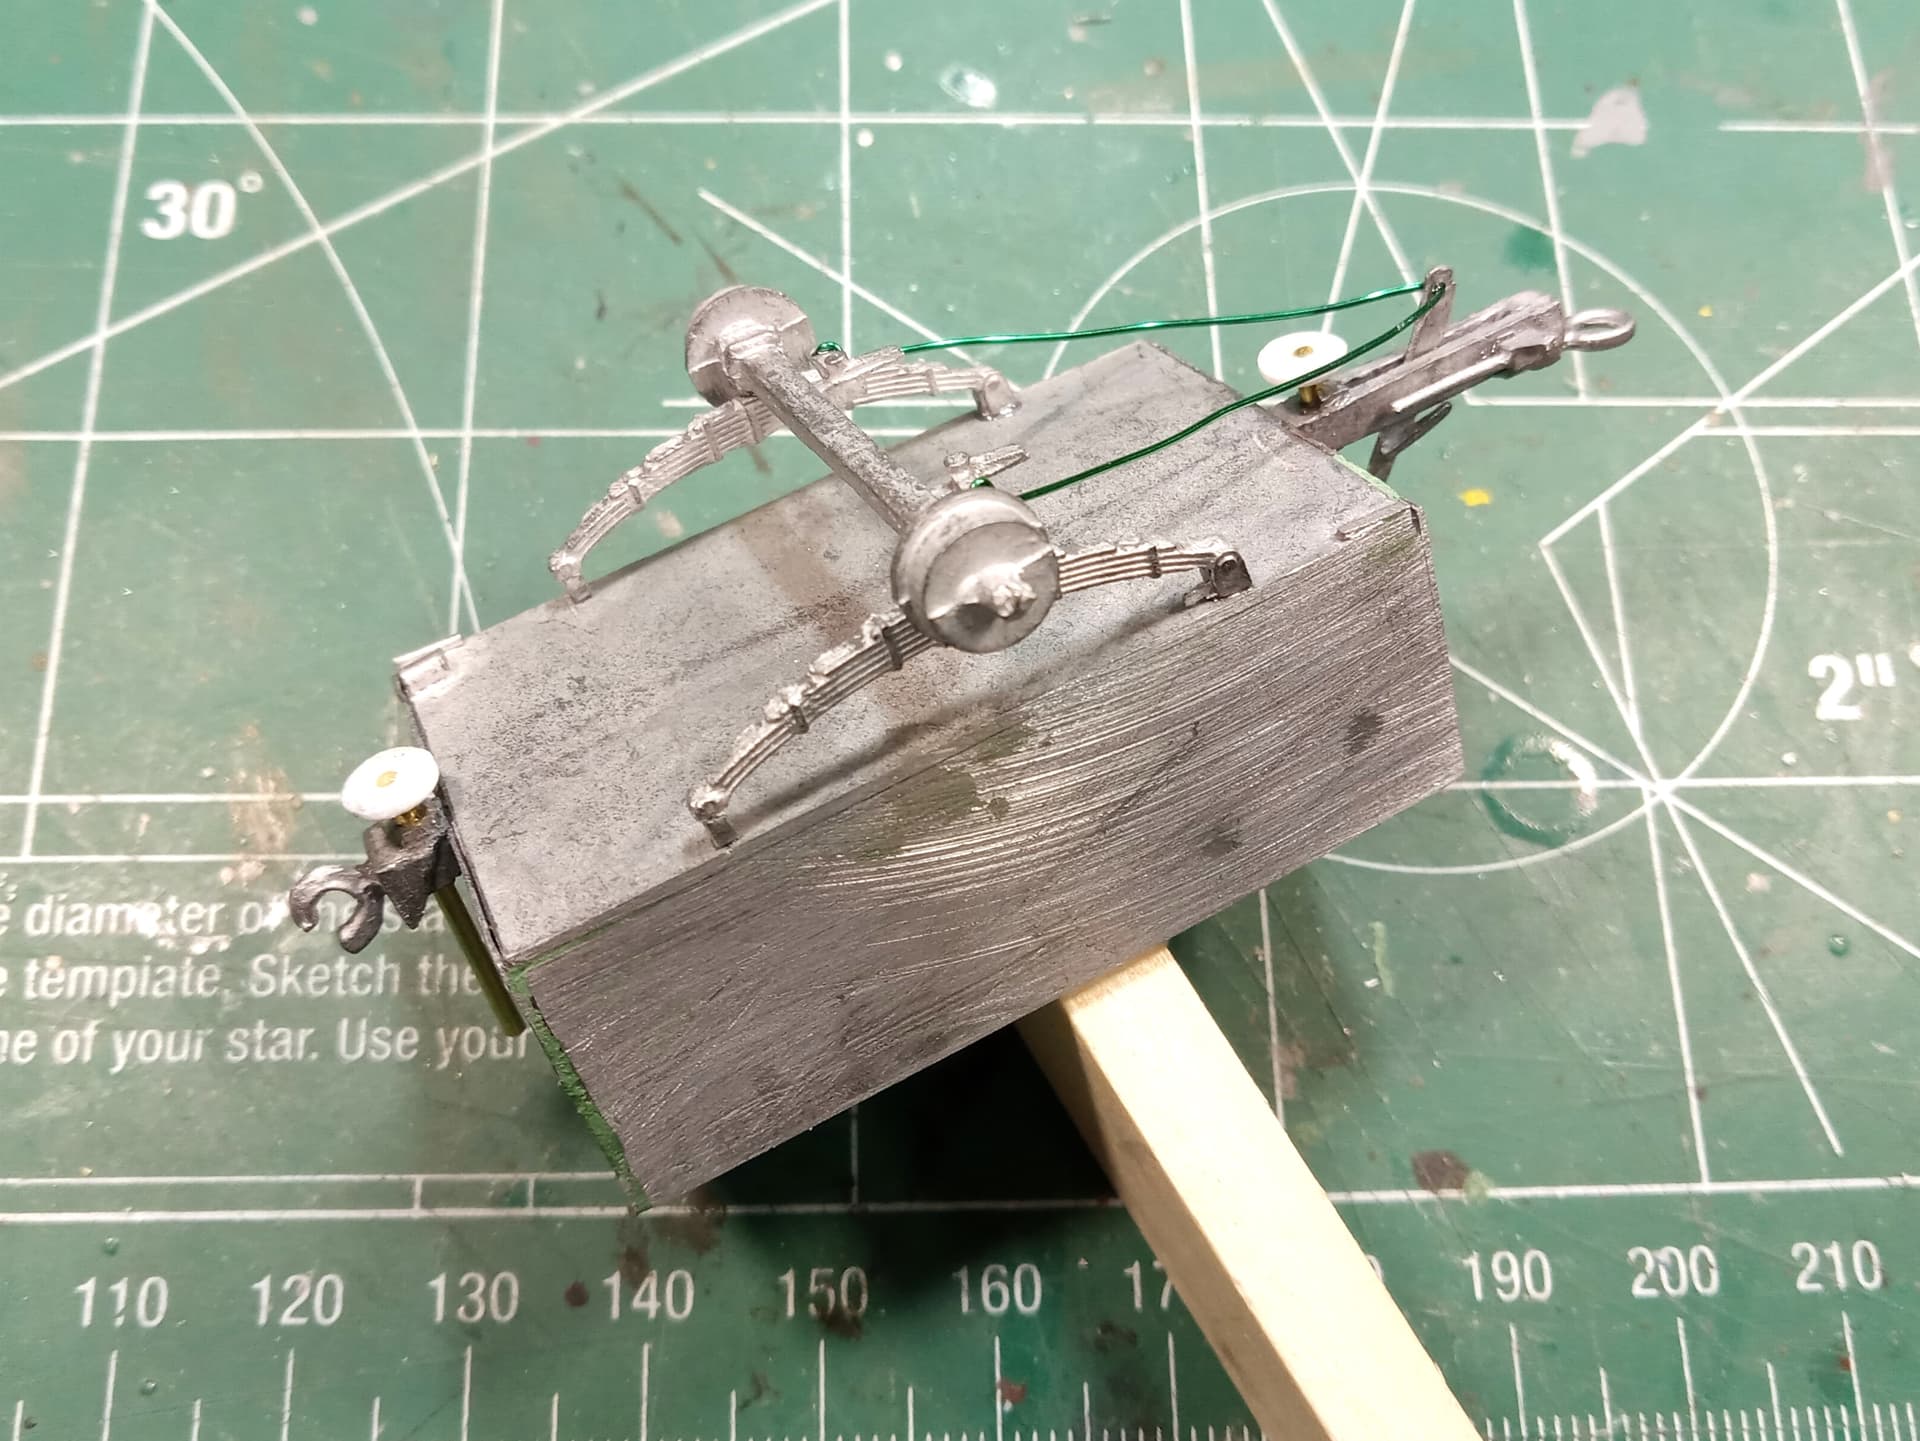
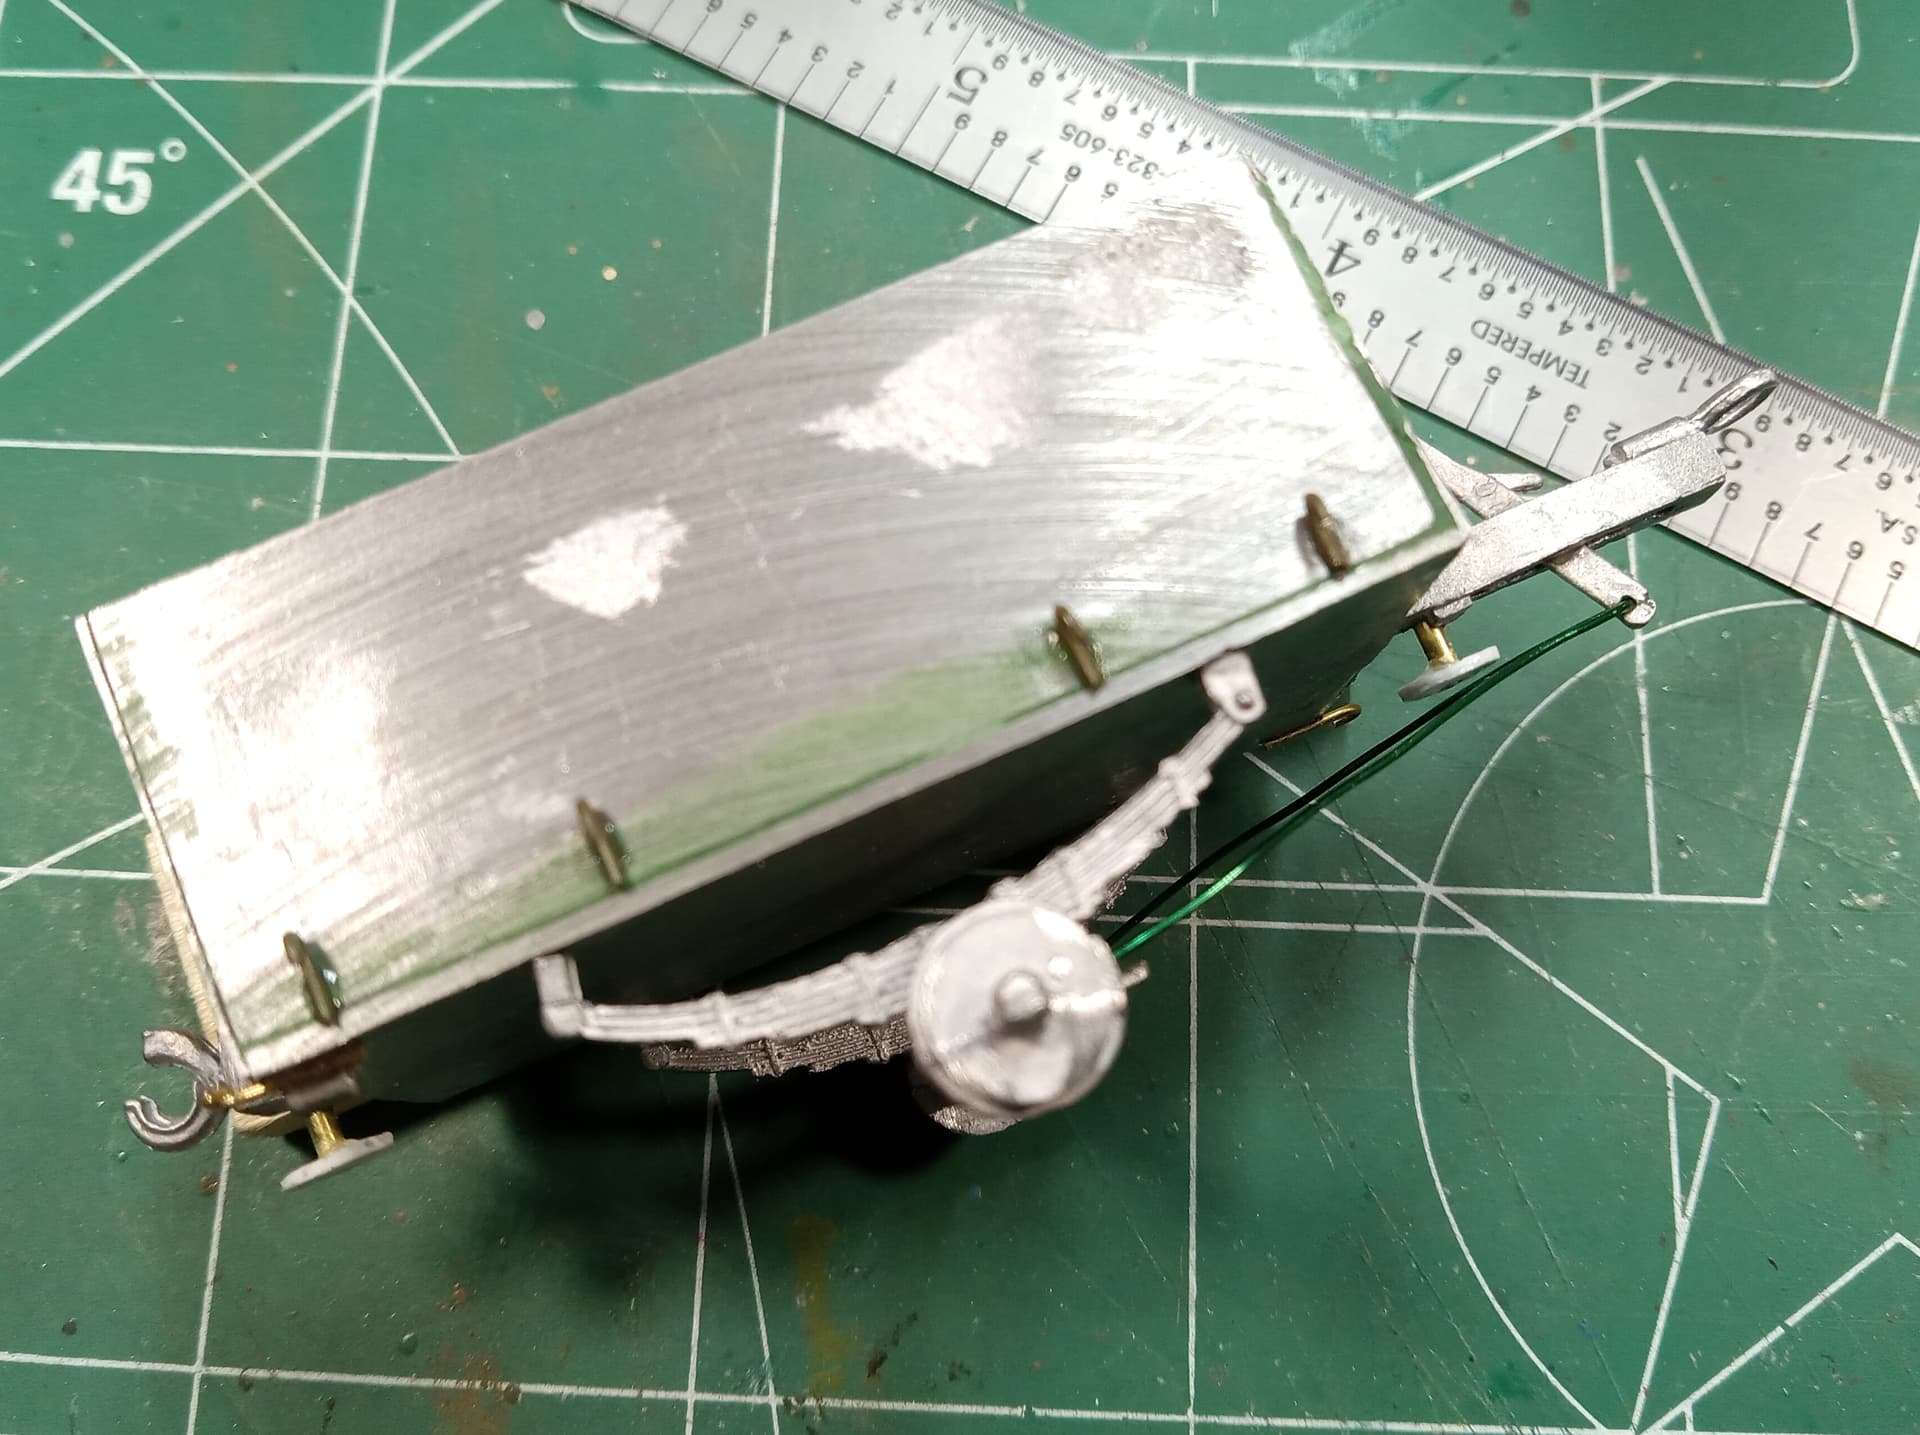
I’ve added the other side panel and floor. Several clamps for the side and a lot of sanding the edges to fit the floor. The axle and springs were pretty straight forward as were the front and rear tow points and the handle on the tongue.
I’m doing away with the kit supplied front and rear supports and replacing the bar with brass rod. I may use the kit “feet”, or I’ll cut ones from plastic sheet. We’ll see how cooperative they are.
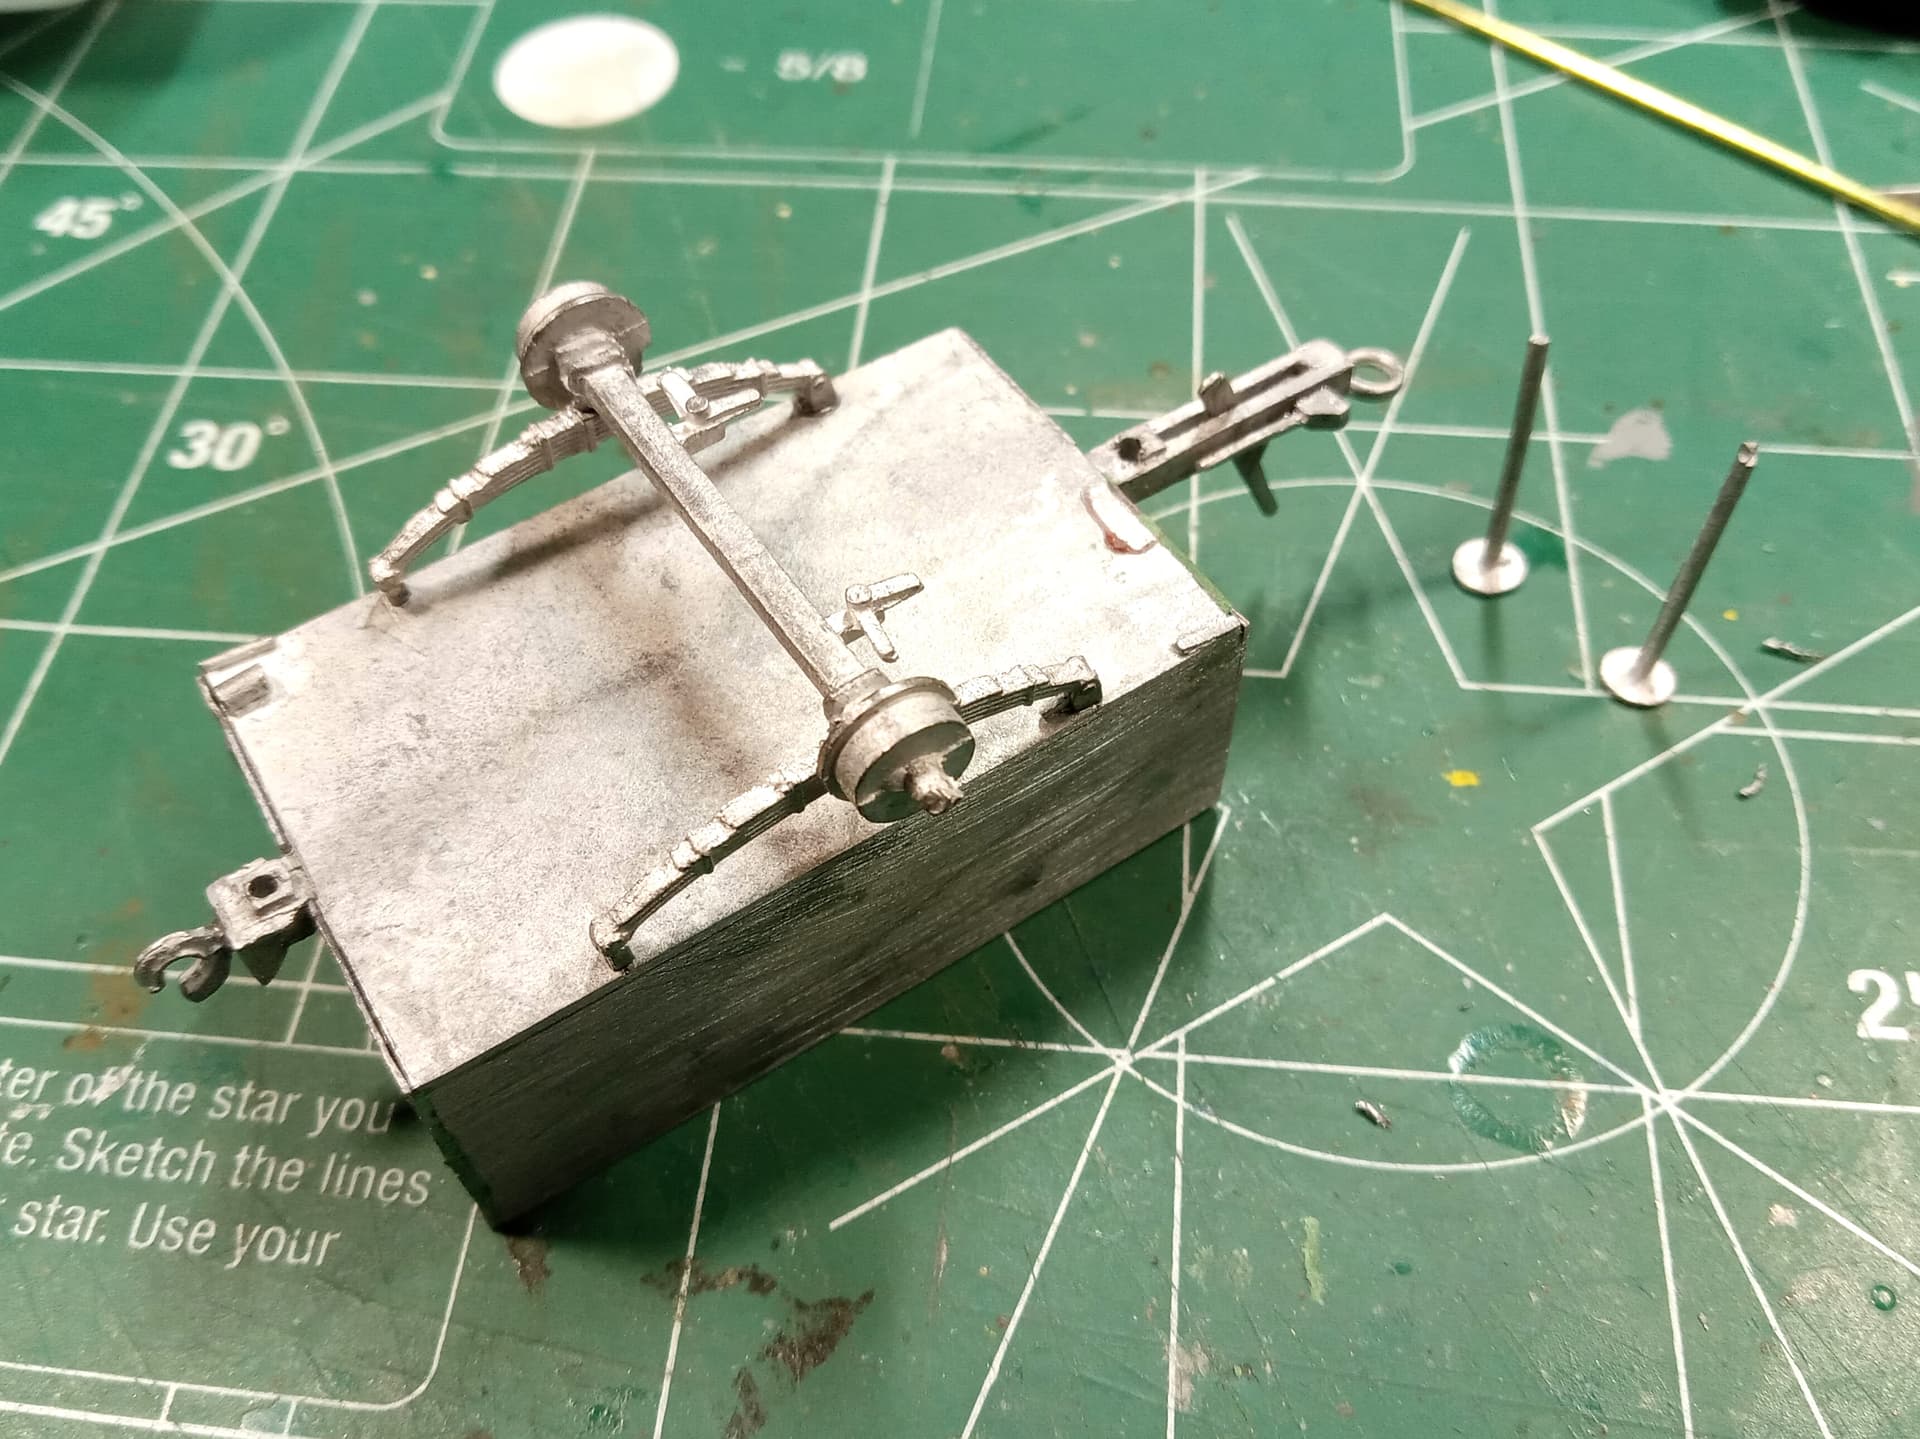
Underside. The two bumps on the far left and right corners are supposed to be hooks. One was broken so I removed the other and will replace with wire. There’s a small piece that attaches to the bottom of the handle for the cable for the brakes. The other end of the wire will attach to the two “L-shaped” parts attached to the axle. The rear two hook shows, but it didn’t come with the part that would close down on another trailer’s pintle. I’ll probably make something out of styrene rod for that.
There are a few spots I need to sand/file still. Maybe tomorrow.
Once the brake cable(s) are attached and the front and rear stabilizer legs are attached it’ll be time for primer. 
Mike
1 Like
A bit of bench time before I get a procedure done called Radio Frequency Ablation early this afternoon. The doc is going to put a special “needle” (I guess that’s what it is) into six or eight specific areas of my spine and “burn” the nerves - hopefully helping with my chronic (and sometimes disabling) back pain.
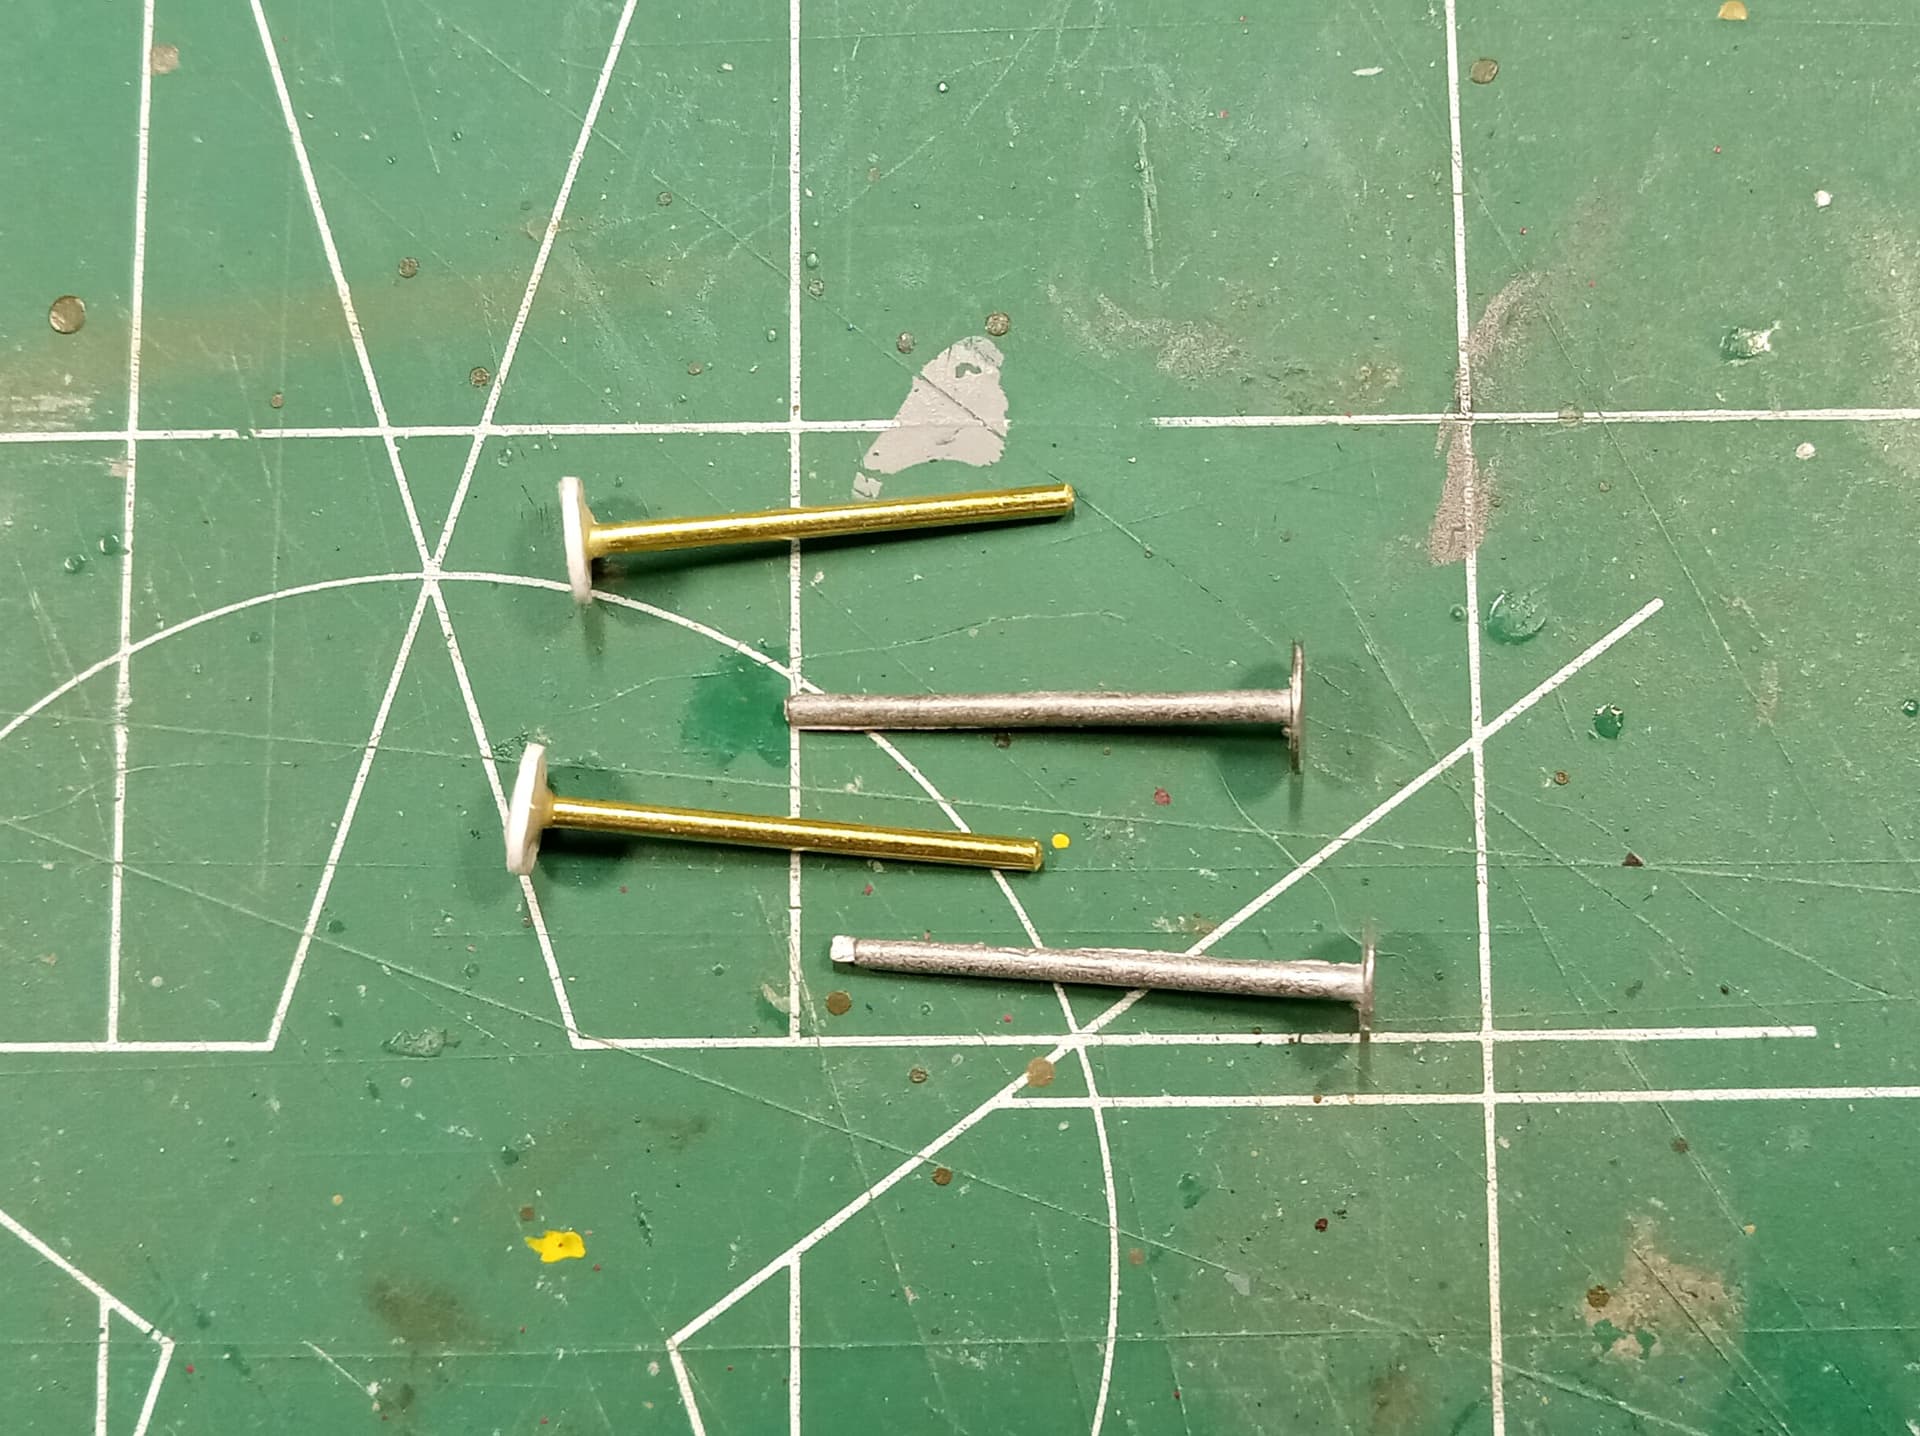
Anyhow, these are the two new leg supports I made compared to the originals. Brass rod and sheet styrene.
I installed the leg supports and the brake cable. Really fragile points at the axle so I wasn’t able to get the wire near a tight as I would have liked.
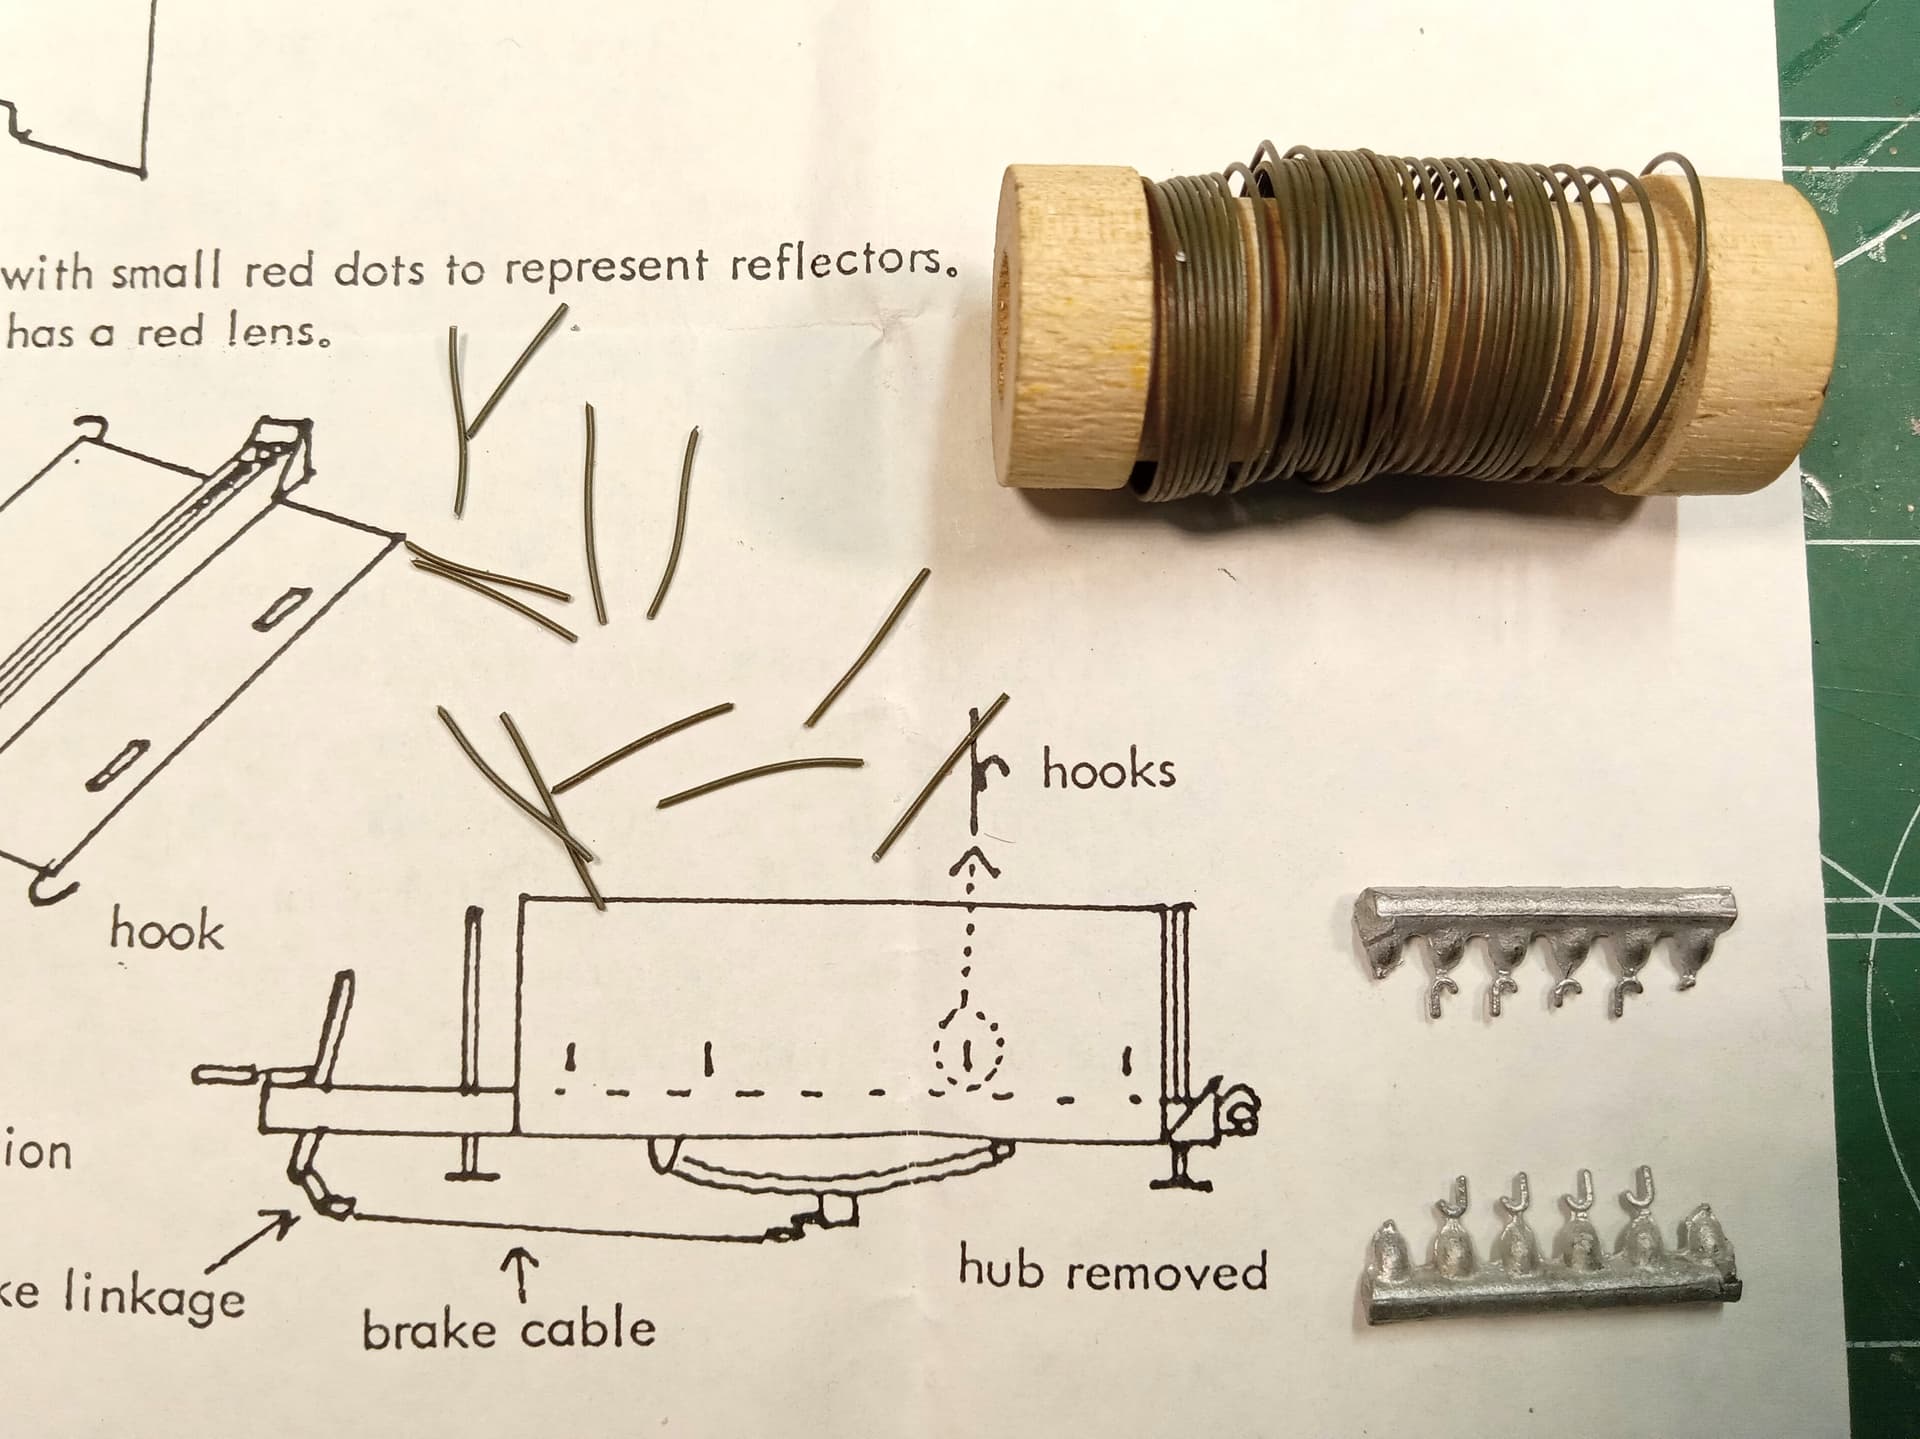
Next up are all the little itty-bitty hooks for a canvas cover. I may just make new ones out of wire as trying to clean those little things will most likely break some.
Mike
1 Like
Tie down hooks. I used wire from the US Army trip flares that I acquired decades ago. 
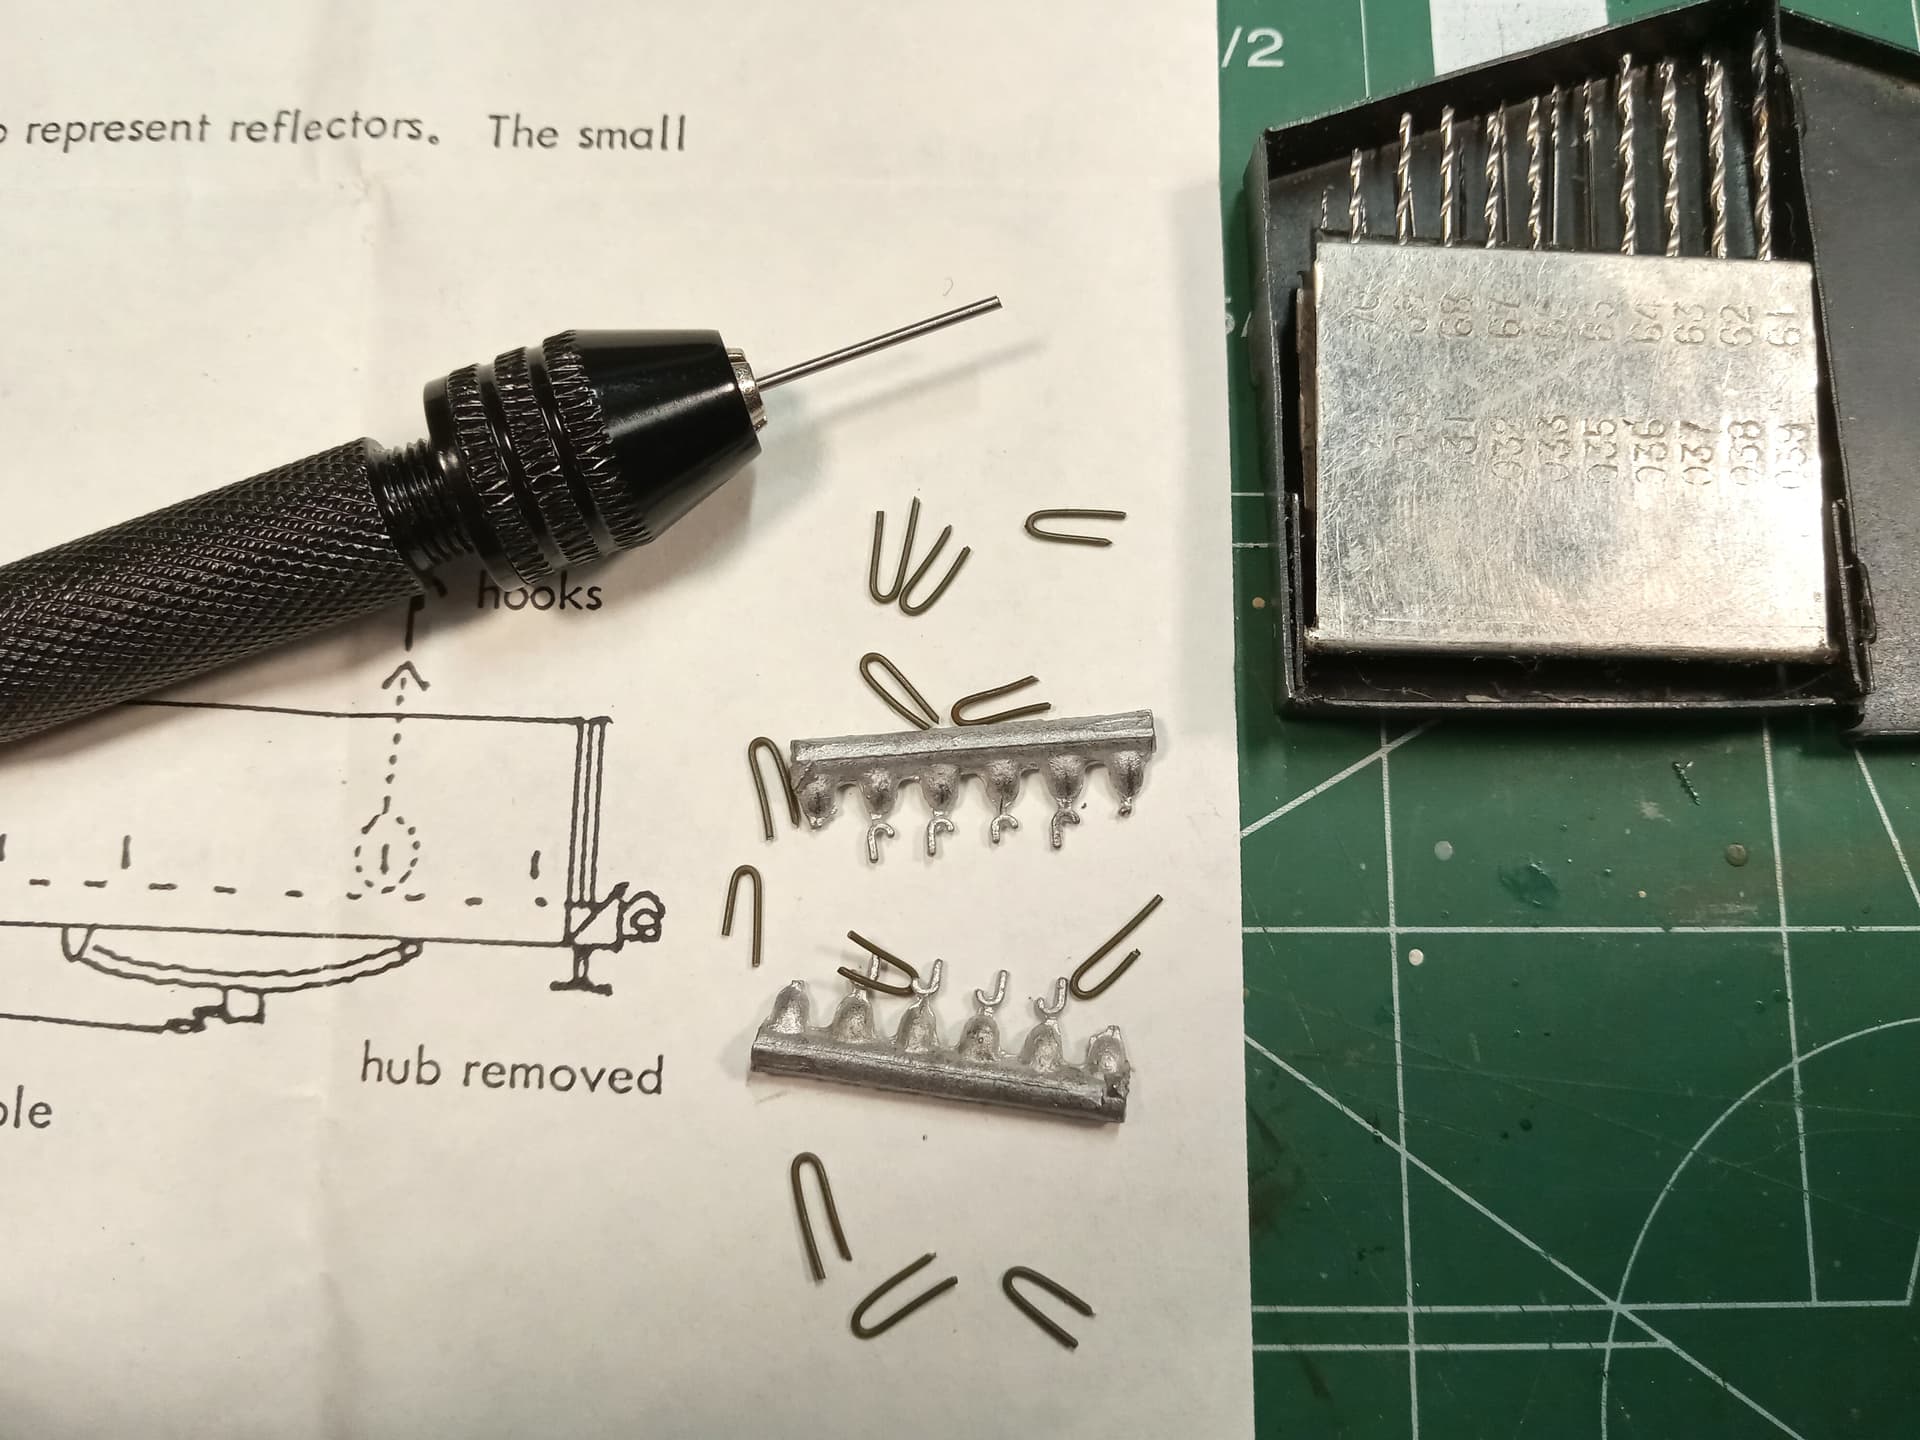
I reversed a #65 bit in my holder and used that to bend the wire.
One side done after cutting the hooks to the proper length. I almost put them upside down ( J ).
I’ll let those dry and do the other side and front and rear.
Mike
3 Likes
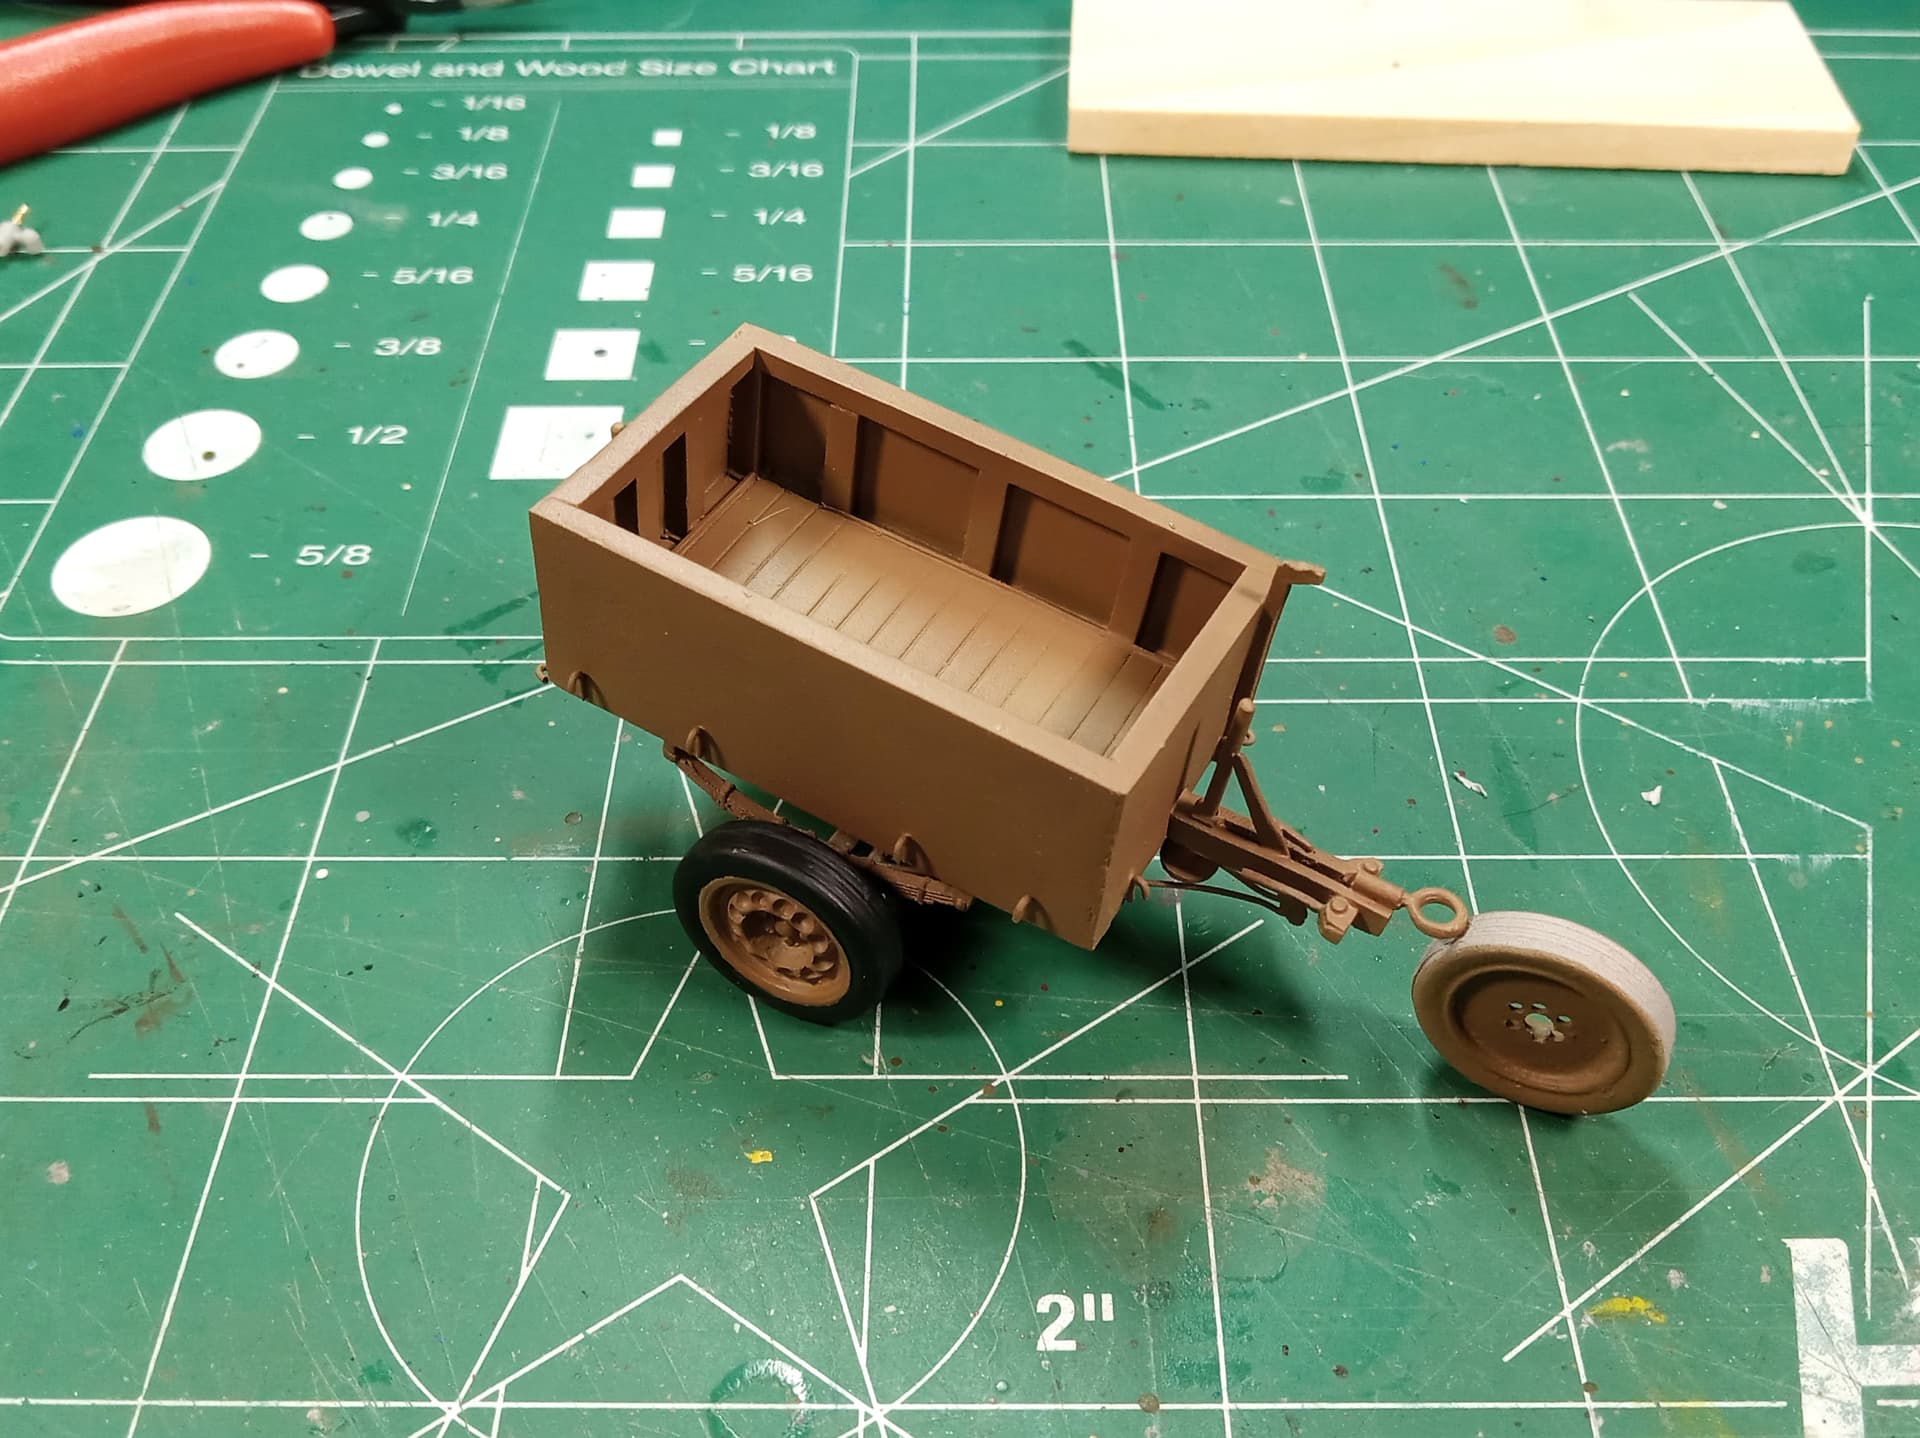
Been awhile for this little trailer.
Paint is on and the two wheels/tires have been added. Paint-wise, I just need to make a quick template of the “T” that goes on the rear. The spare tire’s rim is pretty bad - short shot for the lug holes (main reason I didn’t finish the paint).
Some detail painting, scruff it up some, and weathering.
A simple kit with rather poor instructions and a fair amount of clean up. Regardless, a nifty bit to add to a Commonwealth Jeep.
Mike
3 Likes