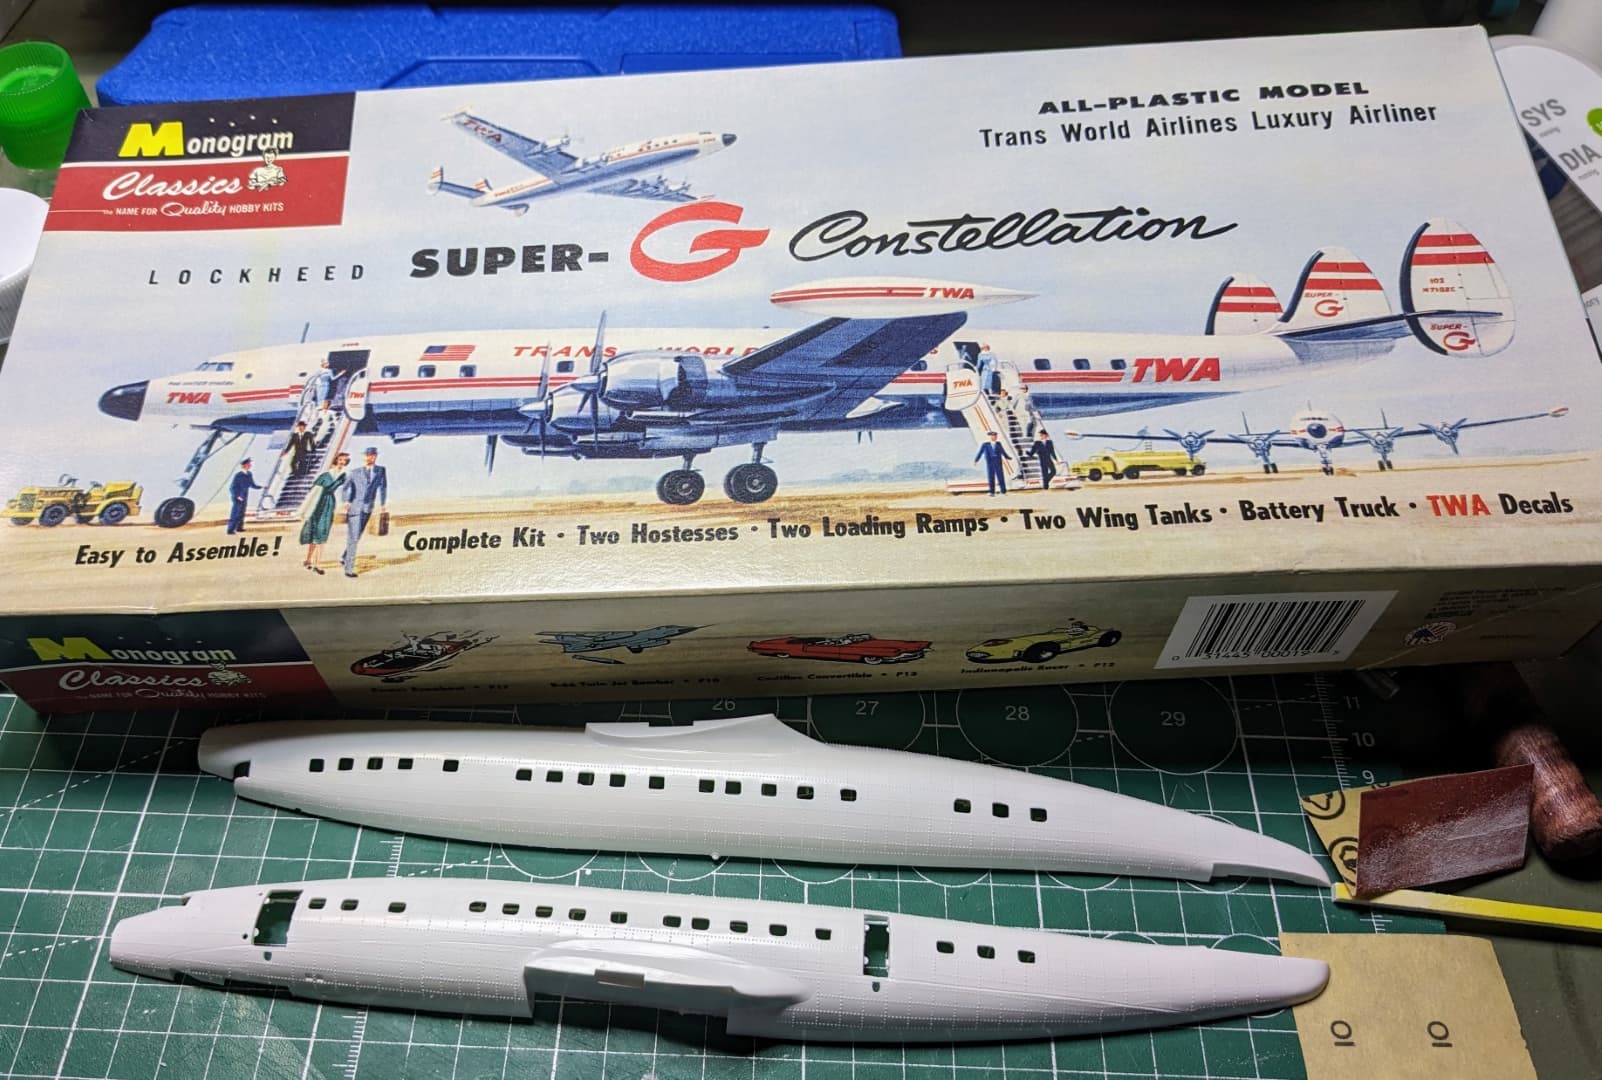
In addition to my A-20 Havoc build, I am also working part of the time on building a repop of an old Monogram Box Scale Lockheed L-1049 Super Constellation. This was a Christmas gift from my son and it piqued my interest enough to start on it fairly soon after the holidays. Work on it is proceeding slowly mainly because I have a lot to do on the A-20 build.
This kit scales out to 1/133 scale which makes it small enough to display on a reasonable diorama base and large enough to add a bit of detailing to.
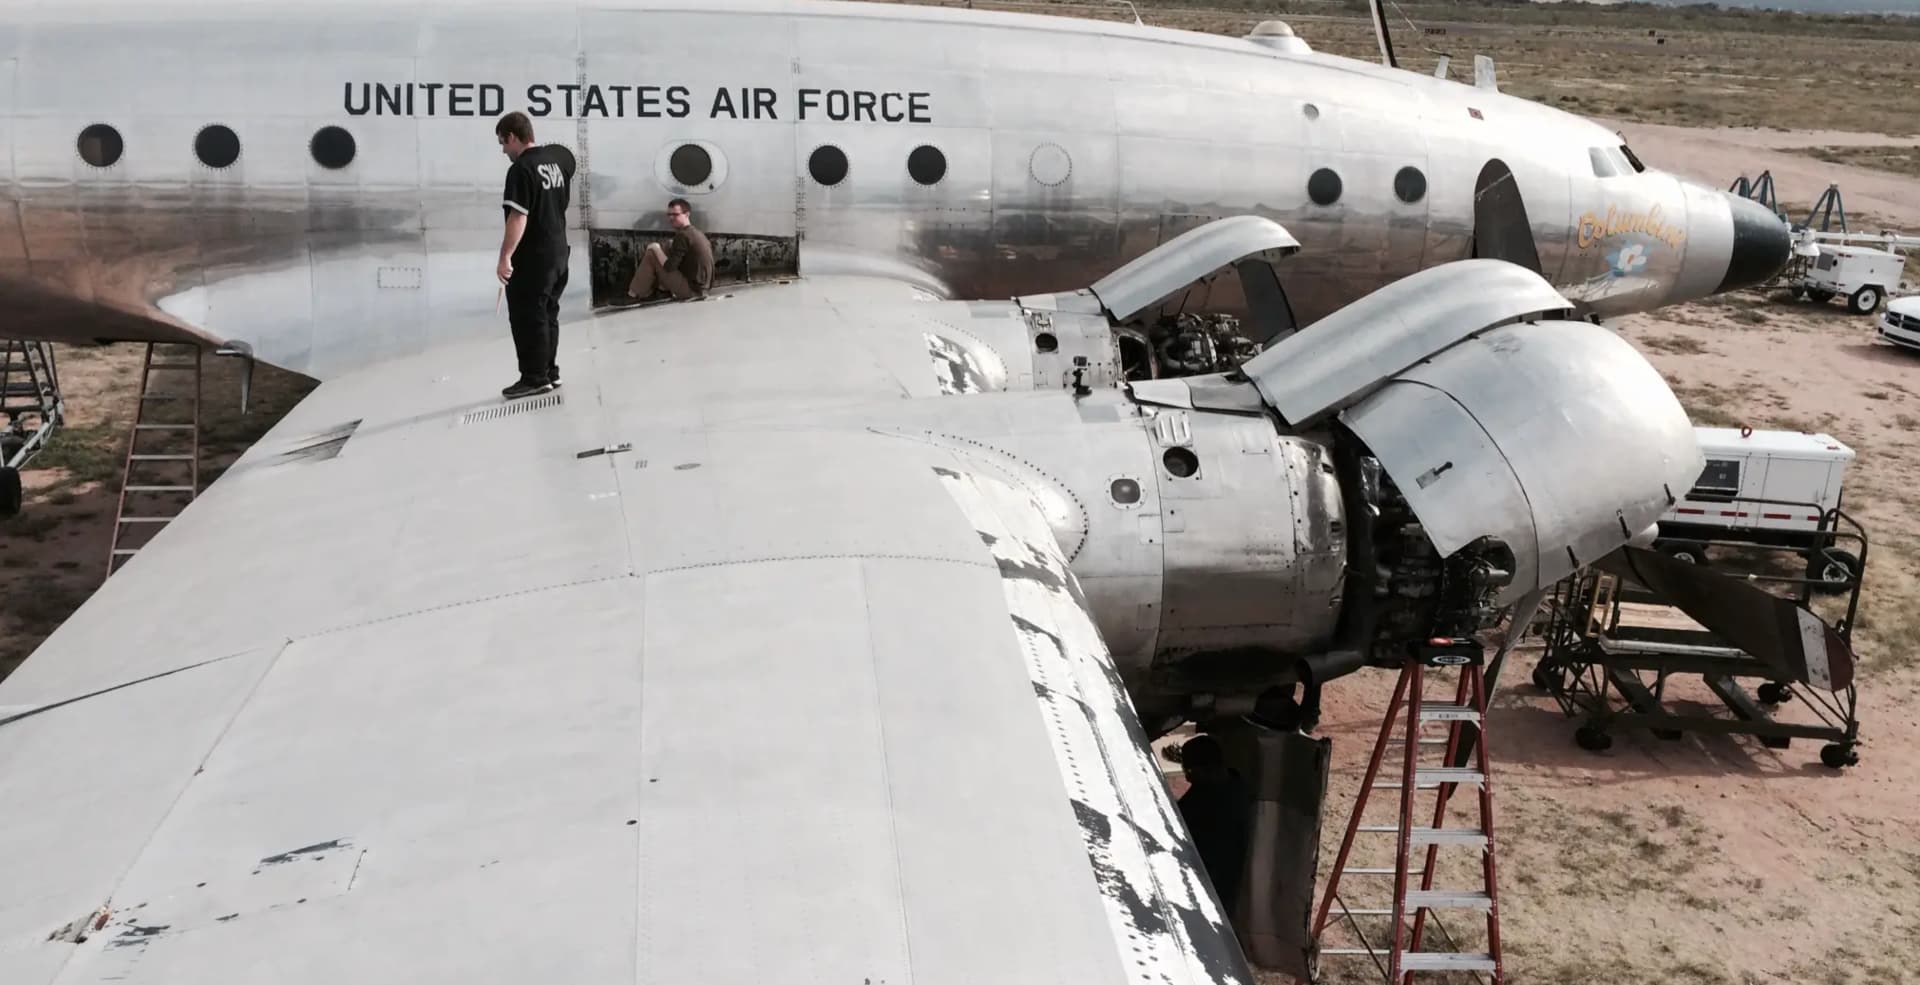
The plan for this kit is to build a small diorama of the Connie taxiing away from the boarding area. This will be one of those lovely 1950’s era boarding areas, where people walked up to the plane and entered via a rolling stairs. The boarding area was separated from the passengers entry by a simple chain link fence. That’s what I hope to duplicate, although the number of figures will be limited mainly because all I have are two tiny stewardesses that come with the kit. My plan is also to fill in the windows and paint them light blue in the style of desktop display models, but the props will be spinning.
The kit is typical of the era it was molded, decent shape, overdone external details and simplified construction. Right up my alley.
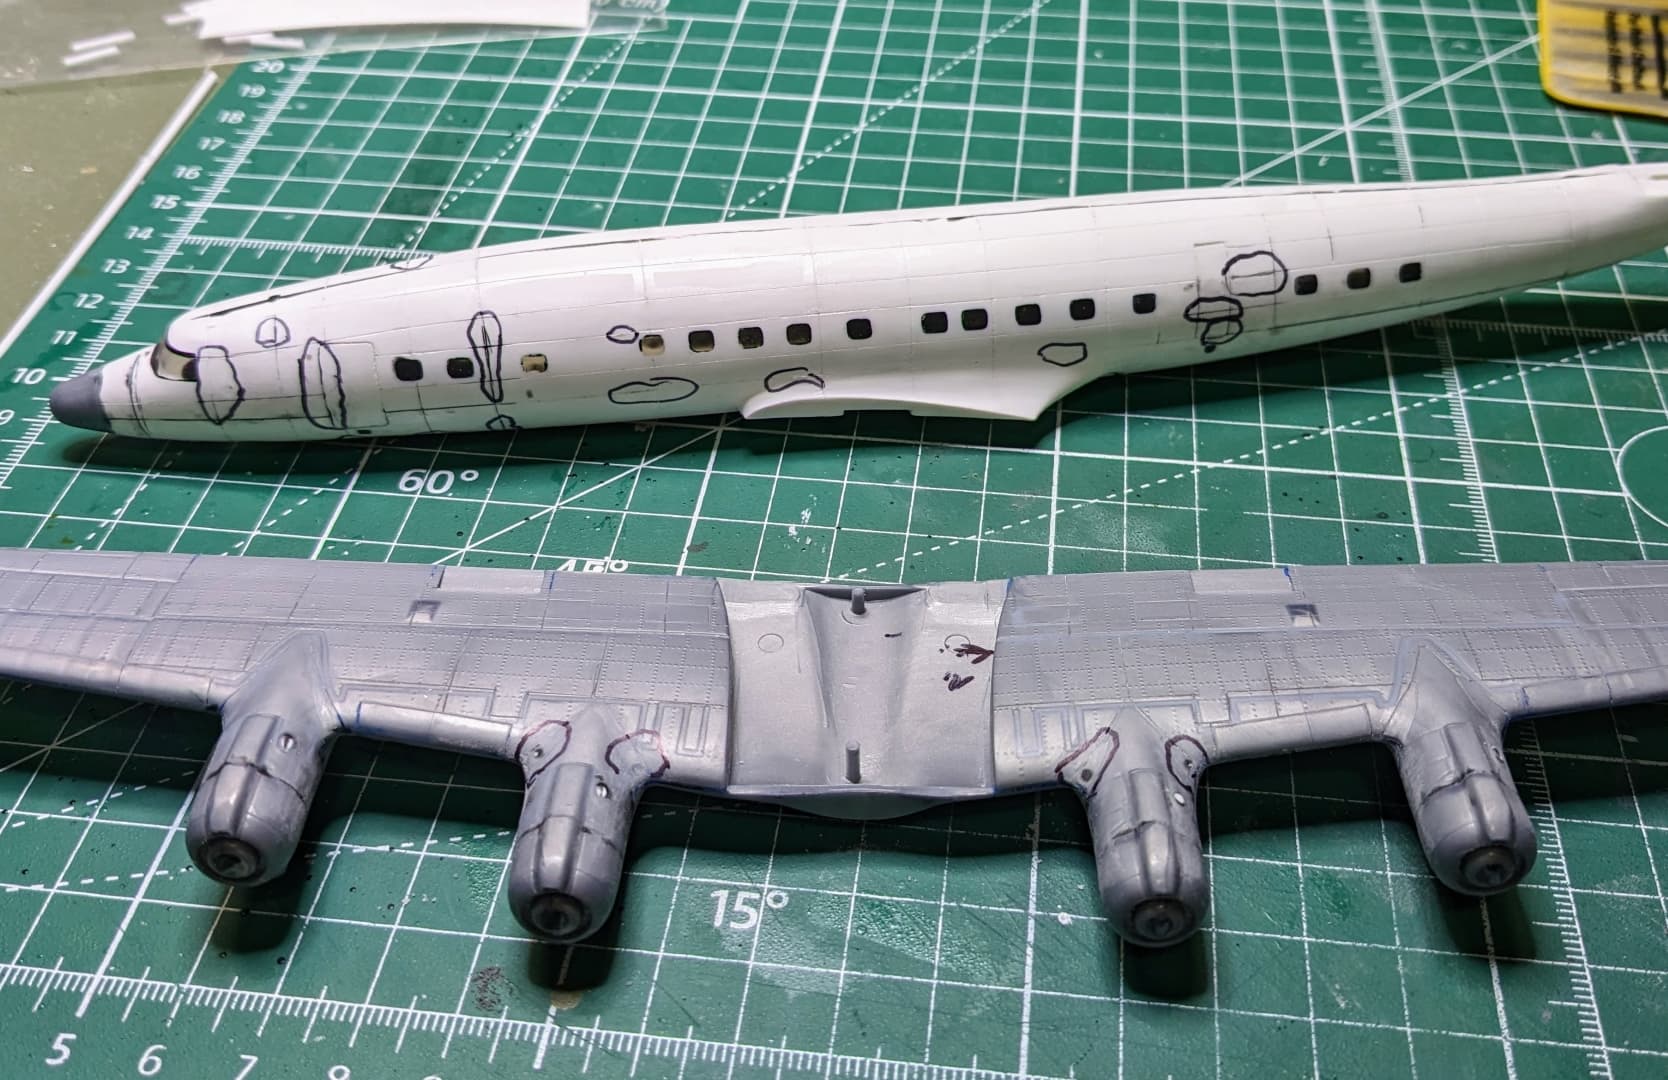
I’ve started by sanding down all the external detail and filling in the trenches that were some of the panel lines. As mentioned, I am filling in the windows as well. There are some incorrect details on the wings and probably elsewhere as well which I will deal with as I can get to it. Lots of sanding and polishing ahead for me. Then, rescribing and some riveting.
I built the 1/72 scale Heller L-749 Constellation kit many years ago (30 plus I think) and it was gigantic for 1/72. Much bigger than the B-17 and in fact I would venture bigger than a B-29, but that’s just a guess. UNfortunately that model ended up flying in the hands of my 3 year old son at the time. It was the first ever metal finish model I built and it was okay, but I didn’t really know what I was doing back then.
Always good to see someone tackling those old classics.
I’ve wanted to do one, most likely in 1/1/44, in bare metal for a Berlin Airlift dio.
Watching yours with interest to see how it turns out without all of those rivets.
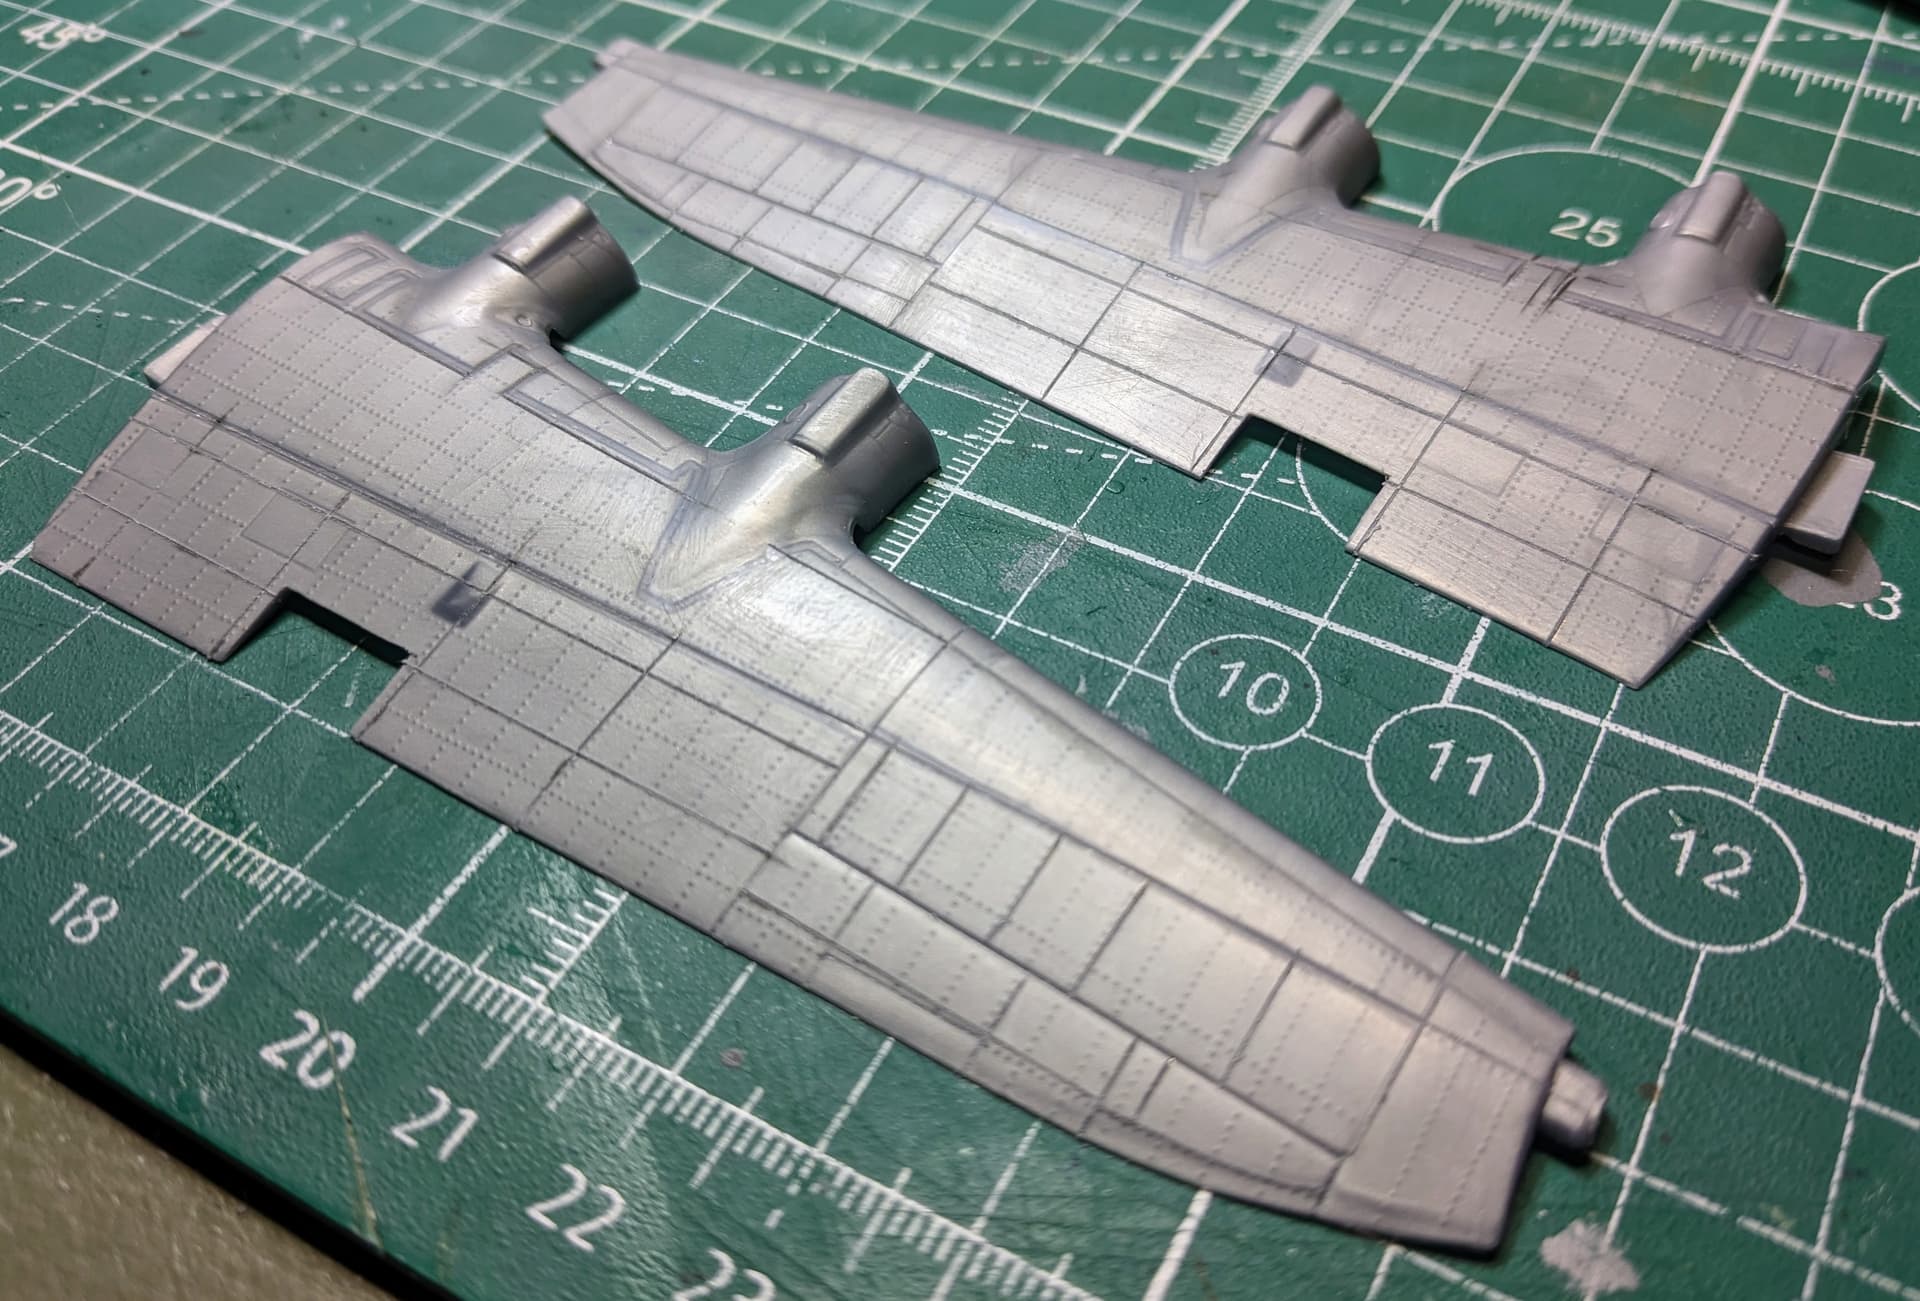
Well, now that my A-20 build is completed, I can shift focus on the Connie. After sanding everything smooth and filling and sanding down the windows, I’ve started the long process of rescribing the panel lines. The upper wings are first. I still have a way to go on these.
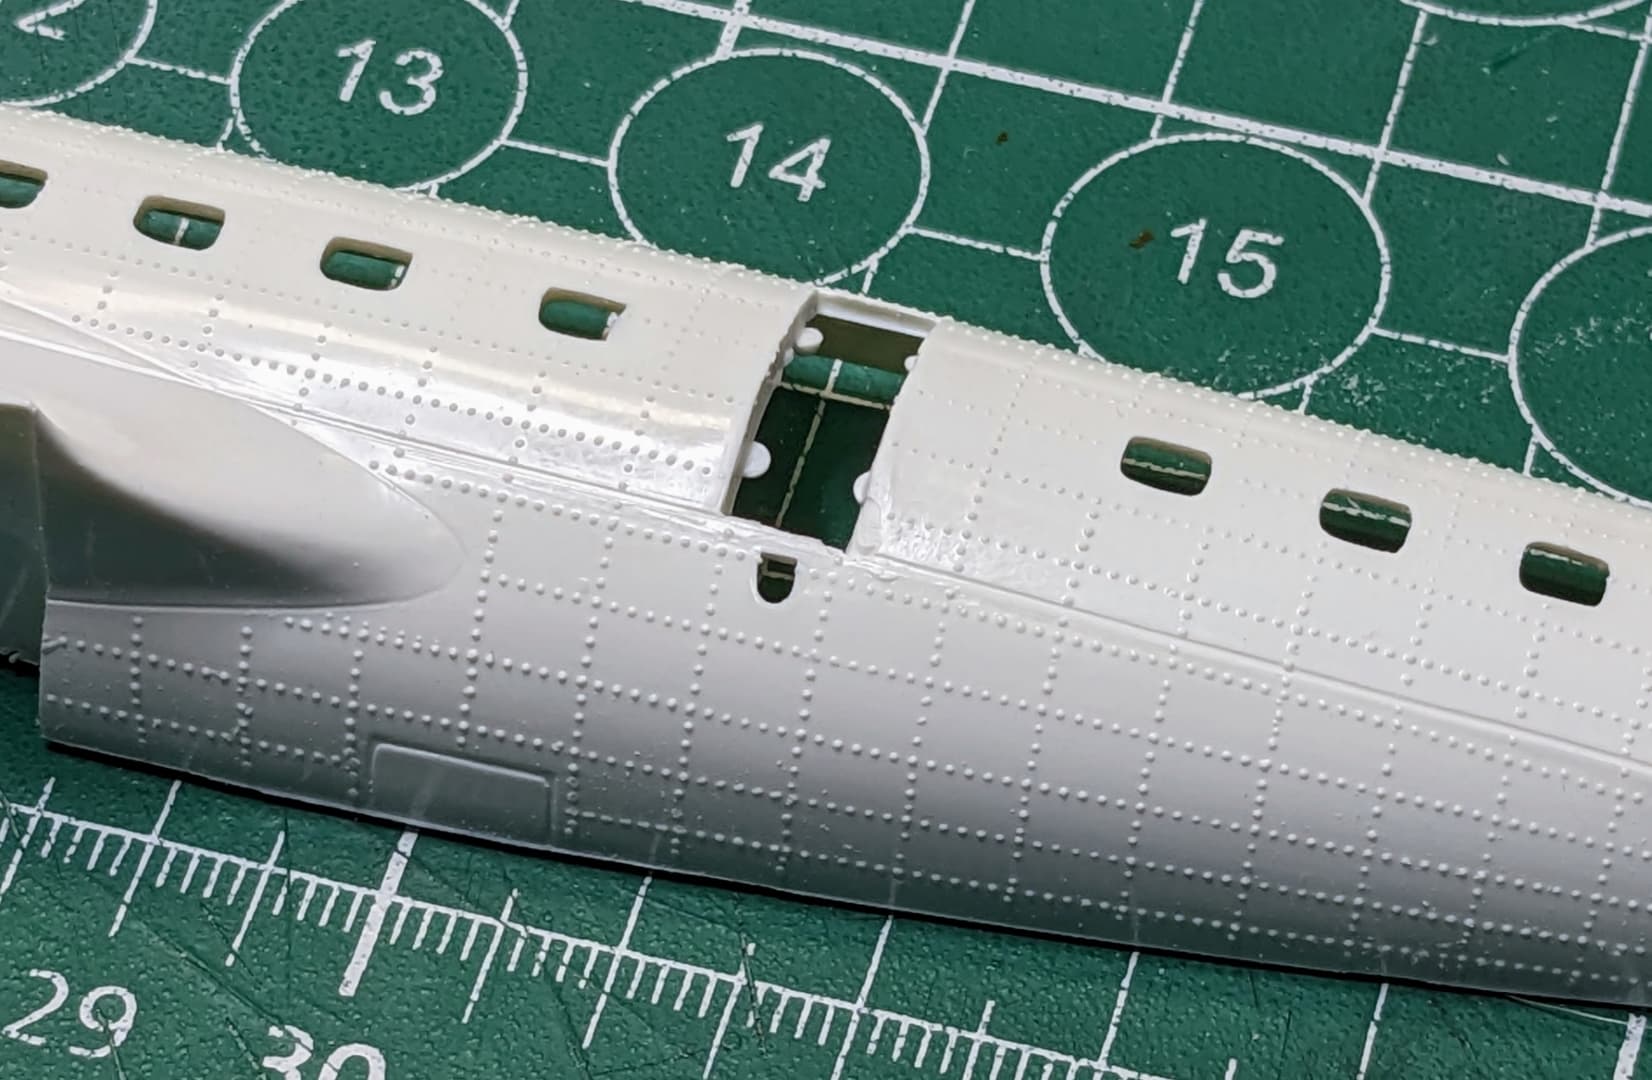
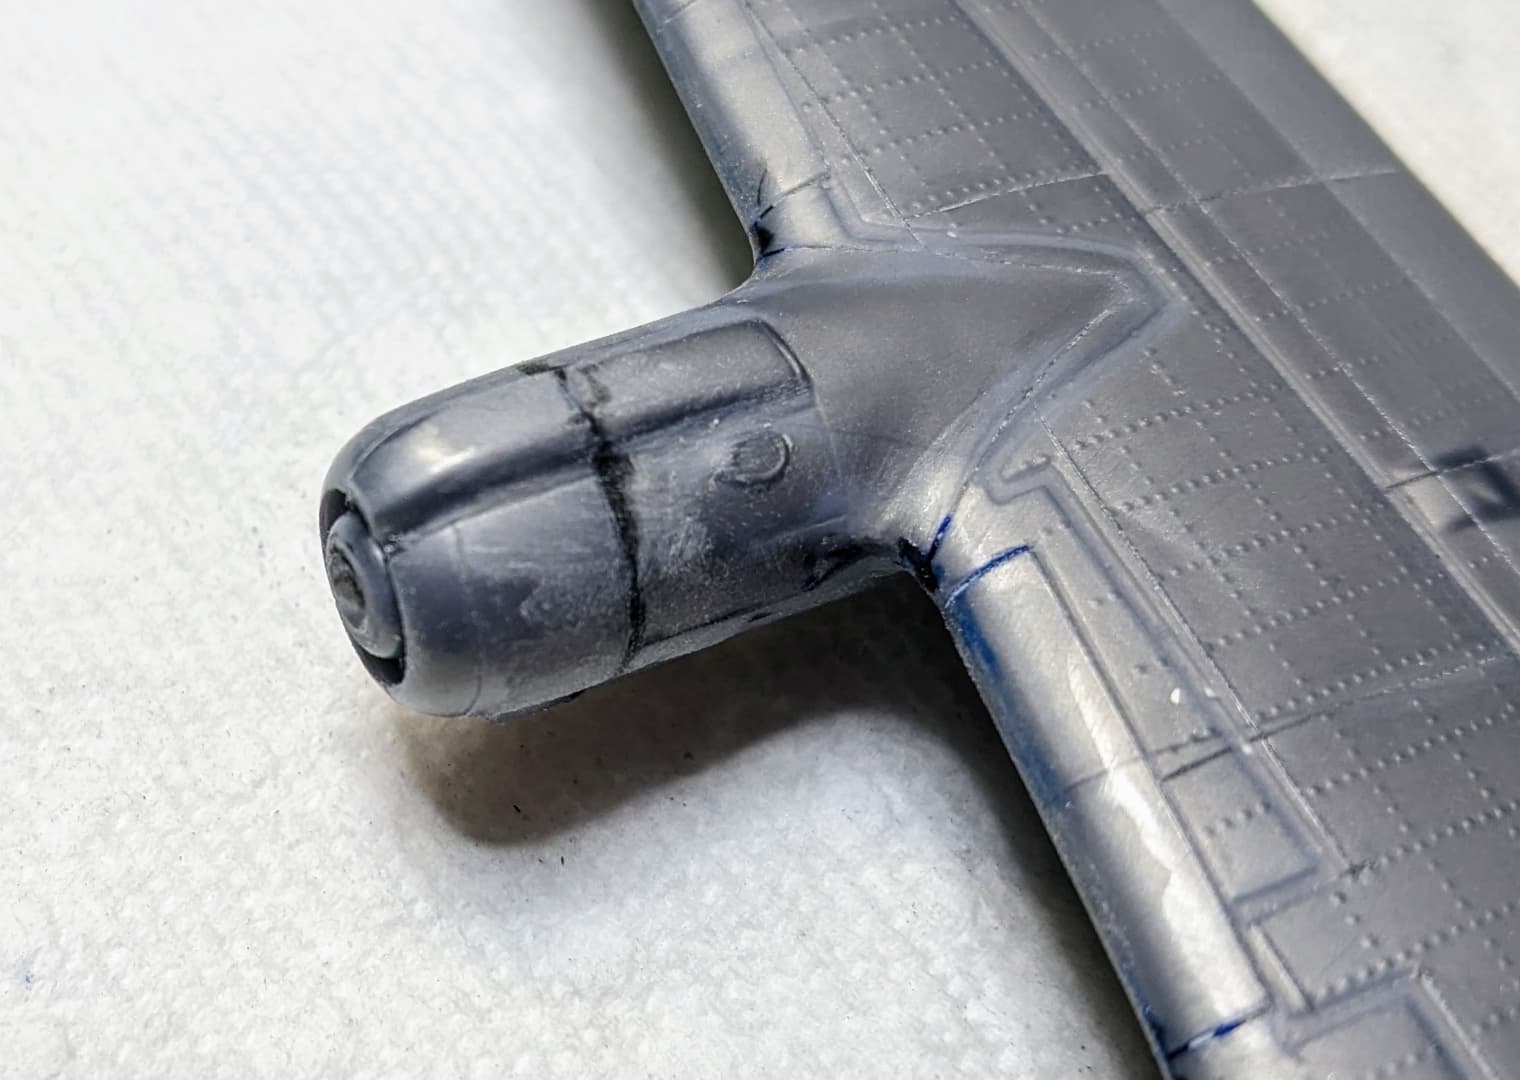
The kit comes with a fairly inaccurate representation of the openings at the trailing edge of the wing. It also has a poorly done rectangular grill forward of that area. I am not sure how I am going to reproduce the grill area yet, but after looking at photos of the openings (not sure yet what these are for), I decided to cut away the wing and box this in.I’ve thinned the aft edge of the cutout as well.
The dark rectangular area just forward of the cutout is where the grill area will be reproduced.
I also didn’t make it clear what livery I was going to use for the paint. It might be confusing because I’ve placed this build thread in the Cold War area of the forum, but it seemed the closest match. Anyway, I plan on reproducing the TWA livery on the box art, although I will probably paint most of the markings rather than use the decals.
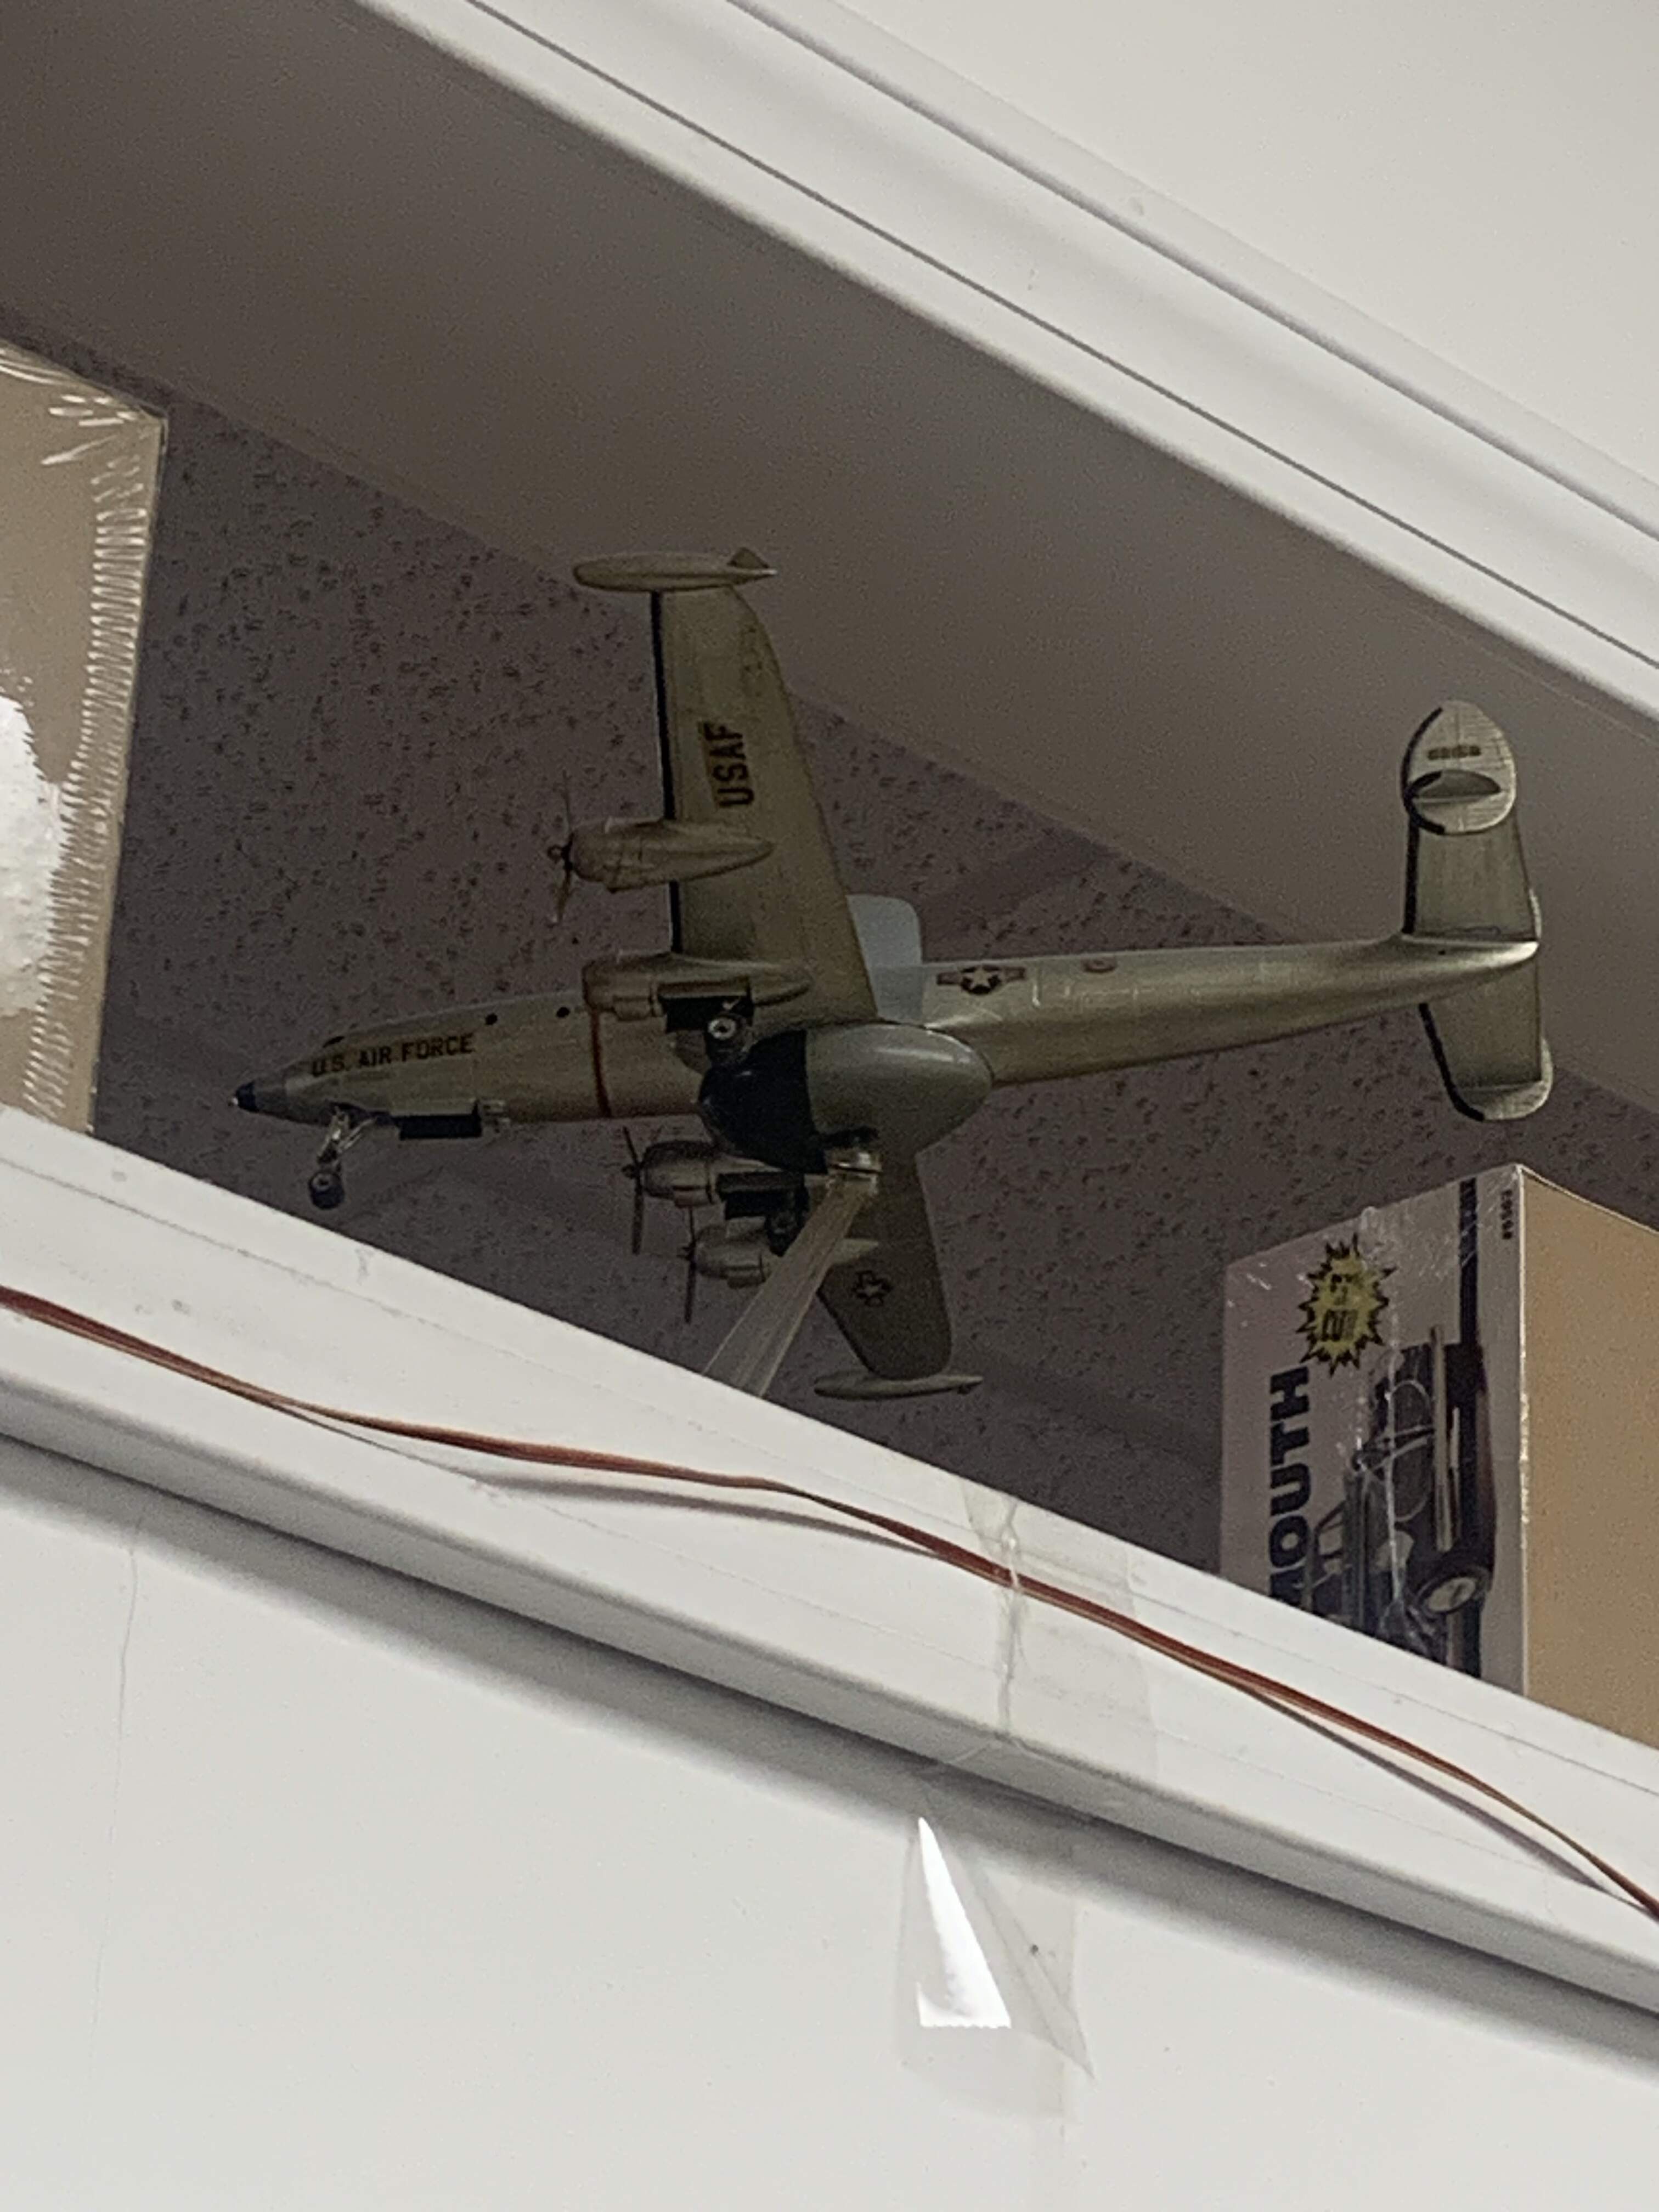
I considered doing an Air Force bird, but the airliners are so pretty, I couldn’t resist.
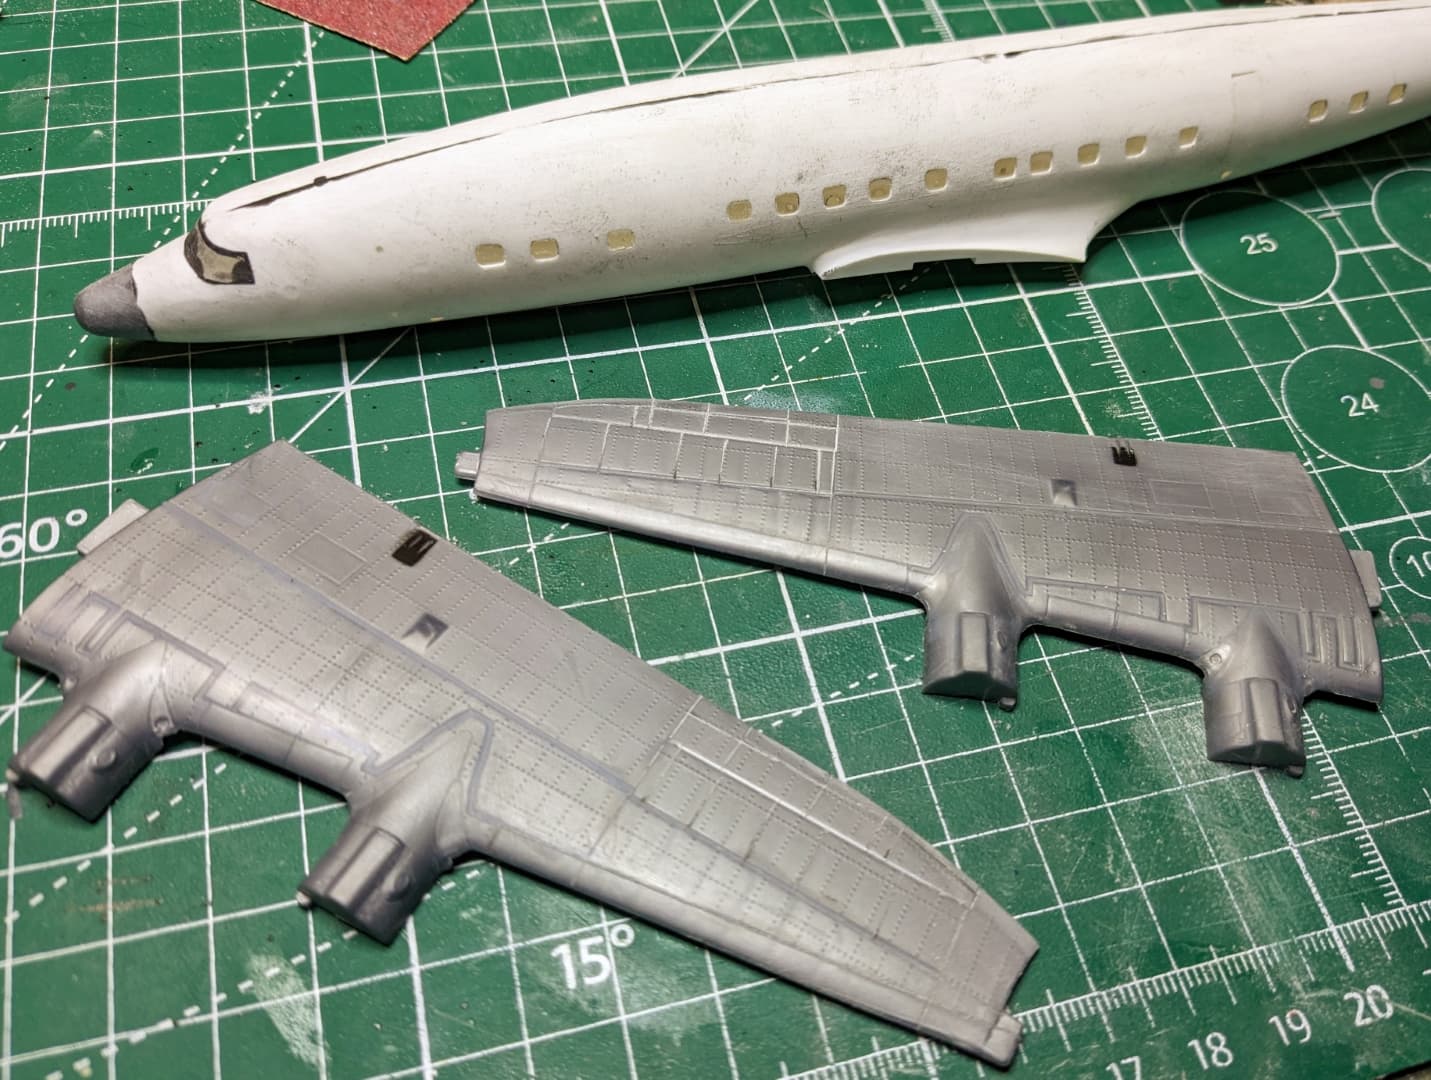
Unfortunately, the fit of the wing and the engine cowlings, as well as the fit of the wing to the fuselage is pretty bad. I am not sure of molds this old can stretch but the upper left hand wing was slightly wider (chordwise) than the lower surface near the fuselage joint and the leading and trailing edges overlapped.
The cowlings were slightly larger diameter than the nacelles and the fit between the upper and lower nacelles was also bad. This kit was originally molded in 1956 and this is a fairly recent re-pop from Revell under the Revell / Monogram Classics series. So it’s been quite a long time since the molds were originally cut.
Anyway, I am working on correcting the mismatches, restoring panel lines after sanding away the overdone external details on wings and fuselage, and also working on some improvements of details.
It’s slow going, but I am actually enjoying the process as there is quite a bit of satisfaction in being able to turn this old kit into something better than original.
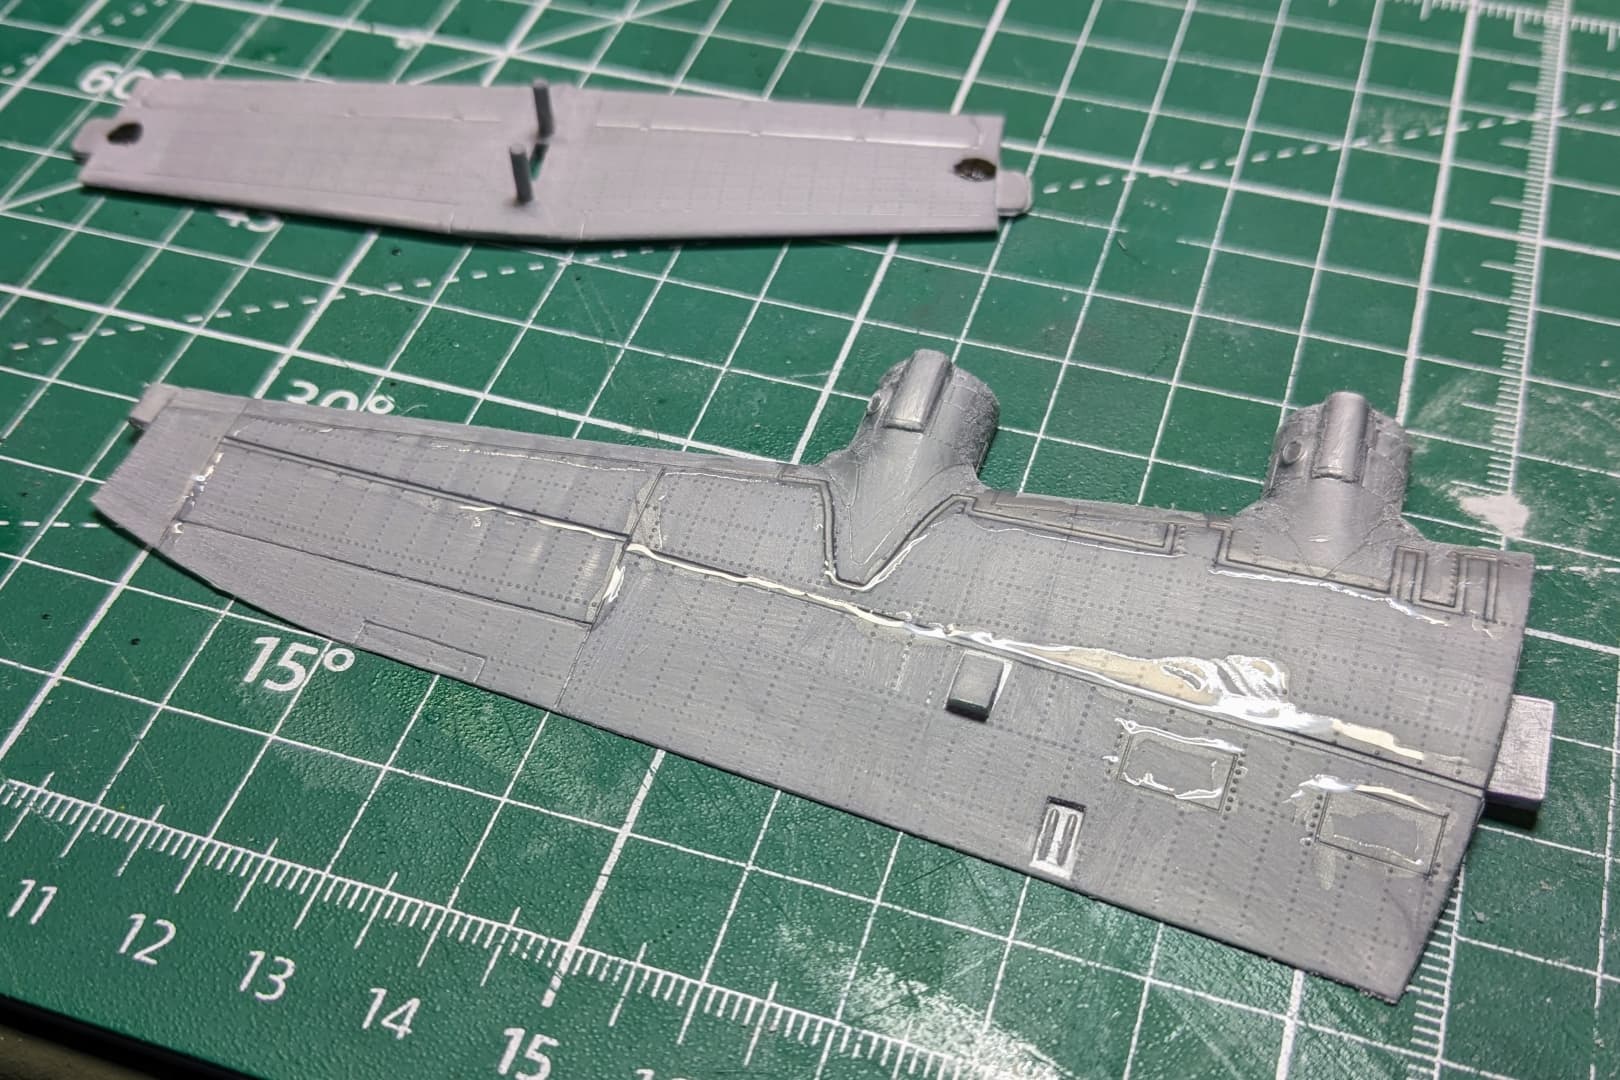
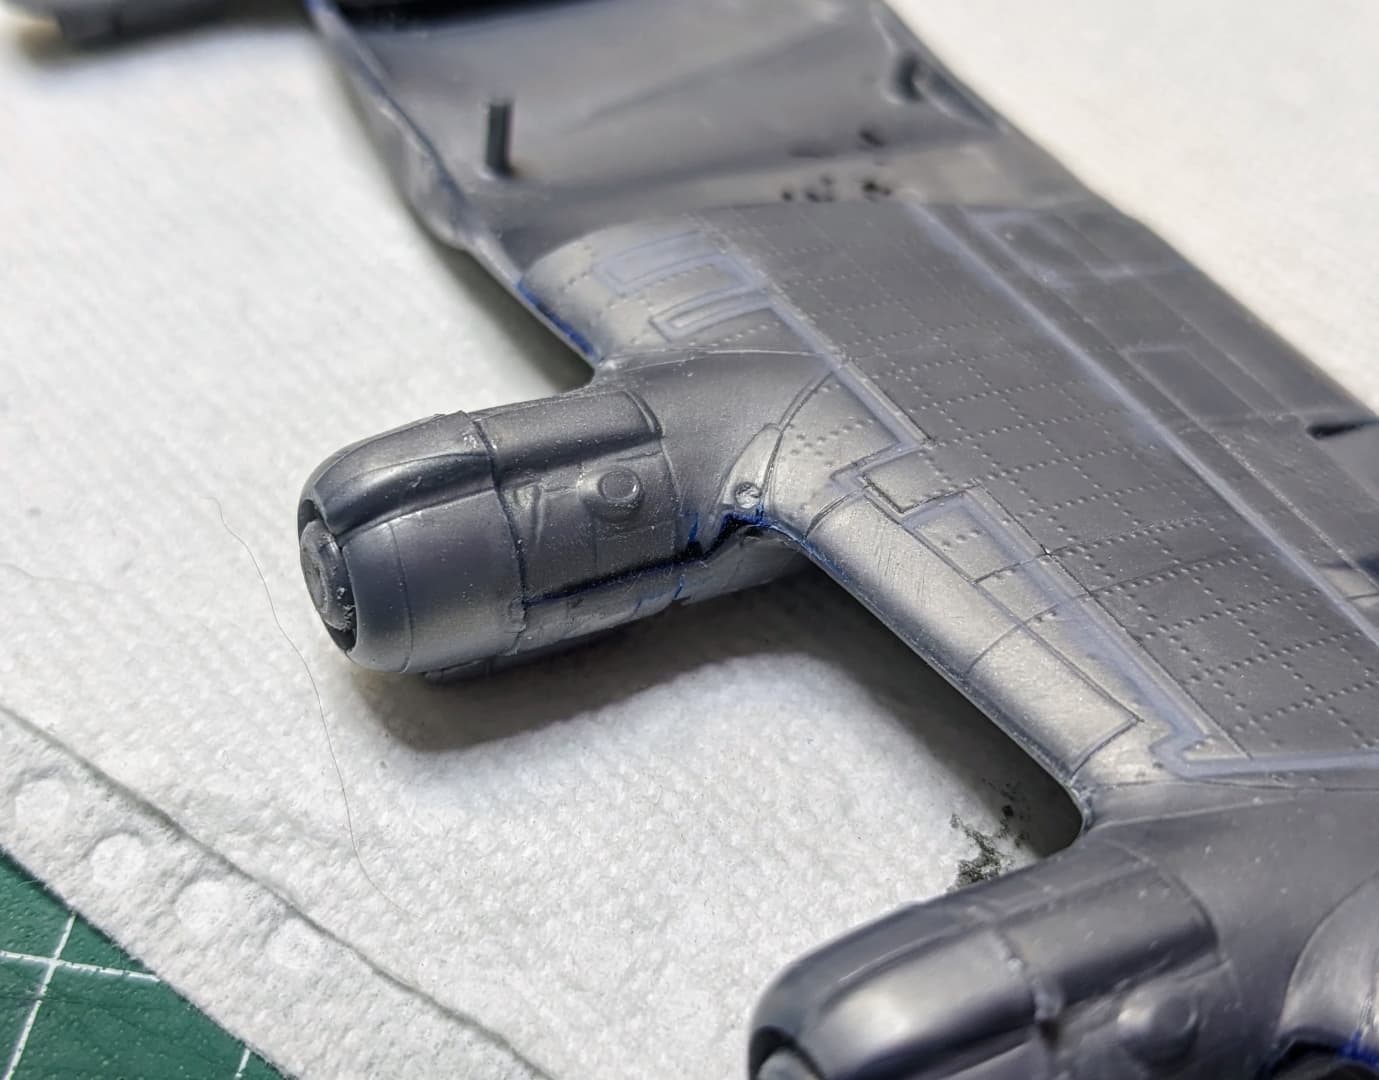
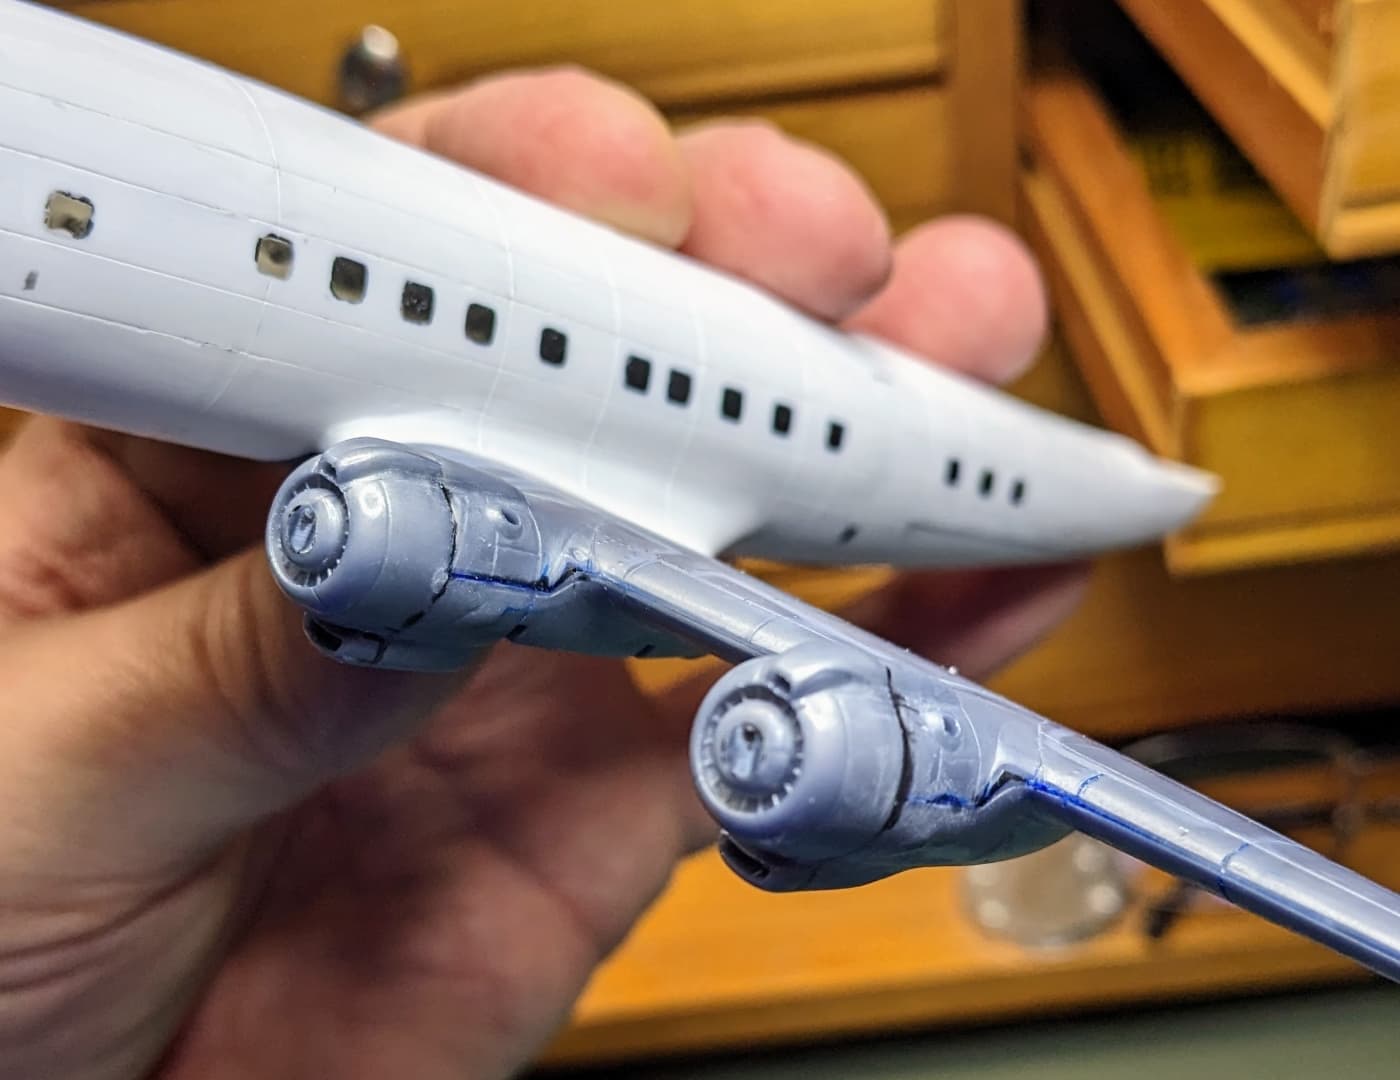
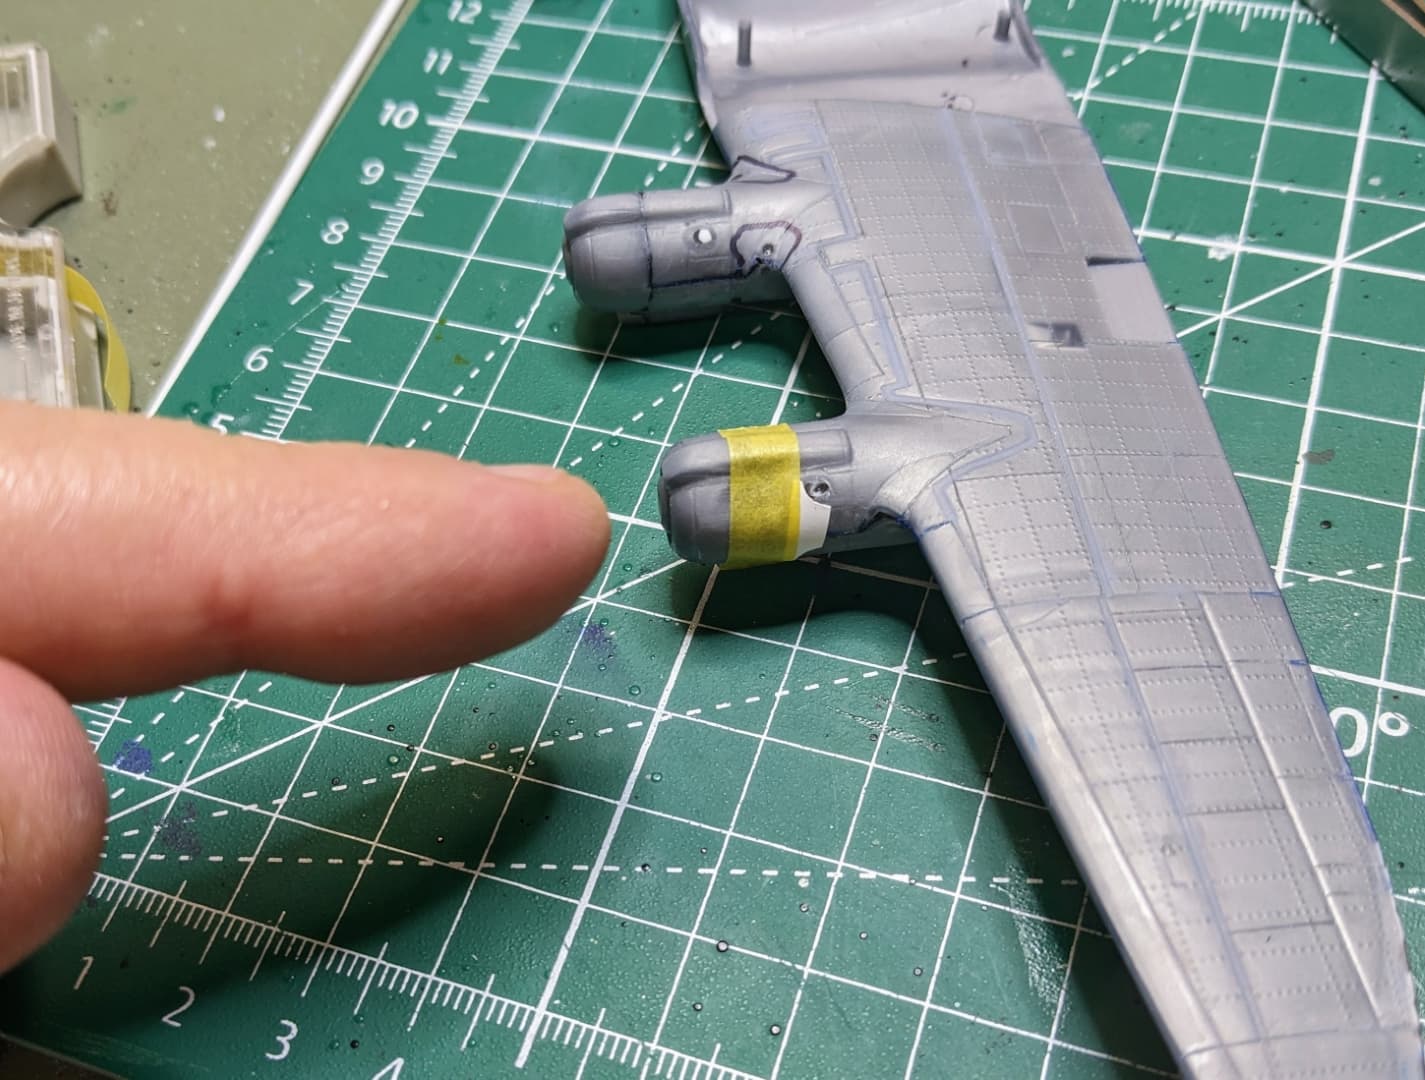
Shows the mismatch between one of the cowlings and the engine nacelles
After filling with black CA glue and initial sanding. The width of some of the black CA shows the extent of the mismatch. The cowling is actually fairly smooth now. It will require finer sanding and detail restoration.
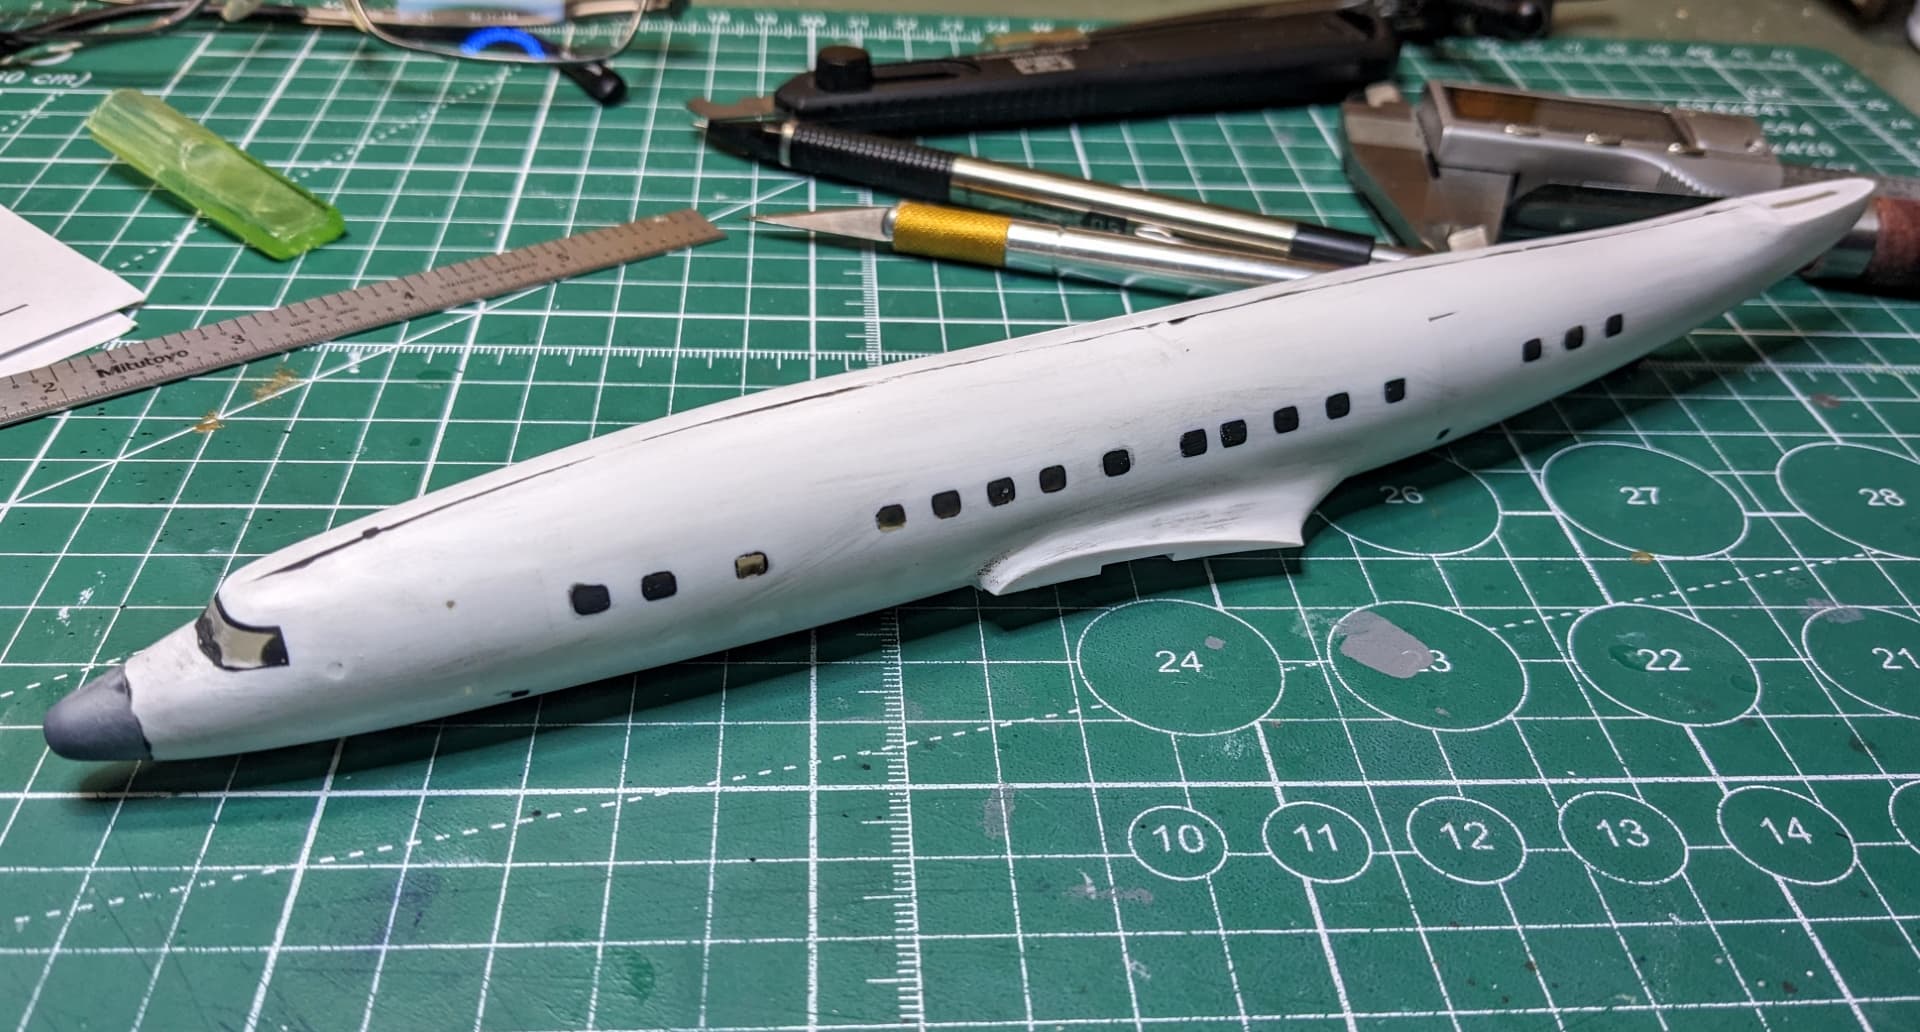
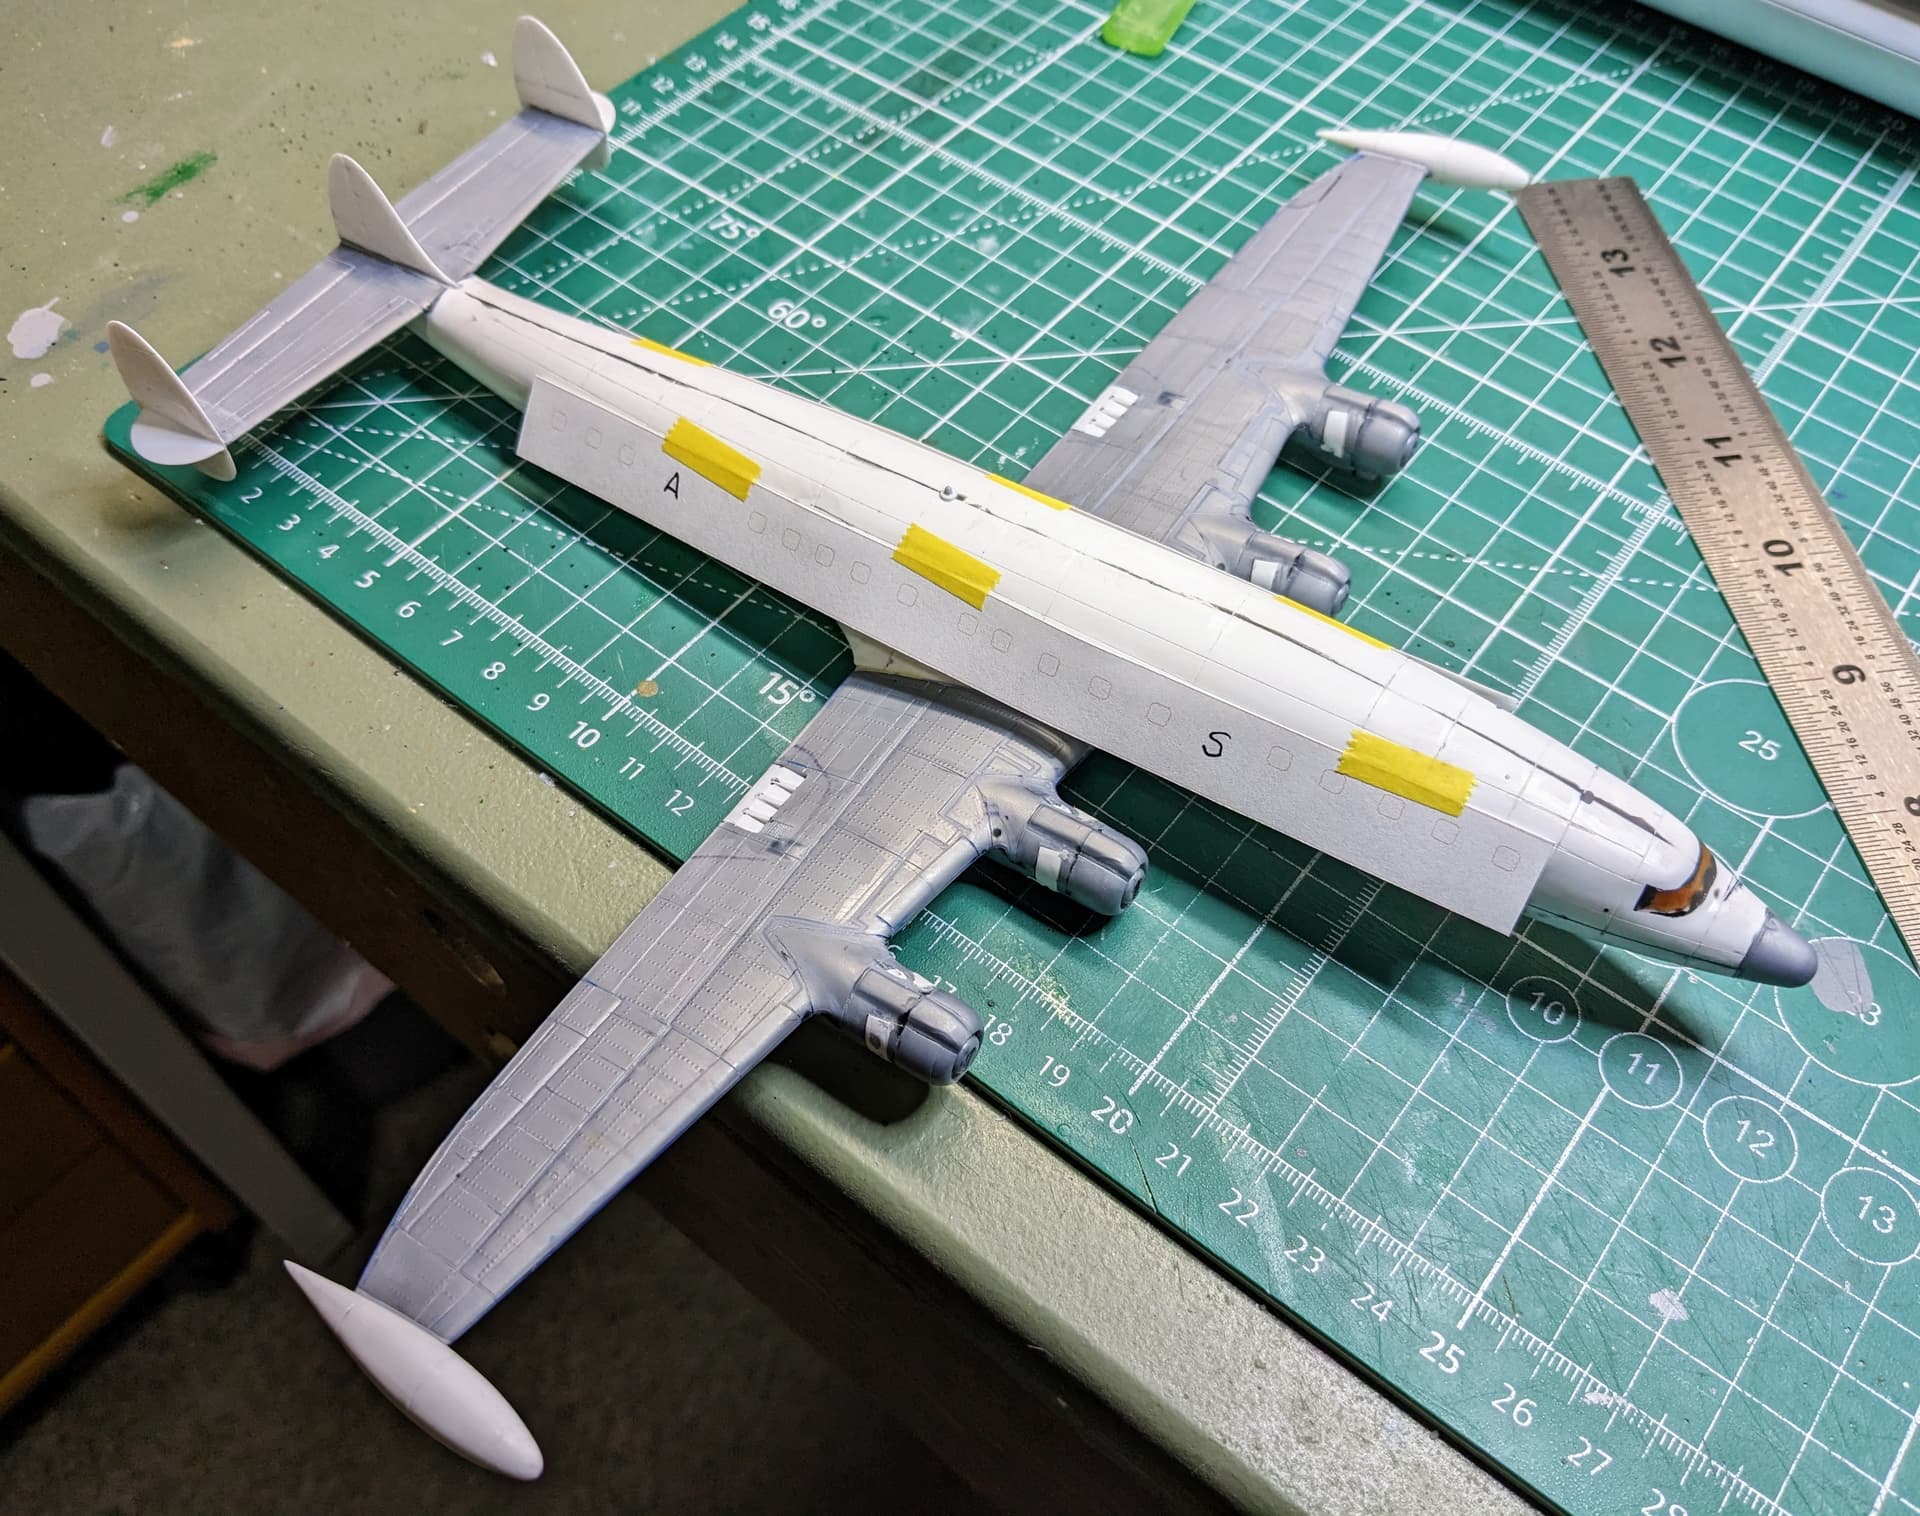
I am gradually adding the vertical panel lines back to the fuselage. This curvy body makes it difficult to measure and mark where the scribing tape goes, difficult to get the tape to lay down correctly, and will require some additional clean up when I am completed.
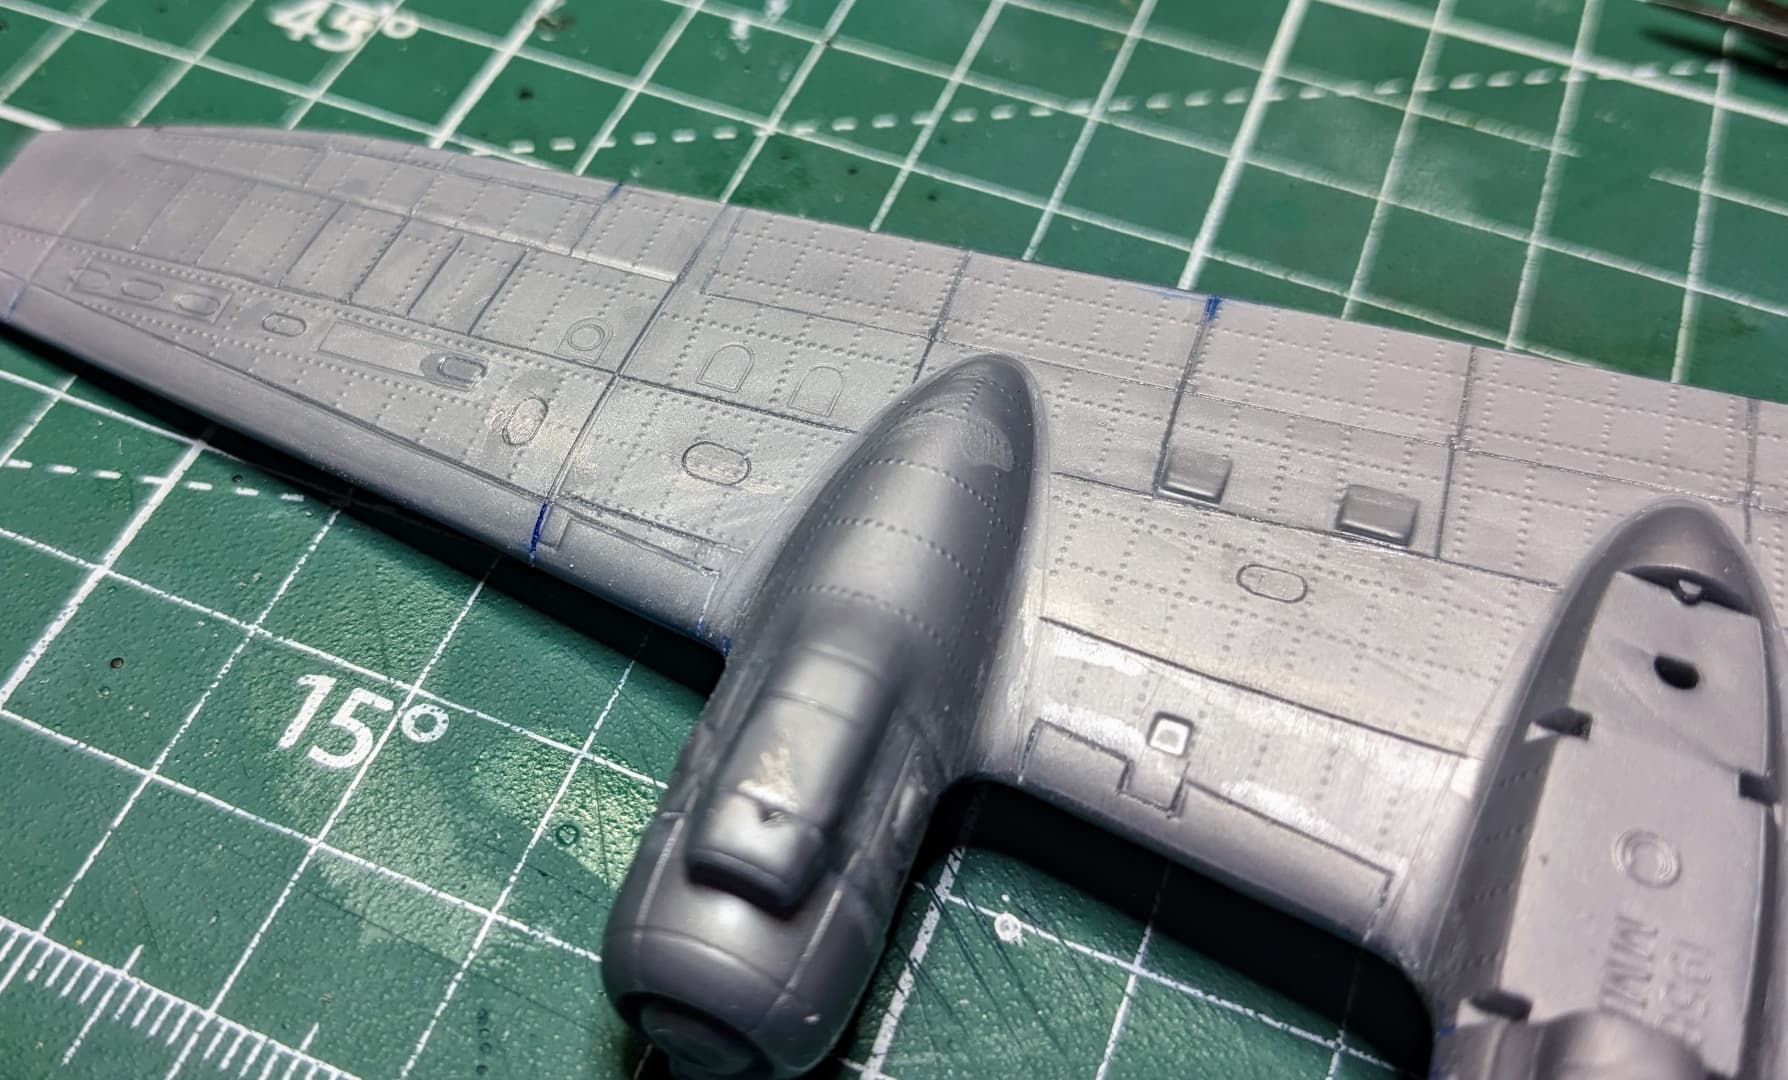
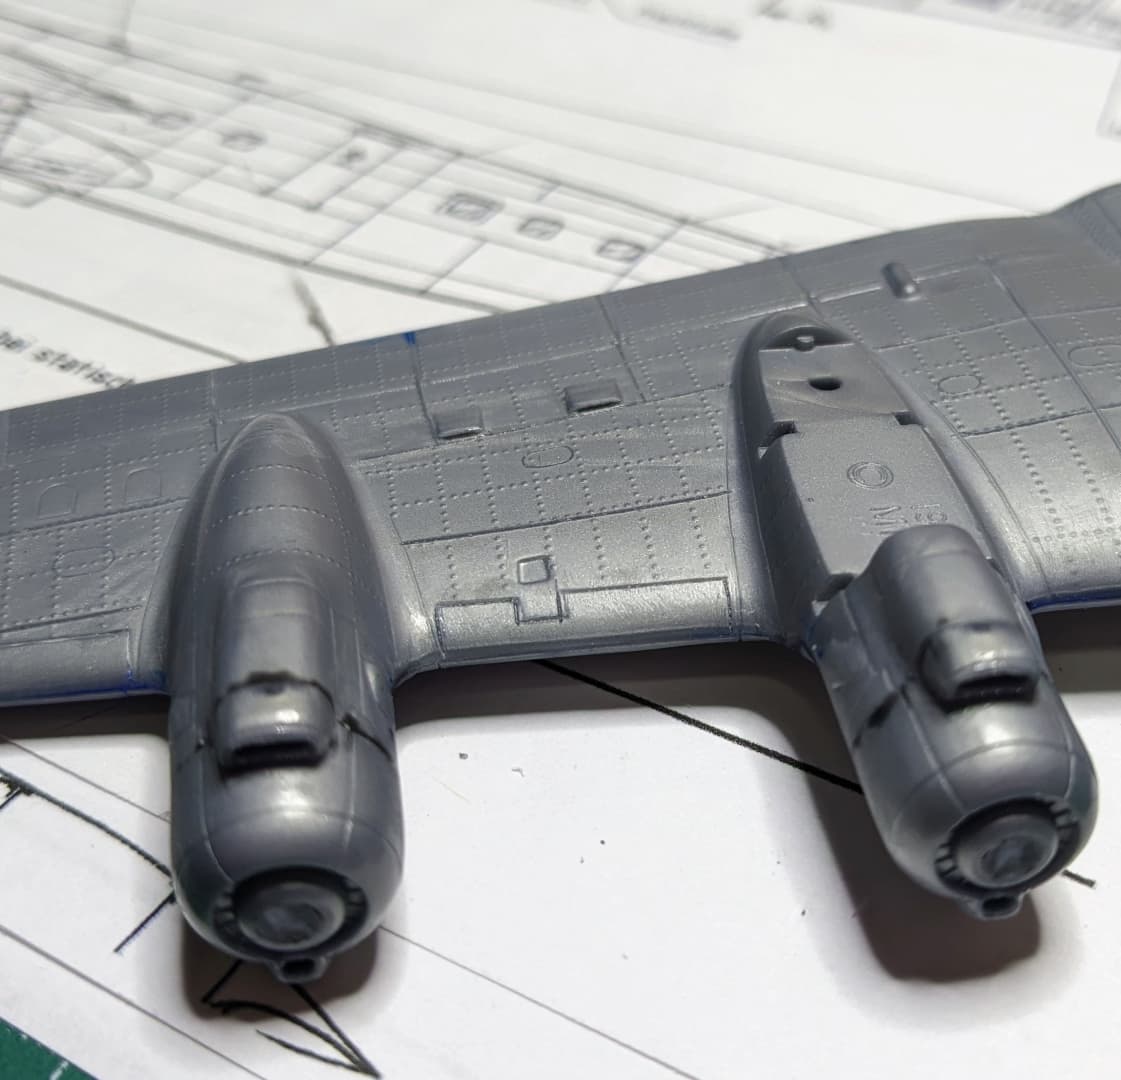
I am restoring panel lines as well as some access panel details. The air scoops between the engines will be scribed on their opening face to give the appearance of an opening (once a wash is applied later).
Ah the TWA Connie. My father worked for TWA from the mid 50’s until the early 90’s. The Connie was his favorite type to work on from his time on ground crew when he first started with the airline. Following this one for sure.
Man, this is why I build square green things, you fly boys have an entirely different skill set, good luck with this one, I love the profile of the Connie, it’s gangly hawmping fuselage is so ugly it’s appealing.
What always amazed me about the Constellation was how the designer managed to get corporate big wigs and their penny pinching accountants to sign off on the design. You’d never see anything like that today. Everything today is about function and efficiency. No originality allowed anymore.
There is a lot of scribing to restore detail on this model. But it will look loads better than the original . The wings are basically scribed. The fuselage is scribed on top and the sides. I still need to do the bottom and there are a few extra small lines on the side that I need to add. The horizontal and vertical stabilizers have not been done yet. Of course all of this will have to be smooth sanded as well and washed.
Another area that still needs work are the engine nacelles. They’ve been smoothed into the cowlings, but I will still need to add panel line details. I also want to make the exhausts look better. The prop spinner shaft holes were off center on three of the four cowlings, so I filled all of them with a larger piece of styrene and will redrill the holes later.
One thing I wish was available was a scribing tape with better adhesive. I am having to use the scribing tape for the guide edge because of its stiffness, but have to add Tamiya tape to hold it in position because the adhesive on the scribing tape isn’t adequate.
You can see I needed to add Tamiya tape to hold the clear scribing tape in position.
When I finally attach the wings, I will have to do a bit of work on the wing to fuselage seams. I am going to try and get that fit as close as possible so I do not have to use any filler there. If I do have to use filler, I want to use the type that can be wiped off (Vallejo Plastic or MrSurfacer 500).
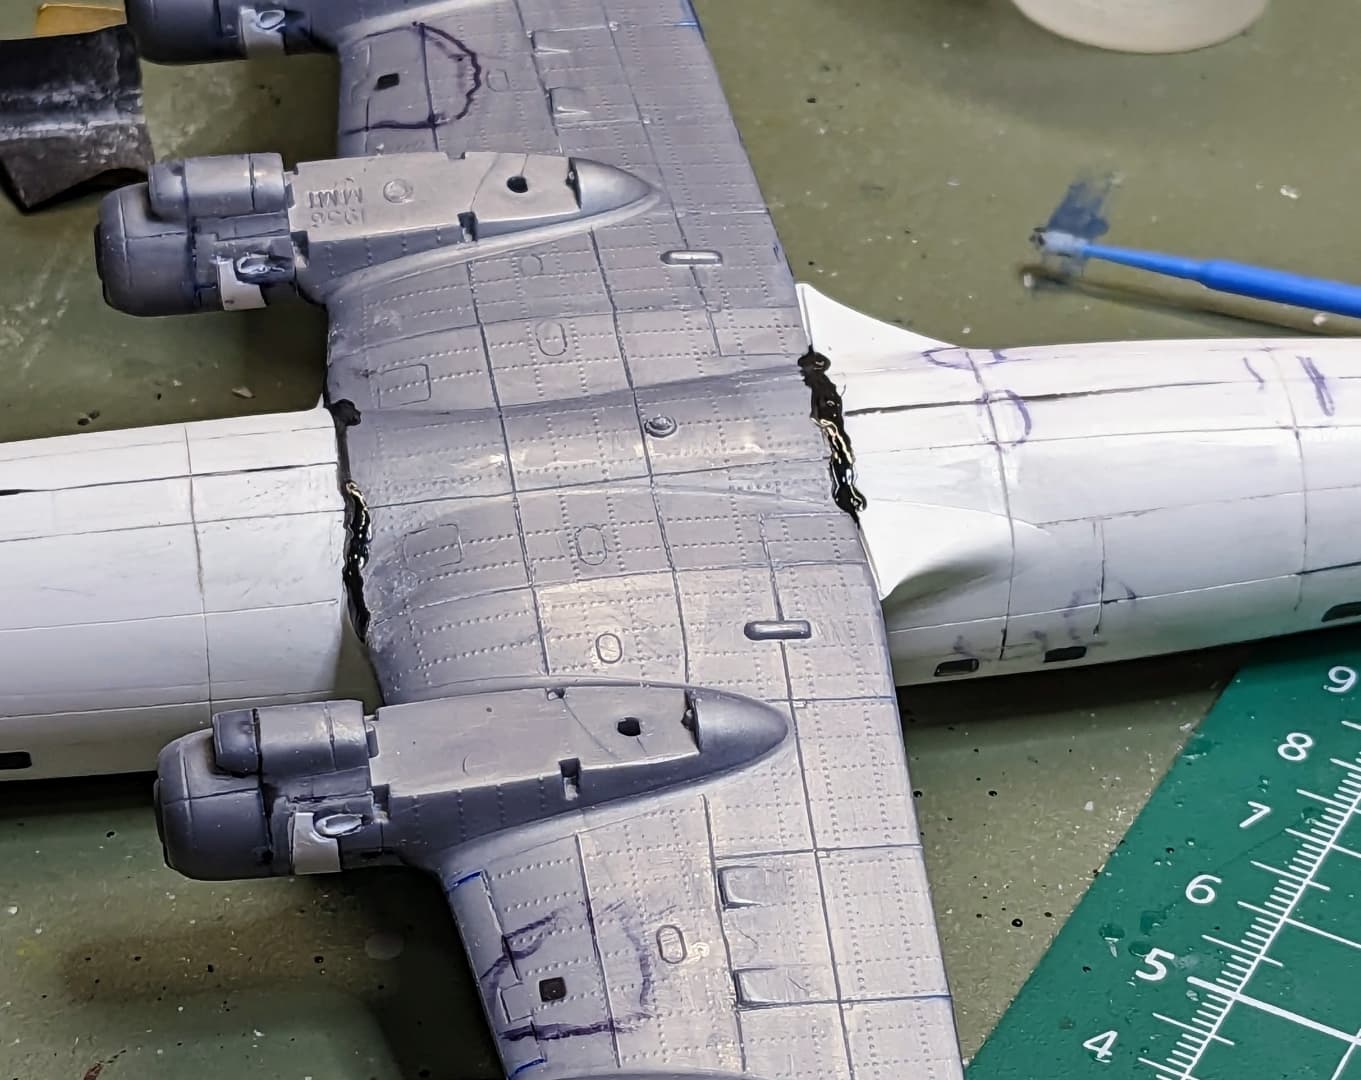
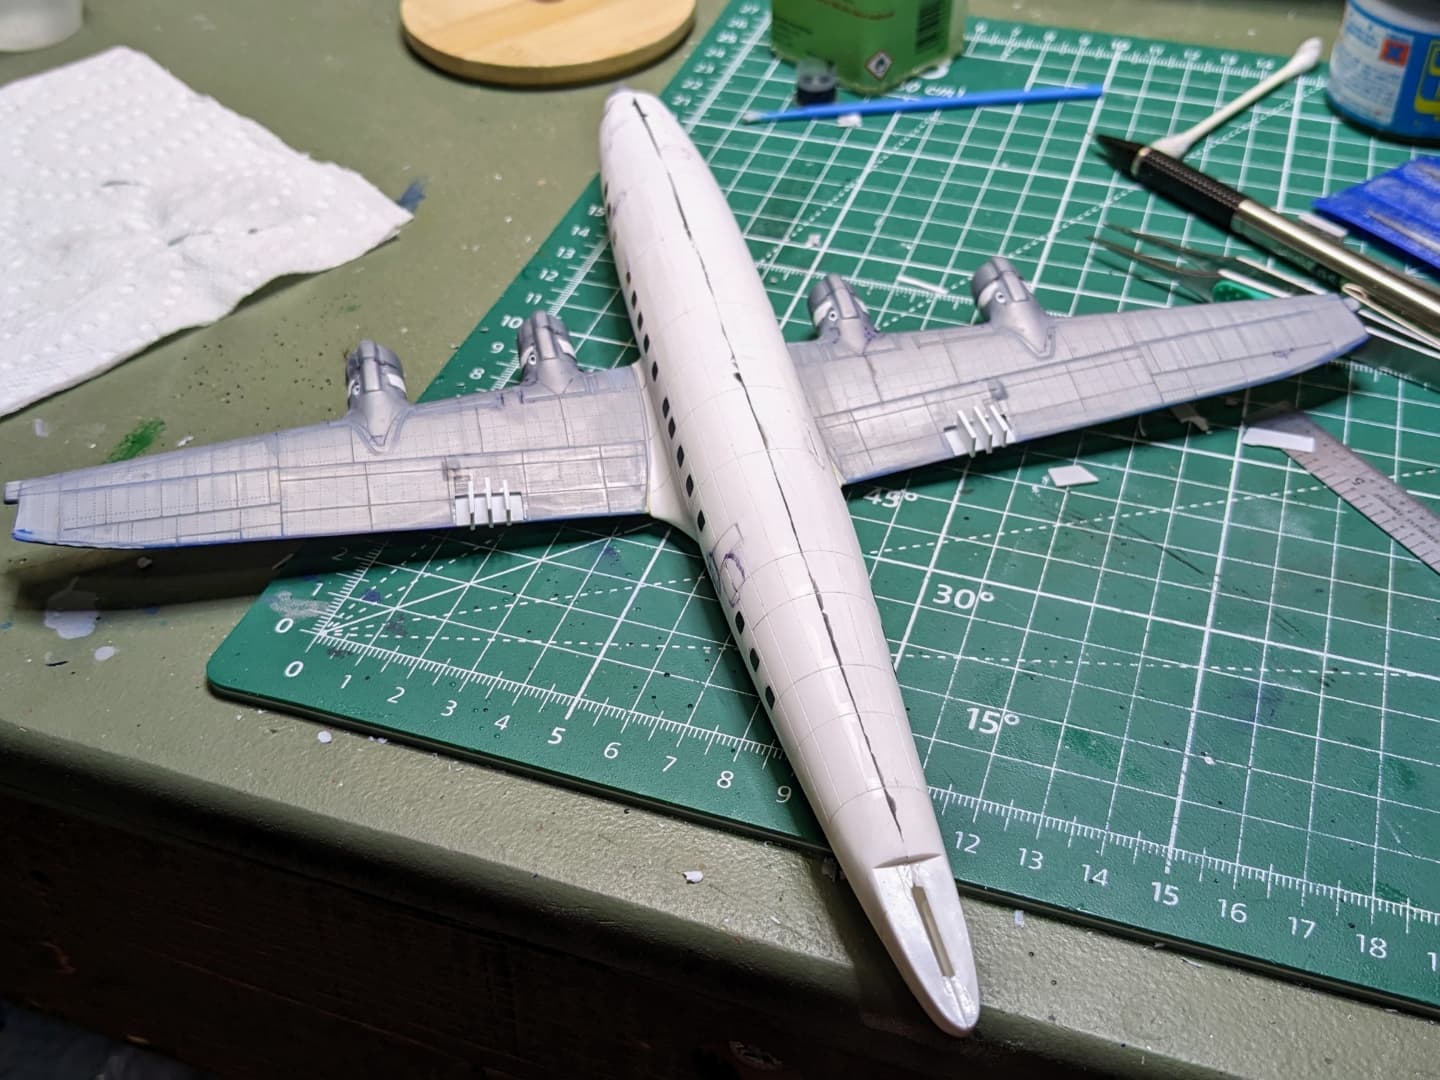
I continue with trying to improve details on this box scale Constellation. Most of the scribing of panel lines was completed (except tail surfaces). Then I had to go over it and repair some lines which didn’t turn out so well. That’s all the circled areas in this photo.
I wanted to improve the appearance of some underwing vents. These are real shallow so I elected to simply scribe a line on their edge to simulate an opening. Once painted and given a wash, I believe they will look okay.
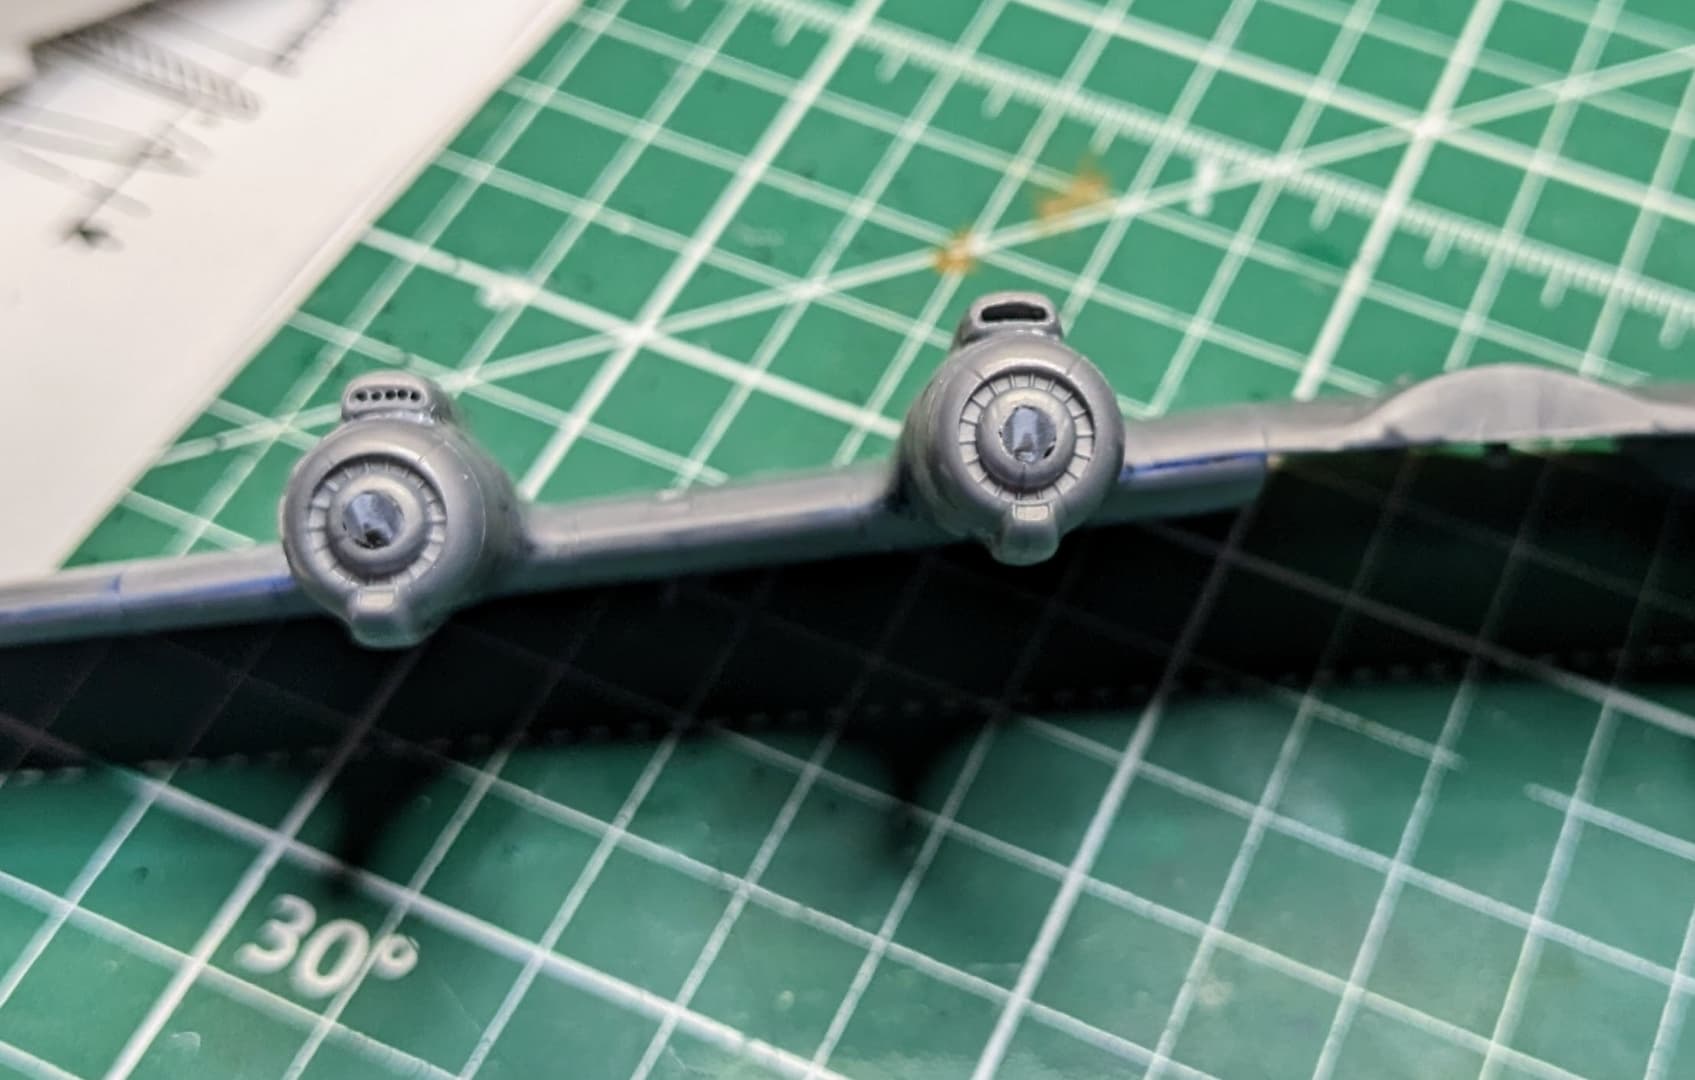
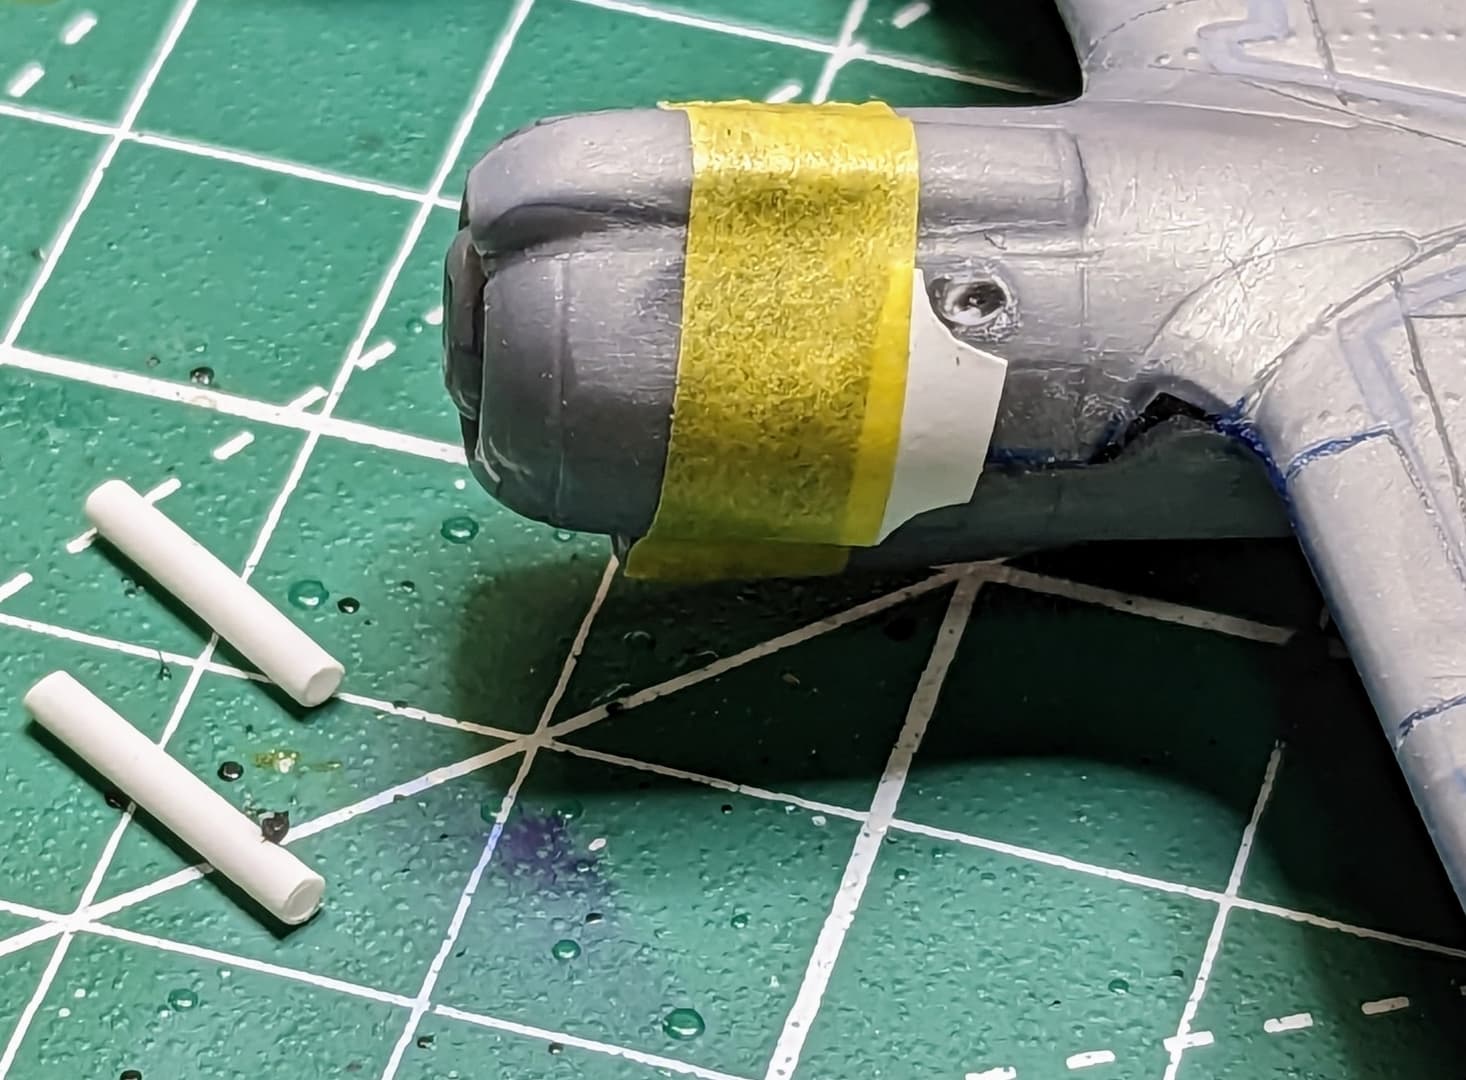
The cowling openings needed to be opened up. A small drill bit and an X-acto blade was used to perform this, followed by a dab of Tamiya Extra thin to smooth them out.
You’ll notice in the last photo the upper cowling exhaust openings were drilled out. I wasn’t happy with these molded in details as they didn’t look like what I was seeing in reference photos. So I’ve decided to add exhaust pipes and cowling covers . I cut away the molded in detail for these and smoothed it out.
The pipes were made from 1/16" plastic rod that was drilled out with progressively larger drill bits. This was tricky and I ruined a couple in the process. The shape of the cowling covers is from a drawing but it matches the locations on the cowling fairly well. I cut this out of .05 thin plastic sheet. The plan is to mark the curves on the back edge of the covers onto the cowlings and then grind small troughs for the exhaust pipes to lay into. Definitely fiddly, but I think it will be worth it in the end.
Working those cowls was tedious. They turned out okay, but it definitely won’t be a contest winner. But I was able to get past that and get the wing installed. The fit of the wing was not great and required soe clean up work. I still have a bot more to go, but need to let a small amount of milliput putty cure before I can continue. So I started working on the upper aft wing edge vents.
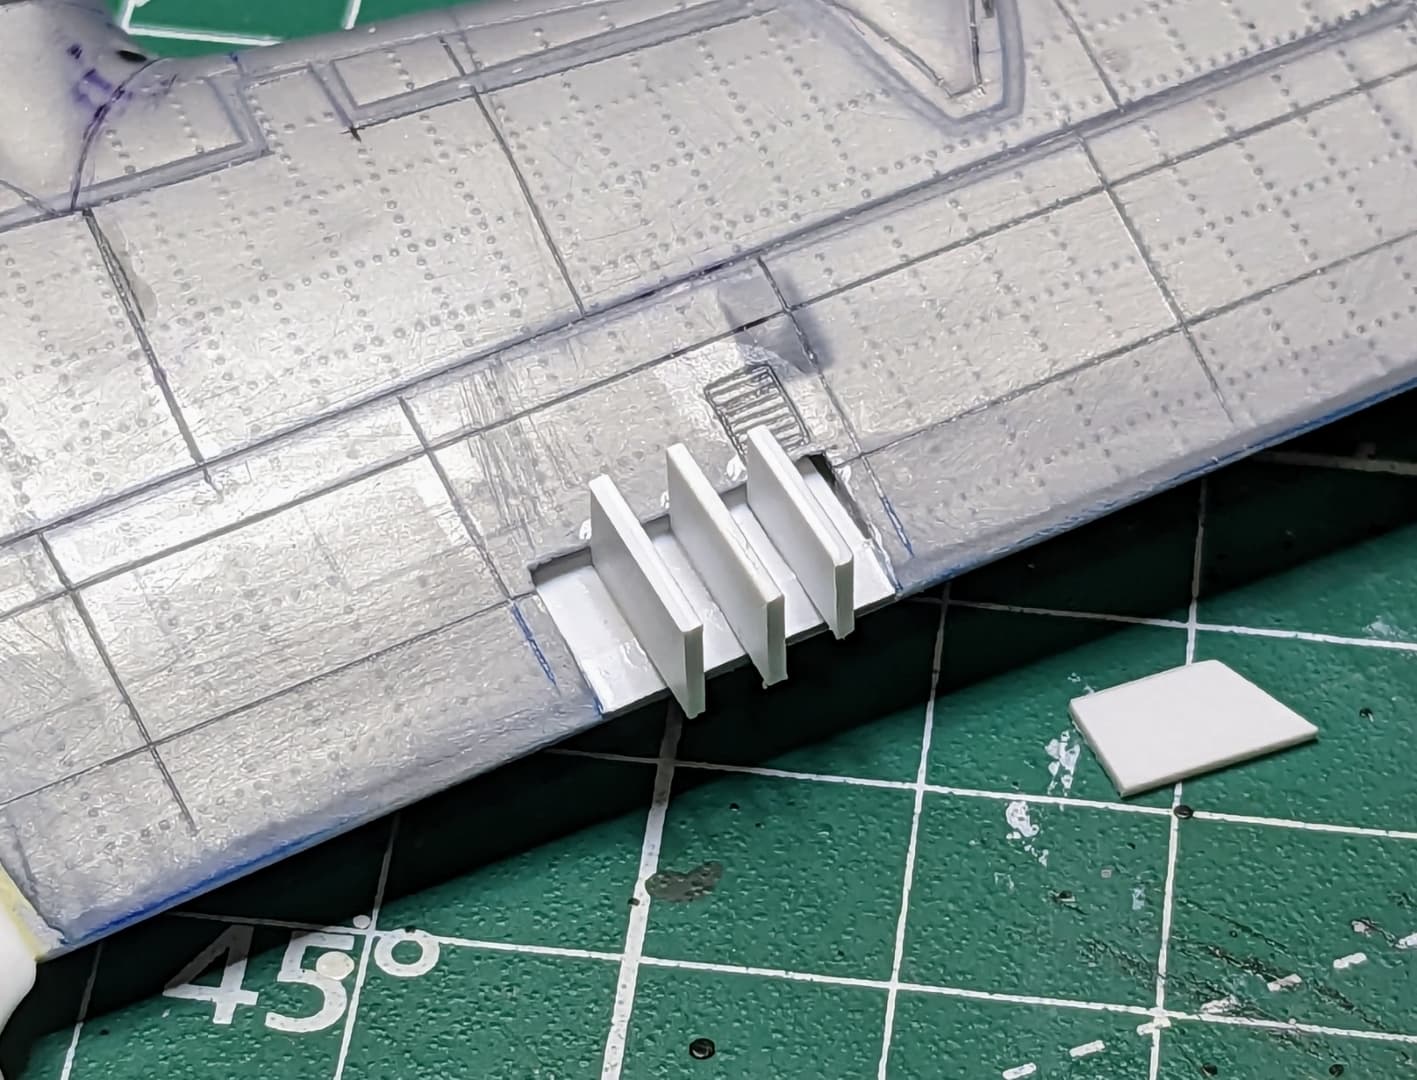
Wing edge vents will have three vertical separators (four vents). First glue them in and then trim them to shape. Because of the tight quarters I am doing the outer two verticals first and then I will do the center one.
Well, my first attempt at the wing vents was unsatisfactory because of the step at the aft end of the vent ramp where I plugged the trailing edge. They looked okay from a distance, but up close they were not cutting it.
Here I’ve just installed the plug at the trailing edge but had not trimmed it yet. After trimming it I tried filling in the step with some filler but could not get in there well enough to sand it down and it ended up looking even worse.
So I cut all of that out and cleaned up the opening. For the second attempt I took a .015 thick piece of styrene sheet and bent a slight angle on the aft end to fit in the area needing the plug… The remainder was fed into the opening of the vents. This left a ramp that I was looking for. Then I glued in the verticals again. This time, they would end up with a gap at the trailing edge because of the change in angle of the ramp.
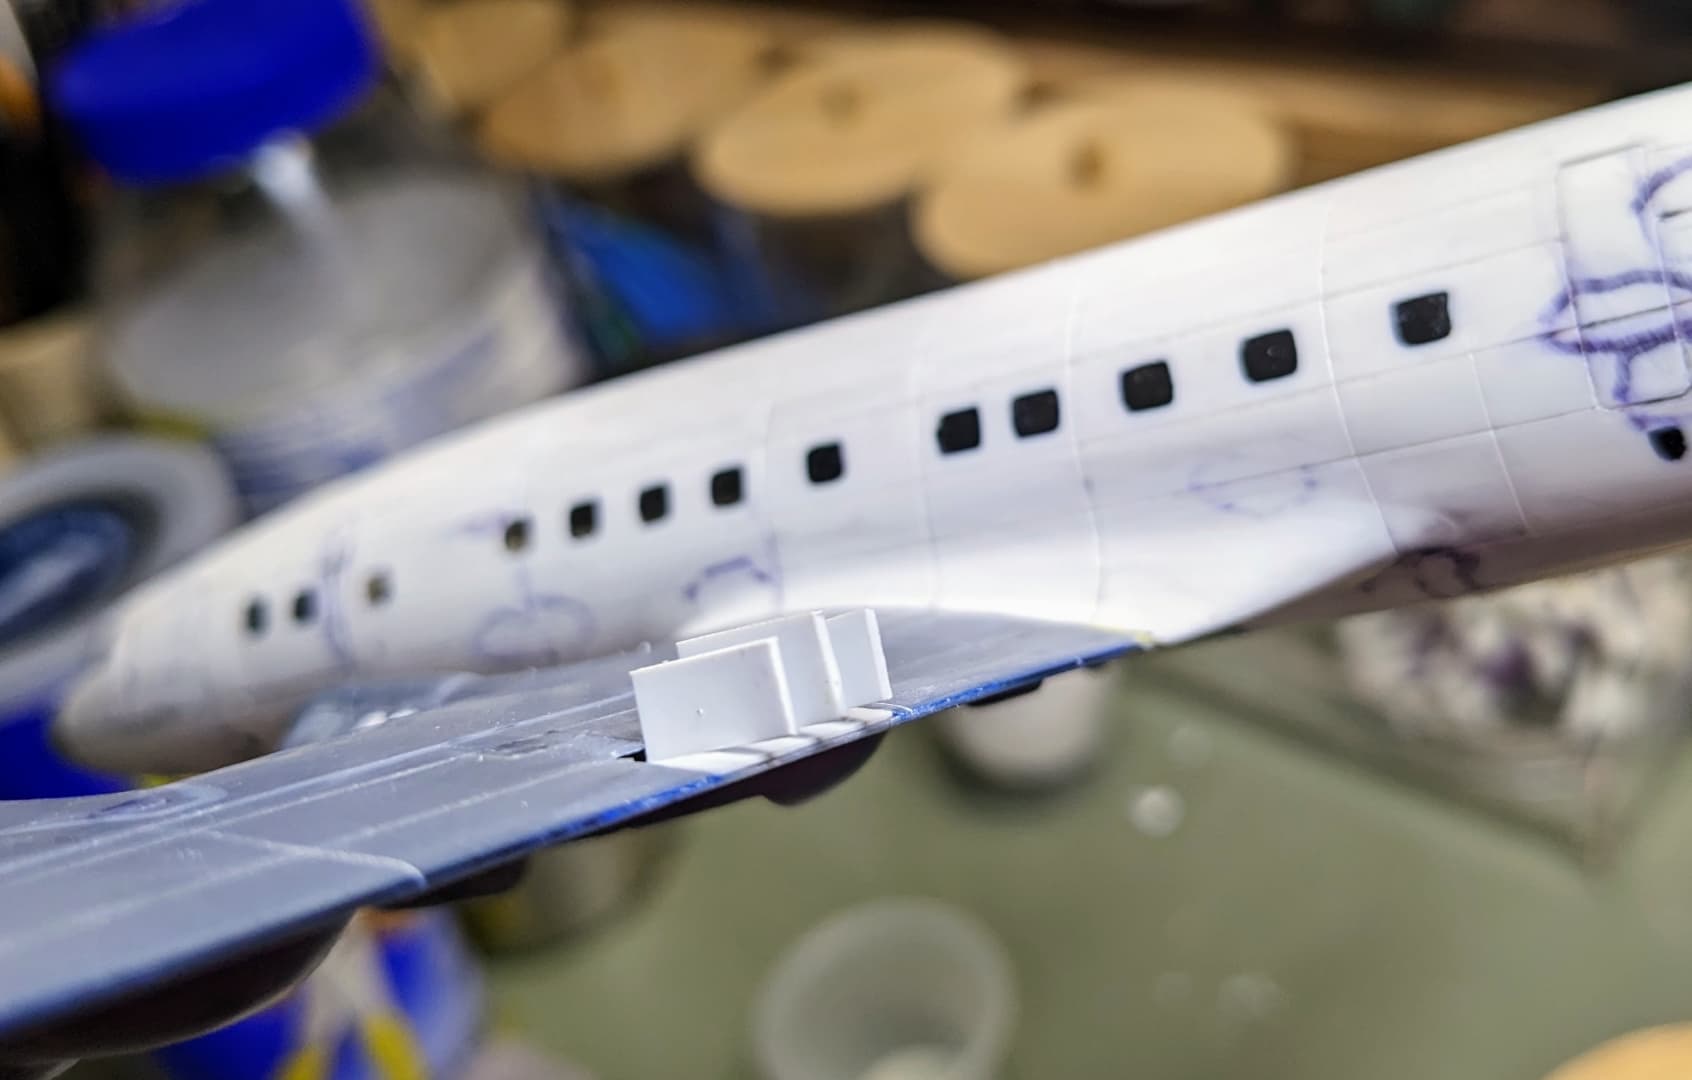
You can kind of see the gap on the verticals at the trailing edge in this photo.
Once the glue had cured, I slowly trimmed away the verticals until only a small angled sliver remained. Because of the gap mentioned earlier, the slivers ended short of the trailing edge, which is what I was after.
These were then carefully sanded to the final height. All that remains is to fill the small gaps. I think they turned out much better the second time and I will remember this lesson for the future should I have to do something similar.
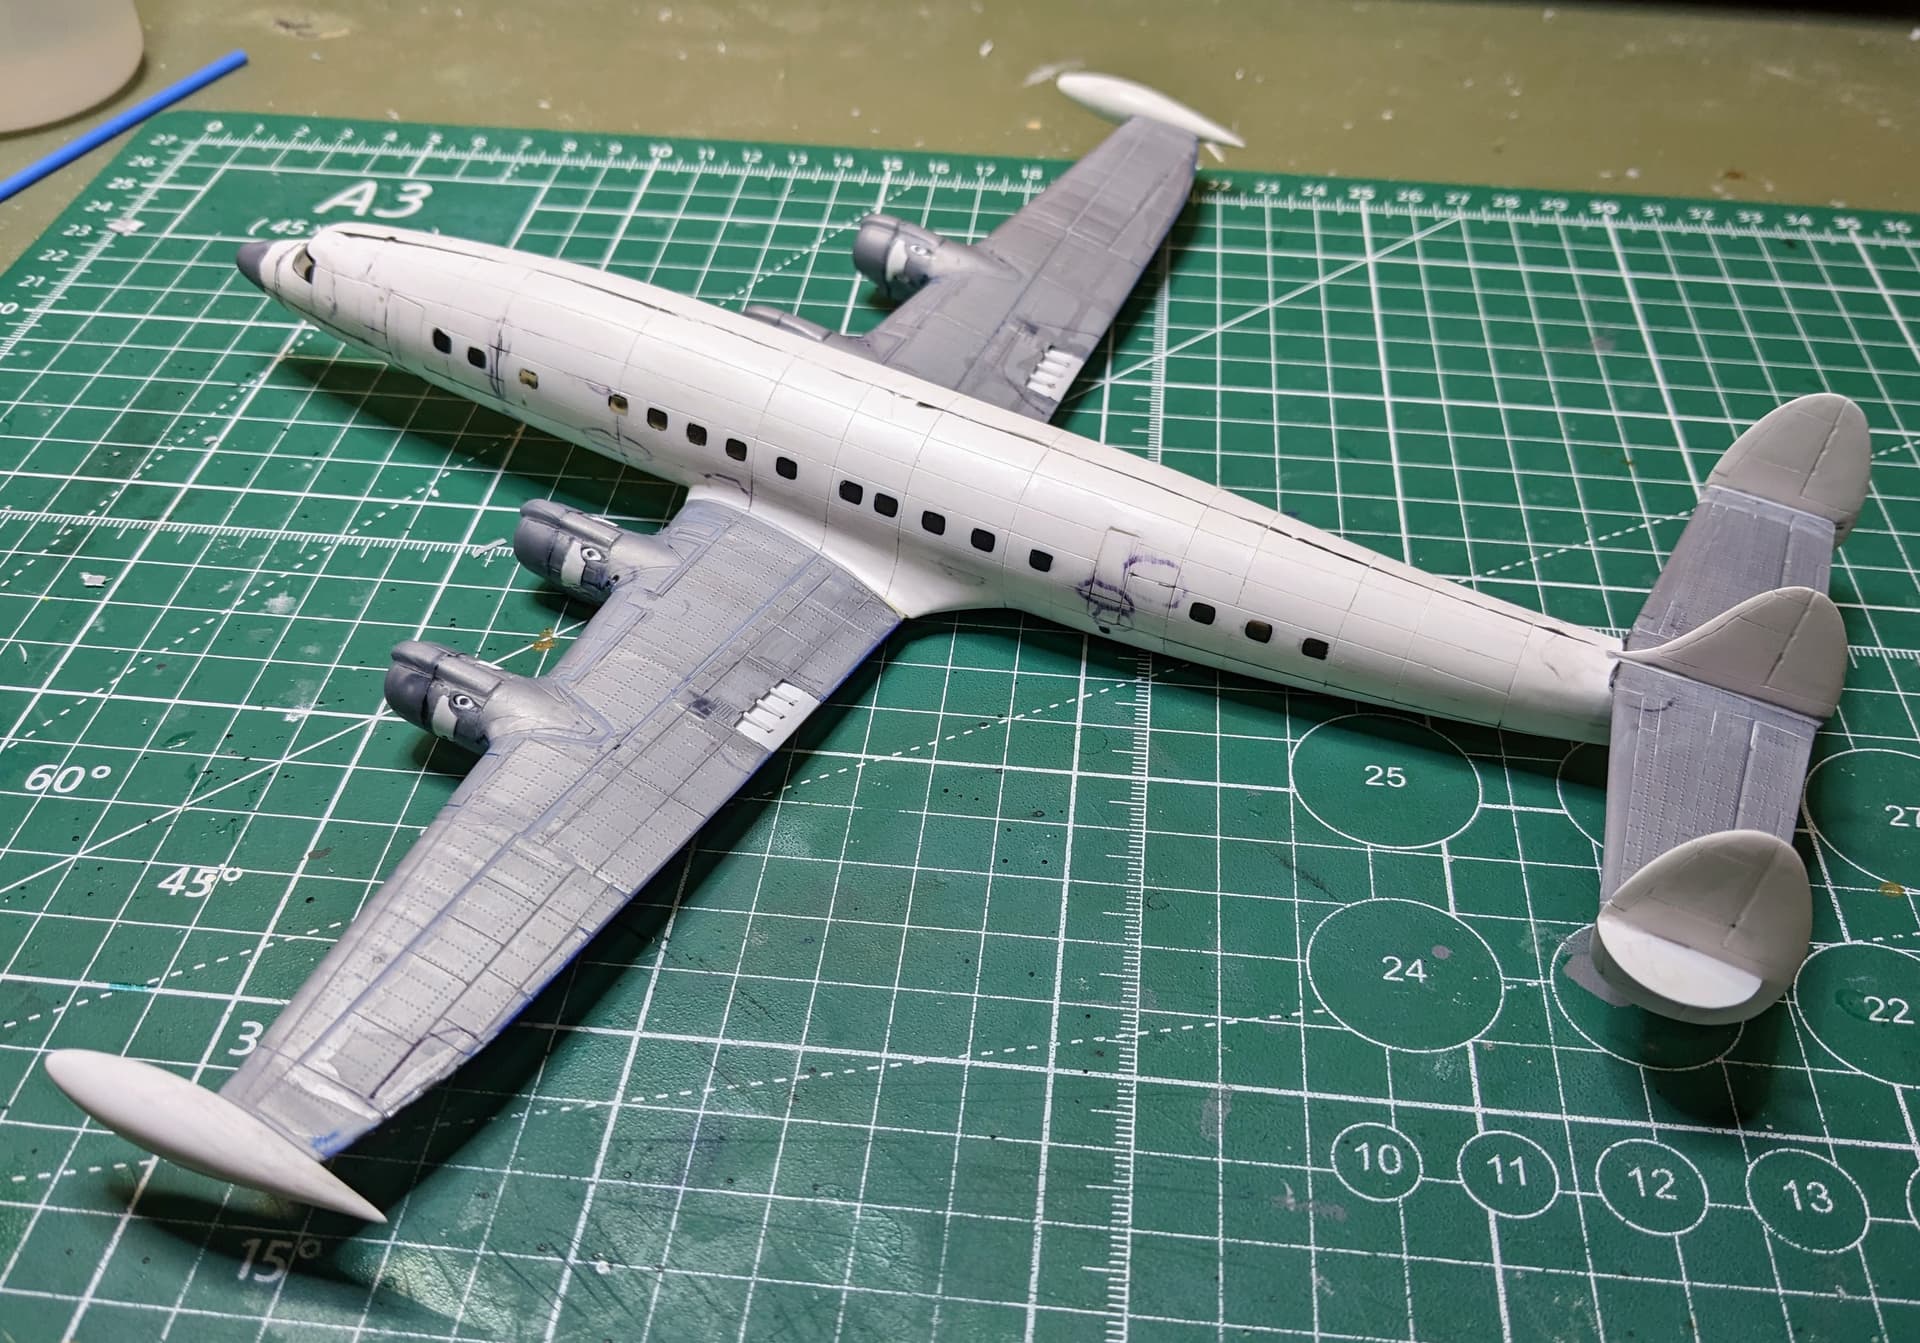
Spring is always a busy time for me , takes time away from modeling and the other hobbies I like to pursue. But I have been able to make some progress on the Constellation. I completed the main assembly and got all the scribing detail cleaned up (at least what I can see without the aid of a primer coat - still to come).
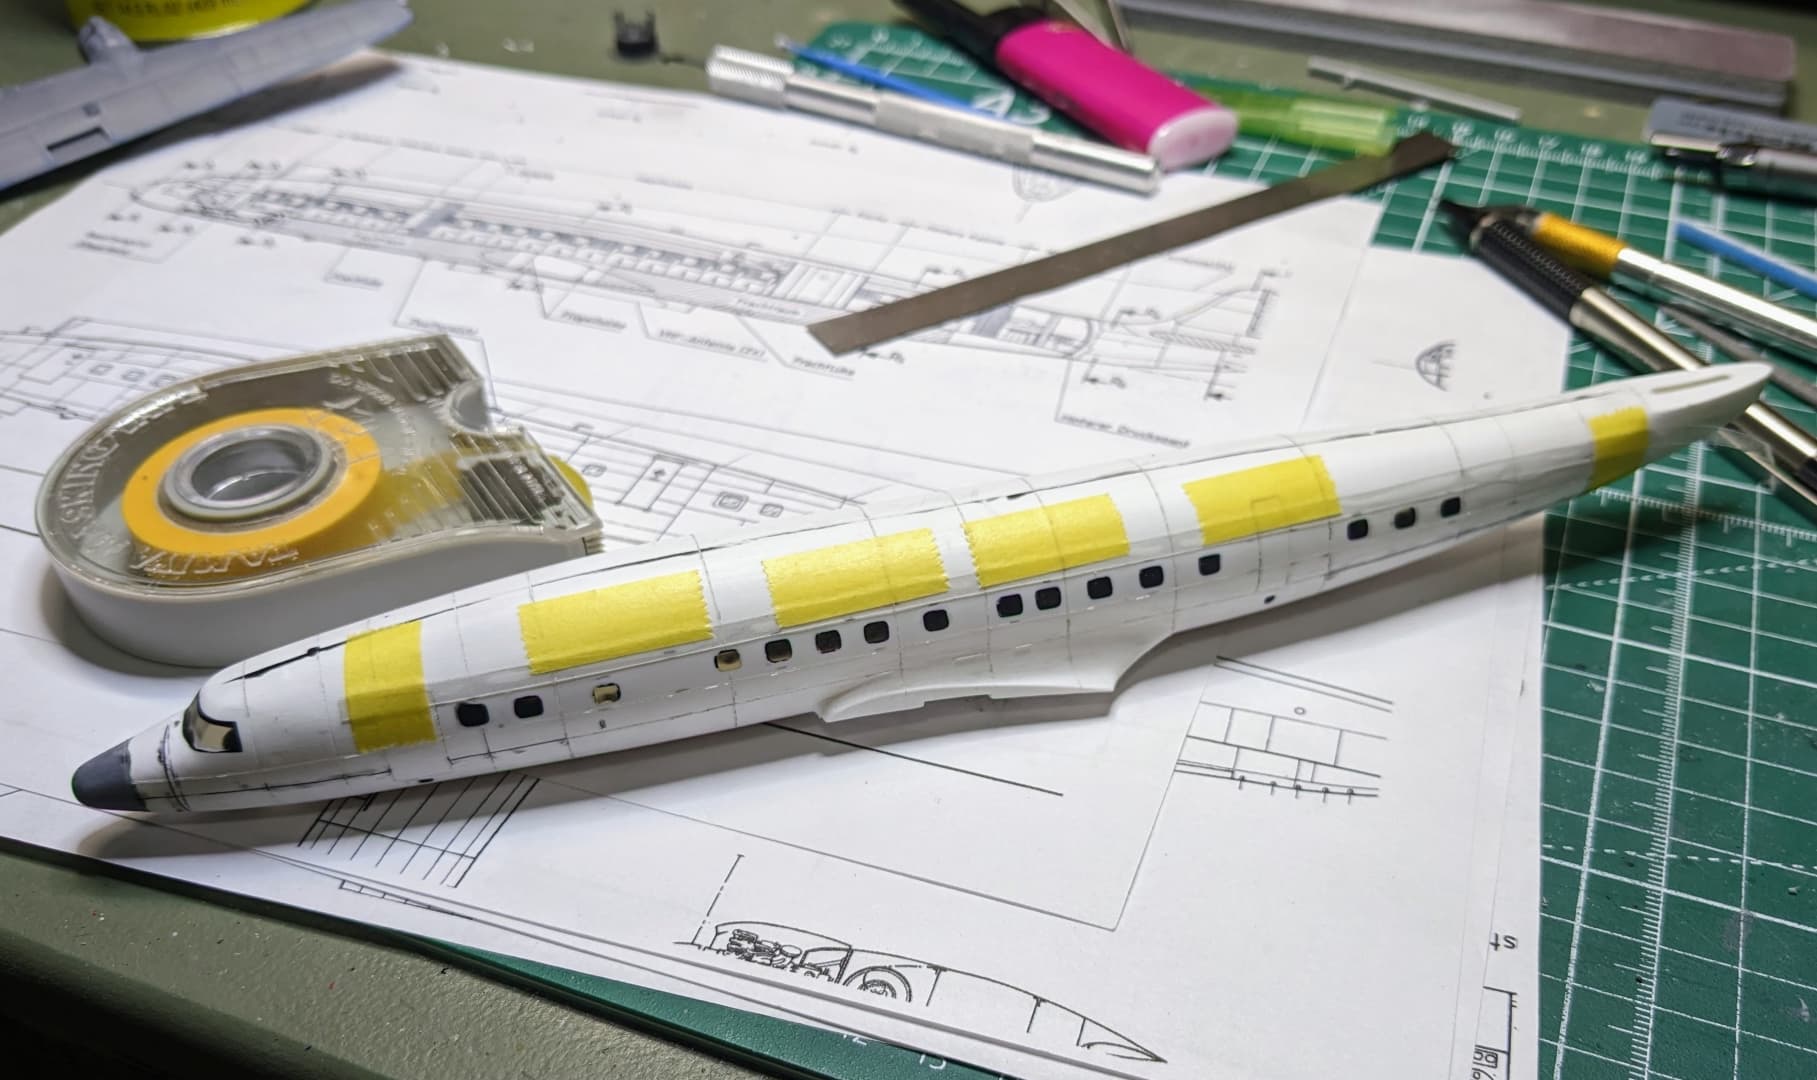
As I had mentioned previously, I plan on painting the windows on this model since the clear parts were pretty bad. I could have probably salvaged them, but I sort of like the light blue window approach on airliner models in small scales.
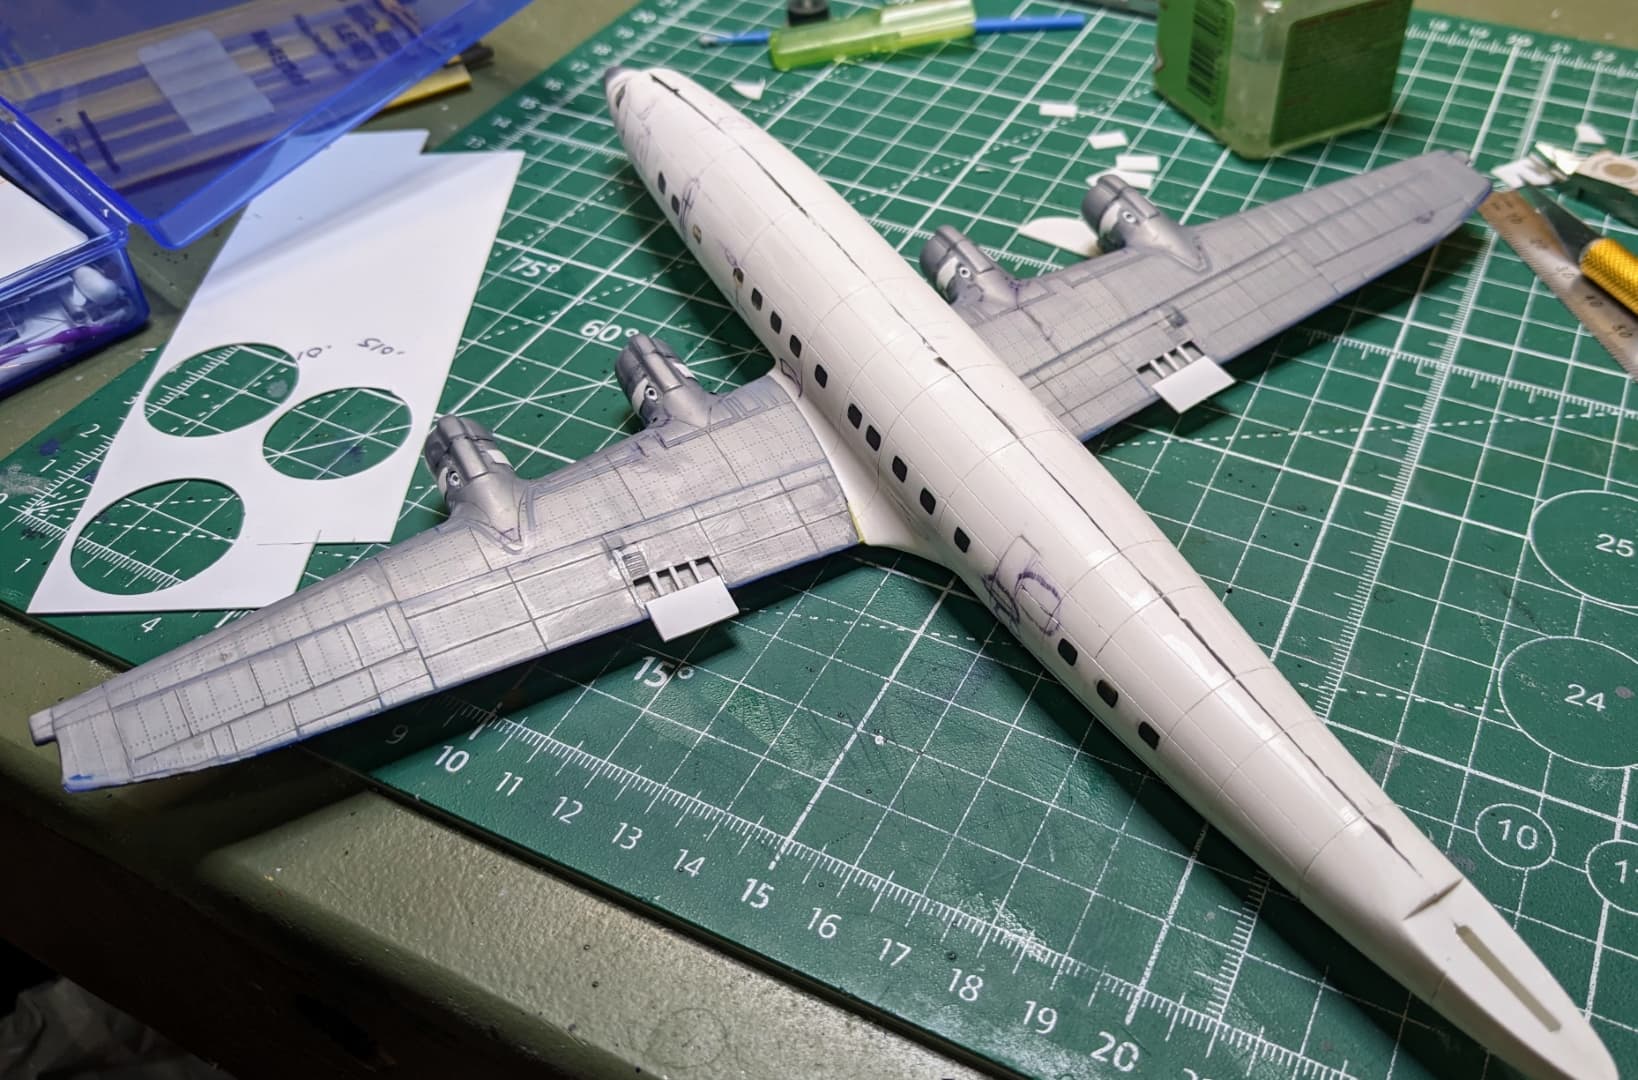
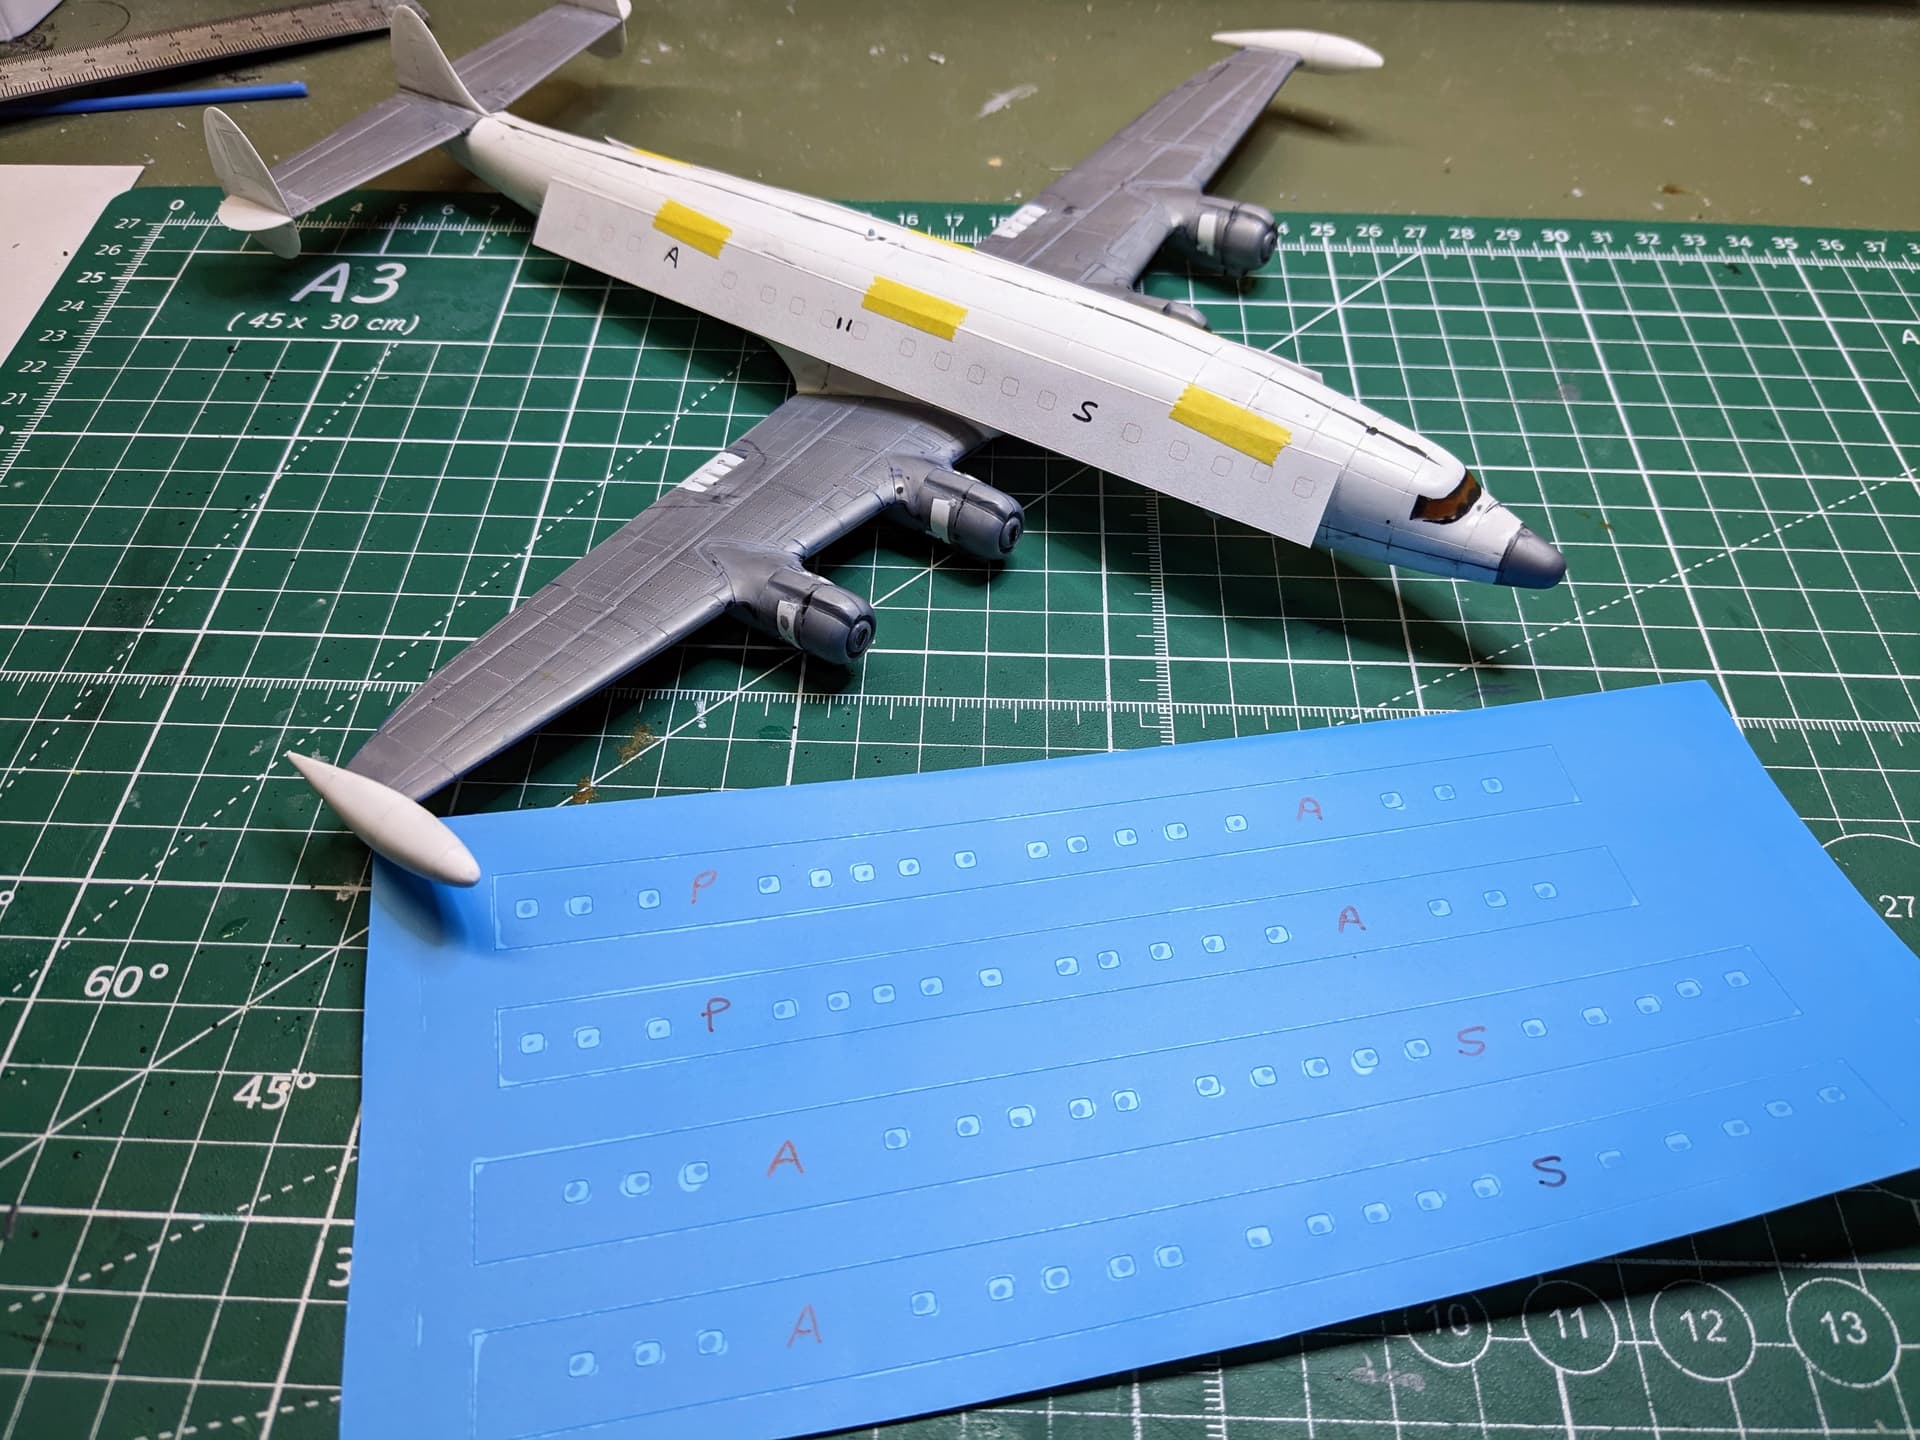
IN order to paint them, I created some paint masks in my vinyl cutter software (Silhouette Studio). I used the blueprint drawings I had to do this by importing them into the software and then creating the window masks cut lines over this.
But I wanted to make sure that I could get them positively located after the primer was applied and the existing windows would no longer be visible. So I spent some time printing out the masks on paper and adjusting them. This involved increasing the size of the surrounding rectangle so that it would line up with panel lines on the model.
But it also showed me that the drawings differed somewhat from the model. Deciding that I trusted the model locations and my scribed panel lines more than I did the drawings, I adjusted the positions of the windows until they lined up with the existing kit windows. Then I made the paint masks.
While researching the paint, I realized that there are some differences between the EC-121 and the Constellation airliner. I was using images from both when I did some of the detail work. So my model is actually sort of of a hodgepodge of both. But as per my rule with building (so I don’t get burned out) I elected to leave things as they were. The main item I believe is not present on the Constellations (and I may be wrong on this) are the wing vents I added. However, I think they will look cool anyway, so they are staying.
Anyway, that’s all for now. I am working on the fiddly bits now (undercarriage, etc) and will be developing the display base as well as getting the model primed and ready for painting.
BOLO! (As in “Be On the Look Out”, not General Robin Olds’ legendary ambush of North Vietnam’s MiG-21 force. ). I’m starting to gravitate back to the old “classic” kits. I’m finding them more enjoyable to build than today’s latest-greatest uber kits. Don’t get me wrong, I’m still buying the latest greatest uber kits and having fun with some of them, but I’m finding more enjoyment in the nostalgia of the older kits, as well. Recently, I found a brick and mortar hobby shop in Stephens City, Virginia. I bought Monogram’s ancient RB-66, their eight-wheel German armored car, and the old Revell Black Cat PBY. Can’t wait to start working on those.