MPC 1969 Dodge Charger R/T

You can’t make a silk purse out of a sow’s ear. - Scottish proverb

Although the Scotts are known for their pragmatism (I am at least part Scottish), I figured I’d give it a go with this kit:
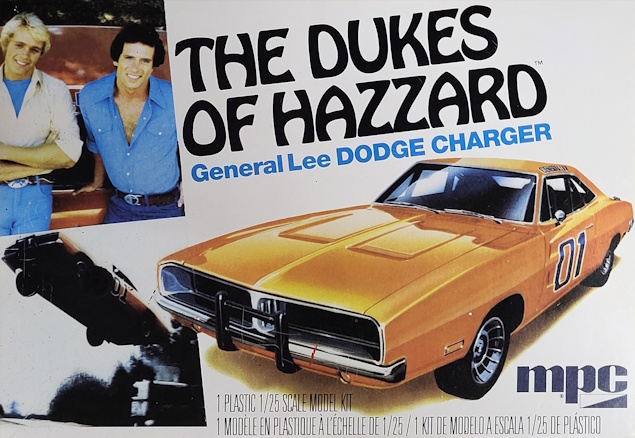
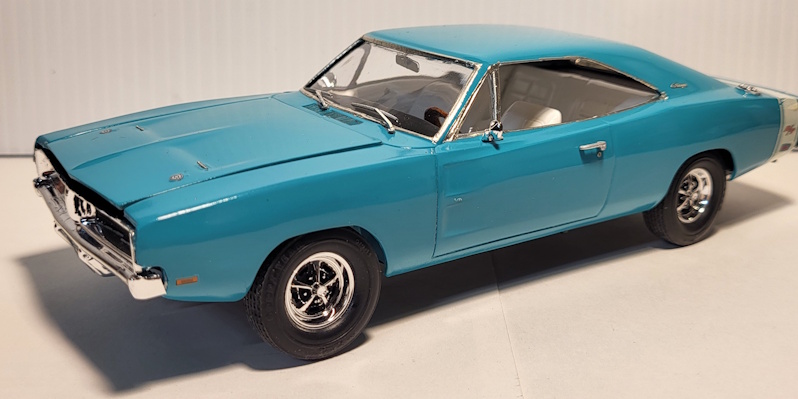
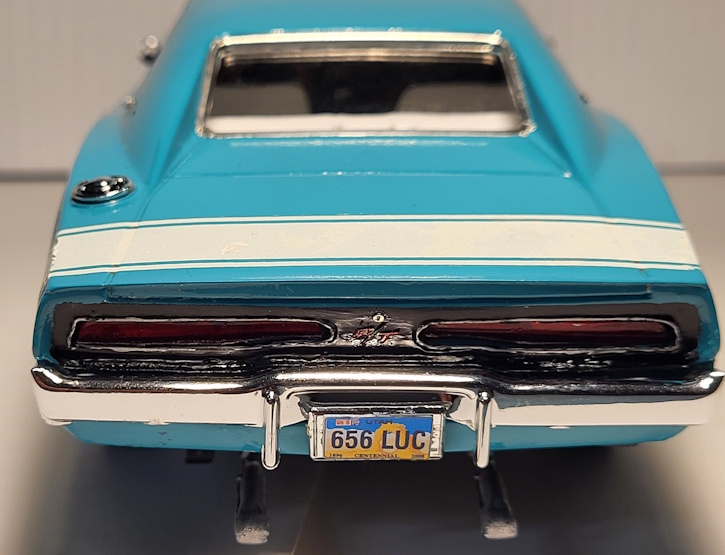
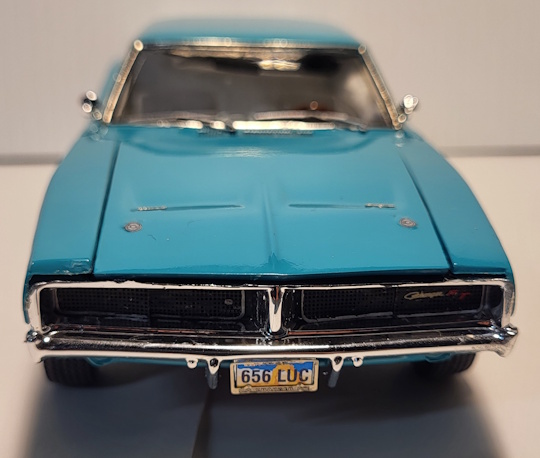
Just about everyone is familiar with this kit, and its reputation for inaccuracy & poor fit. Because of this, I decided that it would be a good “test bed” for some detailing that I’ve been wanting to try. The kit lived up to its reputation, but the few little details that I threw at it (and most of them stuck), seemed to improve it some. I originally purchased this kit for the decals, push bumper, & wheels for my General Lee build I did back in 2019 where I used the Revell Monogram Pro Modeler '69 Charger R/T. So, I had this thing lying around, so I built it stock. Color is Testors Model Master Turquoise. Here are some of the additions/details that I added: 3D printed door handles & wipers from Iceman Collections; wheels, tires & rear stripe from Revell Monogram Pro Modeler '69 Charger R/T; P/E details from The Model Car Garage: rear view mirror, “Charger” interior door panel emblems, steering wheel center cap, window cranks, “Hemi” door emblems, Charger C-pillar scripts, grill inserts, R/T rear emblem, R/T & Charger grill emblems, radiator cap, door & trunk locks, front license plate frame, & signal lights for hood; License plates from Revell Kenworth W900; marker light decals from Revell '69 Dodge Super Bee 440 Six Pack 2’n1; hood pin decals from Indycals.

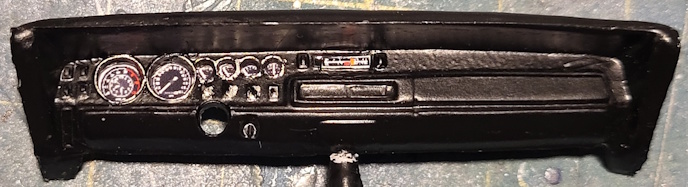
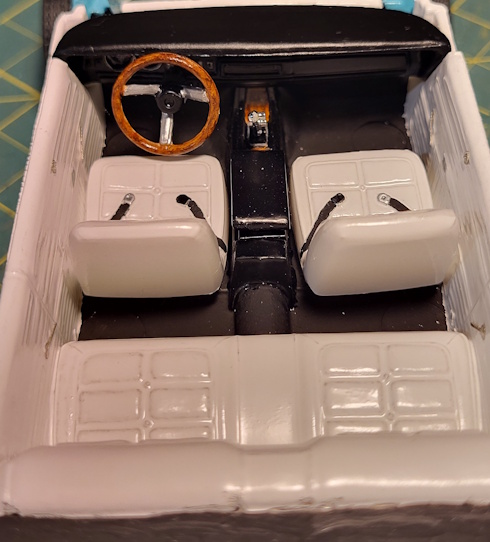
Interior - dash gauges from Best Model Car Parts. Whoever though a white interior was a good idea, anyway? :thinking: Probably didn’t have kids or pets.

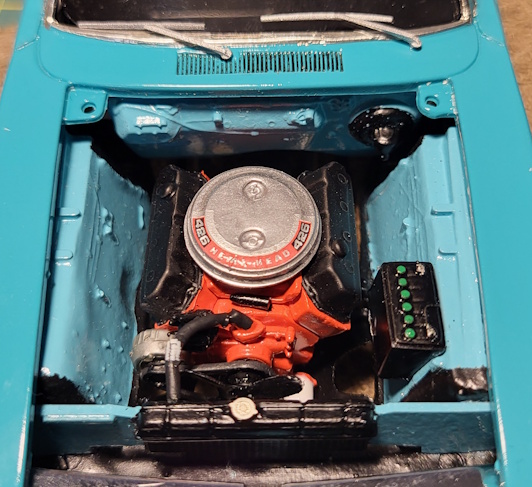
Engine bay - scratch built upper radiator hose & ignition coil, 427 Hemi Head air cleaner decal & radiator hose decal from Revell '67 Plymouth GTX.
Well, there it is. Is it a “silk purse”? No, I don’t think so, but considering what I started with, I’m pleased with the results.

Jim

12 Likes

The best outcome to any project. :+1:

2 Likes

Thanks, Ryan. You got that right!

Jim

1 Like

Fantastic results Jim! You definitely threw everything except the kitchen sink into the build, and it shows

1 Like

Thanks, Jeff. It’s not a “Contest Car” by any stretch of the imagination, but I’m happy with it.

Oh, the sink’s in the trunk. :laughing:

Jim

Wow great work!

Reading your Text and seeing your build I would consider you as an, at least advanced modeler - for me personally rather a professional :slight_smile:

I am new to the hobby and after my tank build I was thinking on building a car next to test out the different interests I have and to see what kind of scale modeling I like.

But after seeing your build I have one question and I did notice that with, I would say with any car build I have seen:
Why is no one adding detail to the seats? I have never seen anyone trying to make the seats look like “real” seat. There is always so much detail in everything but the seats are always looking like - plastic.
And please don’t get my question wrong, that’s not a critique, it is just something I noticed and maybe as a scale modeler who seems to build for a long time can enlighten me.

1 Like

Thanks, Tobi. I appreciate the comments & the compliment.

I wouldn’t go so far to say that I’m an advanced modeler (unless you mean age :grin:), and defiantly not a professional, but I do the best that I can with the talent & patience that I have. I do some detailing so that it looks good on the shelf, and so that I don’t get too wrapped up in the minutia of a build that keeps me from moving on to other builds. I have more builds coming, so stay tuned!

As for the seats: there are products out on the market that will make your seats look like cloth. The most common one is flocking, and it comes in a variety of colors. Some people use it for seats & carpets, but I don’t. To me, it just doesn’t look realistic in 1/25 or 1/24 scale, but that’s just me. Plenty of builders at the contests that I go to here in the Syracuse, NY, are use it. They’ll also wire the engine, open the doors & trunk, add lines, all sorts of stuff. Also, you have to remember that many seats in cars back in the 1960s & 1970s were plastic, or at least vinyl. Cloth seats were probably an option on higher-end cars, but I’m not certain. I try to replicate cloth or vinyl using paint: flat for cloth & semi-gloss for vinyl. Some people do it differently, but that’s how I do it. Speaking of flocking, I once watched a guy flock the floor pan on the interior of a race car! Completely wrong, but hey, it’s his build.

One thing you’re going to have to consider is the age of automotive kits. Many AMT & MPC kits are pushing 60 years old, and Round2 just keeps reissuing them. Most are ok, some are atrocious, so it can be hit or miss. Many of the European & Japanese kits are “newer”, but some of them can be poor too, but nothing compared to an MPC kit. At least they’ll fit!

Remember, this is a hobby, and it’s supposed to be fun! Armor & aircraft modeling has a huge aftermarket when compared to automotive modeling. Don’t get me wrong, we have one, it’s just not as extensive. Build what you like, build how you like, and try to improve. Good luck & have fun.

Jim

2 Likes