I guess this is a transfer case (arrow)? Something will lead out from under the top deck?
Hello KoSprueone
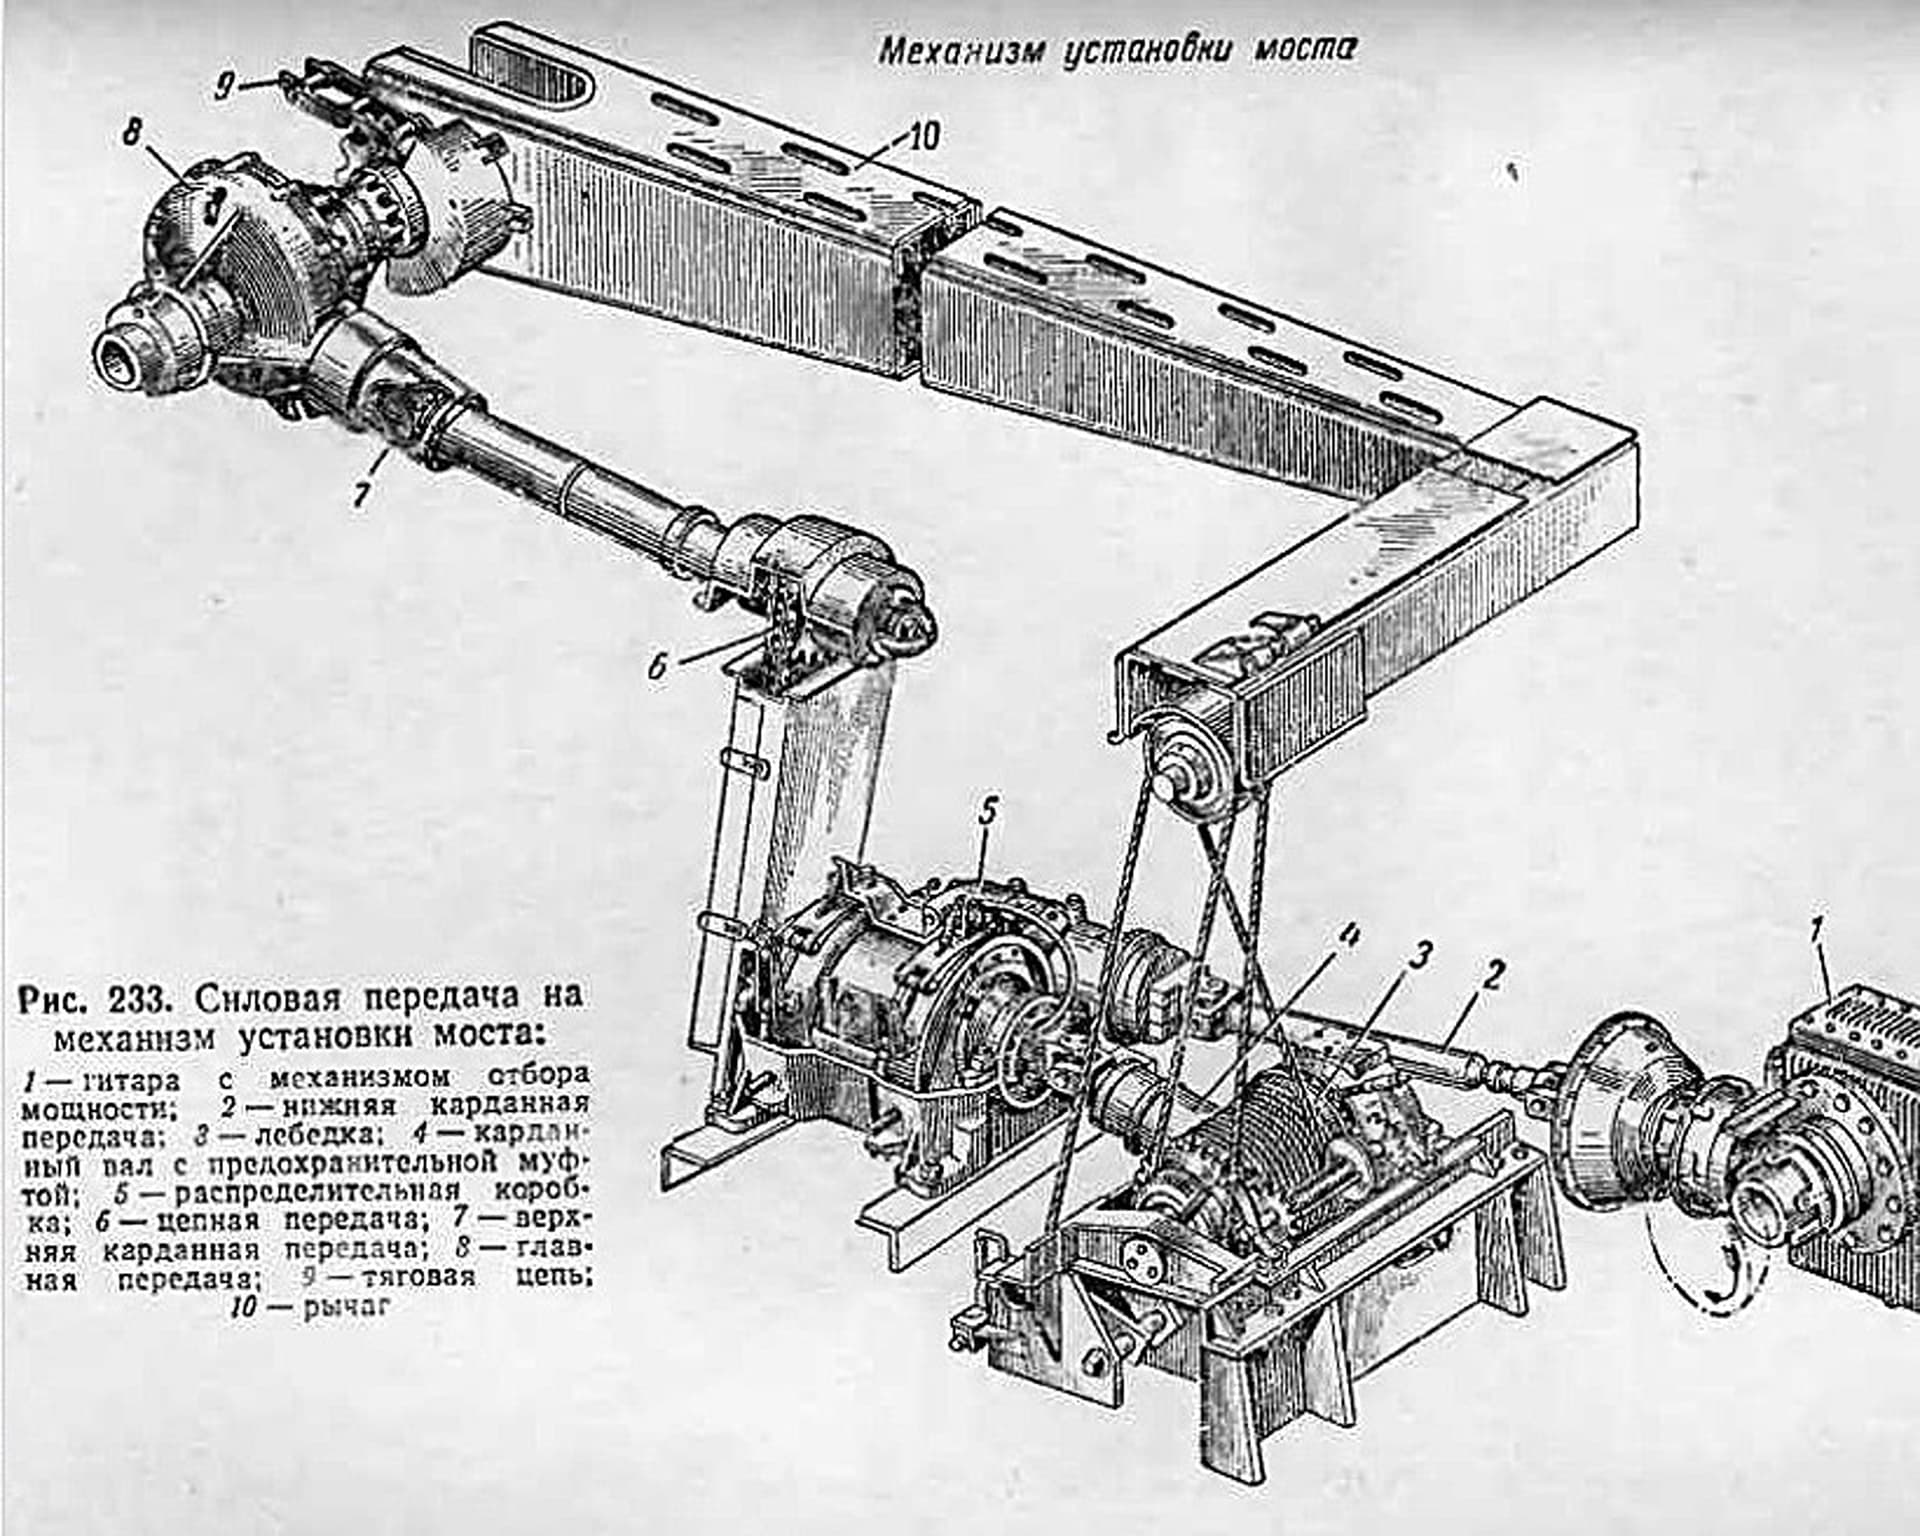
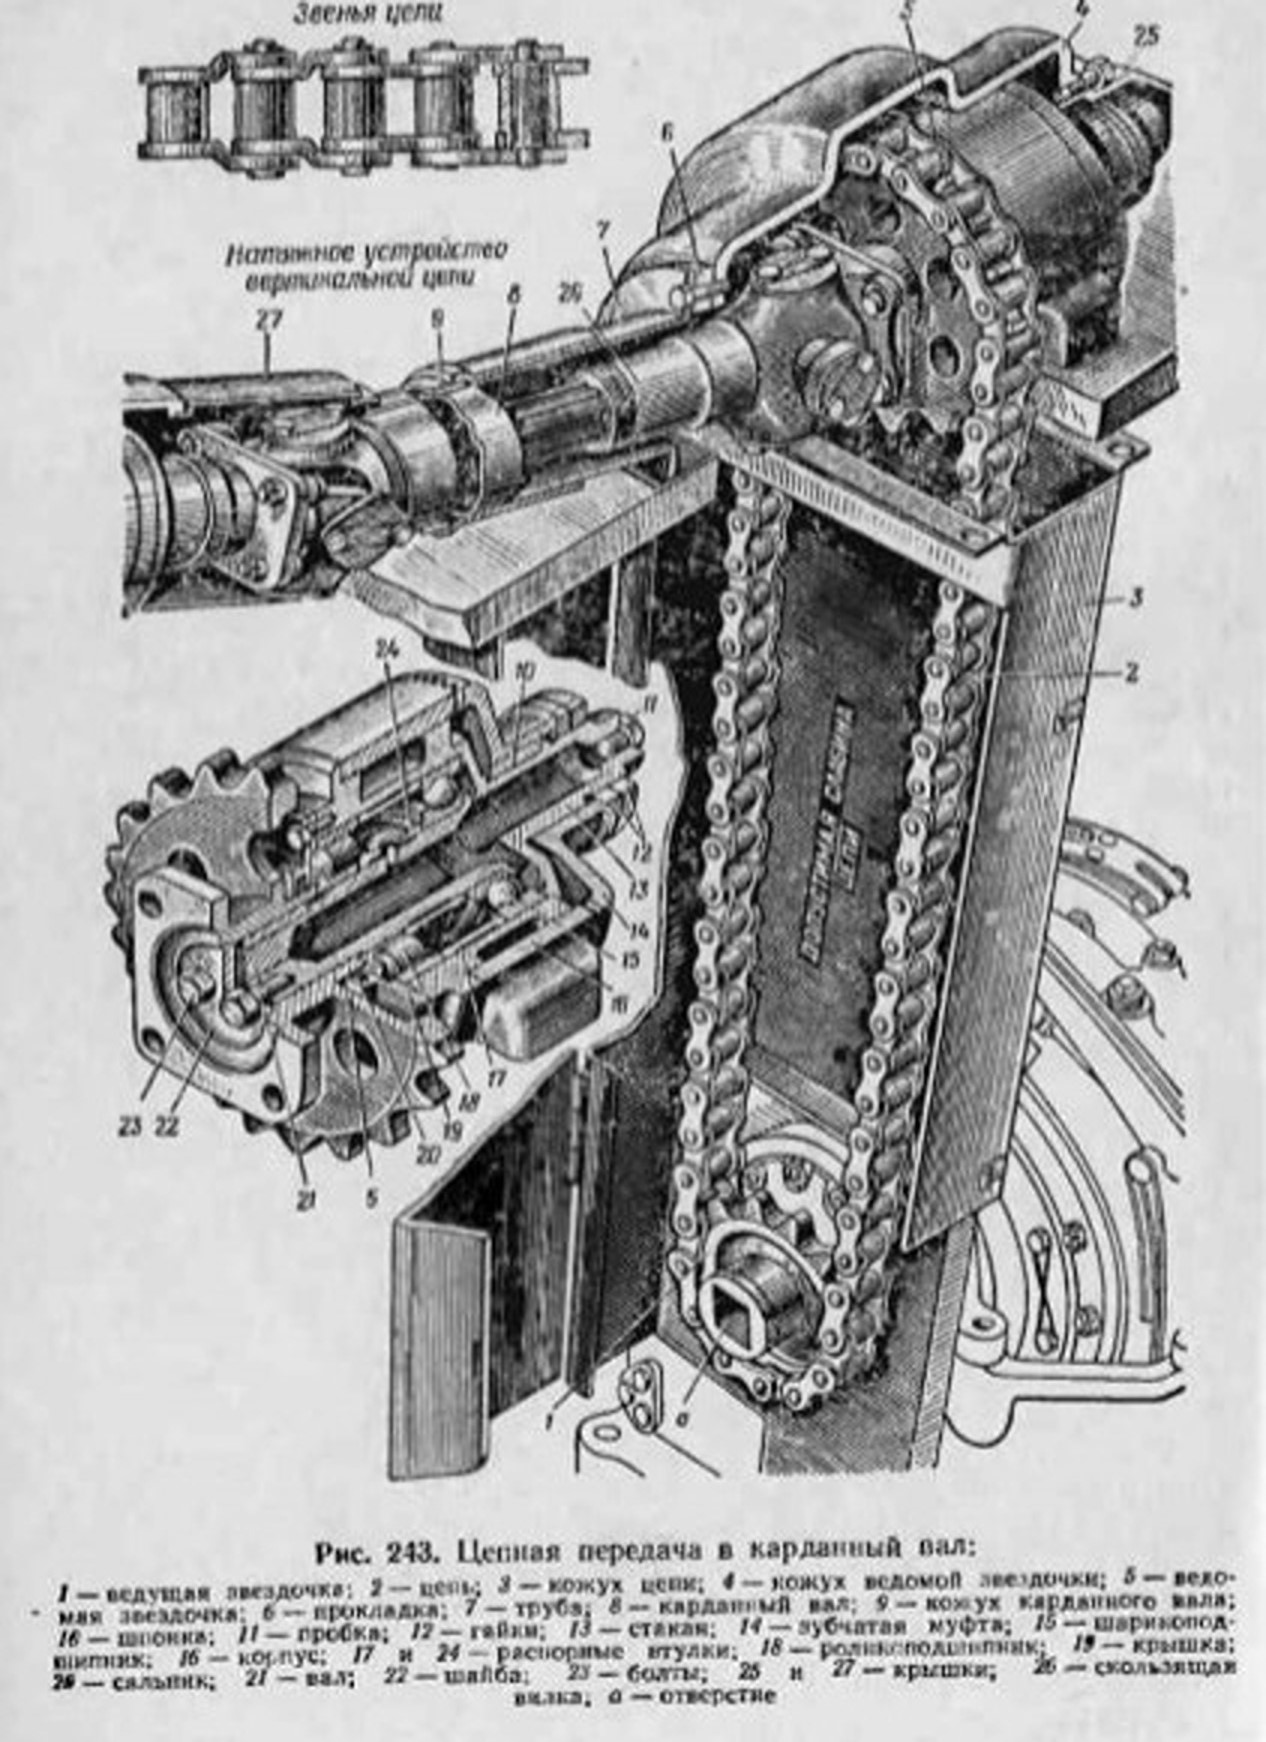
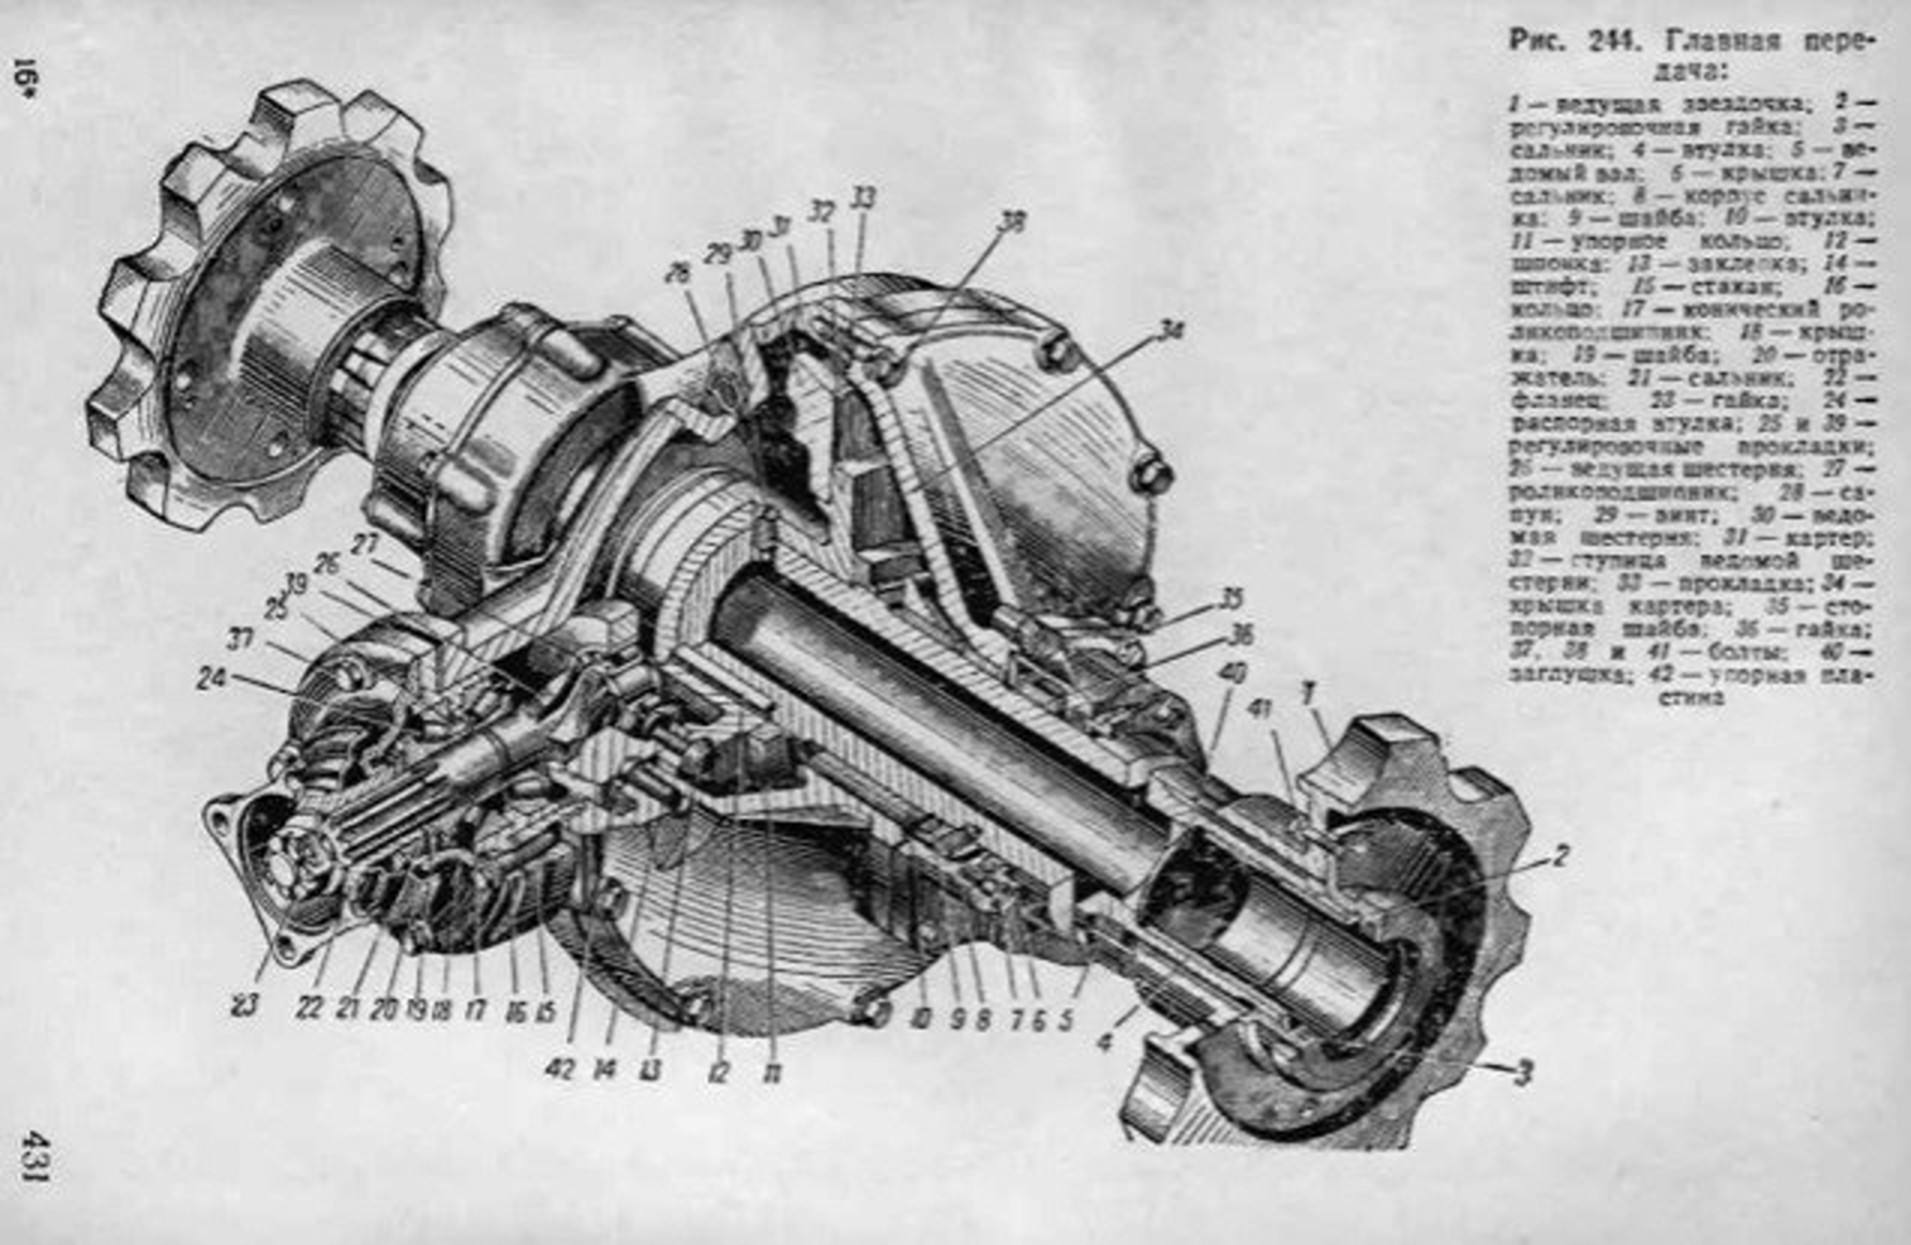
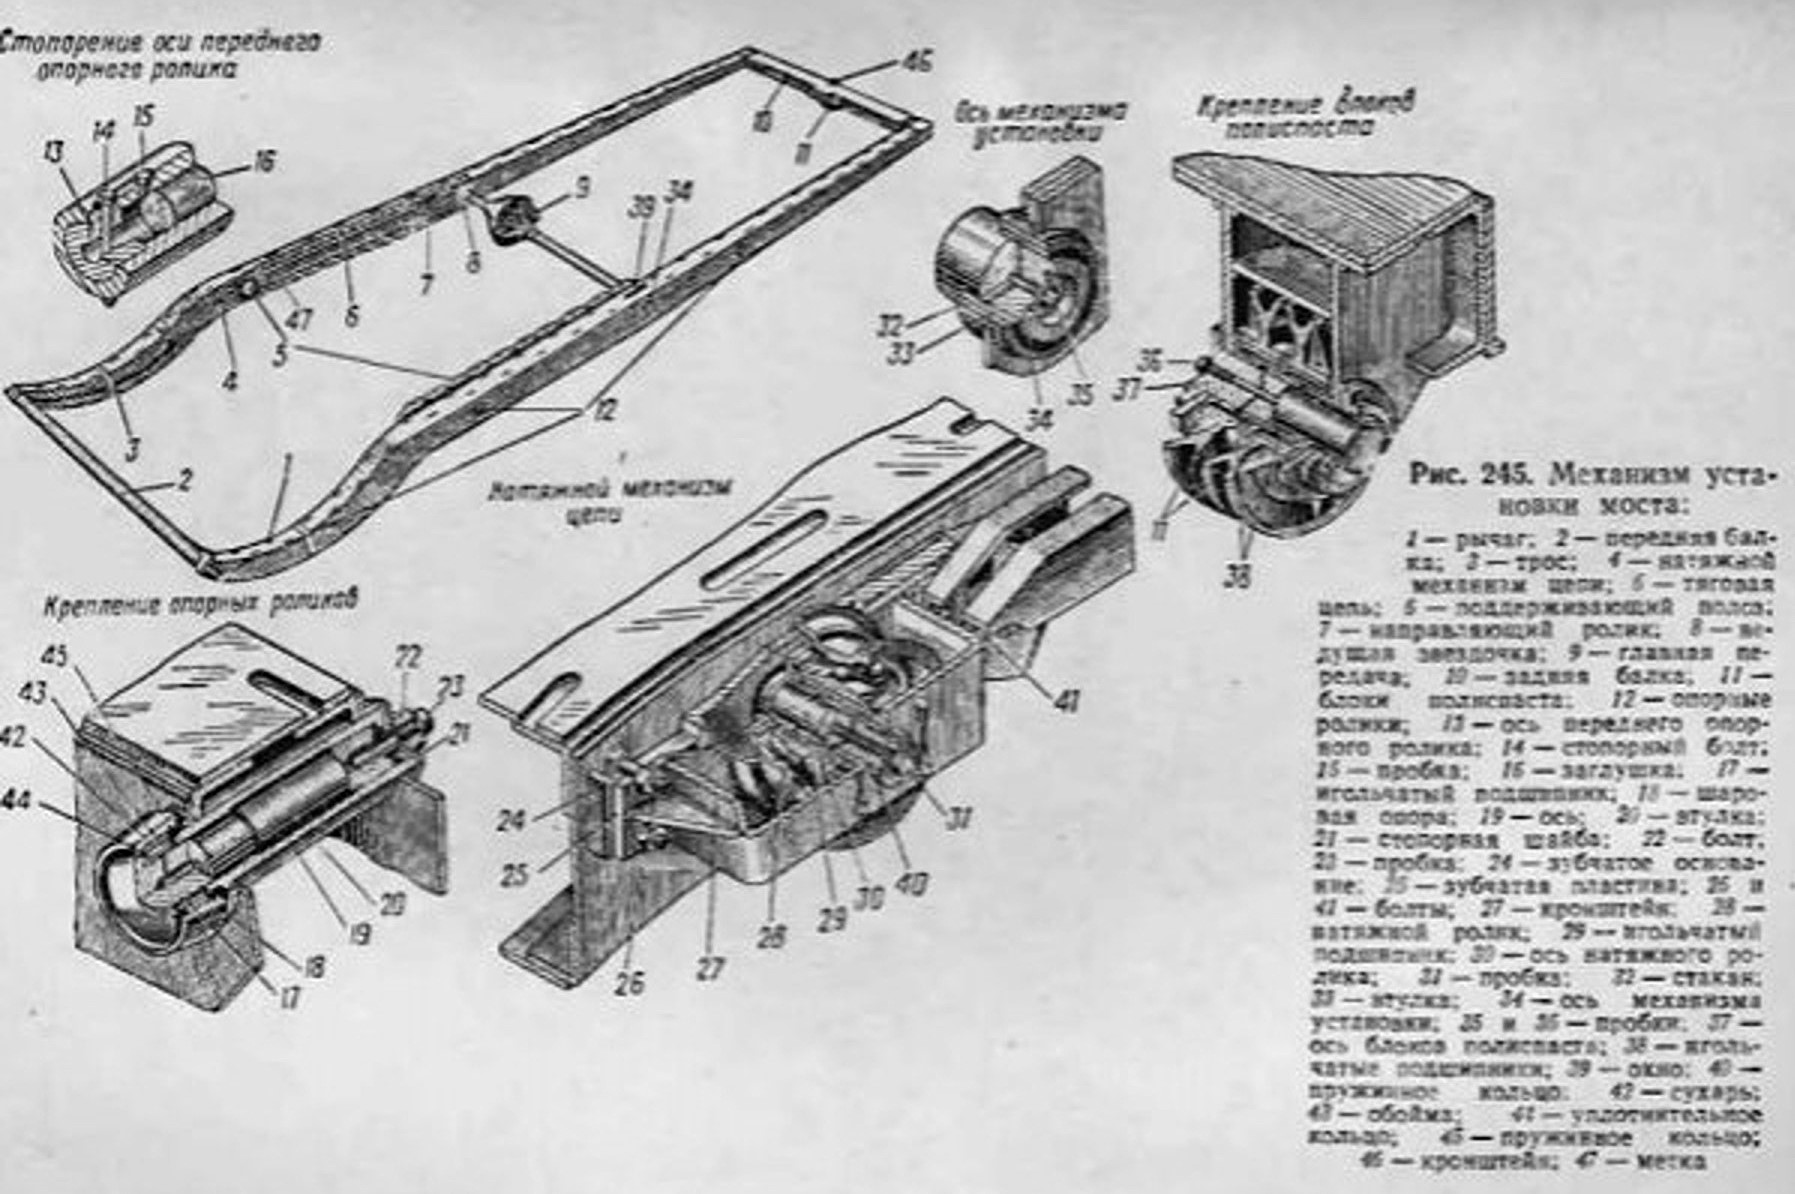
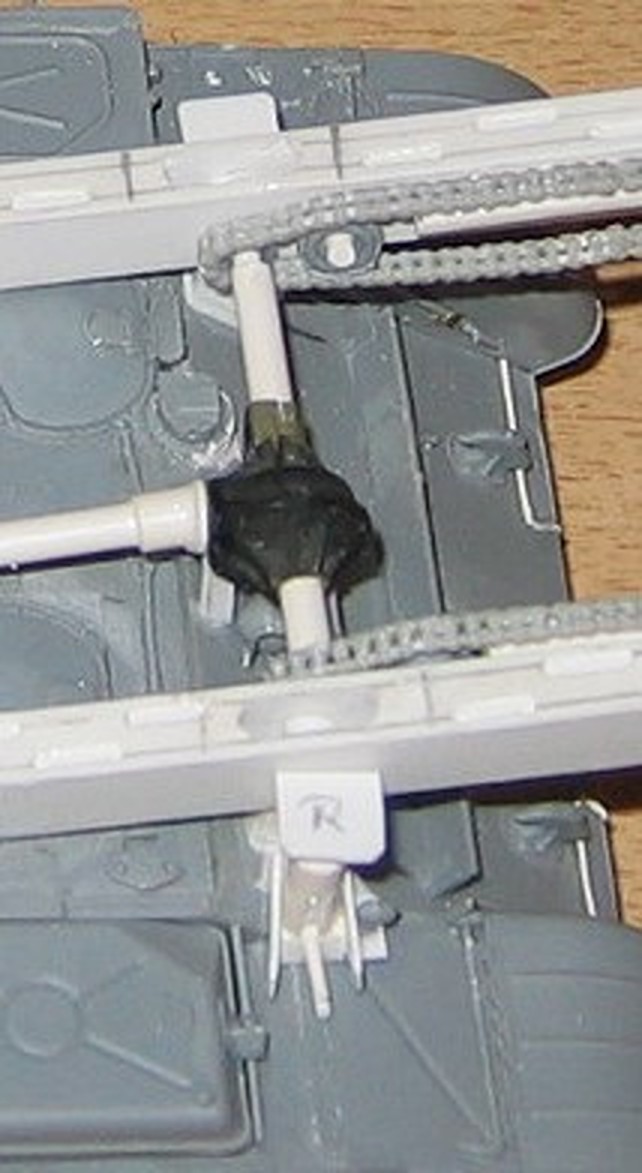
It’s great if the build report helps you. That’s what the forum is for, too—to discuss problems. To answer your question: The drive is transmitted from the tank hull via a chain drive, similar to an enlarged bicycle chain, to the gear box you marked. This isn’t a differential; the compensation between the right and left chains takes place in the axle drive, like in a truck. If the drive fails due to engine failure, this chain drive can be operated manually, using a crank inside the tank, to accommodate the bridge. The effort required will have been enormous, especially when the crew would have been taking turns. That was the basic principle of the Russian designers back then; there was always an emergency solution. Here are some more pictures to answer your question and help you understand it better.
I hope I was able to answer your question.
the complete drive
3 Likes
Hallo Joachim, wie hast Du die Kette hergestellt?
1 Like
Hans-Hermann, die Ketten sind bei diesen Modellen ein großes Probem. Ich habe keine geeigneten Ketten zu kaufen bekommen. Hatte schon geschrieben, das ich hier Kompromisse eingehen muss. Die Ketten entstanden aus dem Bausatz von Trumpeter BTM-3. Das war die einzige Alternative, die ich hatte. Auch wenn die Ketten zu klein sind, ich werde daran nicht mehr ändern. Es ist schade.
1 Like
Yes, very helpful. Thank you.
1 Like
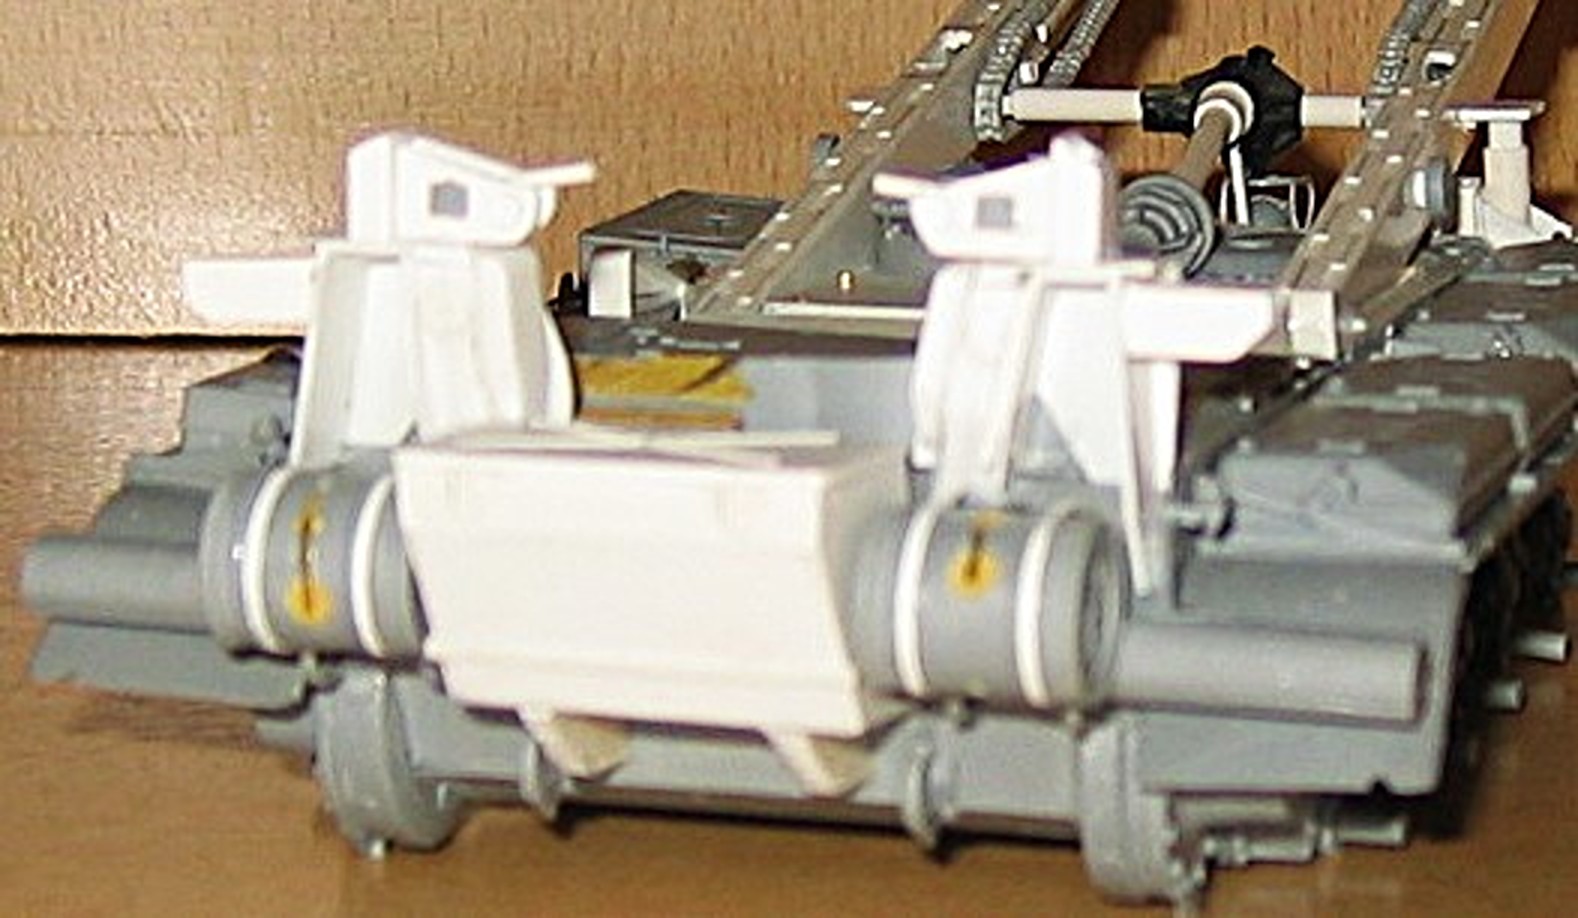
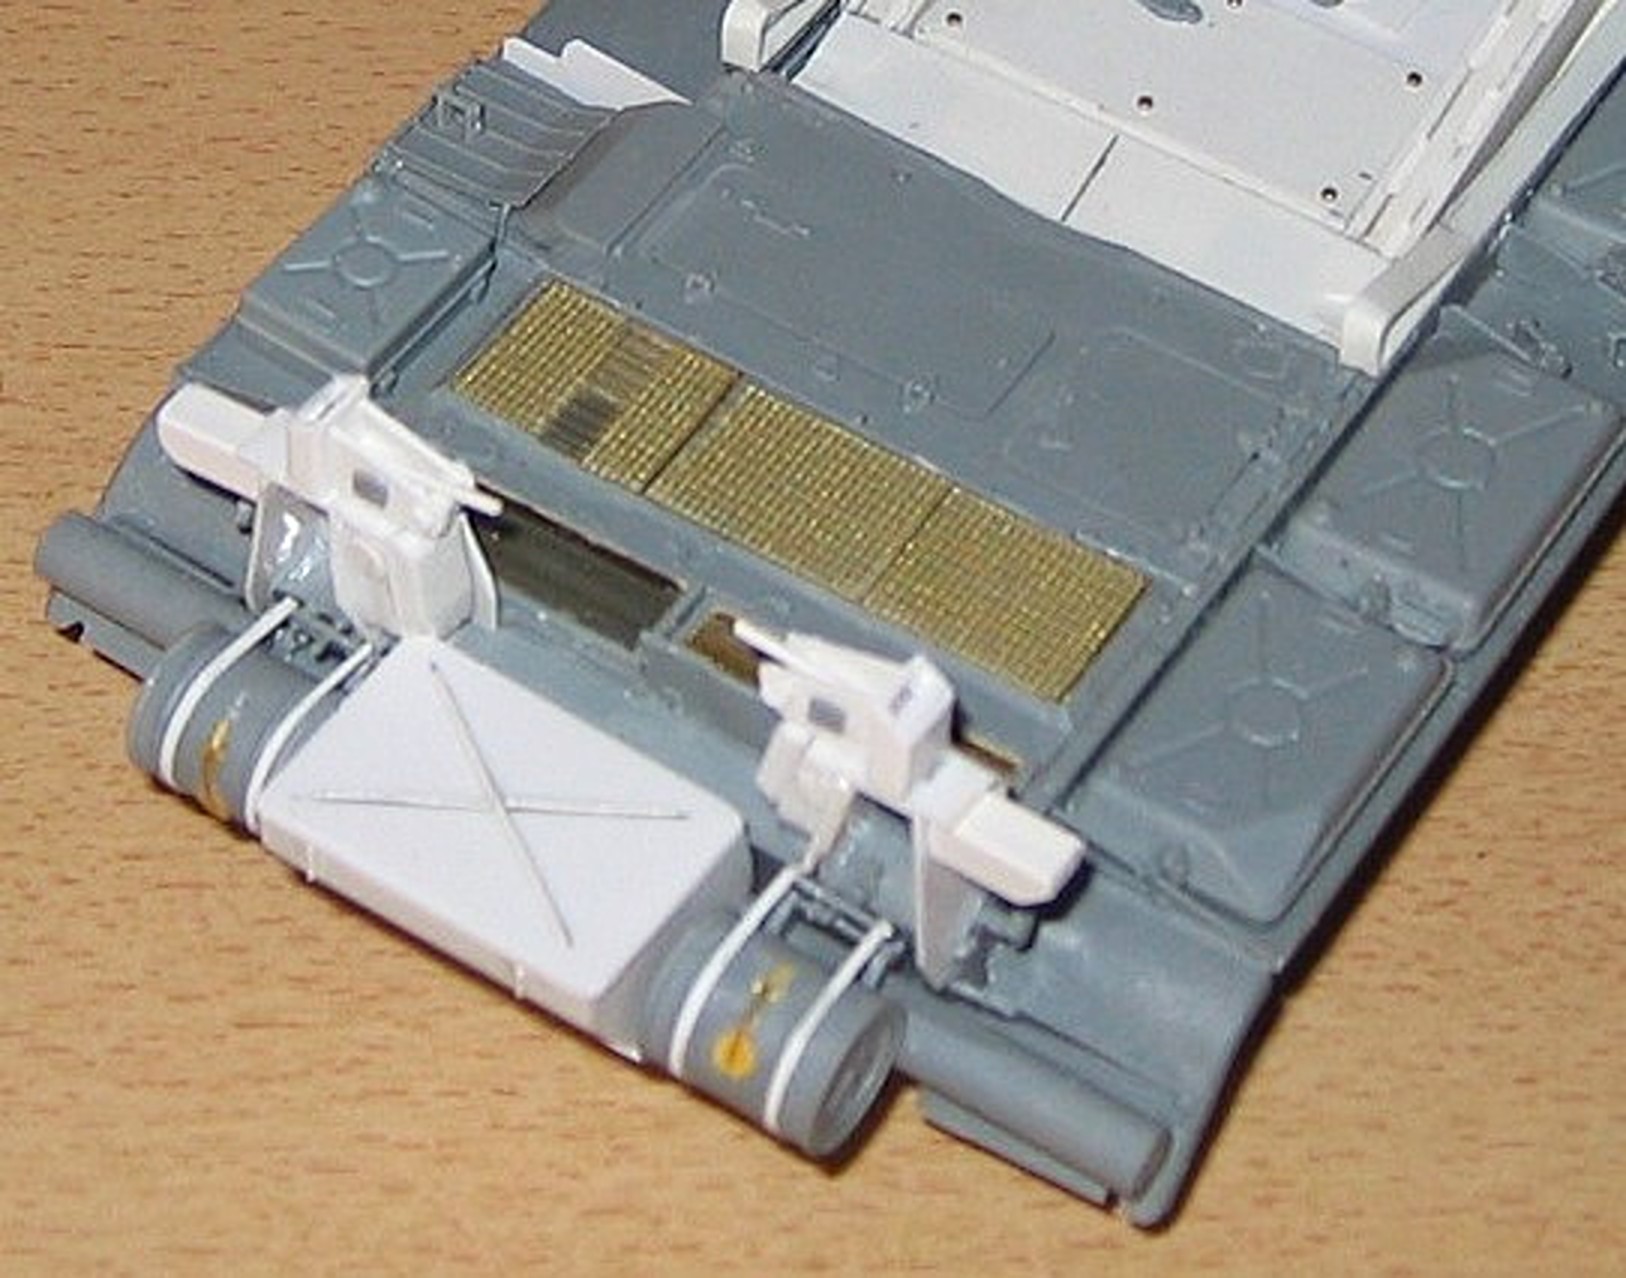
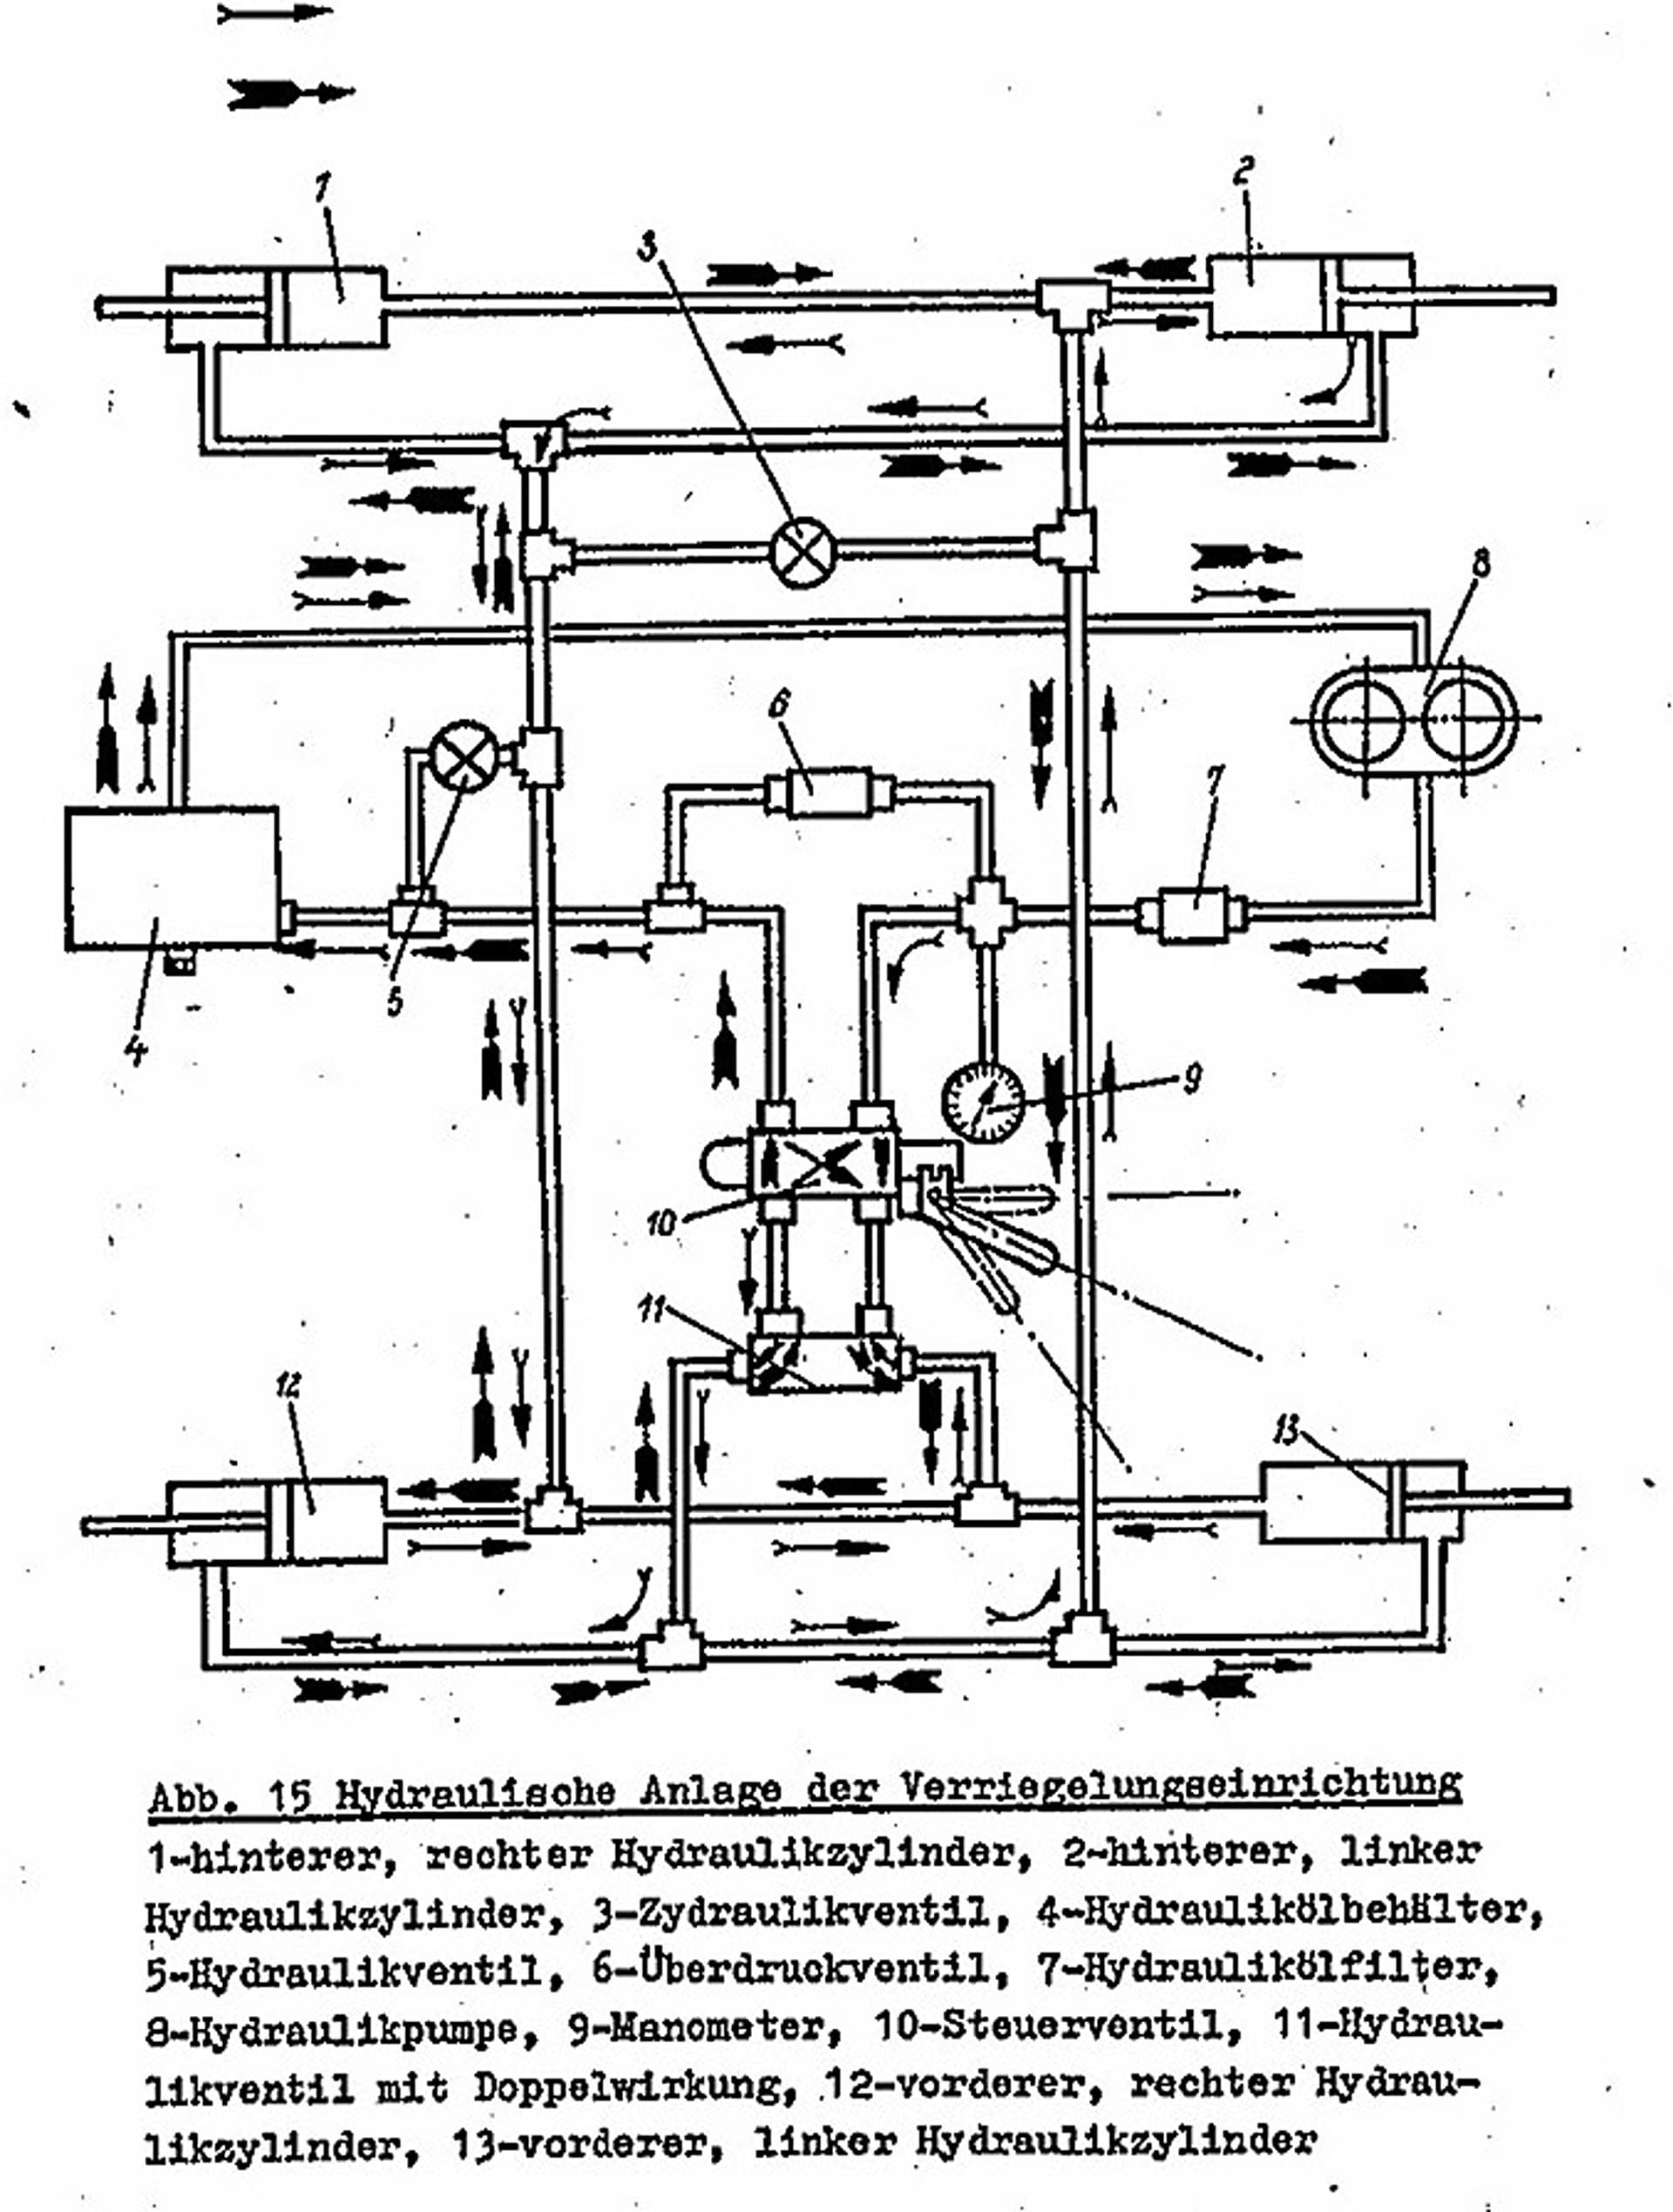
The next construction step is to attach the support blocks for the bridge. This looks very simple at first, but it is not. The support blocks also serve to lock the bridge in place when the tank is moving. Four blocks are installed, two at the rear and two at the front. The locking, or holding of the bridge, is hydraulic. The two front blocks hold the bridge vertically and the two rear blocks hold it horizontally. This device is operated by the driver. If the hydraulic system fails, it can also be operated manually. So, this, along with the tanks and the storage box, was attached to the rear. The storage box serves as a counterweight when the bridge is extended. For technically interested model builders, I will show the principle here so that you can better understand how the bridge is locked. But first, the pictures of the model.
4 Likes
The track rollers and tracks of the chassis have been installed. The cable winch for the bridge’s outrigger arm was initially installed in the armored hull without a cable. The cable will be installed after the paint job. The cable winch is identical to the ZIL-157 truck. Here are some more pictures of the construction.
5 Likes
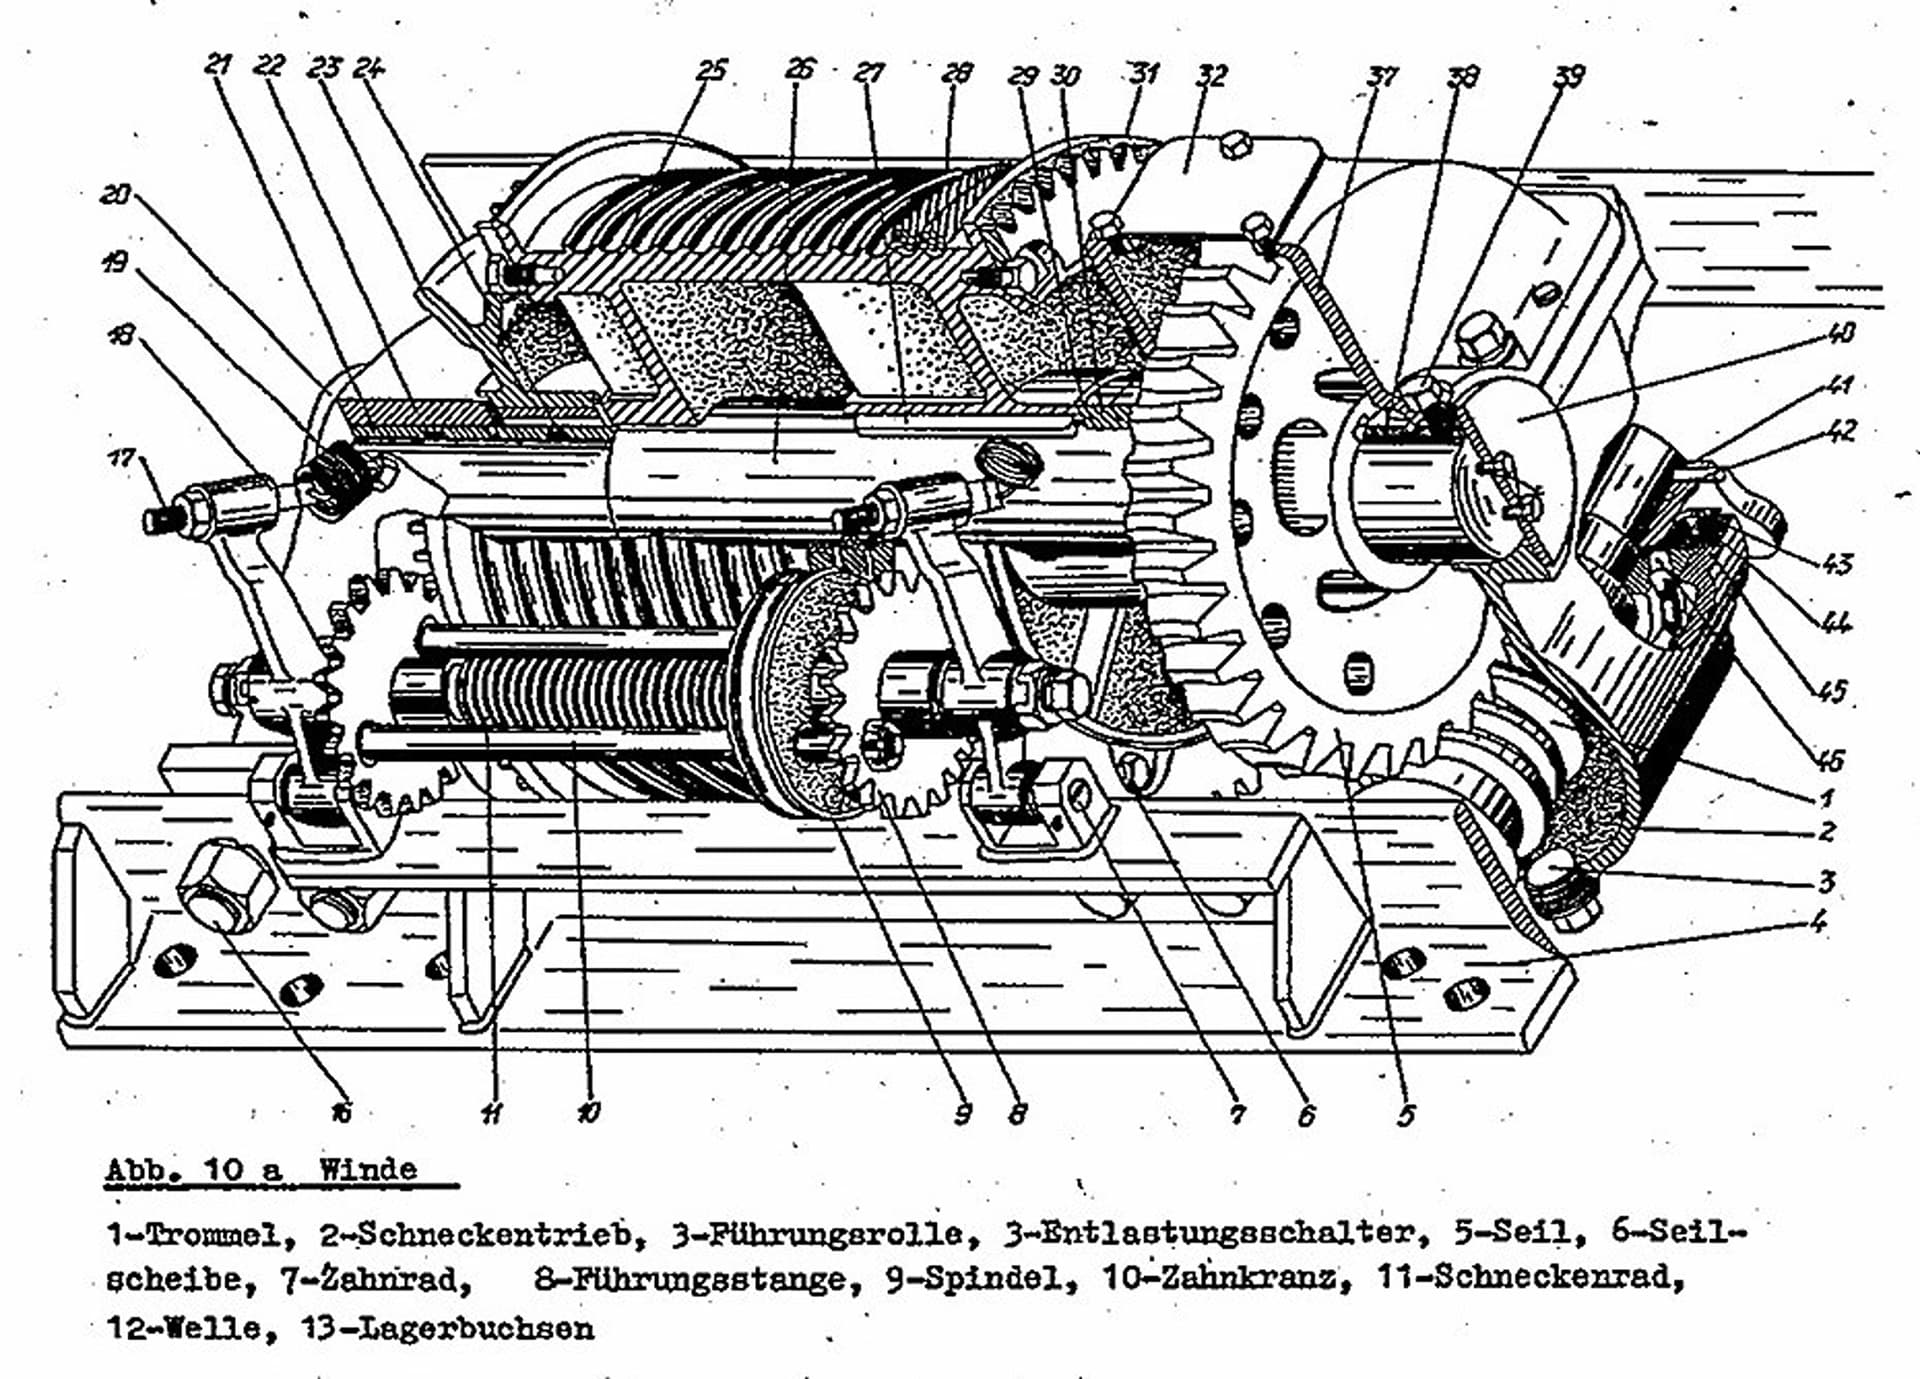
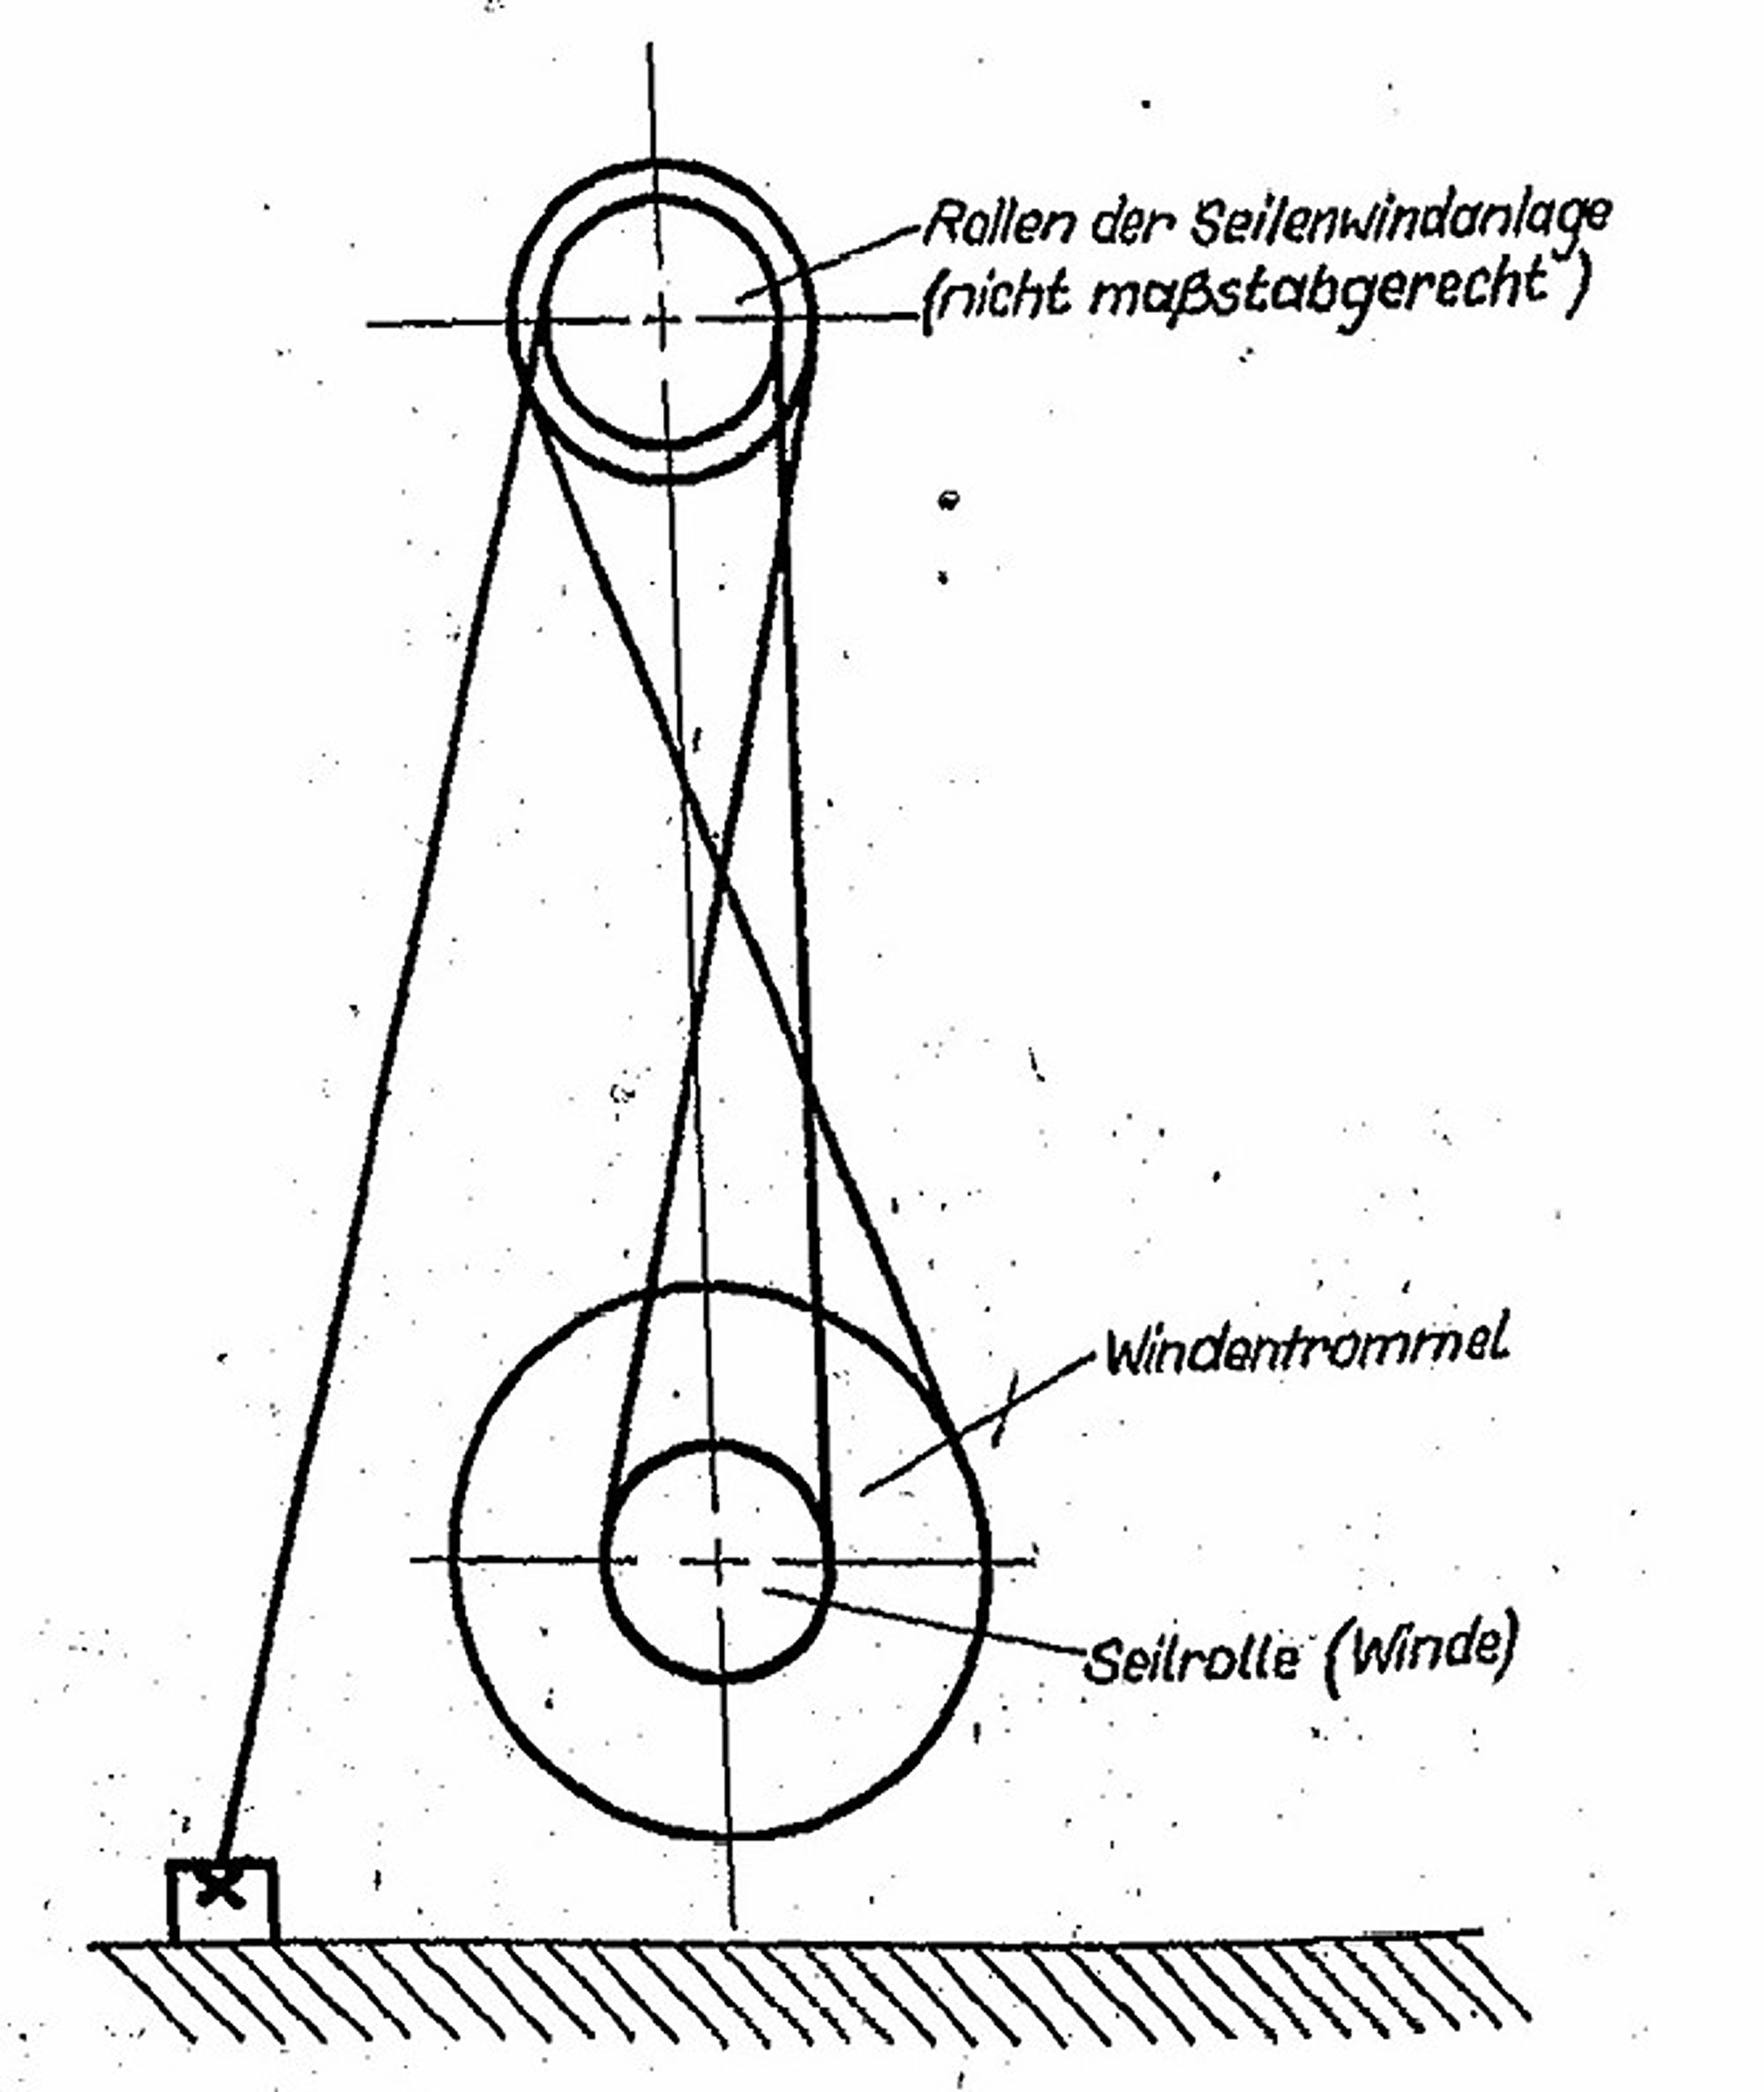
Here’s some more information about the design of the cable winch and the cable guide. As already mentioned, the cable winch corresponds to the one on the ZIL-157 truck. The cable winch is turned on the model using a small screwdriver on the right side. It is inserted through the openings of a roller and through the hull. The hole in the right side of the hull is not visible to the viewer. This makes it possible to demonstrate the lowering and lifting of the bridge. I will show you how this is done with pictures. Here are the cable winch and the cable guide in pictures.
3 Likes
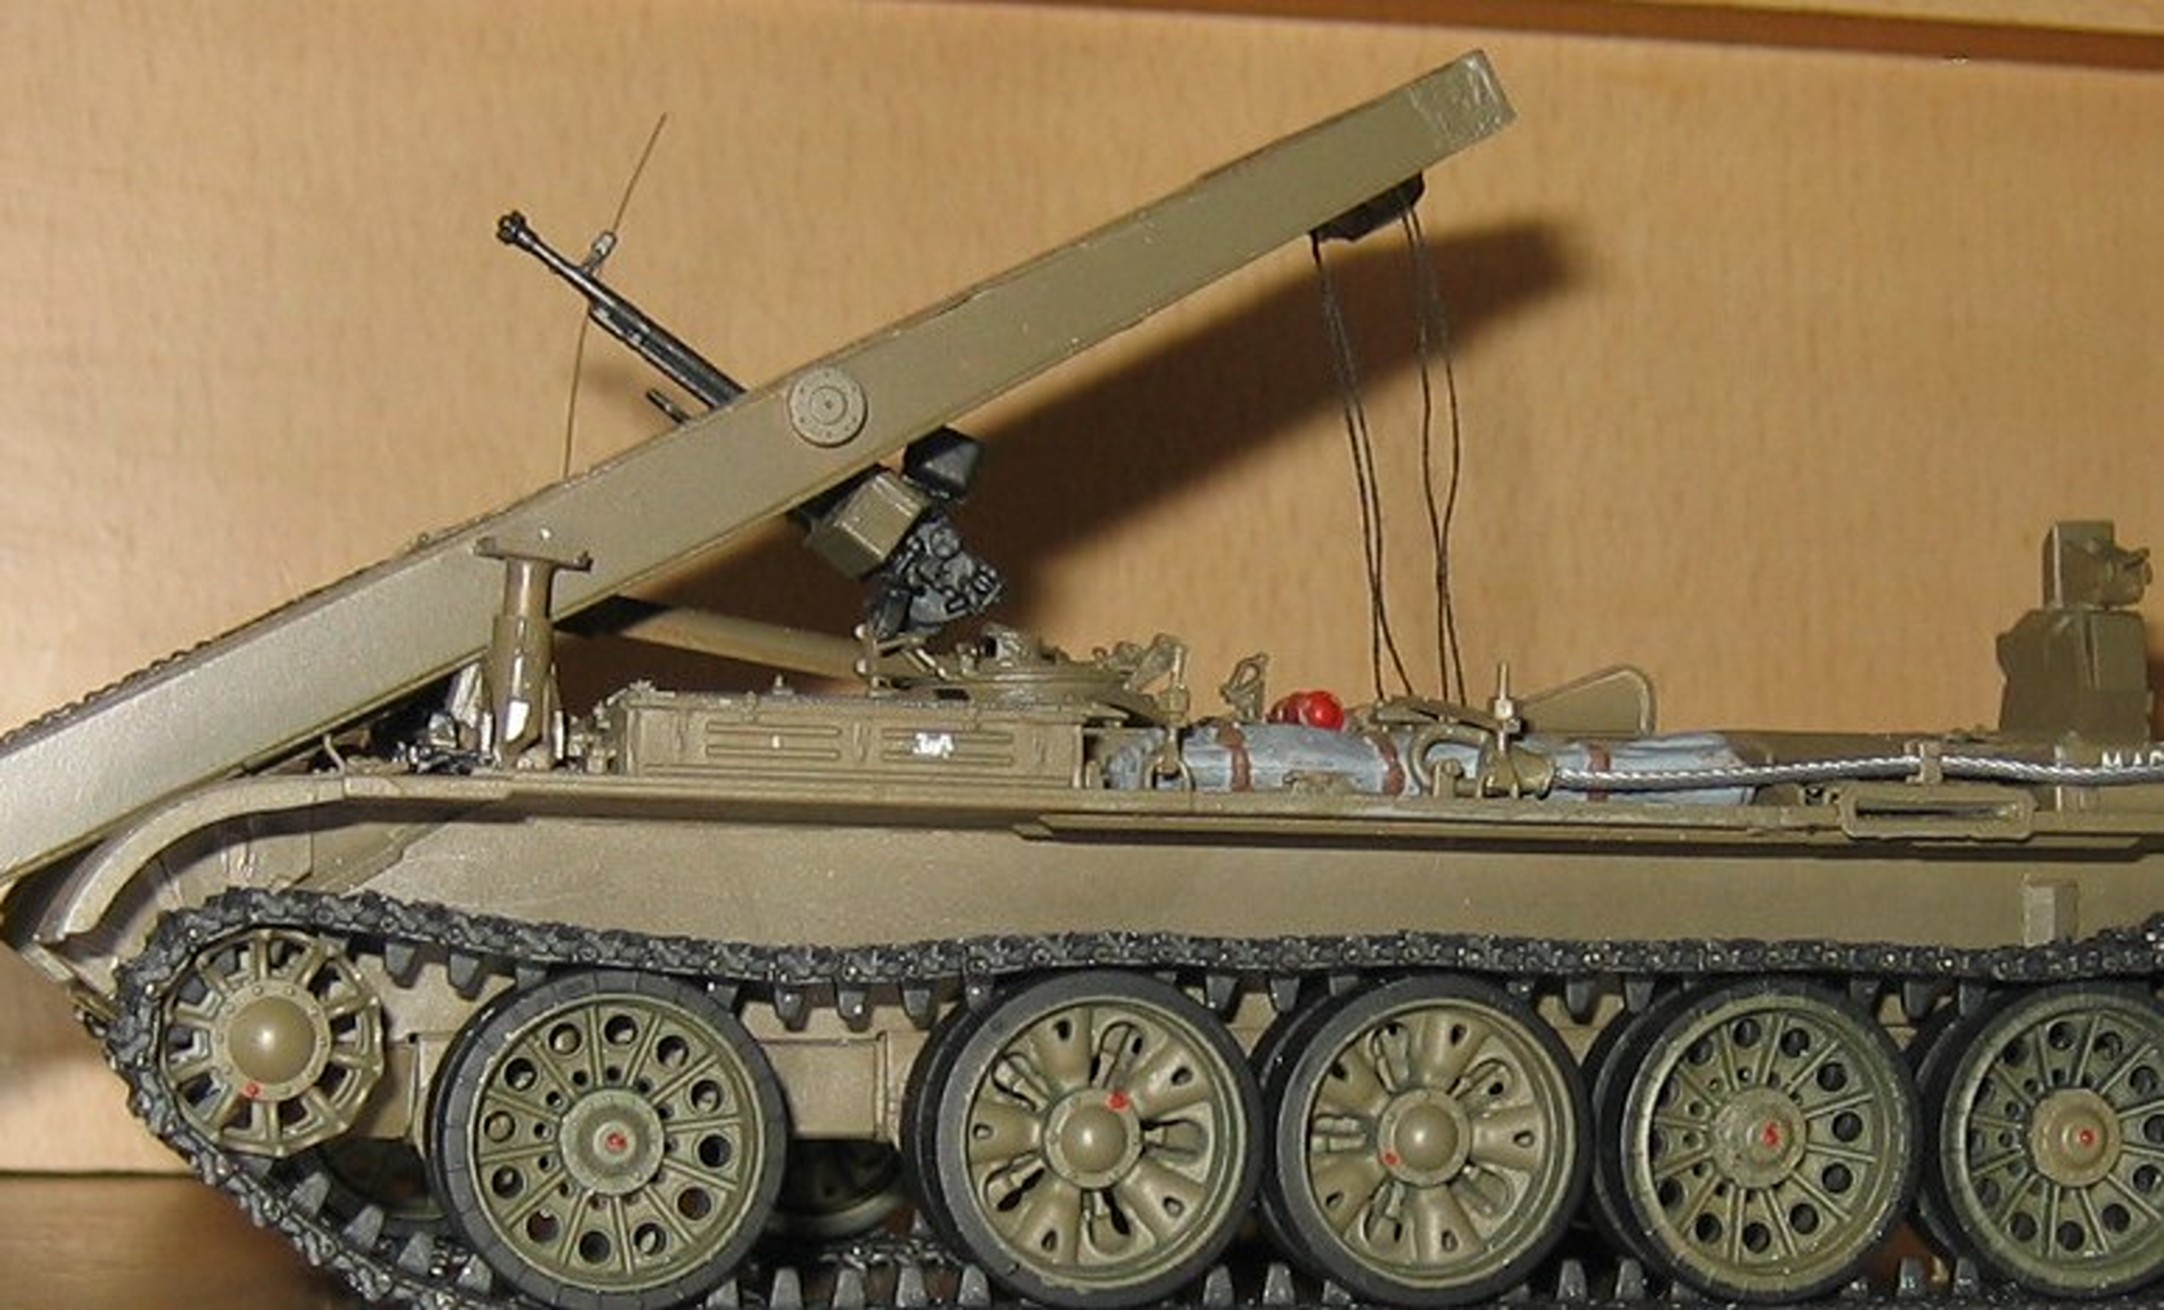
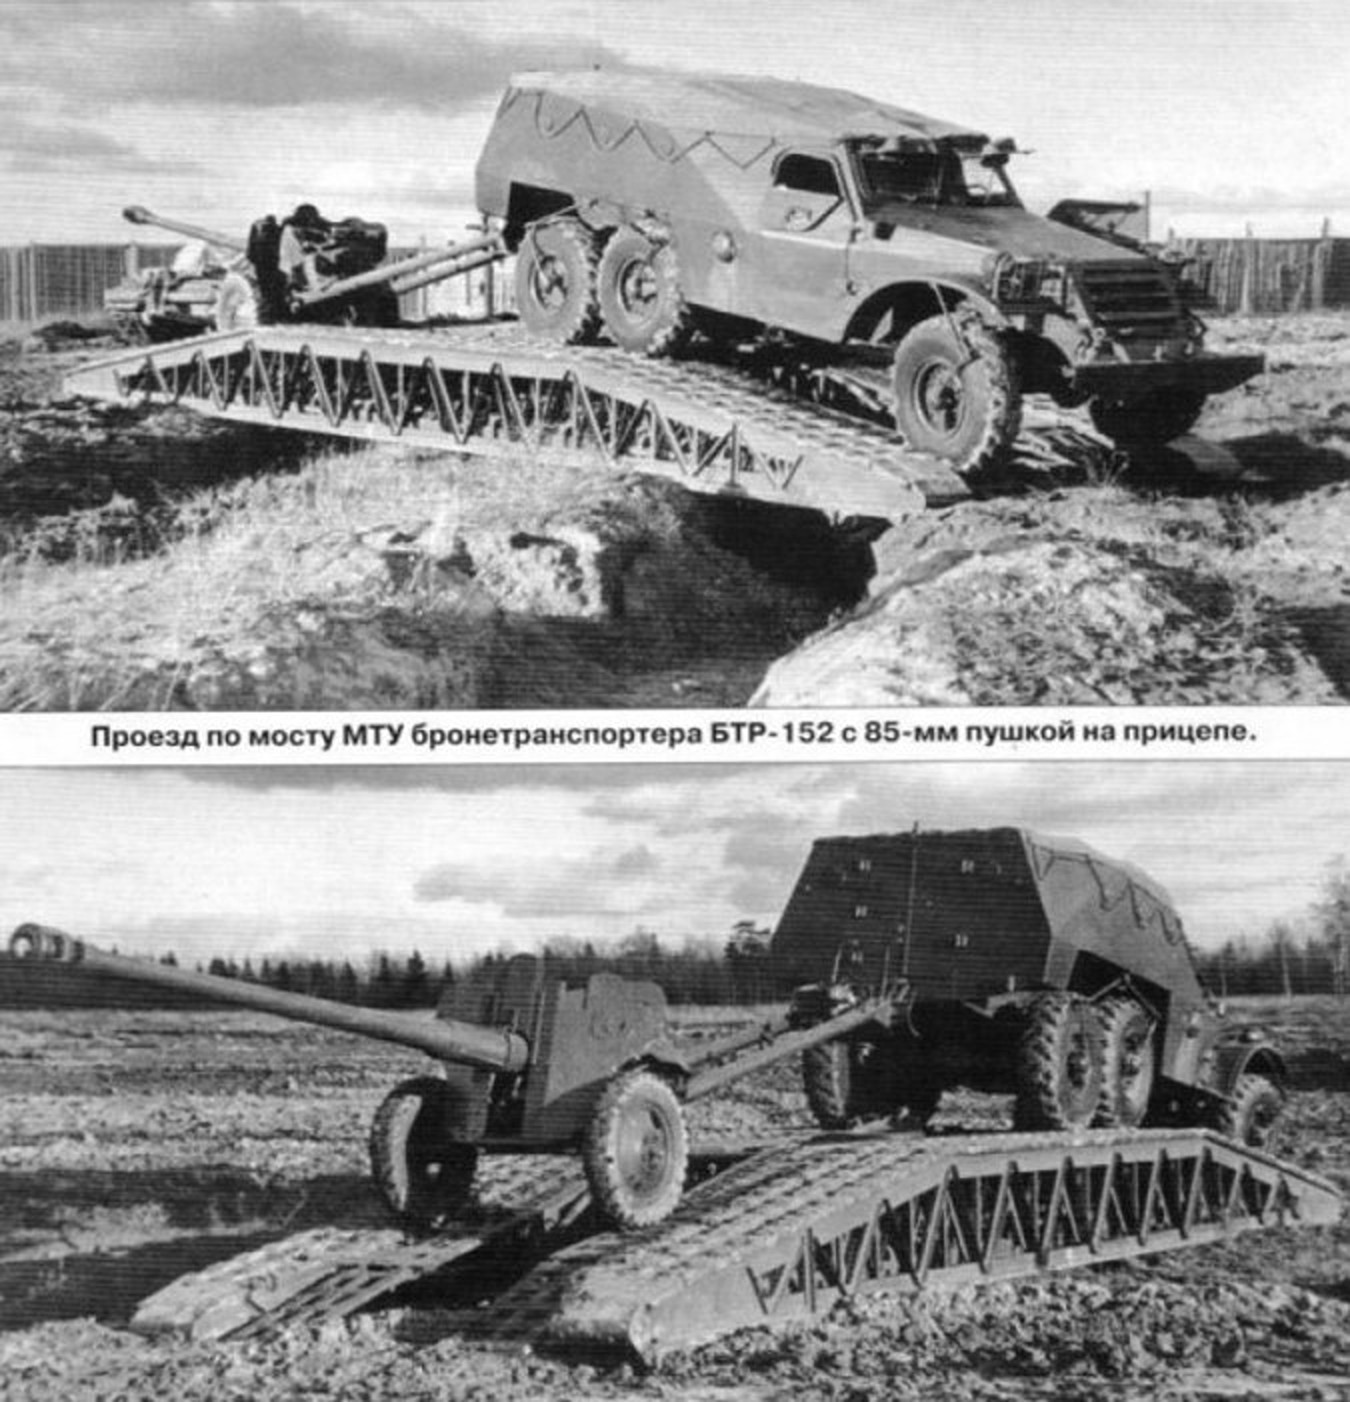
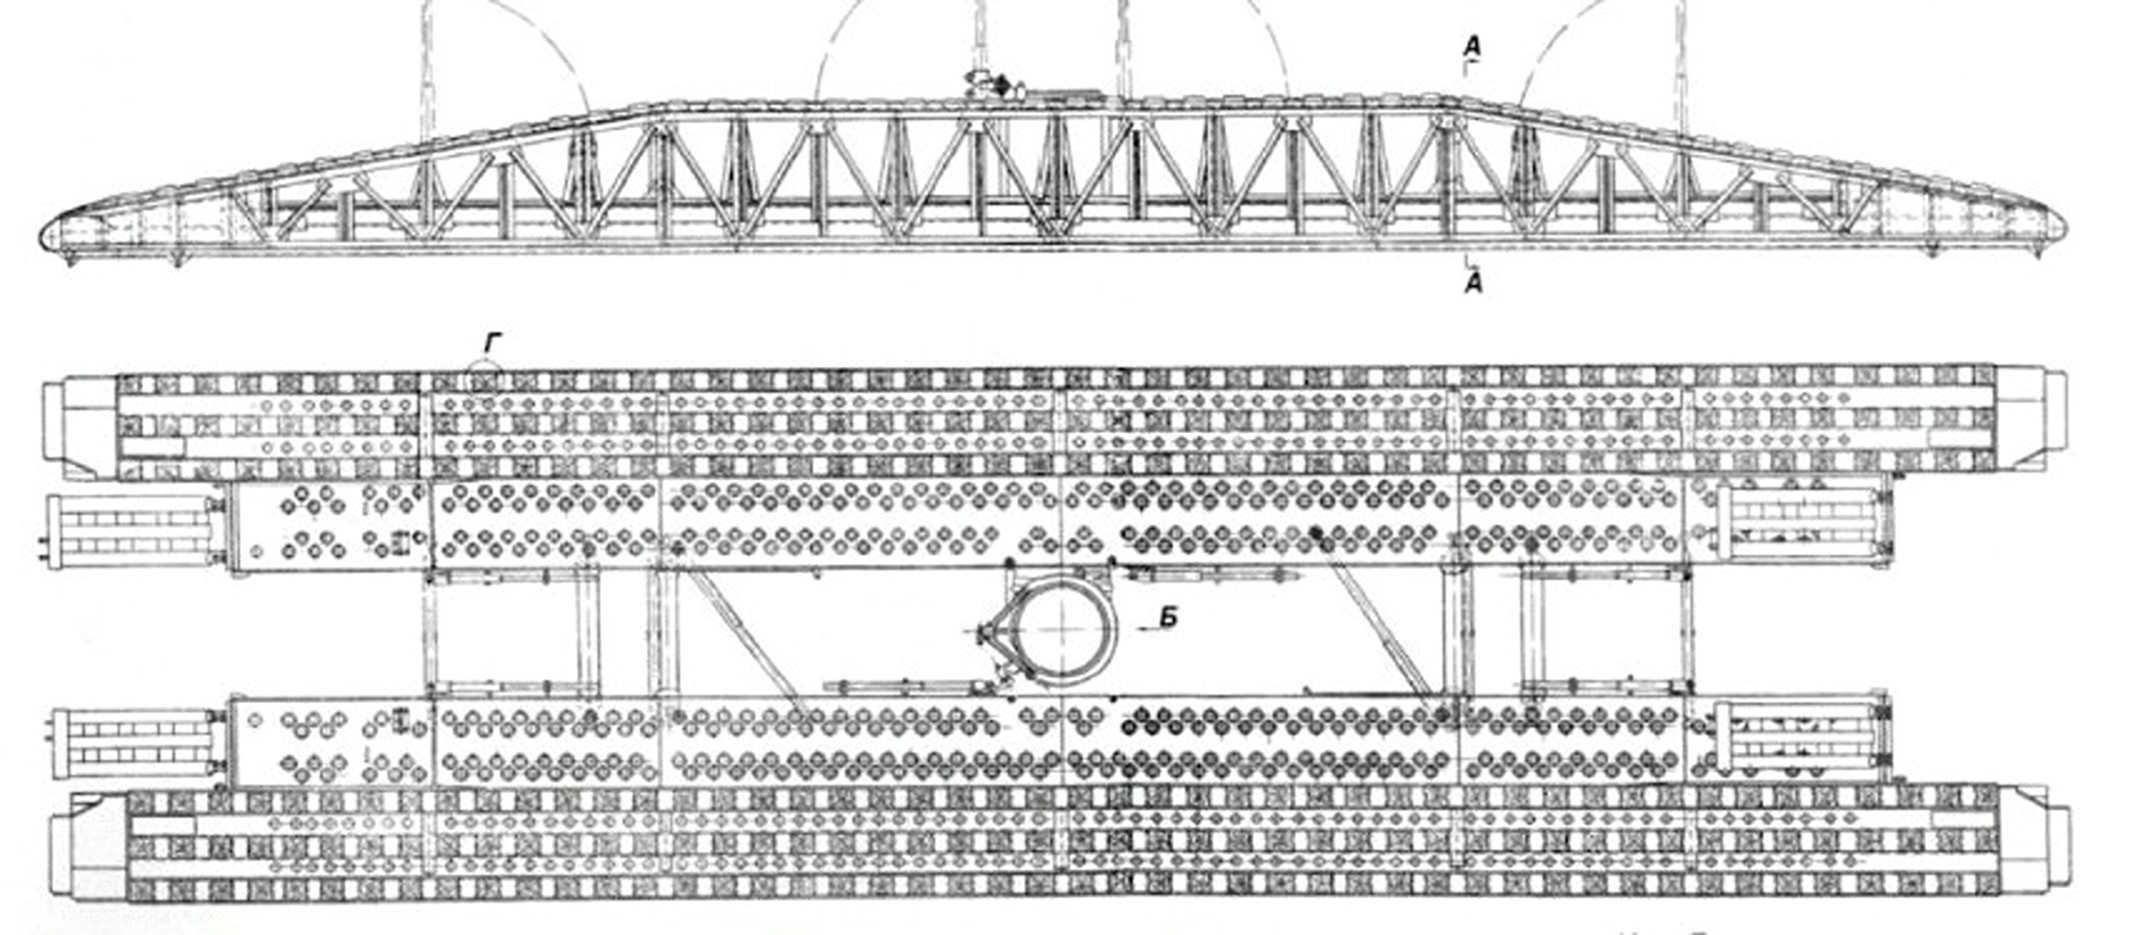
Now that the base vehicle is complete, construction continues with the bridge. It’s a complicated challenge to convert this bridge into a model. I’ll show you some photos of the bridge first.
5 Likes
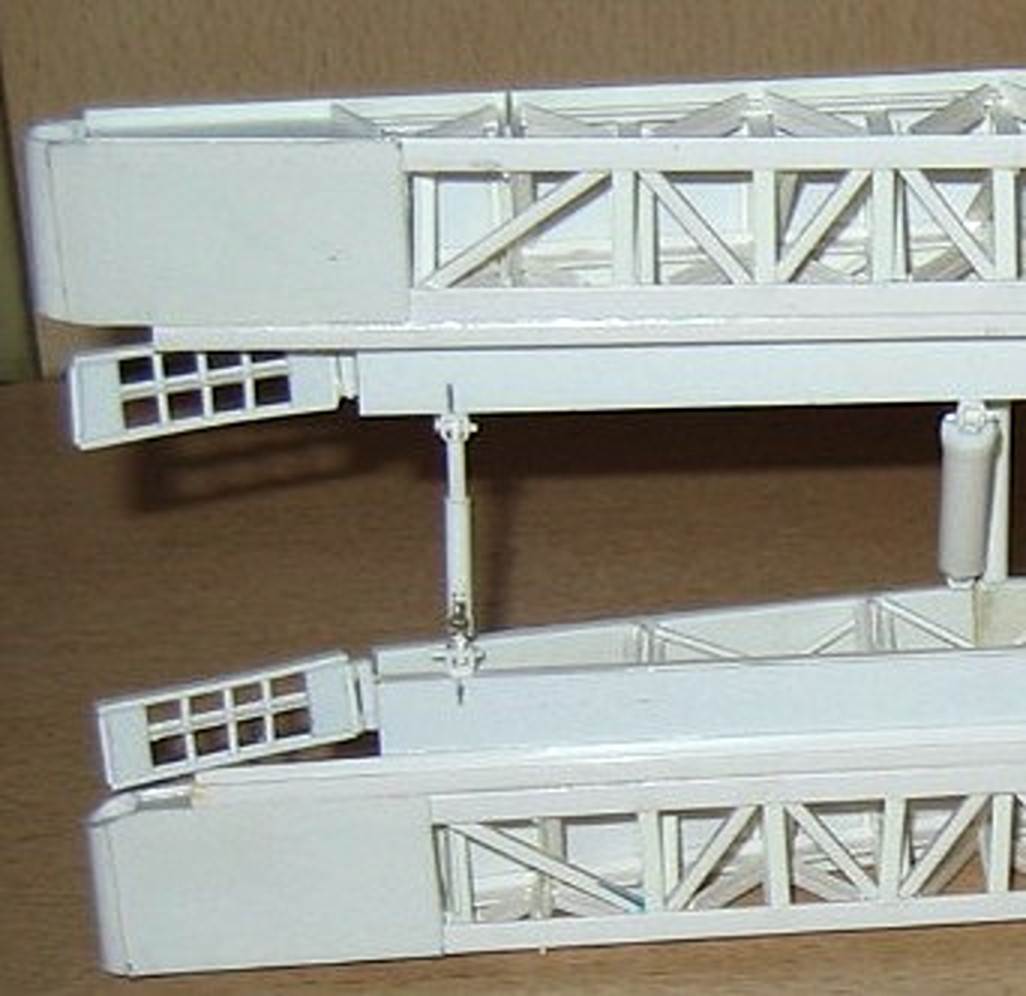
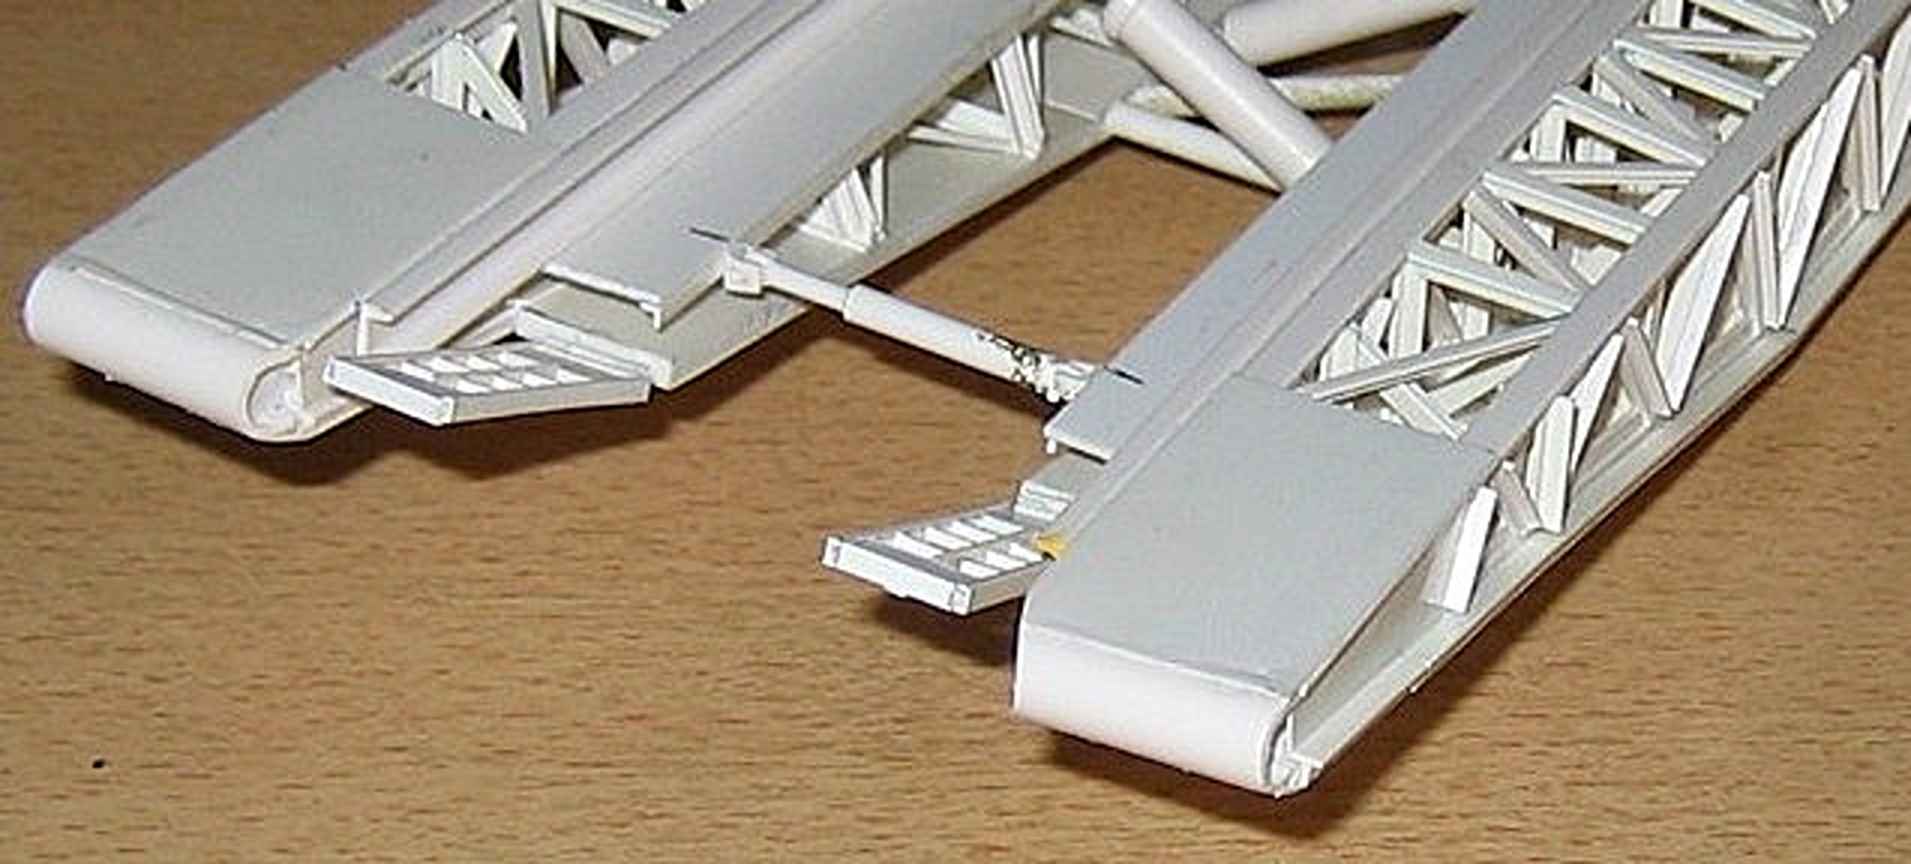
Building the bridge is the most complicated part of the entire model. The structure is made from plastic profiles and assembled in individual segments. Templates must be built for assembling the individual struts to ensure consistent spacing. The overall length of the bridge must be taken into account. In the original version, the bridge was designed to support loads of over 50 tons, including the T-10M tank. Here are some pictures of the construction.
8 Likes
Wow, wow, wow!
I’m speechless!

Angel
2 Likes
That’s incredible. Magnificent work.
2 Likes
to quote @ayovtshev: “Wow, wow, wow!” thank you for sharing your research images and of course the build - great work to see!
Cheers
Nick
3 Likes
This is madness! In a positive way. Benutzt Du die NVA Dienstvorschrift?
2 Likes
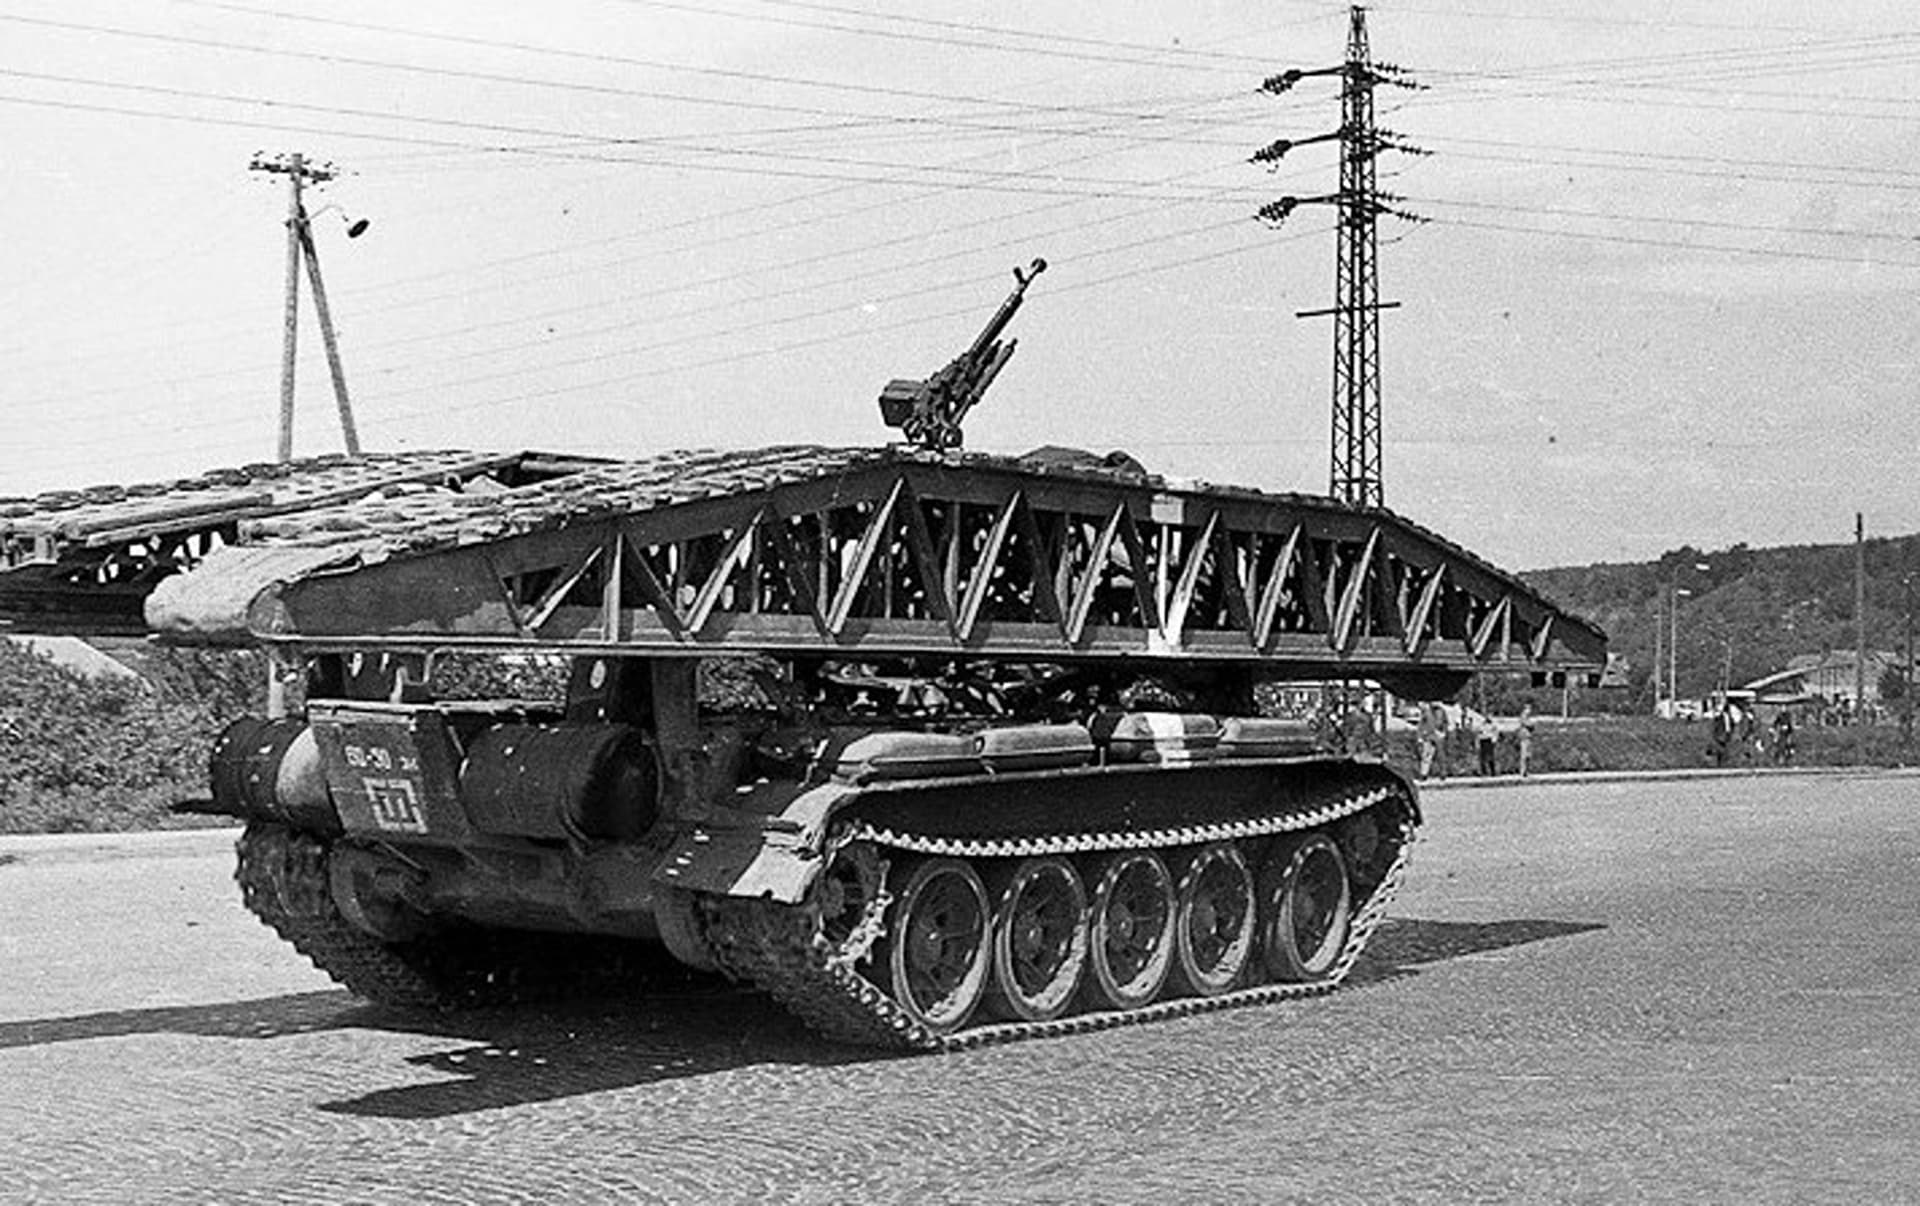
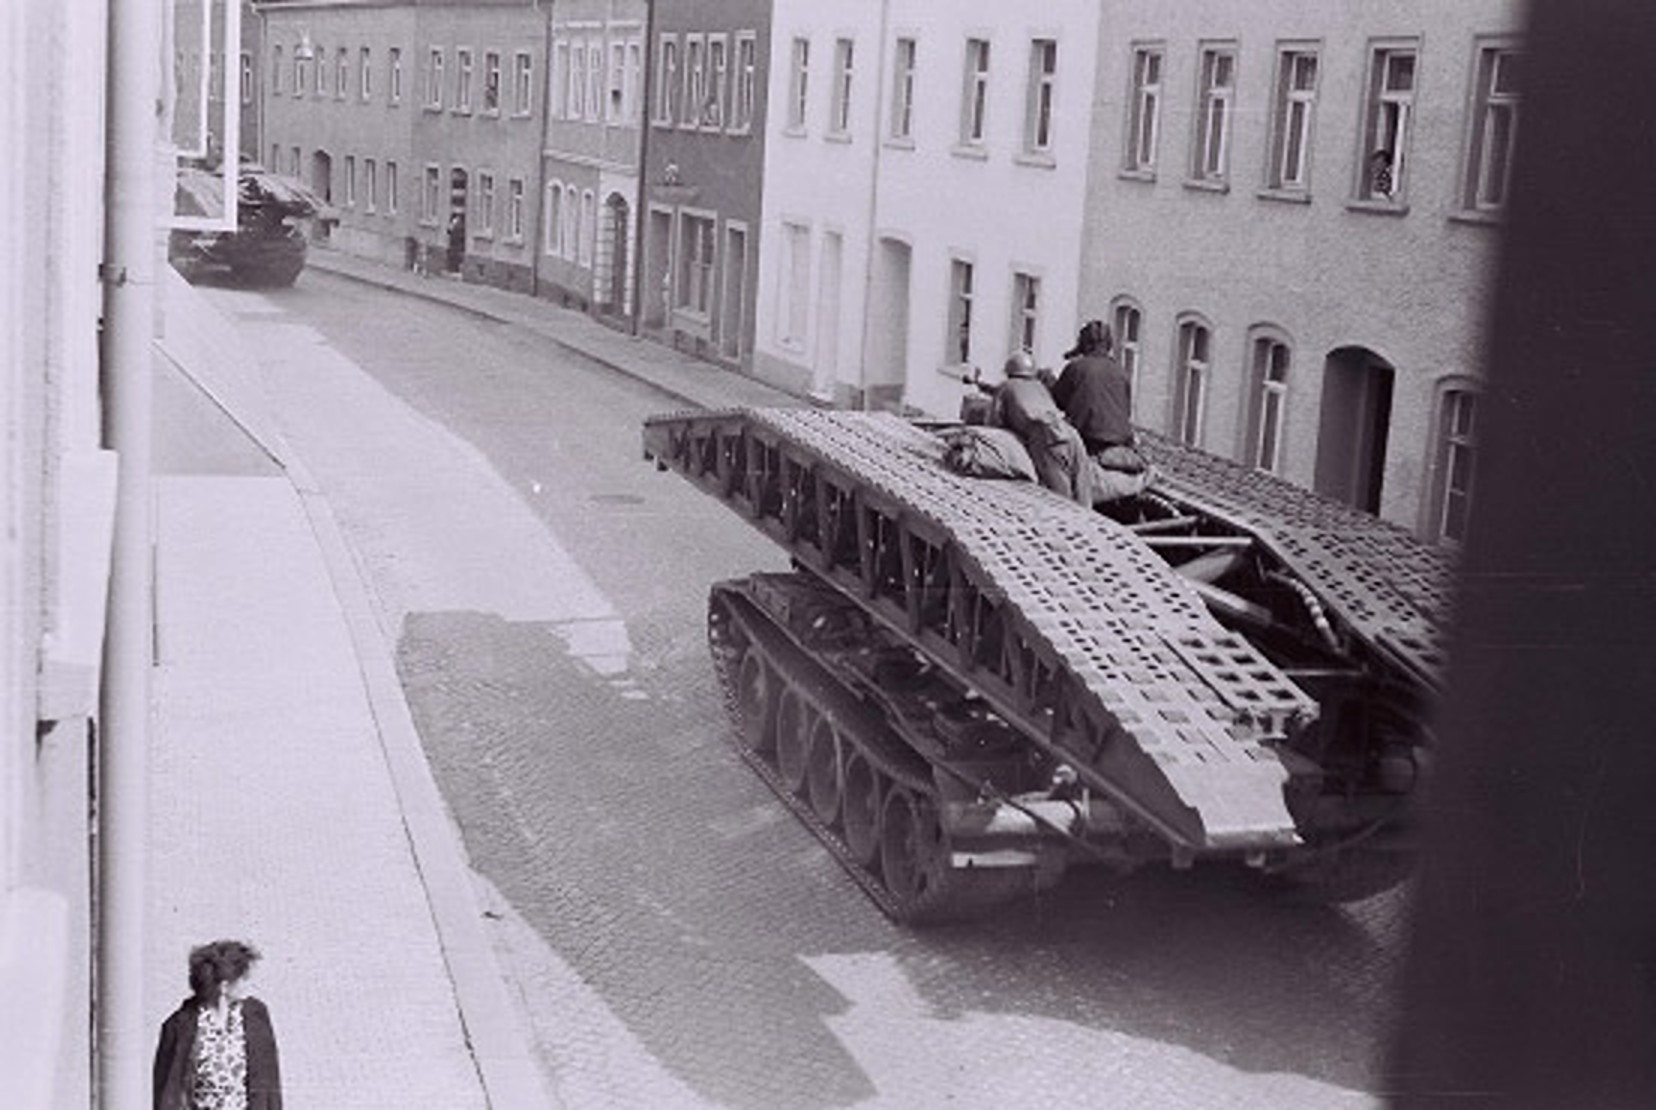
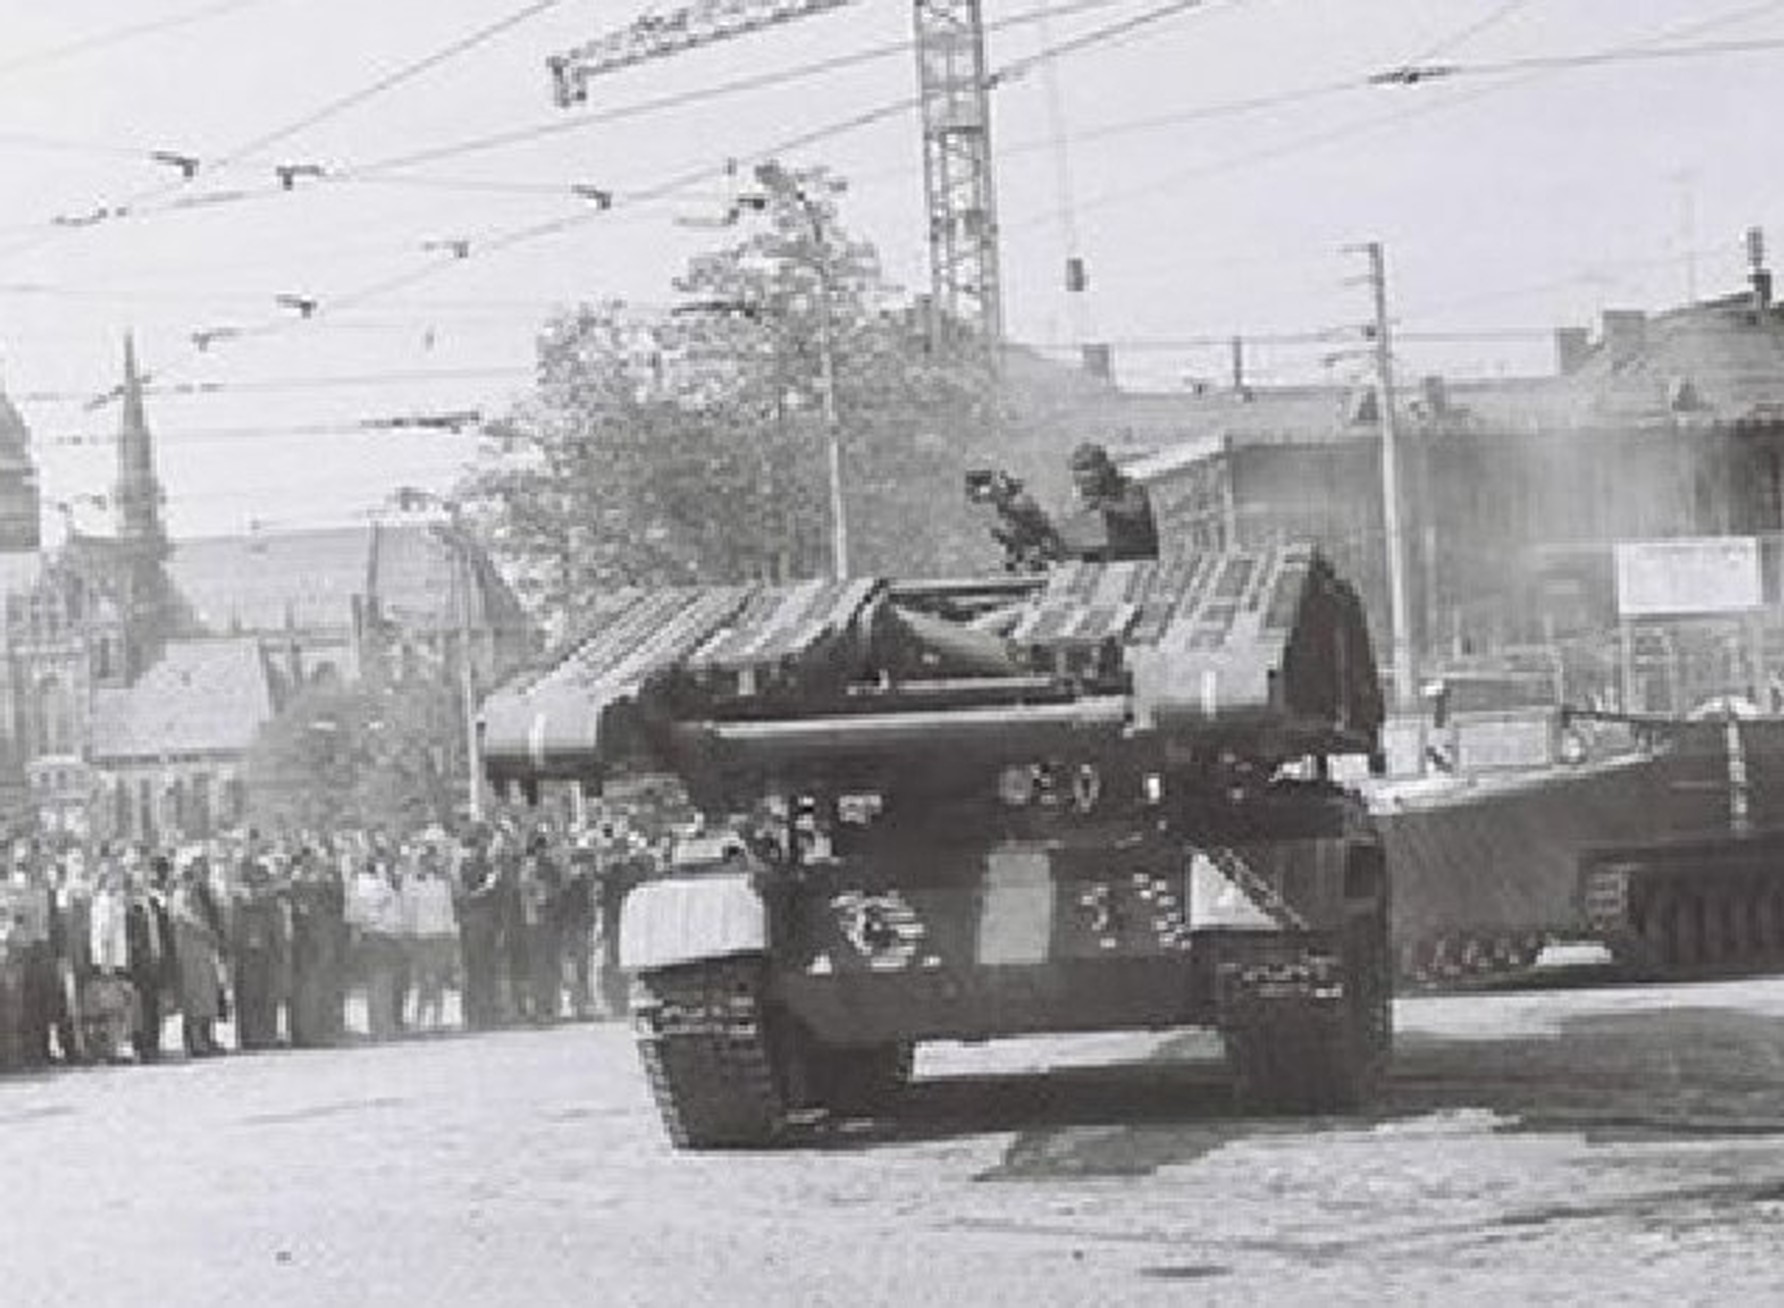
Thank you for your answers to this MTU-12 model construction question. Regarding Hans-Hermann’s question, yes, I am using the NVA (National People’s Army) regulations for the build. I also have original Russian documentation for the MTU-12, which is very helpful to me in this construction. Without these descriptions, it would not be possible to build this model. There is no museum near where I live where the MTU-12 can be seen. The Military Museum in Dresden does not have such a vehicle in its collection. I am therefore using many existing photos of these vehicles and what I remember from years ago. Unfortunately, at that time, it was not permitted to photograph these vehicles or troop movements. This would be very helpful to me today when building the models. The best pictures were taken by the Russian soldiers themselves during their service. I will build the MTU-12 as I remember it from August 1968 during the invasion of Czechoslovakia.
Here are some photos from that time.
5 Likes
Outstanding build and documentation. Thank you for sharing your step by step and reference images.
2 Likes
According to my books GDR NVA received only 12 vehicles in 1962. ALL were ordered to be destroyed in 1982 (sad!)
BTW Had the GSSD only the MTU-12 AVLB?
1 Like
Hello HermannB
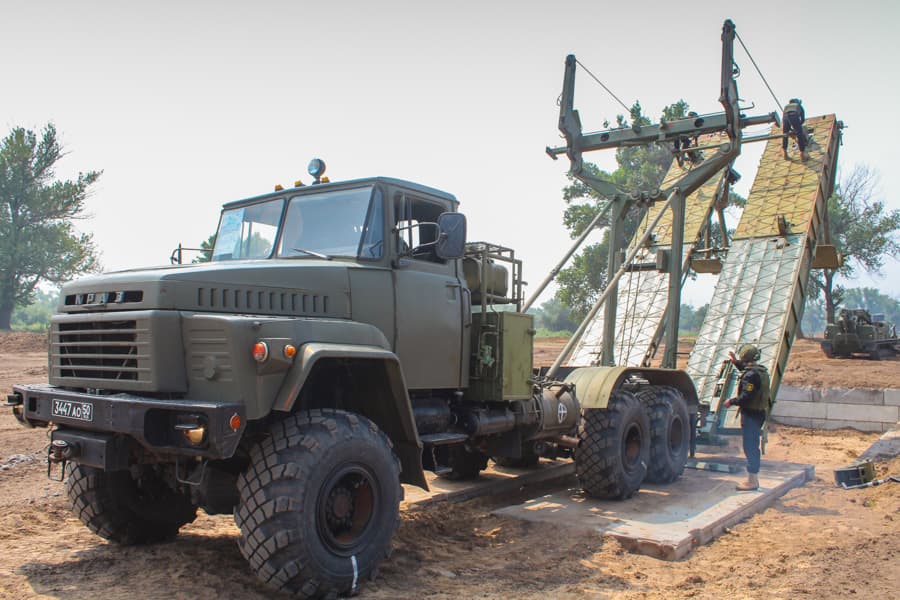
The GSSD not only used the MTU-12, they also had the MTU-20 and the MT-55A bridge-laying vehicle in their fleet. However, the MTU-12 was definitely in their fleet longer than it was in the NVA. The BLG-60 bridge-laying vehicle led to the MTU-12’s demise. It had several advantages over the MTU-12, including longer bridge spans and the ability to navigate underwater. This was a major consideration. There were also companion bridges on Kraz and ZIL chassis.
1 Like
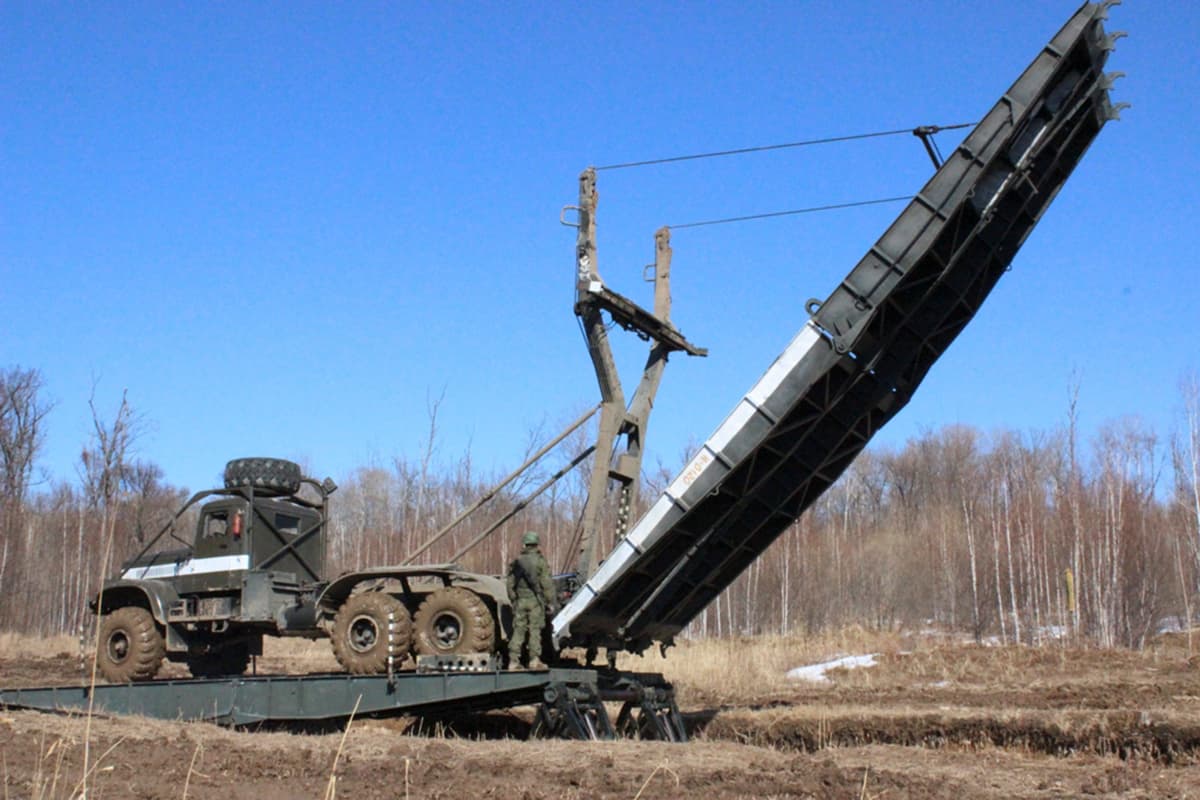
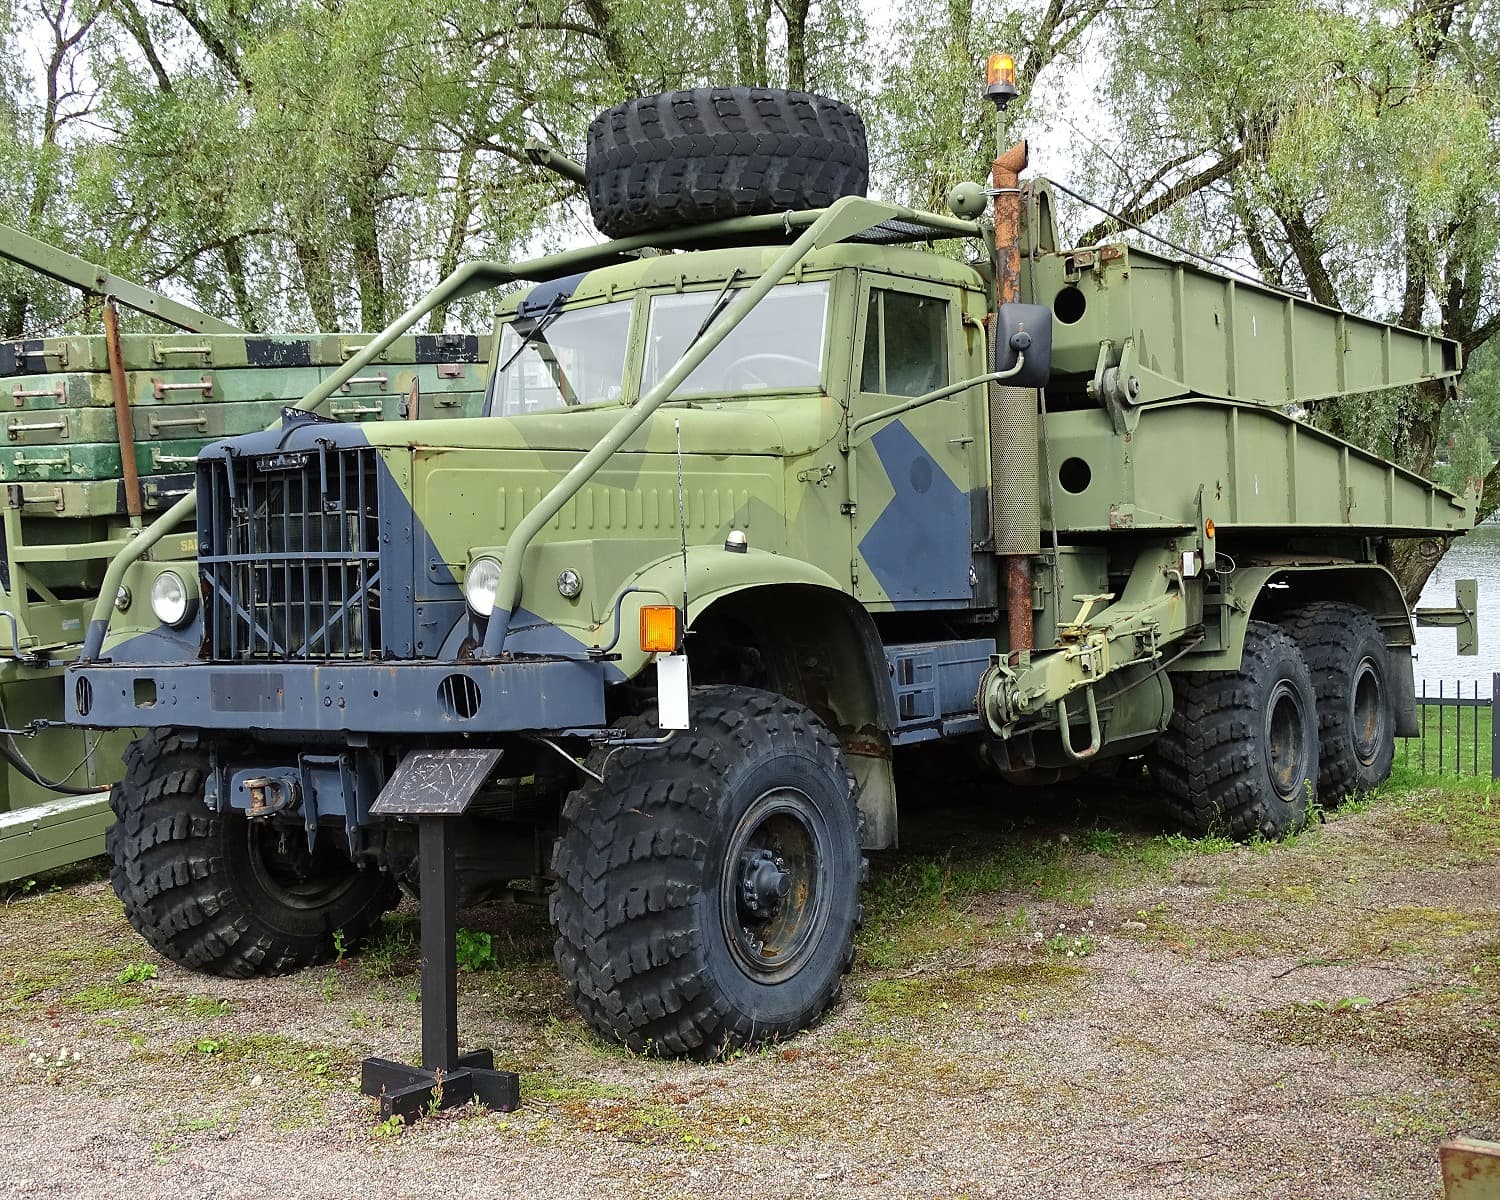
Mechanisierte Begleitbrücke TMM-3.  One more my list.
3 Likes
That could be the next topic.
2 Likes
Fantastic scratch building skills
1 Like