Hi everyone, new to the forum.
I dabble in model making but never seem to be consistent with it so end up forgetting stuff half the time.
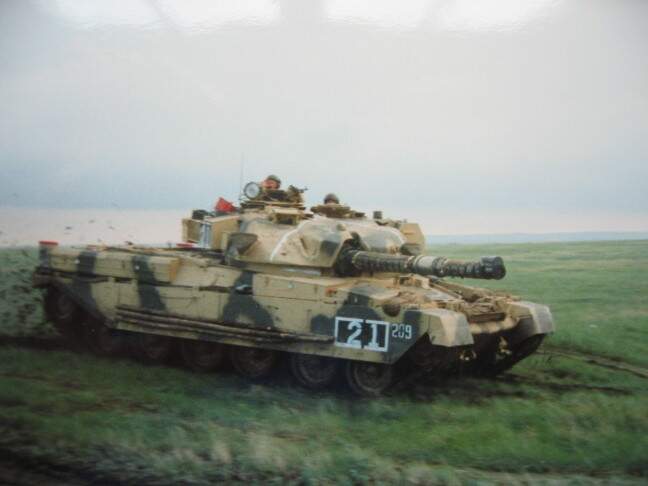
Decided to make a little BATUS Dio using the Tamiya chieftain MK.5, I built the model in lock down but only this month got my act together and built my first proper Diorama, scoured this forum for advice and a lot of YouTube for ideas and came up with this. Side note, I’m rubbish with figures so that’s why my tanks are always hatches down.
Hey mate, welcome to the game.
Nice to see a modern Brit tank. They are not usually covered here much.
I mostly do figures now but I started years ago by building tanks and throwing away the included figures. You never know !
J
Thanks for the welcome, it’s funny you say that, I did keep the figured from my kits just in case I ever end up dabbling in the dark art of figure painting
Nice job. The majority of modellers are crap at figures, me included, but I guess the only way to improve anything is keep trying. I get a little better each time, but still a long way off doing any photography within 20 feet!
Great job of small base placement. The tank is sunk down into the grass just the right amount… and the mud track! … Looks like the beast is actually moving!
Base looks good. As it’s a Tamiya Chief, I notice all the little details that Tamiya simplified off the model - the skirt support brackets, Tow rope brackets, wading trunk hooks, lift eyes on the searchlight housing, padlock hasps on the stowage bins - that sort of thing. A lot of that can be hidden with stowage clutter - netting, oil & fuel, water cans etc. Being a Tamiya, that gap in the thermal sleeve on the barrel behind the bore evacuator needs filling. Weathering looks about right.
Being a BATUS Chief, it needs a set of '45’s on the turret front/roof. They’re the white line markings painted at 45 degrees either side of the barrel so the T/C can check there is nothing forward within those lines that would be endangered by the discarding sabot when they open fire.
I have my own Chieftain project, which I’m stalled on currently, so I’m familiar with the Tamiya Chief & it’s OOB deficiencies.
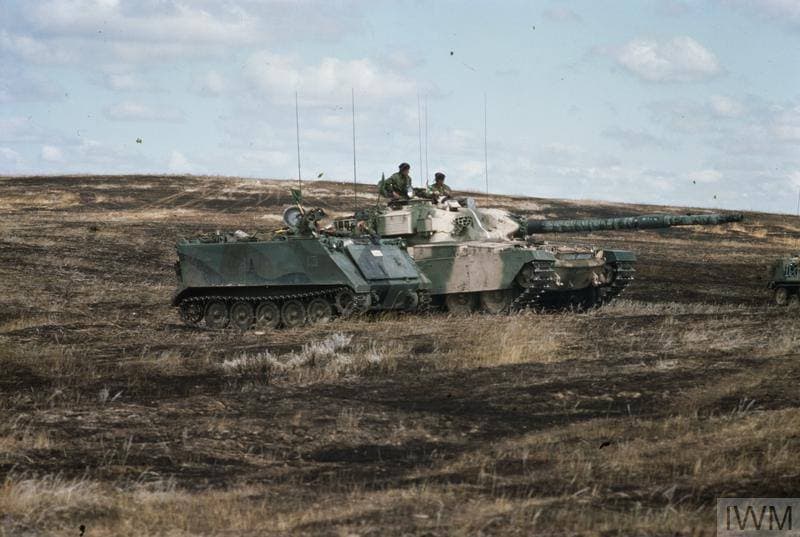
Welcome Andy, and a nice entry post to the forums. A subject close to my heart after spending so much time out there on MedMans…looks good and sits well on the base area…
Here’s one I finished last year of my Mk10 ride near Coke tower
Thanks for the tips, I’d never noticed the white lines before on the turret, I’m just an amateur modeller really so the Tamiya kit was something to pass time during lock down. I definitely would like to build a more detailed one in the future as it’s such a fantastic looking machine.
I’ve been dabbling in tarps and netting, I’ll have to use your idea to cover the simple details on a Tamiya leopard I was given for free.
Ah yeah makes sense now I’ve seen them. Honestly hadn’t noticed them when I was looking up pics of the camo, will have to add them to the next one I build. Thanks
That’s a very nice job there Andy. Great job on the camo and weathering. The Chieftain is one of my favorite tanks. It’s nice to see other companies making them now. (I did a chieftain Mk10 or was it 11? In Berlin camo several years ago. I used the accurate armor conversion.)
I think Andy’s done a pretty good job on the venerable, but still workable, Tamiya Chieftain – which I understand purports to be a Mk 5 (fair enough) but according to a REME acquaintance is in fact a Mk 5/2(!) – I wouldn’t know, but let’s not get too wrapped around the axle.
A few details have already been mentioned but I do feel the model would benefit from some antennae.
Regarding the “45s”, I just have a suspicion that they were only applied in the 80s, so for the time-frame of a Mk 5 ie roughly 1975 onwards, Andy’s tank may be just fine. That’s not to lock horns with the RAC component on the site(!)
Anyway, keep it up – look forward to the Leopard in due course.
Yes it takes lots of practice to paint good figures and the older injection molded ones are good to practice on as other have mentioned. Figure painting is an art unto itself. Still drives me crazy lol