I recently discovered this thread. What a great build and I discovered many new interesting manufacturers, which is superb. What a giant leap the hobby took in comparison with a couple of years ago.
I’ve been building the Tamiya Yamato off and on since 2016 and I’m not nearly at your stage just yet. more or less halfway I think.
This build sure gave me inspiration again to continue. And I testordered some Blue Fatty and Bunker Models stuff from Asia. Looking forward to receiving it (pitty no European sellers just yet).
Keep up the good work I’d say, this is eyecandy and a gold mine for modellers who want to have a go at building the Mighty Y ^^
Welcome to you and your first post here Wouter, ( sorry is that your first name ?)
It’s great to see that this build of Thomas has inspired you to not only pick up your build again of the Yamato, but to order some of the same parts
Would be great to see a thread that you start on your build with some images and progress shots …
@GewoonWouter: Hello Wouter, welcome aboard here and nice that my build gave you inspiration for your own build. This is what this forum is all about - not just sitting lonely inside your cave but to interact with a worldwide community outside, get tips and constructive critics which keep the mood and motivation high for all participants
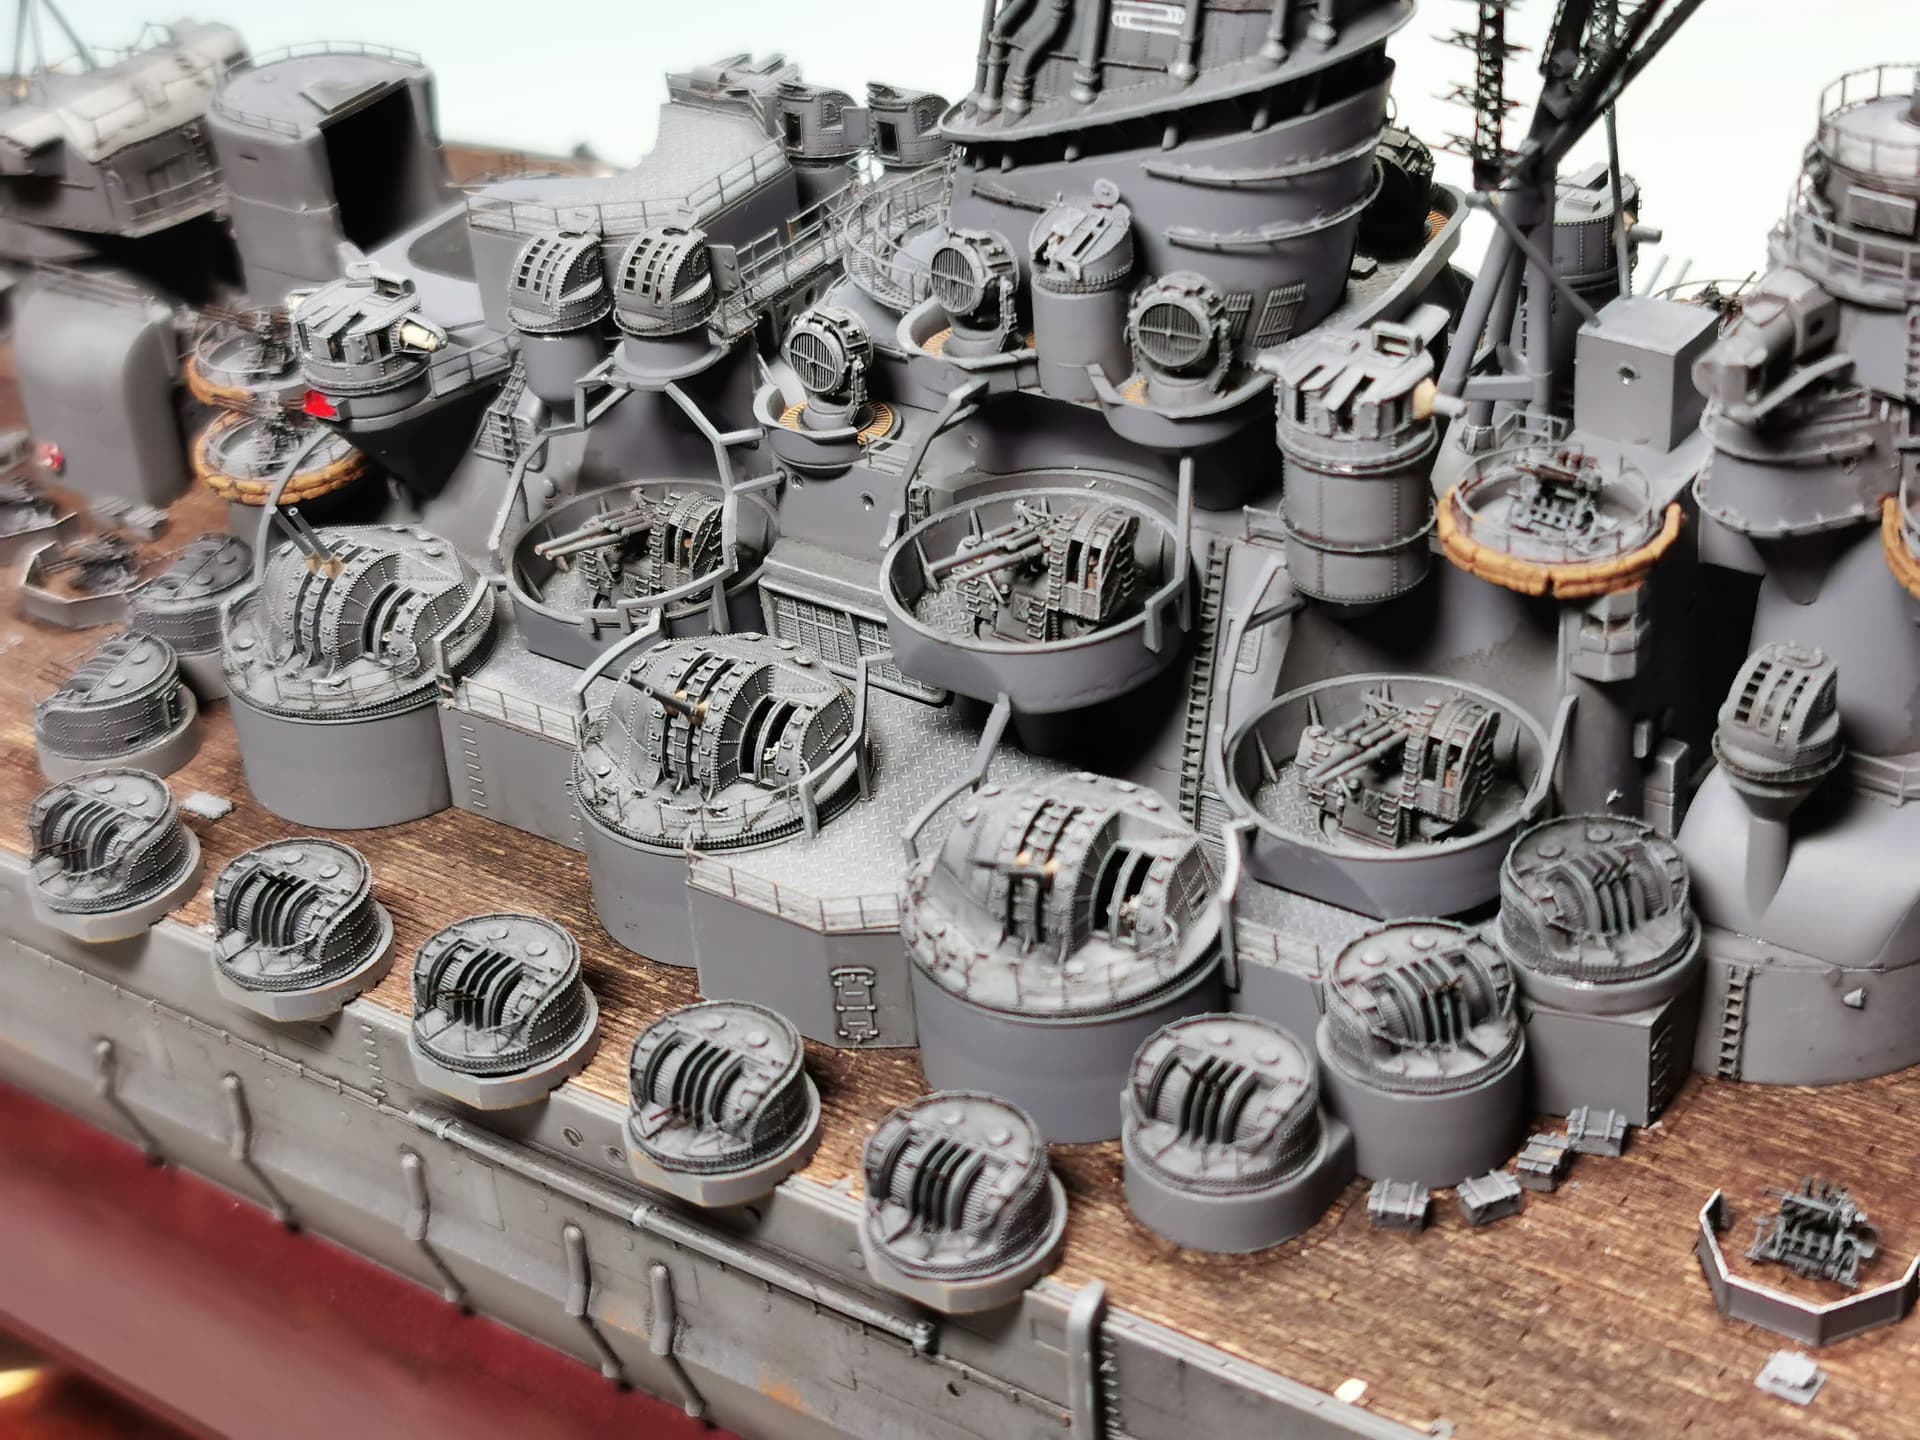
Some small progress to finish the building procedure at the main superstructure of the ship: I installed the gun firing arc limiters for the big 12.7 cm twin guns. Also the last four additional ammunition boxes were added behind the middle rear triple 25 mm triple machine gun armored turrets and I finally painted the ship´s port and starboard positional lights. Ah and one discovered missing open deck door was finally added.
This done there are just the railings left for the main deck exept the main turret. I will attach these railings at the very end after all rigging was done in order not to break anything during rigging.
@Johnnych01 Thanks for the welcome mate (and you got that right, Wouter is my first name - Dutch version of Walter ^^ ). I’ll post my Yamato soon.
@Black_sheep Thanks for the welcome as well. Yeah, I still prefer the fora to follow builds and post my own. The social media stuff passes by way too fast. While forum threads last longer and you can revisit them much more easily. I used to be on the Kitmaker Network but it seems it was way too long in the past since I didn’t find my old accounts anymore.
Great update btw, really advancing nice and steady. How did you find those gun arc limiter? I found the plastic ones a tad fragile (I reckon less fragile than the 3D printed stuff) and already broke one with no effort
Wouter these plastic gun arc limiters were partly a bit fiddly to install when you have to take care not to break anything in your way during attaching. For my taste they are maybe a bit thick but I have no alternatives - are there 3d printed parts available?
You can avoid highlighting them, leave them the same color as the main superstructure and they will look much thinner than they are. Avoid adding any kind of detail painting or washes or fading on them.
Most people that try to replicate them use brass wire but that is a huge task.
The U.S.N lost 10 aircraft (some thought to have been lost to blast when Yamato exploded) but there were only 12 fatalities thanks to well-organised rescue plans. The 25mm gunners were slaughtered not only by blast and splinters from bomb hits but the Hellcats and Corsairs escorting the bombers and torpedo planes found themselves with nothing to do so contented themselves with low-level strafing runs targeting the light AA.
No sadly I’m not aware of 3D printed parts. I think there’s a company which has brass ones in their full detail set, but they seemed a bit on the thin side to me.
I remember a modeller building Yamato also with the Pontos upgrade years ago, and he scratchbuilt them out of evergreen plastic, but that’s too brave for me.
Wow, jut a few days away (more or less) from the forum, and you made this progress! Thomas, that’s absolutely amazing, the speed and the quality of your work!
Yes, your Yamato now has the look one is used to. That’s quite some guns there around the main structure. Their performance in battle was already discussed in several posts, but there look - almost like a hedgehog with all those barrels - is just most impressive!
Now I wish you all the best of luck - the skills you do have - for the rigging!
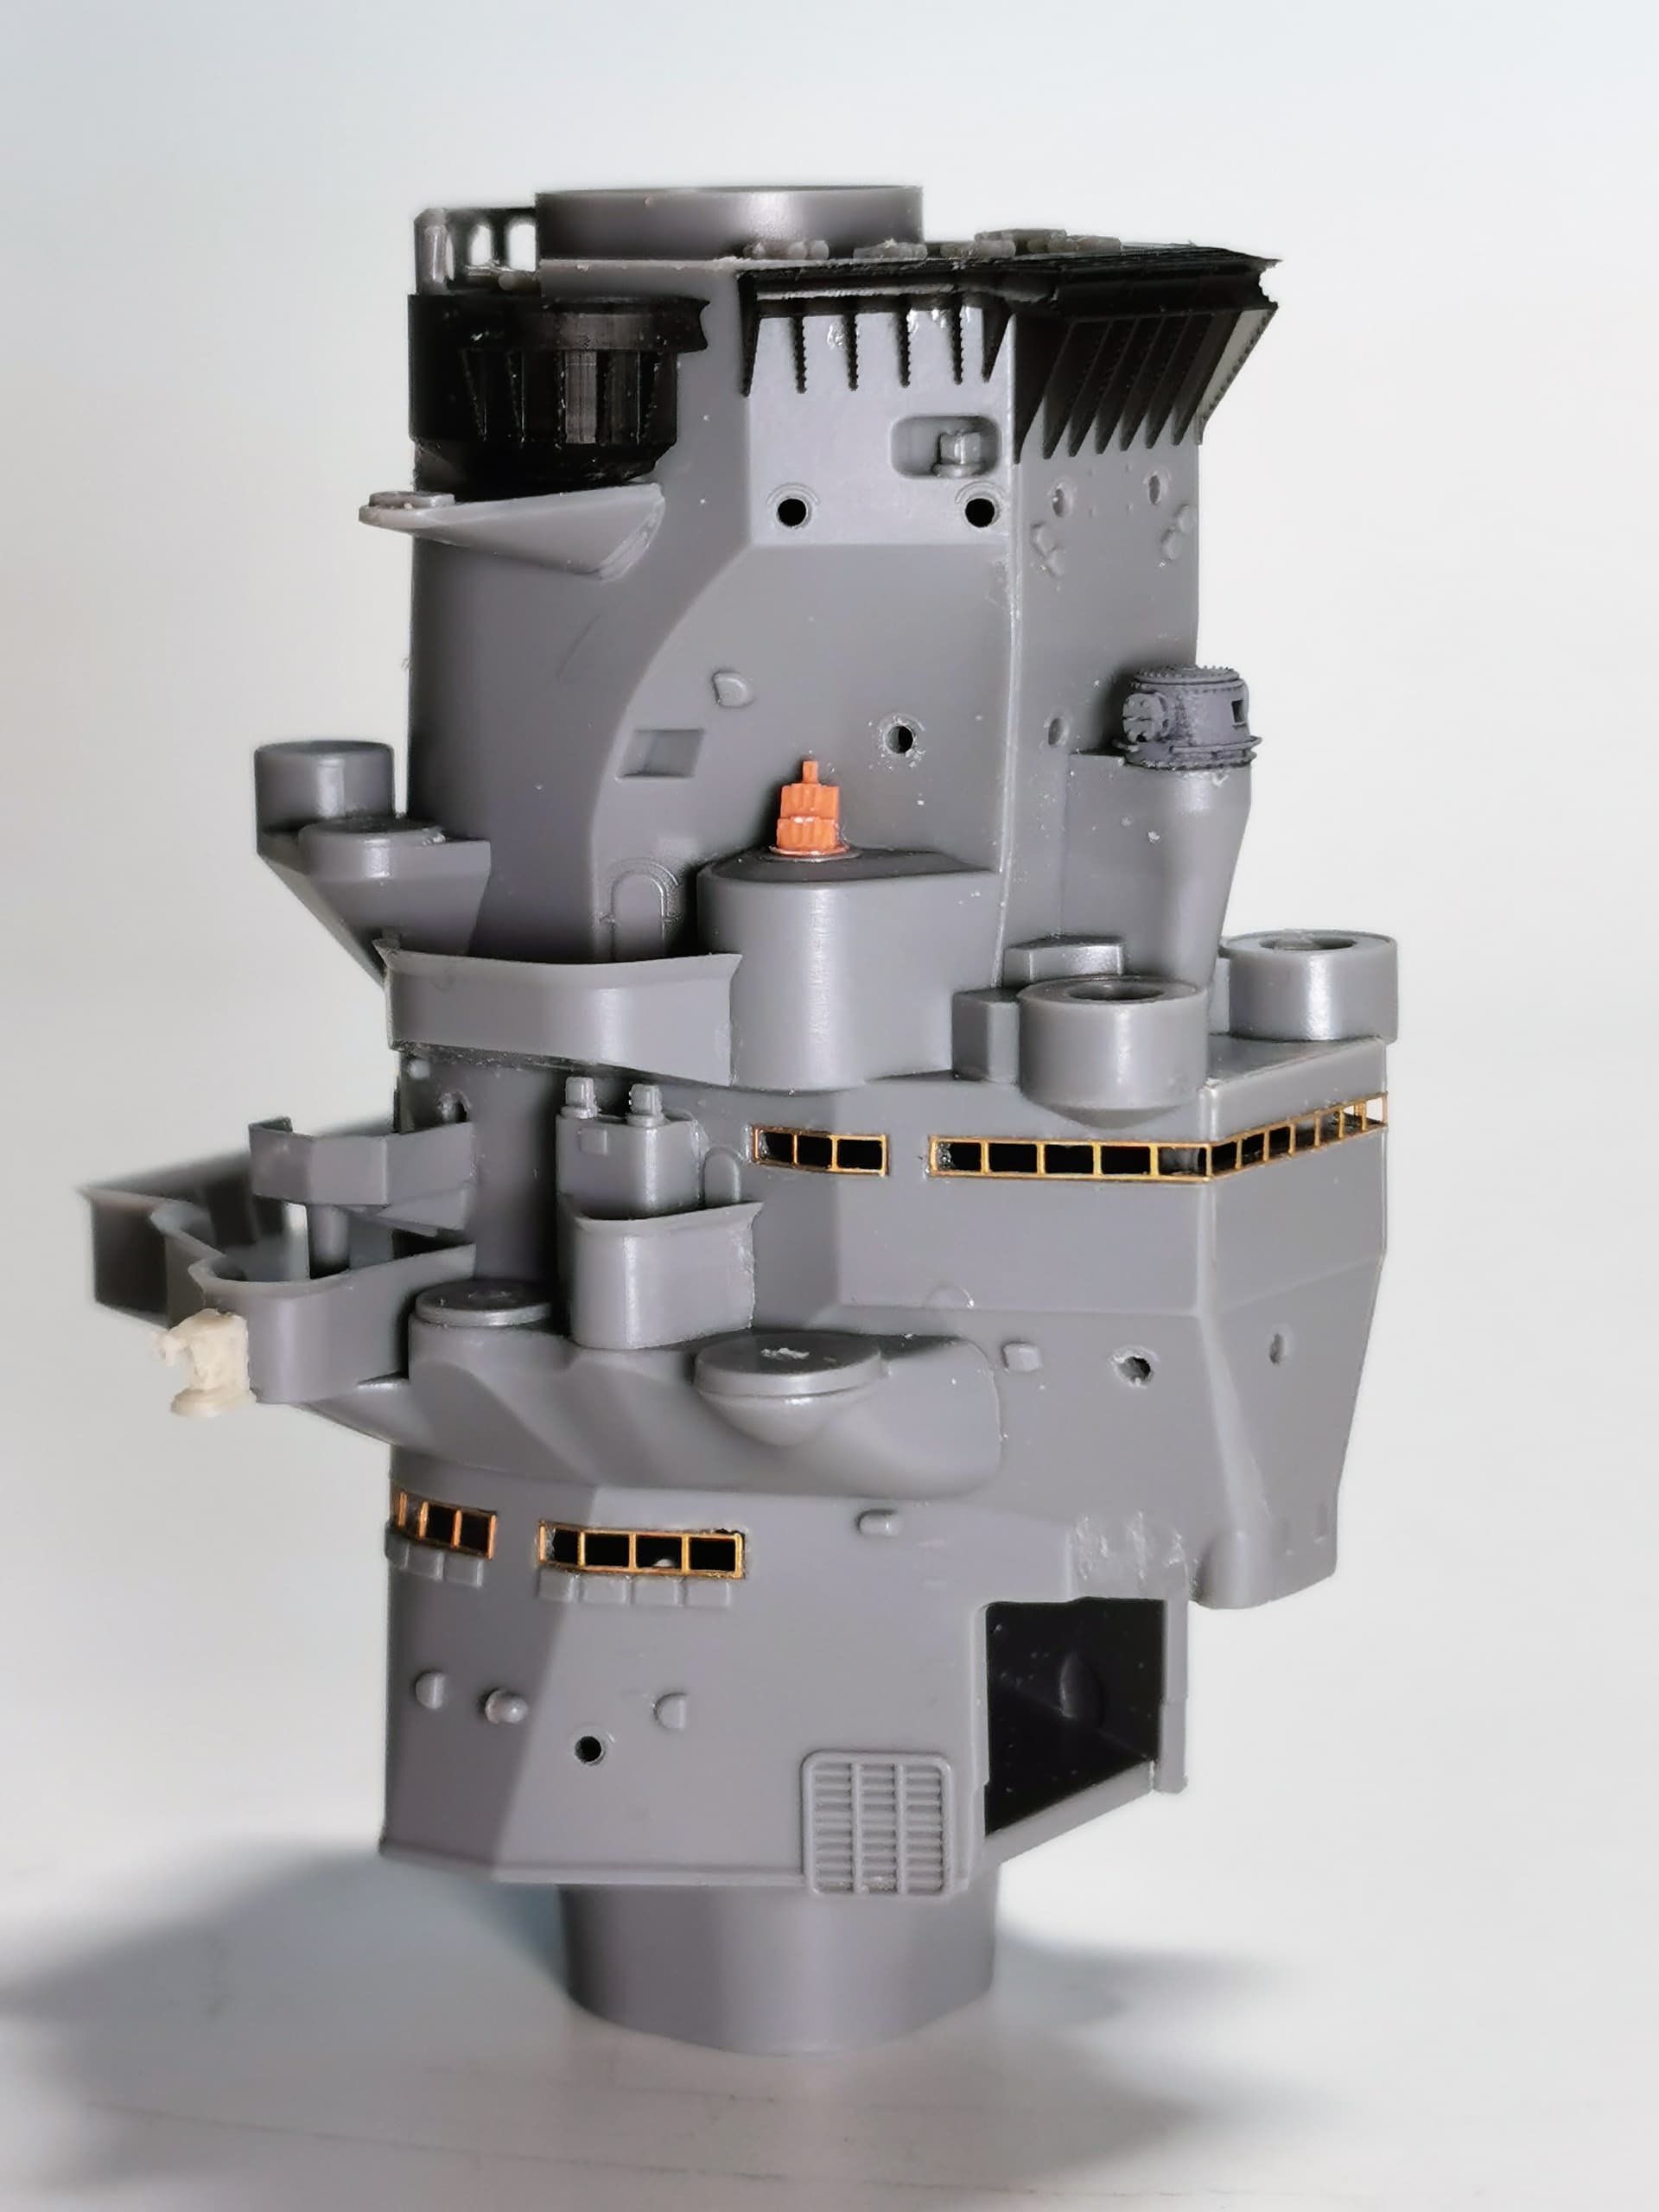
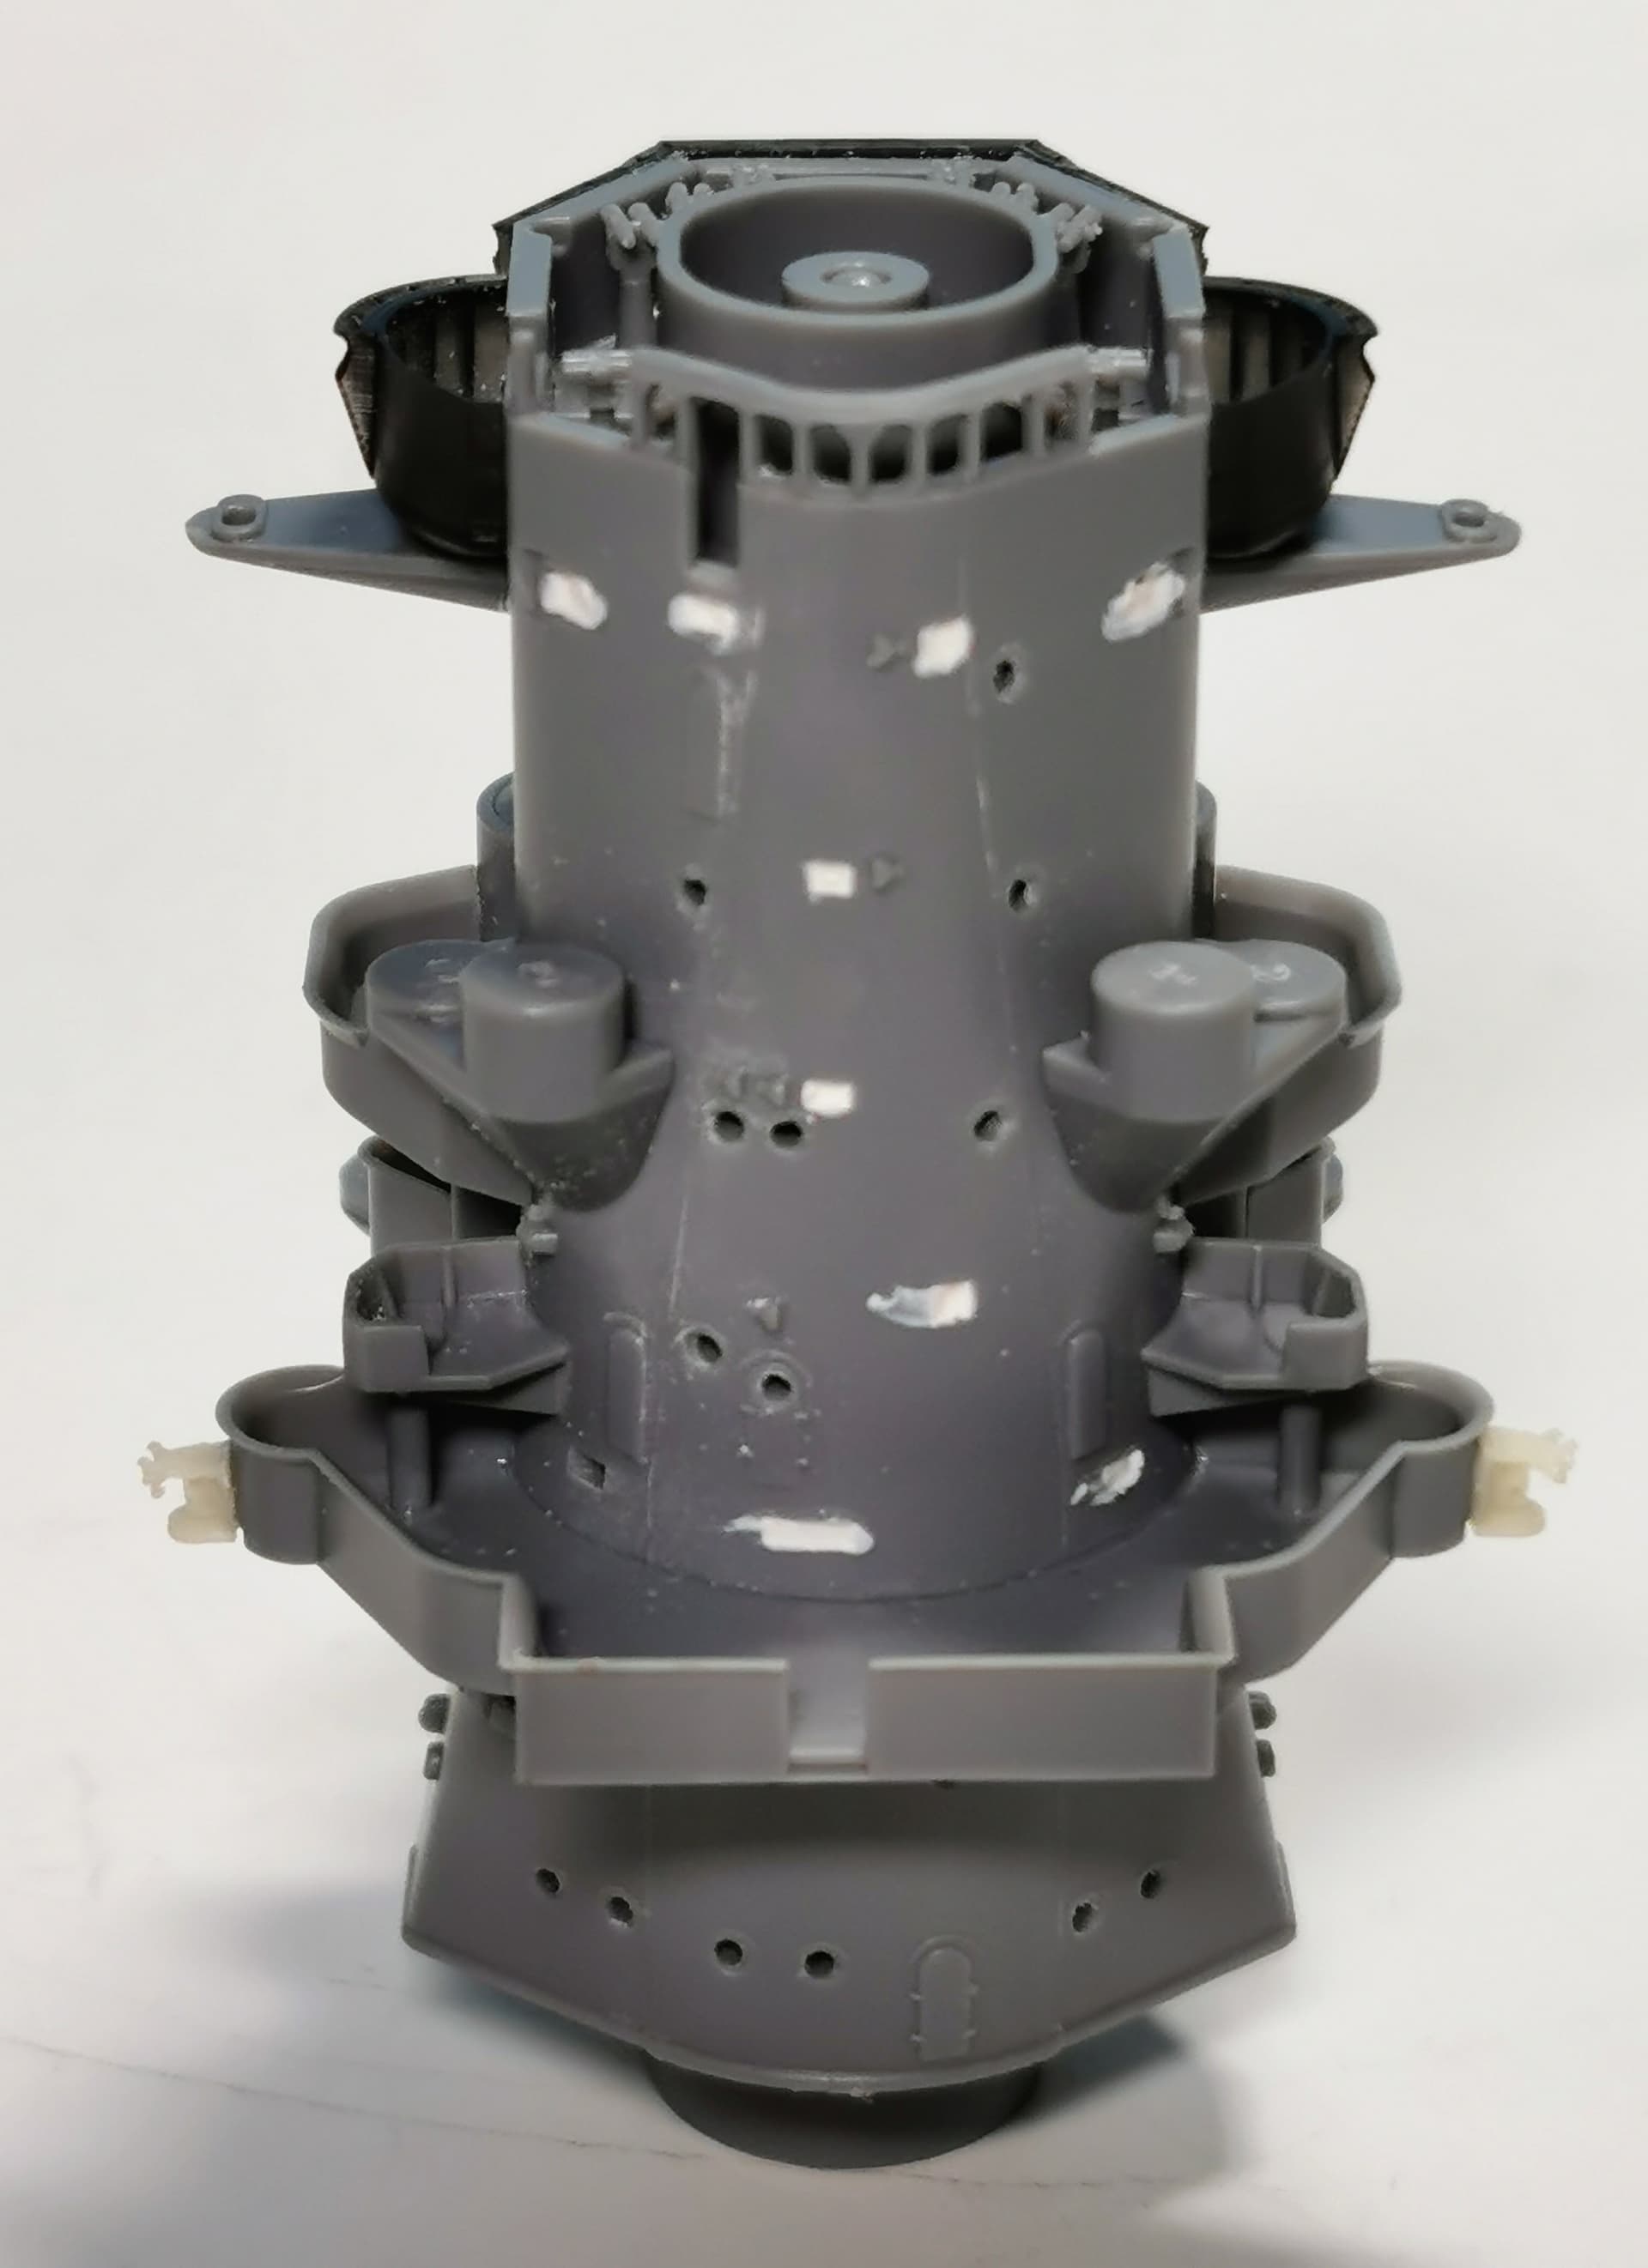
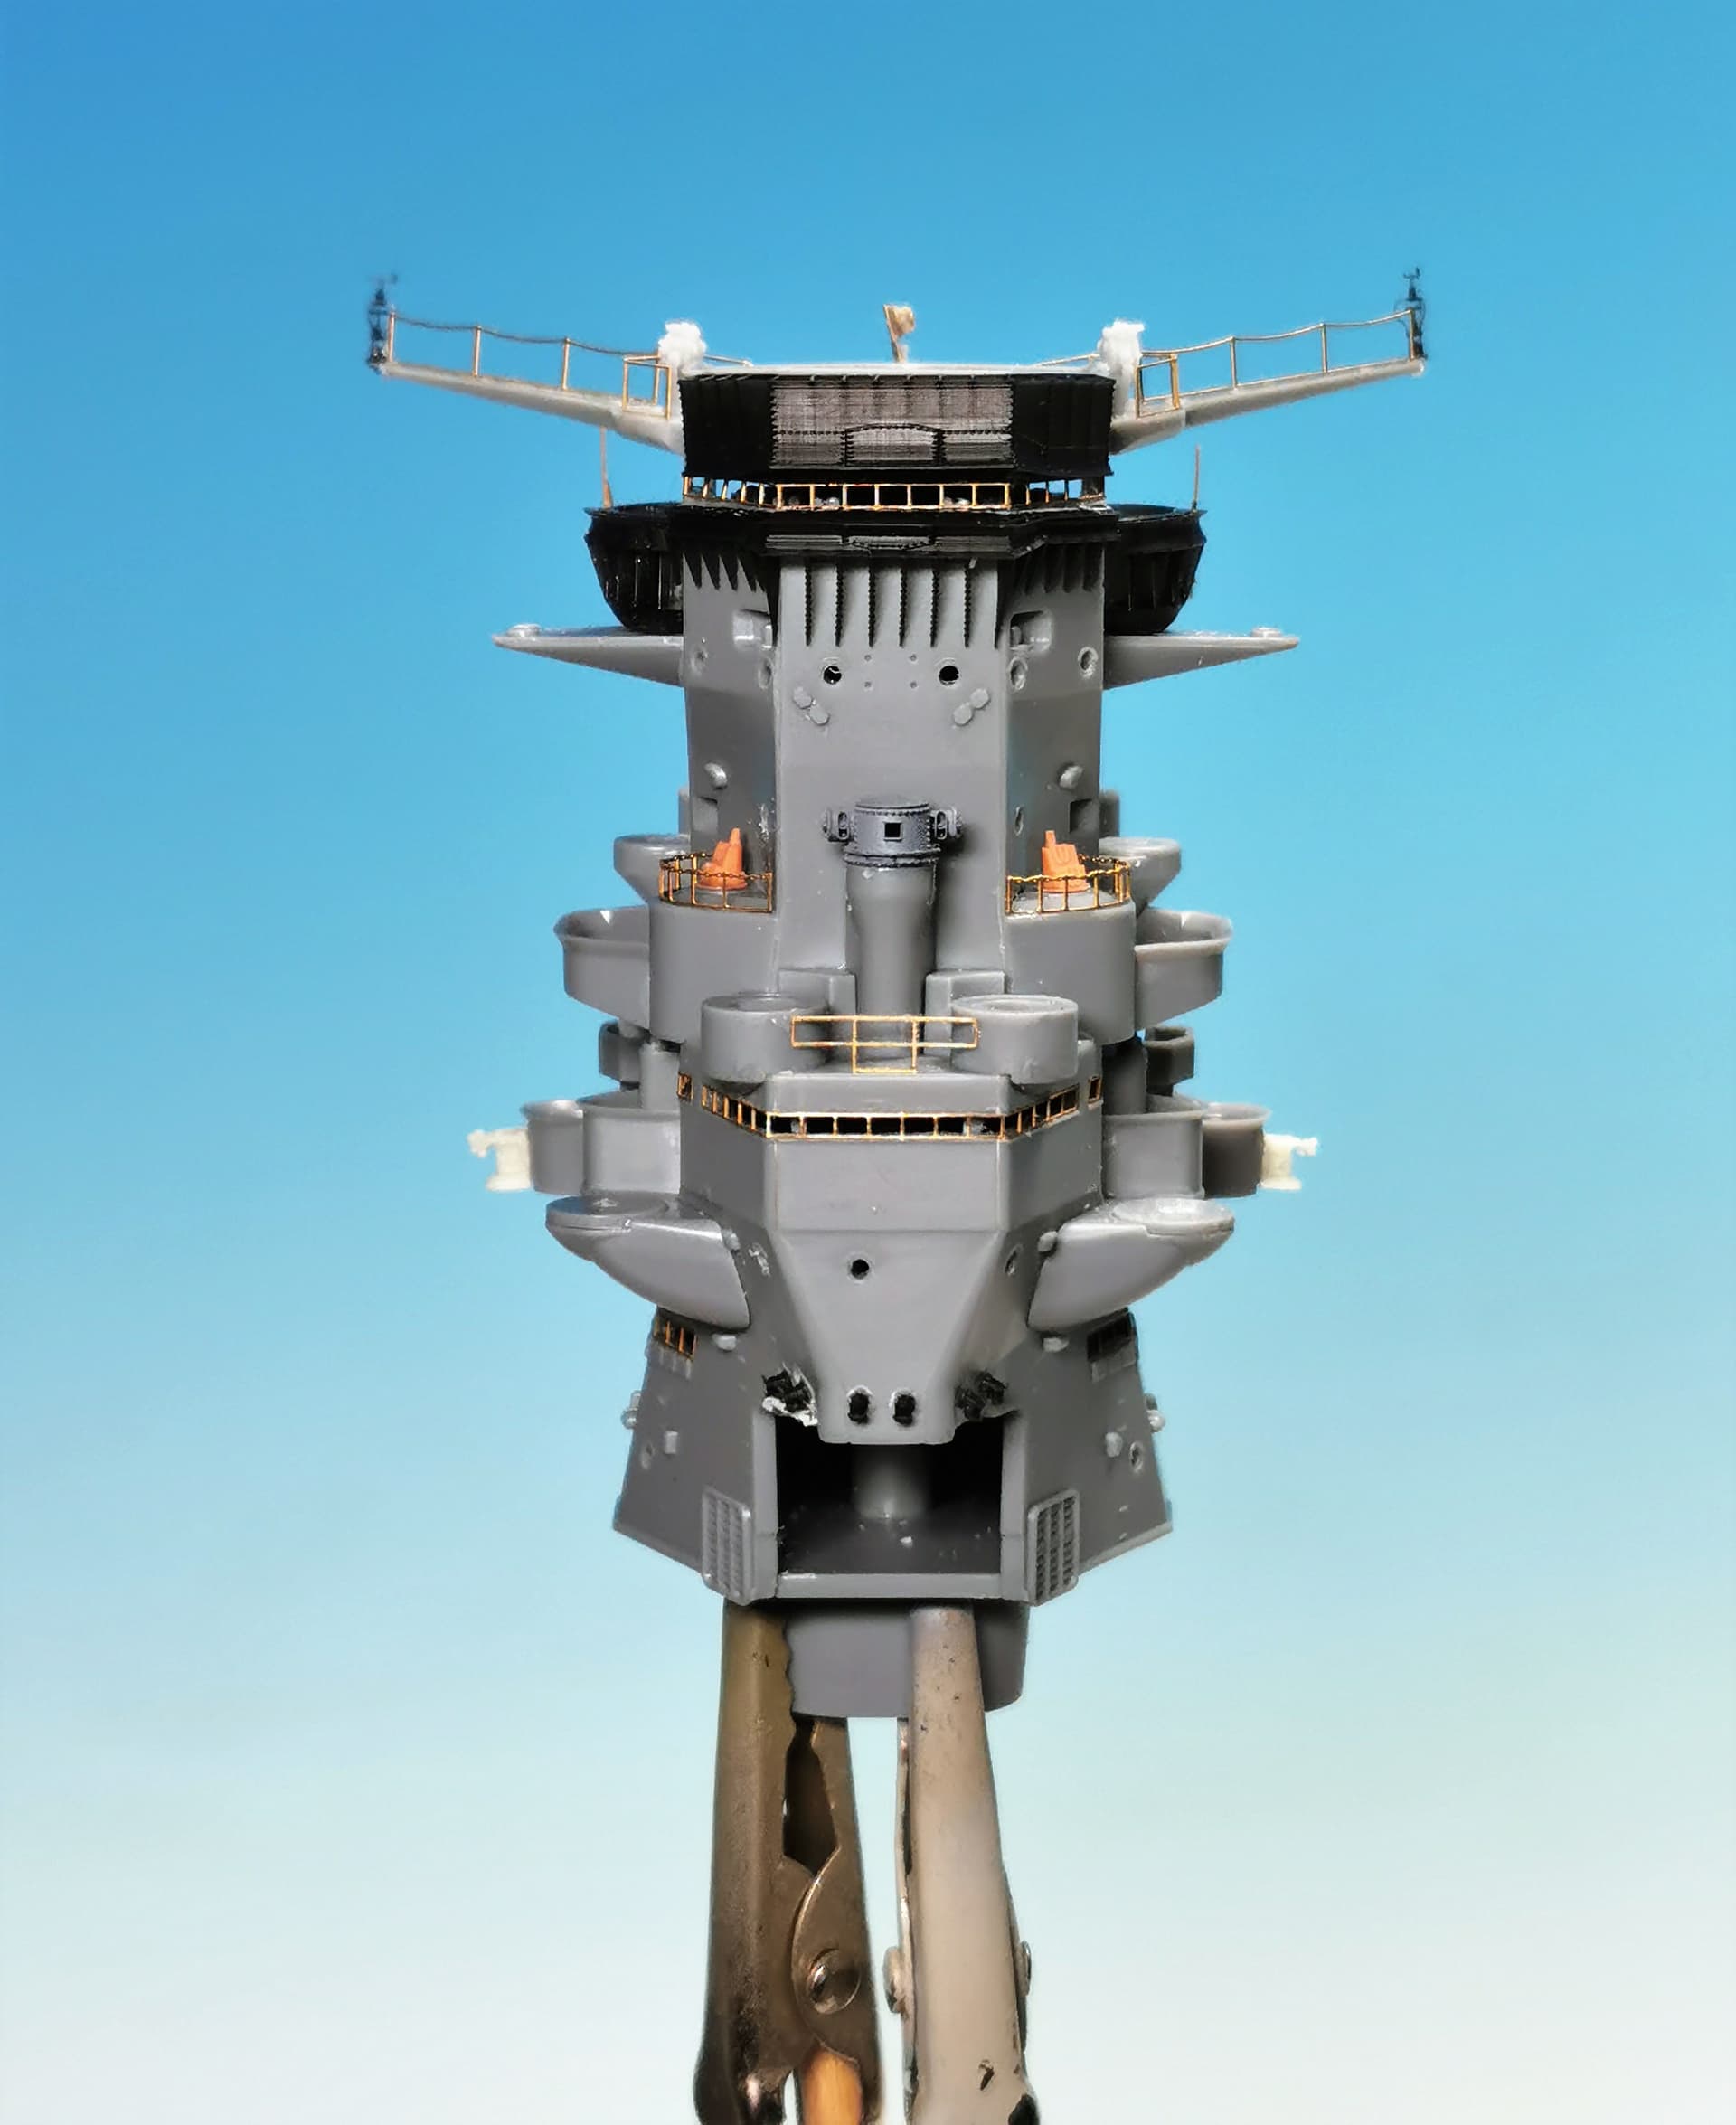
Thank you Jan, I think the rigging will be not too much extensive what I´ve seen so far. But before this its time for the last highlight of the build in my eyes: The main tower bridge. There will be serveral 3d-printed, etched and resin items which will be added here!
This is just the beginning of the build. I´ve had an eye ommitting seam lines at the tower bridge and close holes where later etched platforms were added instead of full plastic ones. portholes where drilled out already
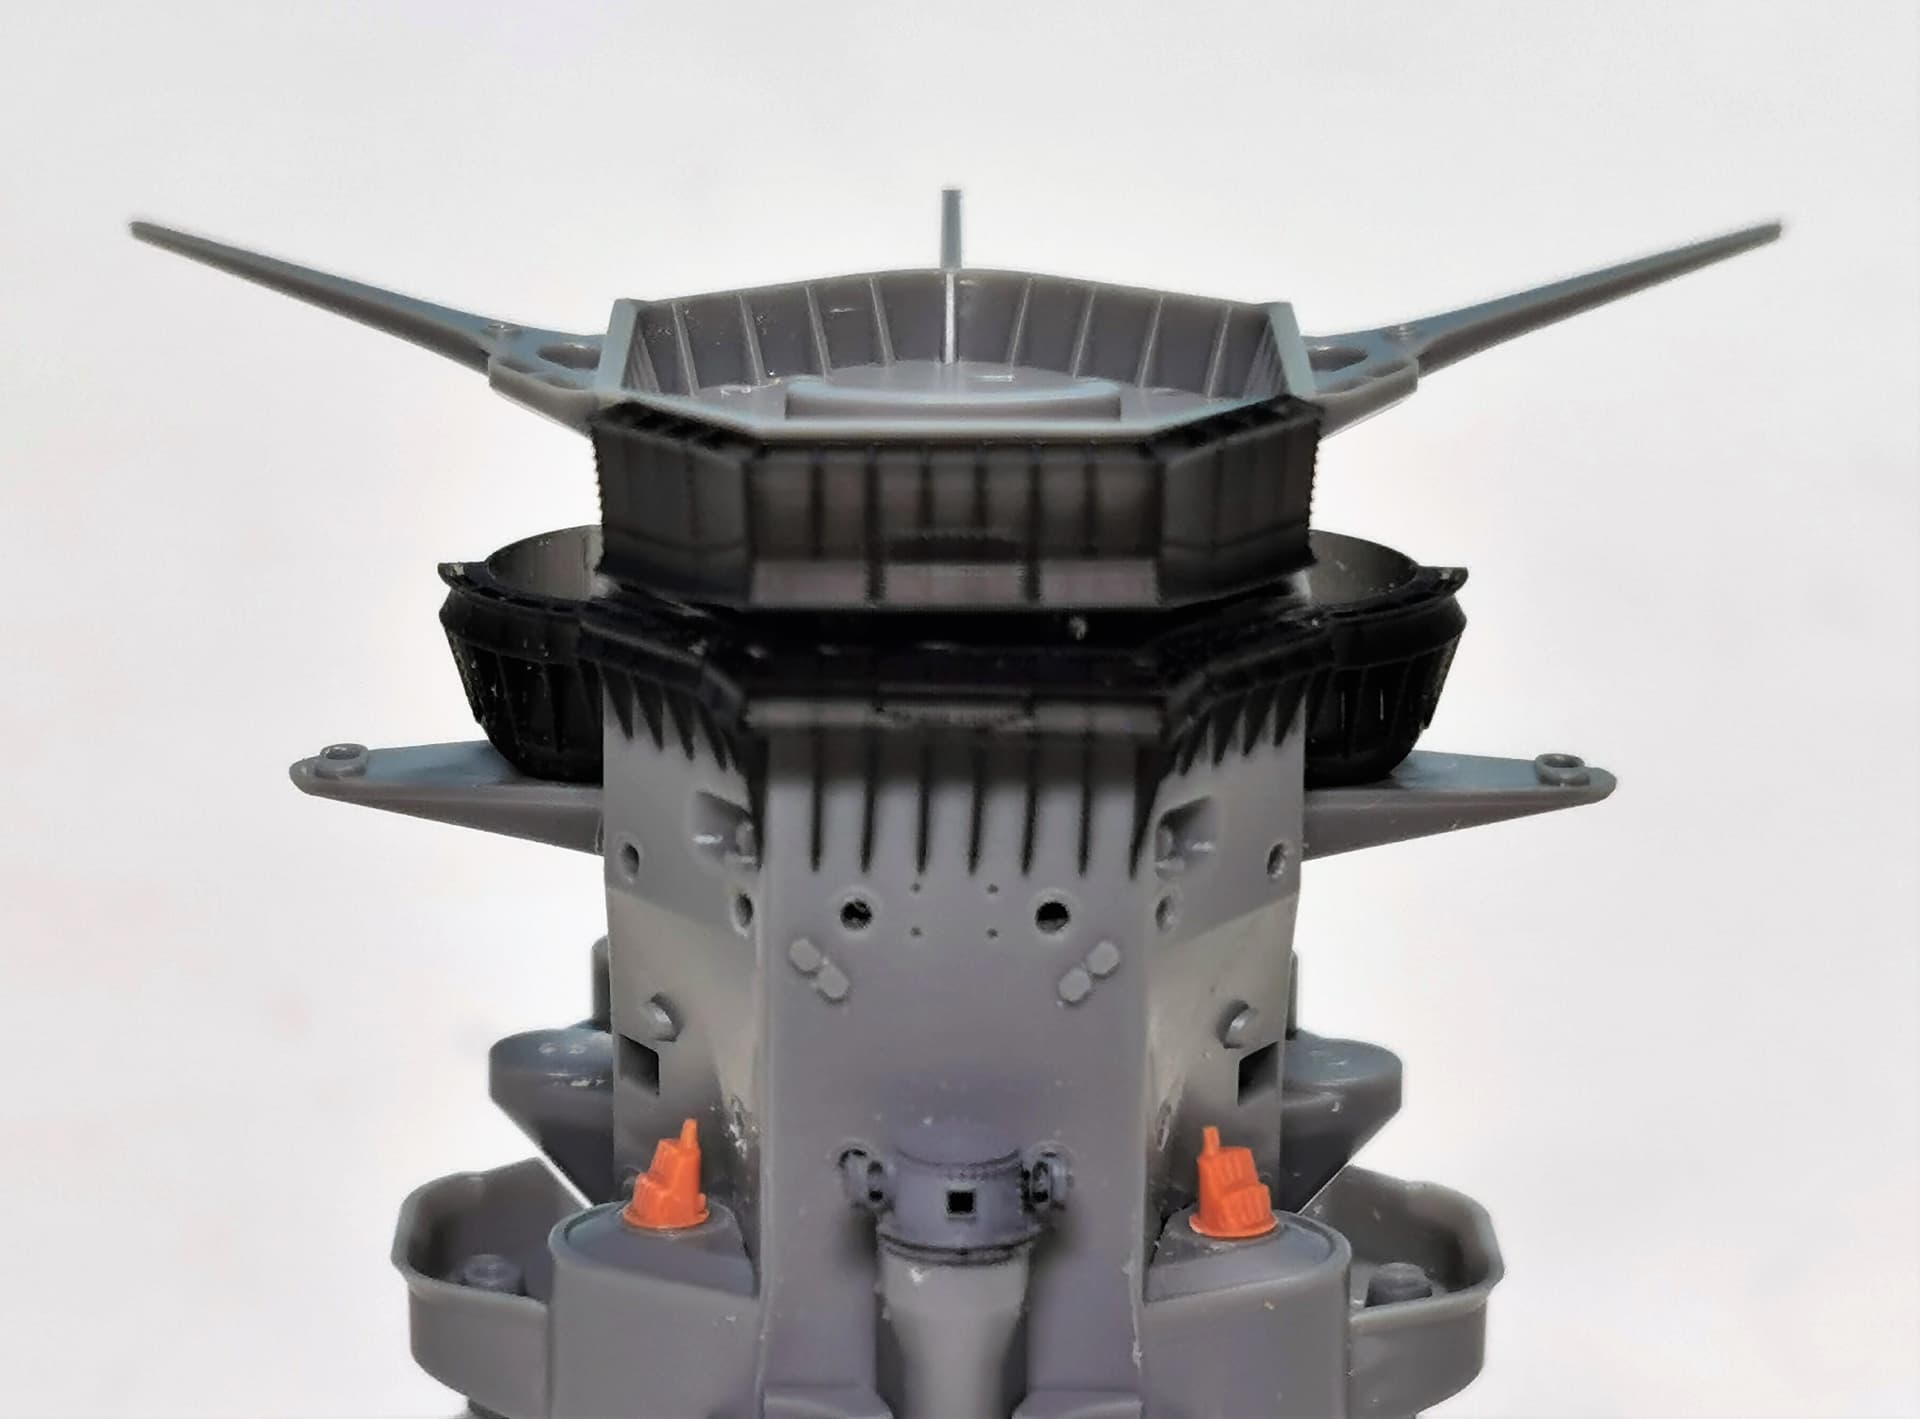
I replaced the kits plastic wind baffles with 3d-printed parts from BUNKER STUDIO again and they look marvelous! There is also an conversion for updating the late style air defence control platform which will be shown later
I noticed their upgrade (with the late style air defence control) but I already glued the kit parts in place.
I was wondering though, where did they got the air defence control thingy info from? I’m asking this because in the Skulski book it isn’t mentioned (or I completely missed it) and I didn’t find it anywhere. But it’s good to know that this changed later on since I’m also depicting mine during her final sortie.
Wouter I did collect my references from Skulski`s book but not alone from there but also from two different internet builds and the japanes film https://www.youtube.com/watch?v=9f64mYmaRGc I did read that some of Skulski´s book facts were already proven outdated already (for example Yamato carried no armored shields with the open triple 25 mm guns. Also there were actually two F1M1 Pete aircraft aboard at the last mission; these were flying antisubmarine duty after Yamato entered the open sea etc.). If I remember correctly the top AA control station for the IJN staff officers was installed immediately before her last journey to better centralise command to all the AA gun installations.
Yamato: the last battle I bought years ago on blue ray, but have never seen it yet. It was sold with English subtitles, but I only found out that you had two options: Japanese spoken with German subtitles or German dubbed.
And while I do understand and speak a little German, a whole film is another thing . And my Japanese is very very limited .
Might need to watch it though, even if I don’t understand much ^^
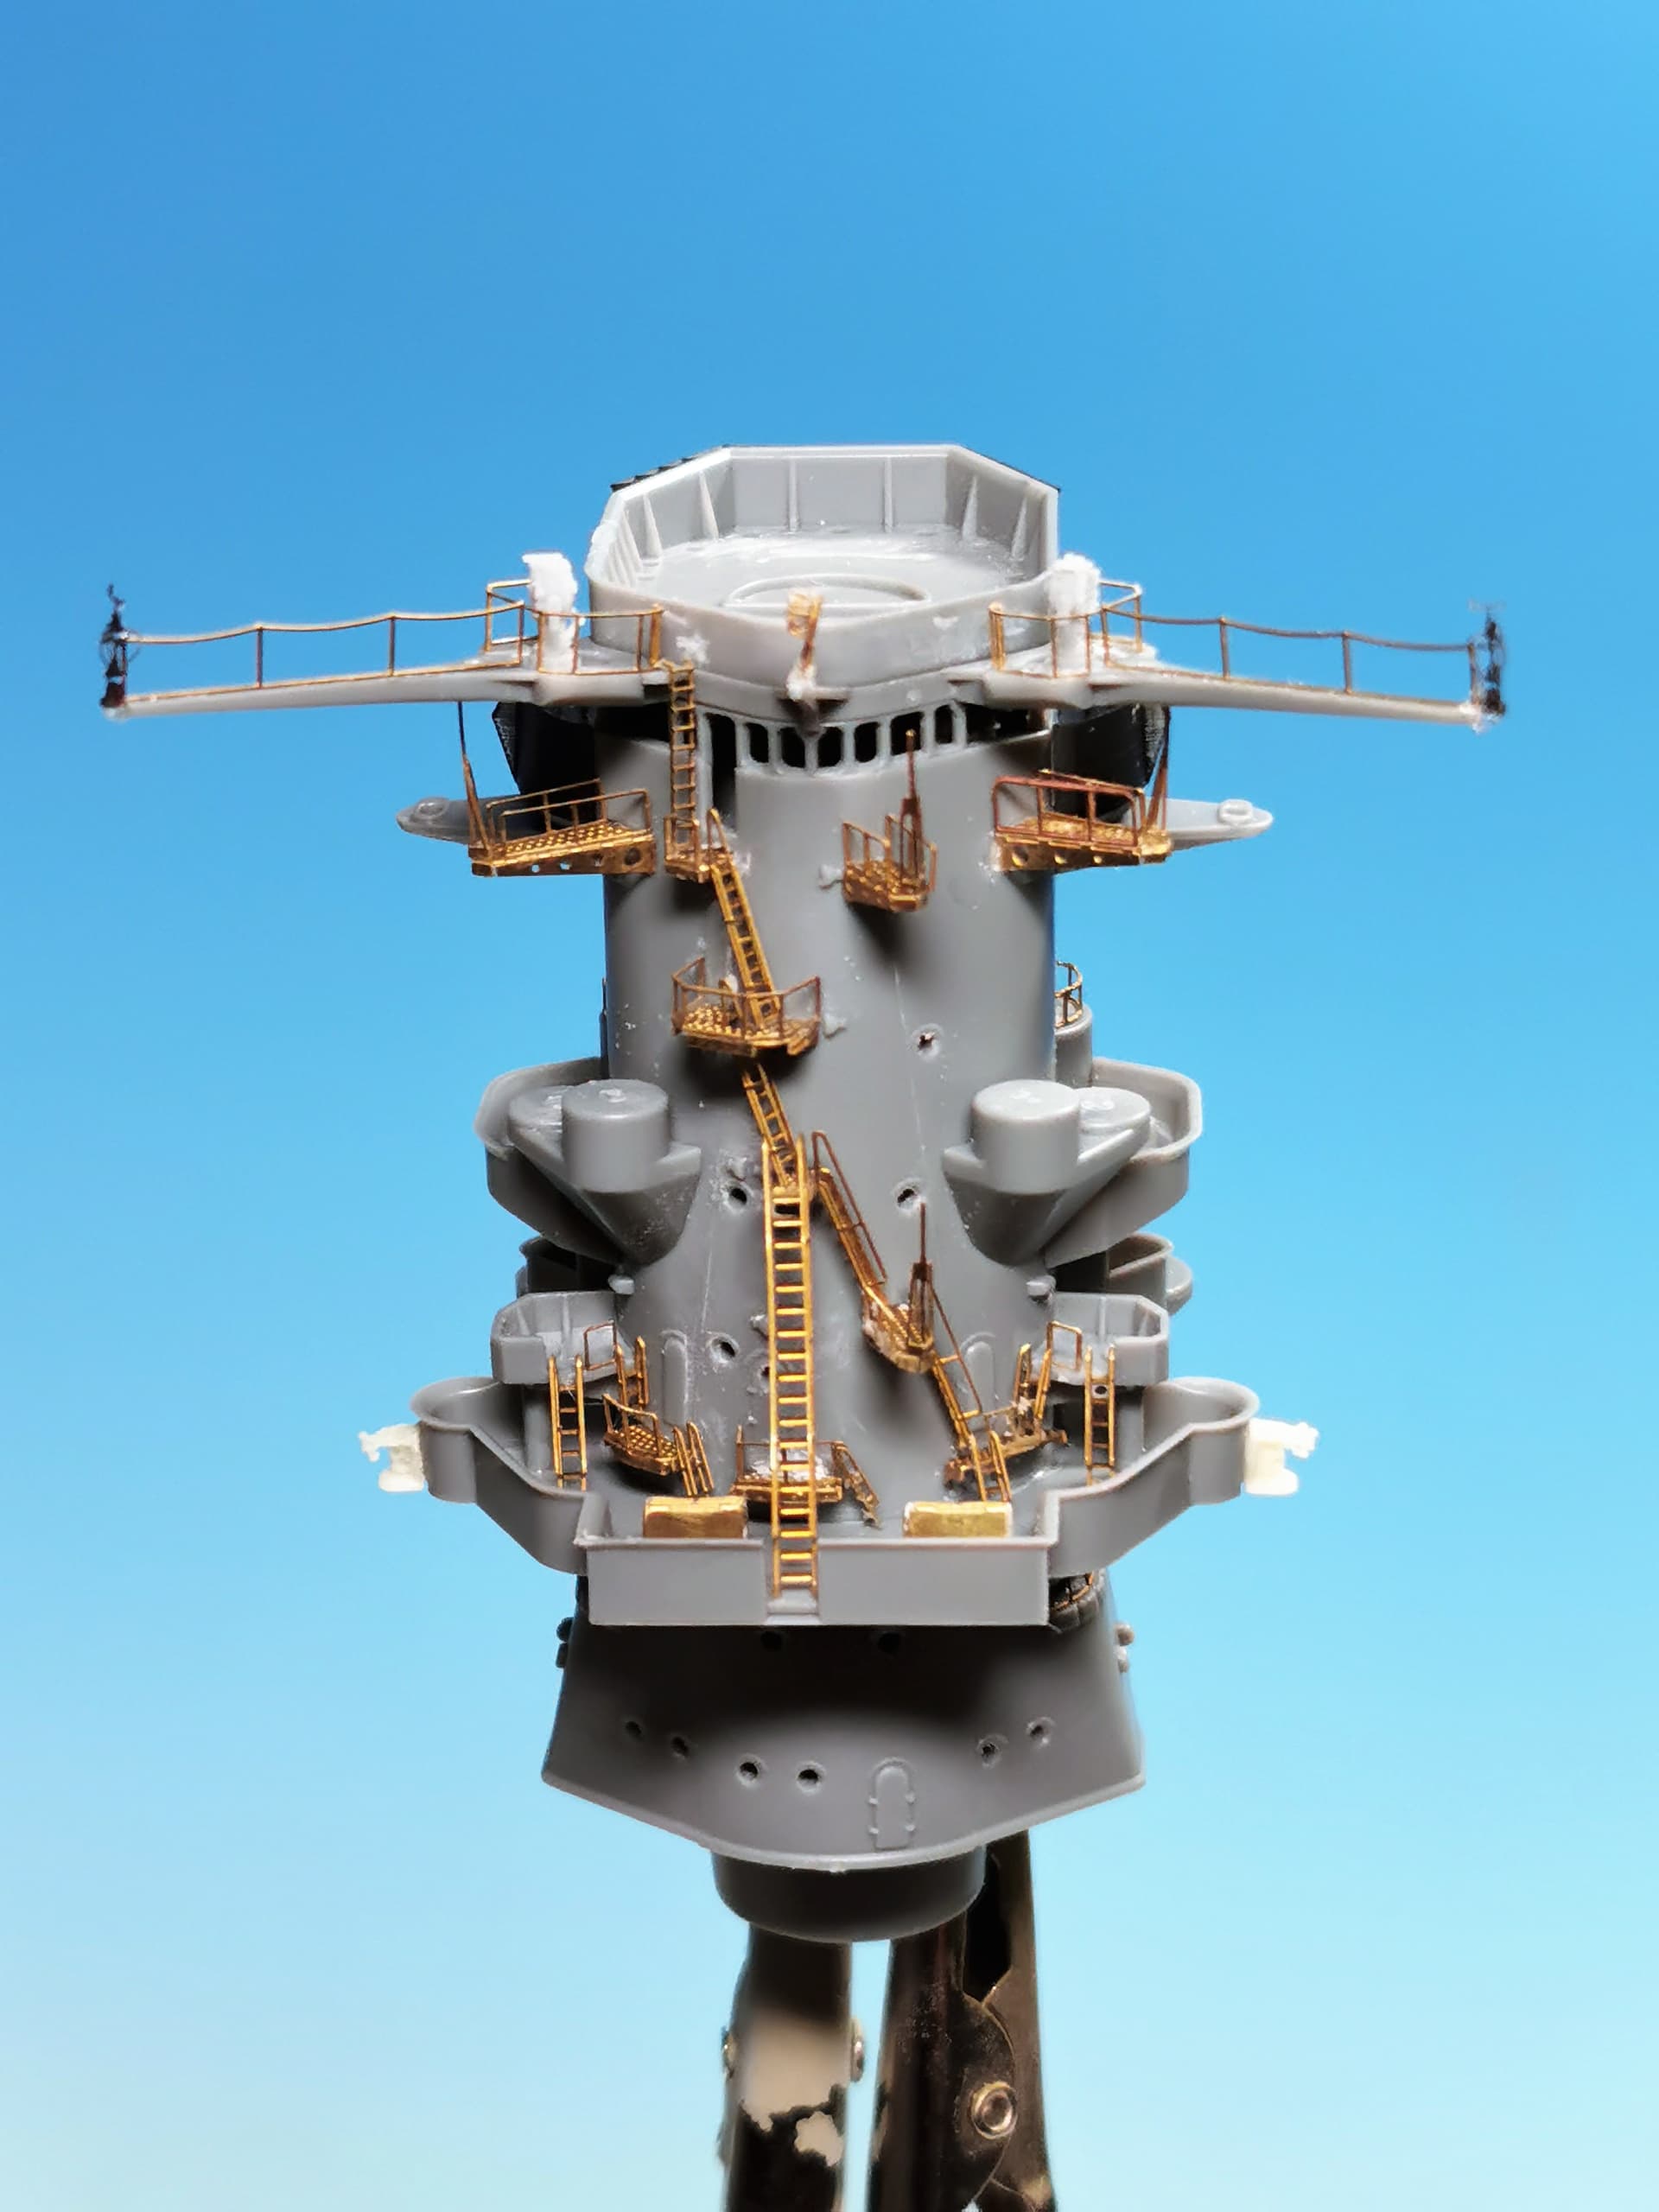
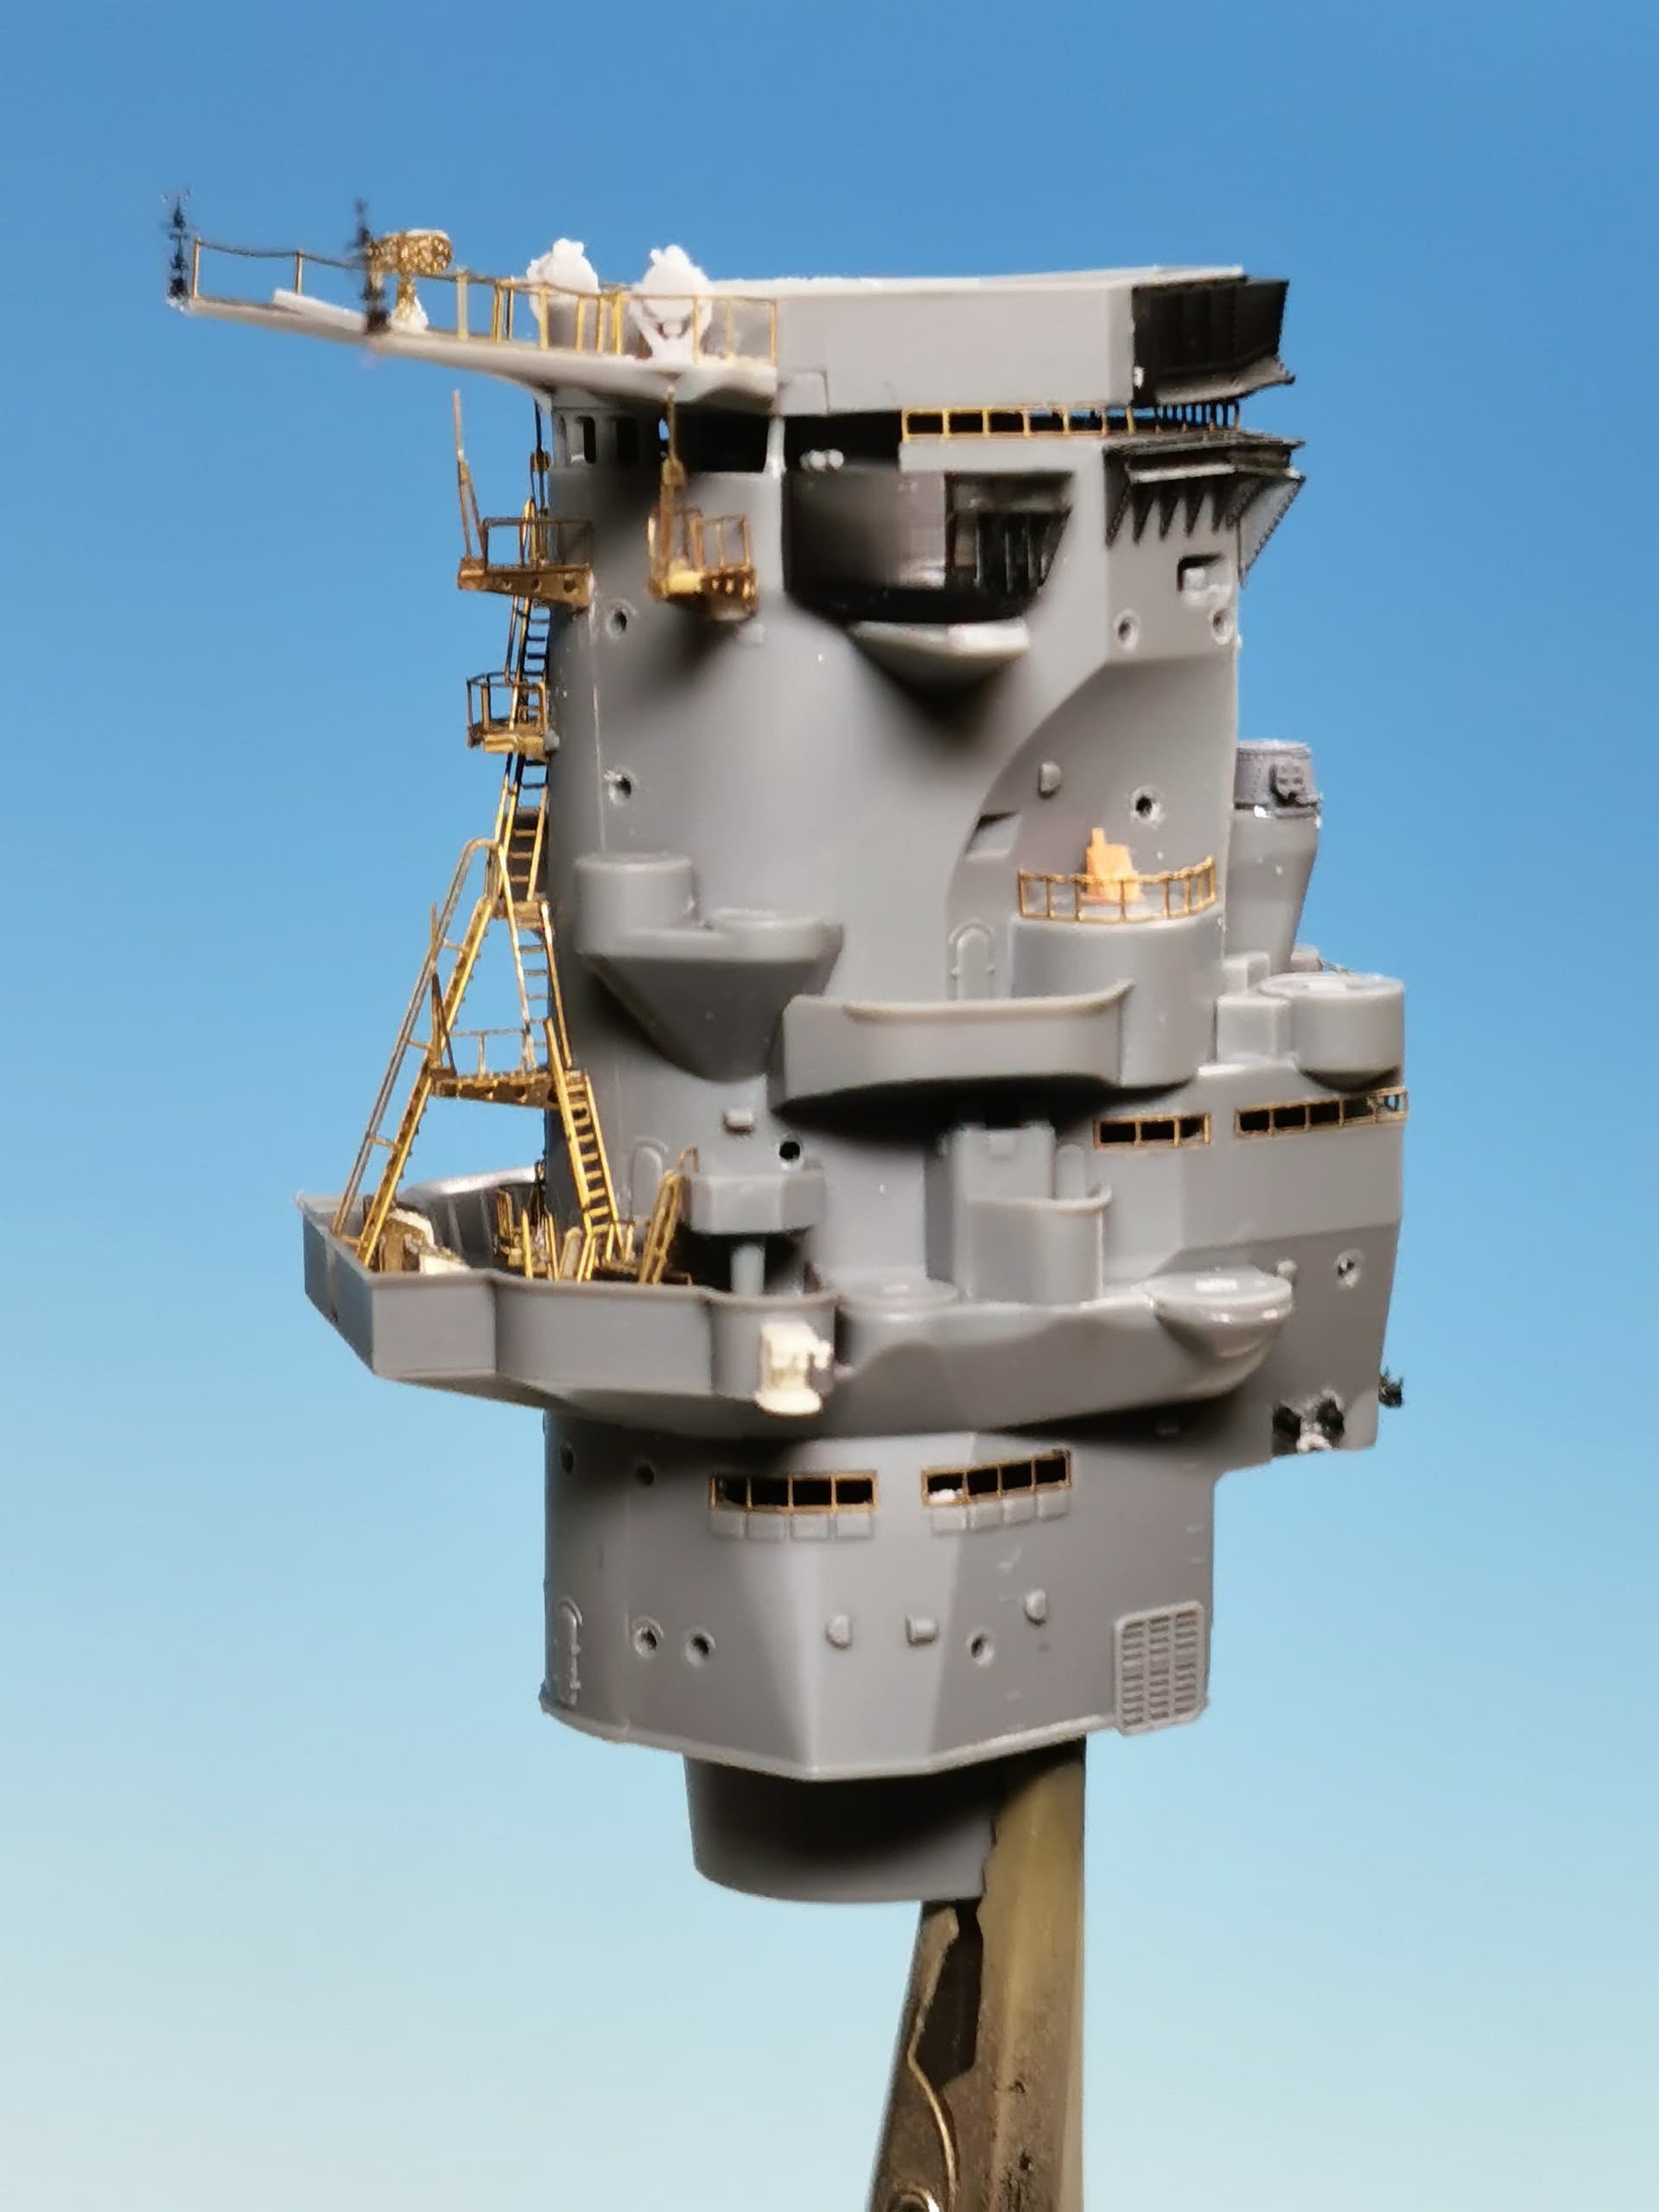
this is my progress for today at the main bridge. I worked on and off at it during the whole day. Again it is a mish mash of different parts: The ladders and platforms are from KA-Models, the 60 cm searchlights from Black Cat, the microscopic Anemometers at the end of both signal yard arms from Blue Fattie Model, the Type 2 IR transmitters are from Veteran Models and the Type 98 director periscopes from YX Models.
The carpet monster took its heavy toll; I was able to salvage some parts again but two railings were lost forever and had to be replaced by some similar rails from my replacement stash…
In the end the current state of my works look like this