This was originally part of my efforts to meet the criteria of the Get Hitched campaign, and is duly mentioned there; however, I thought that it was not the place to explain in detail the background, as to the why’s and wherefores of the aim of the diorama. Granted, it meets the something towed theme of the campaign, but some (and it may not be very many) – may wish to read the background.
This may not be to everybody’s taste; after all, it’s a small part of my personal military history, and I warn you now, not exciting at all. This I’m afraid is a model of Me. If you have had enough of seeing me in 1:35 then turn away now(!)
I have felt the need to explain and describe how it all worked, not least to set the model in context, but it is lengthy; if you just want to get to the model bit then avoid the next dozen or so paragraphs. For those that remain, this is a bit of Cold War history as I experienced it all.
Back in September 1977 I was posted to HQ Northern Army Group, based in the massive British Army complex at Rehindahlen, near Moenchengladbach. I’d been serving at a Divisional HQ in the south of England for the previous 3 and a half years, where I went from private soldier to full corporal; I’d been king of my own dunghill in Div HQ, master of my trade (or so I thought) and was probably quite cocky; young Corporals often are. I’d been lucky in that my job in the General Staff Branch was interesting, and encompassed the staff functions of Intelligence, Operations, Plans, Training and even Air. I worked to some very capable officers, highly professional and often demanding- the Staff College’s finest.
So, it was to my immense dismay that upon reporting to the Chief Clerk of the G1/G5/CCP Division (as the staff branches were known), I learnt that I was to be assigned to the Typing Pool. I was aghast; whilst I may well have presented as being a bit too big for my boots, this seemed a colossal waste of my experience and skills; now, back in the day of the printed word, typing was of paramount importance, and being in a NATO post, we did not have civilian typing pools, so it was down to the Clerks of each Staff Branch - or Division as they were confusingly called – to produce the written word - I just didn’t expect it to be me!
In fact, quite a bit was confusing in my early days: the NATO staff system was used, which was totally different to the then historic Brit staff functions, however I soon got used to it. “G1” covered personnel issues, “G5” Civil/Military cooperation – or “CIMIC”, and “CCP” apparently stood for “Combined Computer Projects” but was all a bit mysterious.
The staff in the HQ were all drawn from the contributing nations to the Army Group, viz Brits, Germans, Belgians, and Dutch; we also had a US Corps earmarked to support us in time of war, but the only US staff present when I was there were the 59 Ordnance Brigade Element, the nuclear surety boys.
As an aside I eventually found out that “CCP” was a cover name for the development and construction of a massive NATO bunker, to replace the ageing JOC Maastricht (see below); it eventually became known as “Castlegate”; Google “Static War Headquarters Castlegate” if you so wish.
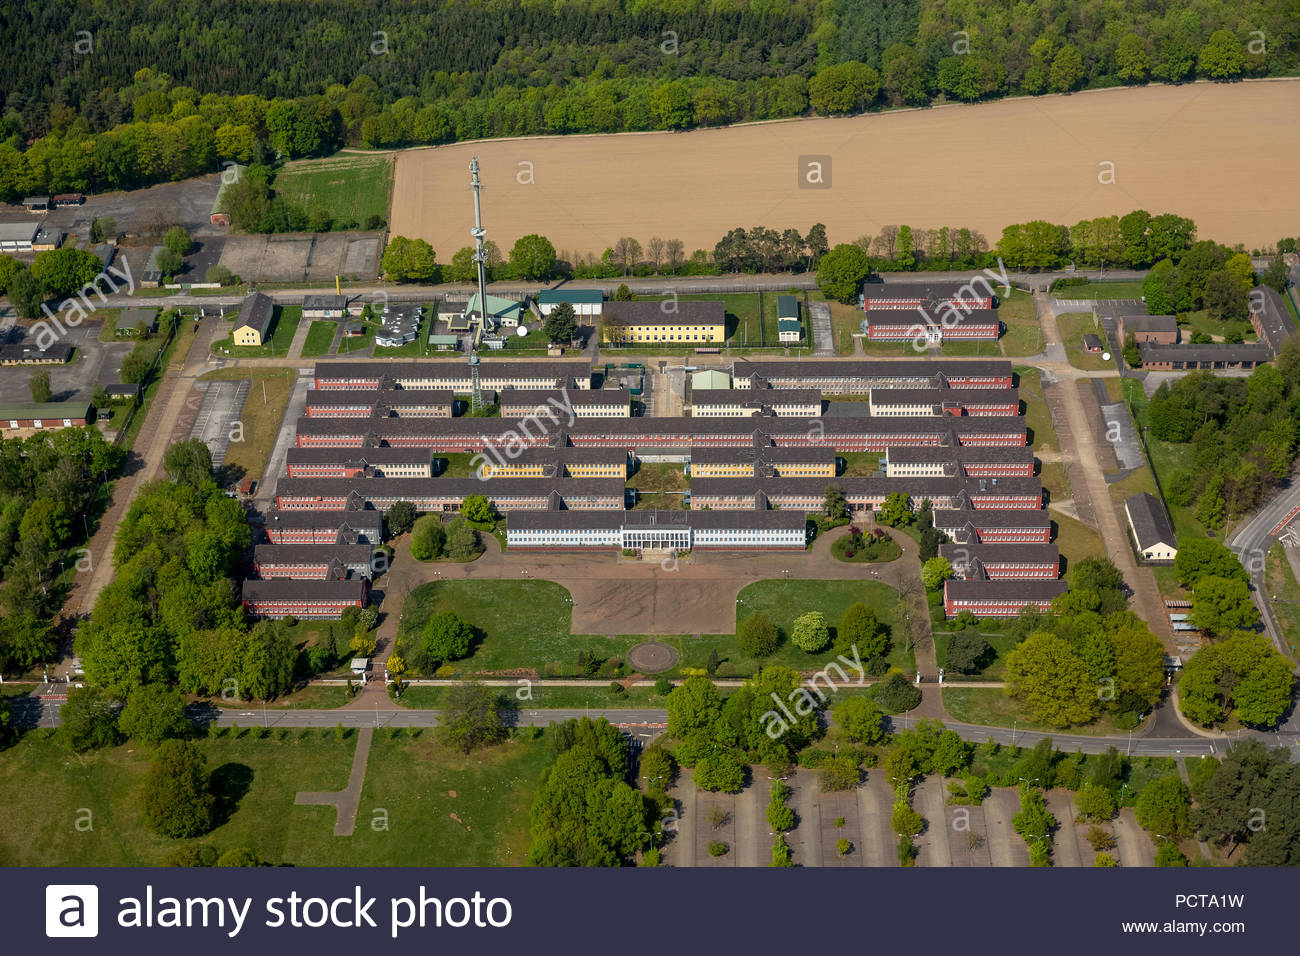
The command devolved upon a British 4 star General, who was double-hatted as the CinC BAOR; I should just explain that the Joint Headquarters complex as it was known, in Rheindahlen, consisted of 4 HQs: the 2 x national Brit HQs of Army and Airforce, the Army Group as I’ve described, and our air force counterparts, the NATO 2nd Allied Tactical Air Force or “TWOATAF”, constituted again, from the same nations as the Army Group HQ.
For the record, the Joint Headquarters at Rheindahlen – known as “the Big House” for obvious reason and earlier, the “White House” before it was painted in different colours.
So, it was in ill-humour that I ensconced myself in the G1/G5/CCP Typing Pool to begin nearly a 3 year posting. The other typist was a very affable Belgian Para-Commando, called Jules, a French speaking Belgian. Despite him ensuring that the office was a smoke-filled hell-hole, we became firm friends, and I helped with his English, and he helped me with learning some key French phrases – often scatological at my rather juvenile behest.
A further explanation to the Army Group’s structure: it commanded some 5 Corps, that is 1st British, 1st German, 1st Belgian, 1st Netherlands and in time of war, a US Corps which may have been 3rd – I can’t quite remember. The staff of the HQ were from all these nations.
The 2 official NATO languages for day-to-day business are French and English, so Jules would undertake the French typing tasks, and I the English ones. It was somewhat embarrassing to note that the majority of foreign staff officers and even soldiers, spoke (and wrote) rather good English whereas the Brits didn’t, or couldn’t, be bothered to learn anything else. I was quite surprised at this; a few years previously, in the British Corps HQ, nearly all the officers spoke French or German.
Anyway, I soldiered on, fuming inwardly and resenting my job; that is, until the first exercise loomed. Apparently, my war role was to be employed in the Cosmic Top-Secret Registry; this made no sense whatsoever, but at least for 10 days or so I wouldn’t be typing. However, just prior to STARTEX (Start of the Exercise folks – do keep up) I was tasked as described below still within the G1/G5/CCP auspices.
Now, the HQ upon deployment, divided into 2 component parts: Static and Mobile. The Static HQ deployed to an underground complex on the outskirts of Maastricht, known colloquially as “the caves”, and the Mobile component, was, you’ve guessed it, a complex of vehicles, primarily DAF office trucks with expanding sides. It was also huge, I think someone once told me that overall, it consisted of nearly 200 vehicles, of all types. However, I only served at Mobile once, and that’s another story (and possibly a modelling project too).
I should also point out that the idea of having 2 duplicated HQs was to ensure the continuation of command should either one be destroyed, and we also had to exercise and practice such a scenario; to this extent, when Mobile changed location (to ensure survivability) then Static would assume command. To exercise Mobile, Static would stand down and Mobile command – I’m sure you get the picture. Such drills were complex but well-rehearsed, and as you might expect, highly classified.
The Static War HQ (SWHQ) was also known as Joint Operations Centre Maastricht and was I believe, manned on a daily basis by 2ATAF; supported by elements from the not-too-distant Belgian Army barracks at Tongeren, just across the border.
SWHQ as it is today:
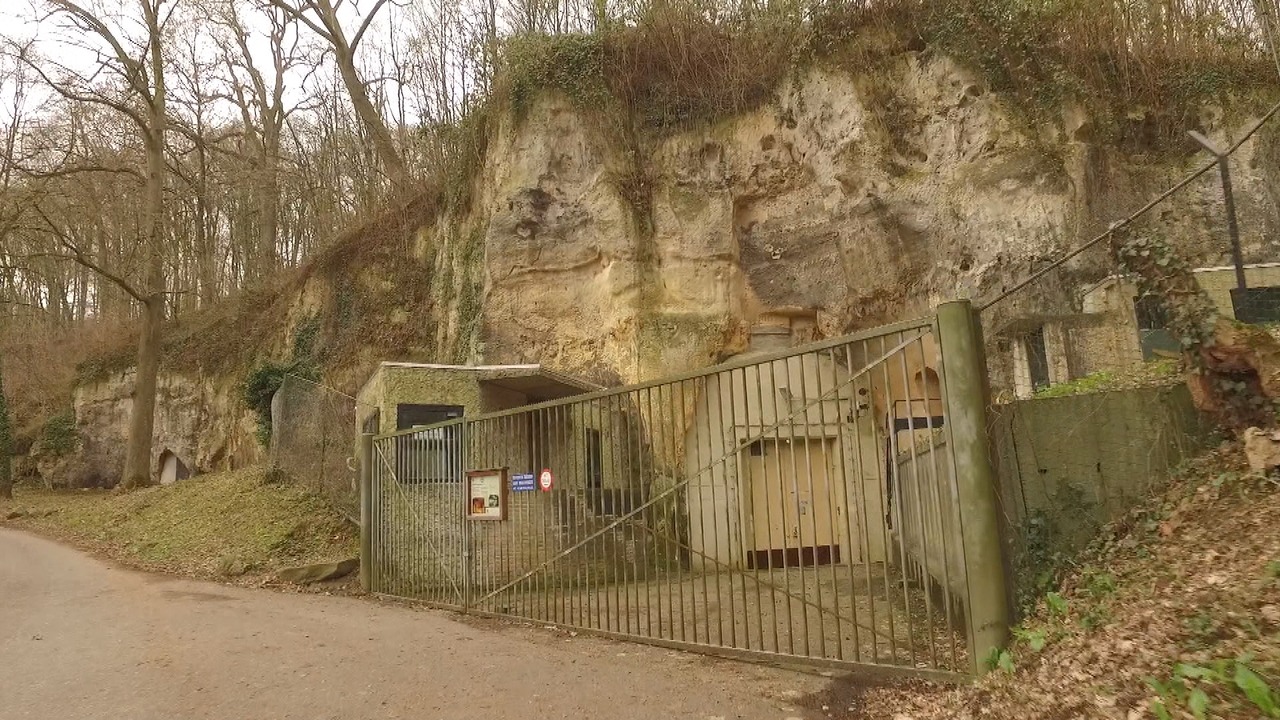
or at least the main entrance
The HQ had begun life as a Roman facility, and Latin graffiti could still be seen within. It was a vast system of corridors and offices, all carved out of the limestone. The Germans had used part of it in WW2 for the assembly of V1s. NATO, casting around upon its formation for hardened HQs, improved it with concrete, blast doors, power, air conditioning, ablutions, cookhouse, living quarters and so on and so forth. Here’s an internal map:
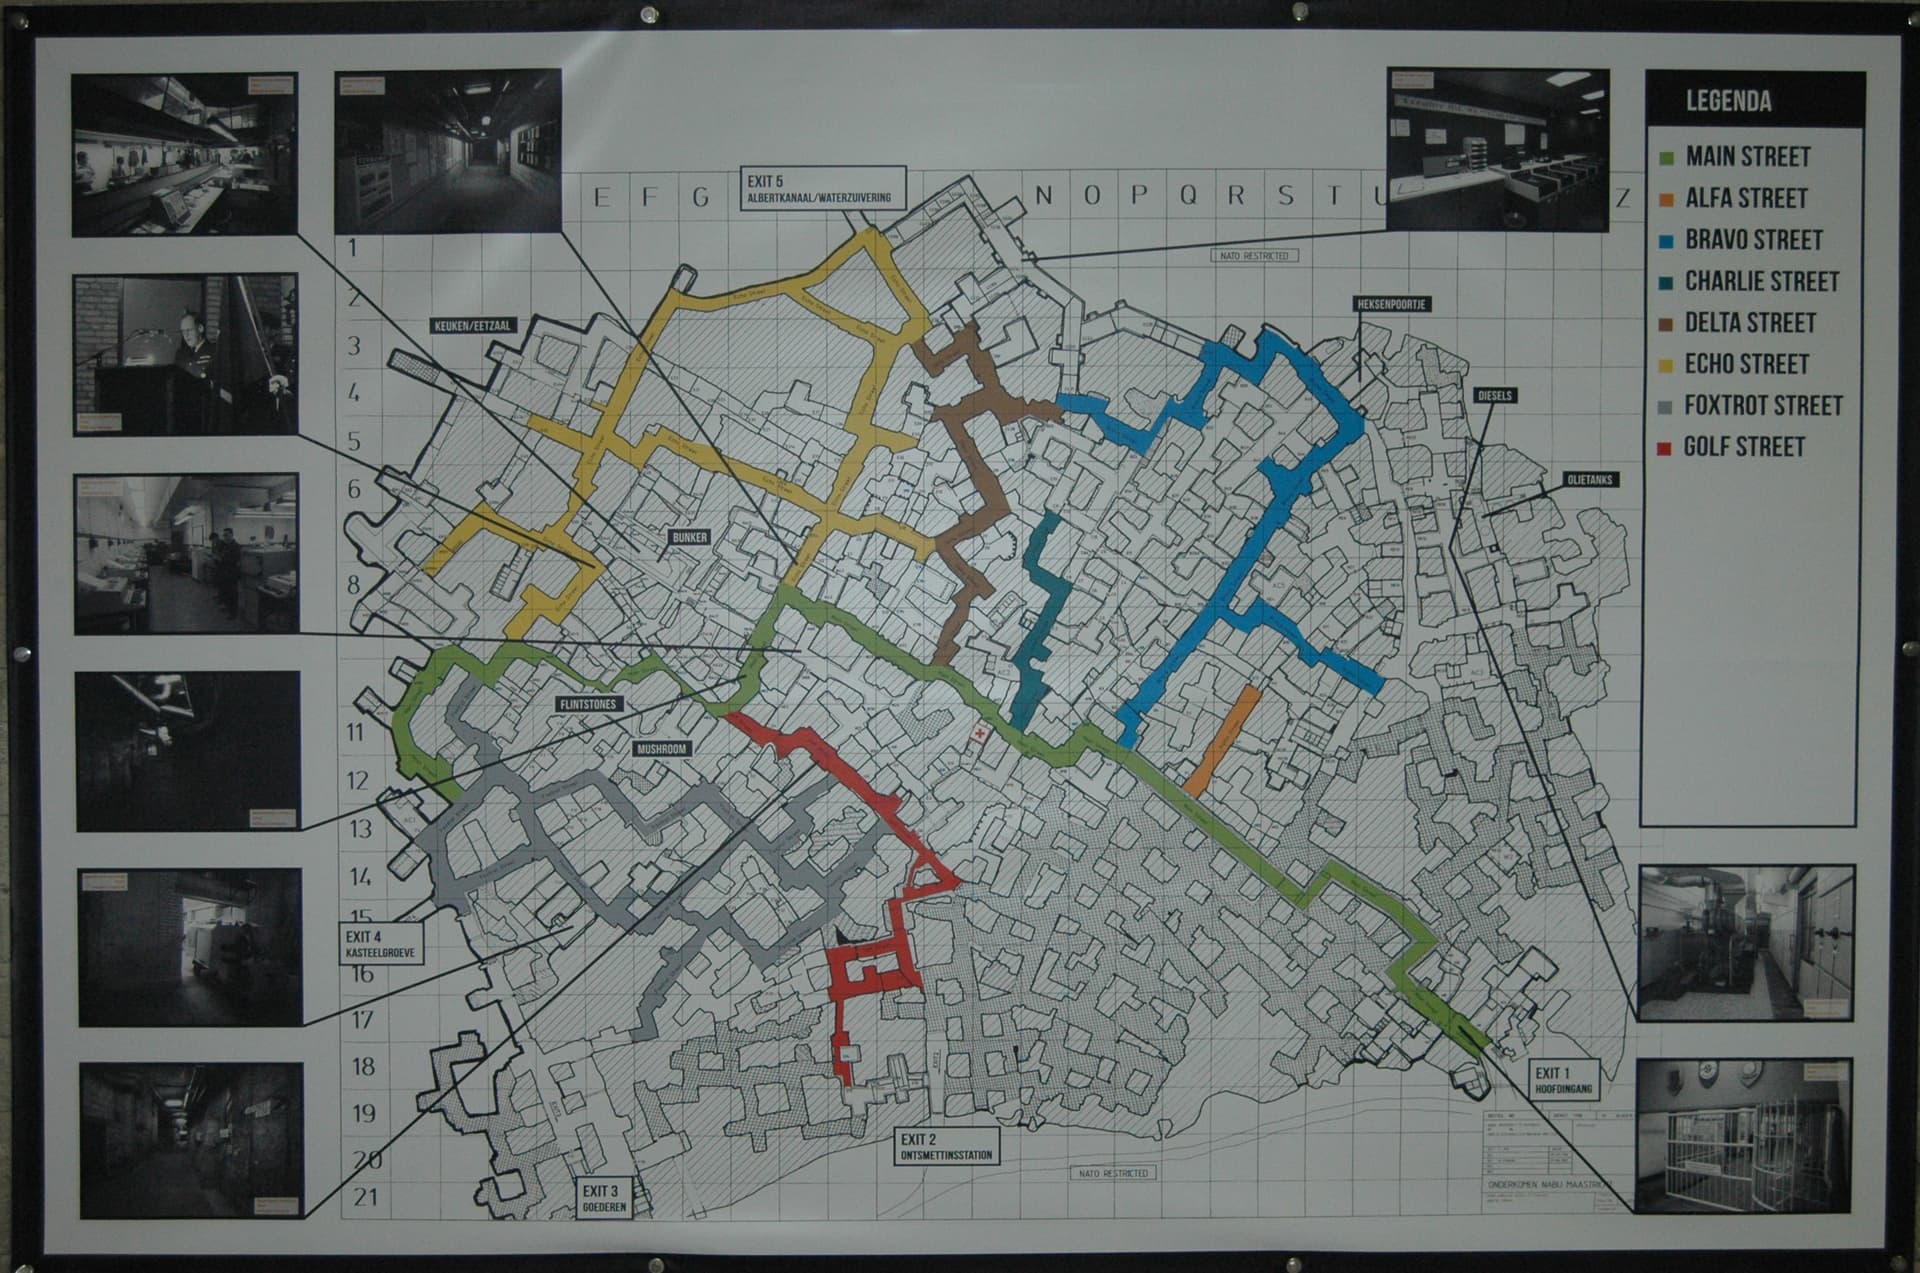
No wonder I often got lost.
The particular exercise I was tasked to attend was titled WINTEX-CIMEX 77 and was a biennial Command Post Exercise (CPX) involving all levels of command, including national governments, higher NATO-level HQs, and I think down to some national Divisional HQs (I had been on at least one WINTEX CPX previously, either at Corps or Division – I can’t quite remember).
I was tasked by my Chief Clerk, a fat, unfit Brit Warrant Officer who I loathed (mainly for assigning me to the Typing Pool, but also for his unsoldierly demeanor – I was still a somewhat arrogant ex-junior leader) to deliver a photocopier, stationery, and several key documents to the SWHQ prior to the actual start of the CPX; I was to be accompanied by a Belgian Corporal from the HQ’s Central Registry as a singleton transit of such classified material was not permitted. I think the Chief Clerk wanted to just get me out of the HQ for a bit, as he was probably sick of my moaning, but I was also one of his clerks who could actually drive; it may seem quaint now, but back in the 70s, not every last soldier could drive. I reported to the Joint Transport Company, and eventually, after an inordinate amount of paperwork, was charged with the responsibility of 1 x Land Rover and trailer; we did have quite a bit of kit to take).
I sought out my Belgian compatriot from the Central Registry, Jean-Luc, who was a bit of an Anglophile, and quite a smooth operator, speaking several languages, and with a penchant for the Brit Army girls (known as WRAC – Women’s Royal Army Corps) who also populated the garrison; in some ways I resented this latter attribute, not least as he was more successful than I in securing their favours, which I put down to his Porsche (!), but he was easy company and very funny, who seemed by osmosis to have adopted a Brit sense of humour.
As we were going straight into the CPX after delivering the goods we’d loaded up, we also took along all that we needed for the duration, so personal weapons, webbing equipment, sleeping bags, steel helmets and the like all went into the back of the Land Rover or the trailer, and off we went.
The Model – at last!

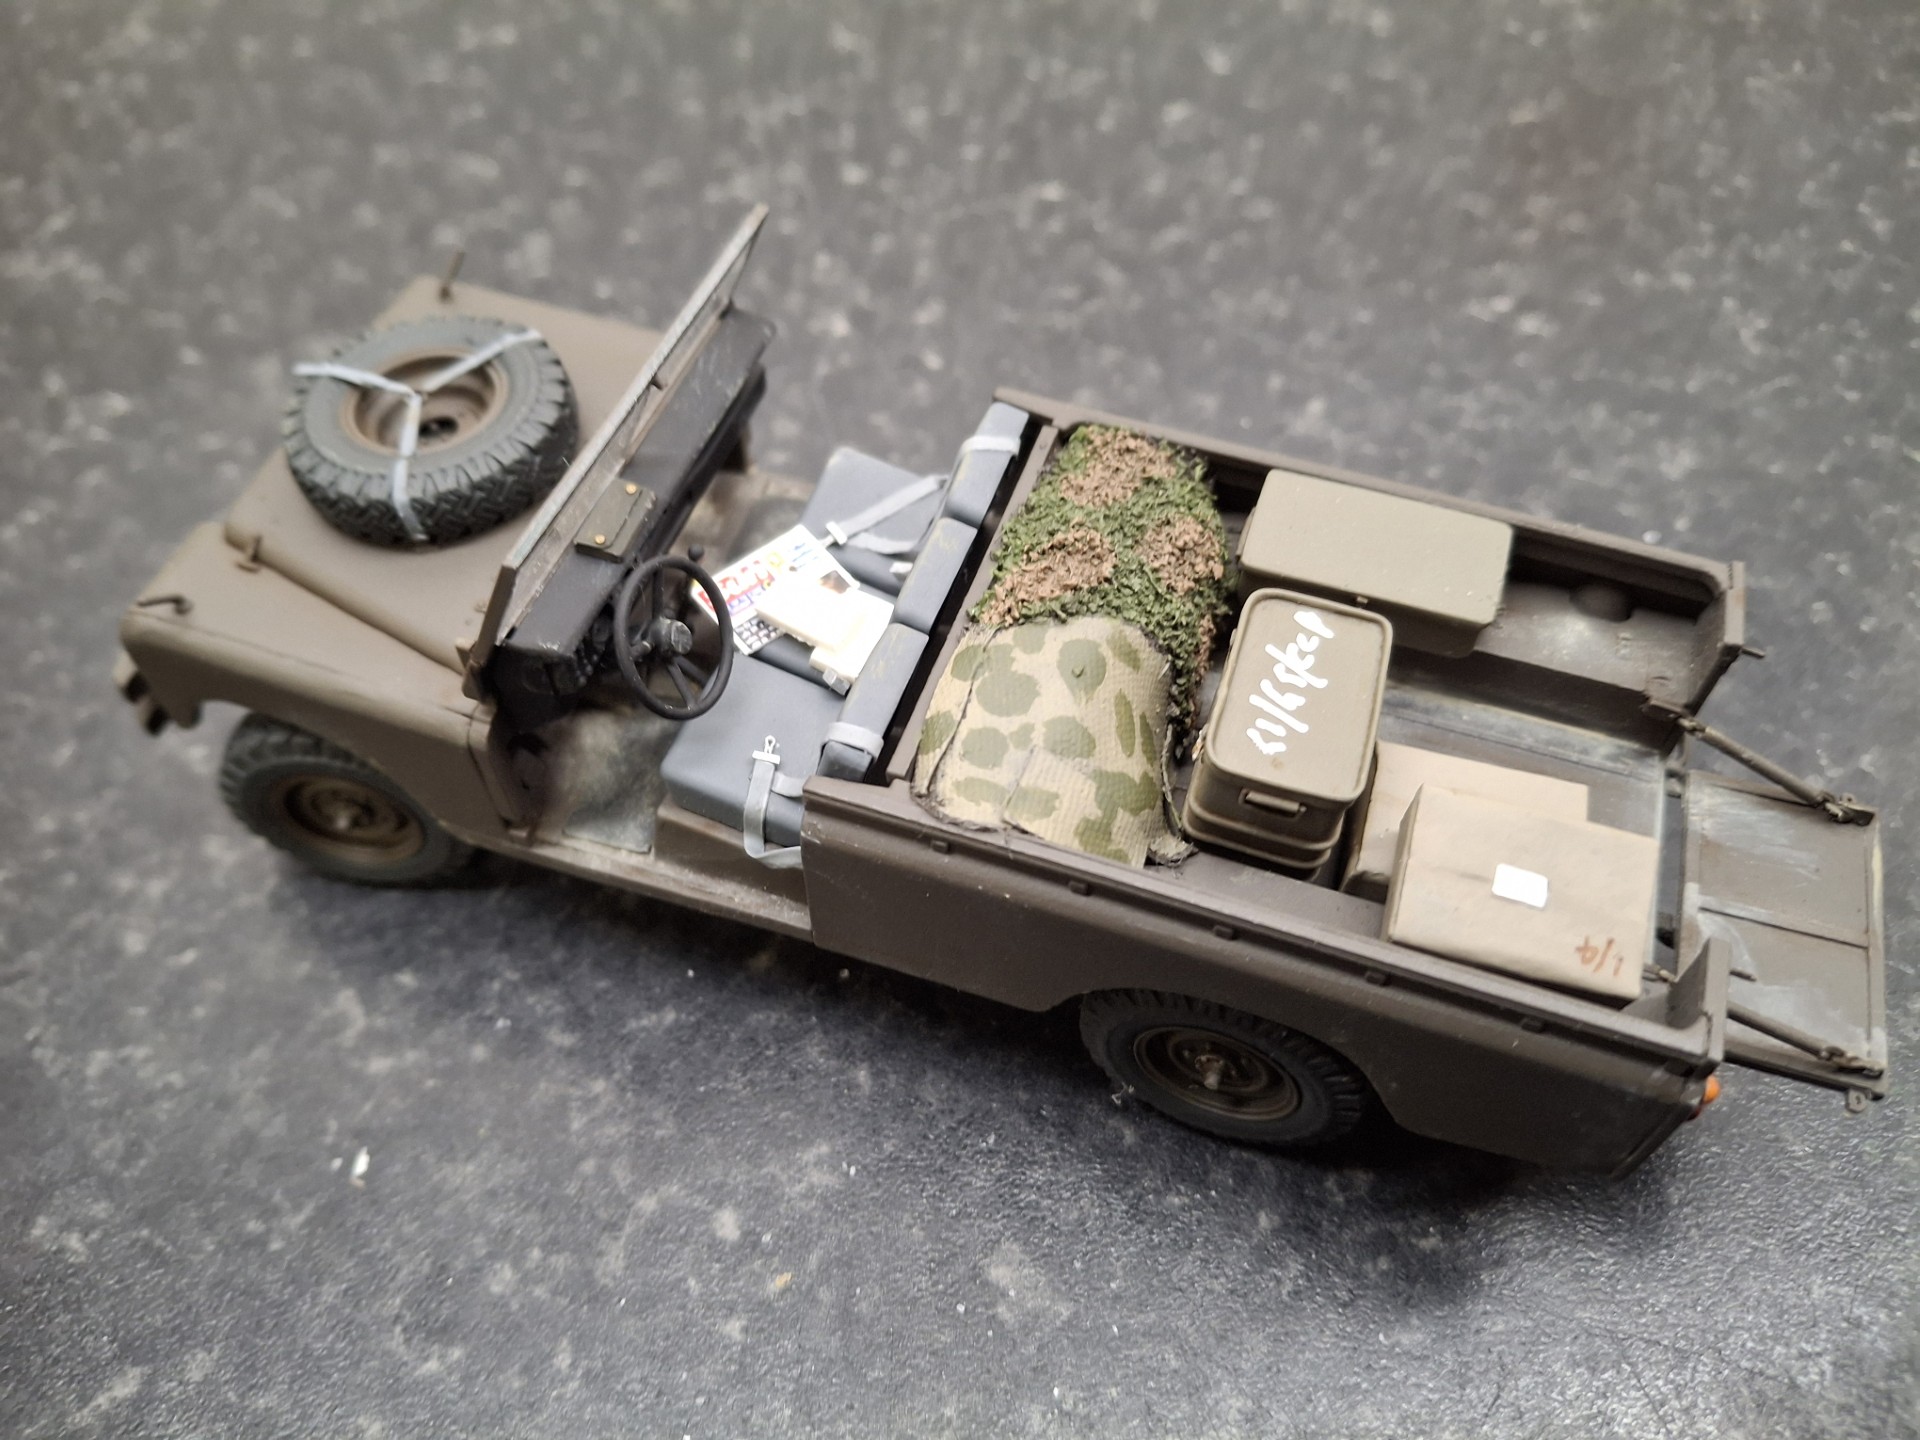
This is the venerable Italeri model from 1980 – produced just as my tour with NORTHAG was coming to an end. It is an excellent representation of those vehicles used by the Joint Transport Company: left-hand drive, naturally, transparencies in the canvas hood, and even has the 3 seat cushions, which I’ve never ever seen in a Brit Army Land Rover of the time.
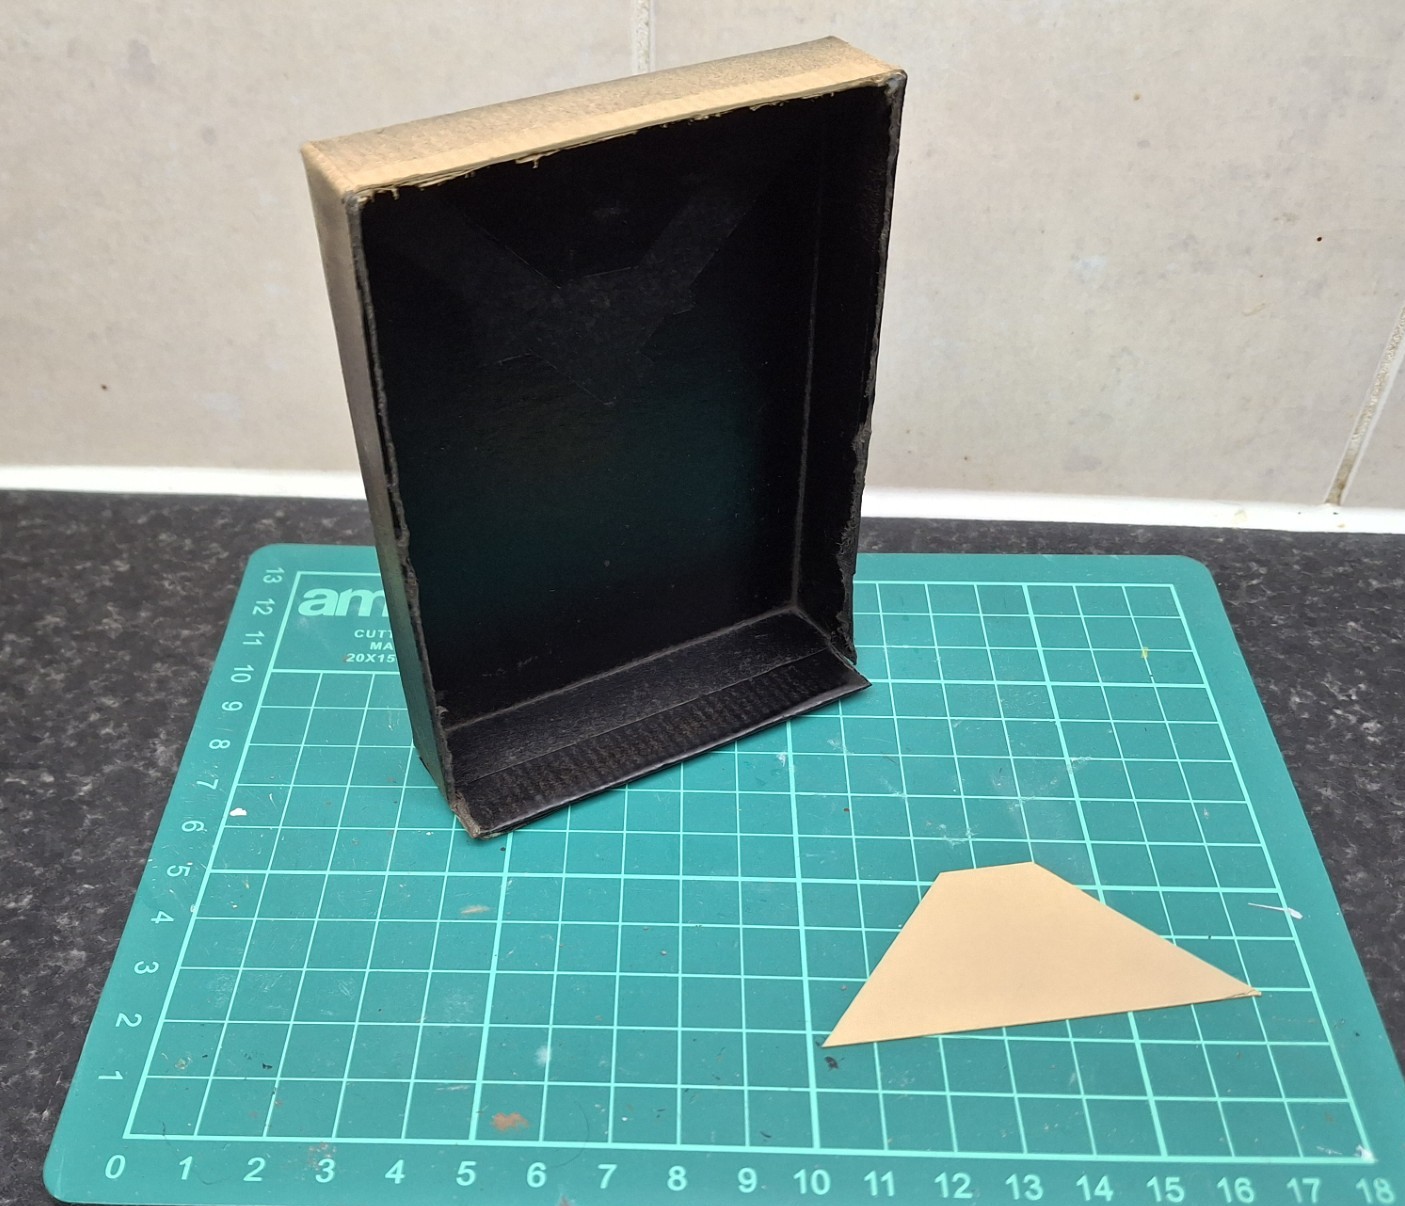
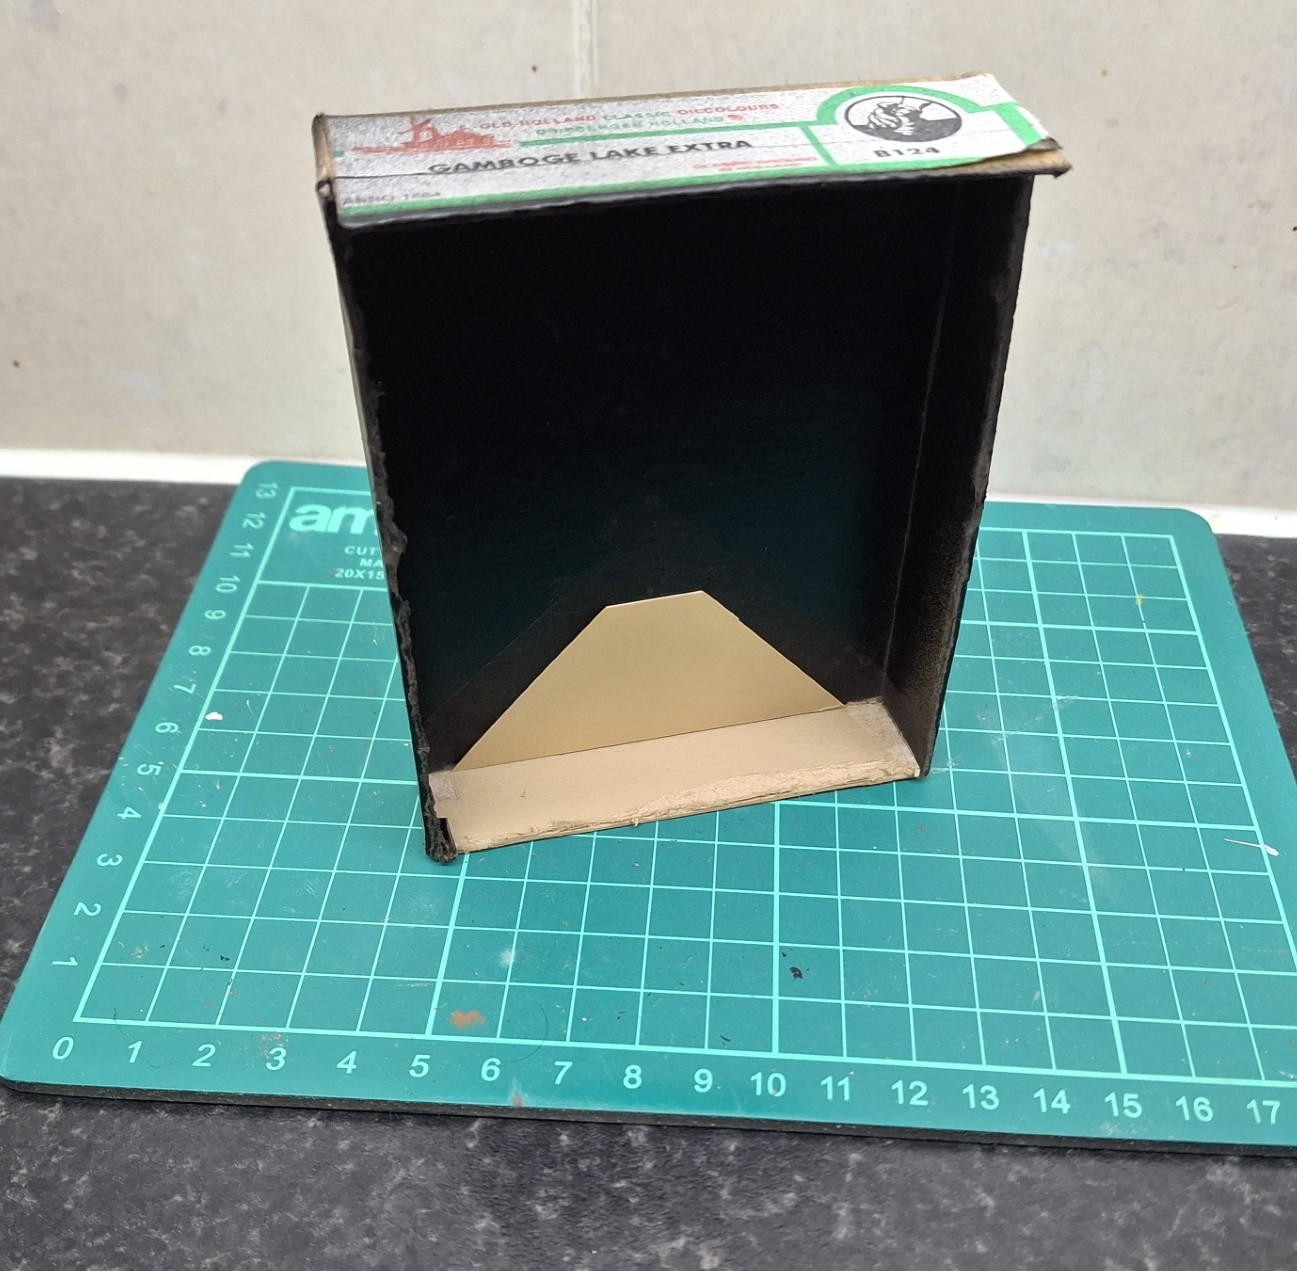
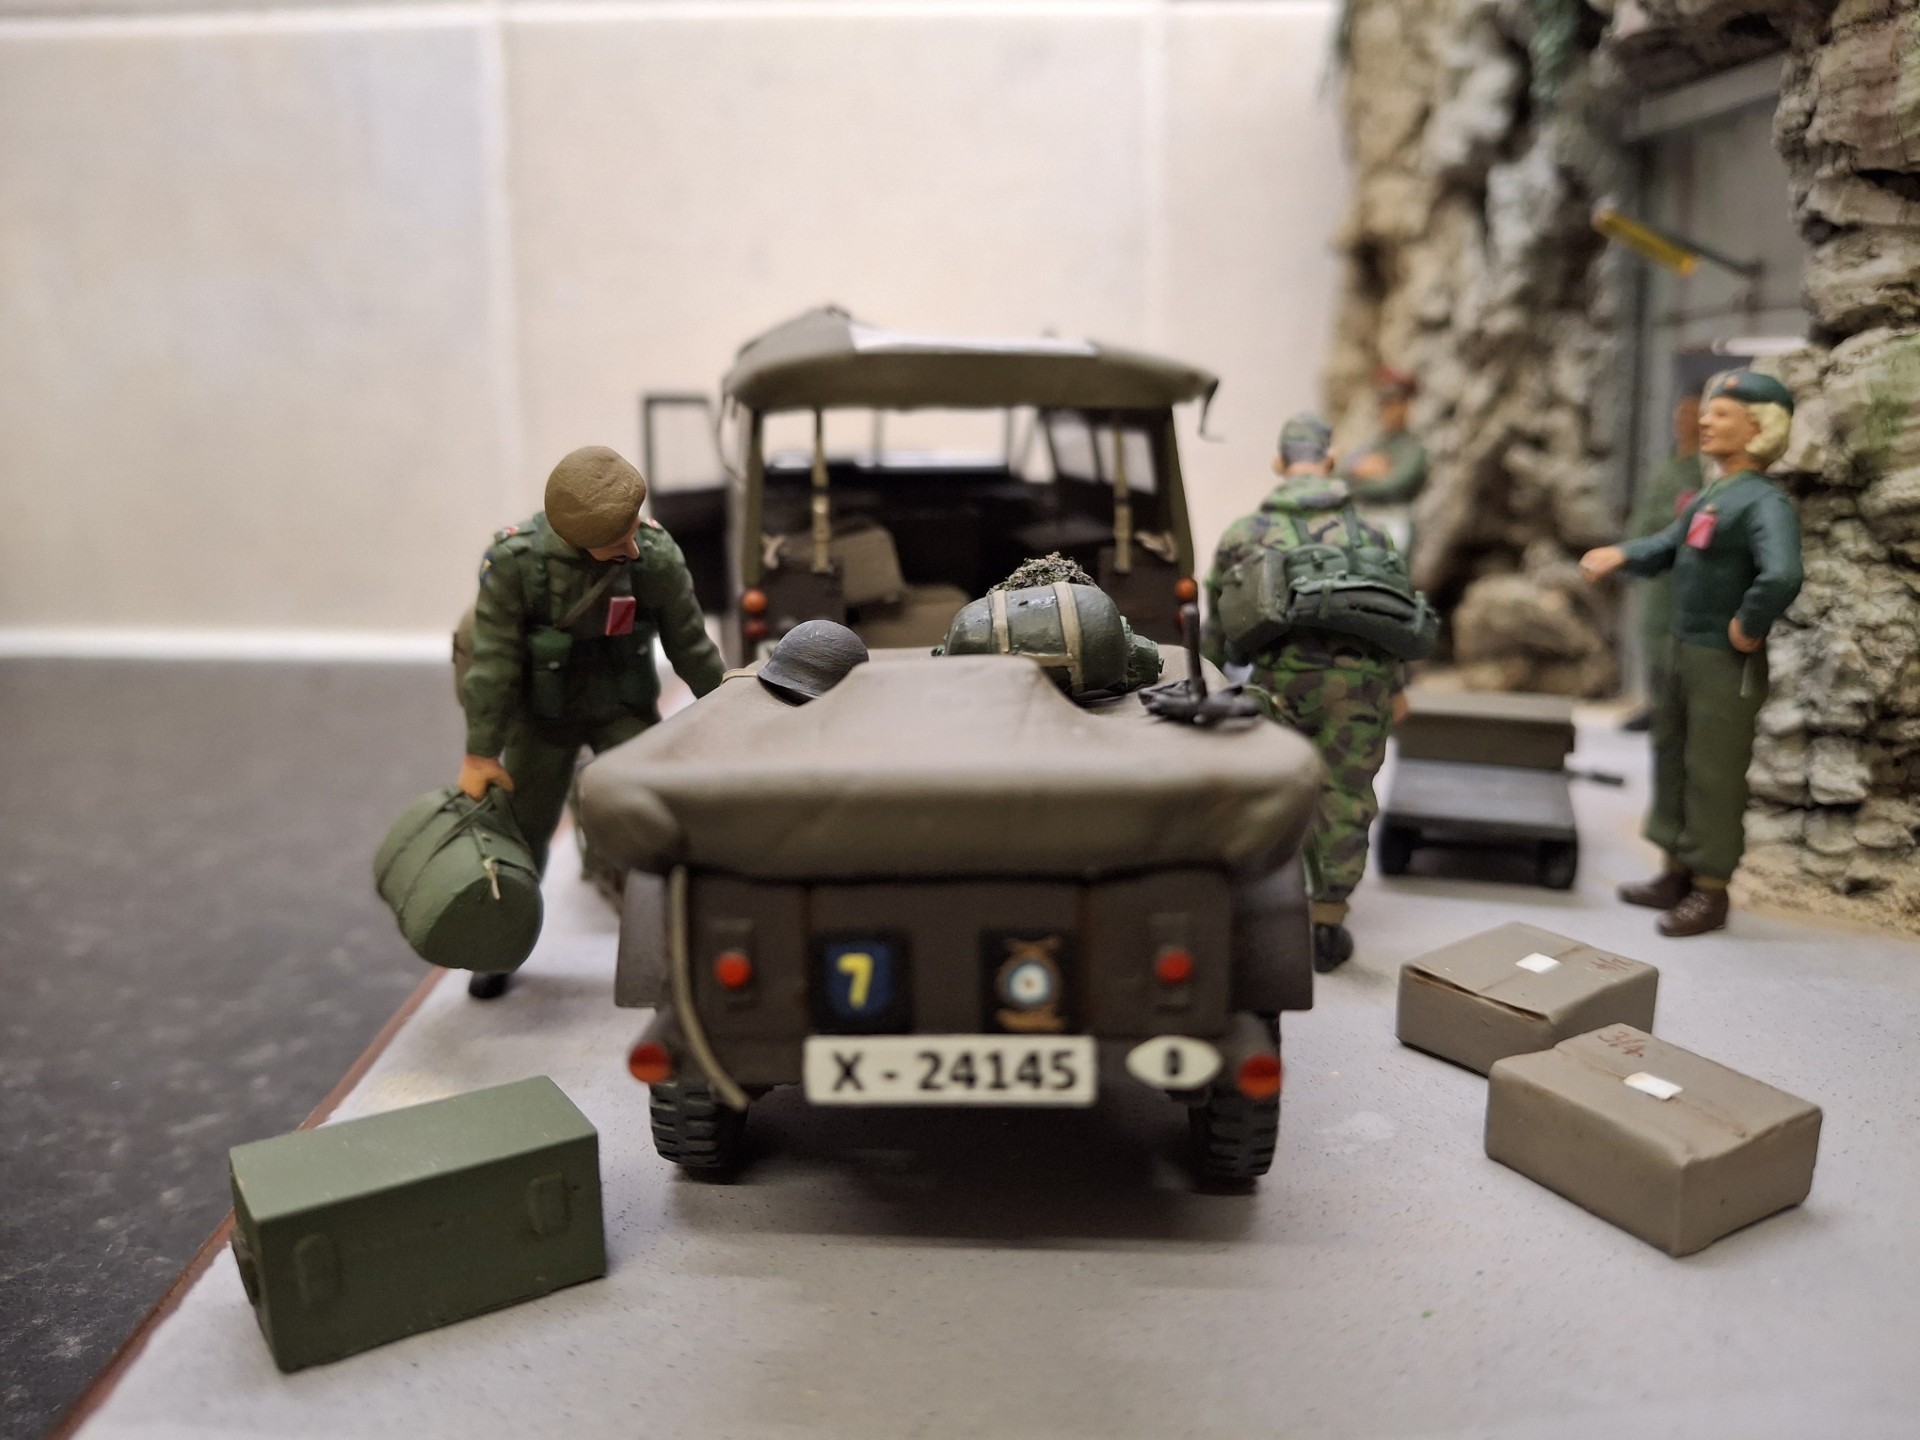
I modelled the tailgate down as I wanted to depict myself and Jean-Luc unloading all the kit we’d packed back at Rheindahlen. The trailer is a US pattern, from the Italeri “Jeep and Trailer” kit, again reflecting the type of trailers used. I’ve sculpted the tilt to reflect the bulky loads within. On top of the canvas we’ve dumped some of our personal kit and placed our weapons there temporarily while we sort out what is what. I’m struggling with the NATO version of what we used to call in the British Army, a “Box, Document Security”, in other words, a portable safe with a combination lock, used for transporting classified documents. On the lid is taped a small alphanumeric matrix used as an aide memoire for combinations. Also affixed to the lid is a NATO seal and a paper authorisation which denies any Border Police or Customs organisations access to the container. The seal is of red wax, and was heated up in a special German-made device back in the CTS Registry in the HQ in Rheindahlen; ‘think of everything the Germans(!)


I’m depicted as struggling as it was bloody heavy. Jean-Luc is also assisting in unloading endless boxes of stationery or paper and a few metal library boxes – usually known as Battle Boxes in the Brit Army. Upon arrival at one of the utility entrances of the complex, we had to sort ourselves out; the classified stuff had to be unloaded first and assigned to the staff cell within, hence most of the boxes etc unloaded as we didn’t think to load the classified last so that it came off first!
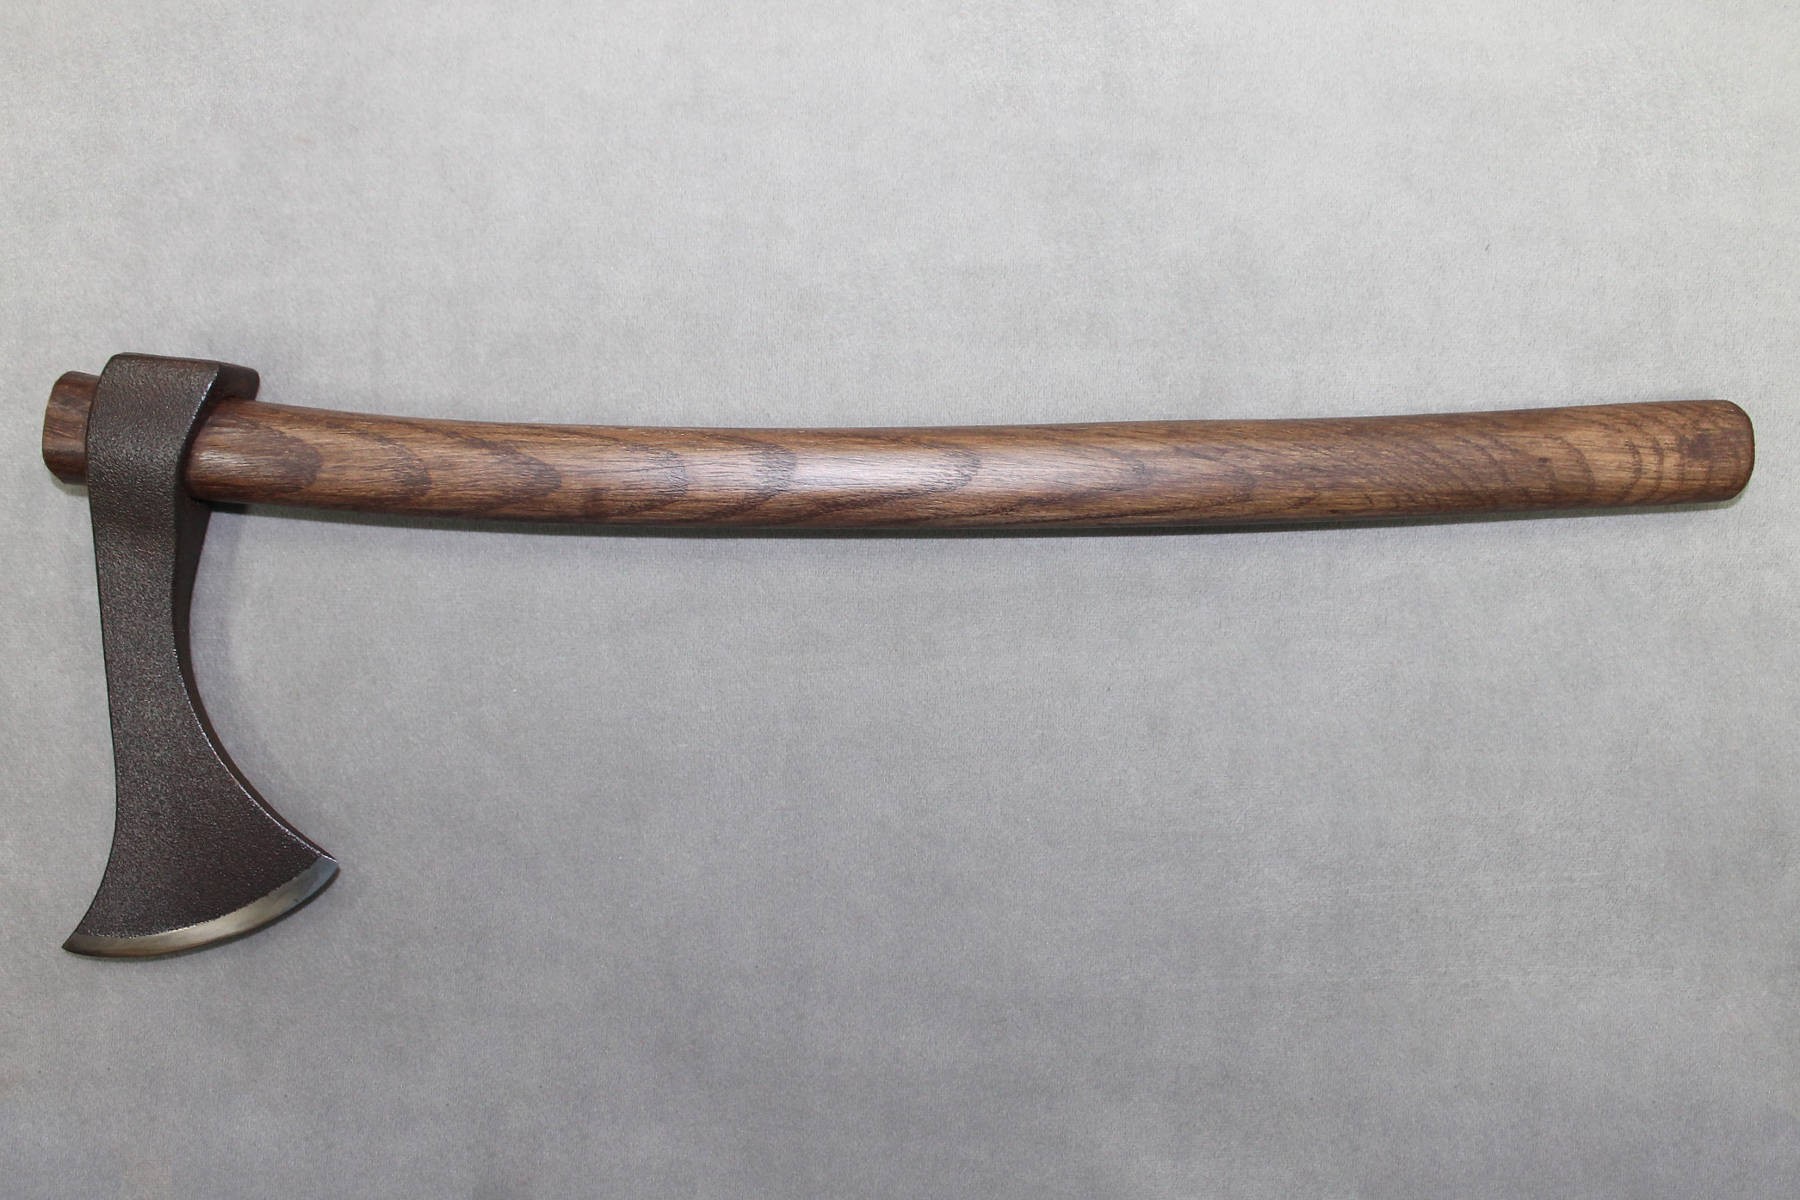
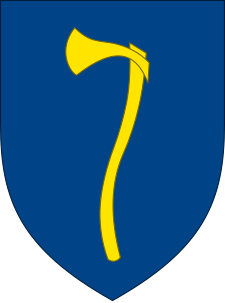
Markings. Army Group number plates began with an “X” and sadly I cannot remember how many digits followed; what I’ve done is add 5 digits from my Army number; these number plates looked like the Bundeswehr ones ie black on white. I think our superior HQ, AFCENT, used the same system. I hand painted the respective NORTHAG and TWOATAF badges. The image the Army Group badge was based on was that of a Frankish throwing axe or Francisca. When the JHQ building at Rheindahlen was being built back in the early 50s, a remnant of one was excavated. This was subsequently chosen as the symbol as it represented the victory of the Franks over the Huns, ie an enemy from the East, so, all very appropriate for NATO facing the Soviets and Warsaw Pact perhaps.
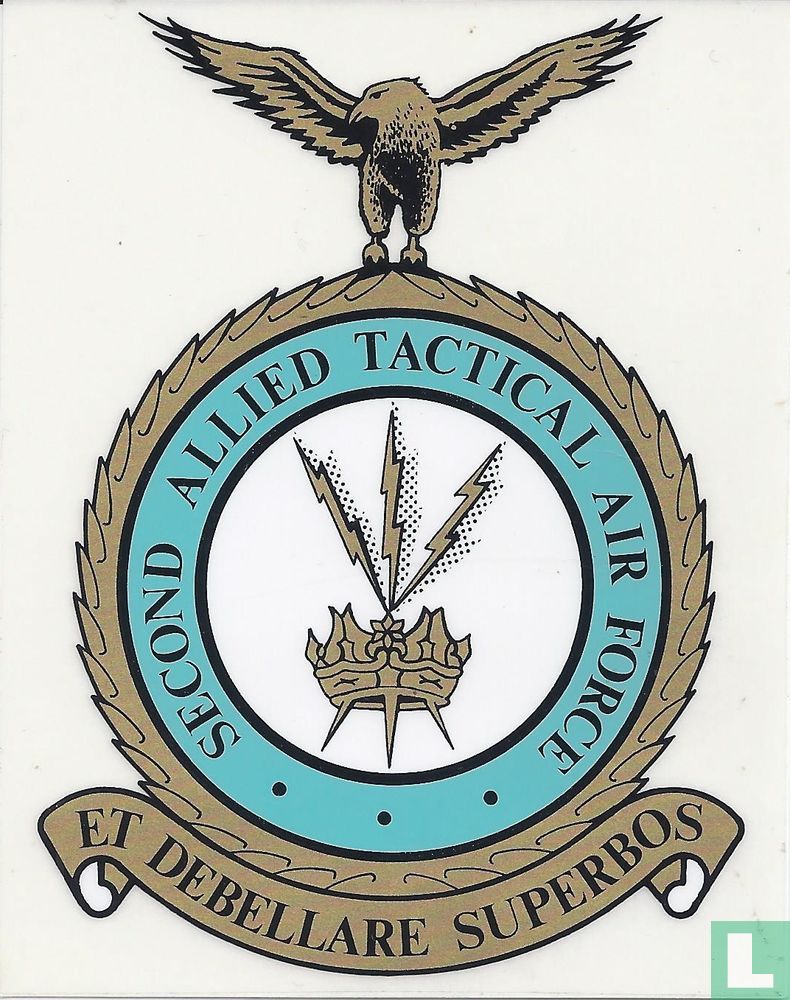
For the record the TWOATAF badge:
The Figures:
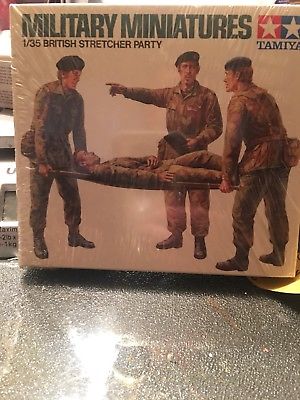
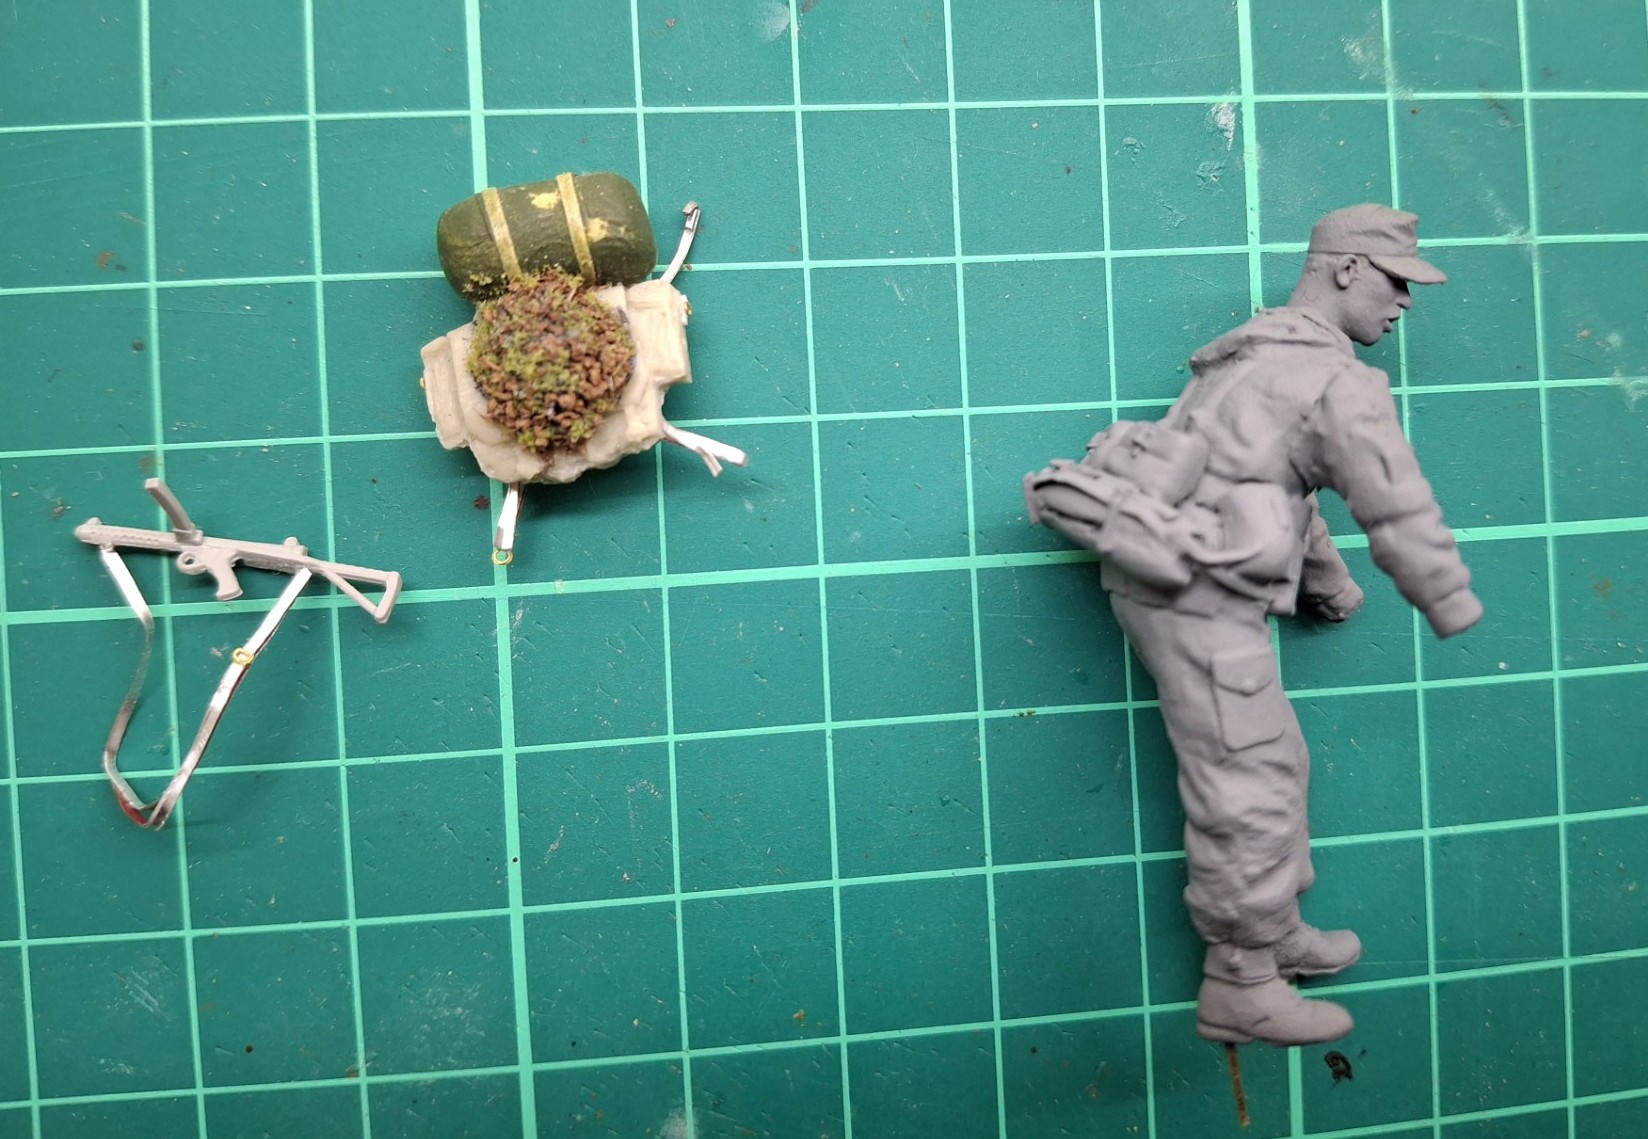
Me. Converted from the ancient Tamiya stretcher-bearer set, which is ideal, obviously depicting someone lifting something. It’s also useful as it has the yoke and belt of the ’58 pattern webbing moulded on. The ammo pouches needed modifying and I had to devise the rear kidney pouches, water bottle pouch, poncho roll and respirator haversack from Magic Sclulp, adding tabs from plastic card and buckles from an etched brass set. I would like to have added a bayonet to the front LH pouch but we never drew them up. The trousers were filled out a bit with more Magic Sculp, and map pockets represented from thin card; puttees manufactured from Tamiya tape and a tiny square of plastic card to make the folded over tape (which secured the puttee). The smock was slightly modified to show a sleeve pocket and buttons added from sections of plastic rod. A Hornet Head was chosen from their German range in order to depict the Combat Caps we all wore back then. It was sanded down slightly to reflect the Brit item. I also added a hood, which was buttoned on to the collar of the smock.
The uniform was DPM camouflaged which was, as ever, a tad tricky to paint; see list of paints below. Puttees were khaki, the Boots DMS (Ta dah!) were black. The NORTHAG emblem was hand-painted on the right-hand sleeve in blue and yellow. The small rank badge of 2 chevrons for a Brit Corporal is painted on the right arm; it was actually woven in a brown drab on an olivey-green patch, so I painted it accordingly. I also had a name badge above my left breast pocket; this wasn’t actually ordered but I’d noticed early on in my career that some Brit units did do it, and most of the NATO nations did too. I always thought it was a good idea but then I was ambitious and wanted to be noticed. However, given the contours of the model this can’t be seen.
I’ve shown my personal weapon, the SMG, (“sub-machine gun”, and it was thus known in British service not “Sterling”) with the butt extended and sling fitted, as otherwise in this scale no one would recognize it in the folded-up state, which is what we really did. I painted it satin black with a visible silver breech block, and then sort of dusted it with graphite from a 2B pencil. The white splodges on the magazine housing represent the armoury numbers.
My ’58 Pattern Large Pack as it was known, is dumped on the trailer canvas; this contained, as far as was possible, everything I needed for the duration of the exercise (Bergen rucksacks back then were the preserve of the Paras, Commandos and SF) and had both my sleeping bag and steel helmet attached to it. Being an ex-Junior Leader and therefore intrinsically keen, my helmet is properly camouflaged with Hessian and pieces of plastic camouflage material; I was outraged at the permissive attitude amongst both my peer group and the SNCOs and Warrant Officers, who should have known better but turned up with naked helmets, or sometimes didn’t even bother. I thought this was pretty shabby, but by now, had come to expect not very much at all from the leadership of members of the Royal Army Ordnance Corps, or rather those in my particular trade group.
Of course, one learns and takes note from all this; when I became a Chief Clerk at a Brigade HQ some years later, my poor clerks didn’t know what hit them(!)

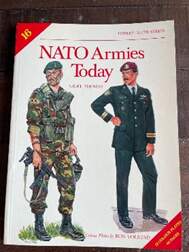
Jean-Luc. I’ve really had to do this from memory; I refreshed same with a look at the Osprey book “NATO Uniforms Today”,
and modified another Tamiya stretcher bearer figure with Milliput and sanding . I had to trawl around the net to identify the personal equipment and found these images from some enthusiast posing in his garden; they were very useful:

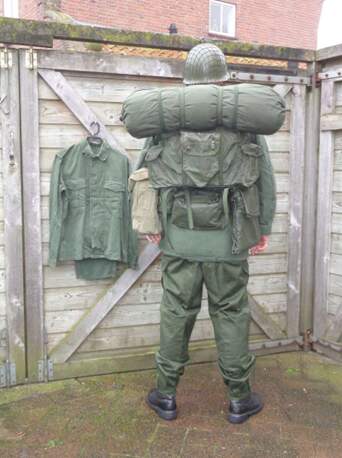
Which was roughly how I’d remembered it; Jean Luc didn’t have the full issue as per the infantryman shown, so I restricted his equipment to belt, ammo pouches, waterbottle and respirator case. He did take his helmet with him. He had different ammo pouches as his personal weapon was an SMG known as a Vigneron.
For info – a Vigneron:
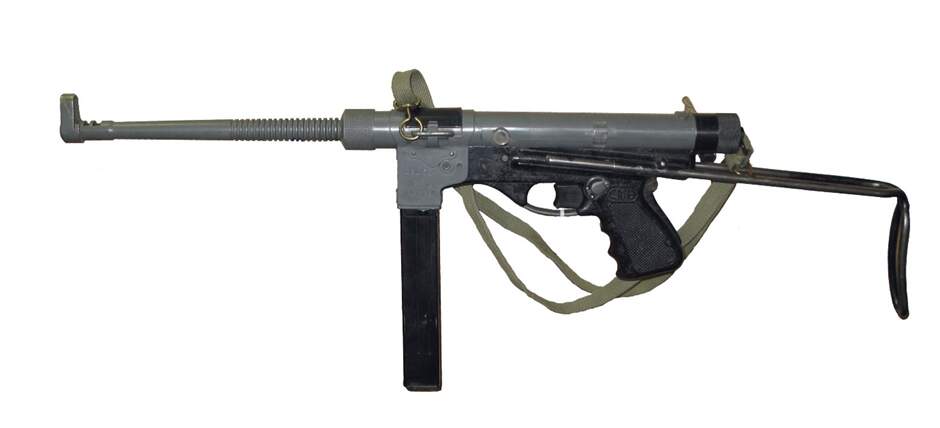
Note the grey painted finish.
Making the Vigneron was relatively simple: plastic rod of varying diameters, a pistol grip and trigger housing filched off a rifle in the Italeri Modern Light Weapons set, and the metal stock form a heller set, originally for the MAT 49. Foil from a wine bottle provided the sling.
Once I was satisfied with the figure modifications, I used another Hornet Head and made Jean-Luc’s rather shapeless beret from Milliput. He had a wispy beard and moustache so a bit of light texturing using Mr Dissolved Putty was carefully added.
I mixed a colour for his uniform but cannot remember what ratio of paints. I think I used a Humbrol enamel Light Olive 86, and their Cockpit Green 78. The beret was khaki and I recall the badge was gold on a red background to represent the Belgian lion. The rank chevrons for a Caporal Chef were white on a olive plastic epaulette slide with a thin red center, which was a bit tricky to paint. Naturally he had the NORTHAG axe badge on his right sleeve.
Personal equipment was finished in a different shade of olive green, the Vigneron painted as per the picture above, and the high laced boots were black.
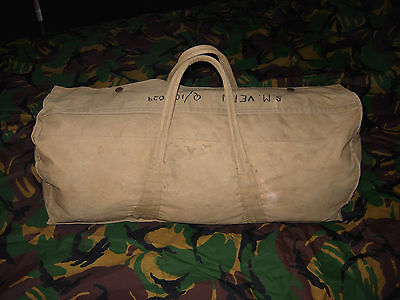
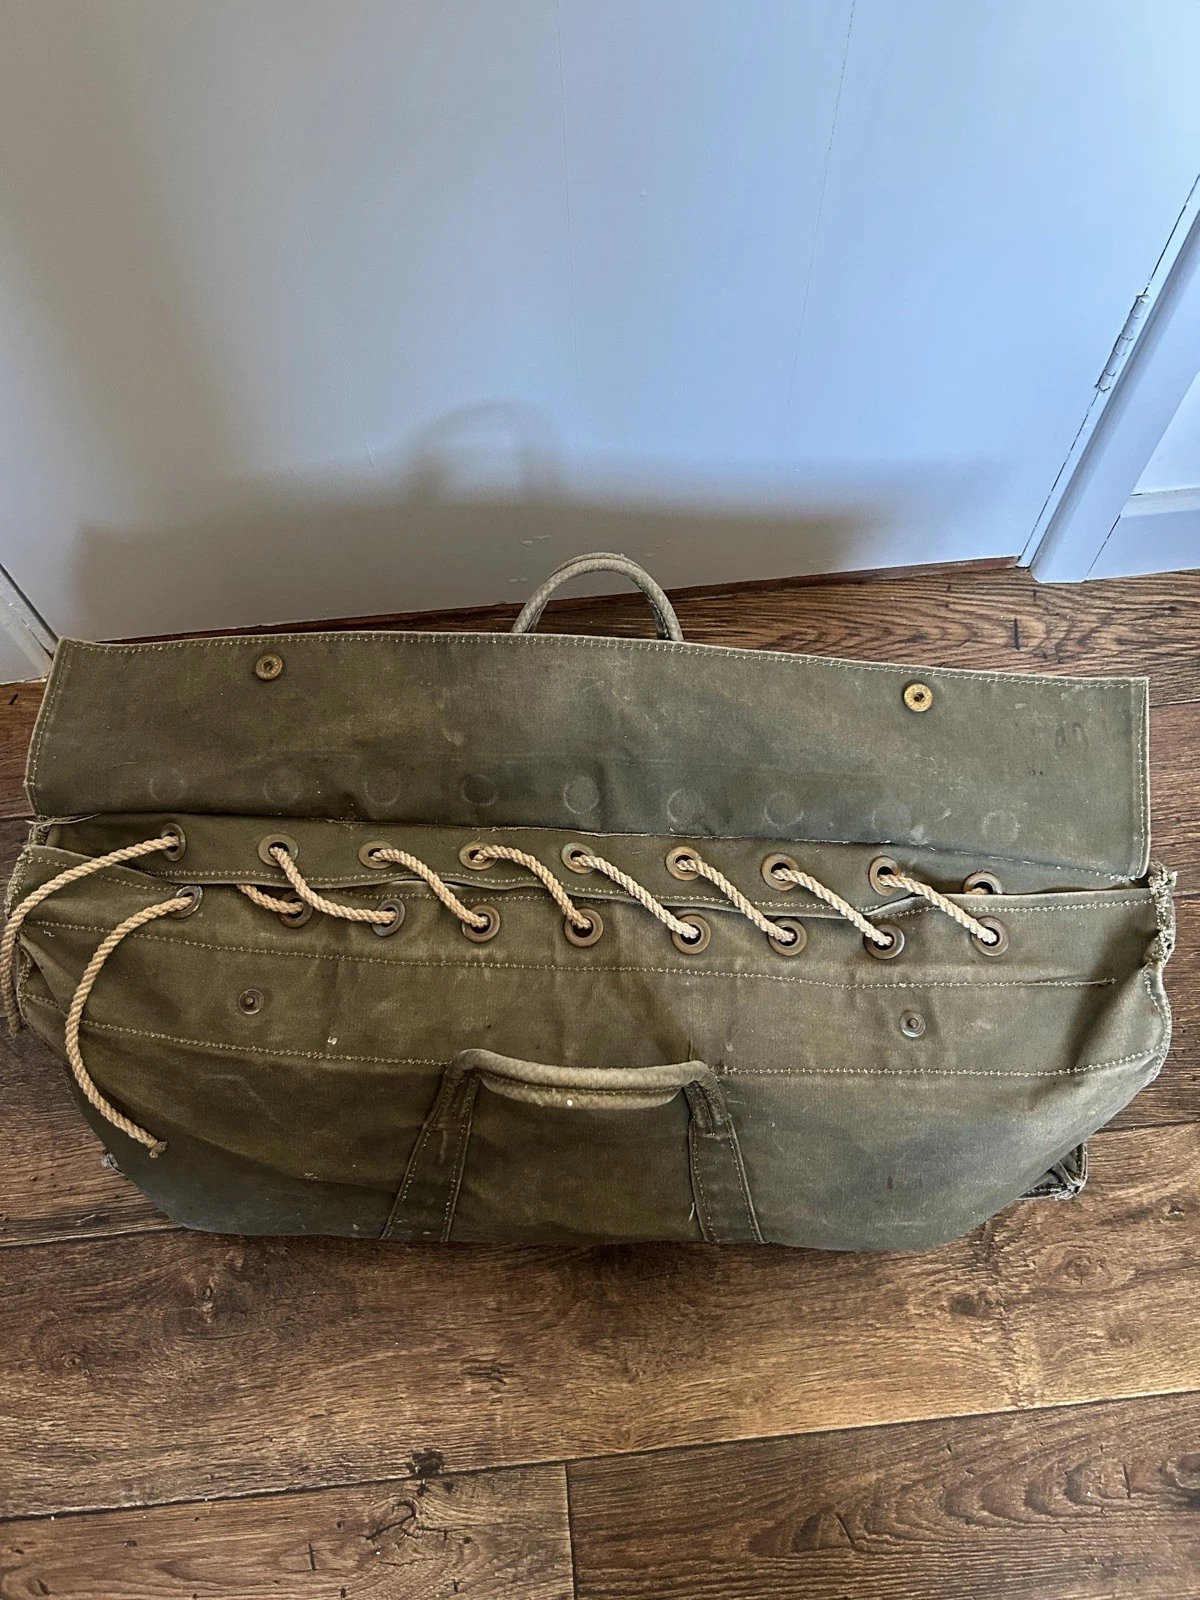
Interestingly perhaps, Jean-Luc did not utilise a back pack or rucksack for the rest of his kit but had borrowed a holdall from his then Brit Army girlfriend; back then members of the WRAC were issued a very useful holdall which fastened with a sort of crisscross length of cord, and over this was a long flap secured using press-studs. Anyway, I set to and made this from Magic Sculp and more lead foil.
The real thing:
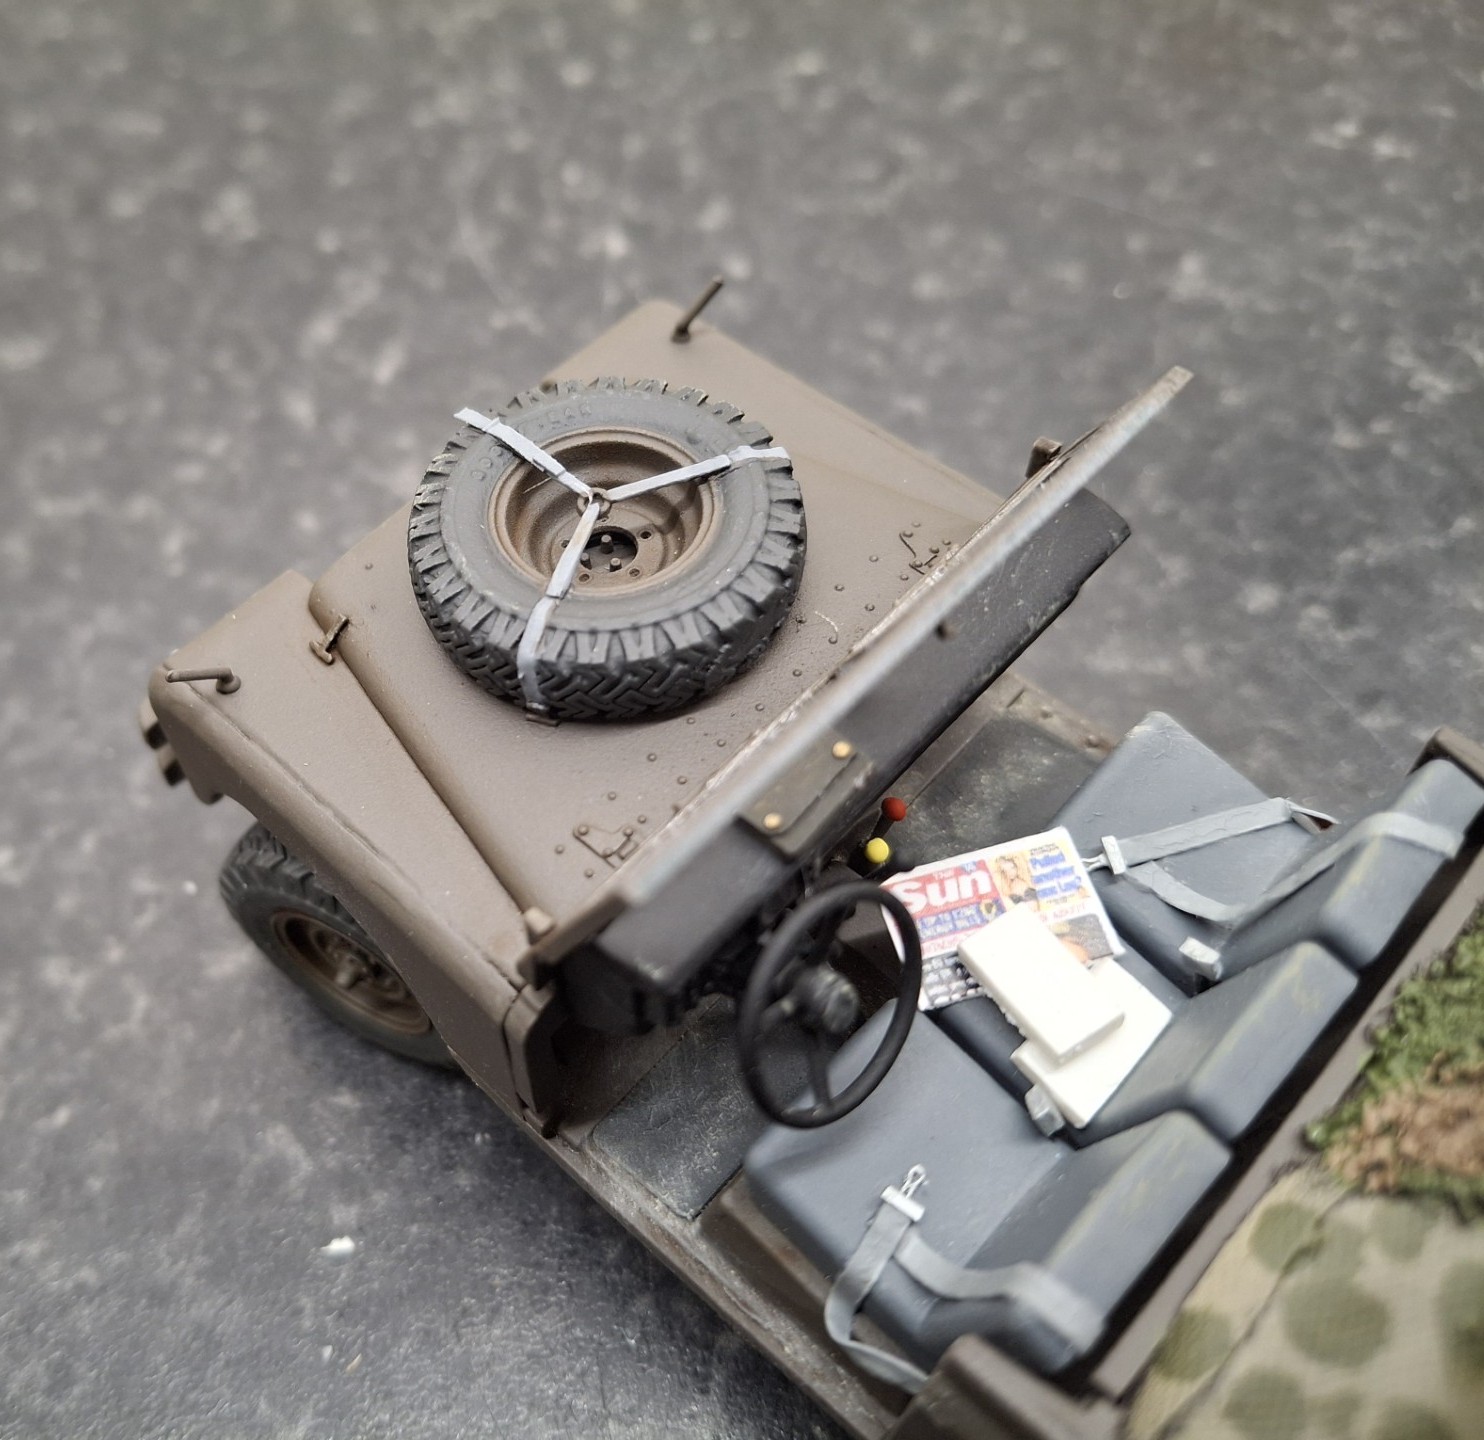
The Vehicle. More or less built out of the box although I did replace the wheels using DEF Models’ product, due to Italeri moulding the wrong number of wheel nuts. I also adjusted the steering so that the wheels were turned slightly.
I added a bridge plate to the front grill, but the main task was to add details to the rear of the vehicle, although I did model a Work Ticket folder (which was based on the Brit one) and that is shown on the windscreen shelf in the front. Jean-Luc liked the British newspaper The Sun, primarily for the daily page 3 rendition of a bare-breasted female, and a folded newspaper is on the seat. We had drawn rations for the journey down to Maastricht and these were contained in a white cardboard box; unlike the British Army version, these were very good as we benefited from a NATO cookhouse, which although not always producing meals that met British tastes, were very good when it came to packed rations – freshly baked rolls for a start - complete with decent fillings not the wretched “pink death” and margarine sandwiches known to generations of hapless Brits! The boxes, which were plundered soon after we left the garrison, were made using laminations of plastic card and painted white.
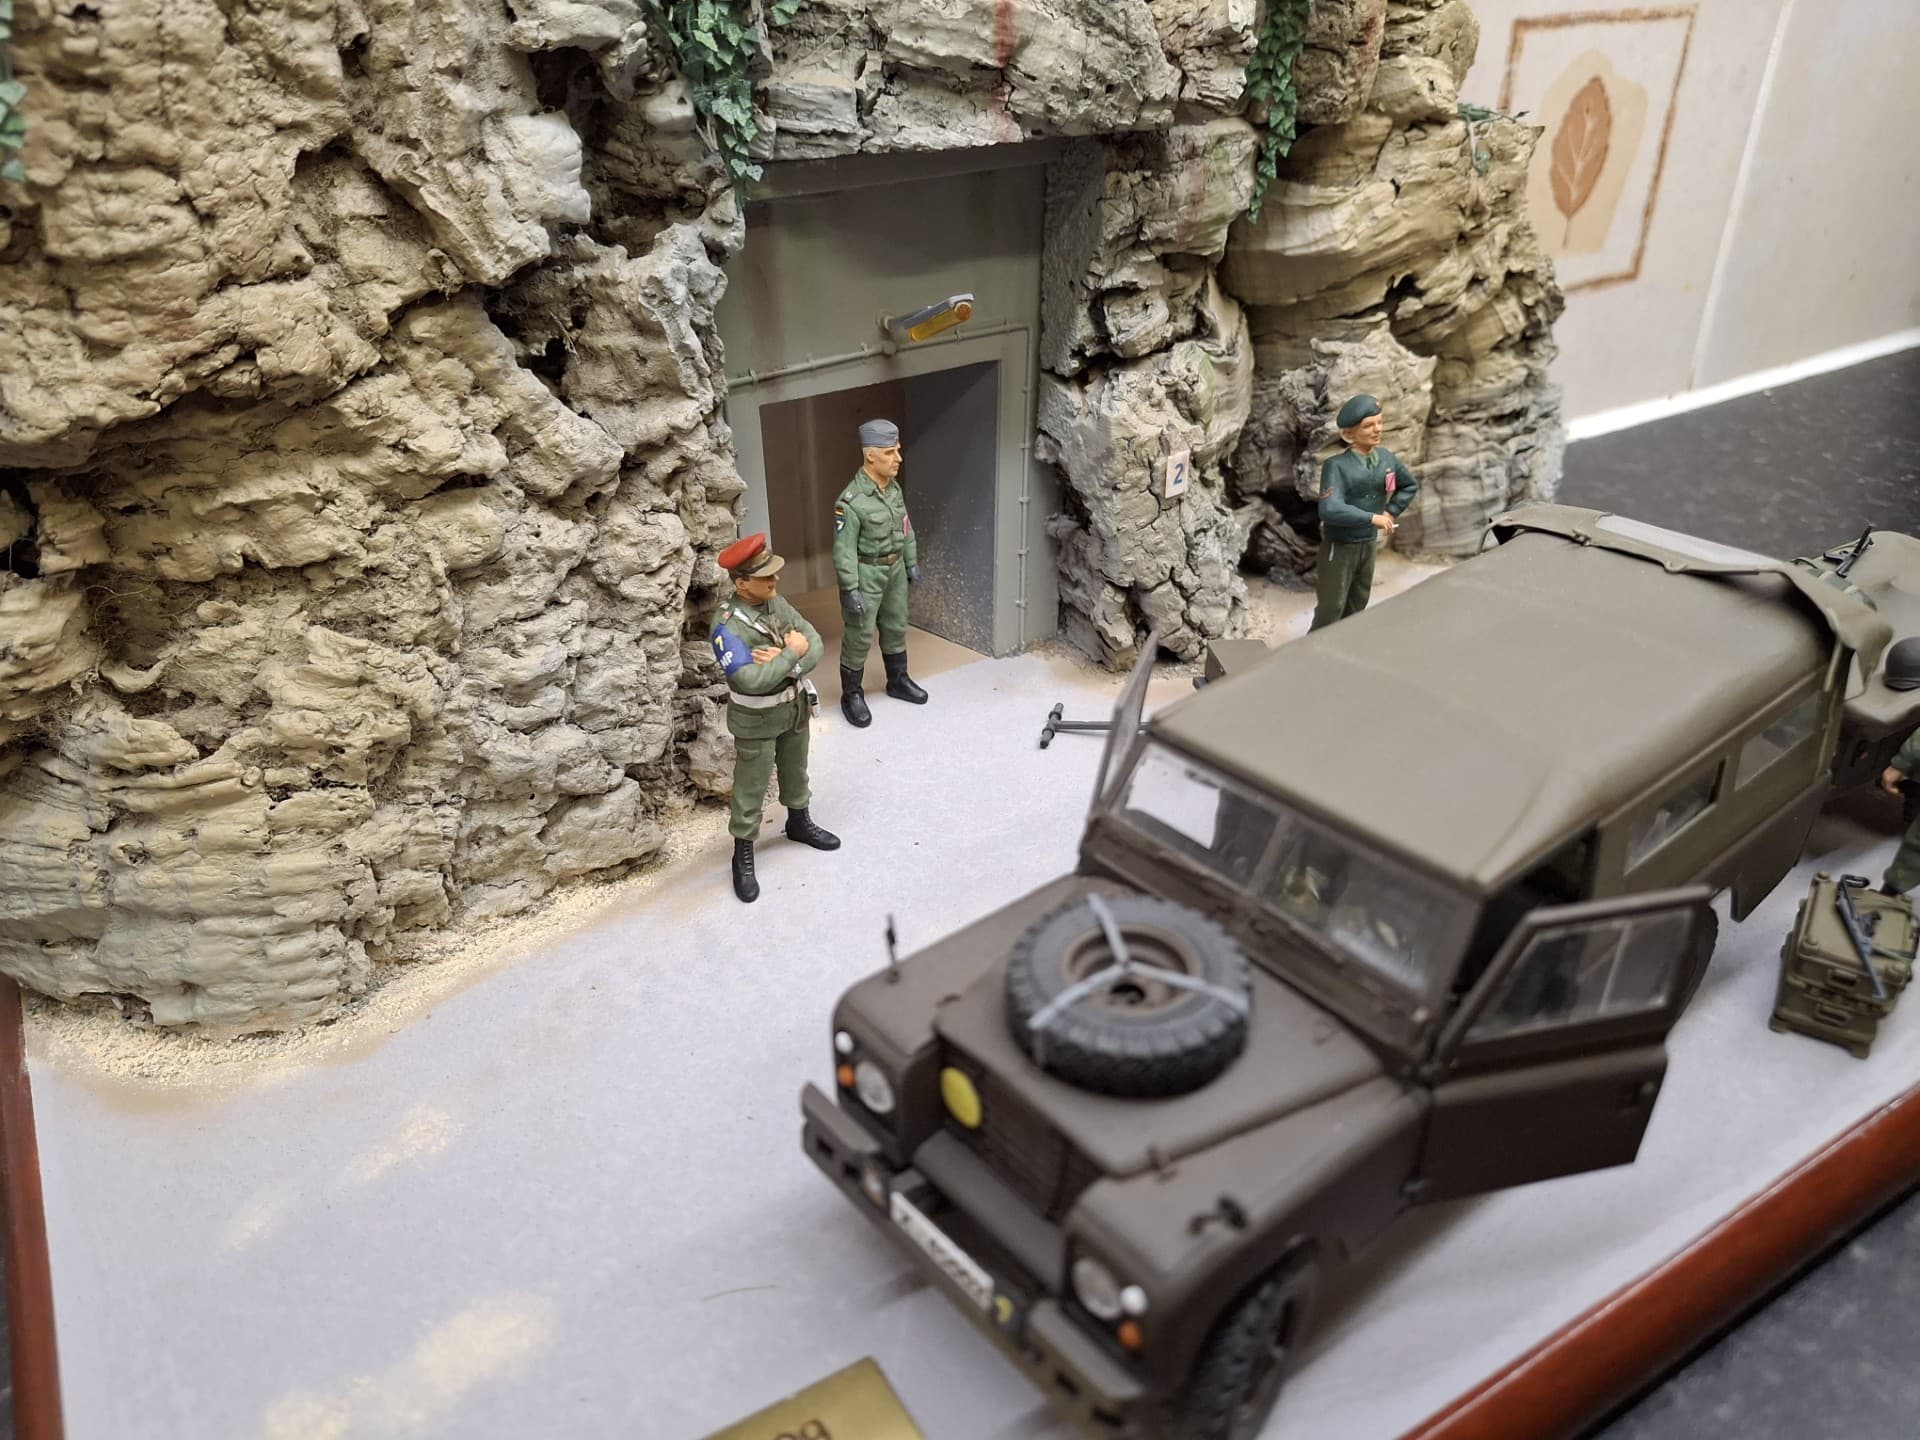
I’ve used model railway birch bark to depict the exterior of the underground complex; see the real thing here:

The bark is a bit craggy but will have to do; I’m not especially good at landscape stuff.
There was a separate entrance for unloading kit and that is the one I’ve tried to model, although it took a fair bit of remembering; I mainly recall a “No 2” sign – for second entrance I suppose, and a grill and metal door set into the sandstone.
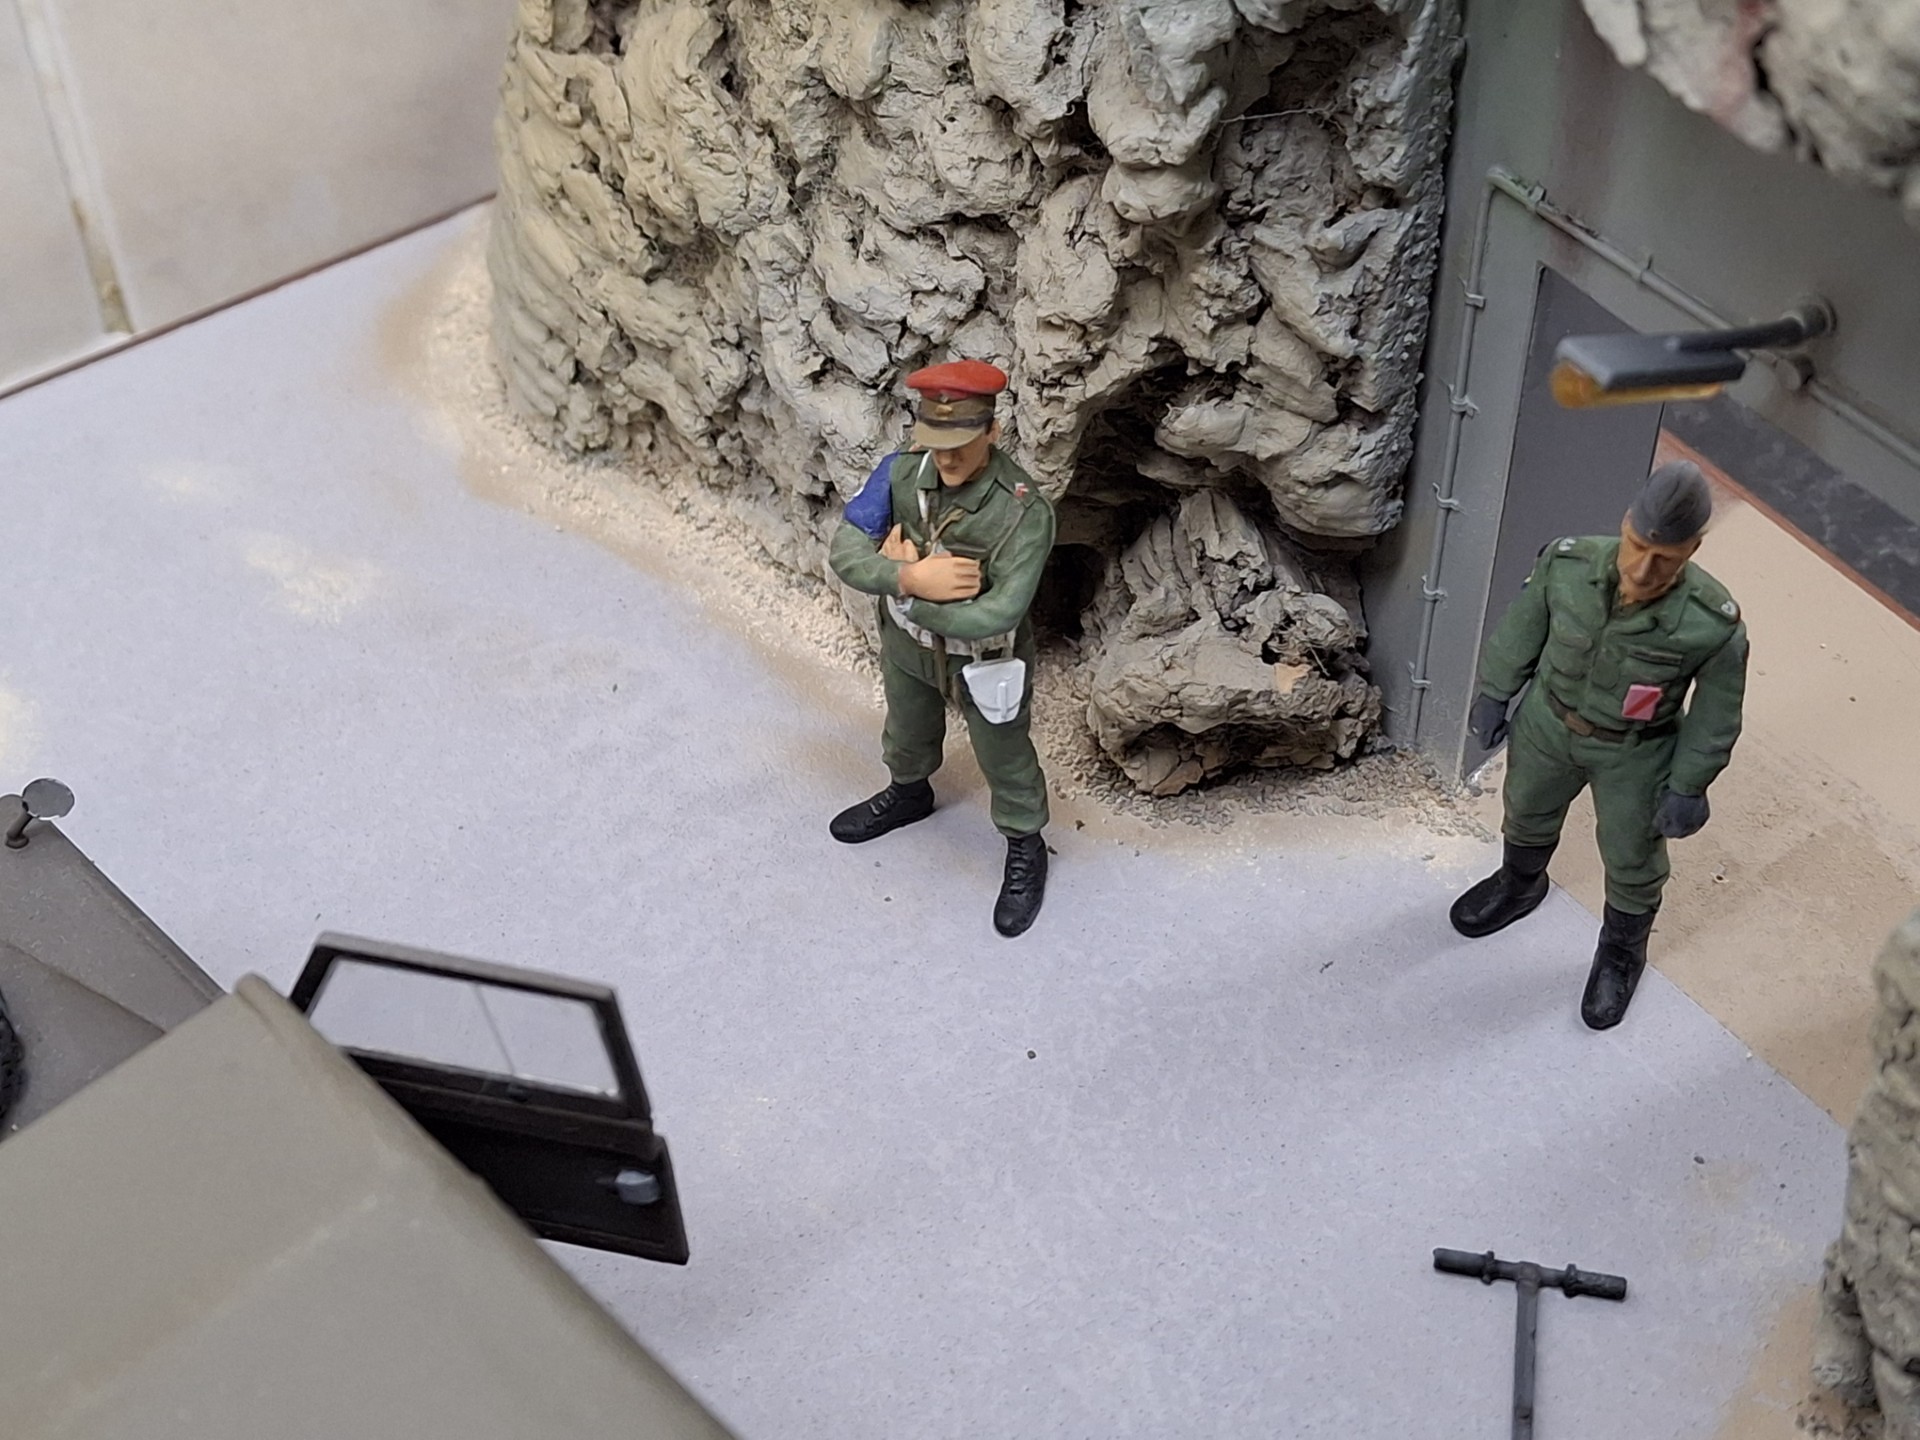
In addition to the 2 figures labouring I’ve modelled a member of the NORTHAG/TWOATAF Provost Company, in this case another Belgian soldier, imperturbably guarding the entrance, casting his stolid gaze over NATO in action, and a WRAC girl who has turned up with a trolley – so perhaps the Chief Clerk was a tad more switched on than I thought.
For info, the WRAC girls, all who nearly all worked in the Brit HQ – ie HQ BAOR – had a war role with us as clerks, runners and the like (they even used bicycles to get around the labyrinth) all vital to the smooth running of the HQ, and also an opportunity for us single soldiers to get to know them. Sometimes this latter emphasis got in the way of doing one’s job.
A note on Brit Army Disruptive Pattern Material (DPM); I still major in enamels, often Humbrol, so if you’re keen to use acrylics you’ll have to do a bit of cross-matching. I used:
131 - Mid Green (as base colour) There were, on the DPM of the time 2 shades of green but in 1:35 would be practically unnoticeable so I tend not to bother. Later iterations – driven by the usual parsimonious Civil Servants I imagine, did away with the second colour completely.
170 - Brown Bess
72 - Khaki Drill
33 - Black
Note that all these colours fade quite quickly (with the exception of the black), due to wear and tear and constant washing. Depending on the effect I require, I sometimes utilise a Humbrol Dust Wash to get such an effect. I didn’t in this case as the matt varnish seemed to tone it all down a little.

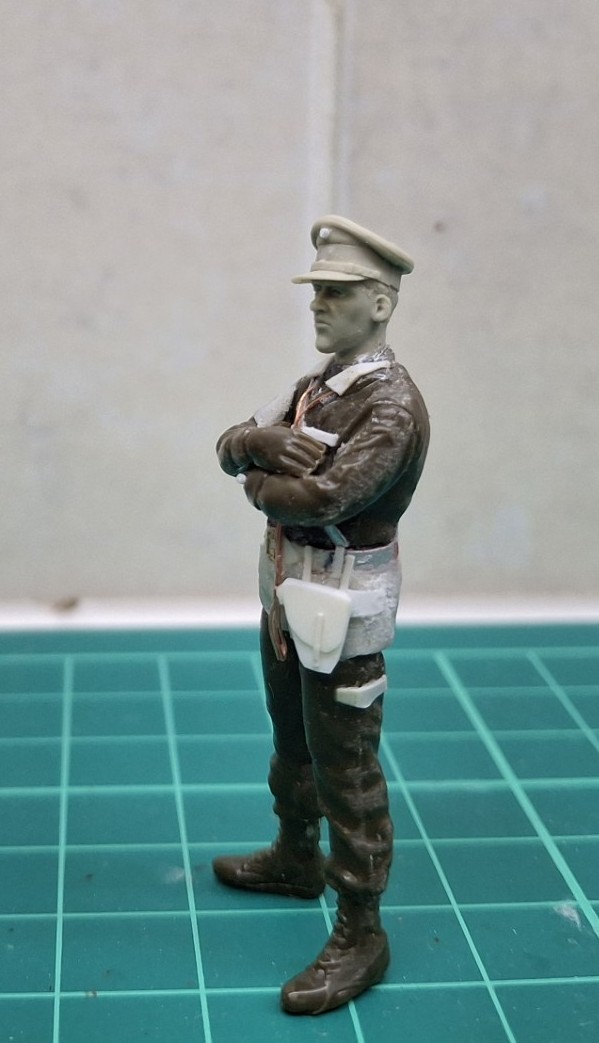
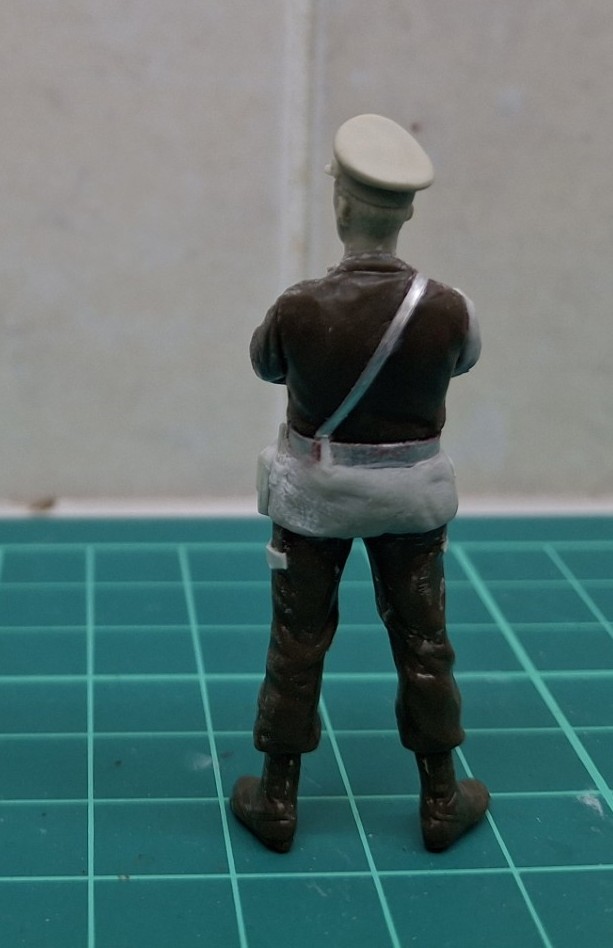
The Jean-Luc figure and a German officer:

The Belgian MP figure (from the Joint Provost Company). This figure came from the Tamiya US Command Group set; again, lots of sanding down, Magic Sculp modifications, straps and belt from lead foil, holster from scratch, lanyards from fuse-wire, and the inevitable Hornet Head.

And the WRAC Girl; for this figure I used a fairly ancient Tamiya US figure, from an M8 armoured car; it was smaller than most Tamiya figures and that was what I wanted. The female head came from a Masterbox set. I added, ahem, contours to the chest from Magic Sculp, and also used this for other details. Boots were sanded down a bit and puttees added from tape.
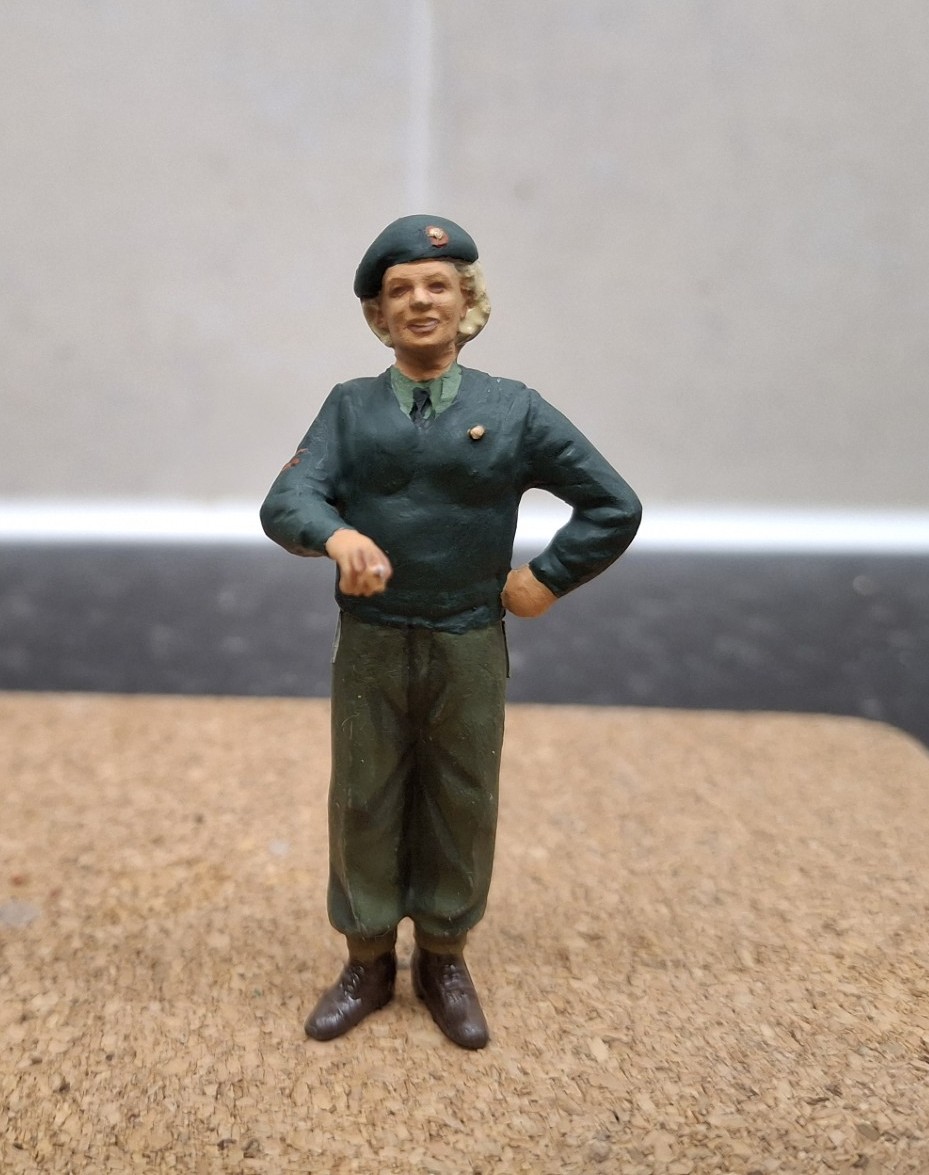
She is kitted out with;
Dark Green beret with beech-brown capbadge backing cloth, gold badge.
Olive Green shirt and dark green tie.
Dark green pullover, normally sporting a badge of the Arm or Service in which they were employed.
Olive green trousers with a strange zip each side (presumably to encompass the female pelvic girdle)
Khaki Puttees
Brown leather ankle boots of a feminine pattern (not to be confused with male studded footwear) with leather soles.
I used one other figure to represent a Bundeswehr officer from one of the Staff Divisions; he has turned up to await transport bringing his office’s documents and kit. I used the fairly ancient figure from the Tamiya Leo 1A4 set, with a replacement Hornet Head and a bit of sanding down. Not perfect but as has been discussed all too frequently here, one really has no other choice when it comes to Cold War figures.

And knitted all together:


So, that is it really: an extensive preamble and then a somewhat mundane scene, but then, a lot of La vie militaire is mundane! A mere Land Rover and trailer, unloading kit for an exercise. Anyway folks, that was me on exercise in 1977. Thanks for your patience; over to you!